Valentine Frame

This is quite possibly the easiest project I have ever made. It is perfect for the crafty-challenged, those who need an easy decoration, or those pressed for time but want a little something for Valentine’s Day decor.


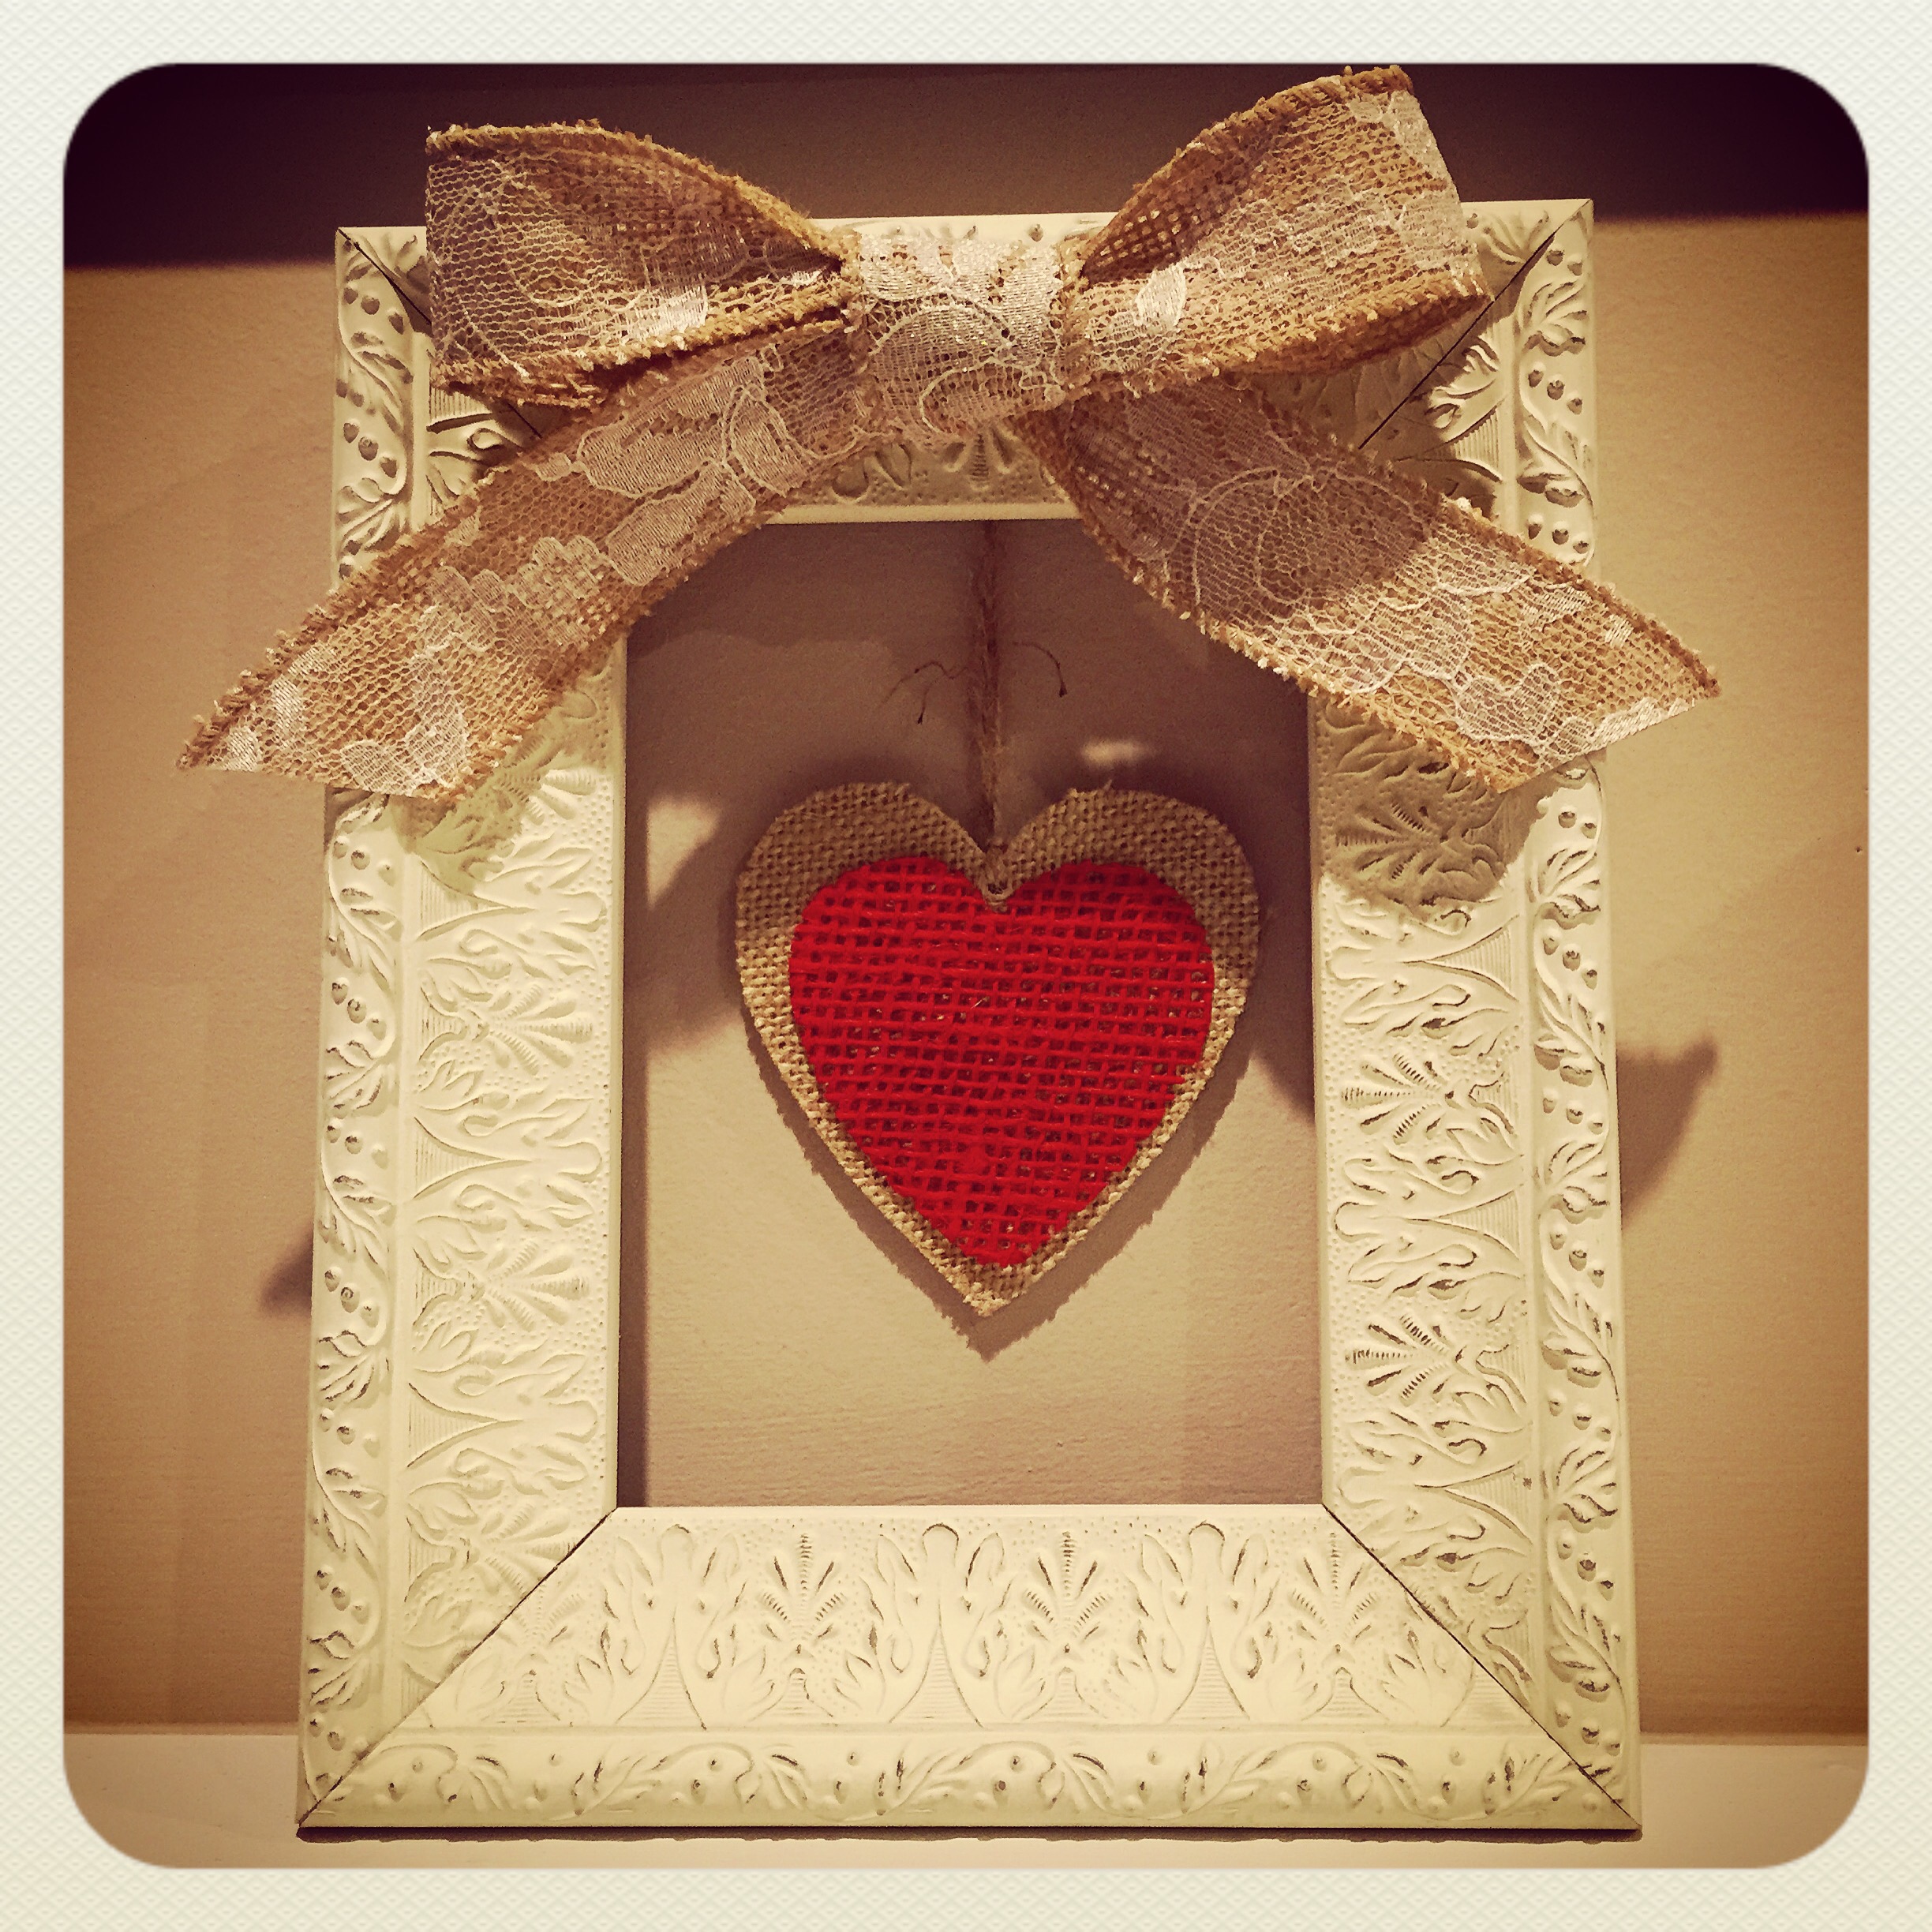
You will need an open back frame of your choice.  My frame actually had an easel back on it, but I was able to remove it with my trusty exacto knife. The brown burlap heart ornament (complete with hanging twine) came from Hobby Lobby. The red burlap heart (came in a package of 6) and the burlap lace ribbon are also from Hobby Lobby. 

Glue one of the red hearts to the center of the burlap heart ornament. Then glue the ornament to the center-top back of the frame, using the twine hanger, so the ornament hangs freely. Tie a bow with the ribbon and glue to the center-top front of the frame.

And it’s just that easy!! Takes less than 10 minutes and you have a cute frame to add to your Valentine decor.  You can see it here on my mantel along with the Valentine Garland I made.❤️

Thanks for stopping by,

Anita

Posted in Decor, Gifts, Uncategorized, Valentine | Leave a comment

Valentine Garland

Do you decorate for Valentine’s Day? This a super quick and easy Valentine garland to add to your mantel or across a window to share a little love.

IMG_5527

I used the largest heart die in this set from Spellbinders. I die cut 7 hearts and using tiny 1-1/2″ clothespins clipped them onto twine leaving a couple of inches between each heart. I then knotted red and white gingham ribbon between the hearts. I really like how this turned out – just a simple idea that adds a little pop to my mantel. ❤

IMG_5528

Stay tuned and I’ll tell you about the frame in this picture next week 🙂

Thanks for stopping by,

Anita

Posted in Decor, Uncategorized, Valentine | 4 Comments

Hip Hugger Bars

The name says it all. These incredibly tasty bars go directly to your hips. I mean just look at everything that’s in them…

IMG_5534

 All of this yummy goodness in one bar! What more could you want?!?! I only make these when I need to take a dessert to share – otherwise I would eat the whole pan!! 😉

Here’s the recipe:

Hip Hugger Bars

  • 30 light caramels
  • 1/3 cup evaporated milk
  • 1 pkg Betty Crocker German Chocolate cake mix
  • 1 cup chopped pecans
  • 3/4 cup melted butter
  • 1/3 cup milk
  • 12 ounce bag chocolate chips

Preheat oven to 350°F.

Unwrap caramels. Melt caramels in evaporated milk in a small saucepan. Set aside.

Combine cake mix, milk, and butter. Mix well. Add nuts. Pat 2/3 of dough into a greased 9 x 13 pan. Bake 6 minutes. Remove from oven. Cake will have risen but still be quite soft.

Sprinkle chocolate chips over crust, then drizzle caramel mixture over melting chocolate. Drop remaining dough by spoonfuls over the top. Return to oven for 15 minutes or until set.

Cool completely before cutting.

My kitchen smells wonderful!!!

IMG_5540

So gooey, chocolaty, and just plain good! Try them warmed in the microwave with a little vanilla ice cream –  YUM!

IMG_5543

Maybe I should try one just to be sure they turned out ok…

Thanks for stopping by,

Anita

Posted in Recipes, Uncategorized | Leave a comment

Let It Snow

We don’t get a lot of the white stuff in Alabama, but when we do there is major excitement. Schools and businesses close and the kids (and some adults!) have a ball playing in the snow. Since I grew up in Northern Indiana and am not a huge fan of the stuff, I like to sit at home and watch it from my warm, cozy living room.  It usually melts quickly and that is just fine with me! 😉

This little guy is all about the snow! He’s just waiting for the skies to open up and cover everything with a fluffy, white blanket. 

IMG_5424

This cute little snowman and sentiment are from Doodlebug Design Inc. I’m not sure where the snowflake background stamp is from, but a lot of stamp companies have their own version – just pick your favorite!

Stamp a kraft note card with the snowflake stamp in white ink. (I used Craft White from Stampin’ Up and heat set it with my heat gun.) Add a wide strip of patterned paper to the card. Attach 2 thin strips of brown card stock to slightly wider blue card stock and attach over patterned paper. Stamp snowman and sentiment with brown ink on white card stock. Trim, ink the edges with blue ink, and lightly sponge entire panel with blue ink. Add pink to snowman’s cheeks with chalk. Attach snowman panel to card with pop dots. Attach 2 small black gems for buttons.

He may be ready for the snow, but I still think I’ll be fine without it… 🙂

Thanks for stopping by,

Anita


Posted in Cards, Uncategorized | Leave a comment

Snowballs 10 cents

Here’s a cute little snowman to put a smile on your face and warm your heart during these cold January days.

IMG_5374

He’s one of the Snow Peeps from Unity Stamps. I’ve done a couple of other posts using more of these adorable snow people. You can find them here and here

To make this card, stamp the snow peep on white card stock with black ink and color with Copic markers. Trim the stamped piece and layer to red card stock. Emboss a blue square of card stock with the snowflake folder from Stampin’ Up and attach to a white card. Cut a banner from red patterned paper and attach to card. Attach stamped image to card with pop dots. Add clear glitter to snowflakes and the snowman to add a little bling.

Add a smile to someone’s dreary January by having this little guy show up in their mailbox just to say hi!

Thanks for stopping by,

Anita

Posted in Cards, Uncategorized | 1 Comment

Winter Candles

The Christmas decorations are packed away for another year and the house always seems a little empty when that happens. Since it’s January (and still very much winter), I decided to keep these simple winter candle decorations out for a while. Seriously, they couldn’t be any faster or easier to put together!

IMG_5501

All you need are your favorite glass containers, white pillar candles, and epsom salt for the “snow”. Simply pour some epsom salt into your containers and nestle the candles into the salt. That’s it! 

Here’s what the candle in the middle of the picture looked like during the Christmas season. A little greenery tucked on each side made a lovely centerpiece for a bridesmaid luncheon I hosted for my goddaughter’s winter wedding.

IMG_5502

Just a little change by removing the greenery and grouping them together and I can keep these winter candles out through January!

Thanks for stopping by,

Anita


Posted in Decor, Uncategorized | 3 Comments

Happy 3rd Birthday

A very special little girl turned 3 last month. She has brought love, laughter, and joy to my life in more ways than I can possibly mention. She has the most tender heart and seems to know intuitively when I need an extra hug or kiss on the cheek. Can you tell she has captured my heart?

IMG_5317

This photo of us was taken by her very talented Momma. If you are local, I highly recommend Amanda Powell (Photographer) if you are in need of a photographer. She is amazing!

Here is the card I made for this very special occasion 🙂

IMG_5289

The balloon stamps and matching die are a set from Hero Arts. “Celebrate” is from Simon Says Stamp.

To make the card, stamp the balloons with 3 different colors of ink and die cut. Attach a panel of purple card stock to a white card. Attach balloons to card, using pop dots to attach the center balloon. Using a thin black marker, draw the strings for the balloons. Stamp “celebrate” on white card stock and trim into a banner. Attach to card with pop dots. The “3” is a chipboard die cut that I inked with pink ink and then added some clear glitter glue to add a little sparkle. Attach this to the banner. Add 3 little gems for the finishing touch.

Looking forward to many, many more birthday celebrations with this most special little lady!!!

Thanks for stopping by,

Anita


Posted in Cards, Uncategorized | Leave a comment

Happy New Year Snow Peeps

Unity Stamp Company has the best stamps!! I love these Snow Peeps – they are just so cute! This little guy had the best time ringing in the New Year. 🙂

IMG_5239

I stamped the snowman with brown ink on white card stock and colored him with Copic markers. I punched him out with a circle punch and then layered the image to an orange scalloped circle (you can find basic shape punches at your local craft store). I embossed a panel of light aqua card stock with the snowflake embossing folder from Sizzix, attached a strip of patterned paper, and attached the panel to a white card. The snowman is attached with pop dots.

Happy New Year!

Thanks for stopping by,

Anita


Posted in Cards, Uncategorized | 1 Comment

Yummy Peanut Clusters

Need a last minute yummy treat for your New Year’s celebration? These tasty Peanut Clusters are made in your slow cooker and are incredibly easy! A sweet friend gave me this recipe – so good!

IMG_5309

Here’s what you need:

Yummy Peanut Clusters

  • 16 oz jar salted peanuts
  • 16 oz jar honey roasted peanuts
  • 16 oz package chocolate bark
  • 16 oz package white chocolate bark
  • 11 oz bag butterscotch chips

Put all ingredients in your slow cooker, breaking up the chocolate and white chocolate bark into squares. Cover and cook on low 2-1/2 to 3 hours. When melted, stir well. Drop by spoonfuls onto waxed paper and let cool.

Just a note: as this is melting, the chocolate squares may keep their shape even though they have become very soft. So check to see if they are melted and don’t just go by looks.

This makes a lot of candy! Plenty to share or you can freeze some if you’d like.

A little sweetness to start the New Year!

Thanks for stopping by,

Anita

Posted in Recipes, Uncategorized | Leave a comment

Merry Christmas

A quick post to wish you all a very Merry Christmas! May your day and the year to come be filled with the many blessings of Jesus!!

IMG_2271

Thanks for stopping by,

Anita

Posted in Christmas, Decor, Uncategorized | Leave a comment