Hi friends,
I have a bag of vintage wood spools that I picked up quite a while ago at a thrift store. And to be honest, I forgot I had them! 🙃 I was doing some cleaning in my craft room and decided I needed to create something with them.
Disclosure: Some of the links on my site are affiliate links, meaning, at no additional cost to you, I will earn a small commission if you click through and make a purchase. As an Amazon Associate I earn from qualifying purchases.
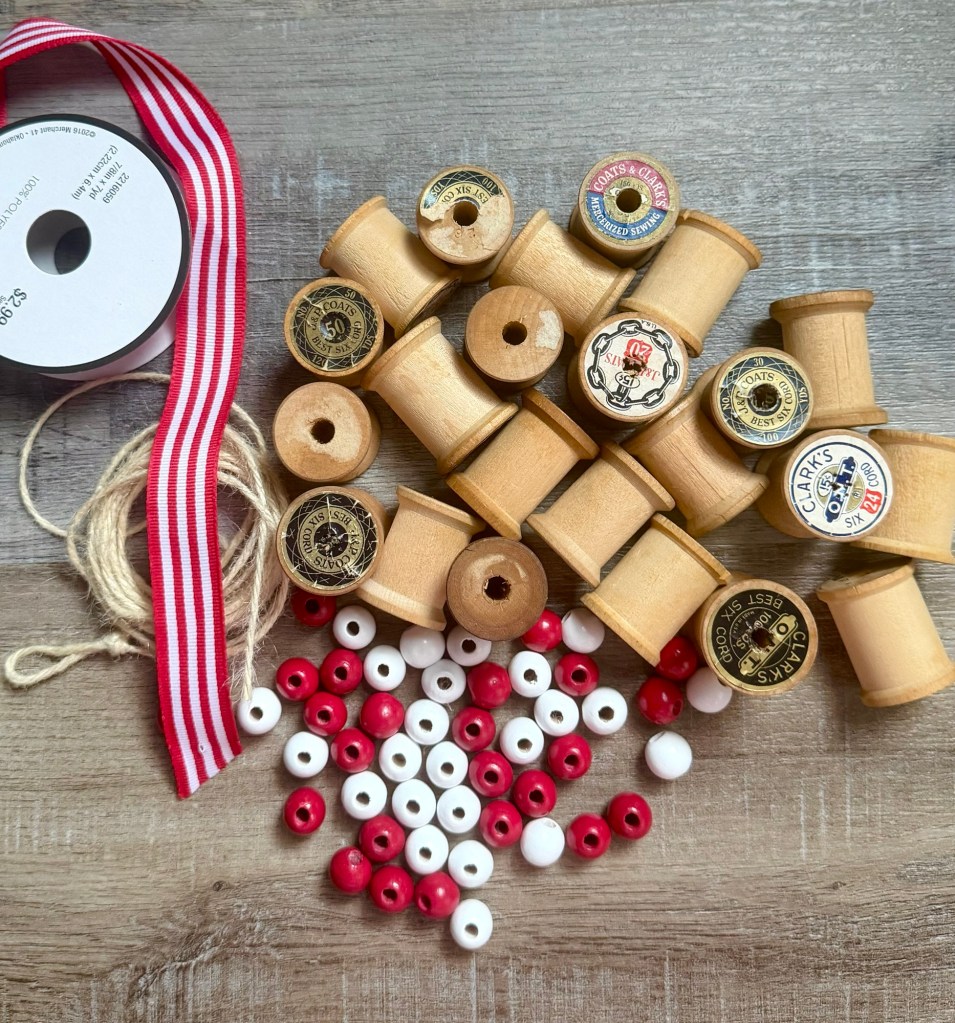
And since it’s time for Christmas in July 🎄, this Vintage Wood Spool and Bead Garland was a great way to use some of them! I had all the other supplies I needed in my craft stash – red and white wood beads, red and white ribbon, and natural twine.
The garland was super easy to make. I cut pieces of ribbon to fit around the spools and glued it onto each spool using this glue. Then I tied a loop using a double knot at one end of the twine. Simply thread the spools and beads onto the twine in whatever pattern you like. Tie another loop at the end of the garland. And that’s it!


For my garland I used 23 wood spools and 24 each of red and white beads. My finished garland measures about 58 inches long. Of course you can make yours any length you’d like.
You don’t have to use vintage spools. You can find wood spools a little larger than the ones I used here. And these beads are similar to what I used. You can also make the garland in any colors – it would be so cute to decorate your craft or sewing room!
Anita