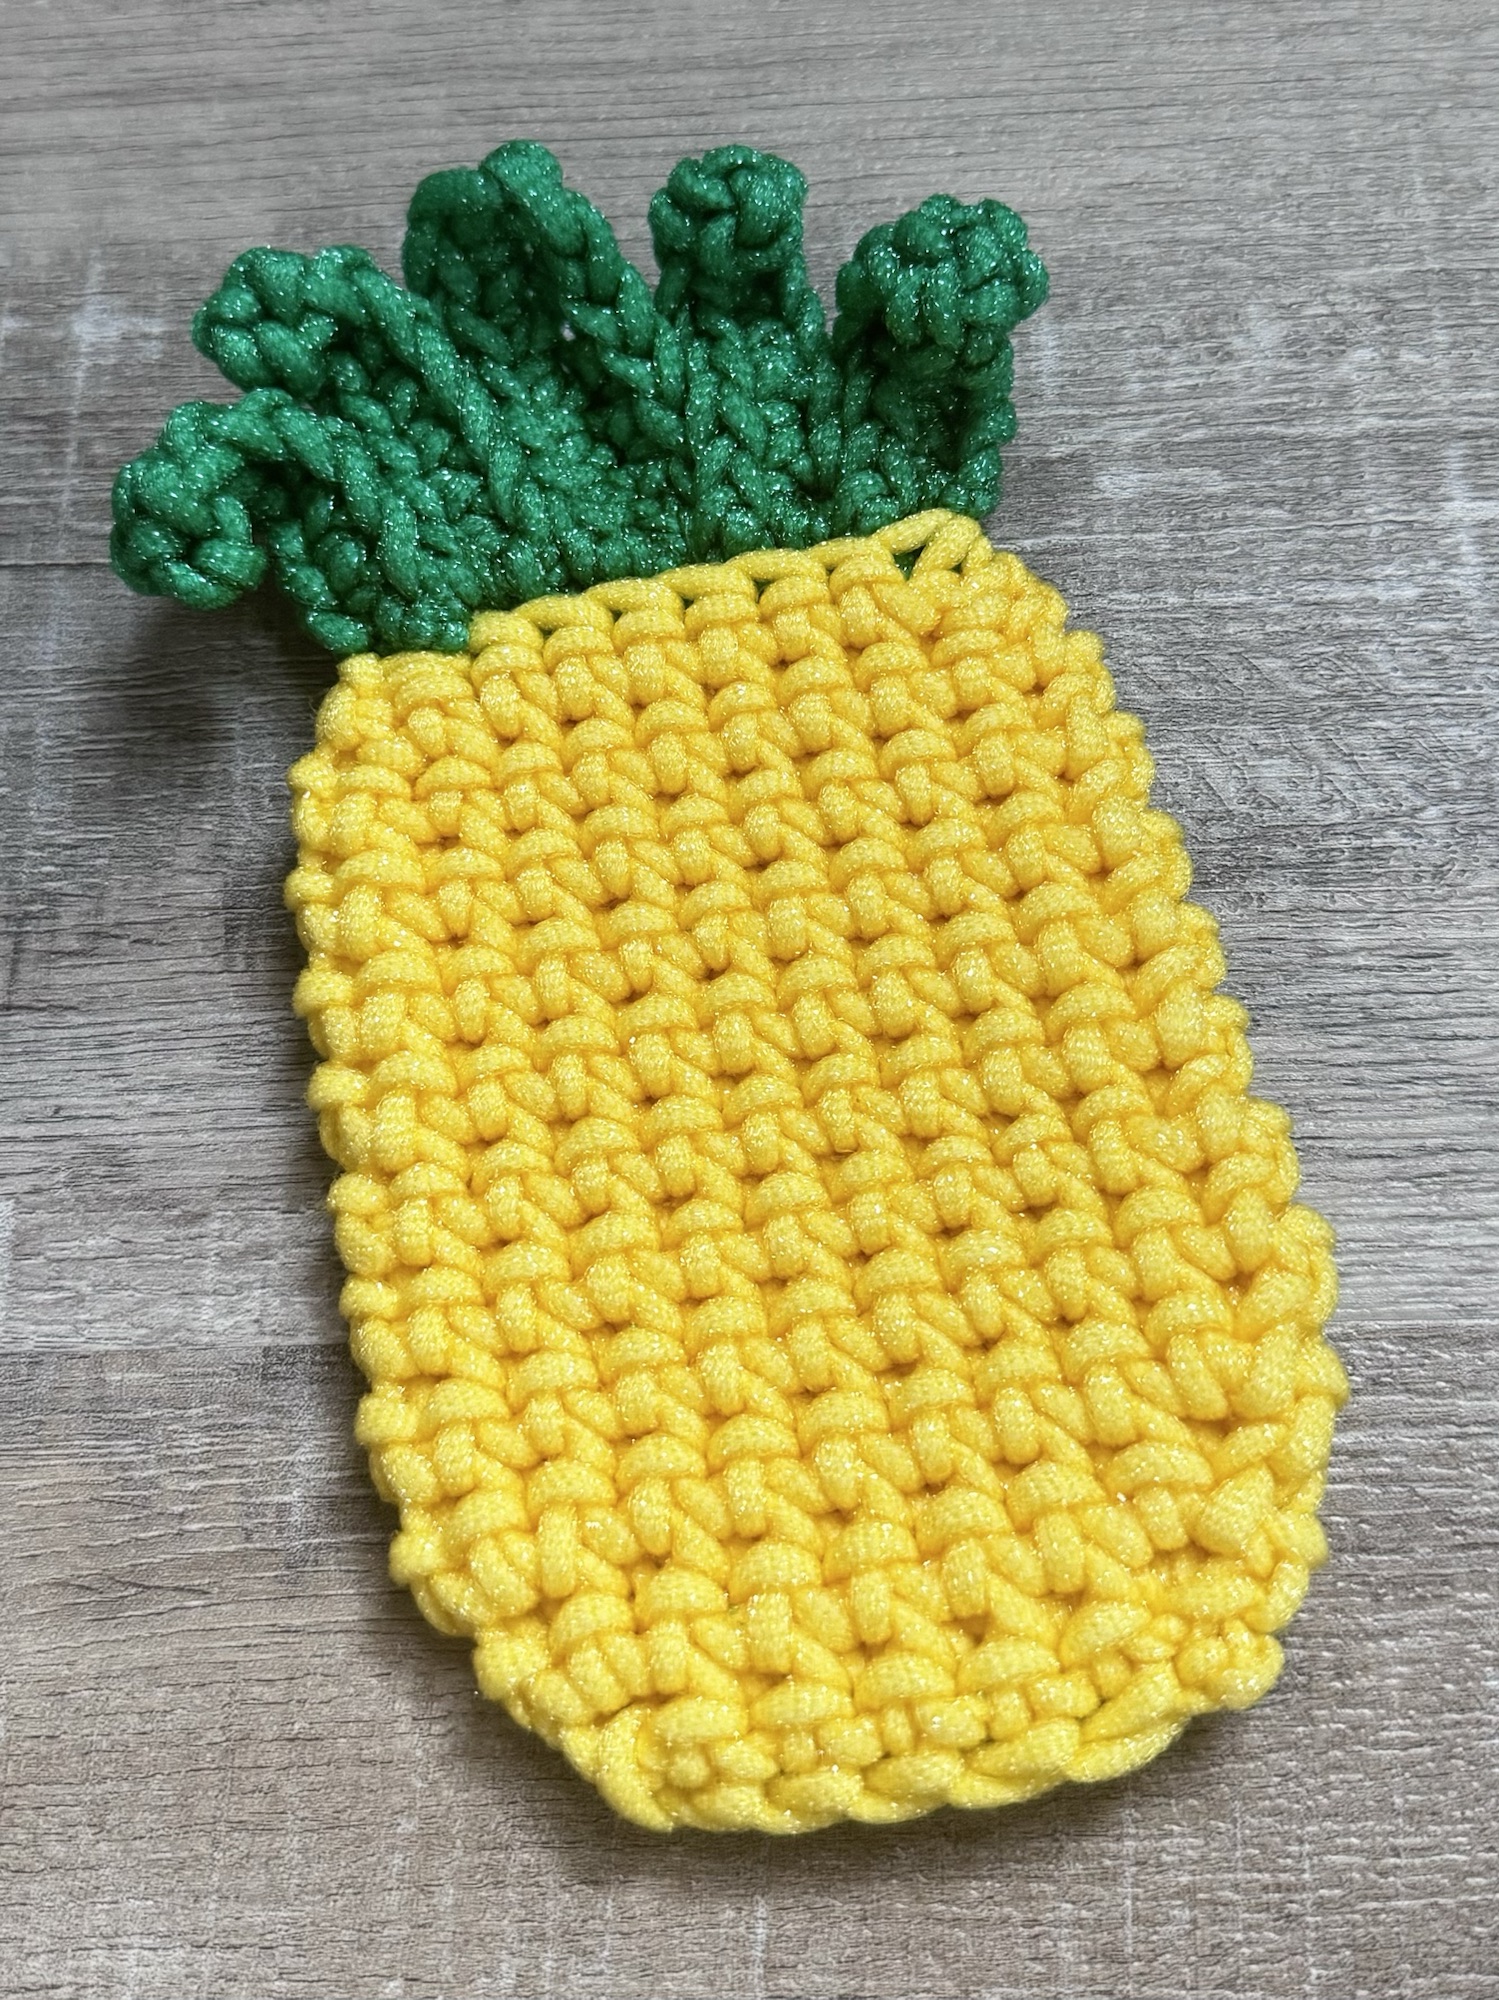
Look how cute these Crochet Pineapple Scrubbies are! 🍍🍍 The pattern is from Okie Girl Bling ‘n’ Things and you can find it here on her website.
Disclosure: Some of the links on my site are affiliate links, meaning, at no additional cost to you, I will earn a small commission if you click through and make a purchase. As an Amazon Associate I earn from qualifying purchases.
The pineapple scrubbies are stitched up using Yarn Bee Scrub-Ology Scrub It yarn from Hobby Lobby in Lemon and Green with a J/6mm crochet hook. They are stitched using the Thermal Crochet Stitch. Kylee from Okie Girl Bling ‘n’ Things has a great video tutorial on crocheting this stitch if you need it.
These scrubbies work up really quickly and will look so cute in your kitchen! They make fun gifts, too. 🙂 🍍🍍
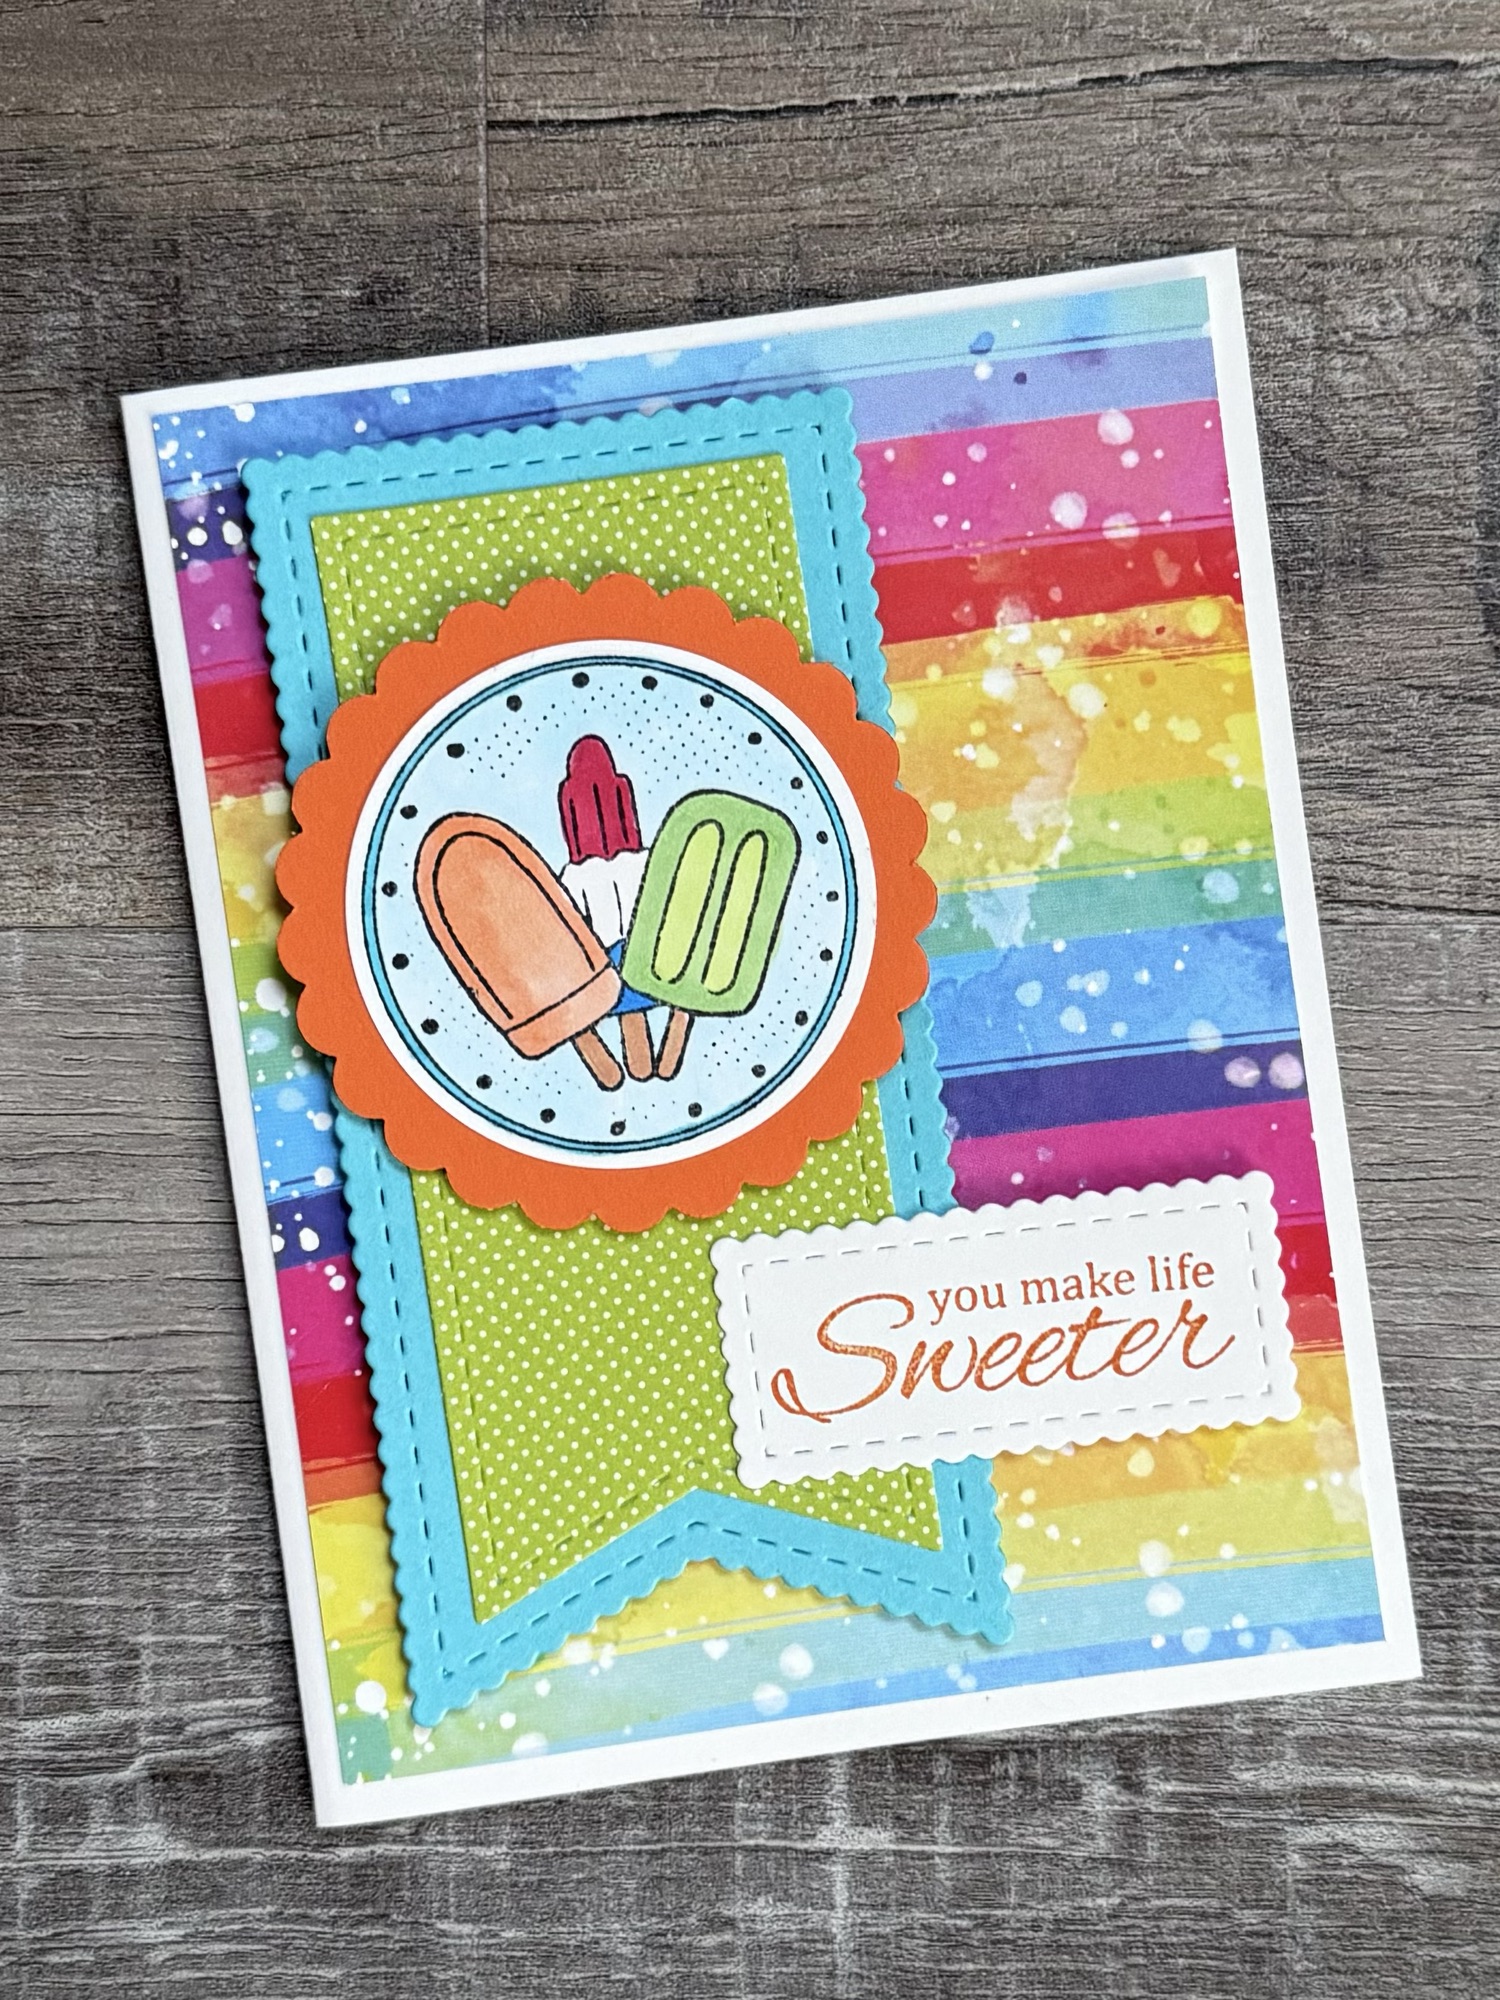
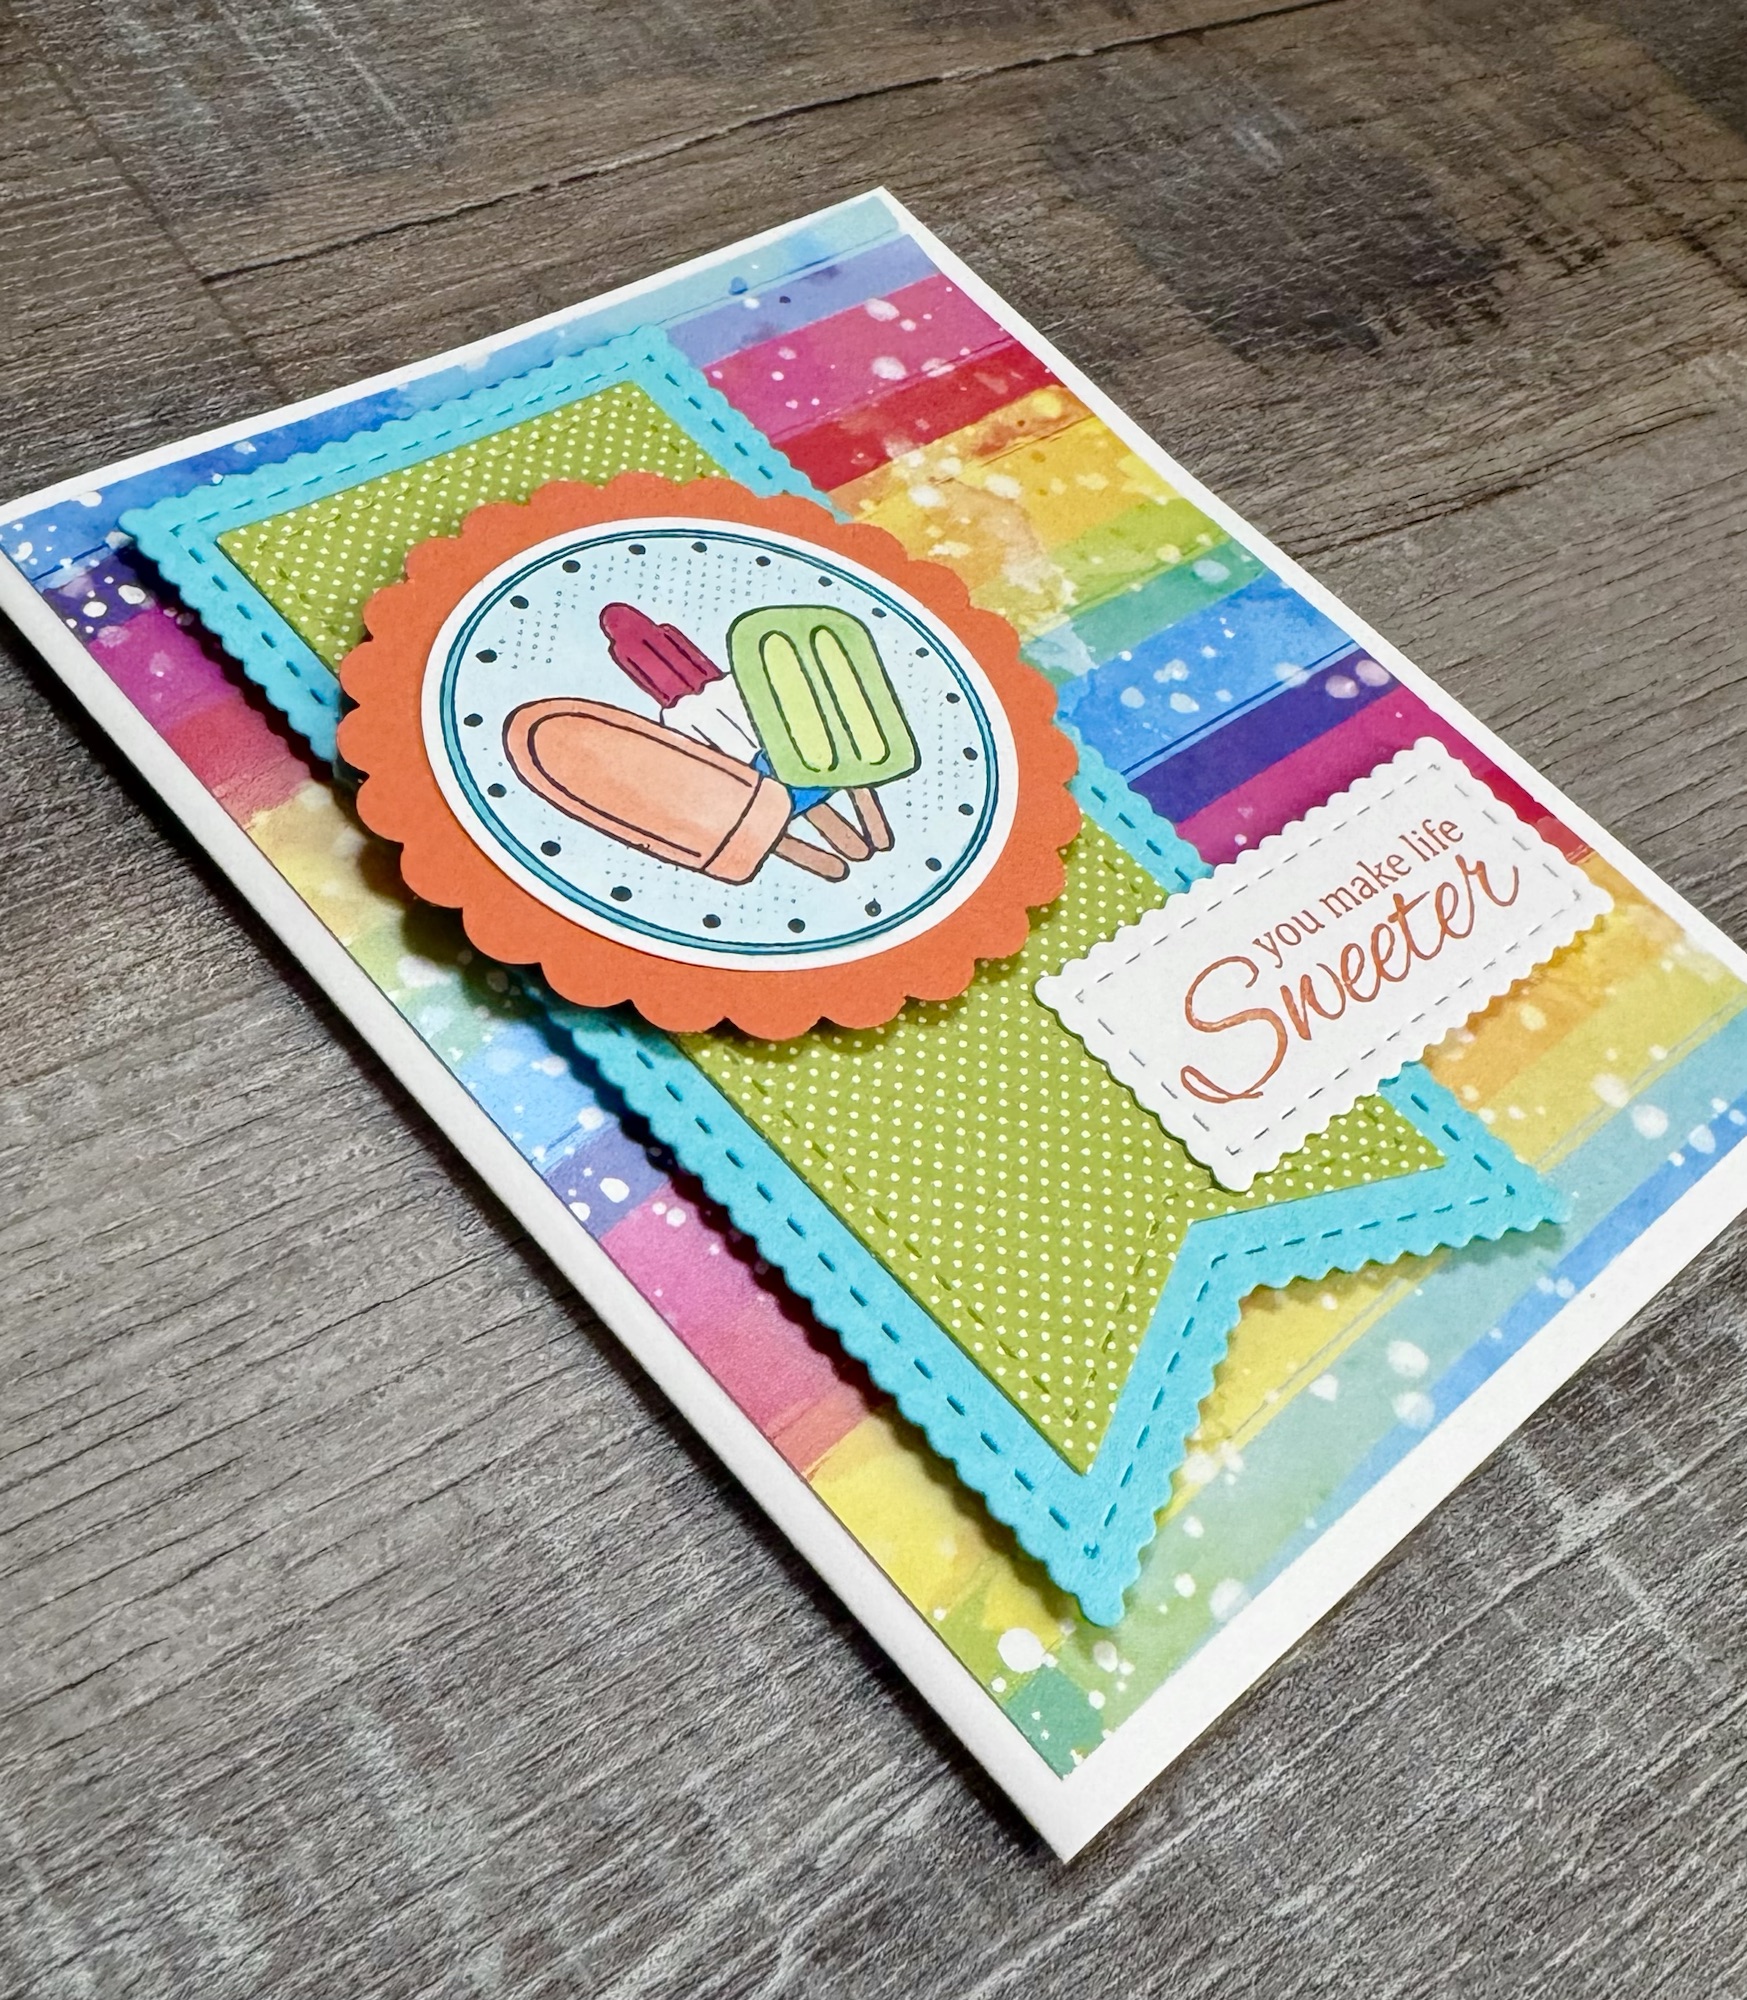
This You Make Life Sweeter Birthday Card just makes me happy! 🙂 The colors are so bright and fun and I love the sentiment.
Disclosure: Some of the links on my site are affiliate links, meaning, at no additional cost to you, I will earn a small commission if you click through and make a purchase. As an Amazon Associate I earn from qualifying purchases.
The stamp set is called Life is Sweeter with Treats from Unity Stamp Company. Sadly, this set is retired. ☹️ If you don’t have this set in your collection, I hope the layout on this card will inspire you to create a fun birthday card with your favorite birthday stamps.
To make the card, I added a piece of patterned paper to a white card. Using the Scallops & Banners Nesting Dies from Unity Stamp Company, I die cut a banner from turquoise card stock and green patterned paper. I layered them together and attached them to the card using foam tape. Then I attached the stamped image over the banner using foam tape.
Have you seen this new book Crochet Secrets from The Knotty Boss by Anna Leyzina? It is filled with over 100 crochet tips and tricks. It is a great reference for beginners and seasoned crocheters alike. 🙂
Disclosure: Some of the links on my site are affiliate links, meaning, at no additional cost to you, I will earn a small commission if you click through and make a purchase. As an Amazon Associate I earn from qualifying purchases.
Anna has tips to help you from the beginning of your crochet project to finishing it off. There are ways to keep your rows even and help when crocheting in the round. She has tips for changing colors and making amigurumi – and so much more! The book is written using US crochet terms but she’s also included a chart to convert to UK terms.
The Knotty Boss also has an Etsy site filled with printable tags, labels, inserts, and templates that you can purchase to make your finished makes look even more professional. I have personally purchased a few of them and they are great! All you have to do is print them onto card stock, cut them out, and add them to your finished crochet project.
The book is well written and filled with beautiful photos to help you get everything just right. This would be a great book to add to your library – I’m sure I will be referencing Crochet Secrets from The Knotty Boss over and over again. 🙂
This book would make a great Christmas gift for all your crocheting friends. 🎄
I’m sure I’ve said this before, but baby blankets are one of my favorite things to crochet! They make snuggling up with those sweet little ones even better. 😊
Disclosure: Some of the links on my site are affiliate links, meaning, at no additional cost to you, I will earn a small commission if you click through and make a purchase. As an Amazon Associate I earn from qualifying purchases.
The Crochet Suzette Stitch Baby Blanket has the best texture! And the simple border just sets it off. The pattern uses simple stitches and is great for beginners and seasoned crocheters alike.
I used I Love This Yarn in White and Pink with an I/5.5mm crochet hook to stitch up my blanket. You can find the pattern below along with a link to a free PDF if you’d like to easily print it.
Crochet Suzette Stitch Baby Blanket
Worsted Weight (4) yarn – 14 ounces White and 2-3 ounces Pink
I used I Love This Yarn in White and Pink
I/5.5mm crochet hook
Stitches used in US terms:
Chain – ch
Single Crochet – sc
Half Double Crochet – hdc
Double Crochet – dc
Slip Stitch – ss
Note: ch 1 at the end of the row does not count as a stitch.
Chain 91 with White.
Row 1: sc in 2nd ch from hook and in each stitch across. ch 1 and turn. (90 stitches) (Right Side)
Row 2: hdc in the first stitch, *skip next stitch, sc and dc in the next stitch*. Repeat from * to * across to last stitch. hdc in the last stitch. Ch 1, turn. (90 stitches) (Wrong Side)
Row 3: hdc in the first stitch, *skip next stitch, sc and dc in next stitch*. Repeat from * to * across to last stitch. hdc in the last stitch. Ch 1, turn. (90 stitches)
Repeat Row 3 until blanket measures approximately 27 inches, ending with a Wrong Side row.
Last row will be a right side row. The sc stitches will face the same way as Row 1.
Last Row: sc in each stitch across. (90 stitches)
Begin working in rounds.
Continue with White.
Round 1: ch 1. sc evenly around, working 3 sc in each corner. Join with ss to 1st sc.
Change to Pink.
Rounds 2-4: ch 1. sc in each stitch around, working 3 sc in each corner. Join with ss to 1st sc.
Round 5: ch 4 (counts as 1st dc and ch 1). dc in same stitch as ss. *Skip next 2 stitches, (dc, ch 1, dc) in next stitch.* Repeat from *to* around. Join with ss to 3rd ch of beginning ch.
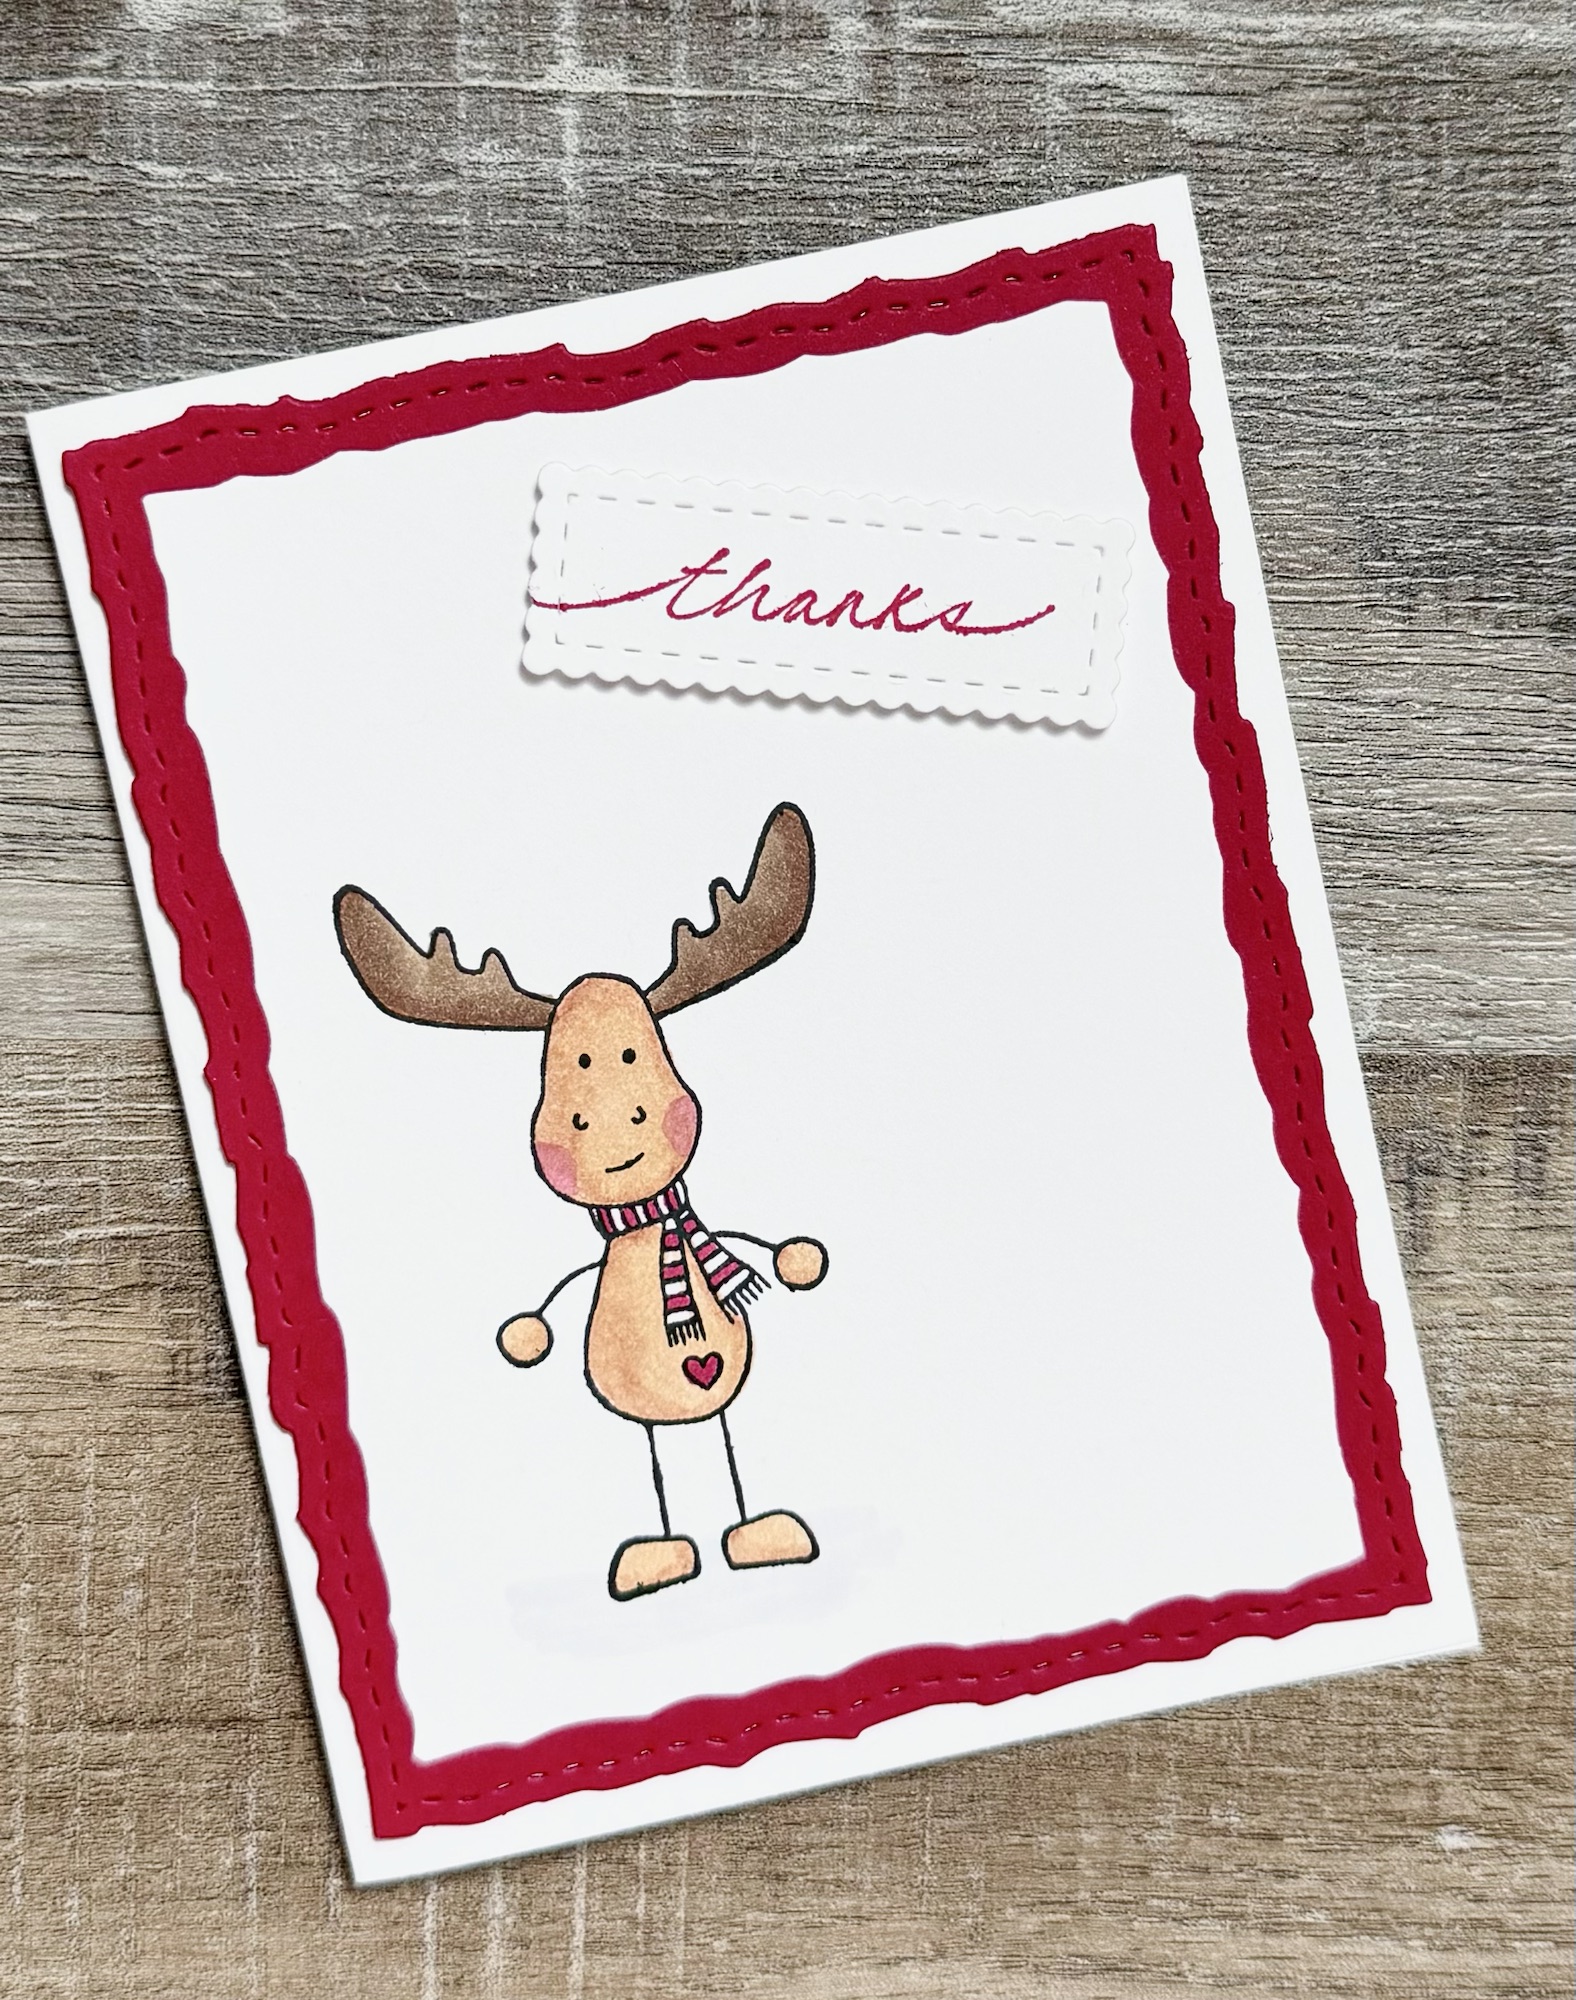
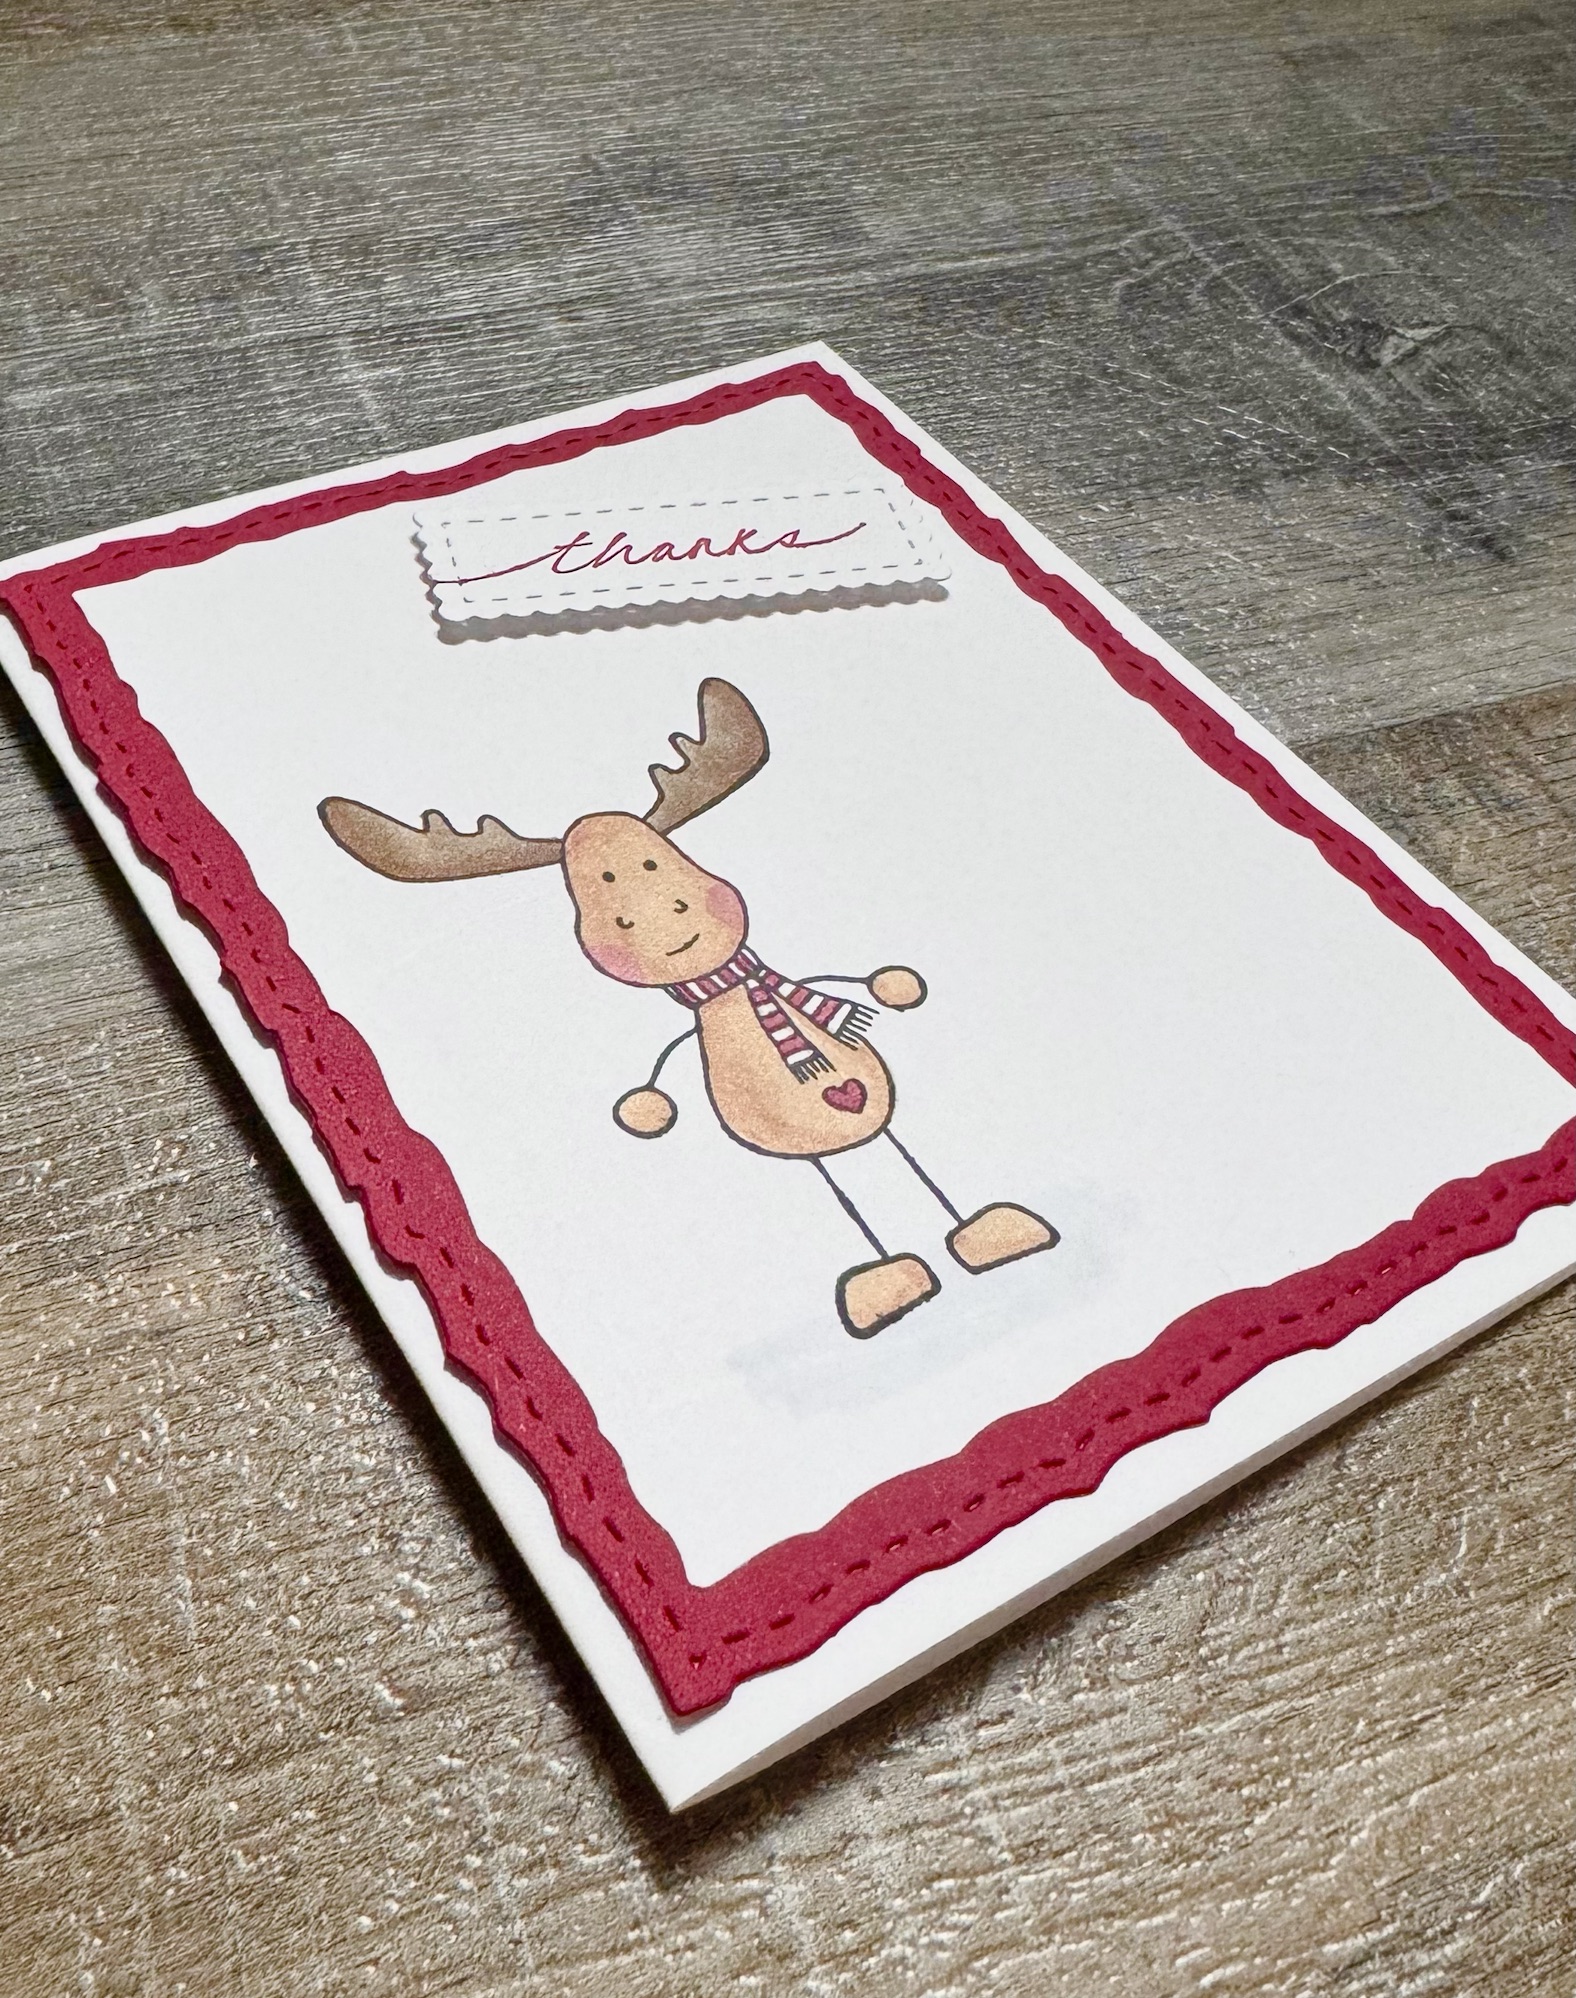
To finish out Christmas in July, I have a cute Christmas Thanks card to share with you. 🎄 Make a few of these now and you’ll be all set to send out your thanks for those Christmas gifts. 🎁
Disclosure: Some of the links on my site are affiliate links, meaning, at no additional cost to you, I will earn a small commission if you click through and make a purchase. As an Amazon Associate I earn from qualifying purchases.
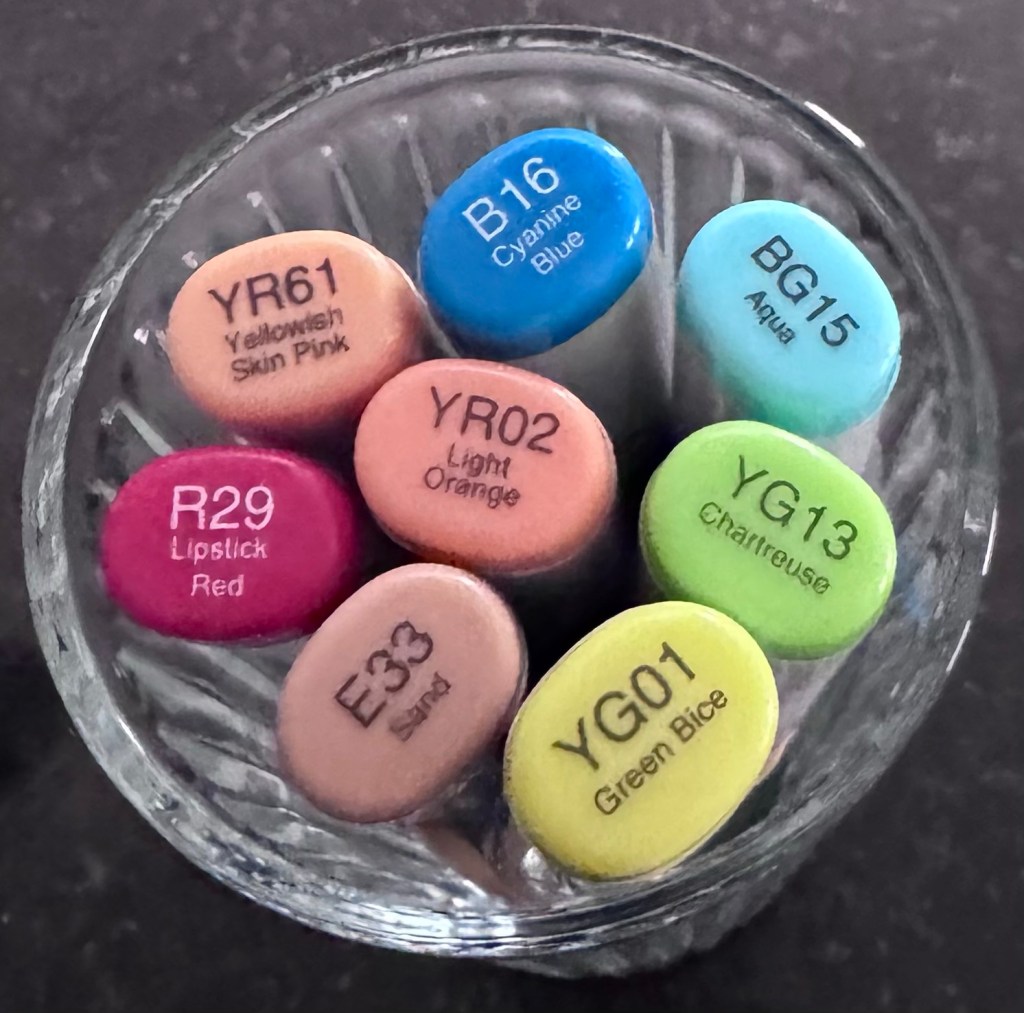
I stamped the moose image with Memento Tuxedo Black Ink on white card stock and colored him with Copic markers. The colors I used are in the picture below.
I stamped “thanks” with red ink on white card stock and die cut around it using the Scalloped & Stitched Sentiment Nesting Dies from Unity. This particular stamp is one I’ve had in my collection forever and is no longer available. Use your favorite thank you stamp – or if you are looking to add a new one to your collection, I really like this one. I attached the piece to the card at an angle using foam tape.
This little guy would also make a very cute Christmas card. Just change the sentiment to your favorite Christmas greeting.🎄
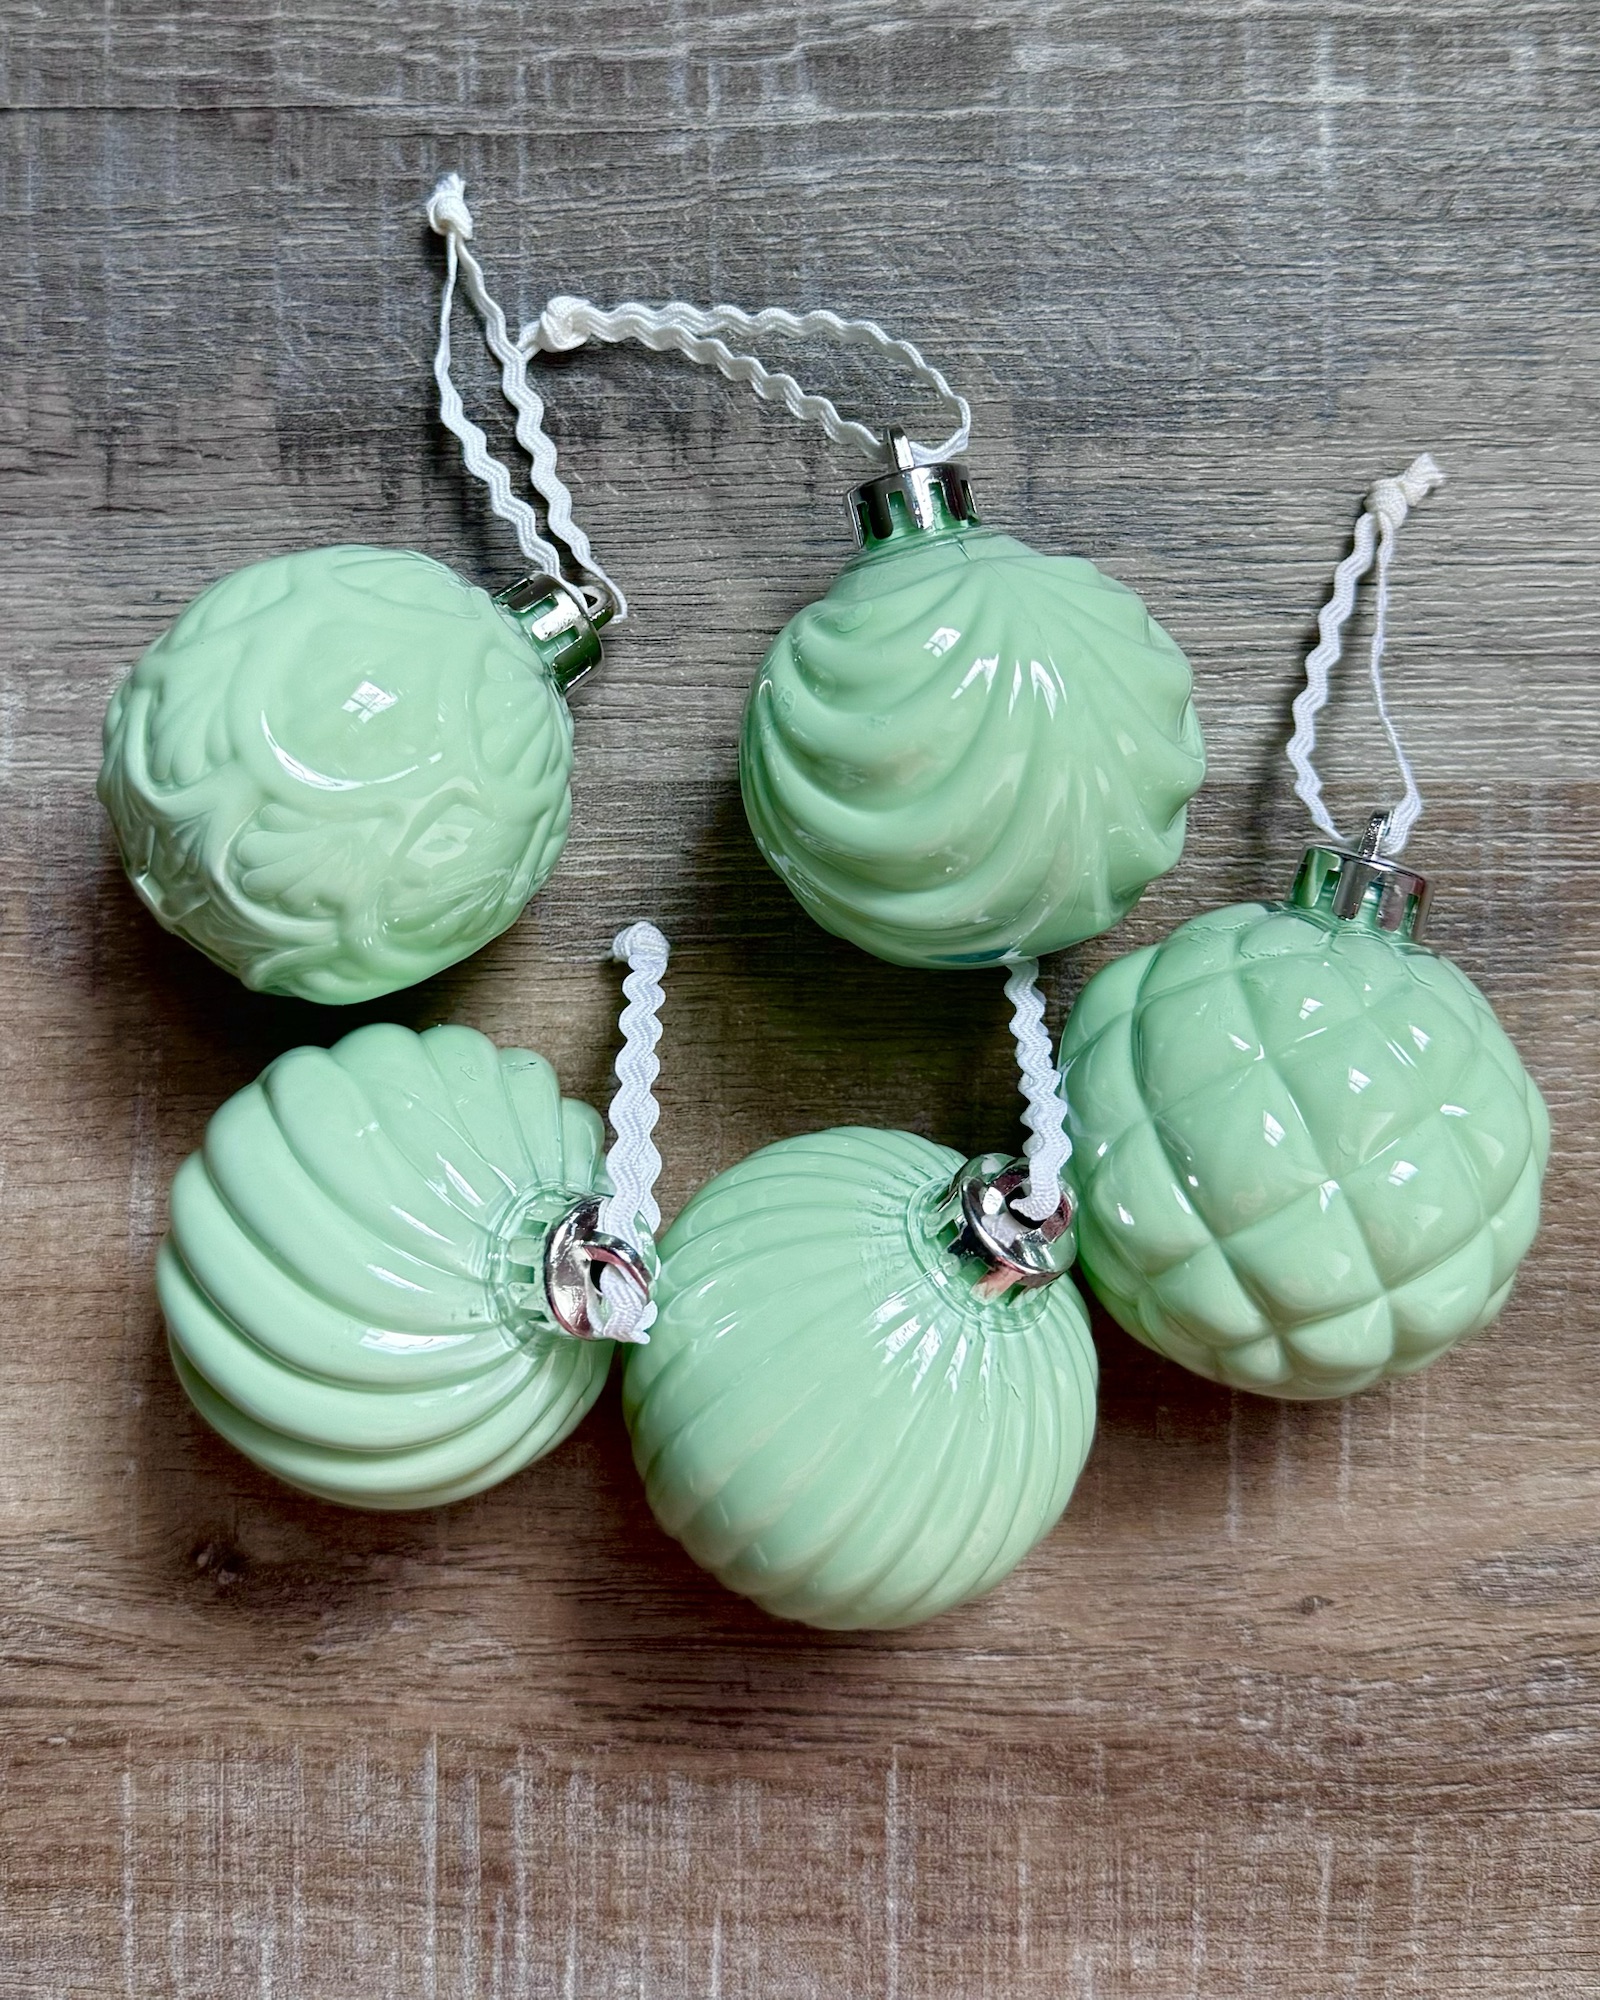
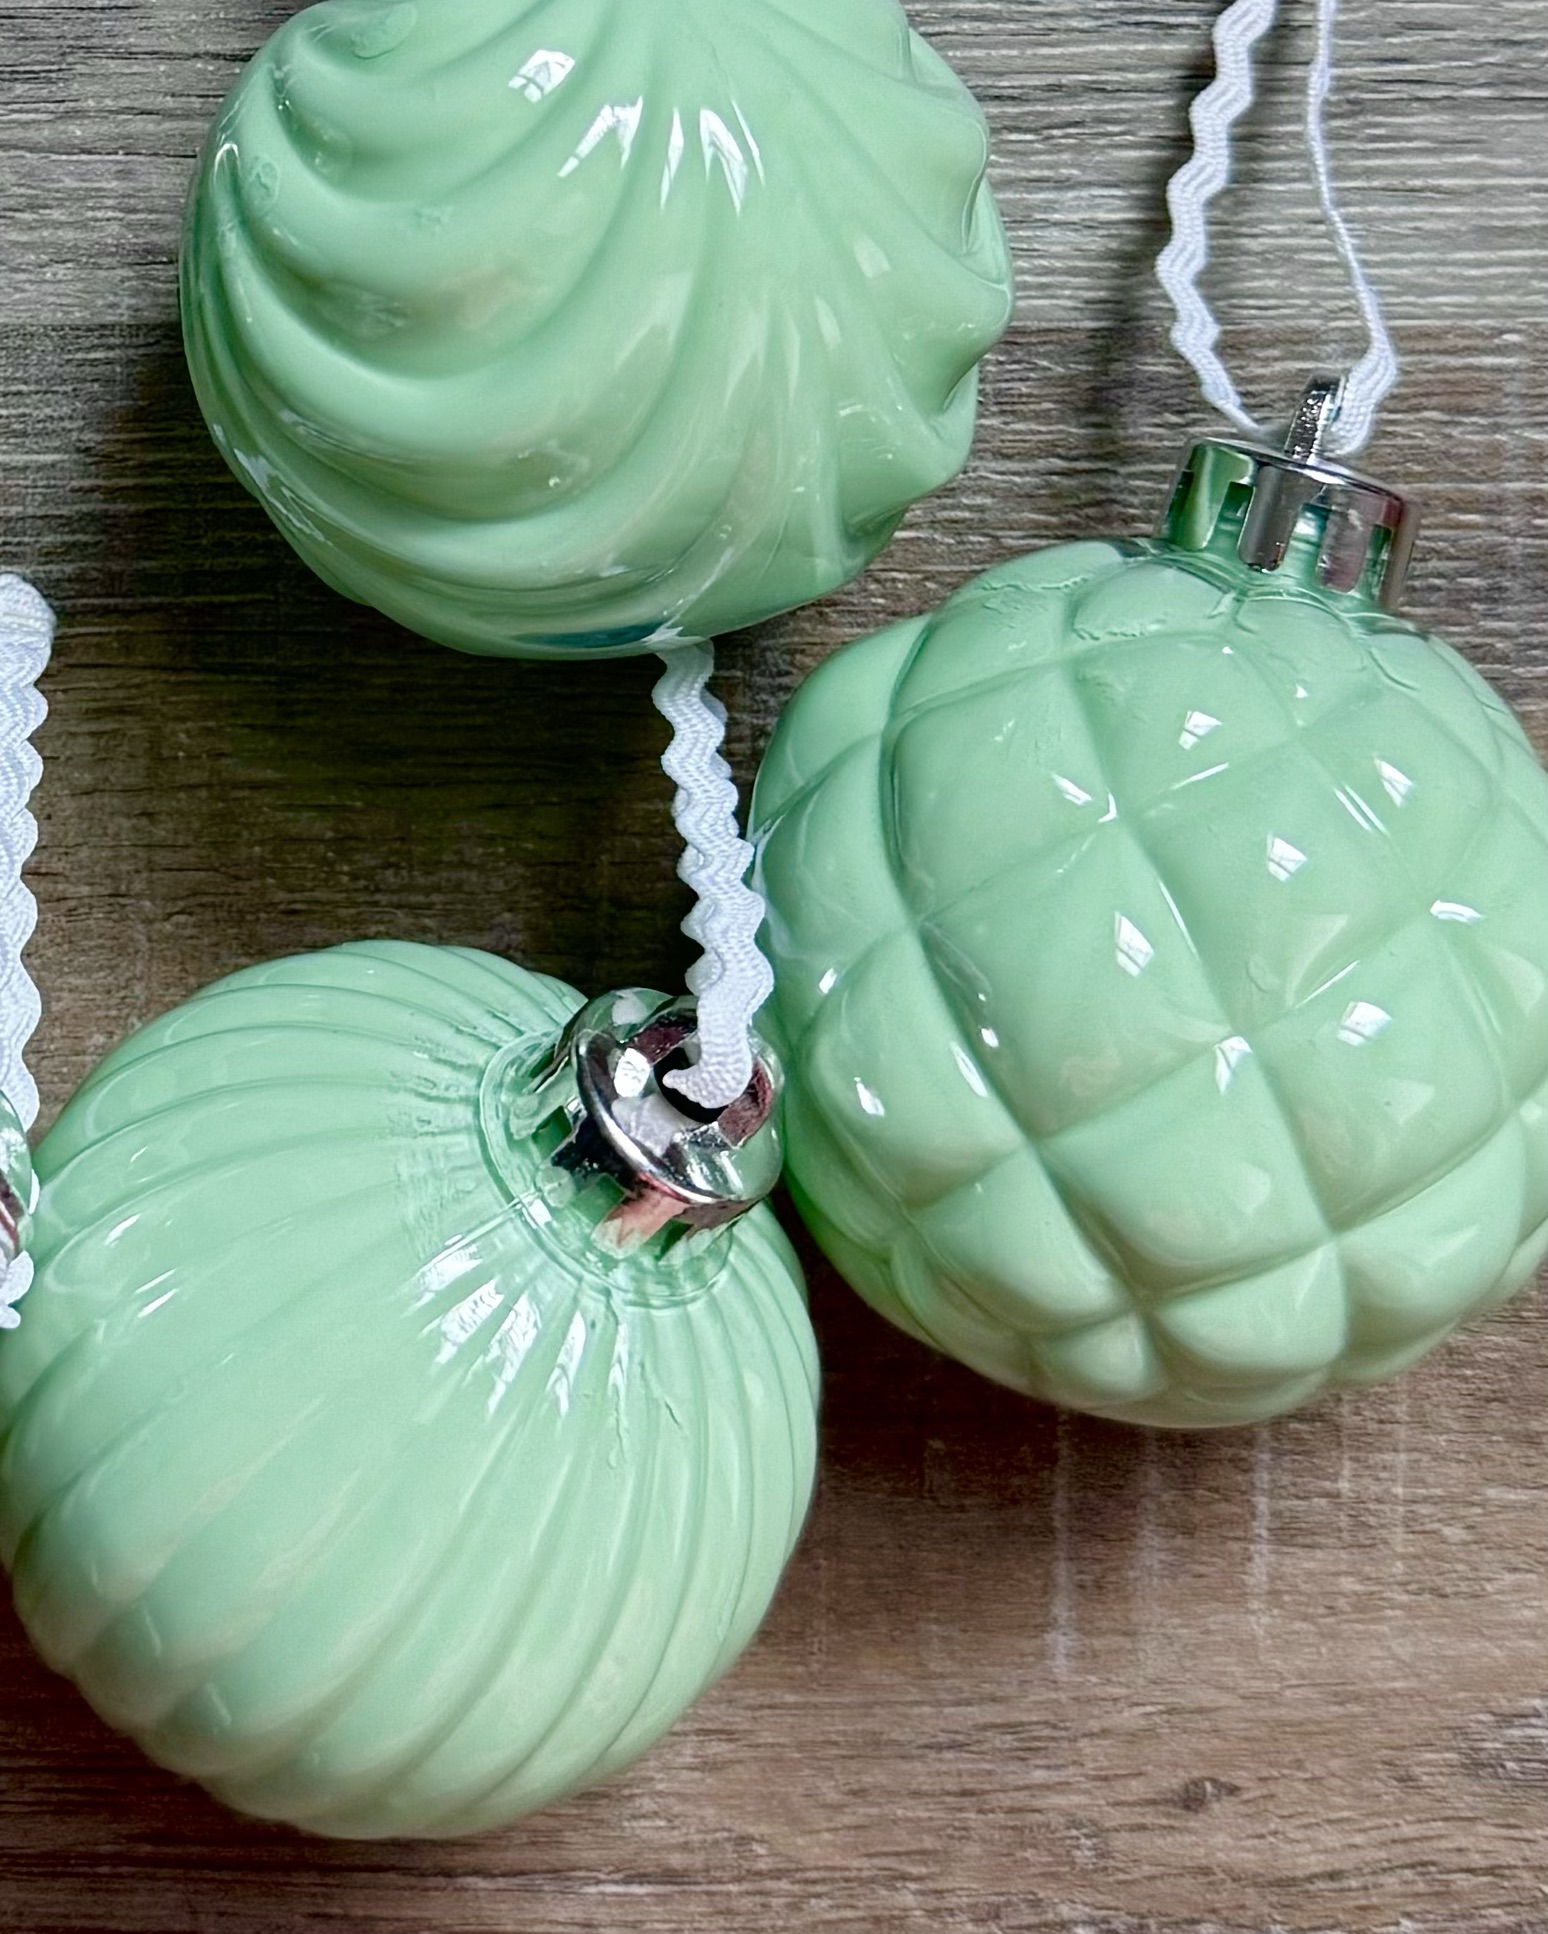
These Faux Jadeite Ornaments almost look like the real thing! They are so simple to make and will look so pretty on your tree. 🎄
Disclosure: Some of the links on my site are affiliate links, meaning, at no additional cost to you, I will earn a small commission if you click through and make a purchase. As an Amazon Associate I earn from qualifying purchases.
You’ll need some clear plastic ball ornaments. Mine measure 2.25 inches in diameter. I used textured ones (I found them at Hobby Lobby last Christmas season) but I think the plain ornaments would be just as pretty. You’ll also need acrylic paint in a color that mimics jadeite. I used DecoArt Americana acrylic paint in Sage Mint.
First pop off the silver top of the ornament. Then squeeze some paint into the ornament. Swirl the paint around until the entire inside of the ornament is covered, adding more paint as needed. I found that covering the top of the ornament with my finger and shaking it a bit helped to get the paint into all the crevices.
Pour any excess paint back into the bottle and invert the ornament onto a small paper cup to drain any paint that is left. Let dry for several hours.
Pop the top of the ornament back on and add a pretty ribbon for a hanger.
I think these would look lovely in a pretty bowl as part of a Christmas centerpiece. They would also be great package tie-ons.
If the jadeite color isn’t for you, these ornaments would be beautiful in any color to go with your Christmas decor. 🎄
I have a fun stocking stuffer idea for you as Christmas in July continues. 🎄
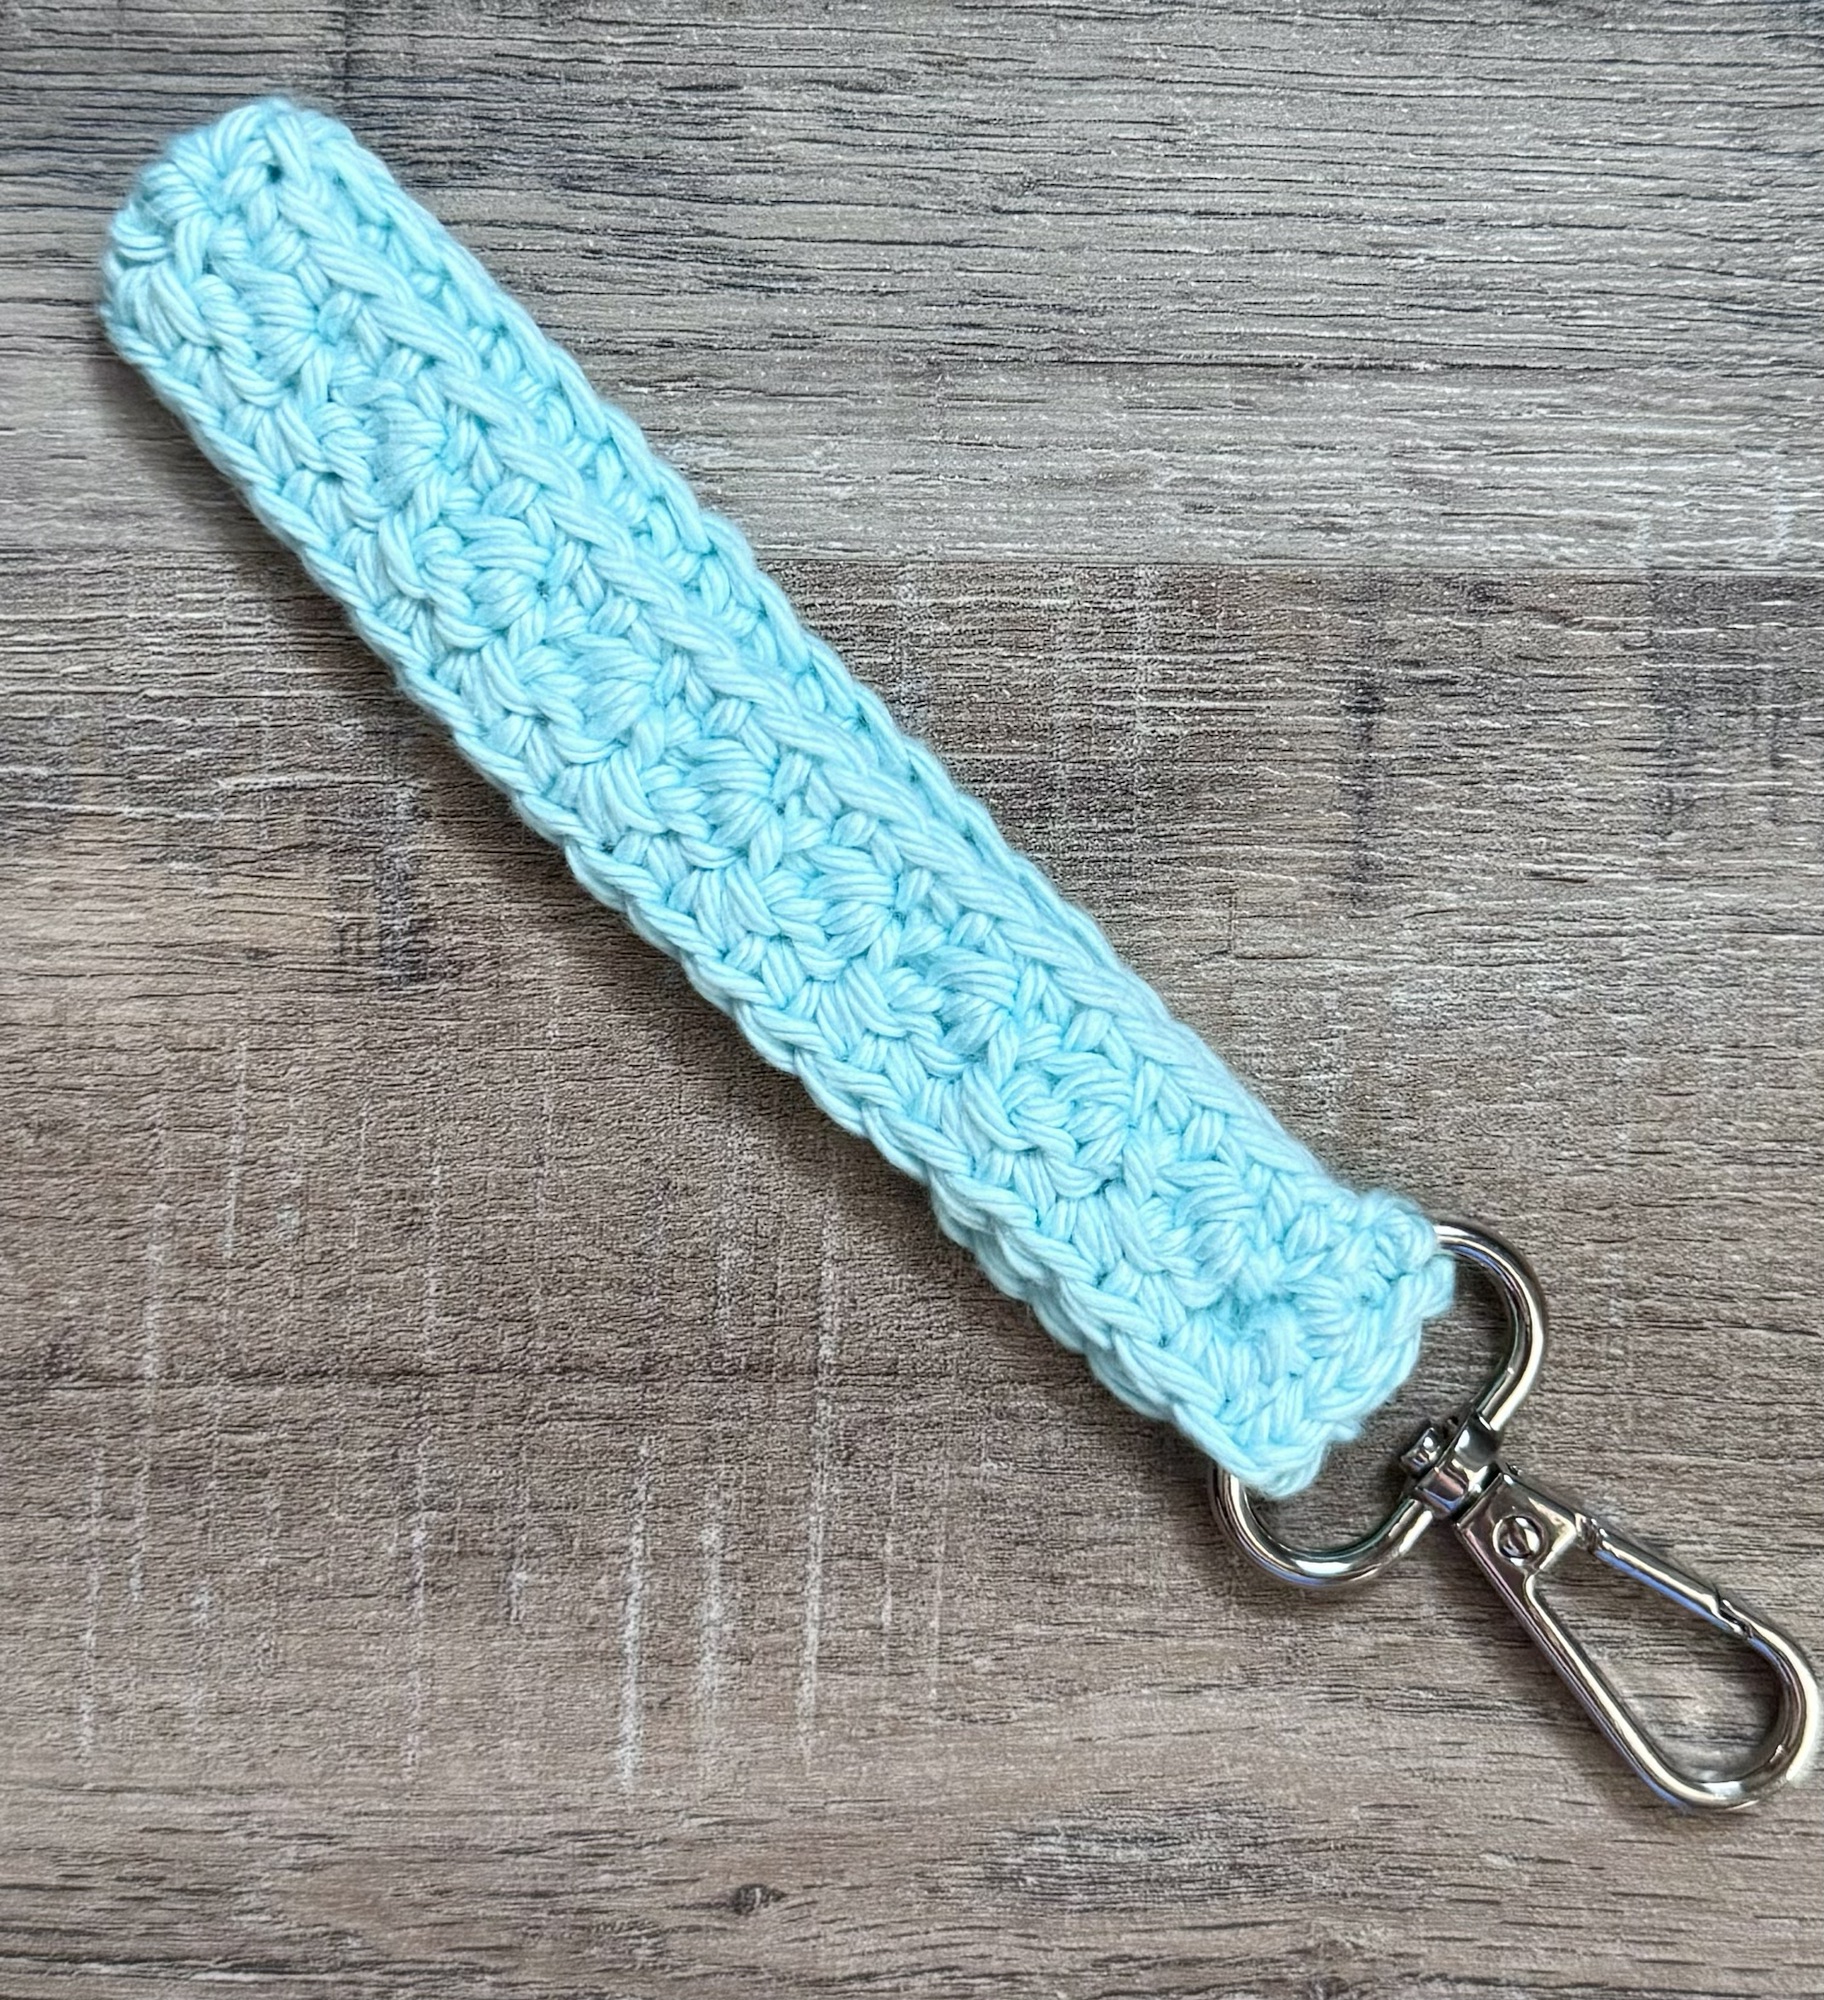
Crochet Wristlet Keychains work up in just a few minutes! They make great stocking stuffers or a little something extra to add to gifts. You can make them in any color and are a great way to use up some of those yarn scraps. 😊
Disclosure: Some of the links on my site are affiliate links, meaning, at no additional cost to you, I will earn a small commission if you click through and make a purchase. As an Amazon Associate I earn from qualifying purchases.
The super easy pattern can be found below. I’ve also included a free PDF if you’d like to easily print it. If you need help finding the back bump of your beginning chains, this is a great video to explain it. 🙂
Crochet Wristlet Keychain
Worsted weight (4) yarn – I used I Love This Cotton yarn
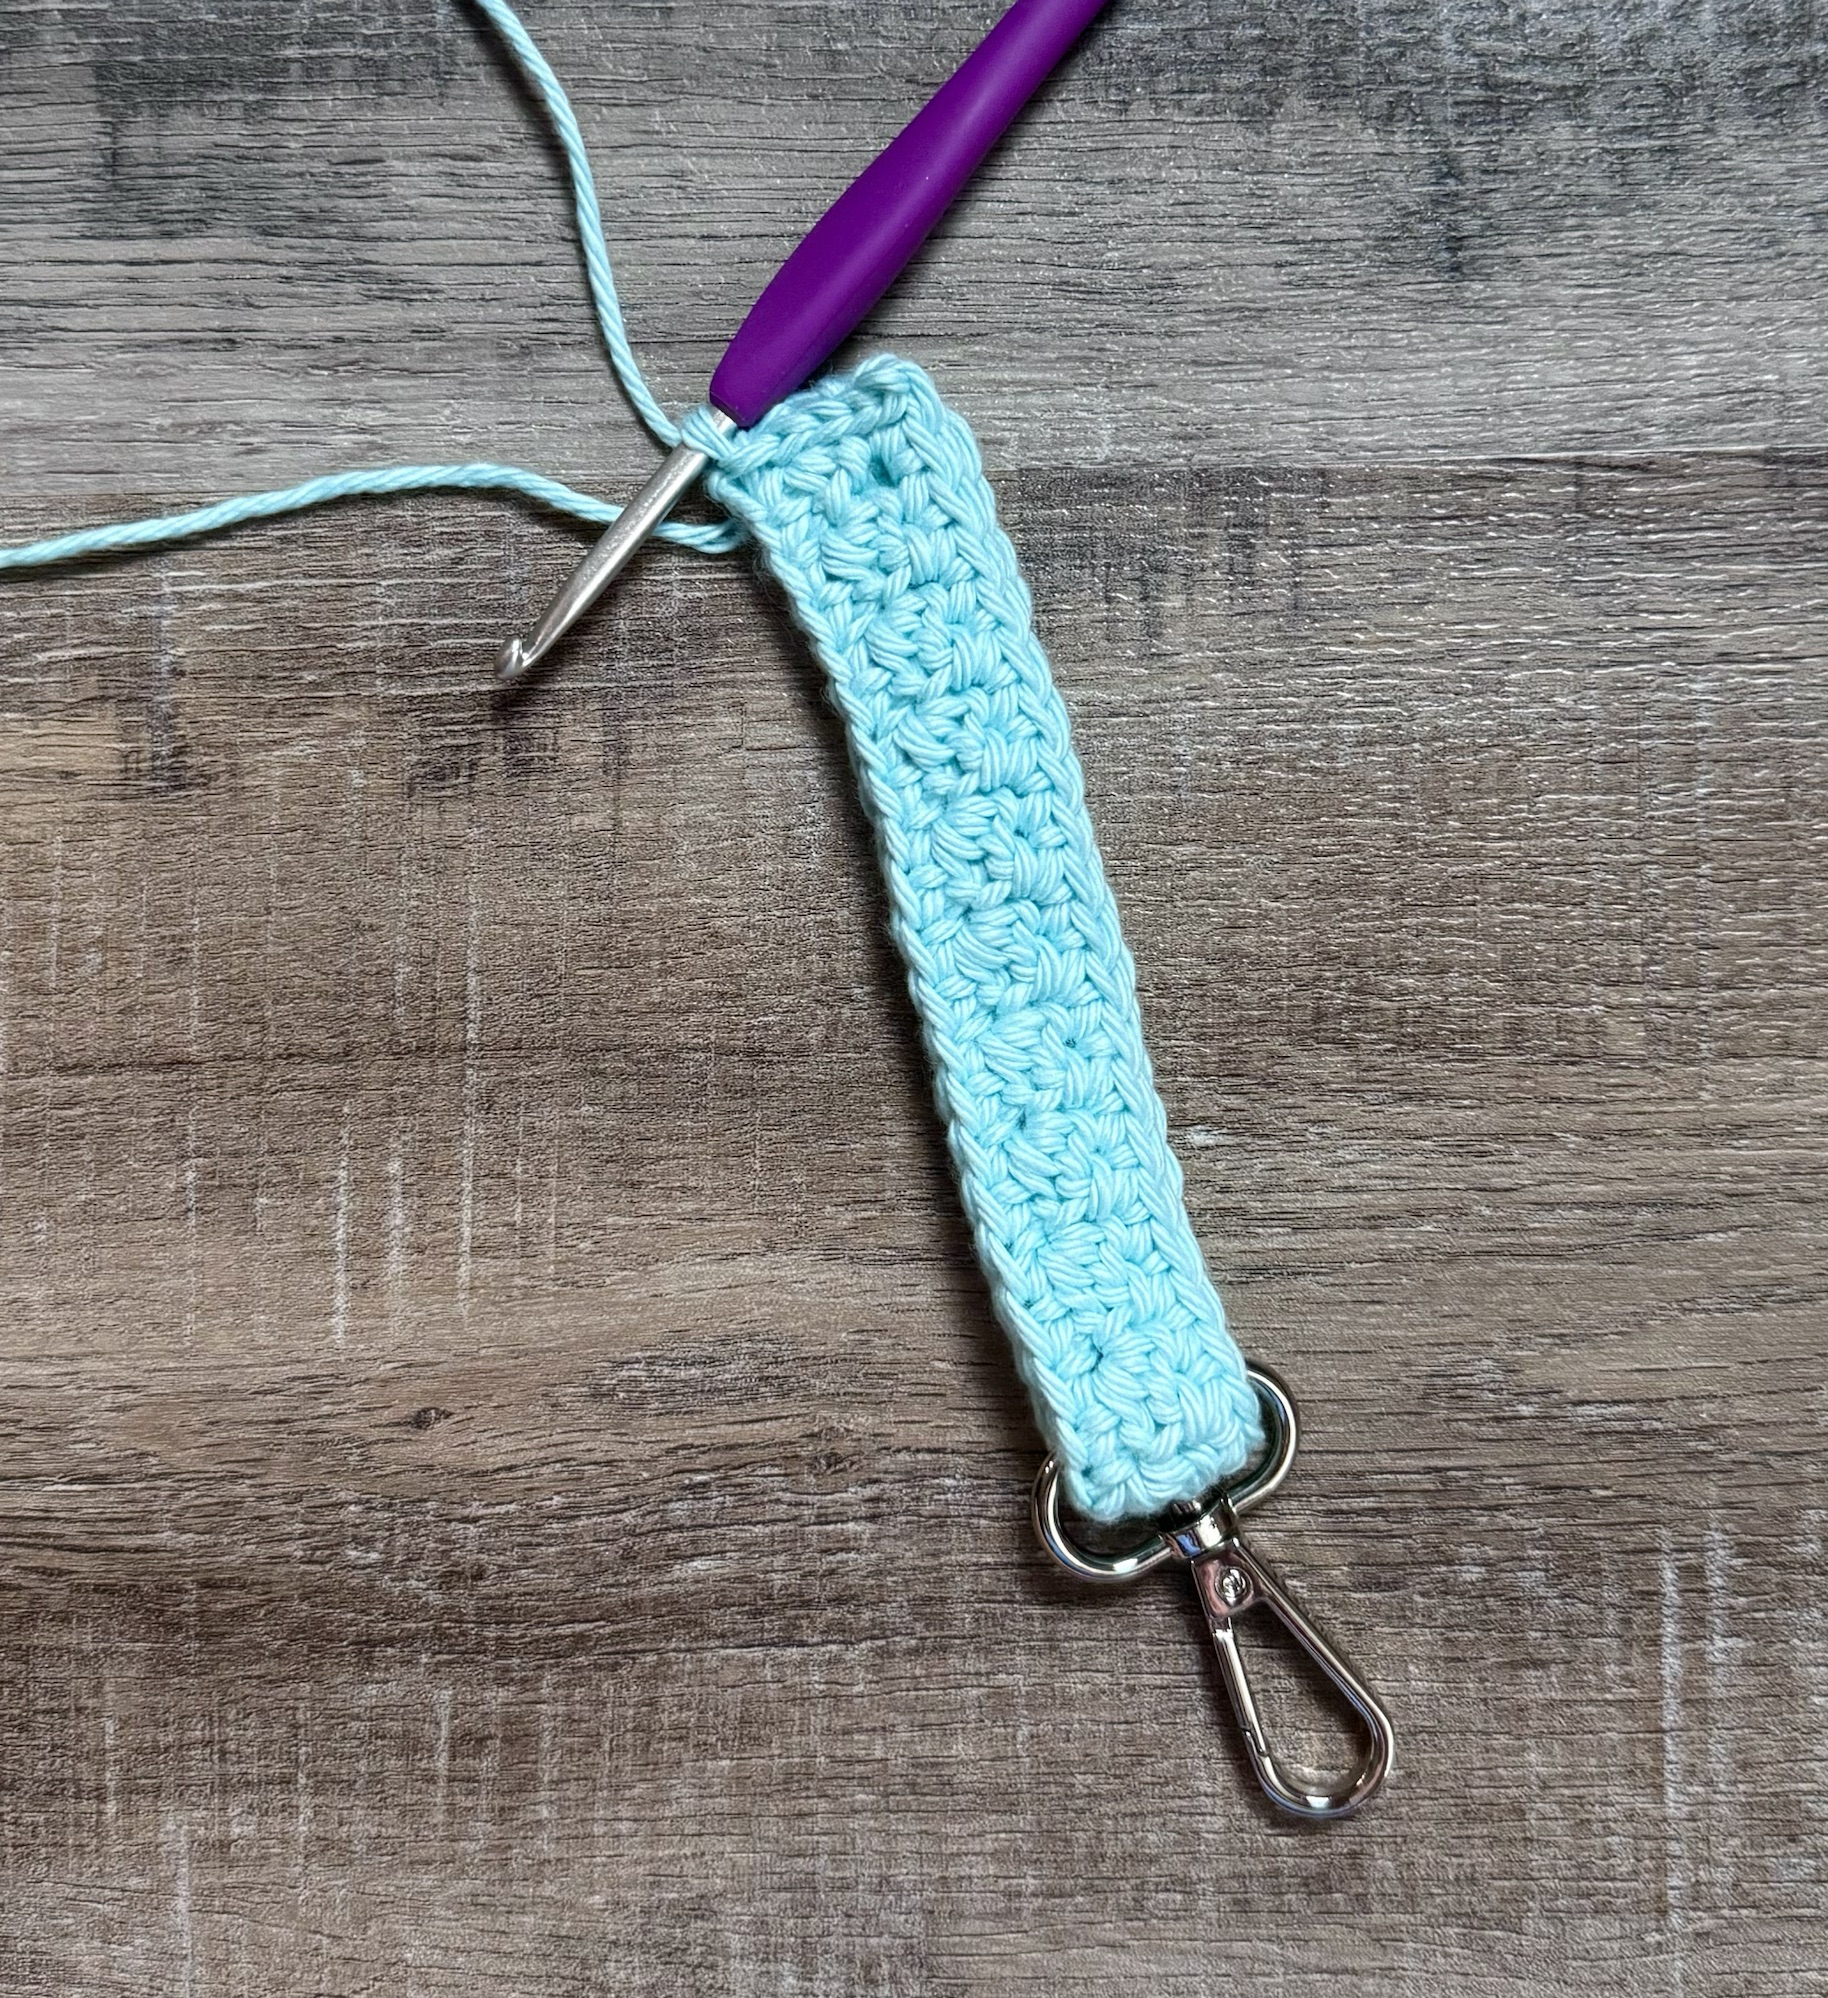
Row 1: sc in the back bump of the 2nd ch from hook and in each stitch across. ch 1, turn. (42 stitches)
Row 2: hdc in the first stitch, *skip next stitch, sc and dc in the next stitch*. Repeat from * to * across to last stitch. hdc in the last stitch. Ch 1, turn. (42 stitches)
Row 3: sc in each stitch across. (42 stitches)
Slip key ring onto strap and ss ends together.
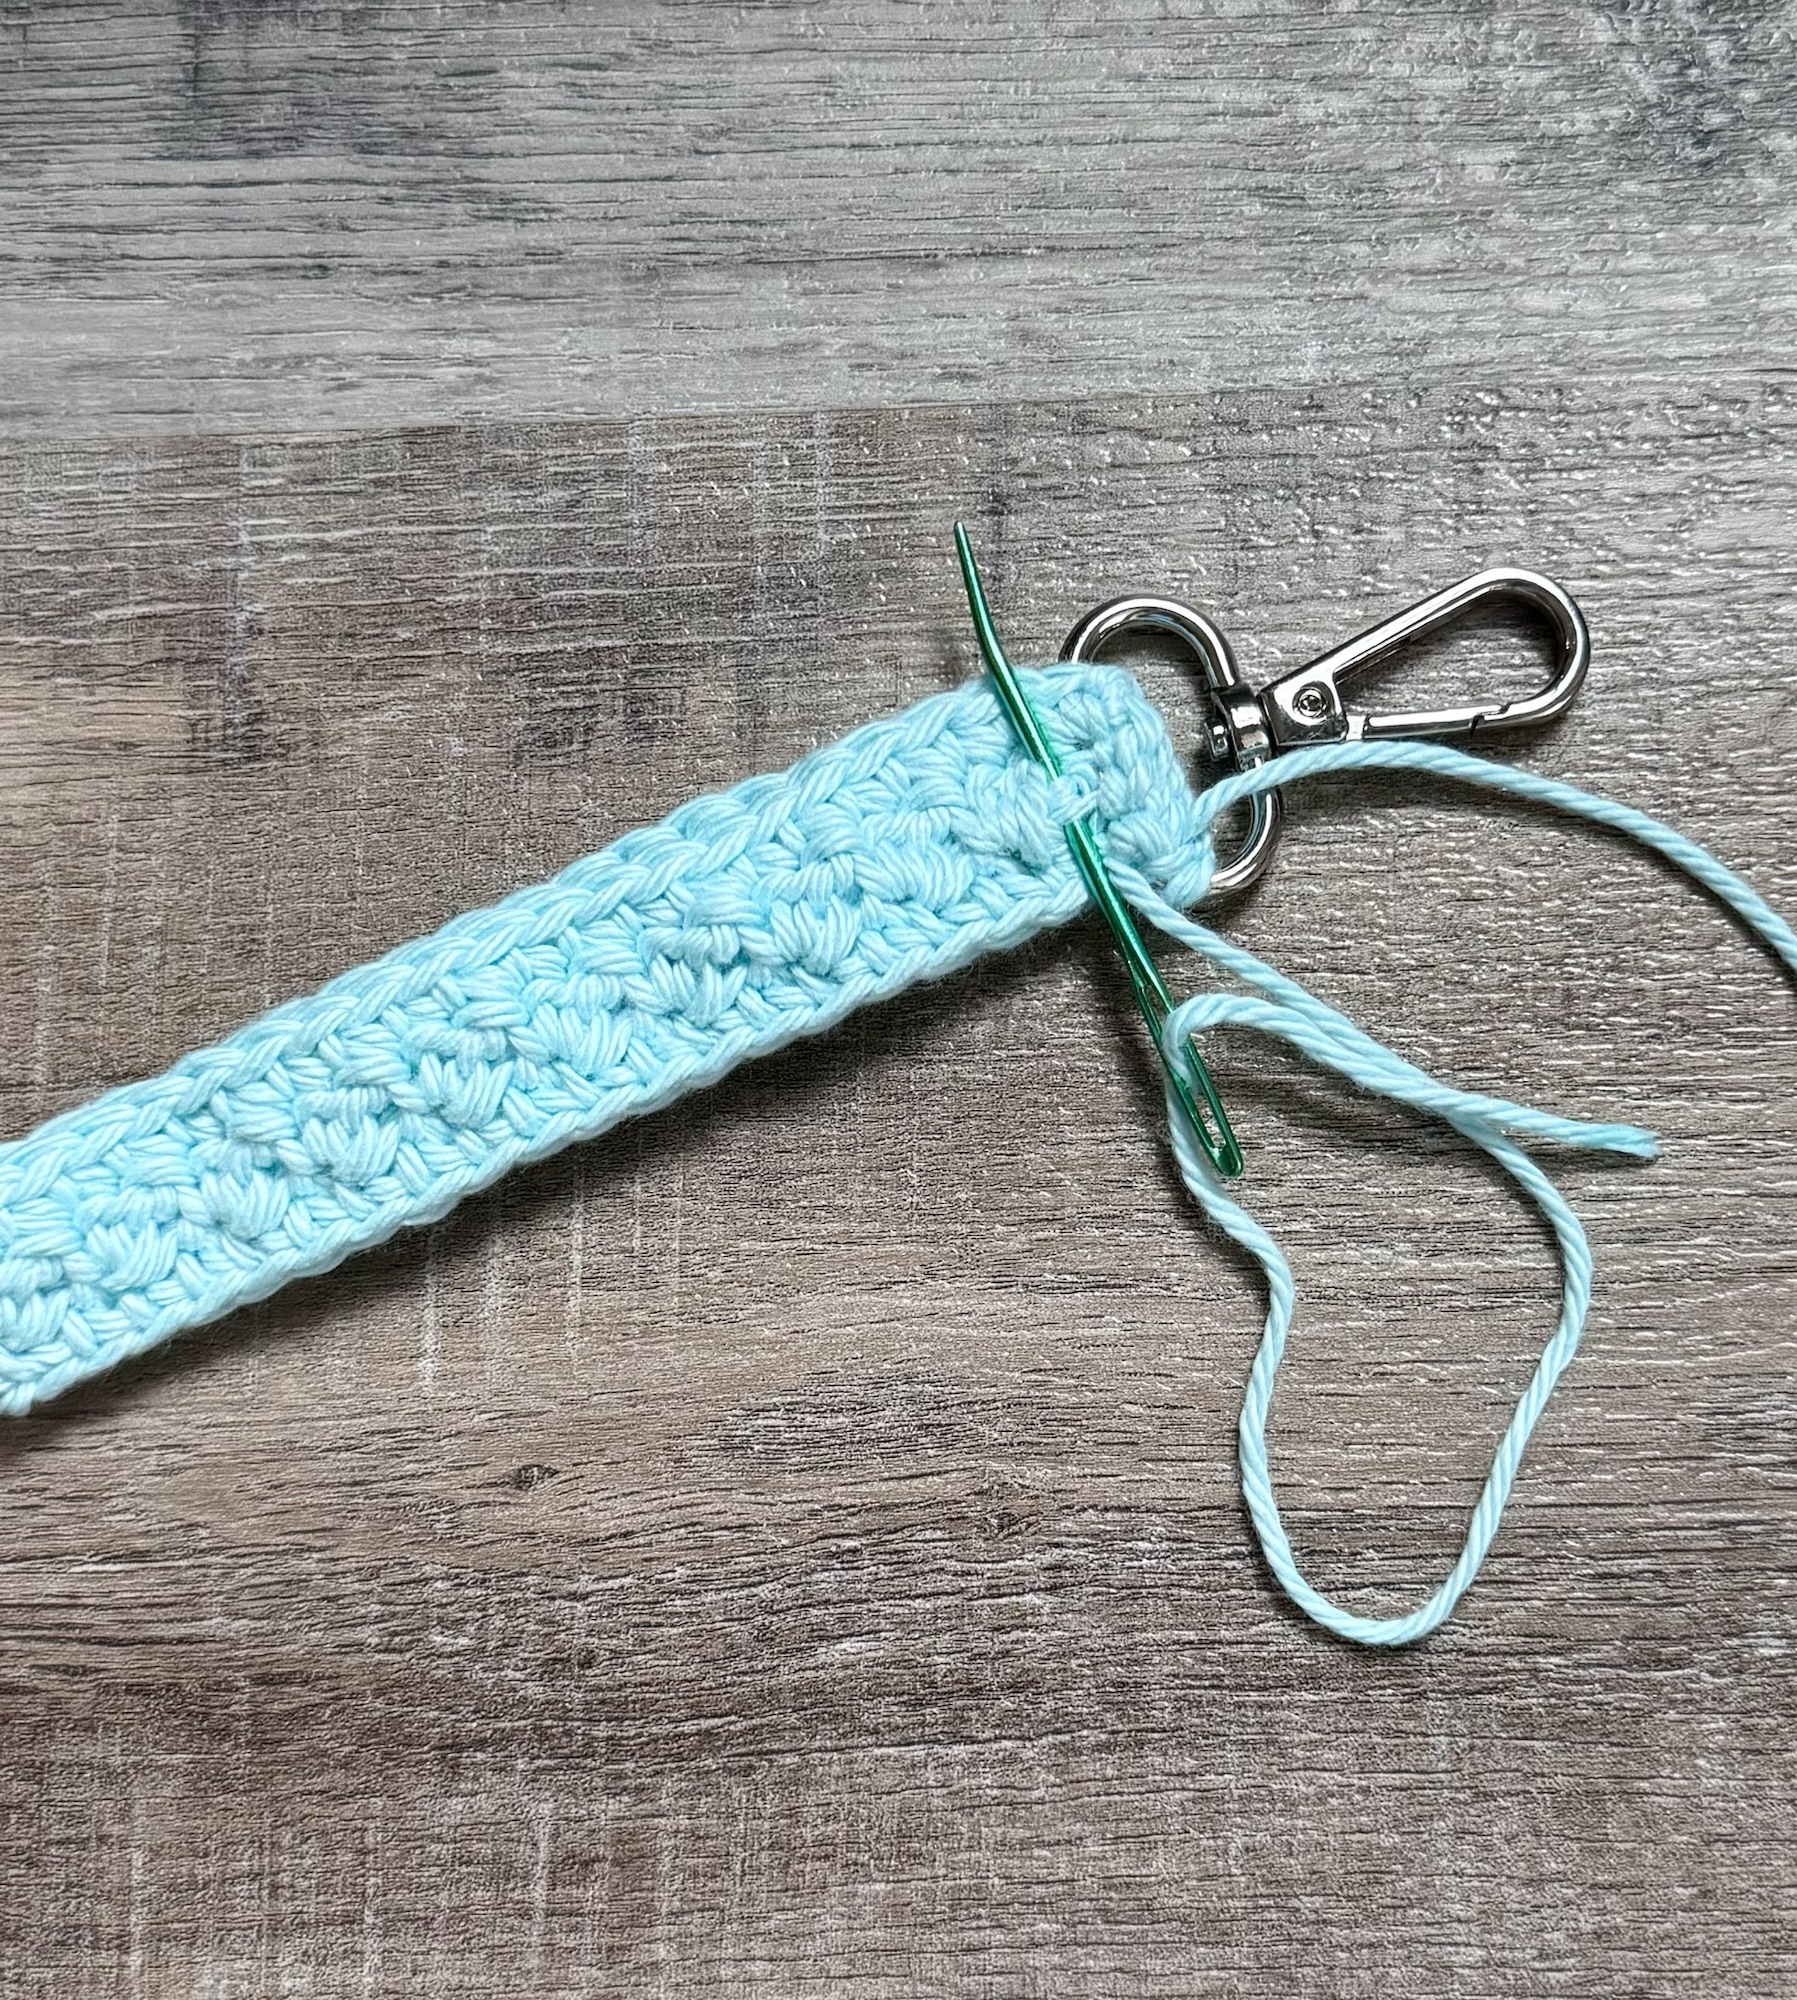
Fasten off leaving a long tail for sewing.
Pull strap tight to key ring and stitch across, close to the key ring, 2-3 times to secure.
Fasten off and weave in ends.
Here’s the link to the free PDF if you’d like to print the pattern…
I used cotton yarn because I think it will hold up well, but any 4 weight yarn would probably work, too. Make a few Crochet Wristlet Keychains now to be ready for Christmas. 🎄 Or pin this post to your crochet Pinterest board to save for later.
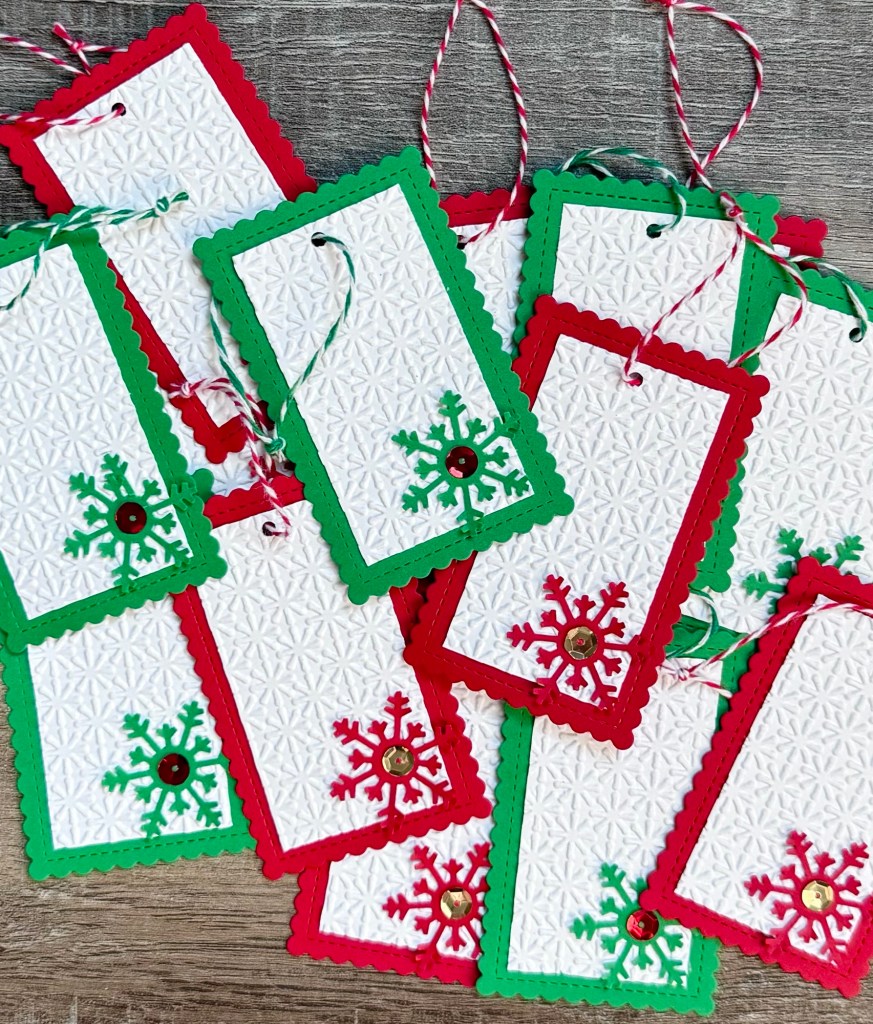
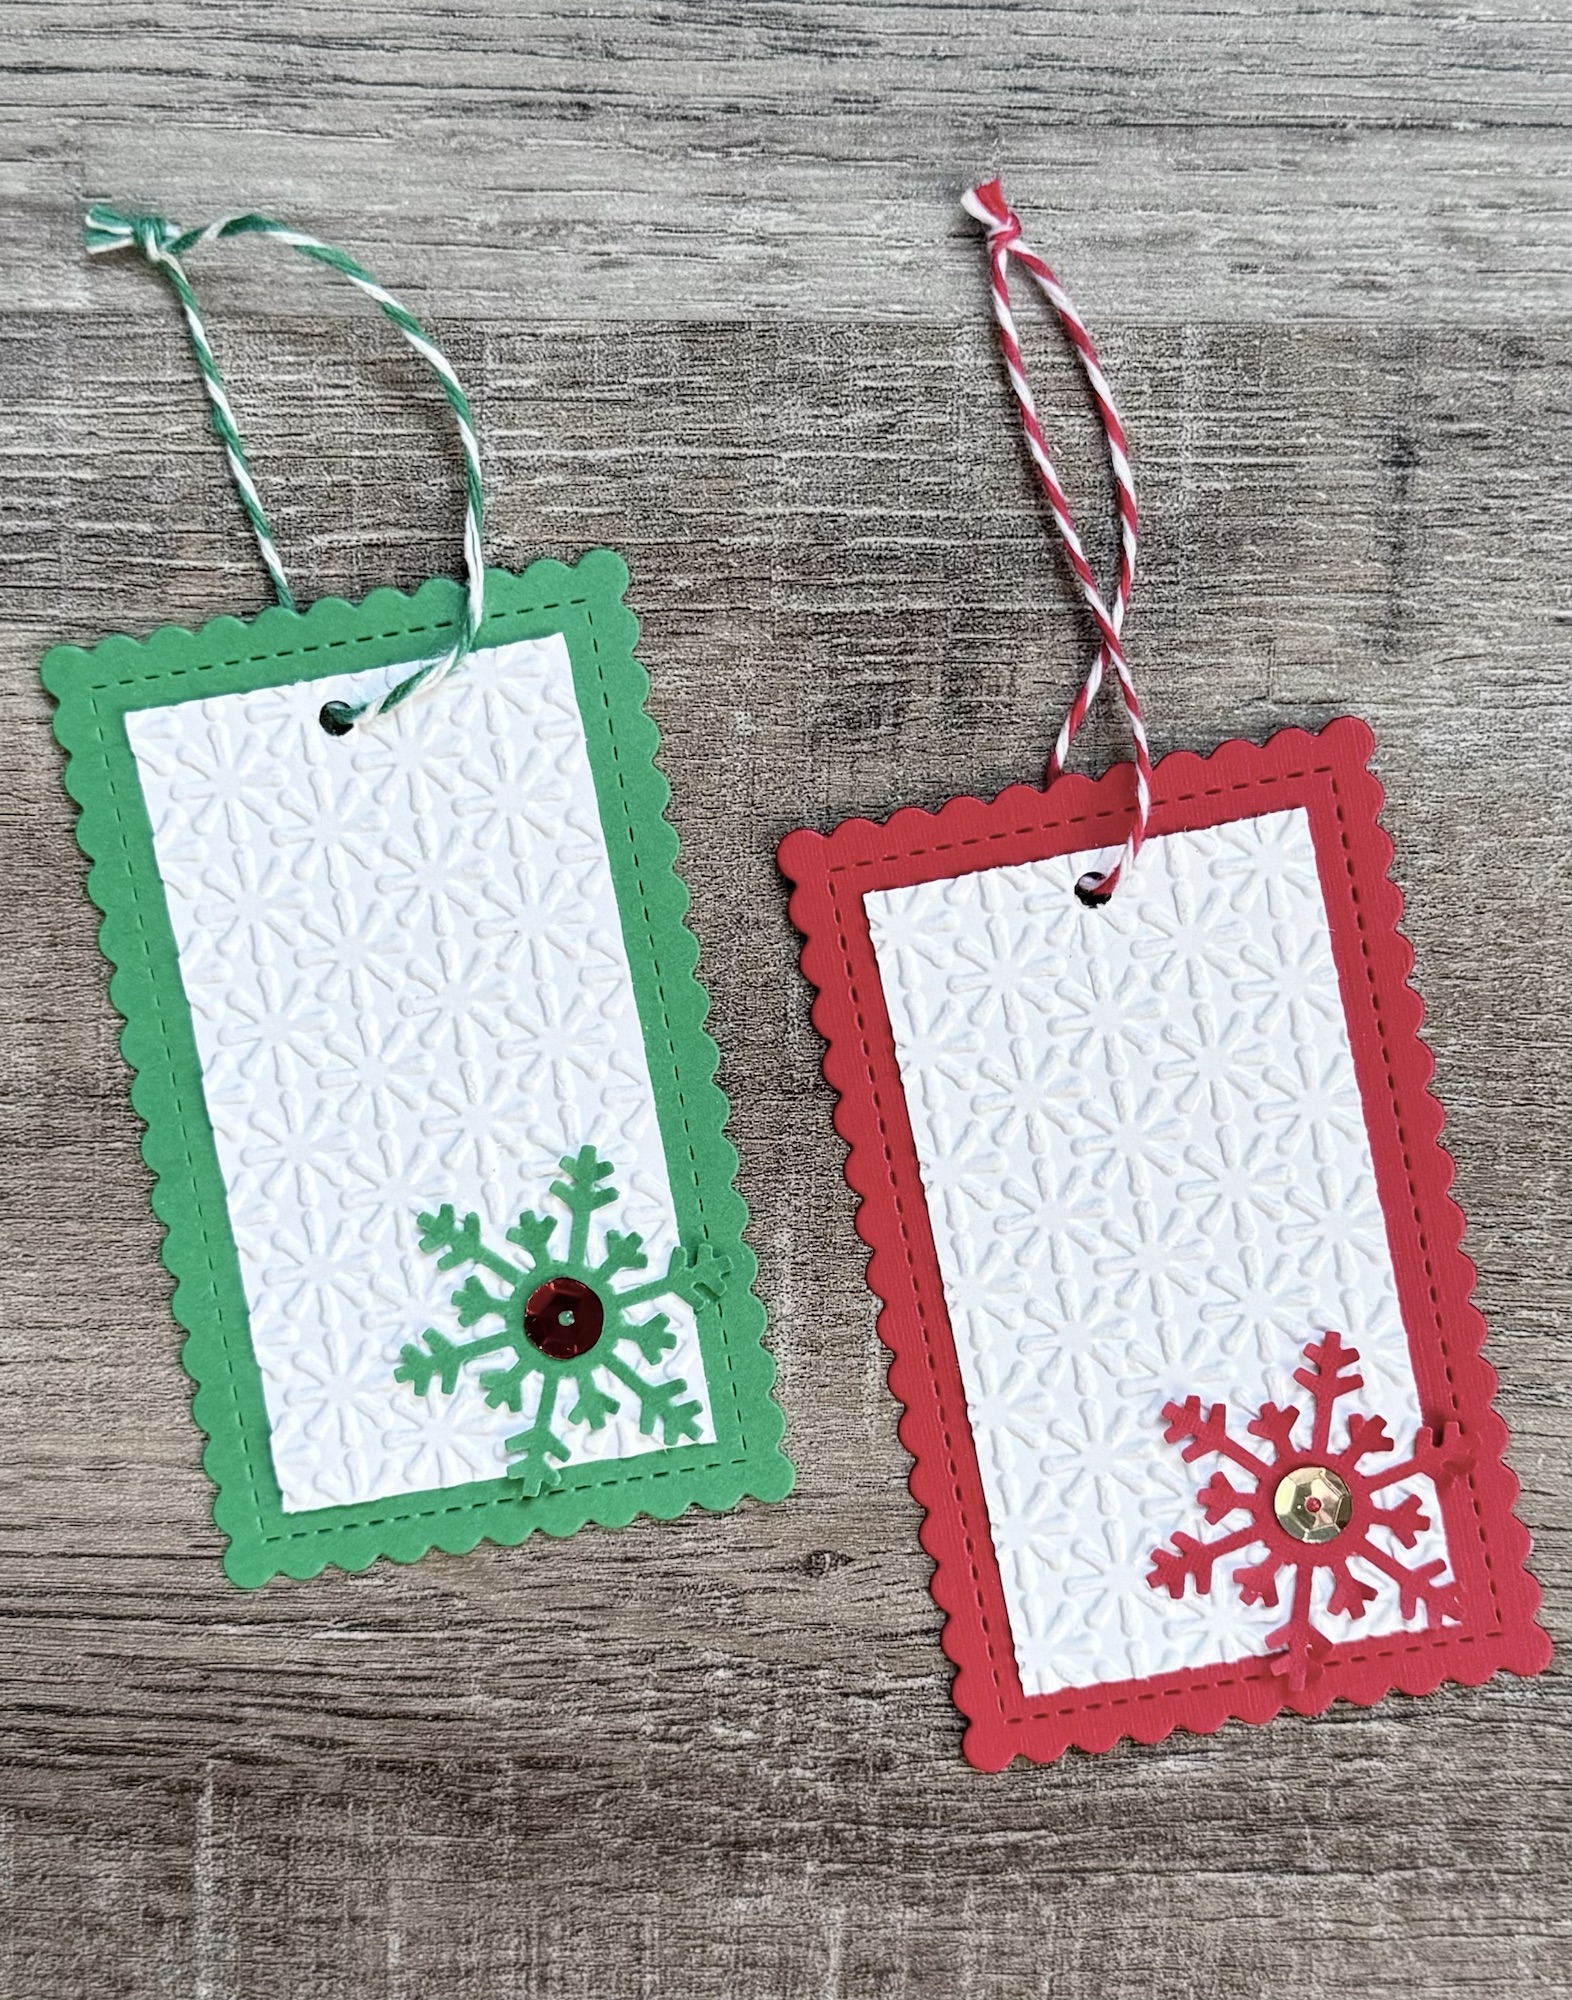
What would Christmas in July be without Christmas gift tags? 🎁 These tags are quick and easy to make – and not only will they be great to have on hand for your own gift giving, you can also gift a batch of these to friends or family before the holidays so they will be ready, too! 🎄
Disclosure: Some of the links on my site are affiliate links, meaning, at no additional cost to you, I will earn a small commission if you click through and make a purchase. As an Amazon Associate I earn from qualifying purchases.
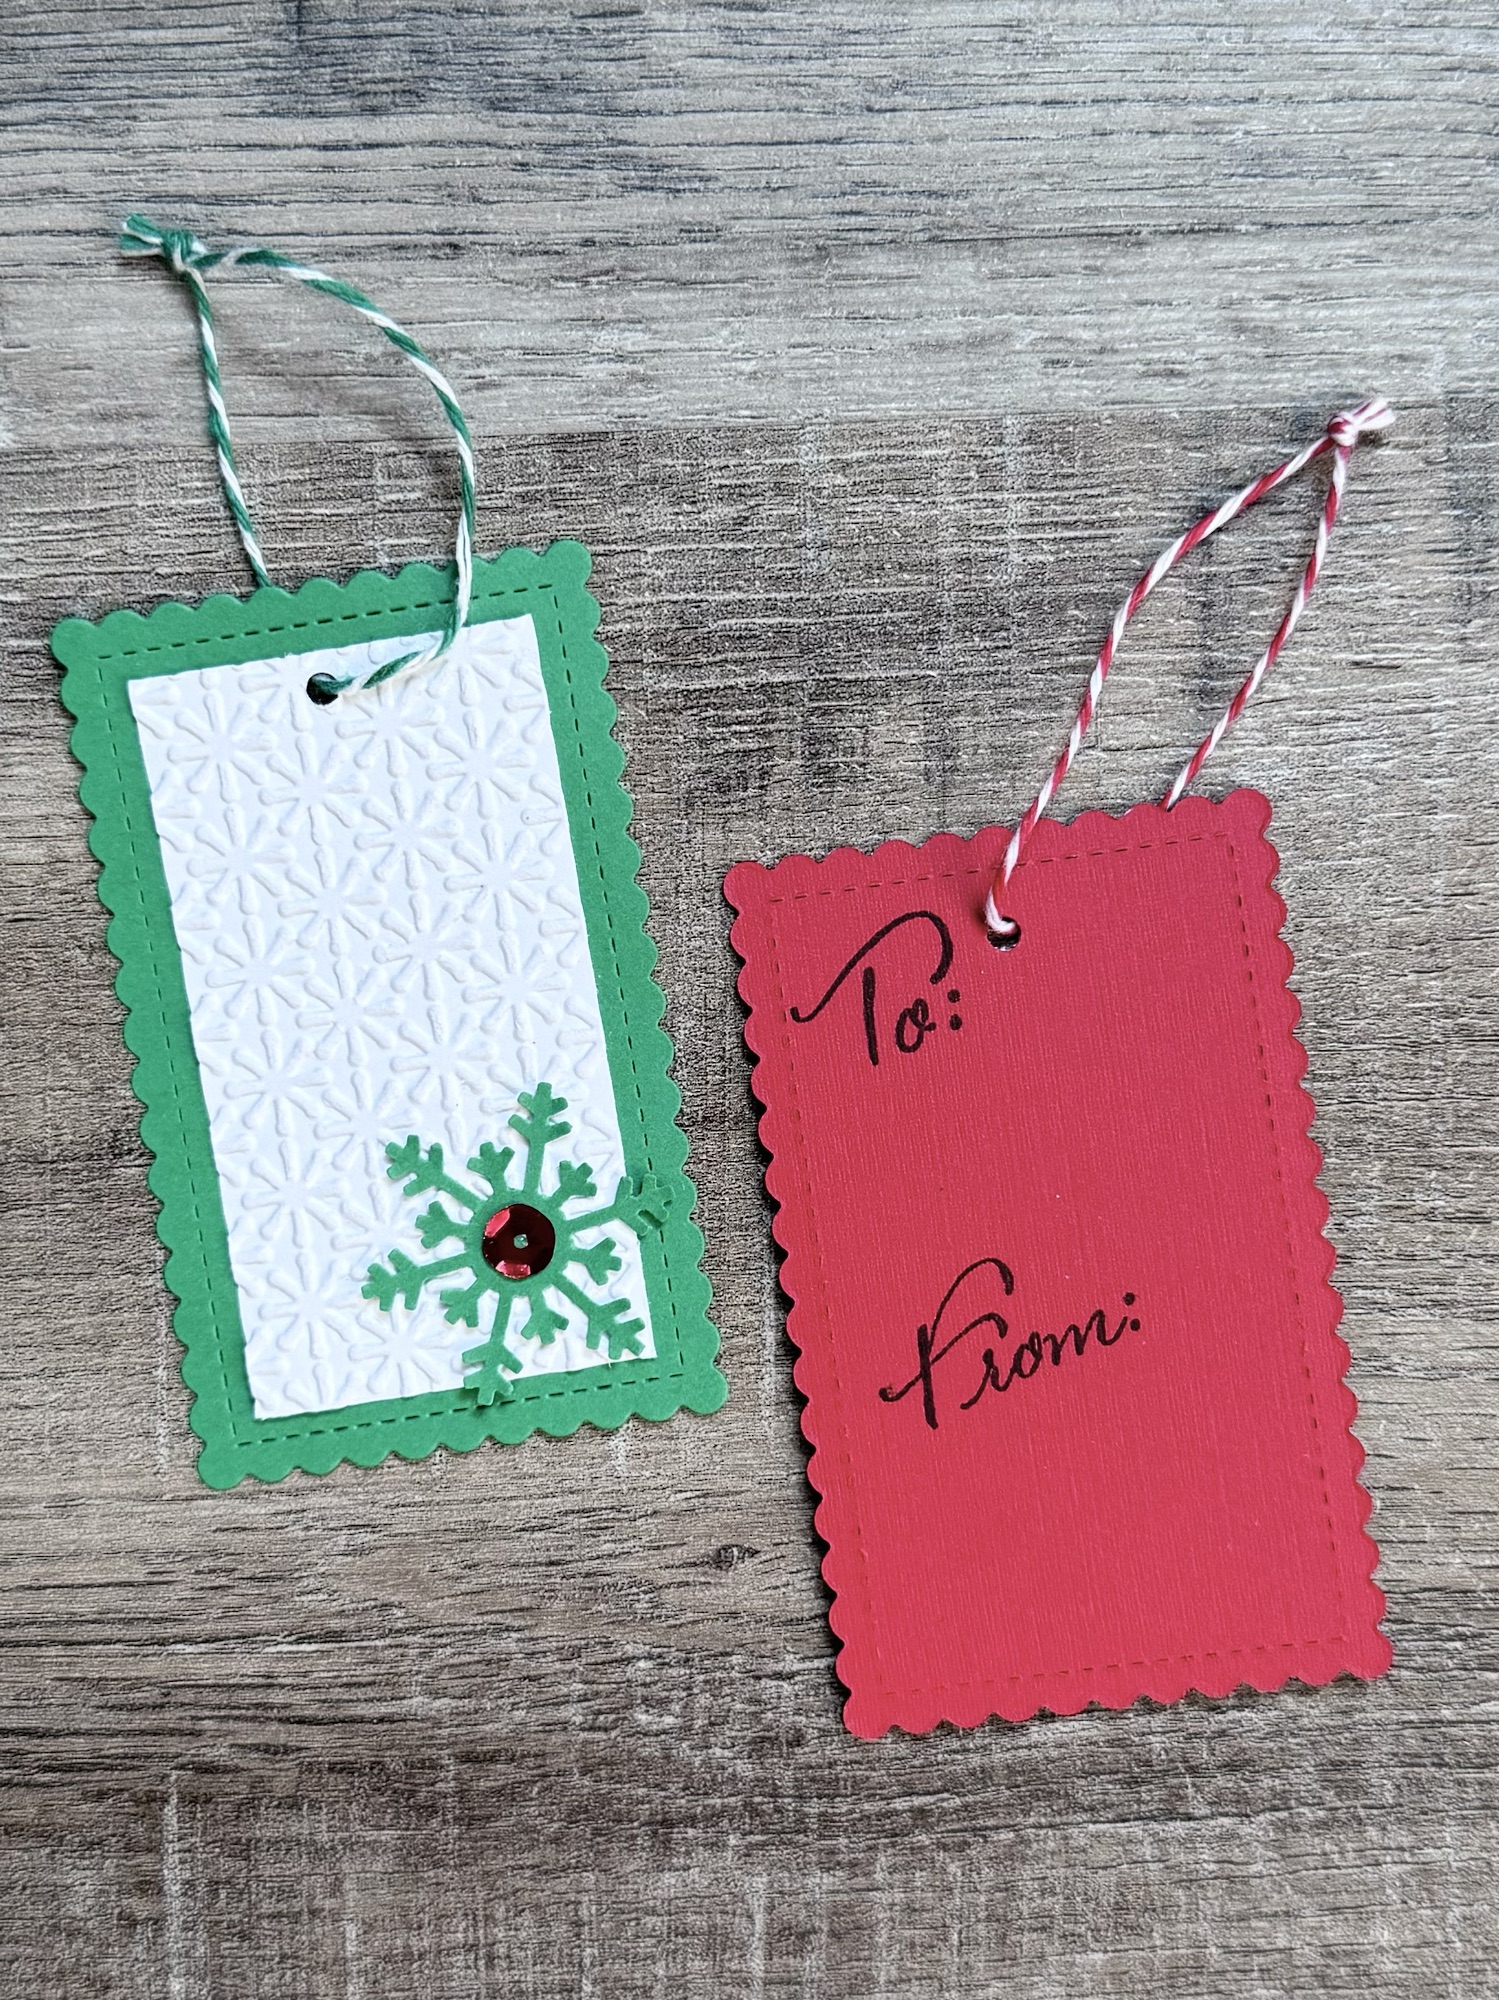
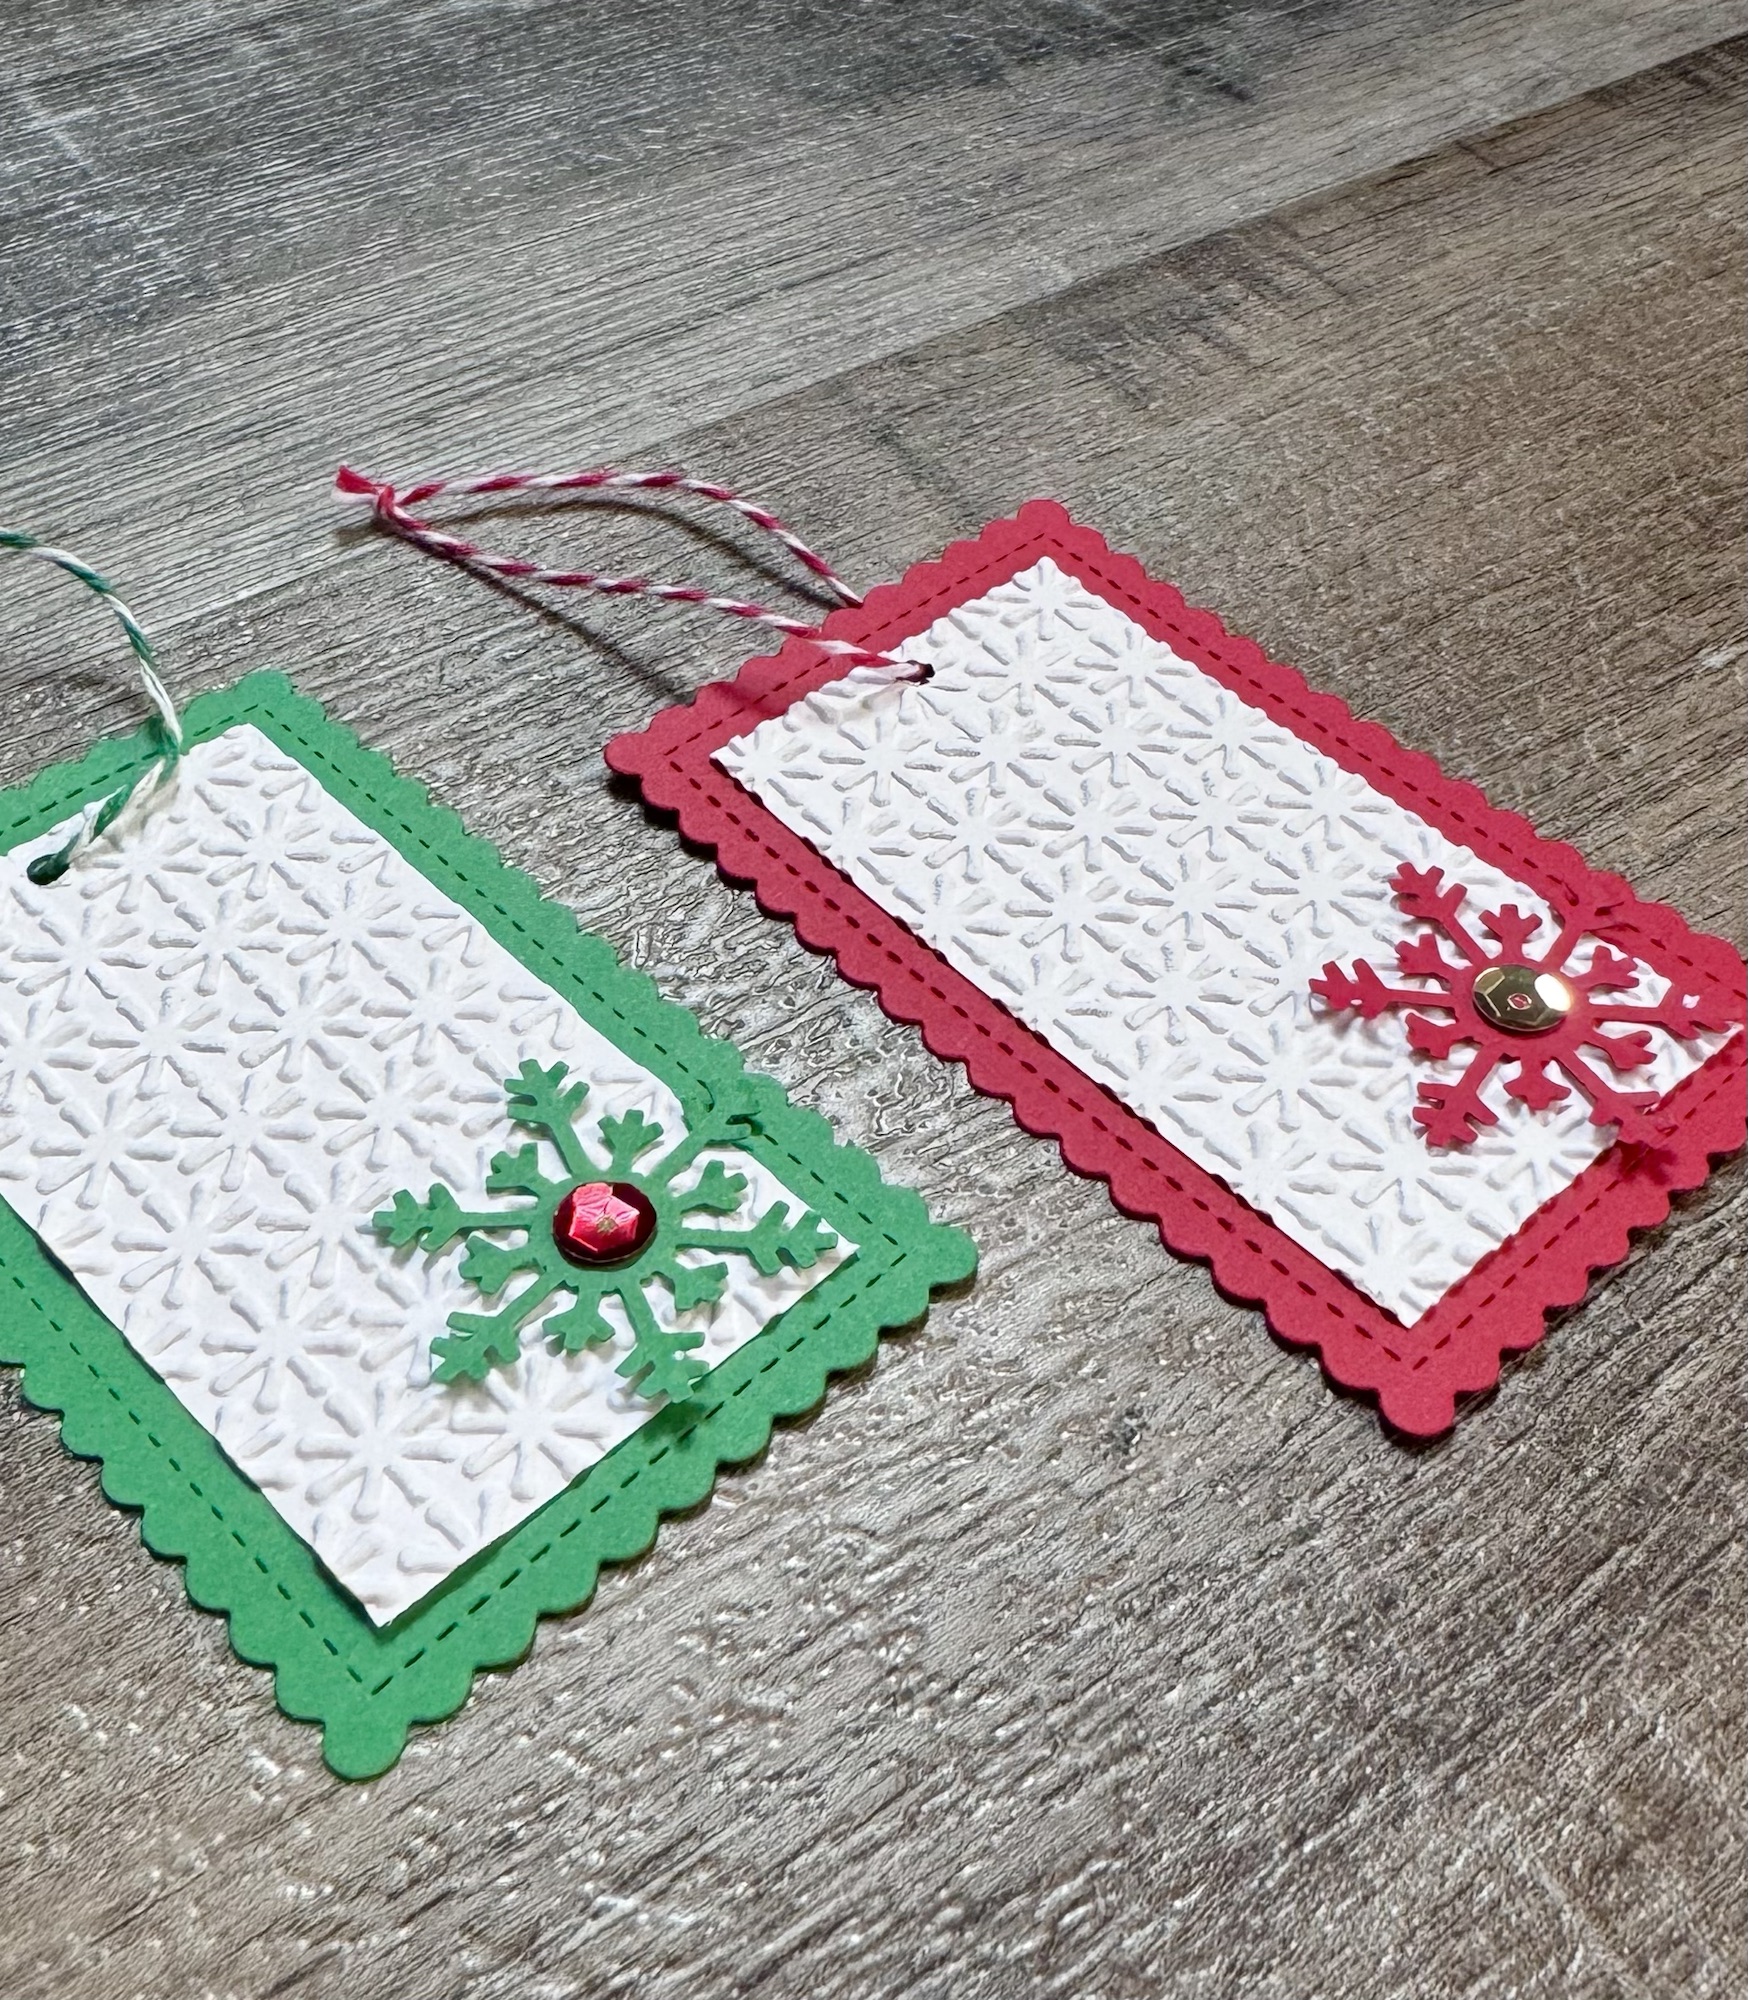
I used the Stitched Mini Scallop Rectangle STAX Die-namics from MFT Stamps to die cut red and green card stock. I trimmed white card stock to fit inside, embossed it with a snowflake embossing folder, and attached it to the tag. This embossing folder is no longer available – use your favorite folder or this is a nice option. Patterned paper is another option or you can just leave the card stock as is. 🙂
Making your own gift tags adds just little something extra to your gift giving. You can make them any shape or color. You can use any shape punch like a star or Christmas tree. There are so many options! I would love to see your creations! ❄️⭐️🎄
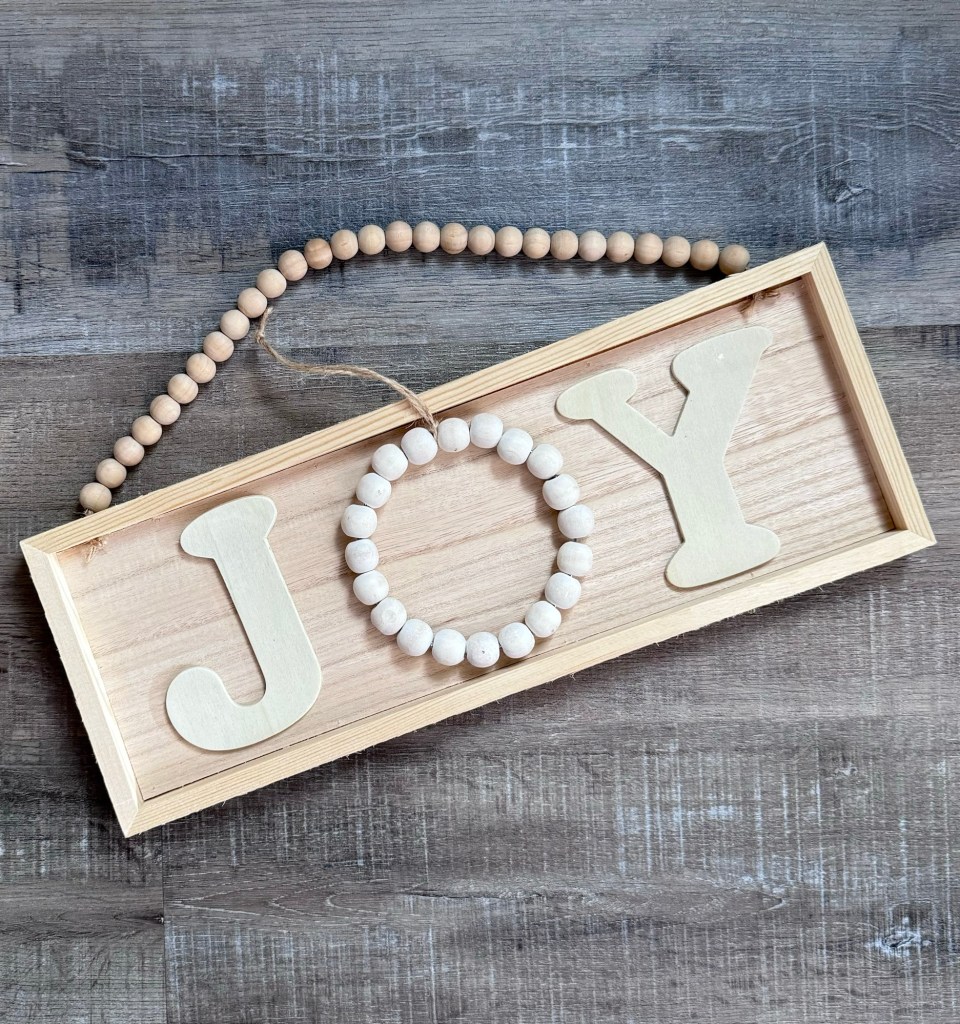
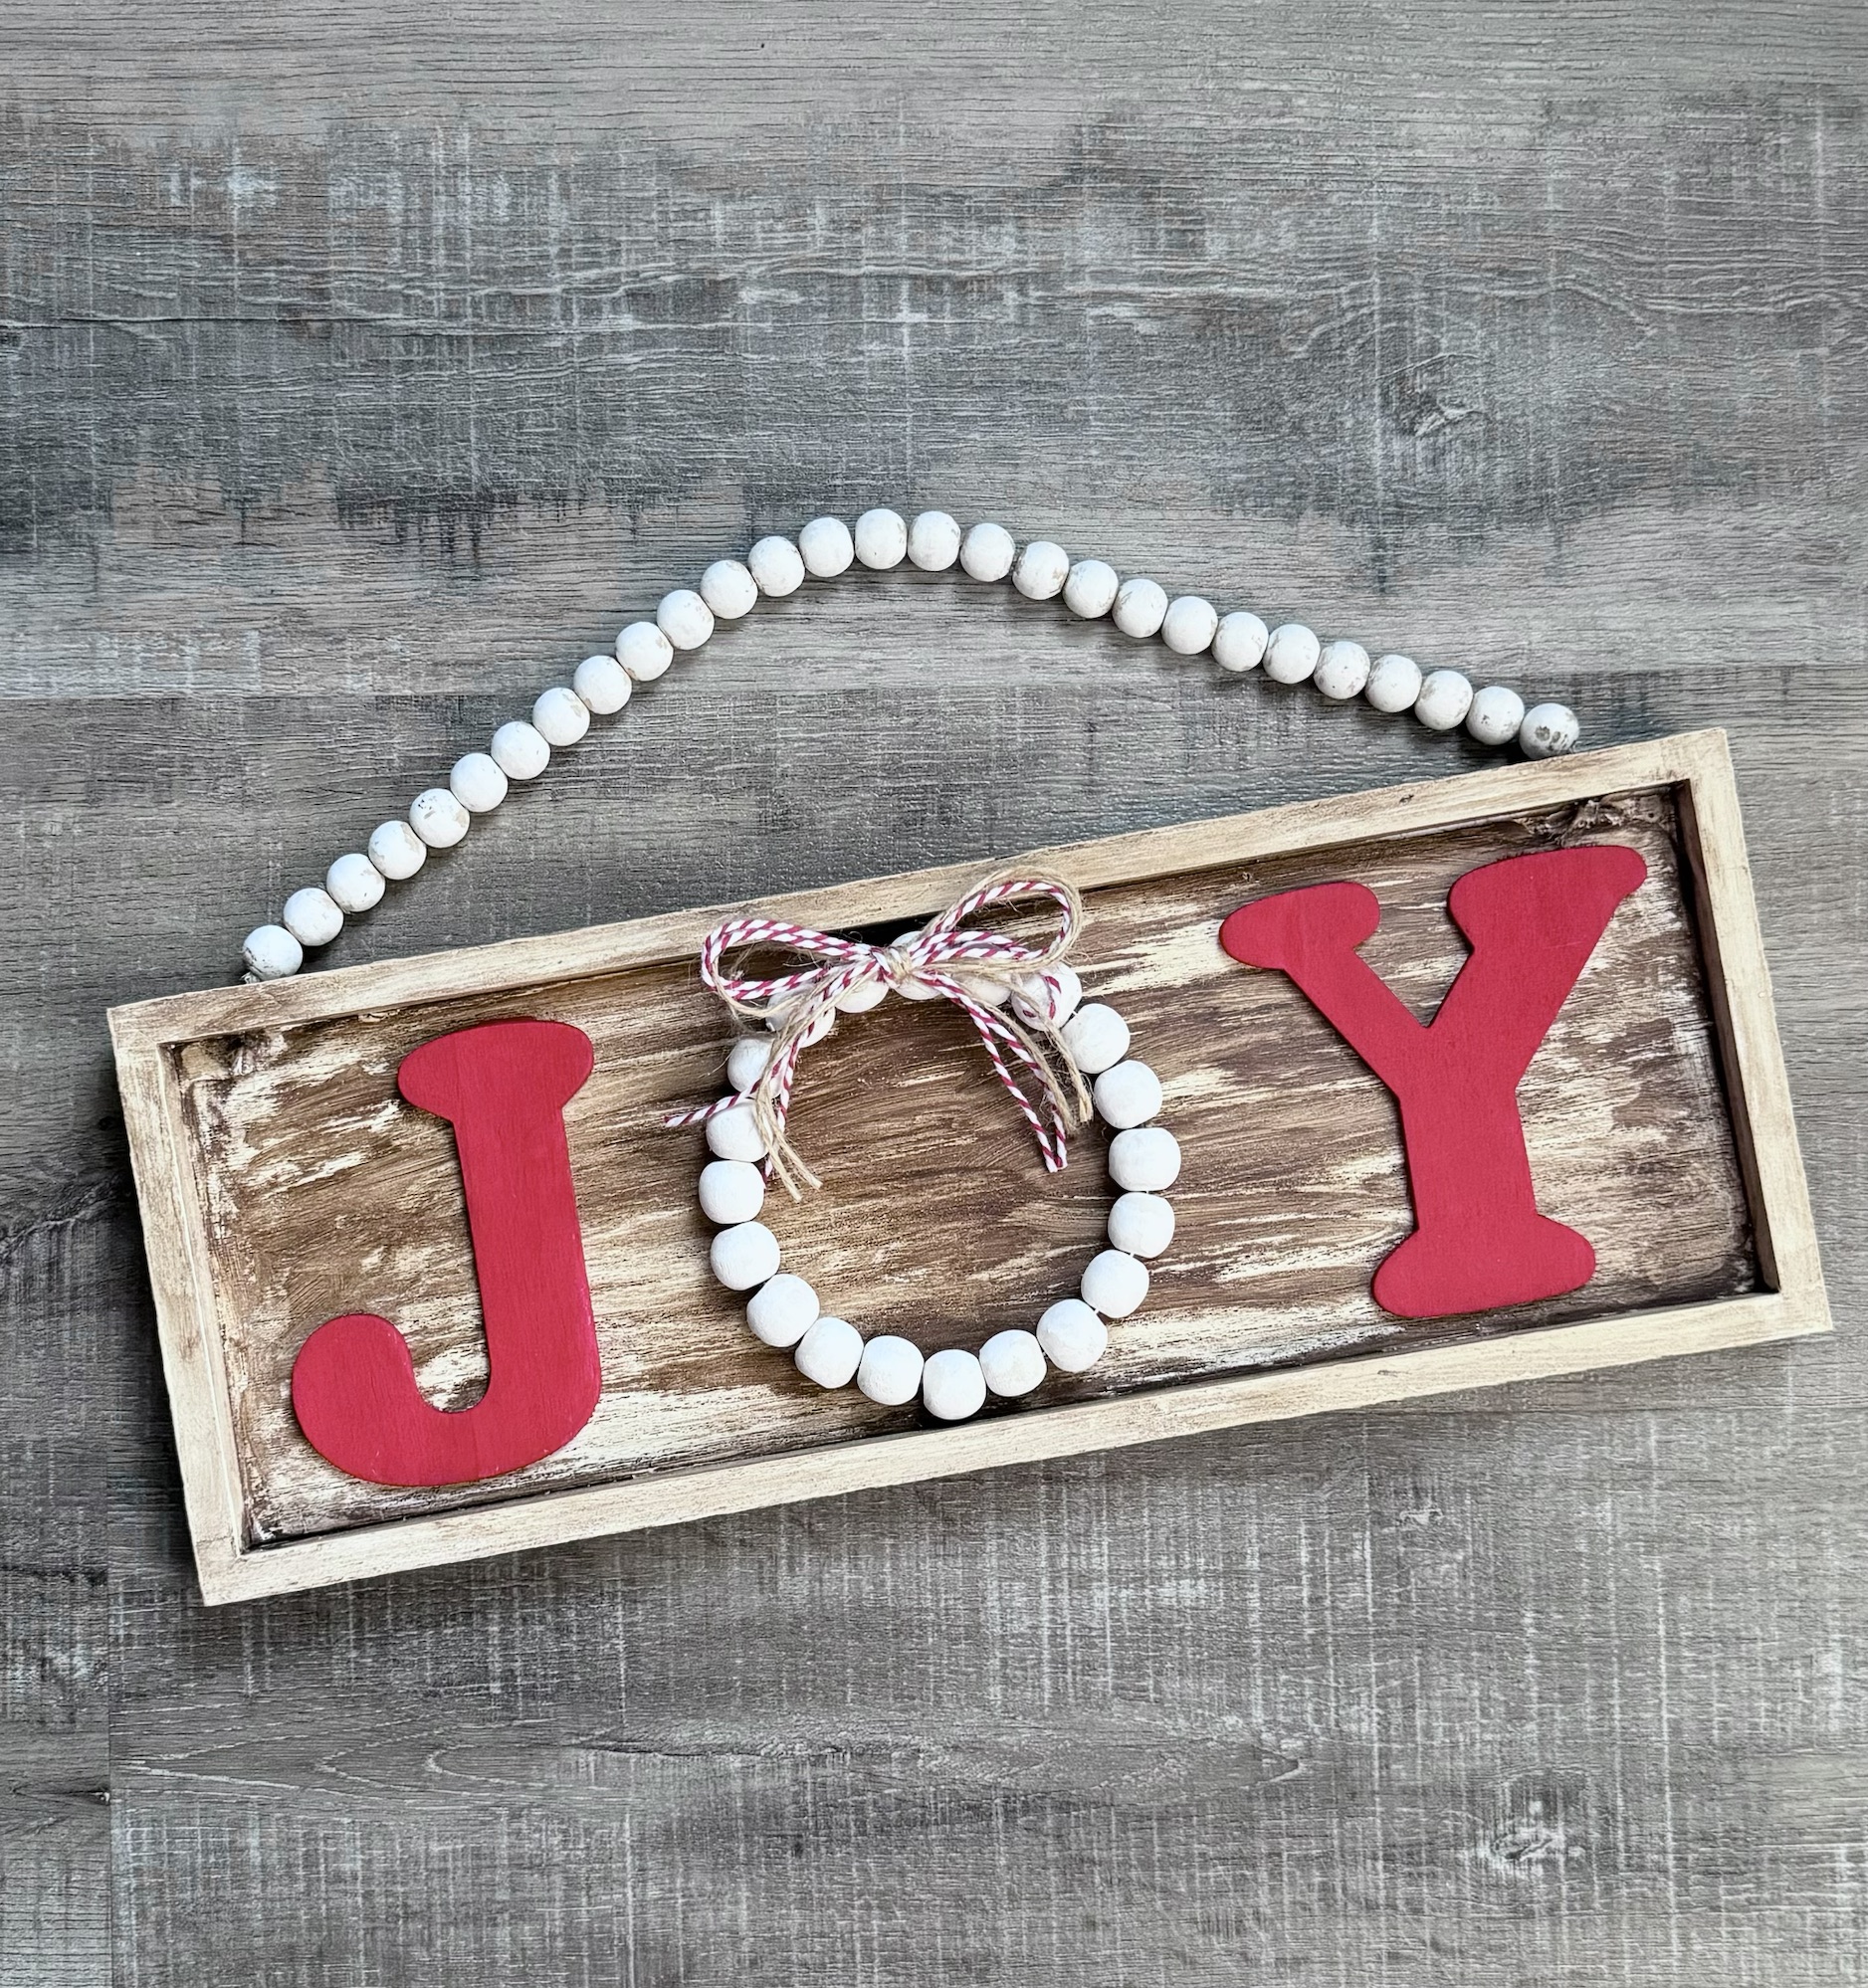
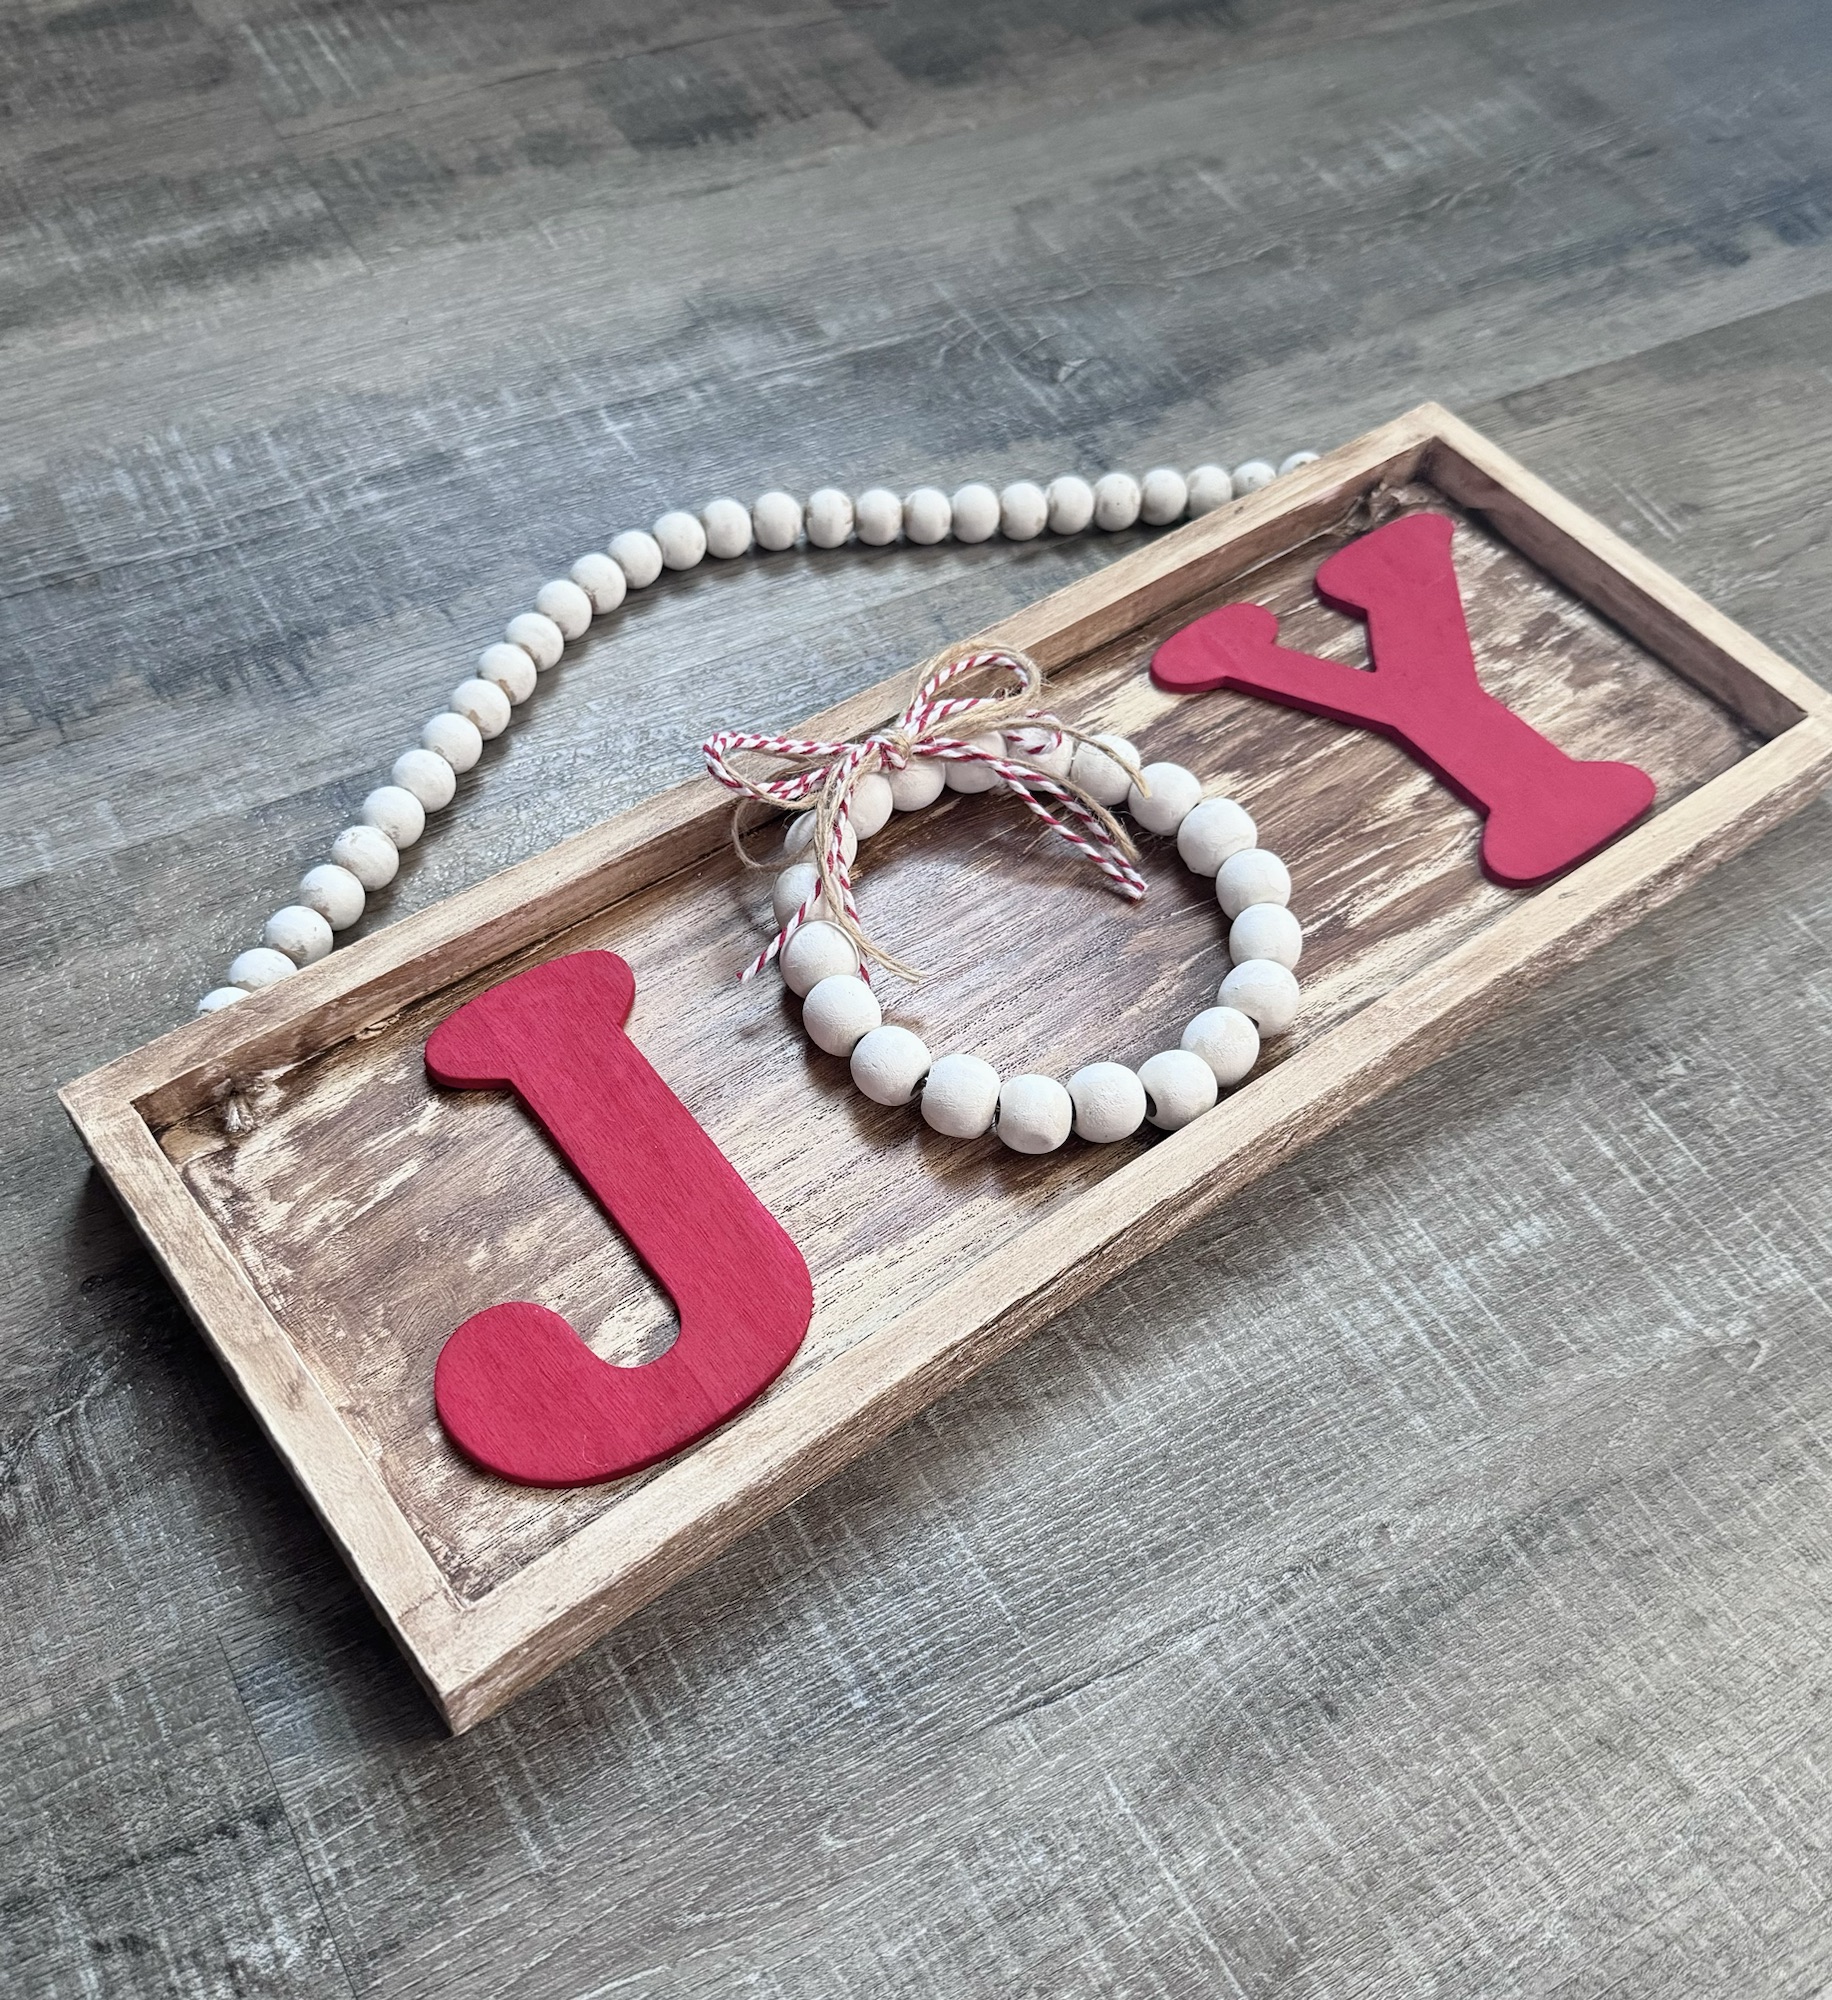
Do you want to add a little something to your Christmas decor this year? Or give someone a gift of the season that they can use for years to come? This JOY sign is easy and inexpensive to make – especially if you buy your supplies on sale. 😉
Disclosure: Some of the links on my site are affiliate links, meaning, at no additional cost to you, I will earn a small commission if you click through and make a purchase. As an Amazon Associate I earn from qualifying purchases.
I found all my supplies at Hobby Lobby. The beaded rectangle sign measures about 5.5 by 15 inches. The wood letters measure 4 inches and the beaded ornament measures about 4.5 inches. I bought the beaded ornament last season in a package of 3 – I’m guessing they will be available again this year. You can always use a wood letter, a small grapevine wreath, or greenery wreath if the beaded ornaments aren’t available.
First, I painted the entire sign with one coat of white chalk paint. It doesn’t have to be perfect. 🙂 I also painted the beaded hanger with the white paint, but didn’t worry about completely covering the beads because I wanted the finished sign to have a farmhouse feel.
I brushed antique wax over just the frame, not the beaded hanger, and wiped off the excess immediately with a paper towel.
I removed the twine hanger from the beaded ornament and brushed white chalk paint over the beads, again not worrying about completely covering them. I painted the J and Y with 2 coats red acrylic paint. All 3 pieces are attached to the frame using E6000 clear adhesive.
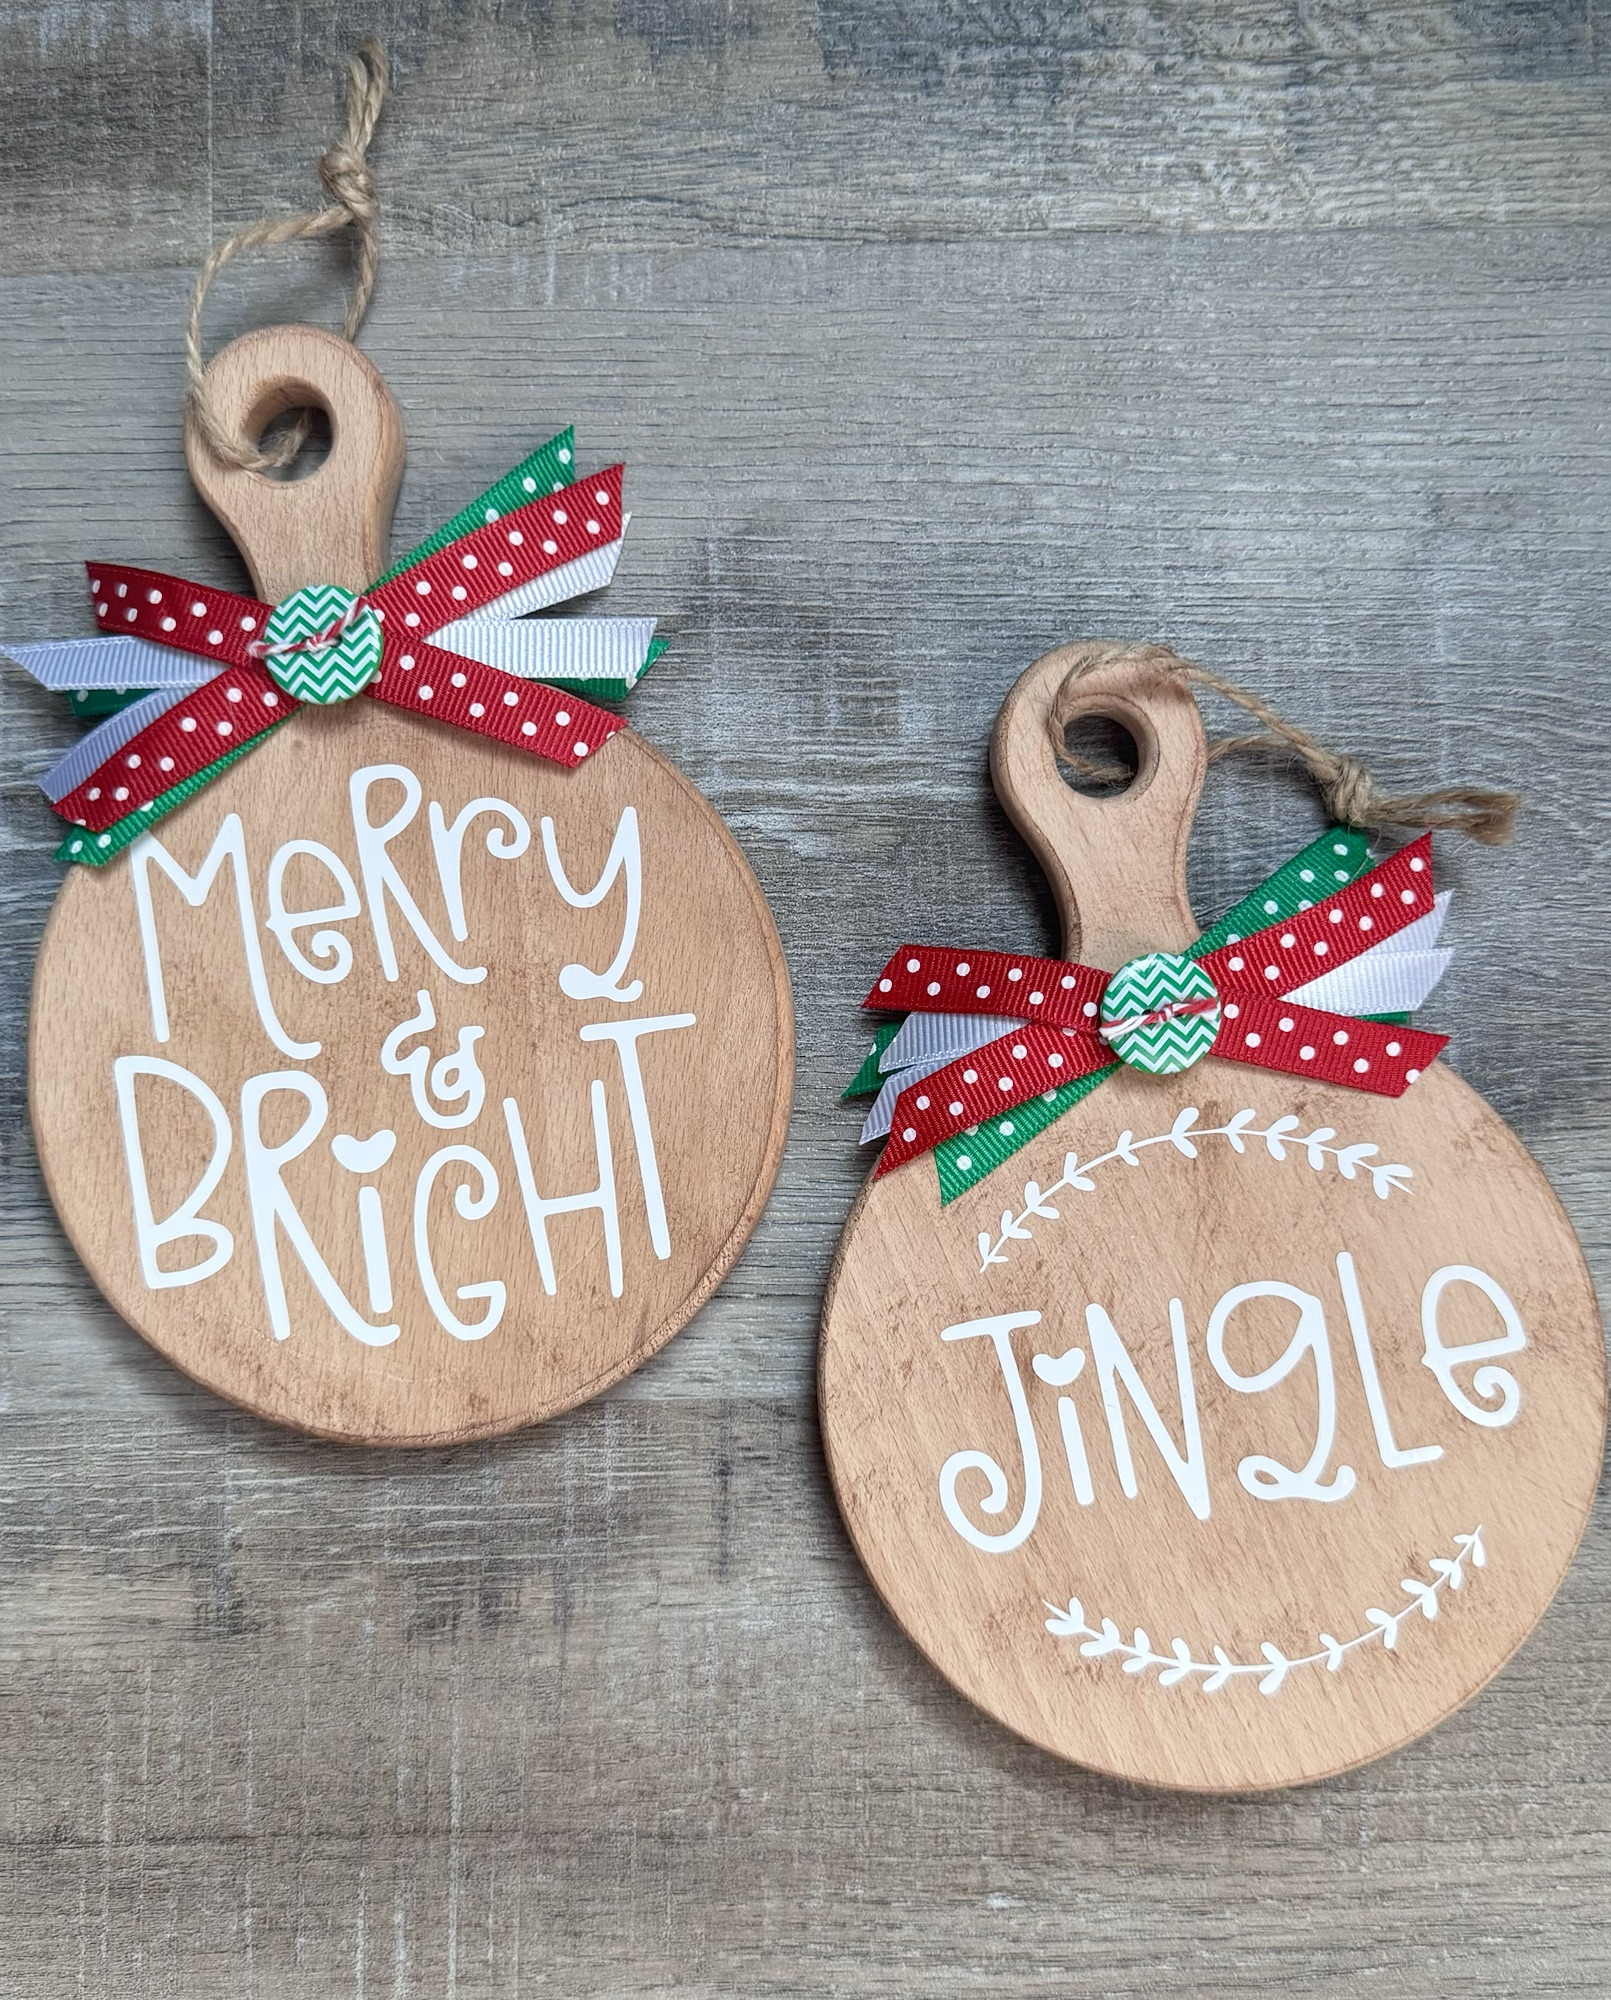
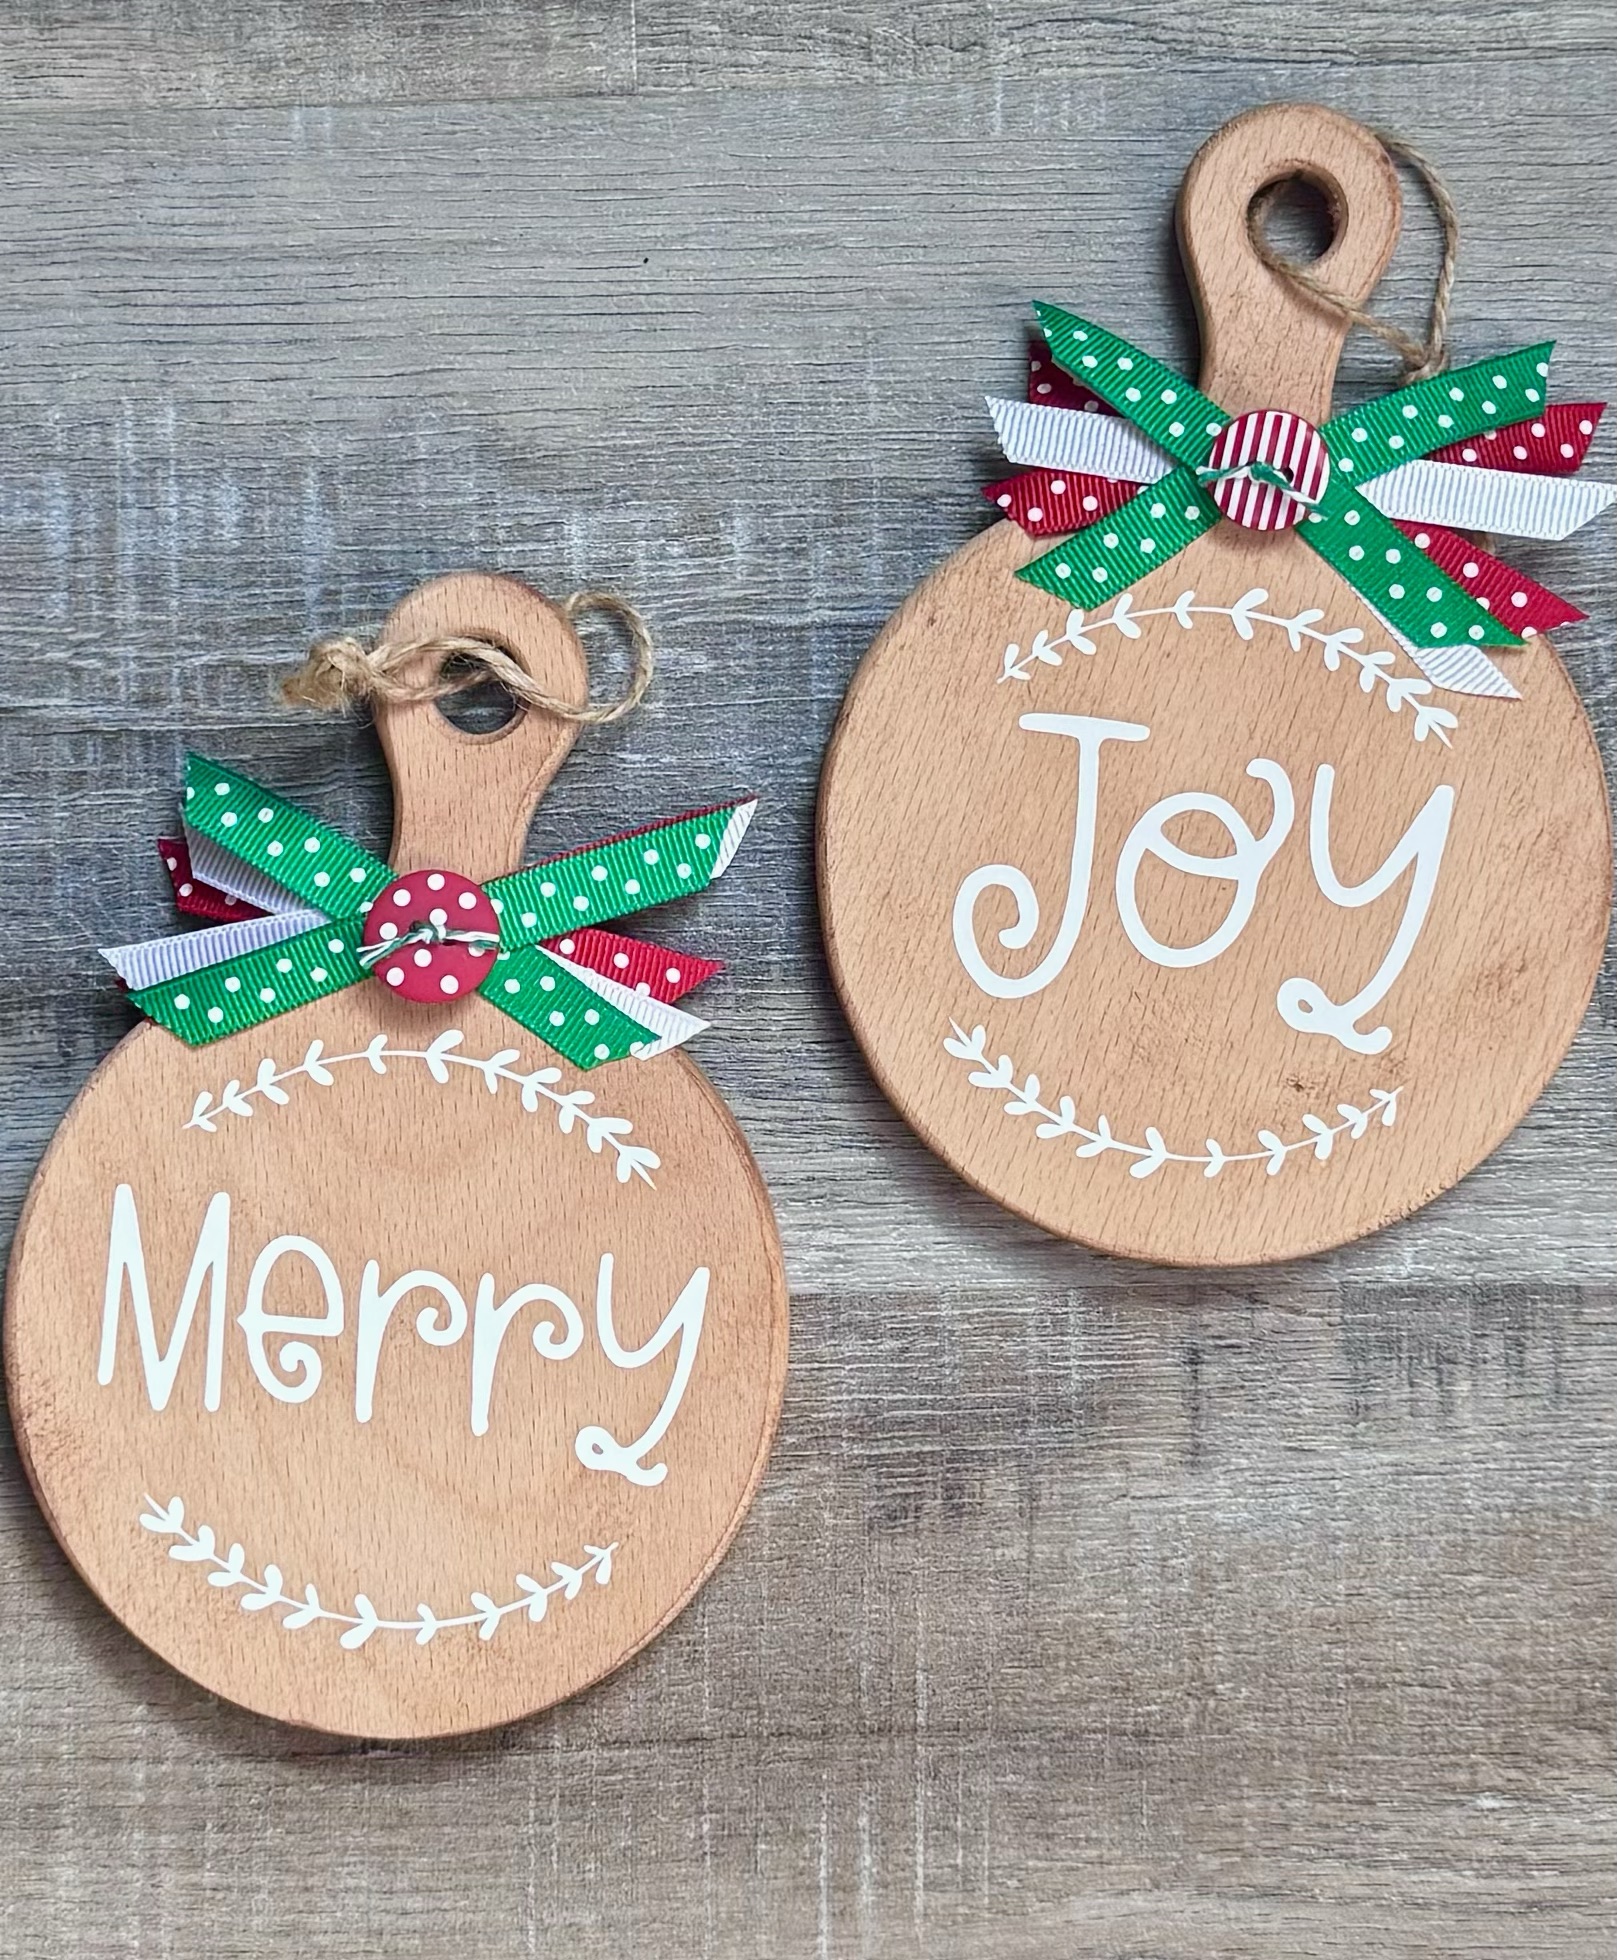
These mini cutting boards make the cutest Christmas decorations for your kitchen – or anywhere else! 🎄 They measure about 4.5 by 6.5 inches and are just waiting for your creative touch. I found mine at Hobby Lobby.
Disclosure: Some of the links on my site are affiliate links, meaning, at no additional cost to you, I will earn a small commission if you click through and make a purchase. As an Amazon Associate I earn from qualifying purchases.
Using my Cricut machine, I cut out the Christmas messages that are available in Cricut Design Space from white permanent vinyl. I sized the images to measure about 3.5 inches to fit nicely on my cutting boards. I have a Cricut Explore Air 2, but there’s a Cricut Explore 3 model now available that has more features and cuts faster.
I wanted to add a little depth to the cutting boards without painting them. I used a stencil brush and lightly dry brushed dark brown acrylic paint onto the cutting boards. Then using transfer tape , I applied the Christmas messages to the cutting boards. If you are in need of any basic Cricut tools, this is a great set.
There are so many ways to be creative with these little cutting boards! You can paint them, stamp on them, find all kinds of great images on Cricut Design Space for Christmas or kitchen, add a monogram or initial to them…What will you create with them?
Disclosure: Some of the links on my site are affiliate links, meaning, at no additional cost to you, I will earn a small commission if you click through and make a purchase. As an Amazon Associate I earn from qualifying purchases.