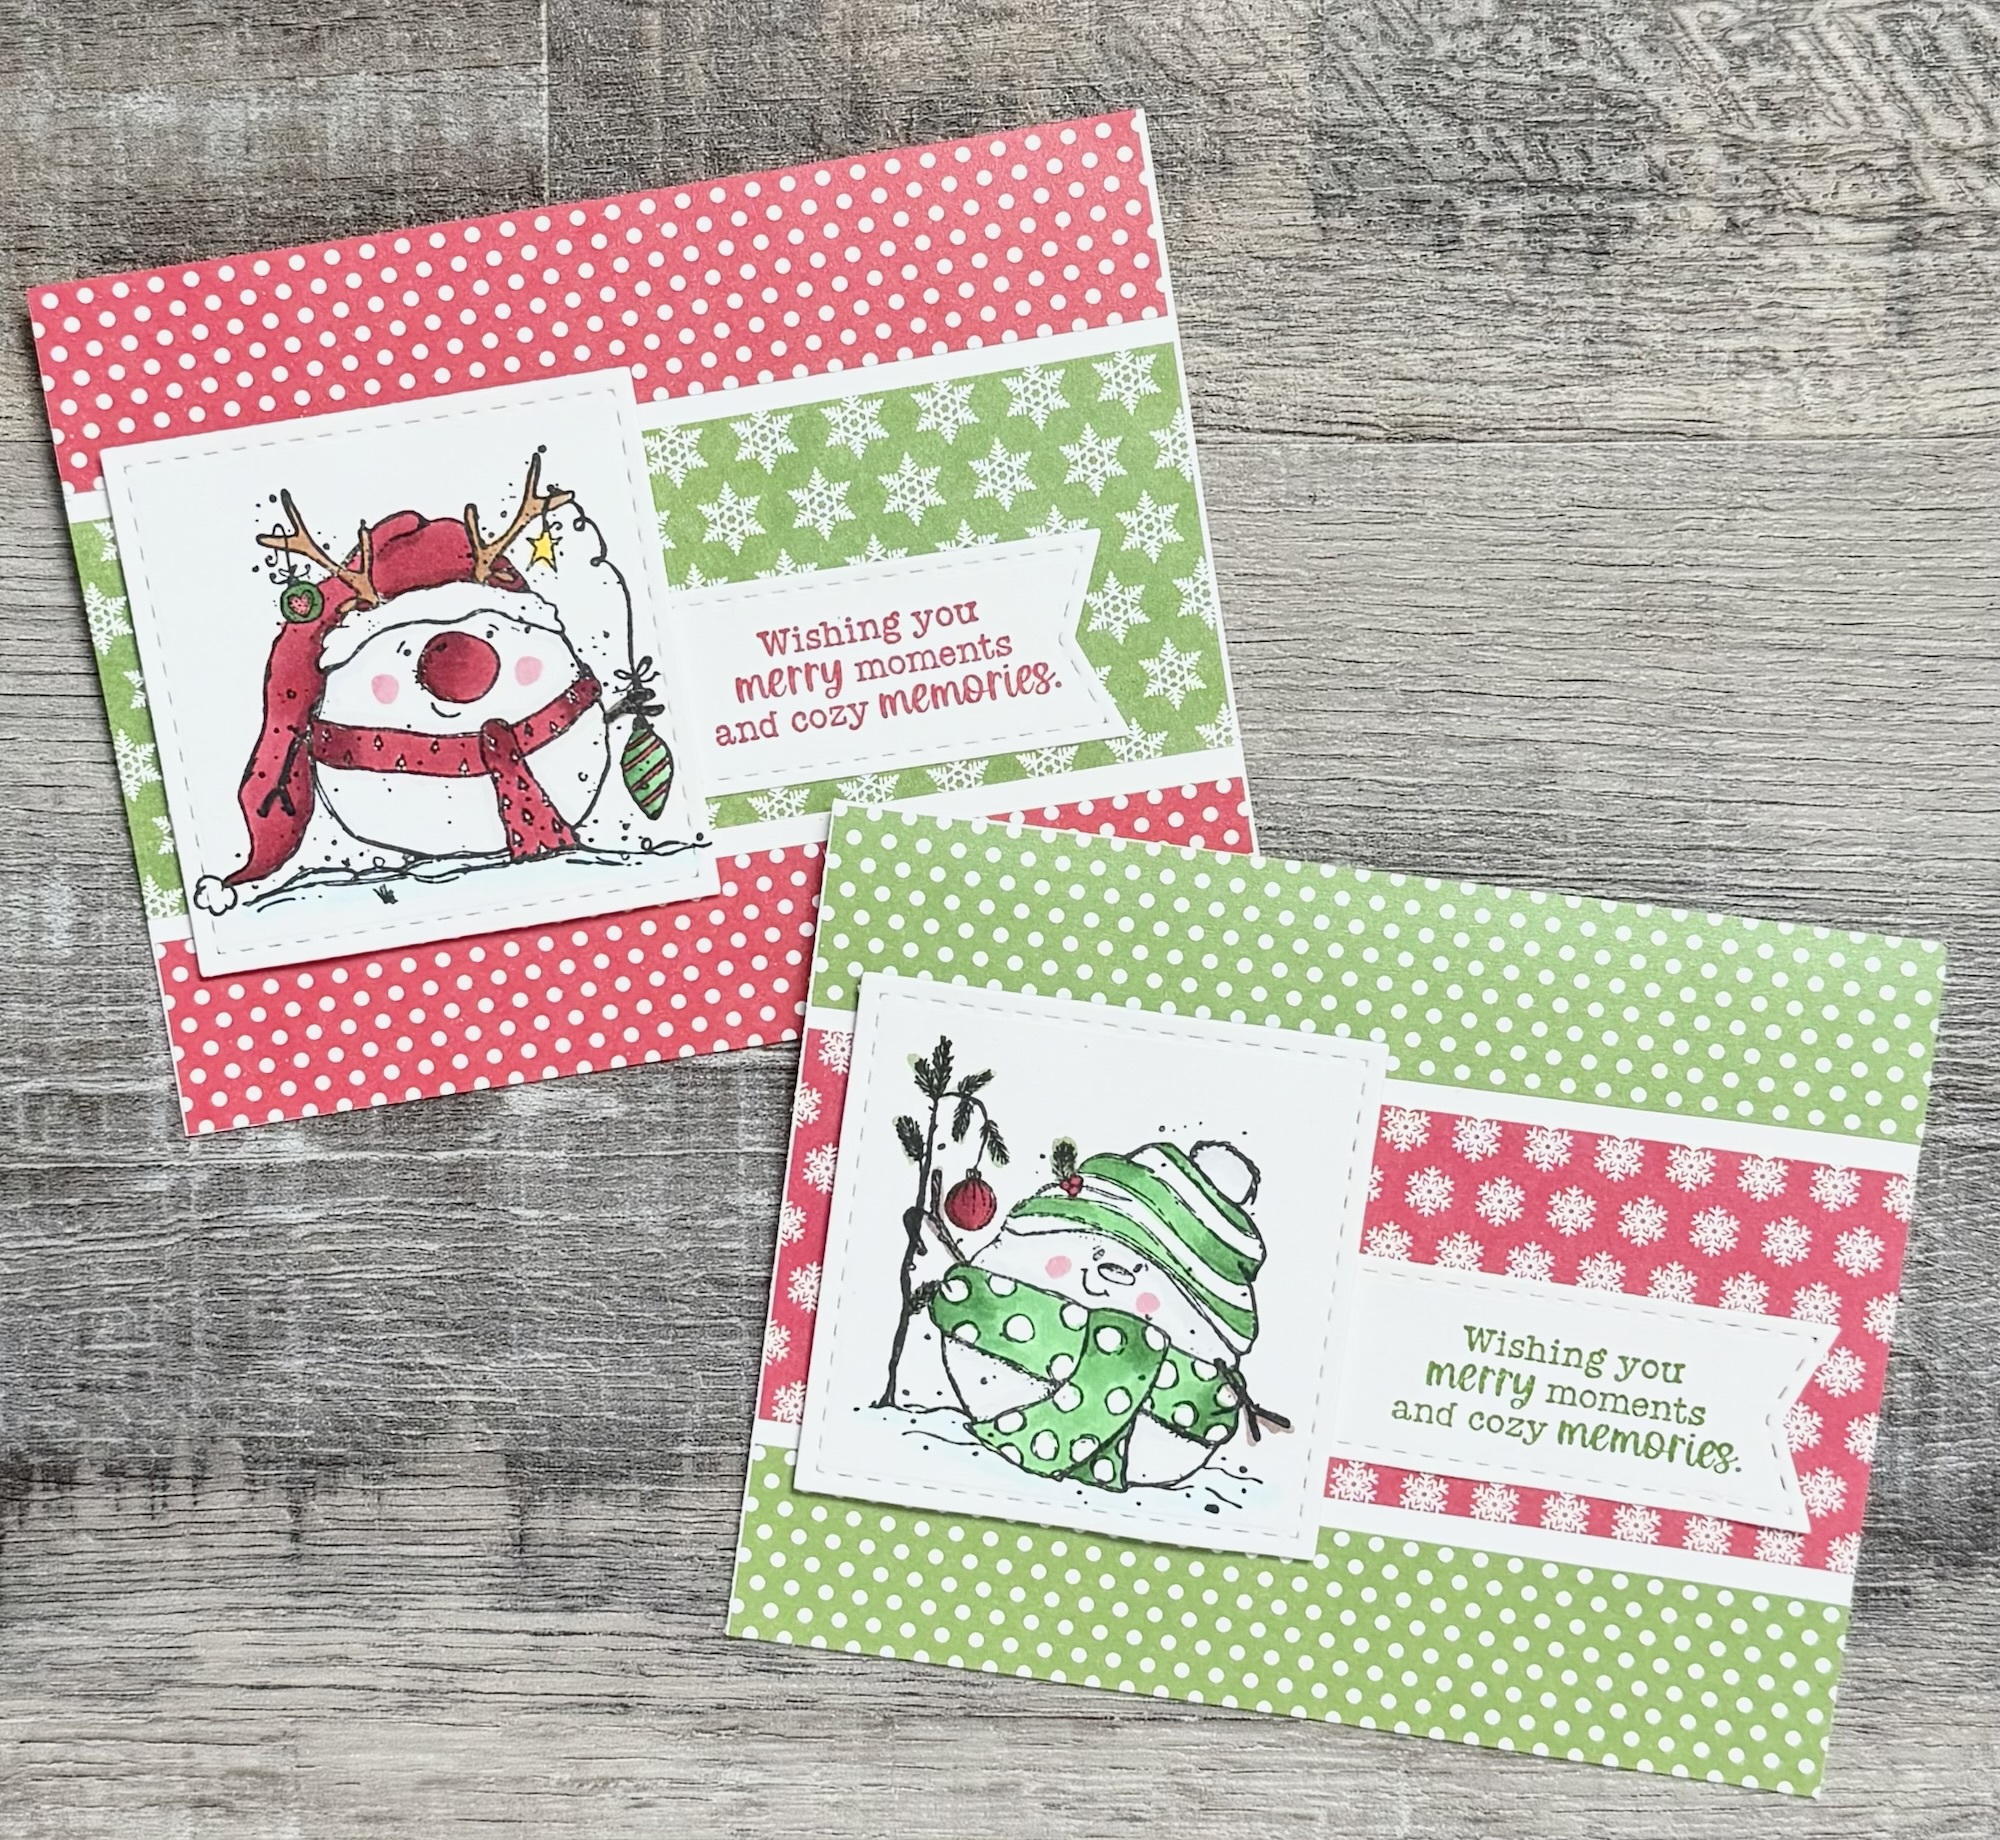
I barely made it, but here’s my Christmas card creation for September! 🎄You can find my other cards for this year in these posts: January, February, March, April, May, June, July, and August. 😊
Disclosure: Some of the links on my site are affiliate links, meaning, at no additional cost to you, I will earn a small commission if you click through and make a purchase. As an Amazon Associate I earn from qualifying purchases.
To make the cards, I added 3 strips of patterned paper to a white card. I attached the sentiment banner to the card and then added the snowman to the card with foam tape.
Fun and super easy to create! ⛄️ Great way to wish Merry Moments to family and friends! 🎄
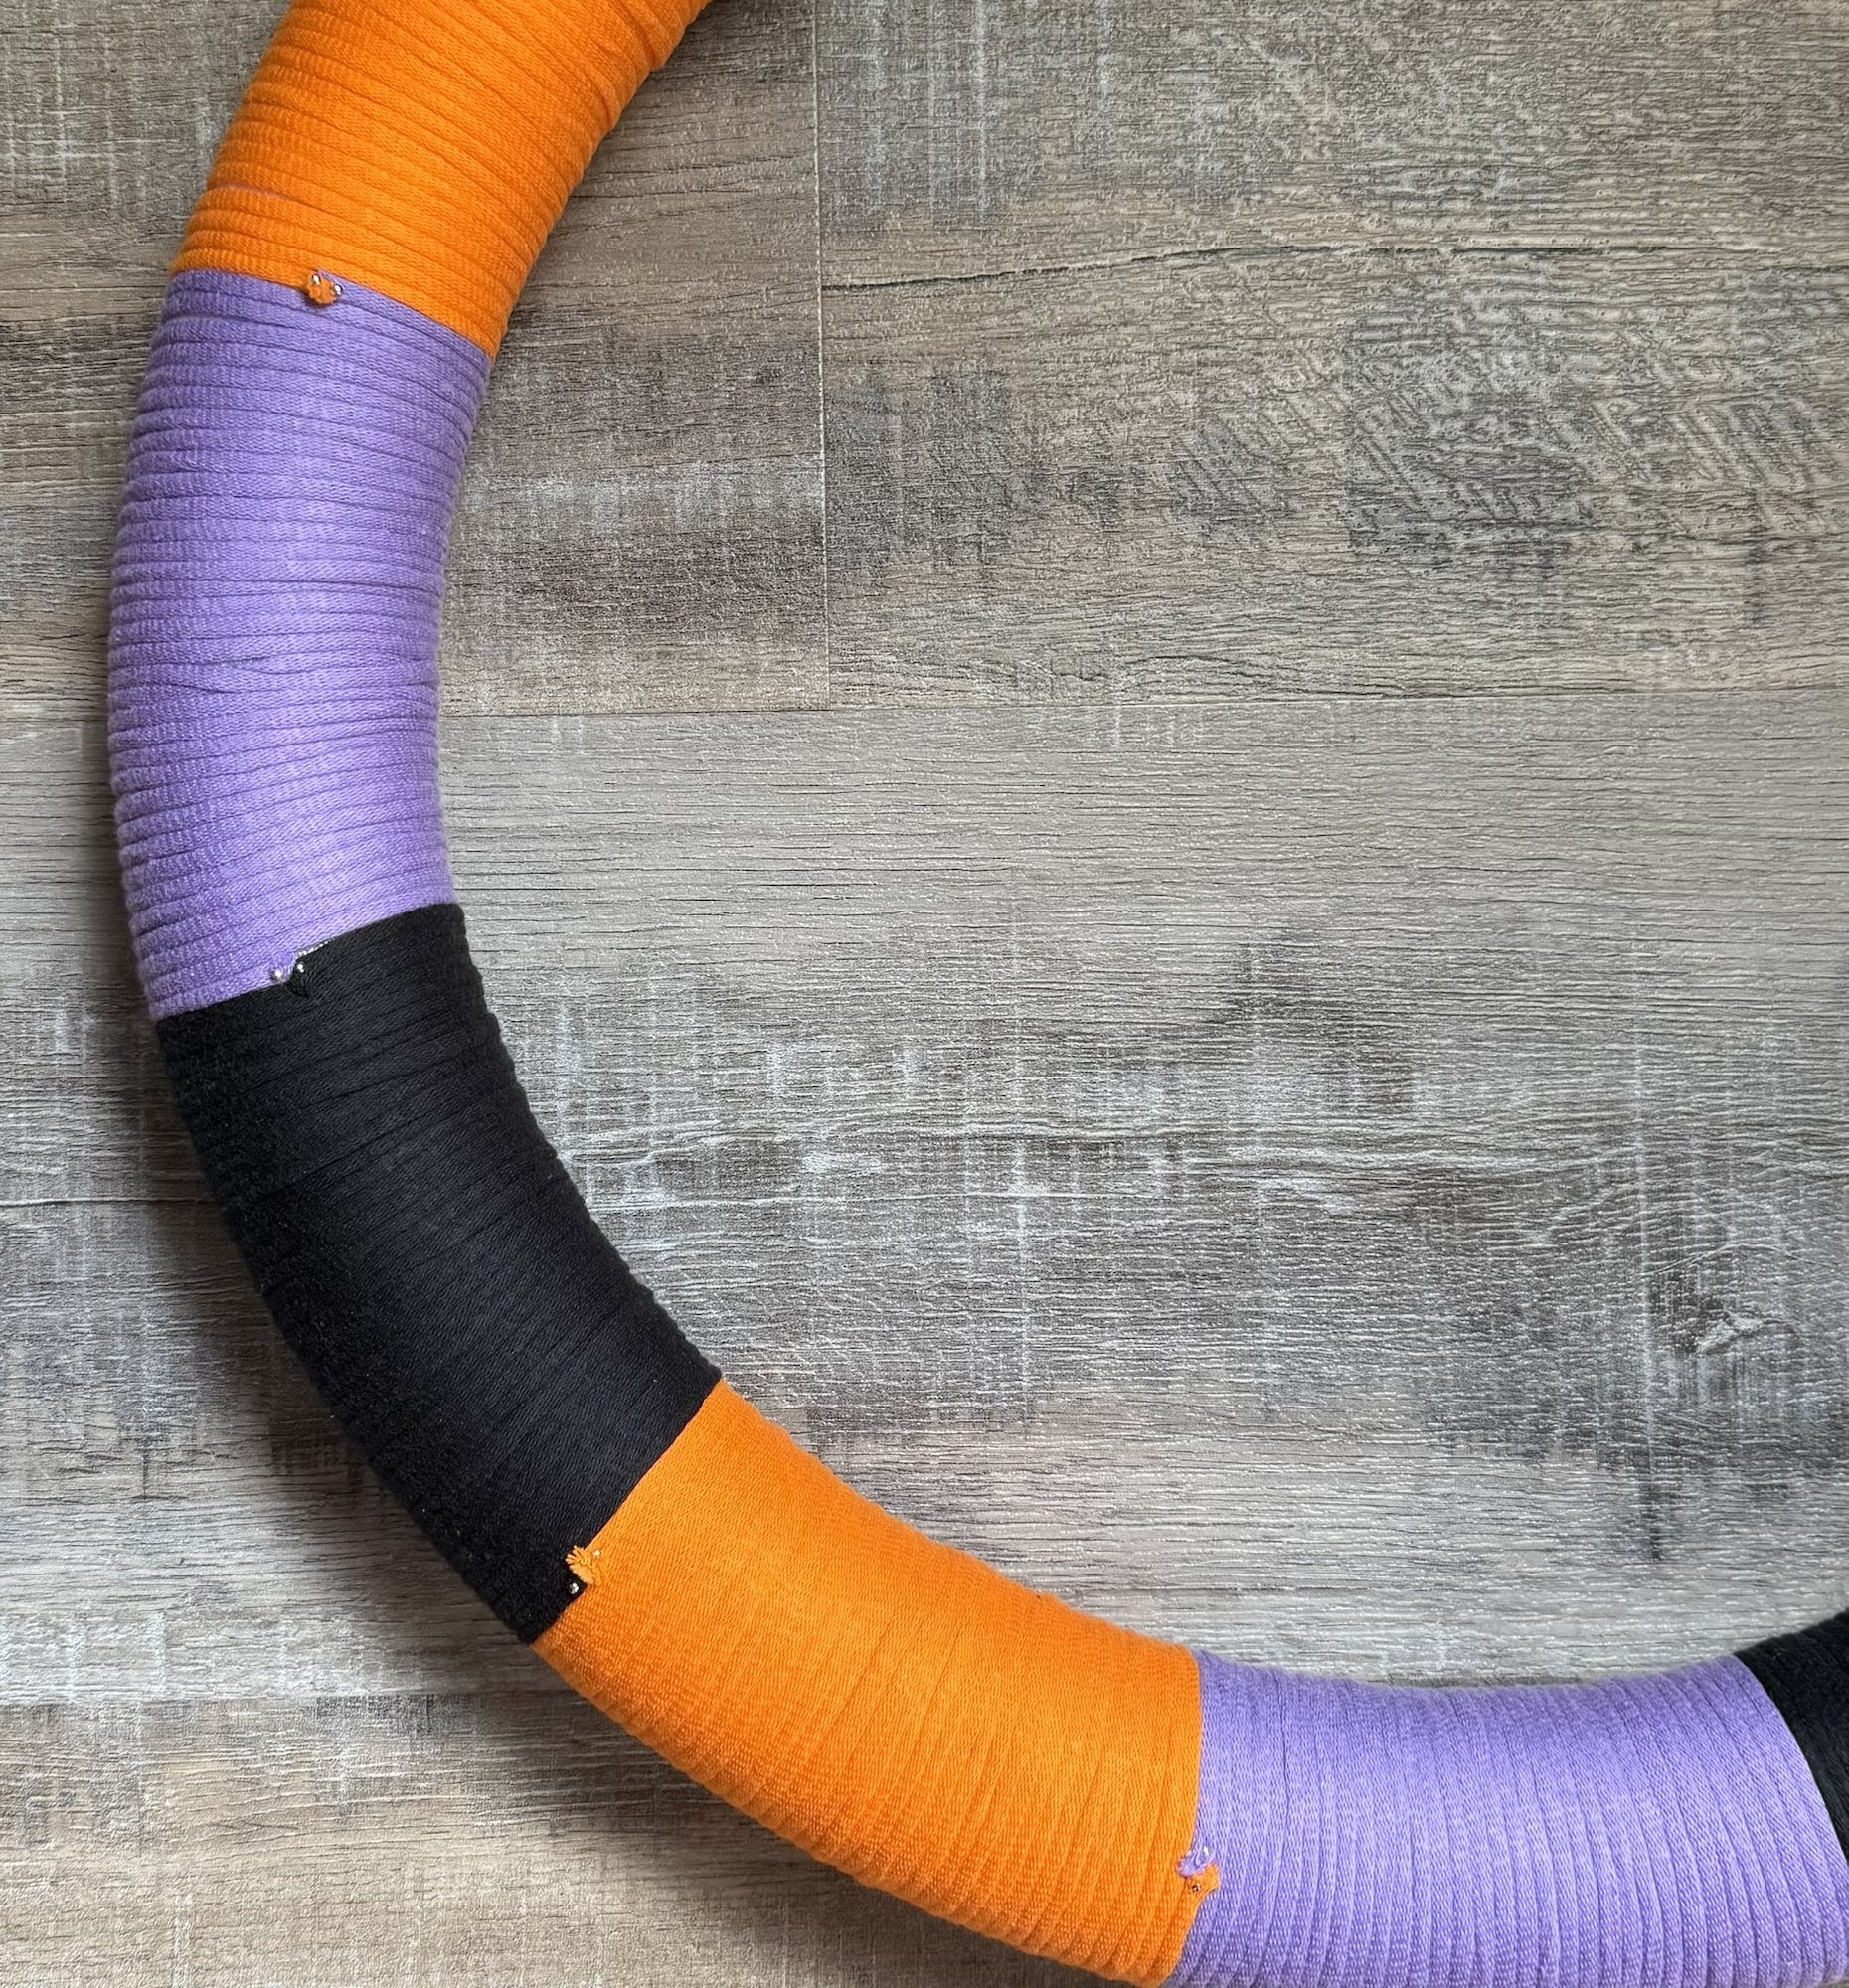
I have a fun Yarn-Wrapped Halloween Wreath to share with you today. 🎃👻 It’s easy to make and will look so cute on your front door!
Disclosure: Some of the links on my site are affiliate links, meaning, at no additional cost to you, I will earn a small commission if you click through and make a purchase. As an Amazon Associate I earn from qualifying purchases.
You’ll need a styrofoam wreath (mine measures about 18 inches in diameter), yarn for wrapping in orange, purple, and black, straight pins, and various ribbons for the bow. You can also add a ghost and pumpkin wood cutout or any other embellishments you’d like. The yarn I used is Beginner Bee yarn from Hobby Lobby. It’s a tubular t-shirt style yarn. I ended up using less than 1 skein of each color on my wreath. The skein weighs 2.3 ounces and has 65 yards.
I had the ghost and pumpkin cutouts in my stash – they came from Dollar Tree a couple of years ago, I’m not sure if they have them again this year. You can also find the ghost here and the pumpkin here in packages of 8.
Begin your wreath by attaching the yarn with a straight pin. Then just keep wrapping the yarn around the wreath in sections. When you are ready to start a new color, simply cut the first color, attach the end with a straight pin, and start the new color by attaching with a straight pin. Continue wrapping the yarn around the wreath. I wrapped 4 sections of each color – the sections measure about 4.5 inches each. I didn’t measure – I just eyeballed it. 🙂The photo below shows how the wreath looks from the back.
I created a Re-Fabbed style bow and used black/orange twine to tie it around the wreath. I tied another loop of twine around the wreath for the hanger. I painted the ghost and pumpkin with white and orange acrylic paint, tied a knot bow from twine and purple ribbon, and hot glued them to the ghost and pumpkin. Then I hot glued the ghost and pumpkin to the wreath.
This is a fun and easy wreath to make – it will add a little bit of Halloween whimsy to your front door!🎃👻
Disclosure: Some of the links on my site are affiliate links, meaning, at no additional cost to you, I will earn a small commission if you click through and make a purchase. As an Amazon Associate I earn from qualifying purchases.
I stamped the background stamp with Memento Tuxedo Black Ink on white card stock. I used my Misti Stamping Tool to stamp it a couple of times to get a good image. Then I applied 3 different shades of orange ink using blending brushes. Using these Deckle & Stitches Nesting Dies, I die cut the piece. I layered the piece to black card stock cut with the same die set and attached it to a white card.
I stamped the Jack-O-Lantern with Memento Tuxedo Black Ink, colored him with Copic markers, and cut him out using these detail scissors. Using these Scallops & Circles Nesting Dies, I die cut a circle from black card stock and attached the Jack-O-Lantern to it. The piece is attached to the card using foam tape. I stamped “Happy Halloween!” (another really old stamp in my collection 🙂) with black ink on white card stock and die cut around it using these Scalloped & Stitched Nesting Dies. Using a blending brush, I applied black ink to the edges and attached to the card.
A fun, not too scary, way to send Halloween greetings! 🎃
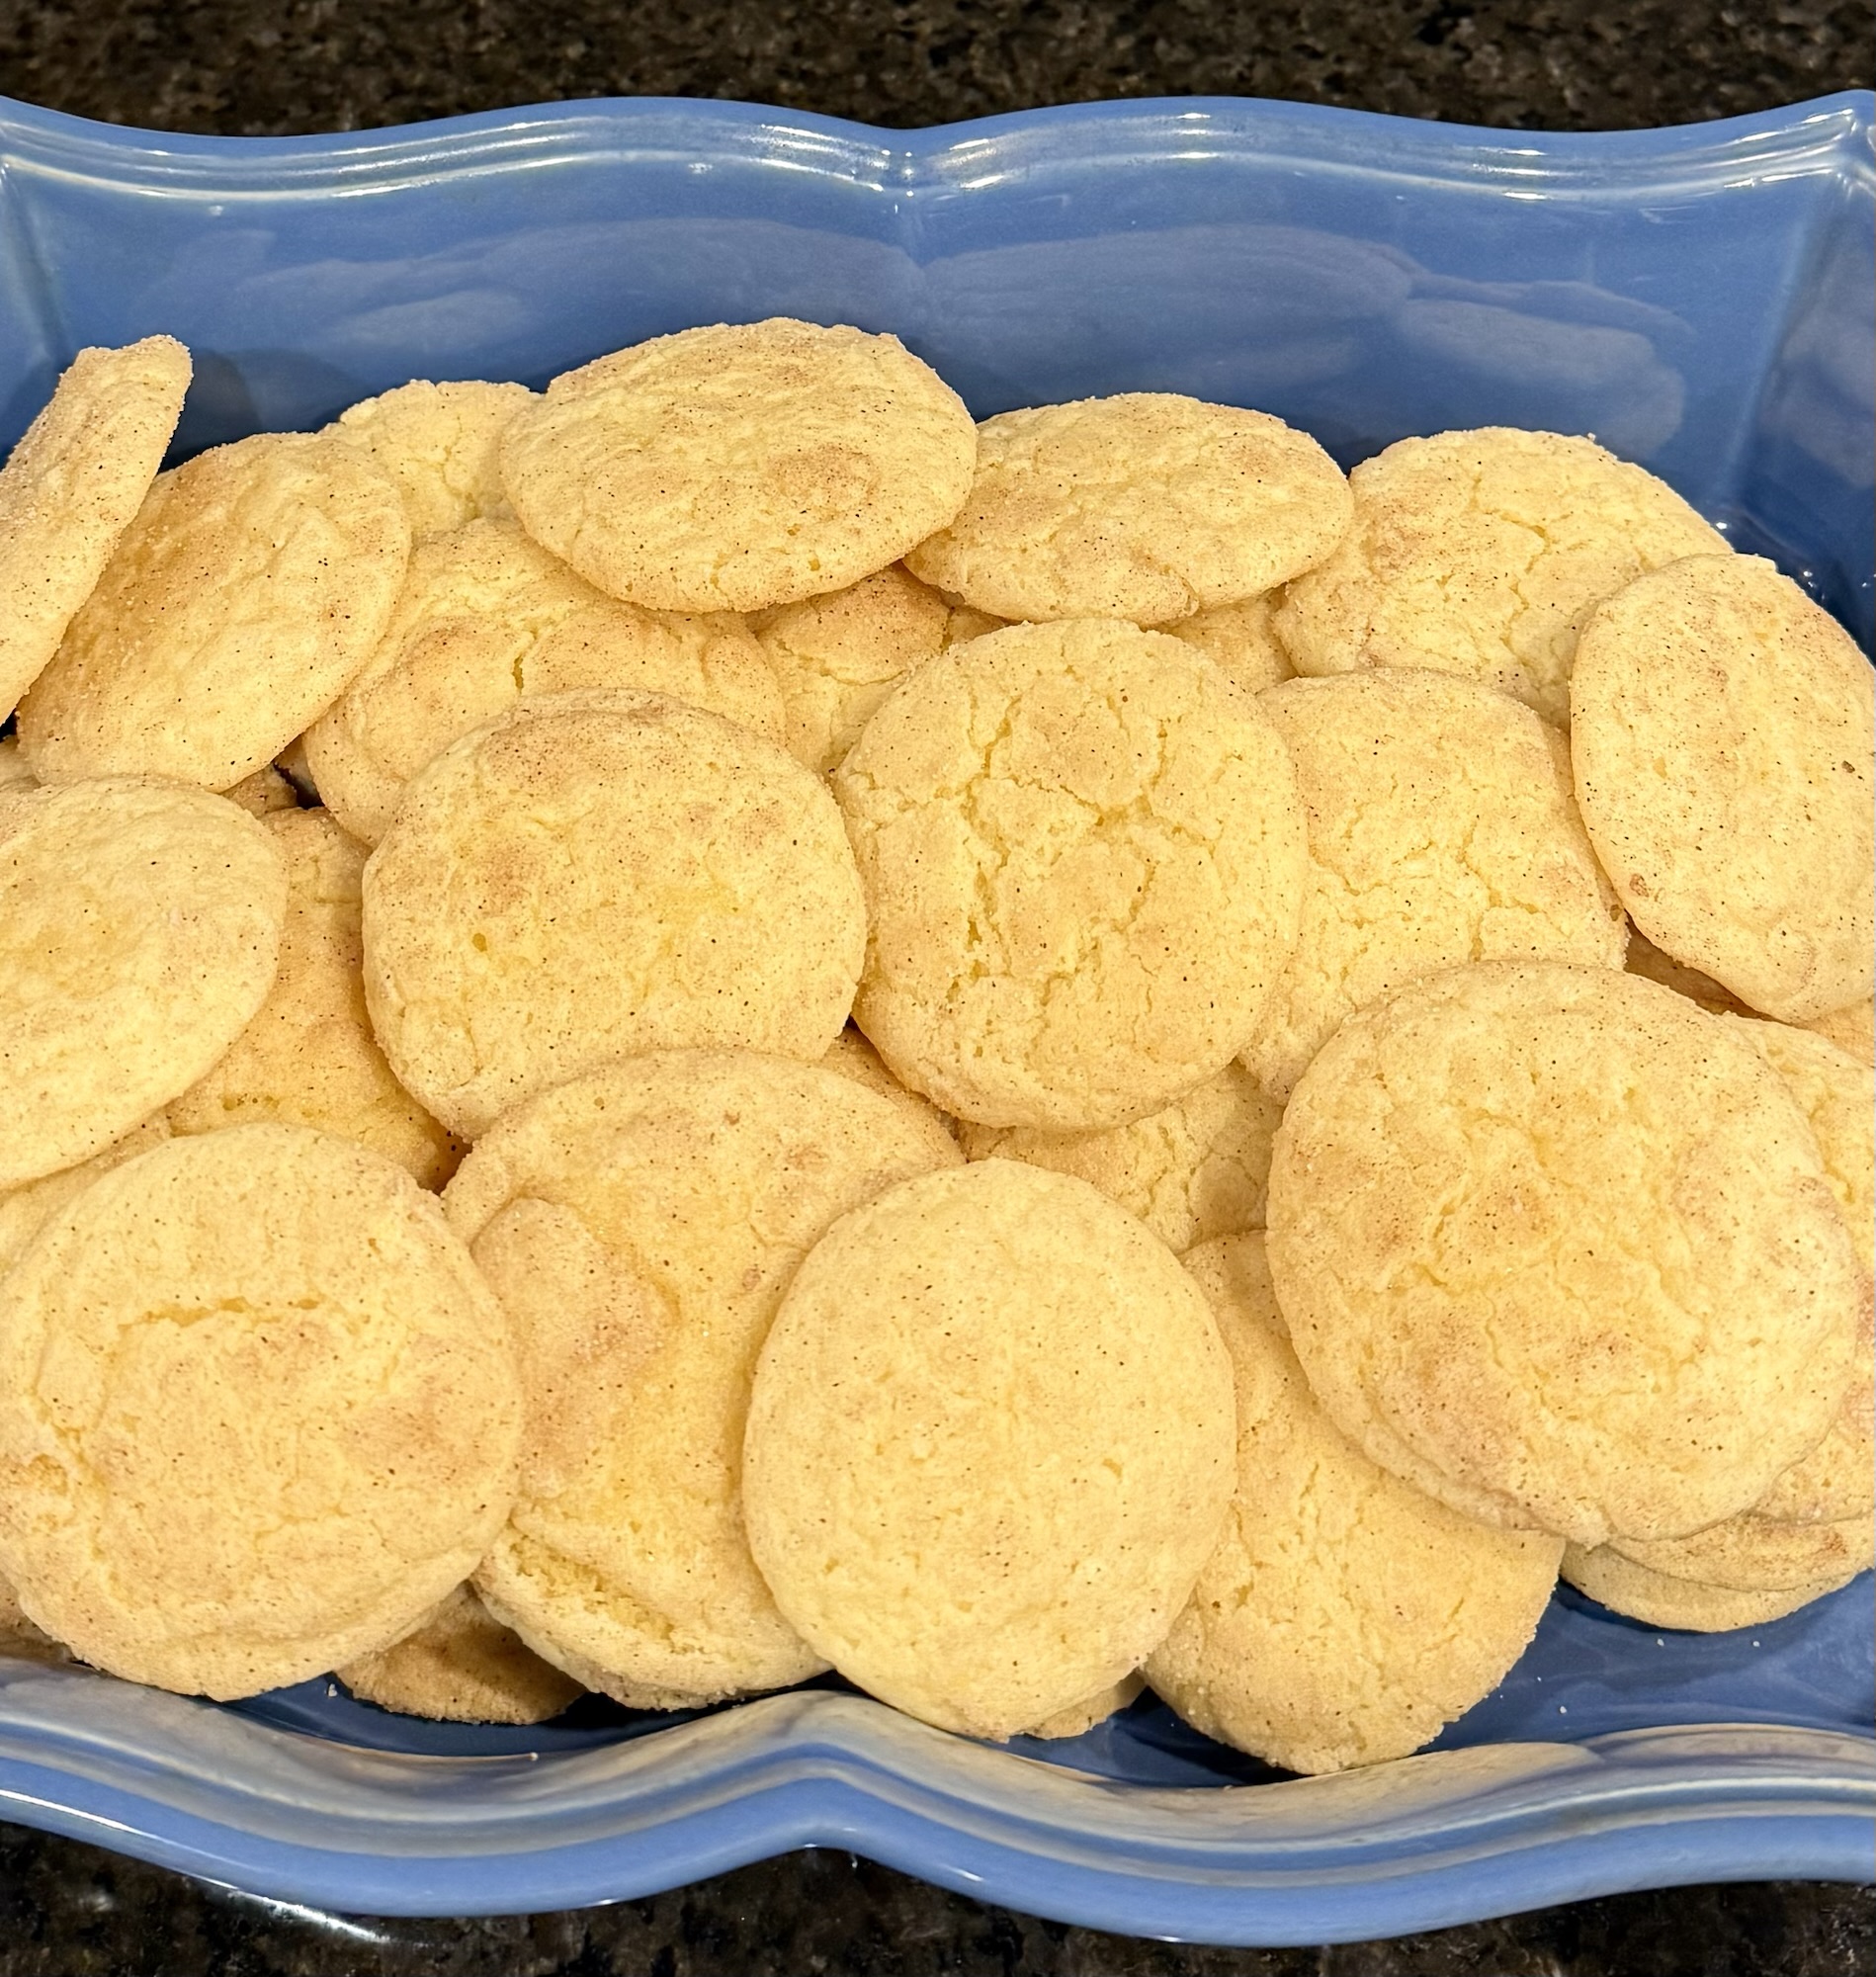
One of my favorite easy cookie recipes is Snickerdoodle Cookies. 😋 They are such a yummy Fall treat. 🍁🍂🍁 You may even have everything you need in your kitchen right now to whip up a batch!
Disclosure: Some of the links on my site are affiliate links, meaning, at no additional cost to you, I will earn a small commission if you click through and make a purchase. As an Amazon Associate I earn from qualifying purchases.
Important tip: Be sure to use margarine NOT butter! This will keep your cookies soft and chewy.
Here’s the recipe:
1 cup margarine at room temperature
1 and 1/2 cups sugar
2 eggs
2 and 3/4 cups flour
2 teaspoons cream of tartar
1 teaspoon baking soda
1/4 teaspoon salt
3 tablespoons sugar
3 teaspoons cinnamon
Preheat oven to 400°.
Cream together margarine, sugar, and eggs thoroughly. Sift together flour, cream of tartar, baking soda, and salt. Add to the first mixture and blend thoroughly. Form dough into balls the size of walnuts.
If dough is too sticky, just put it in the refrigerator for a few minutes or sprinkle your hands with water before rolling into balls.
In a small bowl, combine 3 tablespoons sugar and 3 teaspoons cinnamon. Roll each ball in this mixture and place on an ungreased cookie sheet, allowing at least 2 inches between each ball. Bake 8 to 10 minutes.
This recipe makes about 5 dozen cookies so there are plenty for everyone. 😋 So good with a cold glass of milk or a hot cup of tea or coffee! And if there are any left, they freeze well.
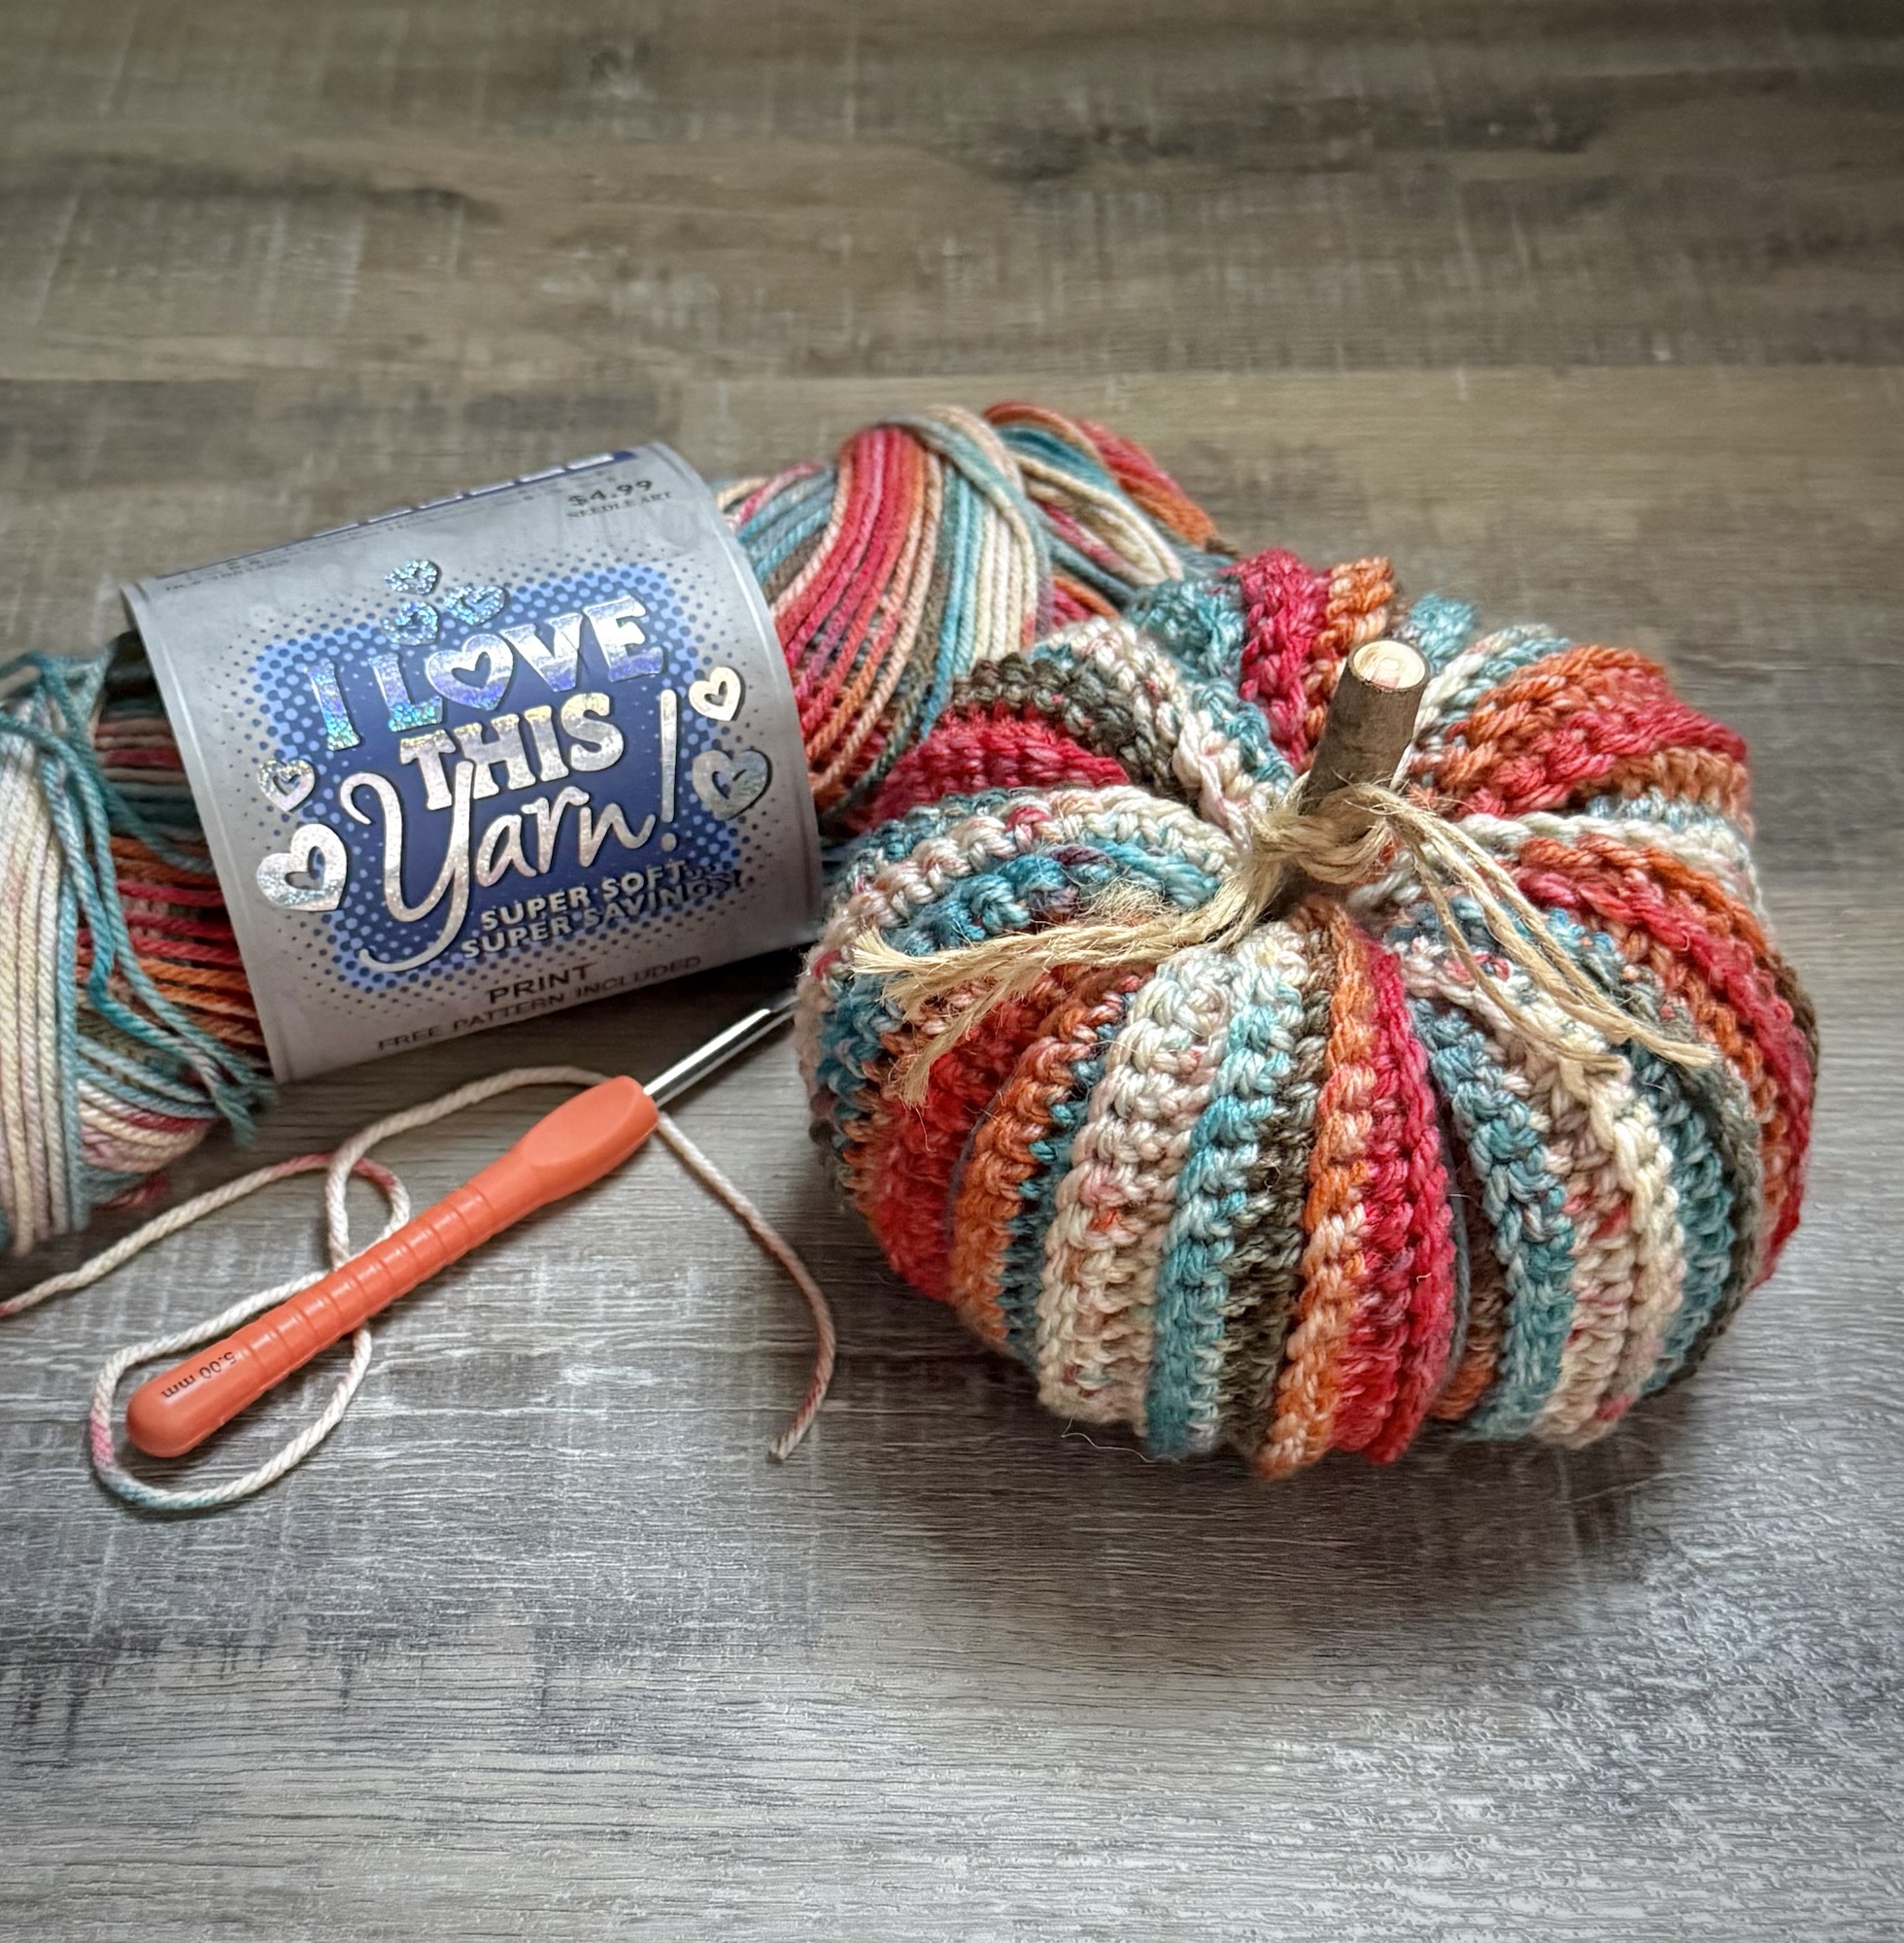
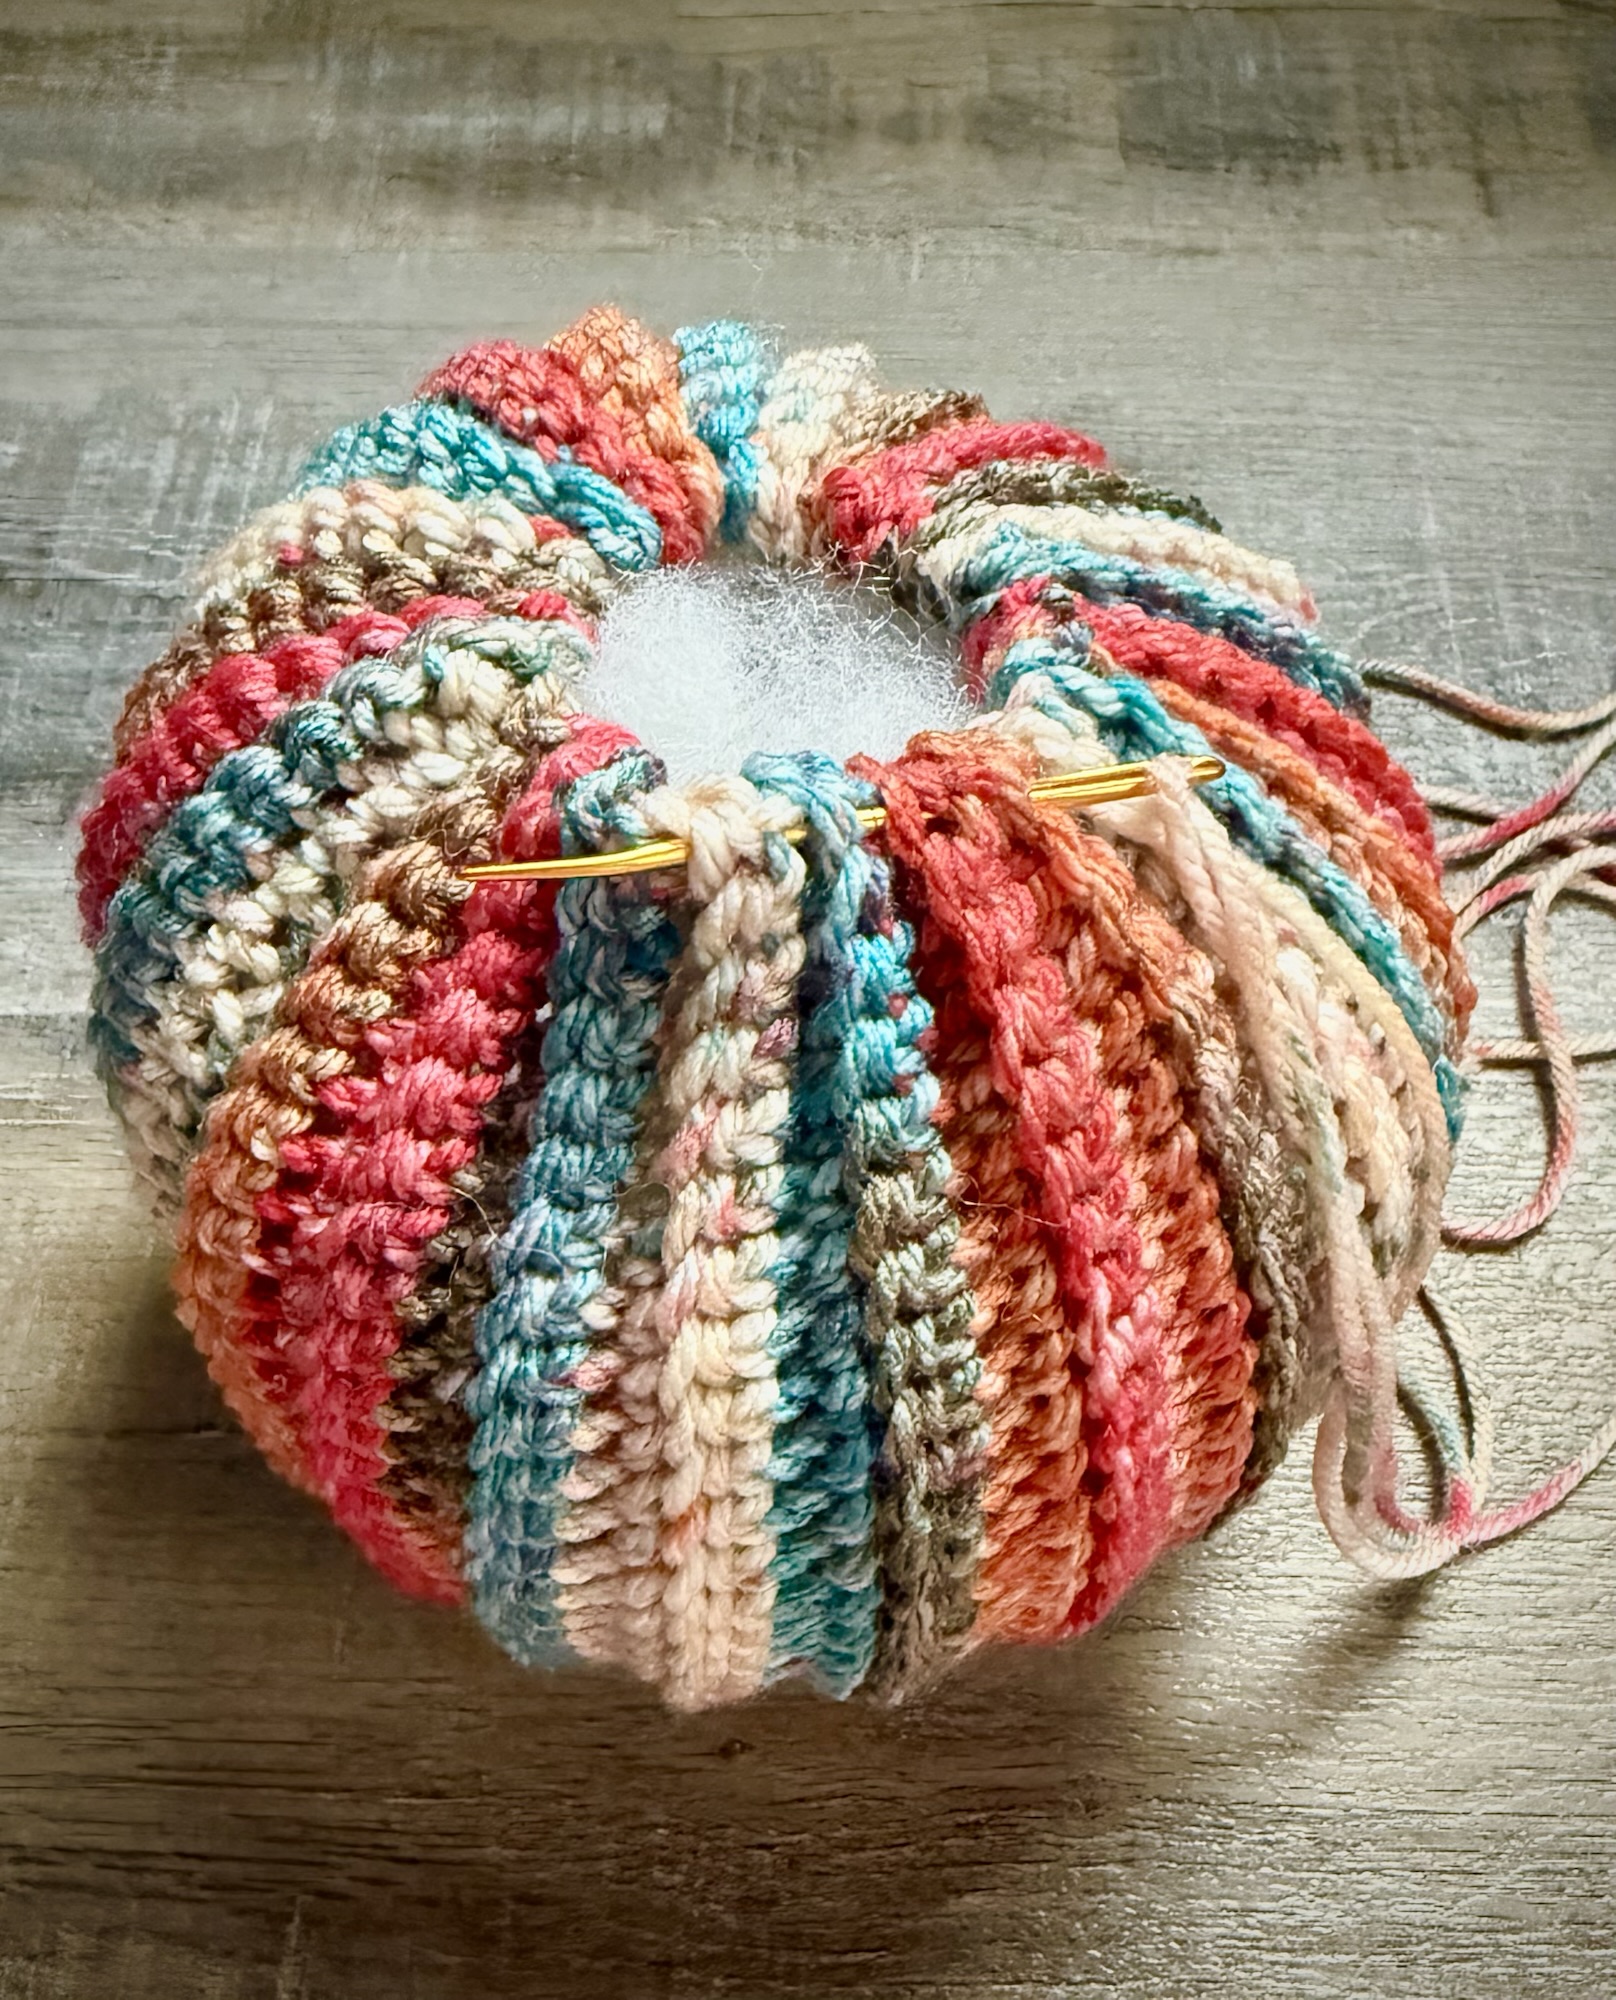
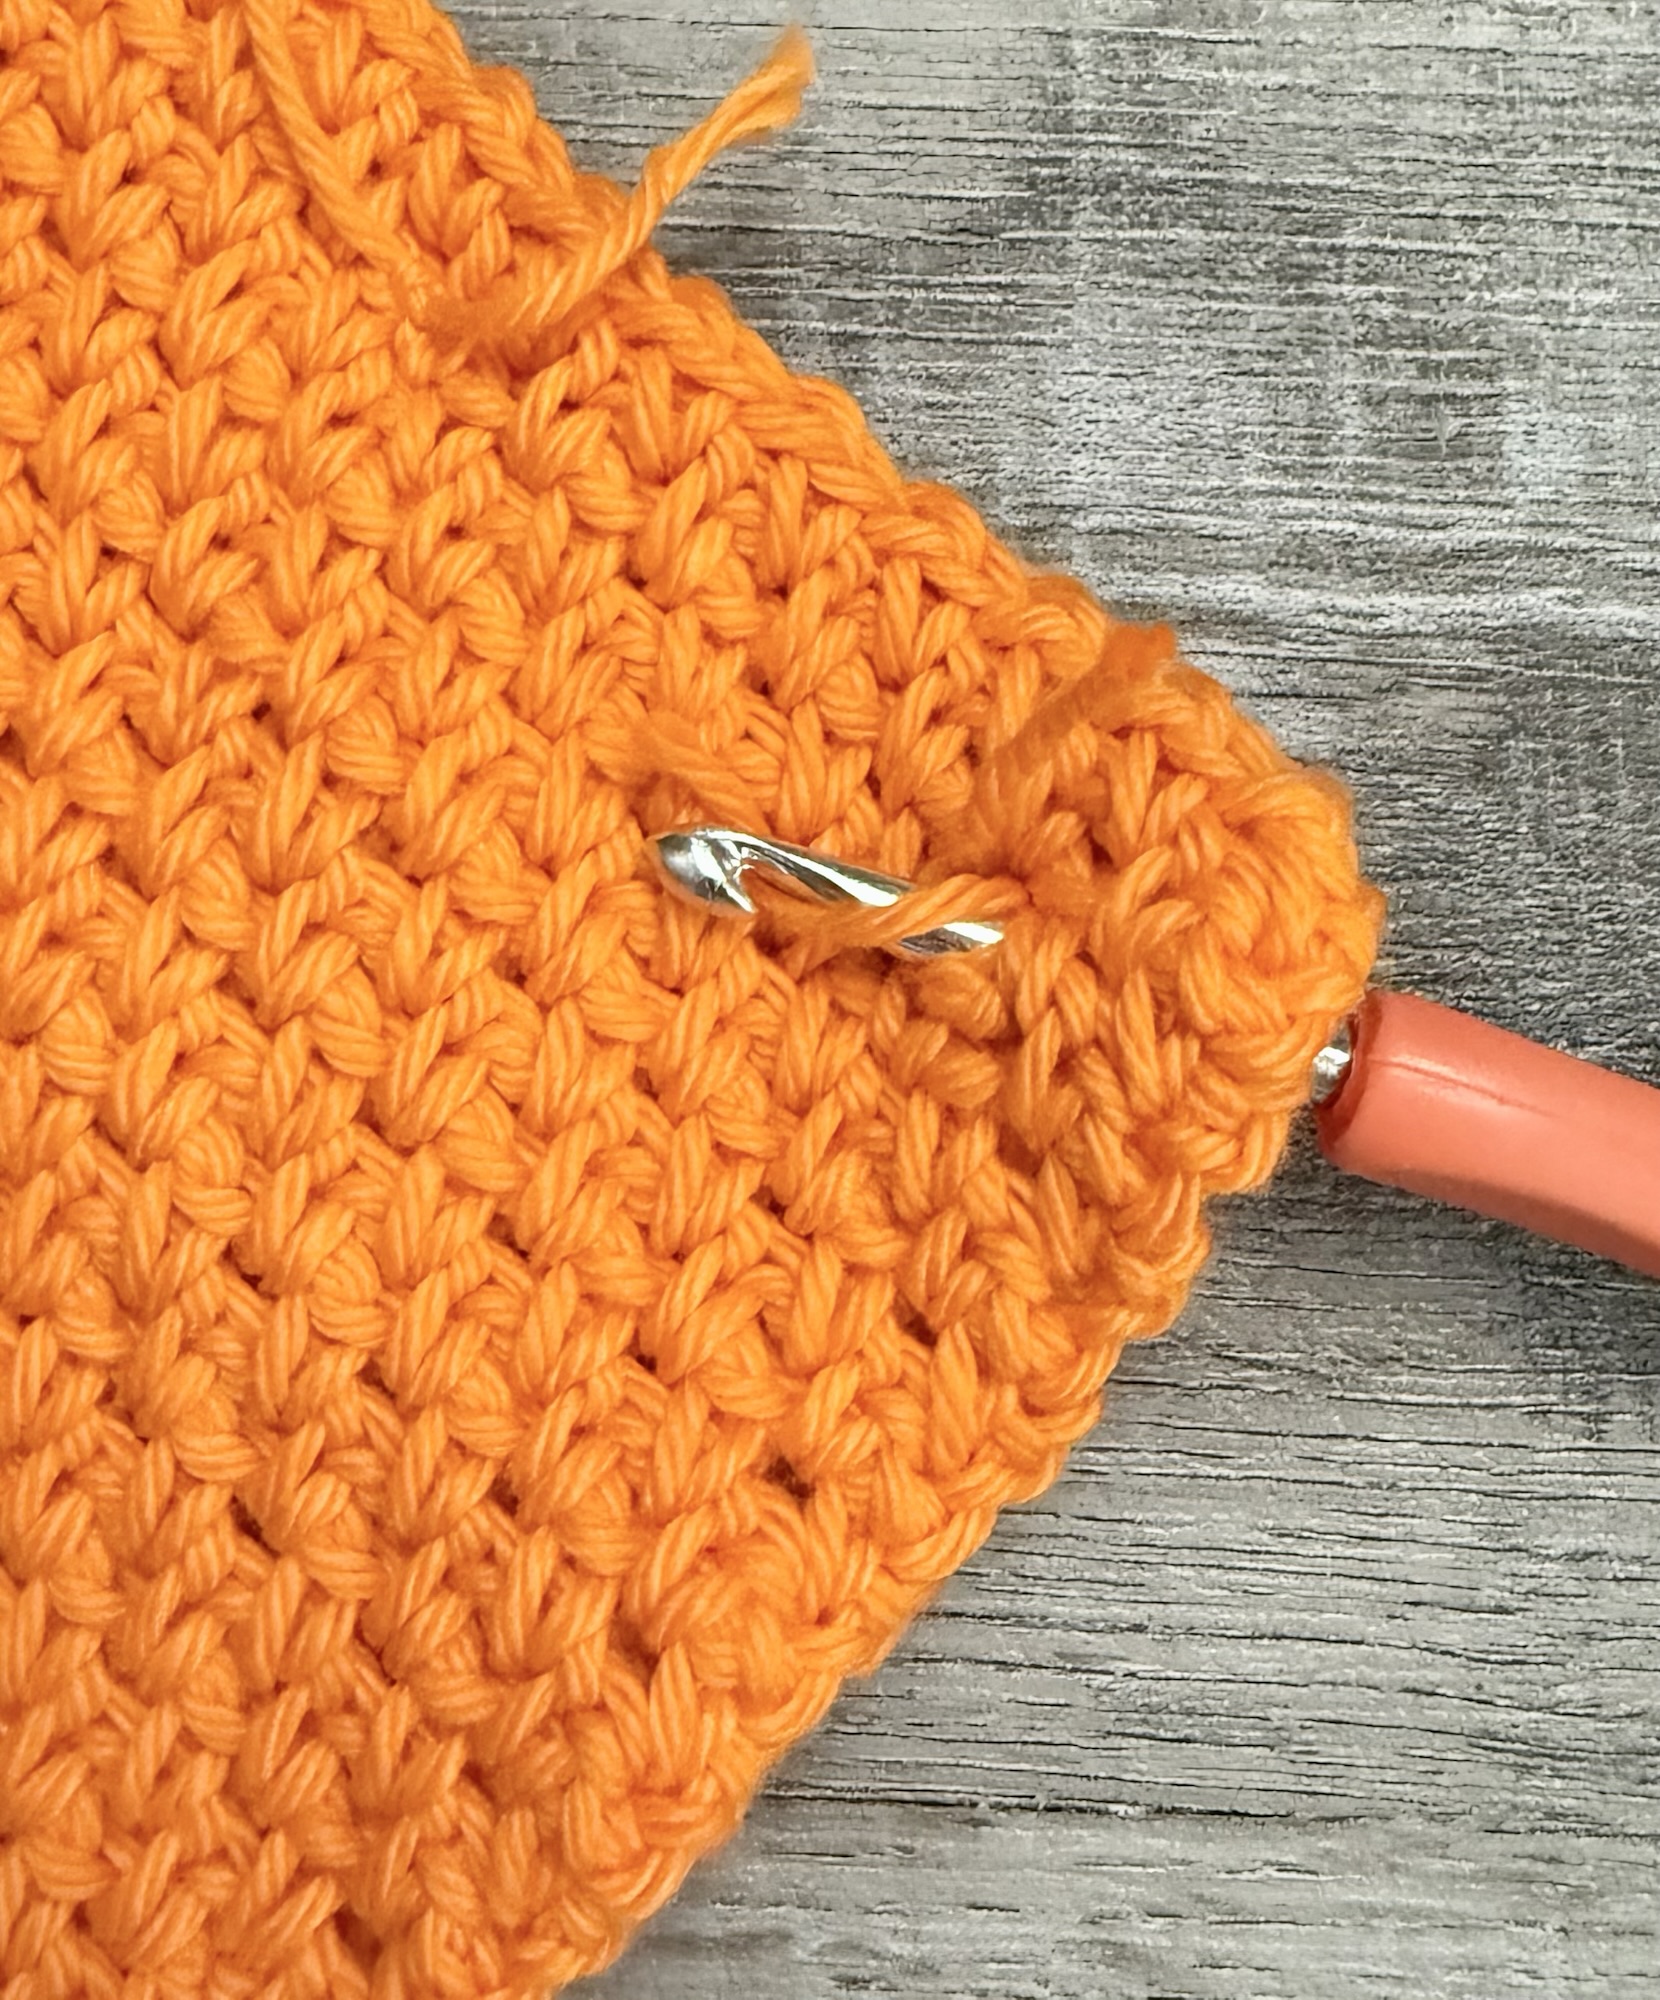
I found this amazing color of I Love This Yarn called Royal Gorge at Hobby Lobby and fell in love with the rich Fall colors. 🧶 I thought it would be great stitched into a pumpkin so I created a crochet pattern that’s perfect for beginners or seasoned crocheters.
Disclosure: Some of the links on my site are affiliate links, meaning, at no additional cost to you, I will earn a small commission if you click through and make a purchase. As an Amazon Associate I earn from qualifying purchases.
I stitched up my pumpkin using an H/5mm crochet hook. You’ll also need some Poly-fil to stuff your pumpkin. I used a small stick for my stem – cinnamon sticks would work great, too. I tied some natural twine around my stem and you can always use ribbon, too.
The pattern is below along with links to free PDFs – one with photos and one without – if you’d like to easily print the pattern.
Crochet Pumpkin
By Anita Young at creatingme.net
Worsted weight (4) yarn (about 2.5 ounces)- I used I Love This Yarn in Royal Gorge
H/5mm hook
Yarn needle
Poly-fil
Gauge is not important for this pattern
Stitches used:
Chain – ch
Single Crochet – sc
Slip Stitch – ss
Back Loop Only – blo
Ch 31, leaving a long tail for gathering the bottom of the pumpkin later.
Row 1: sc in 2nd ch from hook and each stitch across. Ch 1 and turn. (30 stitches)
Row 2 – 51: sc in blo of each stitch across. Ch 1 and turn. (30 stitches)
Do not ch 1 and turn at the end of row 51.
Fold piece in half and ss ends together. Finish off leaving a very long tail. You will need this to shape the pumpkin.
Turn piece so the seam is on the inside.
Using a yarn needle and your beginning tail, run a gathering stitch around the bottom of the pumpkin. Pull tight to close the opening, secure the yarn tightly, and weave in the end.
Stuff pumpkin with Poly-fil and gather the top in the same manner, using the very long tail. Do not cut yarn.
Using your needle, draw the yarn through the center top of the pumpkin to center bottom of the pumpkin. Wrap the yarn around to the top of the pumpkin and pull it through again, pulling it tightly to form a “ridge”. Do this 5 or 6 times to give the pumpkin “ridges”. Tie it off tightly at the bottom after the last wrap around and weave in your end.
Finished pumpkin measures about 6 inches across and 3.5 inches high.
Glue a small stick or cinnamon stick to the center for the stem. Add twine, ribbon, or other embellishments as desired.
I love this pumpkin in the variegated yarn but it would be great in a solid color, too. Make some in your favorite variegated yarn and make some in matching solid colors to fill a basket for your Fall decor. I would love to see your pumpkin creations!
Disclosure: Some of the links on my site are affiliate links, meaning, at no additional cost to you, I will earn a small commission if you click through and make a purchase. As an Amazon Associate I earn from qualifying purchases.
To make the card, I embossed a piece of turquoise card stock with a dot embossing folder and attached it to a white card. I attached the robot image and the sentiment to the card with foam tape.
He’s such a cute little robot – you could even add some googly eyes for even more fun!👀
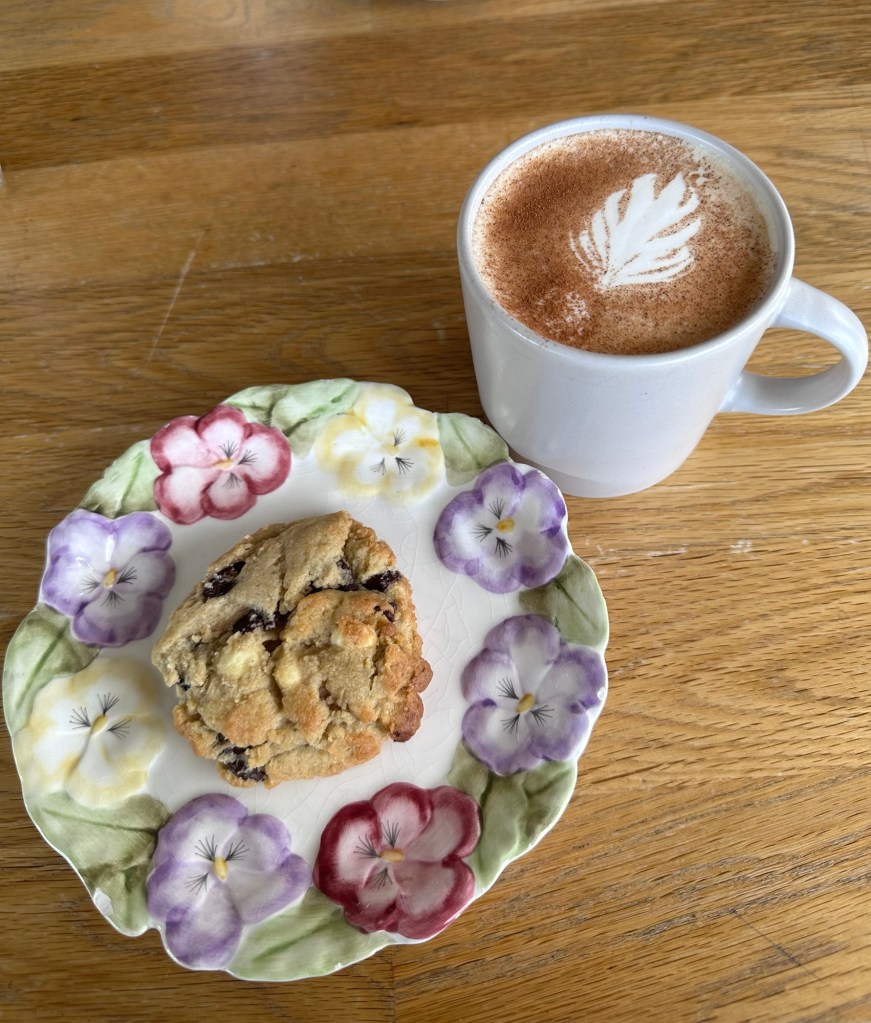
A couple of years ago we took a bucket list trip to Scotland. While we were on the Isle of Skye, we stumbled upon The Hungry Gull in Staffin and had the most amazing chocolate chip cookies!
Disclosure: Some of the links on my site are affiliate links, meaning, at no additional cost to you, I will earn a small commission if you click through and make a purchase. As an Amazon Associate I earn from qualifying purchases.
I loved them so much that I asked the baker about them. She told me they were the recipe from Jane Dunn at Jane’s Patisserie. She has several cookbooks with the most amazing recipes! My husband, Bret, bought me 2 of them and they are filled with yummy recipes and beautiful photos. She is in the UK and the recipes are written in UK measurements so keep that in mind if you are in the USA like us. 😊 They are easily converted to the different measurements or you can use a kitchen scale that weighs in grams to measure your ingredients.
For my birthday this month, Bret made 2 different delicious recipes from this cookbook. (I’ll share the other recipe he made in a later post.)
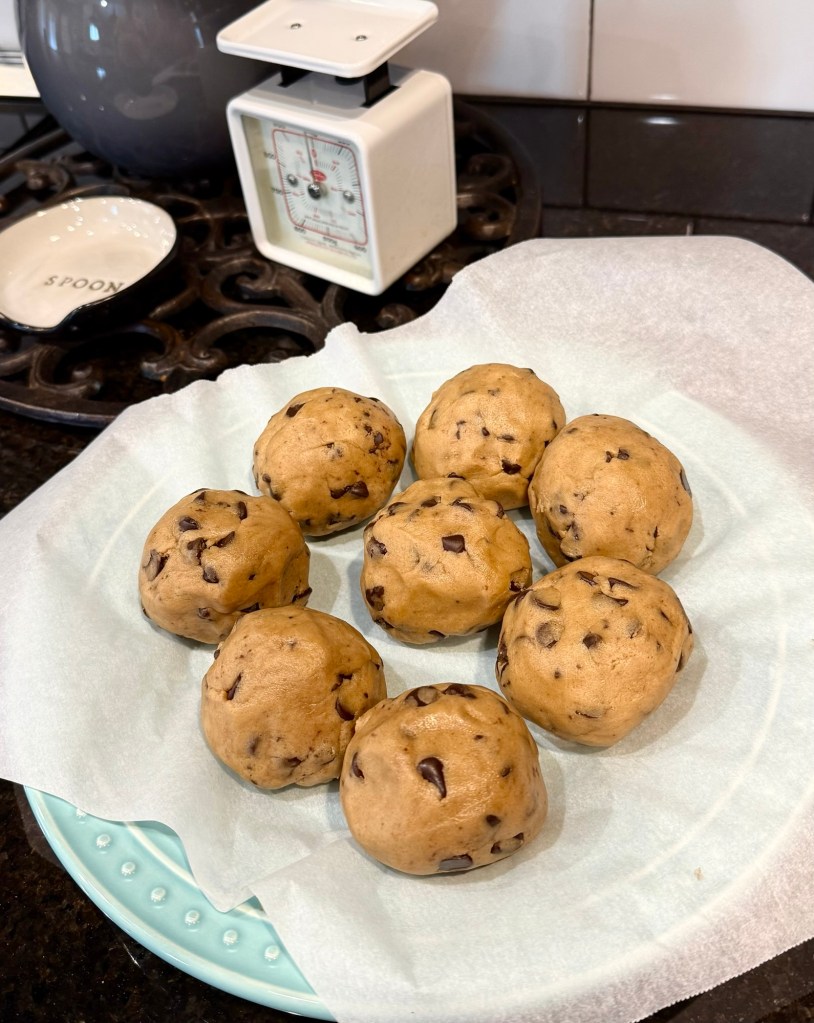
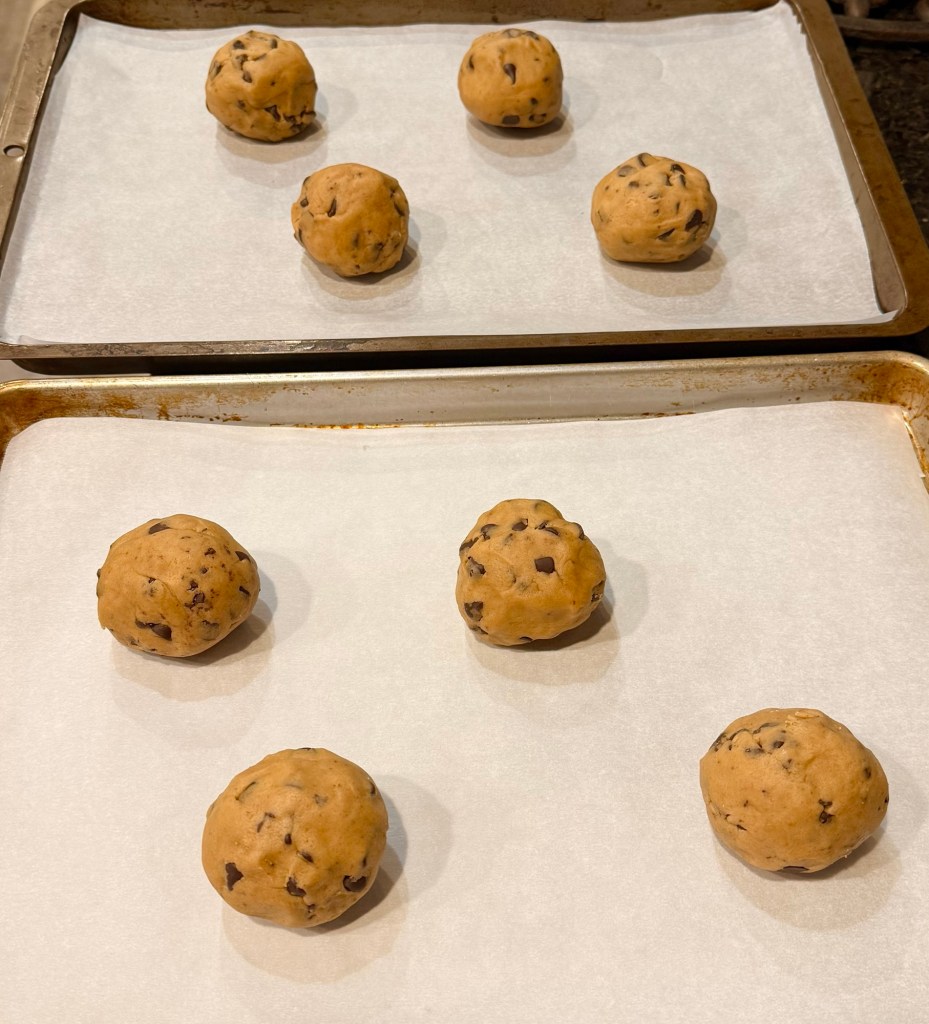
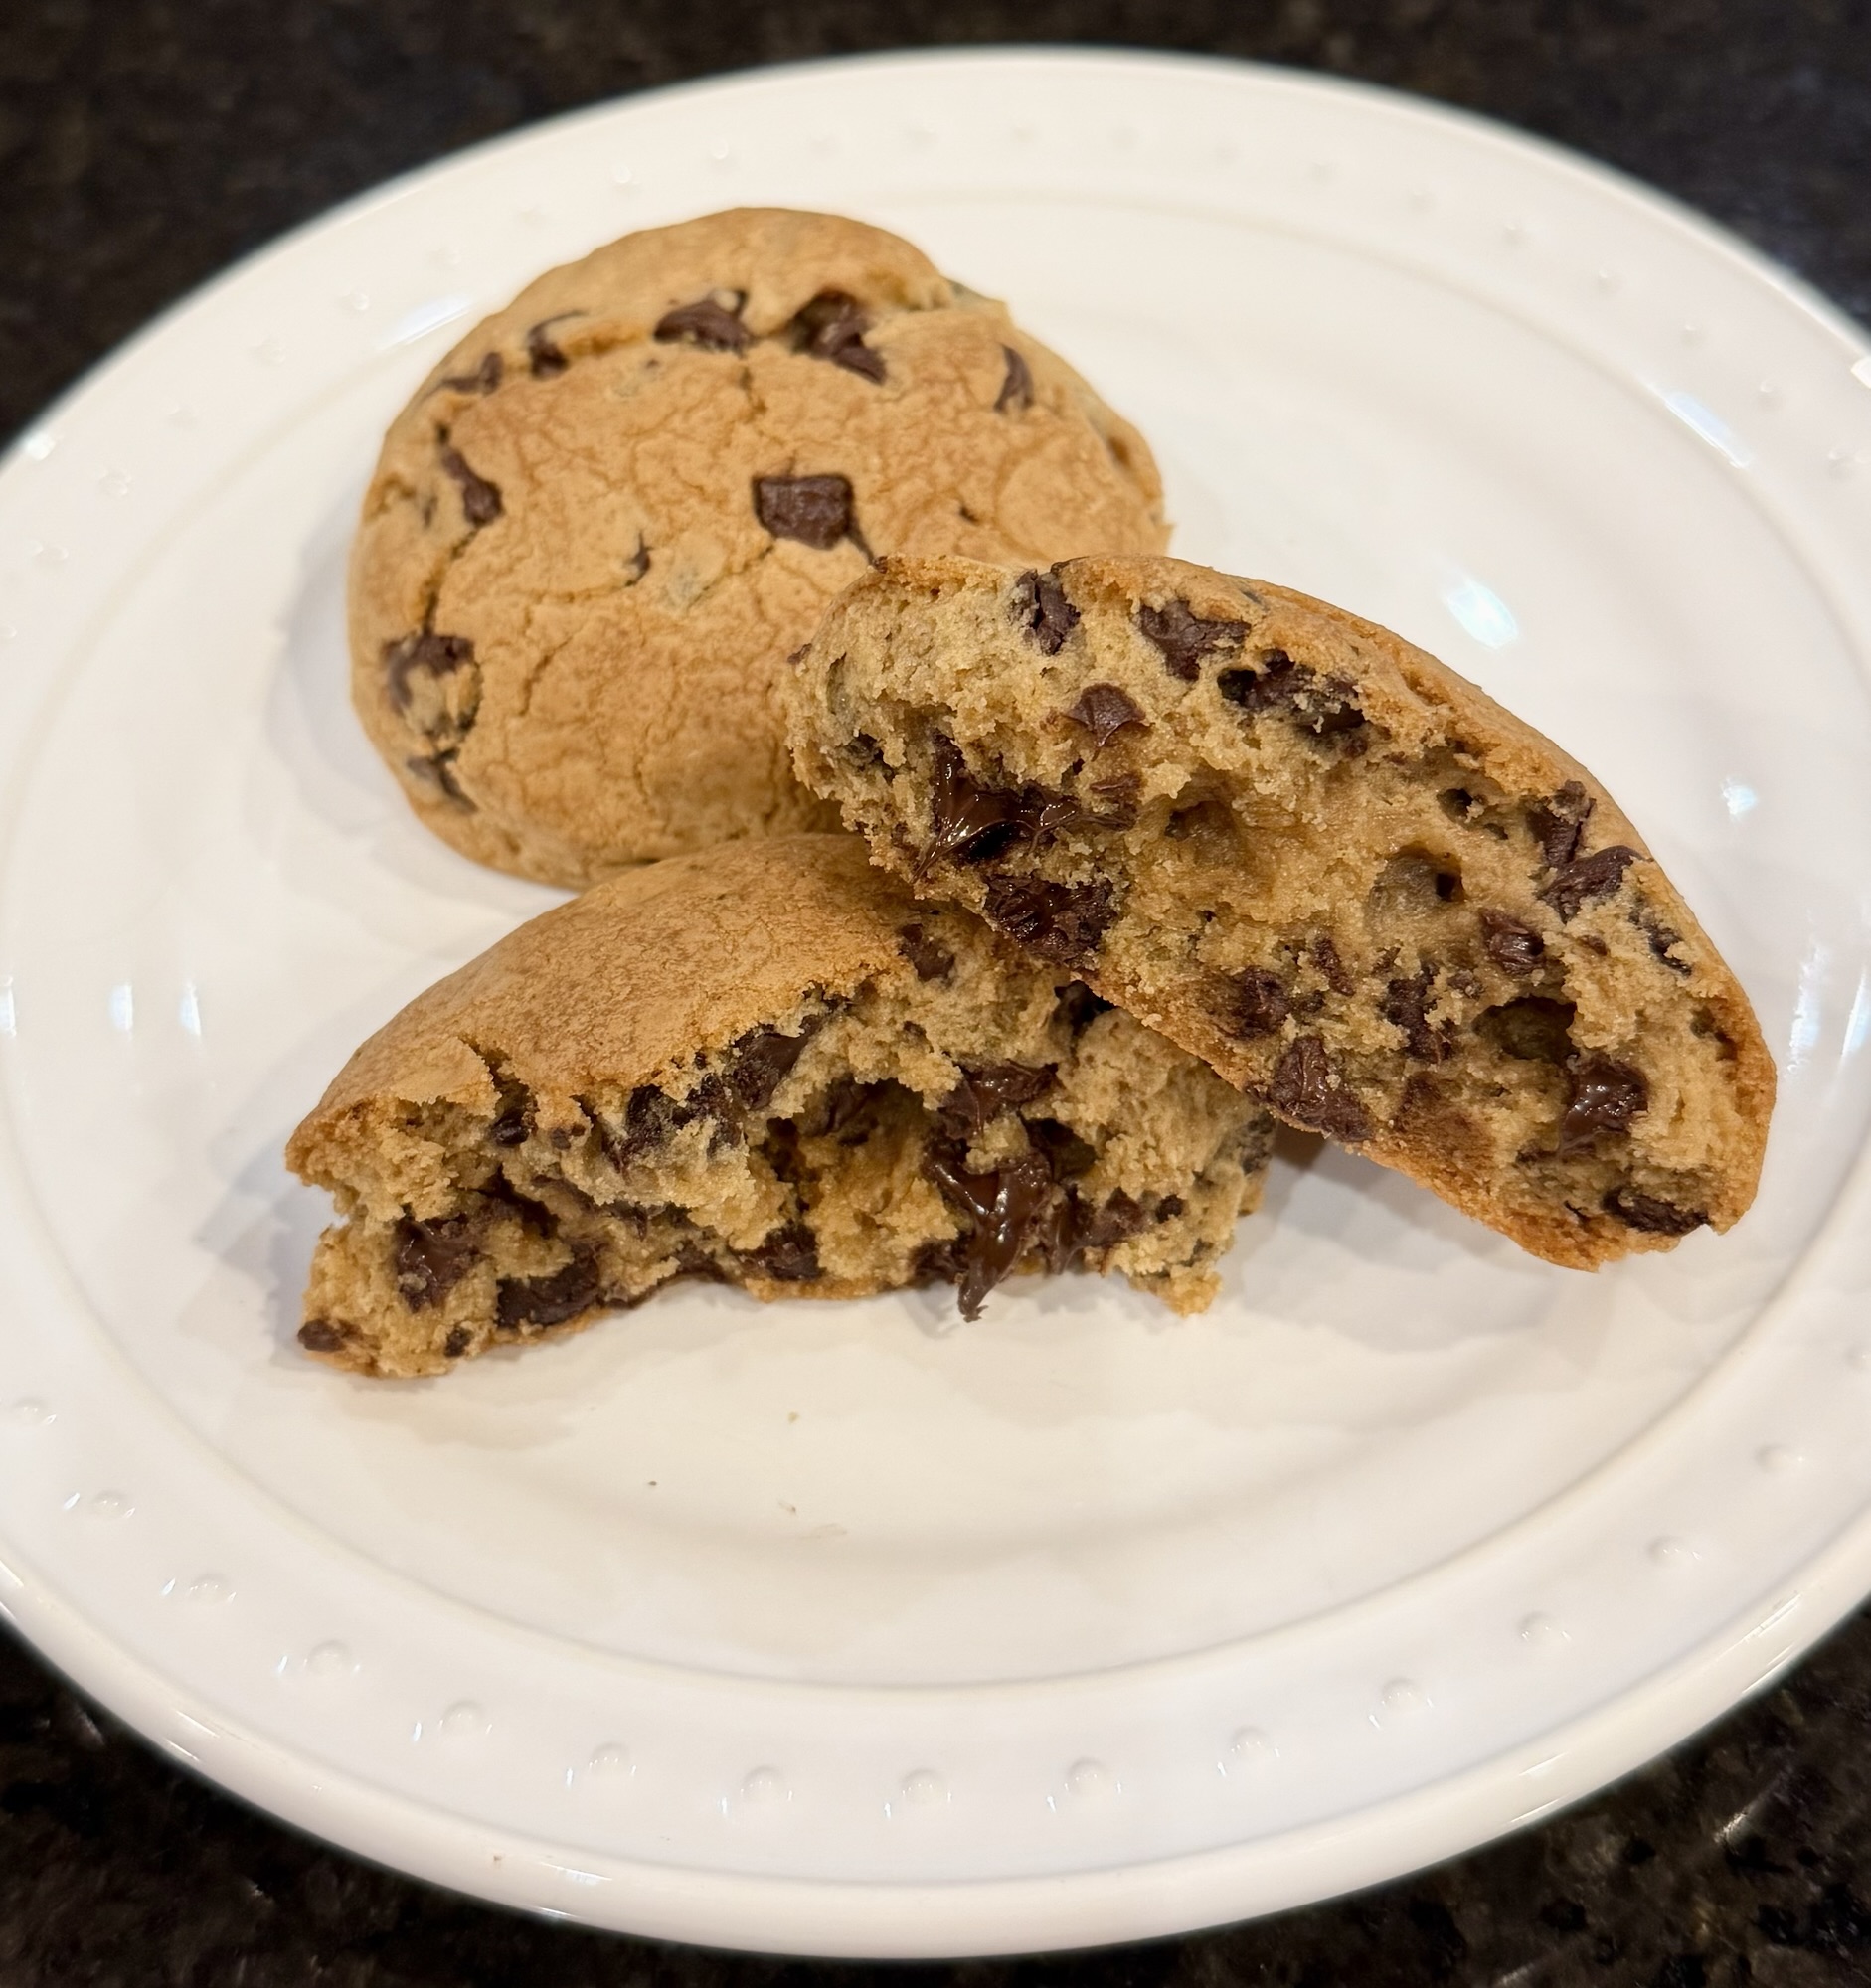
The first recipe he made are the NYC Chocolate Chip Cookies that we enjoyed so much in Scotland. The recipe makes 8 huge cookies!
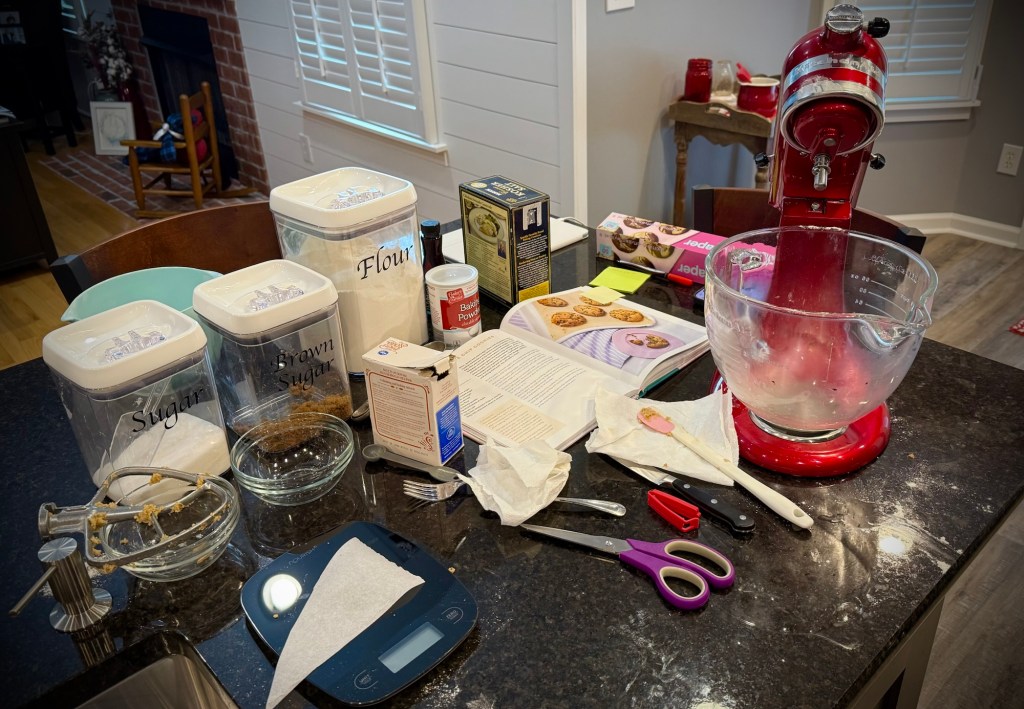
This is the counter after he mixed up the dough. He’s just as messy in the kitchen as I am. 🙃
These are the huge 8 balls of dough ready to chill in the fridge for a while.
Ready to go in the oven…Yes, just 4 per baking sheet. 😊
Fresh from the oven and ready to eat! Just so, so good!!! 😋 We did need to bake them a few minutes longer than the recipe calls for, but it may be our oven. 🤷♀️
So many of Jane’s Patisserie recipes to try – I’m sure they will all be just as tasty! 😋
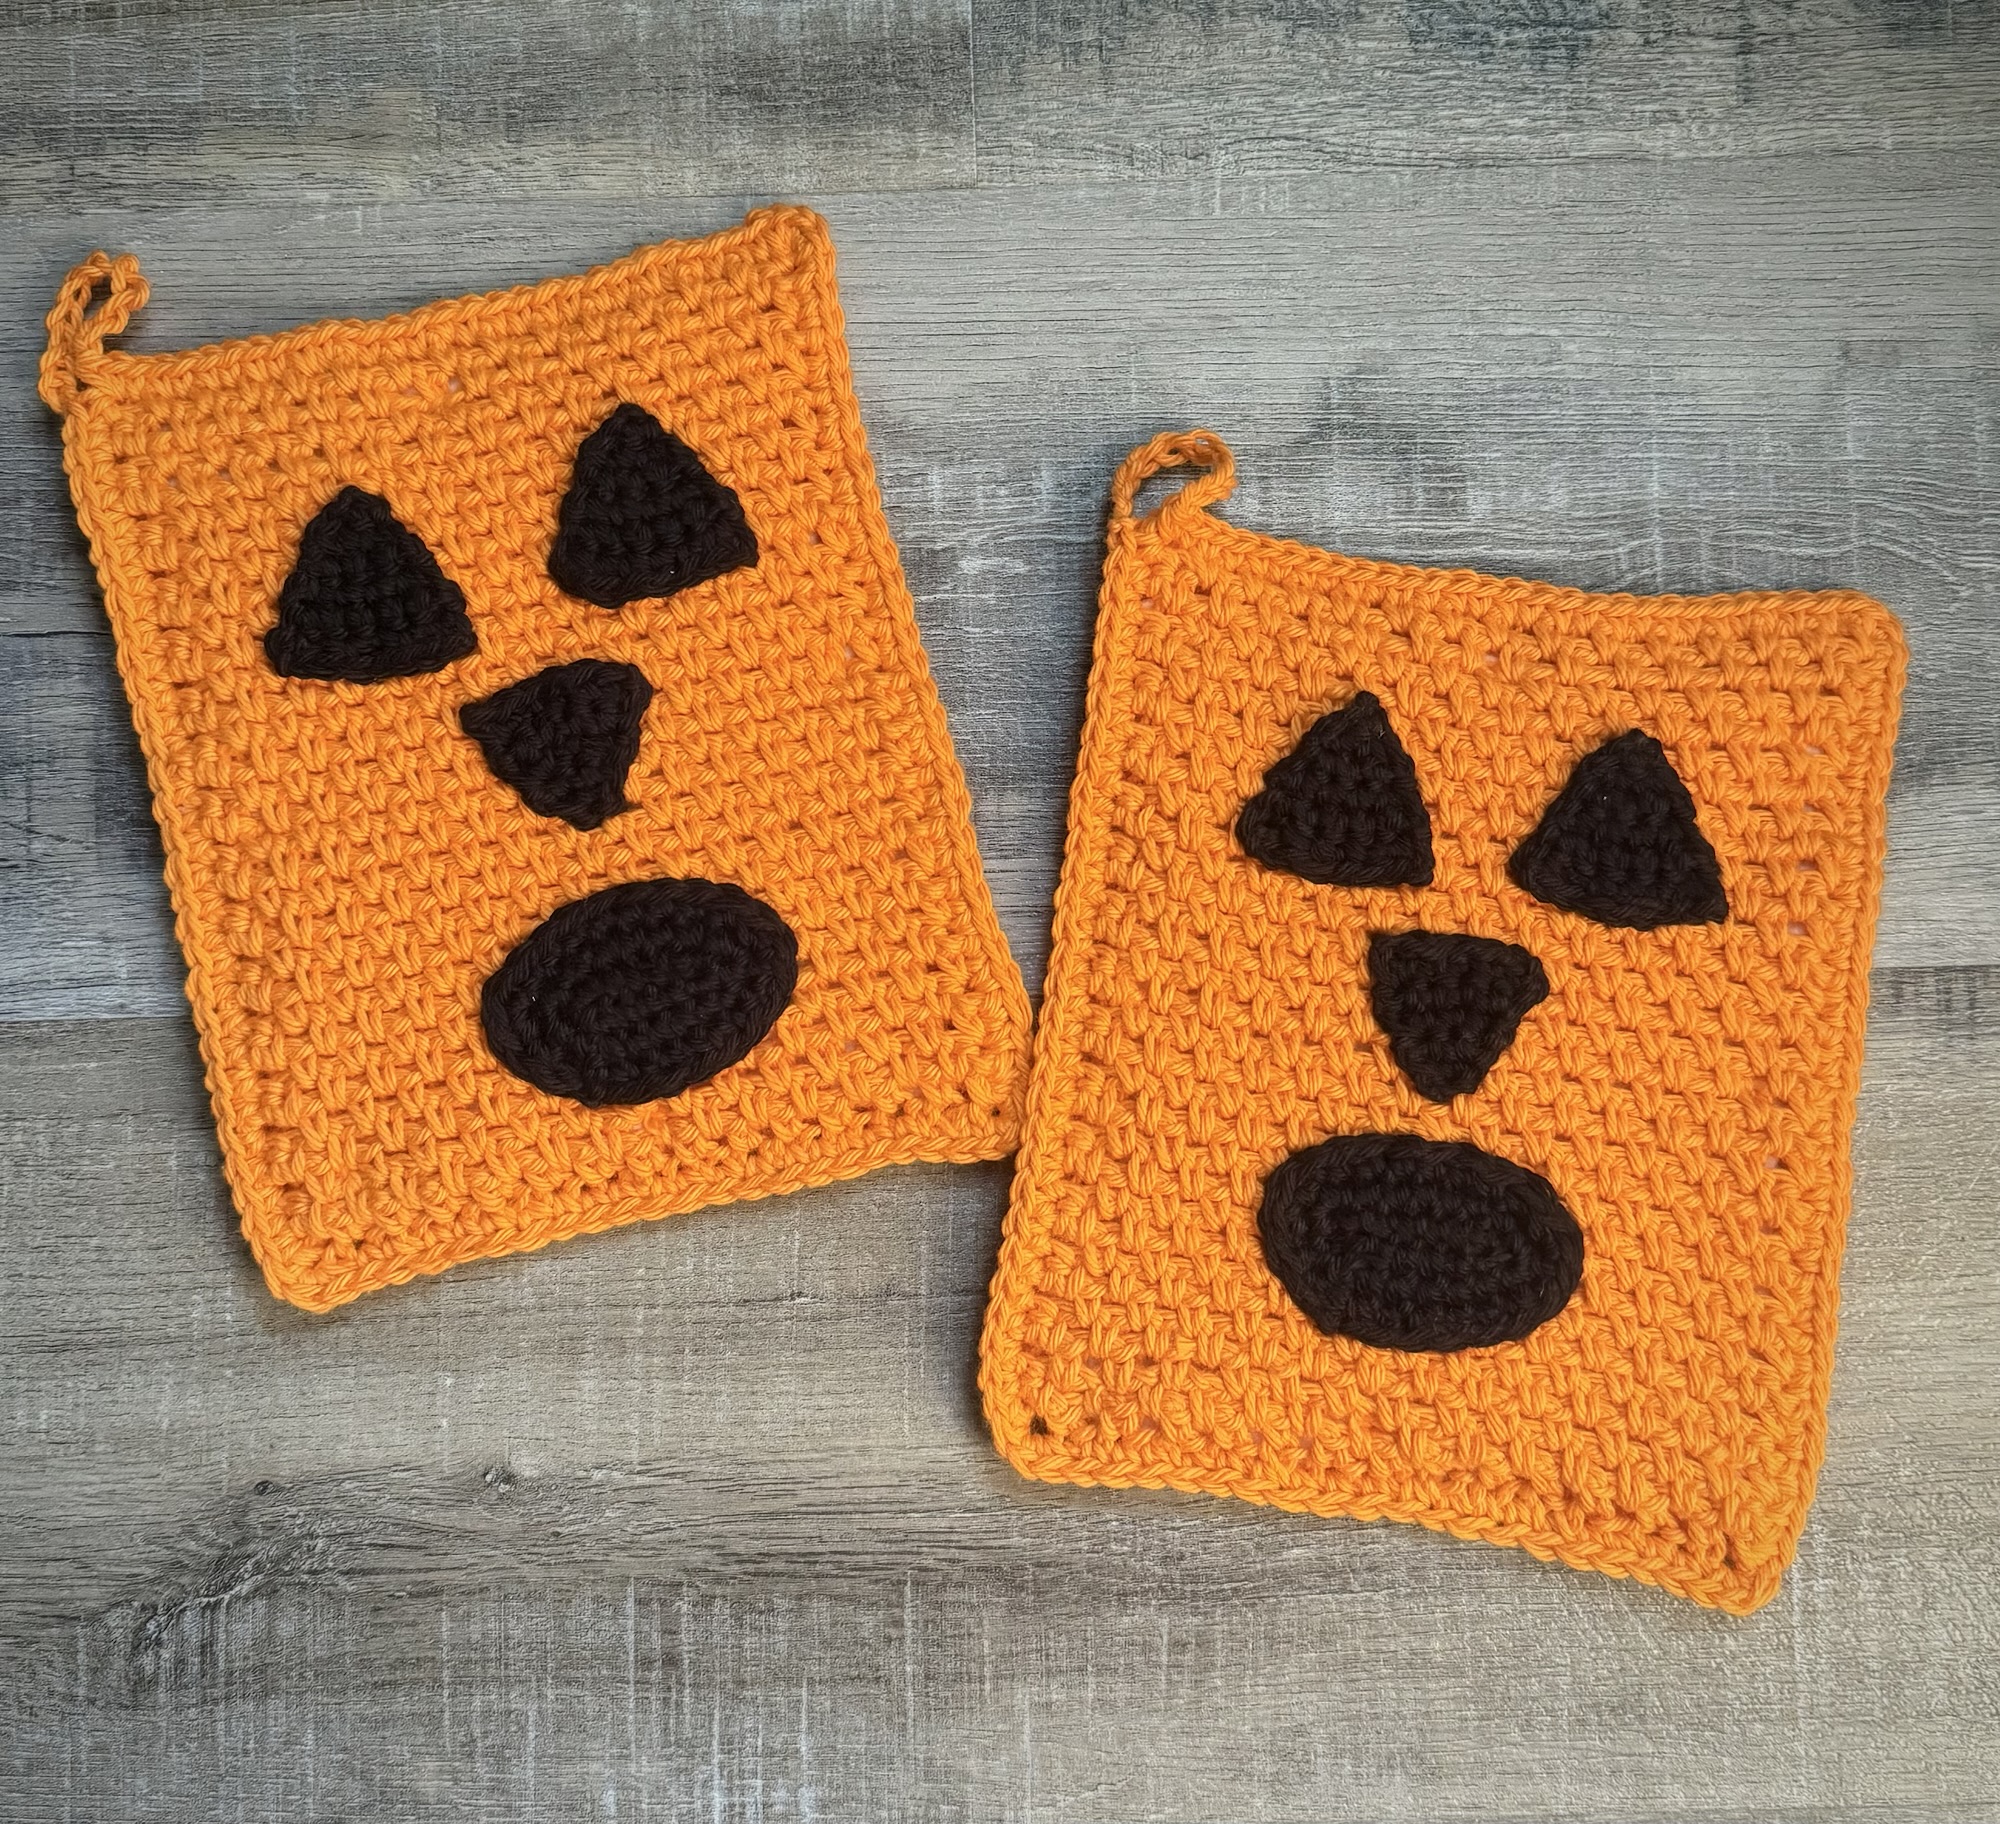
Did you see my cute Crochet Ghost Potholder in this post? 👻 Well, I decided he needed a friend so I created this fun Crochet Jack-O-Lantern Potholder. 🎃
Disclosure: Some of the links on my site are affiliate links, meaning, at no additional cost to you, I will earn a small commission if you click through and make a purchase. As an Amazon Associate I earn from qualifying purchases.
I stitched up my potholder using I Love This Cotton yarn in Glowing and Black with an H/5mm crochet hook. You can find the pattern below along with links to free PDFs – one with photos and one without – if you’d like to easily print the pattern.
Crochet Jack-O-Lantern Potholder
Worsted Weight Cotton Yarn – I used I Love This Cotton in Glowing and Black
100% cotton batting
H/5mm crochet hook
Stitches used in US terms:
Chain – ch
Single Crochet – sc
Magic Ring
Slip Stitch – ss
Potholder – Make 2
Chain 30 with Glowing
Row 1: sc in 2nd ch from hook. *ch 1 skip next ch, sc in next ch * Repeat from * to * across. Turn. (29 stitches)
Row 2: ch 1. sc in 1st stitch, sc in ch 1 space. *ch 1, skip next stitch , sc in next ch 1 space.* Repeat from * to * across to last stitch. sc in last stitch. Turn. (29 stitches)
Row 3: ch 1. sc in 1st stitch, *ch 1, skip next stitch, sc in next ch 1 space.* Repeat from * to * across to last 2 stitches. ch 1, skip next stitch, sc in last stitch. Turn. (29 stitches)
Rows 4-31: Repeat Rows 2 and 3 (14) times.
Fasten off and weave in ends.
To make the face:
Eyes – Make 2
Chain 2 with Black.
Row 1: work 2 sc in 2nd ch from hook. Turn. (2 stitches)
Row 2: ch 1. sc in first stitch, 2 sc in next stitch. Turn. (3 stitches)
Row 3: ch 1. sc in first 2 stitches. 2 sc in last stitch. Turn. (4 stitches)
Row 4: ch 1. sc in 3 stitches, 2 sc in last stitch. Turn. (5 stitches)
Row 5: ch 1. sc in 4 stitches, 2 sc in last stitch. Turn. (6 stitches)
Row 6: ch 1. sc in 5 stitches, 2 sc in last stitch. (7 stitches)
Fasten off leaving a long tail for sewing.
Nose – Make 1
Chain 2 with Black.
Row 1: work 2 sc in 2nd ch from hook. Turn. (2 stitches)
Row 2: ch 1. sc in first stitch, 2 sc in next stitch. Turn. (3 stitches)
Row 3: ch 1. sc in first 2 stitches. 2 sc in last stitch. Turn. (4 stitches)
Row 4: ch 1. sc in 3 stitches, 2 sc in last stitch. Turn. (5 stitches)
Row 5: ch 1. sc in 4 stitches, 2 sc in last stitch. Turn. (6 stitches)
Fasten off leaving a long tail for sewing.
Mouth – Make 1
Round 1: ch 6 with black. sc in 2nd ch from hook and next 3 ch. Work 3 sc in next stitch. Working in the opposite side of the chain, sc in next 4 stitches. Work 3 sc in next stitch. Join with ss to first sc. (14 stitches)
Round 2: ch 1. sc in same stitch as ss and next 4 stitches. Work 3 sc in next stitch. sc in next 6 stitches. Work 3 sc in next stitch. sc in last stitch. Join with ss to first sc. (18 stitches)
Round 3: ch 1. sc in same stitch as ss and next 6 stitches. Work 3 sc in next stitch. sc in next 8 stitches. Work 3 sc in next stitch. sc in next 2 stitches. (22 stitches)
Fasten off leaving a long tail for sewing.
Sew eyes, nose, and mouth onto one of the potholders.
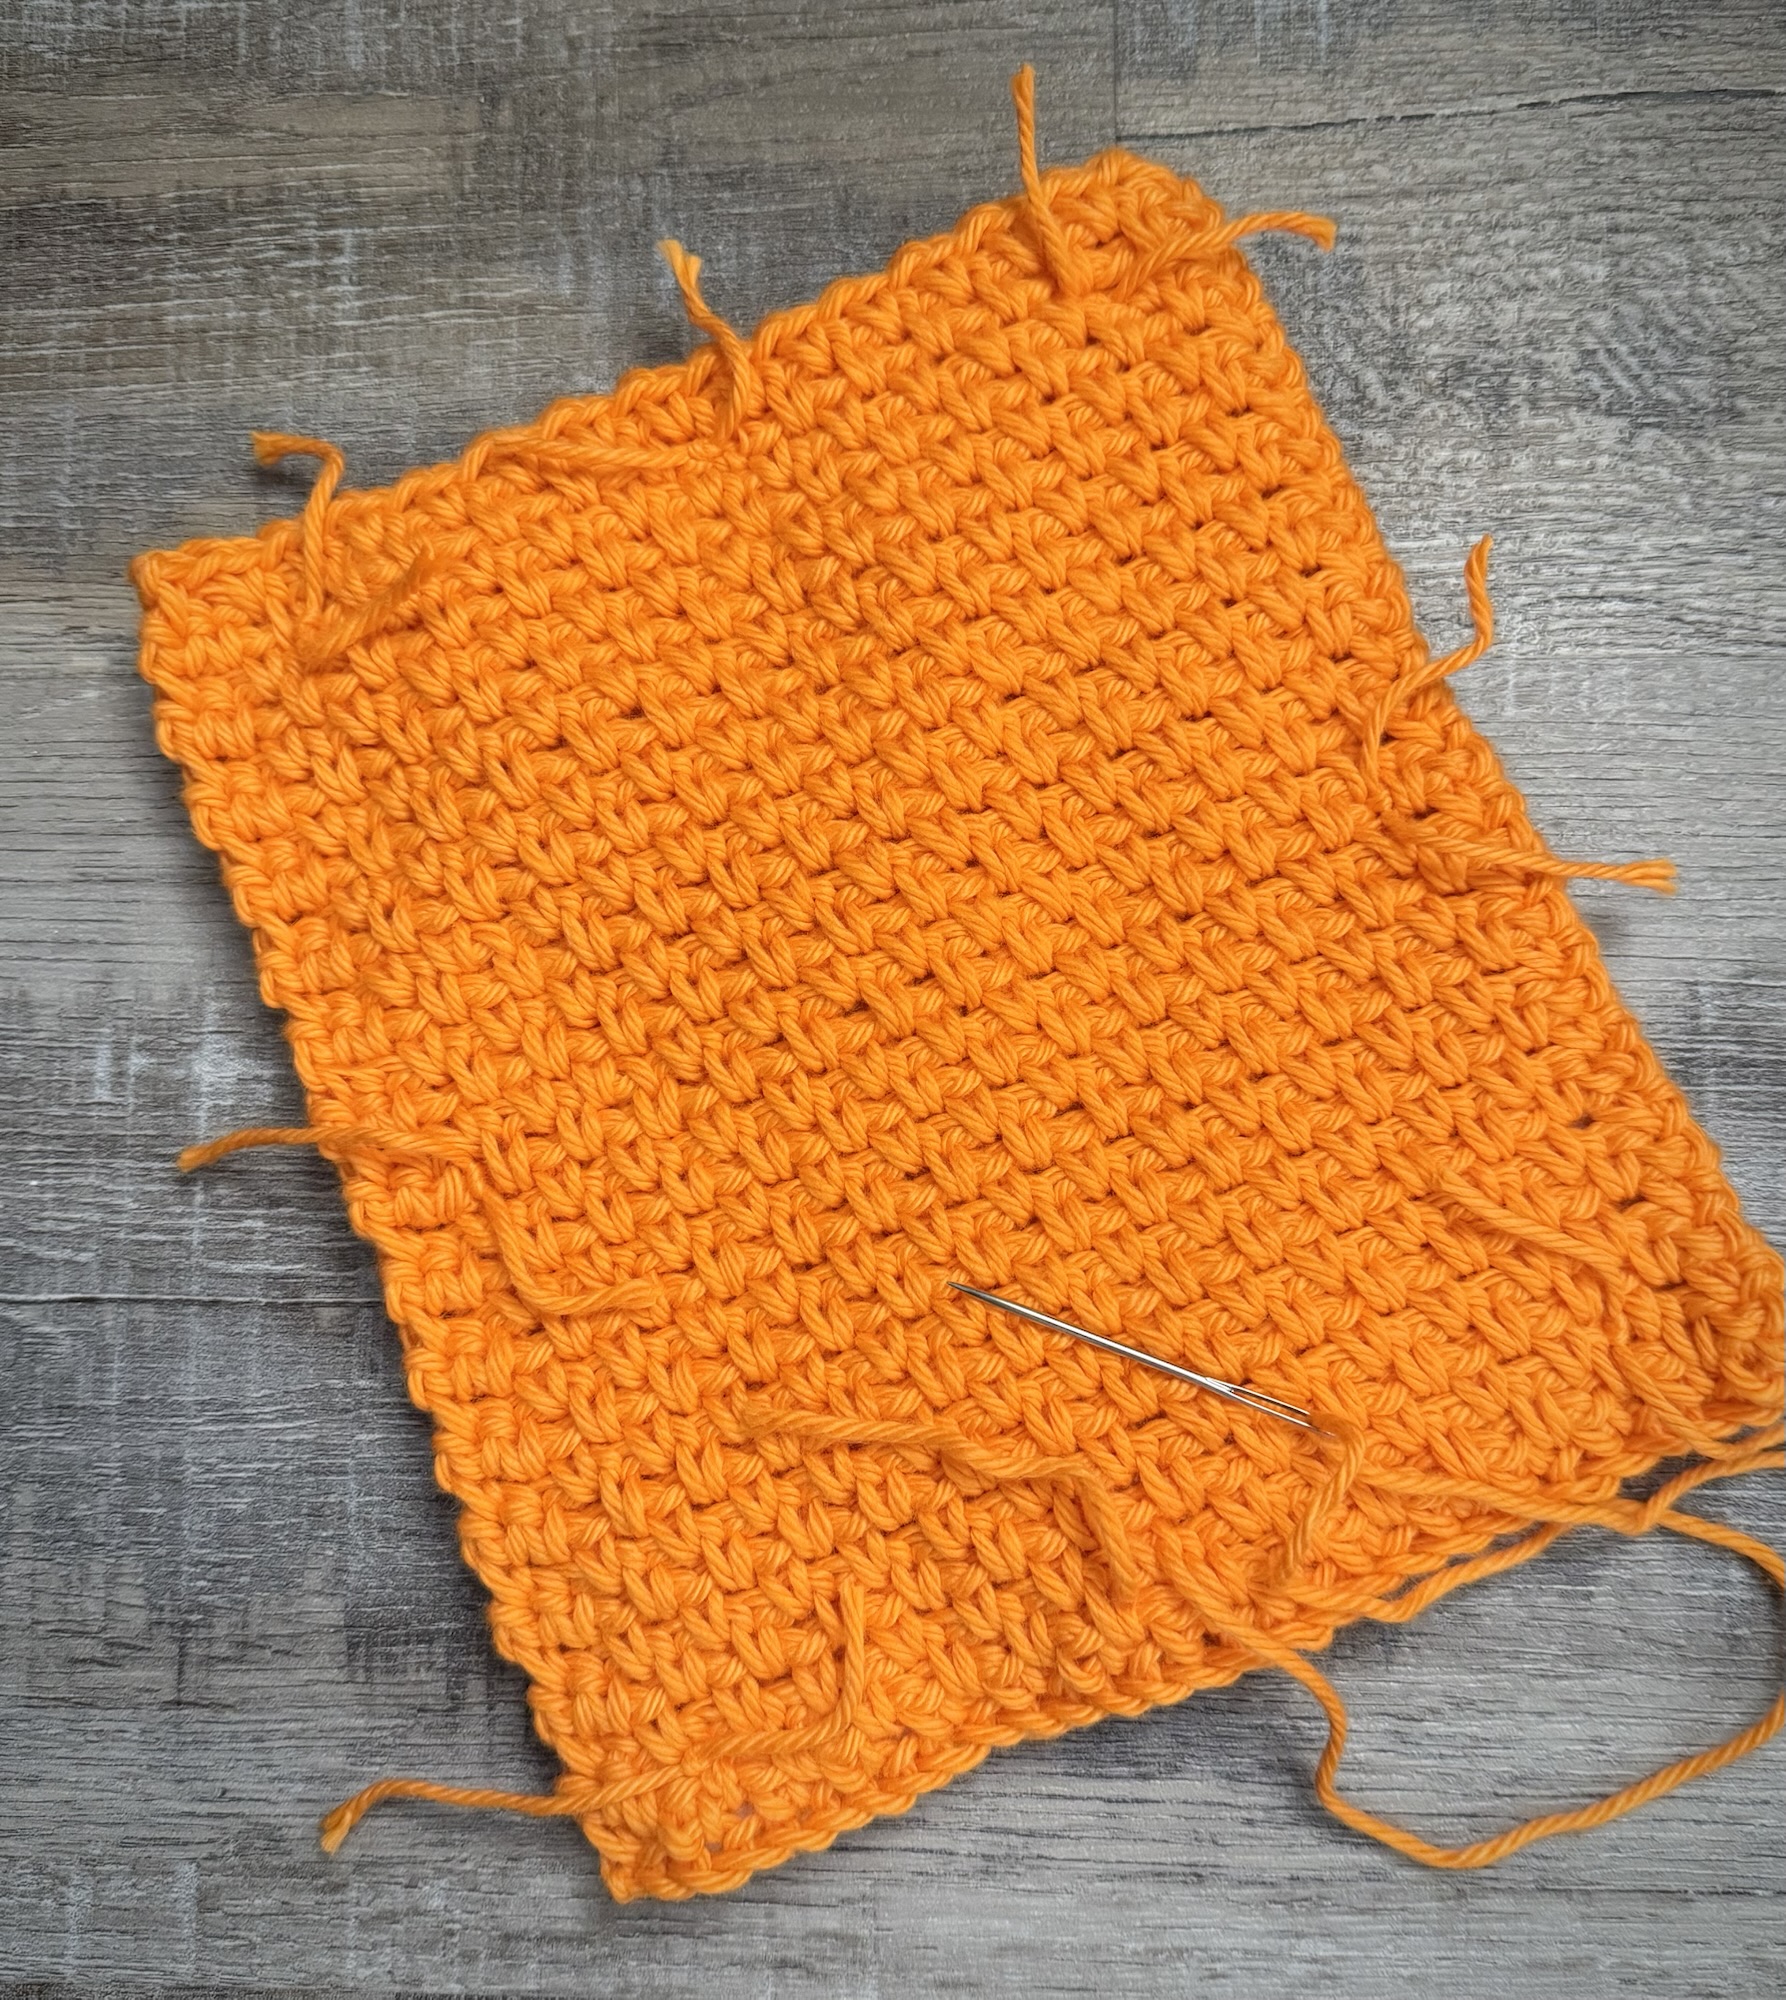
Cut a piece of batting slightly smaller than the potholder. Layer onto the bottom potholder and place the piece with the face on top. Pin to hold in place.
Using orange yarn, tack the corners and the center of each side together through all 3 layers. Using your crochet hook, pull the yarn ends through so they are hidden between the potholder and the batting.
Border: with right side facing you (face side), attach orange yarn in bottom right corner. sc around the potholder through both layers, working 3 sc in each corner.
If you want a hanging loop:
When you get to the top left corner, sc 2 in same stitch, ch 12, sc in same stitch to make the 3rd corner stitch. Continue the sc border around to first sc. Join with ss to first sc.
Fasten off and weave in ends.
Finished Jack-O-Lantern Potholder measures about 7 by 8 inches.
Disclosure: Some of the links on my site are affiliate links, meaning, at no additional cost to you, I will earn a small commission if you click through and make a purchase. As an Amazon Associate I earn from qualifying purchases.
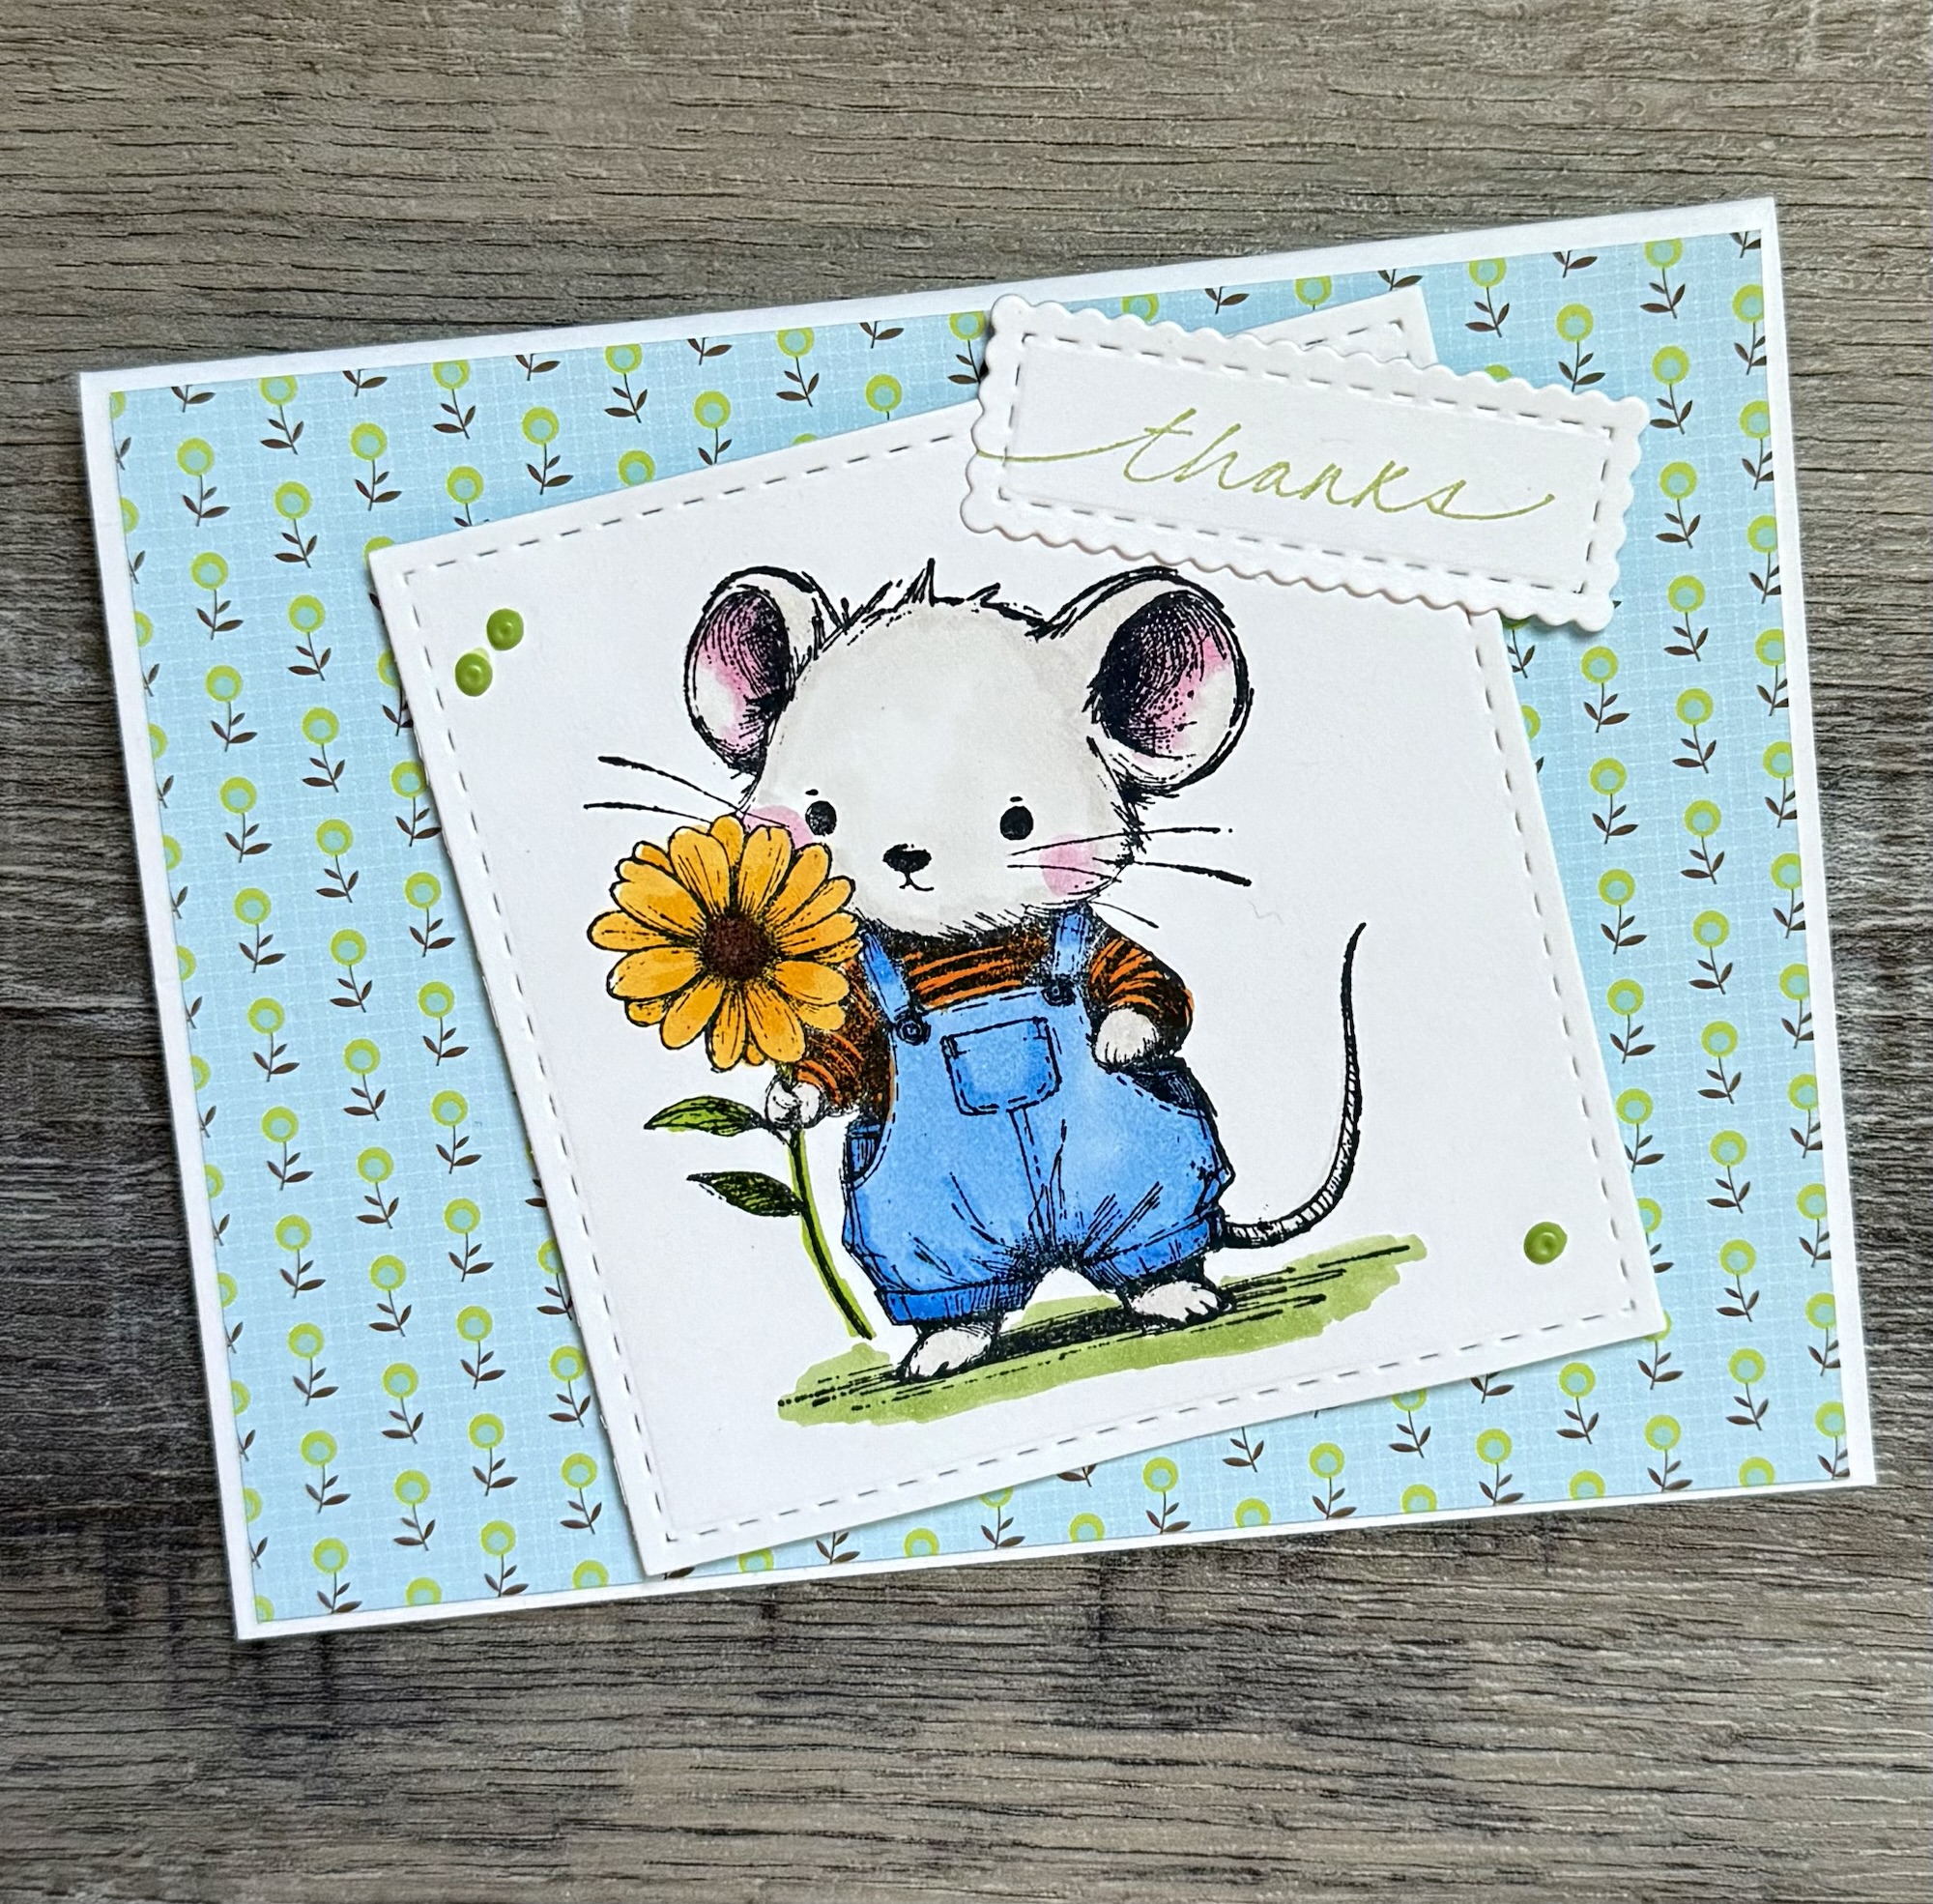
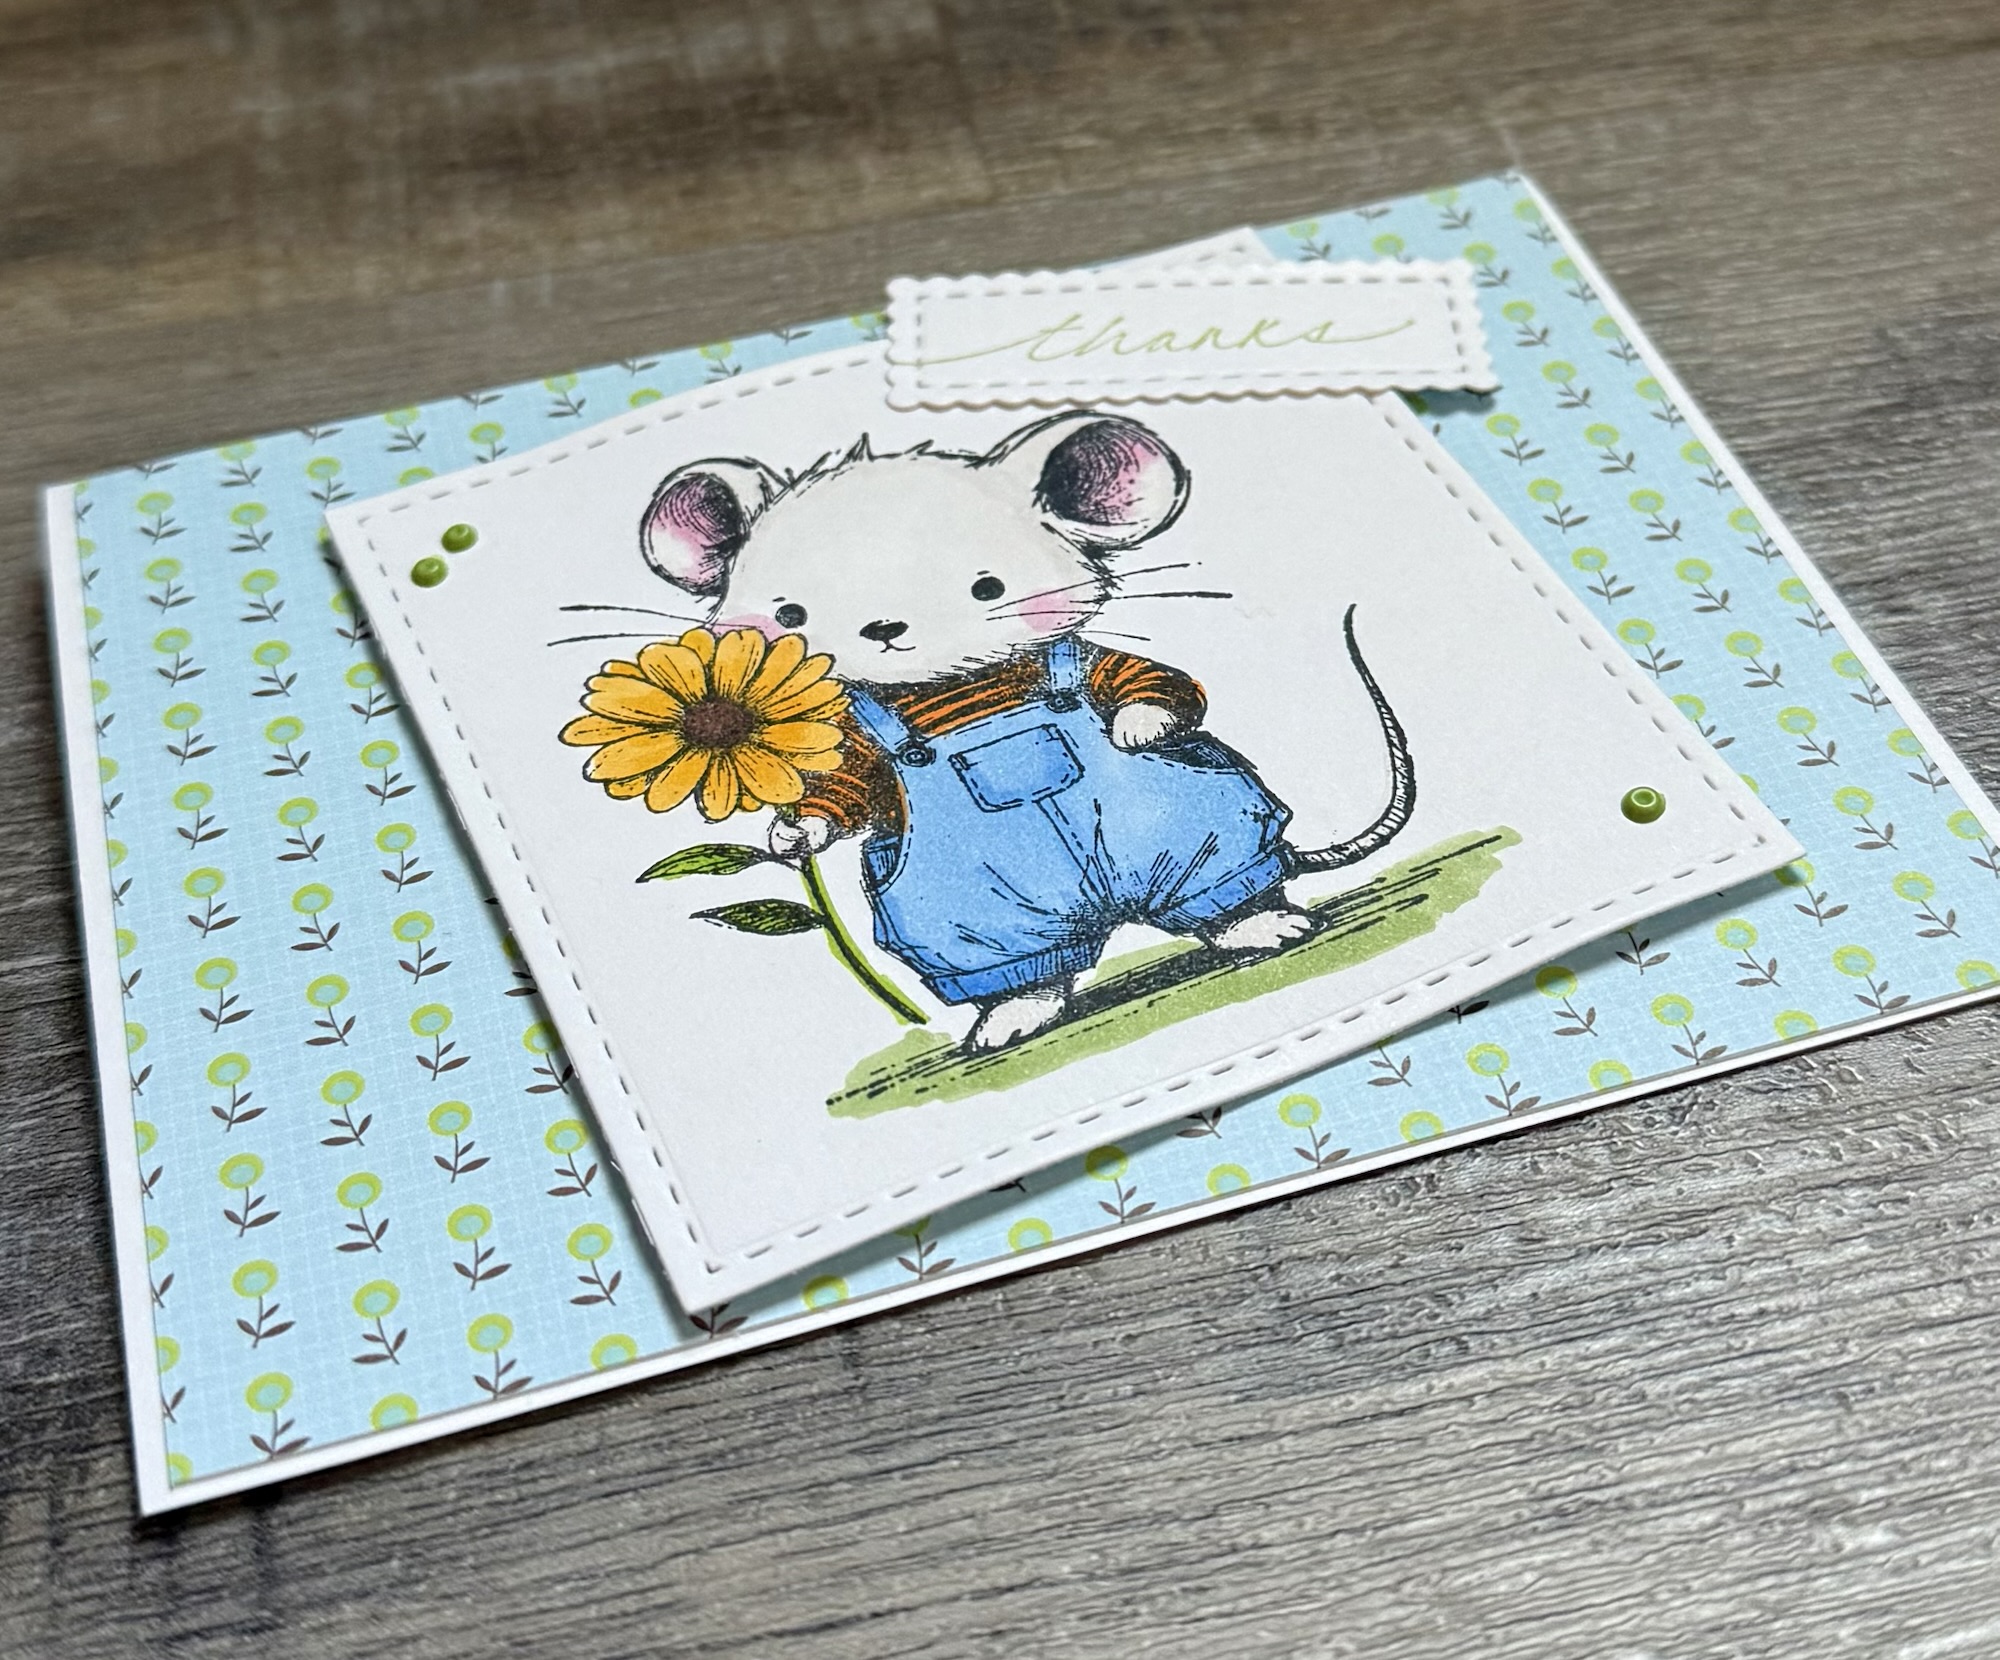
I stamped the sentiment with light green ink on white card stock and cut around it using these Scalloped & Stitched Sentiment Nesting Dies. The sentiment is a stamp I’ve had in my collection for years – use your favorite from your collection.
To make the card, I attached a piece of patterned paper to a white card. The mouse image is attached at an angle using foam tape and the sentiment is attached to the upper right corner.
To finish it off, I added three drops of Nuvo Drops in Pioneer Green to the card. You could also substitute green enamel dots.
This sweet little guy would also make a cute birthday or thinking of you card.
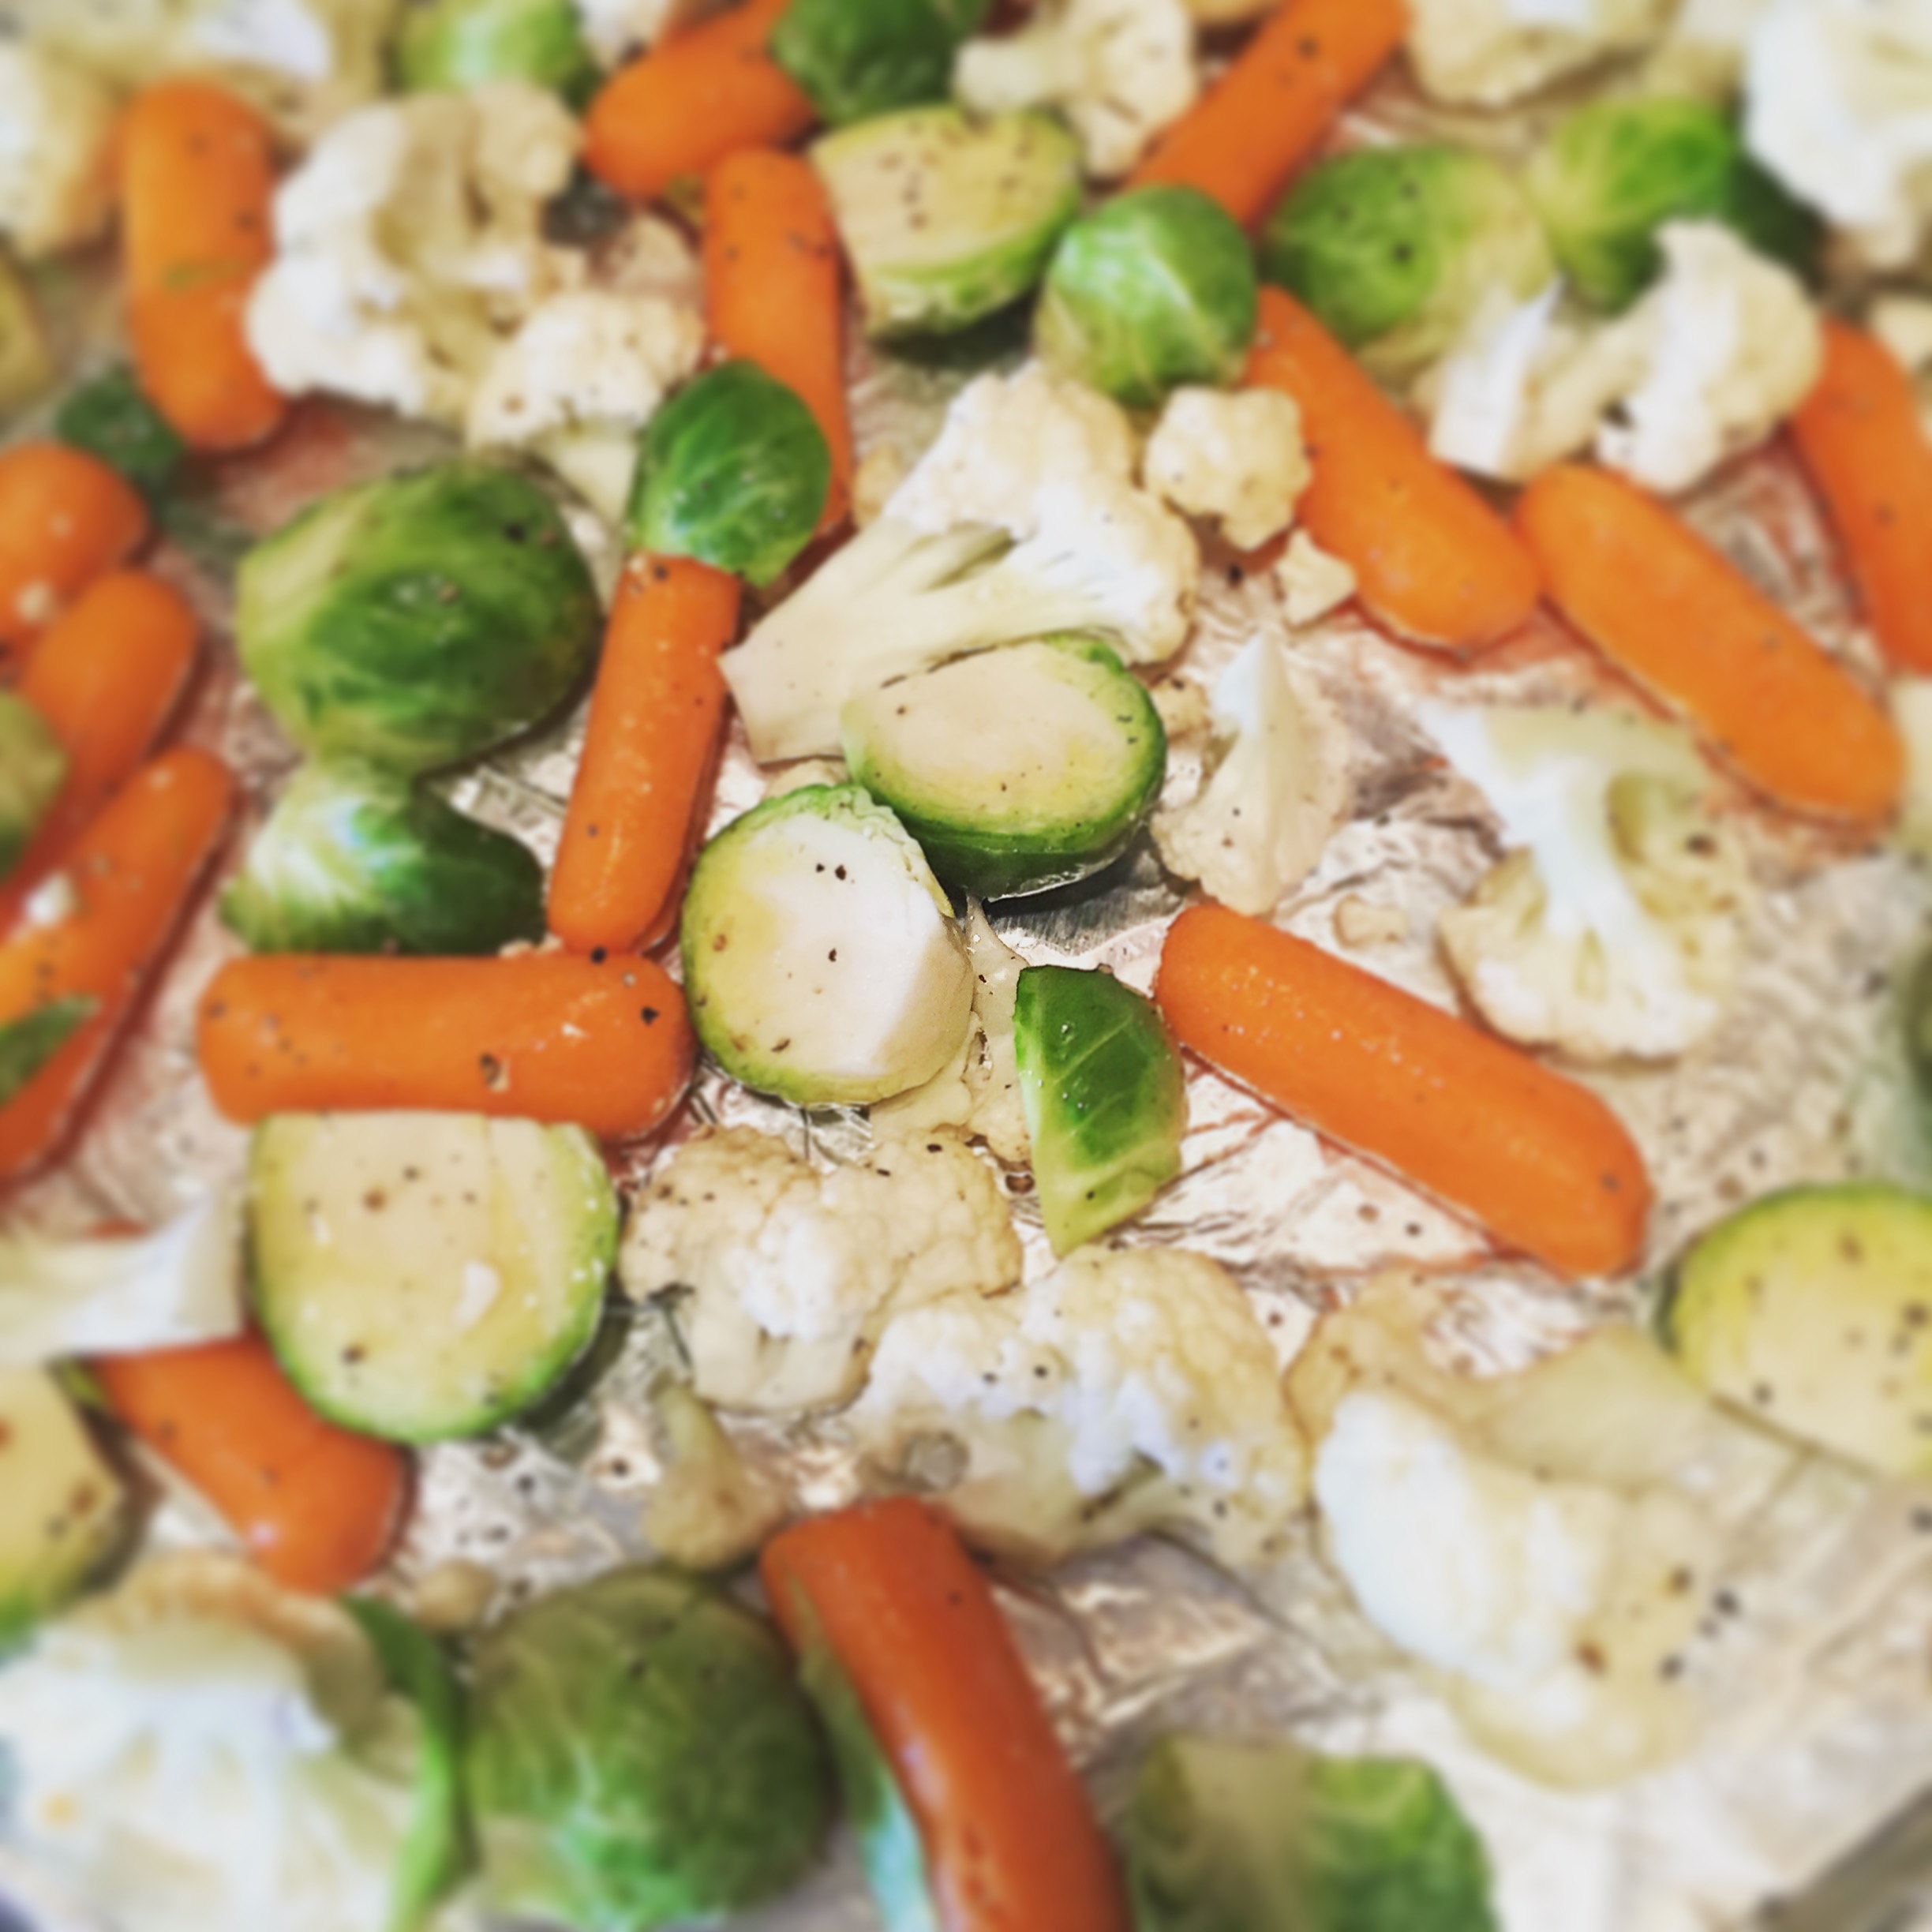
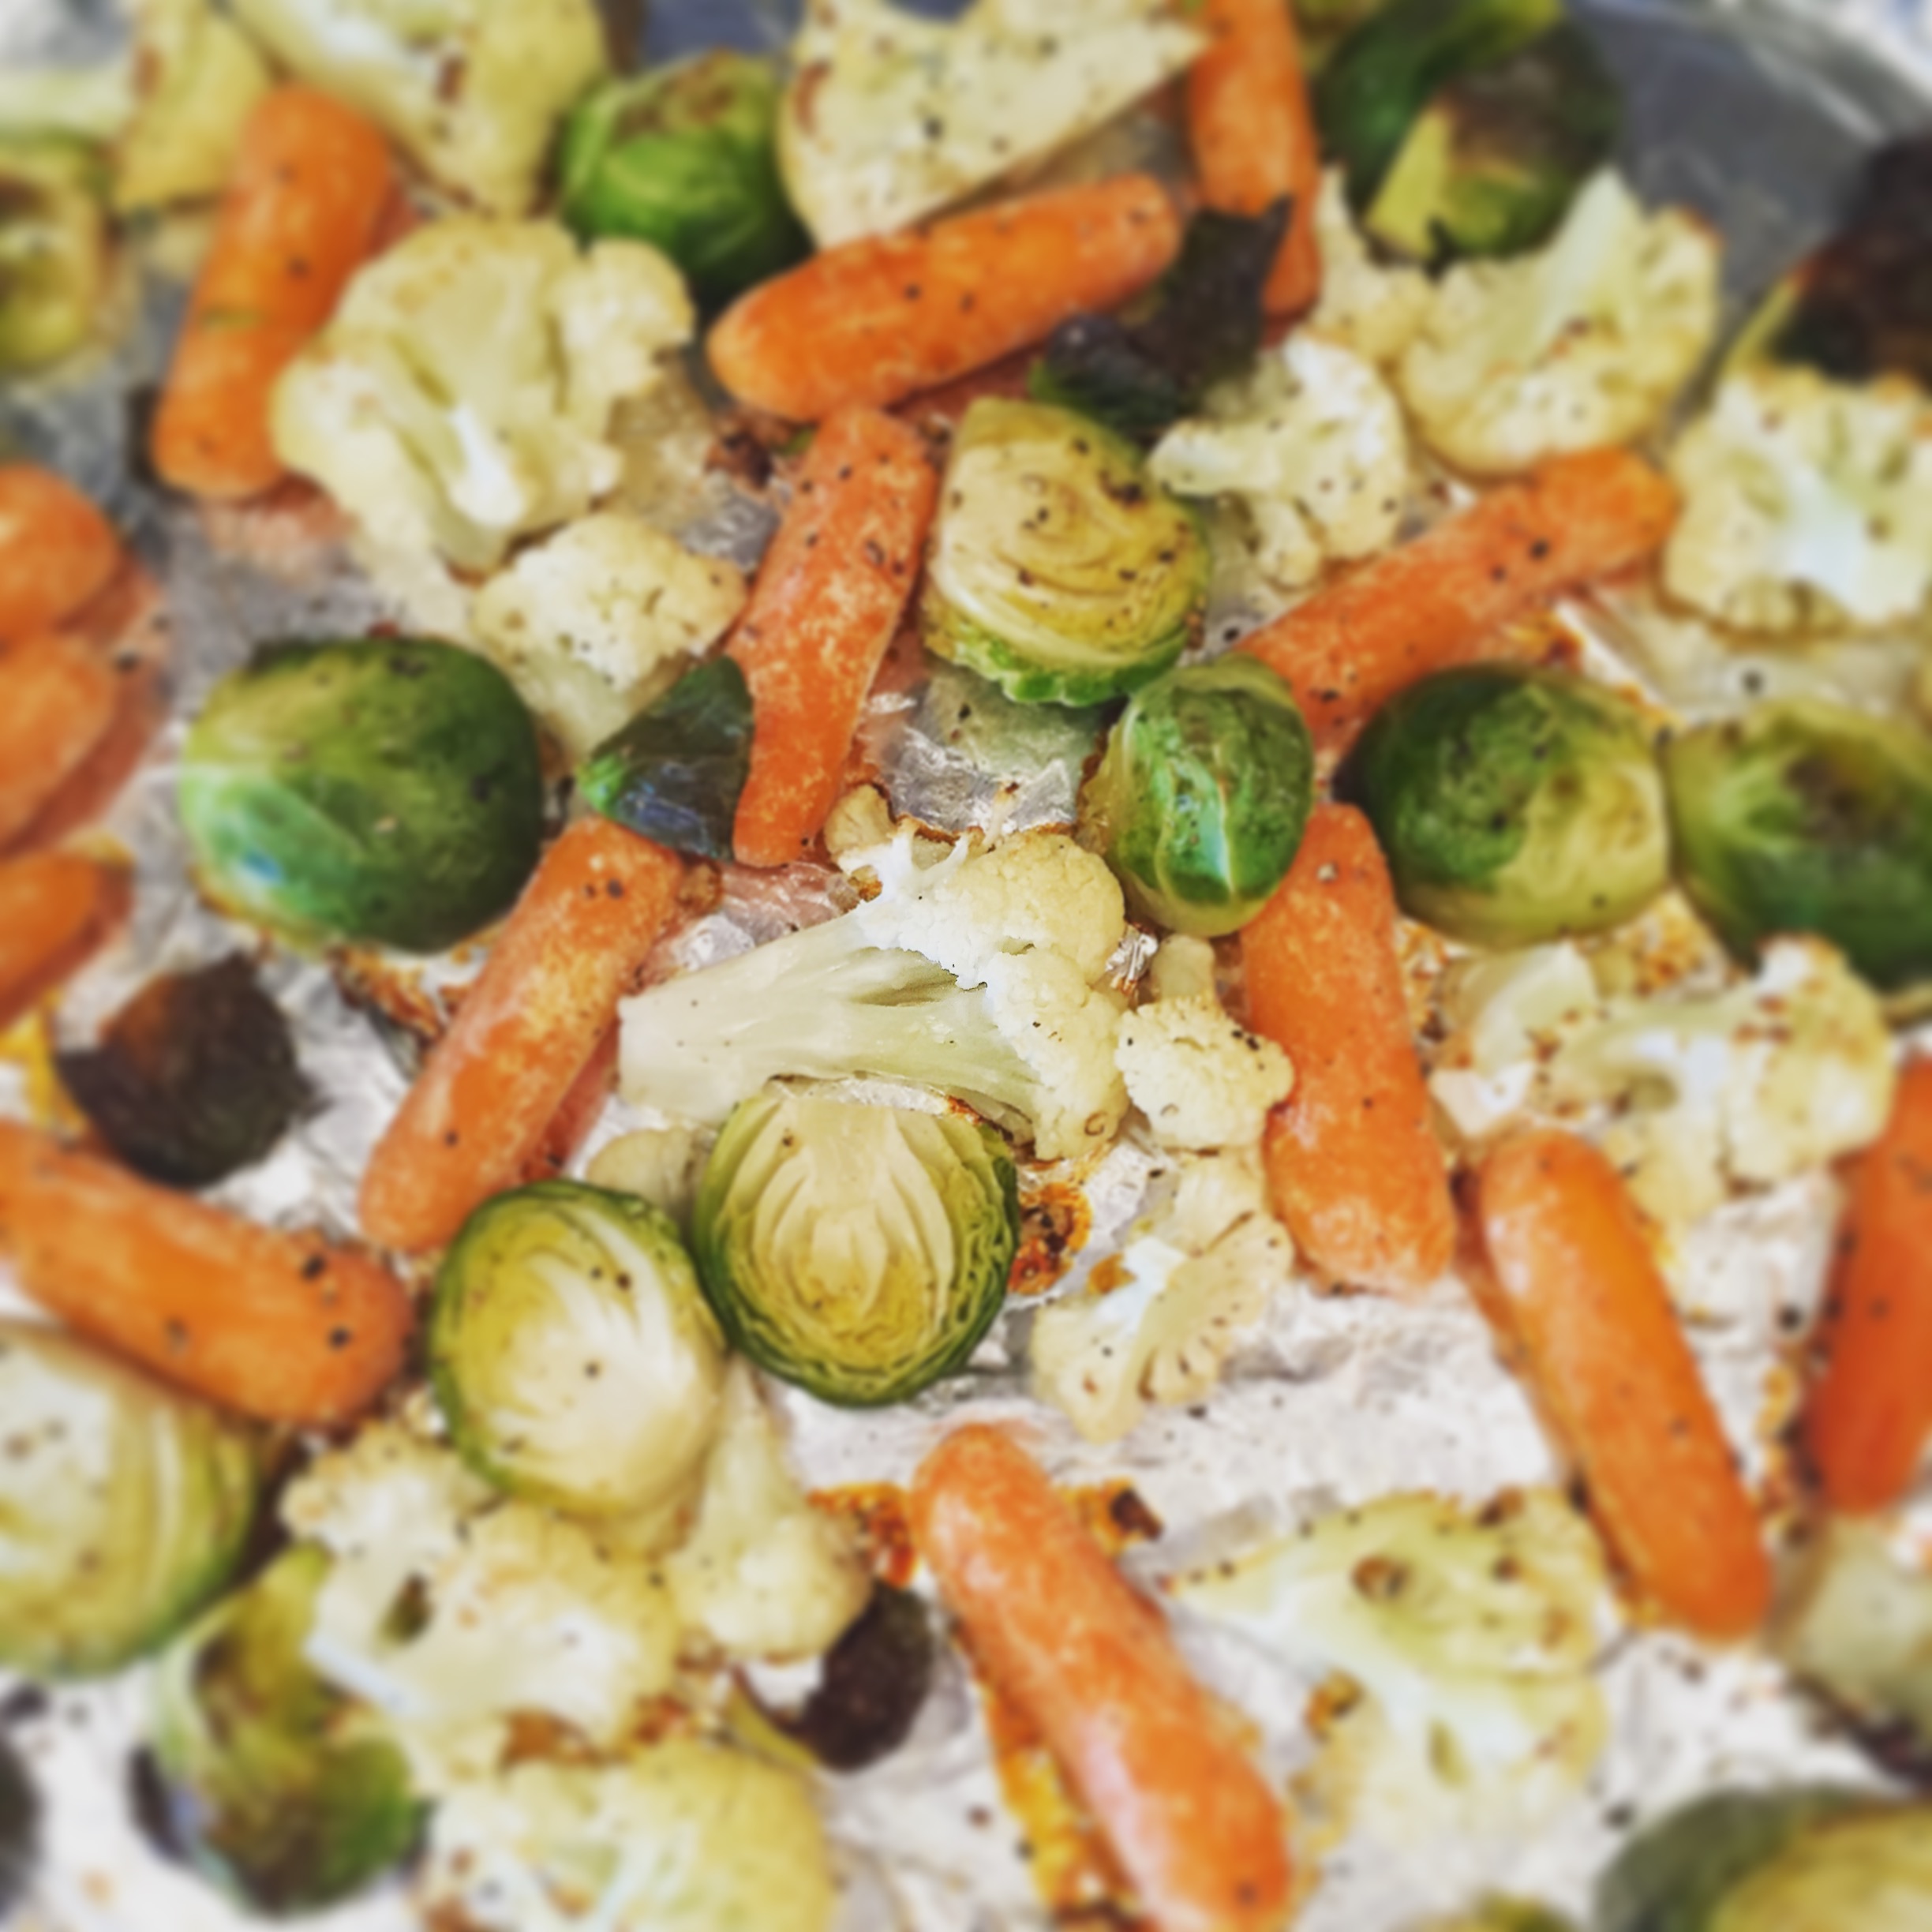
It’s starting to feel a little like Fall here in Alabama. 🍁🍂🍁 One of my favorite Fall (or anytime) side dishes is Maple Roasted Veggies and they are so easy to make! I used carrots, cauliflower, and Brussels sprouts, but go ahead and use your favorite vegetables – broccoli is great roasted this way.
Disclosure: Some of the links on my site are affiliate links, meaning, at no additional cost to you, I will earn a small commission if you click through and make a purchase. As an Amazon Associate I earn from qualifying purchases.
Prepare your vegetables by rinsing and cutting them into bite-size pieces. I cut the ends off the Brussels sprouts and then sliced them in half, cut the cauliflower into florets, and used baby carrots. Put your vegetables into a large bowl. Spray with olive oil spray and sprinkle with salt and pepper. Mix well – you may have to spray with olive oil spray another time or two to make sure all the vegetables get a light coating. Then drizzle with a tablespoon or two of maple syrup and toss to coat. I didn’t measure the syrup so I’m not exactly sure how much I used – just enough to coat the vegetables.
Line a baking pan with aluminum foil and spray with olive oil spray. Spread your prepared vegetables in a single layer on the pan. Bake at 420 degrees for about 20 minutes until tender.
Here’s the before…
And here are the veggies in all their maple-y goodness…😋
This is such an easy side dish to make with any weekday meal – it may become a family favorite!
Disclosure: Some of the links on my site are affiliate links, meaning, at no additional cost to you, I will earn a small commission if you click through and make a purchase. As an Amazon Associate I earn from qualifying purchases.