Hi friends,
Did you know that you can make Gnome Christmas Ornaments using wood Halloween cutouts from Dollar Tree? They are so easy to make!🎄
Disclosure: Some of the links on my site are affiliate links, meaning, at no additional cost to you, I will earn a small commission if you click through and make a purchase. As an Amazon Associate I earn from qualifying purchases.
You’ll need the witches hat and ghost wood cutouts along with 1/2 inch split wood balls, some Christmas scrapbook paper, ribbon, and buttons. You’ll also need some white, gray, and pink acrylic paint and Mod Podge.
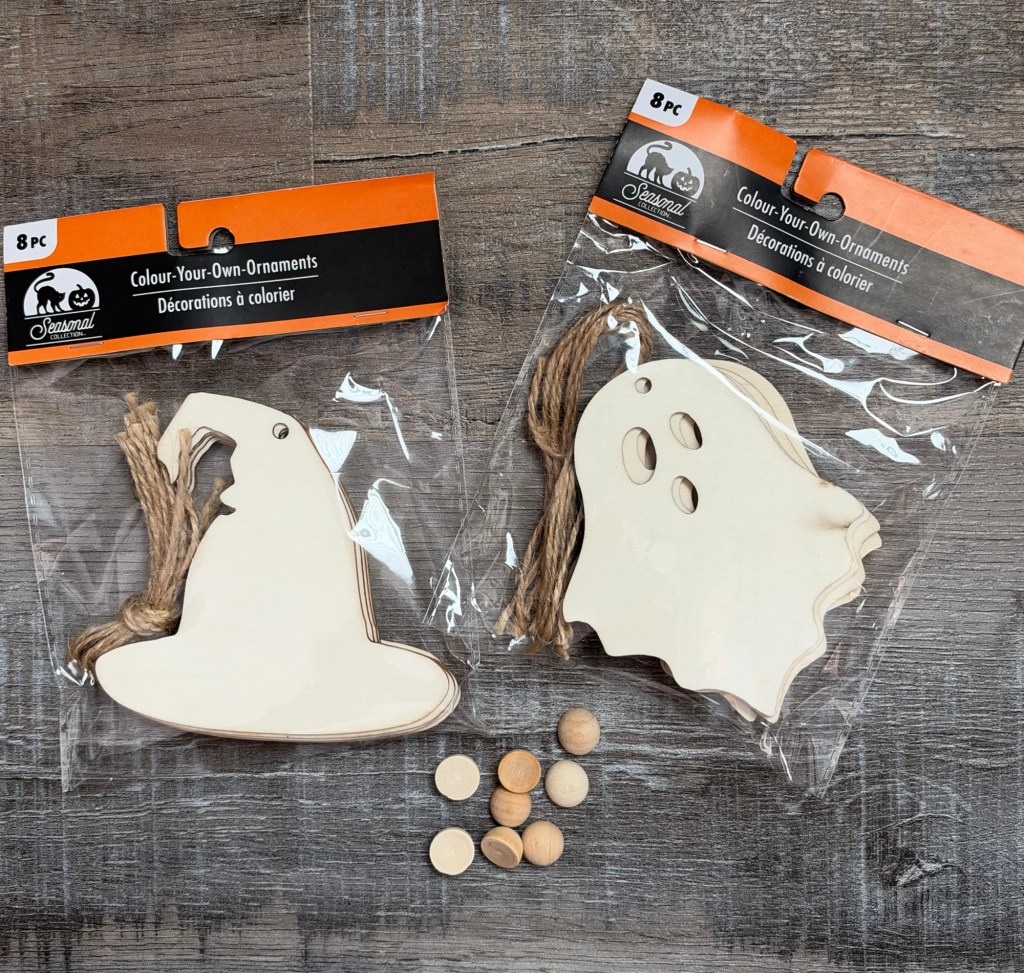
First, paint the hat and ghost with 2 coats of white paint. I painted the backs also to give it a more finished look, but that’s totally optional. Once dry, I used a stiff brush to dry brush a little gray on the “beard” and along the edges. It didn’t show up well in the photos, but it adds a little depth to the beard. Next, paint the split wood balls with pink paint.
Trace the hat on the back of the scrapbook paper and cut out. Apply a thin coat of Mod Podge to the front of the hat and attach the scrapbook paper. Then apply a thin coat of Mod Podge over the top of the paper.
Glue the hat to the ghost, covering up the ghost face. Glue the pink wood ball under the hat for the gnome’s nose. Attach a piece of ribbon to the hat. Tie a button with some natural twine and glue the button over the ribbon. I used E6000 clear adhesive but I think hot glue would work, too.
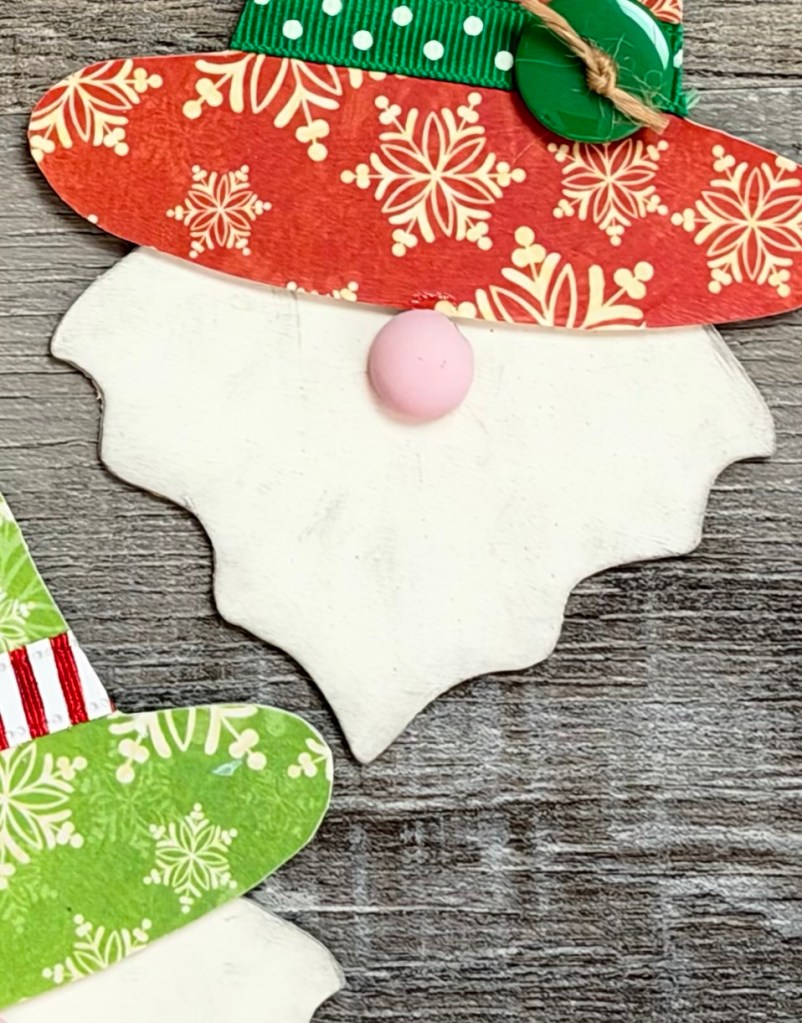
Punch through the paper where the little hole is at the top of the hat. Tie a piece of natural twine through the hole for the hanger.
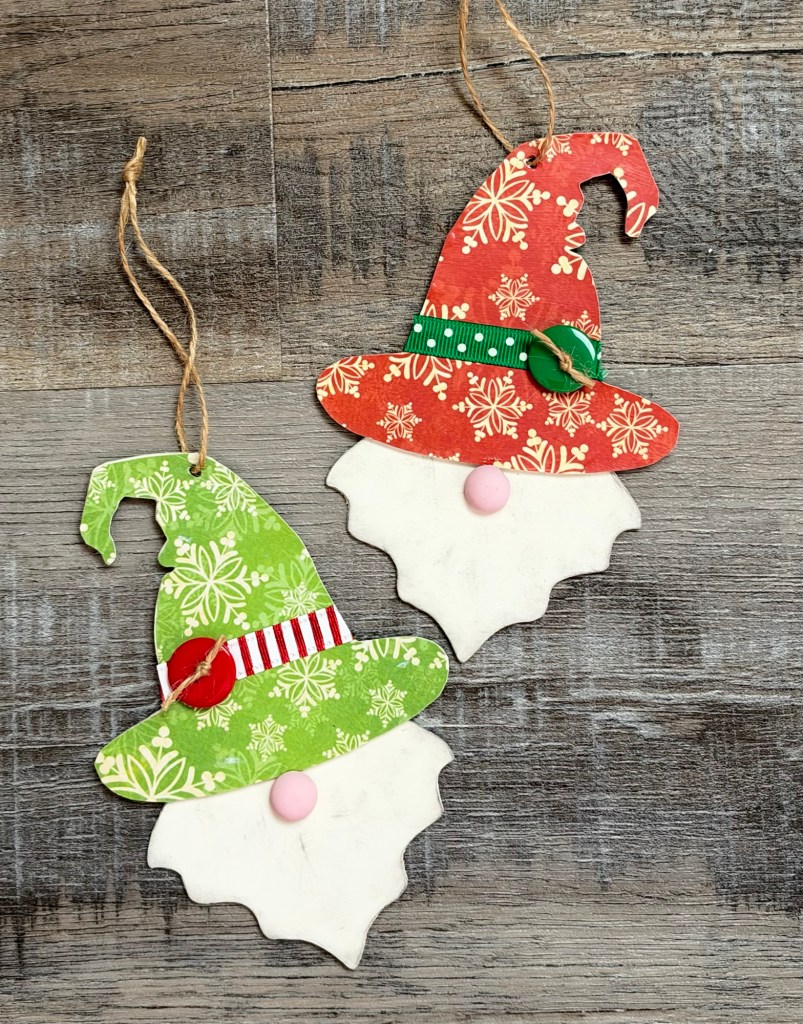
These Gnome Christmas Ornaments are so cute and fun! They will be great on the tree, to decorate a wreath, or as package tie-ons. You can even make them look like Santa with a red hat, some white felt or fuzzy cotton on the brim, and a little white pom pom on the tip of the hat.🎅🏻
Anita