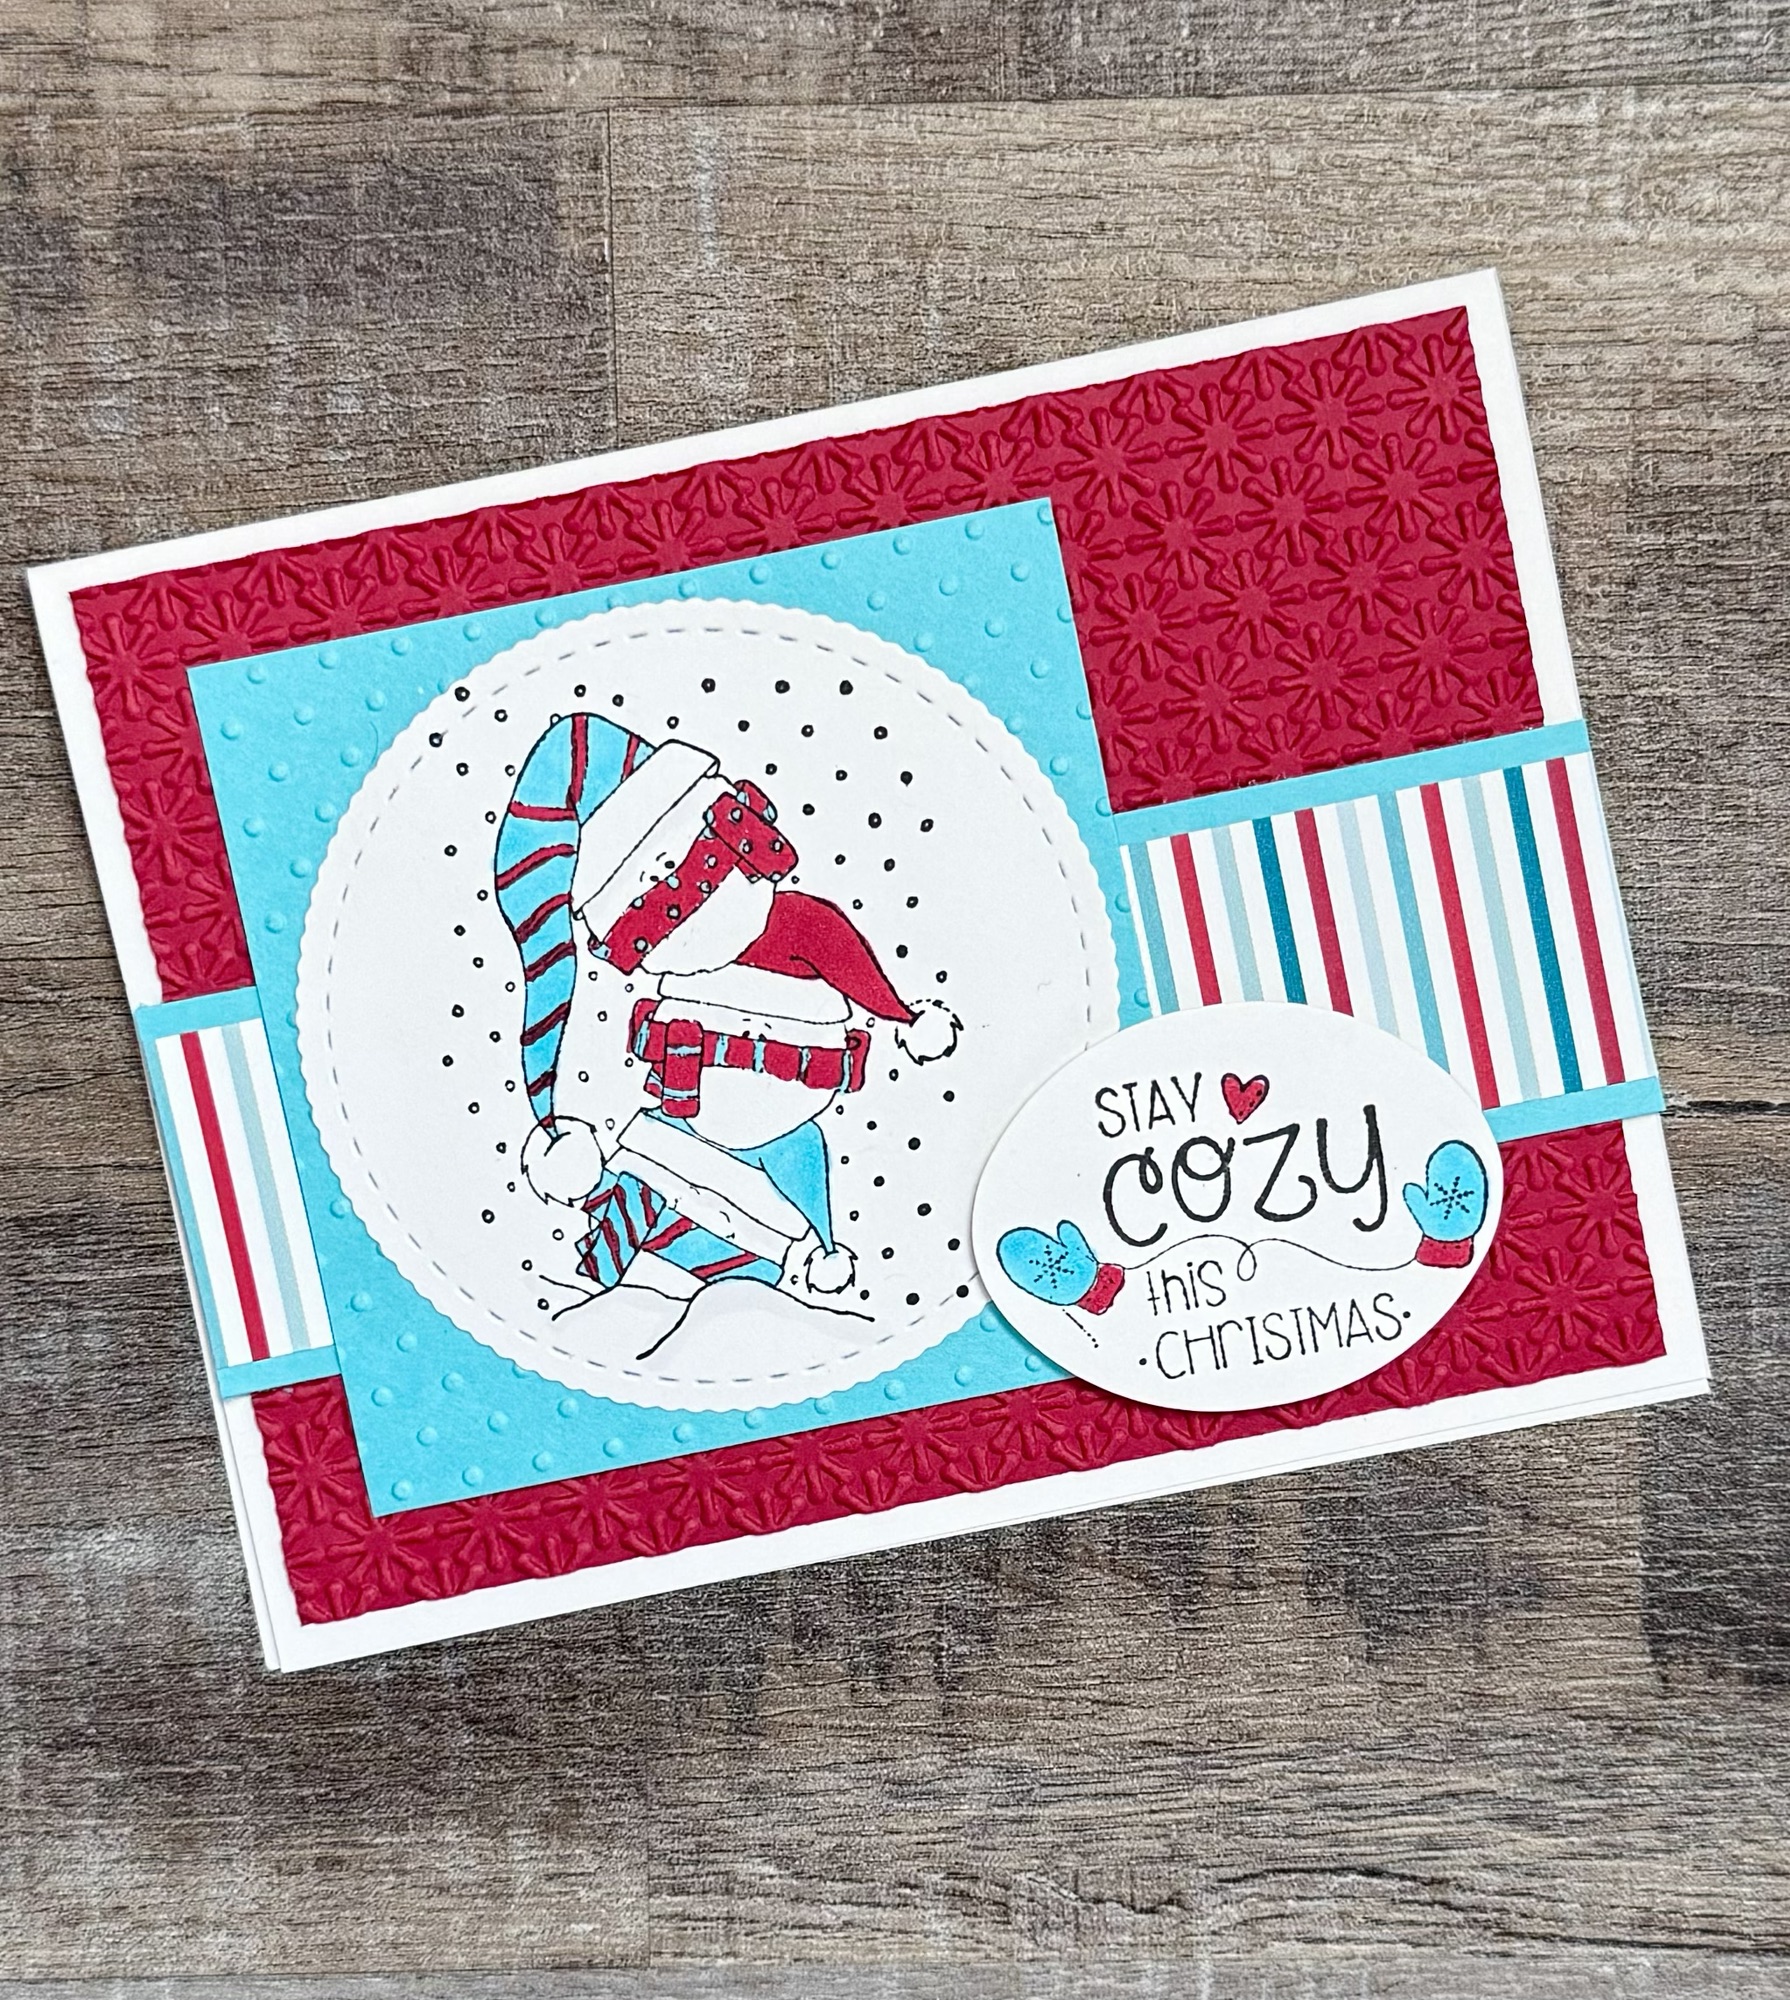
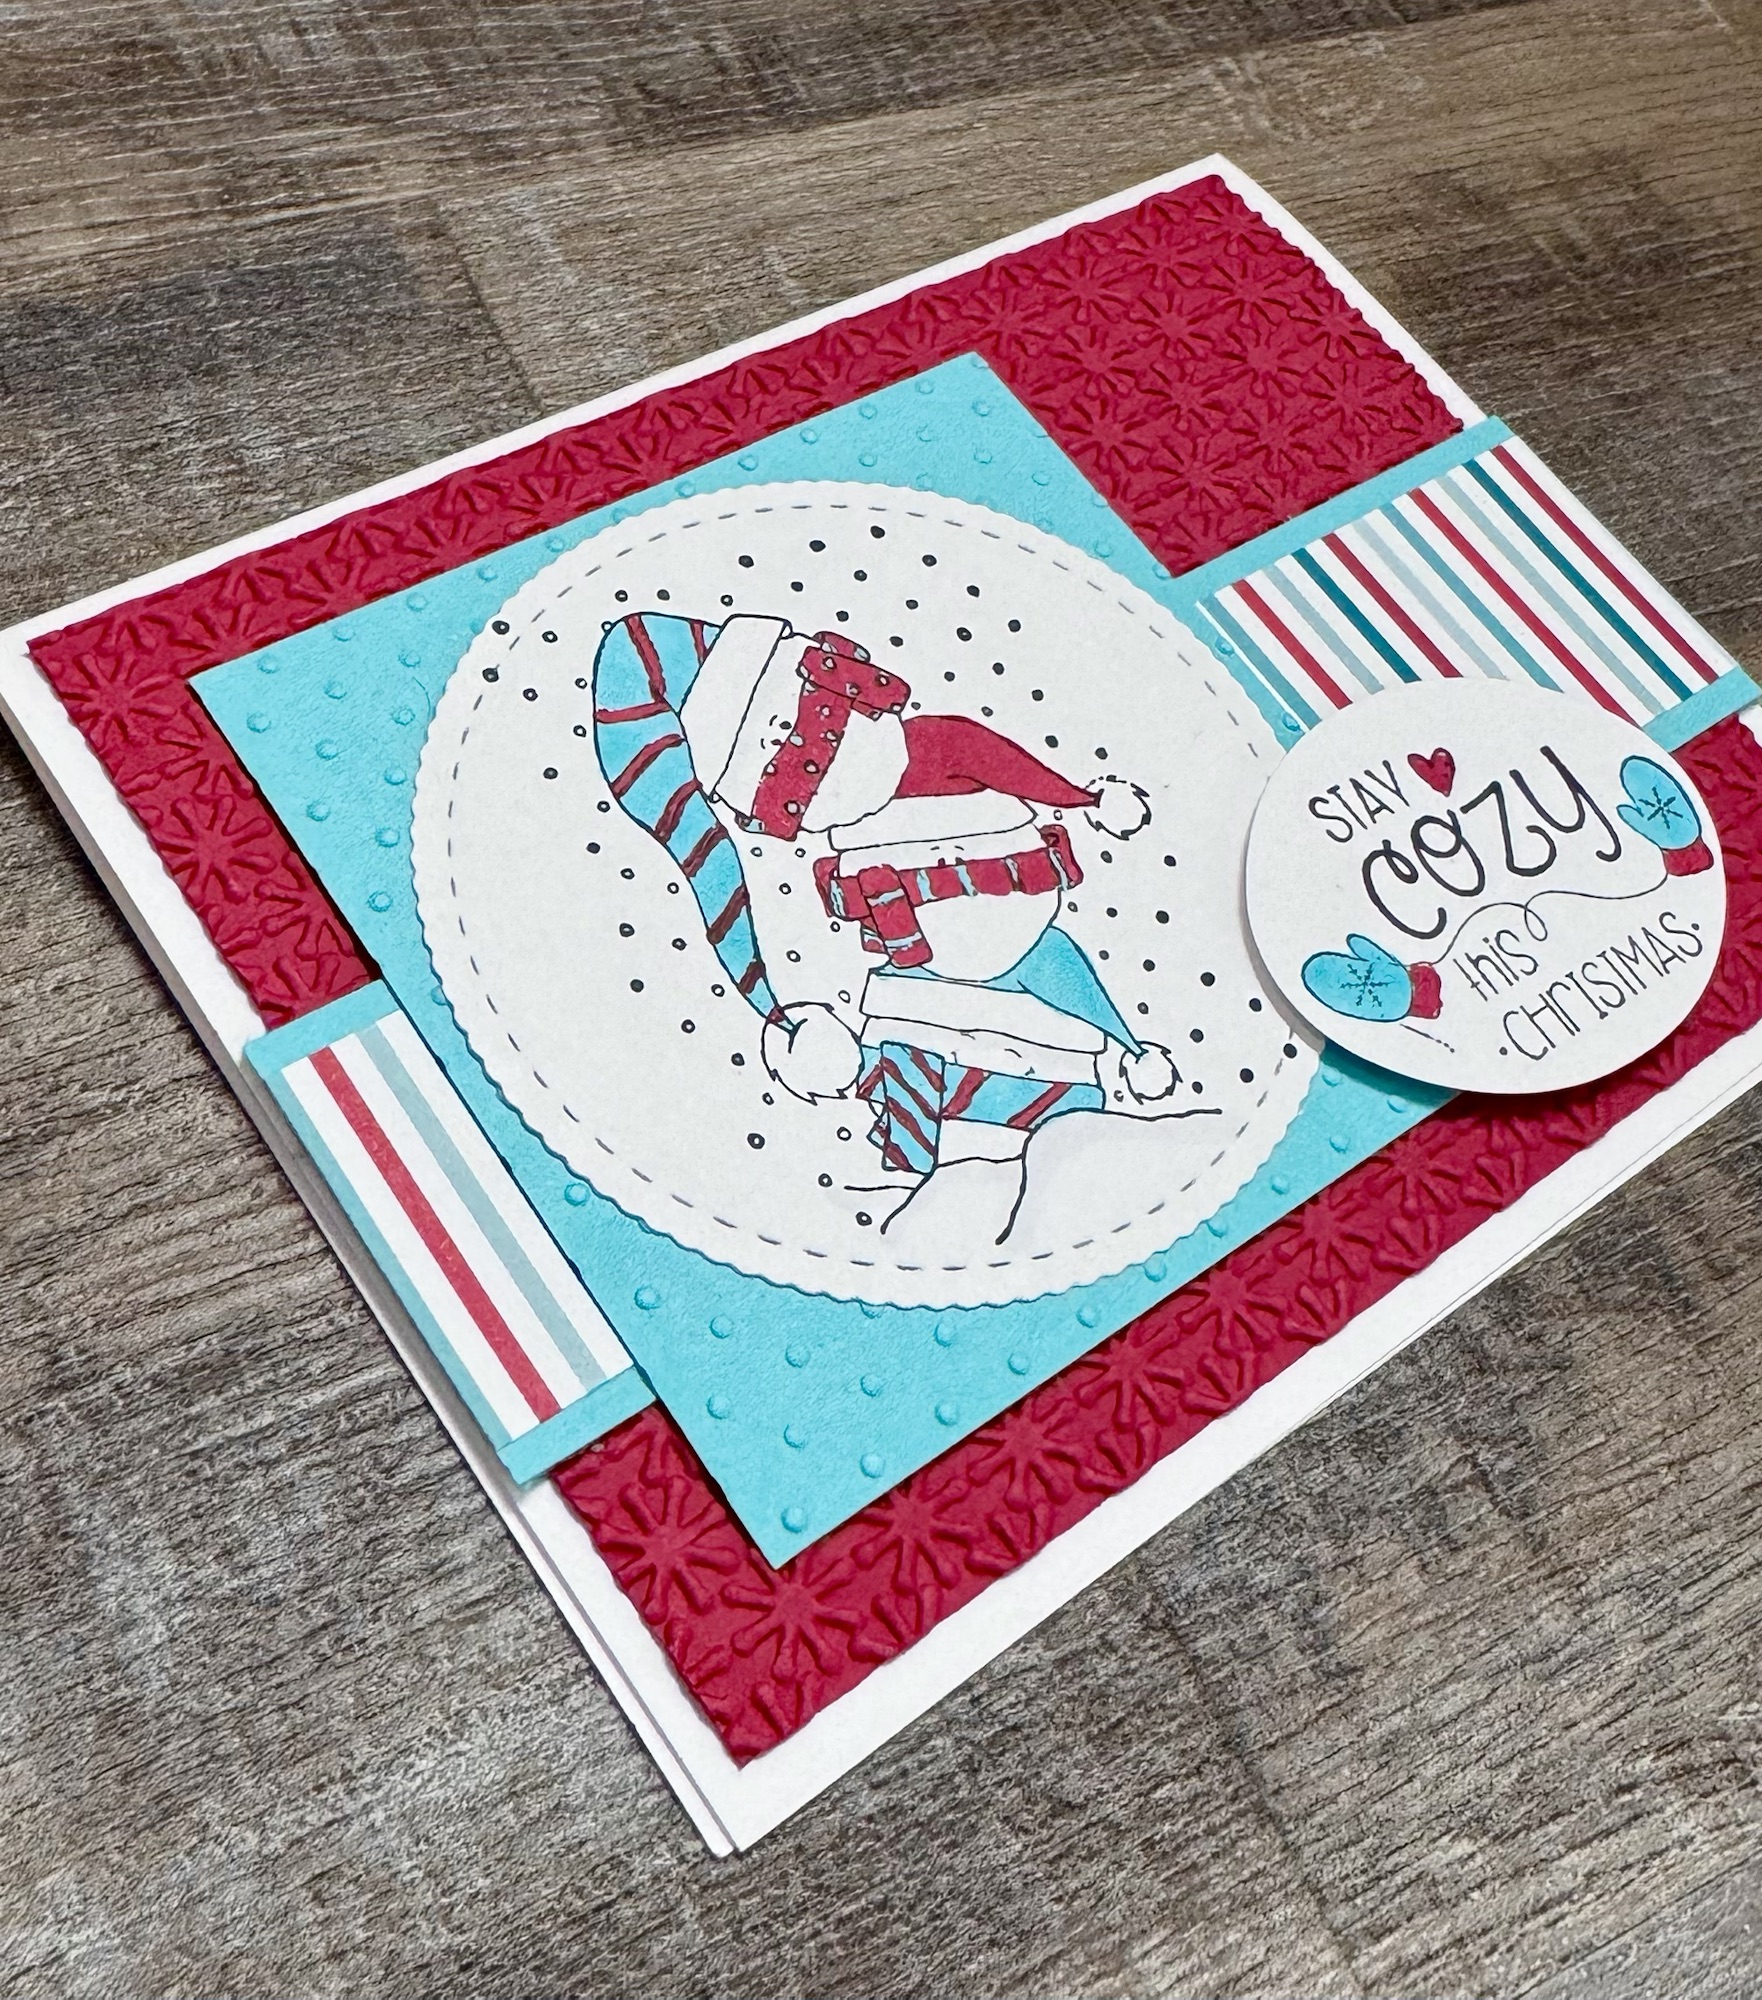
Hi friends,
Welcoming new little ones to the world is so special! And of course I love making sweet baby cards for them. 🙂
Disclosure: Some of the links on my site are affiliate links, meaning, at no additional cost to you, I will earn a small commission if you click through and make a purchase. As an Amazon Associate I earn from qualifying purchases.
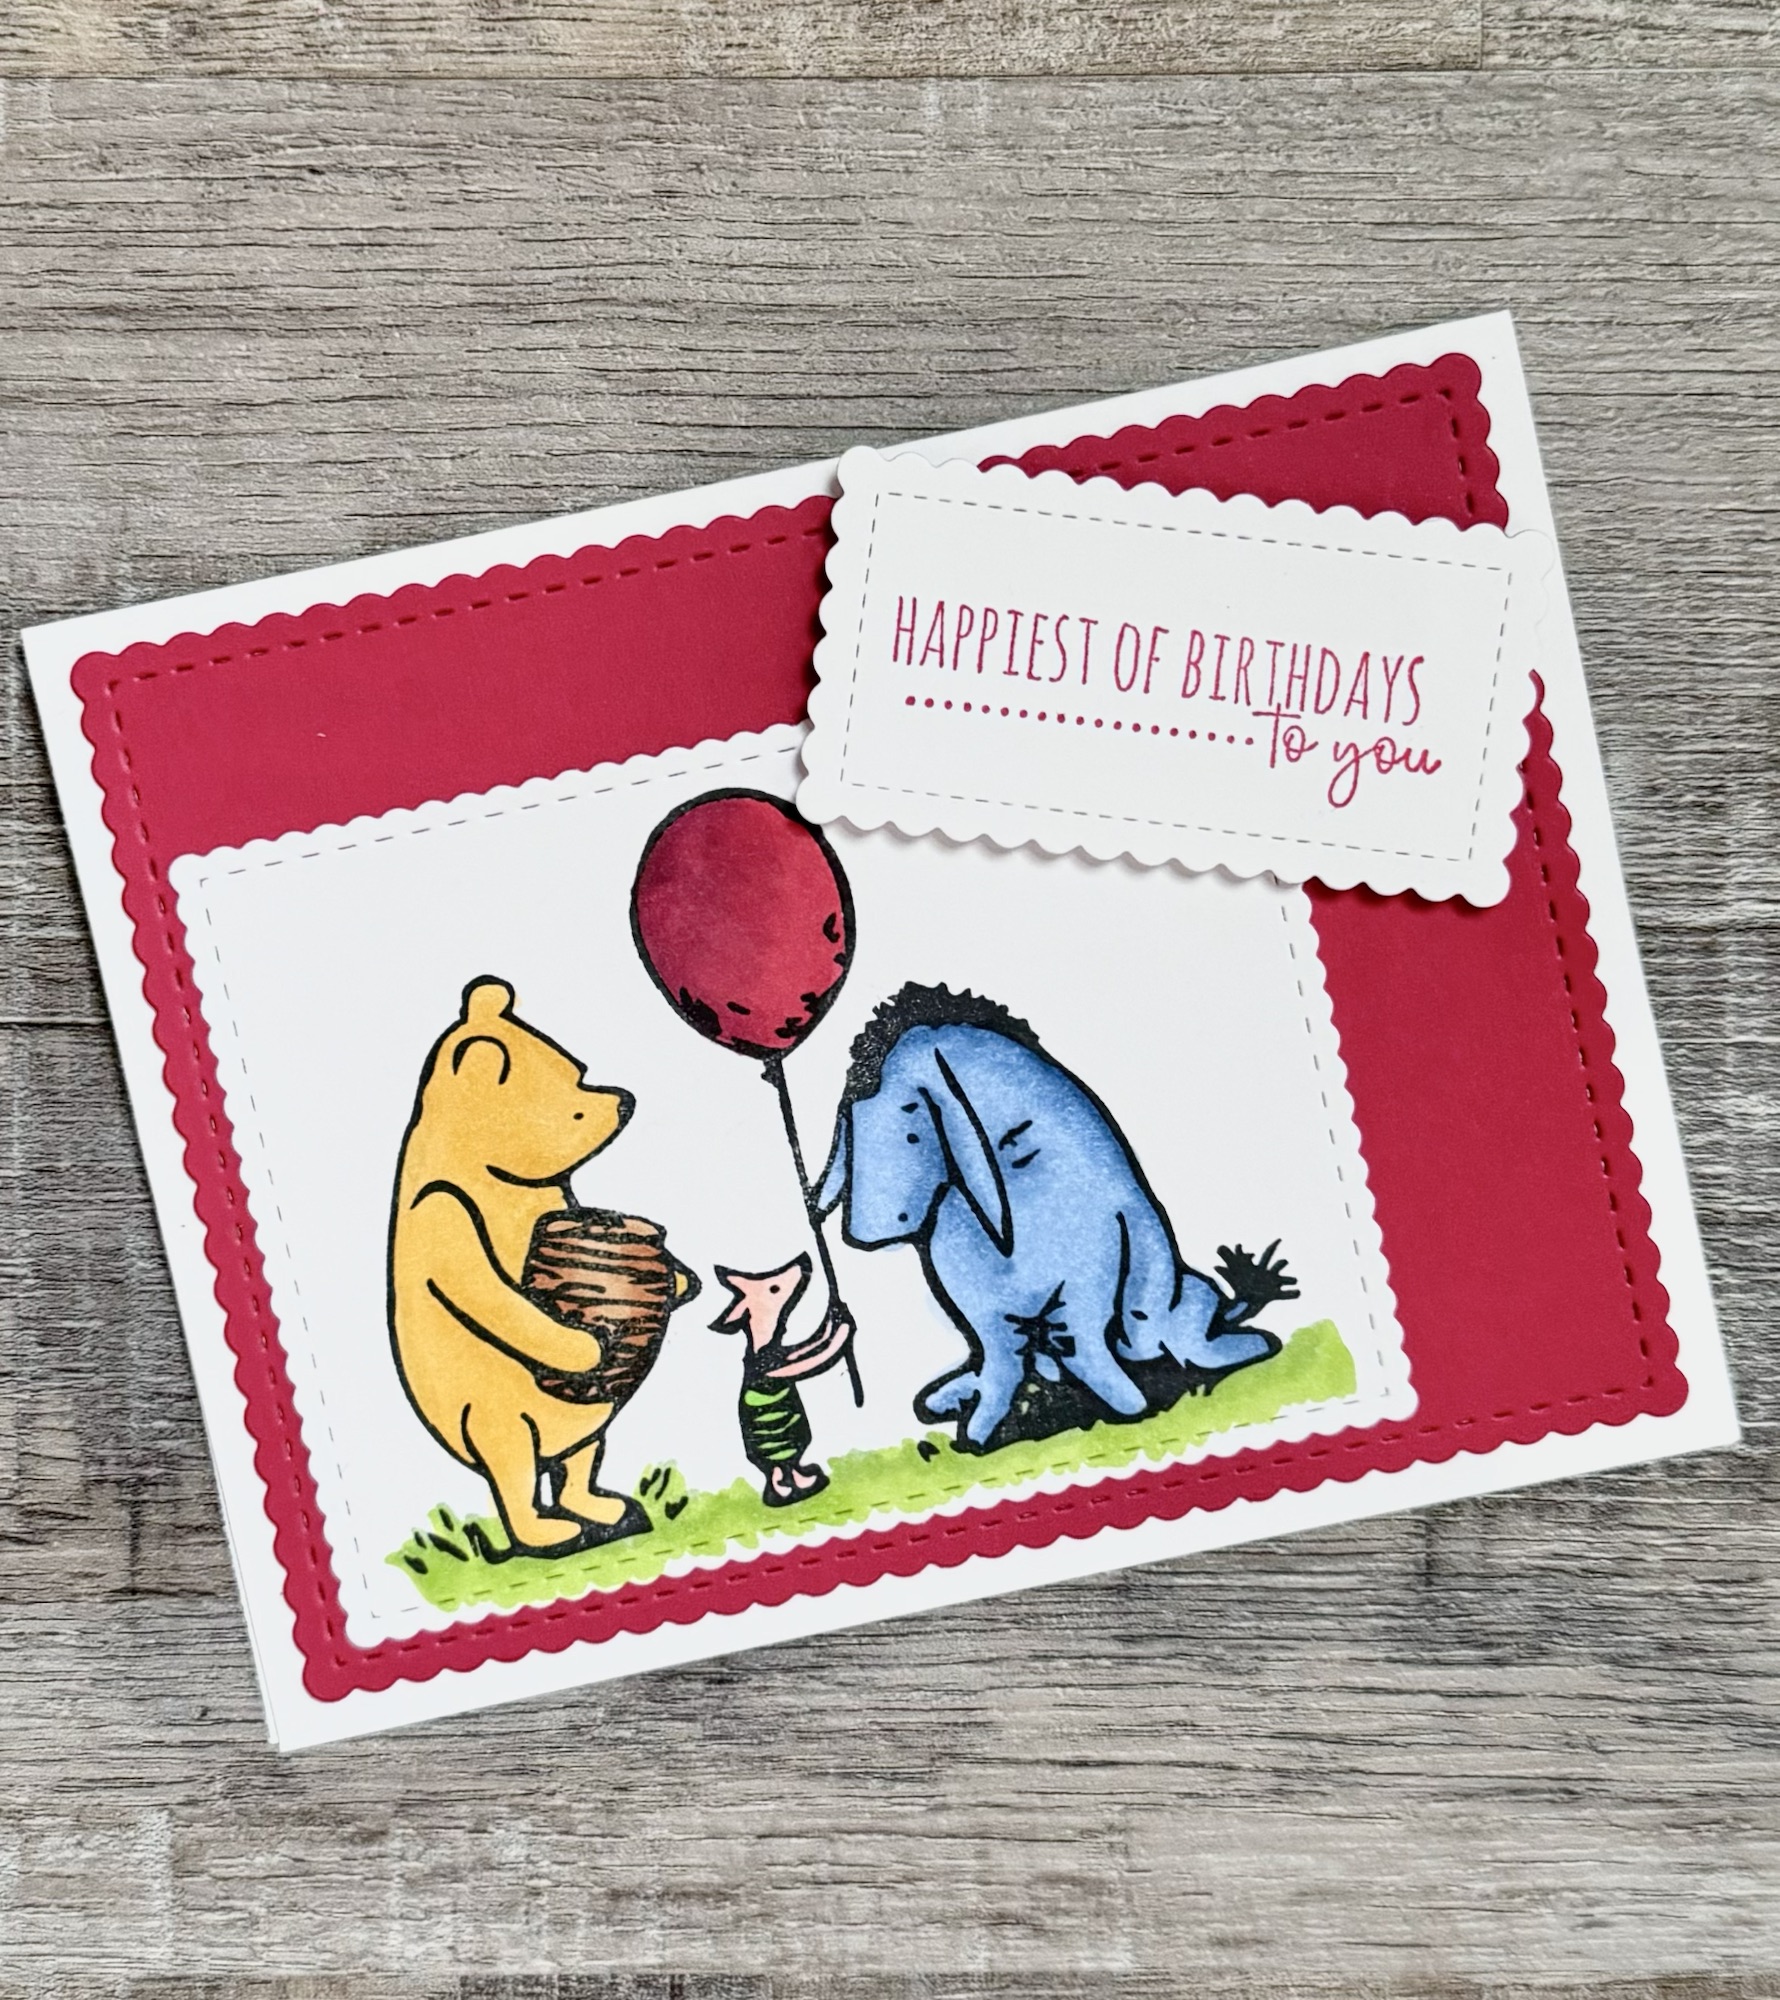
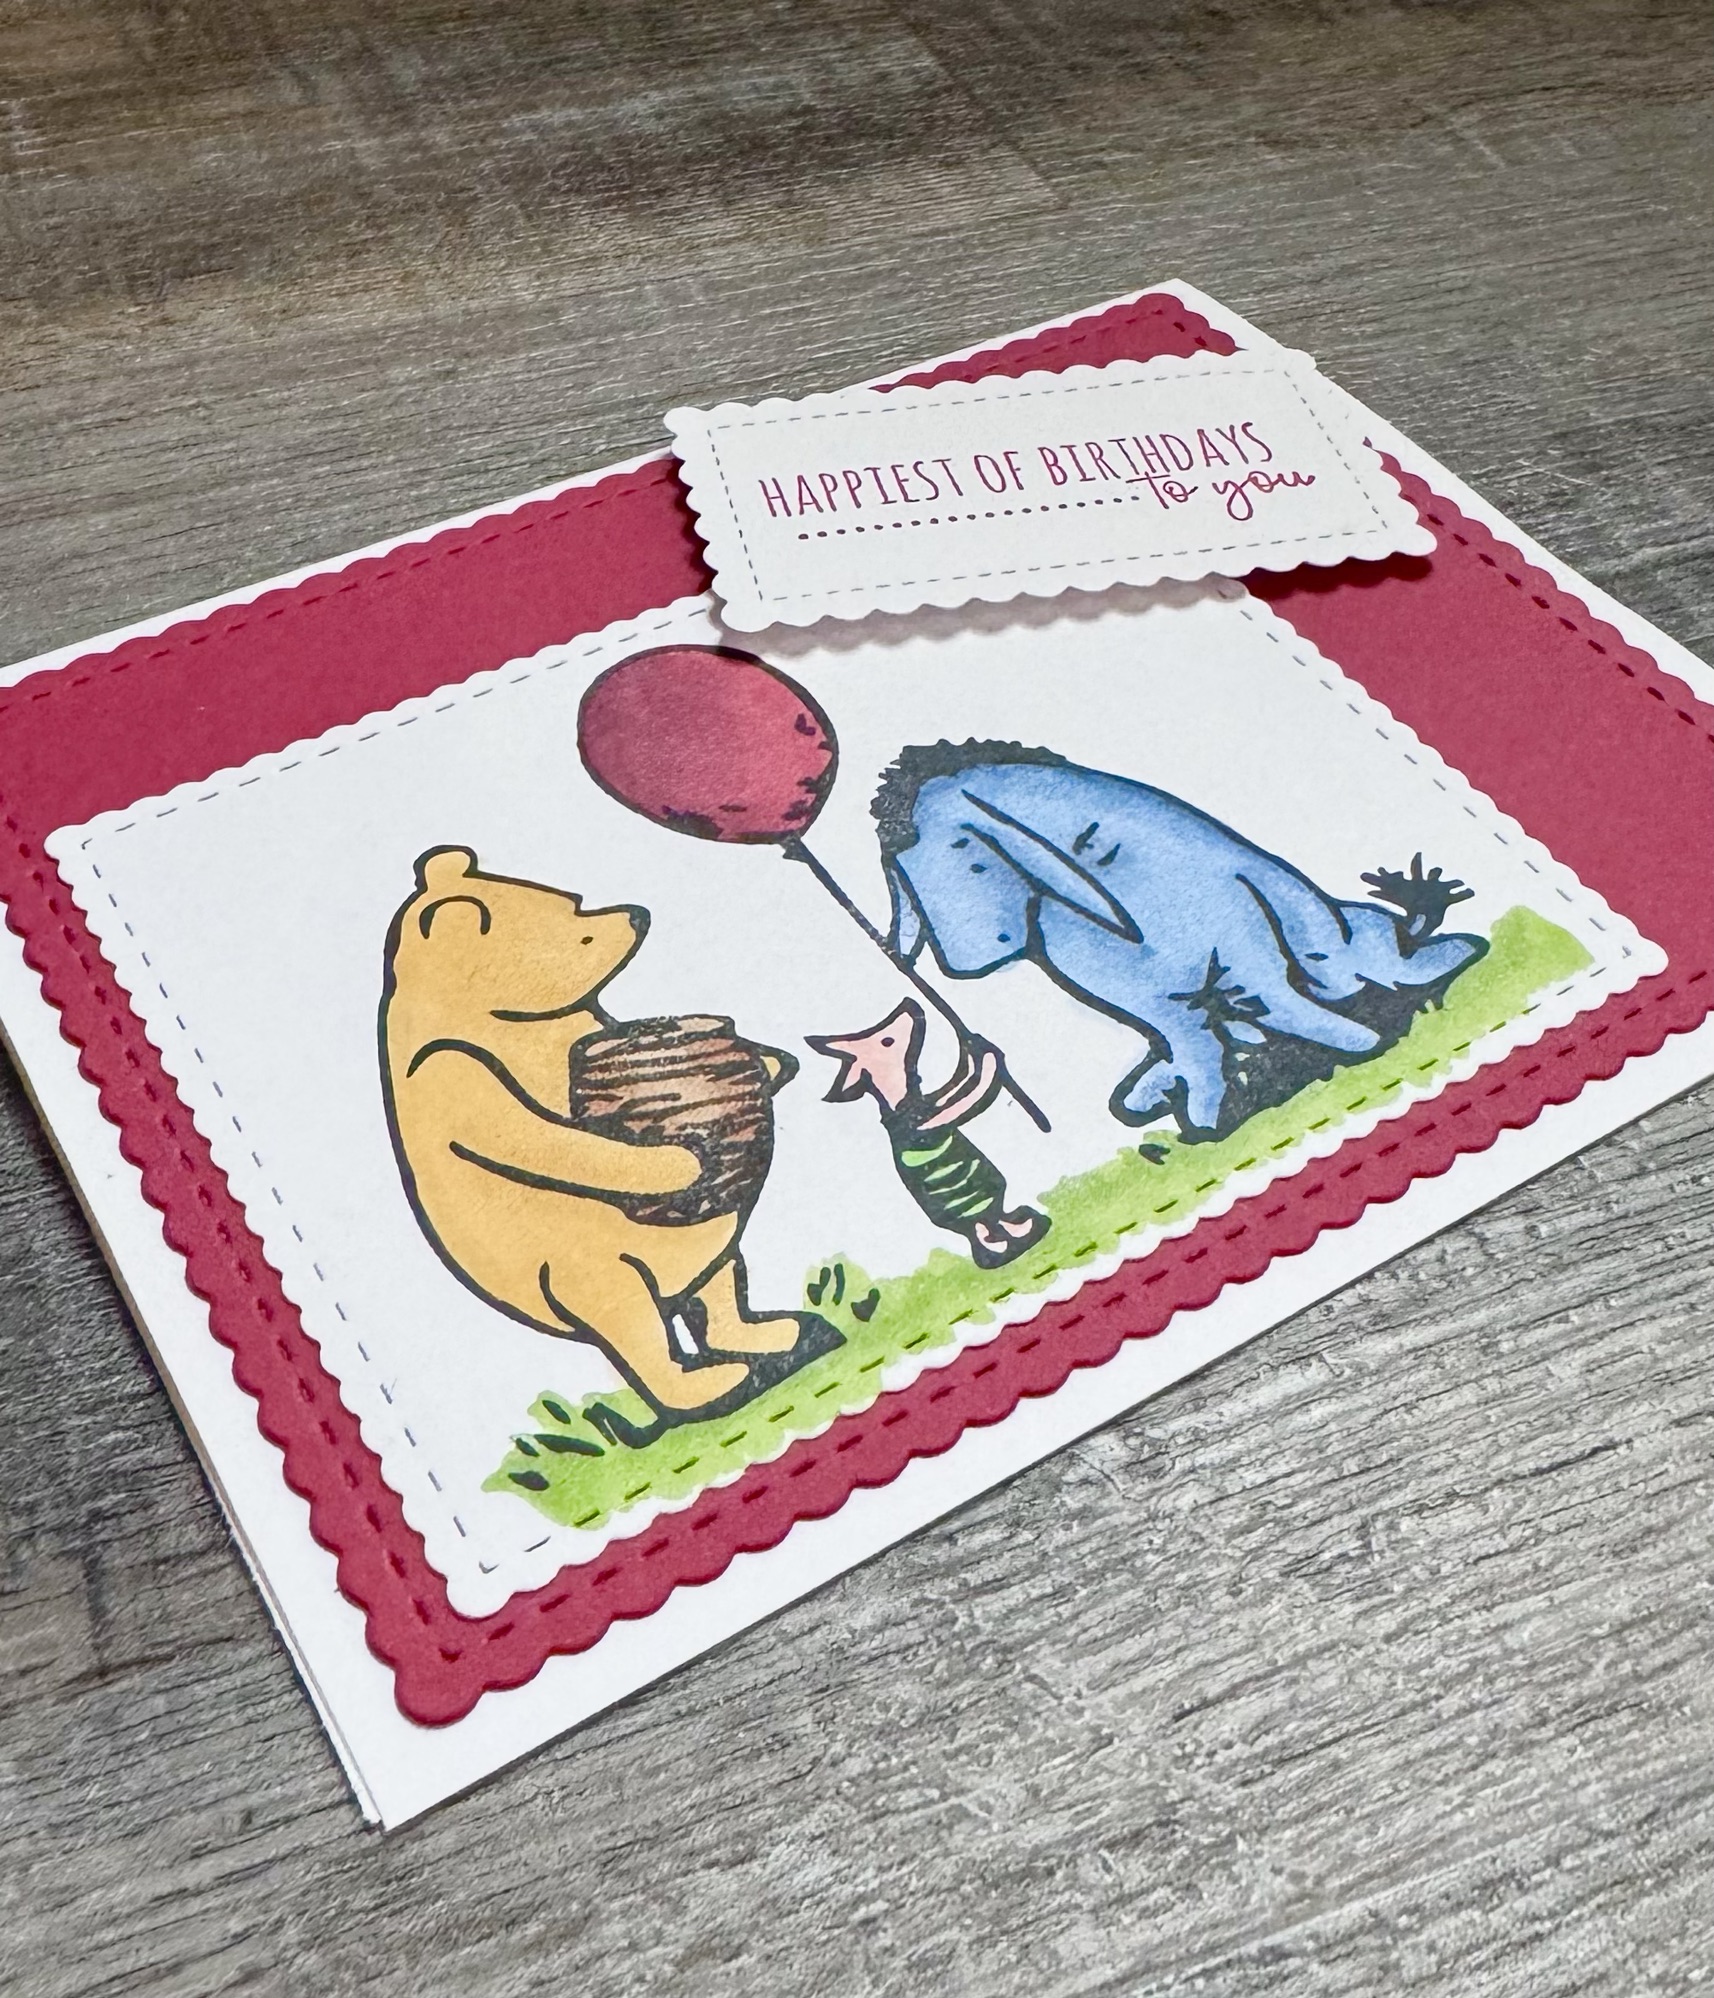
I used the Hello Little One stamp set from Unity Stamp Company to make this cute card.
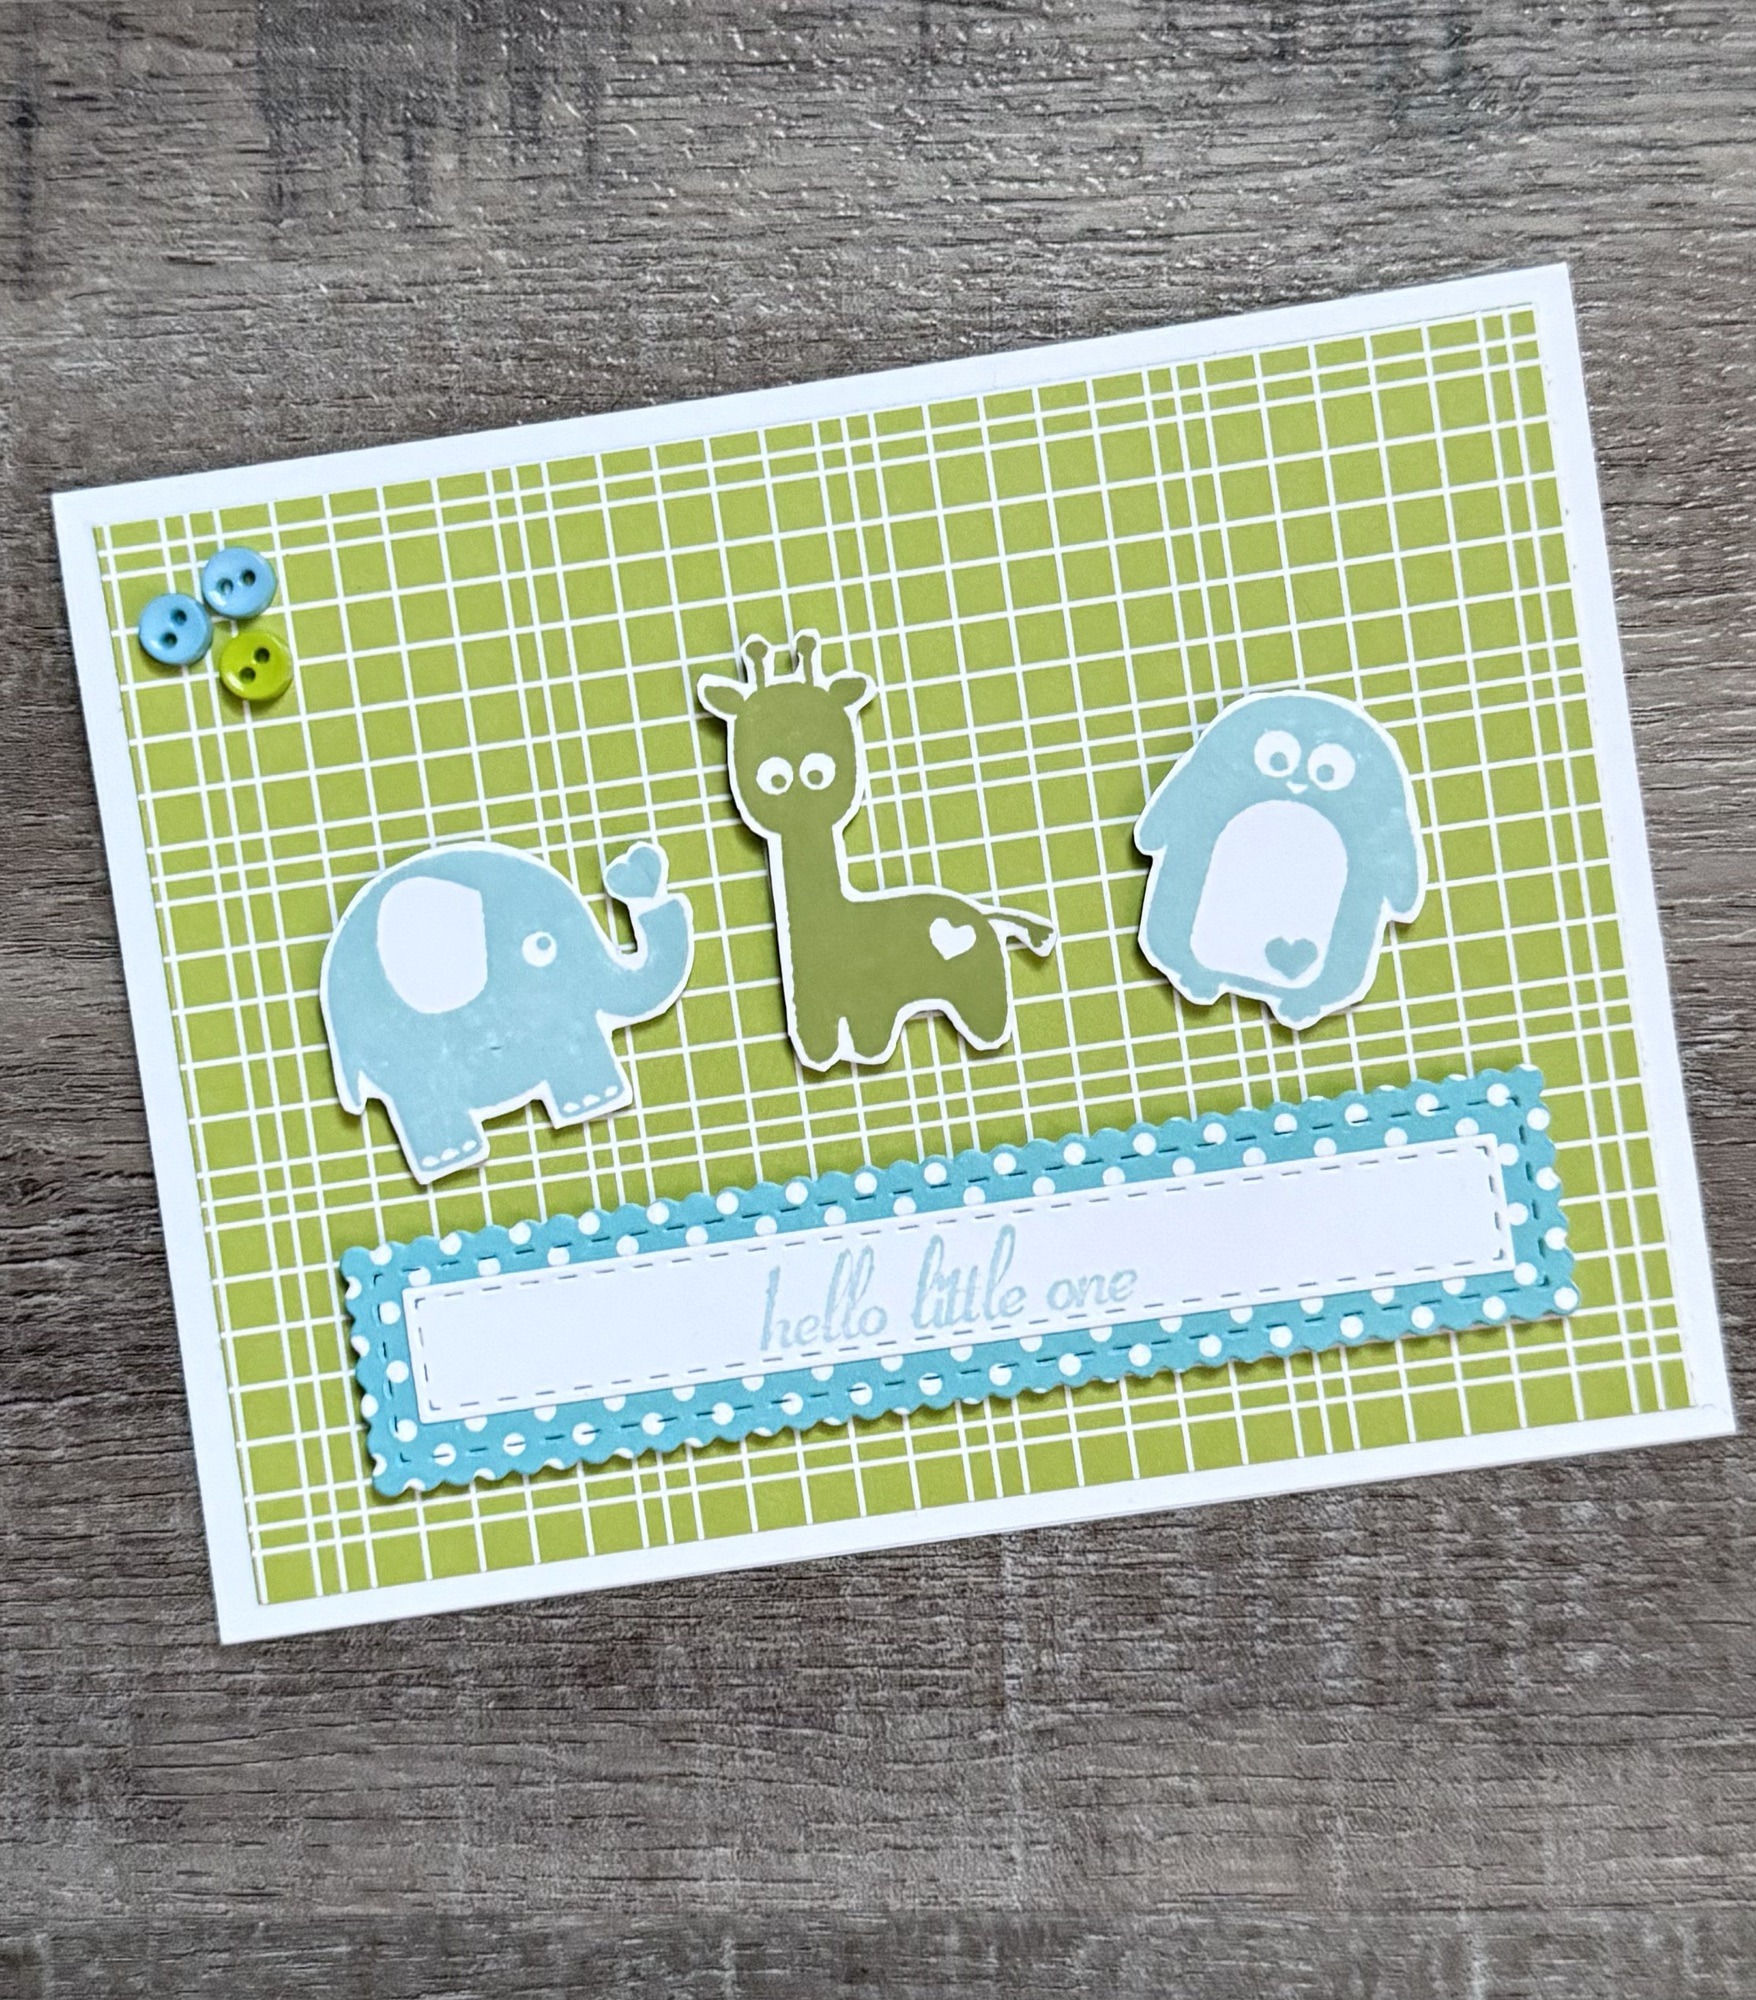

I stamped the elephant and penguin with light turquoise ink and the giraffe with sage ink onto white card stock. I used my Misti stamping tool to stamp the images a couple of times so I was sure to get the solid images stamped well. (This pressure tool is a must have for your Misti!) Then I cut around each image leaving a small white border. These are my favorite detail scissors for fussy cutting.
I stamped the sentiment with light turquoise ink and used the Scalloped & Stitched Sentiment Nesting Dies from Unity Stamp Company to die cut around it. I layered it to patterned paper die cut using the same die set.
I added a piece of sage patterned paper to a white card. The animals and sentiment are all attached to the card using foam tape. Then I added 3 tiny buttons to the upper left corner.
Such a fun little card that can be made with any colors. You could also change the sentiment and it would work great for a toddler’s birthday.
Anita