Hi friends,
This is such a fun and easy way to make a sweet Valentine Wreath for your front door – and to use up some scrap yarn! 💕
Disclosure: Some of the links on my site are affiliate links, meaning, at no additional cost to you, I will earn a small commission if you click through and make a purchase. As an Amazon Associate I earn from qualifying purchases.
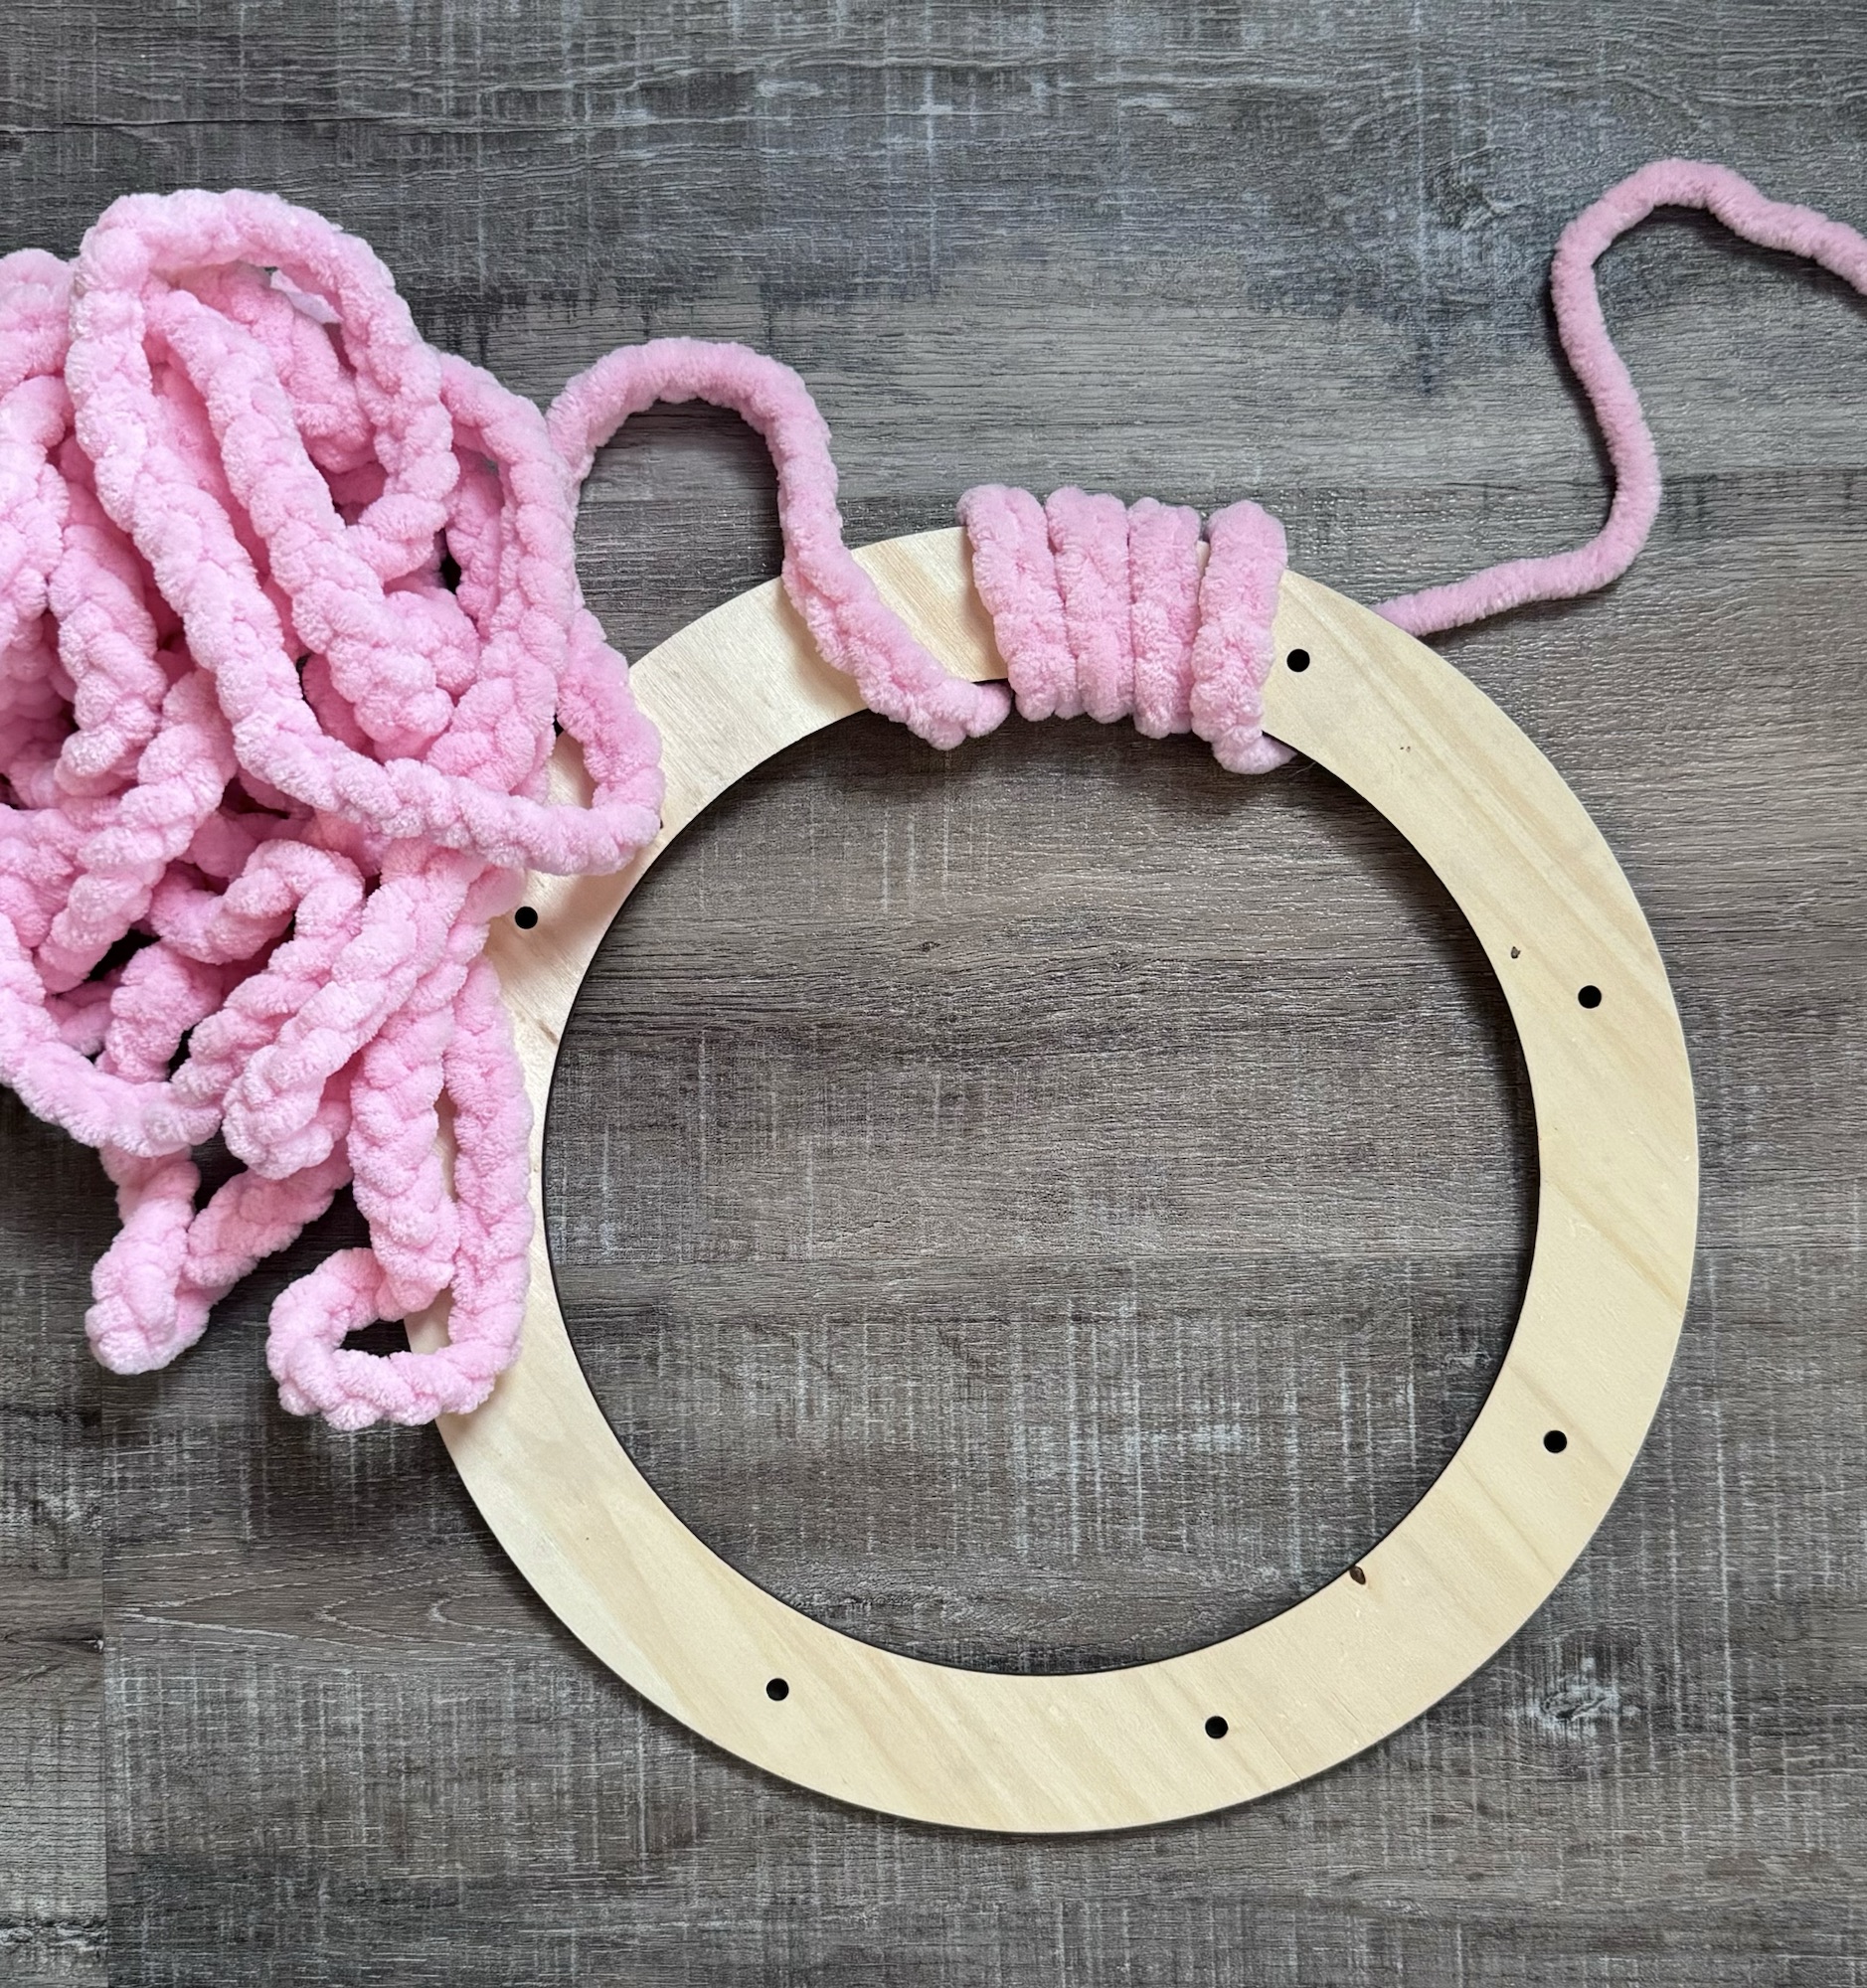
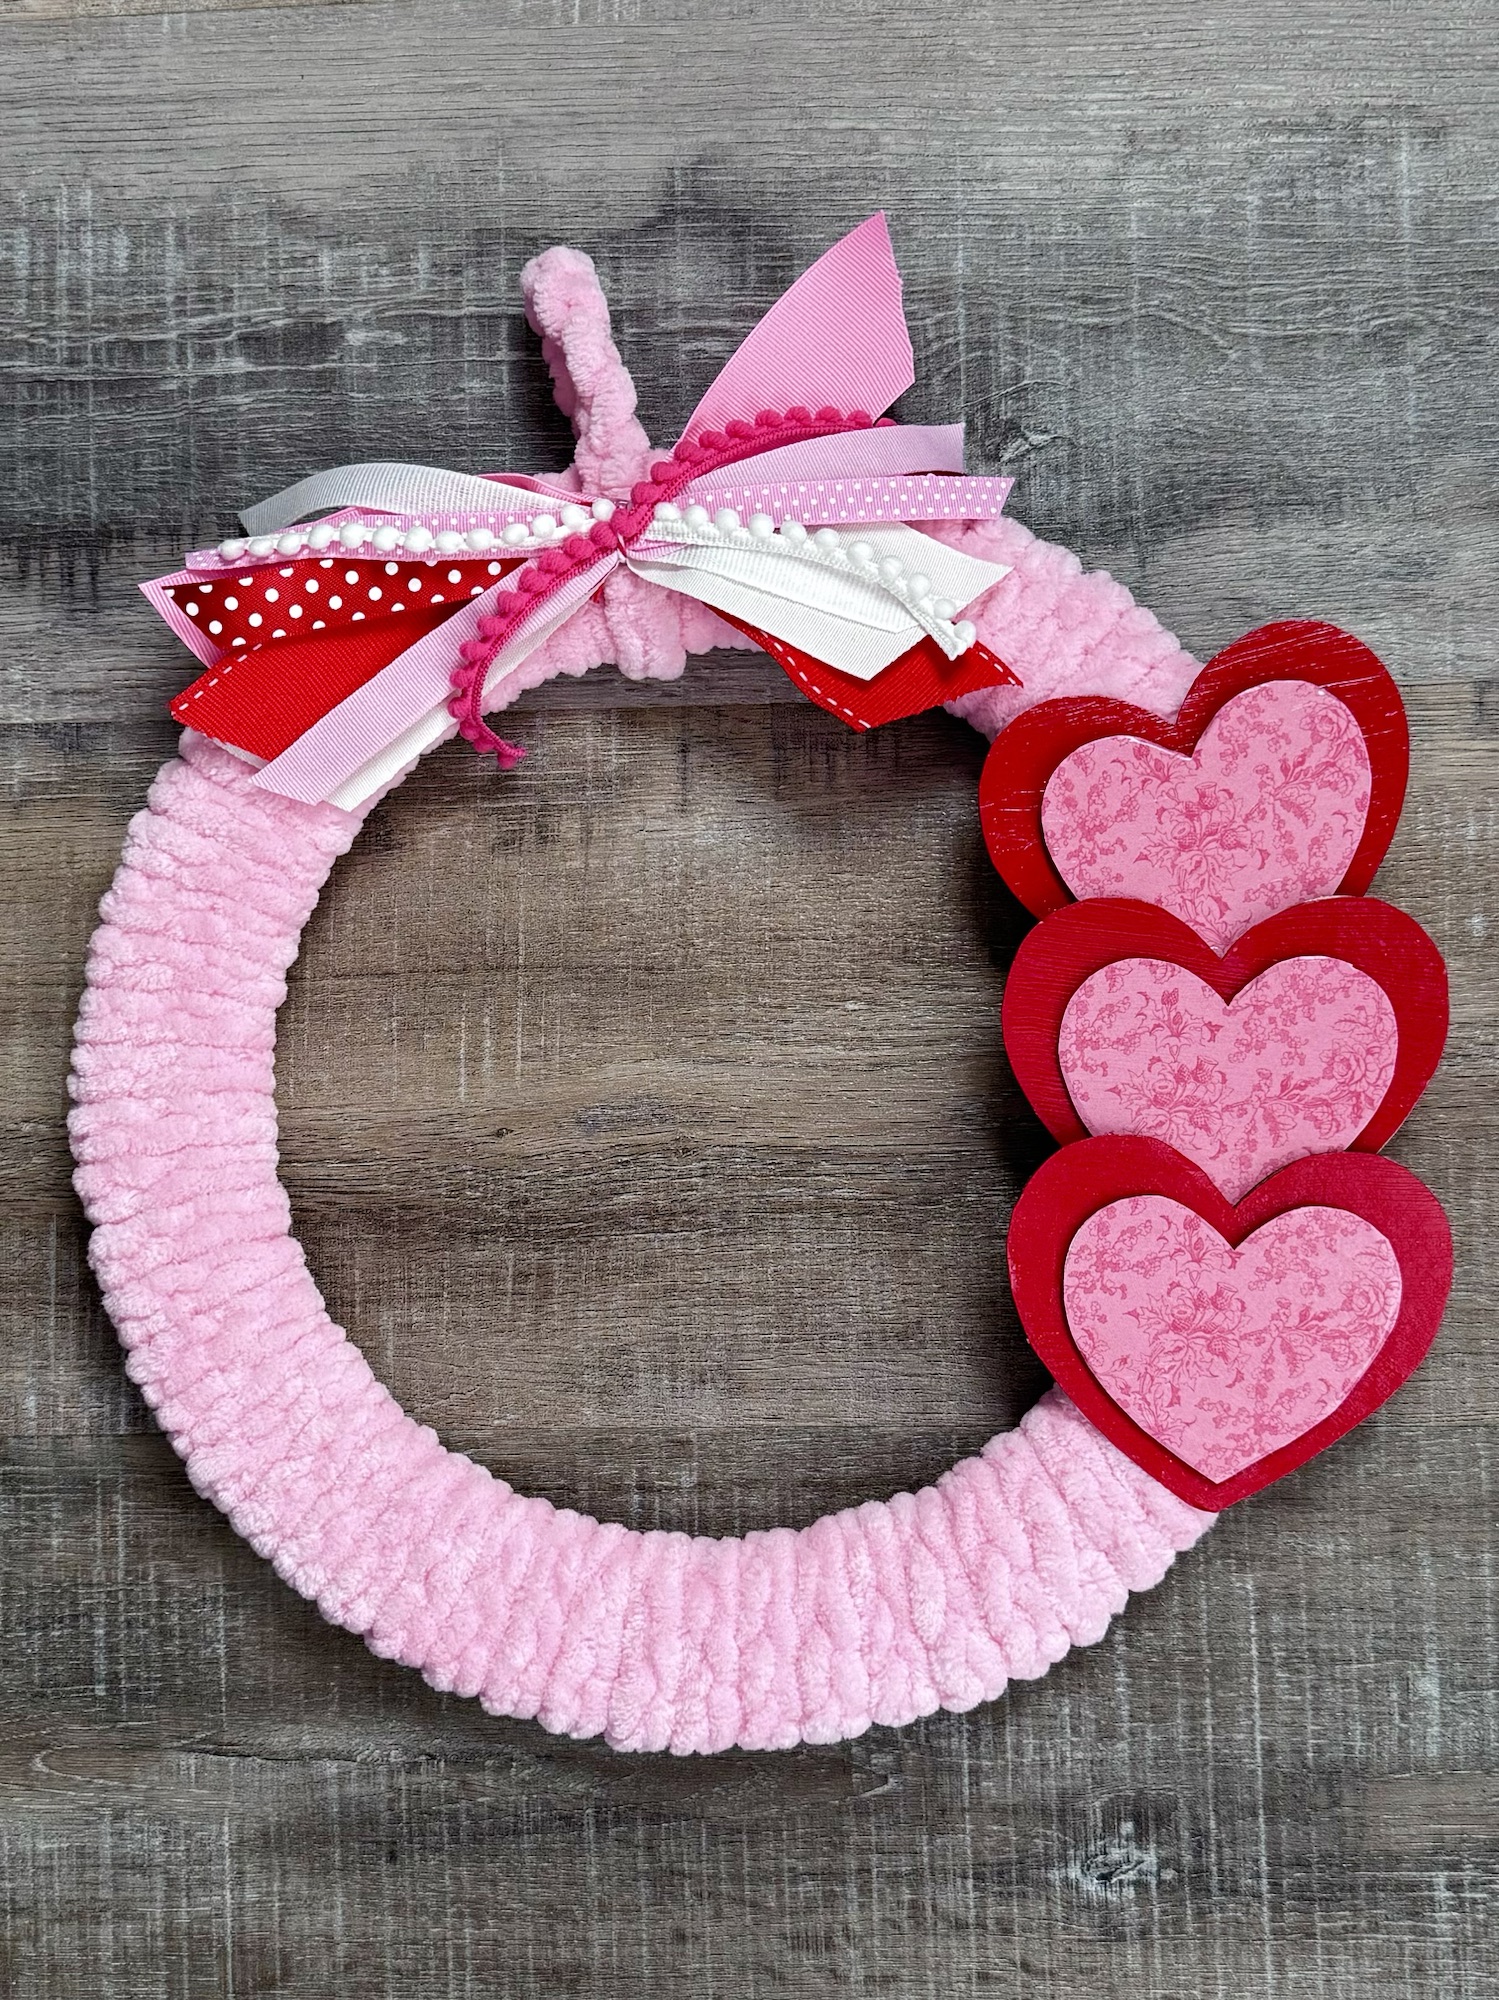
You’ll need a wooden wreath ring, some size 7/jumbo yarn (I used Sweet Snuggles in Pink), and an N/9mm crochet hook.
Crochet a simple chain to wrap around your wreath form. Mine measured about 18-19 feet, without stretching. Using hot glue, attach one end to the back of the wreath and wrap your chain around the form being careful not to twist it. Continue around until the wreath form is covered and attach the other end with hot glue. If your chain isn’t long enough, just add a few more stitches as needed.
Make a smaller chain to tie around the top to hang the wreath. I added a little hot glue to the front and back to keep the hanging loop in place.
You can also use a styrofoam wreath form to make your wreath but you will need to make your chain longer.
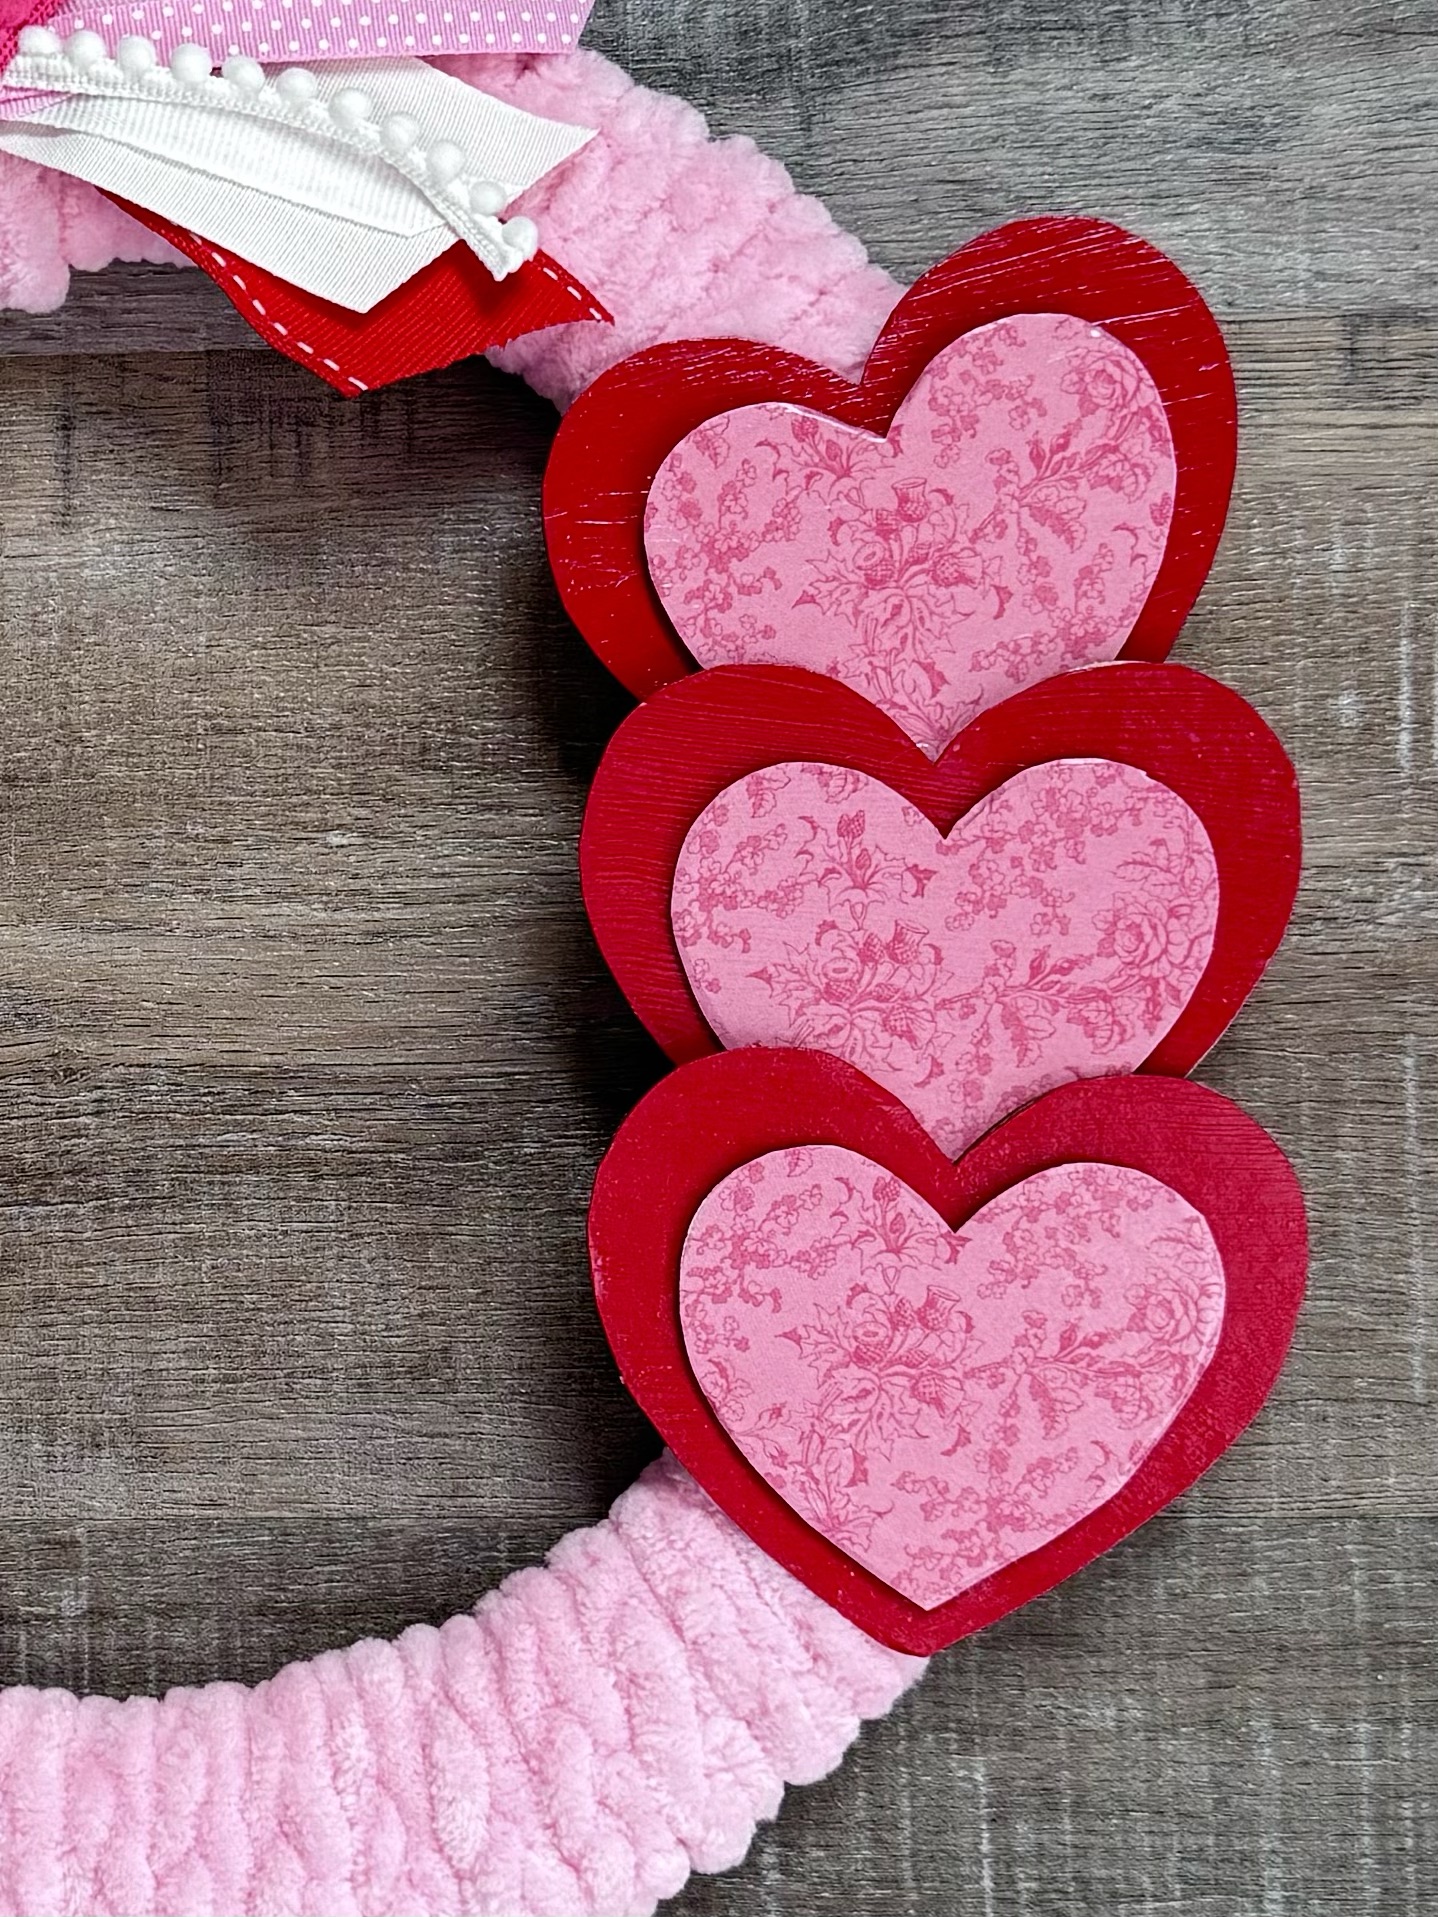
Now it’s time to embellish your wreath! I had some wood heart cutouts in my crafting stash in 2 different sizes – you can find them at Hobby Lobby or Dollar Tree in the seasonal section. I traced around the large heart on red card stock and the smaller hearts on patterned scrapbook paper and cut them out.
Using Mod Podge with a foam brush, I adhered the paper to the wood hearts. I also brushed a thin layer of Mod Podge over the top of the hearts to add a little shine. I glued the small hearts to the large hearts with hot glue and then hot glued the hearts to the wreath.
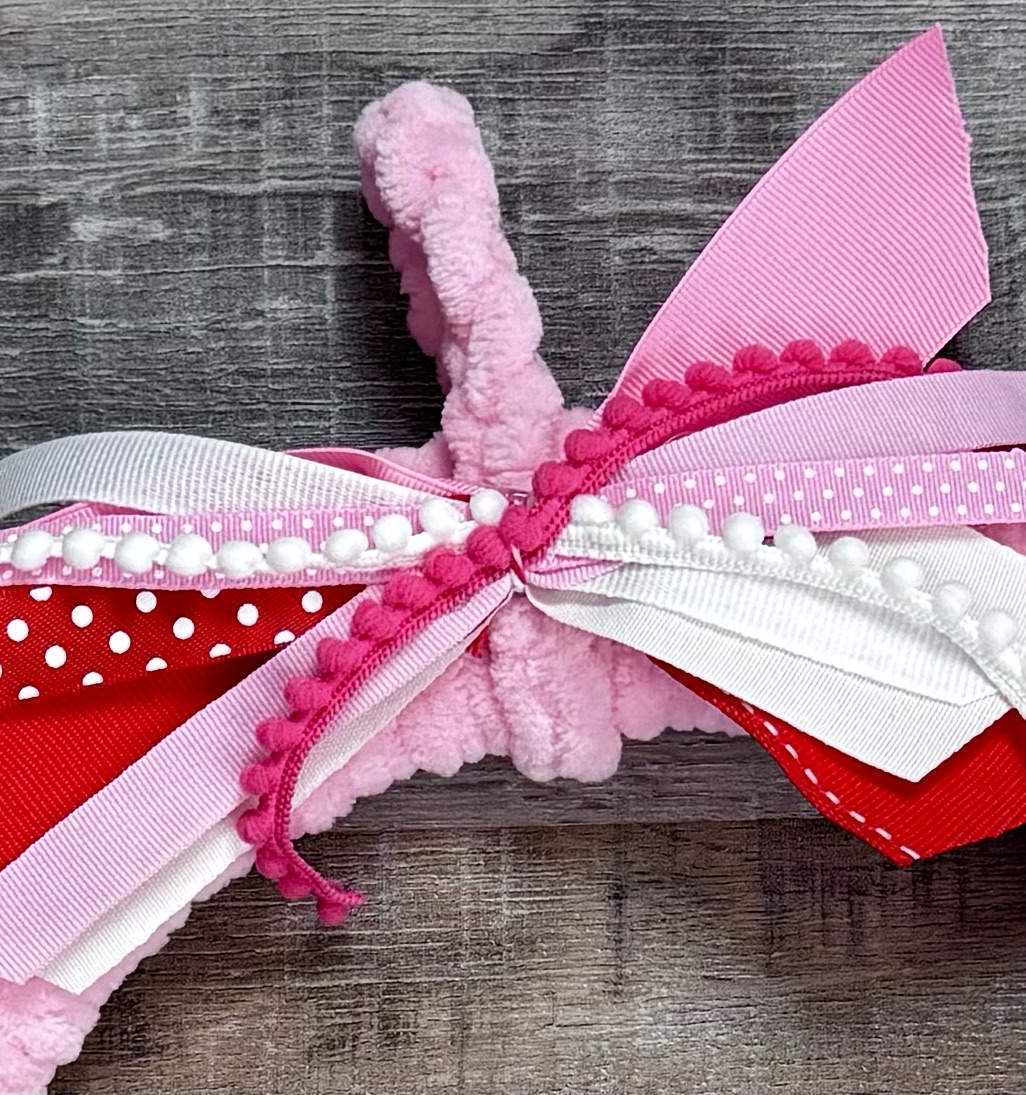
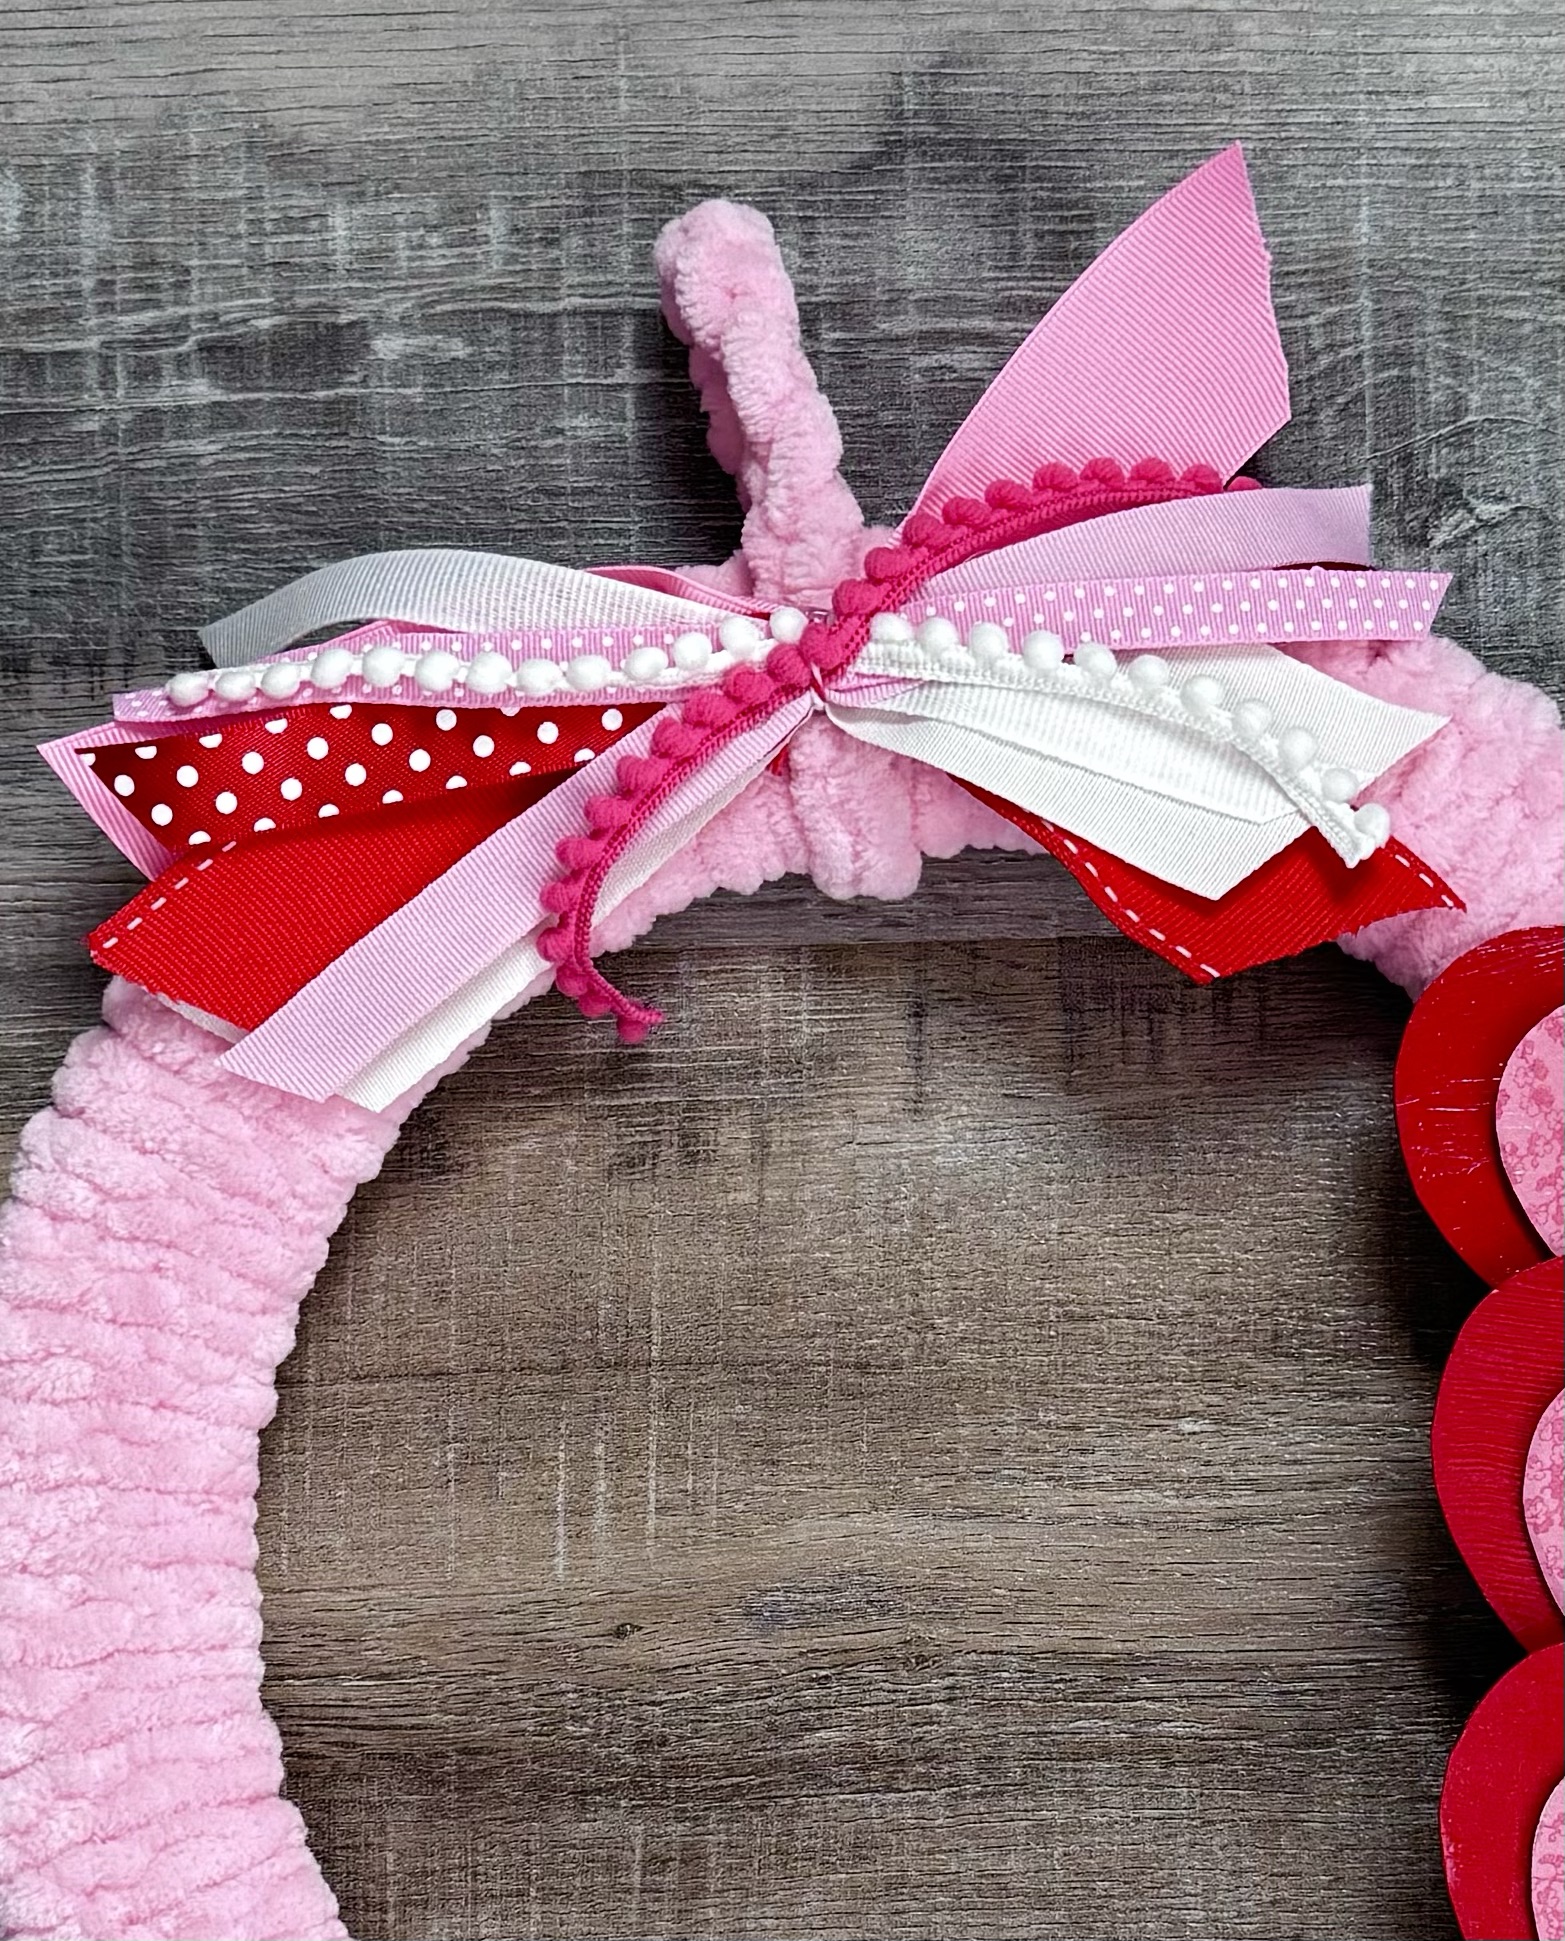
I created a bow using various ribbons and hot glued it to the top of the wreath.
It turned out so cute! 💕 And it was a great way to use up that last bit of yarn I had in my stash. 😉 This is a fun project that will add a little bit of love to your Valentine decor. 💕
Not a crocheter? No worries! You can just wrap the wreath form with the yarn and then add your embellishments. The texture will be a little different, but it will still be very cute. 💕 You can see my Yarn Wrapped Valentine Wreath in this post.
Anita