Little Crochet Christmas Gift Bag

Hi friends,

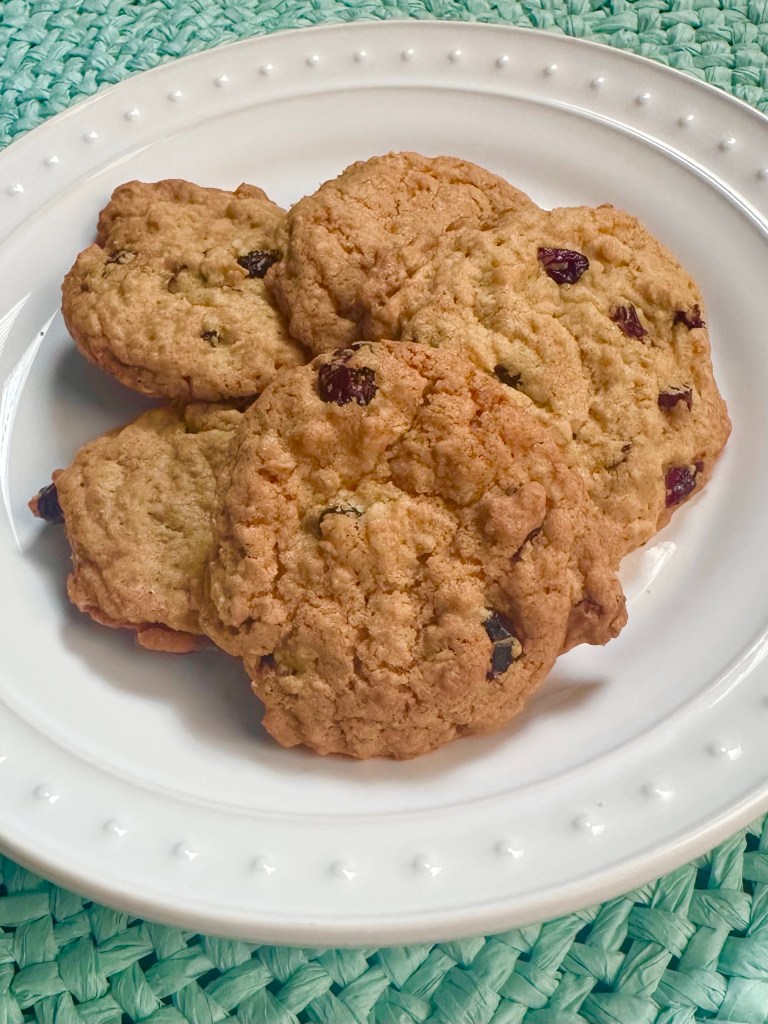
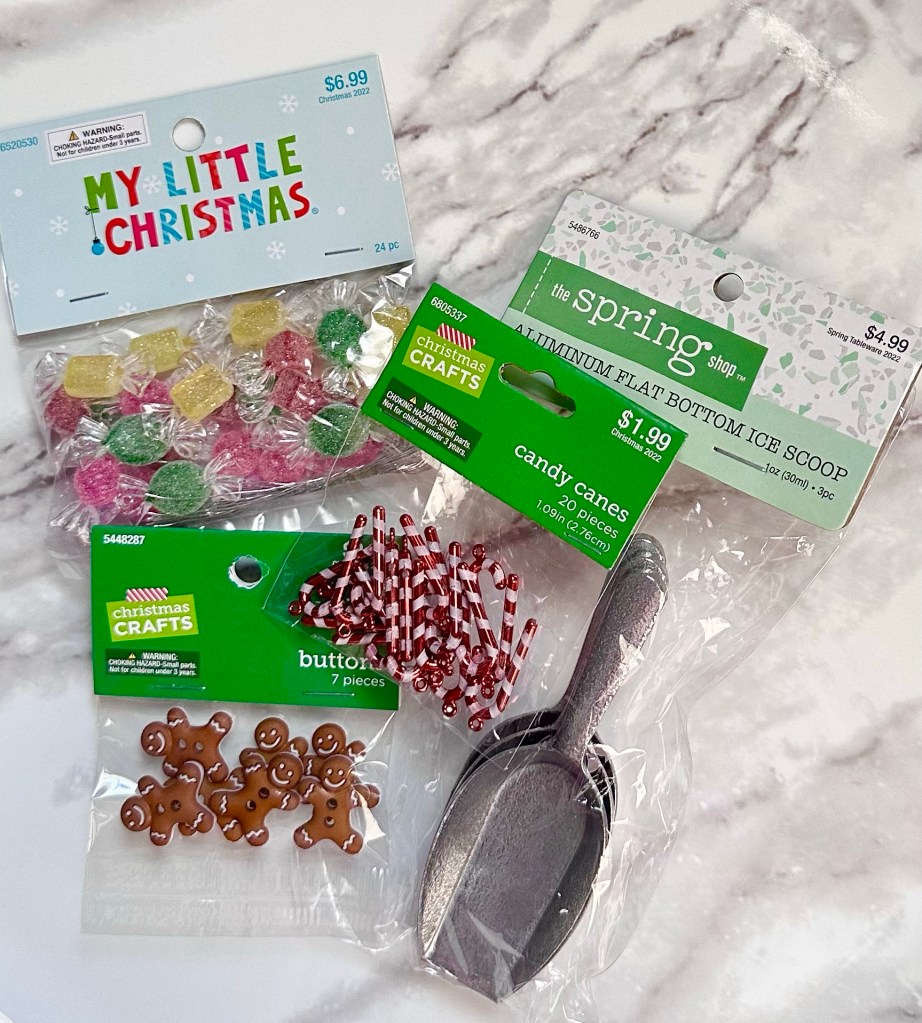
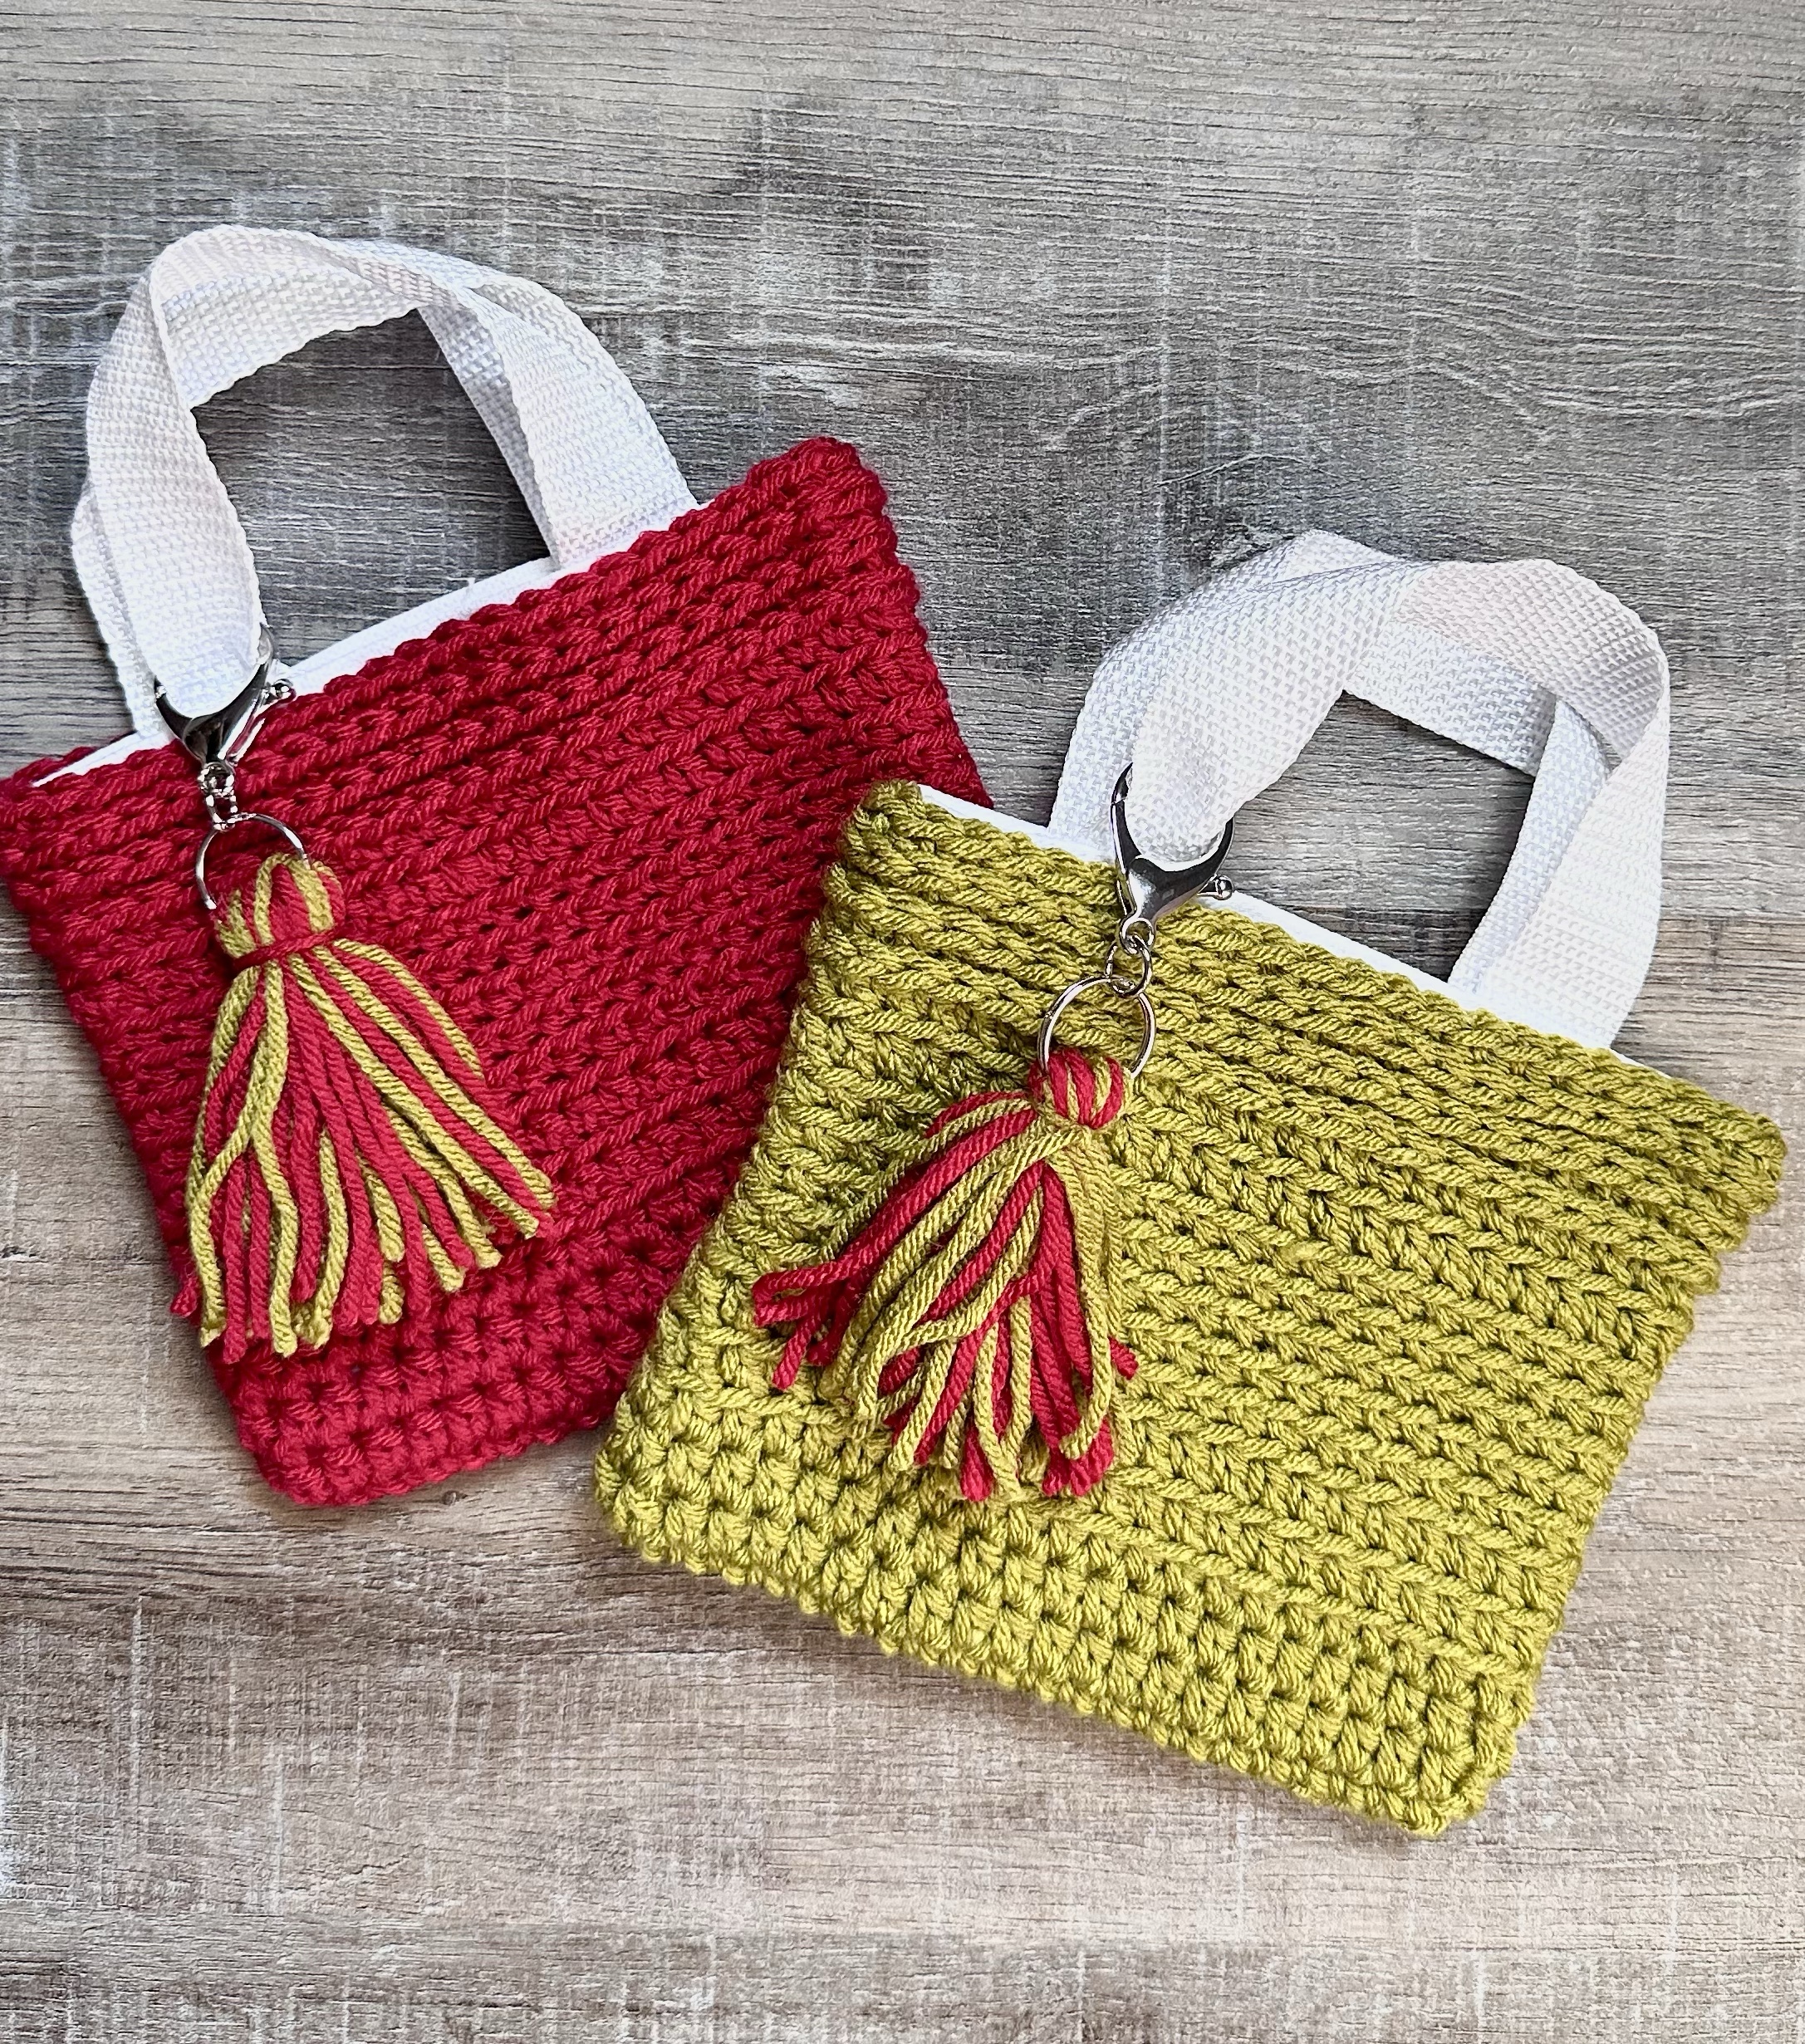
It’s Christmas in July at Creatingme! We all need gift bags when it’s time to wrap up all the Christmas things. This Little Crochet Christmas Gift Bag is perfect for small gifts or gift cards along with some yummy chocolates!

Disclosure: Some of the links on my site are affiliate links, meaning, at no additional cost to you, I will earn a small commission if you click through and make a purchase. As an Amazon Associate I earn from qualifying purchases.

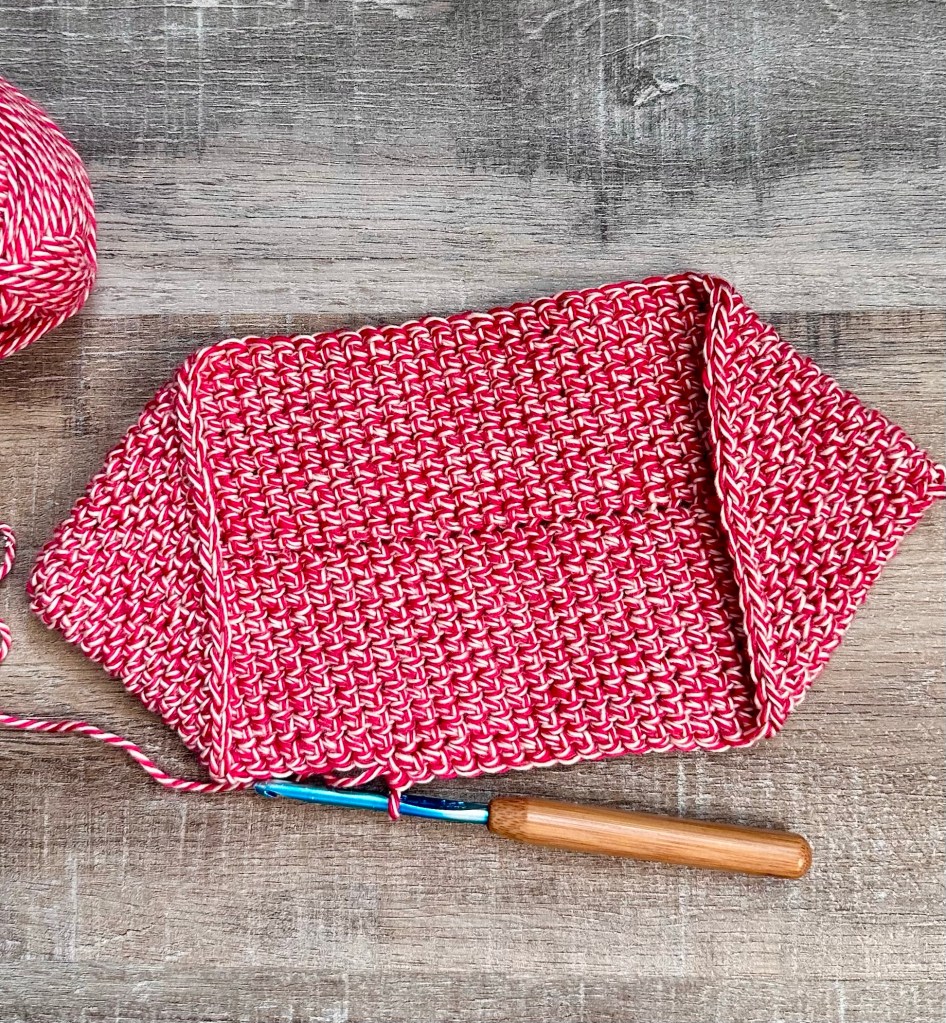
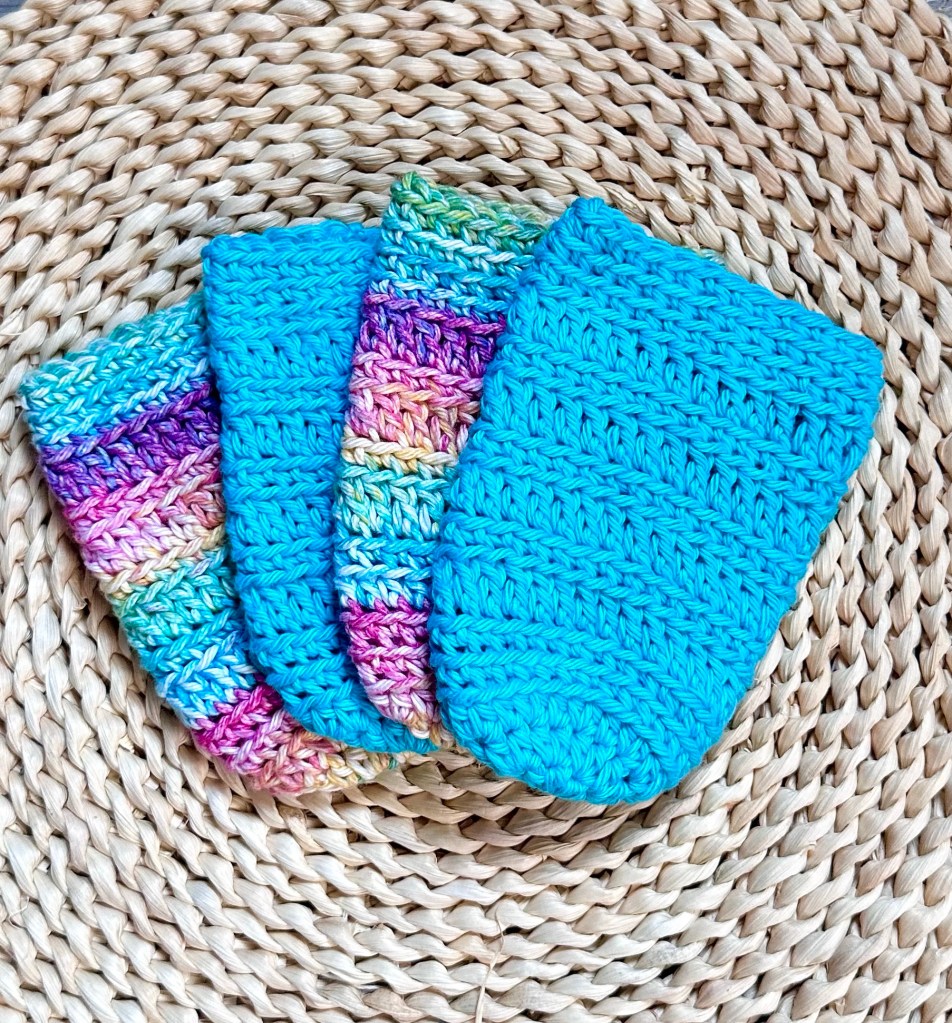
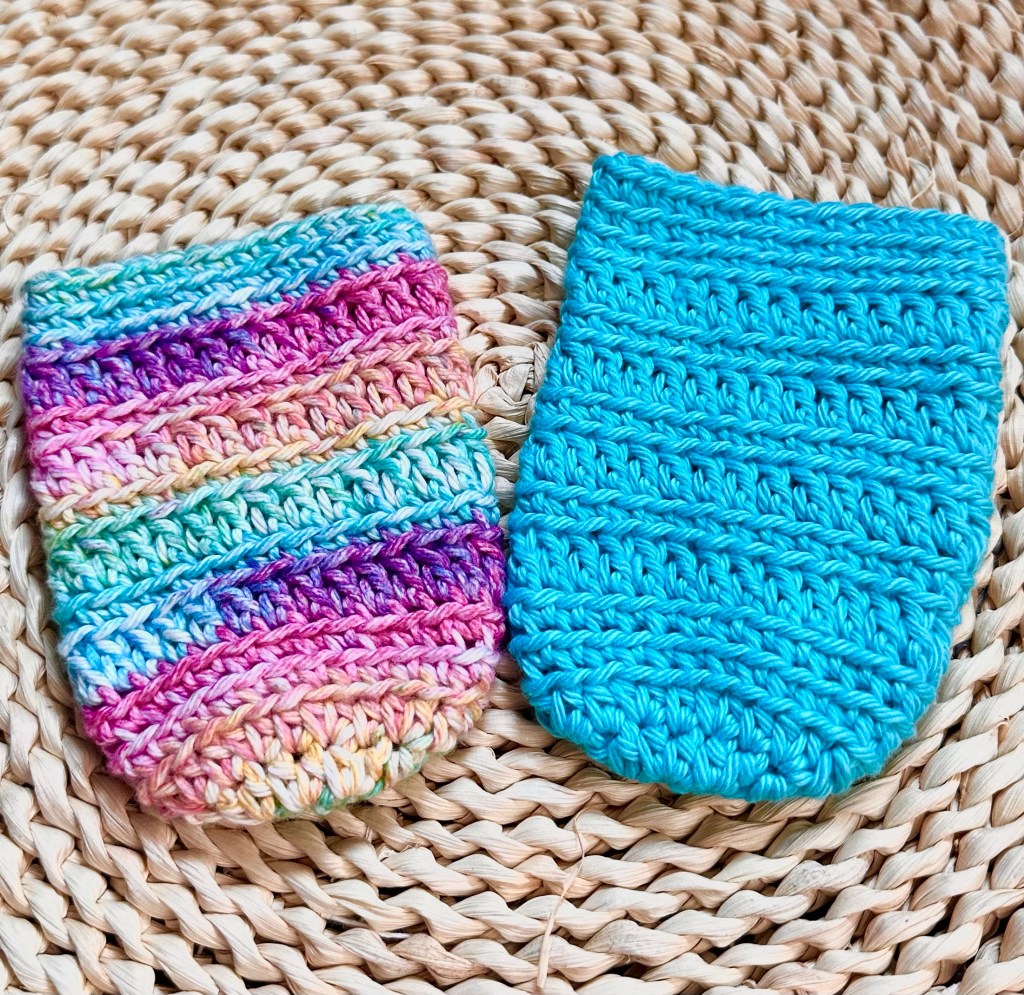
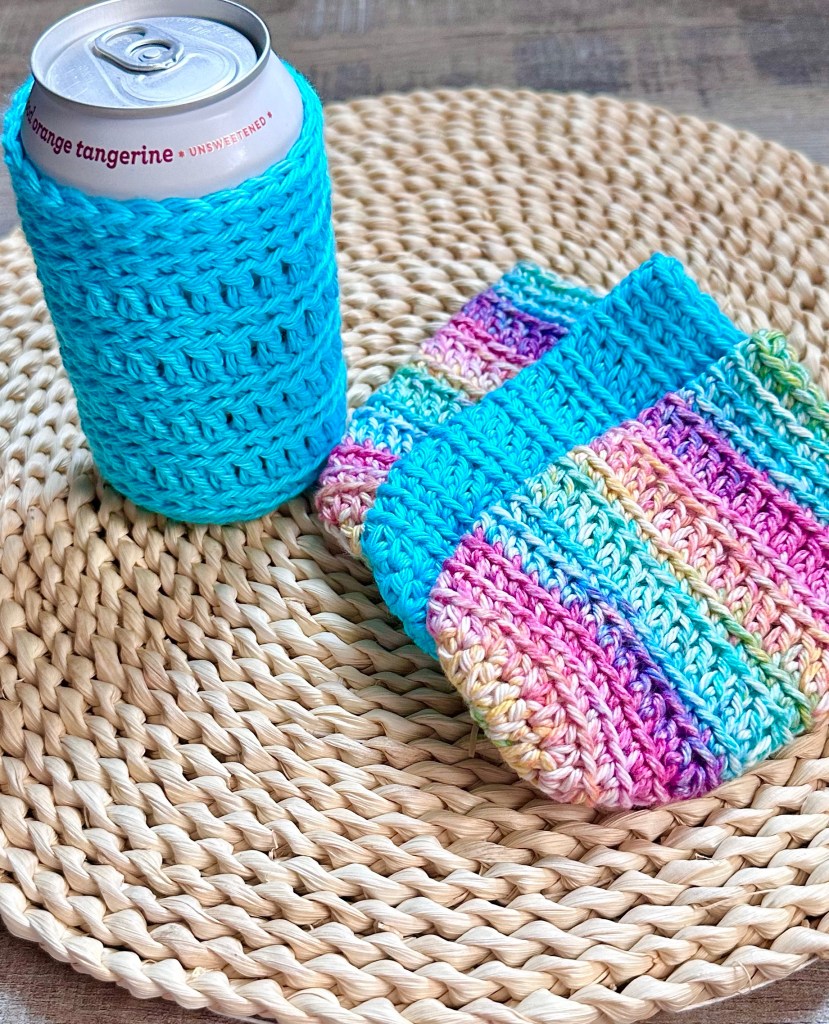
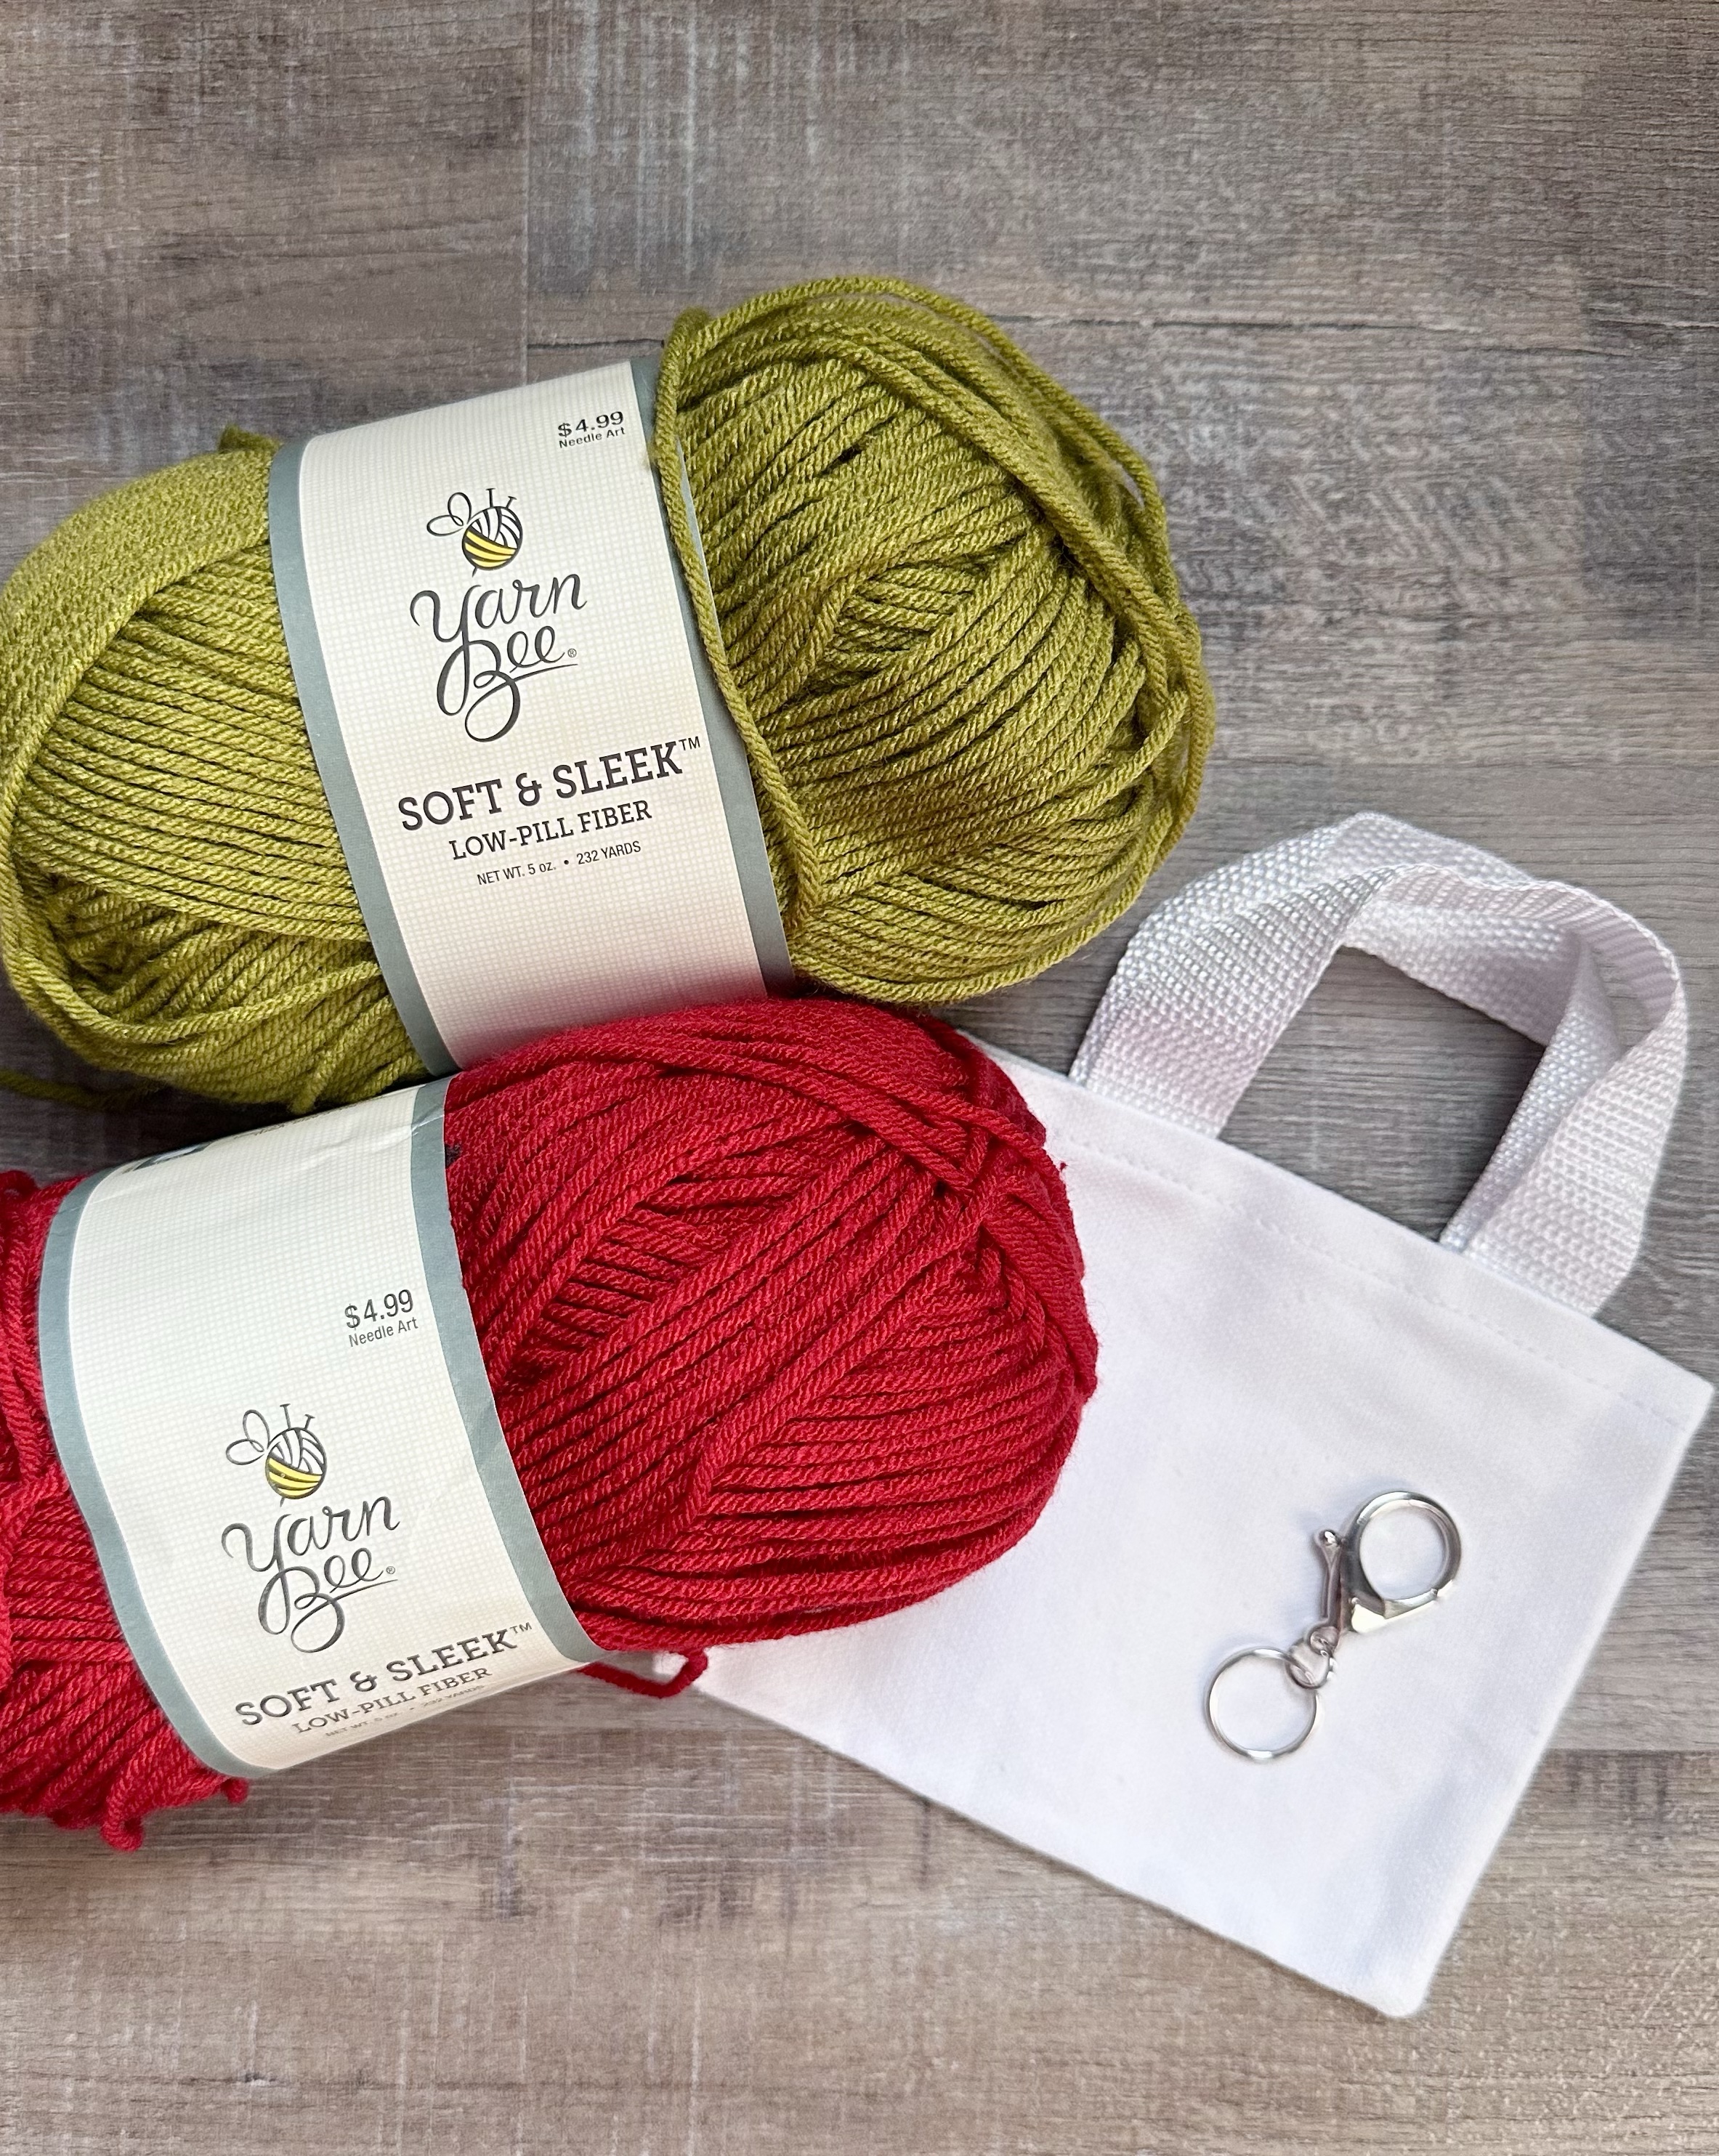
I used Yarn Bee Soft & Sleek Yarn with an H/5mm crochet hook to stitch up my gift bags. The lining of the gift bag is a small canvas bag – no sewing required! – that I picked up at Hobby Lobby. (I also found this assortment of colors here that are similar if you want something other than white.) The Lobster Clasp Keychain I used for the tassel is similar to this.

The little bag is hot glued to the crocheted piece along the top edge. I like these Surebonder fabric hot glue sticks for glueing them together, although regular hot glue would work, too. I also have this Surebonder glue gun that I use only with the fabric glue sticks to it separate from my regular glue gun.

I’ve included the pattern below along with a link to a free PDF if you’d like to easily print it.

Little Crochet Christmas Gift Bag

Worsted Weight Yarn – I used Yarn Bee Soft & Sleek Yarn in Red and Green Apple

H/5mm crochet hook

Little Canvas Tote Bag (measures about 6 inches wide by 5 inches tall plus handle) I found mine at Hobby Lobby

Optional: Lobster Clasp Keychain (similar to this)

Stitches used in US terms:

Chain – ch

Half Double Crochet – hdc

Slip Stitch – ss

Back Loop Only – blo

Third Loop – you can find a tutorial for crocheting in the third loop here.
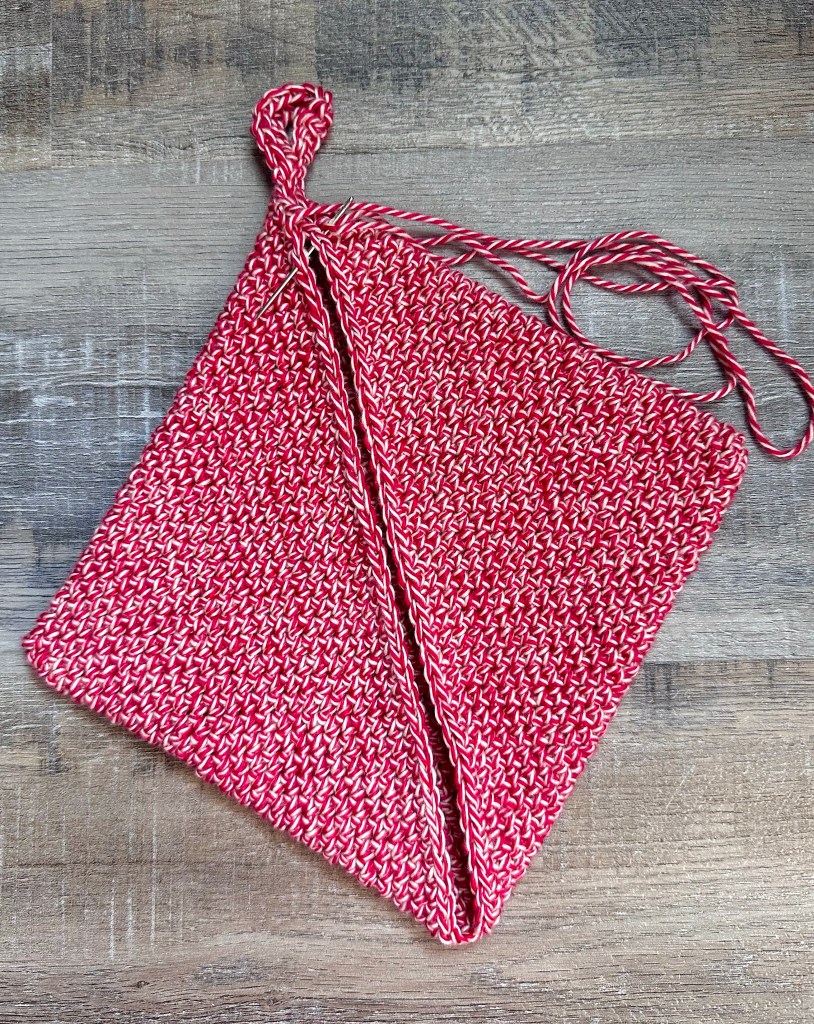
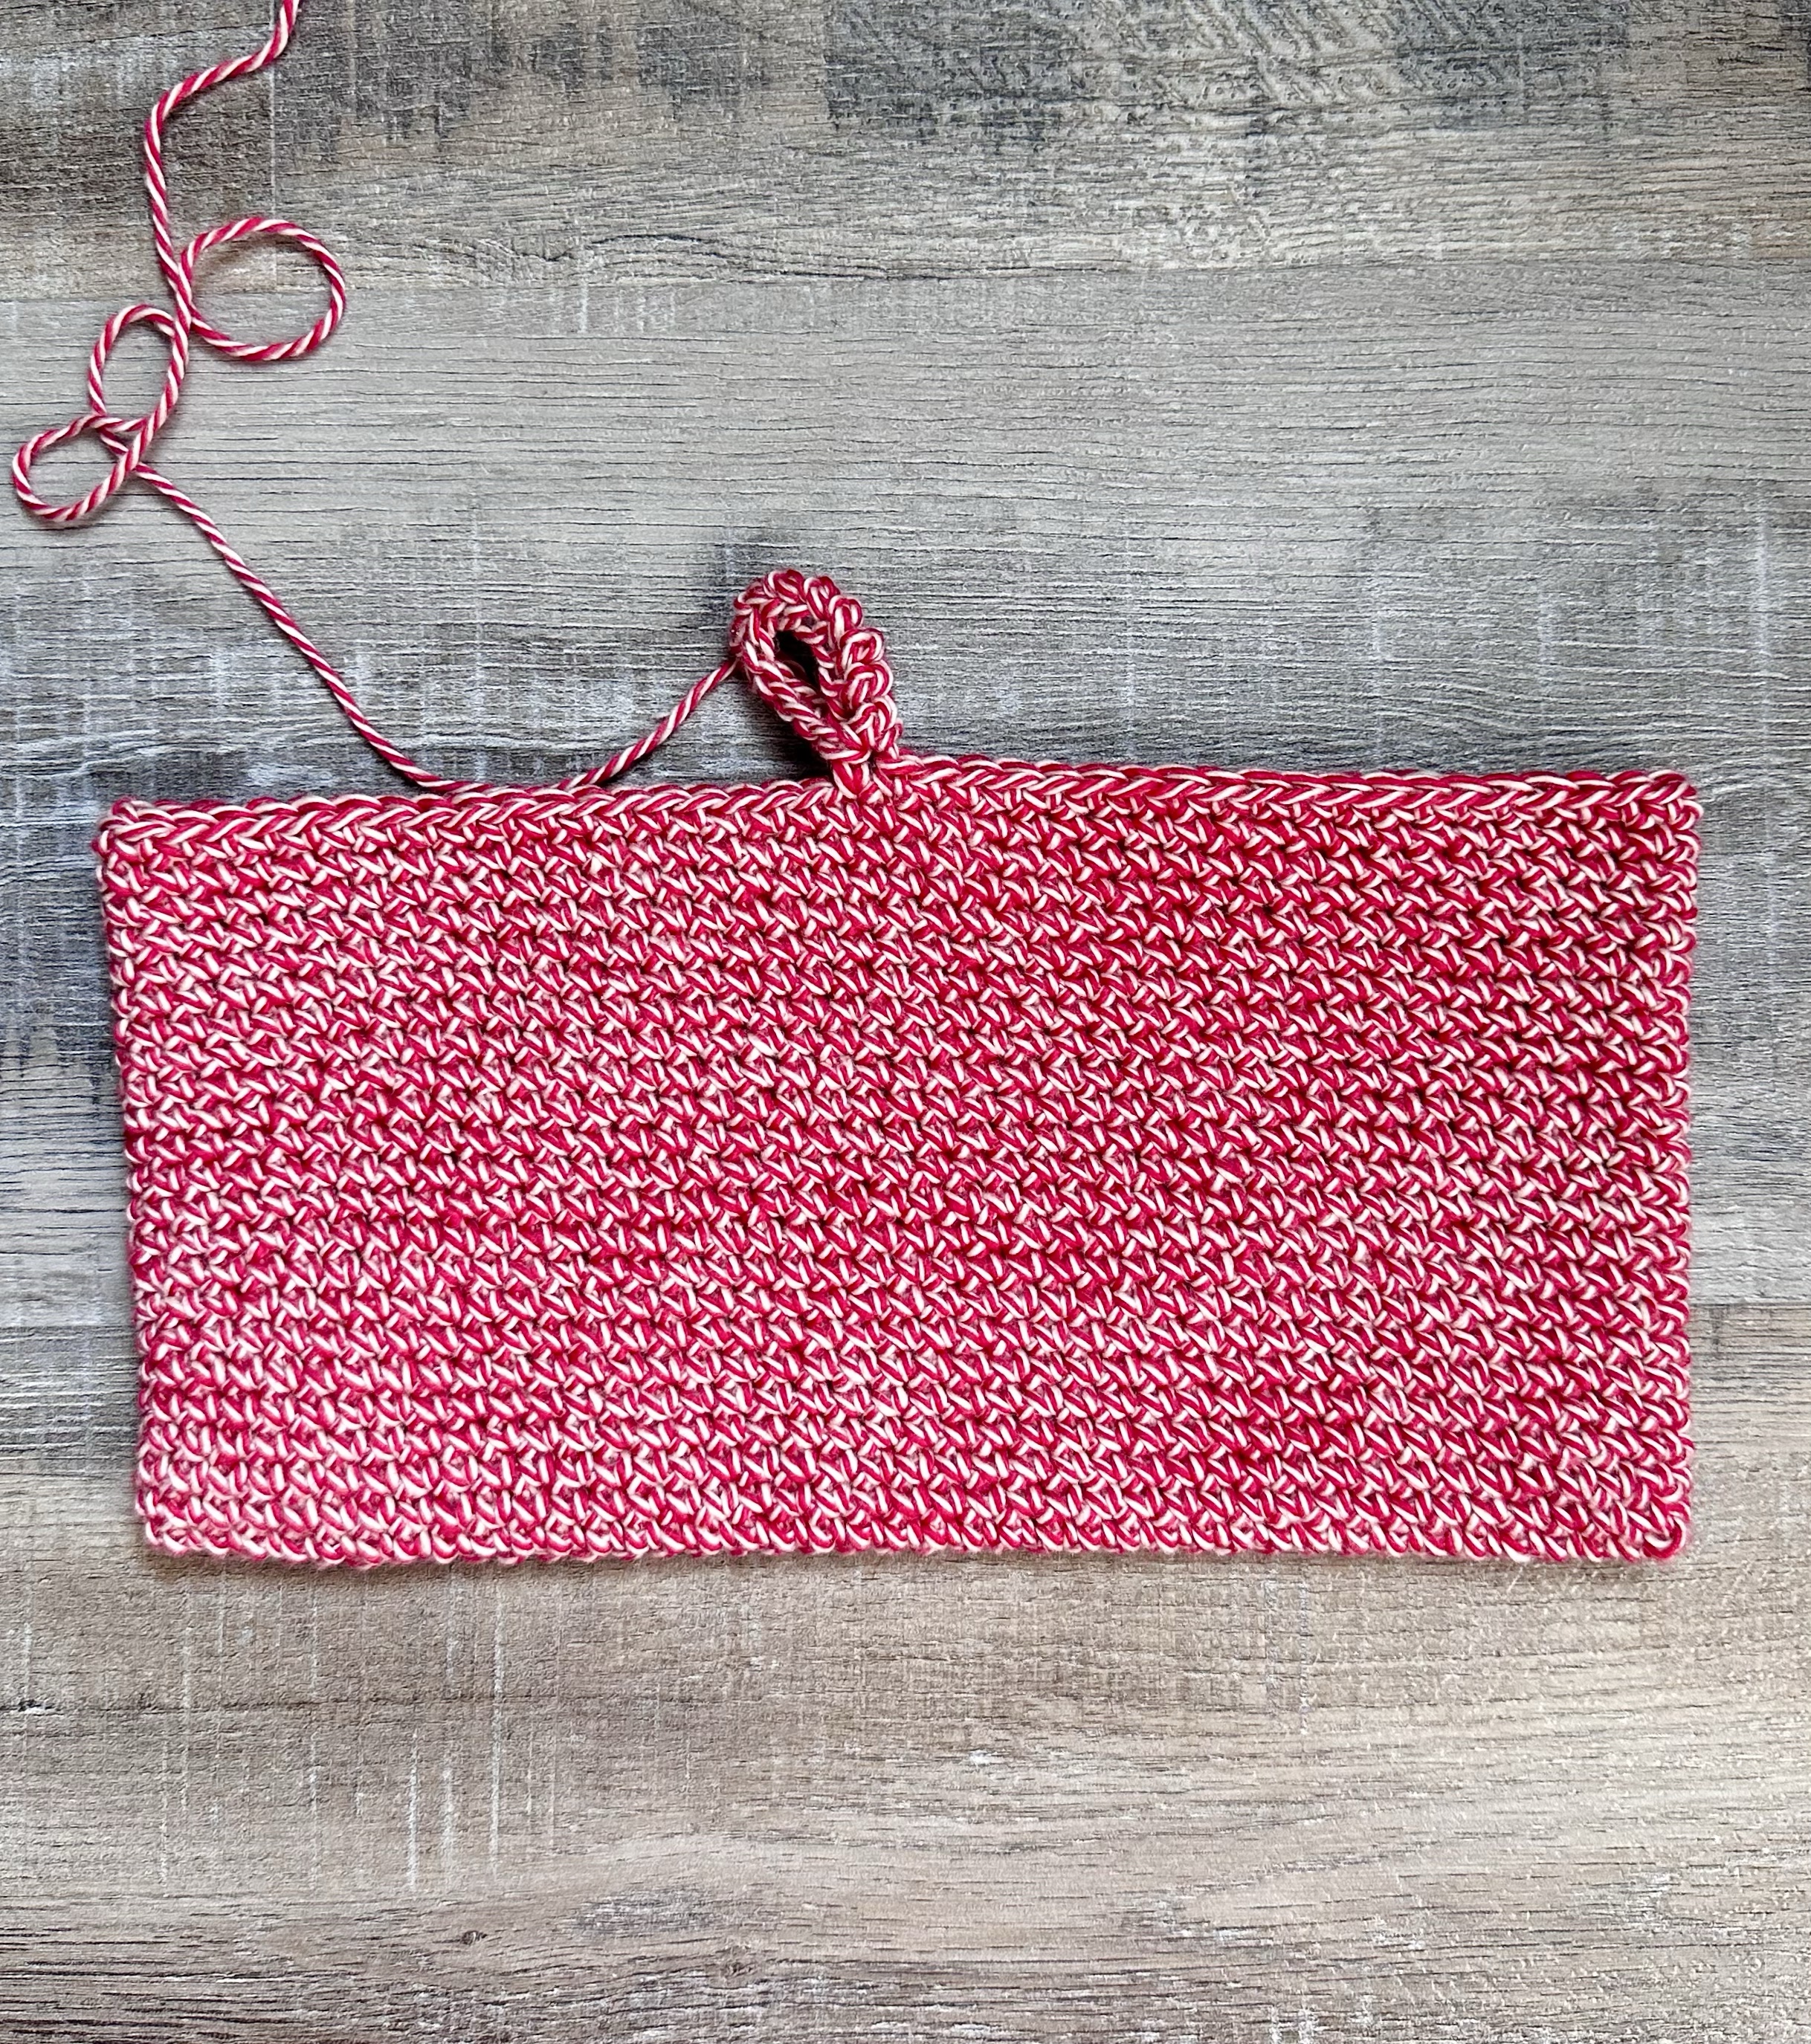
Chain 22. 

Round 1: sc in 2nd ch from hook and each ch across to the last ch. Work 3 sc in last ch. Turn your work to work on the other side of your ch. sc in each ch to the last stitch. Work 3 sc in last stitch. Join with ss to first sc. (45 stitches)

Rounds 2-4: ch 1. hdc in same stitch as ss and in each stitch around. Join with ss to first hdc. (45 stitches)

Rounds 5-6: ch 1. Working in blo, hdc in same stitch as ss and in each stitch around. Join with ss to first hdc. (45 stitches)

Rounds 7-11: ch 1. Working in blo, sc in same stitch as ss and in each stitch around. Join with ss to first sc. (45 stitches)

Rounds 12-13: ch 1. Working in blo, hdc in same stitch as ss and in each stitch around. Join with ss to first hdc. (45 stitches)

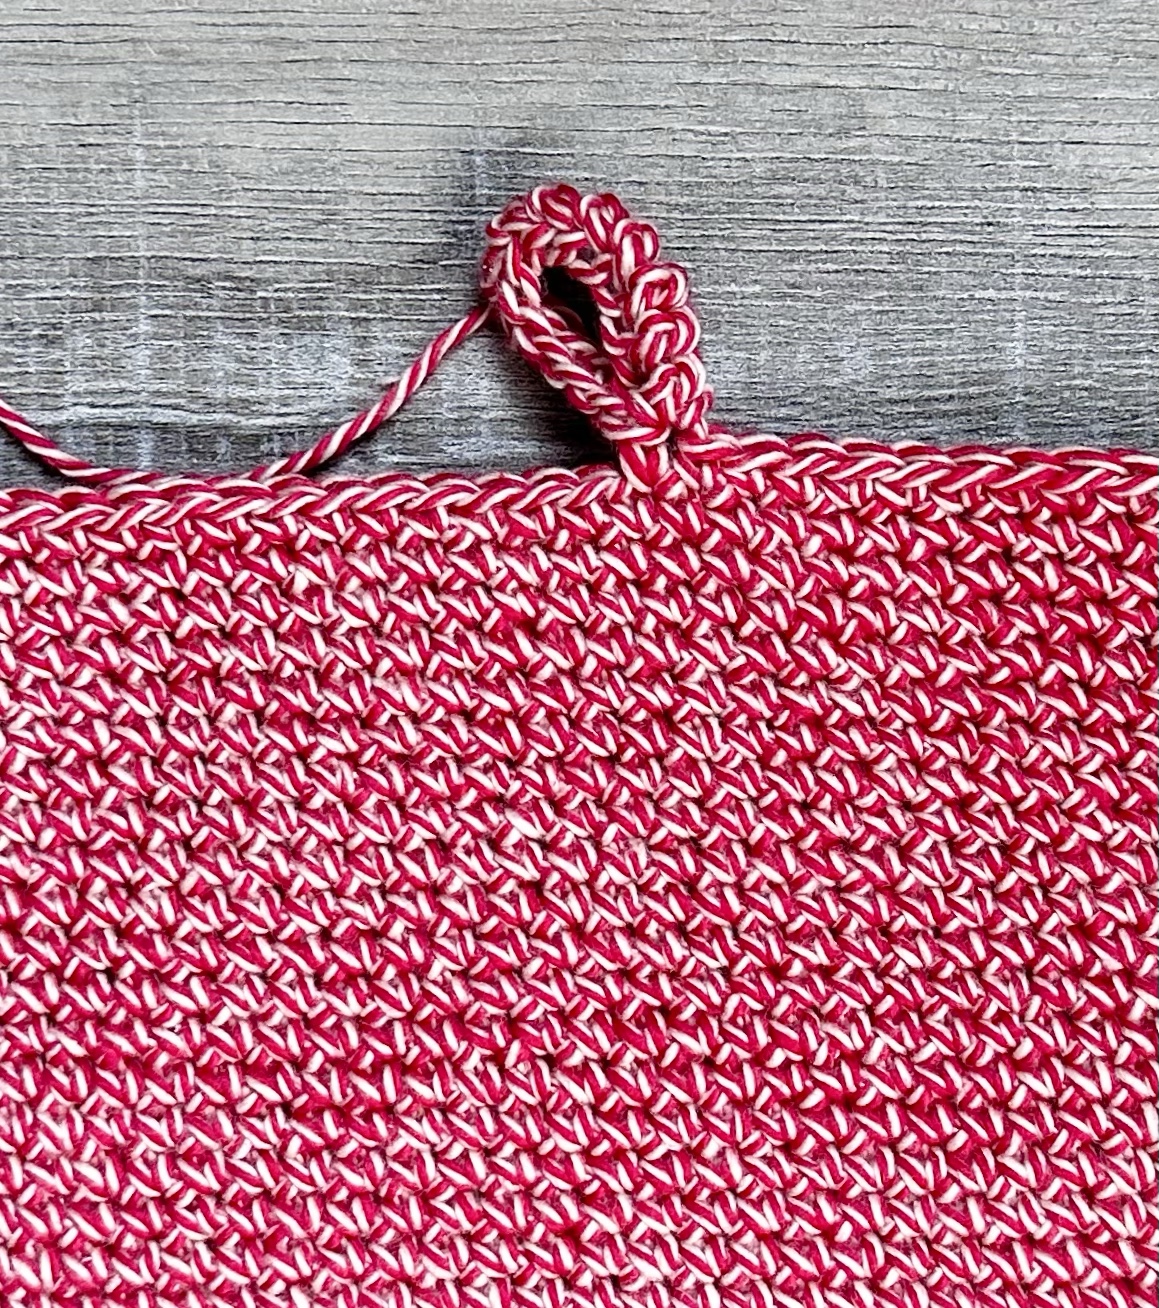
Rounds 14-15: ch 1. Working in third loop, hdc in same stitch as ss and in each stitch around. Join with ss to first hdc. (45 stitches)

Round 16: ch 1. Working in third loop, sc in same stitch as ss and in each stitch around. Join with ss to first sc. (45 stitches)

Fasten off and weave in ends. 

Slip little canvas tote into crocheted piece and hot glue around the top edge to secure.   

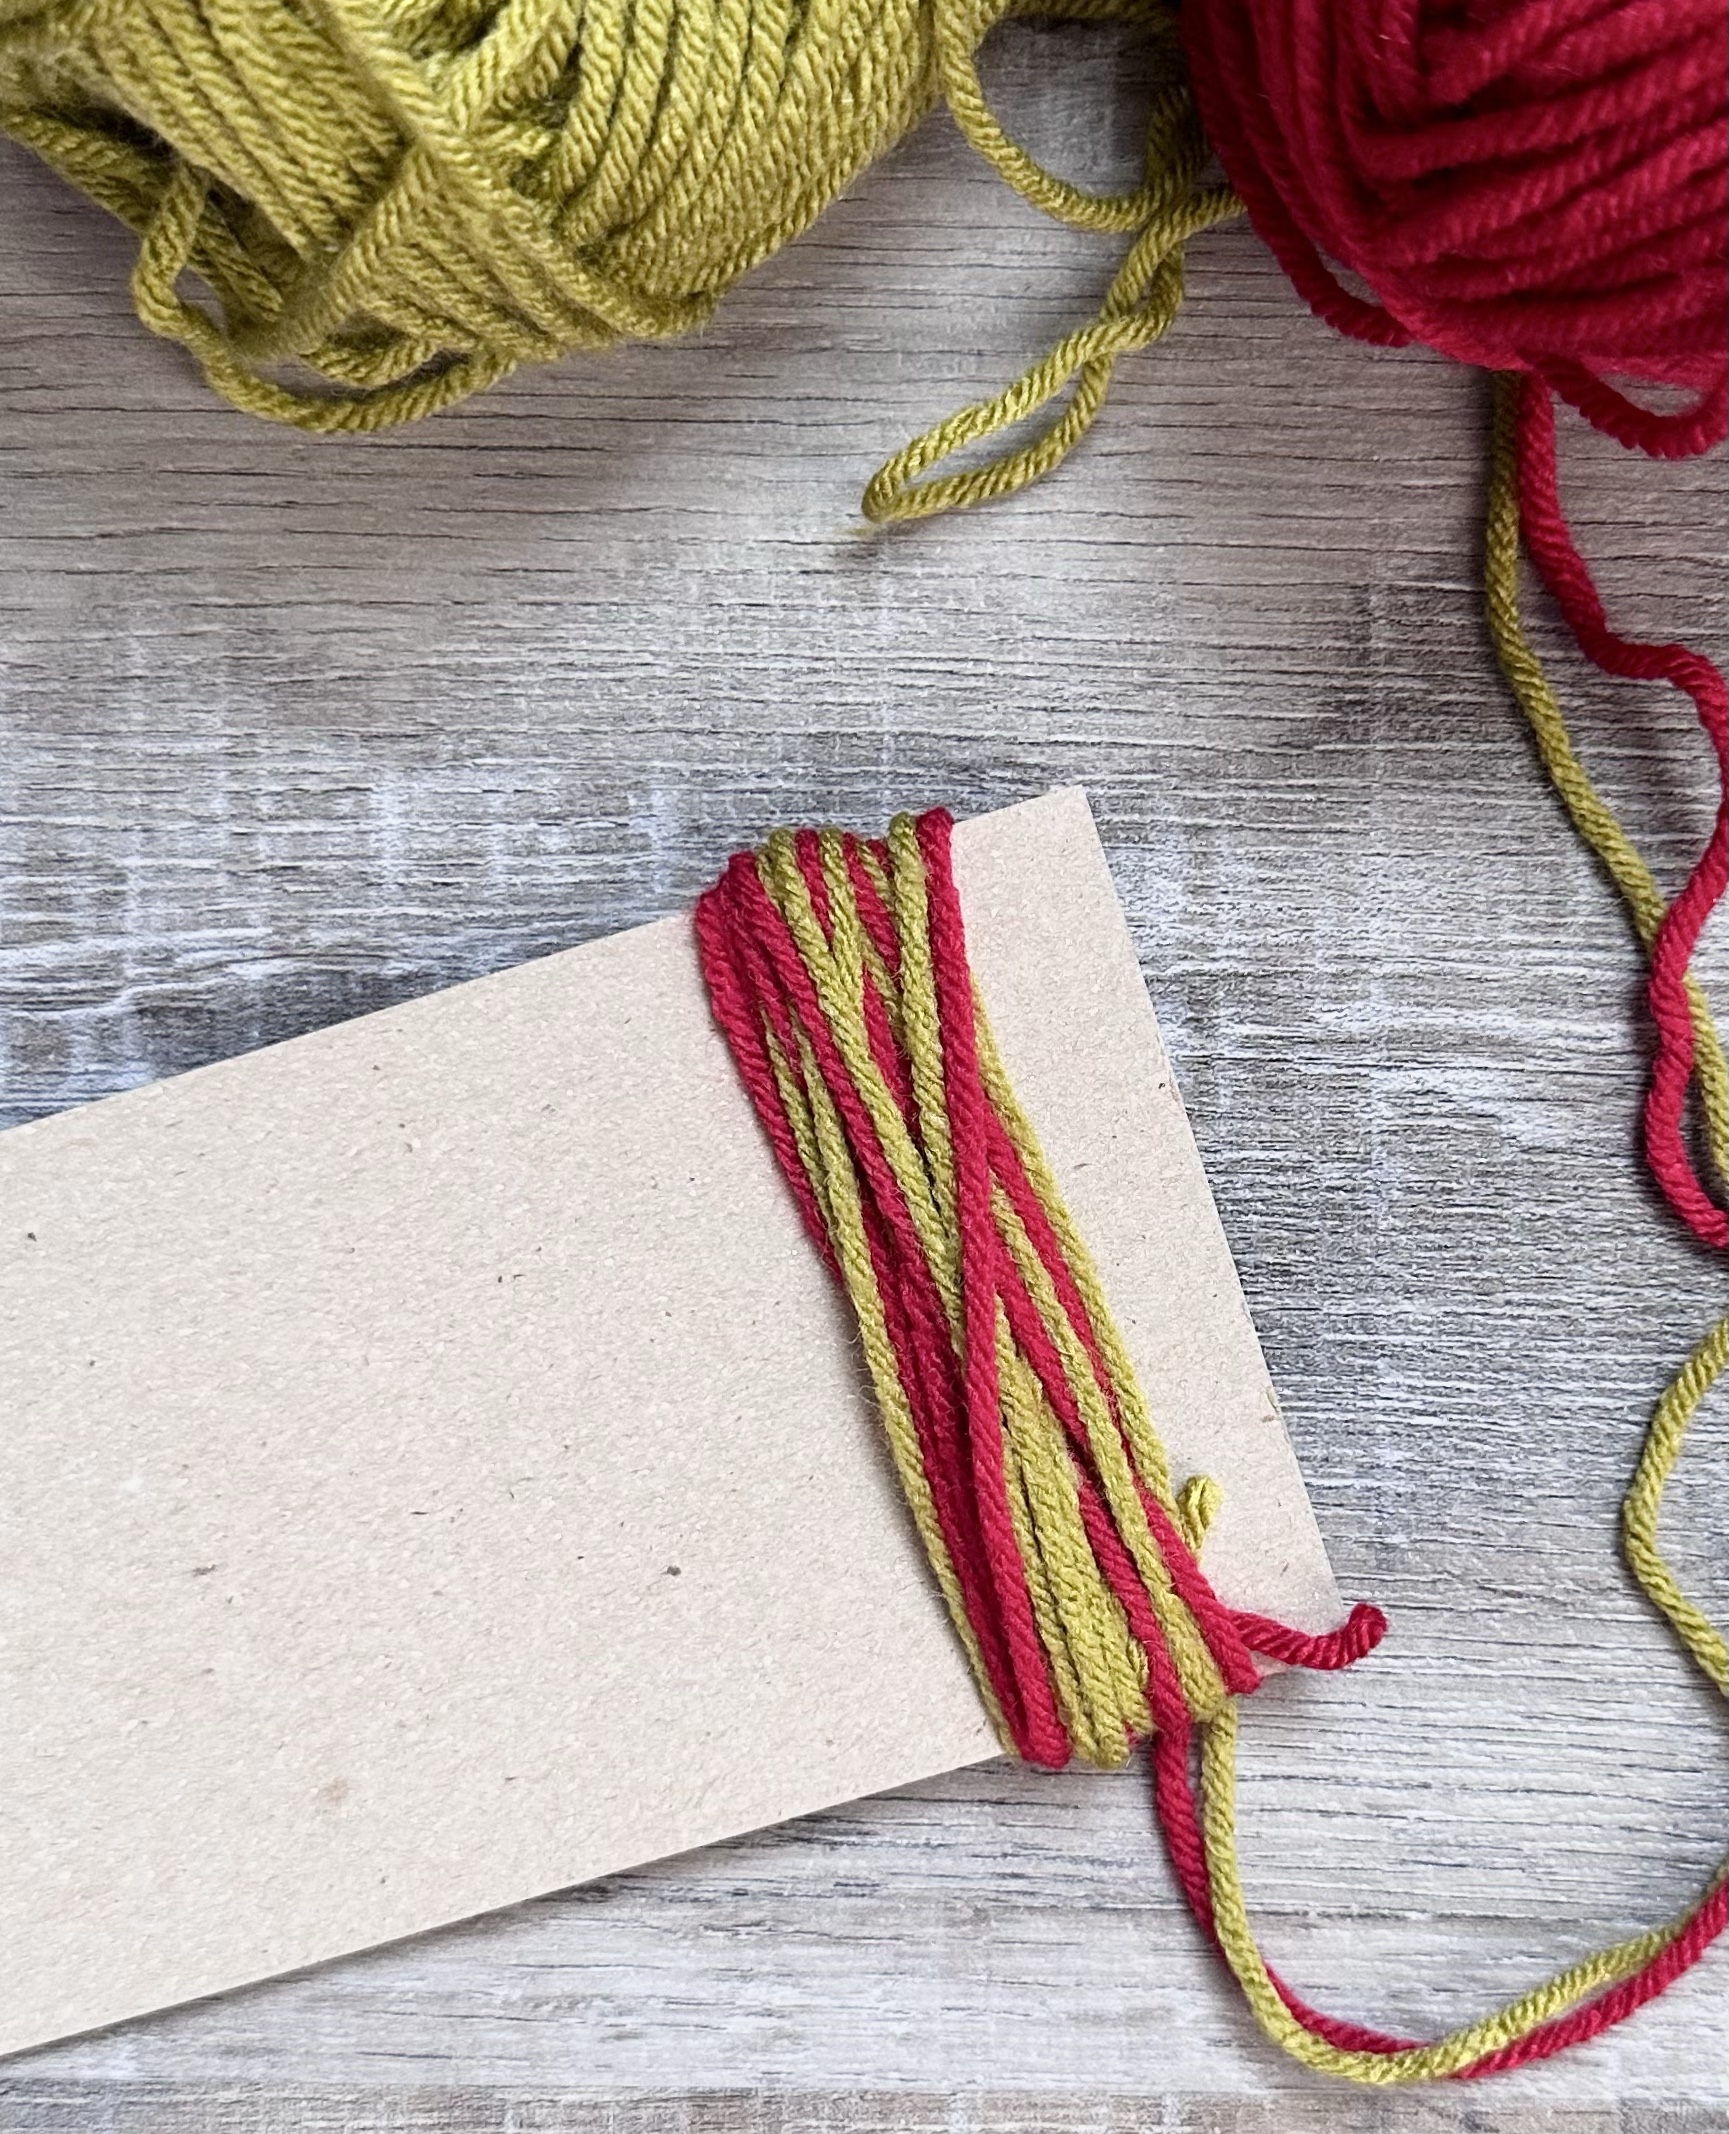
To make optional tassel key ring :

Cut a piece of cardboard about 3-inches wide. Using 1 strand of each color yarn (or 2 strands of one color), wrap the yarn around the cardboard piece to desired thickness.    

Cut one end of the yarn and slip the key ring onto the strands of yarn. Using a strand of yarn, tie tightly around all of the strands close to the key ring. Trim the tassel to desired length. Attach key chain to handle of tote.  

Here’s the link to the free PDF…

These Little Crochet Christmas Gift Bags work up quickly and are fun to make. You could tie some festive ribbon around the handle instead of the tassel. Be sure to add a handmade tag to your gift bag! And of course they can be made in any color. 🙂

Anita

Posted in Christmas, Crochet, Gifts | Tagged , , | Leave a comment

Merry Christmas – July 2023 Christmas Card

Hi friends,

Christmas in July continues with the July 2023 Christmas card. 🎄 You can find my other Christmas card creations I’ve made so far this year in these posts – January, February, March, April, May, and June.

Disclosure: Some of the links on my site are affiliate links, meaning, at no additional cost to you, I will earn a small commission if you click through and make a purchase. As an Amazon Associate I earn from qualifying purchases.

I used the sketch from Build Your Stash Holiday Cardmakers Challenge #35 for the layout of this month’s card. I pulled out one of my really old Christmas stamps from Inkadinkdo and stamped it with red ink on white card stock. (This stamp would be fun on this layout.) I attached a strip of green patterned paper to the end and then used a corner rounder punch on 2 of the corners.

I used a poinsettia embossing folder (this is a similar folder) on a piece of green card stock and attached it to a red card. Then I attached the stamped piece to the card and added 3 red gems to finish it off. You can also use patterned paper in place of the embossed card stock.

This is such a simple layout, but it inspired me to pull out an older stamp and embossing folder that I haven’t used in a long time. So fun! What supplies will you use to make your July Christmas cards? 🎄

Anita

Posted in Cards, Christmas, Stamping | Tagged , , | 4 Comments

Oatmeal Cranberry Cookies

Hi friends,

We were out doing some shopping and my husband said “Oatmeal cranberry cookies sound good”. I told him I thought we had everything we needed to make them at home – we did…and you might, too!

Disclosure: Some of the links on my site are affiliate links, meaning, at no additional cost to you, I will earn a small commission if you click through and make a purchase. As an Amazon Associate I earn from qualifying purchases.

Here’s the recipe I used. Keep reading below for a couple of hints and variations on this yummy treat. 😋

Oatmeal Cranberry Cookies

2 cups lightly packed brown sugar

1 cup melted butter, slightly cooled

2 eggs

2 cups flour

1 teaspoon baking powder

1 teaspoon baking soda

2 cups oatmeal

2 cups dried cranberries

Preheat oven to 350 degrees. Beat brown sugar, melted butter, and eggs together thoroughly. Combine flour, baking powder, and baking soda. Add to first mixture, mix well. Mix in oatmeal and cranberries. Drop by tablespoons on a greased cookie sheet, leaving 2 inches between each cookie. Bake for 12 to 15 minutes until golden brown.

I love using these Silicone Baking Mats on my cookie sheets – no need to grease your cookie sheet! This small cookie scoop is the perfect size for scooping your dough onto the cookie sheet.

If you want chewier cookies, use margarine instead of butter – I prefer them with margarine but I didn’t have any on hand. 🤷🏼‍♀️ To make White Chocolate Oatmeal Cranberry Cookies, add a 12 ounce bag of white chocolate chips to the dough.

For Chocolate Chip Oatmeal Cookies, omit the dried cranberries and add a 12 ounce bag of chocolate chips. I’ve also added 1 cup of raisins along with my chocolate chips for Chocolate Chip Oatmeal Raisin Cookies. And of course you can make Classic Oatmeal Raisin Cookies by adding 2 cups of raisins to your cookie dough and omit the chocolate chips. Add your favorite nuts to any of the variations.

So many options to choose from!! 😋 Which is your favorite? I think White Chocolate Oatmeal Cranberry Cookies would be great around Christmas time. 🎄

Anita

Posted in Recipes | Tagged | 3 Comments

Crochet Christmas Potholders

Hi friends,

This is one of those crochet patterns that has been around forever, but it is so easy and practical that I think it will still be here for a long time to come! It’s great for beginners and seasoned crocheters. It’s also one of those mindless patterns with no counting of stitches or color changes. Sometimes we just need that! 😉

Disclosure: Some of the links on my site are affiliate links, meaning, at no additional cost to you, I will earn a small commission if you click through and make a purchase. As an Amazon Associate I earn from qualifying purchases.

You’ll want to use your favorite 100% cotton yarn to make these potholders so they can stand up to the heat – acrylic yarn will melt! 😱 I used I Love This Cotton Yarn in Monkey Red with an H/5mm crochet hook to stitch up my Christmas Potholders.

To make your potholder, chain 42. Single Crochet in the 2nd chain from hook and in each chain across.

After the last Single Crochet, turn your work so you will be working on the other side of the beginning chain.

Single Crochet in the other loop of each beginning chain across to your first Single Crochet. DO NOT JOIN to the first Single Crochet, but begin working Single Crochet stitches in rounds.

Single Crochet in the next Single Crochet and continue to work one Single Crochet in each stitch around. Do not join at the end of rounds, just keep working a Single Crochet in each stitch. Your piece will look like the picture below. (This is after several rounds)

If you open your piece up and fold in the corners, this is what it will look like. You’ll continue to Single Crochet in each stitch around until those 2 sides come together like in the next picture.

You can stop there and sew the edges together or add a hanging loop like I did. To add the loop, lay your piece flat like in the picture below. Stop crocheting in the middle of one side as shown below. Chain 12 and slip stitch back to the last Single Crochet on your piece. Then Single Crochet in each of the 12 chains you just made. Slip stitch back to the main piece. Fasten off, leaving a long tail for sewing edges together.

Using your long tail, whipstitch the edges of your potholder together. Your hanging loop will be in the corner of your potholder.

Here’s how they look all finished! These are such great potholders – double thick and durable. And they can also be used to protect your counter or table from hot dishes. My finished potholders measure about 7 inches by 7.5 inches.

Pair a couple of Crochet Christmas Potholders with your favorite cookie mix in a jar or some fun kitchen utensils for great Christmas gift! 🎁

Anita

Posted in Christmas, Crochet, Gifts | Tagged , , | 1 Comment

Candy Scoop Christmas Ornaments

Hi friends,

It’s time for Christmas in July! 🎄 Yes, it’s hot out there but we all know how fast the year is going to go and if you want to create some Christmas gifts, crafts, or decor now is the time to start! 😊

Disclosure: Some of the links on my site are affiliate links, meaning, at no additional cost to you, I will earn a small commission if you click through and make a purchase. As an Amazon Associate I earn from qualifying purchases.

I found these mini aluminum ice scoops at Hobby Lobby on clearance. I wasn’t sure what I was going to do with them, but they were so cute! 🤷🏼‍♀️ They measure about 4.25 inches from the tip of the handle to the end of the scoop. I started looking through my craft stash and found the little Christmas candies, candy canes, and gingerbread men that I got at the after Christmas sale at Hobby Lobby. Do you do that?? Shop the clearance sales for craft supplies? If not, you should!! You can find some great deals – just don’t forget what you bought! 😉

These are some similar scoops. They are a little bigger and actually plastic, but I think they would work great. My Hobby Lobby has already started putting out some of their Christmas stock, especially in the craft area, so start looking for the little candy pieces for your ornaments.

These Candy Scoop Christmas Ornaments are super easy to make. I used E6000 clear adhesive to glue the mini candy pieces to the scoop. To make it easier, I squeezed a small amount of adhesive onto wax paper and used a toothpick to apply it to the individual candy pieces. The little candy canes had a loop on the top, so before I glued them to my scoop I snipped it off using my Button Shank Remover Tool.

I tied a ribbon bow around the handle of the scoop and a length of twine (see photo below), then tied the ends of the twine together in a knot to make a hanger.

These little candy scoops would also be so cute on your tiered tray – just leave off the twine hanger.

Candy Scoop Christmas Ornaments would be a cute addition to a plate of homemade sweet treats for a fun neighbor or friend gift. Don’t forget to Pin this post to your Christmas board for later!

Anita

Posted in Christmas, Decor | Tagged , | 4 Comments

Happy 4th of July! 🇺🇸

Hi friends,

Happy Independence Day to all of my friends in the USA! 🇺🇸 I hope you have some time to celebrate with family and friends! 🧨🧨

Disclosure: Some of the links on my site are affiliate links, meaning, at no additional cost to you, I will earn a small commission if you click through and make a purchase. As an Amazon Associate I earn from qualifying purchases.

You can find details for my patriotic tiered tray decor in these posts…Chunky Polka Dot Wood Stars, Americana Wood Blocks, Mini Patriotic Rolling Pins, and Mini Pallet Flag.

Be safe and enjoy your day! 🇺🇸🧨🇺🇸🧨

Anita

Posted in Decor, Summer | Tagged , | 2 Comments

Summer Dipped Oreos

Hi friends,

I shared these fun Summer Dipped Oreos a few years ago and wanted to share them again…Just in time for the 4th of July weekend!

Do you need a fun dessert to take to your Summer BBQ, family reunion, or picnic? These easy to make Summer Dipped Oreos may be just the thing!

Disclosure: Some of the links on my site are affiliate links, meaning, at no additional cost to you, I will earn a small commission if you click through and make a purchase. As an Amazon Associate I earn from qualifying purchases.

All you need are vanilla candy melts in red, white, and blue, some sprinkles, and, of course, Oreos. 🙂 I got my candy melts at Hobby Lobby in the cake/candy decorating section and the sprinkles were in the 4th of July section. Most craft or cake decorating stores will carry the supplies you’ll need – except the Oreos…you’ll have to go to the grocery store for those. 😉

Line a rimmed baking sheet or two with wax paper – this will make cleanup easier especially if you use the sprinkles. Melt the candy melts in the microwave according to the package directions. Dip the Oreos one at a time into the melted candy. Remove with a fork and place directly onto the wax paper. Drizzle a different color of melted candy over the cookies and add the sprinkles. Be sure to do this before the candy has cooled or the sprinkles won’t stick! Let sit for a while until the candy has cooled and set.

And here they are!! A fun addition to any Summer gathering…

This would be great to do with the kids! I’m sure they would enjoy decorating their own cookies!! 🙂

Anita

Posted in Recipes, Uncategorized | 2 Comments

Crochet Summertime Can Cozy

Hi friends,

Can Cozies in the Summertime just make things better! 😊 They keep your hands and table dry from all the condensation, not to mention they are just cute. 😉

Disclosure: Some of the links on my site are affiliate links, meaning, at no additional cost to you, I will earn a small commission if you click through and make a purchase. As an Amazon Associate I earn from qualifying purchases.

I found this variegated I Love This Cotton yarn in Brights at Hobby Lobby – it made me think of Summertime and the Turquoise color goes with it perfectly. I use can cozies all the time and these colors make fun Summertime Cozies. The cozies fit 16.9 ounce bottles, too! Stitch up your cozies using your favorite cotton yarn and an H/5mm crochet hook. They work up very quickly so you can easily make several in just an evening.

By working in the back loops only, it creates a great texture. You’ll get 3-4 cozies from each skein of I Love This Cotton yarn, so very economical! I’ve included the pattern below along with a link to a free PDF if you’d like to print it.

Crochet Summertime Can Cozy

I Love This Cotton Yarn in Brights and Turquoise

H/5mm hook

Stitches used US terms:

Magic Ring

Chain – ch

Single Crochet – sc

Half Double Crochet – hdc

Double Crochet – dc

Back Loop Only – blo

Slip Stitch – ss

Make Magic Ring, ch 1.

Round 1: Work 9 hdc in ring. Join with ss to first hdc. Pull ring closed. (9 stitches)

Round 2: ch 1. 2 hdc in same stitch as ss and in each stitch around. Join with ss to first hdc. (18 stitches)

Round 3: ch 1. 2 hdc in same stitch as ss. *hdc in next stitch, 2 hdc in next stitch* Repeat from * to * around to last stitch. hdc in last stitch. Join with ss to first hdc. (27 stitches)

Rounds 4-5: ch 1. Working in blo, sc in same stitch as ss and in each stitch around. Join with ss to first sc. (27 stitches)

Round 6: ch 2 (does not count as a stitch). Working in blo, dc in same stitch as ss and in each stitch around   Join with ss to first dc. (27 stitches)

Round 7: ch 1. Working in blo, sc in same stitch as ss and in each stitch around. Join with ss to first sc. (27 stitches)

Round 8: ch 2 (does not count as a stitch). Working in blo, dc in same stitch as ss and in each stitch around   Join with ss to first dc. (27 stitches)

Round 9: ch 1. Working in blo, sc in same stitch as ss and in each stitch around. Join with ss to first sc. (27 stitches)

Round 10: ch 2 (does not count as a stitch). Working in blo, dc in same stitch as ss and in each stitch around   Join with ss to first dc. (27 stitches)

Round 11: ch 1. Working in blo, sc in same stitch as ss and in each stitch around. Join with ss to first sc. (27 stitches)

Round 12: ch 2 (does not count as a stitch). Working in blo, dc in same stitch as ss and in each stitch around   Join with ss to first dc. (27 stitches)

Round 13-15: ch 1. Working in blo, sc in same stitch as ss and in each stitch around. Join with ss to first sc. (27 stitches)

Fasten off and weave in ends. 

Here’s the link to the free PDF…

I hope you enjoy this quick and easy pattern. What color will you make your Summertime Can Cozy?

Anita

Posted in Crochet, Summer | Tagged , | 1 Comment

Oh Christmas Tree – June 2023 Christmas Card

Hi friends,

I found my inspiration for June’s Christmas Card using the Sketch Challenge #34 from Build Your Stash Holiday Cardmakers. There is a great sketch released each month on their Facebook page to use as a starting point to create cards and get ready for the holiday season.

Disclosure: Some of the links on my site are affiliate links, meaning, at no additional cost to you, I will earn a small commission if you click through and make a purchase. As an Amazon Associate I earn from qualifying purchases.

I’ve been making a few Christmas cards each month – I hope I’ve inspired you to create some, too! You can find the cards I’ve made so far this year here… January, February, March, April, and May.

June’s card is a simple quick and easy card that only takes a few minutes to make. My Christmas tree stamp is an older one from Hero Arts. This tree would be cute, or you can use any of your favorite simple Christmas image stamps on your card. 🎄

To make the card, I trimmed 2 pieces of coordinating patterned paper – one 3 by 3 inches and one 3 by 1.5 inches – and attached them to a red card. I stamped the tree with green in on white card stock and trimmed around it using my favorite scissors. Using my Tim Holtz Ink Blending Tool, I inked the edges of the tree with green ink. This helps the image to pop against the patterned papers. I attached the tree to the card with foam tape. To finish the card I added dots of red glitter glue.

This is such a great layout that will work with any Christmas stamp that can be easily trimmed and popped up on the card. You can also use this layout for just about any occasion by changing your stamped image.

Half way through the year, and by making 6 cards of each design I created, I now have 36 cards ready to send out when the holiday season hits! How many Christmas cards have you created? 🎄

Anita

Posted in Cards, Christmas, Stamping | Tagged , , | 5 Comments

Scotland – Ports, Beaches, Lochs, and Waterfalls

Hi friends,

Scotland has so many ports, beaches, lochs, and waterfalls throughout the country. You are never far from water – and if you know me, you know that I love the soothing sounds of water lapping the shore. And Scotland did not disappoint!

I’m highlighting just a few of the beautiful ports, beaches, lochs, and waterfalls we visited. We saw so many more – even just random small waterfalls as we were driving that I wasn’t able to get a picture of. The countryside of Scotland is amazing!

Disclosure: Some of the links on my site are affiliate links, meaning, at no additional cost to you, I will earn a small commission if you click through and make a purchase. As an Amazon Associate I earn from qualifying purchases.

St. Andrews Beach

This beach is right next to St. Andrews Castle on the St. Andrews Bay of the North Sea. As you can see, it was a beautiful sunny day when we visited although still a bit chilly for swimming! I did pick up a few seashells from along the water’s edge.

River Ness

River Ness flows through the middle of Inverness. There are shops, hotels, and restaurants along its banks. And Inverness Castle sits on a cliff overlooking the river. The beautiful Free North Church in Inverness, Scotland is also at the end of a pedestrian bridge over the river. We took a lovely walk along River Ness after dinner one night.

Durness Beach

This beautiful beach is along the northern coast of Scotland. As you can see by the photos below, we had a gorgeous sunny day as we were making our drive along this part of the North Coast 500.

Fairy Pools

The Fairy Pools on the Isle of Skye were one of my favorite places to visit! The snowmelt from the Black Cuillin Mountains feeds these amazing waterfalls and pools. You can see the snowcapped mountain in the background of the middle photo below. The photos don’t begin to do justice to just how beautiful this area is!

An Corran Beach

Not only does An Corran Beach on the Isle of Skye have amazing views, there are also 18 dinosaur footprints scattered across the rocks.

Portree Harbour

The quaint village of Portree on the Isle of Skye sits along a picturesque harbour formed by Loch Portree. You will find the iconic colorful buildings in the first photo below in just about any article you read about Portree. Both that photo and the middle photo were taken from our hotel across the harbour – we couldn’t have asked for a better view! The last photo below is sea glass that I found along the shore of the harbour.

Loch Ness

Along the famous Loch Ness sits the ruins of Urquhart Castle. I shared a little about our visit to the castle in this post. We searched for Nessie, but never did see her! 😉 We did see some absolutely beautiful views, though.

I love to hunt for sea shells whenever I am near the ocean and was delighted to find shells, sea glass, and a few rocks to bring home to remember our trip!

I hope you enjoyed seeing some of the most beautiful places we visited on our trip to Scotland! I’ll be back soon with one more post sharing some of my favorite things from our trip. 🙂

Anita

Posted in Travel | Tagged | 5 Comments