Reflections on 2020

Hi friends,

We all know 2020 was a difficult year. Covid 19 hit us fast and hard. There have been lockdowns, jobs lost, loss of contact with family and friends, terrible illness, and loss of loved ones.

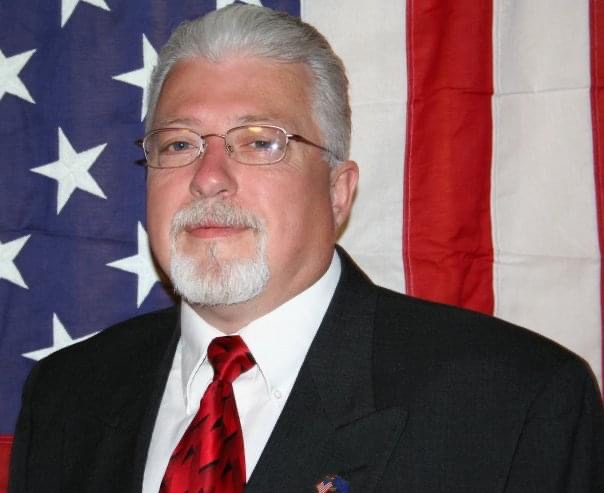
Our family was one of the many to lose a loved one to this awful virus. My brother Keith passed away on November 22, 2020. He left us quickly and unexpectedly and my heart hurts that he’s no longer here. I miss his random texts. I miss his teasing me about my “southern” accent he thought I had acquired. I miss his checking to see if we were ok after bad weather hit our area – and this past year checking to see if we were still covid free. I miss his asking when we would be in Indiana – and his making sure we got back to Alabama safely.

One of my best memories of him is one I don’t think many know. We were in my Dad’s hospital room moments after Dad passed in 2015. I was in a chair with Keith standing next to me. As I was crying, he reached over and put his arm around me. I leaned my head against his hip and we just stayed that way for a while. I felt so close to him in those moments of shared pain. He was feisty, loved his wife fiercely, was a strong supporter of our Veterans, and did things his own way. No matter how old I get, he was always my big brother and I miss him!

When I look back at 2020, the loss of my brother is, of course, the first thing I think of. But when I look over the rest of the year, I remember that despite the pandemic…

We were able to get away to the beach and the mountains.

We were able to see our oldest godson marry the love of his life.

And we were blessed by family and friends in countless little ways all year long … an impromptu concert in our driveway, little gifts and flowers left at our front door, cards, texts, phone calls, zoom get togethers, prayers.

This bible verse has been in my heart much of 2020. John 16:33 from the Message translation…

33 I’ve told you all this so that trusting me, you will be unshakable and assured, deeply at peace. In this godless world you will continue to experience difficulties. But take heart! I’ve conquered the world.”

It’s been a rough year. But it hasn’t all been hard. There has been a lot of good, too. I’m moving into 2021 still hurting, but with hope! Because Jesus has conquered the world and He is walking this journey with me! ❤️

My prayer for 2021 is that you will find the grace and peace that Jesus offers and let him go along on your journey, too.

Much love,

Anita

Posted in Uncategorized | Leave a comment

Crochet Ridged Cowl

Hi friends,

Happy New Year! Praying this year will be much better than 2020!

I decided to start off 2021 with a free crochet pattern. 🙂 This is a fun and easy pattern that works up in just a couple of hours in your choice of worsted weight yarn. I used I Love This Yarn in the beautiful Painted Canyon color way with an I/5.5mm hook to stitch up my cowl.

Disclosure: Some of the links on my site are affiliate links, meaning, at no additional cost to you, I will earn a small commission if you click through and make a purchase. As an Amazon Associate I earn from qualifying purchases.

You can find the free pattern below. I’ve also included a free PDF for easy printing.

Crochet Ridged Cowl

I Love This Yarn in Painted Canyon – one 5 ounce (252 yards) skein

I/5.5mm hook

Stitches used US terms

Chain – ch

Foundation Double Crochet – fdc

Double Crochet – dc

Front Post Double Crochet – fpdc

Back Post Double Crochet – bpdc

Slip Stitch – ss

Note: ch 2 at beginning of row counts as 1st dc stitch.

Row 1: Work 29 fdc. Turn. (29 stitches)

Row 2: ch 2 (counts as 1st stitch). Skip 1st dc, dc in each stitch across. Turn. (29 stitches)

Row 3: ch 2 (counts as 1st stitch). Skip 1st dc, dc in next 3 stitches. fpdc in next stitch. *dc in next 4 stitches, fpdc in next stitch* Repeat from * to * 3 times. dc in last 4 stitches. Turn. (29 stitches)

Row 4: ch 2 (counts as 1st stitch). Skip 1st dc, dc in next 3 stitches. bpdc in next stitch. *dc in next 4 stitches, bpdc in next stitch* Repeat from * to * 3 times. dc in last 4 stitches. Turn. (29 stitches)

Repeat Rows 3 and 4 to desired length. My cowl measured about 31 inches before adding the last row.

Last Row: ch 2 (counts as 1st stitch). Skip 1st dc, dc in each stitch across. Turn. (29 stitches)

Fold scarf in half and ss ends together. Fasten off and weave in ends.

If you would like to make this an infinity scarf that you can wrap around twice, you’ll need about 10 ounces of yarn. Crochet until the scarf measures about 60 inches before adding the last row, then join the ends together.

Here’s a link to the free PDF…

What color Crochet Ridged Cowl will you make?

Happy Stitching!

Anita

Posted in Crochet, Gifts | Tagged , | 6 Comments

Thanks Gnome Much

Hi friends,

Do you love gnomes? They are so cute, are everywhere, and just so fun! Unity Stamp Company has several new gnome stamp sets including this adorable Gnome-One Like You set.

I thought it would be fun to color this cute gnome in Christmas colors and make him into a thank you card. He’s perfect for saying “thank you” for those special Christmas gifts.

Disclosure: Some of the links on my site are affiliate links, meaning, at no additional cost to you, I will earn a small commission if you click through and make a purchase. As an Amazon Associate I earn from qualifying purchases.

I stamped the gnome with Memento Tuxedo Black ink on white card stock and colored the image with Copic markers. I die cut the image with a scalloped oval die and layered it to a larger scalloped oval die cut from red card stock. (This is a good set of scalloped oval dies.) I then added dots of clear glitter glue to his hat.

I added a strip of green patterned paper to a white card and attached the stamped image to the card with foam tape. I stamped “thanks” with red ink (this is a nice red) in the bottom right corner of the card. (My “thanks” stamp has been in my collection forever and is no longer available, but this set has some great sentiments!)

I think this little guy is just so adorable…my head is already spinning with ideas for Valentine’s Day, birthdays, and thinking of you cards. Stayed tuned – I’m sure I will be sharing more fun cards with you!

Thanks Gnome Much for stopping by!

Anita

Posted in Cards, Christmas, Stamping, Uncategorized | Tagged , , | 3 Comments

Merry Christmas

Merry Christmas friends,

I hope that your Christmas is filled with love and joy.

Life has been so difficult this year and my prayer is that we will all find our hope in the precious gift of the birth and resurrection of Jesus. ❤️

This cute little guy makes me smile…I hope he will bring a smile to your face, too!⛄️

You can find all the details for this card here in this post.

Sending you love…

Anita

Posted in Cards, Christmas, Stamping | Tagged , , | 2 Comments

Snickerdoodle Cookies

Hi friends,

Need one more sweet treat for Christmas? I’ll bet you have everything you need in your kitchen to whip up a batch of these yummy Snickerdoodle Cookies. 😋

Disclosure: Some of the links on my site are affiliate links, meaning, at no additional cost to you, I will earn a small commission if you click through and make a purchase. As an Amazon Associate I earn from qualifying purchases.

Important tip: Be sure to use margarine NOT butter! This will keep your cookies soft and chewy.

Here they are ready for the oven! I like to use silicone mats on my baking sheets. The cookies won’t stick and you can use them over and over. You can also use parchment paper.

Hot and fresh from the from the oven…they smell amazing!!

Here’s the recipe:

  • 1 cup margarine at room temperature
  • 1 and 1/2 cups sugar
  • 2 eggs
  • 2 and 3/4 cups flour
  • 2 teaspoons cream of tartar
  • 1 teaspoon baking soda
  • 1/4 teaspoon salt
  • 3 tablespoons sugar
  • 3 teaspoons cinnamon

Preheat oven to 400°.

Cream together margarine, sugar, and eggs thoroughly. Sift together flour, cream of tartar, baking soda, and salt. Add to the first mixture and blend thoroughly. Form dough into balls the size of walnuts.

If dough is too sticky, just put it in the refrigerator for a few minutes or sprinkle your hands with water before rolling into balls.

In a small bowl, combine 3 tablespoons sugar and 3 teaspoons cinnamon. Roll each ball in this mixture and place on an ungreased cookie sheet, allowing at least 2 inches between each ball. Bake 8 to 10 minutes.

This recipe makes about 5 dozen cookies so there are plenty for everyone. So good with a cold glass of milk or a hot cup of tea or coffee! And if there are any left, they freeze well.

This is a fun recipe to make with the kids. They will love rolling the dough into little balls and then into the cinnamon/sugar mixture. 😊

Happy Baking!

Anita

Posted in Recipes, Uncategorized | Tagged | 1 Comment

Red Crochet V-Stitch Scarf

Hi friends,

Do you need a last minute Christmas gift? This simple Red Crochet V-Stitch Scarf works up quickly – you still have time. 🙂 It’s an easy repeat pattern, so you can make it any length you want.

I used Red Heart Soft Yarn in Really Red with an H/5mm hook to stitch up my scarf. I used a little more than one skein (each skein has 5 ounces/256 yards). The finished scarf measures about 6.5 inches wide by 60 inches long.

Disclosure: Some of the links on my site are affiliate links, meaning, at no additional cost to you, I will earn a small commission if you click through and make a purchase. As an Amazon Associate I earn from qualifying purchases.

Here’s the pattern…

Chain 35 loosely.

Row 1 – Double crochet in 4th chain from hook. (3 skipped chains count as a double crochet). *Skip 2 chains. Double crochet, chain one, double crochet (V-stitch) in next chain.* Repeat from * to* across until last 4 chains. Skip 2 chains. Double crochet in final 2 chains. Turn. (9 V-stitches and 2 double crochet at each end)

Row 2 – Chain 3 (counts as double crochet). Skip first double crochet. Double crochet in next double crochet. Work V-stitch in chain-one space. Repeat V-stitch across to last 2 double crochet. Double crochet in last 2 double crochet. Turn.

Repeat Row 2 to desired length. Fasten off and weave in ends.

Of course you can make this simple scarf in any color and any worsted weight yarn will work – I would suggest using a soft yarn so it will drape nicely.

Happy Stitching!

Anita

Posted in Christmas, Crochet, Gifts, Uncategorized | Tagged , , | Leave a comment

Yummy Slow Cooker Peanut Clusters

Hi friends,

Looking for a super easy sweet treat for the holidays? These Yummy Peanut Clusters are made in your slow cooker! All you do is dump everything in your slow cooker for a couple of hours and scoop them onto wax paper to cool.

Disclosure: Some of the links on my site are affiliate links, meaning, at no additional cost to you, I will earn a small commission if you click through and make a purchase. As an Amazon Associate I earn from qualifying purchases.

Yummy Slow Cooker Peanut Clusters

  • 16 oz jar salted peanuts
  • 16 oz jar honey roasted peanuts
  • 16 oz package chocolate bark
  • 16 oz package white chocolate bark
  • 11 oz bag butterscotch chips

Put all ingredients in your slow cooker, breaking up the chocolate and white chocolate bark into squares. Cover and cook on low 2-1/2 to 3 hours. When melted, stir well. Drop by spoonfuls onto wax paper and let cool.

Note: Don’t put the honey roasted peanuts in first – they may burn if they are directly on the surface of the slow cooker.

Another note: as this is melting, the chocolate bark squares may keep their shape even though they have become very soft. So check to see if they are melted and don’t just go by looks.

This makes a lot of candy! Perfect for putting in cellophane treat bags and tying with red and white bakers twine for gifting. And it also freezes well if you want to save some for later. 🙂

I hope you enjoy this candy – it’s kind of addicting 😉

Anita

Posted in Christmas, Recipes, Uncategorized | Tagged , , | 1 Comment

No Sew Christmas Pillow

Hi friends,

Sewing is not one of my talents – but I can use a glue gun! 🙂 This is a super easy way to make a No Sew Christmas Pillow to add to your seasonal decor.

Disclosure: Some of the links on my site are affiliate links, meaning, at no additional cost to you, I will earn a small commission if you click through and make a purchase. As an Amazon Associate I earn from qualifying purchases.

You’ll need a tea towel, the cotton/linen type fabric not terry cloth. I found my towel at Target, it is 30-inches square. You’ll also need a glue gun with glue sticks made for fabric. I like this Surebonder Glue Gun it has a very fine tip along with an on/off switch. (I decided to keep this glue gun specifically for the fabric glue so I don’t mix glue types.) The glue sticks I used are also from Surebonder. They are specially made for glueing fabric, although they are white not clear so make sure you don’t get glue in the wrong place! 😉 You’ll also need Polyfil to stuff your pillow.

I washed, dried, and ironed my towel. I folded it in half so my finished pillow measured 30 by 15 inches. Then I simply ran a line of glue along the edge securing a few inches at a time, leaving one end open to add the Polyfil. After I had the pillow stuffed the way I wanted, I glued the open end closed.

Here’s how 3 of the edges of the pillow look where they have been glued together. The bottom of the pillow is where my towel is folded in half.

This is my completed pillow – even though I found my towel in the Christmas section it could easily be used year round.

This easy pillow adds a little extra Christmas cheer to my decor. 🎄

There are lots of different, fun Christmas towels available. Some of them measure about 15 by 30 inches so folded in half would make a pillow about 15 inch square instead of a rectangle like mine.

No sew pillows are so quick and easy to make. They are a great thrifty gift idea, too! 🎁

Happy Crafting!

Anita

Posted in Christmas, Decor, Uncategorized | Tagged , | 2 Comments

Marshmallow Mug Crochet Santa Hat

Hi friends,

Have you seen these cute little Marshmallow Mugs? I’ve seen them used on tiered trays and cocoa bars. They don’t hold a lot, but they are so adorable!

Disclosure: Some of the links on my site are affiliate links, meaning, at no additional cost to you, I will earn a small commission if you click through and make a purchase. As an Amazon Associate I earn from qualifying purchases.

I found the free pattern for this fun crochet Santa hat here at JaimeLee Crochet. I found my Marshmallow Mugs here on Amazon.

I used Yarn Bee Soft & Sleek yarn in White and Red to stitch up my hats. The pattern calls for a G/4.25mm hook, but I needed to use an H/5mm hook to get the right size – just check your gauge to see what will work for you. I used the 1-inch Clover Pom Pom Maker to make the pom pom on the top of the hat.

I added some chocolates in a snack size ziptop bag, put them inside the mug, and slipped on the Santa hat. Then I put the mug in a 4 by 9 inch cellophane bag and tied it with red curling ribbon for a super cute gift. 🎁

These make great teacher, neighbor, or friend gifts. The Santa hats work up super quick and everyone loves a little chocolate! 🎅🏼 🎁

Happy Stitching!

Anita

Posted in Christmas, Crochet, Decor, Gifts | Tagged , , | 4 Comments

Farmhouse Yarn Wrapped Christmas Trees

Hi friends,

I love farmhouse/vintage decor! The Christmas season is a perfect time to craft a little something farmhouse-y. 😉

These sweet little trees are so easy to make and will add the perfect touch to your table or shelf. All you need are some styrofoam cones (I got my little ones at Dollar Tree and the larger one at Hobby Lobby), some chunky yarn (I used Bernat Blanket Yarn in Vintage White), craft glue (I love this glue), and something for the tree topper. I used kraft card stock to make stars to top my trees.

Disclosure: Some of the links on my site are affiliate links, meaning, at no additional cost to you, I will earn a small commission if you click through and make a purchase. As an Amazon Associate I earn from qualifying purchases.

To make the trees, begin by putting a thin layer of glue on the top of the cone. Attach the end of the yarn in the center of the top and make a little coil until the top is covered. Add a little more glue on the sides and continue wrapping the yarn around the cone until you get near the bottom, no need to add glue to the entire cone. I added more glue before I wrapped the last couple of rows. Then just cut the yarn making sure to glue the end securely.

To make my stars, I used my star dies and cut 2 stars from kraft card stock for each tree. I glued them together with a toothpick sandwiched between them. Then I added a button to the center of each star. Once they were dry, I pushed the toothpick into the top of the tree. 

And here are my completed Farmhouse Yarn Wrapped Christmas Trees! I love how they turned out!

My Tiny Bottle Brush Christmas Trees on Vintage Wood Spools look so cute with my Farmhouse Yarn Wrapped Christmas Trees! (You can find the details for the Bottle Brush Christmas Trees here.)

This would be a fun craft to make with the kids! The styrofoam cones come in so many different sizes – you could make a whole forest! 😊

Happy Crafting!

Anita

Posted in Christmas, Decor, Uncategorized | Tagged , | 6 Comments