I found this super quick and easy Crochet Star Ornament pattern here at One Dog Woof. It works up in just a few minutes and it’s free! ⭐️
Disclosure: Some of the links on my site are affiliate links, meaning, at no additional cost to you, I will earn a small commission if you click through and make a purchase. As an Amazon Associate I earn from qualifying purchases.
These are so fun to hang on your tree or to use as a package tie on. You could also string them together to make a garland. What will you do with your Crochet Star Ornaments?
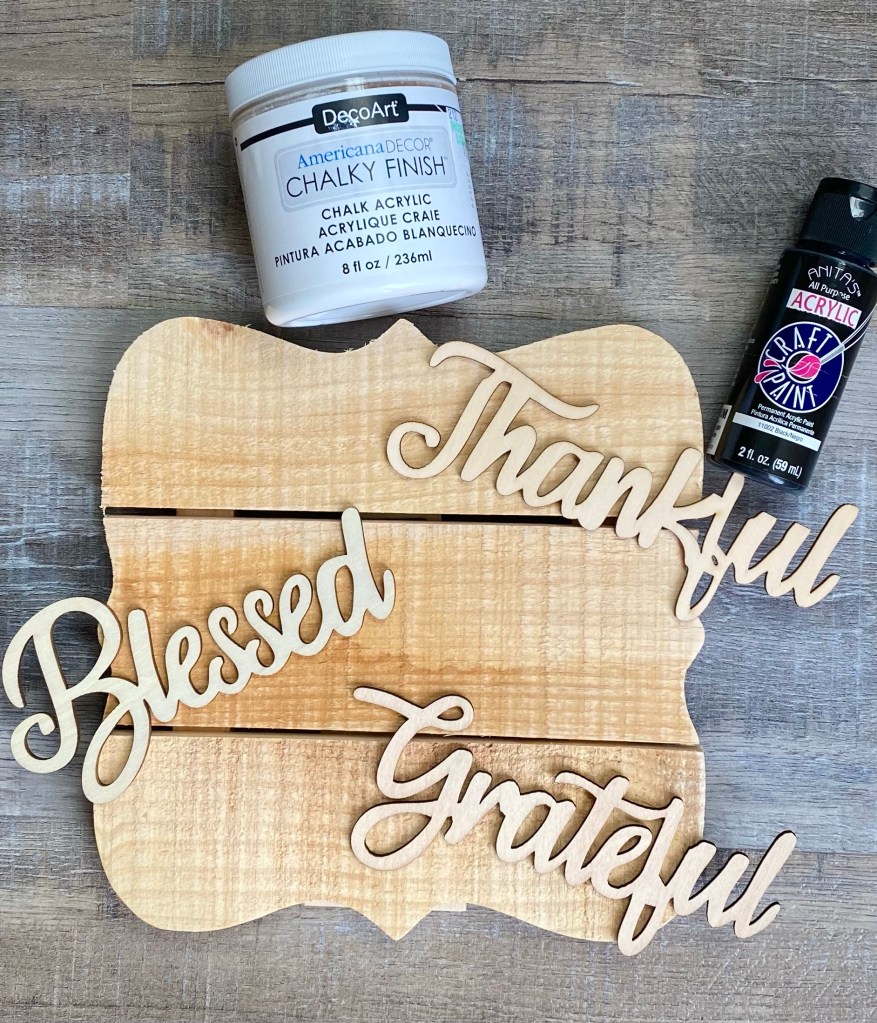
Looking for a quick project to add to your Fall decor? This little Grateful, Thankful, Blessed sign might be just the thing!
I found my slatted wood panel at Hobby Lobby and it has an easel on the back so you can put it anywhere – it measures about 8 by 8 inches. I also found my wood words there in the seasonal aisle. There are options for words in other mediums like chipboard or metal in other areas of the store as well. You could also use a stencil and paint to add your words. 🙂
Disclosure: Some of the links on my site are affiliate links, meaning, at no additional cost to you, I will earn a small commission if you click through and make a purchase. As an Amazon Associate I earn from qualifying purchases.
After all the paint was dry, I used E6000 clear adhesive to attach the words to the slatted wood panel.
Here it is! It adds a little farmhouse touch to my Fall decor – but I can also use it all year long because the sentiment lasts much longer than just through November.
You can find the info on my cute little acorns in this post.
I am truly Grateful, Thankful, and Blessed that you are here! ❤️
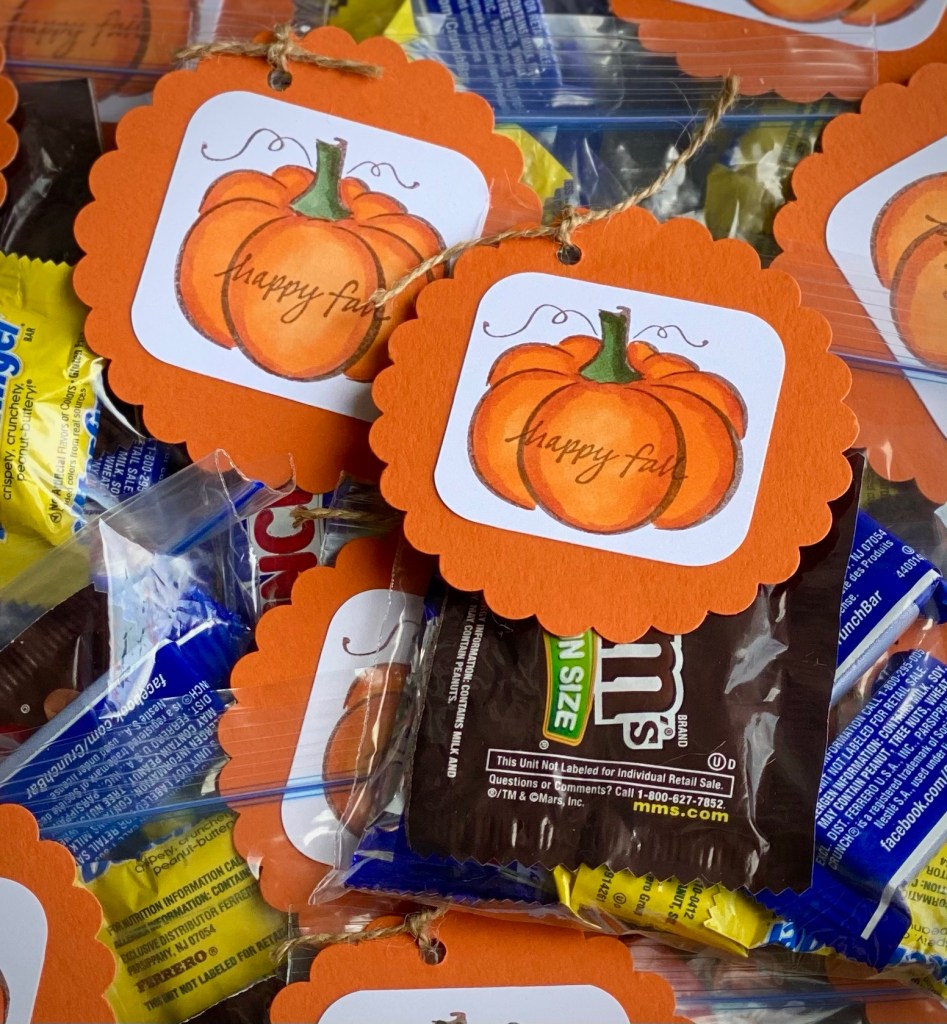
There’s still time to make up some of these quick tags to add to treat bags for those special little trick or treaters who may be ringing your doorbell tomorrow night! Not doing the Halloween thing this year? These will also be fun as Thanksgiving favors at each place setting – even if it is just your immediate family. We all need to add a little joy where we can find it. 😊
Disclosure: Some of the links on my site are affiliate links, meaning, at no additional cost to you, I will earn a small commission if you click through and make a purchase. As an Amazon Associate I earn from qualifying purchases.
Sweet potatoes are such a great Fall side dish! I have to admit that when I was younger, they weren’t one of my favorite things to eat. But as I’ve learned with lots of other vegetables, roasting them makes them so yummy!
Disclosure: Some of the links on my site are affiliate links, meaning, at no additional cost to you, I will earn a small commission if you click through and make a purchase. As an Amazon Associate I earn from qualifying purchases.
We picked up a small bag of sweet potatoes at our local orchard. They are on the smaller side, not those great big ones you often see, so they are perfect to cut into chunks for roasting.
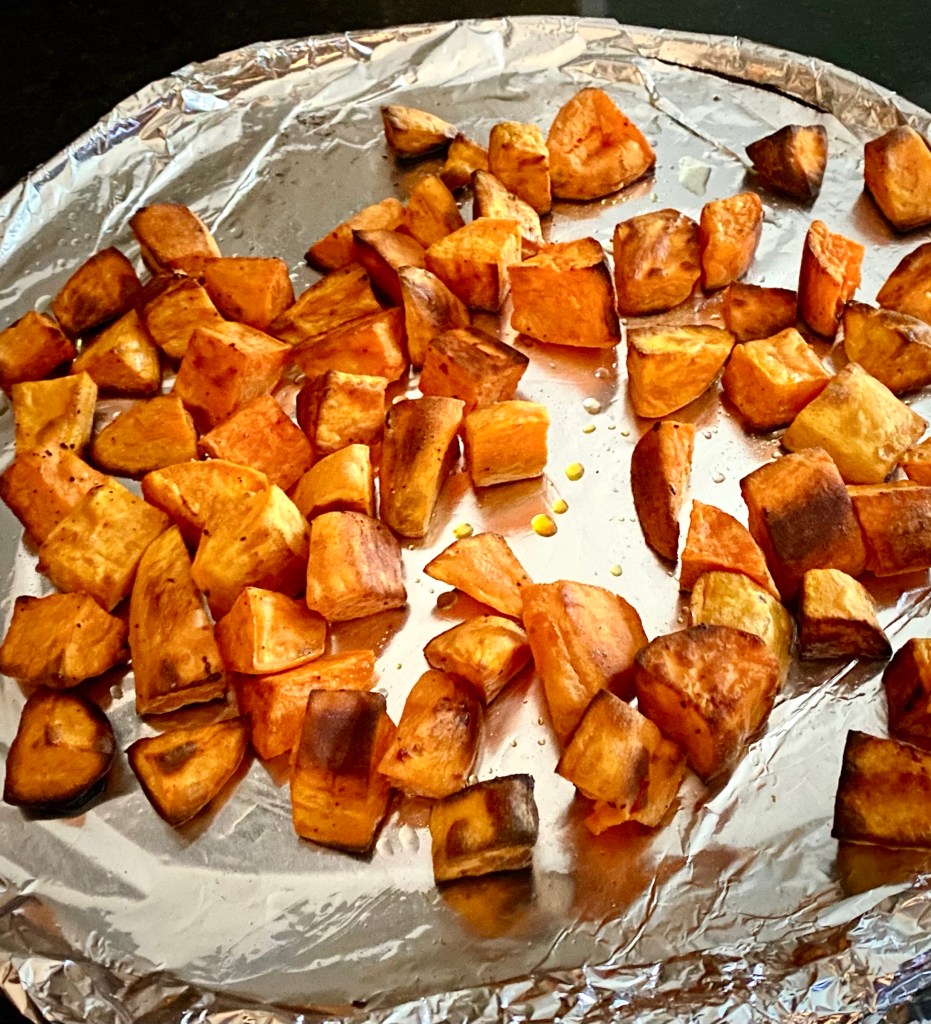
First rinse and peel the skins from the sweet potatoes. Then cut them into roughly 1/2-inch chunks, toss them with olive oil, and sprinkle them with salt and pepper. I lined a baking pan with foil and sprayed it with olive oil spray. Spread the sweet potato chunks in a single layer on the baking sheet.
Preheat the oven to 425 degrees. Roast the sweet potatoes for 30 minutes or until browned and soft when tested with a fork. Stir them about halfway through the roasting time.
This is how they will look when they are done! The sugar in the potatoes comes out and helps to add caramelization for a slightly crunchy outside. They are so yummy!
You can experiment with the seasonings – chili powder, garlic powder, curry powder, or even brown sugar and cinnamon for a sweeter side dish. But you’ll want to toss them in melted butter instead of olive oil if you go for the sweet taste.
It’s just my husband and I so I used my Breville Convection Countertop Oven to roast my sweet potatoes. I used the pizza pan that came with my oven – it’s the perfect size to roast veggies for just the two of us.
I hope you enjoy this easy way to roast sweet potatoes!
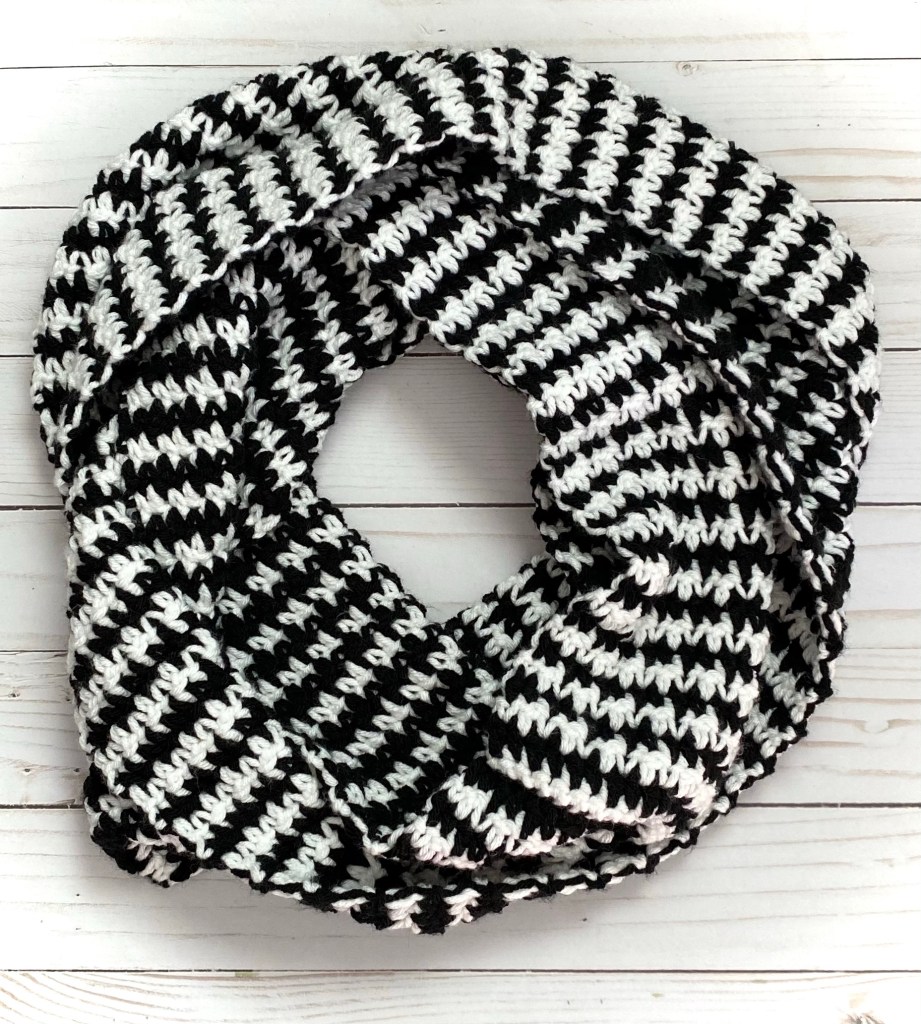
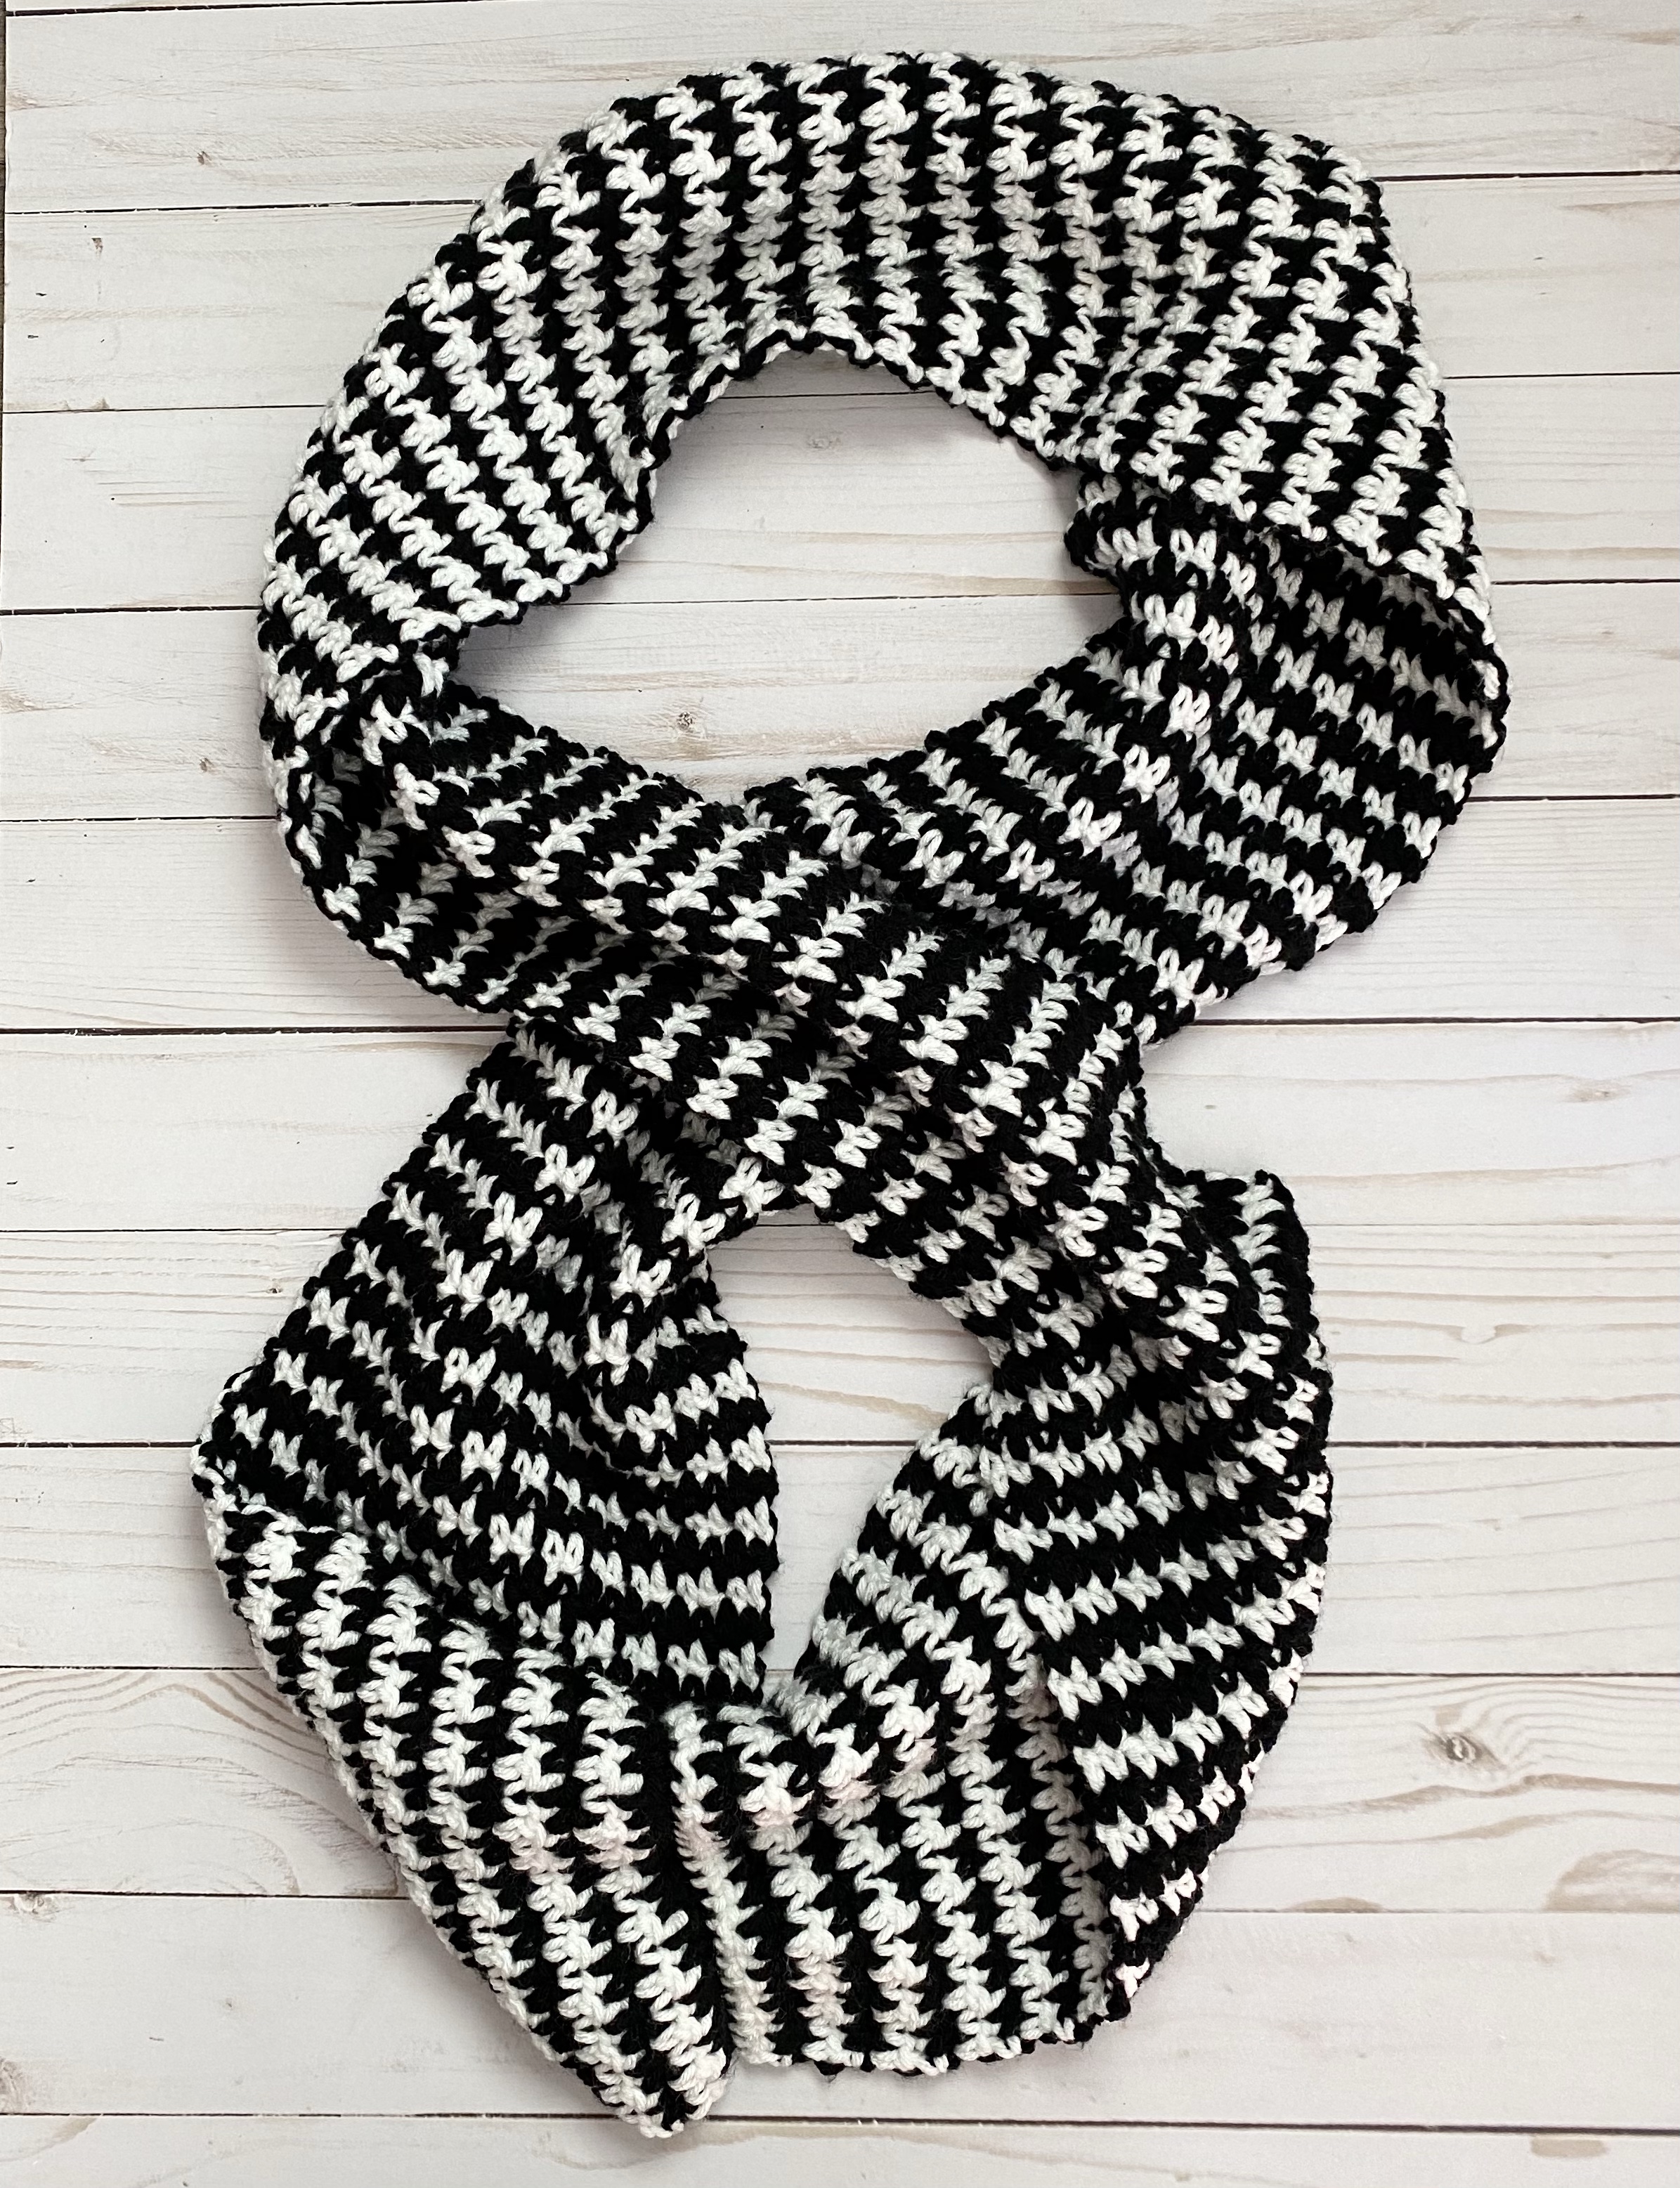
I found the free pattern for this crochet Peppermint Houndstooth Scarf at Crochet For You and thought it would be so cute as an infinity scarf! The original scarf is made in red and white with pom poms on it and it’s so fun! I decided to make my scarf in black and white, but any 2 of your favorite colors would be beautiful!
Disclosure: Some of the links on my site are affiliate links, meaning, at no additional cost to you, I will earn a small commission if you click through and make a purchase. As an Amazon Associate I earn from qualifying purchases.
I used Yarn Bee Soft & Sleek yarn from Hobby Lobby in white and black with a J/6mm hook to stitch up my scarf. I followed the pattern to start my scarf and continued until it measured about 65-inches long. Then I folded the scarf in half and slip stitched the ends together. I made it long enough so it can be doubled as you wear it. If you want just one layer, you can make your scarf about 30-35 inches and then slip stitch the ends together.
This is how it looks doubled up.
This is the full scarf.
Here’s a closeup of the scarf. I love how each side looks a little different!
This pattern works up quickly and scarves make great Christmas gifts!
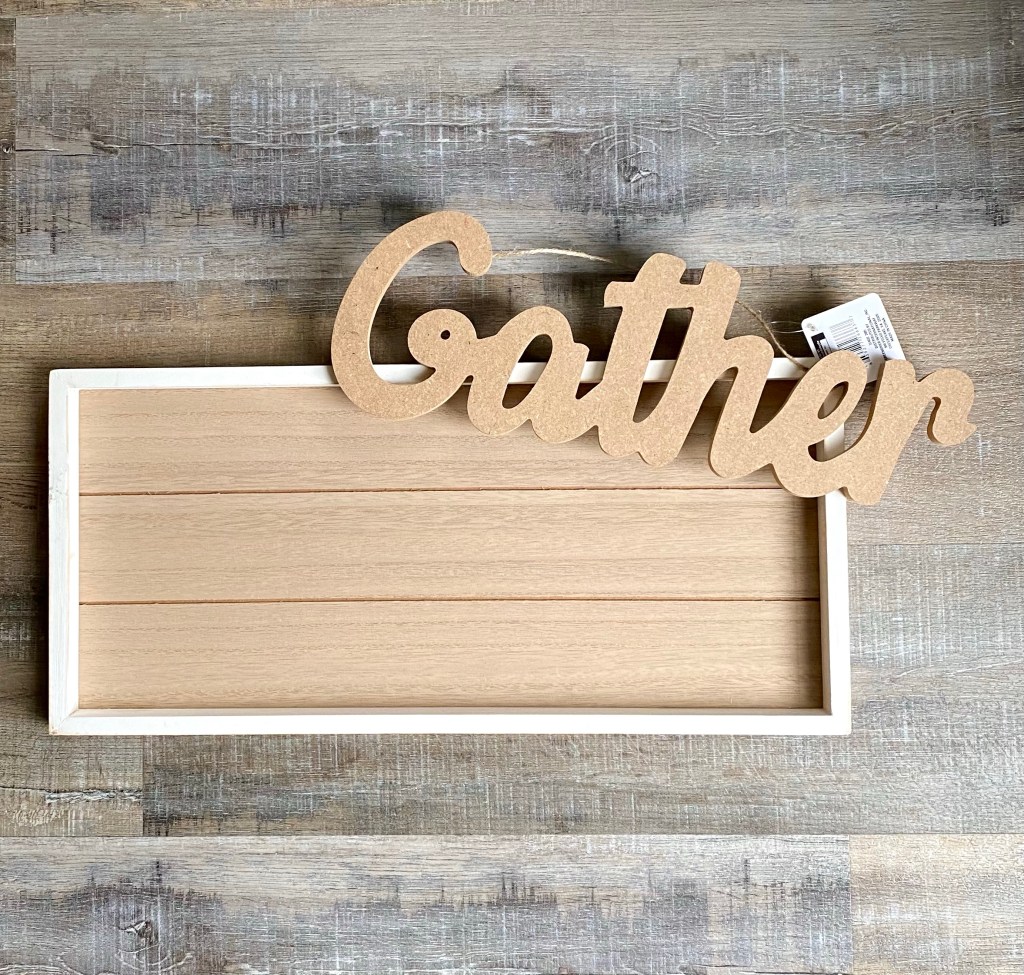
Farmhouse signs are everywhere! The sentiments run the gamut from single words to entire verses – just about anything you can think of. I’ve been wanting to make a sign of my own for a while. And when I found this MDF “Gather” word (it measures about 5 by 15.5 inches) at Dollar Tree I knew what I wanted to do.
Disclosure: Some of the links on my site are affiliate links, meaning, at no additional cost to you, I will earn a small commission if you click through and make a purchase. As an Amazon Associate I earn from qualifying purchases.
I found this wood pallet frame at Hobby Lobby. Regular price is $14.99 – I got it on sale for $9.00. Of course, if it isn’t on sale when you want to get it, you can always use a 40% off coupon. It measures 9 by 19.5 inches. It’s cute the way it is but I wanted it to “pop” a little more.
After cutting the jute hanger off, I painted the front and sides of “Gather” with black acrylic paint. I didn’t worry about painting the back since I was glueing it to the sign. I also painted the frame of my sign with black paint. Then I used a chip brush to paint a thin coat of white acrylic paint on the pallet part of the sign, letting the wood show through and not painting all the way to the edges. (If you need to add some acrylic paints to your craft supplies, this is a great set.)
Once all the paint was dry, I used E600 clear adhesive to attach “Gather” to the pallet frame. And here it is – I’m so happy with how it turned out!
This was a fun and inexpensive project to make! The word and frame cost about $10 and I already had the paint and adhesive. 🙂
If you aren’t able to find the same word I used, check your local craft store. There are lots of different word choices in unfinished wood, chipboard, or even galvanized metal.
This is a great Fall decor piece for your home and it can also be used all year long!
Do you make cards for Halloween? I always send out a few. 🎃 This year I thought it would be fun to make a slimline version.
If you haven’t tried this size yet, you should! 😊 The finished size of the card is 3.5 by 8.5 inches and gives you a slim, long space to work with.
Disclosure: Some of the links on my site are affiliate links, meaning, at no additional cost to you, I will earn a small commission if you click through and make a purchase. As an Amazon Associate I earn from qualifying purchases.
To make your card base, cut a piece of white card stock to 7 by 8.5 inches. Score it at 3.5 inches on the 7 inch side and fold in half so your card measures 3.5 by 8.5 inches. This is a great scoring board if you are looking for one. I use a similar one all the time in my card making.
I used the Slim Braided Circles die from Pinkfresh Studios to die cut a panel of patterned paper and attached it to the front of my card. Then I attached my stamped images to the card using foam tape to give them a little pop.
Any small Halloween images you have will work for making your own card. And, of course by changing the images and color scheme, this layout can be used for any type of card you may need.
Did you see yesterday’s post on how to Make Your Own Pumpkin Purée? I mentioned in that post that I would tell you how I roasted my pumpkin seeds. It is so easy to do!
Disclosure: Some of the links on my site are affiliate links, meaning, at no additional cost to you, I will earn a small commission if you click through and make a purchase. As an Amazon Associate I earn from qualifying purchases.
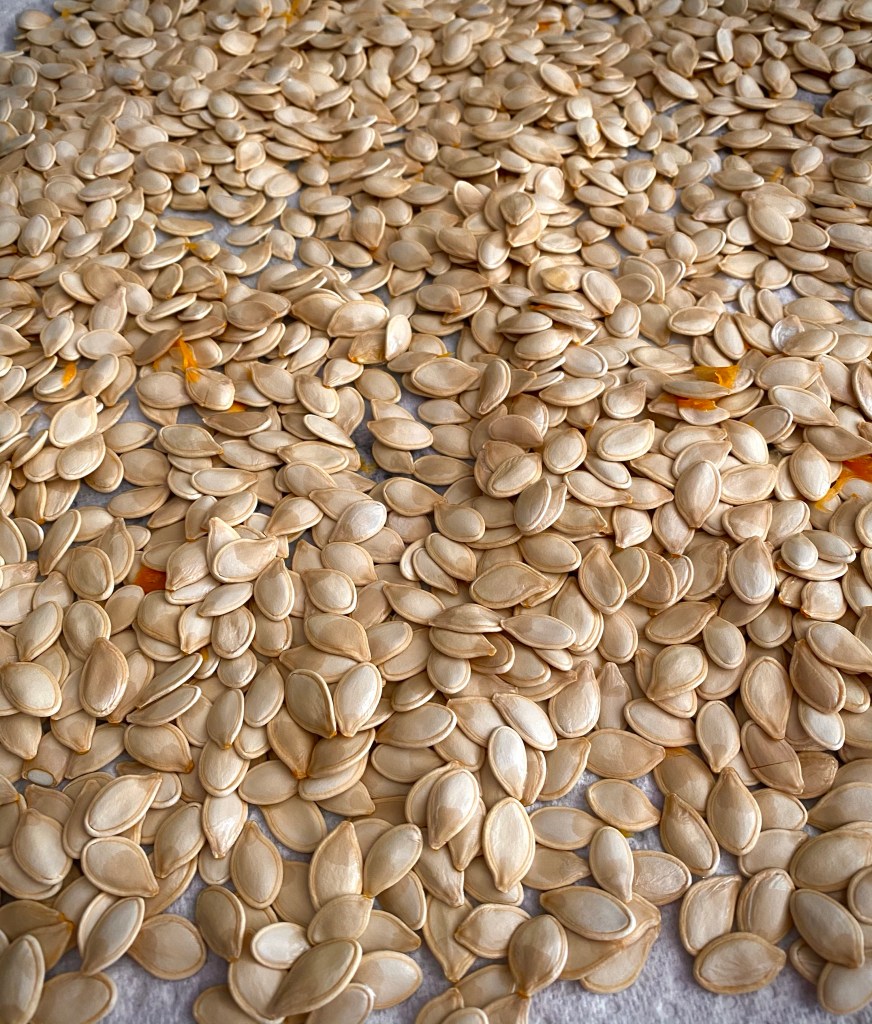
Pull the seeds away from the “stringy” pulp in the pumpkin and place in a bowl of cold water. This will help separate the seeds from the remainder of the pulp. Remove them from the water with a slotted spoon and spread on a baking sheet lined with paper towels to dry. Don’t worry if there is still some pumpkin pulp attached to the seeds. You can blot them with paper towels to help them dry more quickly. Drier seeds will crisp up better when you roast them – let them dry 15 to 20 minutes.
Preheat your oven to 375 degrees. Line a baking sheet (or sheets – I had a lot of seeds!) with foil for easy cleanup. Melt some butter and pour it into a large bowl. I used about 3 tablespoons, but you can just eyeball how much you need. You’ll want enough to be able to coat all your seeds. Add your seeds to the bowl and toss to coat. Sprinkle with salt to taste and toss again. Spread your prepared seeds onto your baking sheet.
Bake for 15 to 20 minutes or until golden. Check them at about 10 minutes and give them a stir. Here ‘s how they will look after they are finished. Let them cool and store them in an airtight container on the counter for 4 to 5 days or in the refrigerator for up to a month.
Roasted Pumpkin Seeds are great just to snack on, but you can also sprinkle them on salads, soups, or roasted vegetables.
There are all kinds of ways to season your pumpkin seeds besides just salt! Add a little pepper with the salt. Use garlic salt or onion salt. Toss them in seasoned salt. Want them a little spicy? Use some Cajun seasoning. Have a sweet tooth? Toss your seeds in brown sugar and cinnamon before roasting them. Be creative! 🙂
Have you ever made your own fresh pumpkin purée? It’s easier than you might think and, in my opinion, so much better than canned from the store!
Disclosure: Some of the links on my site are affiliate links, meaning, at no additional cost to you, I will earn a small commission if you click through and make a purchase. As an Amazon Associate I earn from qualifying purchases.
You’ll need to get the pie pumpkins, sometimes called sugar pumpkins. They are much smaller than the typical Jack-O-Lantern size. You can usually find them at the Farmers Market or you can do what I did and pick them up at your local grocery store. My store had them 3 for $5.00 so I bought 6. 🙂
First, cut the pumpkin in half close to them stem. Don’t try to cut through the stem, it’s too tough. Once it’s cut in half, you can slice off the stem.
Using your hands, pull out the seeds and as much of the “stringy” stuff as you can. If you want to make Roasted Pumpkin Seeds, put the seeds in a bowl of water to help get most of the pulp off. Then spread the seeds out on a baking sheet lined with paper towels to dry. I have another post planned to show you how I roasted my pumpkin seeds. I’ll try to get it out tomorrow. 🙂
Then, using a spoon, scrape out as much of the leftover “stringy” stuff as you can. It doesn’t have to be perfect.
Line a baking sheet with parchment paper and put your pumpkin halves cut side down on the baking sheet.
Preheat your oven to 400 degrees. Bake your pumpkins 35-45 minutes until you can easily punch through the skin with a fork and the pumpkin flesh is soft.
Here’s what they look like when finished baking.
Let cool for a while until you can handle the pumpkin. You should then be able to easily scrape the pumpkin flesh from the skin. Put the flesh in a food processor and process on high until it is smooth. Don’t have a food processor? You can also process it in a blender.
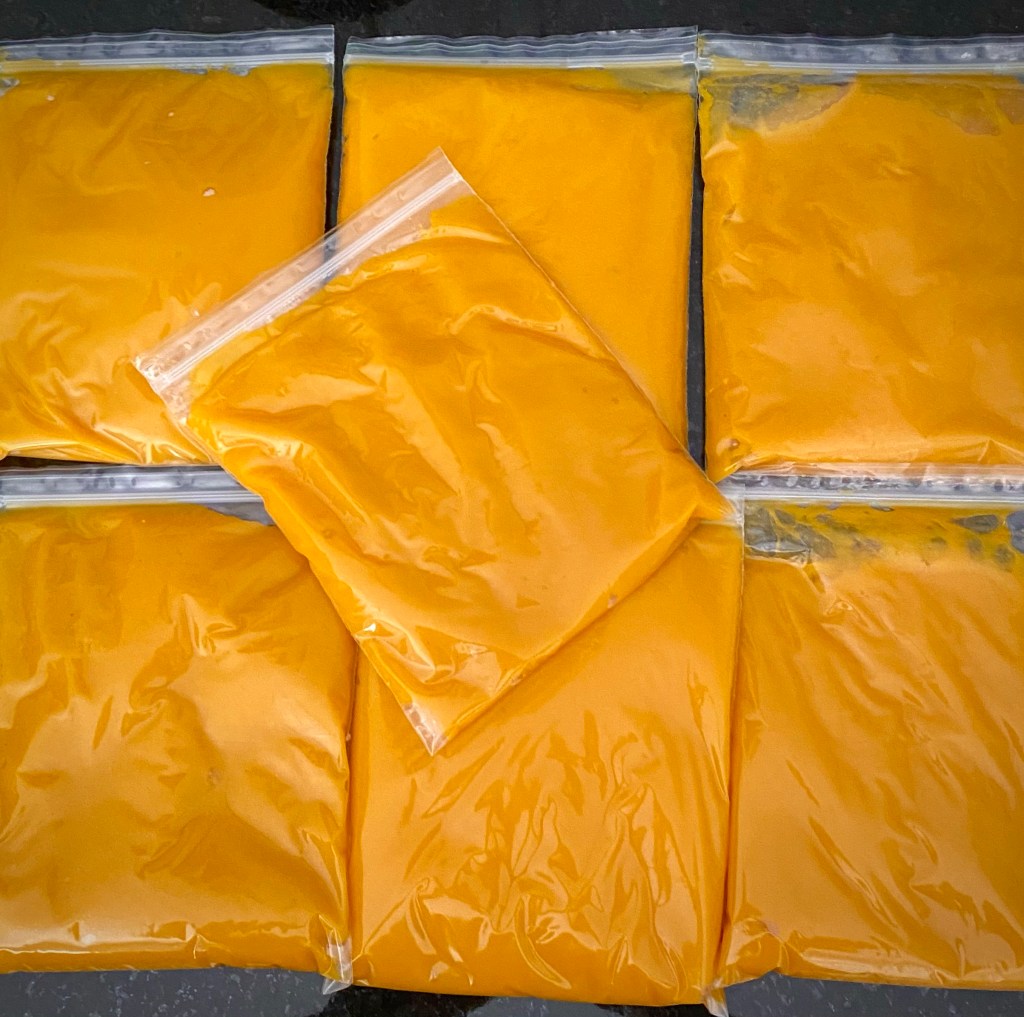
I put 2 cups of pumpkin purée into each quart size freezer bag. Have you seen these bag holders for holding open freezer or storage bags for easy filling? They are a game changer! They are adjustable to handle different size bags and make the job so much easier! Here’s a tip for filling the bags…Fold over the top of the bag before placing in the bag holder – it will keep the zipper part from getting messy. 🙂
I flattened my bags, getting out as much air as I could, before putting them in the freezer. They will take up less space that way and will thaw out more quickly when you are ready to use your pumpkin purée.
I was able to get 14 cups of purée out of my 6 pumpkins. You can probably figure on about 2 cups of purée per pumpkin, which is what you will need for most pie recipes. You can use fresh pumpkin purée in any pie, bread, or muffin recipe – just substitute the same amount of fresh pumpkin purée in place of the canned pumpkin in any recipe you are making.
I’ve included our favorite Pumpkin Bread recipe below. This makes a lot of bread – 3 to 4 loaves depending on the size of your loaf pans. This bread freezers very well. Wrap it in foil and then slip it into a freezer bag. Make some early, put it in the freezer, and you’ll be ready for the holidays!
Pumpkin Bread
5 cups flour
4 cups sugar
4 cups pumpkin purée
1 cup vegetable oil
1 cup chopped nuts (we like pecans)
1 cup raisins or chopped dates (we like raisins)
4 teaspoons baking soda
2 teaspoons cinnamon
1 teaspoon ground cloves
1 teaspoon salt
1 teaspoon vanilla
Preheat oven to 350 degrees. Spray loaf pans generously with nonstick spray.
Mix all ingredients together in a large bowl. (I do this in my 5-quart Kitchen Aid mixer.) Pour into prepared pans.
Bake for 1 hour or until toothpick inserted in center comes out clean. Cool in pans for 15 to 20 minutes. Then remove from pans and finish cooling on cooling racks.
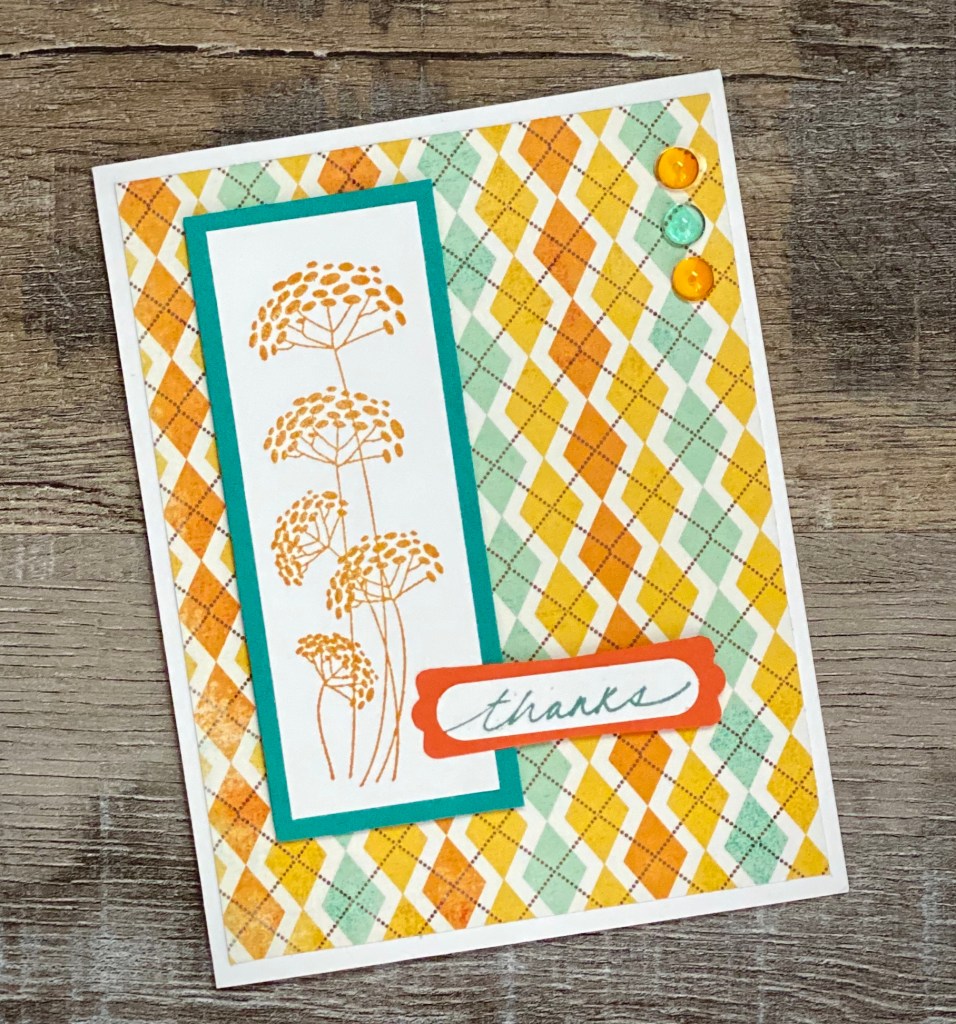
I love the way this “thanks” card turned out! It’s very simple – I think it’s the Fall color combo that I like so much. But it would also be pretty in pastel colors.
Disclosure: Some of the links on my site are affiliate links, meaning, at no additional cost to you, I will earn a small commission if you click through and make a purchase. As an Amazon Associate I earn from qualifying purchases.
The flower is from the Feel the Joy set from Unity Stamp Company. I stamped it with mustard color ink on white card stock and layered it to turquoise card stock. I stamped “thanks” with turquoise ink on white card stock, punched it with a label punch, and layered it to a different label punched from orange card stock.
To make the card, I attached a panel of patterned paper to a white card. Both the flower and the sentiment are attached to the card with foam tape. I finished it off with 3 Dew Drops in the upper right corner.
The label punches I used have been discontinued. 😦 This one by Stampin’ Up is similar to the one I stamped “thanks” on. And this one, also by Stampin’ Up, would work to create a similar label to the one I layered the sentiment to.
This would be a fun card to make in other color combos and also with different sentiments for various occasions.
Disclosure: Some of the links on my site are affiliate links, meaning, at no additional cost to you, I will earn a small commission if you click through and make a purchase. As an Amazon Associate I earn from qualifying purchases.