Crochet Double-Sided Tulle Dish Scrubby

Hi friends,

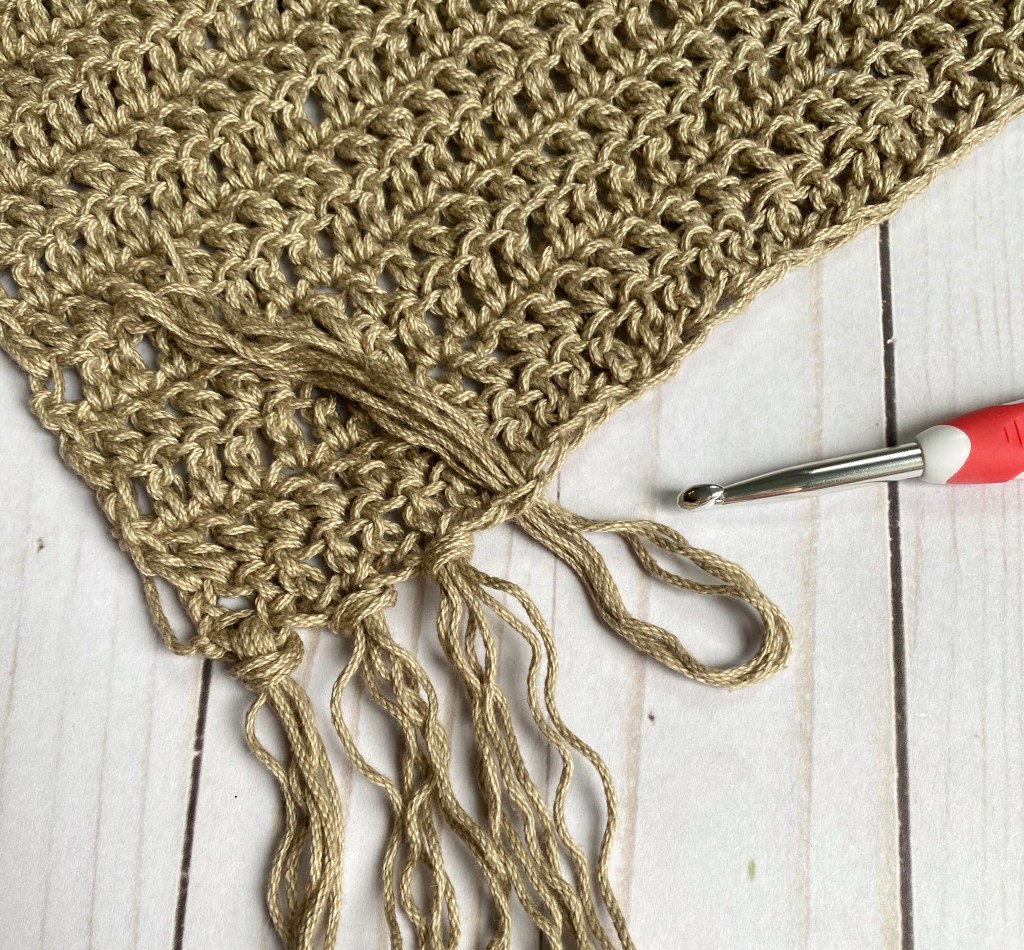
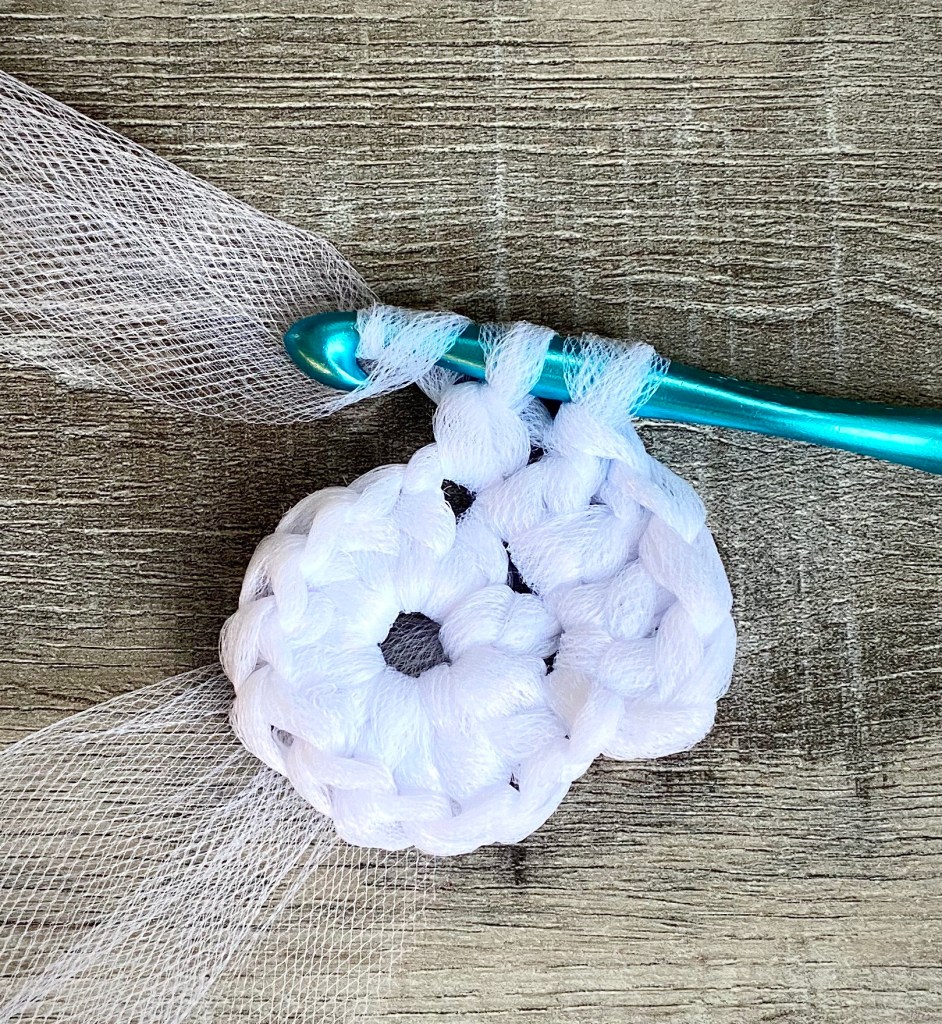
Have you ever crocheted with tulle? This was my first time and it was much easier than I thought it would be. 🙂 You just kind of scrunch the tulle down so you can fit it on your hook as you go along and then crochet just as you would with yarn.

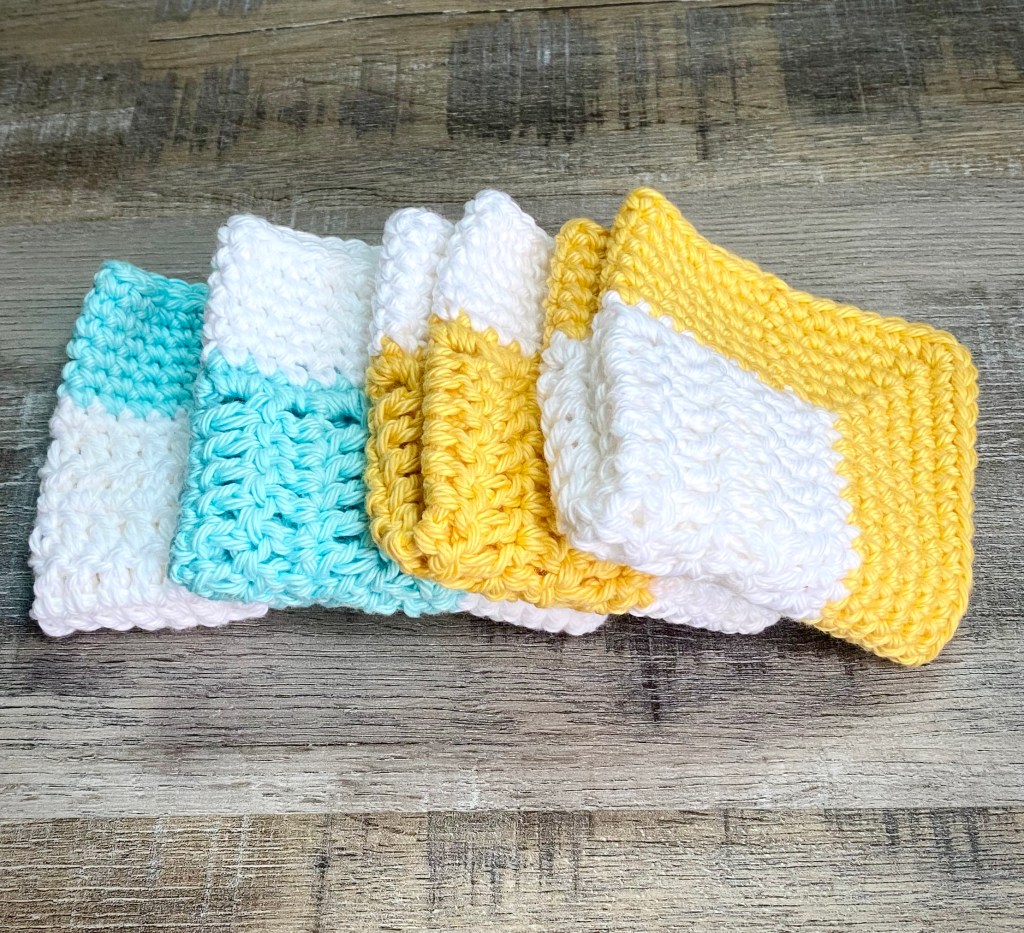
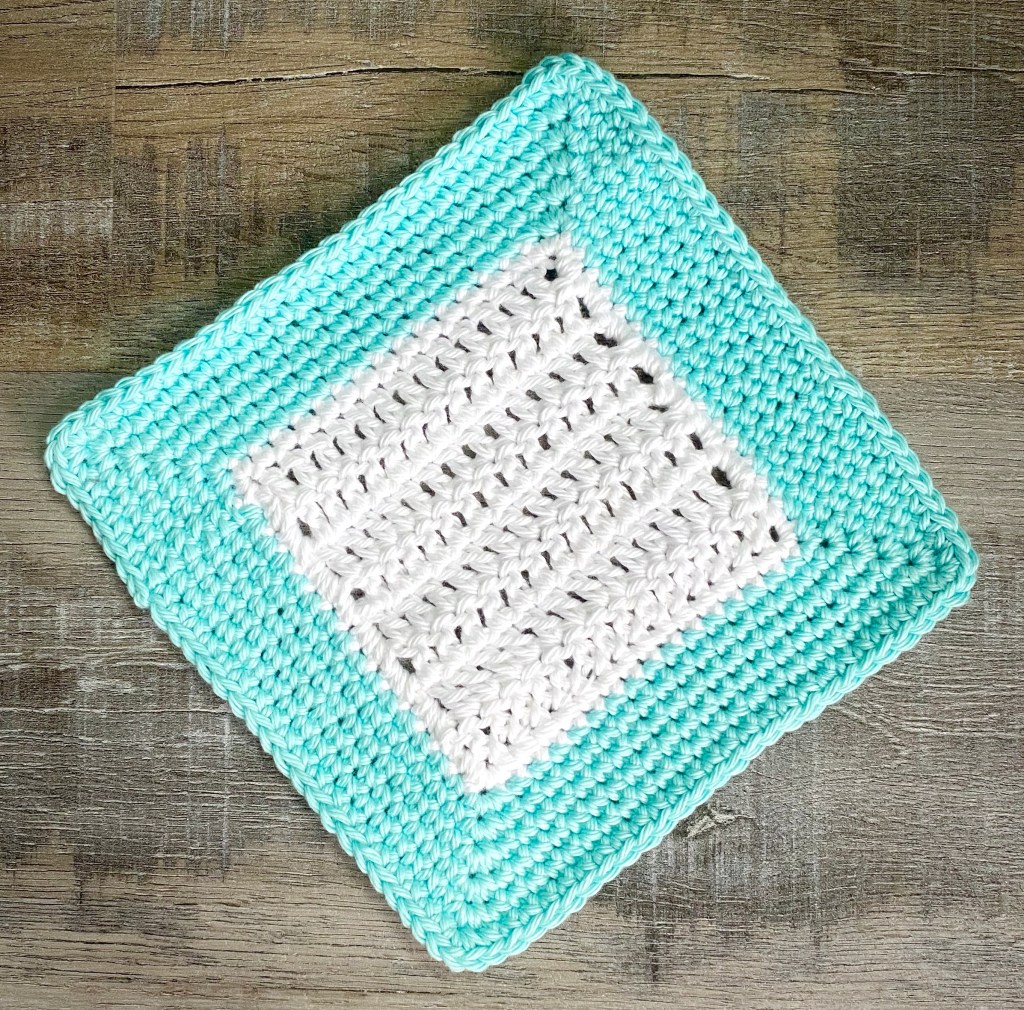
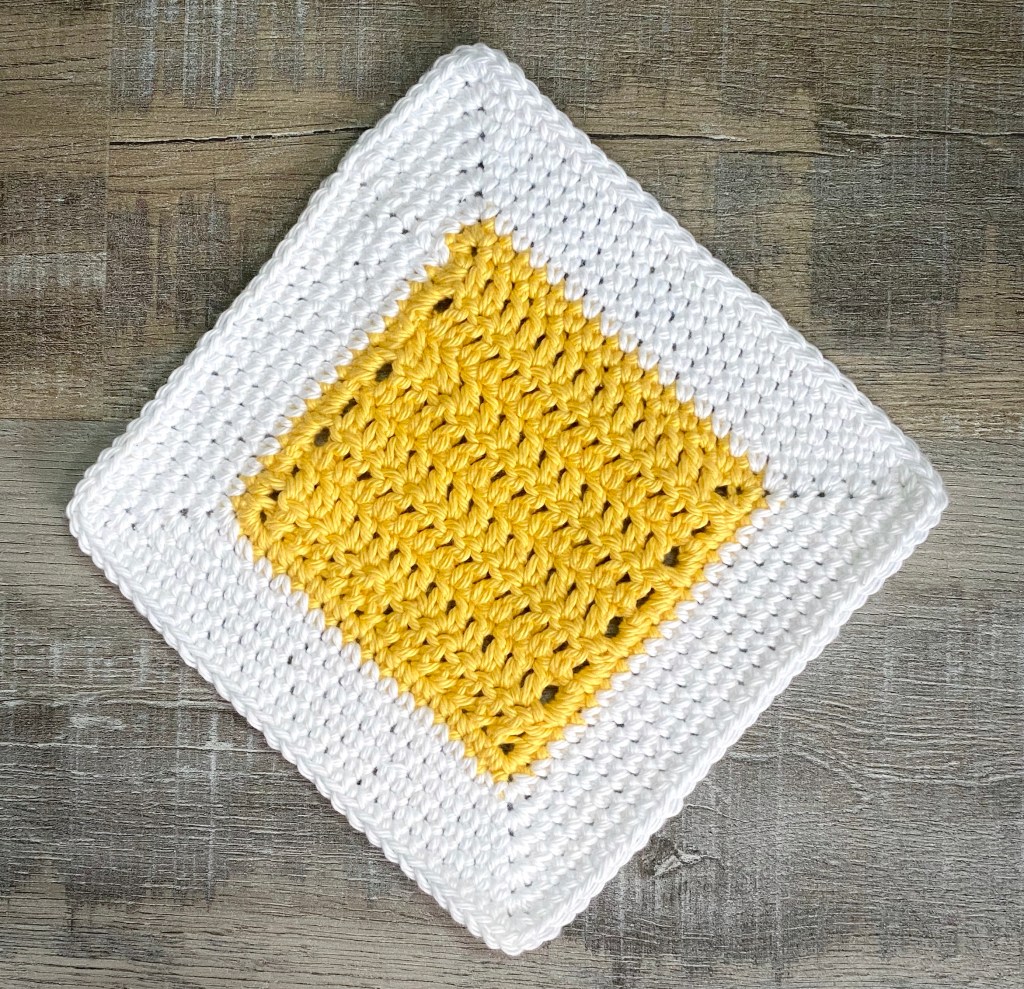
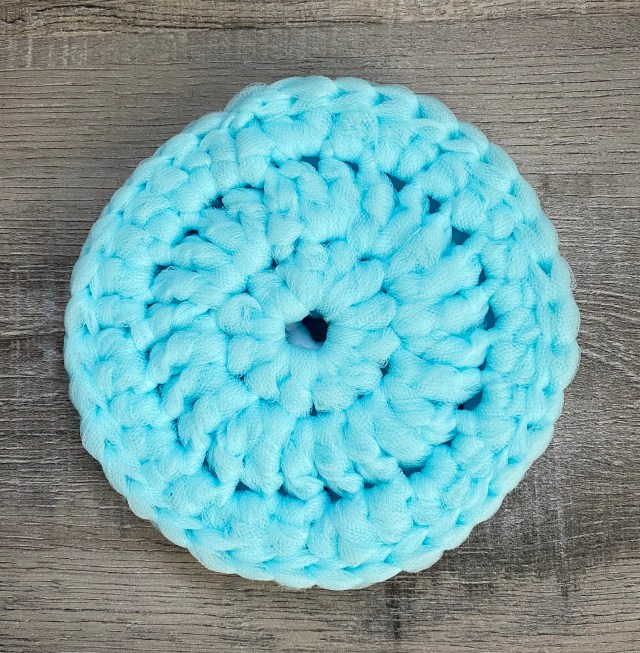
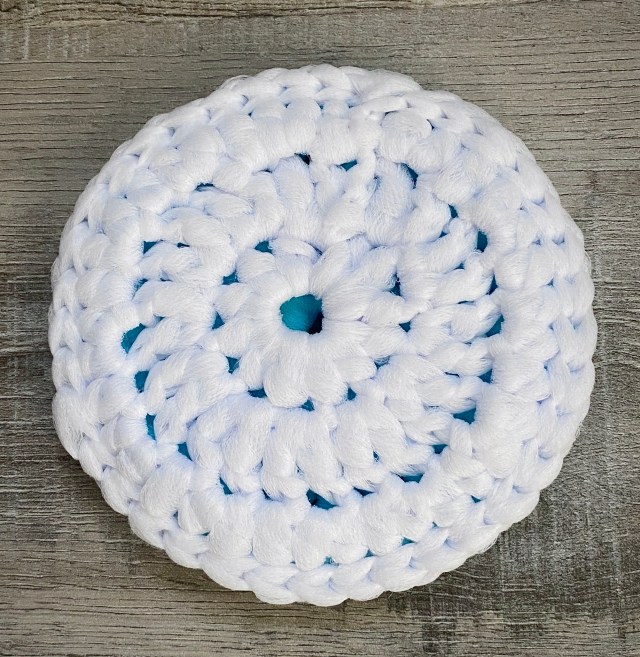
I designed a simple Double-Sided Tulle Dish Scrubby and included the pattern below if you’d like to make your own. It’s about 4-1/2 inches in diameter, so there’s plenty to hold onto while you use it. It also matches my Crochet Square Dishcloth in this post.

Disclosure: Some of the links on my site are affiliate links, meaning, at no additional cost to you, I will earn a small commission if you click through and make a purchase. As an Amazon Associate I earn from qualifying purchases.

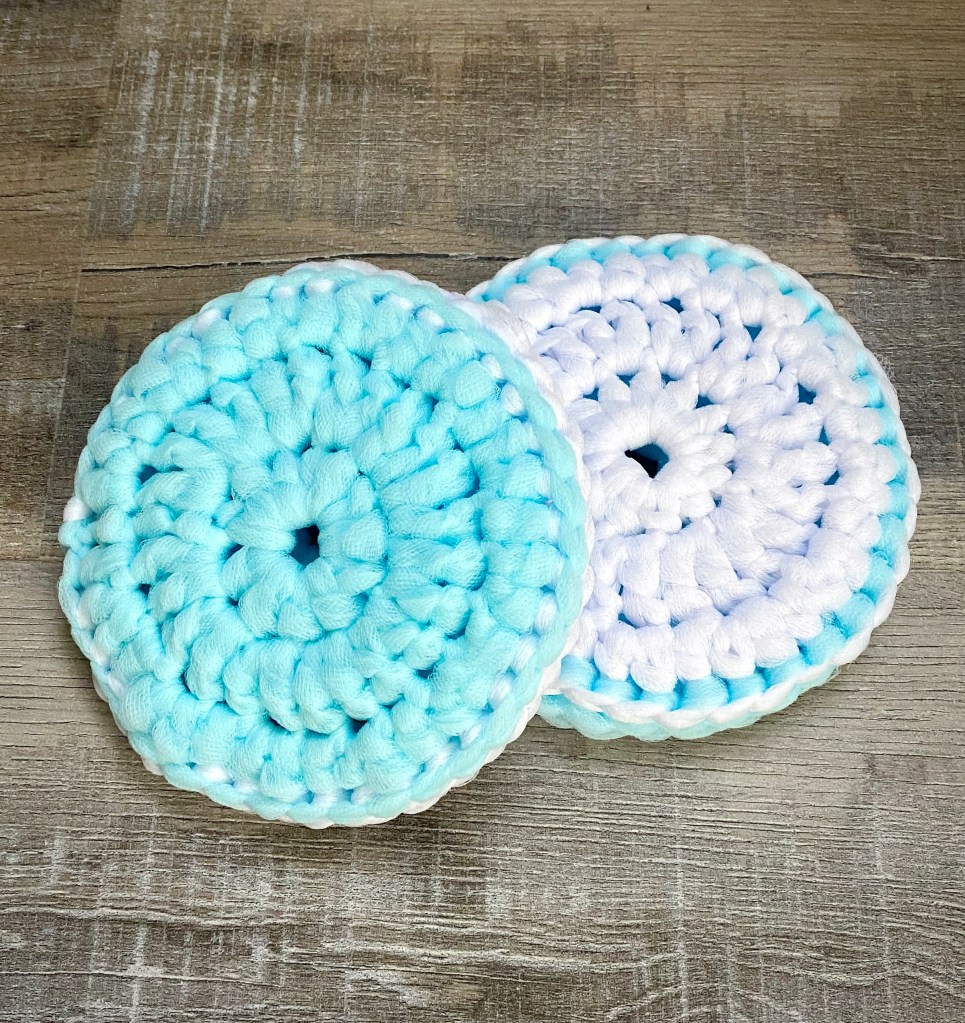
You’ll need 6-inch wide tulle and an N/9or10mm hook. I found my tulle at Hobby Lobby. This great assortment of 10 colors on Amazon would be so fun to mix and match!

Here’s a close up of what I mean by “scrunching” the tulle down to crochet with it.

Here’s my super easy pattern…

Crochet Double-Sided Tulle Dish Scrubby

6-inch wide tulle in 2 colors (about 12 yards of each color)

N/9mm hook

Large eye blunt end needle for weaving in ends

Stitches used US terms:

Chain – ch

Slip Stitch – ss

Half Double Crochet – hdc

Double Crochet – dc

Note: Chains at beginning of rounds do not count as a stitch.

Ch 3, ss in 1st ch to form a ring.

Round 1: ch 1. work 12 hdc in the ring. Join with ss to 1st sc. (12 stitches)

Round 2: ch 2. work 2 dc in same stitch as ss and in each stitch around. Join with ss to 1st dc. (24 stitches)

Round 3: ch 1. work 1 hdc in same stitch as ss. * 2 hdc in next stitch, hdc in next stitch * Repeat from *to* around to last stitch. 2 hdc in last stitch. Join with ss to 1 st hdc. (36 stitches)

Fasten off and weave in ends.

Make another scrubby from 2nd color of tulle but DO NOT fasten off after round 3. Weave in end at beginning of 2nd scrubby.

Place wrong sides of scrubbies together, lining up stitches, and ss through both layers all the way around. Fasten off and weave in end.  

Here’s a free PDF for easy printing…

Be sure to save to your Pinterest Crochet board using the button below!

I hope you enjoy this pattern! If you haven’t crocheted with tulle yet, give it a try. I think you’ll like it. 🙂

Happy Stitching!

Anita

Posted in Crochet, Gifts | Tagged , | 15 Comments

Crochet Square Dishcloth

Hi friends,

Can we ever have enough crochet dishcloths? They are quick to make, are a great stash buster, and make a fun gift when you want to give a little something. Roll them up and tie with twine or a pretty ribbon and put them in a pretty jar or basket – a useful and pretty gift. 🙂

There are a lot of crochet patterns out there – I even have several on my blog (type “dishcloth” in the search bar on the right to find them). This one is just a little different from my other patterns. It has a center square in one color with a wide border in another, making it the perfect pattern for using up those left over bits of cotton yarn in your stash.

Disclosure: Some of the links on my site are affiliate links, meaning, at no additional cost to you, I will earn a small commission if you click through and make a purchase. As an Amazon Associate I earn from qualifying purchases.

Crochet Square Dishcloth

Finished dishcloth measures approximately 7 by 7 inches

I Love This Cotton yarn in 2 colors  (I used Curry, Aqua, and White)

H/5mm hook

Stitches used US terms:

Foundation Double Crochet – fdc

Double Crochet – dc

Single Crochet – sc

Chain – ch

Slip Stitch – ss

Begin with color A

Row 1: work 15 fdc. Turn. (15 stitches)

Rows 2-8: ch 2 (counts as first dc) Skip first stitch. dc in next stitch and in each stitch across. Turn. (15 stitches)

Do Not Turn after Row 8.

Begin working in rounds.

Round 1: ch 1. Work 13 sc along end of rows. Work 3 sc in the corner. sc in next 13 stitches. Work 3 sc in the corner. Work 13 sc along end of rows. Work 3 sc in the corner. sc in next 13 stitches. Work 3 sc in the corner. Join with ss to first sc. (64 stitches)

Change to color B

Rounds 2-7: ch 1. sc in same stitch as ss and in each stitch around, working 3 sc in each corner. Join with ss to first sc. (112 stitches at the end of Round 6)

Fasten off and weave in ends.

Here’s a free PDF for easy printing…

Be sure to save to your Pinterest Crochet board using the button below!

This is a great video for learning the Foundation Double Crochet Stitch. You will love how this gives you a great looking edge at the beginning of your project.

I used I Love This Cotton Yarn to make my dishcloths. I love how soft it is and it comes in so many colors. Need new hooks? This looks like a nice set.

What colors will you make your Square Dishcloths?

Happy Stitching!

Anita

Posted in Crochet, Gifts | Tagged , | 6 Comments

Fun and Easy Birthday Cards

Hi friends,

I pulled out some of my older stamps to make some Fun and Easy Birthday Cards. Sometimes it’s fun to look through the things you haven’t used in a long time and remember why you bought them in the first place. They can spark inspiration where you least expect it! 🙂

Disclosure: Some of the links on my site are affiliate links, meaning, at no additional cost to you, I will earn a small commission if you click through and make a purchase. As an Amazon Associate I earn from qualifying purchases.

The card below was made using Birthday Wishes Peeps from Unity Stamps – and it’s still available! This is a similar embossing folder to the one I used. I stamped the image with Memento Tuxedo Black ink on white card stock and colored it with Copic markers. I trimmed the image and layered it to blue card stock. I embossed a panel of green card stock, then layered it to a white card. I added the stamped image to the card with foam tape.

The next card was made using some older stamps and dies from Hero Arts. But I found this great Birthday Balloon stamp set and matching Birthday Balloon die that would work great! I stamped the balloons with coral and green ink on white card stock and then die cut them with the balloon die. I embossed a panel with a Falling Snow embossing folder similar to this one, layered it to a piece of coral card stock, and attached the panel to a white card. I stamped the sentiment with coral ink on white card stock (here’s a similar stamp) and punched it with an oval punch. I attached the sentiment and 2 balloons to the card, then I attached the 3rd balloon with foam tape. I drew 3 strings with a black pen to finish the card.

This card is made with another older stamp from Hero Arts. Any fun balloon stamp will work – there are some cute ones in this set. I stamped the balloon with green ink on white card stock, trimmed it, and layered it to striped paper. I embossed a panel of blue card stock with a large circle embossing folder (here’s a similar one). I tied the panel with green and white twine and attached it to a white card. Then I attached the stamped image with foam tape.

These were fun to make! So look through your stamps and supplies. Pull out the ones you haven’t used in forever and let your imagination go – you might surprise yourself with how much you’ve missed using them. 🙂

Happy Stamping!

Anita

Posted in Cards, Stamping | Tagged , | Leave a comment

Alton Brown’s Chewy Peanut Butter Cookies

Hi friends,

I love peanut butter and will eat just about anything made with it! 😋 When I stumbled across the recipe for Alton Brown’s Chewy Peanut Butter Cookies I knew I would have to try them!

This is a super easy recipe made without flour so it’s great if you need to avoid gluten. You probably have everything you need in your kitchen to make these yummy cookies right now.

Disclosure: Some of the links on my site are affiliate links, meaning, at no additional cost to you, I will earn a small commission if you click through and make a purchase. As an Amazon Associate I earn from qualifying purchases.

You can find the recipe here.

The recipe only makes about 16 cookies and I needed more than that so I doubled it. I also mixed up the dough in my KitchenAid Mixer (this is the one I have and I Love it!! I use it all the time) to make it a little easier than using a wooden spoon or spatula. The recipe calls for lining your cookie sheets with parchment paper, but I didn’t have any. I used my silicone baking mats (these are similar to mine) which I use every time I bake cookies – I highly recommend using them! A cookie scoop is another handy tool for your kitchen. Saves time and helps make your cookies more uniform in size.

Before and after baking…

These cookies are incredibly soft and chewy! And they smell amazing while they are baking! The peanut butter lovers in your family will love them with a big glass of cold milk or a hot cup of coffee!

Happy Baking!

Anita

Posted in Recipes | Tagged | 2 Comments

Vintage-Look Chalk Painted Salt and Pepper Shakers

Hi friends,

Do you like the vintage look? There are so many fun things available that you can add to your decor to get the look just by altering them a little – even if they are new! 🙂 I found these cute salt and pepper shakers at my local grocery store and I just loved the detail on them. And they were only $3.00!! They look so cute just the way they are, but I decided to change them up a bit…

Disclosure: Some of the links on my site are affiliate links, meaning, at no additional cost to you, I will earn a small commission if you click through and make a purchase. As an Amazon Associate I earn from qualifying purchases.

All you need is a little chalk paint and you can completely change the look of almost anything. I used DecoArt Americana Chalky Finish Paint in Everlasting (white) to paint my salt and pepper shakers. I painted 2 coats, letting it dry completely between coats. I like using these chip brushes to apply the paint.

The left picture is after the first coat, the right picture is after the second coat.

Once the 2nd coat was dry, I used FolkArt Home Decor Chalk Paint in Rich Black to dry brush over the detail on the salt and pepper shakers. I used a chip brush to apply the paint. Dip your chip brush into a small amount of paint and then brush most of the paint onto a paper towel so your chip brush is mostly “dry”. Brush back and forth over the raised area of the shaker to bring out the design. Repeat the process until you get the look you want. This adds so much detail to your project!

I really love the way they turned out! I will be using them simply as a decoration. Chalk paint will come off a glass surface if it gets wet – which can be a good thing of you don’t like how it looks. Just scrub it off and start over!

What will you turn into fun vintage decor? I would love to see your creations!

Happy Crafting!

Anita

Posted in Decor | Tagged , | 2 Comments

Crochet Simple Summer Wrap

Hi friends,

Summer is in full swing! The days can be sunny and warm, but sometimes the evenings are cooler and you need a little something to wrap around your shoulders – or maybe even indoors when the air conditioning is turned up high. 😉 I designed the Crochet Simple Summer Wrap just for those times. I made it with Lion Brand 24/7 cotton yarn in the color Taupe so it is perfect for the Summer season.

I made my wrap using the Taupe color, but the yarn is available in 24 different colors so you can make yours in your favorite hue.

Disclosure: Some of the links on my site are affiliate links, meaning, at no additional cost to you, I will earn a small commission if you click through and make a purchase. As an Amazon Associate I earn from qualifying purchases.

You’ll need about 20 ounces of yarn (maybe a little less) and a J/6mm crochet hook to complete your Simple Summer Wrap.

If you need instructions on how to Foundation Double Crochet, I really like this video from Moogly. I love starting projects this way – it gives such a clean edge.

Crochet Summer Wrap

Finished size is approximately 16.5 inches wide and 67 inches long before fringe

Lion Brand 24/7 cotton yarn in Taupe (about 20 ounces)

J/6mm hook

Stitches used US terms:

Foundation Double Crochet – fdc

Chain – ch

Double crochet – dc

Special stitch: V-stitch – (dc, ch 1, dc) in same stitch

Note: chain 2 at the beginning of each row counts as the first double crochet. Keeping that in mind, your last double crochet in each row will be in the top of the chain 2 of the previous row.

Row 1: Work 66 fdc. Turn.

Rows 2-20: ch 2 (counts as 1st dc). Skip 1st stitch, dc in next stitch and in each stitch across. Turn. (66 stitches )

Row 21: ch 2 (counts as 1st dc). Skip 1st stitch, dc in next 2 stitches. Skip next stitch, (dc, ch 1, dc) in next stitch (v-stitch made) *skip next 2 stitches, v-stitch in next stitch* Repeat from * to * across to last 4 stitches. Skip next stitch, dc in last 3 stitches. Turn. (20 v-stitches and 3 dc at each end)

Rows 22-30: ch 2 (counts as 1st dc). Skip 1st stitch, dc in next 2 stitches. Work v-stitch in each ch 1 space across. dc in last 3 stitches. Turn. (20 v-stitches and 3 dc at each end)

Row 31: ch 2 (counts as 1st dc). Skip 1st stitch. dc in each stitch and ch 1 space across. Turn. (66 stitches)

Rows 32-50: ch 2 (counts as 1st dc). Skip 1st stitch, dc in next stitch and in each stitch across. Turn. (66 stitches)

Row 51: ch 2 (counts as 1st dc). Skip 1st stitch, dc in next 2 stitches. Skip next stitch, (dc, ch 1, dc) in next stitch (v-stitch made) *skip next 2 stitches, v-stitch in next stitch* Repeat from * to * across to last 4 stitches. Skip next stitch, dc in last 3 stitches. Turn. (20 v-stitches and 3 dc at each end)

Rows 52-60: ch 2 (counts as 1st dc). Skip 1st stitch, dc in next 2 stitches. Work v-stitch in each ch 1 space across. dc in last 3 stitches. Turn. (20 v-stitches and 3 dc at each end)

Row 61: ch 2 (counts as 1st dc). Skip 1st stitch. dc in each stitch and ch 1 space across. Turn. (66 stitches)

Rows 62-80: ch 2 (counts as 1st dc). Skip 1st stitch, dc in next stitch and in each stitch across. Turn. (66 stitches)

Row 81: ch 2 (counts as 1st dc). Skip 1st stitch, dc in next 2 stitches. Skip next stitch, (dc, ch 1, dc) in next stitch (v-stitch made) *skip next 2 stitches, v-stitch in next stitch* Repeat from * to * across to last 4 stitches. Skip next stitch, dc in last 3 stitches. Turn. (20 v-stitches and 3 dc at each end)

Rows 82-90: ch 2 (counts as 1st dc). Skip 1st stitch, dc in next 2 stitches. Work v-stitch in each ch 1 space across. dc in last 3 stitches. Turn. (20 v-stitches and 3 dc at each end)

Row 91: ch 2 (counts as 1st dc). Skip 1st stitch. dc in each stitch and ch 1 space across. Turn. (66 stitches)

Rows 92-110: ch 2 (counts as 1st dc). Skip 1st stitch, dc in next stitch and in each stitch across. Turn. (66 stitches)

Fasten off and weave in ends.

Attach fringe according to directions below.

Fringe:

Cut 12-inch lengths of yarn. Attach 3 strands of yarn in every other stitch on both ends.

Fold strands in half and pull loop through the stitch. Pull all 6 ends through the loop and pull tight.  

The lighting is a little different in the photos, but I promise the pics are all of the same wrap in the Taupe color!! 🙂

Here’s a free PDF for easy printing…

What color will you make your Simple Summer Wrap?

Happy Stitching!

Anita

Posted in Crochet, Gifts | Tagged , | 5 Comments

Simple Flower Cards

Hi friends,

More cards today using stamps from my favorite company – Unity Stamp Company! They are a great little company in Minnesota where they make all their stamps out of the best red rubber. They have the best images and fantastic sales! I don’t receive any compensation from them…I just LOVE them!

Disclosure: Some of the links on my site are affiliate links, meaning, at no additional cost to you, I will earn a small commission if you click through and make a purchase. As an Amazon Associate I earn from qualifying purchases.

This sweet sympathy card was made using the Lily Blossom set. Sadly, we will all need to have this type of card at some point and this set is so simple and beautiful.

I stamped the lily image with Memento Rich Cocoa ink on white card stock and colored it with Copic markers. I die cut the image with a label die similar to this set. I used these Blender Brushes from Taylored Expressions to brush the edges with sage ink. I stamped the sentiment with the Rich Cocoa ink, die cut it with a smaller label die, and brushed the edges with sage ink.

To make the card, I embossed a panel of pool colored card stock with an embossing folder. This particular one is discontinued, but this one or this one would be so pretty. I attached the panel to a white card and attached the lily image to the embossed panel. I added the sentiment to the card with foam tape. I finished the card with 3 light turquoise Dew Drops.

I also made a simple birthday card using the Be Unstoppable set. The set includes a beautiful daisy image and several sentiments along with the Tulip image.

I used this 3/4″Striped Stencil set and these Blender Brushes from Taylored Expressions to make my background on white card stock. Then I stamped the tulip and sentiment with Memento Rich Cocoa ink over the background. I layered the stamped panel to green card stock and attached it to a white card. I finished the card with 1 pink and 2 green sequins. A super easy card to make, but I love how it turned out!

(Just in case you are interested, this is my favorite tape runner for card making and here are the refills. 🙂 )

Sometimes less is more – and I think that’s just the way these cards turned out!

Happy Stamping!

Anita

Posted in Cards, Stamping, Uncategorized | Tagged , | Leave a comment

Summer Faux Leather Earrings

Hi friends,

I’ve been playing with my Designer Dangles from Taylored Expressions again! 😊 They have the best dies and faux leather sheets for making earrings in so many different styles. The possibilities are truly endless!

This time I made earrings using Designer Dangles-Diamonds and Designer Dangles-Fringe. They are so fun!

Disclosure: Some of the links on my site are affiliate links, meaning, at no additional cost to you, I will earn a small commission if you click through and make a purchase. As an Amazon Associate I earn from qualifying purchases.

These are the 2 die sets I used. They each come with 3 different dies so you can make a lot of different combinations.

Here are just a few of the faux leather designs available from Taylored Expressions. You can see all of the options they have here.

I used all 3 of the Designer Dangles-Diamonds dies to make the pair on the left below. On the right, I used the large and small dies.

For the red, white, and blue pair below, I use all 3 of the Designer Dangles-Fringe dies. For the animal print pair, I used the large and small dies.

Taylored Expressions also carries earring wires, jump rings, and charms. And these jewelry tools for making your earrings. They also have some great videos on their YouTube channel to show how easy it is to make these cute earrings.

This is also a great set of jewelry making tools. If you want several different colors of jump rings, this set has 6 different finishes. And this is a nice set of earring wires. I like to include these silicone earring backs if I’m giving the earrings as a gift – I use them myself because who wants to lose one of these pretty creations! 😉

To die cut the earrings you’ll need a die cutting machine. I have a Cuttlebug that I love, but they don’t make it any more. 😦 I have heard good things about this Sizzix Big Shot Machine and it looks like a good replacement for the Cuttlebug. It has a 6-inch opening and is a great size to keep handy on your crafting table since it’s not too big.

You can see some other earrings I’ve made in this post and this post. I guess I’m kind of obsessed…😱

Making your own earrings is so fun and they make great gifts! What kind will you make? I would love to see your creations!

Happy Crafting!

Anita

Posted in Gifts, Jewelry | Tagged , | 4 Comments

Simple and Elegant Wedding Card

Hi friends,

We have several weddings coming up this year. Of course, I always make a card for these special occasions. This is a simple, elegant design that comes together in just minutes.

All you need is some white card stock, a heart punch, your favorite embossing folders, and your favorite wedding themed rubber stamp.

Disclosure: Some of the links on my site are affiliate links, meaning, at no additional cost to you, I will earn a small commission if you click through and make a purchase. As an Amazon Associate I earn from qualifying purchases.

First, stamp your sentiment in the bottom left corner of a 5-1/4 by 4-inch piece of white card stock and attach it to a 5-1/2 by 4-1/4 inch white card. I used a dark lavender ink on my card – but of course, you can use any color.

Emboss white card stock using 4 different embossing folders and punch a heart shape from each embossed piece. Attach 2 hearts directly to the card and the other 2 hearts with foam tape. Simple and beautiful!

I have a whole collection of embossing folders to choose from – we won’t say how many… 😉 I love this one, this one, and this one from Taylored Expressions if you would like to add to your collection. This is also a great Swiss Dot embossing folder.

The sentiment stamp I used is an older one I’ve had for a long time. This set has several great stamps that would work.

I used a heart punch similar to this one. This is my favorite adhesive for card making (here are the refills) and this is great foam tape to add some dimension to your cards.

This card would also make a great anniversary card using your favorite anniversary stamp.

Happy Stamping!

Anita

Posted in Cards, Stamping, Uncategorized | Tagged , | Leave a comment

Cute Farmhouse Wood Block “Flag”

Hi friends,

If you saw my post Americana Wood Blocks last week, I promised another project using these 2-inch wood blocks. Well…this is it! This Cute Farmhouse Wood Block “Flag” is super easy to make and it will add a little fun to your 4th of July decor!

Disclosure: Some of the links on my site are affiliate links, meaning, at no additional cost to you, I will earn a small commission if you click through and make a purchase. As an Amazon Associate I earn from qualifying purchases.

Here’s what you’ll need…

To make your flag, paint 2 blocks red, 2 blocks white, and 2 blocks blue. I painted 2 coats on each block. Once they are dry, using white paint with the round sponge brush, dab circles onto 2 sides of each blue block like in the picture below. Once the white circles are completely dry, dry brush all 6 blocks with brown paint to give them a vintage look.

Using E6000 clear adhesive, glue the blue blocks together, one on top of the other. Glue each red block on top of each white block. Let the adhesive dry. Wrap twine around the top blue block and tie in a knot, trimming the ends. Glue the blocks together as in the picture below and let dry.

And here it is! Isn’t it cute?

This would be a fun project to make with the kids on a rainy Summer afternoon! And it’s a great little decoration to leave out all Summer. 🇺🇸

Happy crafting!

Anita

Posted in Decor | Tagged , | 1 Comment