Our Christmas Tree

Hi friends,

I have seen so many themed trees with gorgeous matching ornaments and amazing bows. And they are so beautiful! And I think maybe it might be nice to decorate our tree that way.

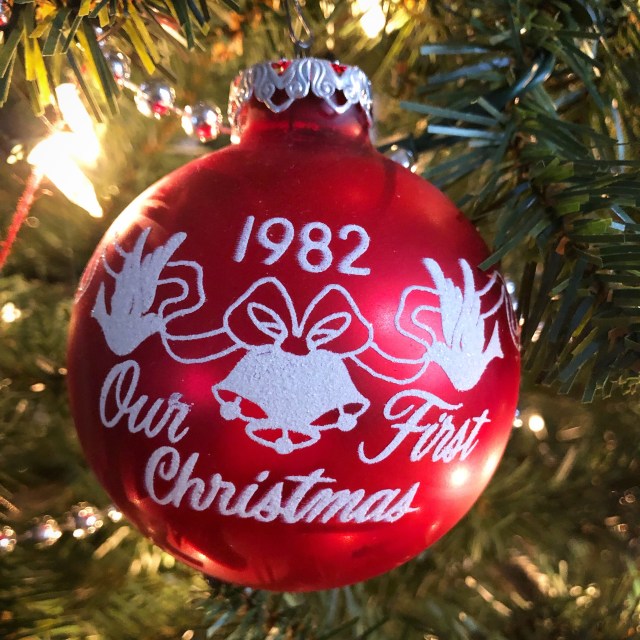
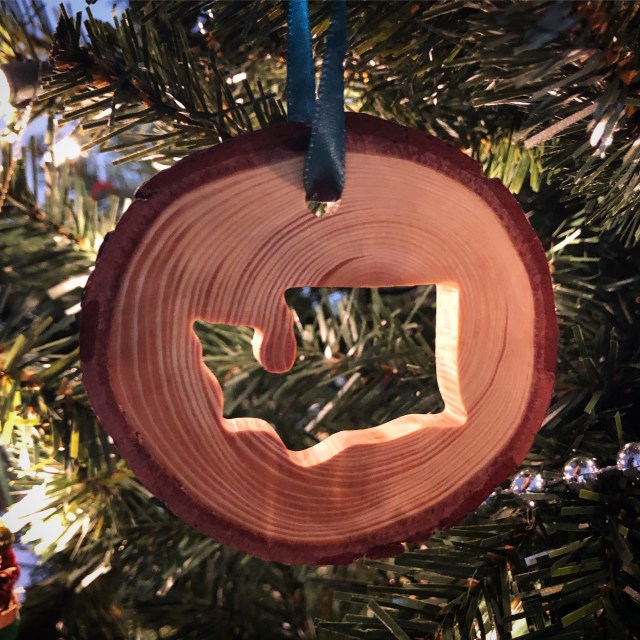
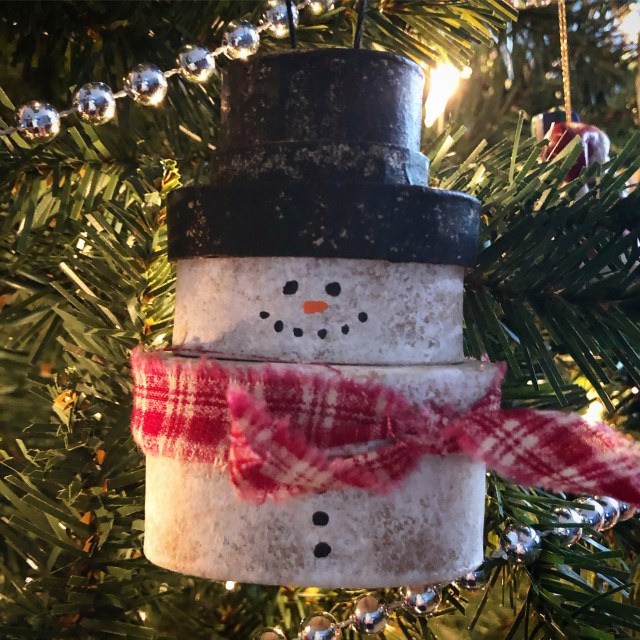
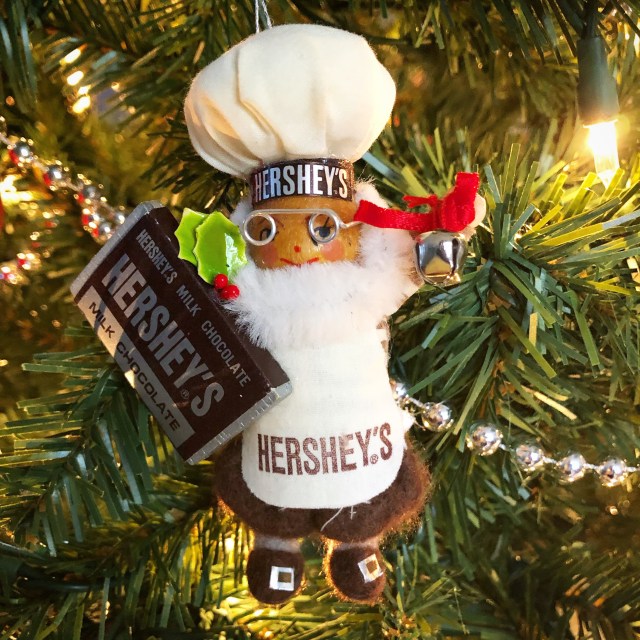
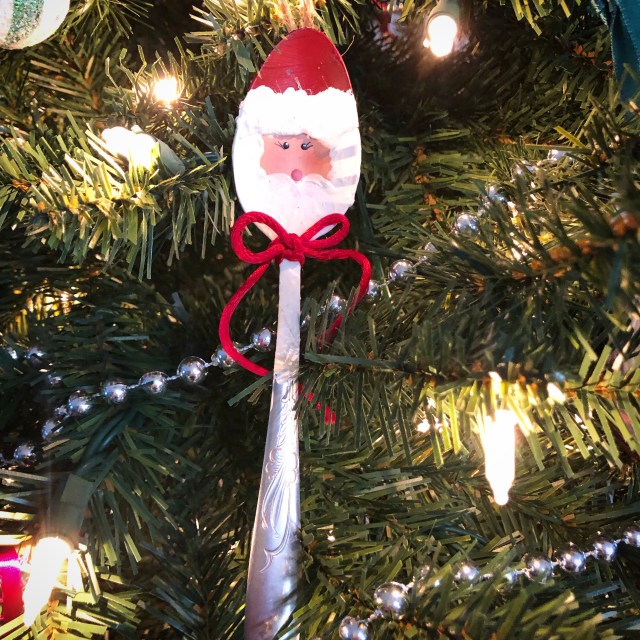
But then I pull out my boxes of Christmas decorations and all of the ornaments I’ve collected over the years – and I know that it just wouldn’t be Christmas without these precious keepsakes on our tree.

I have ornaments that some sweet friends have made for me. I have ornaments that I’ve picked up on our various vacations. I have ornaments that were given to me as gifts. And I have ornaments that I’ve made. Each ornament evokes a special memory. I just can’t imagine any other way to decorate our tree!

Here are just a few of my favorites…there are way too many to post them all! 🙂

I know that you love your tree just as much as I love mine. I hope your season is filled with family, friends, and love as we celebrate the birth of Jesus.

Merry Christmas,

Anita

Posted in Christmas, Decor, Uncategorized | Leave a comment

We Whisk You a Merry Christmas

Hi friends,

Do you need a last minute gift? Or something fun for friends and neighbors? I love this cute idea using a simple whisk from the kitchen section of your favorite store. I’ve seen it done several ways on Pinterest – here’s my take on it.

You’ll need a whisk (I found mine at Walmart), chocolate kisses, cellophane bags (you can find these in the cake decorating area of Walmart or your local craft store), ribbon, and the tag to tie onto the package. If you like the tag I created, click on the “Gift Tag” link below for the pdf to print. It will print on an 8 1/2 x 11 sheet of paper. I printed mine on white card stock, trimmed each tag, and then layered them to red and green card stock.

A simple little gift that is sure to bring a smile!

Merry Kissmas!!

Anita

Posted in Christmas, Gifts, Tags, Uncategorized | Leave a comment

Butterscotch Banana Bread

Hi friends,

Do you end up with bananas that get too ripe and mushy to eat? Yeah, me too! Of course the go to way to use them up is to make banana bread. I found this recipe for Butterscotch Banana Bread here at Six Sisters’ Stuff and it adds a little twist to the normal recipe.

It’s super easy to make and easy to double if you have a lot of bananas you need to use up! ðŸ˜‰

2 loaves ready for the oven!
Golden brown and they smell so good!!
So yummy with a hot cup of coffee or tea – or a tall glass of cold milk!

You can also make these in mini loaf pans. Perfect to tie with a ribbon and a cute tag for a sweet Christmas gift.

Happy Baking,

Anita

Posted in Recipes, Uncategorized | Leave a comment

Farmhouse-Style Christmas Gift Tags

Hi friends,

Do you have all your Christmas gifts wrapped and tagged? If not, I have a super quick and easy Farmhouse-Style Christmas Gift Tag to share with you today. 

You’ll need some kraft card stock, green card stock, red patterned paper, a tree punch or die, “to” and “from” stamps (mine are from Serendipity Stamps), some red ink and red/white bakers twine. My tree die is from Amuse Studio. (Here’s a great die set from Sizzix with 4 different size trees.)

Optional supplies are a tag topper punch like this one from Stampin’ Up and an embossing folder like this one also fromStampin’ Up. (Here’s another option for a swirl embossing folder from Sizzix and a tag die set from Sizzix.) You can also trim your card stock into a tag shape if you don’t have a punch or die.

To make your tag, cut a piece of kraft card stock to 4 by 2 inches. Punch or trim the top into a tag shape. Stamp “to” and “from” with red ink on the tag. Attach a strip of red patterned paper to the bottom of the tag. Die cut a tree from green card stock and emboss with a swirl pattern, if desired. Attach the tree to the tag and tie with bakers twine. 

Super quick and easy – even faster if you decide not to emboss the tree!

Merry, Merry!

Anita


Posted in Cards, Christmas, Stamping, Tags, Uncategorized | Leave a comment

Crochet Bottle Bag

Hi friends,

Are you giving wine or sparkling cider as a Christmas gift this year? This cute Crochet Bottle Bag is the perfect way to add a little something special to your gift.

I love the stripes and texture!

It works up quickly – I used worsted weight yarn and a G/4mm hook. You may even be able to use up some of your yarn stash leftover from other projects.

You can find the free pattern here at Red Heart. I opted to leave off the pom poms and for the drawstring I just made a chain using both colors of yarn. 


Ready to gift!

I think this adds just a little extra Christmas cheer when giving this type of gift.

Happy Stitching,

Anita

Posted in Christmas, Crochet, Gifts, Uncategorized | Leave a comment

Wood Bead Snowman Ornaments

These little Wood Bead Snowman Ornaments are so cute and incredibly easy to make! They would be a fun Christmas project to make with the kids – and they could give them to all their friends!

You can find all the details on how to make these adorable little snowmen here at The Country Chic Cottage. The only thing I added was a red/white baker’s twine bow.

I used 1-inch unfinished wood beads and natural colored twine to make my snowmen. The twine was the same twine that I used to make my Farmhouse Natural Wood Bead Garland in this post. I found my wood beads on Amazon. You can also find supplies at your local craft store.

Snowman supplies
So fun and easy to make!
And he looks adorable on the tree! 

Gather your supplies and have a “snowman day” with the kids! Snow much fun! 😉

Thanks for stopping by,

Anita

Posted in Christmas, Gifts, Uncategorized | 32 Comments

Simply Merry Christmas

Hi Friends,

I always say I’m not going to let time sneak up on me and I’m going to start my Christmas crafting early. Well…once again, I am down to the wire trying to get all the things made on time!! Maybe 2019 will be different…a girl can always dream! 😀

Today I have a simple Christmas card to share. It comes together quickly and can easily be made assembly-line style. I cut, stamped, and embossed all my pieces first and then assembled all the cards. It’s simple but filled with warm Christmas wishes.

Simply Merry Christmas

The embossing folder I used is from Elizabeth Craft Designs, but it is no longer available. This Holiday Flourish folder from Echo Park would work great! Or just use whatever Christmas embossing folder you may have. The “Merry Christmas” stamp is an older one from Stampabilities – use your favorite Christmas sentiment stamp! And if you are in need of a scalloped oval die this set by Sizzzix is a great addition to your craft room.

To make the card, emboss a panel of red card stock and attach it to a card made with kraft card stock. Cut 3 banner shapes from patterned paper. I cut one banner 4 by 1-1/2 inches and 2 banners 3 by 1 inches. I used this Banner Triple Punch from Stampin’ Up to punch my banner shape, but you can easily cut it with scissors. Attach 3 banners to the card. Stamp the sentiment on kraft card stock with red ink and die cut with a scalloped oval die. Attach it to the card with foam tape.

Such a simple card – but filled with Christmas cheer! 

Simply Merry Christmas…

Anita

Posted in Cards, Christmas, Stamping, Uncategorized | Leave a comment

S’mores Bars

Hi friends,

S’mores are the perfect campfire treat! But what do you do if there isn’t a campfire nearby? You make S’mores Bars!! 

I found this recipe for S’mores Bars {to Feed a Crowd} here on Pinterest. You bake them in a jelly roll pan so there really are plenty to feed a crowd. Perfect for a potluck or family gathering.

Chocolate, graham crackers, marshmallows, and more chocolate – what more could you ask for???  ðŸ™‚

Fresh from the oven! Look at all that yummy, gooey deliciousness!
So good!!!

You have to wait until they are completely cool to cut them, but I highly recommend putting your bar in the microwave for 10-15 seconds before you indulge. It makes them so gooey and delicious!! ðŸ˜‹

Happy Eating,

Anita

Posted in Recipes, Uncategorized | Leave a comment

Oversized Farmhouse Joy Ornament

Hi friends,

Have you decorated for Christmas yet? Due to a busy schedule, including a trip with my husband for a conference, I decided to decorate early this year. I had everything up before Thanksgiving!  😳 🌲

Although I have my favorites that I use every year, I love making new Christmas decorations to freshen things up each year. This Oversized Farmhouse Joy Ornament is super fun and easy to make.

I picked up my wood supplies at Michael’s along with the gray chalk finish paint and got the white chalk finish paint at Hobby Lobby. The wood circle is 9 inches across and the letters are 5-1/2 inches tall.


I painted the wood circle with 2 coats of white paint, letting it dry completely between coats. After the 2nd coat was dry, I lightly dry-brushed gray paint over the white. I painted the letters with 2 coats of gray paint and dry-brushed each letter with white paint. 

I glued the “J” and “Y” to the wood circle using E6000 glue. Then I glued the “O” on top of the other 2 letters. I added several red sequins to add a little color and shine. Then I glued a piece of twine on the back for a hanger. 

Here it is hanging in the middle of my grapevine wreath.
A closer look at the Oversized Farmhouse Joy Ornament.

This would make a great teacher or neighbor gift. You can easily make several in just a couple of hours! And with sales or coupons, they make very inexpensive gifts.

If you’re looking for another “Joy” idea, you can see this Joy Farmhouse Wood Sign I made last year in this post. 

I hope your holiday season is filled with Joy!

Anita

Posted in Christmas, Decor, Gifts, Uncategorized | 1 Comment

Happy Thanksgiving

Hi friends,

It’s Thanksgiving in the United States today. I hope you are enjoying the day with family and friends!

Here are the details for this simple Thanksgiving card.

The pumpkin stamp is from the Pumpkin Patch set from Reverse Confetti. The Corrugated Dynamic Textured Impressions Embossing Folder is from Stampin’ Up and the swirl embossing folder I used is from Cuttlebug. I’m not sure if it is still available, but you can find a similar one here.

I stamped the pumpkin with orange ink on white card stock (here’s a good orange). Then I added the stem with Memento Rich Cocoa ink and then added the curly vine with Olive ink. I trimmed the pumpkin leaving a tiny border of white.

To put the card together, I embossed a panel of orange card stock with the corrugated folder, tied some thin twine around it, and attached it to a white card. I embossed a piece of green card stock with the swirl folder and attached it to the card over the twine with foam tape. The pumpkin is then attached to the green piece with foam tape. To finish the card, I added 3 transparent orange gems in the upper left corner.

Grateful, Thankful, Blessed.

I hope you’re having a wonderful Thanksgiving,

Anita

Posted in Cards, Fall, Stamping, Uncategorized | Leave a comment