
Hi friends,
This easy Happy Fall Sign comes together quickly and will add a little Fall color to your decor for the season.🍁🍂🍁
Disclosure: Some of the links on my site are affiliate links, meaning, at no additional cost to you, I will earn a small commission if you click through and make a purchase. As an Amazon Associate I earn from qualifying purchases.
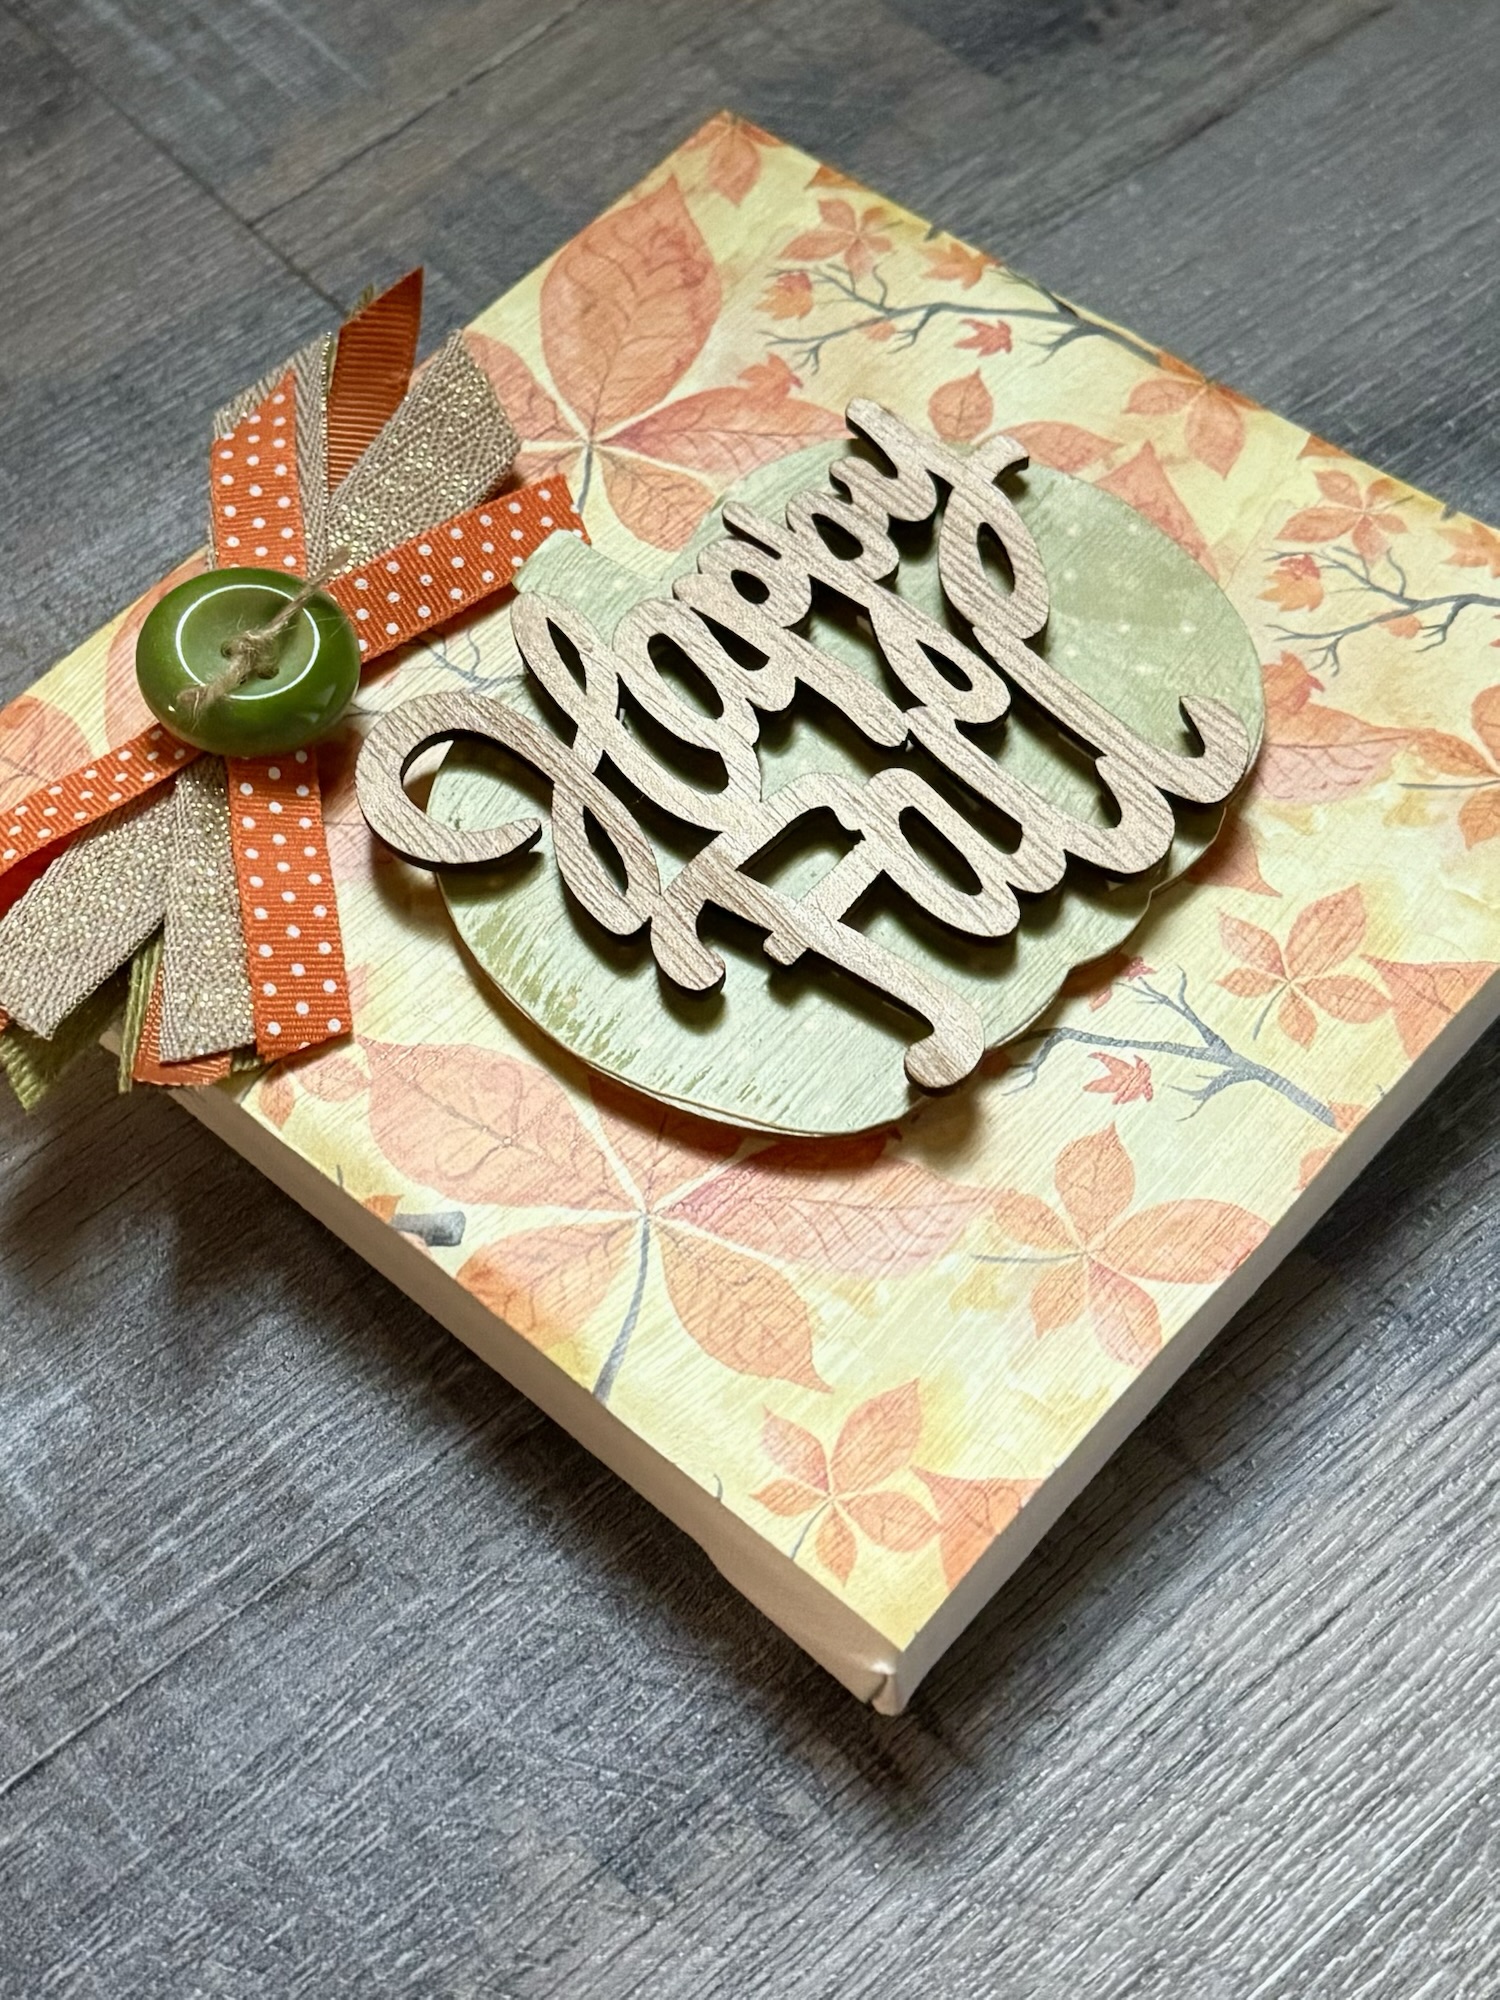
I used a 6 by 6 inch stretched canvas, patterned scrapbook paper, a small wood pumpkin cutout, a “Happy Fall” wood cutout, various ribbons and a button for the bow, Mod Podge to adhere the paper, and foam tape.

First, trace the pumpkin on the back of one of the patterned papers and cut out just inside the pencil line. Trim the other paper to measure 6 by 6 inches to fit on the canvas. Using a foam brush, apply a thin layer of Mod Podge to the canvas and adhere the paper, smoothing any wrinkles. Repeat with the pumpkin cutout. Once dry (it won’t take long!), apply a thin coat of Mod Podge over the top of both and let dry.
I attached the pumpkin to the canvas with foam tape. I left the “Happy Fall” unfinished and attached it to the pumpkin with foam tape. I created a Re-Fabbed bow and attached it to the corner of the canvas using E6000 clear adhesive. I tied a button with natural twine and glued it to the center of the bow.

This cute little sign will add a pop of Fall color to your tired tray, mantel, or anywhere else you decide to put it!🍂🍁🍂
Anita


You have a winner once again!
LikeLiked by 1 person
Thanks, Mom! 🍁🍂🍁
LikeLike