Farmhouse Inspired Crochet Cotton Coasters

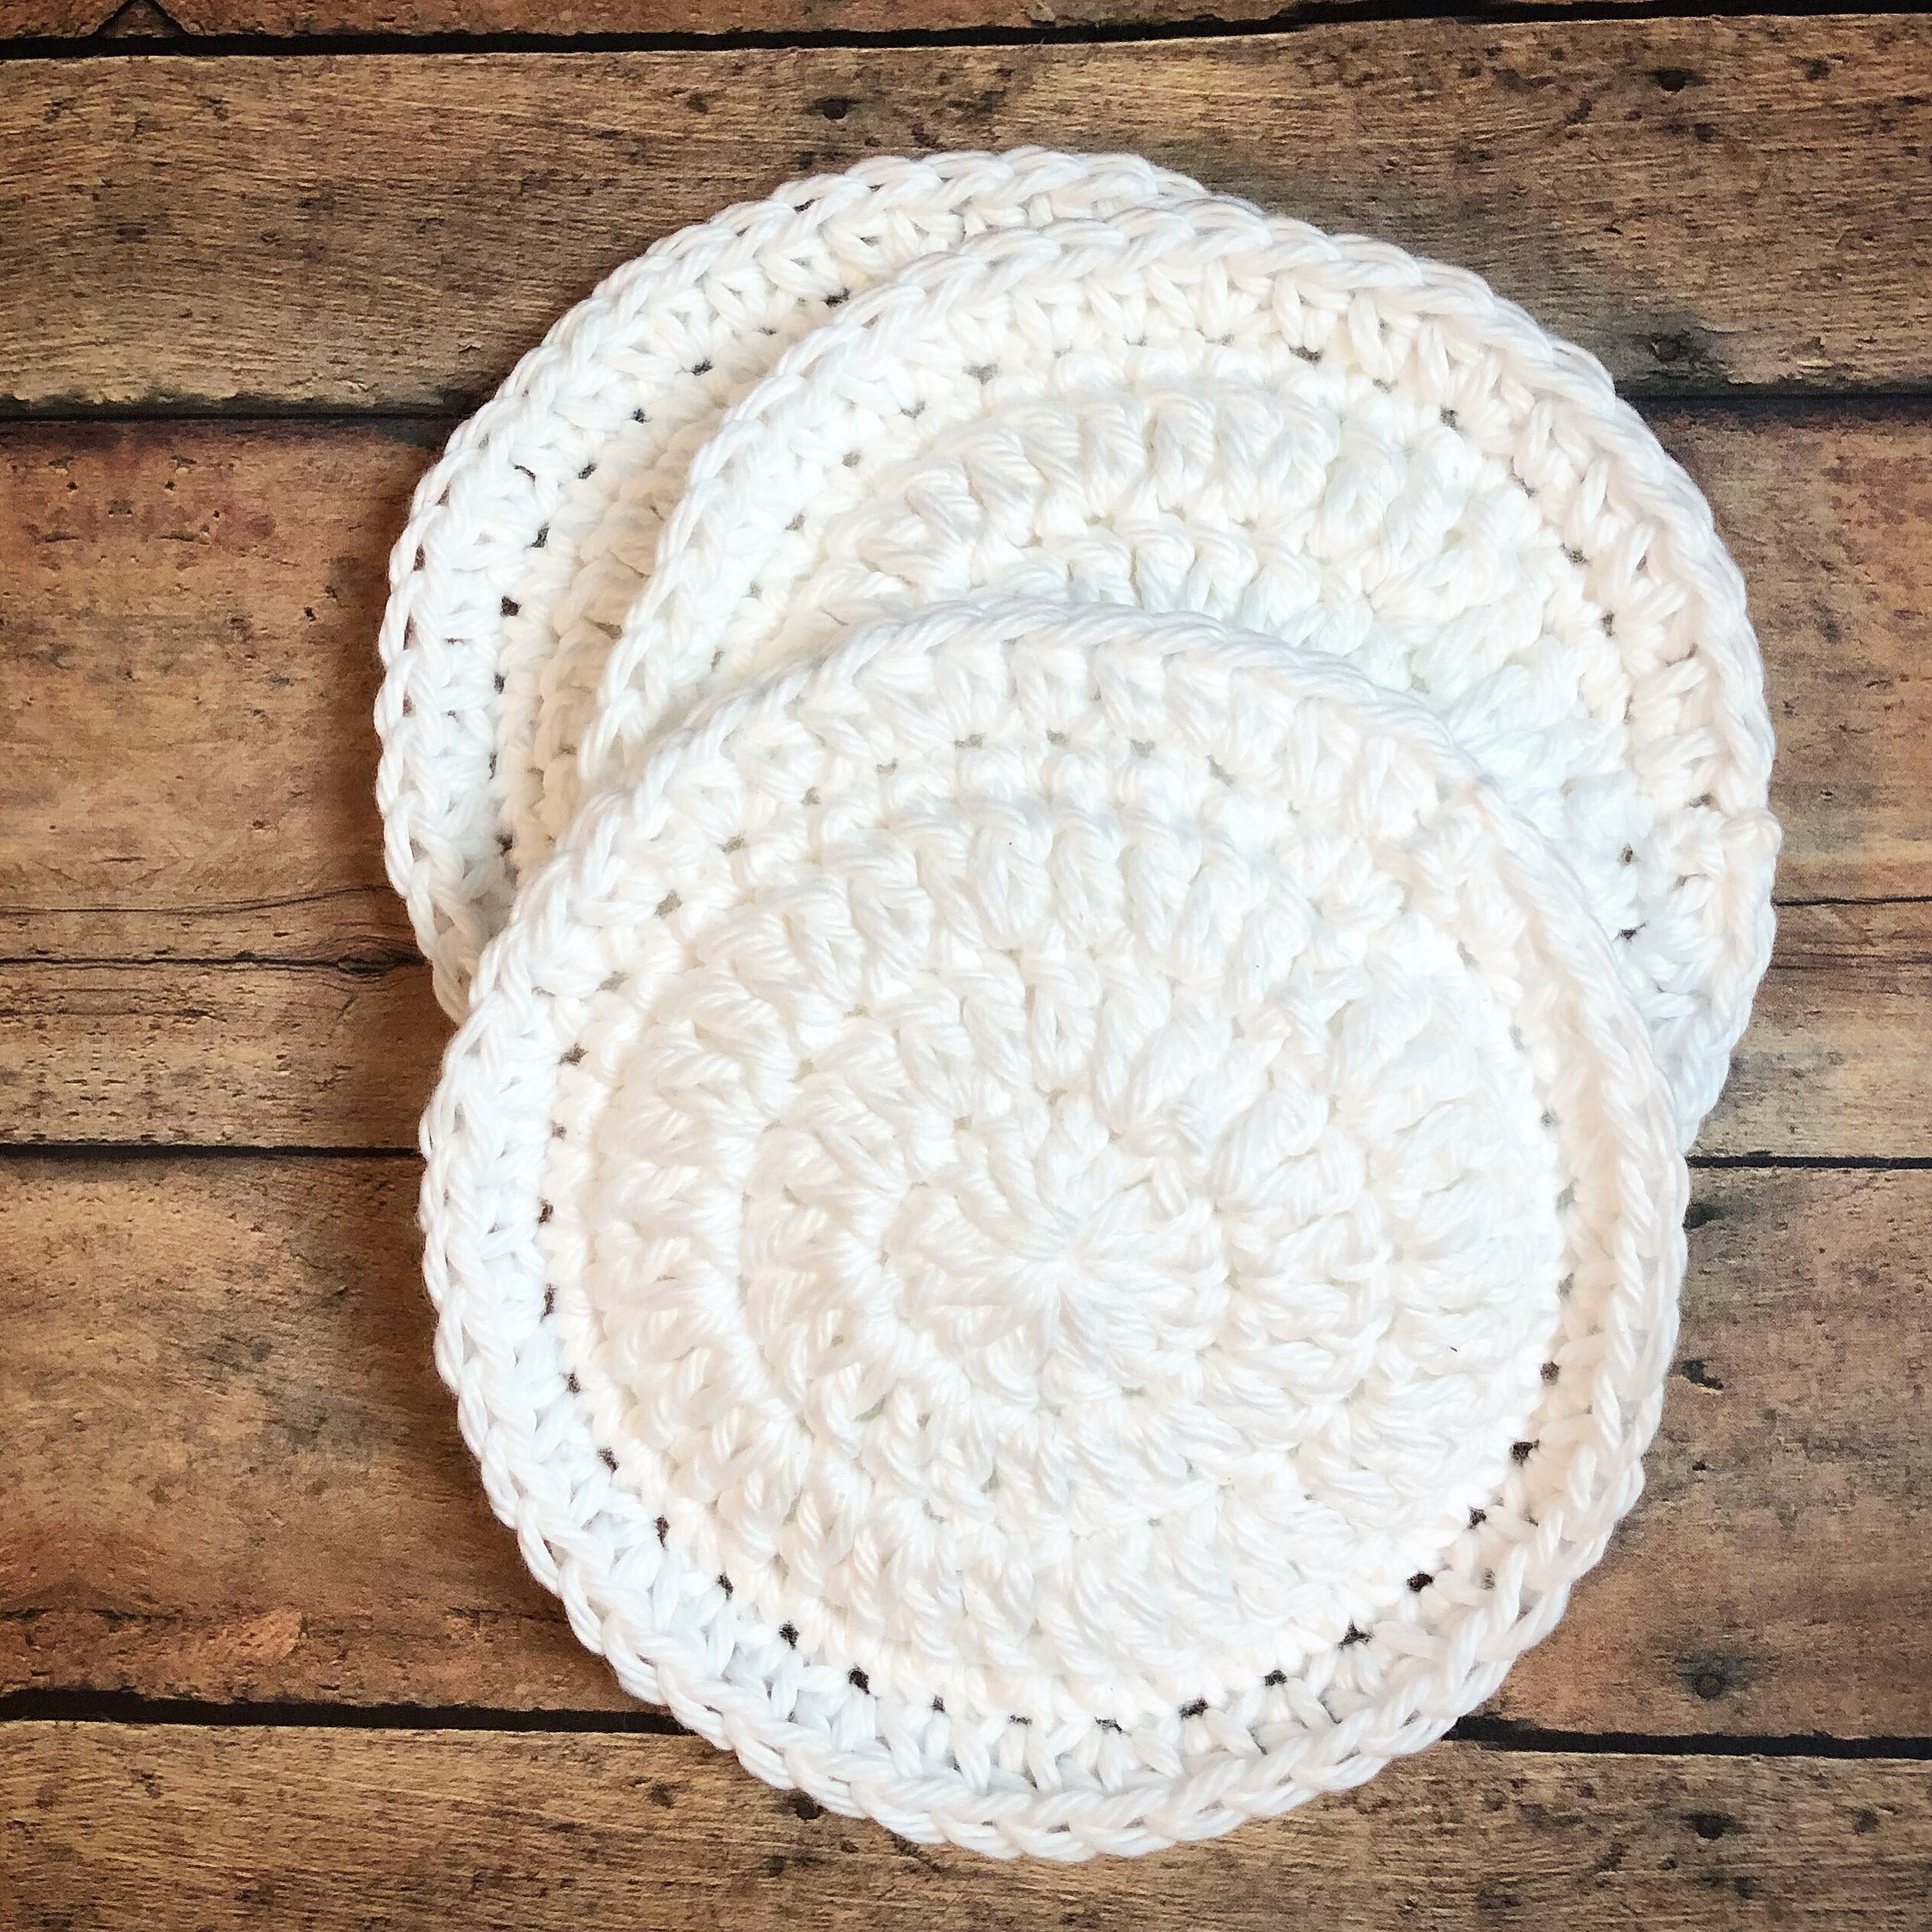
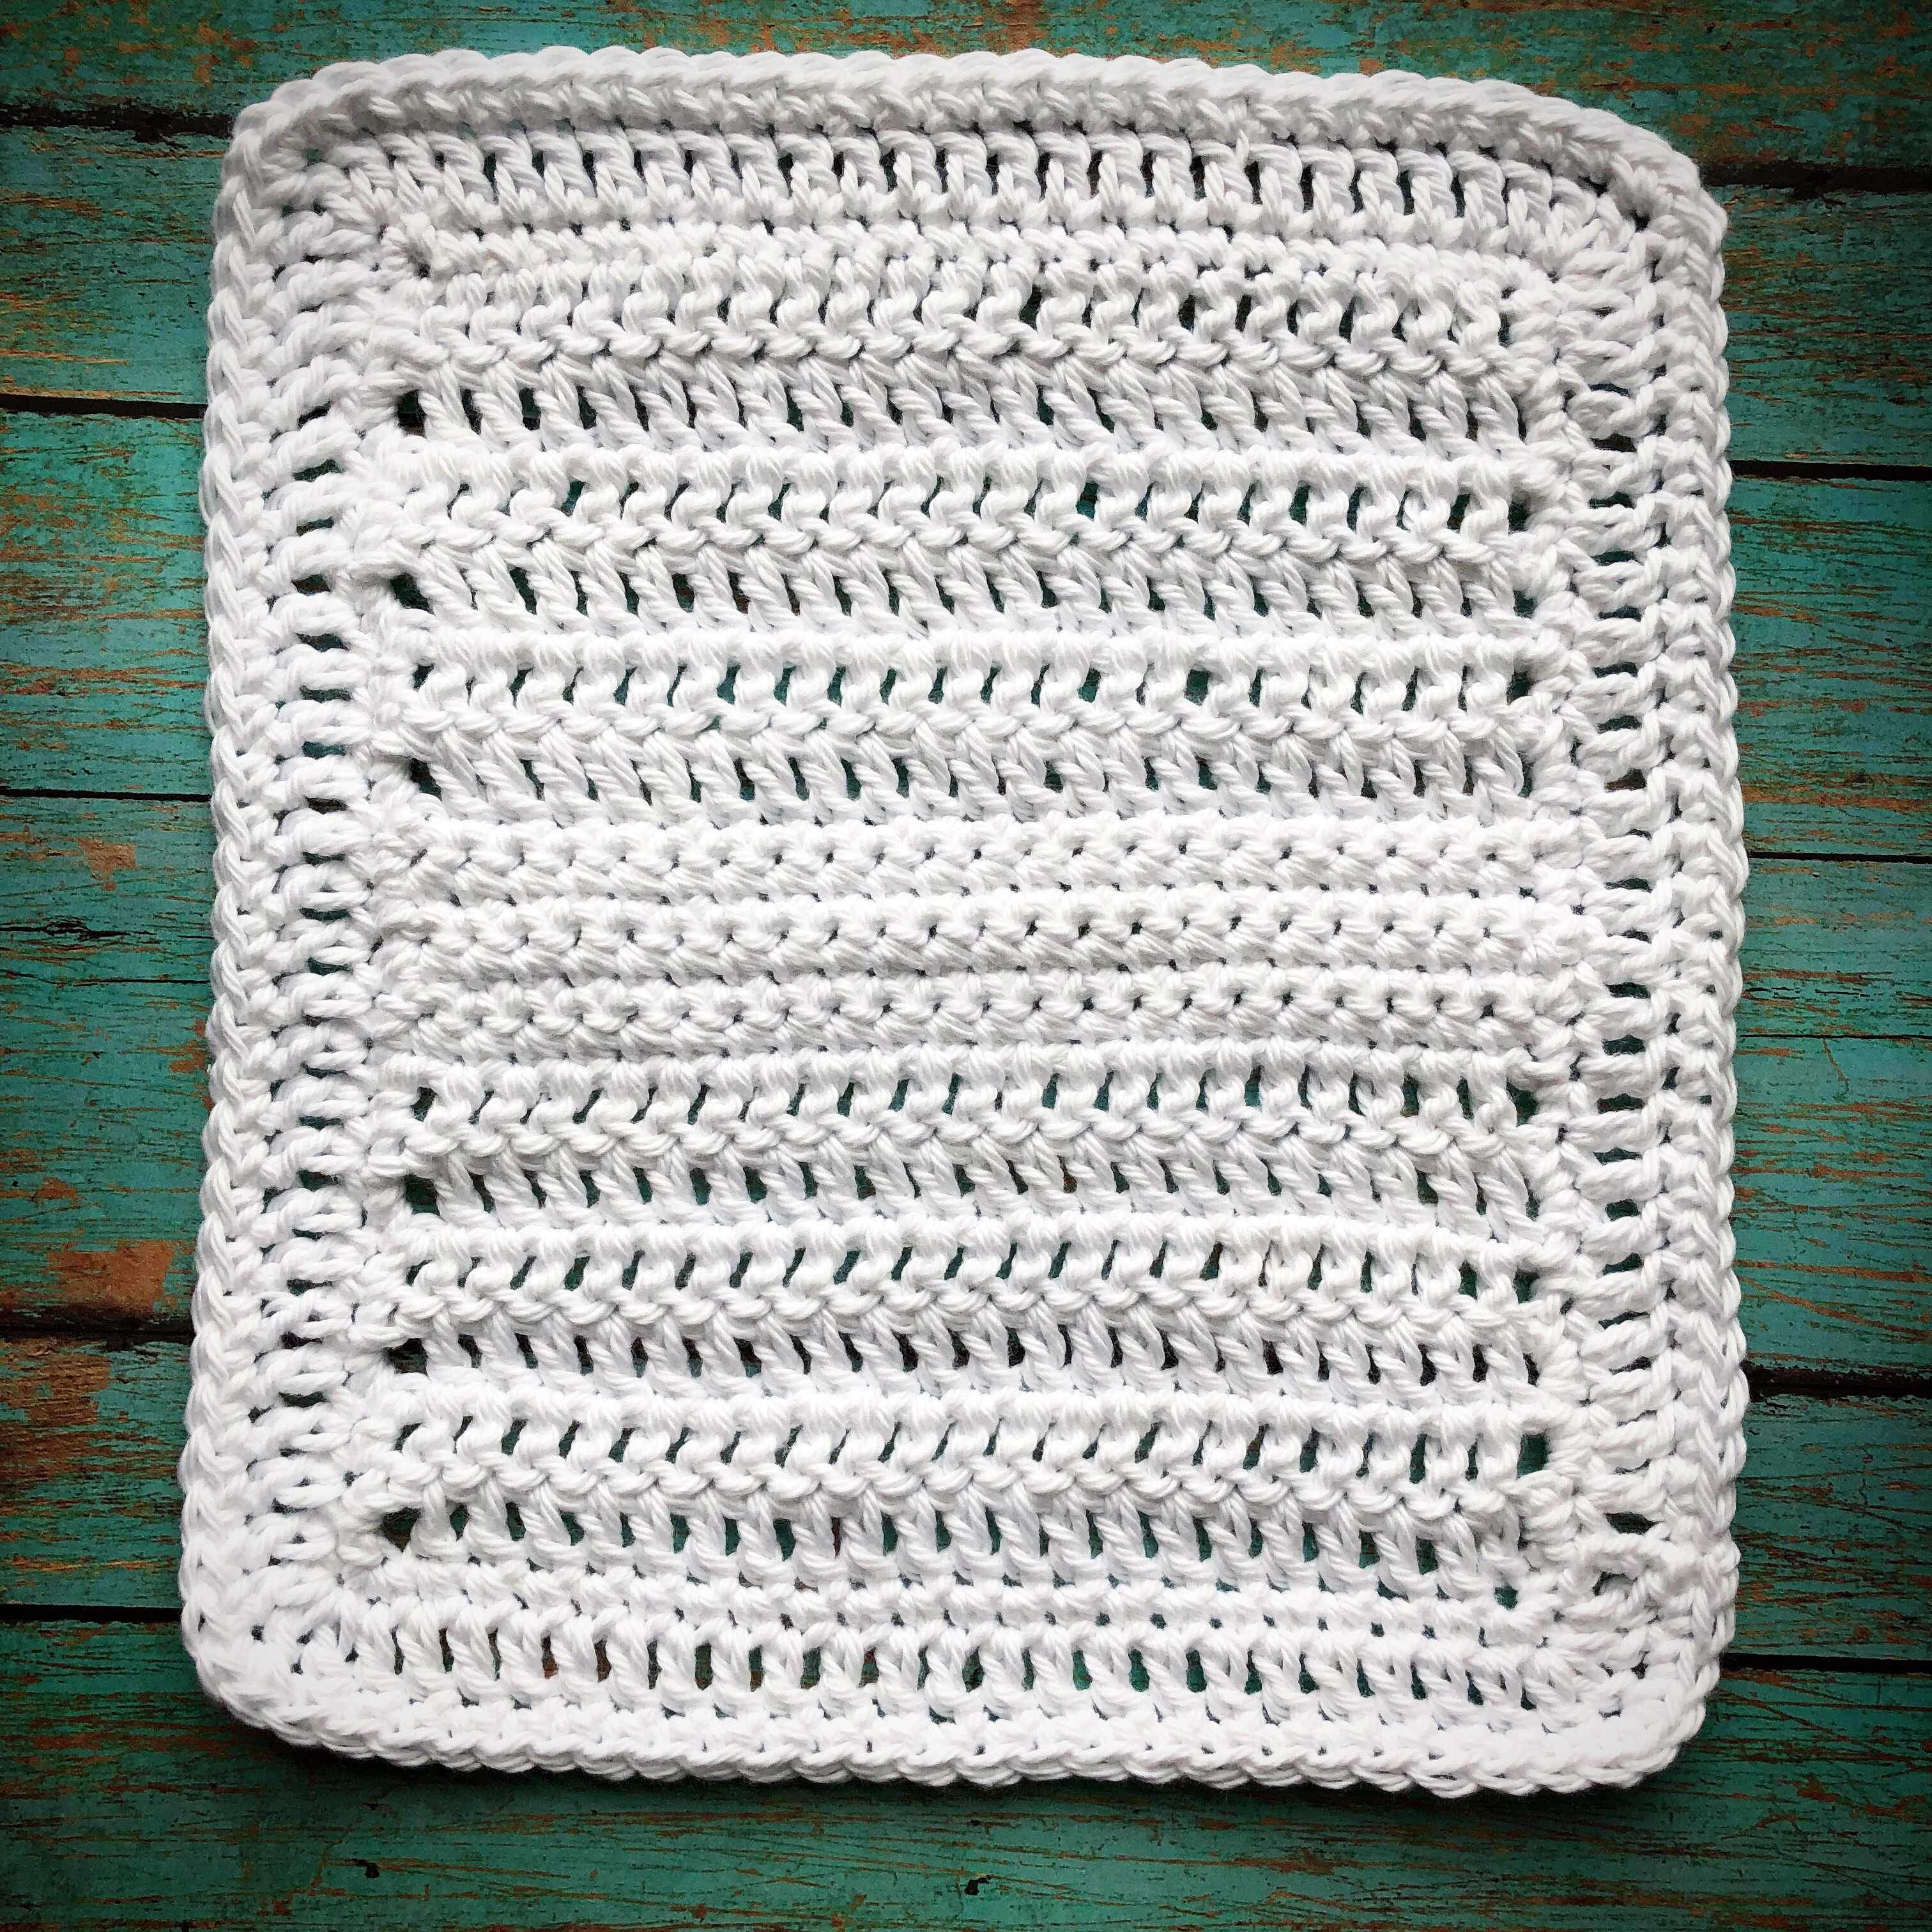
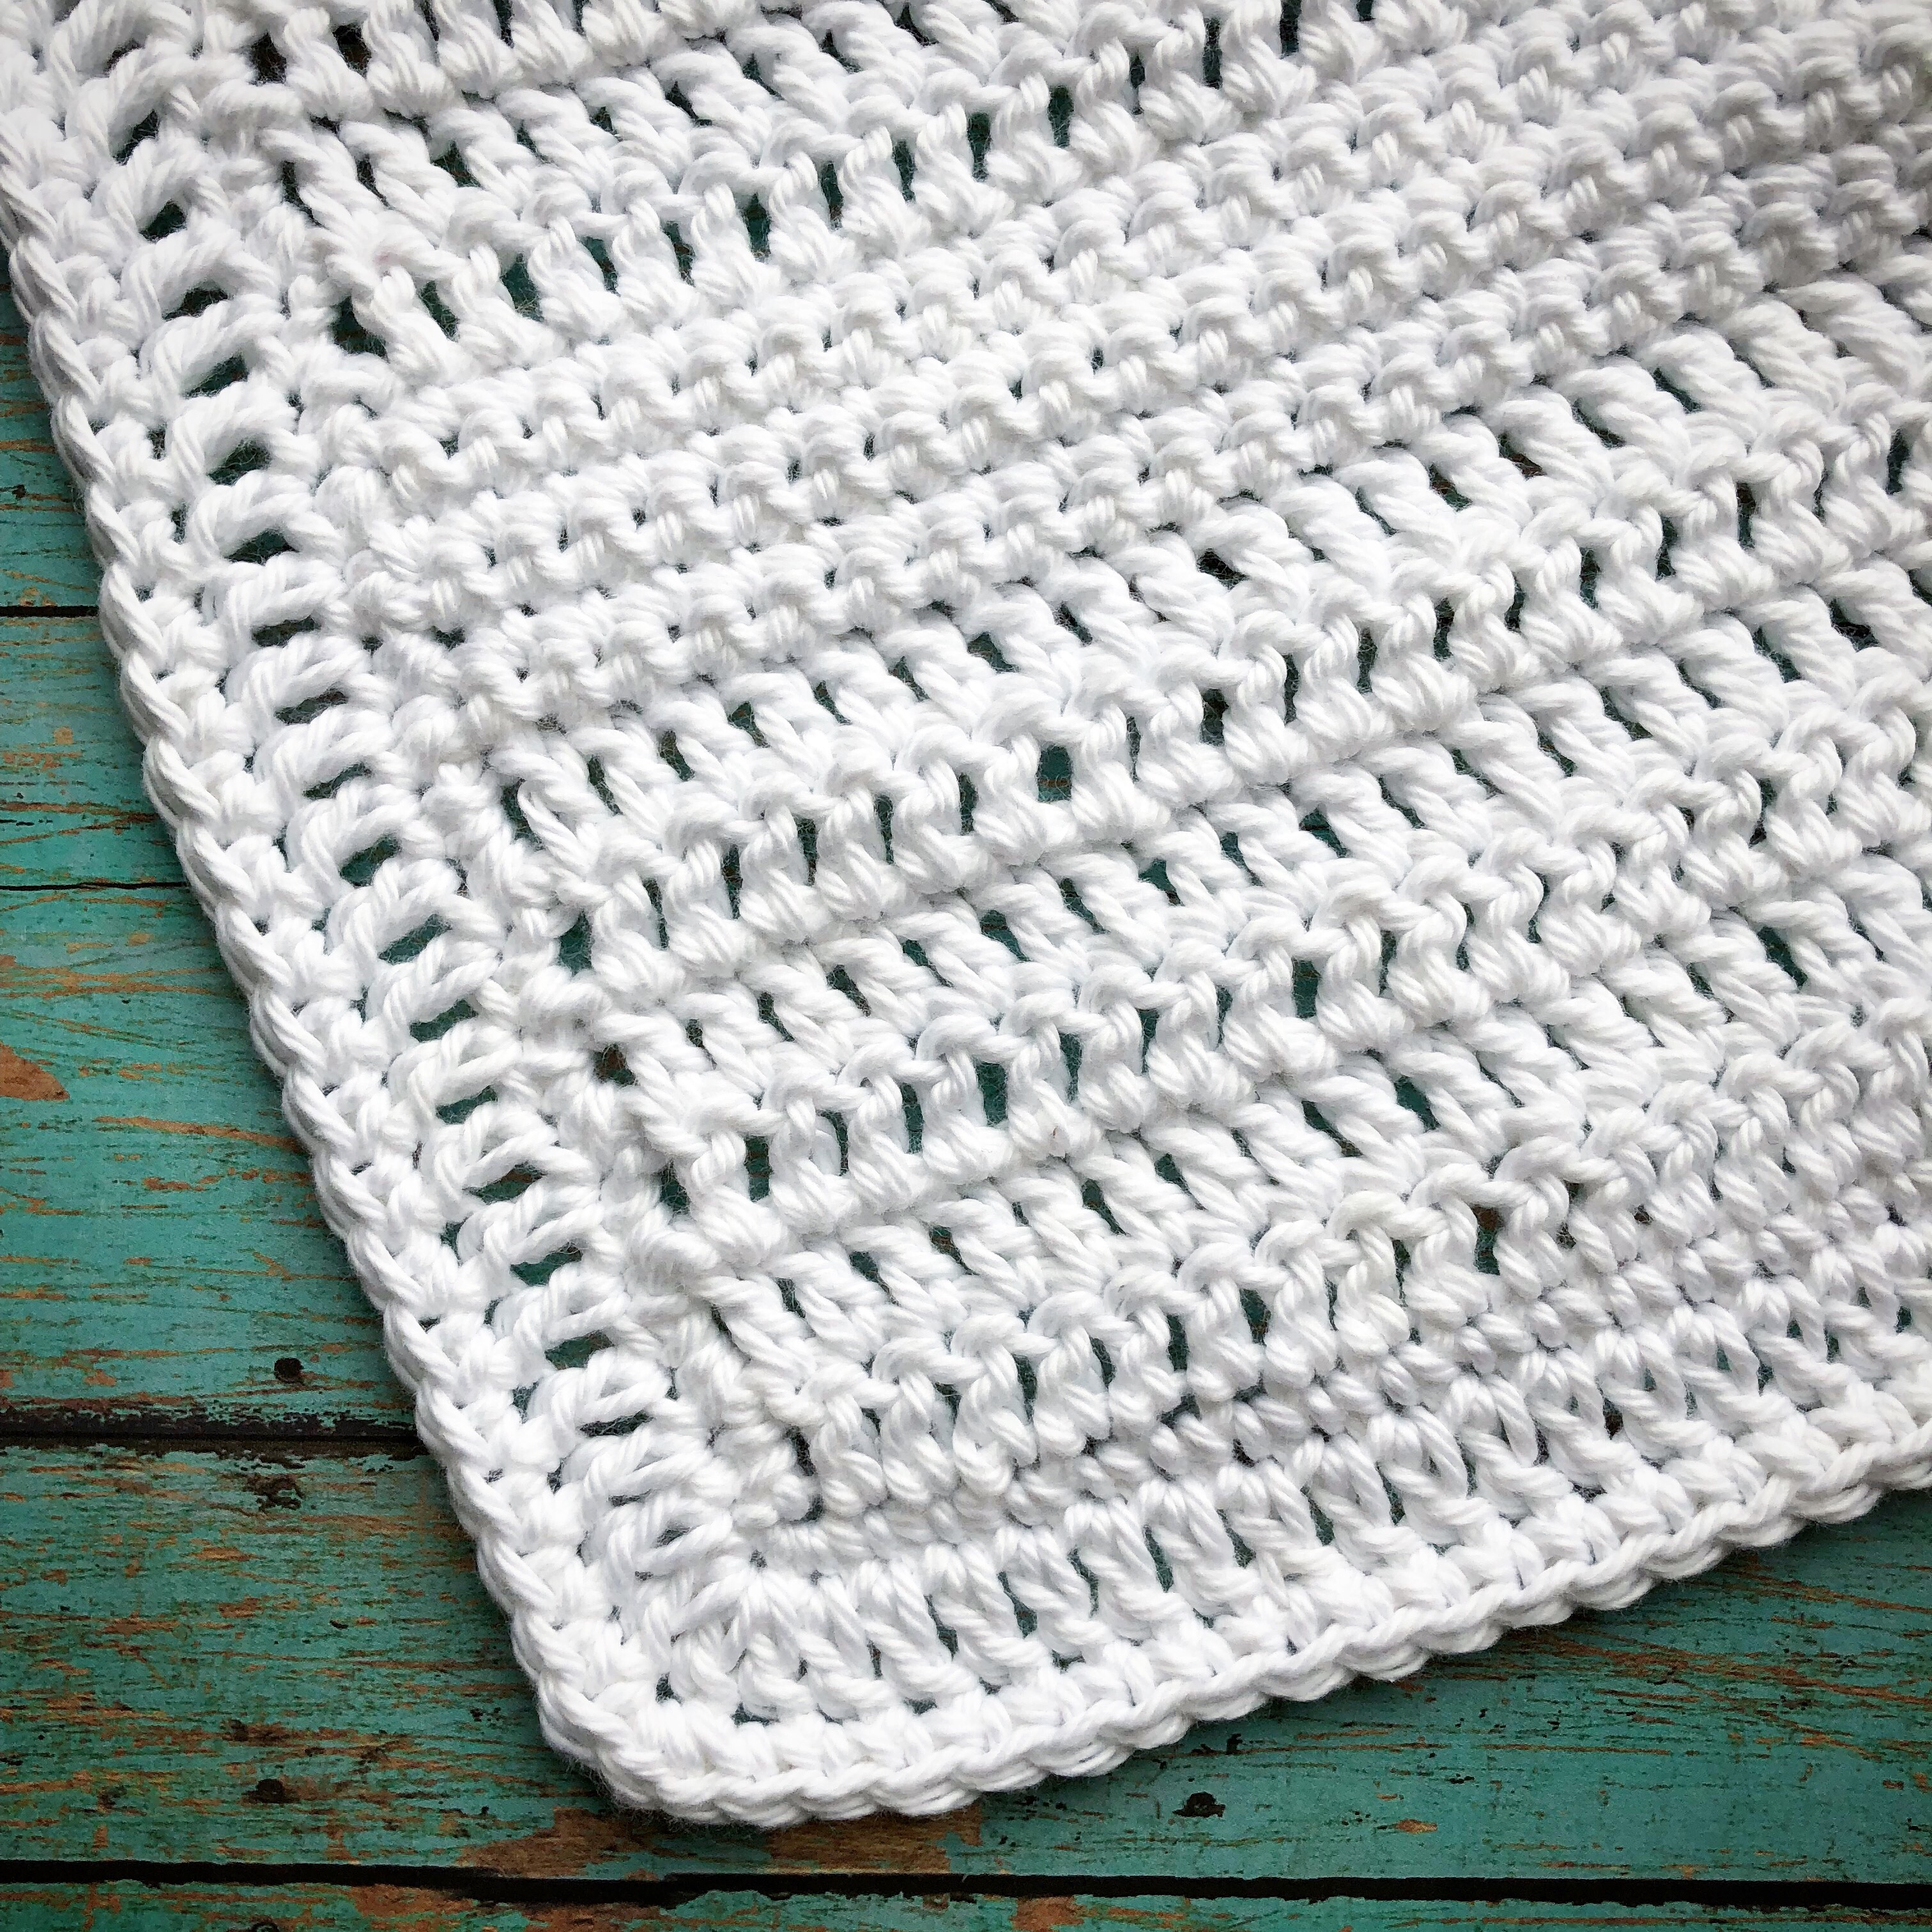
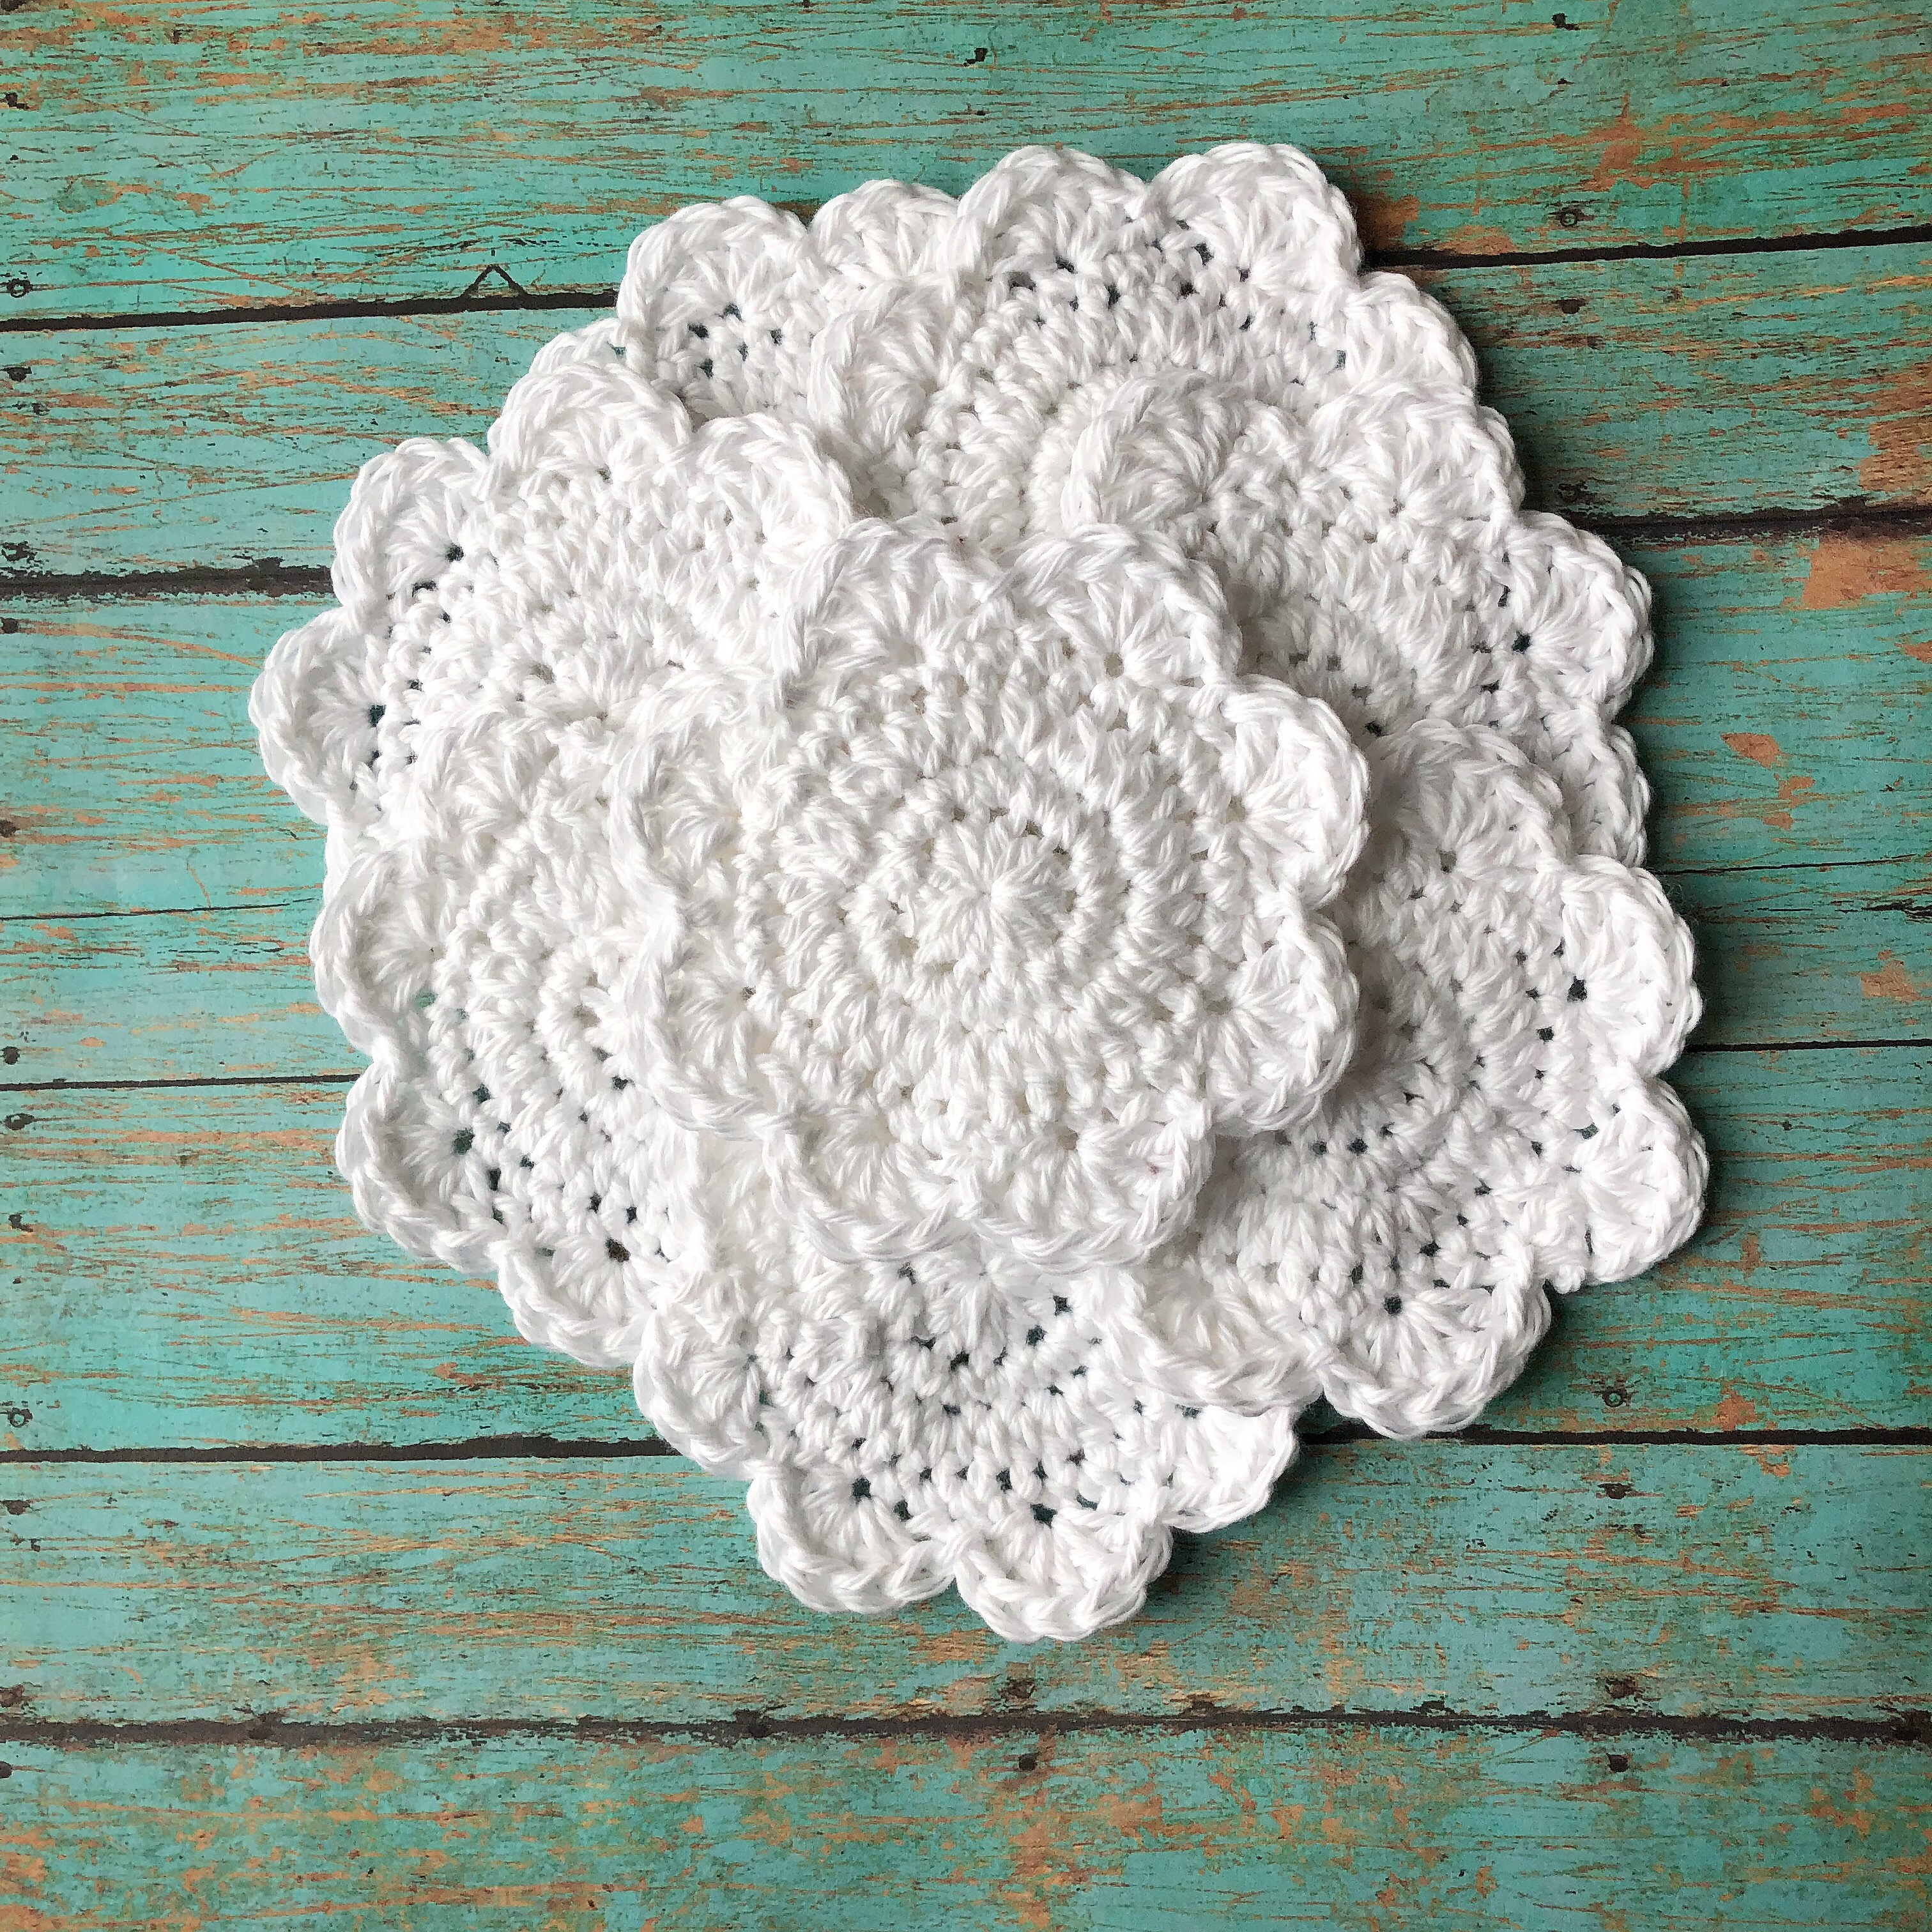
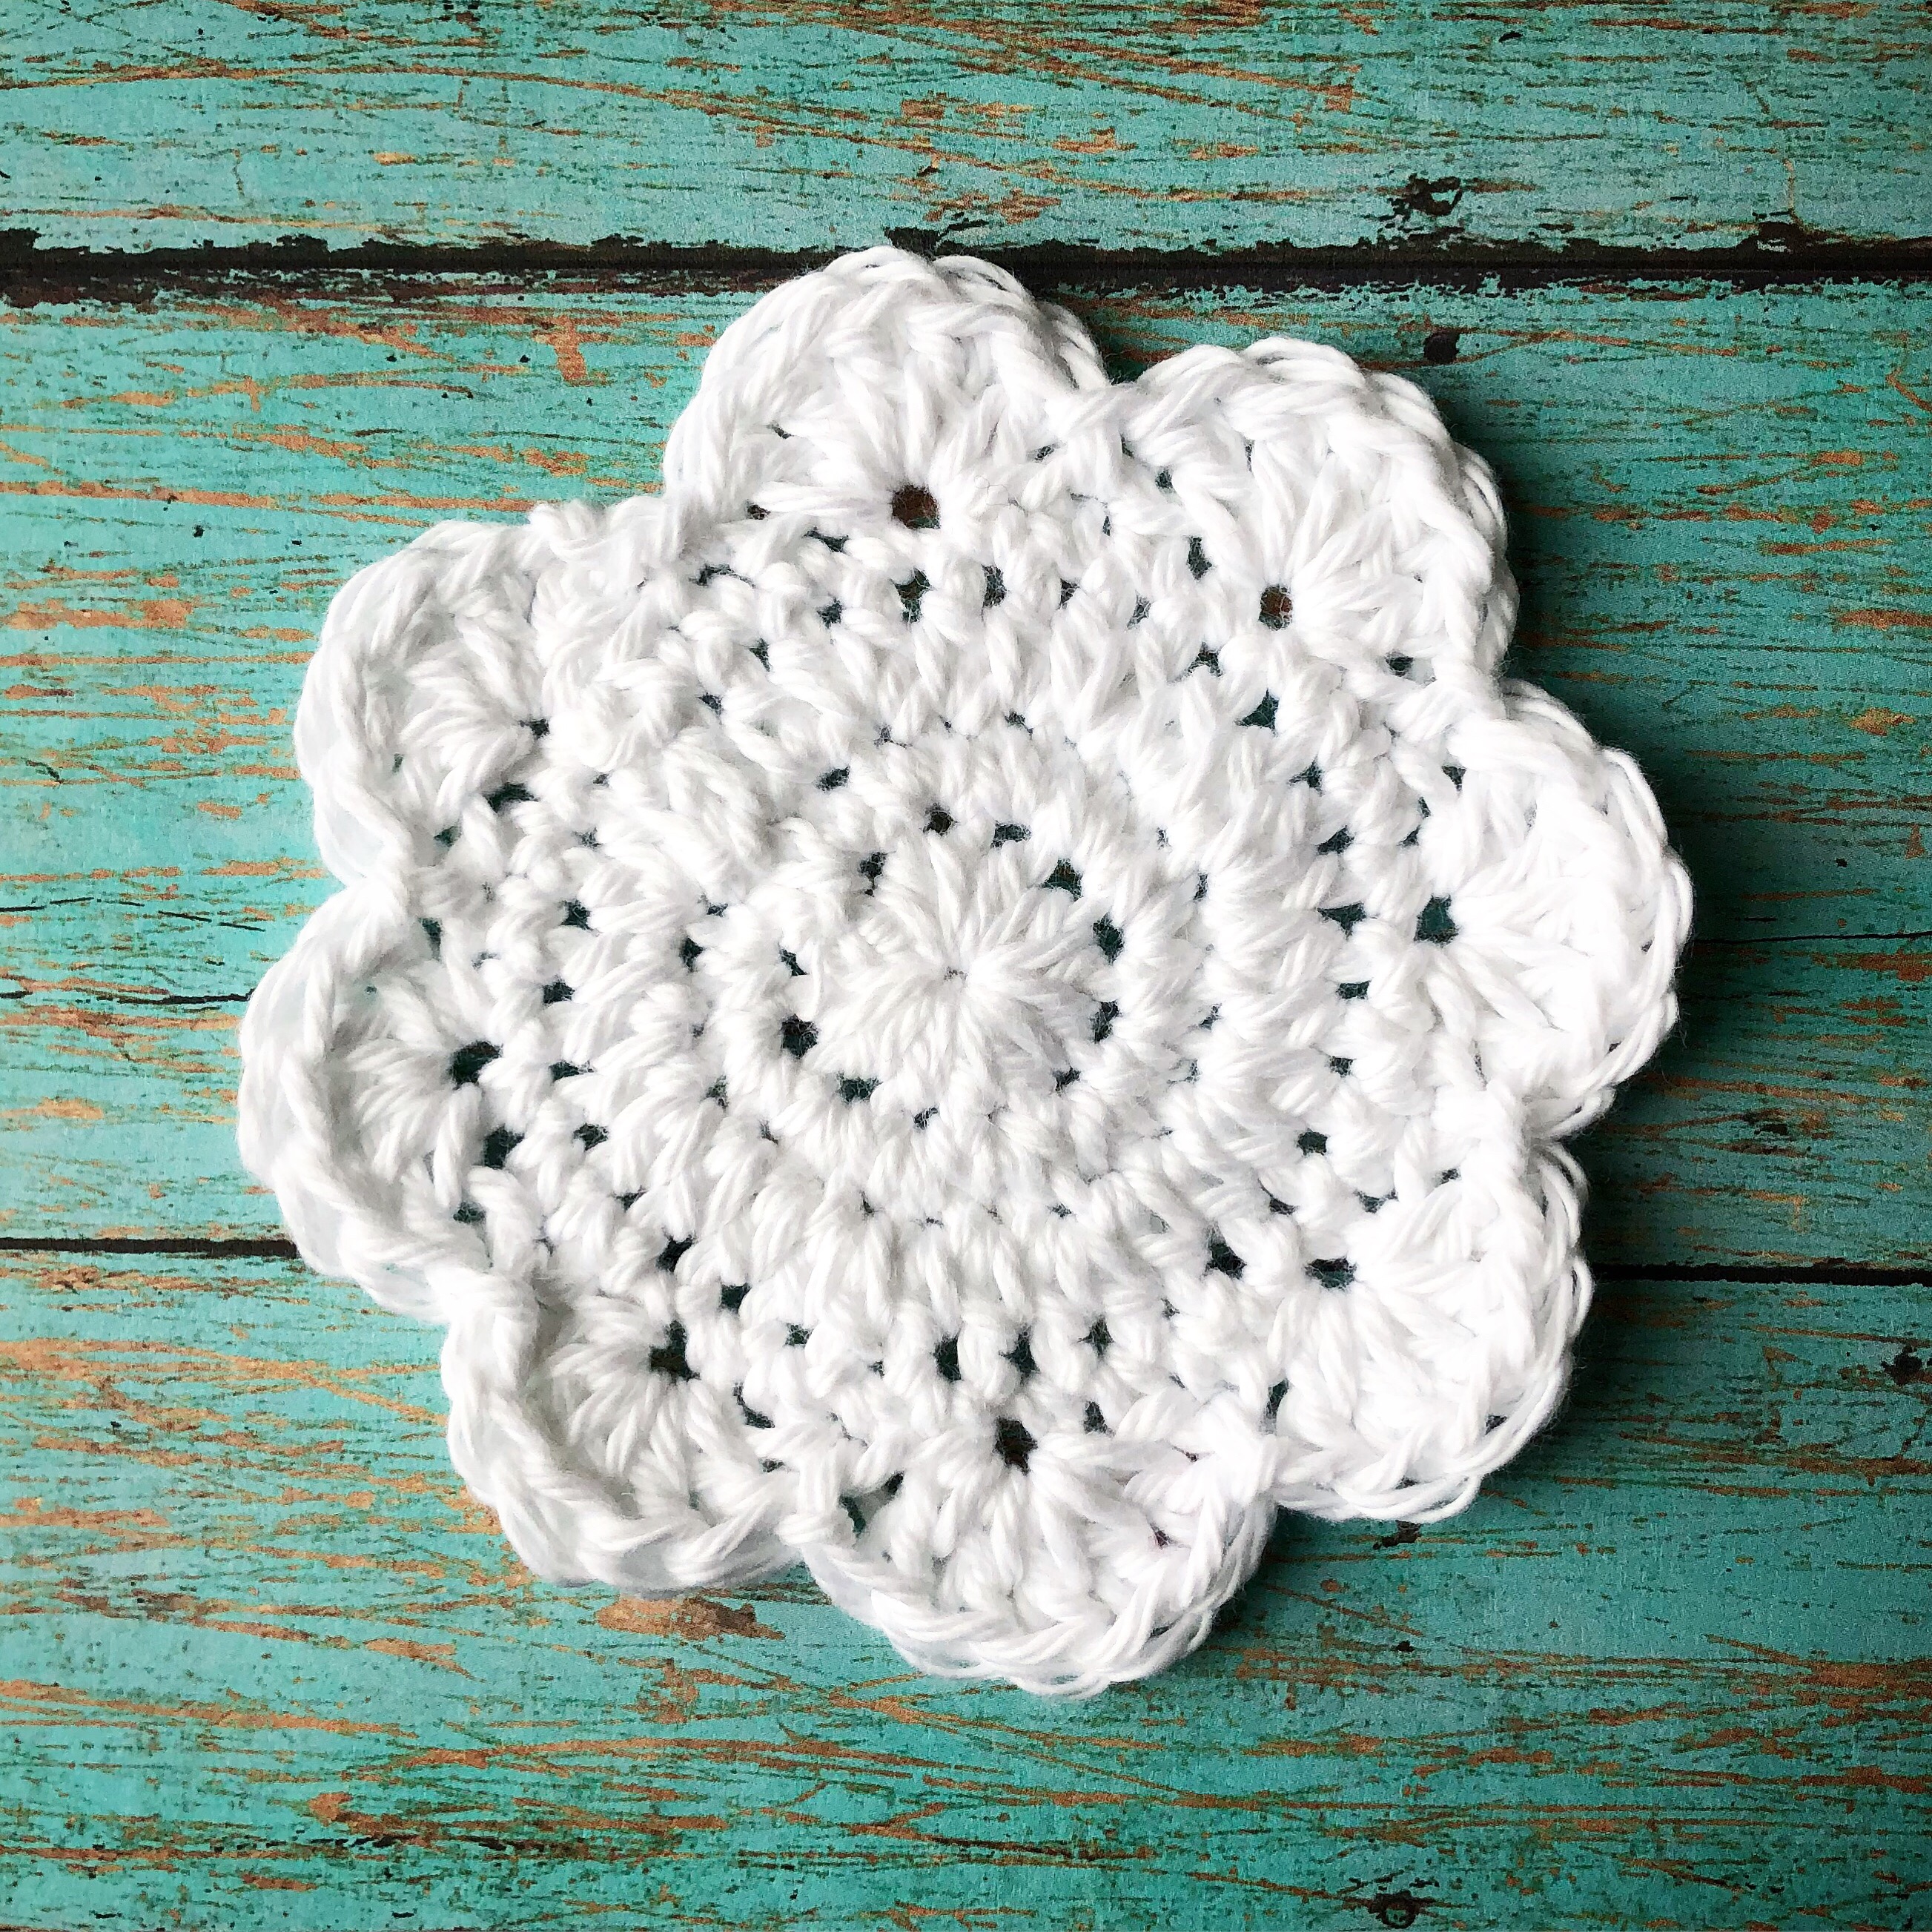
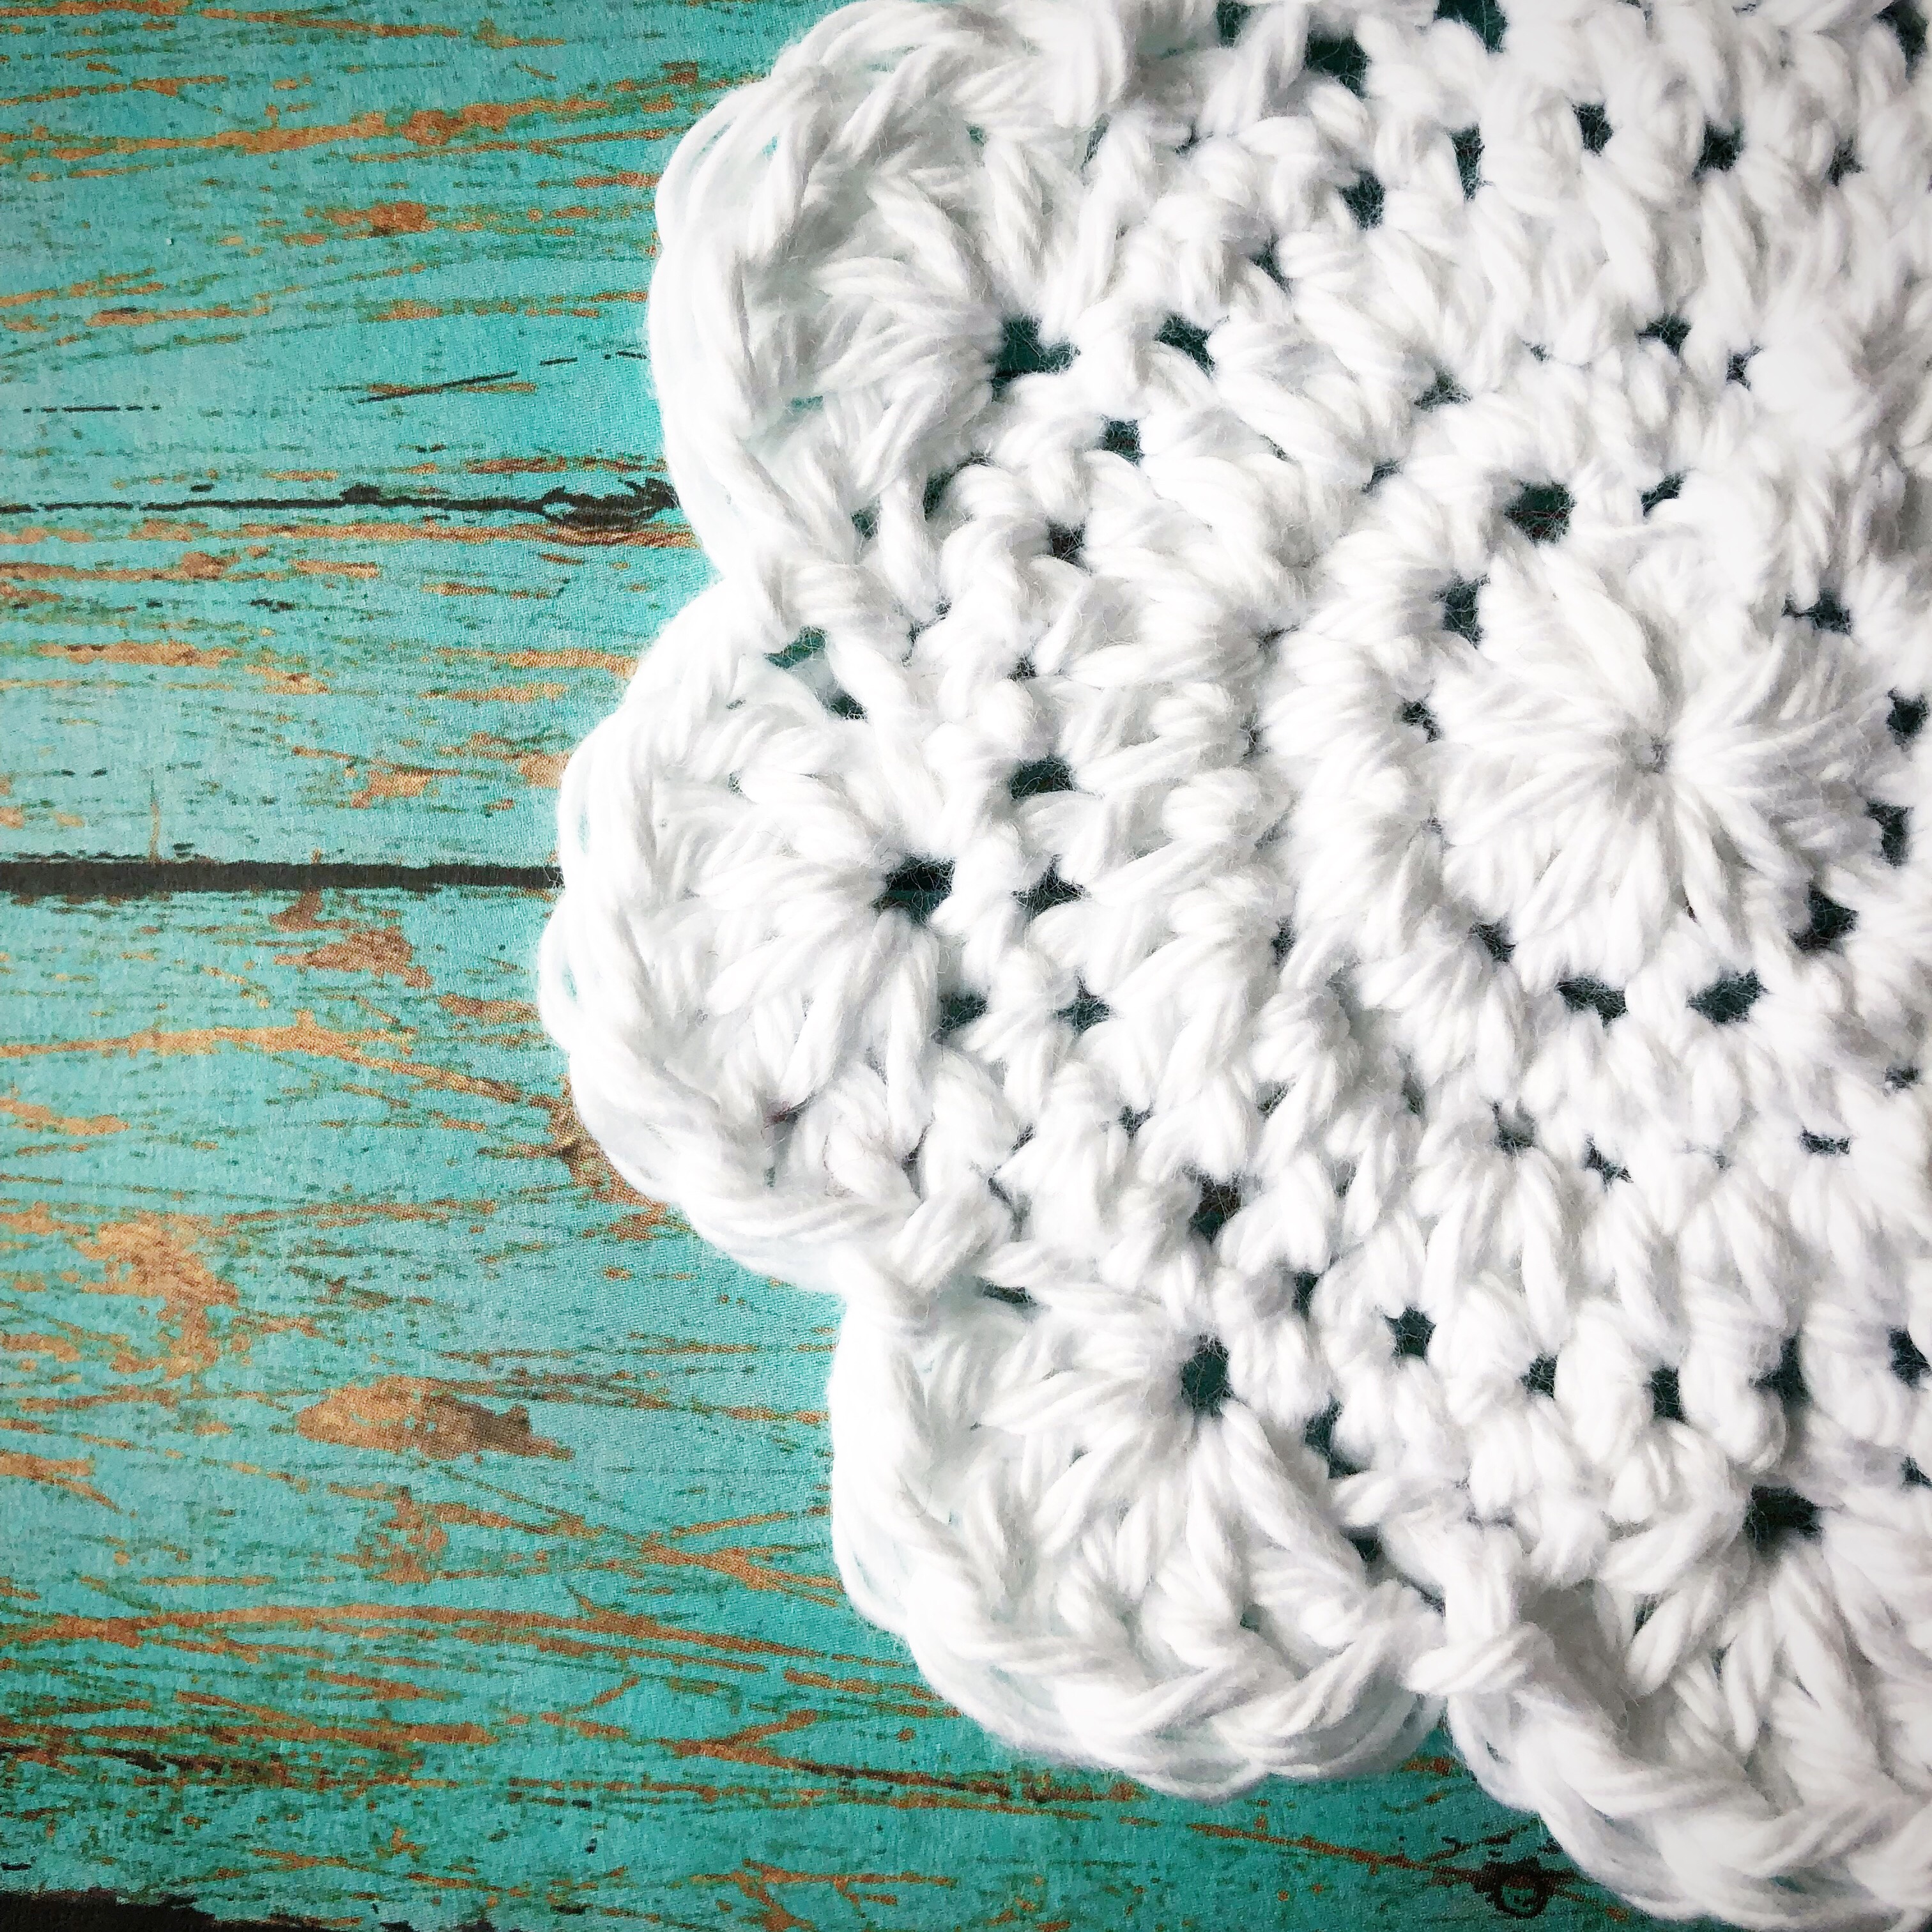
Do you need some new coasters to freshen up your table? I love these sweet little coasters I created. They have a fun farmhouse look and are sort of a cross between a flower and a doily.

img_0817

I stitched them up using I Love This Cotton yarn in white with an H/5mm hook. They work up super fast so you can make several in an evening while you’re watching your favorite show on Netflix. πŸ™‚ You can find the pattern below…

img_0816

Farmhouse Inspired Crochet Cotton Coasters

I Love This Cotton yarn in white

Size H/5mm hook

Coaster measures about 4-1/4 inches in diameter

Stitches used (US terms)

Chain – ch

Slip stitch – ss

Single crochet – sc

Half double crochet – hdc

Double crochet – dc

Make magic ring.

Round 1: Ch 2. 12 hdc in ring. Join with ss to 1st hdc. Pull magic ring closed. (12 stitches)

Round 2: Ch 1. Work 2 sc in same stitch as ss and in each stitch around. Join with ss to 1st sc. (24 stitches)

Round 3: Ch 2. Work 2 hdc in same stitch as ss. Hdc in next 2 stitches. *2 hdc in next stitch, 1 hdc in next 2 stitches* Repeat from * to * around. Join with ss to 1st hdc. (32 stitches)

Round 4: Ch 1. Work 1 sc in same stitch as ss and each stitch around. Join with ss to 1st hdc. (32 stitches)

Round 5: Ch 3. Work 4 dc in same stitch as ss. Skip 1 stitch, ss in next stitch. *Skip 1 stitch, 5 dc in next st. Skip 1 stitch, ss in next stitch.* Repeat from * to * around. Skip last stitch. Join with ss to top of beginning ch 3.

Fasten off and weave in ends.

(Please link back to my pattern if you make any of these cute coasters. I’d appreciate it if you wouldn’t copy or rewrite my pattern onto another page. Thank you!)

img_0819

Click the link below if you’d like to print out a free PDF of the pattern.

These coasters are so fun and easy to make – and I Love This Cotton yarn comes in so many different colors if you don’t want to make them in white. Tie a pretty ribbon around a set of these for a great hostess gift!

Thanks for stopping by,

Anita

Posted in Crochet, Decor, Gifts | 4 Comments

Crochet Zippered Pouch

Do you follow Megmade with Love? You might want to check out her blog. She has some of the best patterns – like this cute Zippered Pouch!

They are so fun to make – and you can make them as deep as you’d like because you start from the zipper and work in rounds until you want to stop. For this pouch I used I Love This Cotton Yarn in Denim Blue Print from Hobby Lobby. I chose a 7-inch zipper in blue to match the yarn. The free pattern is found here at Megmade with Love..

I made this one for my Mom for Mother’s Day – I added her initial and a “made with love” charm to the zipper pull to personalize it for her. It’s about 7-inches by 4-inches.

These would make great travel bags for makeup orΒ jewelry. Or make them in fun colors to keep pens and pencils handy for students. Or to hold crochet hooks, stitch markers, and scissors in your tote bag.Β πŸ™‚

I think I need to make more of these…

Thanks for stopping by,

Anita

Posted in Crochet, Gifts, Organization | 2 Comments

Magnolia Bakery’s (in NYC) Vanilla Birthday Cake Cupcakes

We’re still in the middle of our kitchen remodel…and I so wish I could make these cupcakes now!!!Β They are my favorite vanilla cupcakes and of course I am craving them now when I can’t make them. πŸ˜”

But I can share this previous post with all of you and dream of making them when my new kitchen is finished…

There’s a link below to the recipe for these yummy cupcakes, but if you would like the cookbook that includes so many more yummy recipes you can find it here, The Magnolia Bakery Cookbook: Old-Fashioned Recipes From New York’s Sweetest Bakery.Β 

There are other Magnolia Cookbooks available, too!Β 

The Complete Magnolia Bakery Cookbook: Recipes from the World Famous Bakery and Allysa Torey’s Home Kitchen

More fromΒ Magnolia: Recipes from the World Famous Bakery and Allysa Torey’s KitchenΒ 

At Home with Magnolia: Classic American Recipes from the Founder of Magnolia Bakery

I’m sure they are filled with amazing recipes – I need to add them to my collection! πŸ™‚

You’ll find myΒ original post below…

There is the cutest little bakery on Bleecker St. in New York City. It’s called Magnolia Bakery and we discovered it several years ago during a trip there. (They also have several other locations in NYC, Chicago, LA, and even internationally.) We stood in the line which wound around the corner to order these amazing Vanilla Birthday Cake Cupcakes with Vanilla Buttercream icing. We loved them so much that we had them for breakfast every day we were there! Vacations are so much fun!!

They had so many yummy looking sweets, but we never did try anything else – just couldn’t get past those amazing cupcakes! πŸ˜‰

I was so excited to find that they had a cookbook with many of their wonderful recipes – including the cupcakes and icing – so of course I bought it. And the sad thing is I still haven’t tried any of the other recipes after all these years! πŸ˜•Β I need to be more adventurous…

I recently made these yummy cupcakes once again and discovered that the recipe can be found here on Food.com.Β 

Here they are fresh from the oven…and I highlyΒ recommend investing in one of these 24 count cupcake pans. You can find them at Amazon, Β Hobby Lobby and other craft stores in the baking section. They are around $20, but use a coupon and they are even more affordable!


With the Vanilla Buttercream Icing and red sugar sprinkles…

img_7866

Oh my…just so good!!!


Make up a batch of these and I promise you won’t be disappointed!!!!!!Β 

Thanks for stopping by,

Anita

Posted in Recipes | Leave a comment

Crochet Cotton Face Scrubbies

Have you made any cotton face scrubbies? They are so fun and easy to make! And they are so soft to use. They only take minutes to stitch up.

Here’s my take on these little spa items – the center of each scrubby is 2 layers crocheted together with an edging. My favorite cotton yarn to use is I Love This Cotton from Hobby Lobby. It is so soft and easy to work with!

Cotton Face Scrubbies

I Love This Cotton yarn in white

Size H/5mm hook

Scrubby is about 4 1/2-inches in diameter

Stitches used (US terms)

Chain – ch

Single crochet – sc

Half double crochet – hdc

Double crochet – dc

Slip stitch – ss

Make a magic ring.

Round 1: Ch 2. Dc 12 in ring. Join with ss to 1st dc. Pull ring closed. (12 stitches)

Round 2: Ch 2. 2 dc in same stitch as ss and in each stitch around. Join with ss to 1st dc. (24 stitches)

Round 3: Ch 2. 2 dc in same stitch as ss, 1 dc in next stitch. *2 dc in next stitch, 1 dc in next* Repeat from *to* around. Join with ss to 1st dc. (36 stitches) Fasten off and weave in ends.

Make another scrubby but DO NOT FASTEN OFF AT THE END OF ROUND 3.

Round 4: With wrong sides facing, make 1 ss to join the 2 scrubbies together. Ch 1. Sc in same stitch, going through both layers. Sc in each stitch around, going through both layers. Join with ss to 1st sc. (36 stitches)

Round 5: Ch 2. Hdc in same stitch as ss and in next stitch. 2 hdc in next. *1 hdc in each of next 2 stitches, 2 hdc in next stitch* Repeat from * to * around and join with ss to 1st hdc. (48 stitches)

Fasten off and weave in ends.

(Please link back to my pattern if you make any of these face scrubbies. I’d appreciate it if you wouldn’t copy or rewrite my pattern onto another page. Thank you!)

Click on the link below if you’d link to print out a free PDF of the pattern.

These cotton face scrubbies can be made in any color and would be great in a spa gift basket with special soaps and lotions. Make several and put them in a pretty jar or tie them with a matching ribbon before adding them to the basket.

Thanks for stopping by,

Anita

Posted in Crochet, Gifts, Uncategorized | 4 Comments

Patriotic Crochet Cozies

Memorial Day is just around the corner and that means theΒ unofficial start of Summer! These cuteΒ Patriotic Crochet Cozies are just the thing to keep your drink nice and cool at all those picnics and cookouts coming up.

I found the quick and easy pattern here. The cozies work up super fast using double and single crochet. The pattern calls for 5mm hook, but I had to go down to a 4mm because mine were too big – maybe I just crochet too loosely!! πŸ˜‰

I used Red Heart Soft yarn because that’s what I had in my stash left over from this Red, White, and Blue Afghan. Any worsted weight yarn will work. I found these cute star buttons at HobbyΒ Lobby and they added the perfectΒ finishing touch.

It would be so fun to have a basket of these ready for your guests to use at your next backyard BBQ – you could even send them home as a little gift! Or not 😊 and save them for your next Summer party!

Thanks for stopping by,

Anita

Posted in Crochet, Gifts, Uncategorized | Leave a comment

Simple Flower Card

It’s May 1st! I hope it finally feels like Spring where you are – seems like Winter just didn’t want to leave this year! I’ve got a Simple Flower Card to brighten up your day. 🌸

This flower stamp is an older one from Hero Arts that has been discontinued, but this set from Tim Holtz would work great! Or use your favorite flower stamp. The sentiment stamp is from Pink Ink Stamp Company. IΒ haven’t been able to locate the stamp online, but choose whatever sentimentΒ you’d like to use from your collection.

You’ll also need 2 of your favorite embossing folders. I used the Fancy FanΒ folder from Stampin’ Up – it’s no longer available but you can find a similar one here. I also used a mini honeycomb embossing folder similar to this one.Β 

To make the card, emboss a panel of terraΒ cotta card stock with the fan embossing folder. IΒ used card stock that has a white core and thenΒ lightly sanded the raised areas. Attach this panel to a white card. Stamp the flower on white card stock using terra cotta and green ink. Trim into a triangular shape and lightly sponge the edges withΒ green ink. Attach to the card. Emboss a strip of green card stock with the honeycomb folder, attach a terra cotta ribbon to the strip and attach the strip to the card over the stamped image. Stamp the sentiment on white card stock with terra cotta ink. Trim into a banner shape and lightly ink the edges with green ink. Attach to the card.

By changing the color scheme orΒ sentiment,Β this layout can be used for almost any occasion from thinking of you to birthday or even a sympathy card. It would also make a great Mother’s Day card!

Thanks for stopping by,

Anita

Posted in Cards, Stamping | Leave a comment

DIY Gift Ideas for Mother’s Day 2018

I can’t believe the Mother’s Day is only a couple of weeks away! Where has this year gone?!?!?

Do you need some inspiration for some DIY ideas for those special ladies in your life? Maybe I can help you out…Click on each picture below to get all the details on each fun DIY!

Super Fast Framed Art.

img_8814

DIY Composition Notebook Journal.

img_8848

Fast and easy Crochet Cup Cozy – add her favorite chocolates and a gift card to her favorite coffee house!

img_9580

Deco Mesh Wreath – make one to match her decor!

img_9625

Cozy Chunky Crochet Pillow Cover – make it in her favorite color!

img_0339

Farmhouse Natural Wood Bead Garland.

img_0559

Clip Clothespin Pushpins.

img_0634

And of course you’ll need a card…

img_0509img_0488

Change the sentiment on this one to Happy Mother’s Day or Thinking of You…

img_8475img_8473

And check out last year’s Mother’s Day idea post here for even more inspiration!

Thanks for stopping by,

Anita

Posted in Gifts | Leave a comment

Congrats Graduate

UPDATE: May 8, 2018… The Congrats die is nowΒ available from My Favorite Things!! You can find it here.

It’s that time of year again! How many graduates are in your life this year? We have several high school grads that I want to remember with a little something.

Below is this year’s graduation card – perfect for all the grads in classic black and white. The graduation cap stamp is from Stampendous – I don’t think it’s still available, but this oneΒ or this one would workΒ great!

The congrats die is from My Favorite Things. It was a free die they gave away with an order and I just love it! Sadly it’s notΒ available for purchase (at least not yet!), but if you haven’t visited their site you should! They have tons of cute stamps and dies!! You can find similar dies here, here,Β and here.

TheΒ graduation cap embossing folder is from Darice. I found mine here at Amazon.

To make the card, stamp the graduation cap with black ink (I used Memento Tuxedo Black) on white card stock and punch with aΒ circle punch or die and layer to a scalloped circle punched from black card stock. (This a great basic set of circle dies and here is a set of scalloped circle dies. I can’t believe how often I use circles and scalloped circles in myΒ card making! You may want to consider investing in some of these dies – IΒ think you’ll be glad you did.Β πŸ™‚ )

Anyway…back to the card…Attach a panel of black card stock to a white card. Emboss a piece of white card stock with the graduation cap folder and layer over the black panel. Die cut “congrats” from black card stock and attach to the card. Attach the stamped graduation cap to the card with foam tape. Finish it off with a few goldΒ sequins.

Simple, but filled with best wishes as the graduates continueΒ on their journey.

Thanks for stopping by,

Anita


Posted in Cards, Stamping | Leave a comment

Simple Crocheted Cotton Dishcloth

I made another dishcloth. πŸ™‚ We are remodeling our kitchen and I’ve been having fun making brand new dishcloths to have ready for my brand new kitchen! This one is super easy using just single and double crochet. You can find the pattern below.

img_0690

Simple Crocheted Cotton Dishcloth

Stitches used (US terms)

  • Chain – ch
  • Double Crochet – dc
  • Single Crochet – sc
  • Slip Stitch – ss

I Love This Cotton Yarn (I used white)

H/5mm hook

Chain 25

Row 1: dc in 4th ch from hook (3 skipped ch count as 1st dc) and each ch across. Turn (23 stitches)

Rows 2-6: Ch 3, (counts as 1st dc). Skip 1st stitch. Dc in each stitch across, ending with dc in top of ch 3 of previous row. Turn. (23 stitches)

Row 7: ch 1, (does not count as a stitch) sc in each stitch across, ending with sc in top of ch 3 of previous row. Turn. (23 stitches)

Rows 8-12: ch 1, sc in each stitch across. Turn. (23 stitches)

Row 13: Ch 3, (counts as 1st dc). Skip 1st stitch. Dc in each stitch across. (23 stitches)

Rows 14-18: Ch 3, (counts as 1st dc). Skip 1st stitch. Dc in each stitch across, ending with dc in top of ch 3 of previous row. Turn. (23 stitches) DO NOT TURN at the end of row 18.

Border:

Round 1: Sc evenly around dishcloth, working 3 sc in each corner. Join with ss to 1st sc. DO NOT TURN.

Round 2: Ch 3, dc in each stitch around, working 3dc in each corner. Join with ss to top of ch 3. DO NOT TURN.

Round 3: Ch 1, sc in each stitch around, working 3 sc in each corner. Join with ss to 1st sc. Fasten off and weave in ends.

Finished size is approximately 8 1/2 x 9 1/2 inches.

img_0691img_0692img_0693

Super fast. Super easy. Make several in your favorite colors!

If you enjoyed this pattern, you may like this Scrub-ology Dishcloth or this Cotton Ribbed Dishcloth.

Thanks for stopping by,

Anita


Posted in Crochet, Gifts | Leave a comment

Wood Spool and Bead Bracelet

This is a fun, whimsical bracelet that is super easy to make! You can whip one up in less than 30 minutes!

Here’s what you’ll need to make these fun bracelets:

The bracelets are superΒ easy to make. To figure out the size of bracelet you need, measure around your wrist and then add about 2-inches. For my bracelet, my wrist measures 6-inches so I used 6 each of the spools and beads. When laid out straight, it measured about 8-inches. Just add or subtractΒ spools and beads to get the size you need.

To make theΒ bracelet, cut small pieces of ribbon to fit around the spools. I think the pieces I cut were around an inch or so. I chose white grosgrain and gray stitched ribbon. Glue the ribbon onto the spools.

Cut 2 pieces of the jewelry elastic at least 12-inches long, longer if your bracelet is larger. You want to make sure you have enough elastic to string your spools and beads without them falling off and to easily tie it off. I used 2 strands of theΒ elastic to make the bracelet stronger. Give theΒ elasticΒ a good stretch before stringing the spools and beads.Β 

String the spools and beads alternately onto theΒ elastic – I used a large-eyed needle to make itΒ easier. When you’ve added as many as you need, tie the ends of theΒ elastic into a knot, making sure to tie it as tightly and close to the spool/bead as possible. I tied it 4 times, trimmed the ends, and then added a tiny drop of glue on the knot.

And that’s all there is to it! Here’s my finished bracelet…

I left theΒ spools and beads natural – I wanted a neutral bracelet that would go with almost anything. But theΒ possibilities are endless. You can use any color of ribbon. You can paint or stain the spools and beads. You canΒ wrap embroidery floss around the spools to mimic thread. OrΒ don’t wrap the spools at all and just paint or stain them. You can even add a charm or 2 like I did in the very last photo.Β πŸ™‚

These cute bracelets would make a fun littleΒ gift for Mother’s Day!

Thanks for stopping by,

Anita

Posted in Gifts | Leave a comment