Spring Trees Thinking of You Card

It’s the first day of Spring!! I love when everything is in bloom – new and fresh! Here’s a simple card to welcome the warmer weather and longer days.

The tree and grass stamps are from an older Stampin’ Up set called Totally Trees. It’s no longer available but you can use any fun tree stamps you have in your stash. The sentiment is also from Stampin’ Up. It’s from a set called Teeny Tiny Wishes and you can find it here. I use this set all the time – it has 24 different sentiments that cover so many occasions. The embossing folder is Dotted Lattice from Taylored Expressions.

To make the card, stamp the grass several times with green ink on a panel of white card stock. Stamp the “leaves” of the trees 3 times, twice with green ink and once with yellow-green ink. Stamp the trunk and branch part of the trees with dark brown ink, centering the branches in the center of the “leaves”. Lightly sponge around the trees with blue ink. Layer this panel to green card stock.

Emboss a panel of yellow-green card stock with the Dotted Lattice embossing folder. Attach to a white card. Attach panel stamped with trees to the card. Stamp sentiment with green ink on white card stock and punch with a label punch. (The one I used is discontinued, but you can find a similar one here.) Layer to another label punched from green card stock. (this one is discontinued, too 😦 , but here is a link to a very simple set of dies that I think would work great with a card like this or maybe this set…) Attach the label to the card with foam tape and add a couple of gems.

You could also change the color scheme and this would make a great Fall card!

Happy Spring!

Thanks for stopping by,

Anita

Posted in Cards, Stamping | Leave a comment

A Glimpse into the French Quarter in New Orleans

We recently went to New Orleans for a few days. While my husband was in his conference, I strolled around the French Quarter taking in the sites and enjoying the atmosphere. We’ve been here 3 or 4 times before, but it’s still fun to see all the beautiful, old buildings…and, of course, eat some amazing food!

I am by no means an expert on New Orleans, but here are a few of the pictures I snapped while we were there.

Jackson Square is surrounded by beautiful old buildings, including the St.Louis Cathedral, which is breathtaking by day or night!

A few of the gorgeous buildings as we walked through the Quarter…

And no visit to the French Quarter is complete without beignets from Cafe Du Monde!!

Of course, music is everywhere…

We hopped onto the Algiers Ferry to take the short ride across the Mississippi River to Algiers Point – something we have always talked about doing and finally did this time! We took a short walk around the neighborhood and stopped into a little pub (which I forgot to take a picture of) before heading back across the river.

The spectacular view of the Quarter as we headed back from Algiers Point…

img_0451

The textures to be found are simply amazing!

Oh, and did I mention that NOLA is 300 this year?

img_0359

These are just a few of the sites around the French Quarter…there is so much more to this amazing city! We didn’t even get to the Garden District this time with the beautiful plantation style homes…

Happy 300 Years New Orleans!! I’m sure we’ll be back!

Thanks for stopping by,

Anita

Posted in Travel | Leave a comment

Springtime Hello – Published in Take Ten!

So excited to have this fun card published in the Spring issue of Take Ten Magazine!!! I also have 4 more in the same issue!! 😍 How fun is that?!?!? The other cards are on pages 38, 100 (2 on this page), and 104. You can get your very own copy of this inspirational magazine here. 🙂

I did a post on one of the cards in this magazine, Snowballs 10 cents, back in January of 2016. I love how Take Ten surprises me every now and then by publishing a card that I’ve almost forgotten about!

This card brings Springtime to mind with its bright green and orange. It’s super simple to make and of course you can change the colors to your favorites.

The swirl stamp is from the Keep Wild set from Unity Stamp Company and the “hello” stamp is from Paper Source.

To make the card, stamp the swirl twice with orange ink and once with green ink on white card stock. Punch with a circle punch and layer to green and orange card stock circles using foam tape. Stamp hello with orange ink on white card stock trim and round the corners.

Layer 2 different patterned papers to a white card. Attach a strip of orange card stock to the middle. Attach the swirl circles to the top of the card. Attach hello to the bottom of the card with foam tape. Add a tiny button to the center of each swirl.

Such a simple card, but sure to bring a little Springtime Hello to someone special!

Thanks for stopping by,

Anita

Posted in Cards, Stamping, Uncategorized | 4 Comments

Easter “Peeps” Wood Decor – Re-Run 😊

We are getting ready to do a major remodel of our kitchen so my Easter decor will have to stay boxed up this year. That makes me a little sad because I made this adorable Easter “Peeps” Wood Decor sign last year and I won’t be able to enjoy it this Spring. I’m doing the next best thing by sharing this post again with you so you can make your own fun little sign! 🐰

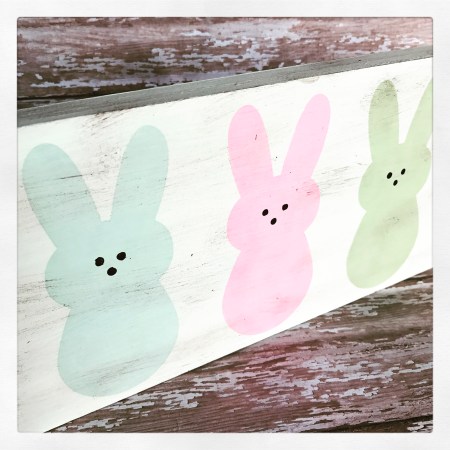
I found this pin on Pinterest and knew immediately I had to make my own version of the cute Easter “Peeps” decoration in the post!

I had some left over scraps of wood from our bathroom remodel and one of them was the perfect size. I painted it with 2 coats of white chalk finish paint and then dry brushed it with brown acrylic paint to give it a distressed look. 

img_7937

I die cut a stencil from a transparency sheet using the bunny die from Amuse Studio. The die set is discontinued, but a quick google search should find a template you can use to make your stencil (like this one). Using the stencil, I applied blue, pink, and green dye ink with a sponge dauber to make the bunnies. After the ink was dry, I used the handle of a small paint brush to make the eyes and nose with dark brown paint. 

Here’s how it turned out… I just love it!!

img_7942

img_7941

If you’d like bolder colors for your bunnies, just use acrylic paint instead of ink.

Such a sweet addition to your Easter decor! 🐰

Thanks for stopping by,

Anita

Posted in Decor, Easter | Leave a comment

Crochet Mini Carrot Treat Bags

I saw several crochet carrots on Pinterest, but nothing was quite what I was looking for. So what to do??? I made up my own little pattern! 🥕😊

I used worsted weight yarn and an H/5mm hook to stitch up my carrots. The specific yarns I used are Crafter’s Secret in Orange and I Love This Yarn in Keylime. Both are available from Hobby Lobby. And have you noticed they have been putting all their yarn on sale 30% off about every other week?!?! Every. Single. Skein. How fun is that?!?!

Here’s my take on the carrot treat bag.

Crochet Mini Carrot Treat Bag

Stitches used – (US terms):

  • Chain – ch
  • Single crochet – sc
  • Double crochet – dc
  • Slip stitch – ss

Note: chain 2 does not count as a stitch

Tip: At the beginning of each round, I worked a slip stitch into the next stitch before chaining 2. By doing this, it helps to keep the seam from going wonky and really helps to hide the seam. The first picture is without the slip stitch, the second is with it.

Rnd 1: Using Orange, begin with a magic ring. Ch 2, dc 6 times in ring. Join with a ss to first dc. Pull magic ring closed.

Rnd 2: ss into next dc, ch 2. Work 2 dc in same stitch, dc in next stitch. *2 dc in next stitch, 1 dc in next stitch* twice and join with ss to first dc of rnd. (9 stitches)

Rnd 3: ss into next dc, ch 2. Work 2 dc in same stitch, dc in next 2 stitches. *2 dc in next stitch, dc in next 2 stitches* twice and join with ss to first dc of rnd. (12 stitches)

Rnd 4: ss into next dc, ch 2. Work 2 dc in same stitch, dc in next 3 stitches. *2 dc in next stitch, dc in next 3 stitches* twice and join with ss to first dc of rnd. (15 stitches)

Rnd 5: ss into next dc, ch 2. Work 2 dc in same stitch, dc in next 4 stitches. *2 dc in next stitch, dc in next 4 stitches* twice and join with ss to first dc of rnd. (18 stitches)

Rnd 6: ss into next dc, ch 2. Work 2 dc in same stitch, dc in next 5 stitches. *2 dc in next stitch, dc in next 5 stitches* twice and join with ss to first dc of rnd. (21 stitches)

Rnd 7: ss into next dc, ch 2. Work 2 dc in same stitch, dc in next 6 stitches. *2 dc in next stitch, dc in next 6 stitches* twice and join with ss to first dc of rnd. (24 stitches) Change to Keylime.

Rnd 8: Using Keylime, ss into next dc, ch 1. Sc in same stitch and each stitch around. Join with ss to first sc of rnd. (24 stitches)

Rnd 9: ss into next sc, ch 1. Sc in same stitch and each stitch around. Join with ss to first sc of rnd. (24 stitches) Do not fasten off.

To make handle:

Row 1: ss into next sc, ch 1. Sc in same stitch and in next sc, (leaving the rest of the round unworked), ch 1. Turn.

Row 2-16: 1 sc in each of the 2 sc, ch 1. Turn.

Fasten off leaving a long tail. Sew the end of the handle to the opposite side of the carrot. Weave in ends.

Here’s a pdf for easy printing…

These cute little carrots are perfect to fill with chocolate and other fun treats. They work up very quickly so you’ll have plenty of time to make as many as you need!

Thanks for stopping by,

Anita

Posted in Crochet, Easter, Gifts, Uncategorized | 13 Comments

Cozy Chunky Crochet Pillow Cover

We recently updated our bedroom with new windows, new trim, plantation shutters, and a pretty dark gray paint on the walls. Of course, new bedding made its way into the room, too. 😉

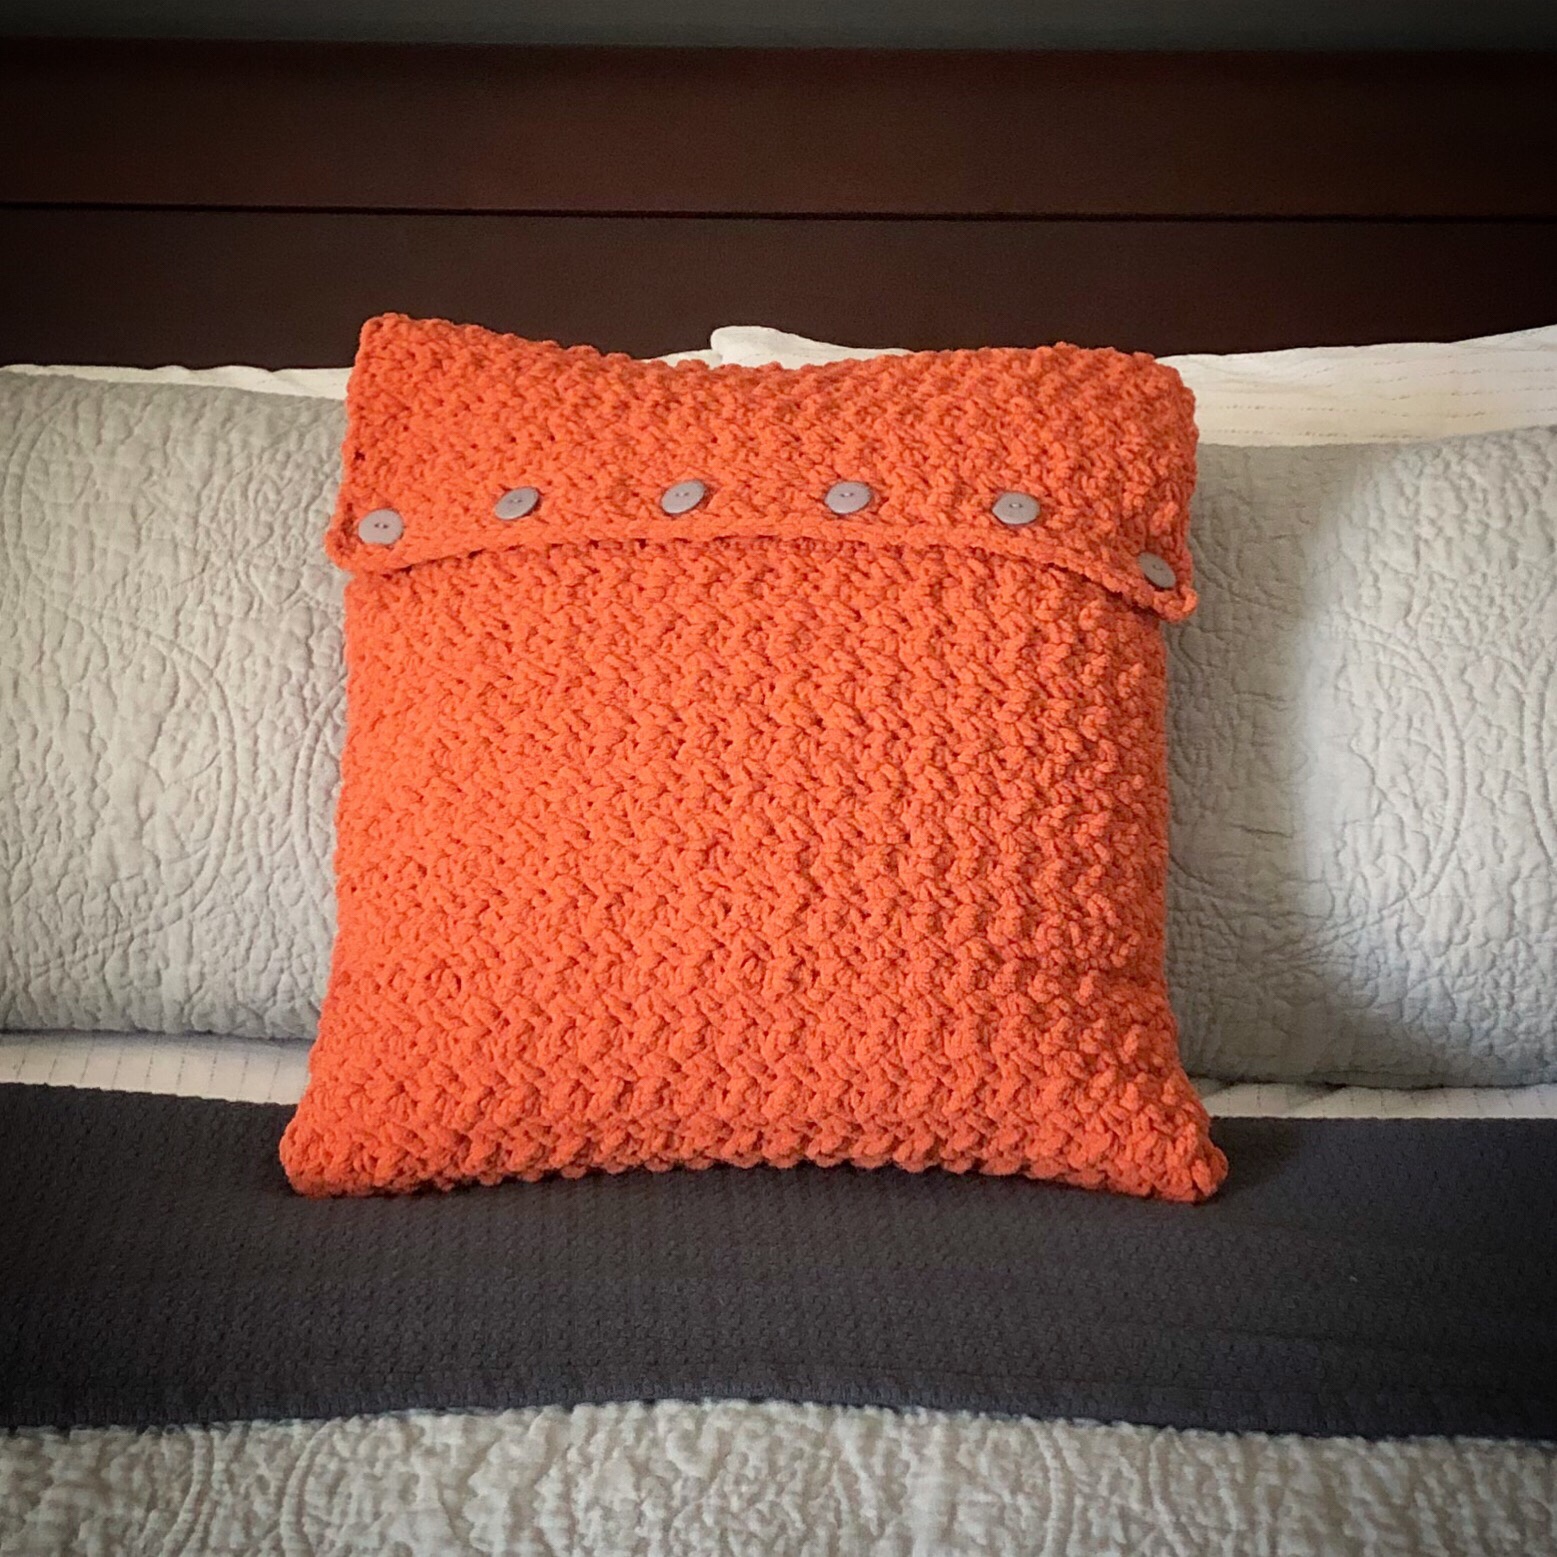
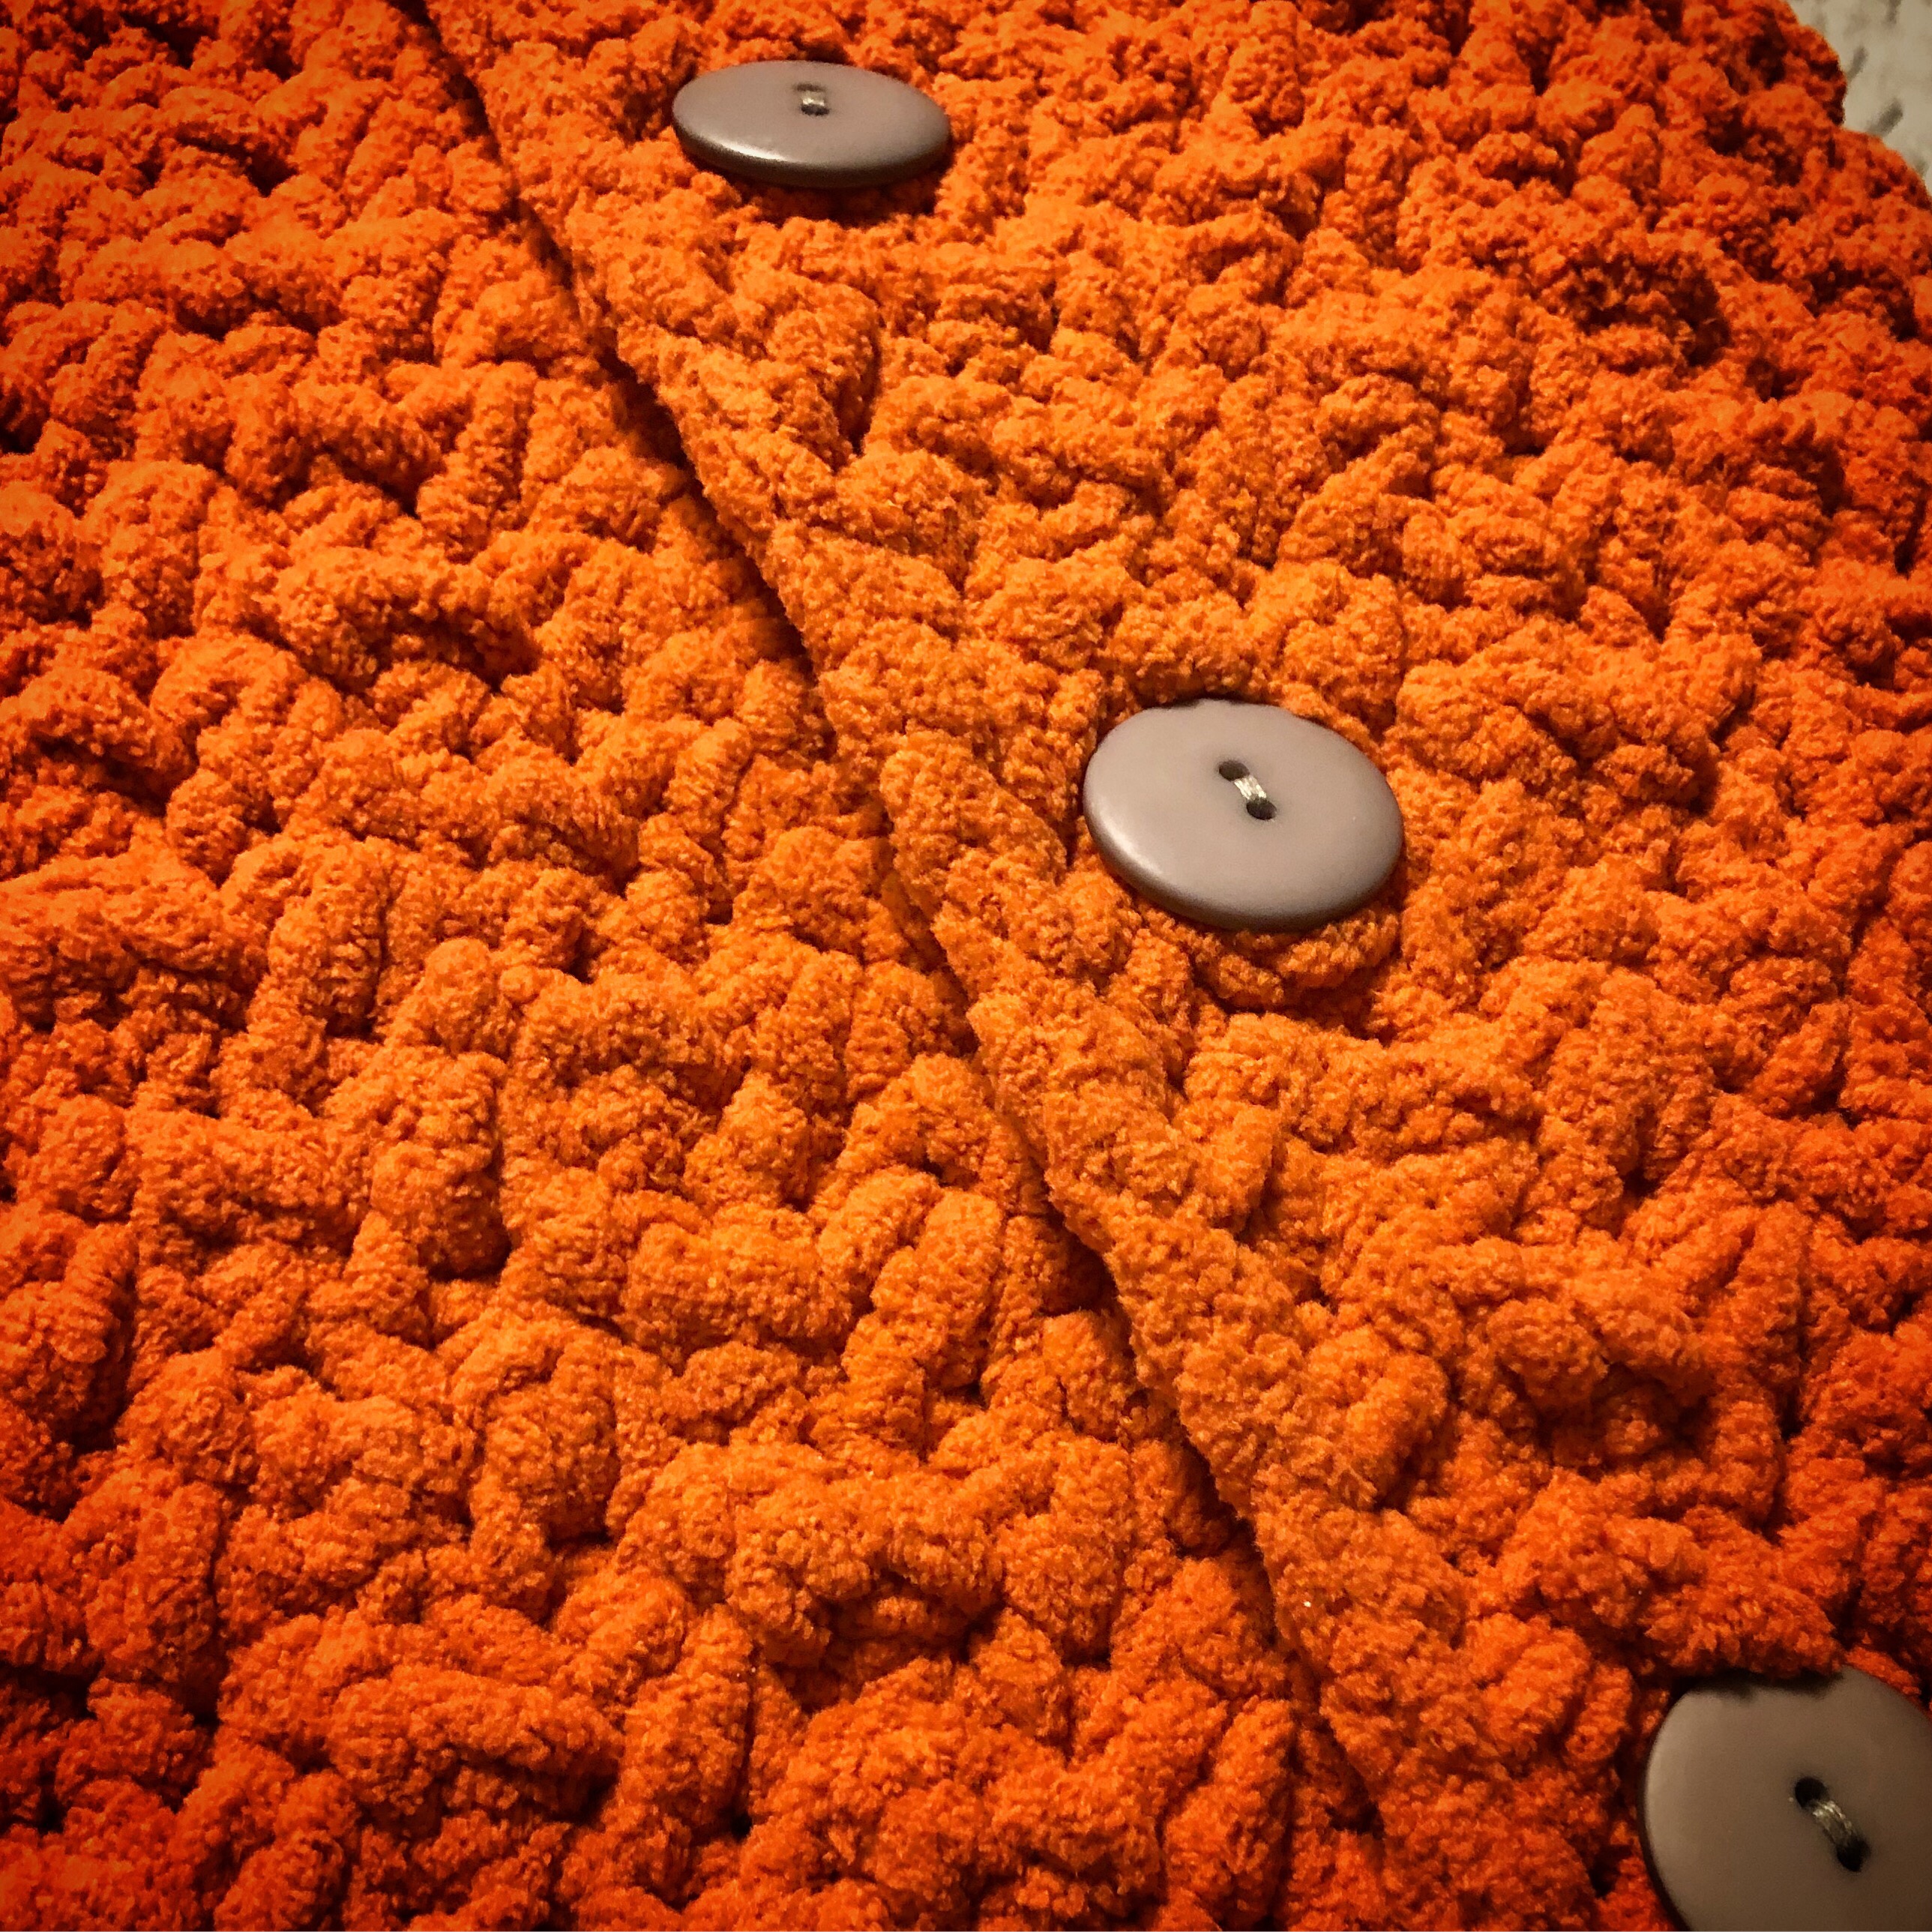
Since the color scheme changed, I decided that a new crochet pillow cover or two would be fun to make. I already had a couple of pillow inserts to use. The only problem is they are big – 20-inches square – so I wanted to find a crochet pattern that would work with some chunky yarn. I thought something with texture would work great on a pillow that big. I found a great simple pattern here at Teal & Finch. I love this pattern because it is worked with bulky yarn and you can make it any size you need!

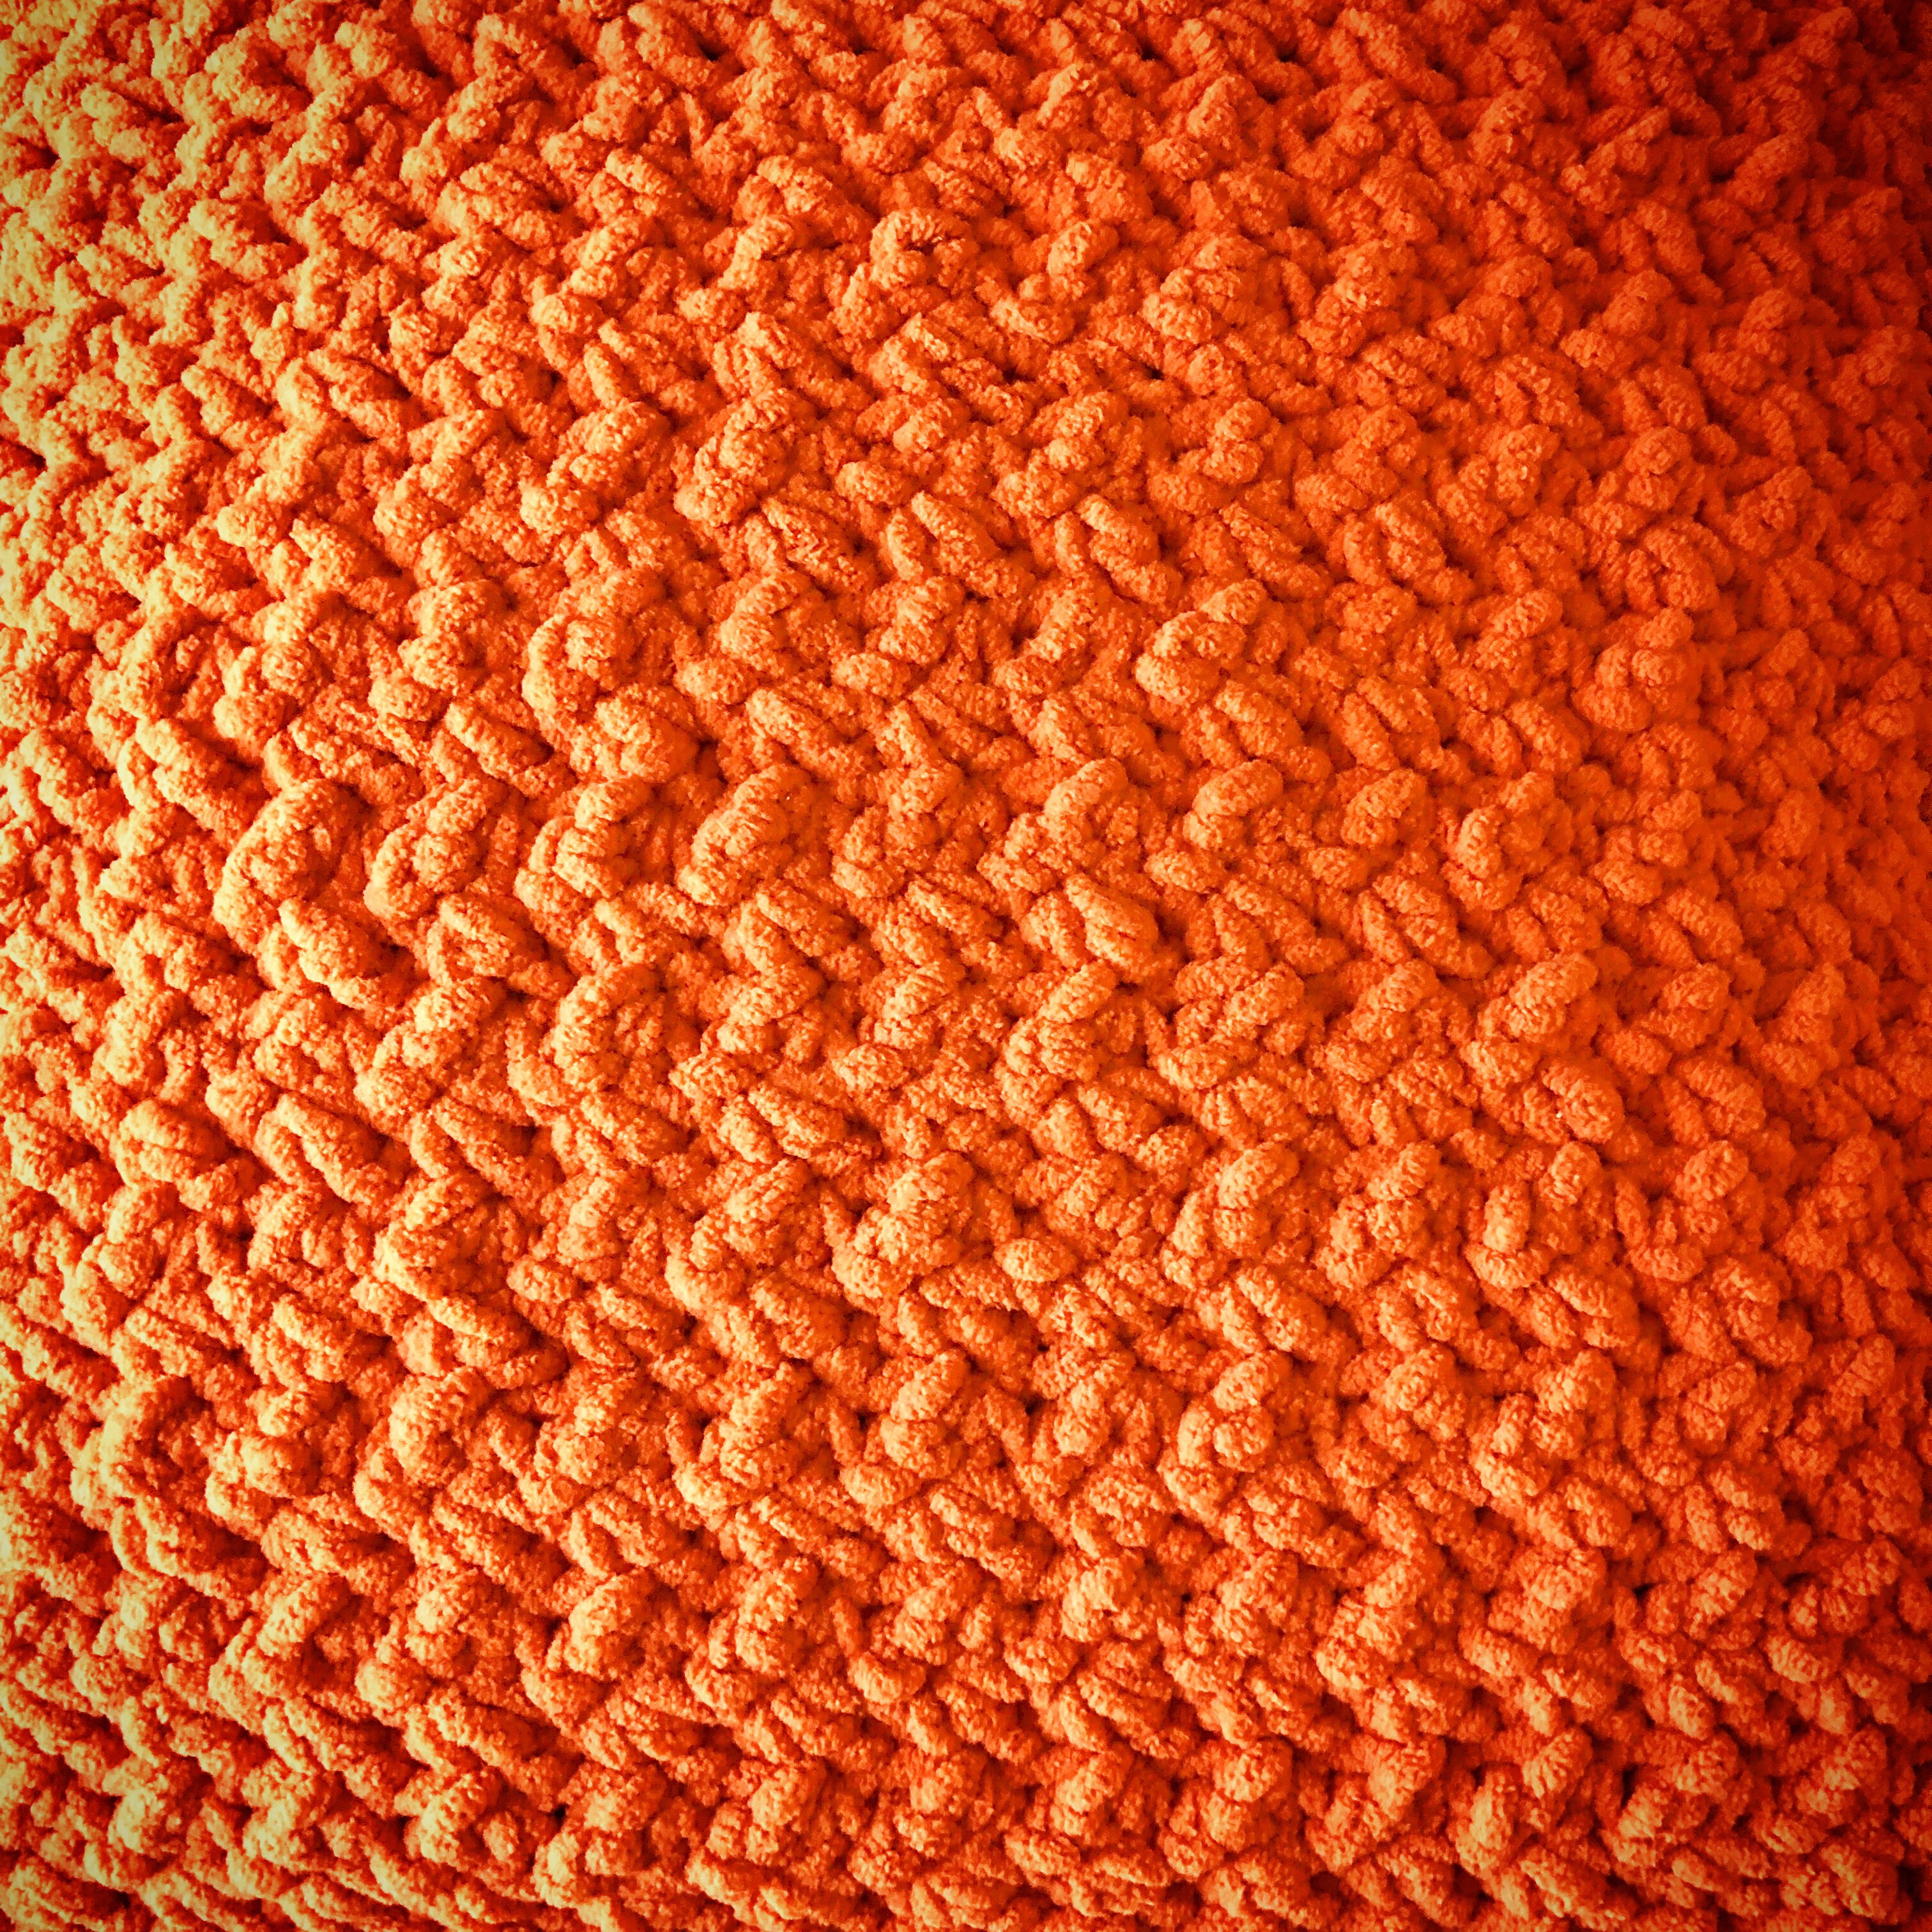
I used Bernat Blanket Yarn in Pumpkin Spice with an N/10mm hook to make my pillow cover. I just followed the directions in the pattern to make the pillow cover large enough to fit my 20-inch insert.

Just look at that texture!!! 😍

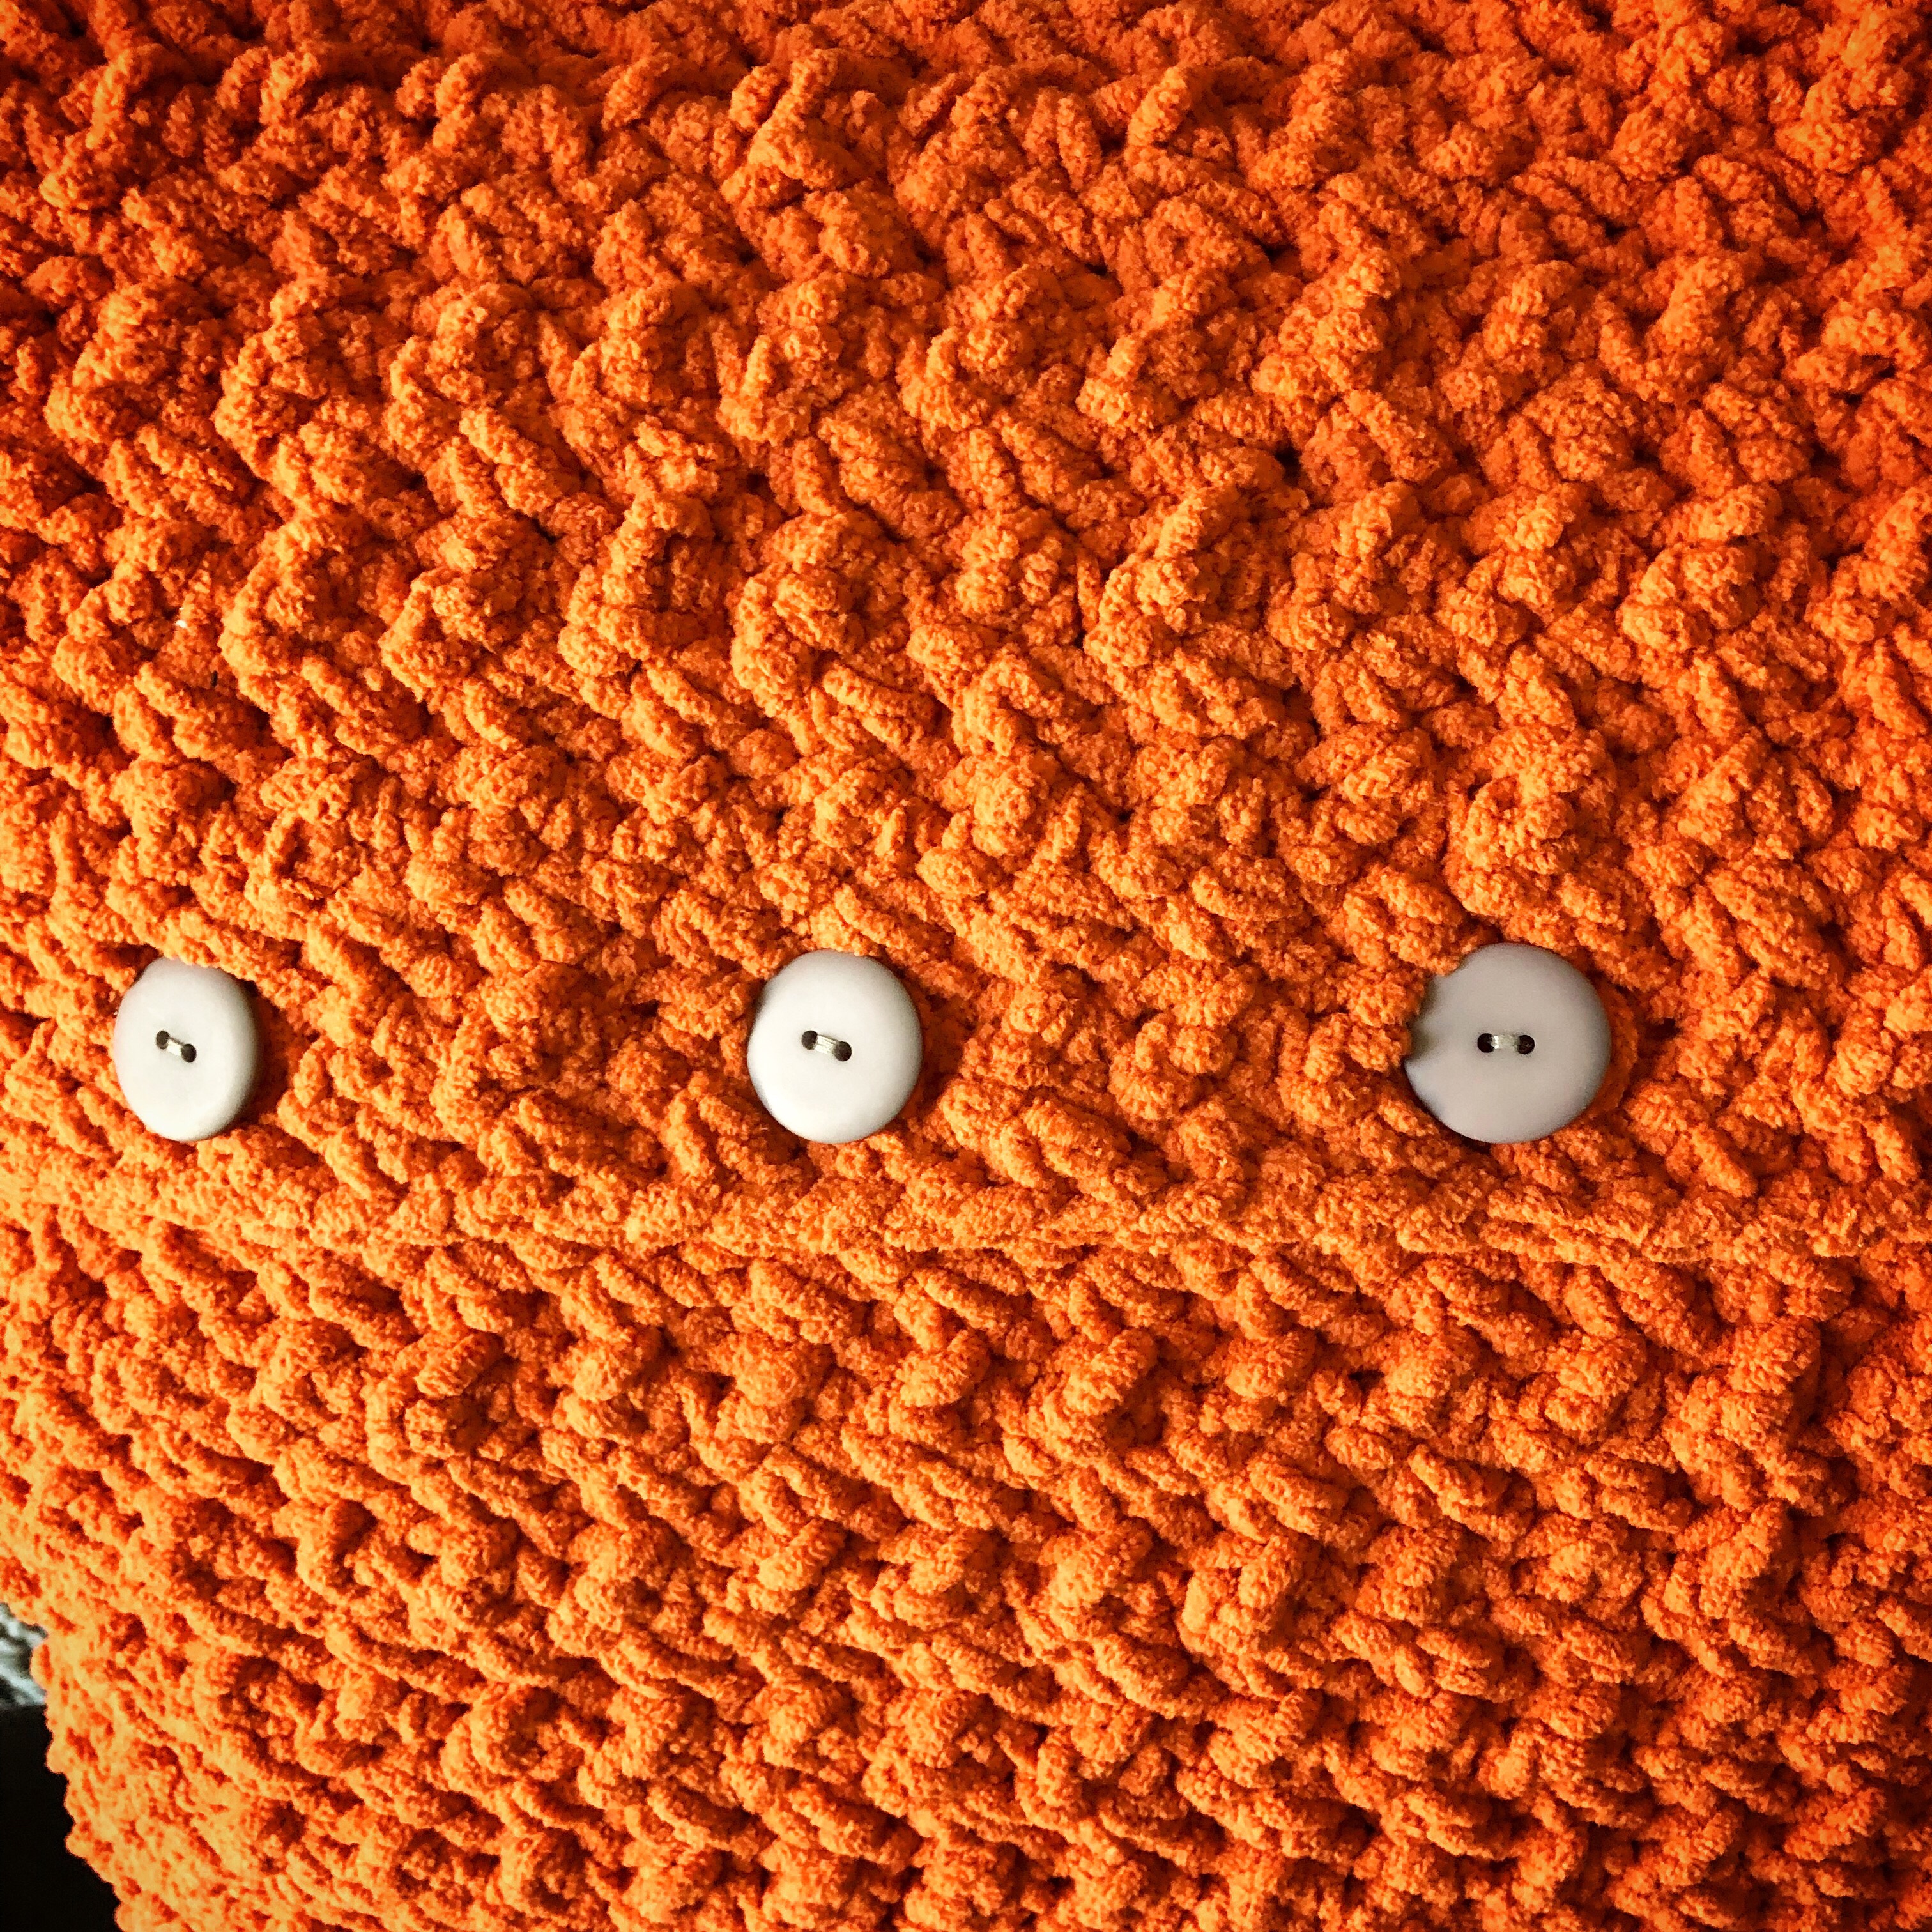
I added 6 (1-inch) gray buttons evenly spaced to secure the cover over the insert. The 1-inch size fits perfectly through the openings in the pattern.

I absolutely love how it turned out!! It looks great on our bed and it is so plush and comfy!! And so easy to take off and throw in the washer when needed!

Thanks for stopping by,

Anita

Posted in Crochet, Decor, Uncategorized | 7 Comments

Love to you

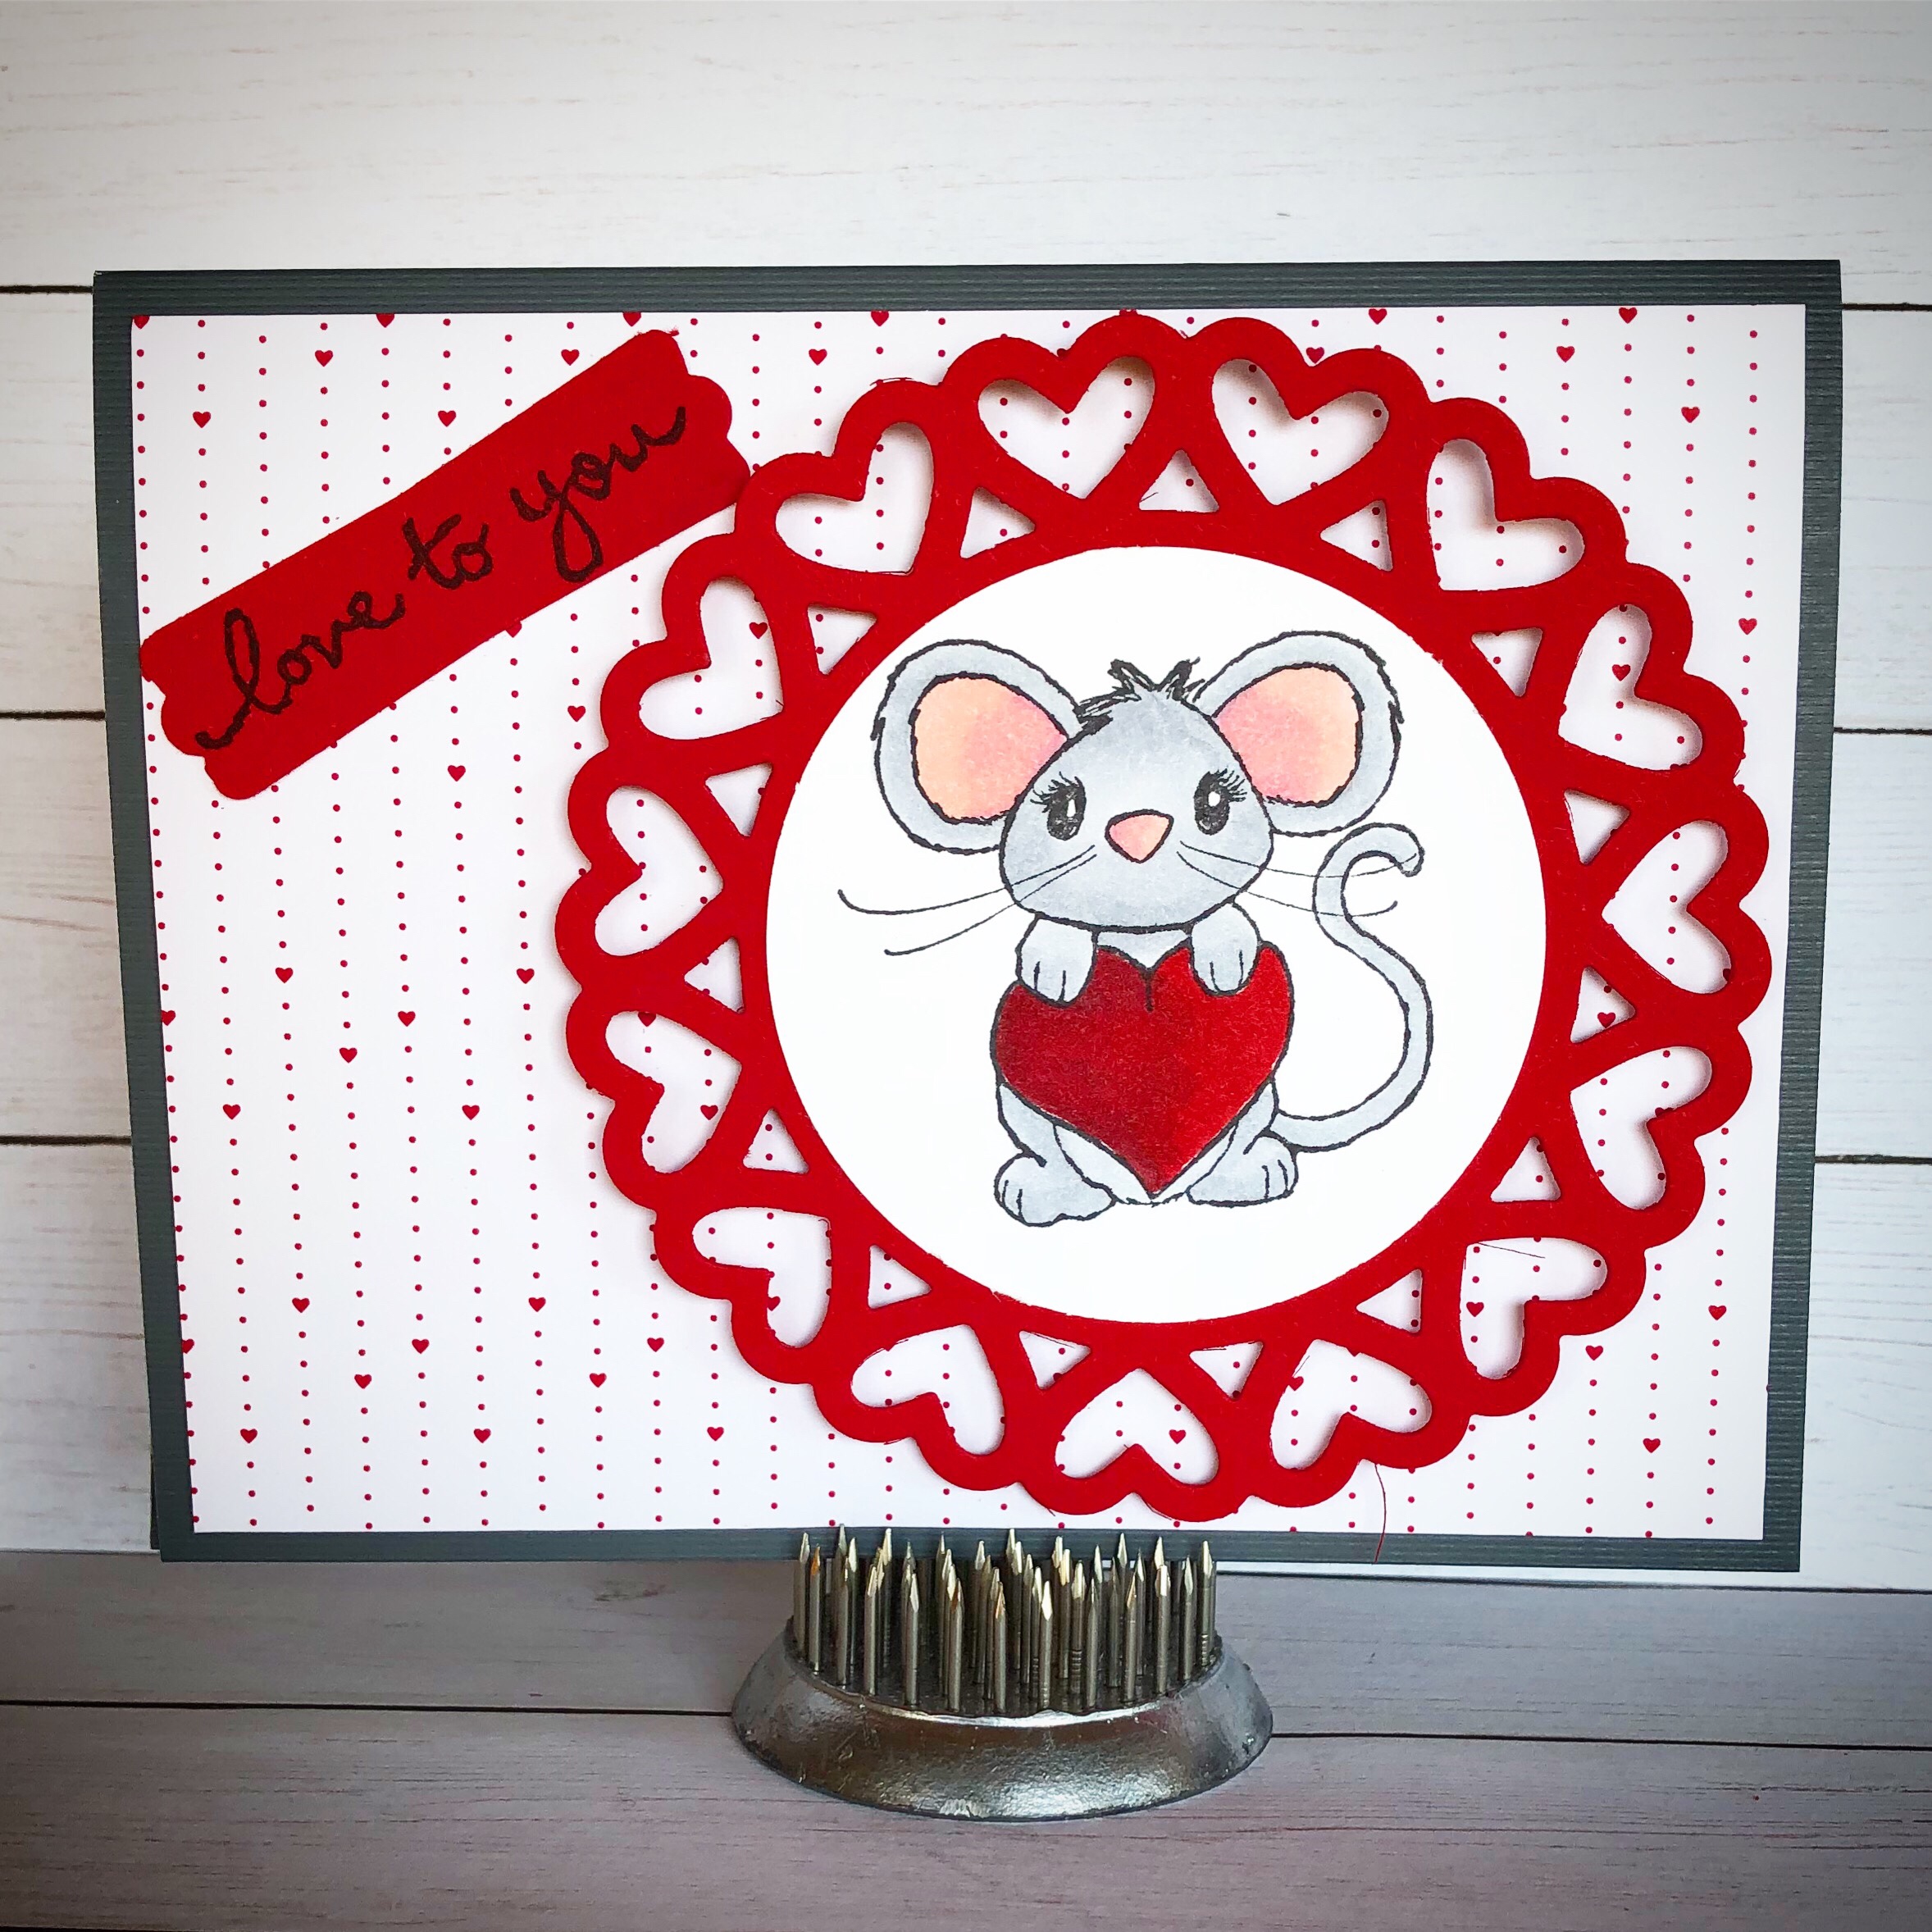
I made this cute card for Valentine’s Day, but I was thinking that with a few tweaks it could be used for so many other occasions.

A different color scheme, maybe a different die cut behind the mouse, a different sentiment…and you have a cute little mouse delivering a heartfelt message for a birthday, to say “thinking of you” or “thank you” or even to welcome a new baby.

This adorable mouse is Mice Lil’ Thank You from Unity Stamp Company. The sentiment is from Stampendous – I don’t think it is still available, just use your favorite sentiment stamp. The heart doily die is a discontinued die from My Favorite Things – but here is a similar one from Spellbinders.

I stamped the mouse with black ink on white card stock, colored him with Copic markers, and punched with a circle punch. I die cut the heart doily from red card stock and attached the stamped image to the center. The sentiment is stamped with black ink on red card stock and punched with a label punch.

To put the card together, I added a panel of black card stock to cover the front of a white card. Then I added a panel of patterned paper over the black. The sentiment is attached directly to the card and the doily with the little mouse is attached with foam tape.

He is just the cutest thing! Use your imagination and I’m sure you’ll come up with all kinds of ideas for this little guy.

Thanks for stopping by,

Anita

Posted in Cards, Stamping, Uncategorized, Valentine | Leave a comment

Hippo Birthday

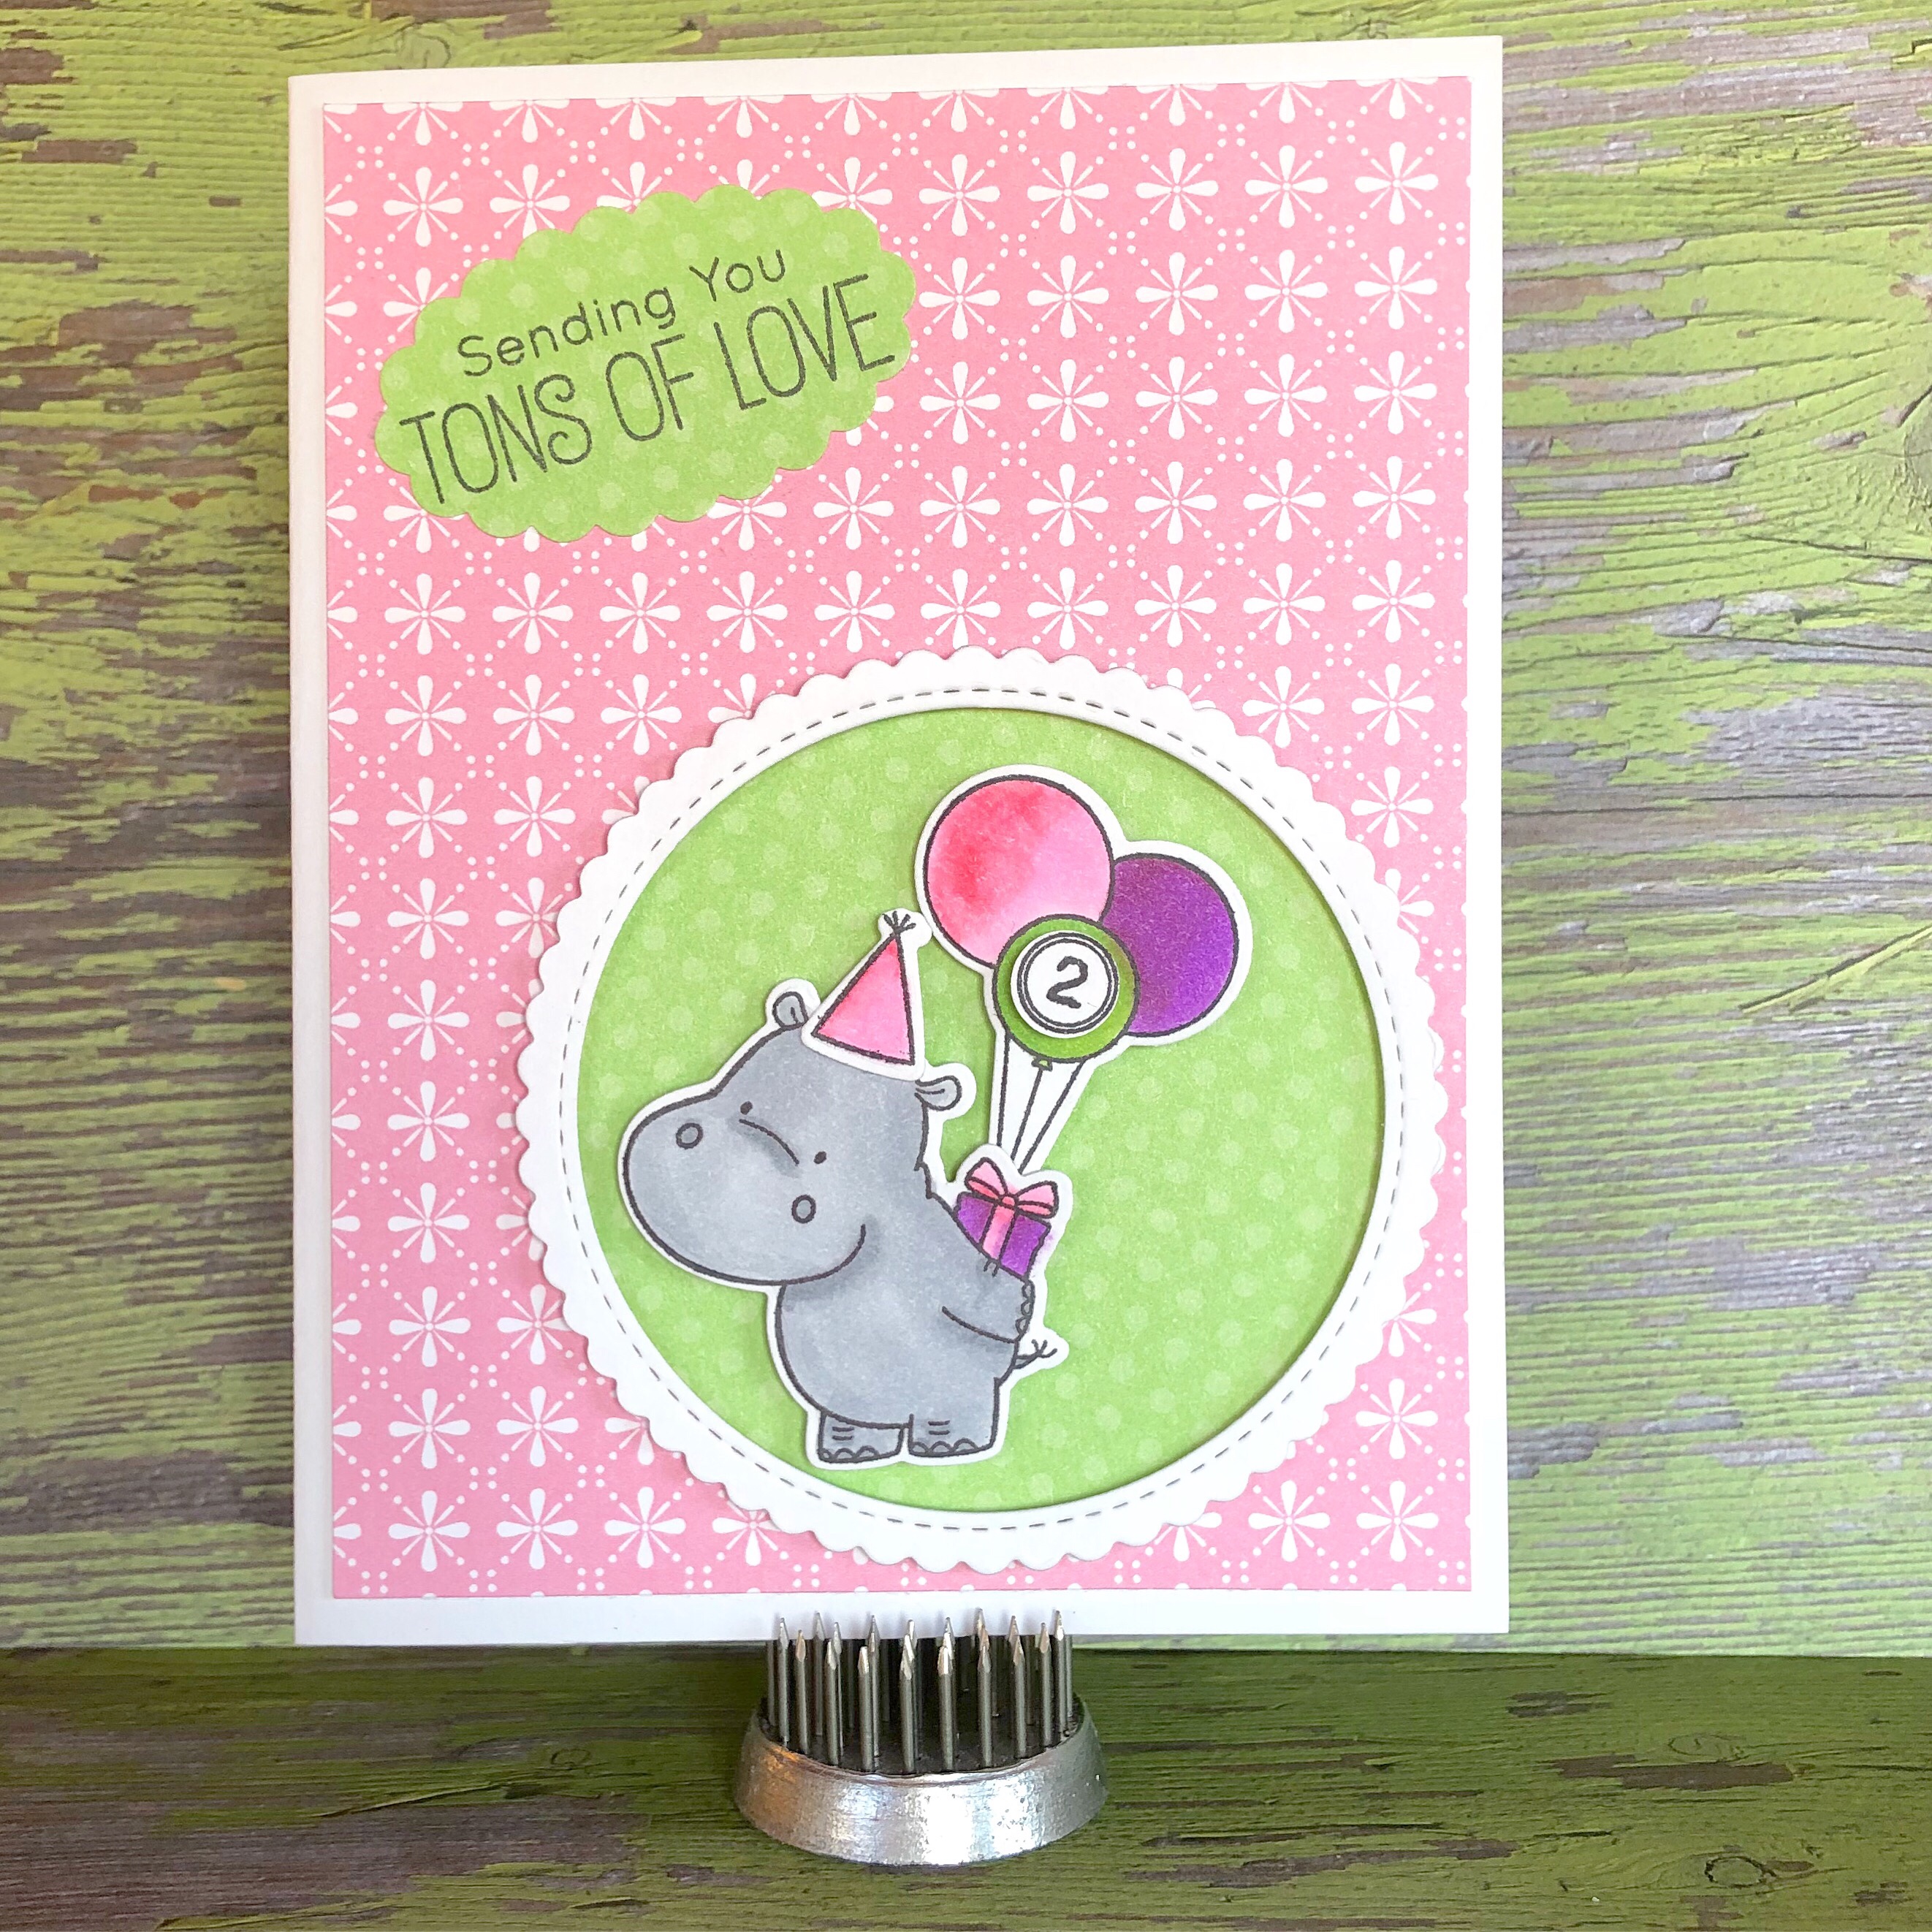
A very special little girl turned 2 this month! Of course she needed a special card to mark the occasion! 😊

This little hippo is just so cute! He’s part of a stamp set from My Favorite Things called Happy Hippos  – and there are matching dies to go with it! The white frame is also from My Favorite Things and is part of the Stitched Circle Scallop Edge Frames Die-namics Set.

To make the card, stamp the hippo, balloons, and hat with black ink on white card stock. Color the images with Copic markers and die cut the images. Attach a piece of pink patterned paper to a white card. Punch a circle from green patterned paper and attach to the card. Die cut the white frame and attach over the green circle with foam tape. Attach stamped images inside the frame with foam tape. Stamp the sentiment with black ink on green patterned paper and punch with a scalloped oval punch. Attach to the card. The tiny “2” on the green balloon is from an old set by The Paper Studio. I stamped it with black ink on white card stock, punched it with a circle punch, and attached it to the balloon.

You could easily change the color scheme to make this a fun card for a little boy.

This little guy carried “tons of love” across the country to a precious little girl who holds my heart!

Thanks for stopping by,

Anita


Posted in Cards, Stamping | 1 Comment

Granny Square Baby Blanket

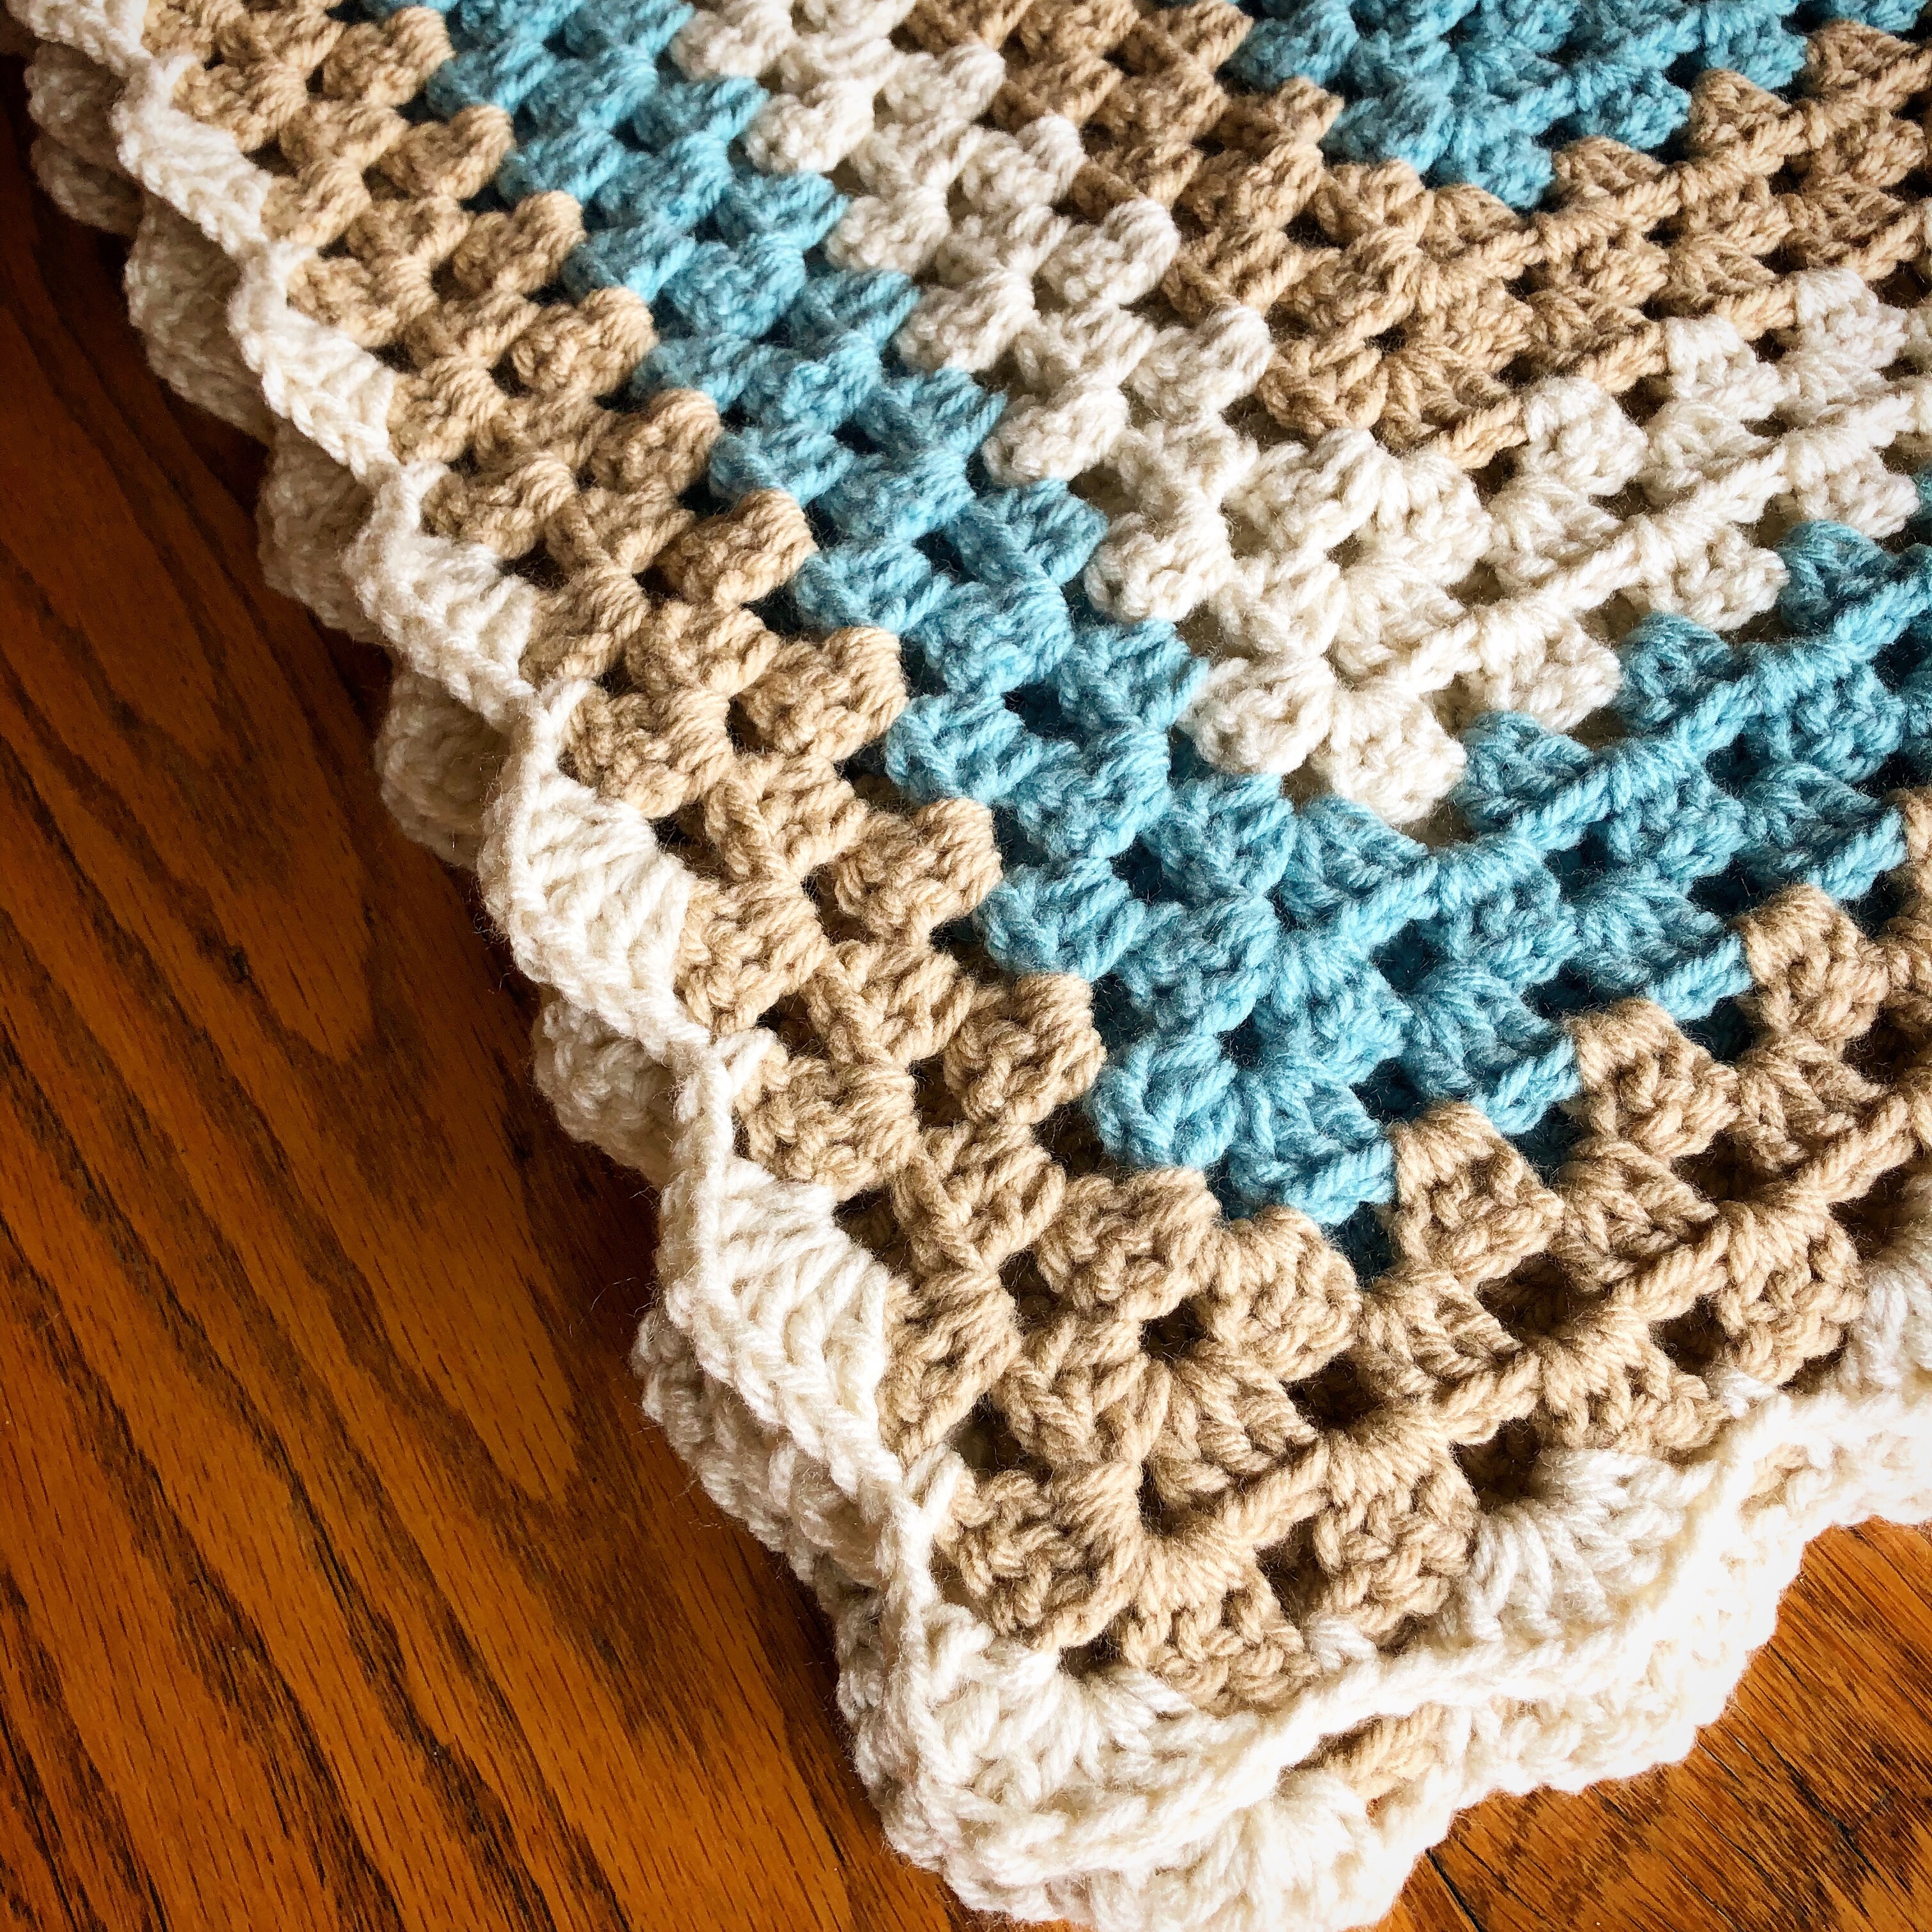
Sometimes it’s fun to get back to basics! That’s just what I did on this baby blanket. It’s a simple granny square pattern made with 3 different colors. If you need a refresher on how to make a simple granny square, click here for great instructions.

I used Caron One Pound Yarn in Off White, Soft Sage (it’s more of a blue than green), and Lace. I started in the center with Off White and crocheted 6 rows. Then I switched to Soft Sage and stitched 3 rows, changed colors to Lace and crocheted 3 rows, and switched back to Off White for 3 rows. I continued the color changes (Off White, Soft Sage, Lace) for 3 rows each until my blanket measured about 32 inches square, ending with the Lace color. I had 3 sections of each color when I finished.

Tip 1: Sometimes when you make a granny square blanket, the finished blanket can end up a little wonky. That’s why I like this pattern. By turning your work after each row, it helps to keep the blanket more square and less wonky. 🙂

Tip 2: Like almost everyone else, I hate weaving in my ends! So one thing I do is to stop every color change or two and weave in the ends. That way I only have to do it a little at a time instead of having to weave them all in at the end.

I made a simple border using Off White. For the border row, chain 1 and work 1 sc in the space between the dc clusters from the previous row. Chain 1, (work 3dc, chain 1, 3dc) in the next space between the dc clusters, chain 1, sc in next space. Continue this pattern around the blanket, making sure that you work the (3dc, chain 1, 3 dc) in each corner.

The finished blanket measures about 33-1/2 inches square. 

The Caron One Pound Yarn becomes much softer after a quick wash on the delicate cycle with a little fabric softener added. I put it in the dryer on delicate for about 10 minutes and then laid it flat to dry the rest of the way.

One of the great things about the basic granny square is that you can make it any size and any color combo you want! It’s also such an easy pattern that once you get started, it’s the perfect project to work on while watching your favorite movie or TV show.

Thanks for stopping by,

Anita

Posted in Crochet, Gifts | 4 Comments

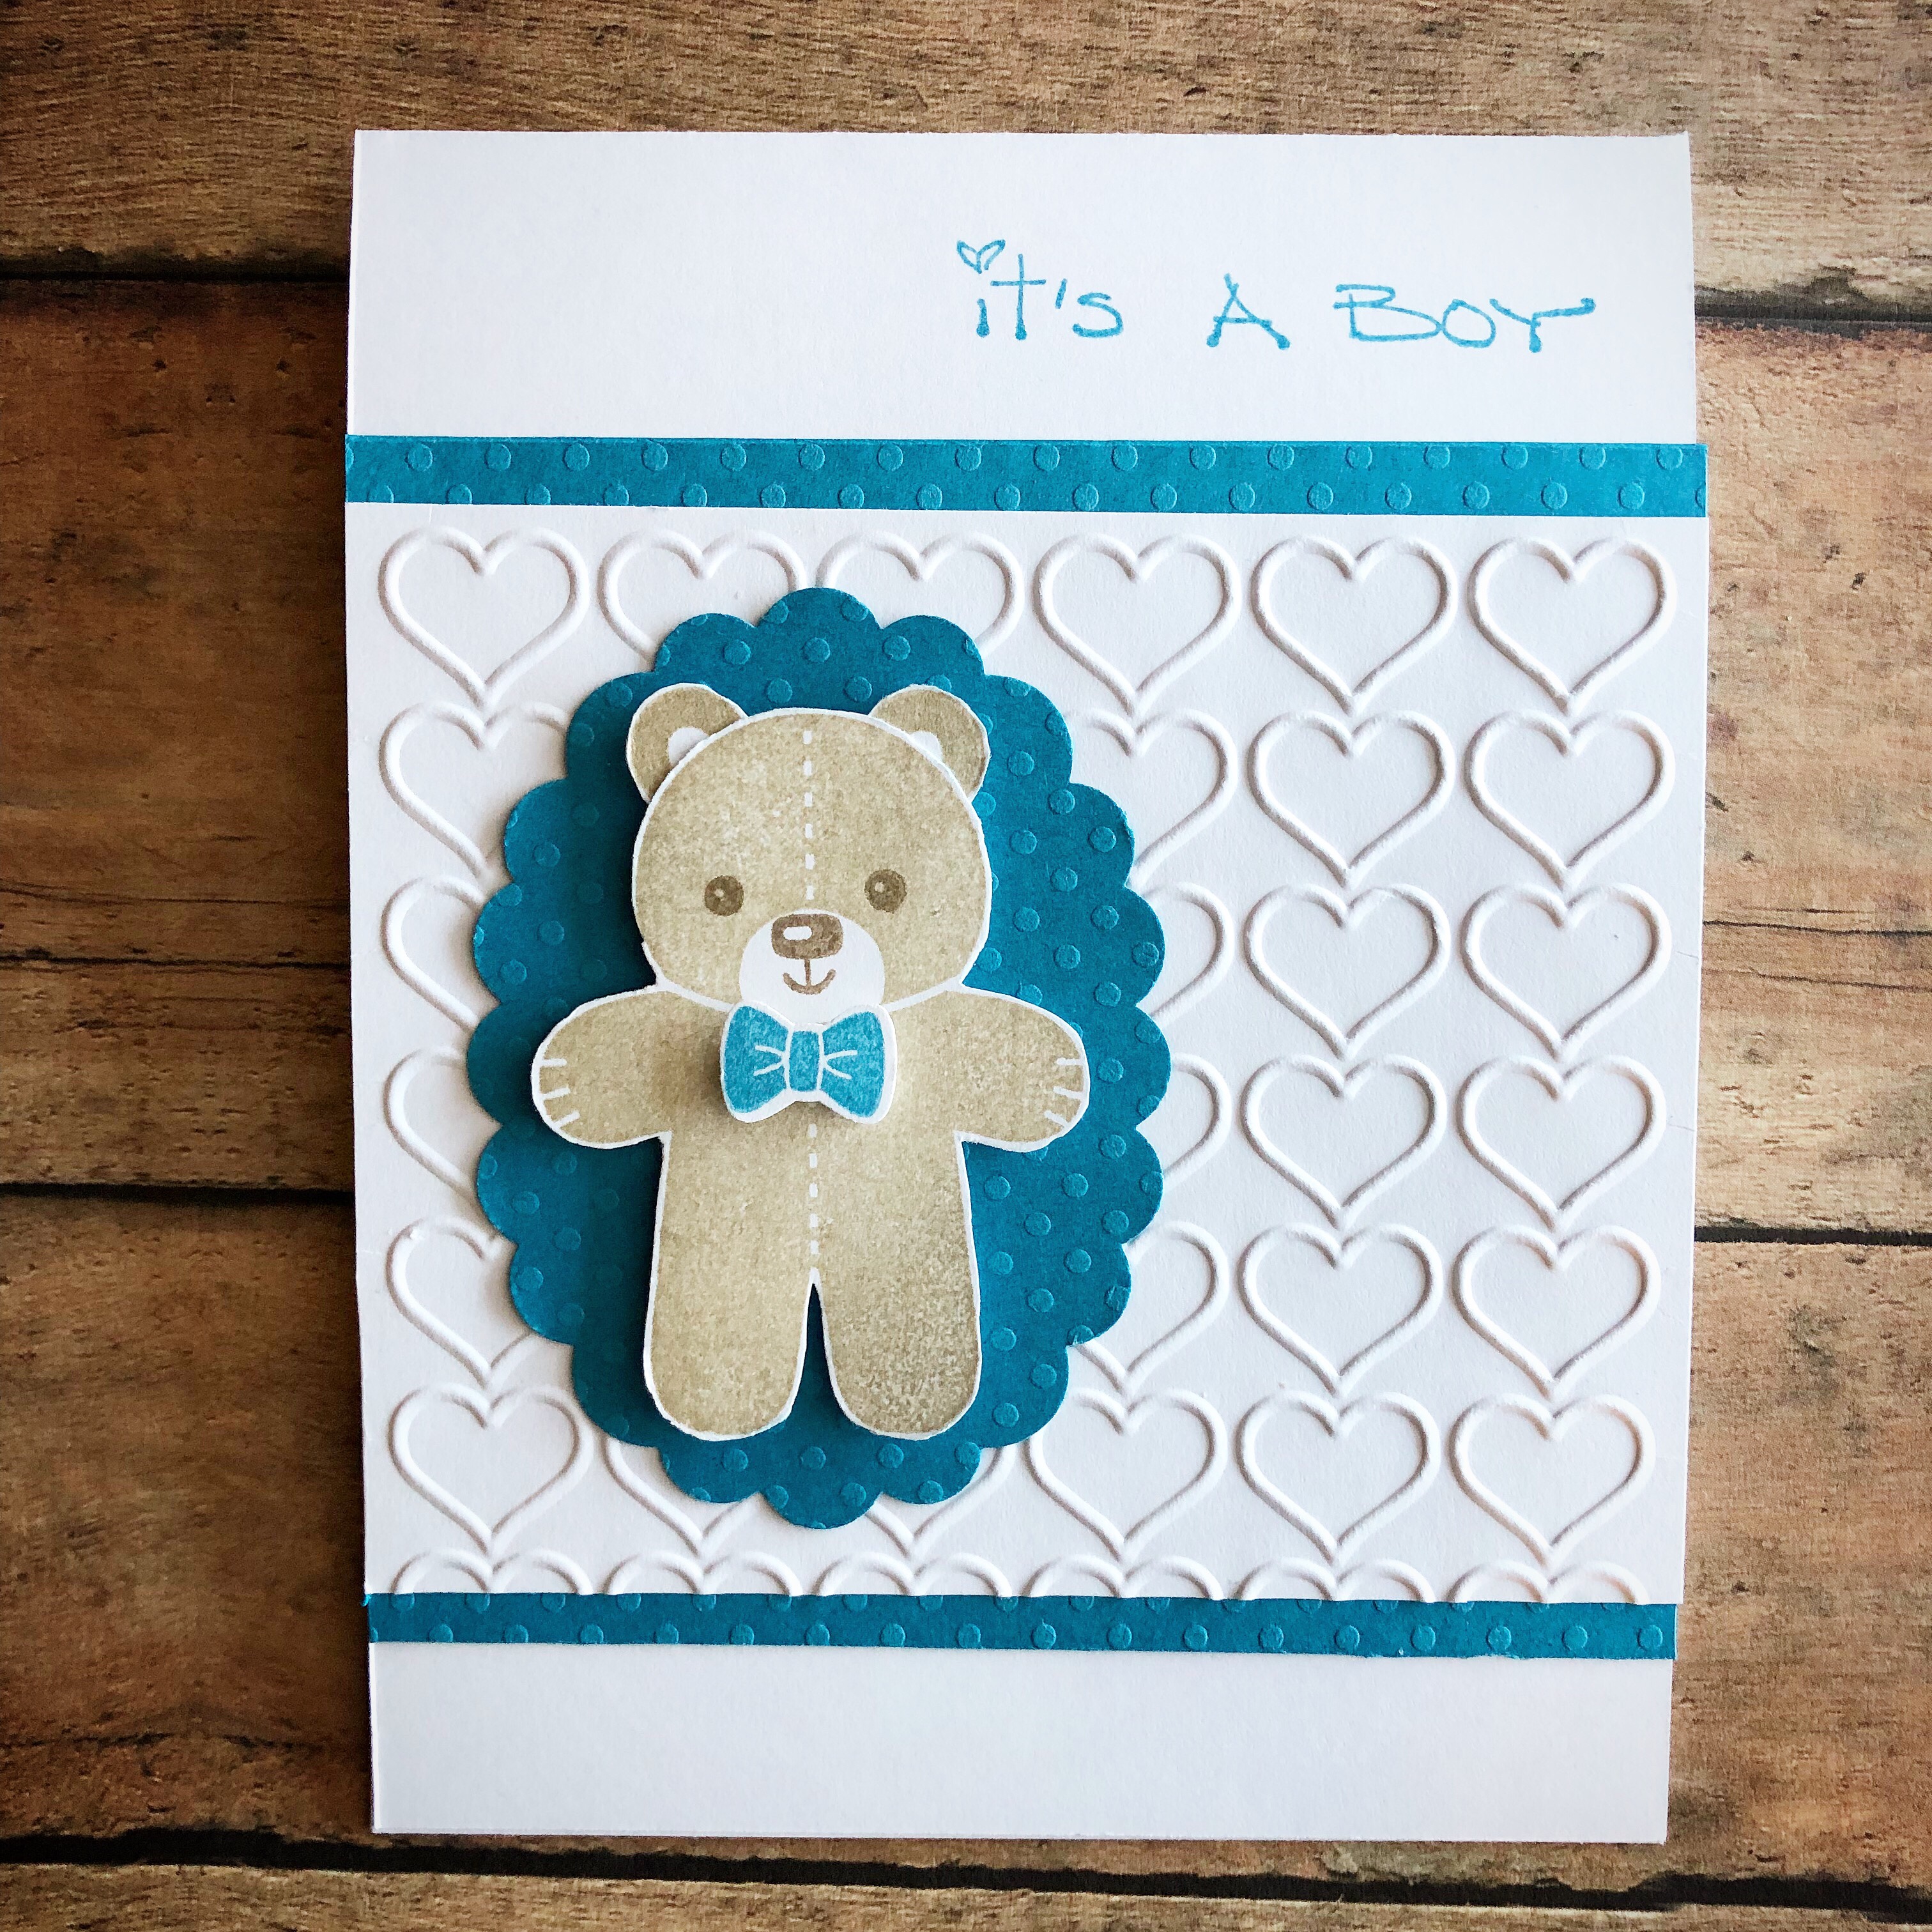
It’s a Boy

This teddy bear is just the cutest little guy! He’s from the Cookie Cutter Christmas Stamp Set by Stampin’ Up. I think he’s just perfect to welcome a sweet new baby boy. 🐻

I stamped the bear and his ears with light brown ink on white card stock. Then I stamped his face with dark brown ink. I trimmed the bear and the ears and attached the ears to the back of the bear’s head. The bow is stamped with blue ink and punched out with the Cookie Cutter Builder Punch from Stampin’ Up. I attached the bow with foam tape.

I embossed a piece of white card stock with the heart folder that came from Stampin’ Up. This particular folder is discontinued – just use whatever folder you may have, or even use patterned paper instead. I layered the embossed piece onto a piece of blue dotted swiss card stock and attached it to a white card. I punched a scalloped oval from the same blue dotted swiss card stock and attached it to the card. Then I added the stamped bear with foam tape. To finish the card, I stamped “it’s a Boy” with blue ink at the top of the card.The stamp is from Stamps by Judith & Heather. I’m not sure if it’s still available…again, just use whatever you have in your stash – welcome baby, congratulations, congrats, or nothing at all! 🙂

I think this card turned out “beary” cute! 😉

Thanks for stopping by,

Anita

Posted in Cards, Stamping | Leave a comment