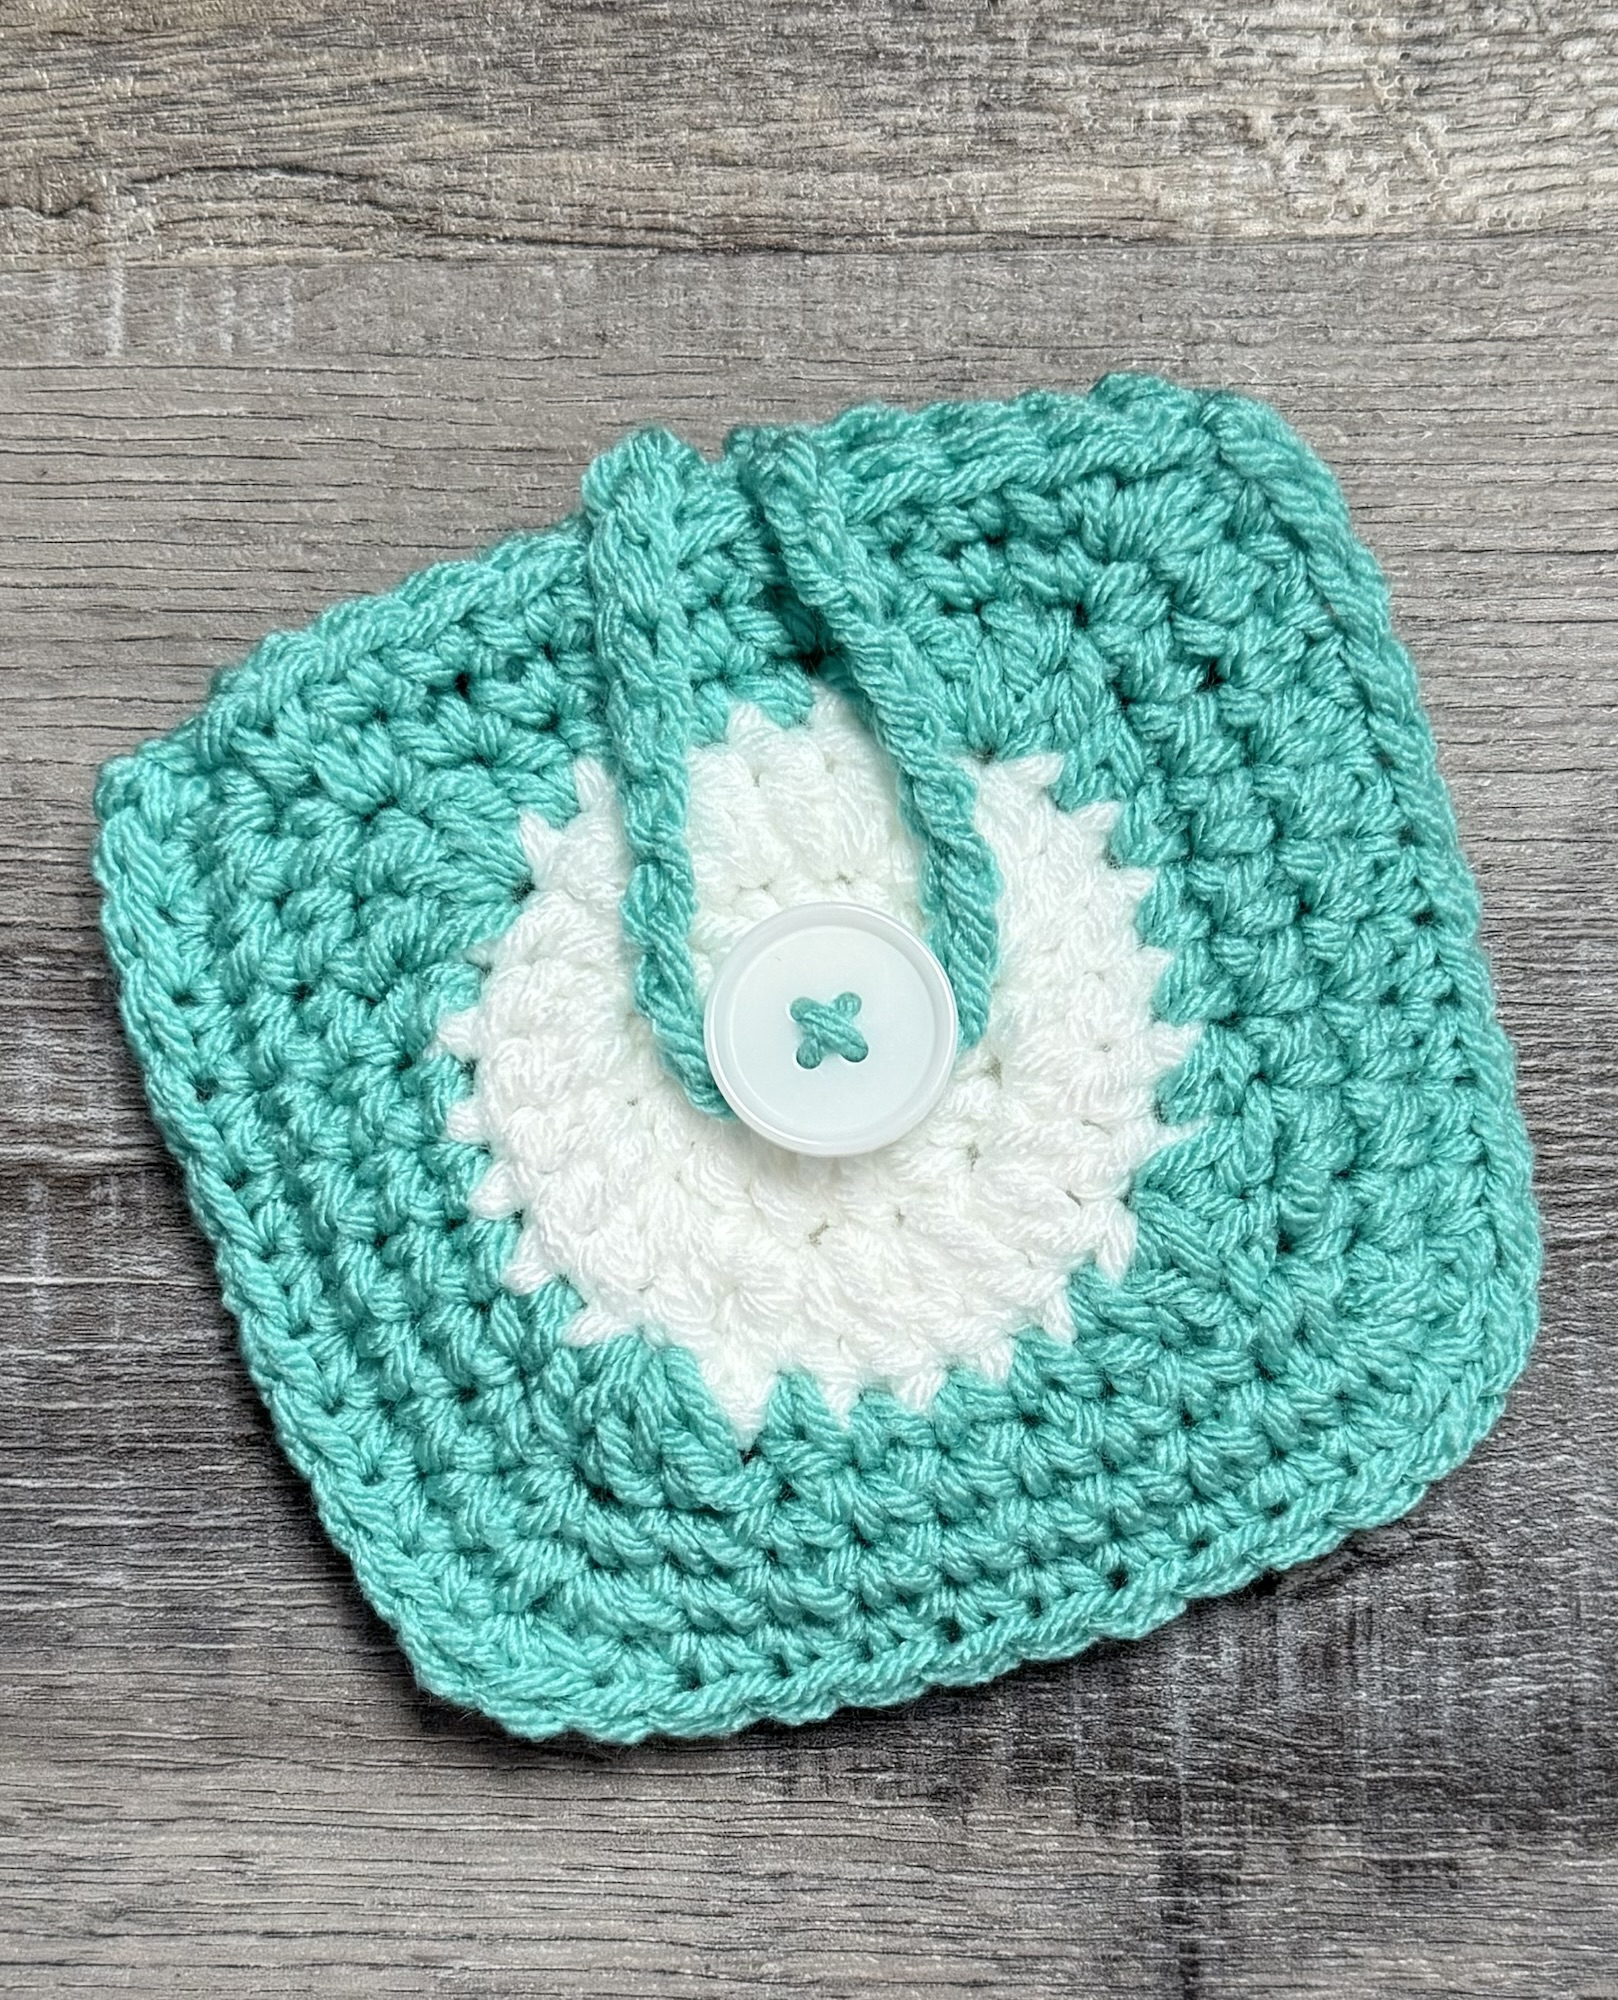
Crochet Tote Gift Bag

Hi friends,

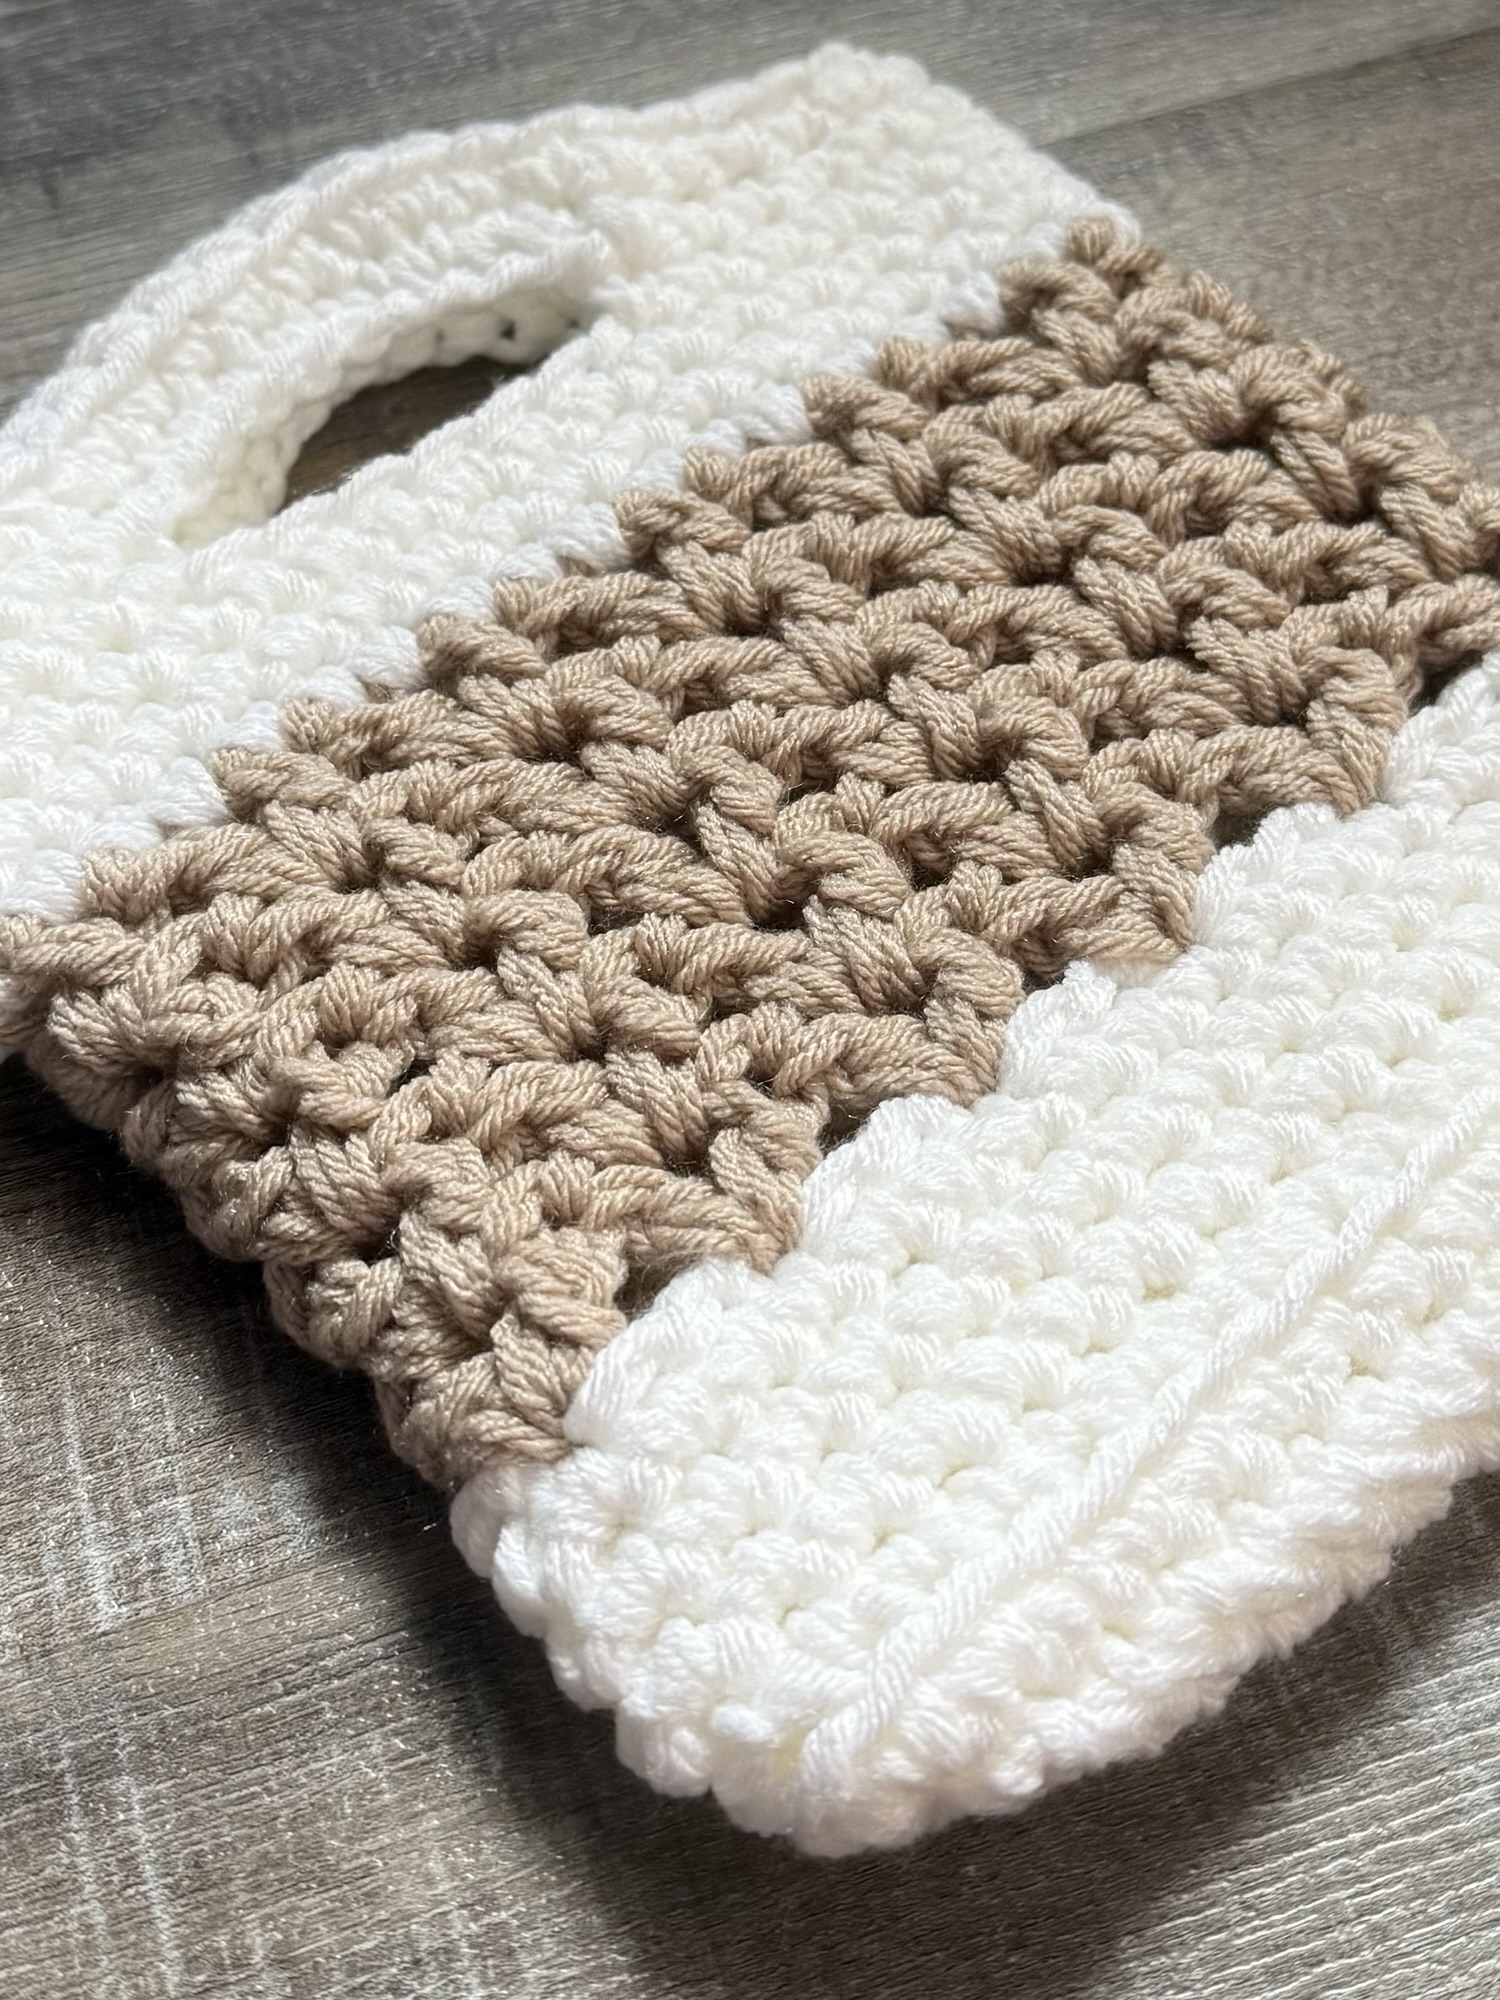
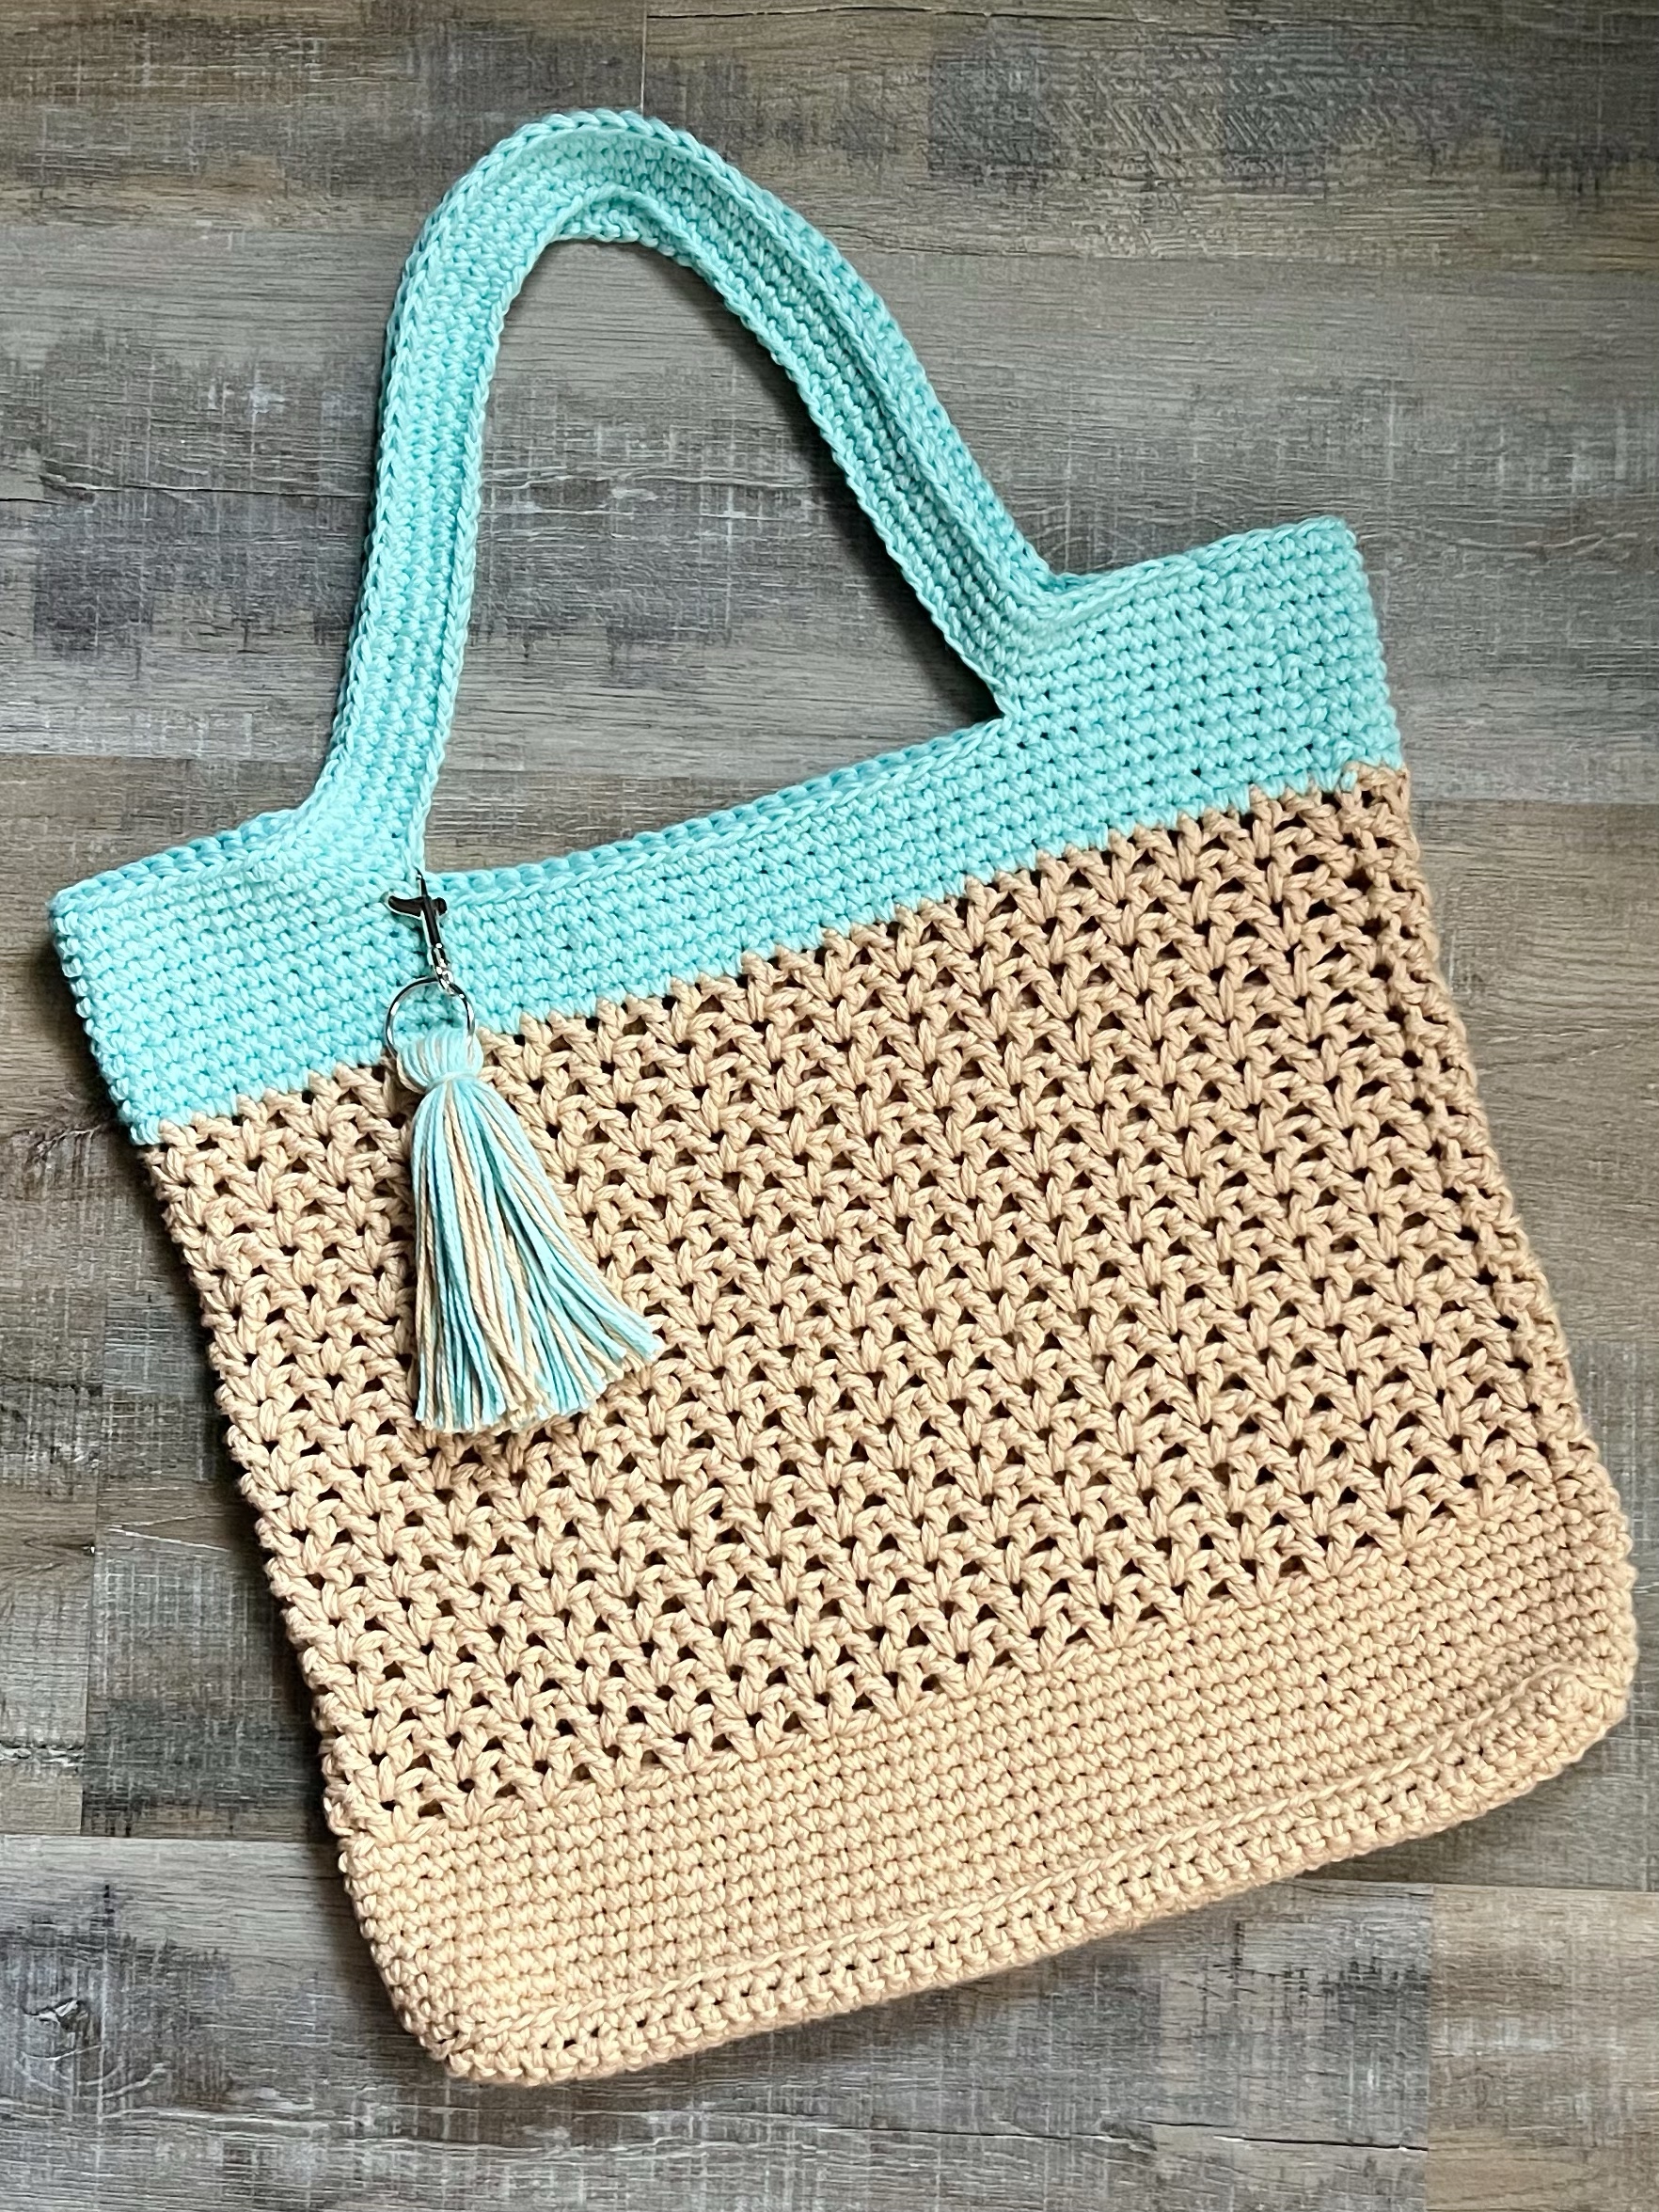
Want to make your gift giving a little more special this year? My Crochet Tote Gift Bag may be just the thing! 🎄🧶

Disclosure: Some of the links on my site are affiliate links, meaning, at no additional cost to you, I will earn a small commission if you click through and make a purchase. As an Amazon Associate I earn from qualifying purchases.

It’s made holding 2 strands of worsted weight yarn together so it’s nice and thick. The gift bag measures about 7 inches wide by 8 inches tall – a good size for gifting lots of things. 🎁 And since you are making it with 2 stands of yarn and a larger hook it works up very quickly. 🙂

You can find the pattern below along with a free PDF if you’d like to easily print it. I stitched up my gift bags with Yarn Bee Soft & Sleek yarn in Linen and White using an L/8mm crochet hook.

Crochet Tote Gift Bag

Finished gift bag measures about 7 inches by 8 inches. 

Worsted weight yarn in 2 colors ( I used Yarn Bee Soft & Sleek Yarn in Linen and White)

L/8mm hook

Stitches used US terms:

Chain – ch

Single Crochet – sc

Slip Stitch – ss

Back Loop Only – blo

Special Stitch – v-stitch (dc, ch 1, dc) in same stitch 

NOTE: tote bag is stitched holding 2 strands of yarn together. 

Round 1: With 2 strands of Color A, ch 15.  sc in 2nd ch from hook and in next 12 ch. Work 3 sc in last ch. Working in the other side of beginning ch, sc in next 13 stitches. Work 3 sc in last stitch. Join with ss to first sc. (32 stitches)

Round 2: ch 1. sc in same stitch as ss and next 13 stitches. Work 3 stitches in next stitch. sc in next 15 stitches. Work 3 sc in next stitch. sc in next stitch. Join with ss to 1st sc. (36 stitches)

Round 3: ch 1. Working in blo, sc in same stitch as ss and in each stitch around. Join with ss to first sc. (36 stitches)

Rounds 4-6: ch 1. sc in same stitch as ss and in each stitch around. Join with ss to first sc. (36 stitches)

Change to 2 strands of Color B. 

Round 7: ch 3 (counts as first dc and ch 1) dc in same stitch as ss (First v-stitch made). *skip next 2 stitches, work v-stitch in next stitch* Repeat from * to * around to last 2 stitches. Skip last 2 stitches and join with ss to 2nd ch in beginning ch 3. (12 v-stitches)

Rounds 8-11: ss into ch 1 space. ch 3 (counts as first dc and ch 1) dc in same ch 1 space (First v-stitch made). Work v-stitch in each ch 1 space of v-stitch in previous row. Join with ss to 2nd ch of beginning ch 3. (12 v-stitches)

Change to 2 strands of Color A. 

Round 12: ch 1. sc in same stitch as ss and in each ch 1 space and dc stitch around. Join with ss to first sc. (36 stitches)

Rounds 13-14: ch 1. sc in same stitch as ss and in each stitch around. Join with ss to first sc. (36 stitches)

The next Round will make the handles. 

Round 15: ch 1. sc in same stitch as ss and in the next 5 stitches. ch 10. Skip next 6 stitches. sc in next 12 stitches. ch 10. Skip next 6 stitches. sc in next 6 stitches. Join with ss to first sc. (44 stitches)

Round 16: ch 1. sc in same stitch as ss and in each stitch and ch around. Join with ss to first sc. (44 stitches)

Round 17:  ch 1: sc in same stitch as ss and in each stitch around. Join with ss to first sc. (44 stitches)

Fasten off and weave in ends. 

Here’s the link to the free PDF…

I made my tote bags in neutral colors, but of course you can make them in any color combo or even just one solid color. Red and green or blue and white for Christmas. Bright colors for celebrating birthdays, or pastels to welcome a new baby. You are only limited by your imagination! 🙂

What color will you make your Crochet Tote Gift Bag?

Anita

Posted in Christmas, Crochet, Gifts | Tagged , , | 3 Comments

Fall Birthday Card

Hi friends,

We can’t forget all of those Fall birthdays in the midst of HallowThanksMas season! 🎃🍁🎄😂 They need a special birthday card, too!

Disclosure: Some of the links on my site are affiliate links, meaning, at no additional cost to you, I will earn a small commission if you click through and make a purchase. As an Amazon Associate I earn from qualifying purchases.

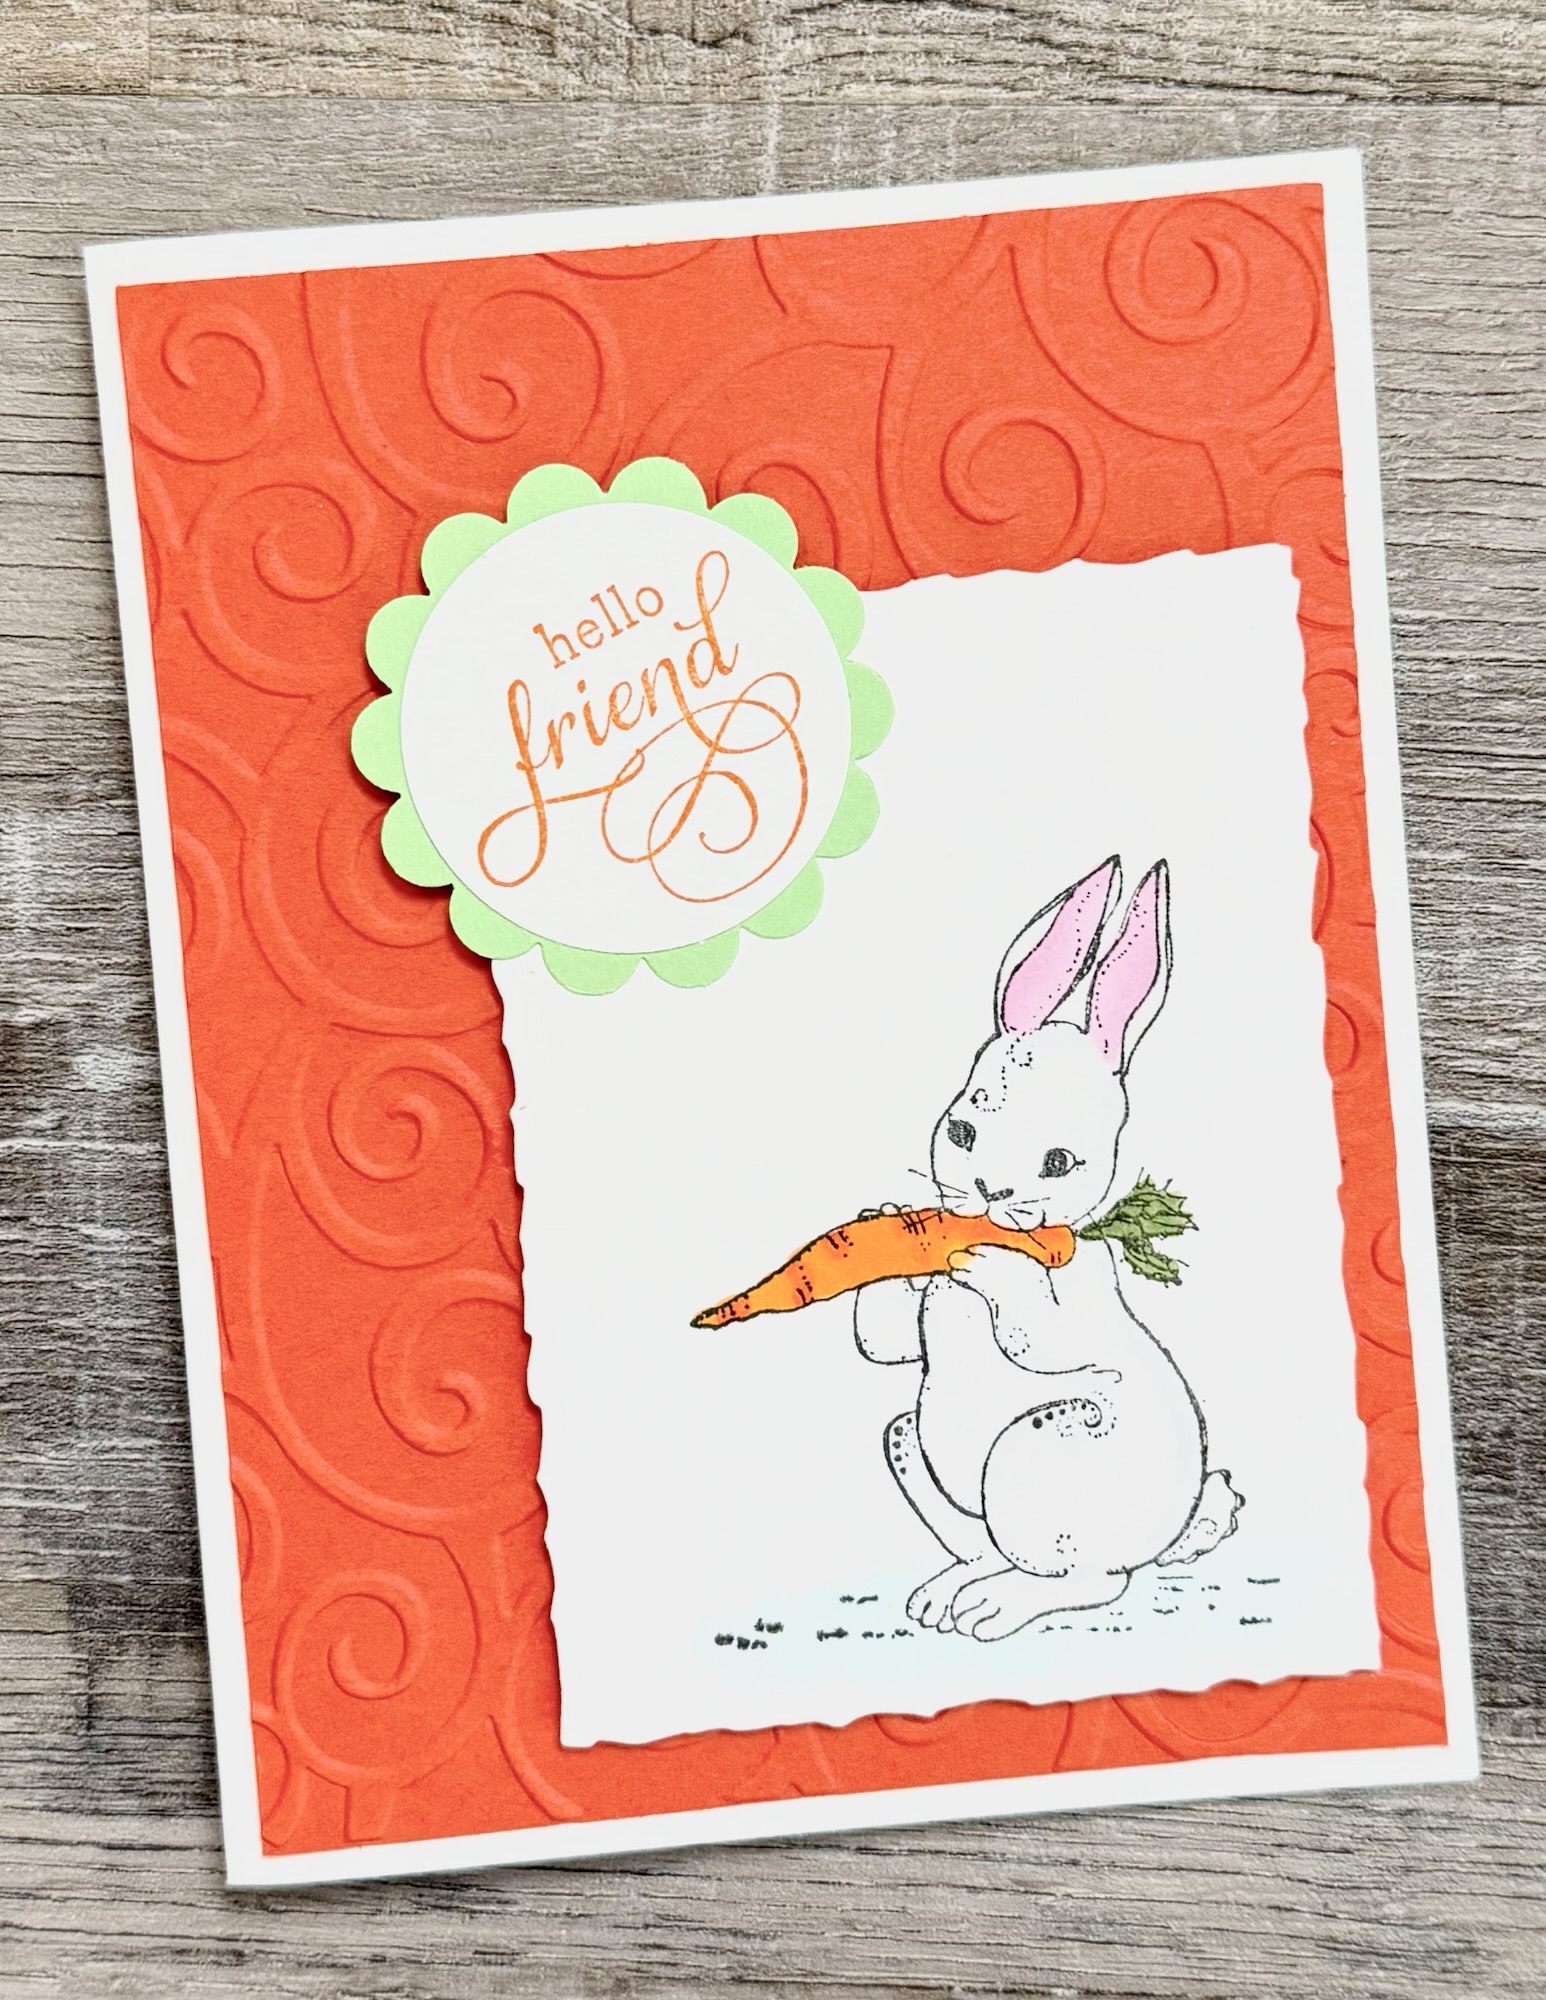
This sweet Heartfelt Reflection stamp from Unity Stamp Company is a fun way to send all kinds of Fall greetings.

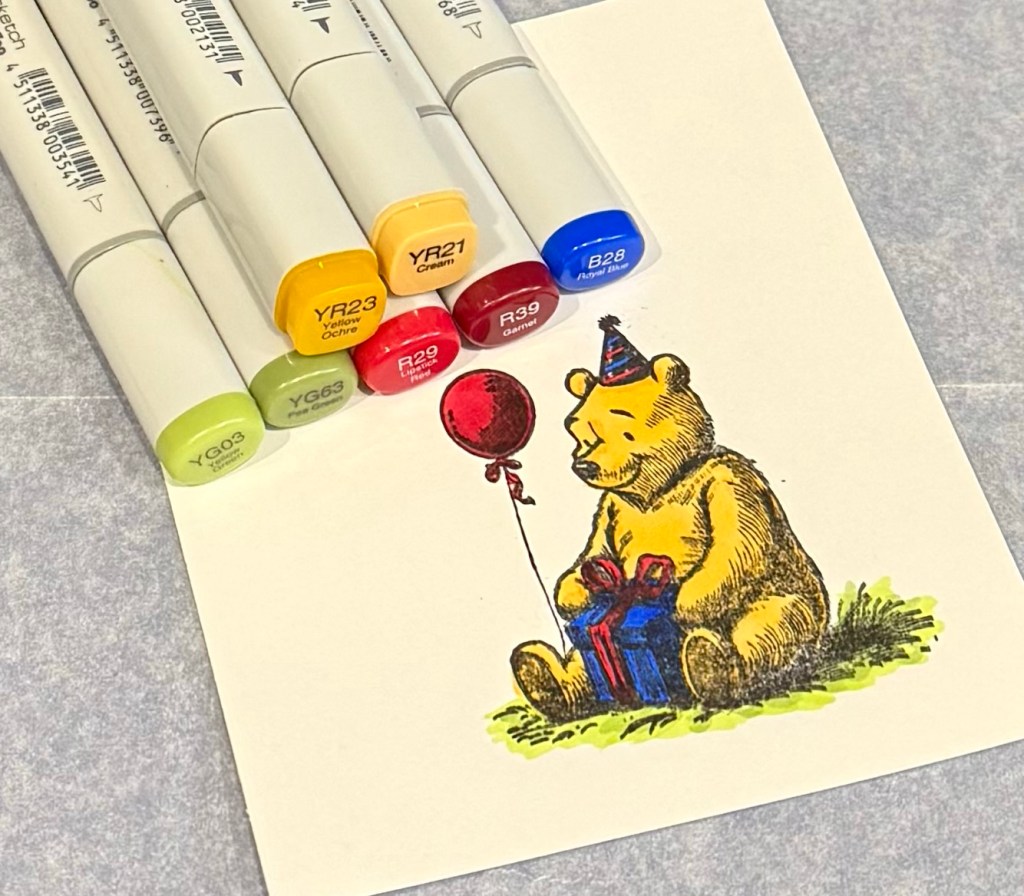
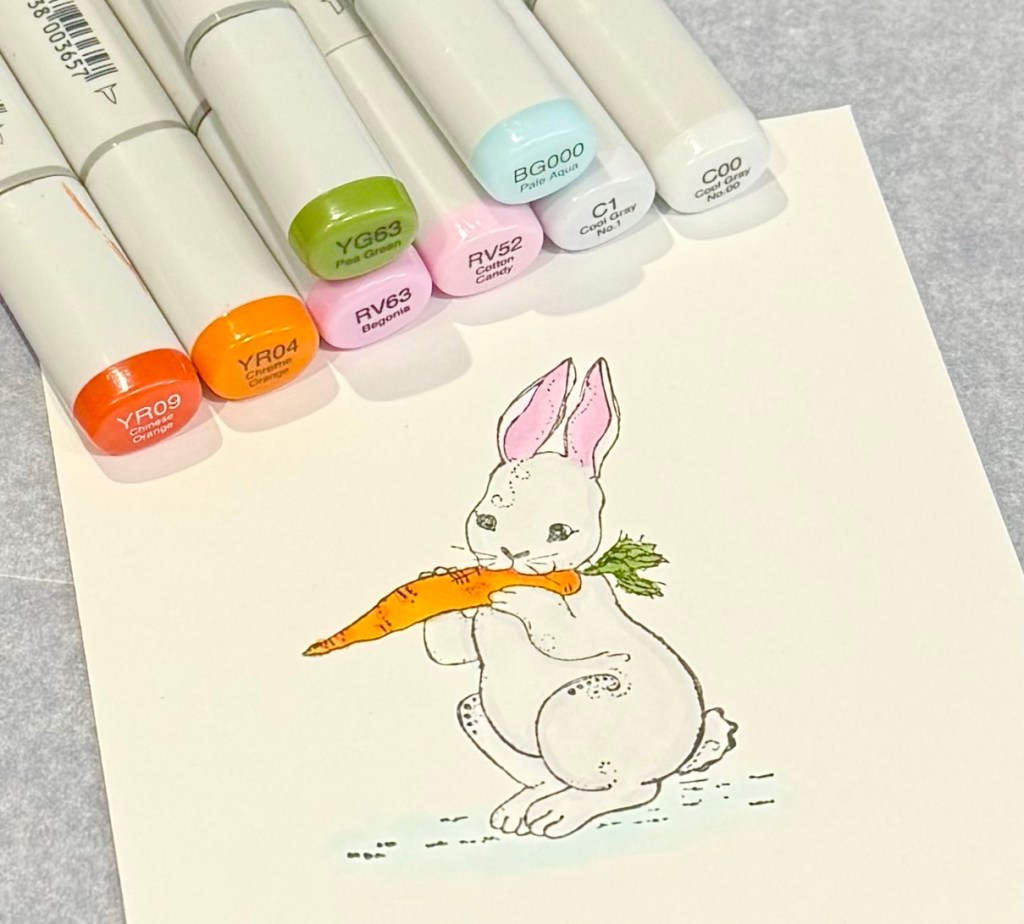
I stamped the image with Memento Tuxedo Black ink on white card stock and colored her with the Copic markers in the photo below.

Using these Deckle & Stitches Nesting Dies, I die cut around the image. I layered it to green patterned paper and orange card stock die cut with the same set. Then I attached the stamped piece to a white card.

The sentiment is stamped with orange ink on white card stock and die cut using the smallest die in the same die set. The sentiment is attached to the card using foam tape. My sentiment stamp is an older discontinued stamp 😕 – but I’m sure you have great sentiments in your collection that you can use. ☺️

This card can be used for so many Fall greetings – Happy Fall, Thanksgiving, Thinking of You, Thank You, and of course, Birthday. 🍁🍂🍁

Anita

Posted in Cards, Fall, Stamping | Tagged , , | Leave a comment

Healthy Blueberry Banana Oatmeal Breakfast Bars

Hi friends,

Looking for a tasty healthy breakfast option? These Healthy Blueberry Oatmeal Breakfast Bars are so easy to make and they are tasty, too! 😋

Disclosure: Some of the links on my site are affiliate links, meaning, at no additional cost to you, I will earn a small commission if you click through and make a purchase. As an Amazon Associate I earn from qualifying purchases.

These breakfast bars are a great way to use up those overripe bananas. Did you know that you can freeze overripe bananas to use for baking or smoothies later? You can peel them, or not (I’ve frozen them both ways), and put them in a freezer bag. They will thaw out quickly when you are ready to use them.

The bars only take 9 ingredients and they mix up in just a few minutes. I used frozen blueberries in my breakfast bars because I already had them in my freezer. The recipe calls for ground flaxseed, but I didn’t have any so I left it out. 😊

This is after about 40 minutes in the oven. They smell so yummy! 😋

I stored my bars in the fridge for a few days and popped them in the microwave for about 15 seconds to warm them up. So good with a cup of hot tea or coffee! 🫖☕️

You can also cut the pan into bars, wrap them in plastic wrap, put them in a freezer bag, and put them in the freezer for a quick breakfast. Just unwrap the bars as needed and microwave for about 30 seconds until they are warm. Easy, quick, and tasty! 😋 The full recipe is here.

Anita

Posted in Recipes | Tagged | 4 Comments

Crochet Race Car Stacking Ring Toy

Hi friends,

A special little boy turned one this month! 💙 I found this adorable Crochet RaceCar Stacking Ring Toy pattern from Those Yarn Girls and knew it would be the perfect gift for his first birthday. 🎁 It is a paid pattern, but I promise it is worth it!😊

Disclosure: Some of the links on my site are affiliate links, meaning, at no additional cost to you, I will earn a small commission if you click through and make a purchase. As an Amazon Associate I earn from qualifying purchases.

The pattern is very well written and works up more quickly than you might think. I also made their Crochet Moose Stacking Ring Toy (you can see him in this post) for his older brother last year and it was a big hit. 🫎

I used I Love This Cotton Yarn in White, Black, Red, Royalty, Curry, and a tiny bit of Glowing (for the back lights on the car) with an E/3.5 mm crochet hook to stitch up my toy. You’ll also need polyfil for stuffing each piece.

The very bottom ring is sewn to the cone for stability and the rest stack onto the cone with the race car on the top. I love this toy because there are no safety eyes or buttons to worry about for little ones. It’s also soft and easy for little hands to grab. 🚗

Check out Those Yarn Girls over on Etsy. They have some really cute and fun crochet patterns! 🚗🫎

Anita

Posted in Crochet, Gifts | Tagged , | 2 Comments

Fall To Go – Handmade Card

Hi friends,

This is such a fun stamp for all your Fall greetings! It’s called Fall To Go and you can find it at Unity Stamp Company.☕️

Disclosure: Some of the links on my site are affiliate links, meaning, at no additional cost to you, I will earn a small commission if you click through and make a purchase. As an Amazon Associate I earn from qualifying purchases.

I made this card for my sister’s birthday and tucked a Starbucks gift card inside.☕️😊

I stamped the image with Memento Tuxedo Black ink on white card stock and colored it with the Copic markers in the photo below.

I die cut around the image using these dies from MFT Stamps and layered it to orange card stock cut with the same dies.

I attached a piece of patterned paper to a white card and attached the stamped piece to the card with foam tape. The sentiment is stamped with black ink on a strip of white card stock, layered to orange card stock, and attached over the coffee image on the card.

I love all these Fall colors! And whether you like coffee, tea, or hot cocoa, this fun stamp will be great for sending Fall birthday wishes. 🍁🍂🍁

Anita

Posted in Cards, Fall, Stamping | Tagged , , | Leave a comment

Joyful Wishes – November 2024 Christmas Card

Hi friends,

We’ve made it to November! 😳 This year has flown by! I’m so glad I have been making a few Christmas cards each month – it makes this time of year a little less hectic. 🎄😊

Disclosure: Some of the links on my site are affiliate links, meaning, at no additional cost to you, I will earn a small commission if you click through and make a purchase. As an Amazon Associate I earn from qualifying purchases.

You can find my Christmas card creations for each month this year in these posts: January, February, March, April, May, June, July, August, September, and October.

This month’s card layout is from the Build Your Stash Holiday Cardmakers Sketch Challenge 51. The cute little reindeer stamp and sentiment stamps are from the Just for You Dear stamp set from Unity Stamp Company.

I stamped the image with Memento Tuxedo Black ink on white card stock and colored him with Copic markers. I die cut around the image with the Deckle & Stitches Nesting Die Set. I stamped the sentiment with black ink on white card stock and die cut around it with the same die set.

To make the card, I added 2 different patterned papers to a white card. I attached both the reindeer and the sentiment using foam tape.

This is a quick and easy card, but it’s so cute for sending Joyful Wishes!🎄

Anita

Posted in Cards, Christmas, Stamping | Tagged , , | 1 Comment

Crochet Cluster V-Stitch Baby Blanket

Hi friends,

This Crochet Cluster V-Stitch Baby Blanket is a simple one row repeat, but it has amazing texture! I created this pattern for a special little one.💛

Disclosure: Some of the links on my site are affiliate links, meaning, at no additional cost to you, I will earn a small commission if you click through and make a purchase. As an Amazon Associate I earn from qualifying purchases.

I stitched up my blanket using I Love This Yarn in Buttercup and White using an I/5.5mm crochet hook. The pattern is below along with a link to a free PDF if you’d like to easily print it.

Crochet Cluster V-Stitch Baby Blanket 

Worsted weight yarn (size 4) – 2 colors. Approximately 15 ounces main color and 3 ounces border color

I used I Love This Yarn in Buttercup and White

I/5.5mm crochet hook

Stitches used in US terms:

Chain – ch

Double Crochet – dc

Cluster V-stitch

Double Crochet 2 together – dc2tog

Slip Stitch – ss

How to make Cluster V-stitch: dc2tog, ch, dc2tog in the same stitch

How to dc2tog: yarn over, insert hook in stitch. Yarn over pull up loop (3 loops on hook). Yarn over, pull through 2 loops (2 loops on hook). Yarn over, insert hook in same stitch. Yarn over and pull up loop (4 loops on hook). Yarn over, pull through 2 loops (3 loops on hook). Yarn over and pull through last 3 loops. 

Chain 92 with Buttercup. 

Row 1: working in back bump of ch, dc in 4th ch from hook. (3 skipped ch count as a dc). *Skip 2 ch. (dc2tog, ch, dc2tog) in next ch (cluster v-stitch made).* Repeat from * to* across until last 4 ch. Skip 2 ch. dc in final 2 ch. Turn. (28 Cluster V-stitches and 2 double crochet at each end)

Row 2: ch 3 (counts as dc). Skip first dc. dc in next dc. *work cluster v-stitch in ch space of cluster v-stitch of previous row* Repeat from *to* across to last 2 dc. dc in last 2 dc. Turn. (28 Cluster V-stitches and 2 double crochet at each end)

Rows 3 – 54: Repeat Row 2 

Do Not Turn at the end of row 54. 

Begin working in Rounds. 

Continue with Buttercup

Round 1: ch 1. sc crochet evenly around, working 3 sc in each corner. Join with ss to first sc. 

Change to White. 

Round 2: ch 1. sc in same stitch as ss, ch 1.  *skip 2 stitches, 5 dc in next stitch. ch 1, skip 2 stitches, sc in next stitch, ch 1* Repeat from * to * around. Join with ss to first sc. 

Round 3: ch 1. sc in first sc, ch 1.  *work 5 dc in center dc of shell, ch 1. sc in next sc, ch 1.* Repeat from * to * around. Join with ss to first sc. 

Fasten off and weave in ends. 

Finished blanket measures approximately 30 by 35 inches.  

Here’s the link to the free PDF…

This blanket would be so pretty in any color combo – or even in one solid color including the border. What color will you make yours?

Anita

Posted in Baby, Crochet, Gifts | Tagged , , | 4 Comments

Give Thanks – Handmade Card

Hi friends,

I love the colors of Fall and this November Girl stamp from Unity Stamp Company is so fun to color! 🍁🍂🍁

Disclosure: Some of the links on my site are affiliate links, meaning, at no additional cost to you, I will earn a small commission if you click through and make a purchase. As an Amazon Associate I earn from qualifying purchases.

I stamped her with Memento Tuxedo Black ink and colored her with the Copic markers in the photo below. Using the Deckle & Stitches Die set, I die cut around the image and attached it to an orange card with foam tape.

I stamped the sentiment from the Pilgrim Gnomies set with black ink on orange card stock, punched around it with a 1.5 inch circle punch, and attached it to the card with foam tape.

I added 3 light blue Dew Drops to finish the card.

It’s a simple card, but with a great reminder to be thankful for the little things! 🍁🍂🍁

Anita

Posted in Cards, Fall, Stamping | Tagged , , | 2 Comments

Little Wood Gift Tags

Hi friends,

I found these cute little unfinished wood tags at Hobby Lobby. I love the 3 wood beads they have and they measure 1.25 inches wide by 1.75 inches tall. There are 12 in a package and all the Christmas items are 50% off! They are the perfect size to use for all your Christmas gift giving.🎄🎁

Disclosure: Some of the links on my site are affiliate links, meaning, at no additional cost to you, I will earn a small commission if you click through and make a purchase. As an Amazon Associate I earn from qualifying purchases.

I also picked up some red shimmer permanent vinyl to use with my Cricut machine to cut initials to put on my tags.

Using Cricut Design Space, I chose a chunkier font (I can’t remember the name🤷‍♀️) and sized the letters to be about 1 inch wide by 1.25 inches tall. I used my weeding tool on the letters and then used transfer tape with my scraper to attach the letters to the tags.

They needed a little something more, so I tied a bow using green satin ribbon at the bottom of the 3 beads.

Don’t have a Cricut machine? I think you could also use alphabet stickers on the tags. You could even paint the letters onto the tags.

These Little Wood Gift Tags are super cute and easy to make. And they can be used as ornaments once the gifts are opened. 🎄

Anita

Posted in Christmas, Cricut, Gifts | Tagged , , | 5 Comments

Cheesy Baked Spaghetti

Hi friends,

Want some yummy comfort food for dinner that’s easy to make? You need to try this Cheesy Baked Spaghetti! 😋

Disclosure: Some of the links on my site are affiliate links, meaning, at no additional cost to you, I will earn a small commission if you click through and make a purchase. As an Amazon Associate I earn from qualifying purchases.

You can find the recipe here at Passionate Penny Pincher. I made the Cheesy Baked Spaghetti in a 9×13 inch baking dish even though the recipe calls for a 10×6 inch baking dish and it turned out great!

The cheesy goodness comes from cream cheese and Parmesan cheese. My husband called it “crack spaghetti” because he went back for a big second helping! 😂

This can also be put together – except for the French’s fried onions – wrapped up tightly and put in the freezer for later. Simply thaw it in the fridge and bake according to the recipe, adding the fried onions during the last 5 minutes of baking.

Add a green salad and some garlic bread and you’ll have a tasty weeknight dinner! 😋

Anita

Posted in Recipes | Tagged | Leave a comment