Disclosure: Some of the links on my site are affiliate links, meaning, at no additional cost to you, I will earn a small commission if you click through and make a purchase. As an Amazon Associate I earn from qualifying purchases.
Cherry Pretzel Dessert is a great for Summertime – or anytime! 🙂 It’s a quick and easy recipe to make. There are different variations on how to make this yummy dessert – you can see how I made mine below.
Disclosure: Some of the links on my site are affiliate links, meaning, at no additional cost to you, I will earn a small commission if you click through and make a purchase. As an Amazon Associate I earn from qualifying purchases.
Cherry Pretzel Dessert
2-1/2 cups crushed pretzels
2 teaspoons vanilla extract
2/3 cup dark brown sugar
2 tablespoons flour
1/2 cup melted unsalted butter
8 ounces cream cheese at room temperature
1 cup powdered sugar
8 ounce container whipped topping, thawed
21 ounce can cherry pie filling
Preheat oven to 375 degrees.
Combine crushed pretzels, vanilla, dark brown sugar, and flour in a medium bowl and stir until combined. Add melted butter to the mixture and stir until well combined. Reserve 1/2 cup of mixture to use for the topping.
Spread the mixture in a 9×13 baking dish (or two 8×8 inch pans). Press into an even layer. Bake for 10 minutes. Remove from oven and let cool completely.
Beat cream cheese in a medium bowl until smooth. Add powdered sugar and mix until combined. Fold in whipped topping and mix until combined.
Spread mixture over cooledcrust. Spread cherry pie filling over the cream cheese layer. Sprinkle reserved pretzel mixture over the top.
Cover and refrigerate 4 hours before serving. Can chill overnight.
Note: You can also use light brown sugar to make the crust. I prefer dark brown sugar because I like the richer taste that it gives.
Not a fan of cherries? You can use any flavor of pie filling! Blueberry would be so yummy and apple in the Fall would be amazing. You can also double the pie filling if you want a thicker layer of fruit on the top.
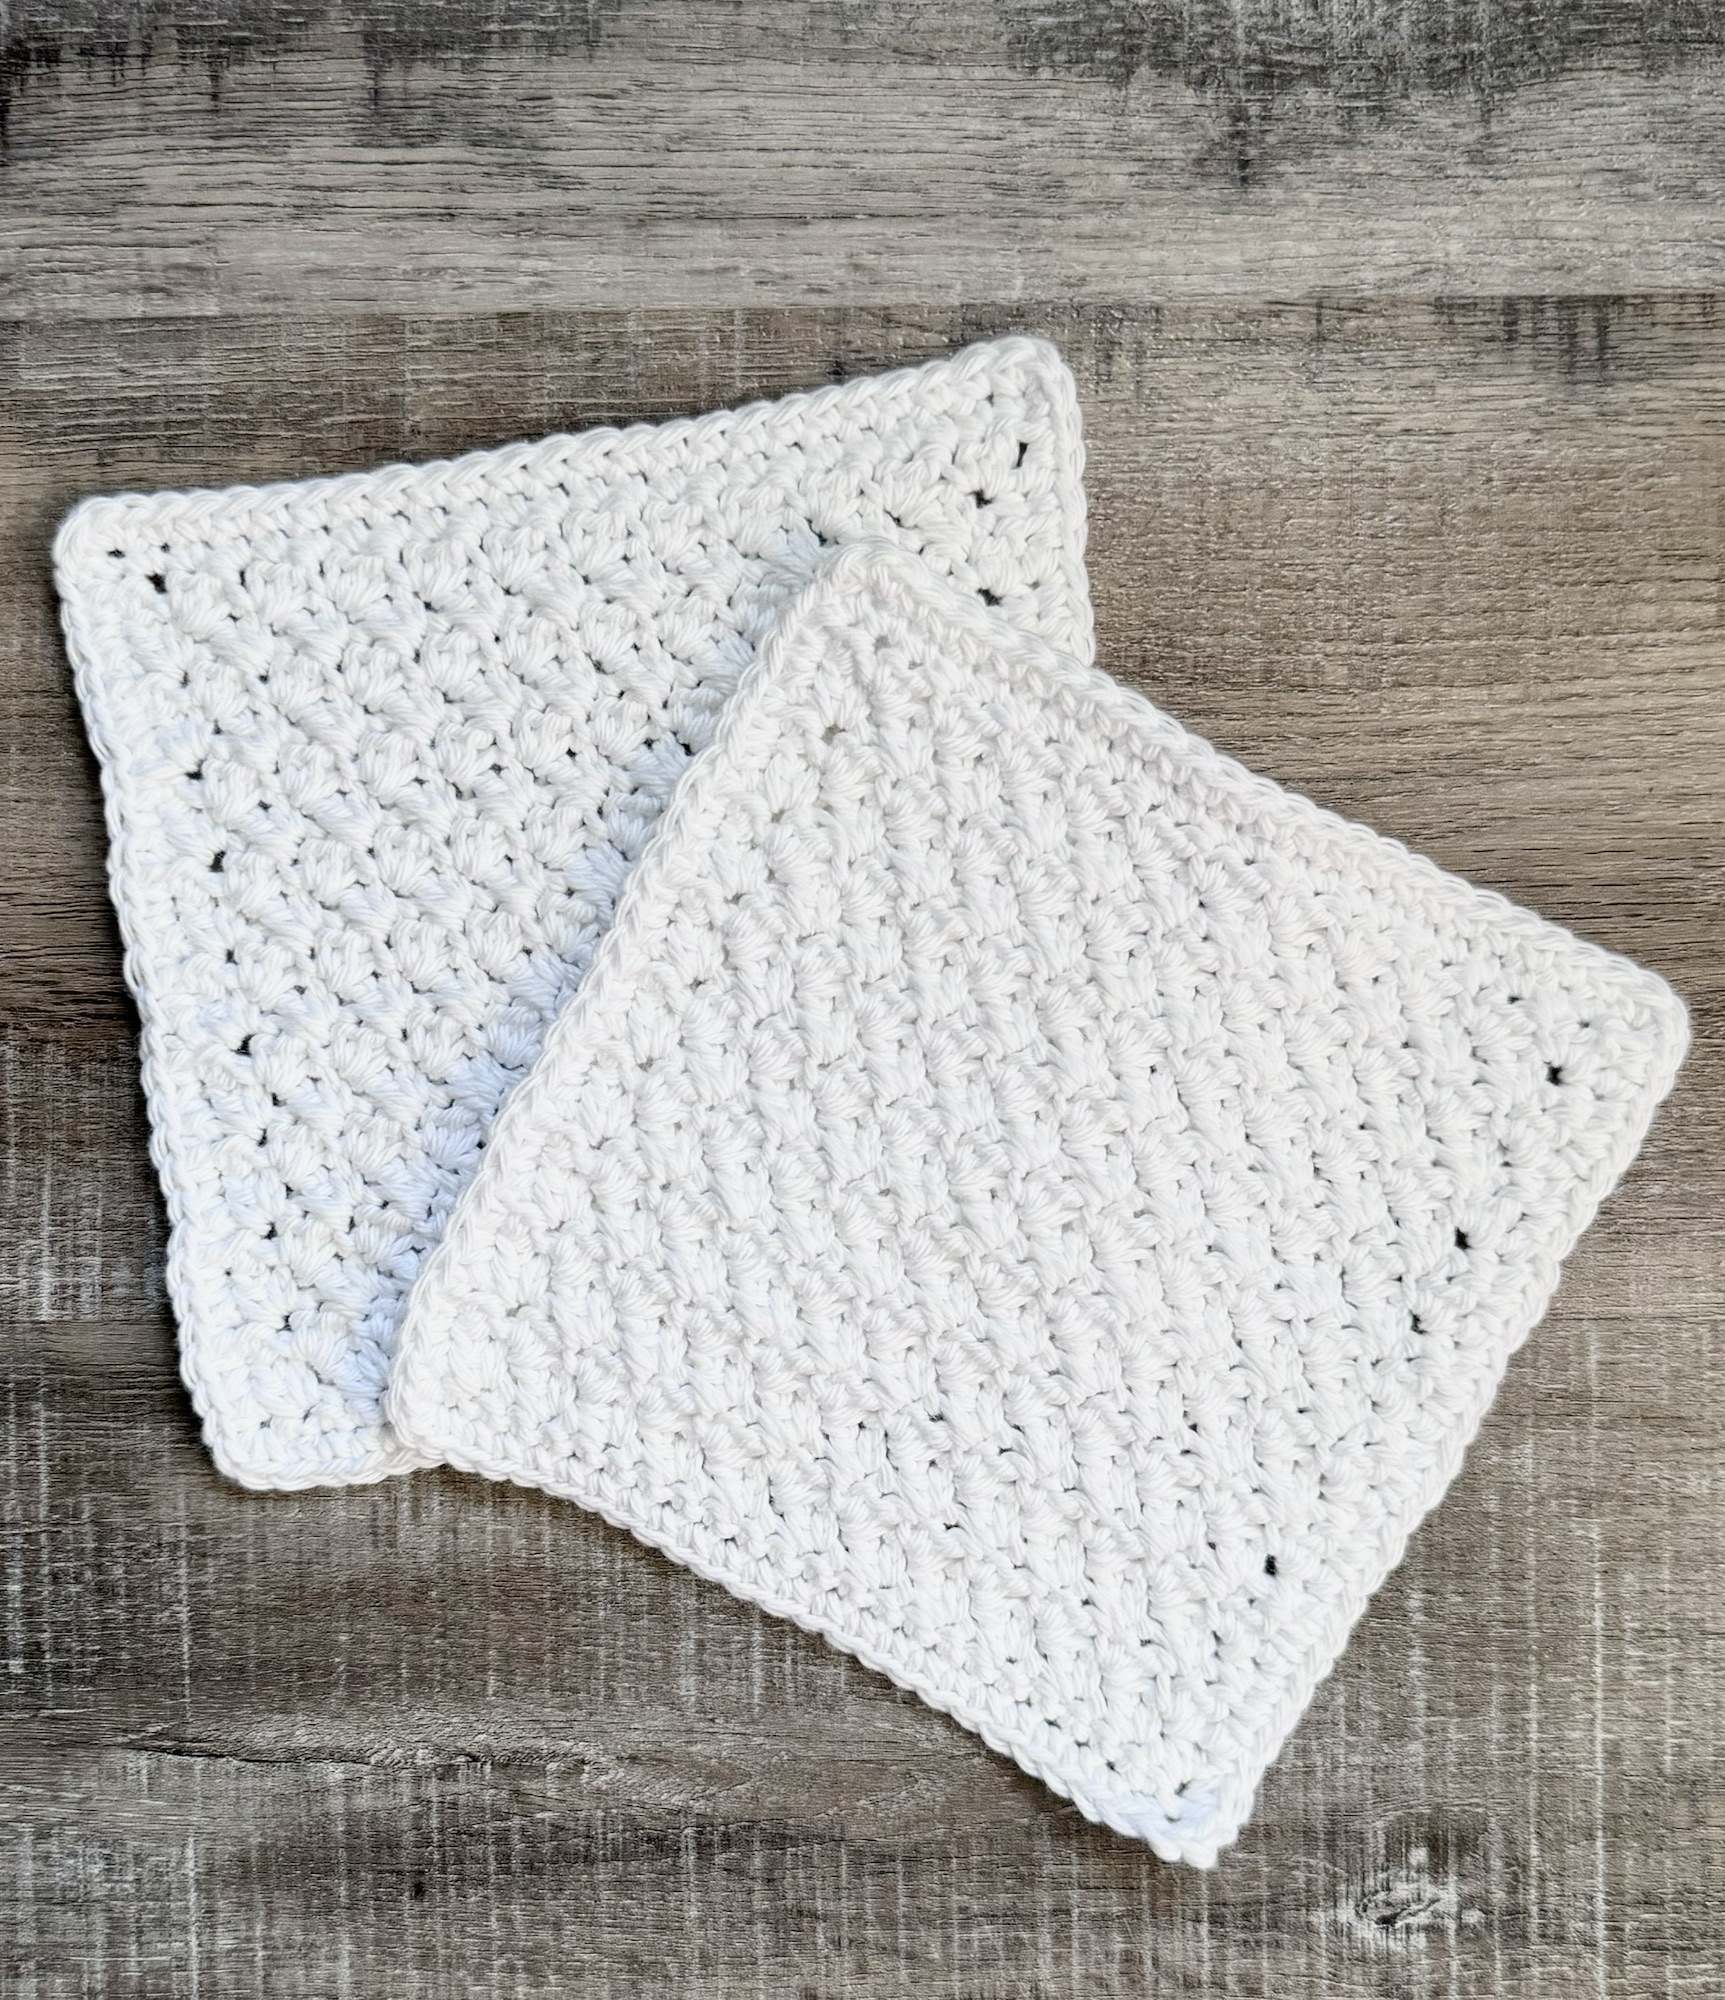
I didn’t get this pattern ready in time for Memorial Day, but you have plenty of time to stitch up some of these Crochet Patriotic Coasters for the 4th of July BBQ! 🇺🇸 They are made with cotton yarn so they will absorb the condensation from your drinks and help to keep your table dry. 🙂
Disclosure: Some of the links on my site are affiliate links, meaning, at no additional cost to you, I will earn a small commission if you click through and make a purchase. As an Amazon Associate I earn from qualifying purchases.
This is a great project for beginners. They work up quickly and they are a great stash buster, too! You can find the quick and easy pattern below.
I Love This Cotton Yarn – I used Red, White, and Royalty
H/5mm crochet hook
Stitches used in US terms:
Chain – ch
Single Crochet – sc
Double Crochet – dc
Chain 17 with Red.
Row 1: sc in 2nd ch from hook. dc in next stitch. *sc in next stitch, dc in next stitch*Repeat from * to * across row, ending with a dc. ch 1 and turn. (16 stitches)
Row 2: sc in first stitch, dc in next stitch. *sc in next stitch, dc in next stitch* Repeat from * to * across row, ending with a dc. ch 1 and turn. (16 stitches)
Rows 3-5: Repeat Row 2 for each row.
Change to White.
Rows 6-10: Repeat Row 2 for each row.
Change to Royalty.
Rows 11-15: Repeat Row 2 for each row.
Fasten off and weave in ends.
Here’s a free PDF if you’d like to print the pattern for later.
These coasters would be great worked up in Summer bright colors, neural tones, or even just a solid color. A set of these would make a great hostess gift! 🎁
Don’t forget to pin this to your crochet Pinterest board! 😉
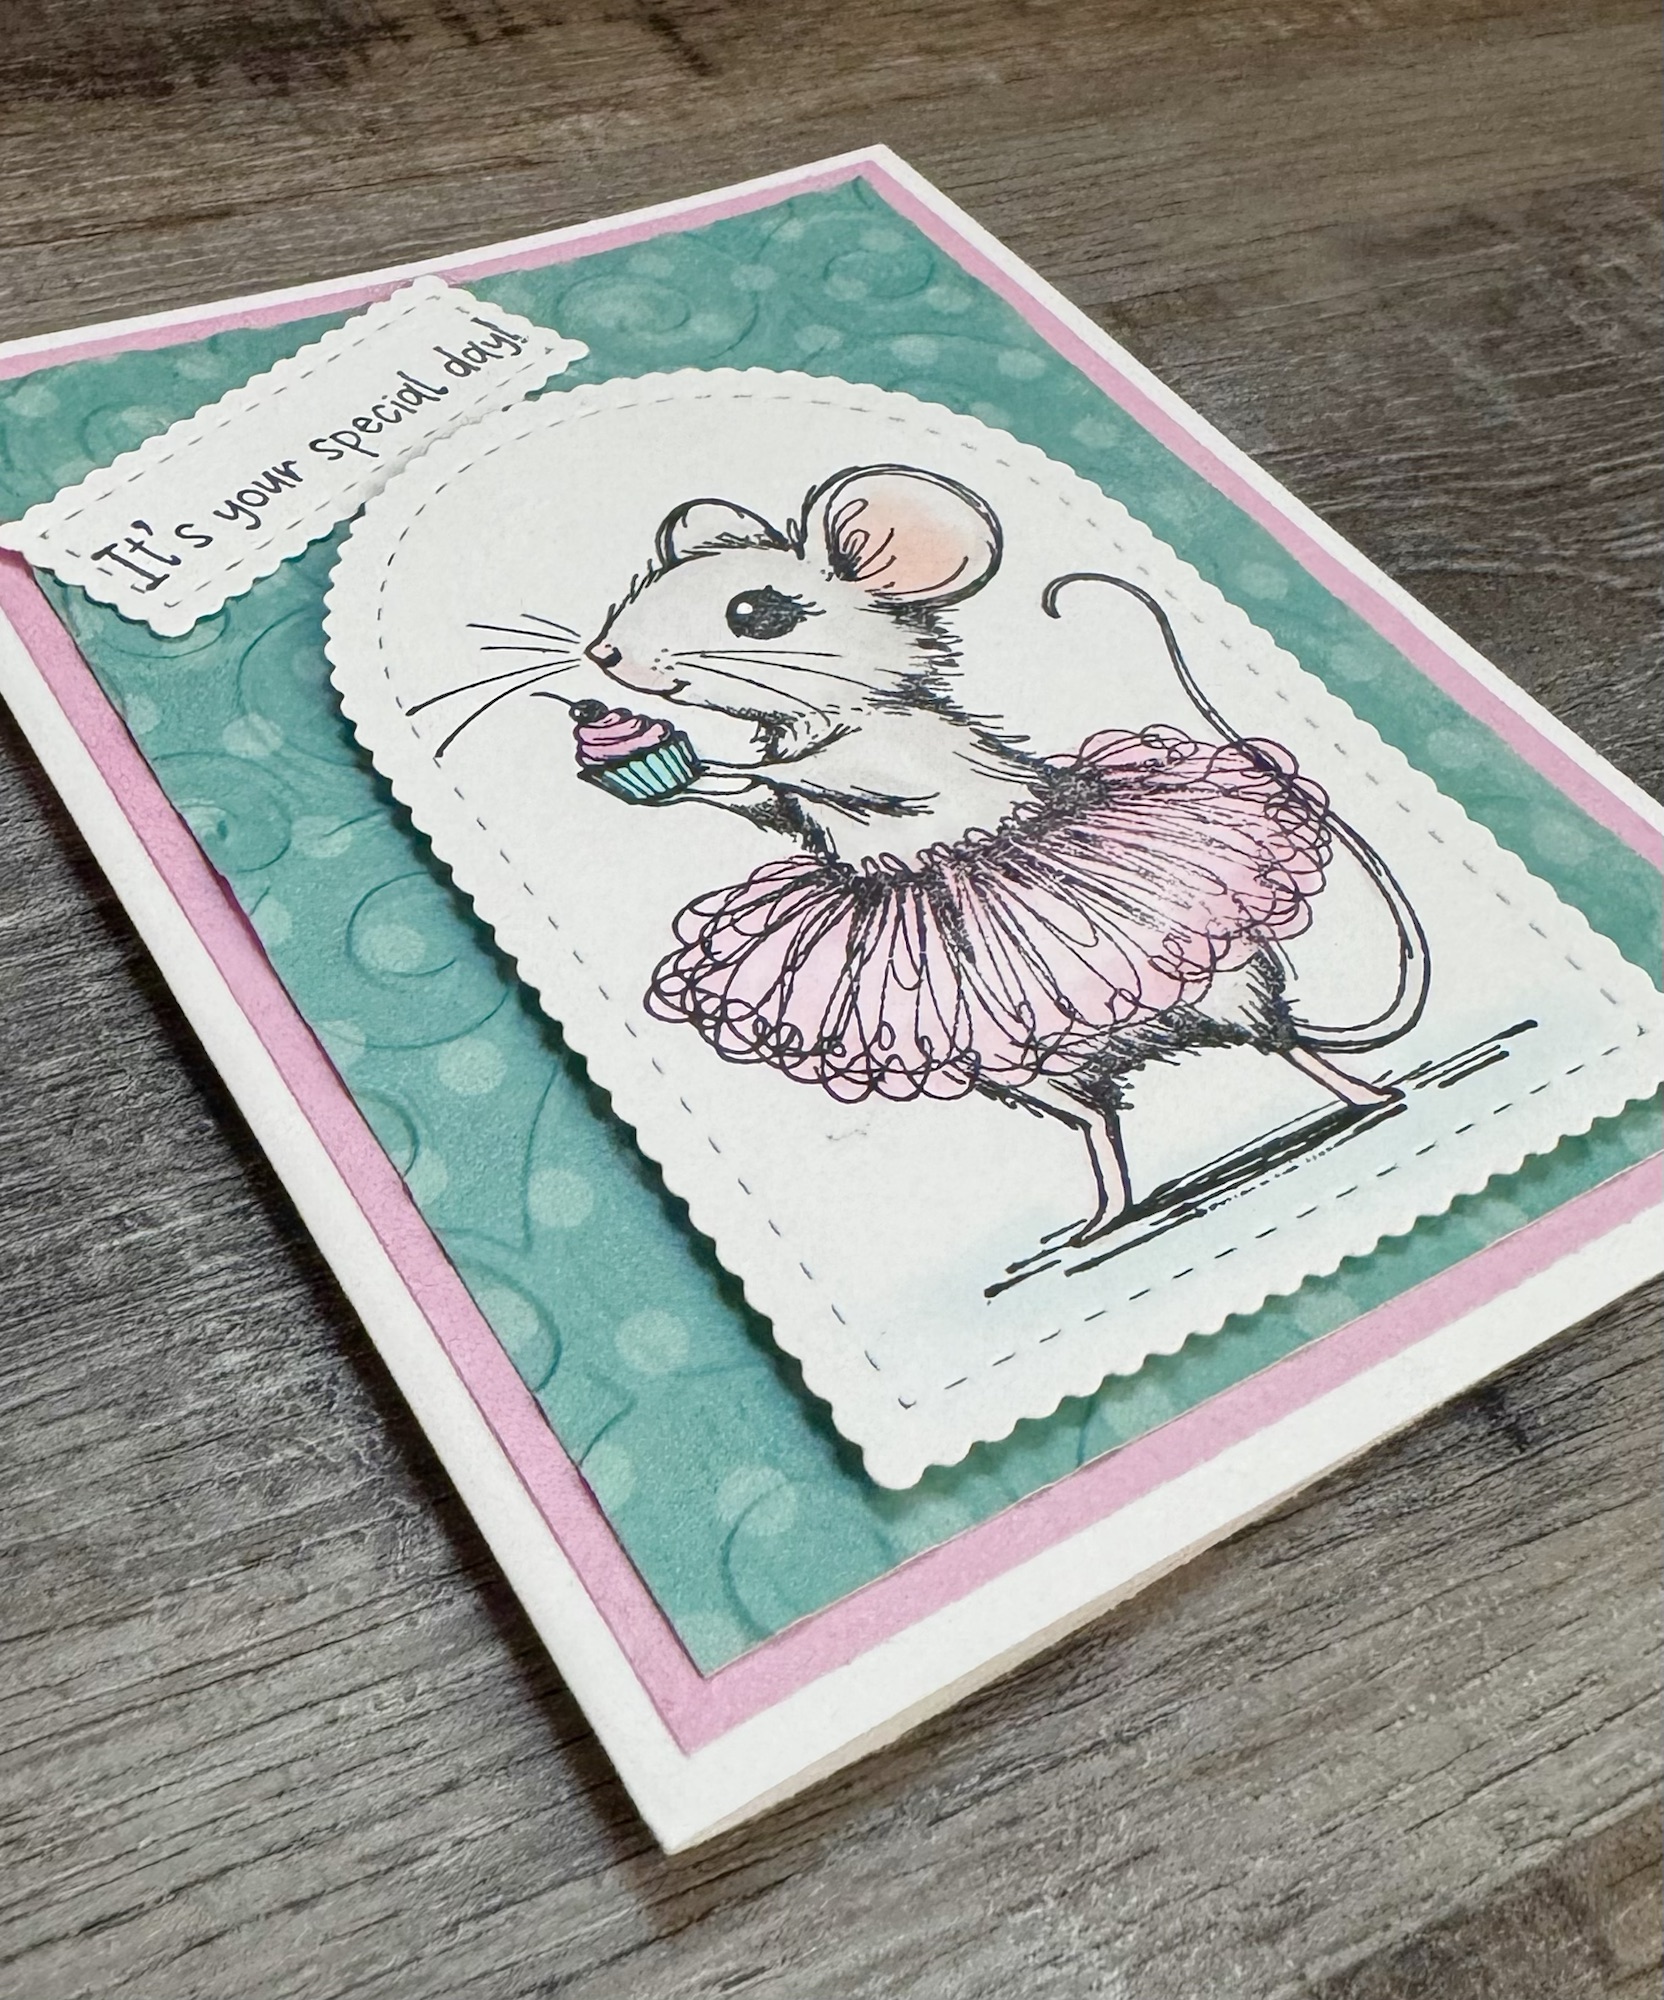
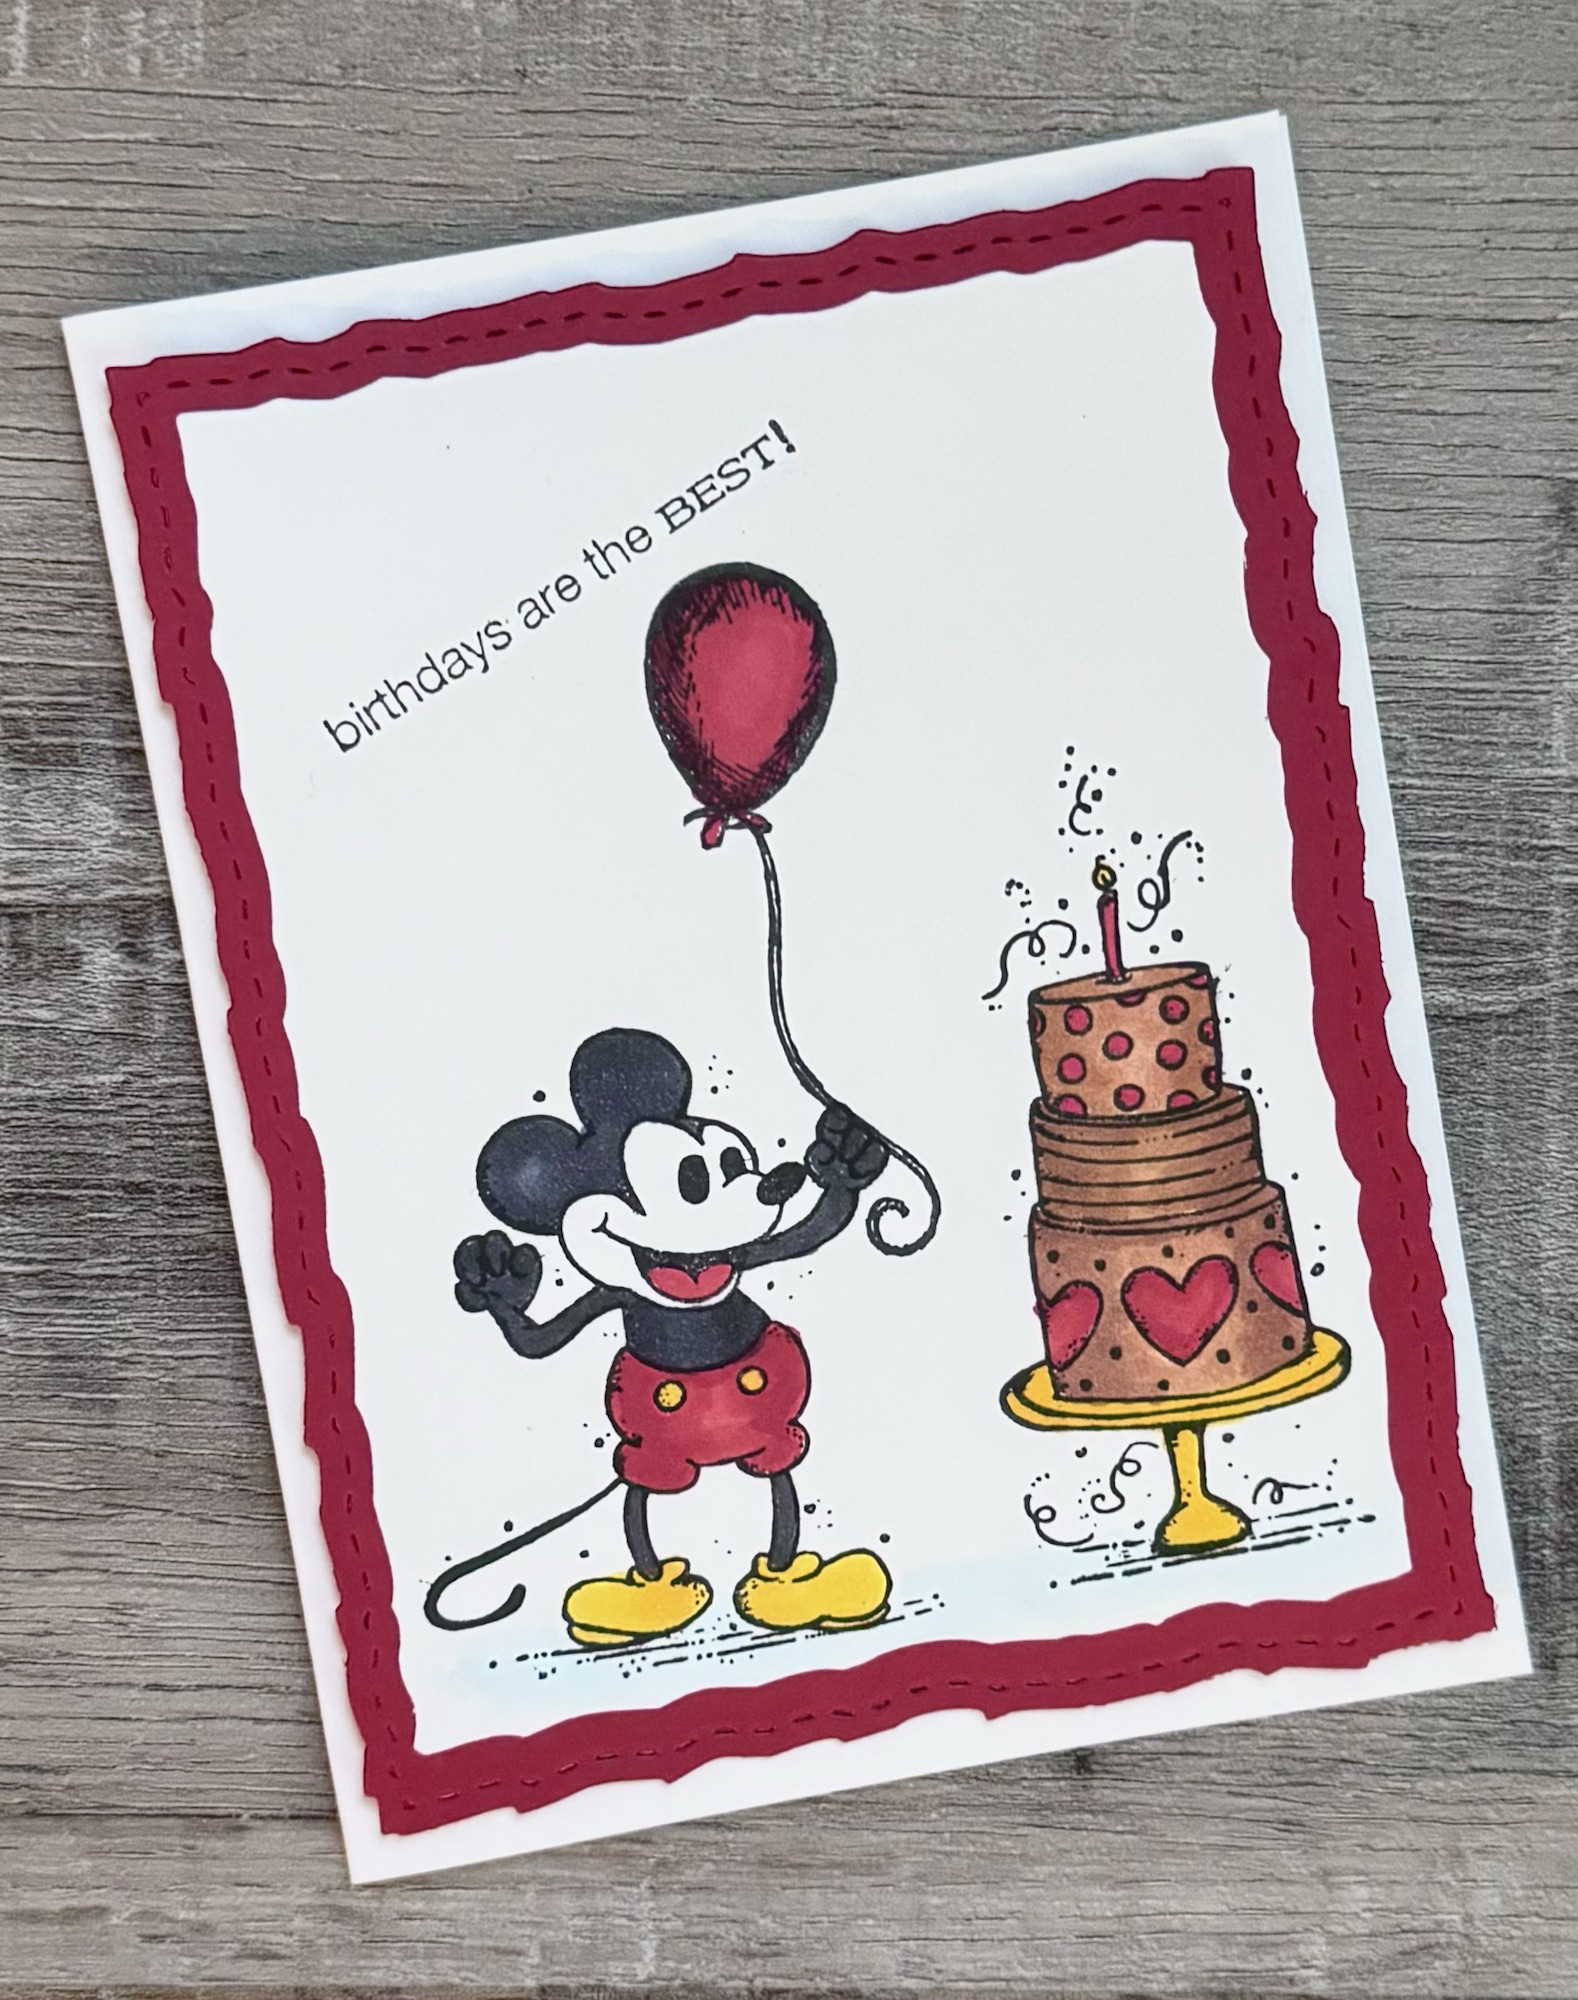
This stamp set has been in my collection for a while and I can’t believe this is the first time I’ve inked it up! What was I thinking?!?!? 🤦🏼♀️
Disclosure: Some of the links on my site are affiliate links, meaning, at no additional cost to you, I will earn a small commission if you click through and make a purchase. As an Amazon Associate I earn from qualifying purchases.
My “Happy Birthday” sentiment is stamped with pink ink on white card stock, die cut with the Scalloped & Stitched Sentiment Nesting Dies from Unity and then attached to the top of the arched piece. My happy birthday stamp is an older one that is discontinued – use your favorite stamp from your collection.
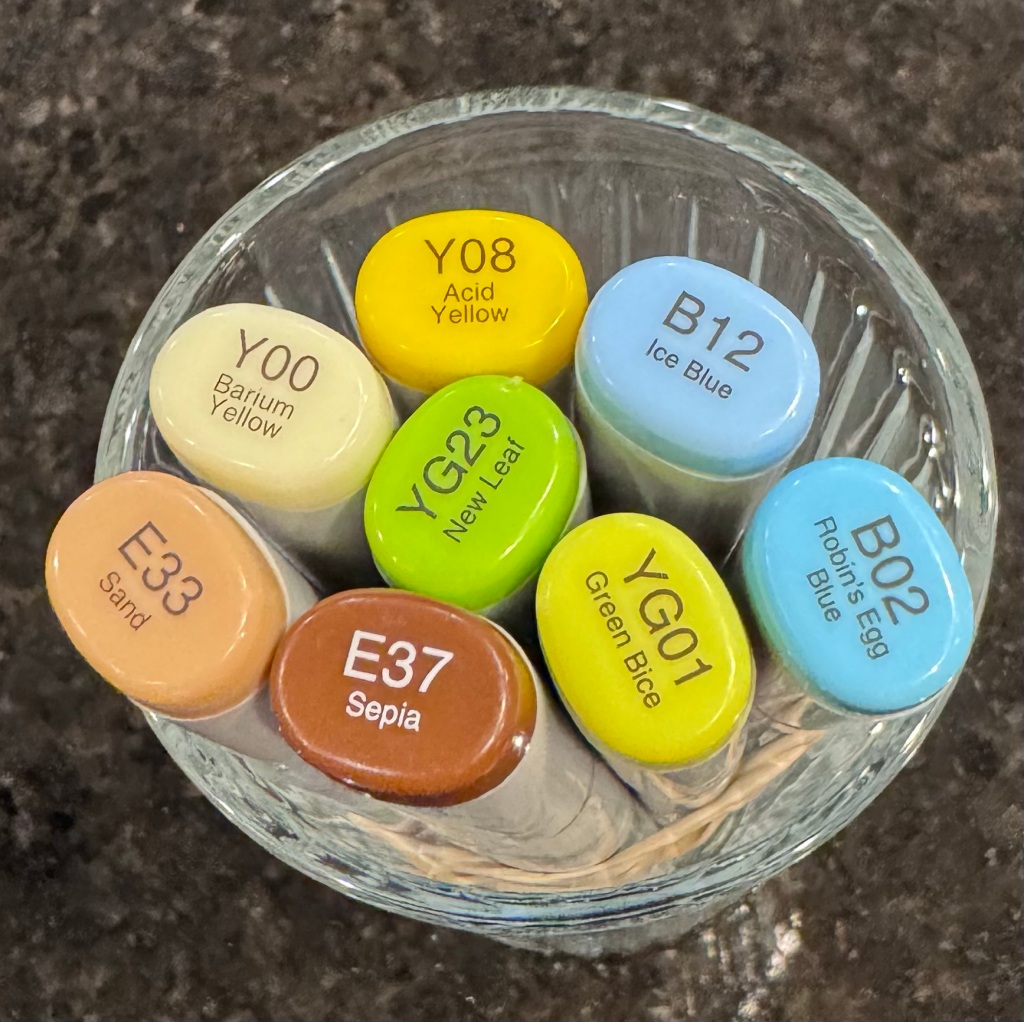
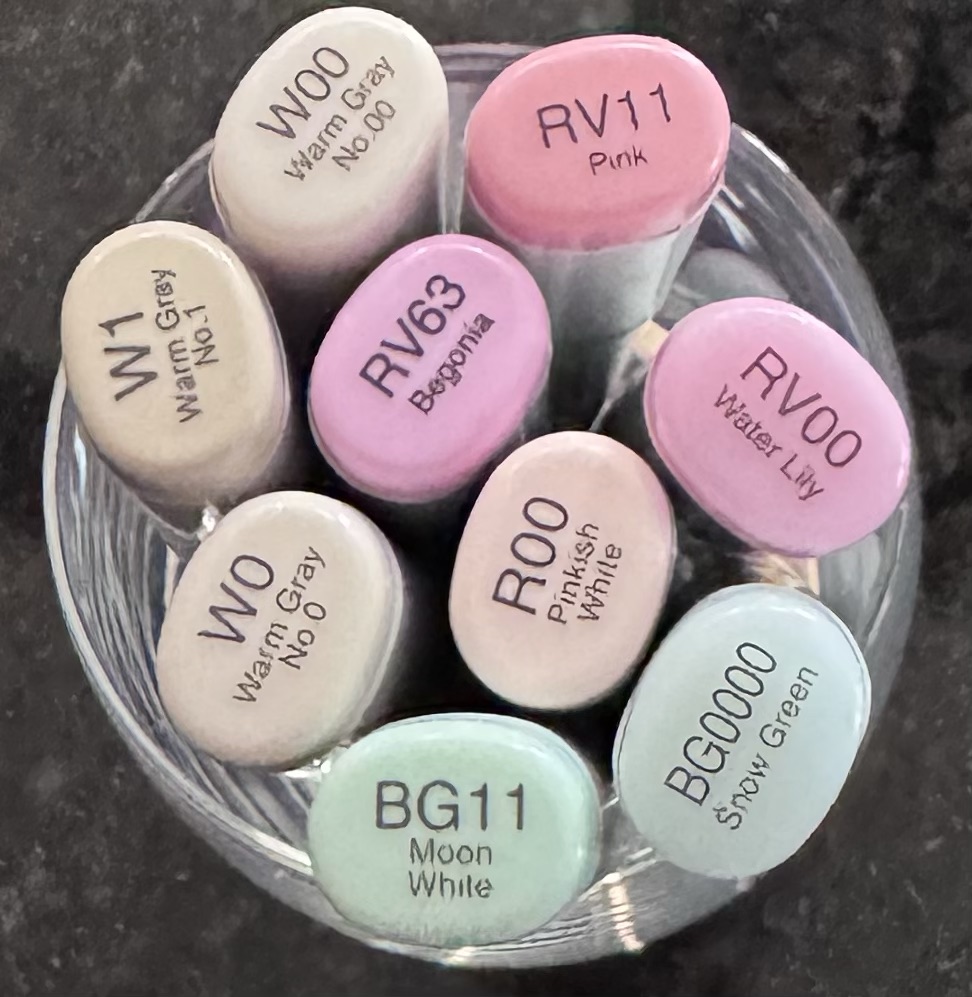
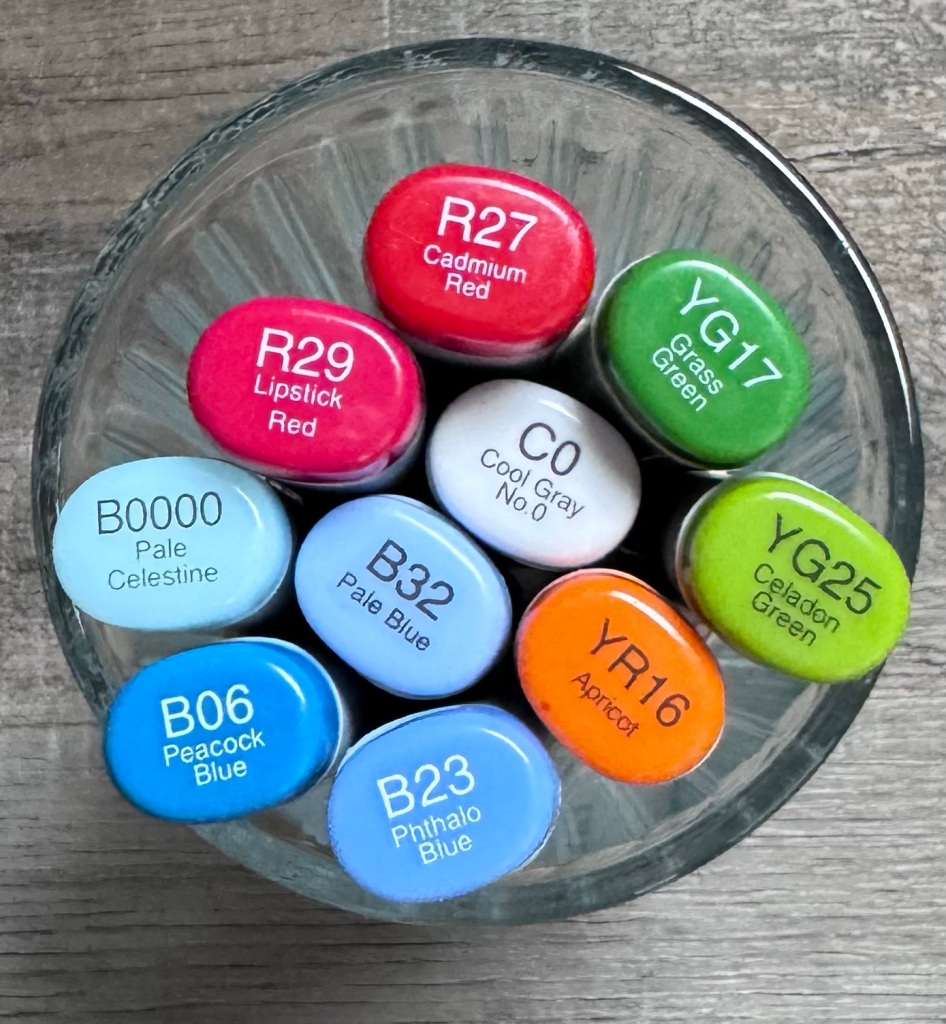
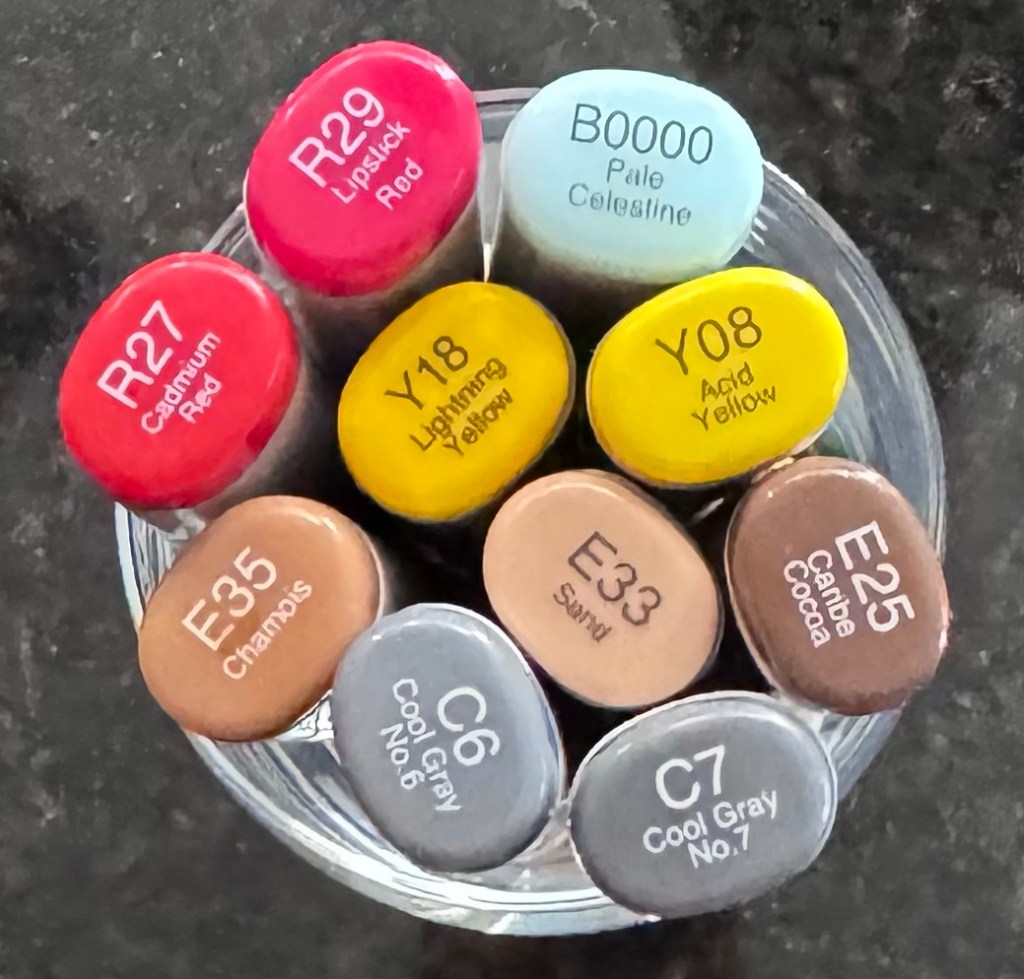
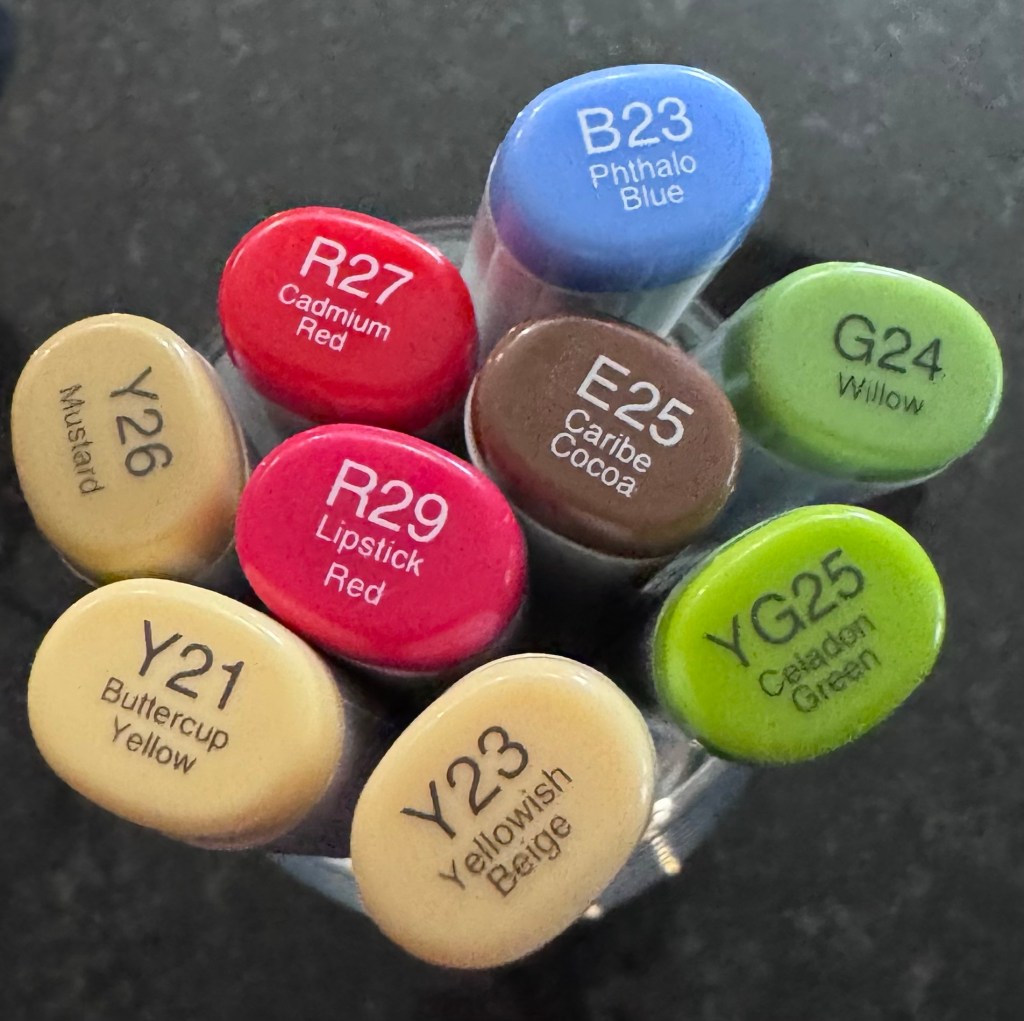
These are the Copic colors that I used on my card….
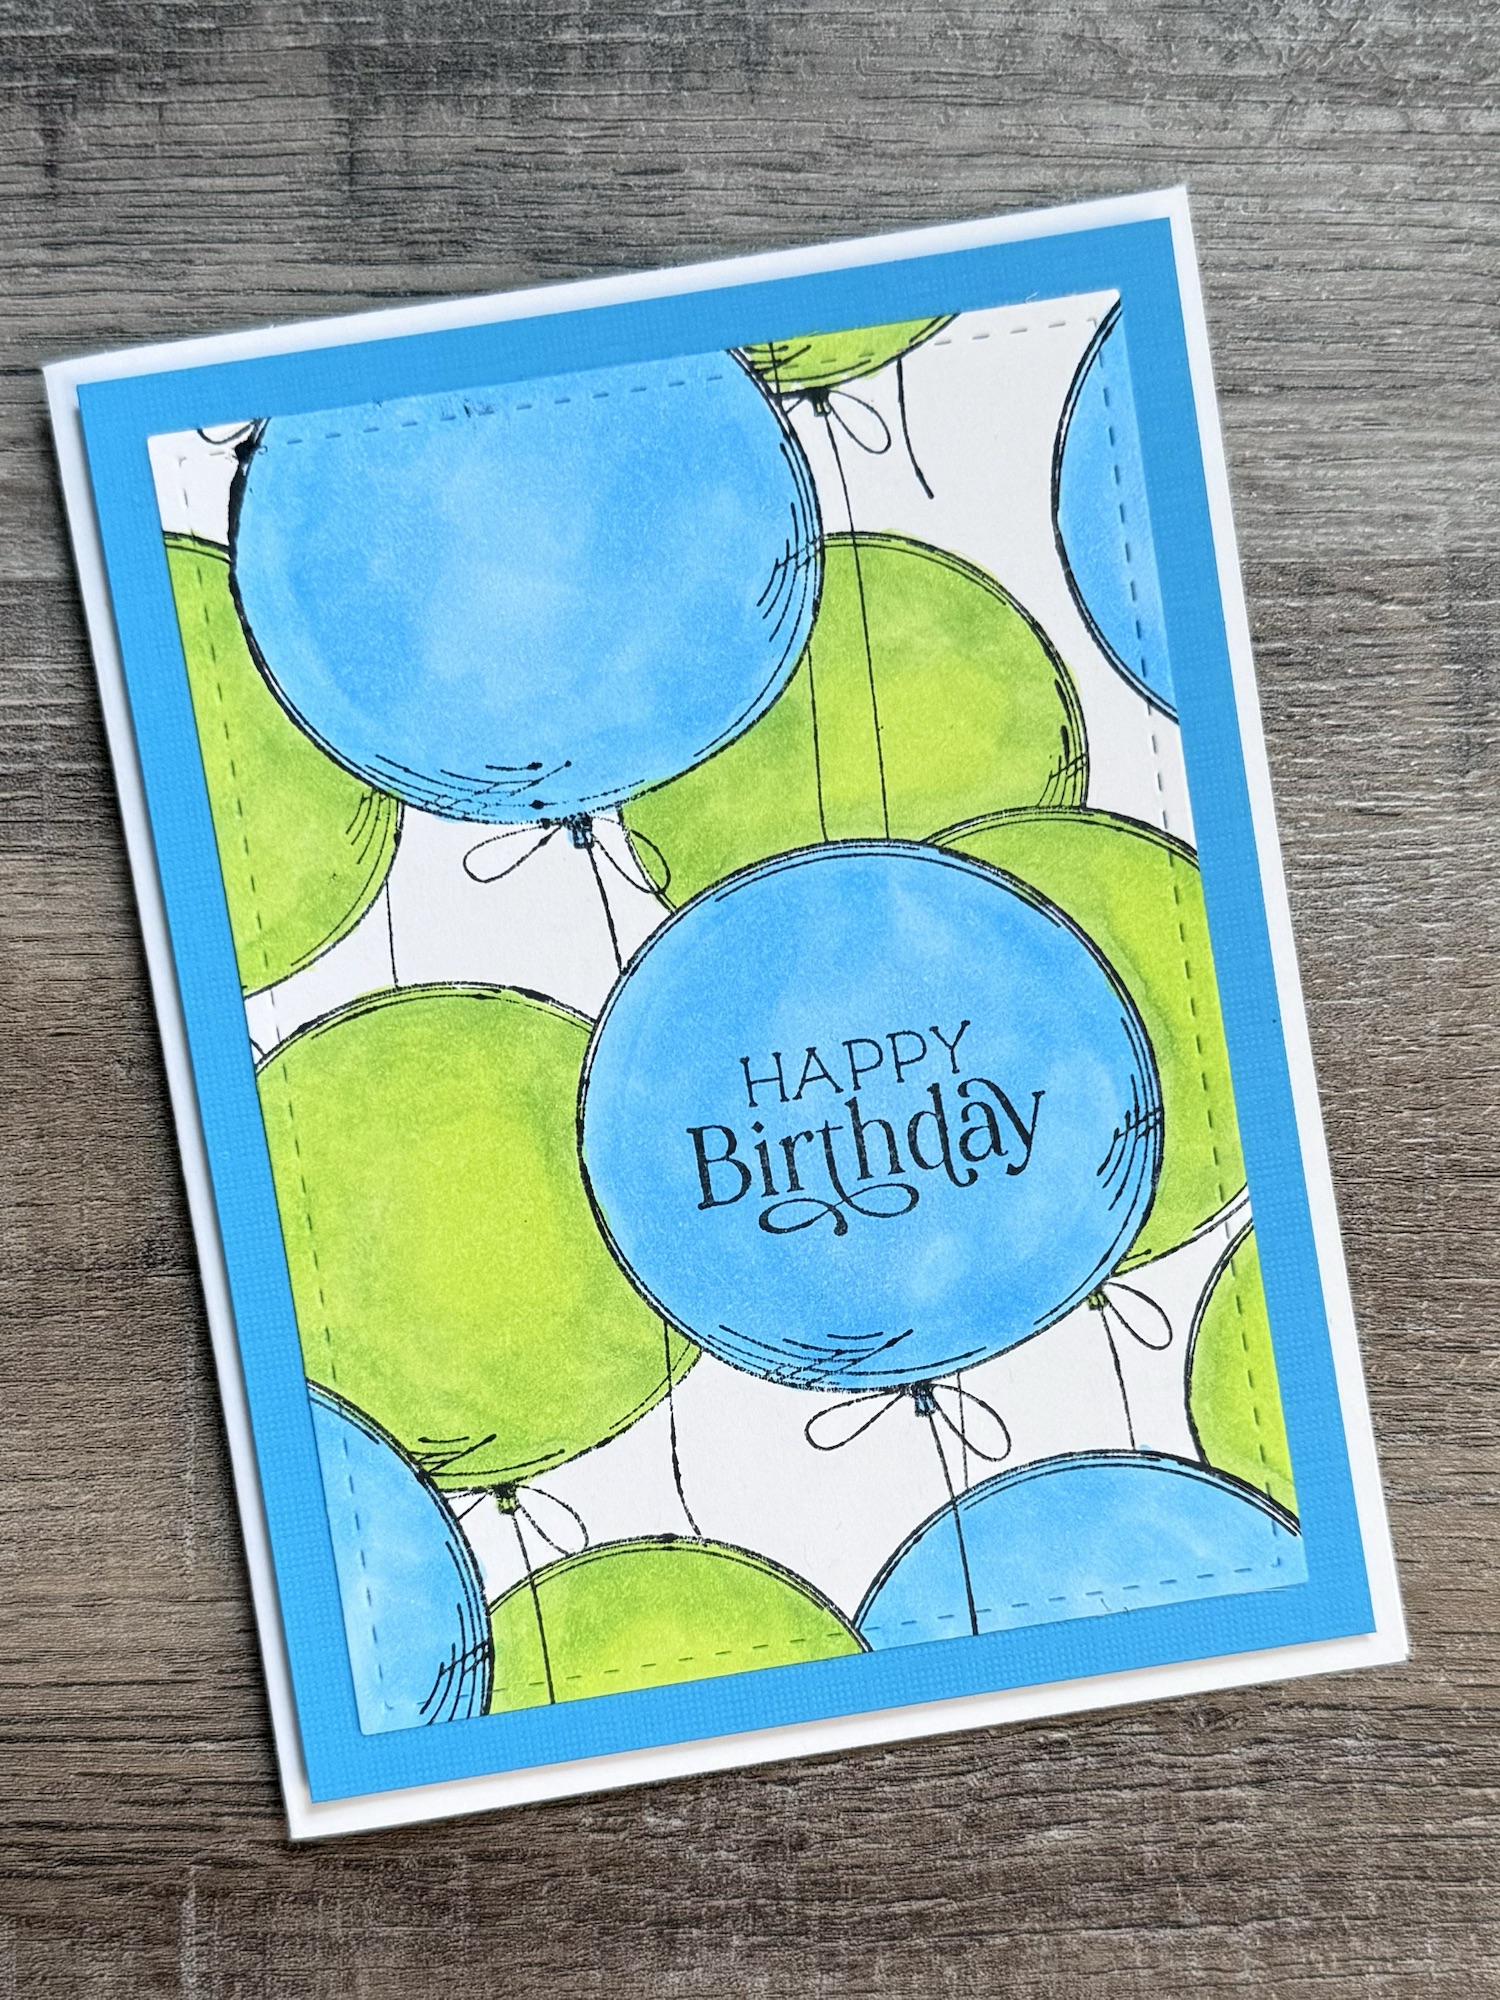
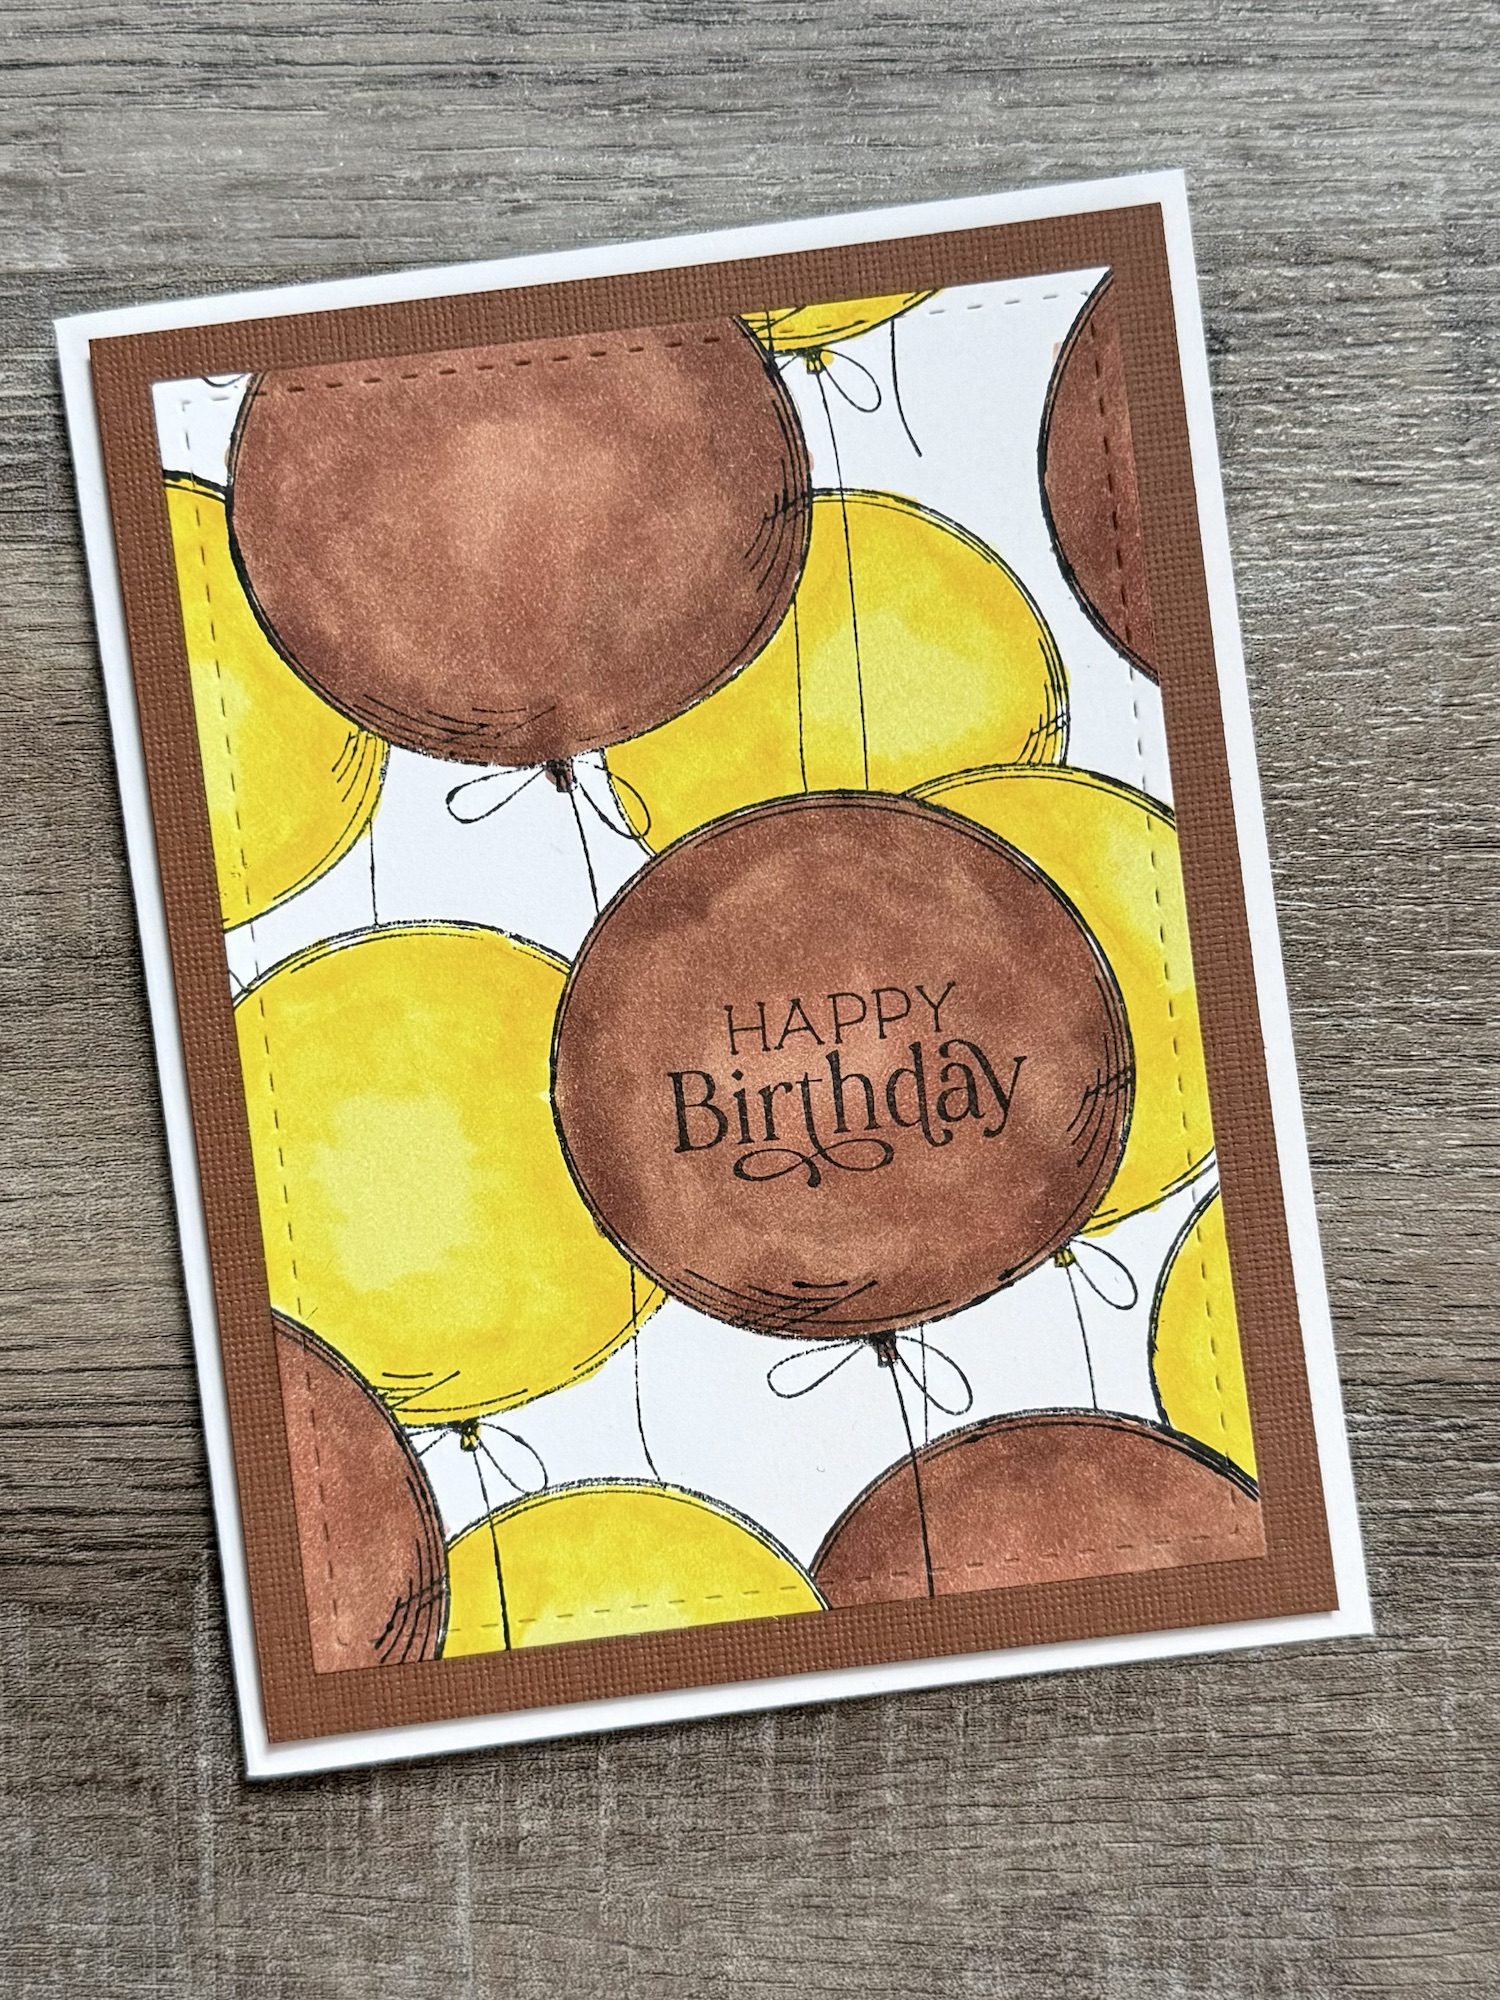
This is such a great stamp and layout to use for so many different occasions…Birthday, Thinking of You, Thank You, or Sympathy. You can color it up in so many different ways. Why did I wait so long to create with this stamp??? I will definitely be using it again!
Disclosure: Some of the links on my site are affiliate links, meaning, at no additional cost to you, I will earn a small commission if you click through and make a purchase. As an Amazon Associate I earn from qualifying purchases.
I stamped the deer image with Memento Tuxedo Black ink several times on white card stock using my Misti tool to get a good crisp image. Then I trimmed the card stock to the shape on the sketch challenge. I stamped the background with Memento Rich Cocoa ink on white card stock and trimmed the piece down to a length of 4 inches.
I have a quick and easy crochet pattern to share with you today. Not only is it an easy project, it’s also practical! 🙂 It’s a great way to keep your kitchen towel close at hand but still out of the way.
Disclosure: Some of the links on my site are affiliate links, meaning, at no additional cost to you, I will earn a small commission if you click through and make a purchase. As an Amazon Associate I earn from qualifying purchases.
My Crochet Towel Holder Ring can be stitched up in any color to match any kitchen. Unfortunately, the yarn I used is discontinued – I had it in my stash. You may have some in your stash, too. But if not, I’ve listed a couple of substitute yarns in the pattern below.
Worsted Weight (4) yarn – I used Yarn Bee Studio 72 in Ivory
Note: This yarn is discontinued. It is a a 4 weight yarn that is on the thicker side and is an Acetate/Acrylic blend. Yarn Bee Soft and Sleek or Hobby Lobby I Love This Yarn would be good substitutes.
I/5.5mm crochet hook
4 inch wood ring
1 inch button
Stitches used in US terms:
Chain – ch
Single Crochet – sc
Double Crochet – dc
Note: chains at the beginning of each row do not count as a stitch.
Make a slip knot and put it on your hook. Attach the yarn to the ring by making a slip stitch around the ring. This does not count as a stitch.
Row 1: sc 12 around ring. ch1. Turn. (12 stitches) Push stitches close together.
Rows 2-6: sc in each stitch across. ch 1. Turn. ch 2 at the end of Row 6. (12 stitches)
Rows 7-9: dc in each stitch across. ch 2. Turn. ch 1 at the end of Row 9. (12 stitches)
Rows 10-14: sc in each stitch across. ch 1. Turn. ch 2 at the end of Row 14. (12 stitches)
Rows 15-17: dc in each stitch across. ch 2. Turn. (12 stitches)
Row 18: dc 2 together. dc in next 8 stitches. dc last 2 stitches together. ch 2. Turn. (10 stitches)
Row 19: dc 2 together. dc in next 6 stitches. dc last 2 stitches together. ch 2. Turn. (8 stitches)
Row 20: dc 2 together. dc in next 4 stitches. dc last 2 stitches together (6 stitches)
Fasten off and weave in ends.
Sew on button.
Wrap the Crochet Towel Holder Ring around the handle of your oven or dishwasher and button it between the stitches of Row 20. It may be a little tight, but the stitches will stretch to fit around the button.
The Crochet Towel Holder Ring makes a great gift! It would be fun to make in Fall or Christmas colors and add a seasonal towel to go with it. What color will you make yours?
If I had to pick a favorite stamp set from Unity Stamp Company, this one would definitely be in the running. The name of the set is Simply Blessed. It includes the beautiful flower stamp along with several sentiments. It is a wonderful set for making cards for so many different occasions.
Disclosure: Some of the links on my site are affiliate links, meaning, at no additional cost to you, I will earn a small commission if you click through and make a purchase. As an Amazon Associate I earn from qualifying purchases.
I stamped the flower stamp slightly off the edge of white card stock using Memento Rich Cocoa Ink. Then I stamped the sentiment, slightly overlapping onto the jar of the flower stamp. I used my Misti Stamping Tool to stamp both images a couple of times to get crisp, darker images. I colored the flower image using Copic markers in colors BG0000, G40, RV00.
This is a fun little project that the kids will love making with you! And it will add a little patriotic touch to your Summer decor. 🇺🇸
Disclosure: Some of the links on my site are affiliate links, meaning, at no additional cost to you, I will earn a small commission if you click through and make a purchase. As an Amazon Associate I earn from qualifying purchases.
I found this little unfinished wood shadow box at Michaels. It measures 5 by 5 by inches and was just 99 cents! You’ll also need a 4-inch wood star cutout, some patriotic scrapbook paper, navy blue acrylic paint, matte Mod Podge, and various ribbons for the bow.
I decided to trim off the twine hanger at the top of my shadow box because I wasn’t going to use it. But of course you can leave it on if you want to.
I painted the shadow box with 2 coats of navy blue paint. I didn’t worry about painting the inside back of the box because I covered it with scrapbook paper. I trimmed a piece of star scrapbook paper to fit inside the shadow box and used matte Mod Podge to glue it to the box. Once it was dry, I applied a thin coat of Mod Podge over the entire box to give it a little sheen.
I traced the star cutout on the back of another patriotic patterned paper and cut it out. I painted the edges of the star with navy blue paint and then used Mod Podge to adhere the paper to the star. Once it was dry, I applied a thin layer of Mod Podge over the top of the star. I attached the star to the box using a double layer of foam tape.
This little shadow box is the perfect size to tuck anywhere. Make several and group them with other patriotic decor for a great centerpiece on your 4th of July picnic table. 🇺🇸
Crochet cotton face scrubbies are a great item to add to a spa basket. Or tie up a few with a pretty ribbon and add a favorite face wash for a great gift . They are super quick and easy to stitch up and are great for using up scrap yarn.
Disclosure: Some of the links on my site are affiliate links, meaning, at no additional cost to you, I will earn a small commission if you click through and make a purchase. As an Amazon Associate I earn from qualifying purchases.
I used I Love This Cotton Yarn with an H/5mm crochet hook to stitch up my face scrubbies. The yarn comes in so many fun, bright colors for making your flower scrubbies. The pattern is below along with a link to a free PDF if you’d like to easily print it.
Round 1: Ch 1. 12 hdc in ring. Join with ss to 1st hdc. Pull magic ring closed. (12 stitches)
Round 2: Ch 1. Work 2 sc in same stitch as ss and in each stitch around. Join with ss to 1st sc. (24 stitches)
Round 3: Ch 1. Work 2 hdc in same stitch as ss. hdc in next 2 stitches. *2 hdc in next stitch, 1 hdc in next 2 stitches* Repeat from * to * around. Join with ss to 1st hdc. (32 stitches)
Round 4: Ch 1. Work 1 sc in same stitch as ss and each stitch around. Join with ss to 1st hdc. (32 stitches)
Round 5: Ch 3 (counts as first dc). Work 4 dc in same stitch as ss. Skip 1 stitch, ss in next stitch. *Skip 1 stitch, 5 dc in next st. Skip 1 stitch, ss in next stitch.* Repeat from * to * around. Skip last stitch. Join with ss to top of beginning ch 3. (8 Petals)
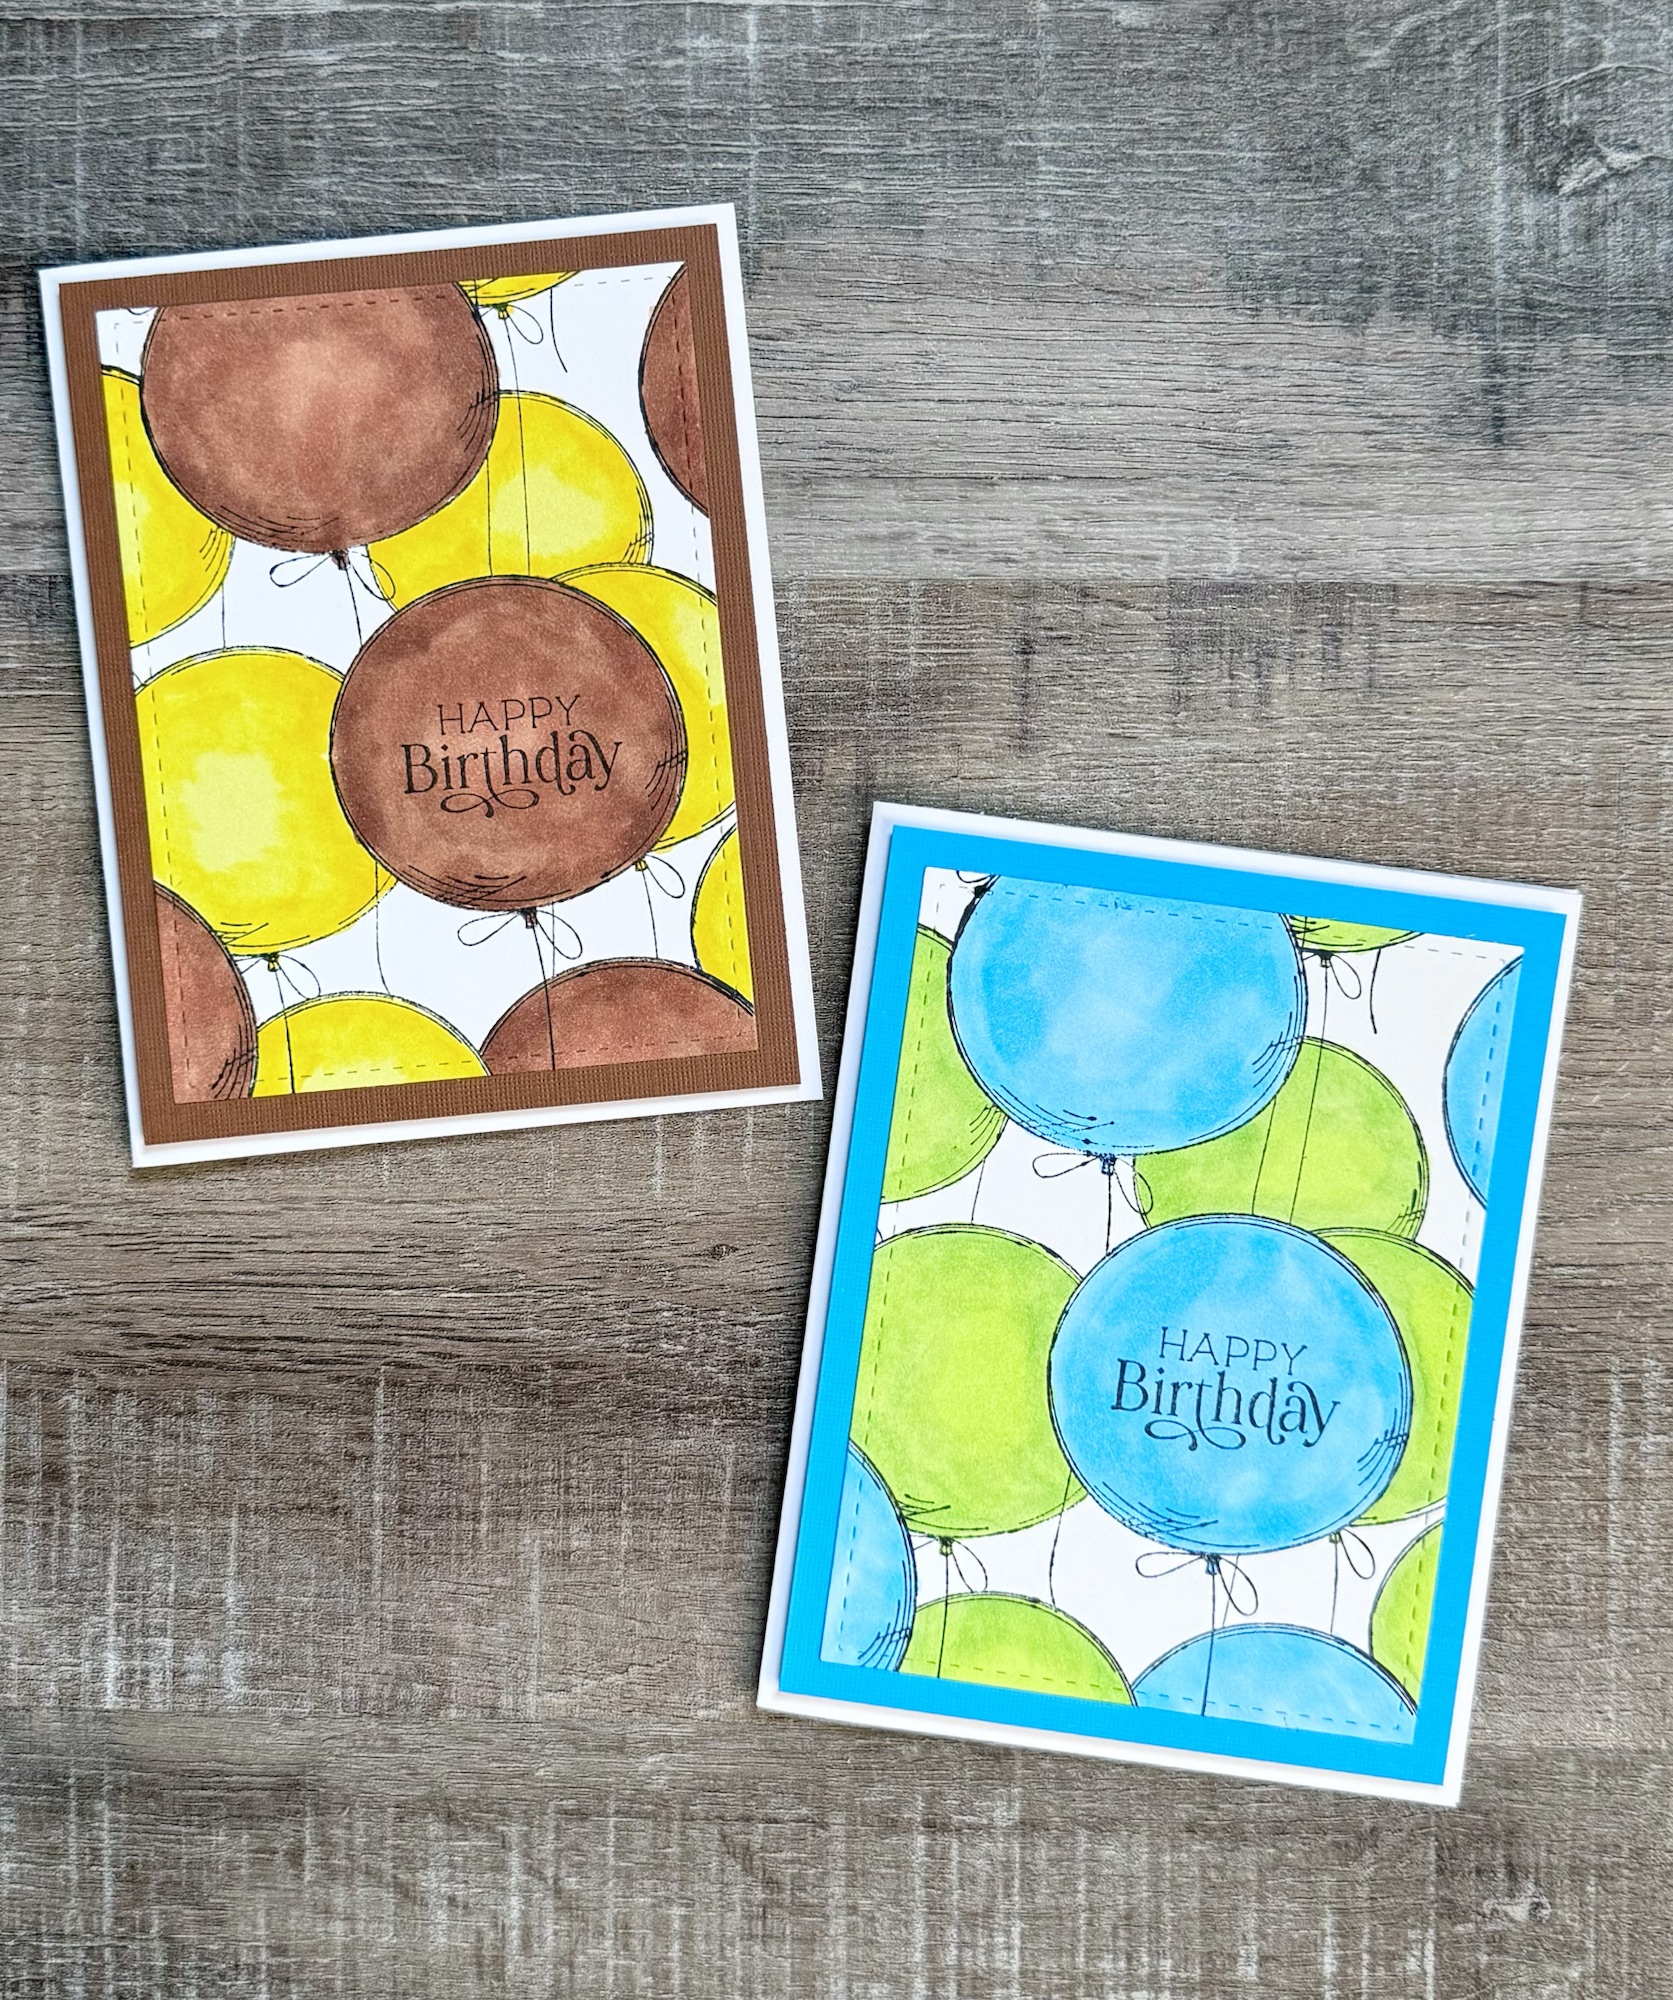
Making cards for the men in our lives can sometimes be difficult. Flowers and cute little animals just don’t seem to work very well! 🙃 But I have a birthday card to share with you that will be great for all the guys and it’s super easy to make.
Disclosure: Some of the links on my site are affiliate links, meaning, at no additional cost to you, I will earn a small commission if you click through and make a purchase. As an Amazon Associate I earn from qualifying purchases.
Then I embossed the piece using a birthday embossing folder similar to this. I trimmed the piece down and layered it to turquoise card stock and attached it to a white card.
And that’s it! Told you it was super easy! 😉
Of course you can make this card in any color combo to make it the perfect card for anyone. What colors will you choose? 😊
Disclosure: Some of the links on my site are affiliate links, meaning, at no additional cost to you, I will earn a small commission if you click through and make a purchase. As an Amazon Associate I earn from qualifying purchases.