Disclosure: Some of the links on my site are affiliate links, meaning, at no additional cost to you, I will earn a small commission if you click through and make a purchase. As an Amazon Associate I earn from qualifying purchases.
I was so excited to find the same candles in pink at my local Dollar Tree! I don’t know if they have them everywhere or all the time (they are available on their website), but I brought home a couple to decorate and add to my Valentine decor. ❤️
I used the Cricut Design Space along with my Cricut Explore Air 2 to cut my hearts and letters from white permanent vinyl. I used the Typewriter font for my letters – they are 1.25 inches tall. The solid heart is sized it at 2 inches, 1.75 inches, 1.5 inches, and 1 inch across. The layered open heart is about 1.25 inches across.
After cutting the images, I used my weeding tool to remove the excess vinyl. I applied transfer tape to the images and applied them to my candles, using my scraper to make sure they adhered to the glass.
A super quick and easy Cricut project. And these candles are so fun to create with! You can decorate them for any holiday – and at just $1.25 each you can make as many as you want!
It’s been a while since I shared this recipe for White Bean and Ham Soup. It’s the perfect soup for these cold January days. It’s one of my husband’s favorite things and we just made it again with the ham bone leftover from Thanksgiving that I kept wrapped tightly in the freezer. Here’s the post that I shared a few years ago…
Disclosure: Some of the links on my site are affiliate links, meaning, at no additional cost to you, I will earn a small commission if you click through and make a purchase. As an Amazon Associate I earn from qualifying purchases.
This is comfort food at its best – and it’s so simple to make! You just put everything in your slow cooker, turn it on low, and go on with your day.
There are lots of different ways to make this yummy and filling soup – here’s what I did.
White Bean and Ham Soup
Ham bone left from our Thanksgiving Honey-Baked ham – I kept in the freezer (or about 1 lb ham cut into chunks)
1 lb dried Great Northern beans, rinsed and sorted
Carrots peeled and chopped into chunks – whatever amount you want – I chopped about 5 carrots
1/2 to 1 medium onion, chopped
6 cups chicken broth
Salt, pepper, parsley flakes, and dried oregano to taste
Put everything in your slow cooker and cook for 8 hours on low.
I didn’t even soak the Great Northern beans overnight. I rinsed and sorted them just before I put everything in the slow cooker! I also used a slow cooker liner to make cleanup easier. This is such a forgiving recipe when it comes to the amount of each ingredient – just fill your slow cooker about 3/4 of the way full and your soup will be wonderful!
Add some fresh, hot cornbread and you have a hearty meal that will warm you up on these cold winter days. 🙂
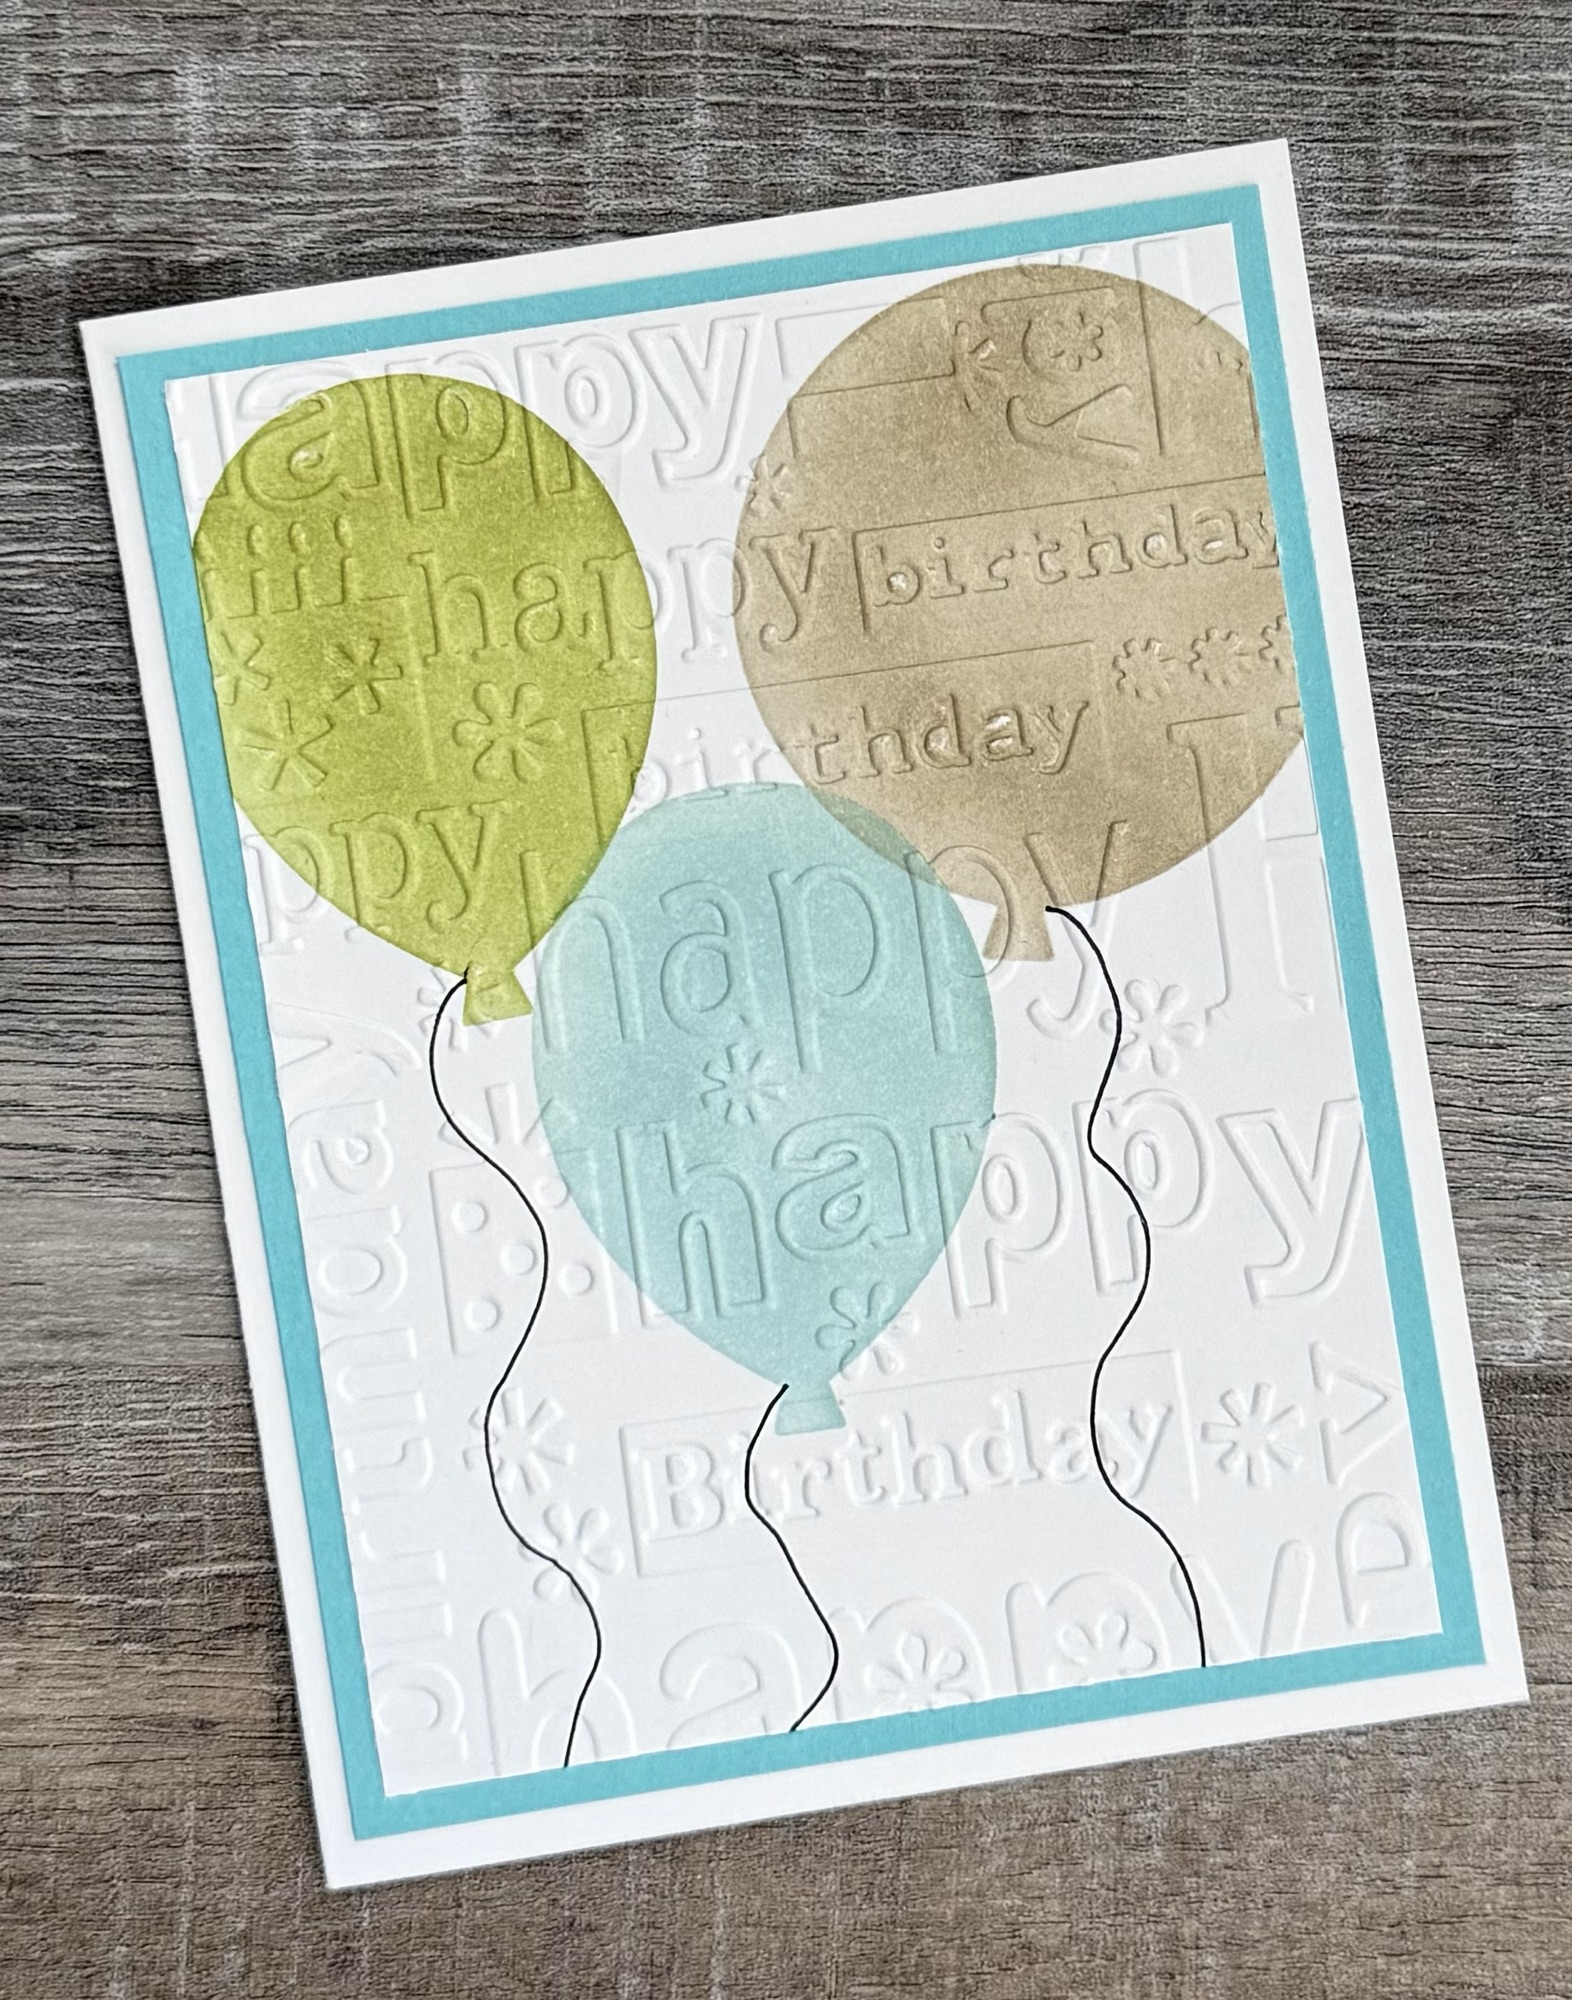
Are you ready to start building up your birthday card stash for the new year? This cute little guy will make the perfect birthday card for just about anyone!
Disclosure: Some of the links on my site are affiliate links, meaning, at no additional cost to you, I will earn a small commission if you click through and make a purchase. As an Amazon Associate I earn from qualifying purchases.
I stamped the gnome with Memento Tuxedo Black ink on white card stock and colored him with Copic Makers. I stamped the sentiment with green ink at an angle and then die cut the piece using the Deckle & Stitches Nesting Dies Set from Unity Stamp Company. I die cut a piece of turquoise card stock using the same die set and attached the stamped piece to it. Then I attached the piece to a white card.
This is a simple, quick card that can be made in any color combo – Pastels, Brights, Pinks, Purples, Orange and Green for an October birthday or even Red and Green for a December birthday. 🙂 You can also add Diamond Glaze to the balloon to make it shiny. Wish I would have thought of that sooner! 😉
Another year has flown by!! The time passes so quickly and it’s fun to look back on the year to remember all that happened. I was busy creating fun things to share with you, along with all the other things we all have to get done. 😉 I love making fun and pretty things to give as gifts, to decorate my home, and to inspire creativity in all of you. 🙂 I hope you have found a thing or two this past year to recreate and make your own by adding your personal touch.
Disclosure: Some of the links on my site are affiliate links, meaning, at no additional cost to you, I will earn a small commission if you click through and make a purchase. As an Amazon Associate I earn from qualifying purchases.
I created 18 new crochet patterns in 2023! These are just a few of my favorites. I also crocheted some fun projects from other great designers. If you’re like me, there are so many great patterns available that there will never be enough time to stitch up all of them!! 🙂 Type the word “crochet” in the search bar on the right and you’ll find tons of inspiration for your next crochet project.
Card makingwill always be one of my favorite creative outlets. The possibilities are endless! Here are just a few I created in 2023. You’ll find lots more ideas by searching the word “card”.
Crafting and creating decor for my home or to give as gifts is so fun! I have lots of great projects for all the different holidays that I created last year. Here are a few that I love.
I also like to share a recipe that I’ve tried every now and then. Here are a few I shared in 2023. You can search “recipe” to find some tasty veggie, main dish, and dessert recipes.
By far the highlight of our year was our trip to Scotland! It has been on my bucket list for years and we finally got to go last April. These are a few of my favorite photos – although it was really hard to choose just a few. Scotland is absolutely beautiful!! I’ve shared more in a few blog posts. I’ve linked them below…
Thank you for following along in 2023 and I hope you’ll continue along with me in 2024! I’ll be making lots of cards – including a new Christmas card design each month – more crafty projects, new crochet patterns and crochet projects from other great designers. I’ll be sharing new recipes I’ve tried and hopefully a post or two about any travels we are fortunate enough to take.
If you live in the South like I do, sometimes a heavier scarf is just a little too much on the warmer days of Winter. But you still might need a little something to keep your neck warm. 🙂 This Crochet Striped Infinity Scarf is just the thing! It’s made with a lighter DK (3) weight yarn so it will keep you toasty without being too warm.
Disclosure: Some of the links on my site are affiliate links, meaning, at no additional cost to you, I will earn a small commission if you click through and make a purchase. As an Amazon Associate I earn from qualifying purchases.
I stitched up my scarf using Yarn Bee Cotton DK yarn in Celadon and Almond and an I/5.5mm hook. Unfortunately, this yarn seems to be discontinued so use your favorite DK (3) weight yarn to stitch up your scarf.
You’ll find the pattern below and there’s also a link to a free PDF if you’d like to easily print it.
Crochet Striped Infinity Scarf
Dk weight (3) yarn, about 3 ounces each of 2 colors – I used Yarn Bee Cotton DK in Celadon and Almond.
I/5.5mm crochet hook
Notes:
(1) This yarn seems to be discontinued. Any 3 weight yarn will work.
(2) I used a larger hook than recommended for the yarn so the scarf will have a nice drape.
Stitches used in US terms:
Foundation Half Double Crochet – fhdc
Chain – ch
Back Loop Only – blo
Single Crochet – sc
Row 1: with Celadon, work fhdc until your row measures about 60 inches. You can also chain until it measures about 60 inches, hdc in 3rd ch from hook and each ch across. Turn.
The number of stitches is not important. Just make sure your first row measures about 60 inches.
Row 2: ch 1 (does not count as a stitch). hdc in blo of each stitch across. Turn.
Change to Almond.
Rows 3-4: ch 1 (does not count as a stitch). hdc in blo of each stitch across. Turn.
Change to Celadon.
Rows 5-6: ch 1 (does not count as a stitch). hdc in blo of each stitch across. Turn.
Change to Almond.
Rows 7-8: ch 1 (does not count as a stitch). hdc in blo of each stitch across. Turn.
Change to Celadon.
Rows 9-10: ch 1 (does not count as a stitch). hdc in blo of each stitch across. Turn.
Change to Almond.
Rows 11-12: ch 1 (does not count as a stitch). hdc in blo of each stitch across. Turn.
Change to Celadon.
Rows 13-14: ch 1 (does not count as a stitch). hdc in blo of each stitch across. Turn.
Change to Almond.
Rows 15-16: ch 1 (does not count as a stitch). hdc in blo of each stitch across. Turn.
Change to Celadon.
Rows 17-18: ch 1 (does not count as a stitch). hdc in blo of each stitch across. Turn.
Do not fasten off.
Fold the scarf in half, matching the short ends together. sc the ends together.
Fasten off and weave in ends.
Scarf measures about 60 inches by 6.5 inches before stitching ends together.
You can make the Crochet Striped Infinity Scarf in any color combo or even in just one color. It might be fun to make in school colors, too! What colors will you make yours?
I made this card for a sweet girl who has a birthday in December and loves penguins! I love the little candy cane that gives a nod to the holiday season, but by not using a Christmas color scheme it makes a great December birthday card.
Disclosure: Some of the links on my site are affiliate links, meaning, at no additional cost to you, I will earn a small commission if you click through and make a purchase. As an Amazon Associate I earn from qualifying purchases.
I stamped the penguin with Memento Tuxedo Black ink on white card stock, colored him with Copic markers, and fussy cut around the image. I stamped the sentiment with pink ink on white card stock and die cut around it with the Scallops & Circles Nesting Dies from Unity Stamp Company. I used the same die set to cut a larger circle from blue card stock. I attached the blue circle to the card and then attached the trimmed penguin and the sentiment to the card using foam tape.
I hope this made her birthday just a little sweeter!
My sweet friend Laura gave me this adorable gnome candy dish (and the Reeses to go in it! 😋) and it reminded me of this cute gnome stamp that is perfect for a Christmas thank you card.
Disclosure: Some of the links on my site are affiliate links, meaning, at no additional cost to you, I will earn a small commission if you click through and make a purchase. As an Amazon Associate I earn from qualifying purchases.
Here’s a tip for glueing on small pieces like the hole reinforcer. I love this Quickie Glue Pen – it works like a pen so you can just “write” on the glue. Be sure to keep the tiny ball that fits on the tip of the pen before putting on the cap to keep it from drying out.
Just popping in to wish you all a Very Merry Christmas! I hope you all have a wonderful time celebrating with family and friends.
Disclosure: Some of the links on my site are affiliate links, meaning, at no additional cost to you, I will earn a small commission if you click through and make a purchase. As an Amazon Associate I earn from qualifying purchases.
And while you are enjoying the day, remember the reason we are celebrating…
For God so loved the world that he gave his one and only Son, that whoever believes in him shall not perish but have eternal life. John 3:16
Thanks be to God for his indescribablegift! 2 Corinthians 9:15
I recently made this cake again and knew I had to share it with all of you in case you missed this recipe when I shared it a few years ago. It is a favorite around our house and it’s really easy to make!
Disclosure: Some of the links on my site are affiliate links, meaning, at no additional cost to you, I will earn a small commission if you click through and make a purchase. As an Amazon Associate I earn from qualifying purchases.
Here’s the post I shared a few years ago which includes the recipe.
Really! The Best Oatmeal Cake ever!! It is just so yummy! The cake has just a hint of cinnamon and the broiled icing has brown sugar, coconut, pecans, and butter – so tasty! 😋
You probably have most of the ingredients you’ll need right in your kitchen – except maybe the coconut and the pecans. (I forgot to add the pecans to the picture. 😐)
You’ll find the full recipe below.
Here’s the cake ready to go into the oven…
Hot out of the oven with the icing spread over the top and ready to go under the broiler…
And here is the Best Oatmeal Cake fresh and hot from the oven! My kitchen smells amazing!! Now comes the hard part…waiting for it to cool! 😉
Here’s the recipe:
The Best Oatmeal Cake
Preheat oven to 350 degrees. Spray a 9 by 13 inch baking pan with cooking spray.
Cake:
1 cup oatmeal
1-1/4 cups boiling water (mix with oatmeal in a small bowl and set aside while you mix the rest of the cake ingredients)
1-1/3 cups flour
1 teaspoon baking soda
1 teaspoon salt
1 teaspoon cinnamon
1 cup sugar
1 cup brown sugar
1/2 cup shortening
2 eggs
1 teaspoon vanilla
Sift together flour, baking soda, salt, and cinnamon. Add sugar, brown sugar, shortening, eggs, and vanilla. Mix well. Add oatmeal mixture. Beat well. Spread in prepared pan and bake for 25 to 30 minutes until toothpick inserted in the center comes out clean.
Broiled Icing:
1 stick butter or margarine at room temperature
1 cup brown sugar
1 cup pecan pieces
1 cup shredded sweetened coconut
5 tablespoons cream (I have also used almond milk or regular milk as a substitute and the both work well)
Mix all ingredients together and spread over warm cake. Set your oven to broil and place cake under broiler until icing has browned. Watch the cake very closely – the icing browns quickly!
Buying snacks on a road trip can get expensive and time consuming if no one can decide what they want! 🤷🏼♀️ I make my own snack mix to keep handy in the car and we get to decide what we want to add to it. 😋
Disclosure: Some of the links on my site are affiliate links, meaning, at no additional cost to you, I will earn a small commission if you click through and make a purchase. As an Amazon Associate I earn from qualifying purchases.
I start with a jar of lightly salted dry roasted peanuts. You can also use mixed nuts, cashews, or almonds – choose whatever your family will enjoy. Then I add either M&Ms, chocolate chips, white chocolate chips, butterscotch chips or a combination of them. I also add raisins to my snack mix. Other dried fruits can be added, too.
This time I used peanuts, toasty vanilla M&Ms (I think this may be a special holiday flavor), semi sweet chocolate chips, and raisins.
To make your snack mix, simply pour the peanuts into a large bowl and mix in the M&Ms, chocolate chips, and raisins. I never measure anything, I just add each ingredient until it’s a good mixture. 😊 The salty/sweet taste is a fun treat while you’re traveling. 😋
Store it in a large zip top bag for your road trip. You can also put a handful or two in individual small zip top bags and put those in a larger bag for easier snacking in the car. Everyone can have their own bag to snack on that way. 😋
This is a super easy snack mix that you can put together just in time to hit the road for Christmas. Christmas red and green M&Ms would make it so festive to eat on the way to family and friends! 🎄
Disclosure: Some of the links on my site are affiliate links, meaning, at no additional cost to you, I will earn a small commission if you click through and make a purchase. As an Amazon Associate I earn from qualifying purchases.