Disclosure: Some of the links on my site are affiliate links, meaning, at no additional cost to you, I will earn a small commission if you click through and make a purchase. As an Amazon Associate I earn from qualifying purchases.
I stamped Pooh, the party hat, and balloon with Memento Tuxedo Black ink on white card stock and colored them with Copic markers. Using the matching Sweet Little Smiles dies, I die cut the images. I used a cloud stencil and a grass stencil to create the background on a white card. These Blending Brushes from Taylored Expressions work great to apply the ink to the card. I attached the stamped images to the card using foam tape and stamped my sentiment using blue ink on the top of the card. I’ve had my “Happy Birthday to You” stamp in my stash for a long time and it’s no longer available ☹️ – use your favorite birthday sentiment on your card.
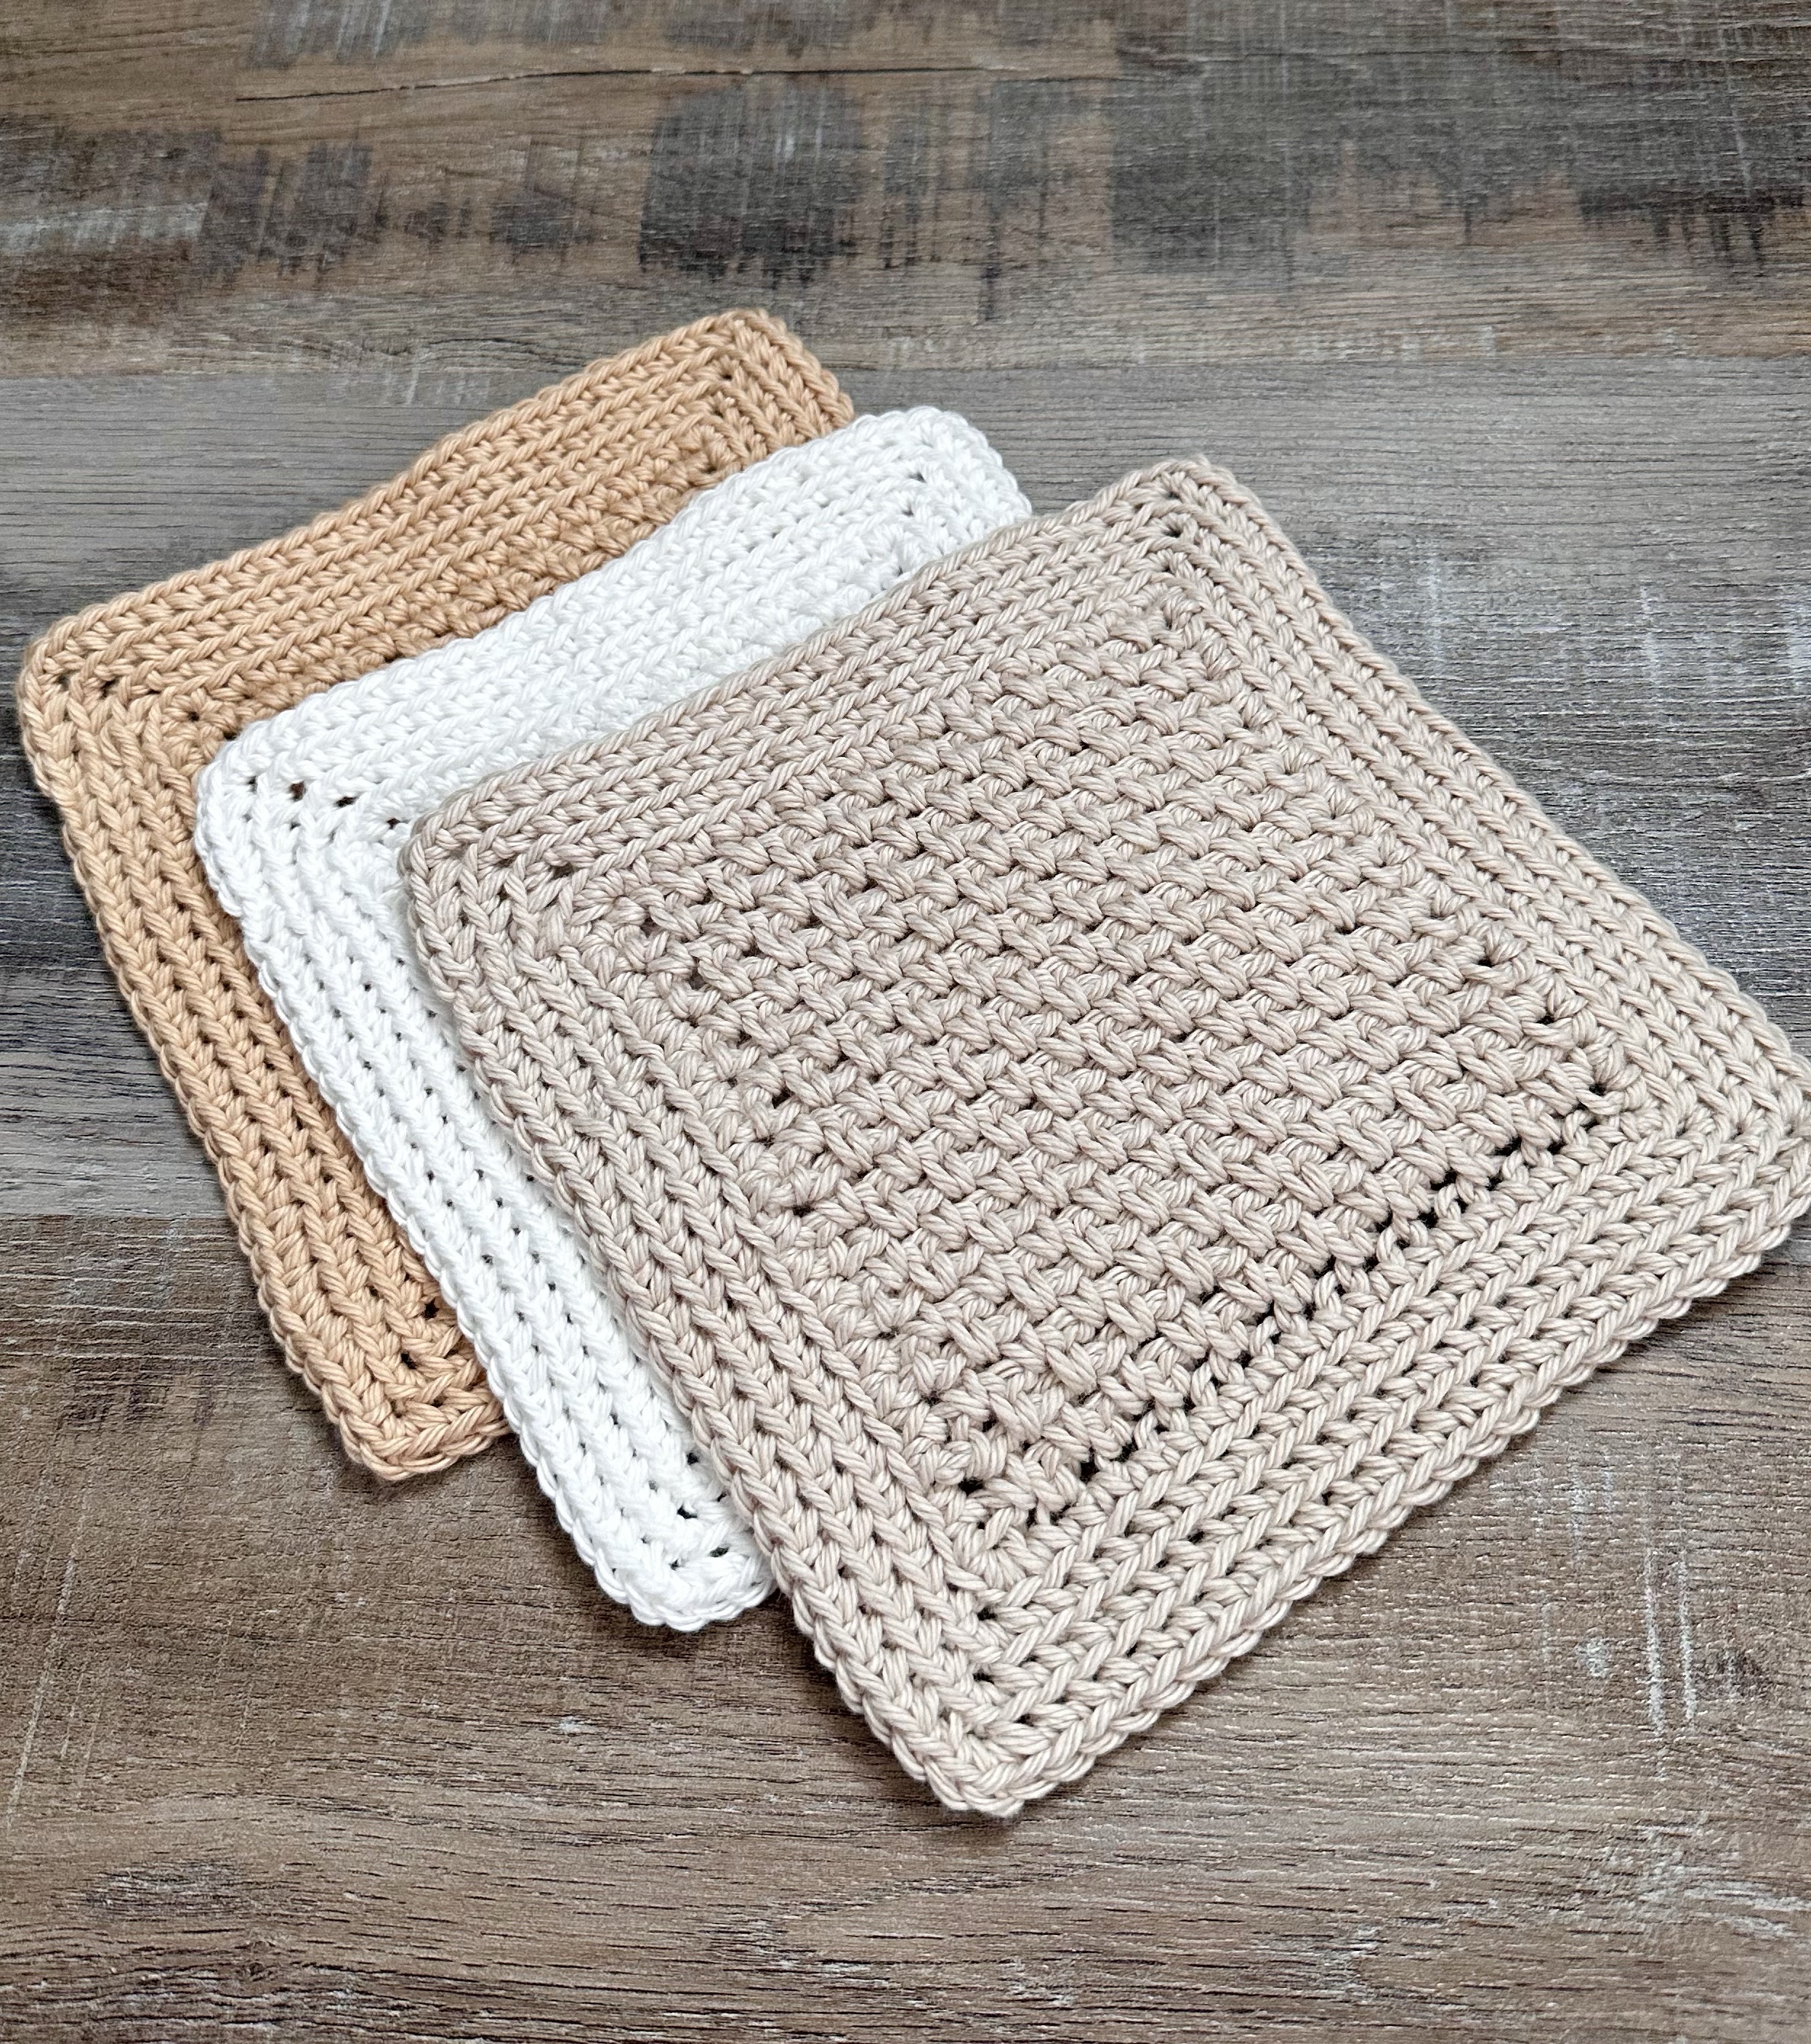
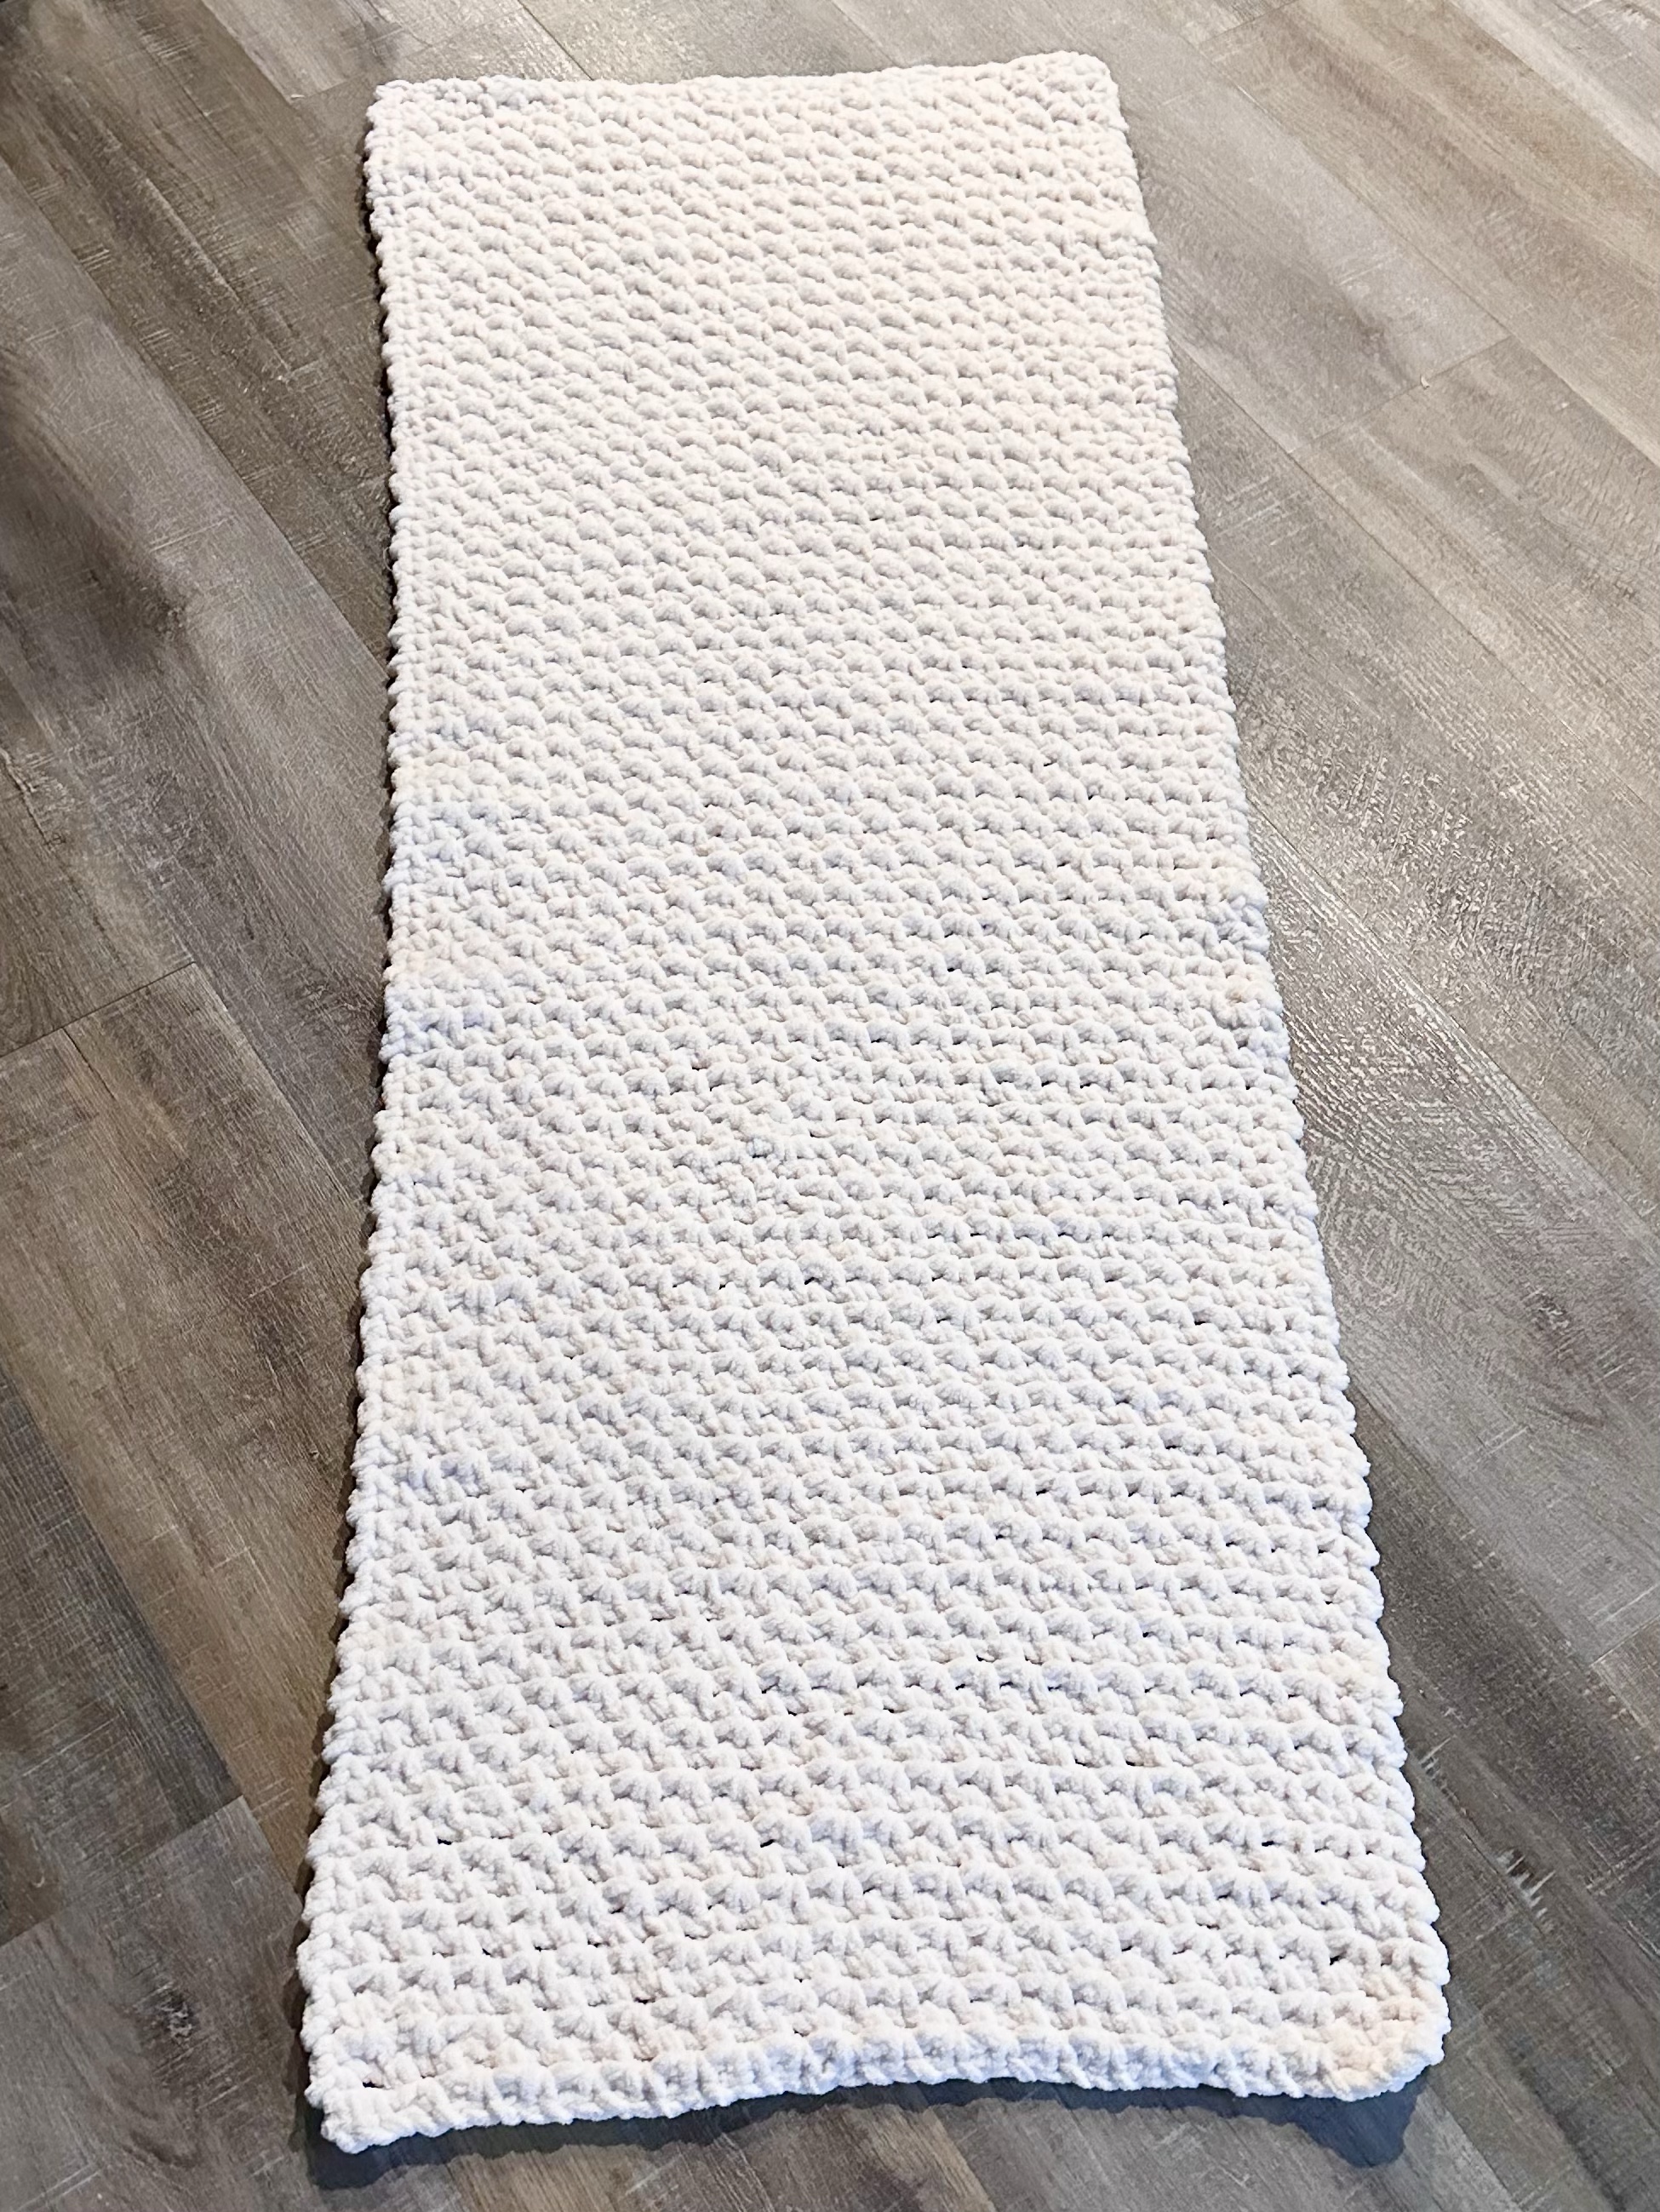
I’ve got my first new crochet pattern for 2023 to share with you today! January is the perfect time to pamper yourself a little – cold temps and dry air are hard on our skin. The Crochet Granite Stitch Spa Cloth is soft cotton, but has just enough texture to gently exfoliate your skin while using your favorite body wash or cleansing bar.
Disclosure: Some of the links on my site are affiliate links, meaning, at no additional cost to you, I will earn a small commission if you click through and make a purchase. As an Amazon Associate I earn from qualifying purchases.
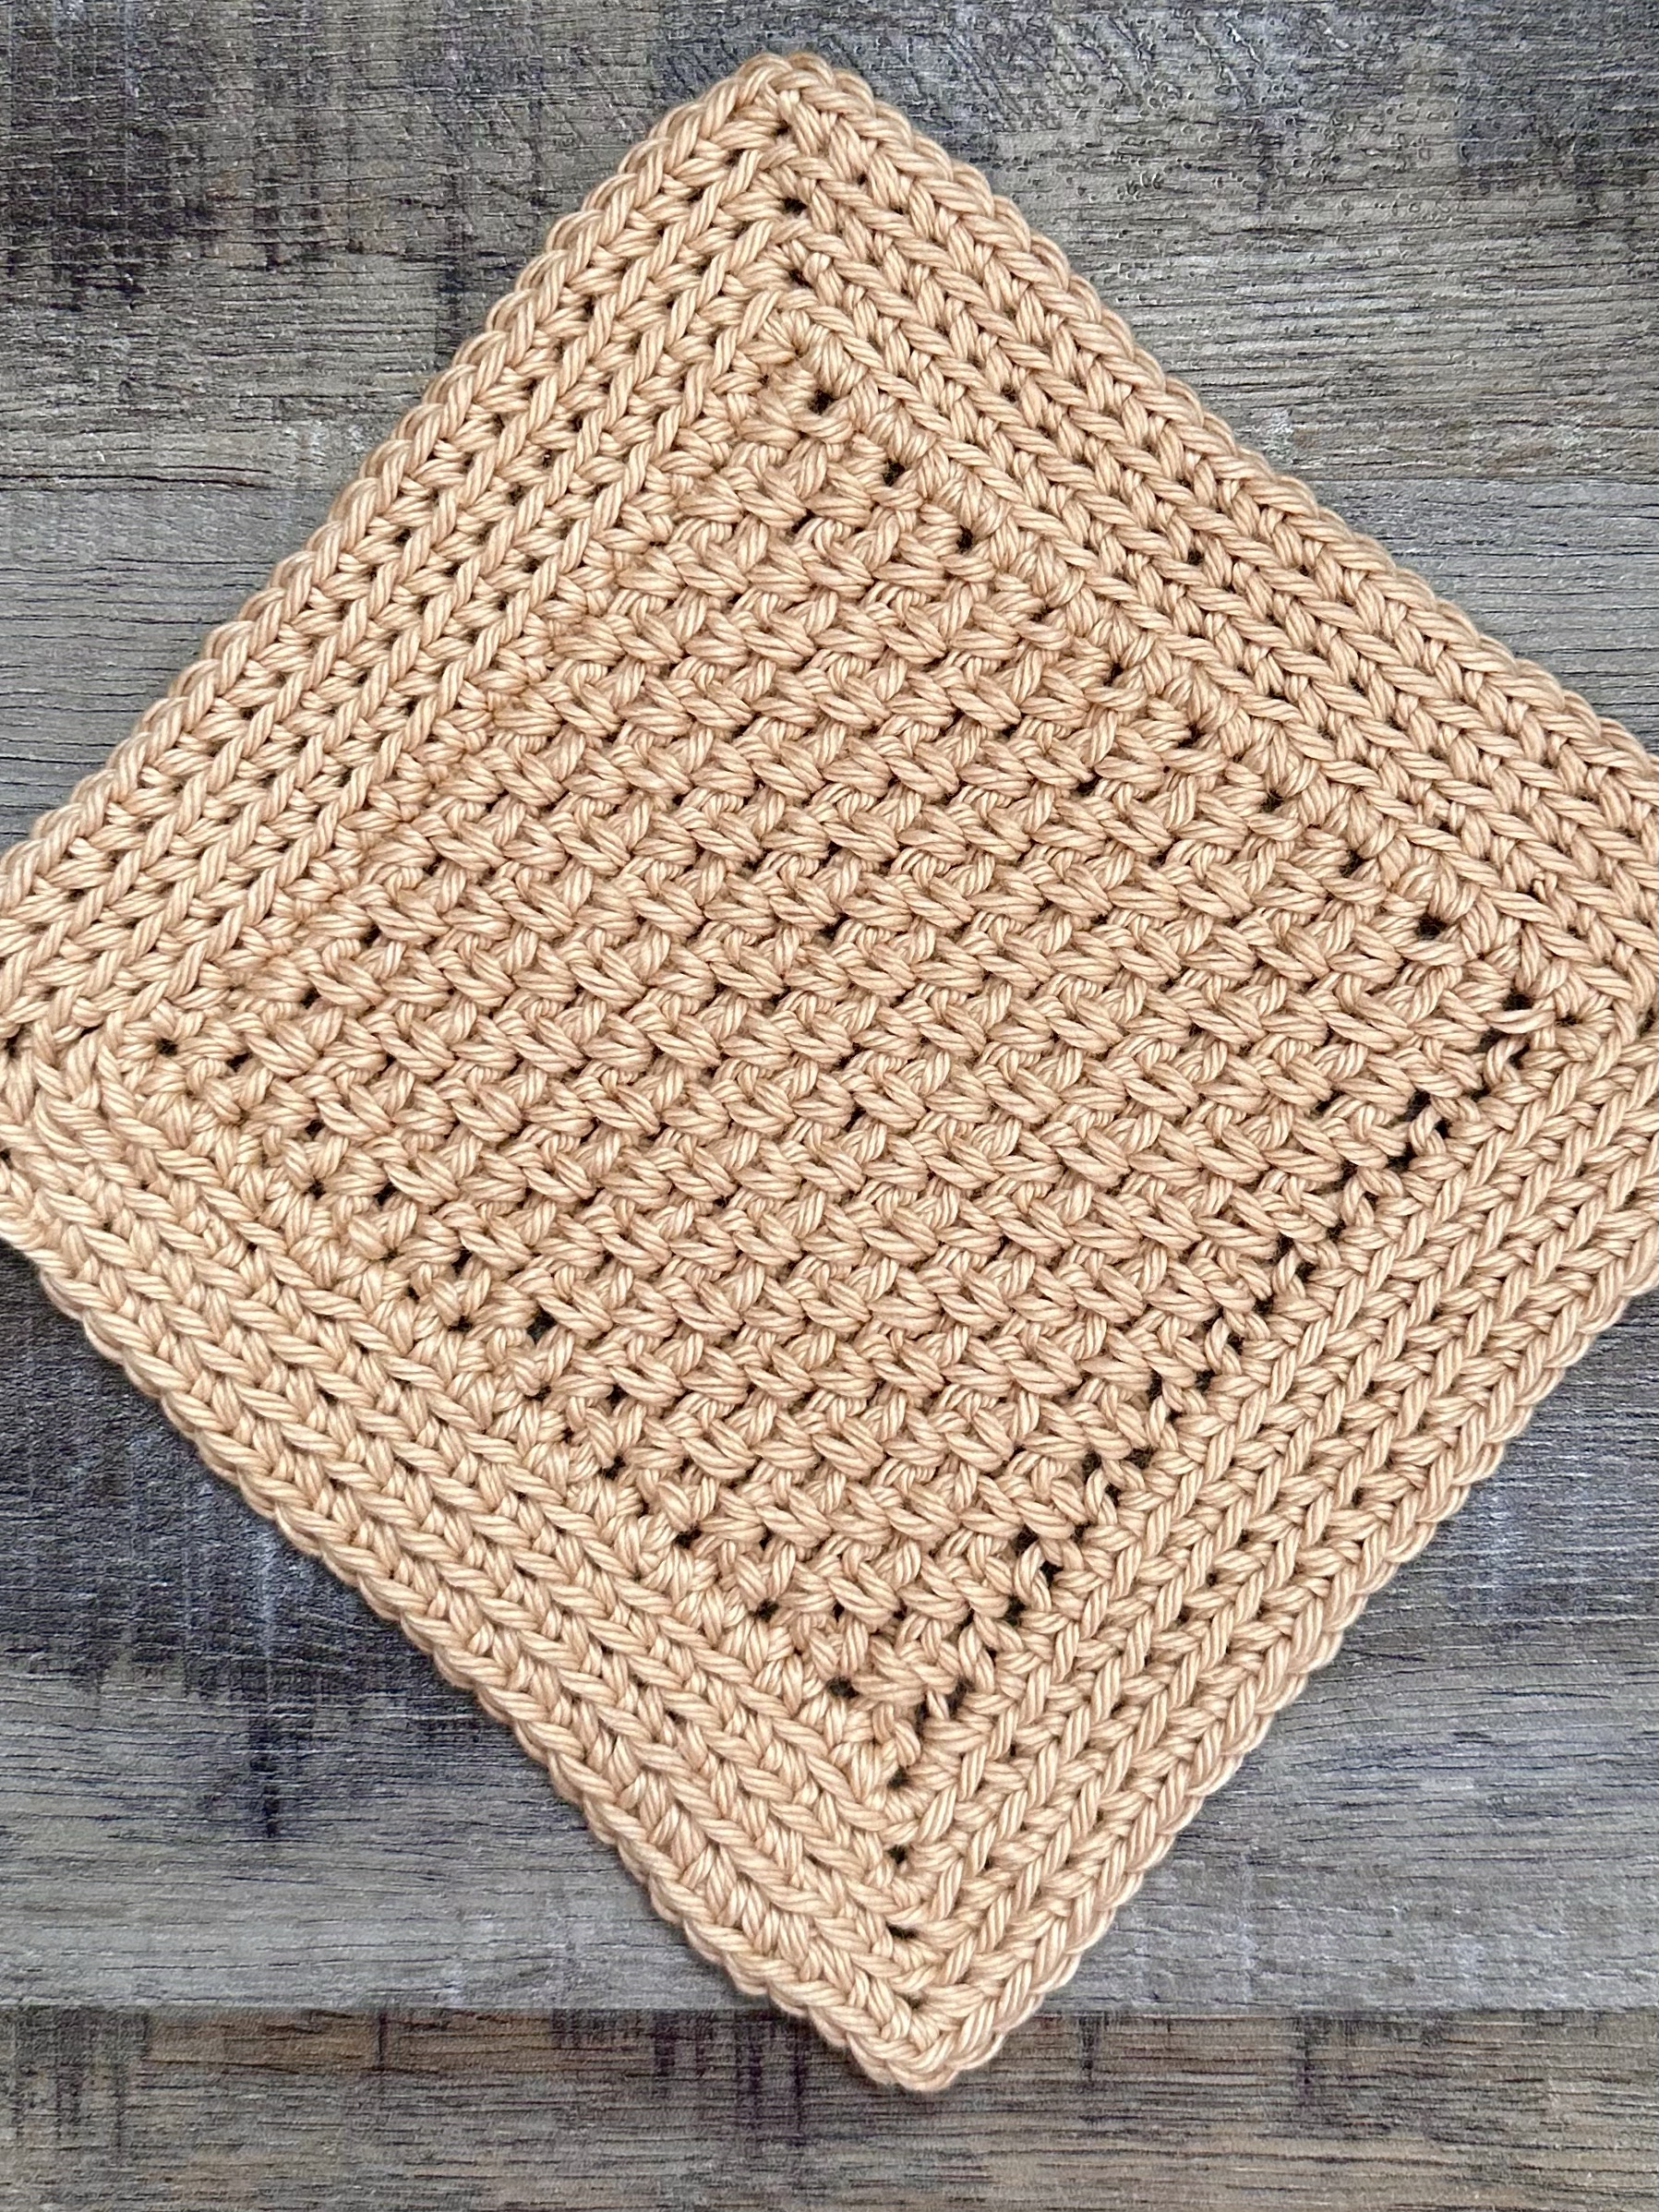
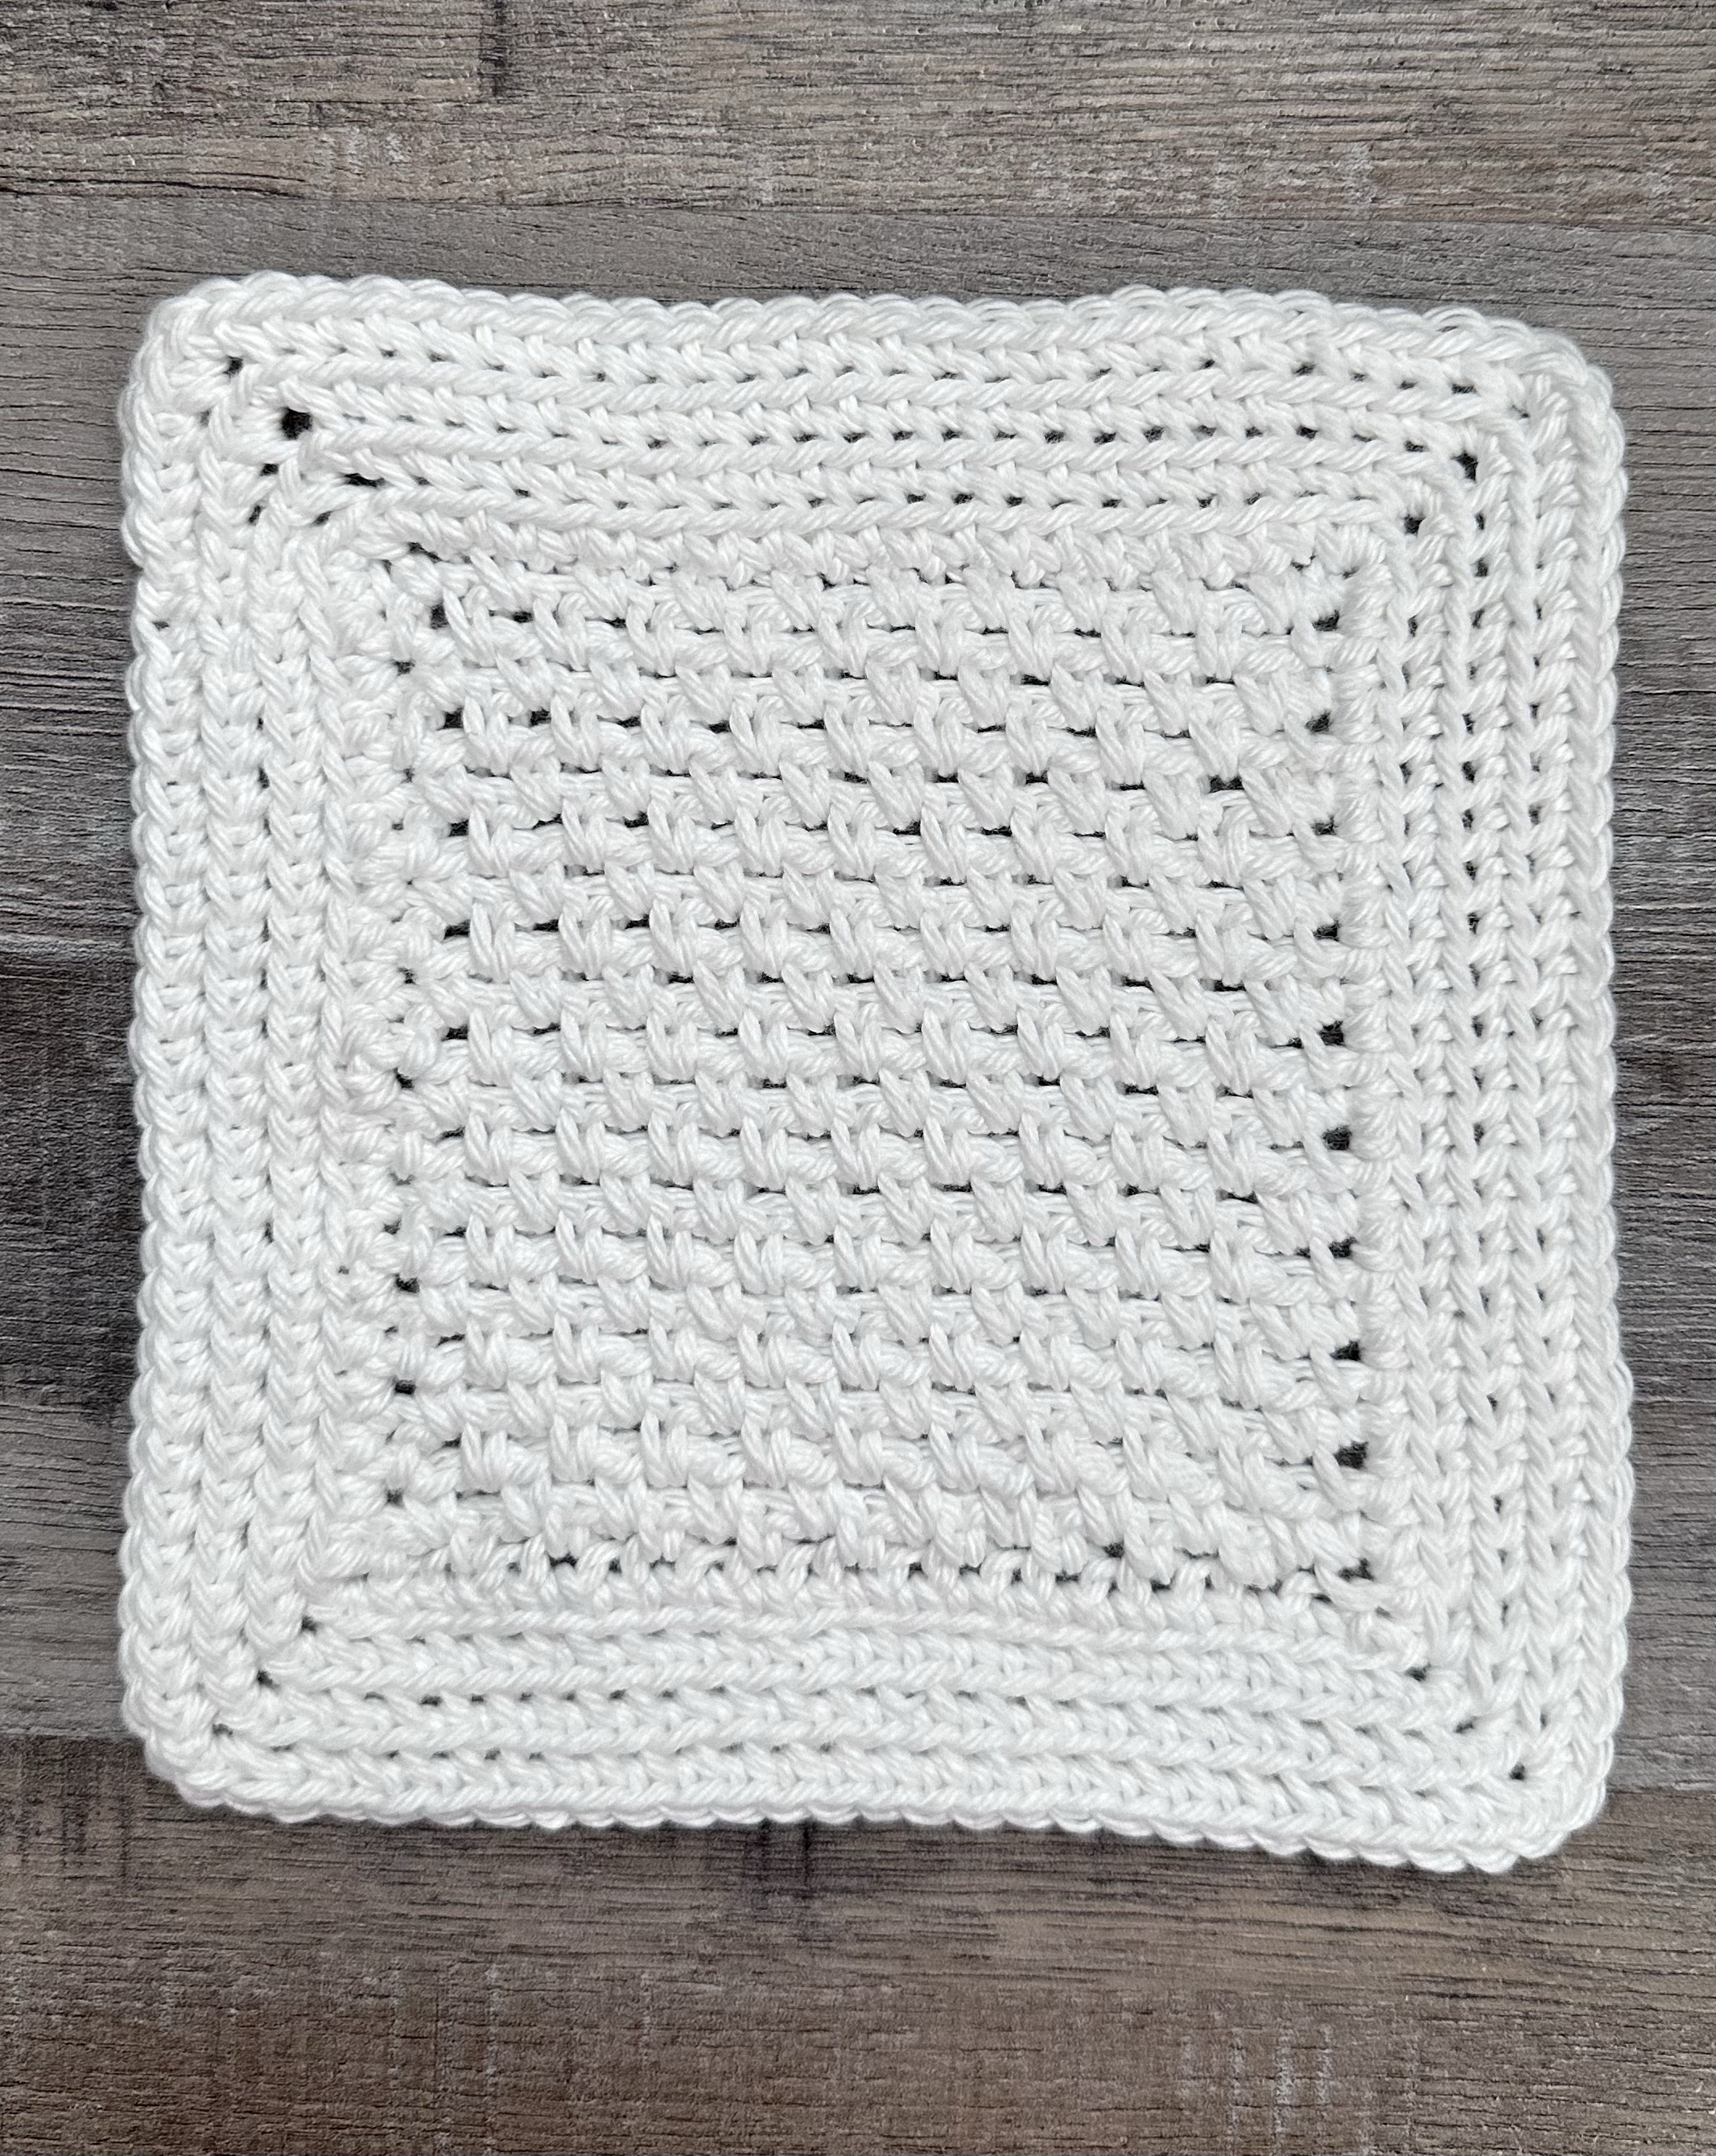
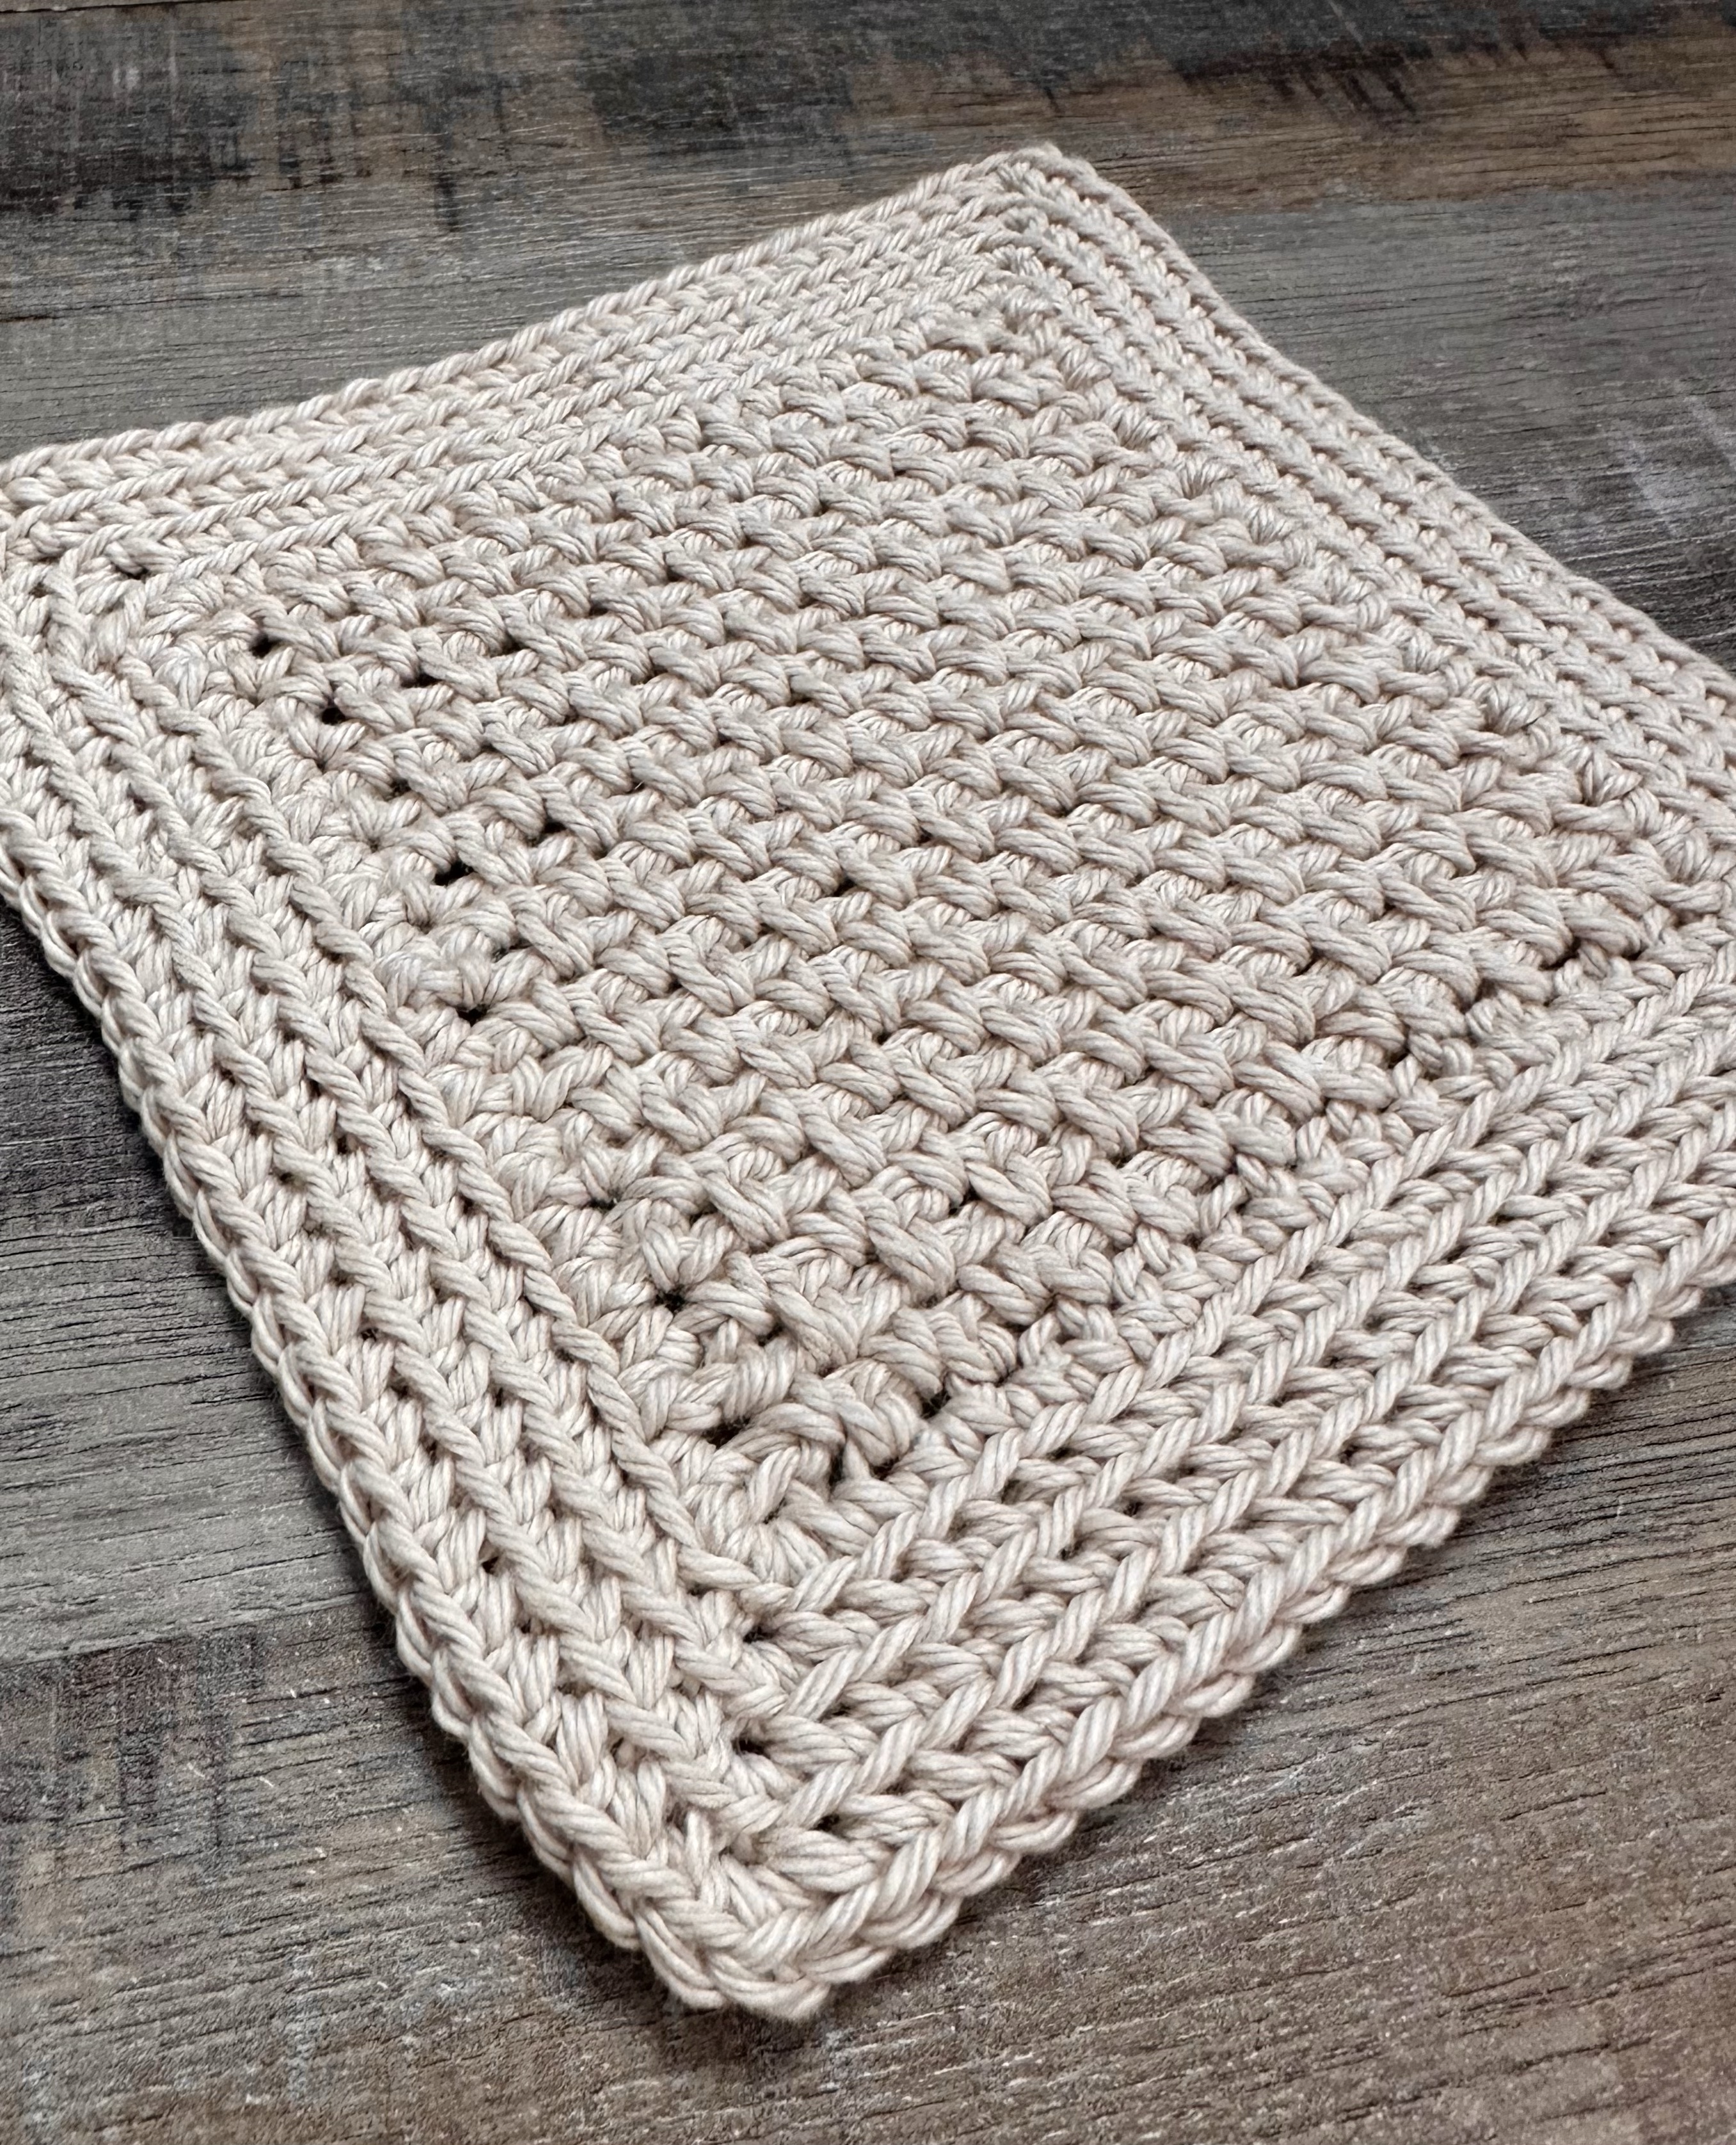
I used I Love This Cotton yarn and an H/5mm crochet hook to stitch up my spa cloths. The colors I used are Taupe, White, and Parchment. Stitch your spa cloths up in your favorite colors – whatever makes you smile. 😊
Here’s the super easy pattern and a link to a free PDF if you’d like to easily print it.
Crochet Granite Stitch Spa Cloth
I Love This Cotton
H/5mm crochet hook
Stitches used (US terms):
Chain – ch
Single Crochet – sc
Slip Stitch – ss
Back Loop Only – blo
Row 1: ch 22. sc in 2nd ch from hook, ch 1. *skip next ch, sc in next ch, ch 1* Repeat from * to * across to last 2 chains. Skip next ch, sc in last ch. ch 1 and Turn. (11 sc and 10 ch 1 spaces)
Row 2: sc in the 1st sc, sc in the next ch 1 space. *ch 1, sc in next ch 1 space.* Repeat from * to * last sc, sc in the last sc. ch 1 and turn. (12 sc and 9 ch 1 spaces)
Row 3: sc in the 1st sc. *ch 1, sc in next ch 1 space* Repeat from * to * to the last 2 sc . ch 1, skip 1 sc, and sc in the last sc. ch 1 and turn. (11 sc and 10 ch 1 spaces)
Repeat Rows 2 and 3 until piece measures about 5 inches.
Do not turn after the last Row.
Begin working in Rounds.
Round 1: ch 1. sc evenly around, working 3 sc in each corner. Join with ss to first sc.
Rounds 2-4: ch 1. sc in blo of each stitch around, working 3 sc in each corner. Join with ss to first sc.
Fasten off and weave in ends.
Finished Spa Cloth measures about 7 inches square.
These Crochet Granite Stitch Spa Cloths stitch up quickly. Package them up in a cute little berry basket, add a small bottle of body wash, and tie it up in a cellophane bag with a cute ribbon for a great gift!
These spa cloths can also be used as dishcloths! Cotton yarn makes the best dishcloths – they are super strong and last for a long time. Give your dishes the spa treatment. 😉
Disclosure: Some of the links on my site are affiliate links, meaning, at no additional cost to you, I will earn a small commission if you click through and make a purchase. As an Amazon Associate I earn from qualifying purchases.
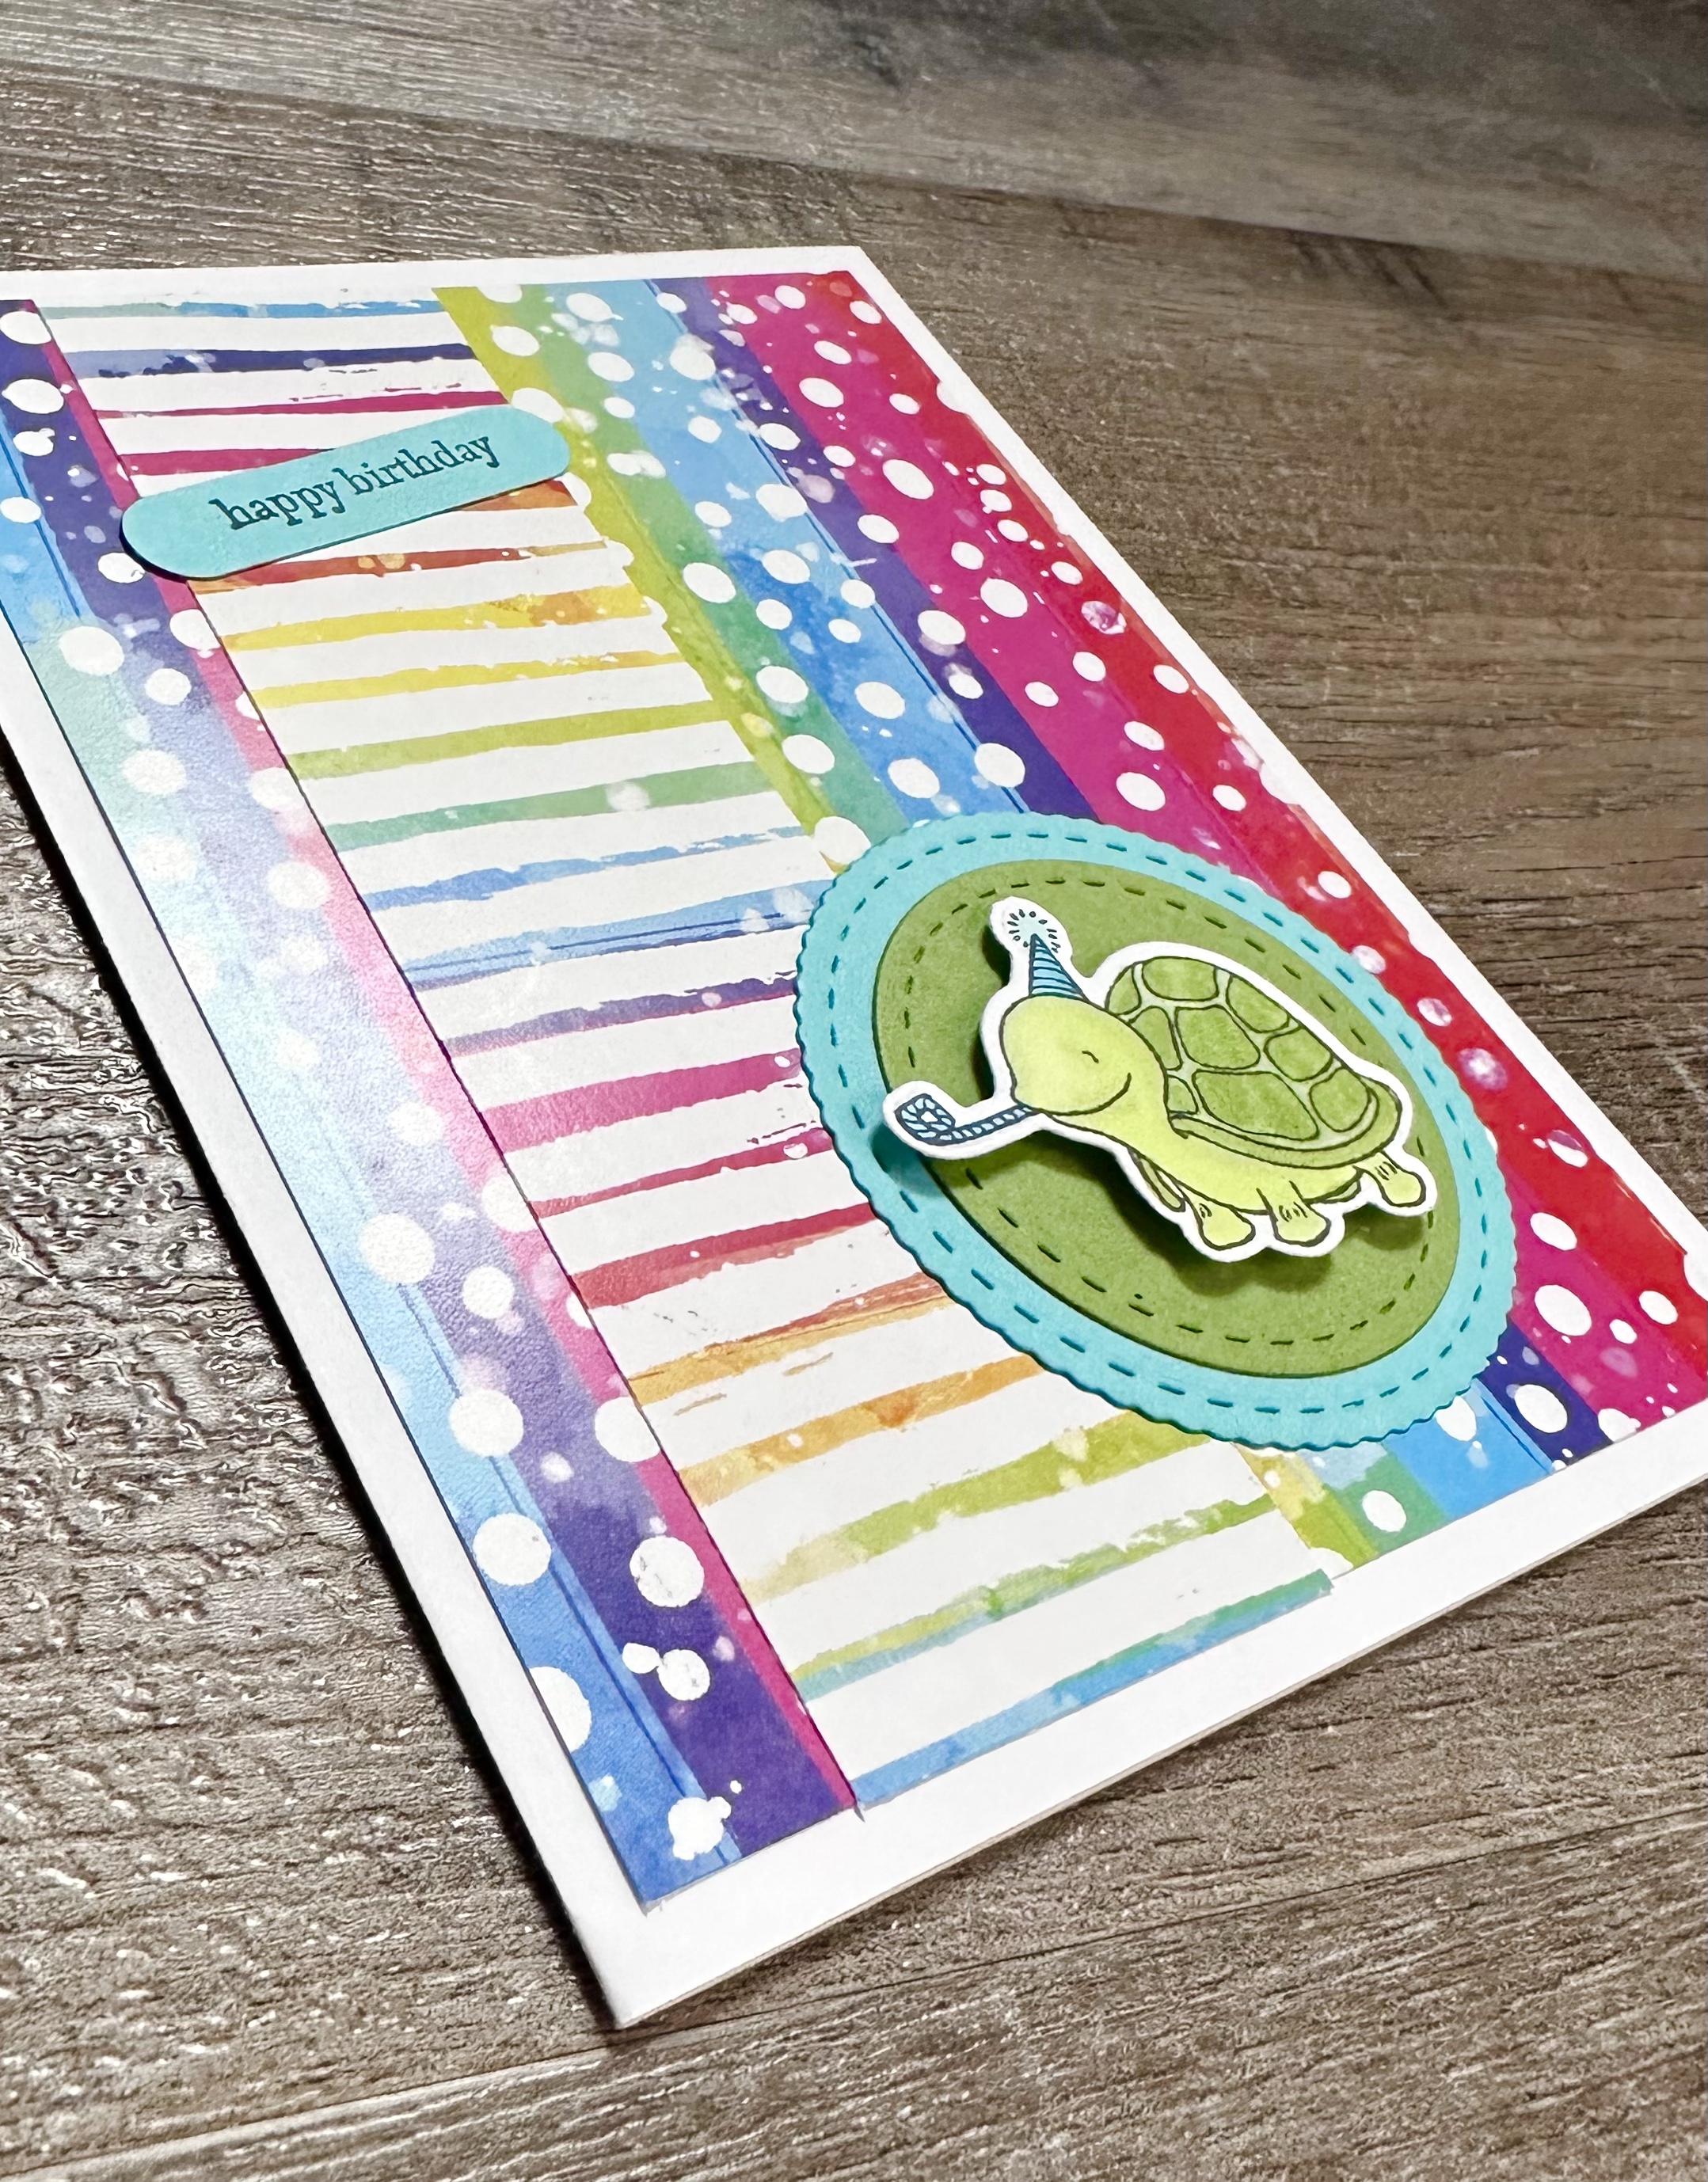
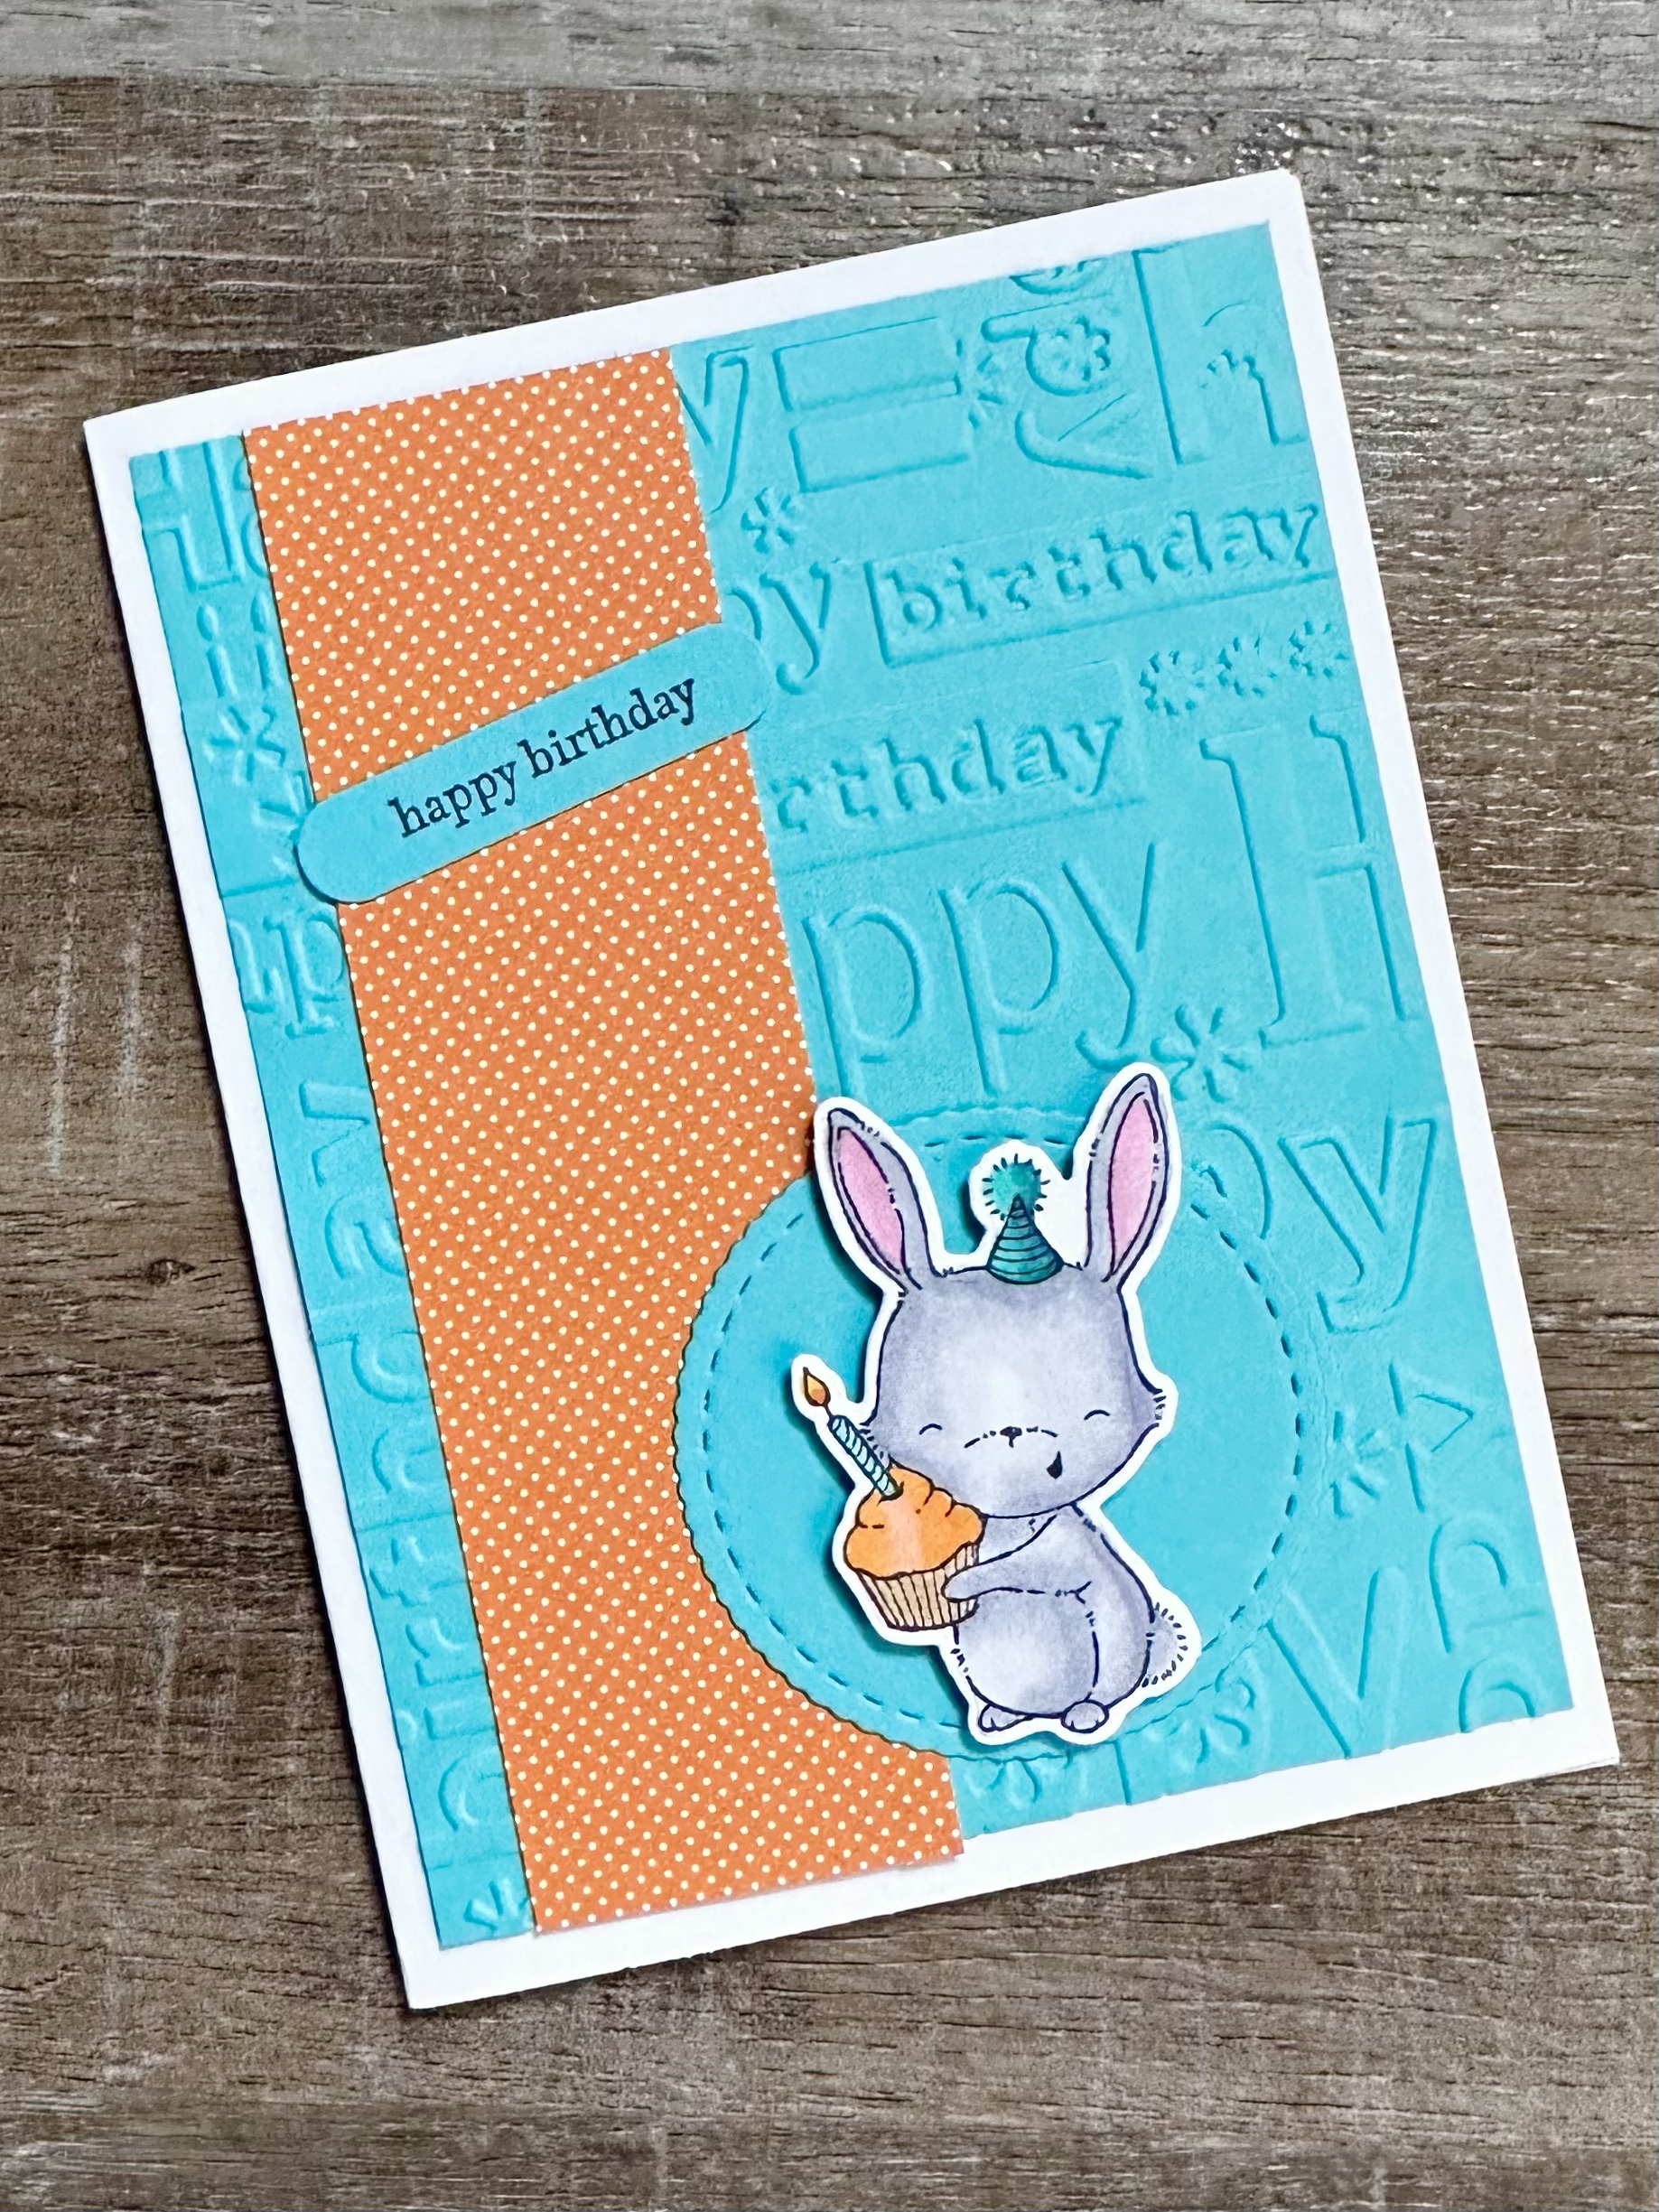
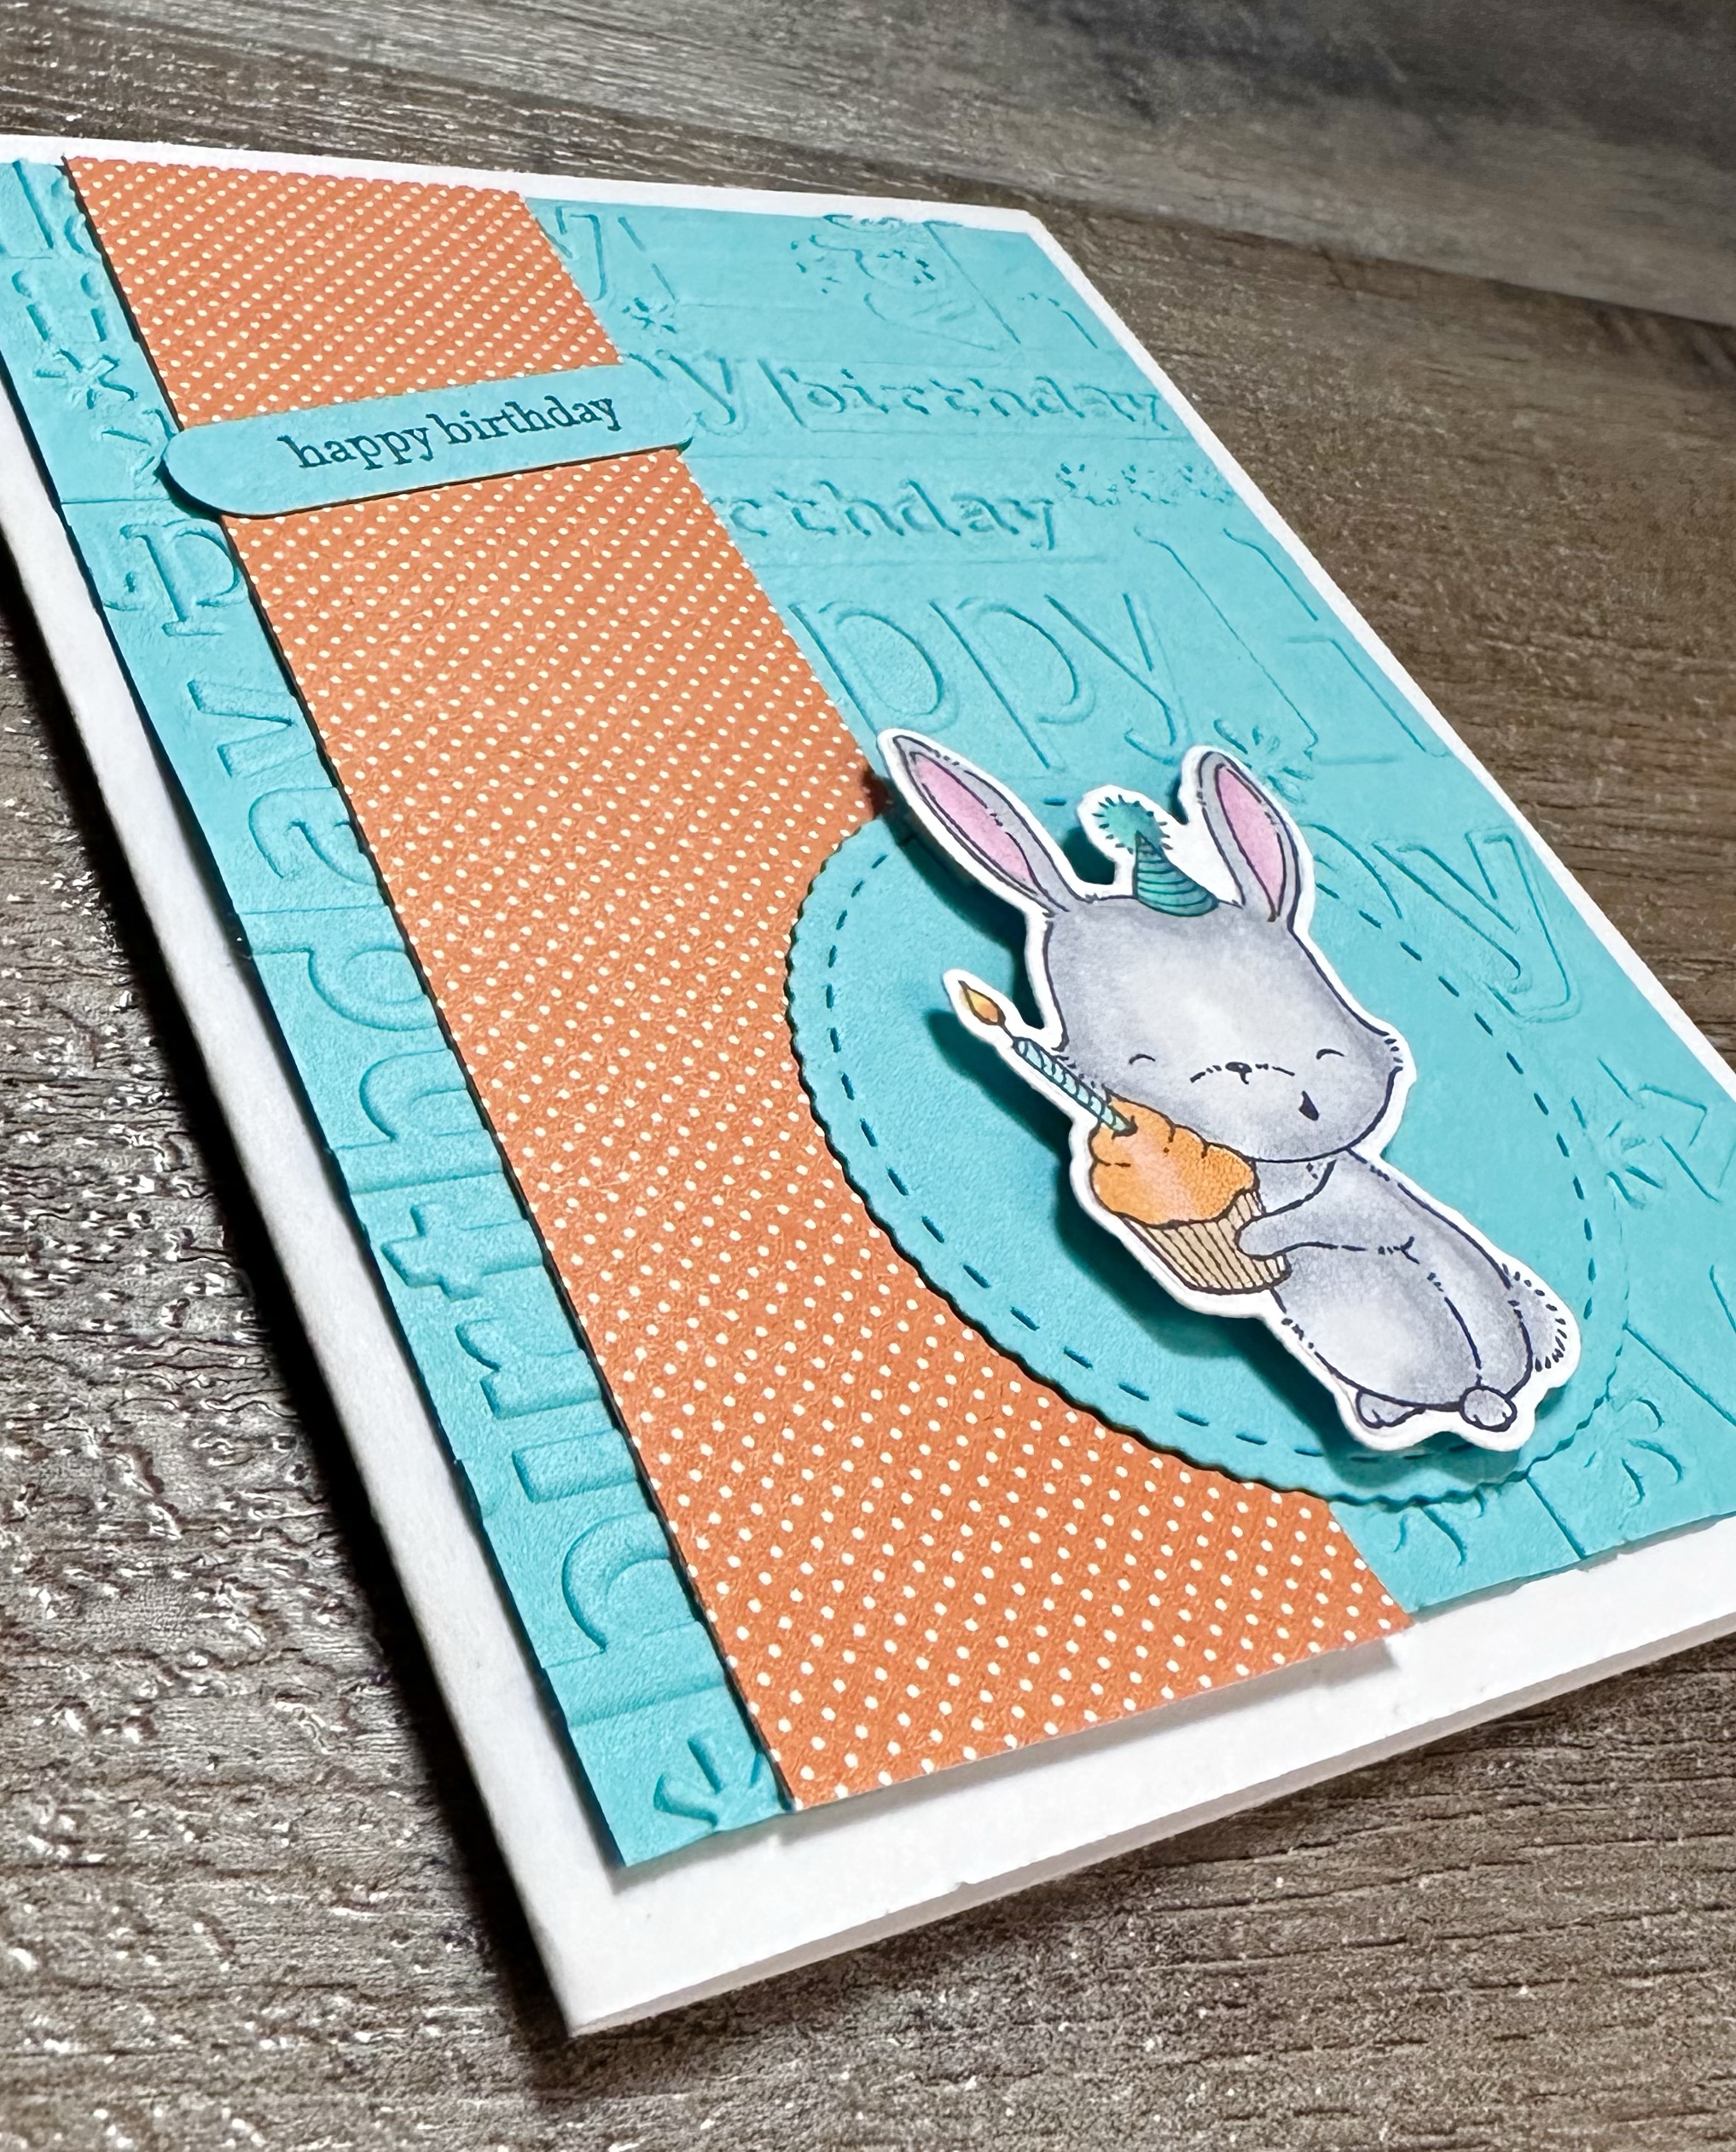
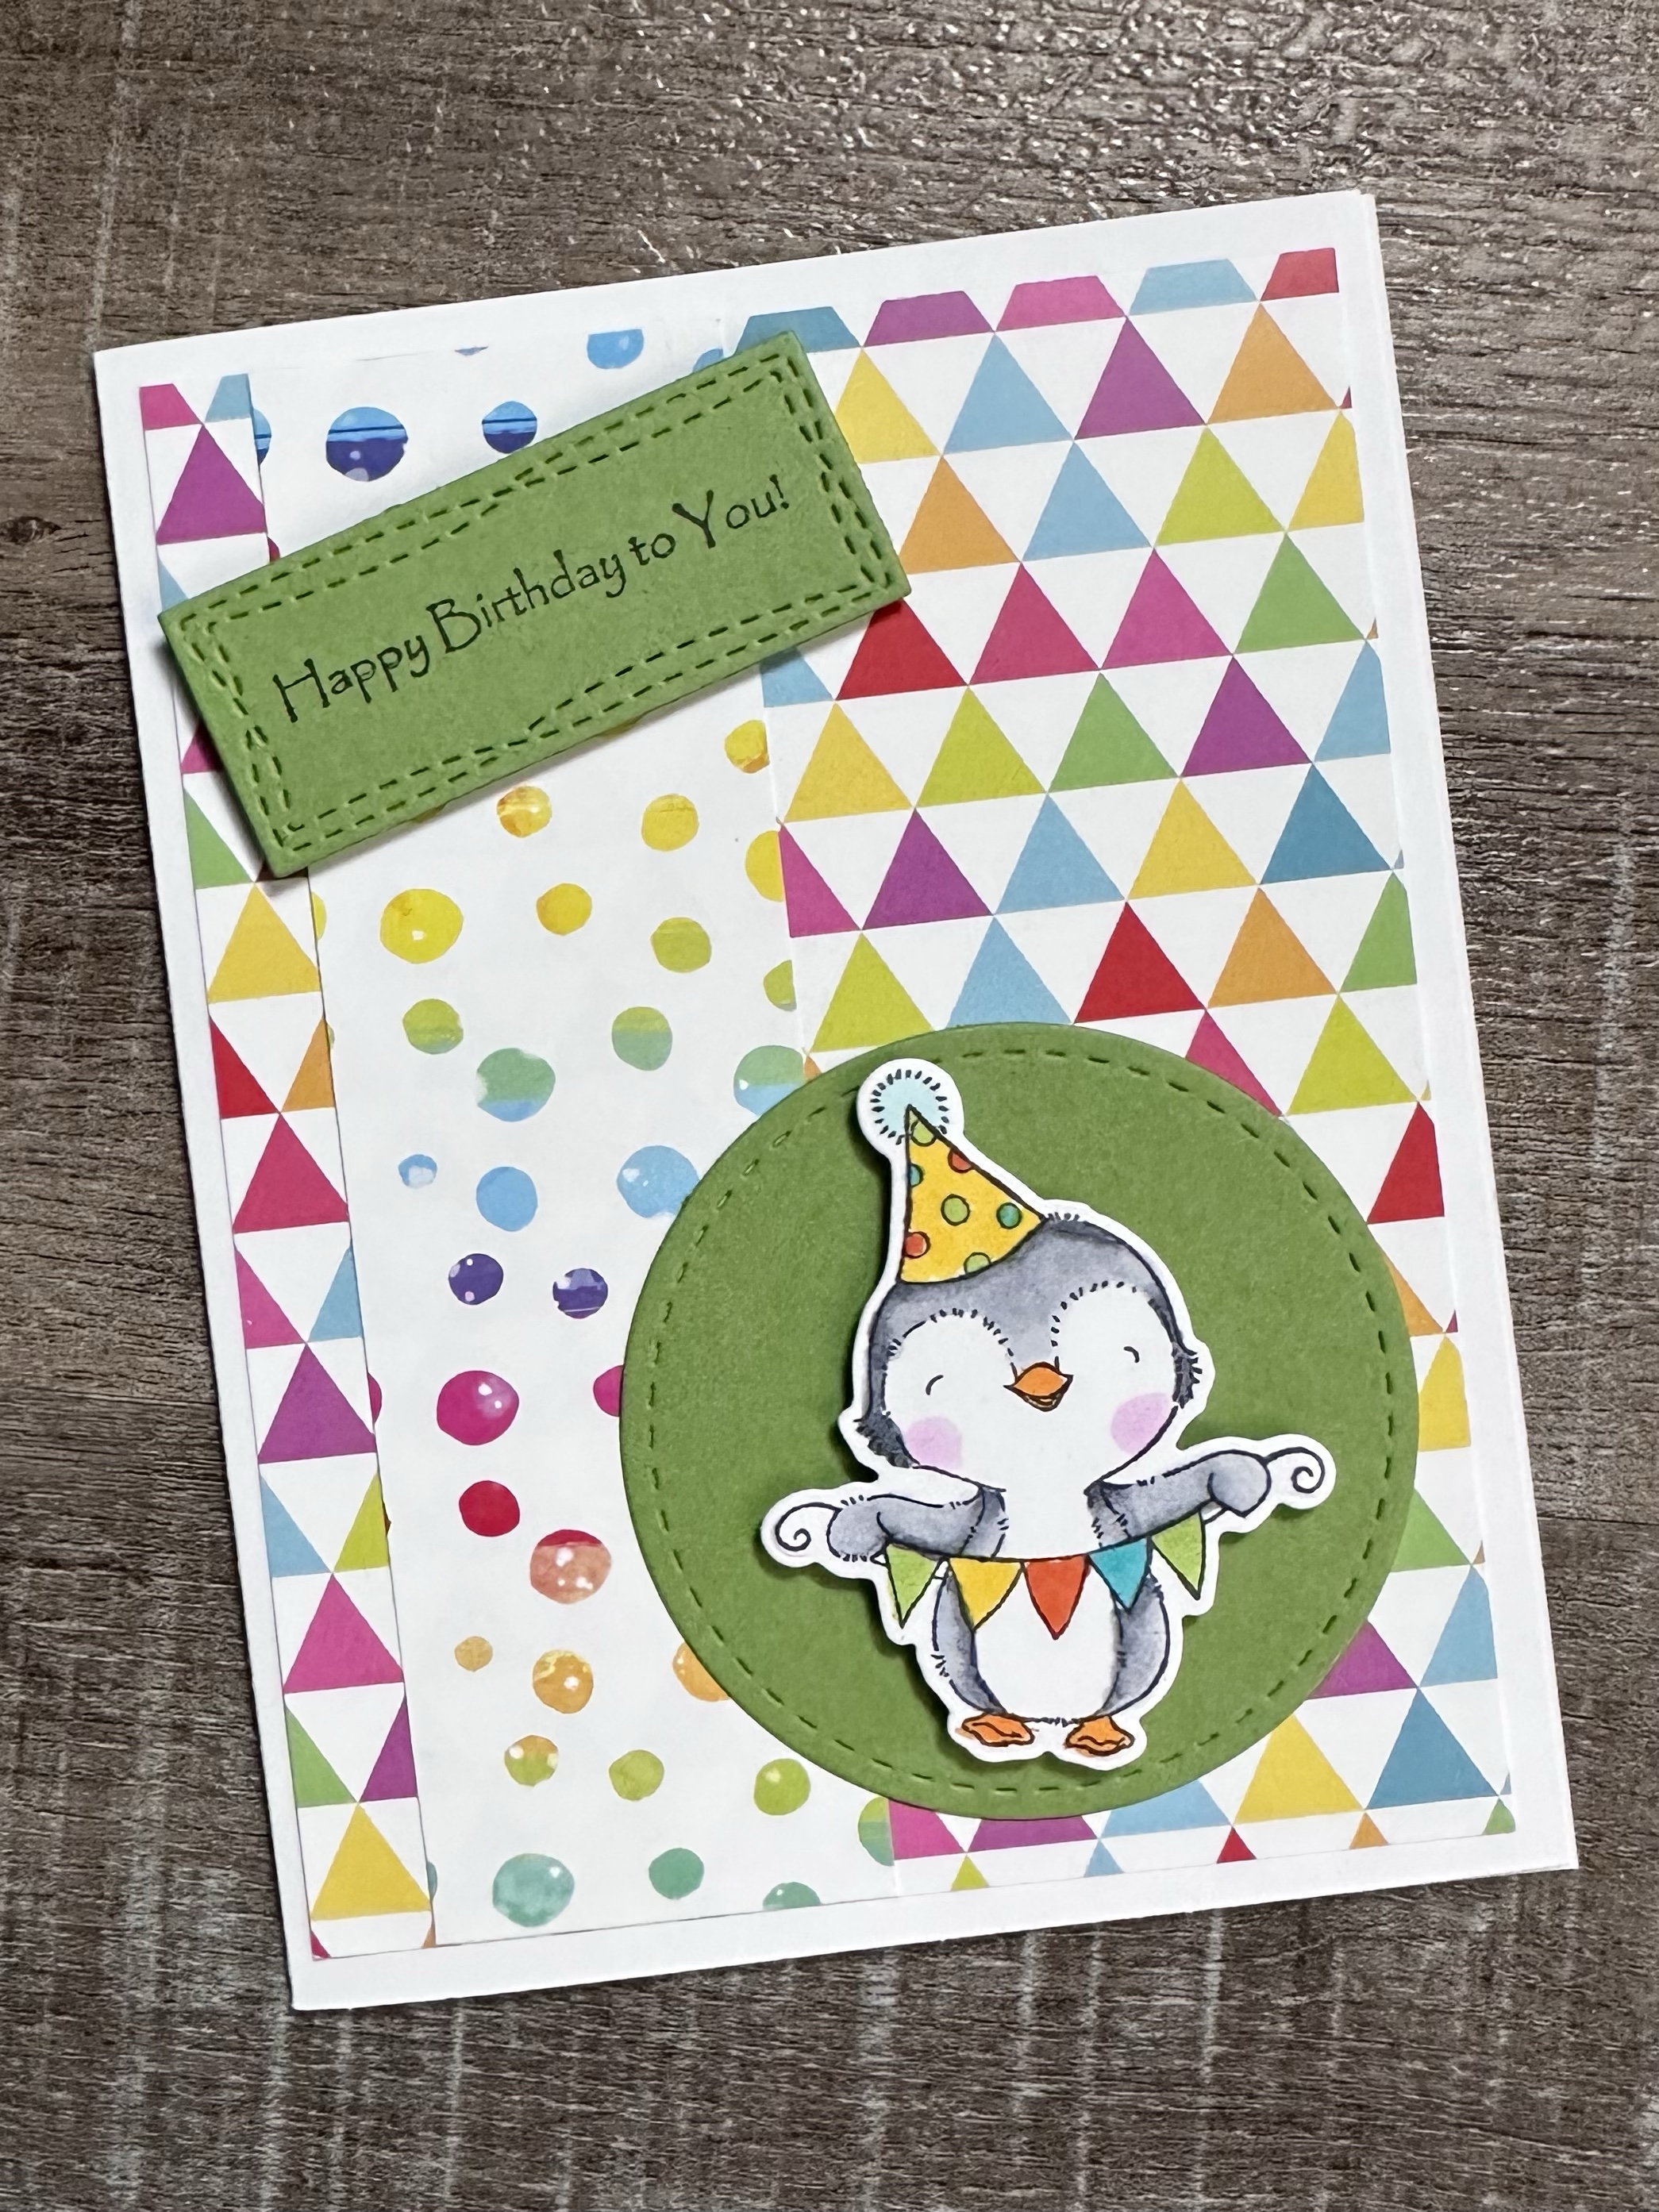
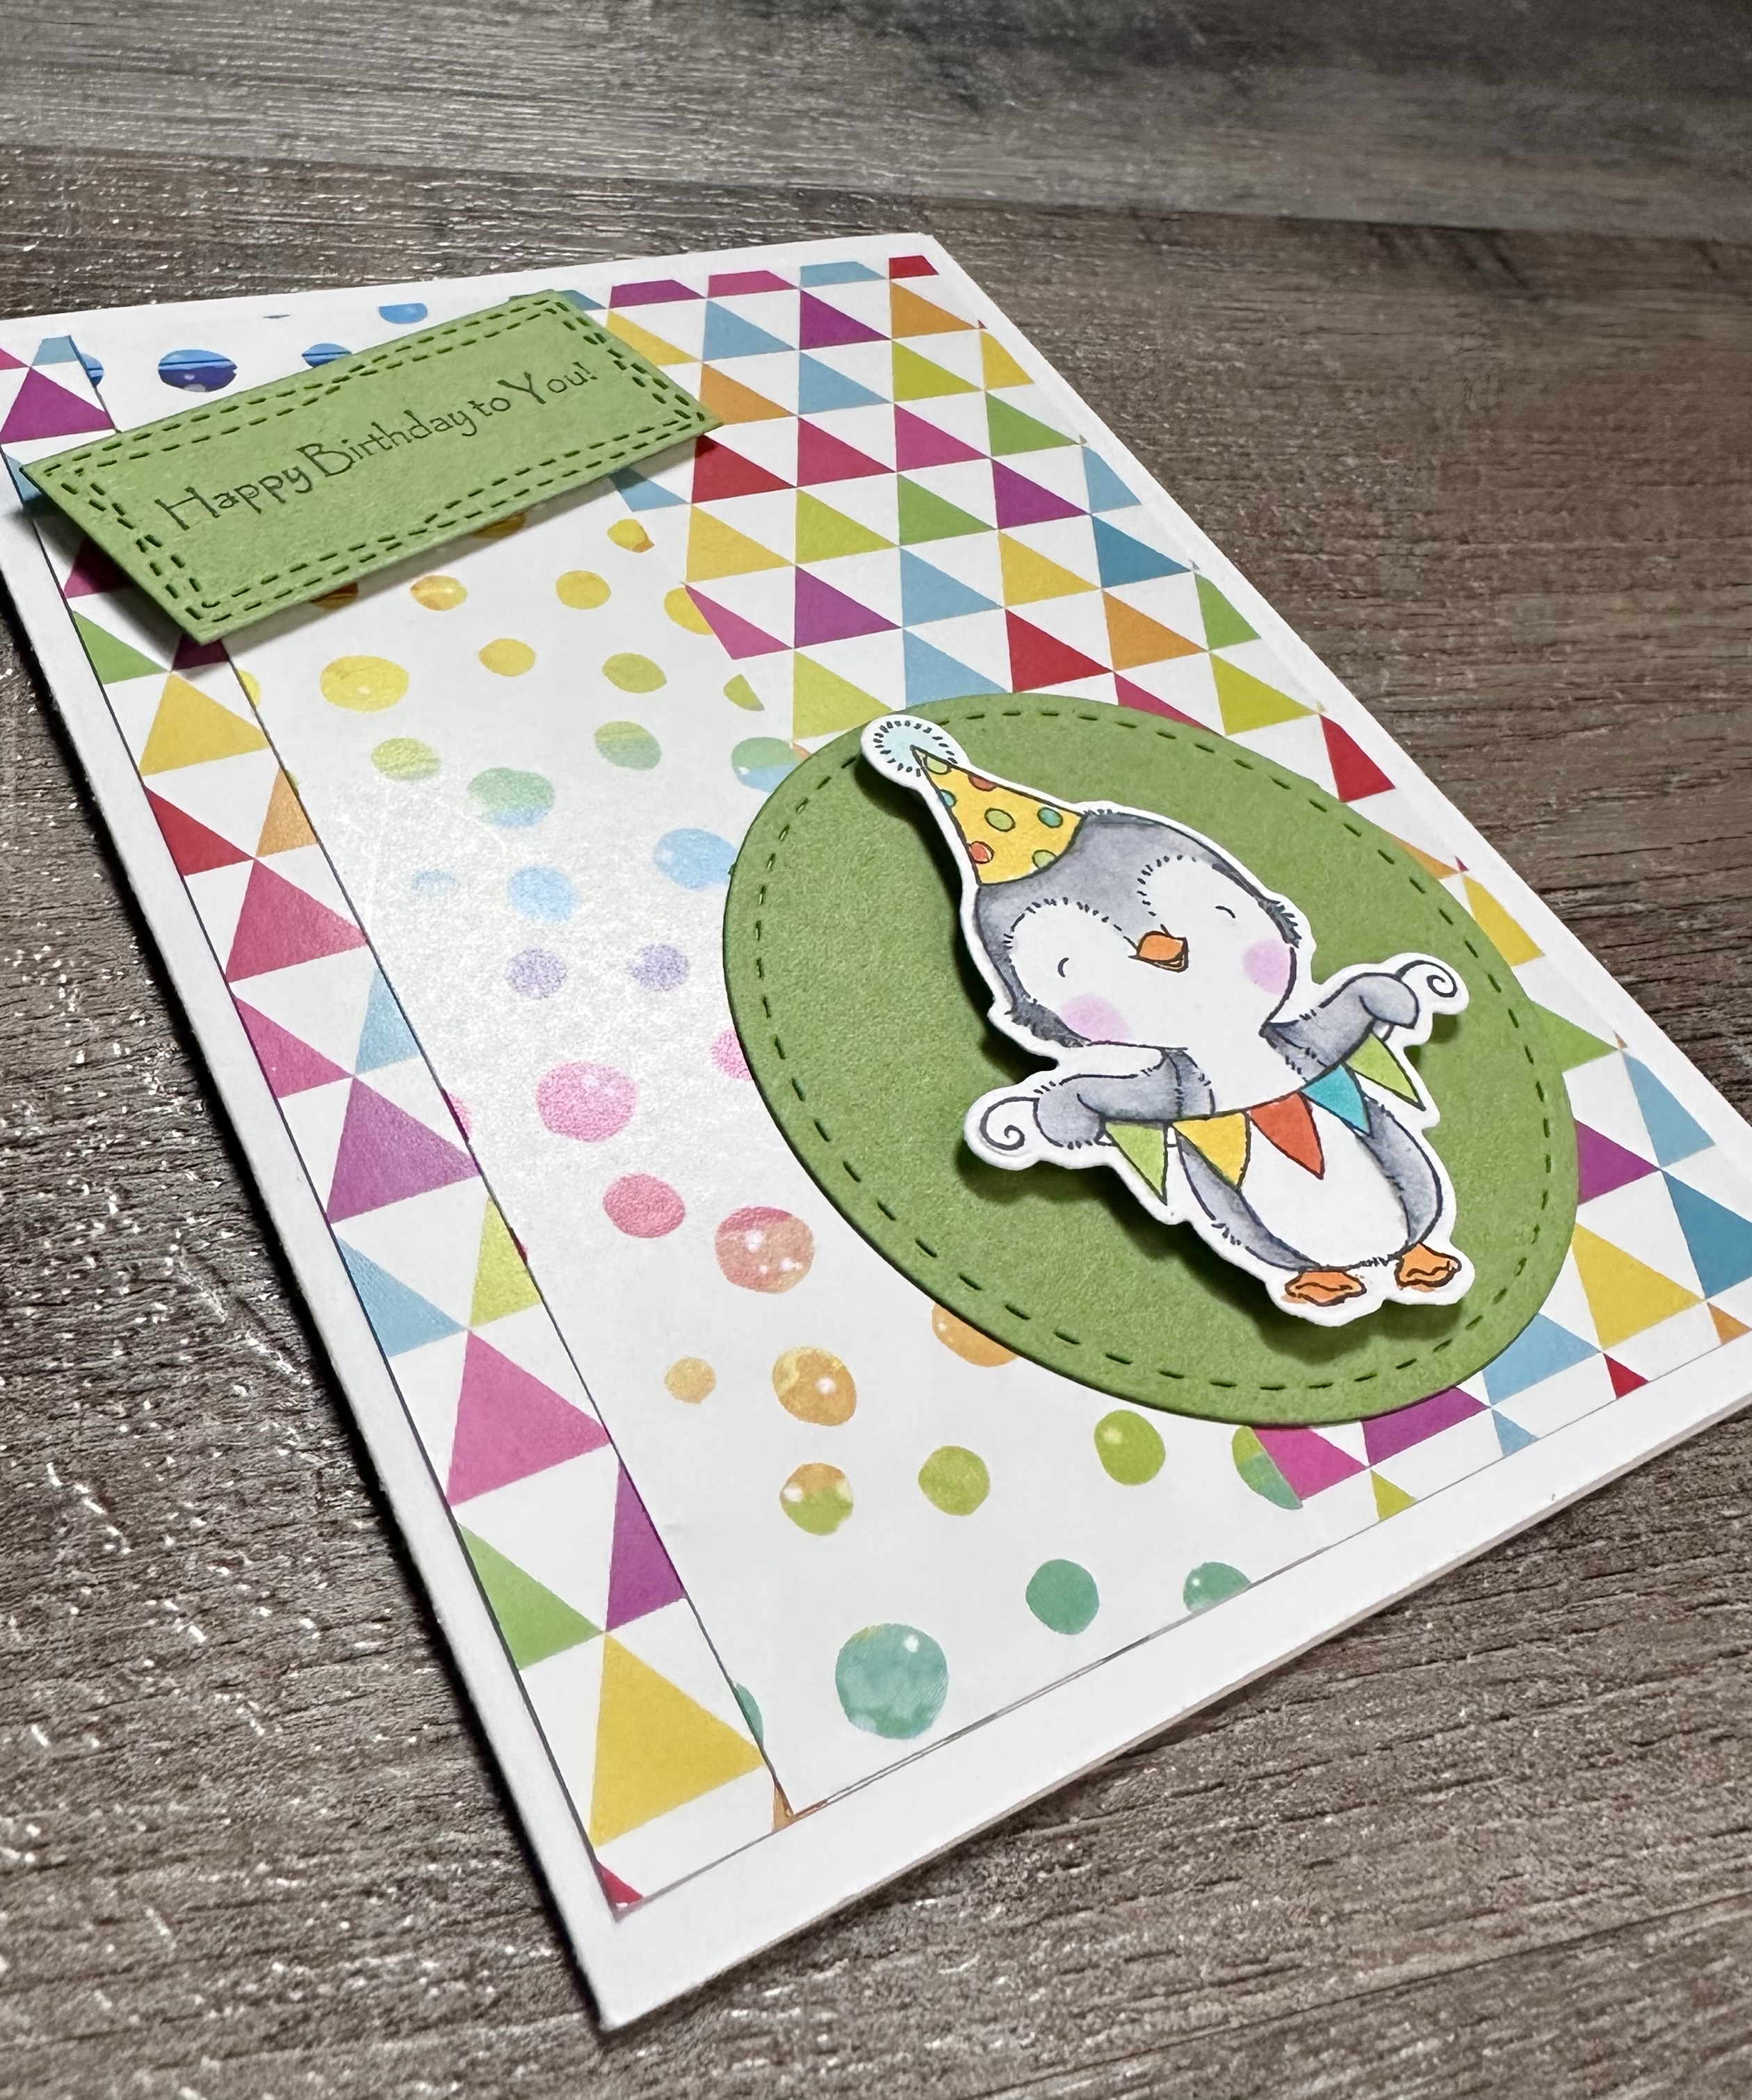
I used three of the cute animals and the same basic layout to create the cards in this post.
I used a birthday embossing folder (similar to this or this) to emboss a piece of turquoise card stock and attached it to a white card for the card with the bunny. I attached a piece of patterned paper to a white card for the other 2 cards. Then for each card, I added a strip of coordinating patterned paper.
I used 2 of my favorite birthday stamps to stamp my sentiments on matching card stock. I used a label punch I’ve had forever on 2 of the cards (this is a great set of dies that are similar to my punch) and the smallest of the Wonky Stitched Rectangle dies from MFT Stamps on the penguin card.
I attached the sentiments and the die cut circles to the cards and then added the animals to the cards with foam tape.
They are fun little cards that came together quickly by using the same basic layout. And patterned paper is your friend to easily add a pop of color to your cards!
I also used this stamp set to make a couple of other cards that you can see in this post.
Try making several cards using the same layout with different color schemes. You will love how easy it is!
I can finally share this with you! It was a Christmas gift for a sweet little boy and I didn’t want to spoil the surprise – well, mainly the surprise for his parents because he’s too little to read yet! 😉
Disclosure: Some of the links on my site are affiliate links, meaning, at no additional cost to you, I will earn a small commission if you click through and make a purchase. As an Amazon Associate I earn from qualifying purchases.
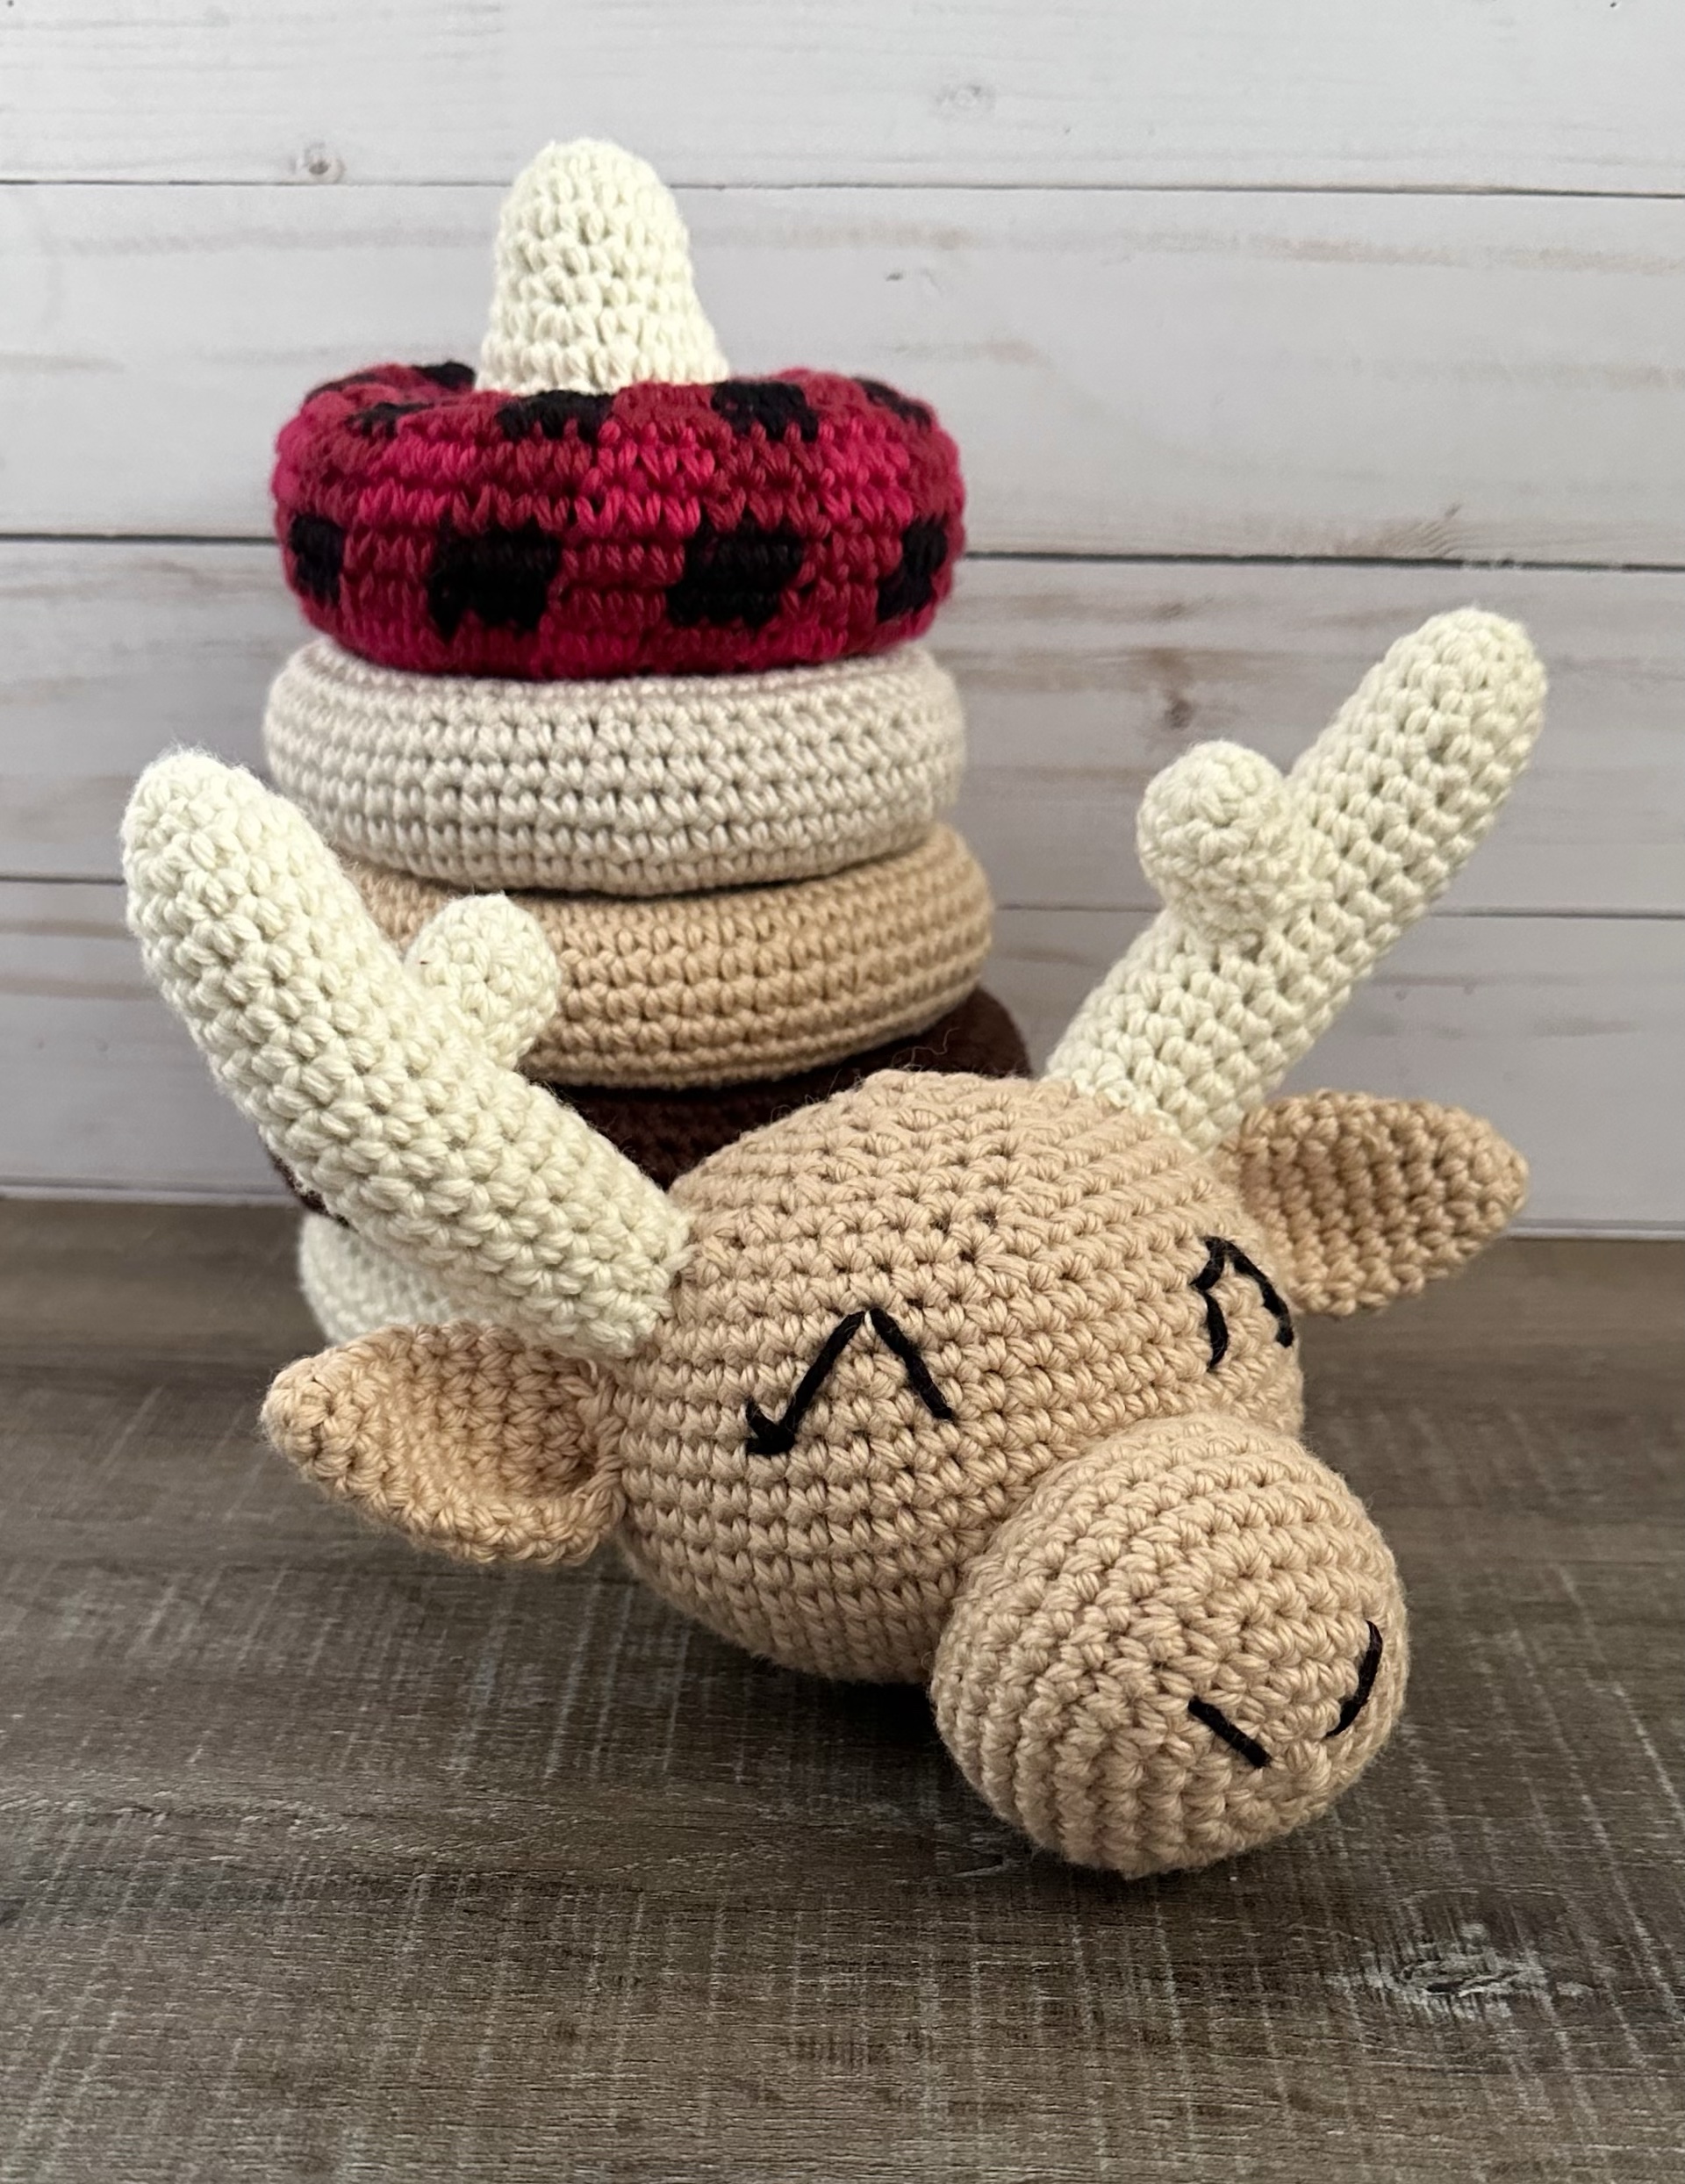
I found this adorable Crochet Moose Stacking Ring Toy pattern by Those Yarn Girls and knew I had to make it! It is a paid pattern but it’s worth every penny. Clear instructions and pics to help you get everything just right. They also have lots of other stacking ring toy patterns if the moose isn’t for you. 😊
The very bottom ring is sewn to the cone for stability and the rest stack onto the cone with the moose head on the top. I love this toy because the face is sewn on – no safety eyes or buttons to worry about for little ones. It’s also soft and easy for little hands to grab.
This was a really fun project to make and worked up more quickly than I thought it would. It turned out so cute!
I know we all think this every year, but how has the last year gone by so quickly?!?!? It seems like just yesterday I was looking back at 2021 and now it’s time to look back at 2022!
Disclosure: Some of the links on my site are affiliate links, meaning, at no additional cost to you, I will earn a small commission if you click through and make a purchase. As an Amazon Associate I earn from qualifying purchases.
It was another fun year here at Creatingme! I created 19 new crochet patterns! And shared some projects using other fabulous designers’ patterns, too. Here are a few pics of some projects from my 2022 patterns.
I created a lot of cards, including a new Christmas card design each month…Here are just a few of my favorites.
I also created other crafty things. Here are some fun things I crafted during the year.
I shared a few tasty recipes, too! 😋
We took an end of Summer trip to Mackinac Island, MI. If you get a chance to visit, I think you would really enjoy it! It’s like stepping back to a simpler time and the fudge is amazing! 😋 You can read more about our visit in this post. 😊
I’m planning some fun, creative things for 2023! I’m hoping to create a Christmas card each month like I did last year – it made it so much easier to make a few each month instead of trying to make them all in November. I have a lot of Christmas craft supplies in my stash so I’m thinking about creating a fun project every month or two to get ready for the holidays. I’ll make lots of cards and crafts for each season and share a recipe every now and then. And of course there will be lots of crochet projects with my own patterns and patterns from other great designers. I’m looking forward to seeing where my creativity leads me – I hope you’ll join me!
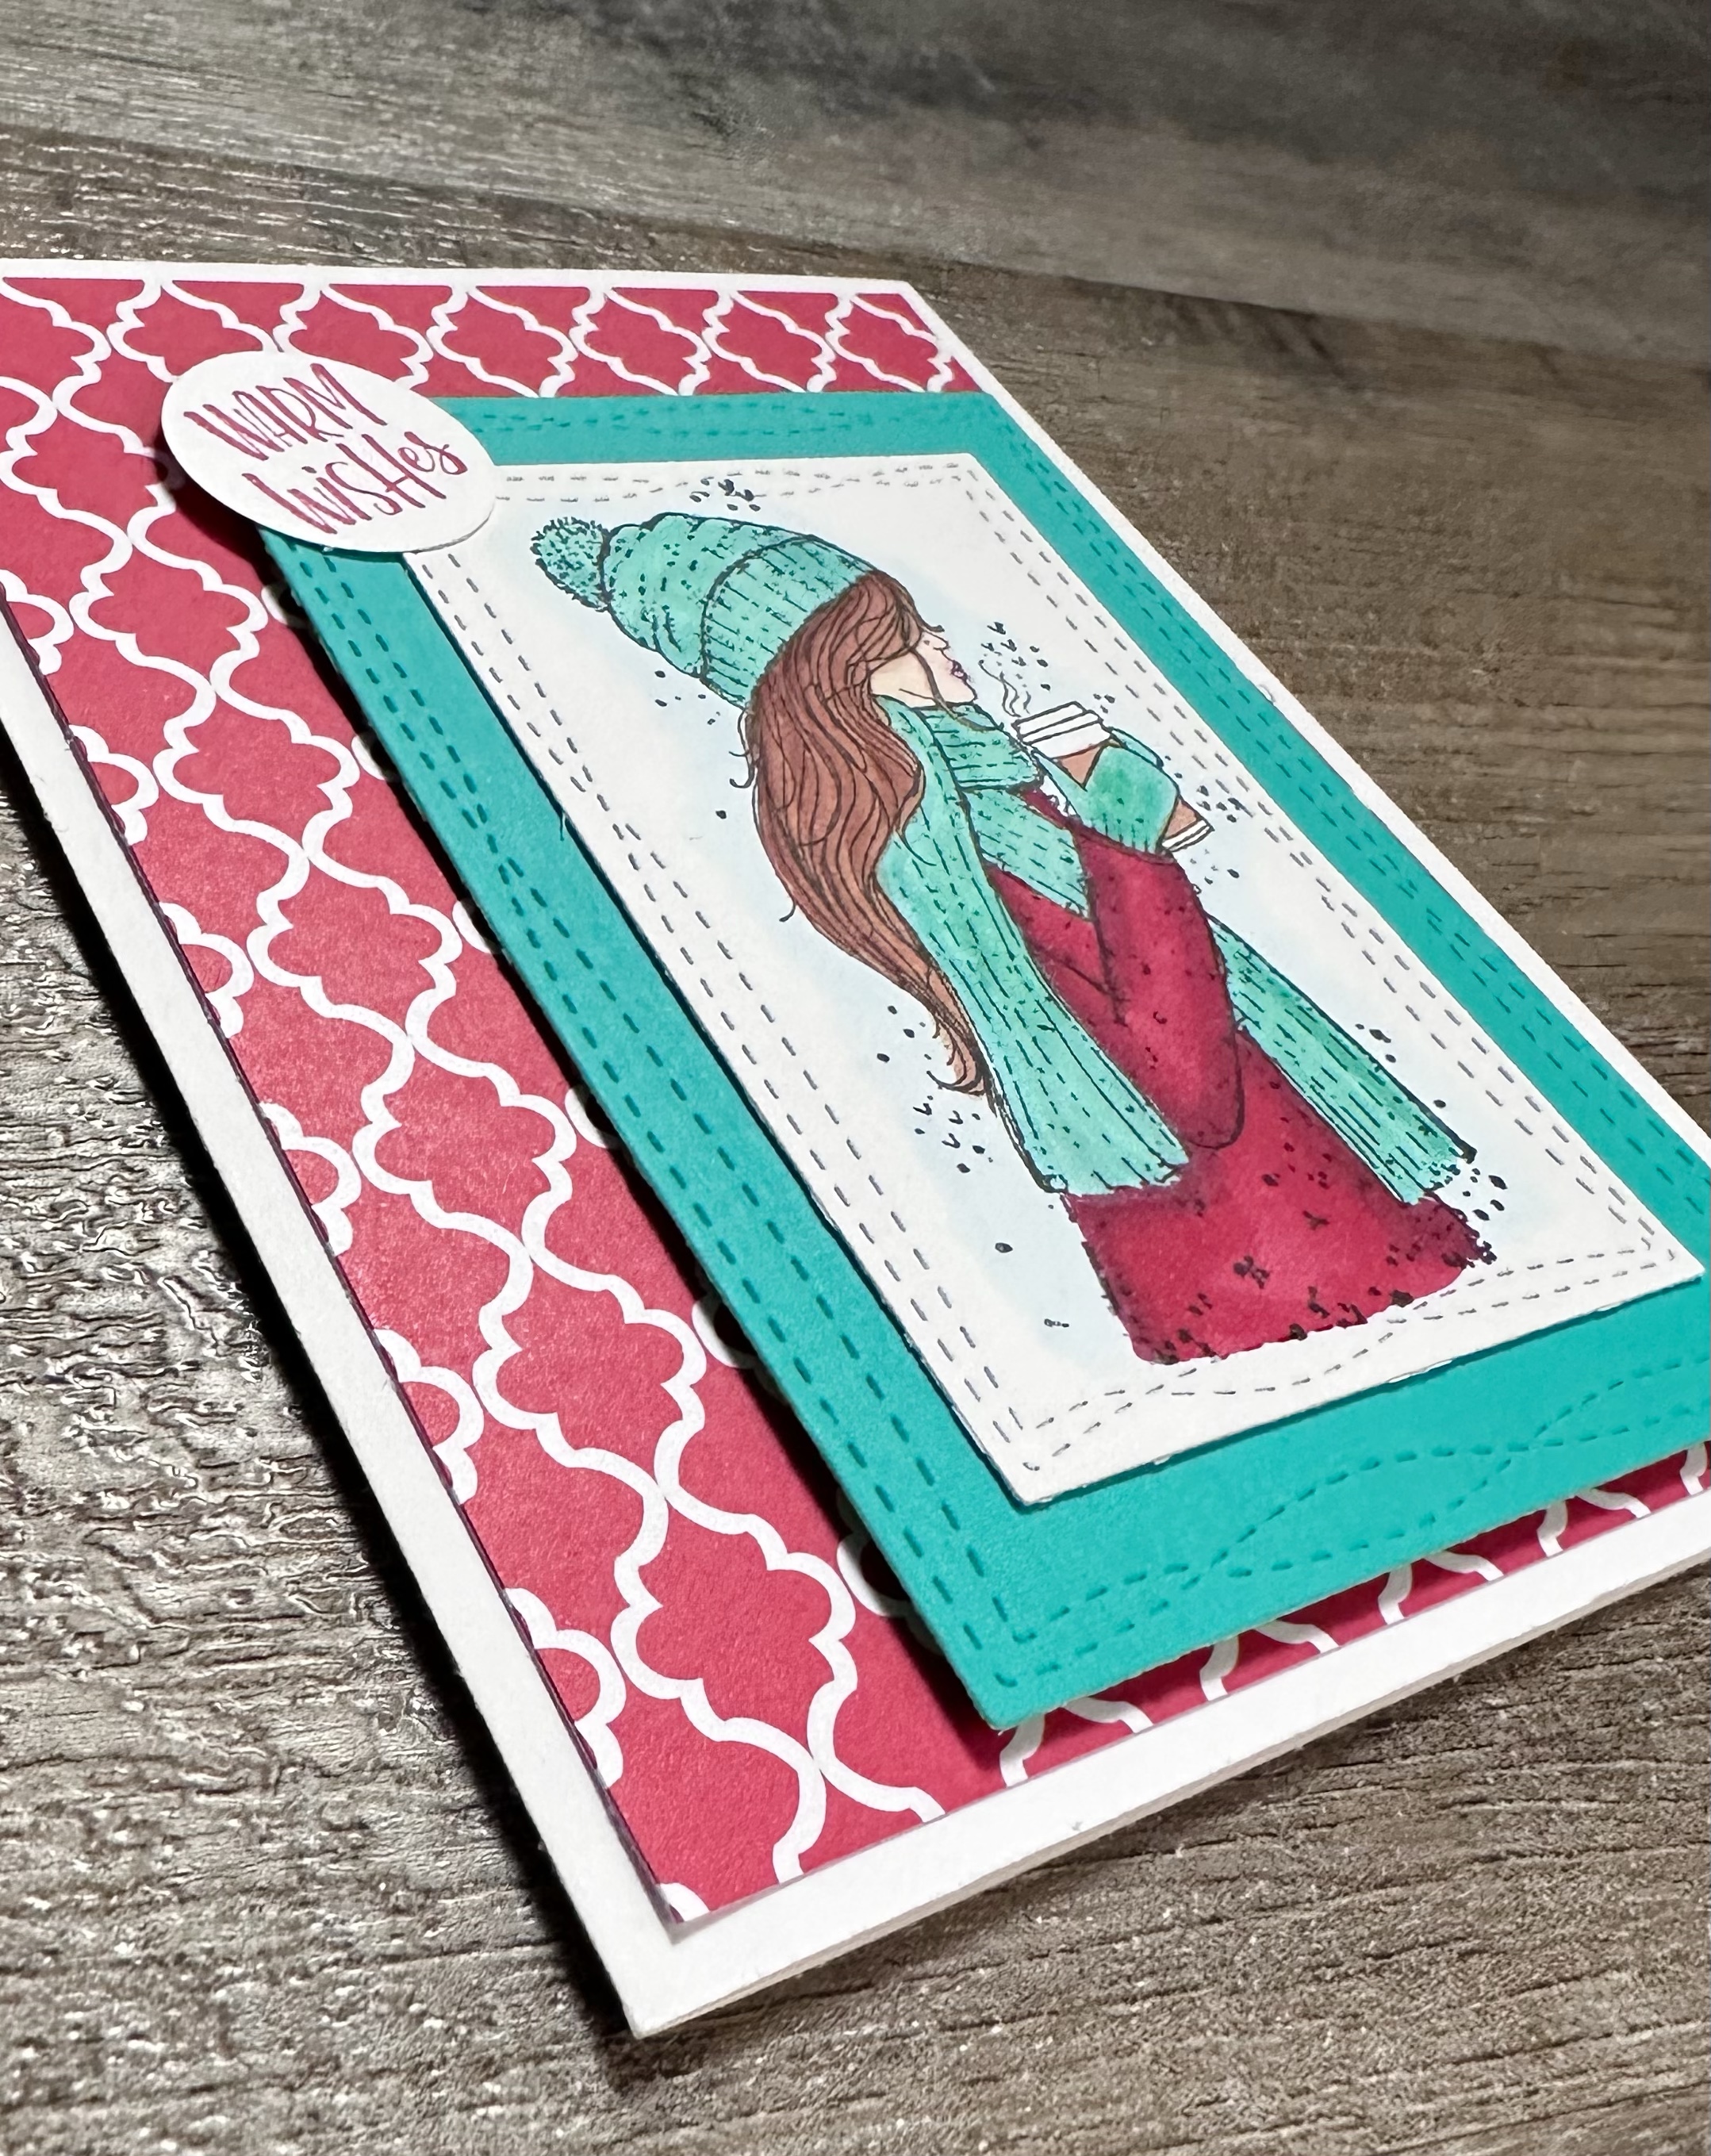
I made this card for my sweet friend’s birthday and after taking another look at it, I thought it could also be a great card for sending Warm Wishes for the New Year.
So to all of you…I am sending all of the Warm Wishes for 2023!! I hope your year is filled with many blessings, much love, lots of laughter, and tons of creativity!! ❤️
Disclosure: Some of the links on my site are affiliate links, meaning, at no additional cost to you, I will earn a small commission if you click through and make a purchase. As an Amazon Associate I earn from qualifying purchases.
I attached a piece of red patterned paper to a white card and attached the stamped image with foam tape. The sentiment is attached to the top left corner of the stamped image to finish the card.
It’s that time of year where we all start thinking about reorganizing our homes – or maybe we don’t. 😉 I love a neat and organized home, but I’m not always great at it. Especially in my craft room! 🤦♀️
Anyway…my best friend recently gifted me these great containers for food storage. They are perfect for all kinds of pantry staples and fit well together to save space on your shelves. And I love the flip handle for opening them!
Disclosure: Some of the links on my site are affiliate links, meaning, at no additional cost to you, I will earn a small commission if you click through and make a purchase. As an Amazon Associate I earn from qualifying purchases.
I already had some glass containers that I’ve had for years, but they were much heavier and didn’t stack well. I have them boxed up to take to the thrift store – I’m sure they will be useful for someone else.
I’m also trying to use my Cricut Explore Air 2 Machine more so labeling my new containers was the perfect quick project. I still have a lot to learn about using my Cricut but I’m slowly getting more comfortable with it. 😊
I used the font called Apple Chancery (which is a font on my computer) with the Cricut Design Space to design my labels. I made each label about 3 to 3.5 inches wide. Design Space automatically sized the height of each label.
There are tons of videos online to help with learning how to use your Cricut. I’ll admit I’m still a little intimidated, but I’m going to keep trying and learning how to use mine.
It’s a simple thing, but my new labeled containers make me so happy!! 😃 Maybe this will inspire me to organize something else…
Just popping in to wish you all a very Merry Christmas! 🎄 I hope you all have a wonderful day celebrating the birth of our Savior Jesus Christ with your family and friends. ❤️
Disclosure: Some of the links on my site are affiliate links, meaning, at no additional cost to you, I will earn a small commission if you click through and make a purchase. As an Amazon Associate I earn from qualifying purchases.
For unto us a child is born, unto us a son is given: and the government shall be upon his shoulder: and his name shall be called Wonderful, Counsellor, The mighty God, The everlasting Father, The Prince of Peace” (Isaiah 9:6).
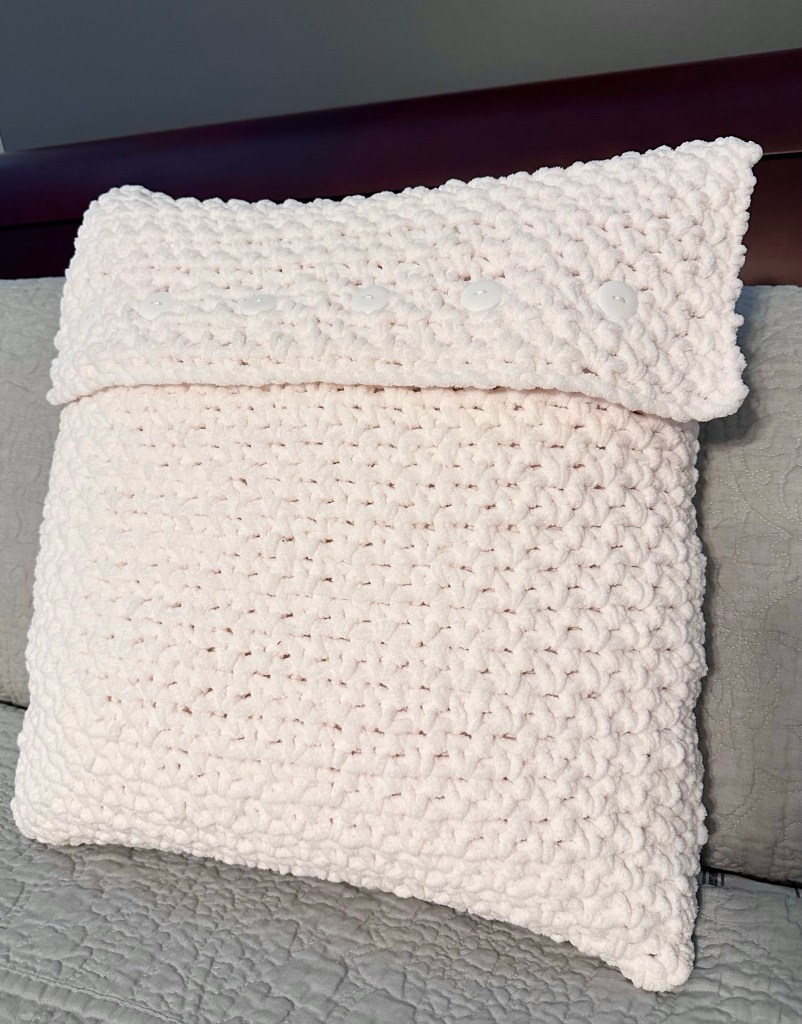
Are you wanting to spruce up your bedroom or living room for the New Year? This Chunky Crochet Farmhouse Pillow Cover is so easy to stitch up and you can make it in any size!
Disclosure: Some of the links on my site are affiliate links, meaning, at no additional cost to you, I will earn a small commission if you click through and make a purchase. As an Amazon Associate I earn from qualifying purchases.
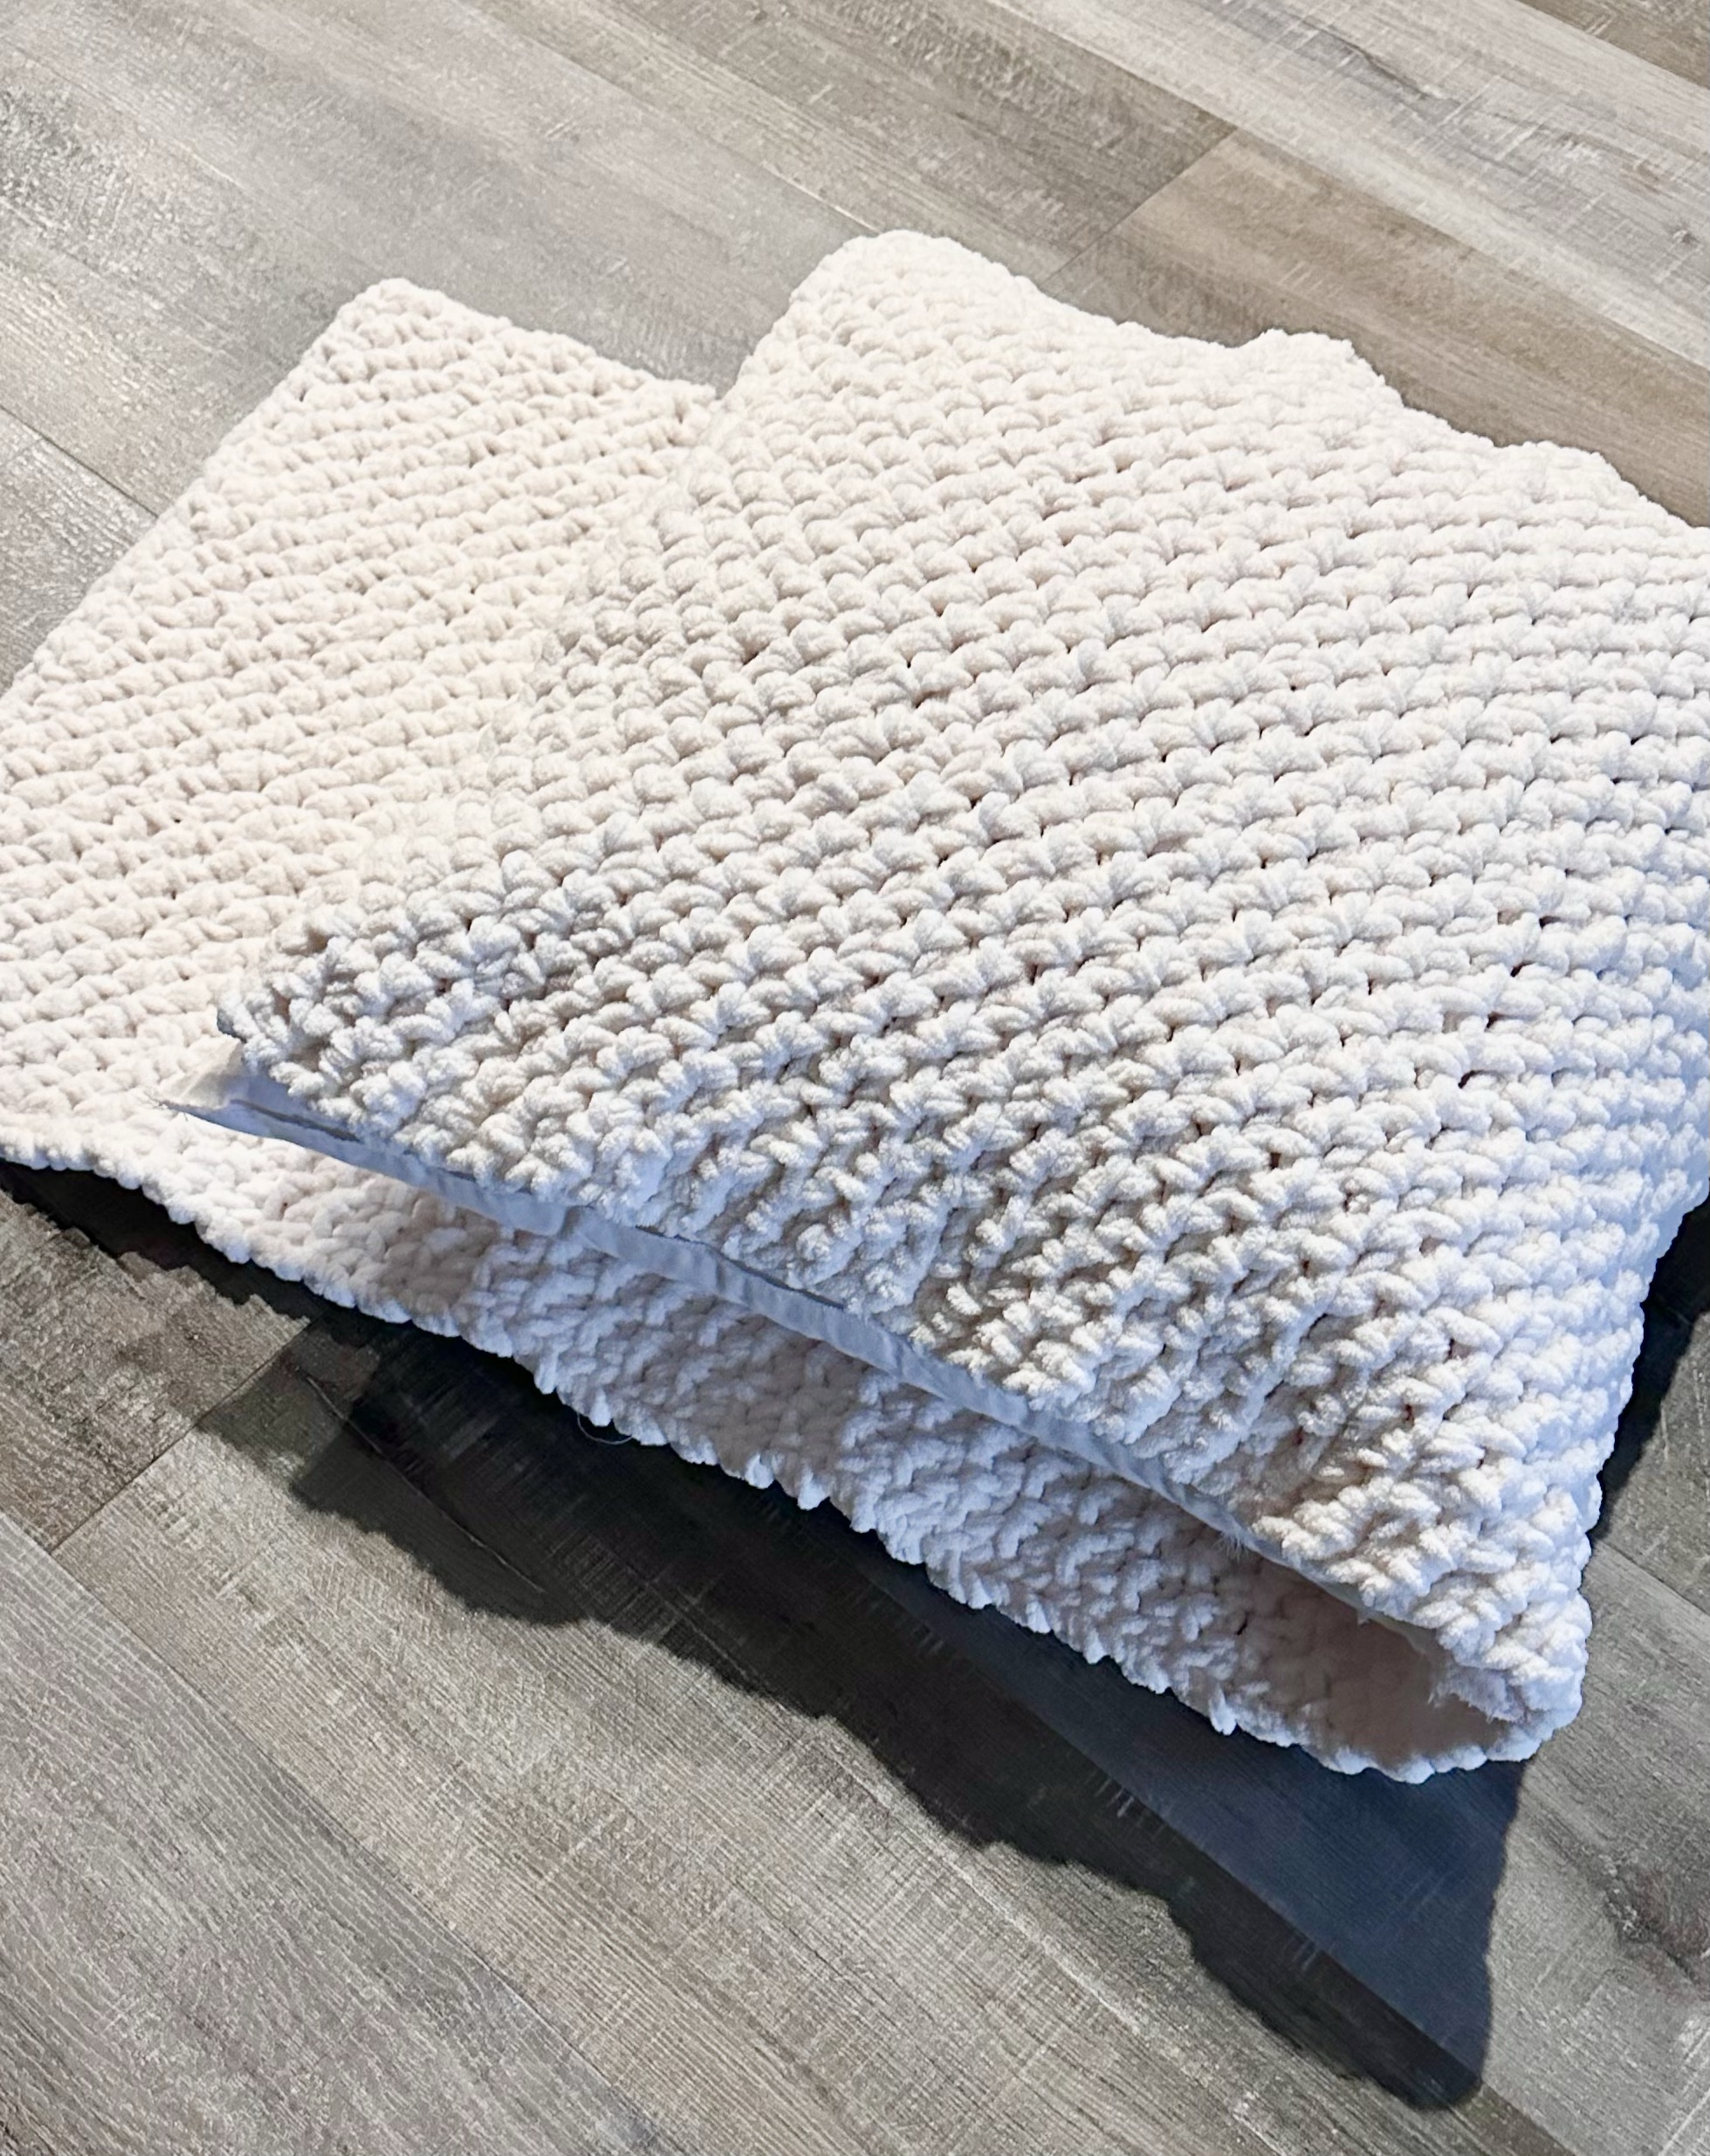
This is a super easy pattern using the Granite Stitch which is just alternating single crochet and chain stitches. As you can see in the photo below, the cover is just one long rectangle – so easy! My pillow insert is 20 inches square, so larger than a throw pillow, but this pattern is so simple to change to fit your pillow insert.
To begin, chain an even number of chain stitches. To know how many to chain, put your chain over your pillow insert. It should fit from the middle of one side to the middle of the opposite side of the insert without stretching it. I forgot to take a photo of this step, but you can see what I mean by looking at the right photo below.
Chunky Crochet Farmhouse Pillow Cover Pattern
Bernat Blanket Yarn – I used Whipped Crream
N/10mm crochet hook
1-inch buttons – I used 6
For my 20 inch pillow insert, I chained 44 stitches. You can chain any number to fit your pillow insert – just make sure to chain an even numberof stitches.
Row 1: Single crochet in the 2nd chain from the hook. *chain 1, skip 1 chain, single crochet in the next chain* Repeat from * to * to the end of the chain. You should end with a single crochet in your last chain. Chain 1 and turn.
Row 2: Single crochet in the 1st single crochet, single crochet in the next chain 1 space. *chain 1, single crochet in next chain 1 space.* Repeat from * to * last single crochet, single crochet in the last single crochet. Chain 1 and turn.
Row 3: Single crochet in the 1st single crochet. *chain 1, single crochet in next chain 1 space* Repeat from * to * to the last 2 single crochet. Chain 1, skip 1 single crochet, and single crochet in the last single crochet. Chain 1 and turn.
Repeat Row 2 and 3 until your rectangle wraps around your pillow insert with an extra few inches to make the flap that you will fold over. For my pillow, my flap measures about 9 inches. If your pillow insert is smaller, you will probably want your flap to be smaller. My rectangle measures approximately 50 inches long by 20 inches wide.
Once you have the length you want, fold your piece around your pillow insert like in the photo above so you’ll know how far to stitch up the sides, leaving the flap at the top. Remove the insert and whip stitch both sides of the pillow cover using the same yarn. Turn the pillow cover so your seams are on the inside.
Fold your flap over and decide where to sew on several 1-inch buttons. I used 6 buttons for my cover, you made need less for a smaller pillow insert. I also wanted to have a few rows below my buttons when the cover was fastened. It’s really a personal preference on where to place them. The 1-inch buttons will easily fit through the stitches without creating any buttonholes. The photos below give you a better idea on how placed my buttons
Here’s a link to a free PDF in you’d like to print the pattern…
The Granite Stitch creates such a wonderful texture and this pillow cover is so soft and cushy made with Bernat Blanket yarn!
If this Whipped Cream color is not for you, Bernat Blanket yarn comes in lots of other colors that are sure to match your decor. Treat yourself to some new pillows – they can add so much to your decor!
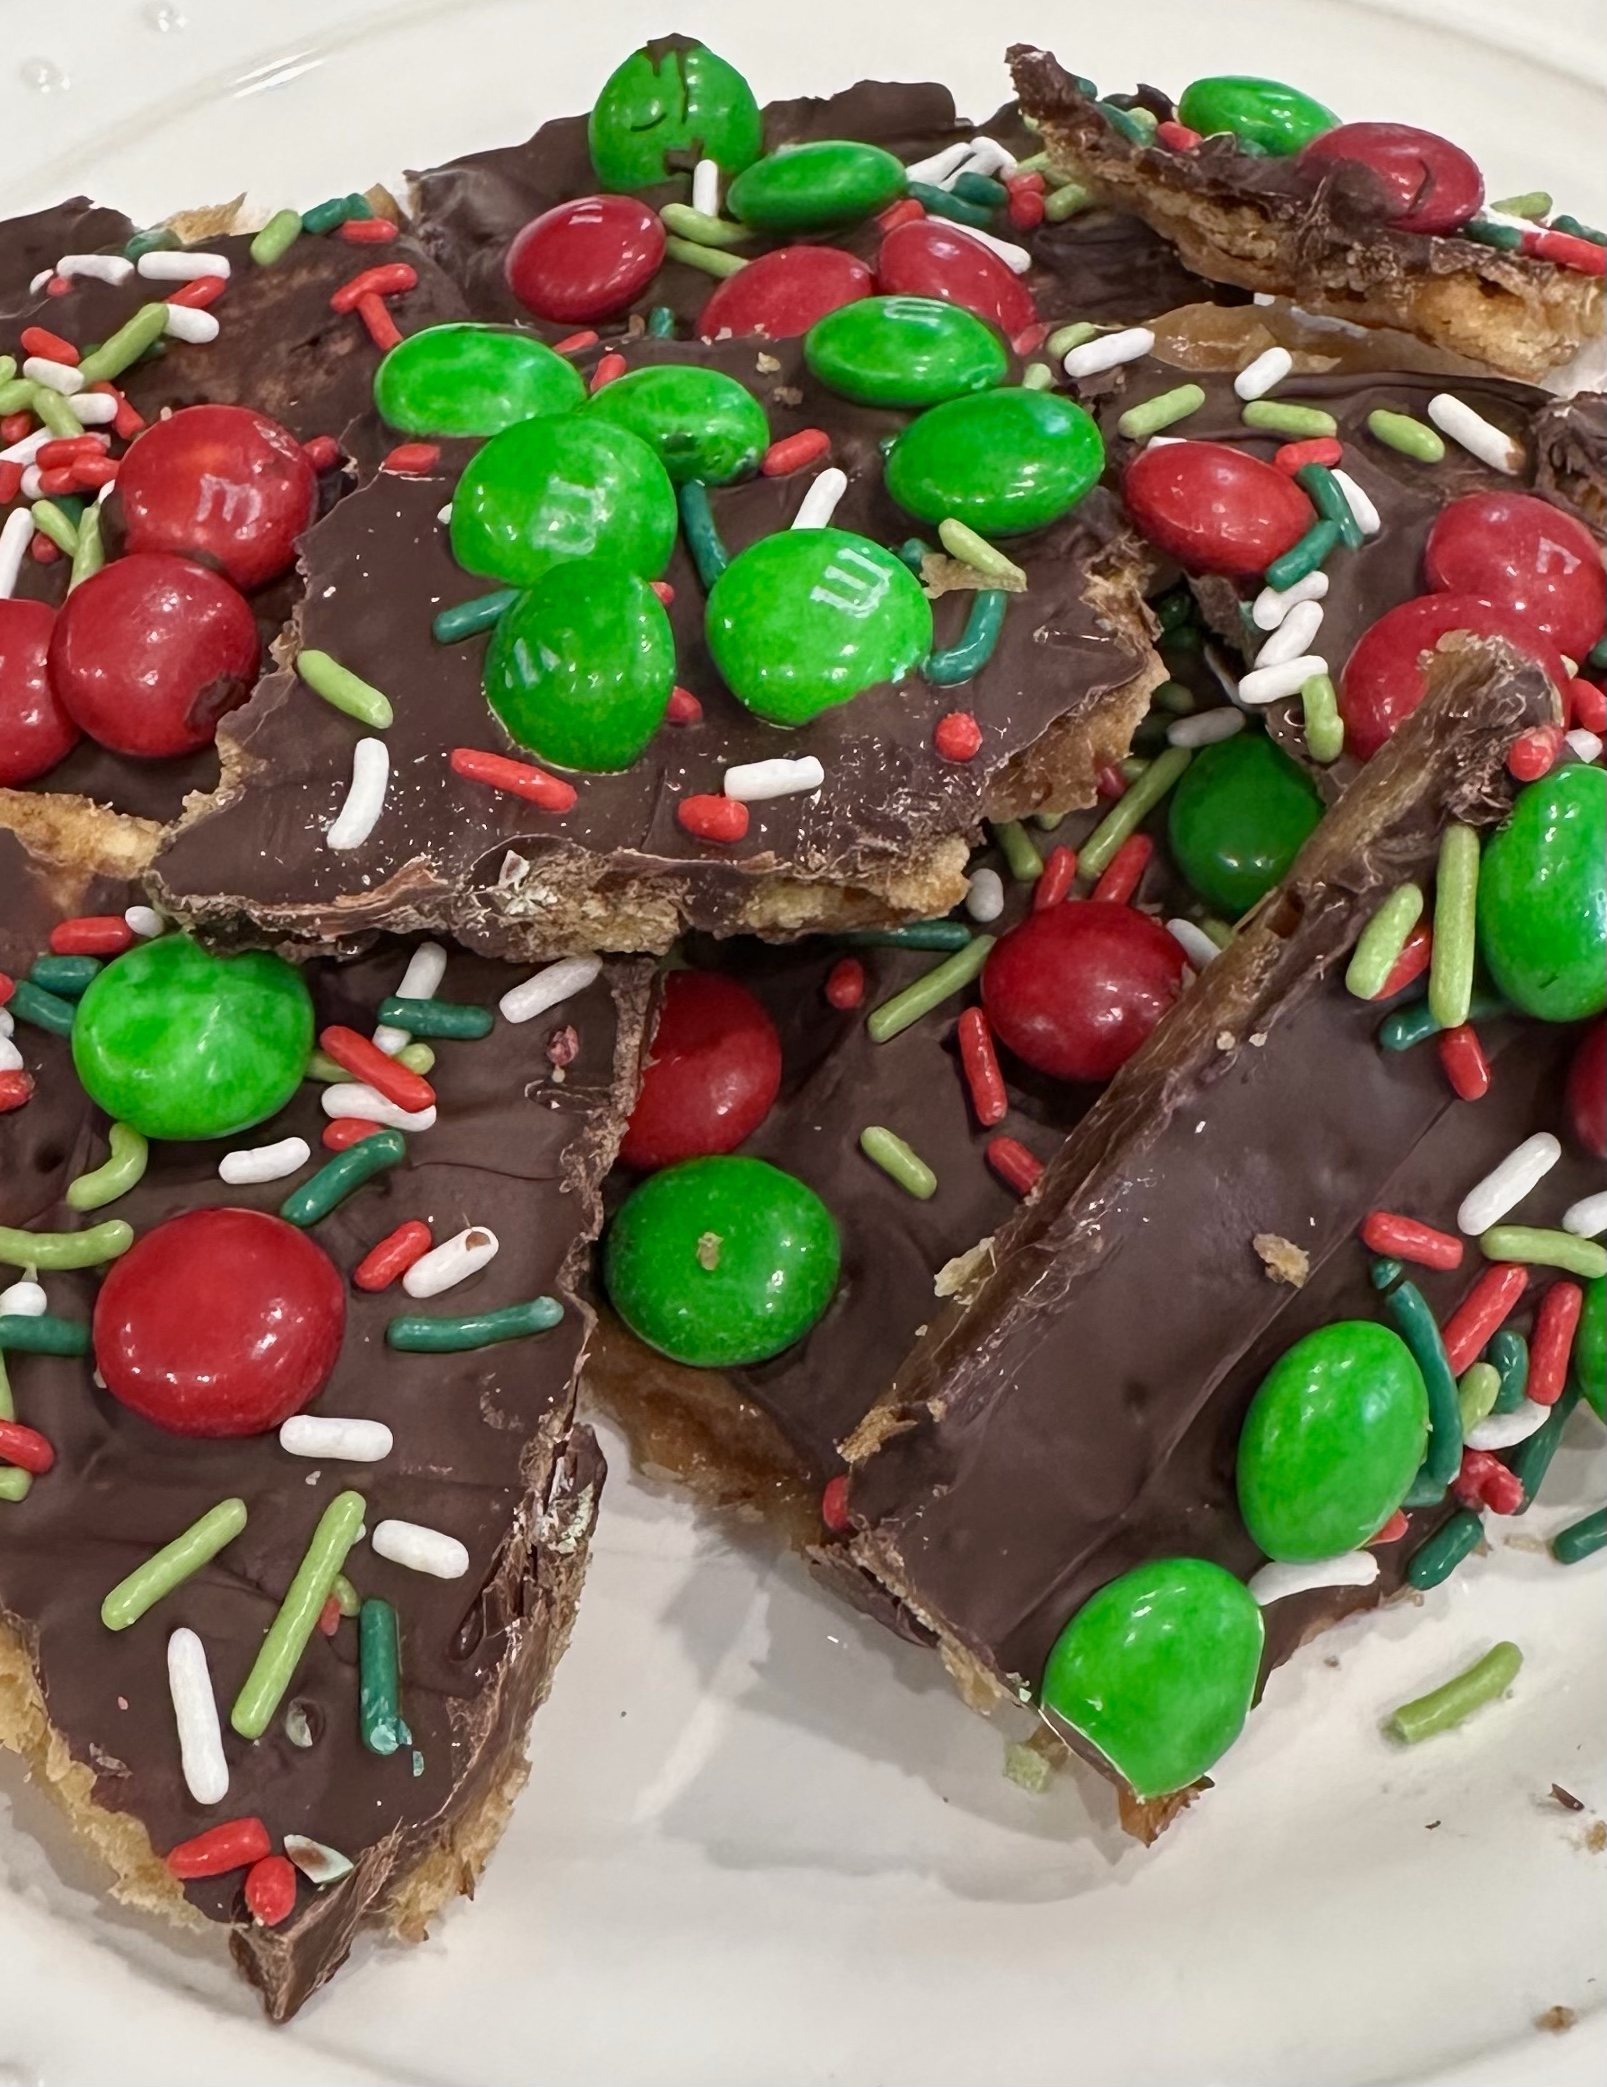
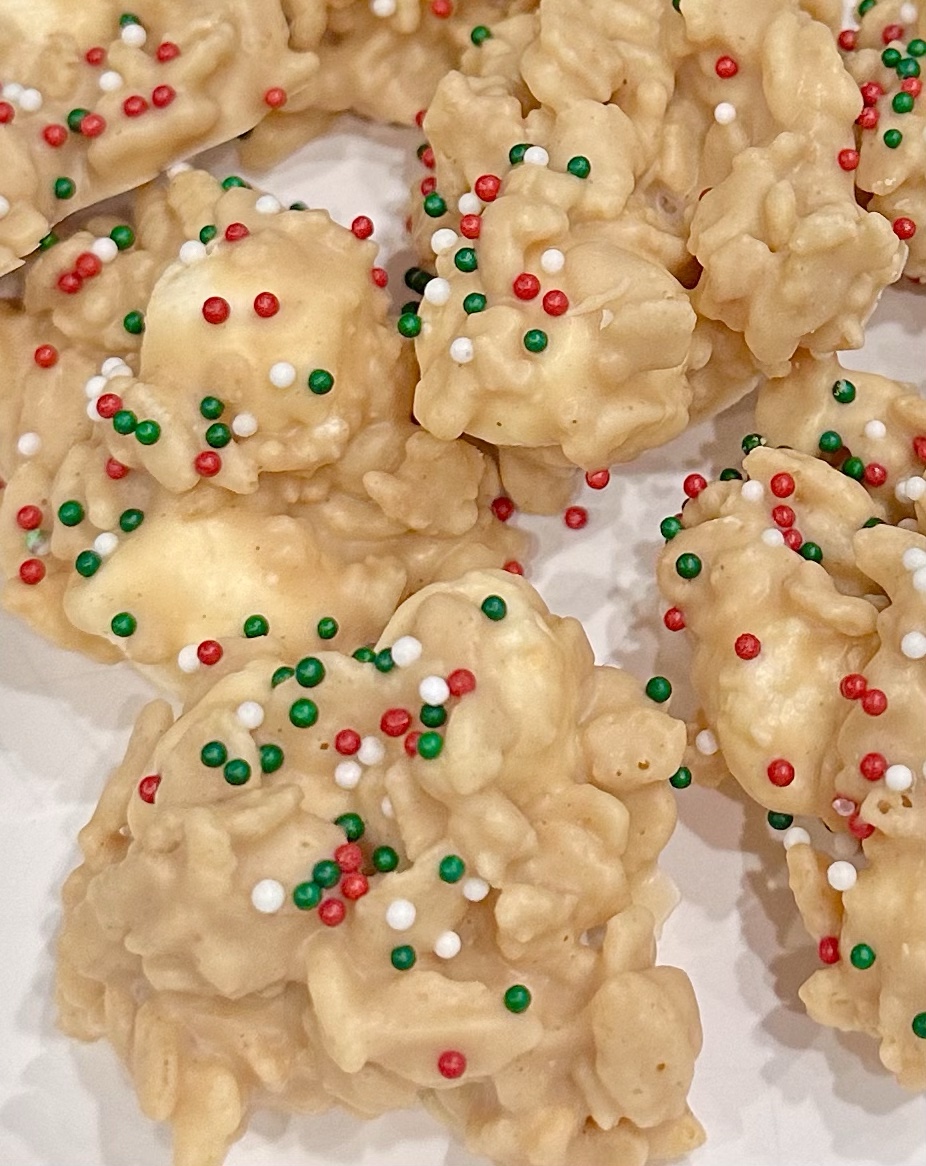
Are you in charge of bringing a sweet treat to your Christmas gathering? Or are you looking for an easy last minute gift for your neighbors? I have 2 great sweet treat options for you! Both are easy and festive – and if you use the right crispy rice cereal, one of them can be gluten free!
Disclosure: Some of the links on my site are affiliate links, meaning, at no additional cost to you, I will earn a small commission if you click through and make a purchase. As an Amazon Associate I earn from qualifying purchases.
The first one is Sweet & Salty Holiday Toffee. I’ve seen several recipes for making this treat made with saltines, but this is the one I used. Super easy to make and the sprinkles and M&Ms add some festive holiday colors. I actually used more than the 35 saltine crackers listed in the recipe – I just filled up my jelly roll pan and then continued on with the recipe.
This next one is No Bake Avalanche Cookies. I love a good no bake treat! So easy and fun to make. To make this treat gluten free, make sure your crispy rice cereal is gluten free. Not all brands are – I used the crispy rice cereal from Aldi. Be sure to check your labels if you need this treat to be gluten free. I added holiday sprinkles over the top of my cookies to make them more festive. Using parchment paper on your jelly roll pans before dropping your cookies makes cleanup so easy!
Pack up some of these Easy Sweet Christmas Treats in a fun Christmas cellophane bag or tin, add a cute tag (maybe a handmade one like this or this), and you have a sweet treat for anyone on your list! 🎄
Disclosure: Some of the links on my site are affiliate links, meaning, at no additional cost to you, I will earn a small commission if you click through and make a purchase. As an Amazon Associate I earn from qualifying purchases.