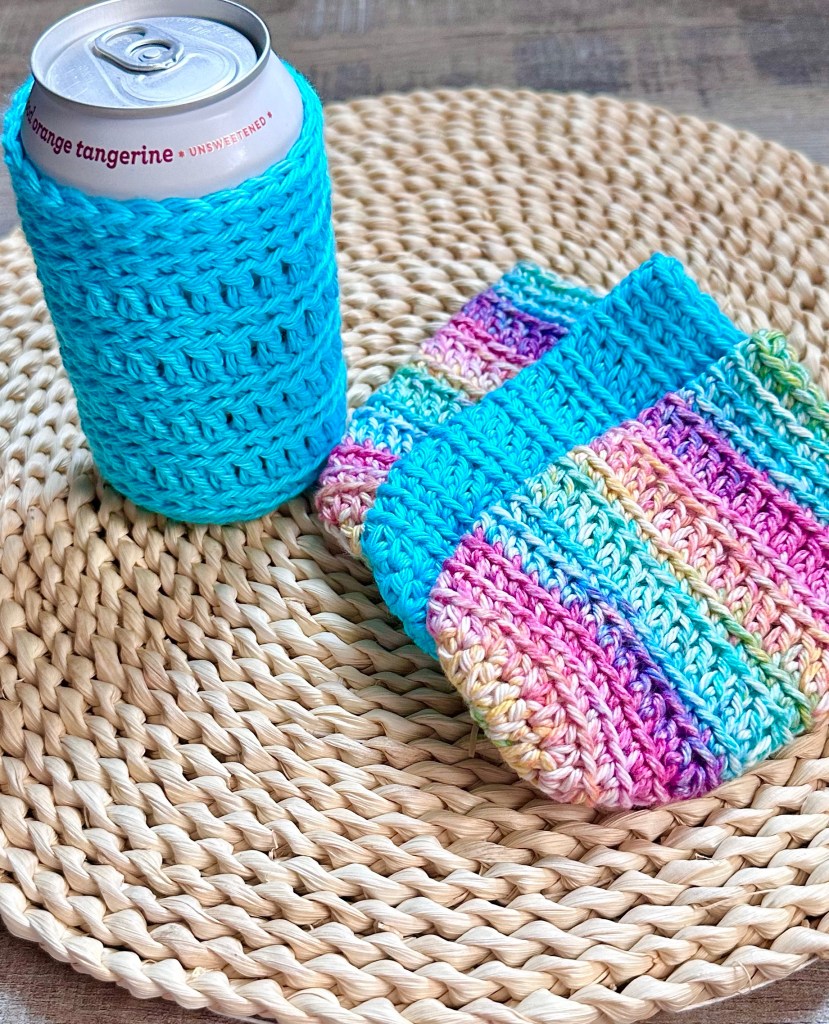
Can Cozies in the Summertime just make things better! 😊 They keep your hands and table dry from all the condensation, not to mention they are just cute. 😉
Disclosure: Some of the links on my site are affiliate links, meaning, at no additional cost to you, I will earn a small commission if you click through and make a purchase. As an Amazon Associate I earn from qualifying purchases.
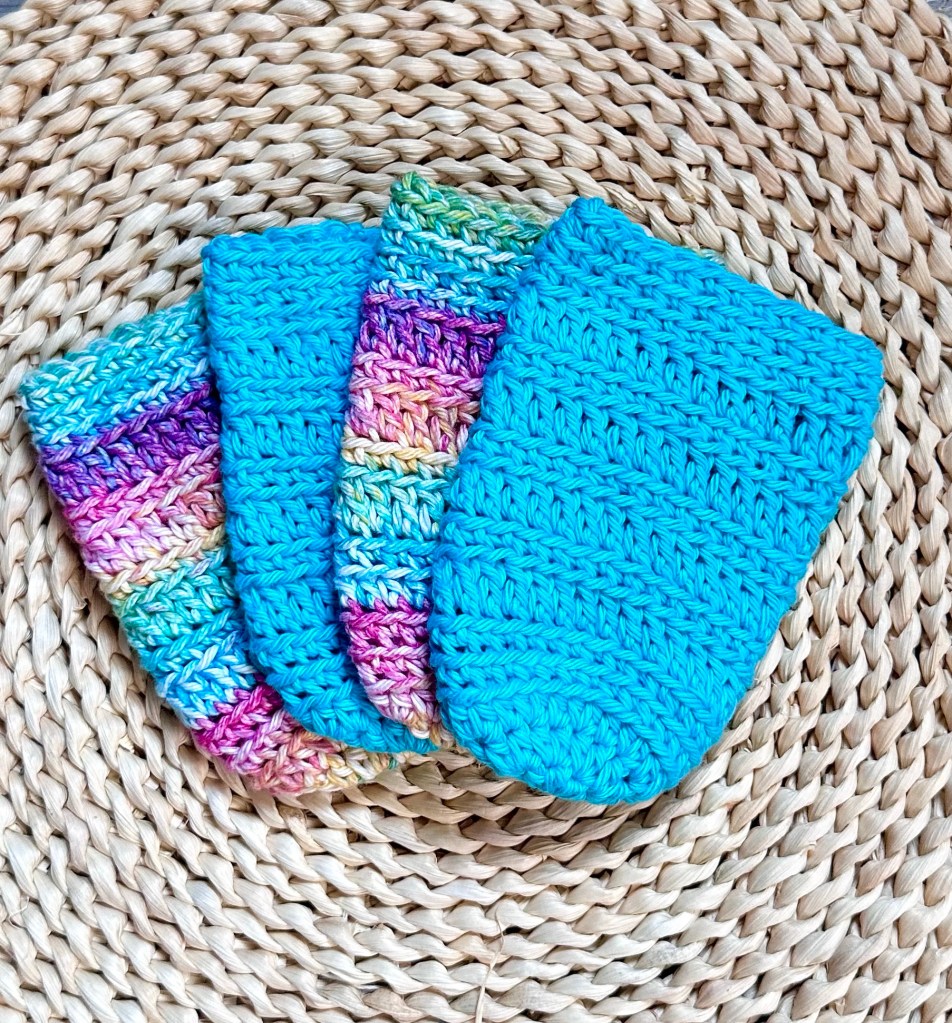
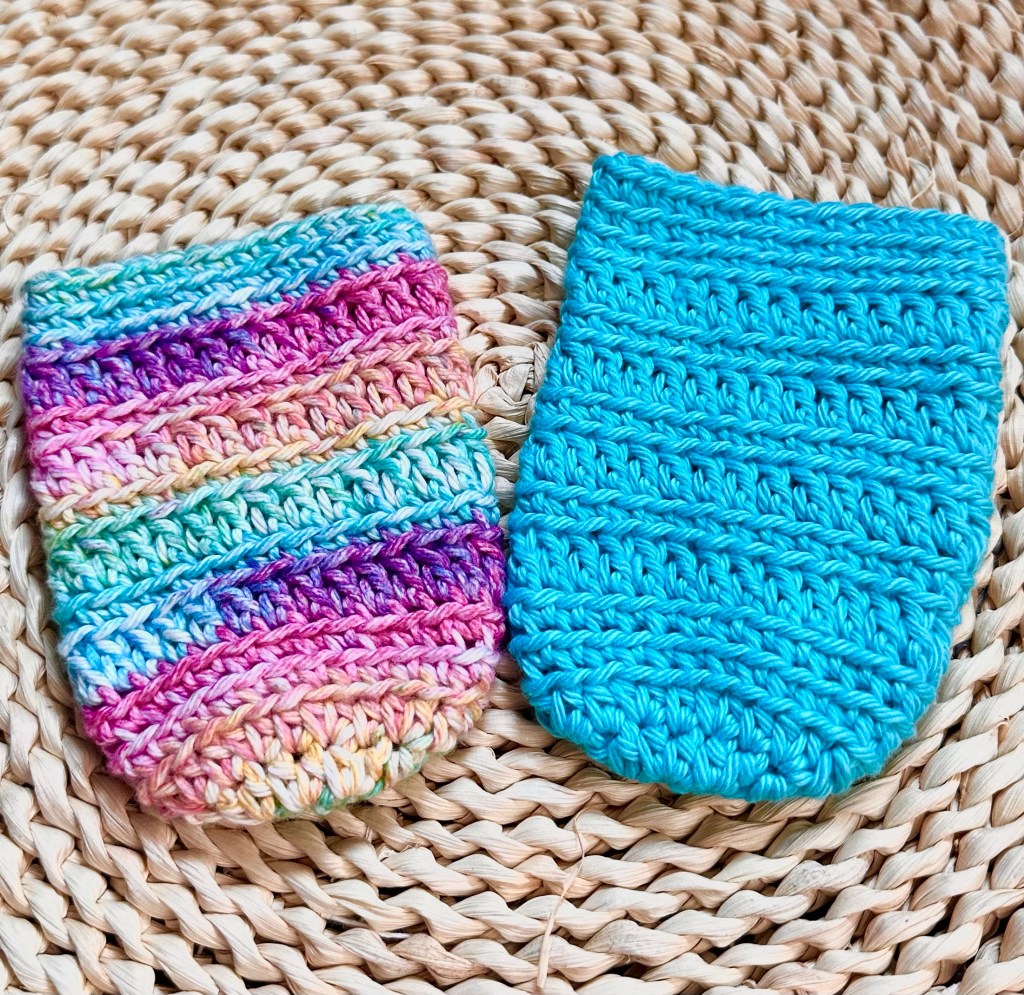
I found this variegated I Love This Cotton yarn in Brights at Hobby Lobby – it made me think of Summertime and the Turquoise color goes with it perfectly. I use can cozies all the time and these colors make fun Summertime Cozies. The cozies fit 16.9 ounce bottles, too! Stitch up your cozies using your favorite cotton yarn and an H/5mm crochet hook. They work up very quickly so you can easily make several in just an evening.
By working in the back loops only, it creates a great texture. You’ll get 3-4 cozies from each skein of I Love This Cotton yarn, so very economical! I’ve included the pattern below along with a link to a free PDF if you’d like to print it.
Crochet Summertime Can Cozy
I Love This Cotton Yarn in Brights and Turquoise
H/5mm hook
Stitches used US terms:
Magic Ring
Chain – ch
Single Crochet – sc
Half Double Crochet – hdc
Double Crochet – dc
Back Loop Only – blo
Slip Stitch – ss
Make Magic Ring, ch 1.
Round 1: Work 9 hdc in ring. Join with ss to first hdc. Pull ring closed. (9 stitches)
Round 2: ch 1. 2 hdc in same stitch as ss and in each stitch around. Join with ss to first hdc. (18 stitches)
Round 3: ch 1. 2 hdc in same stitch as ss. *hdc in next stitch, 2 hdc in next stitch* Repeat from * to * around to last stitch. hdc in last stitch. Join with ss to first hdc. (27 stitches)
Rounds 4-5: ch 1. Working in blo, sc in same stitch as ss and in each stitch around. Join with ss to first sc. (27 stitches)
Round 6: ch 2 (does not count as a stitch). Working in blo, dc in same stitch as ss and in each stitch around Join with ss to first dc. (27 stitches)
Round 7: ch 1. Working in blo, sc in same stitch as ss and in each stitch around. Join with ss to first sc. (27 stitches)
Round 8: ch 2 (does not count as a stitch). Working in blo, dc in same stitch as ss and in each stitch around Join with ss to first dc. (27 stitches)
Round 9: ch 1. Working in blo, sc in same stitch as ss and in each stitch around. Join with ss to first sc. (27 stitches)
Round 10: ch 2 (does not count as a stitch). Working in blo, dc in same stitch as ss and in each stitch around Join with ss to first dc. (27 stitches)
Round 11: ch 1. Working in blo, sc in same stitch as ss and in each stitch around. Join with ss to first sc. (27 stitches)
Round 12: ch 2 (does not count as a stitch). Working in blo, dc in same stitch as ss and in each stitch around Join with ss to first dc. (27 stitches)
Round 13-15: ch 1. Working in blo, sc in same stitch as ss and in each stitch around. Join with ss to first sc. (27 stitches)
I found my inspiration for June’s Christmas Card using the Sketch Challenge #34 from Build Your Stash Holiday Cardmakers. There is a great sketch released each month on their Facebook page to use as a starting point to create cards and get ready for the holiday season.
Disclosure: Some of the links on my site are affiliate links, meaning, at no additional cost to you, I will earn a small commission if you click through and make a purchase. As an Amazon Associate I earn from qualifying purchases.
I’ve been making a few Christmas cards each month – I hope I’ve inspired you to create some, too! You can find the cards I’ve made so far this year here… January, February, March, April, and May.
June’s card is a simple quick and easy card that only takes a few minutes to make. My Christmas tree stamp is an older one from Hero Arts. This tree would be cute, or you can use any of your favorite simple Christmas image stamps on your card. 🎄
To make the card, I trimmed 2 pieces of coordinating patterned paper – one 3 by 3 inches and one 3 by 1.5 inches – and attached them to a red card. I stamped the tree with green in on white card stock and trimmed around it using my favorite scissors. Using my Tim Holtz Ink Blending Tool, I inked the edges of the tree with green ink. This helps the image to pop against the patterned papers. I attached the tree to the card with foam tape. To finish the card I added dots of red glitter glue.
This is such a great layout that will work with any Christmas stamp that can be easily trimmed and popped up on the card. You can also use this layout for just about any occasion by changing your stamped image.
Half way through the year, and by making 6 cards of each design I created, I now have 36 cards ready to send out when the holiday season hits! How many Christmas cards have you created? 🎄
Scotland has so many ports, beaches, lochs, and waterfalls throughout the country. You are never far from water – and if you know me, you know that I love the soothing sounds of water lapping the shore. And Scotland did not disappoint!
I’m highlighting just a few of the beautiful ports, beaches, lochs, and waterfalls we visited. We saw so many more – even just random small waterfalls as we were driving that I wasn’t able to get a picture of. The countryside of Scotland is amazing!
Disclosure: Some of the links on my site are affiliate links, meaning, at no additional cost to you, I will earn a small commission if you click through and make a purchase. As an Amazon Associate I earn from qualifying purchases.
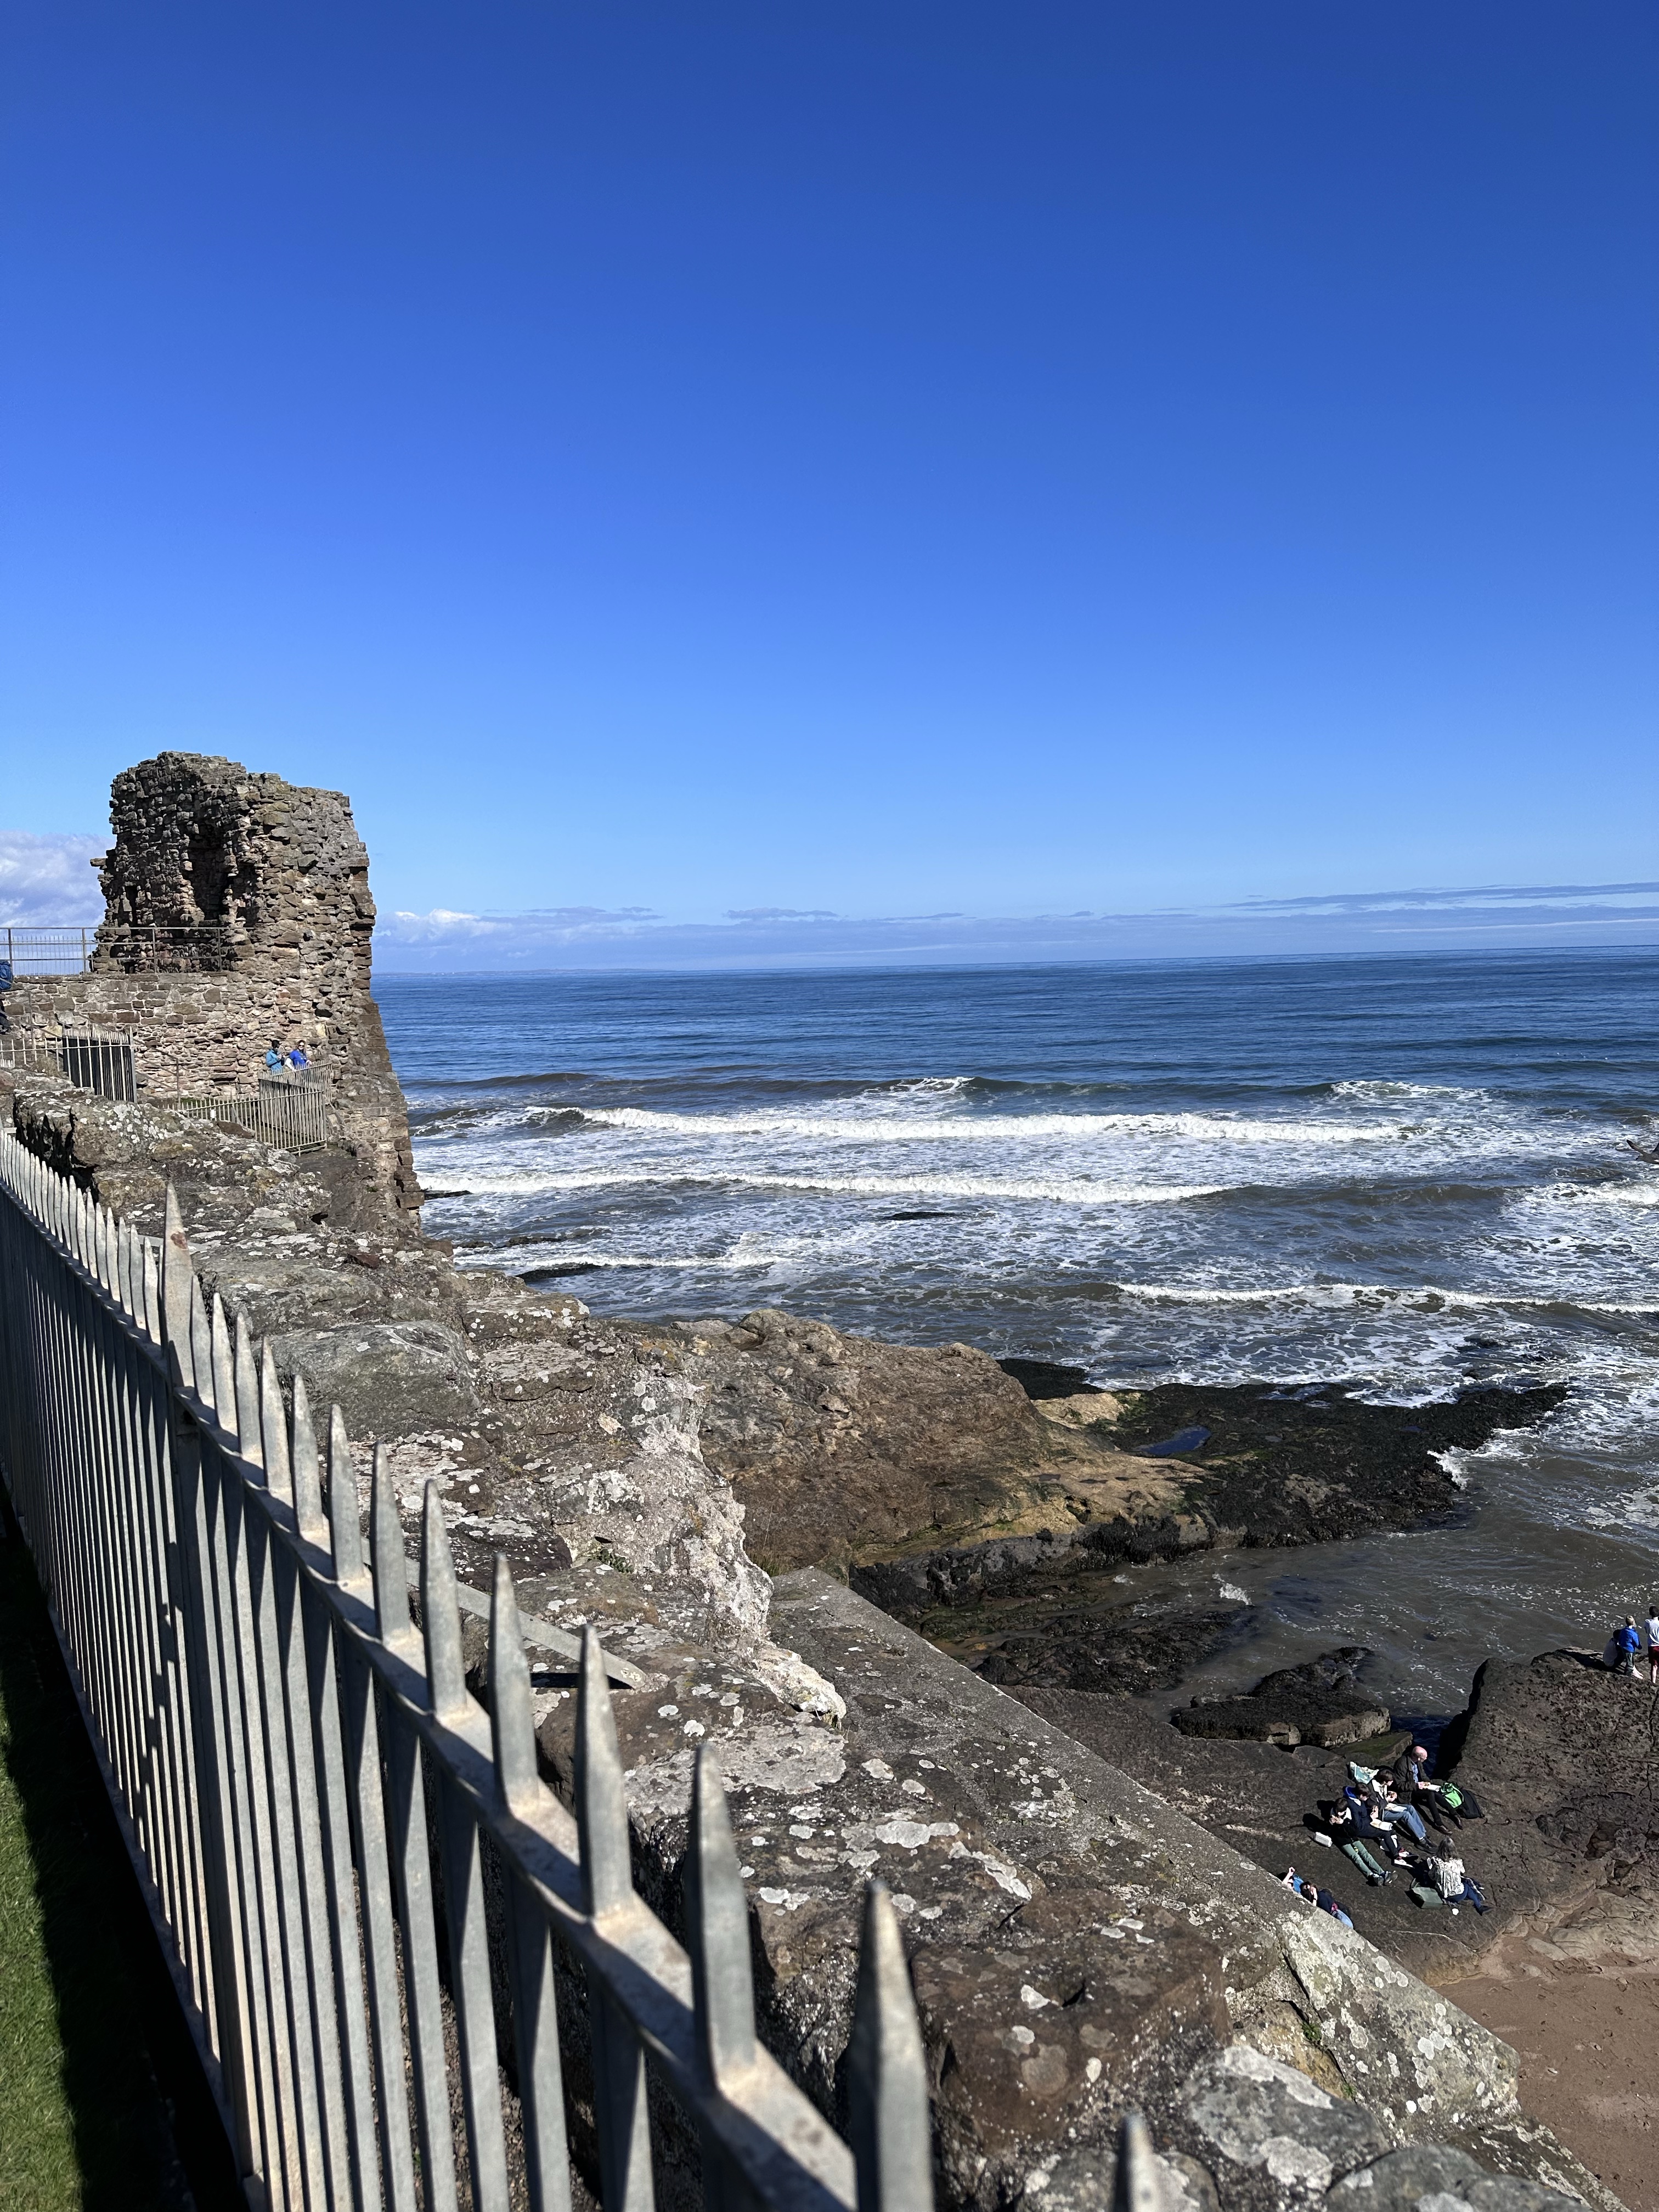
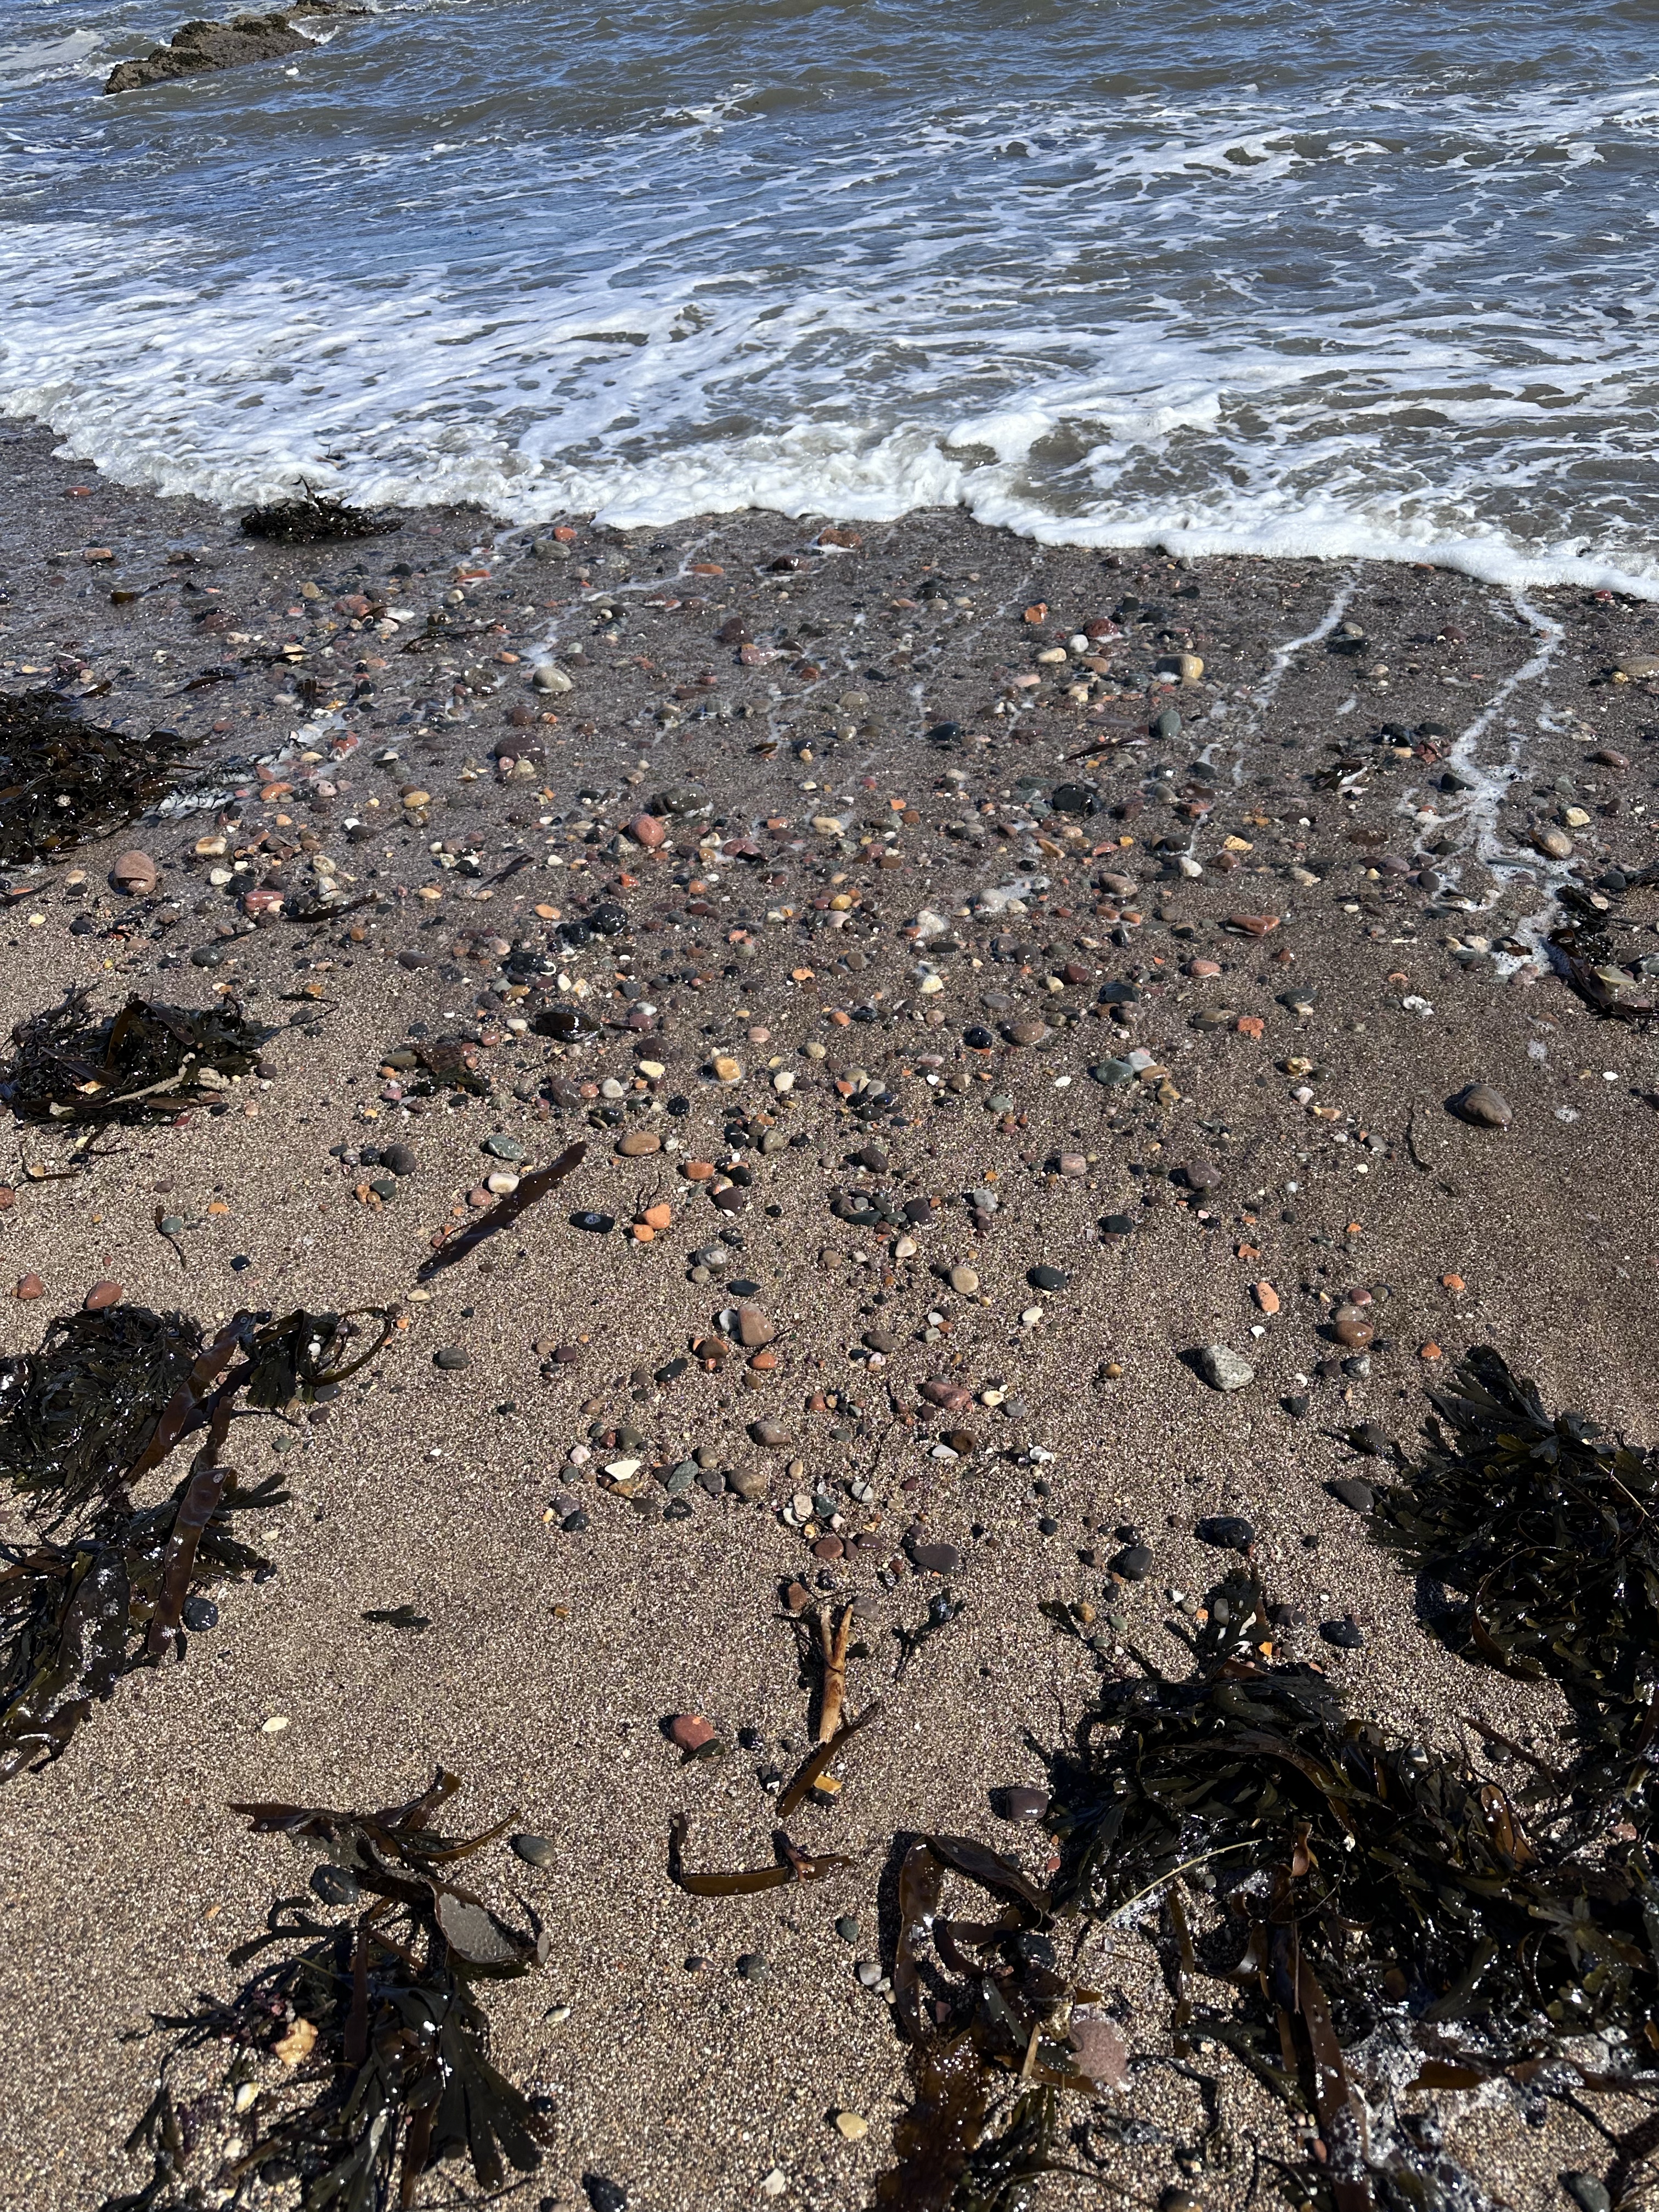
St. Andrews Beach
This beach is right next to St. Andrews Castle on the St. Andrews Bay of the North Sea. As you can see, it was a beautiful sunny day when we visited although still a bit chilly for swimming! I did pick up a few seashells from along the water’s edge.
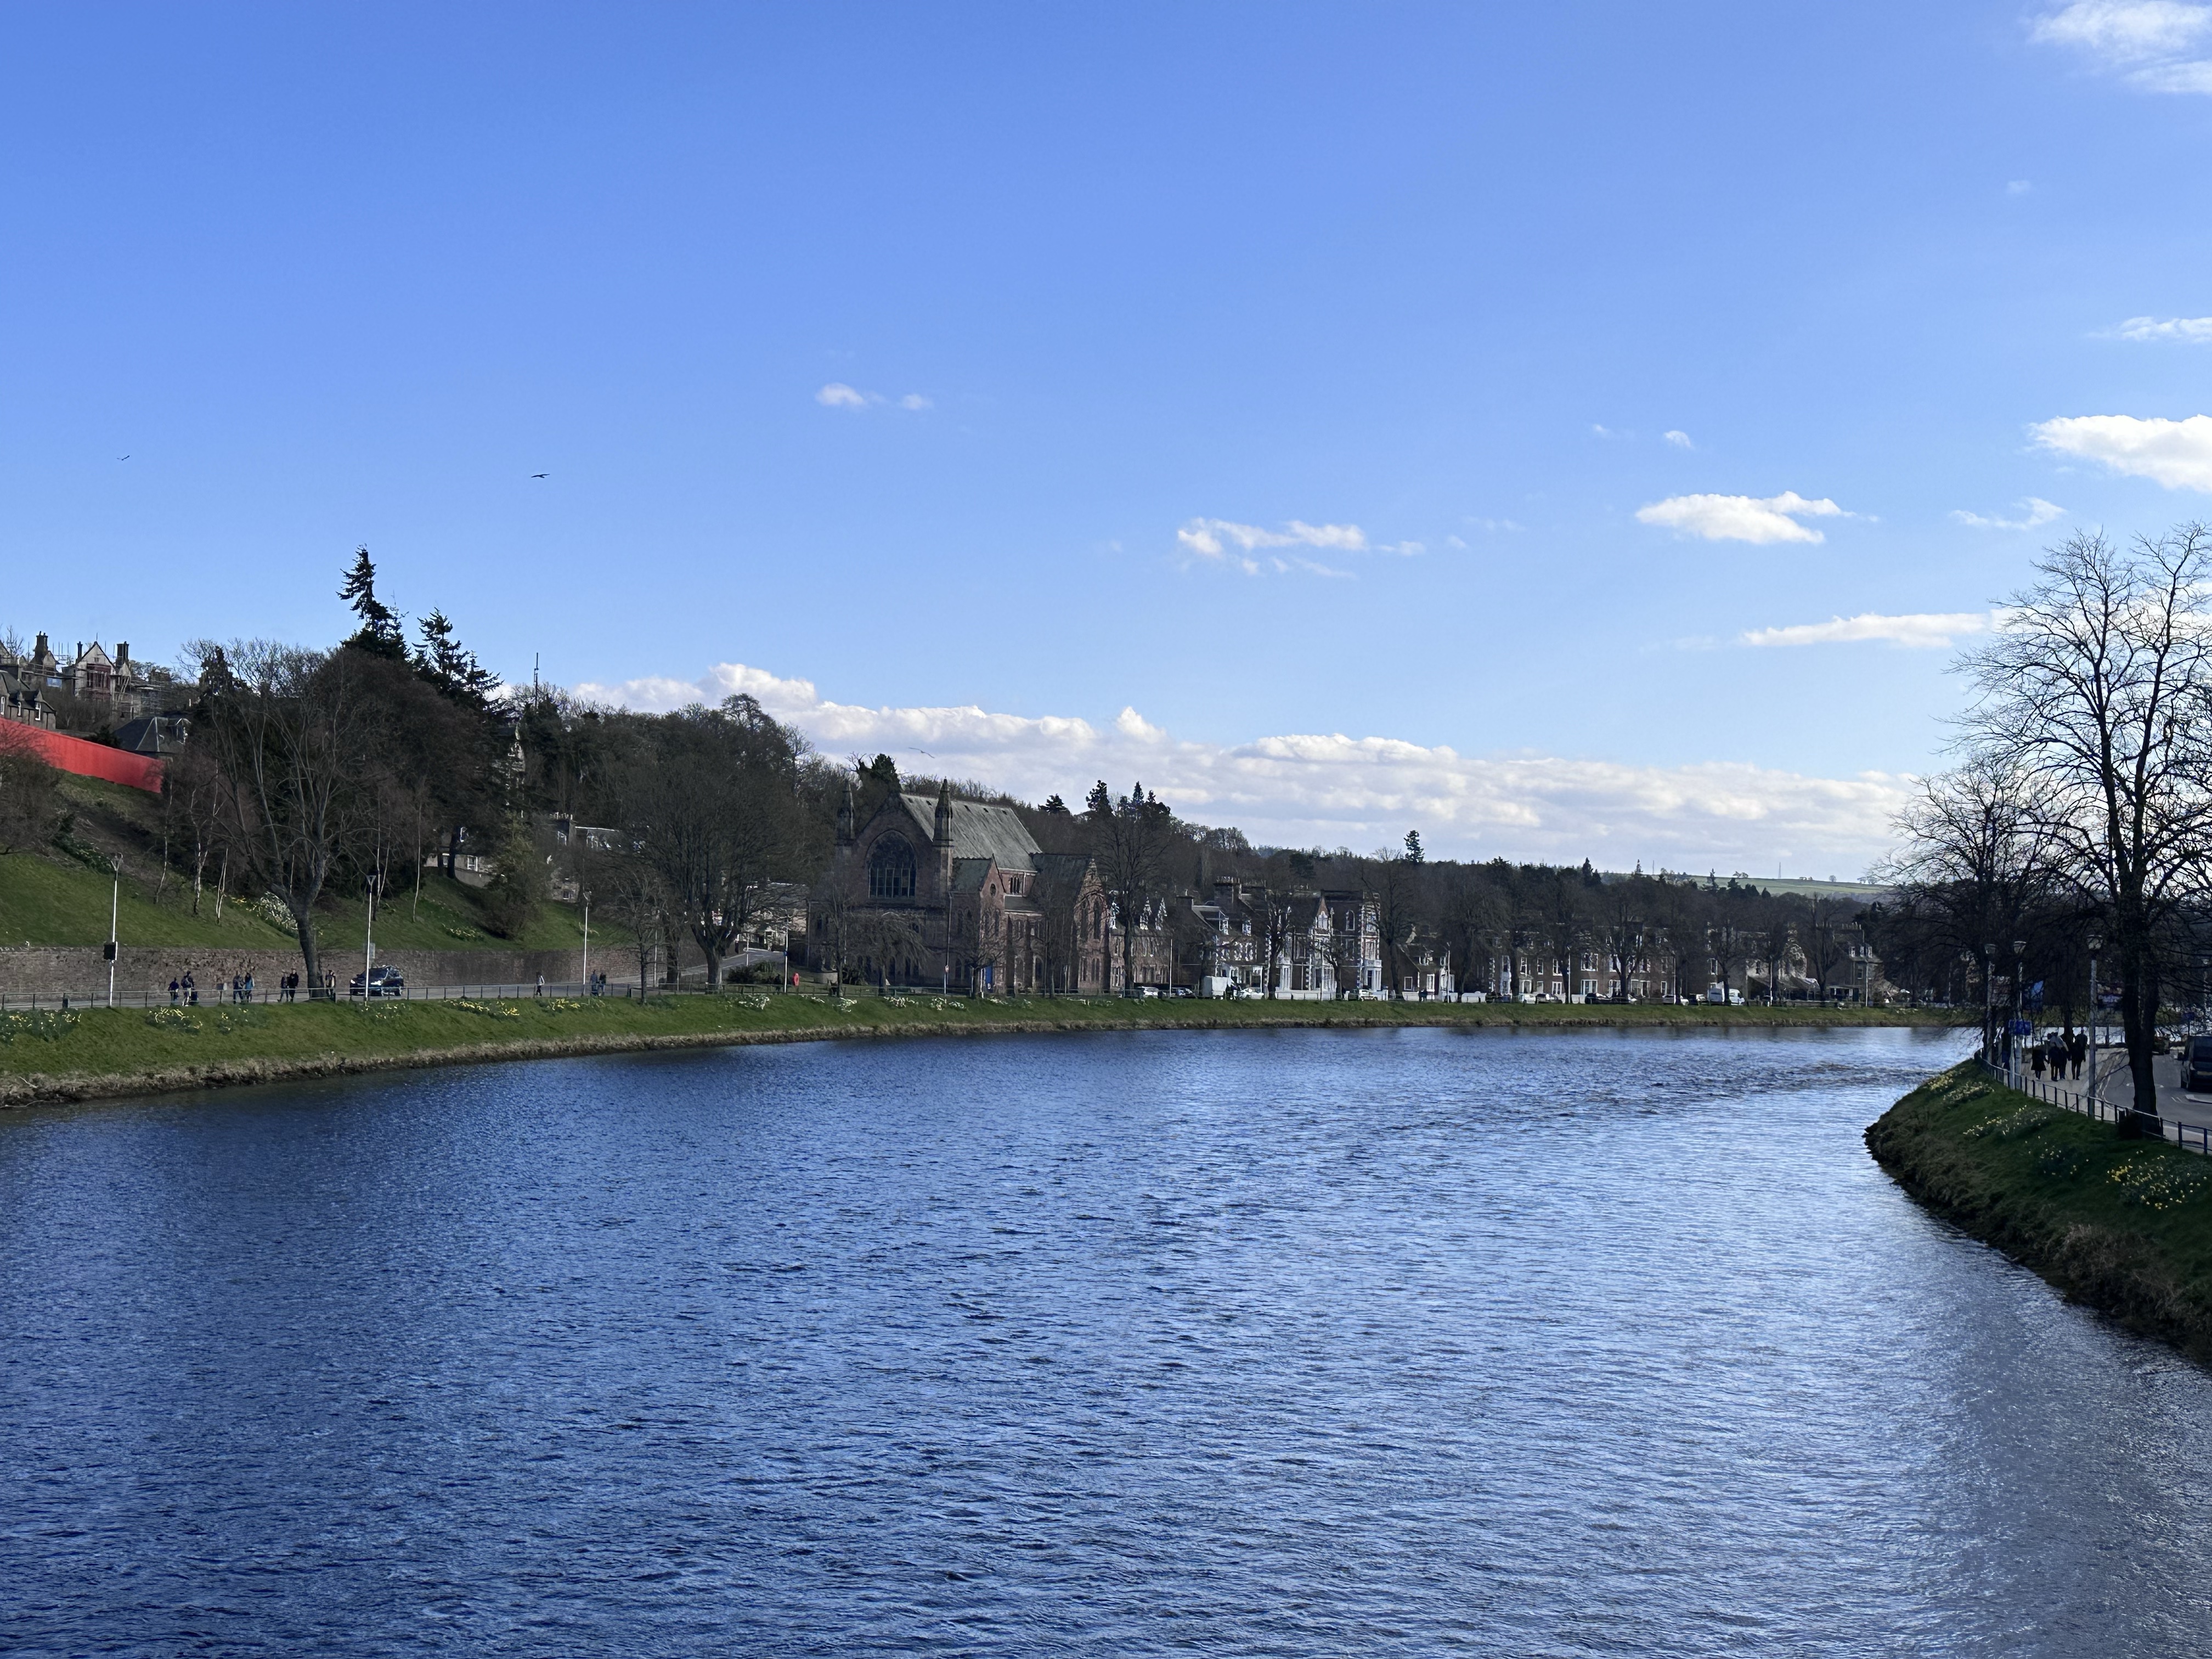
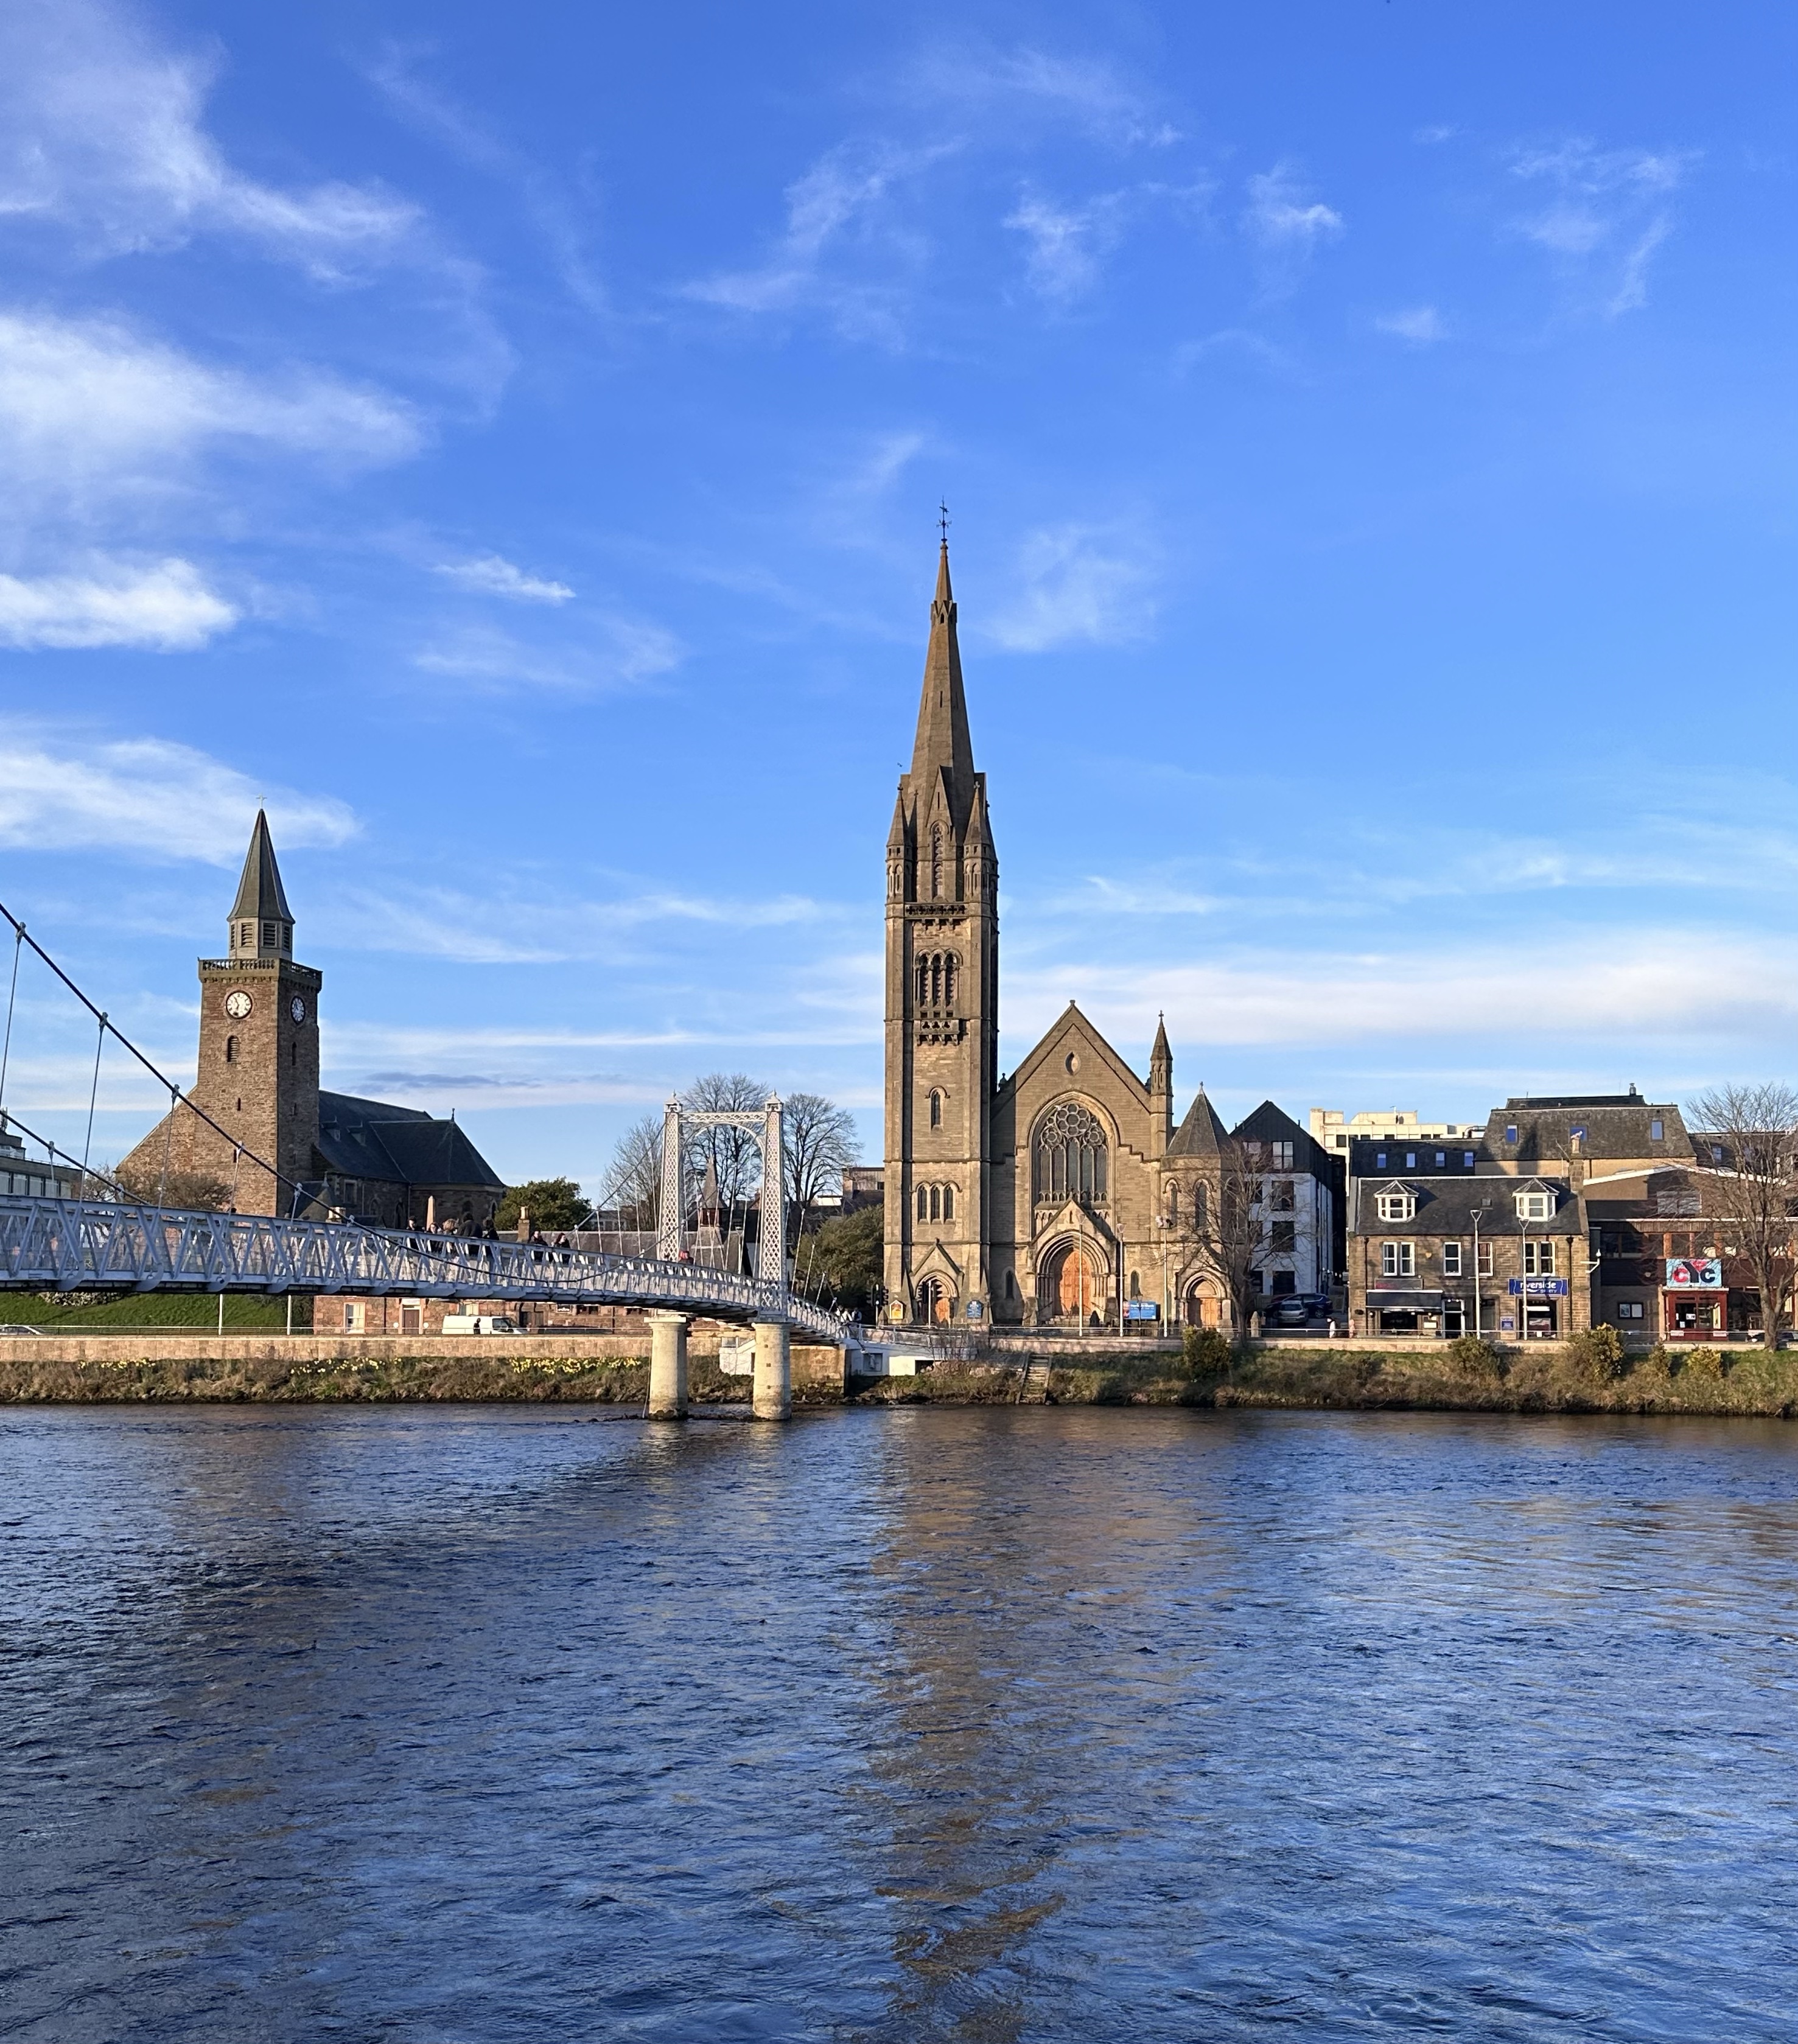
River Ness
River Ness flows through the middle of Inverness. There are shops, hotels, and restaurants along its banks. And Inverness Castle sits on a cliff overlooking the river. The beautiful Free North Church in Inverness, Scotland is also at the end of a pedestrian bridge over the river. We took a lovely walk along River Ness after dinner one night.
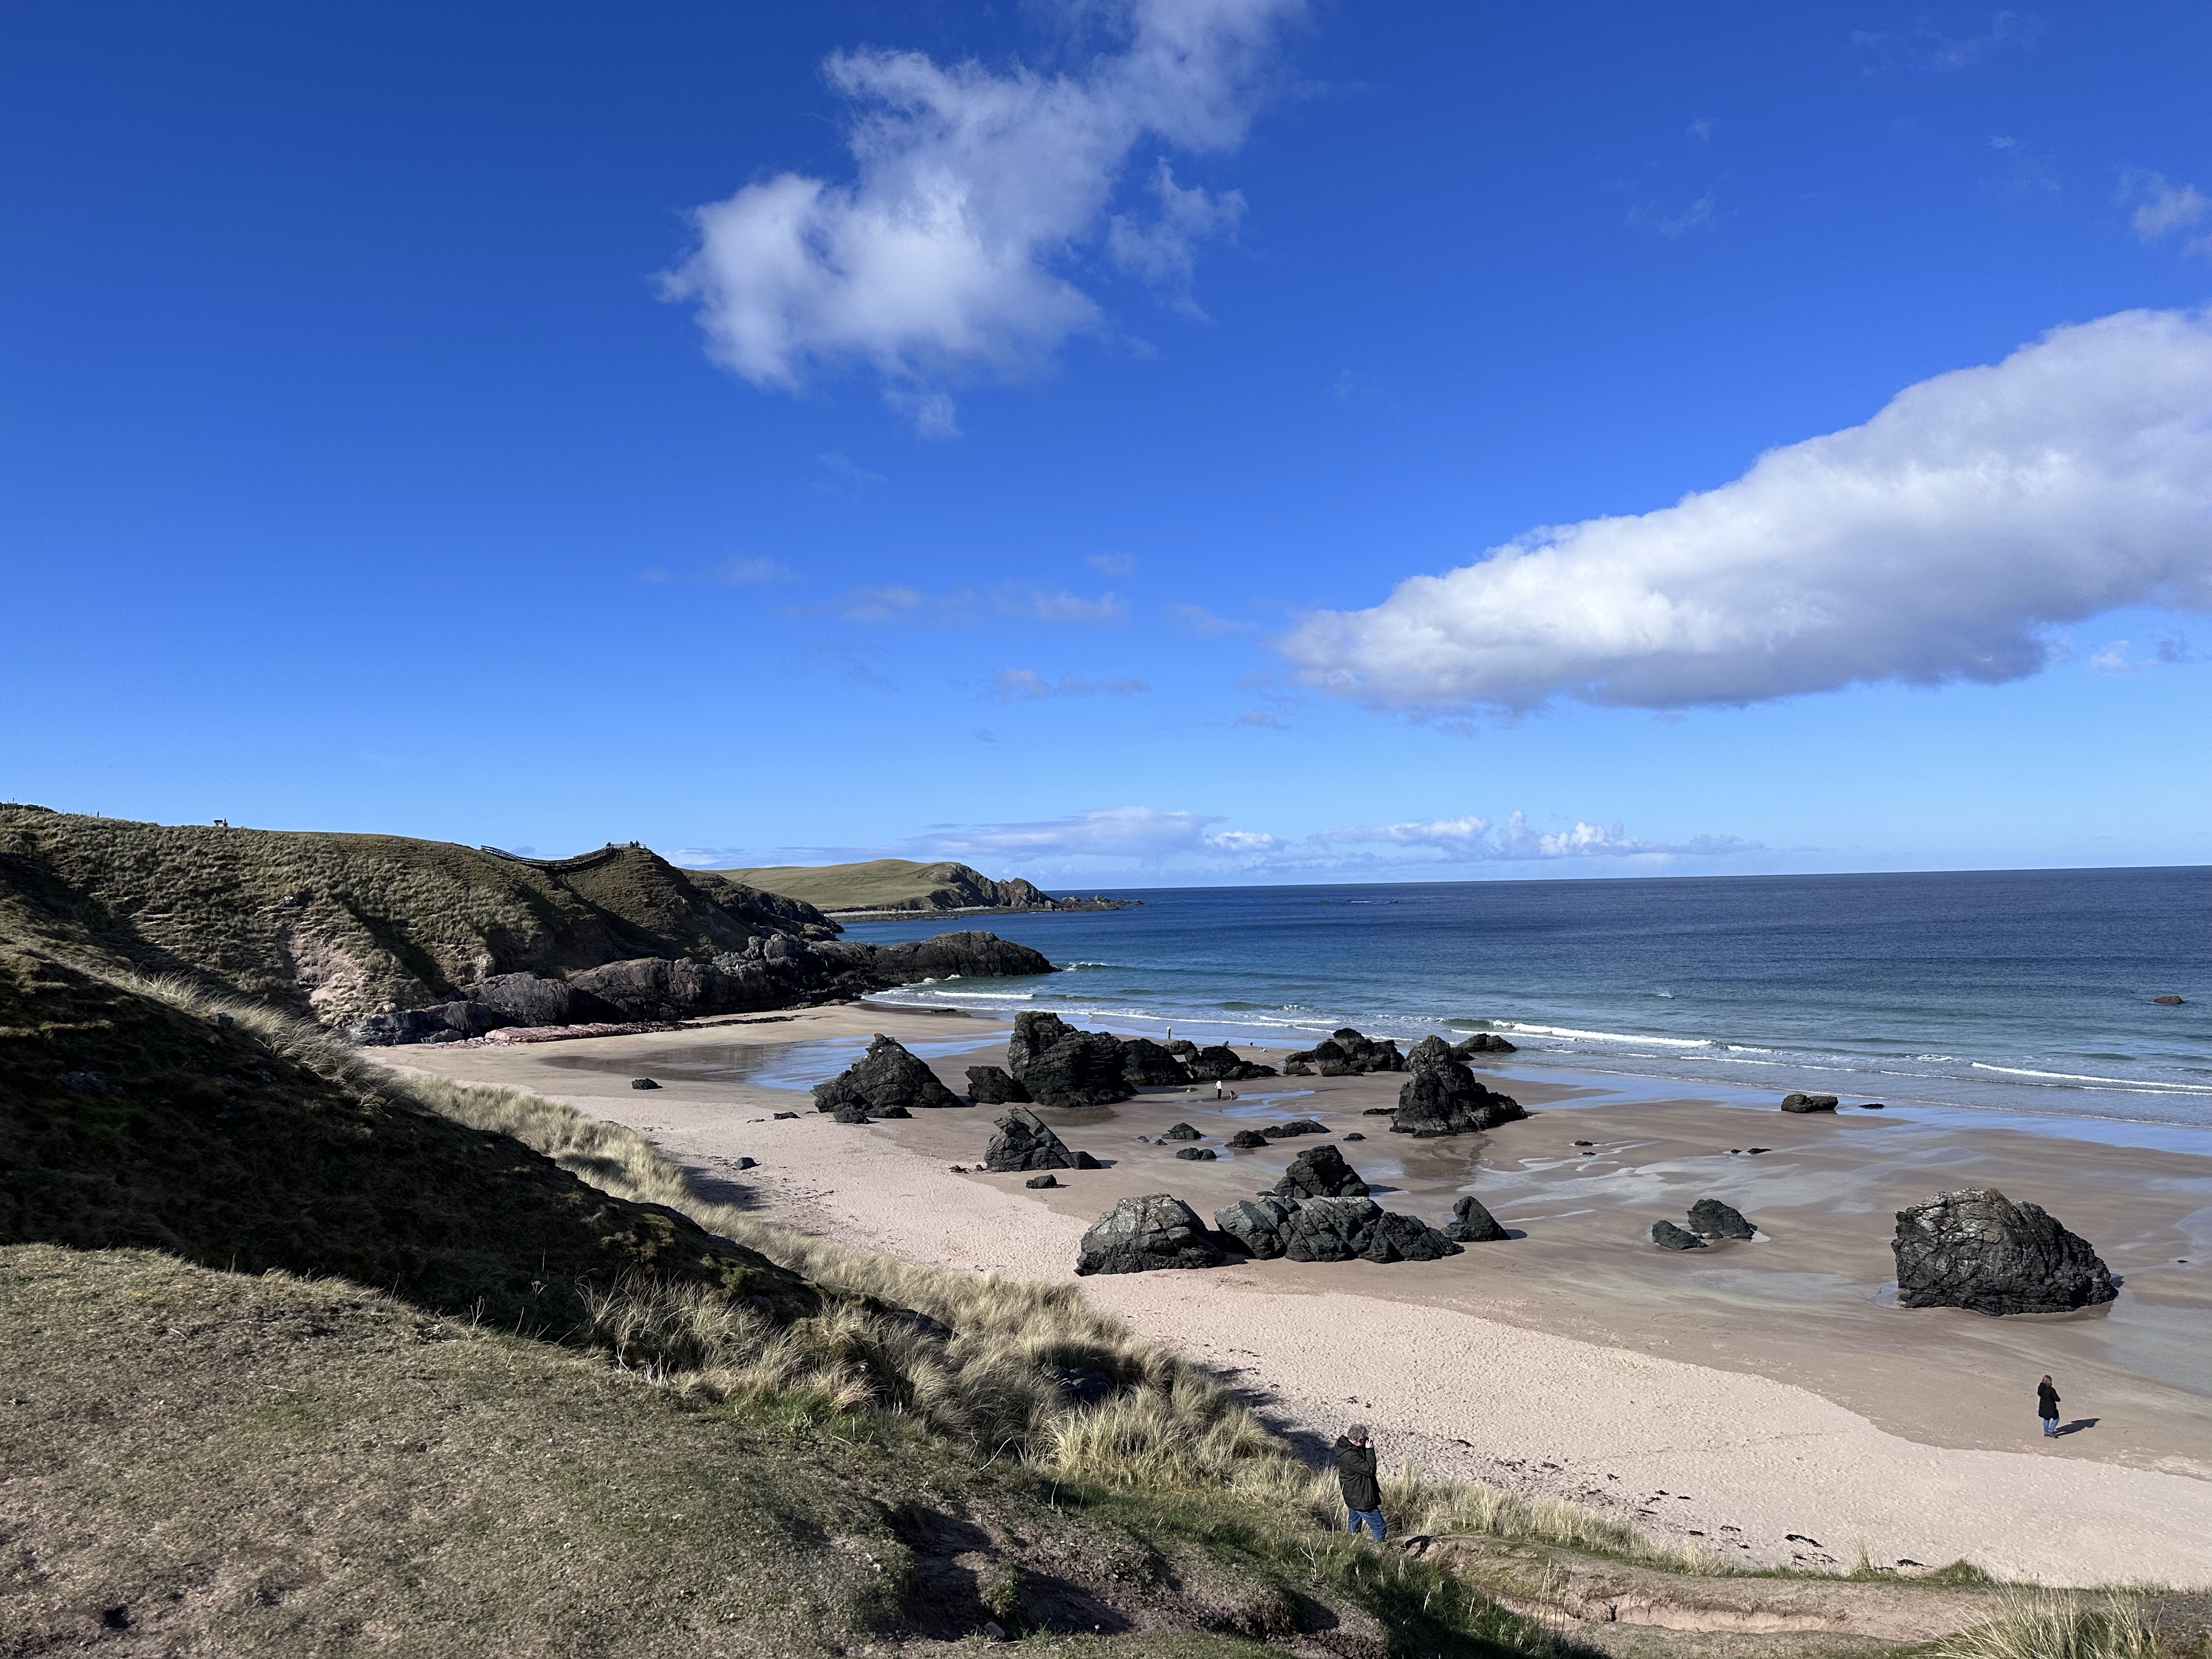
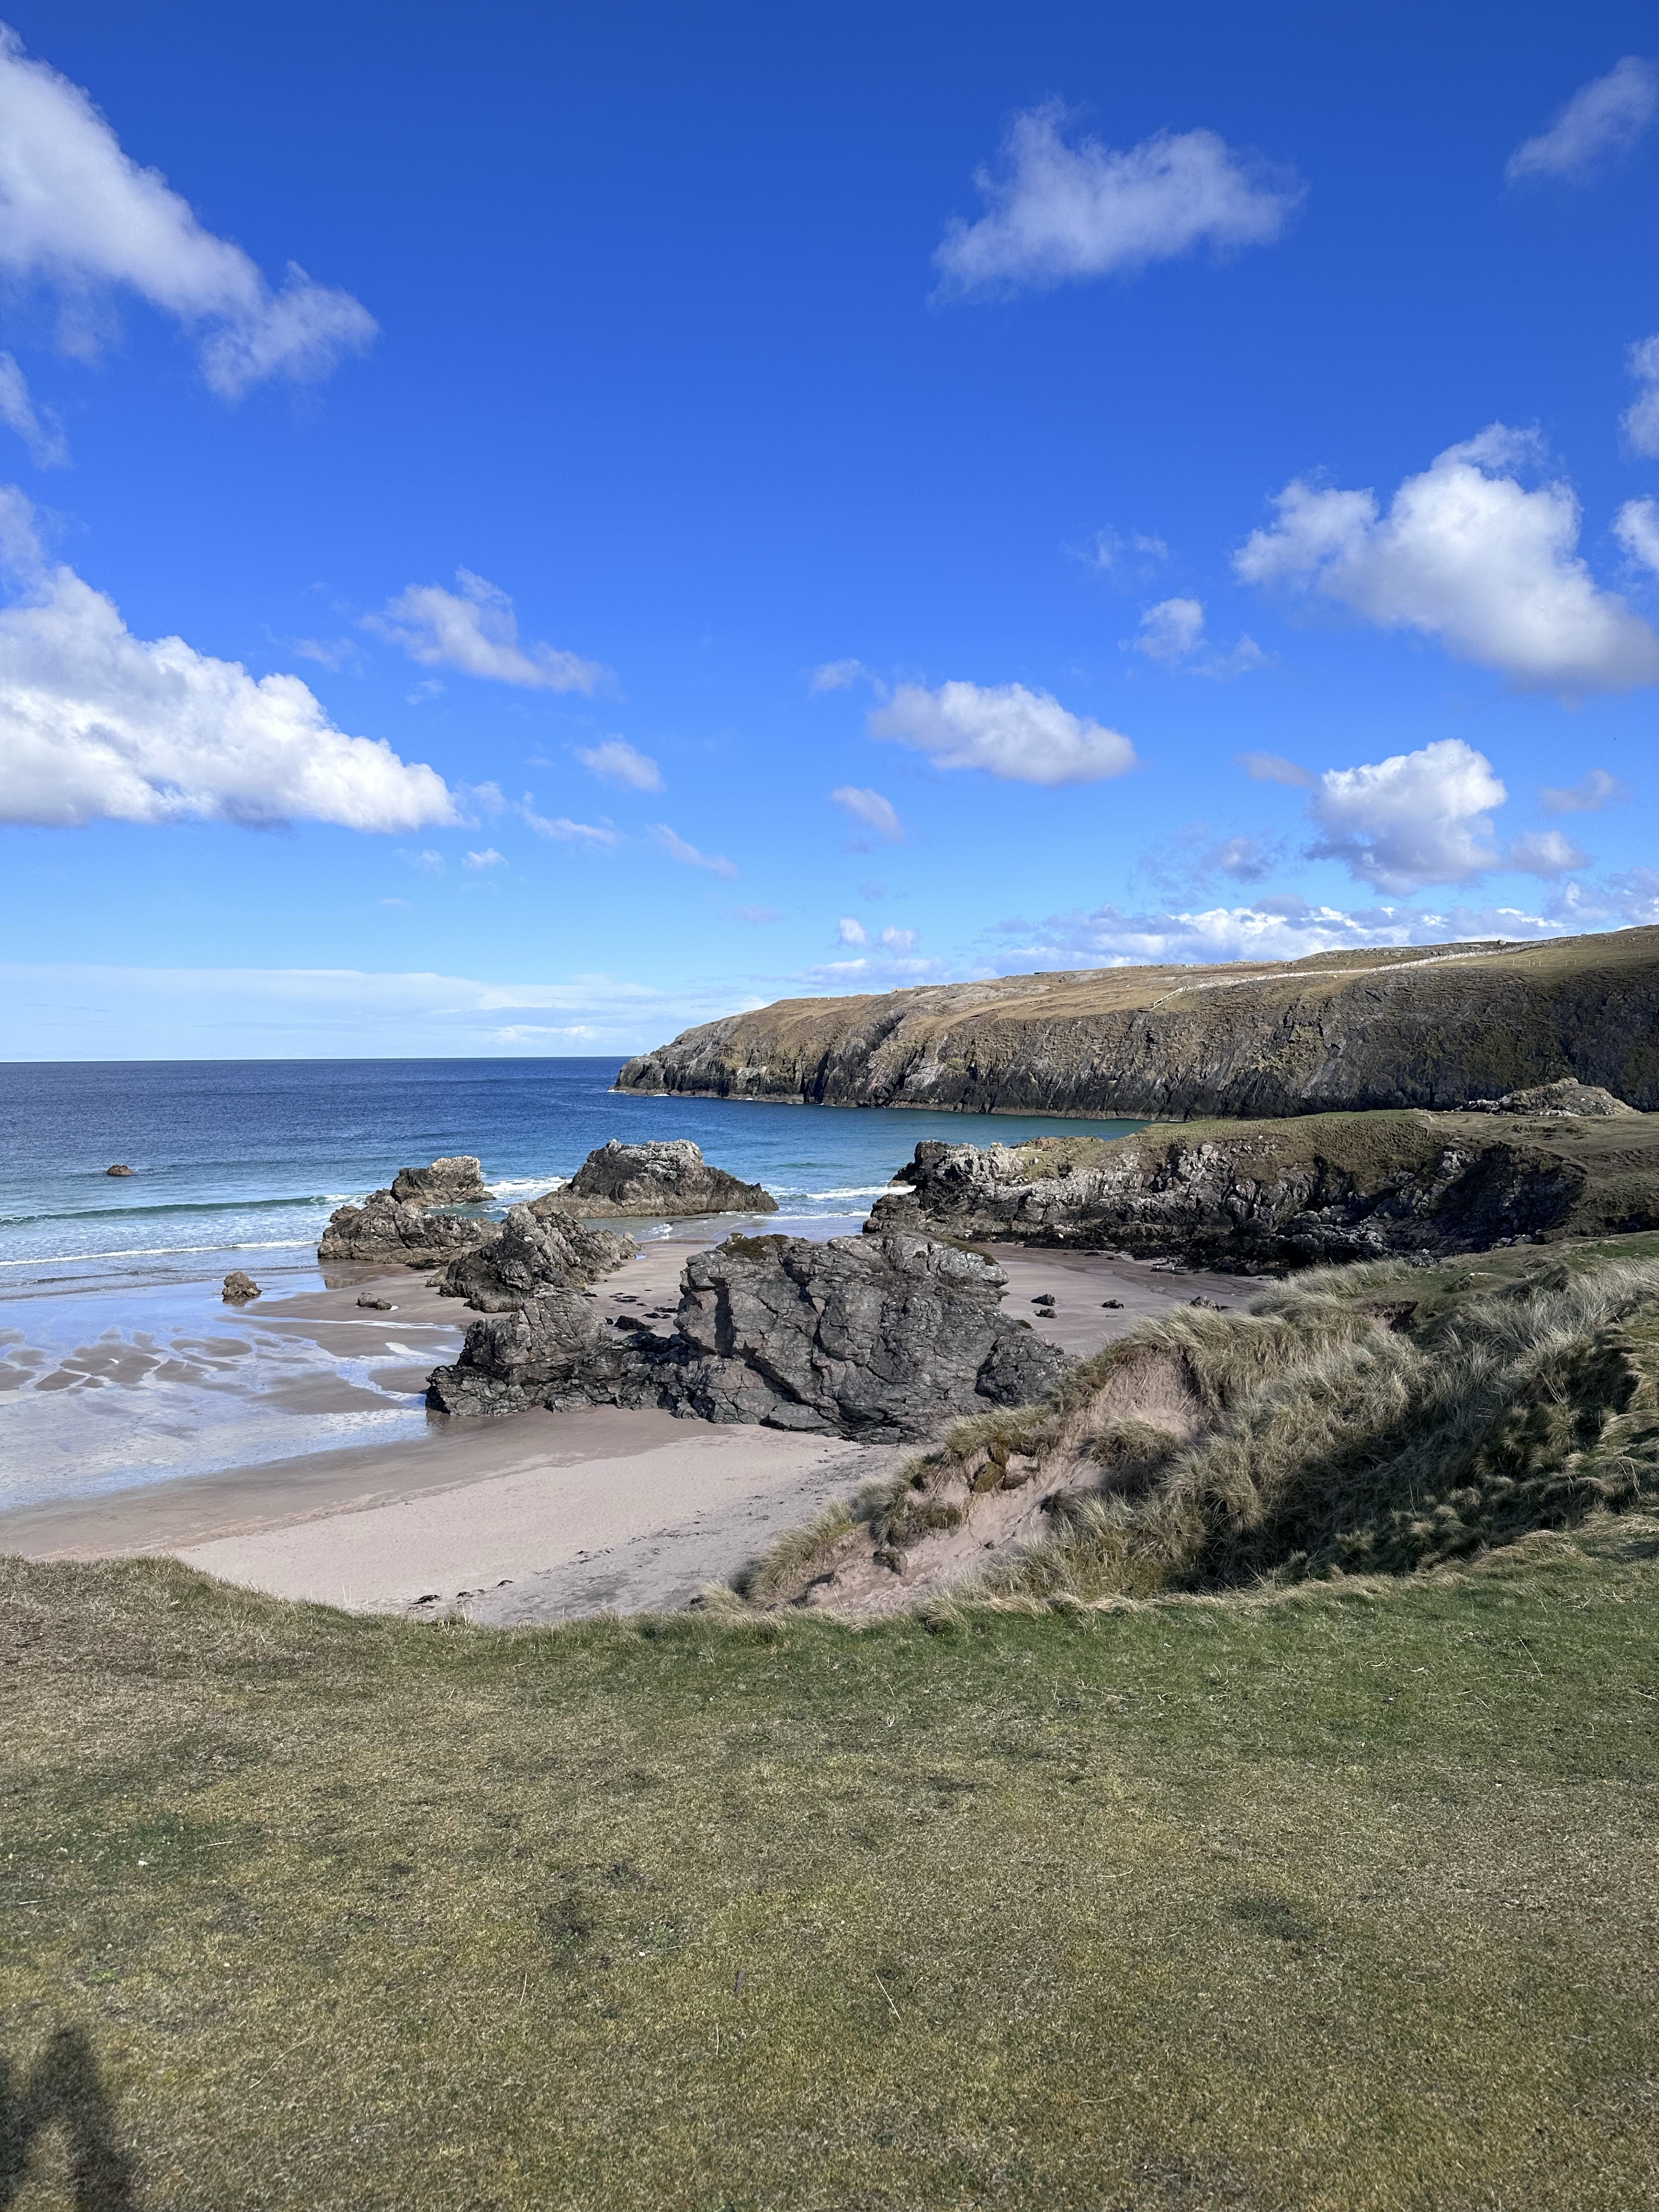
Durness Beach
This beautiful beach is along the northern coast of Scotland. As you can see by the photos below, we had a gorgeous sunny day as we were making our drive along this part of the North Coast 500.
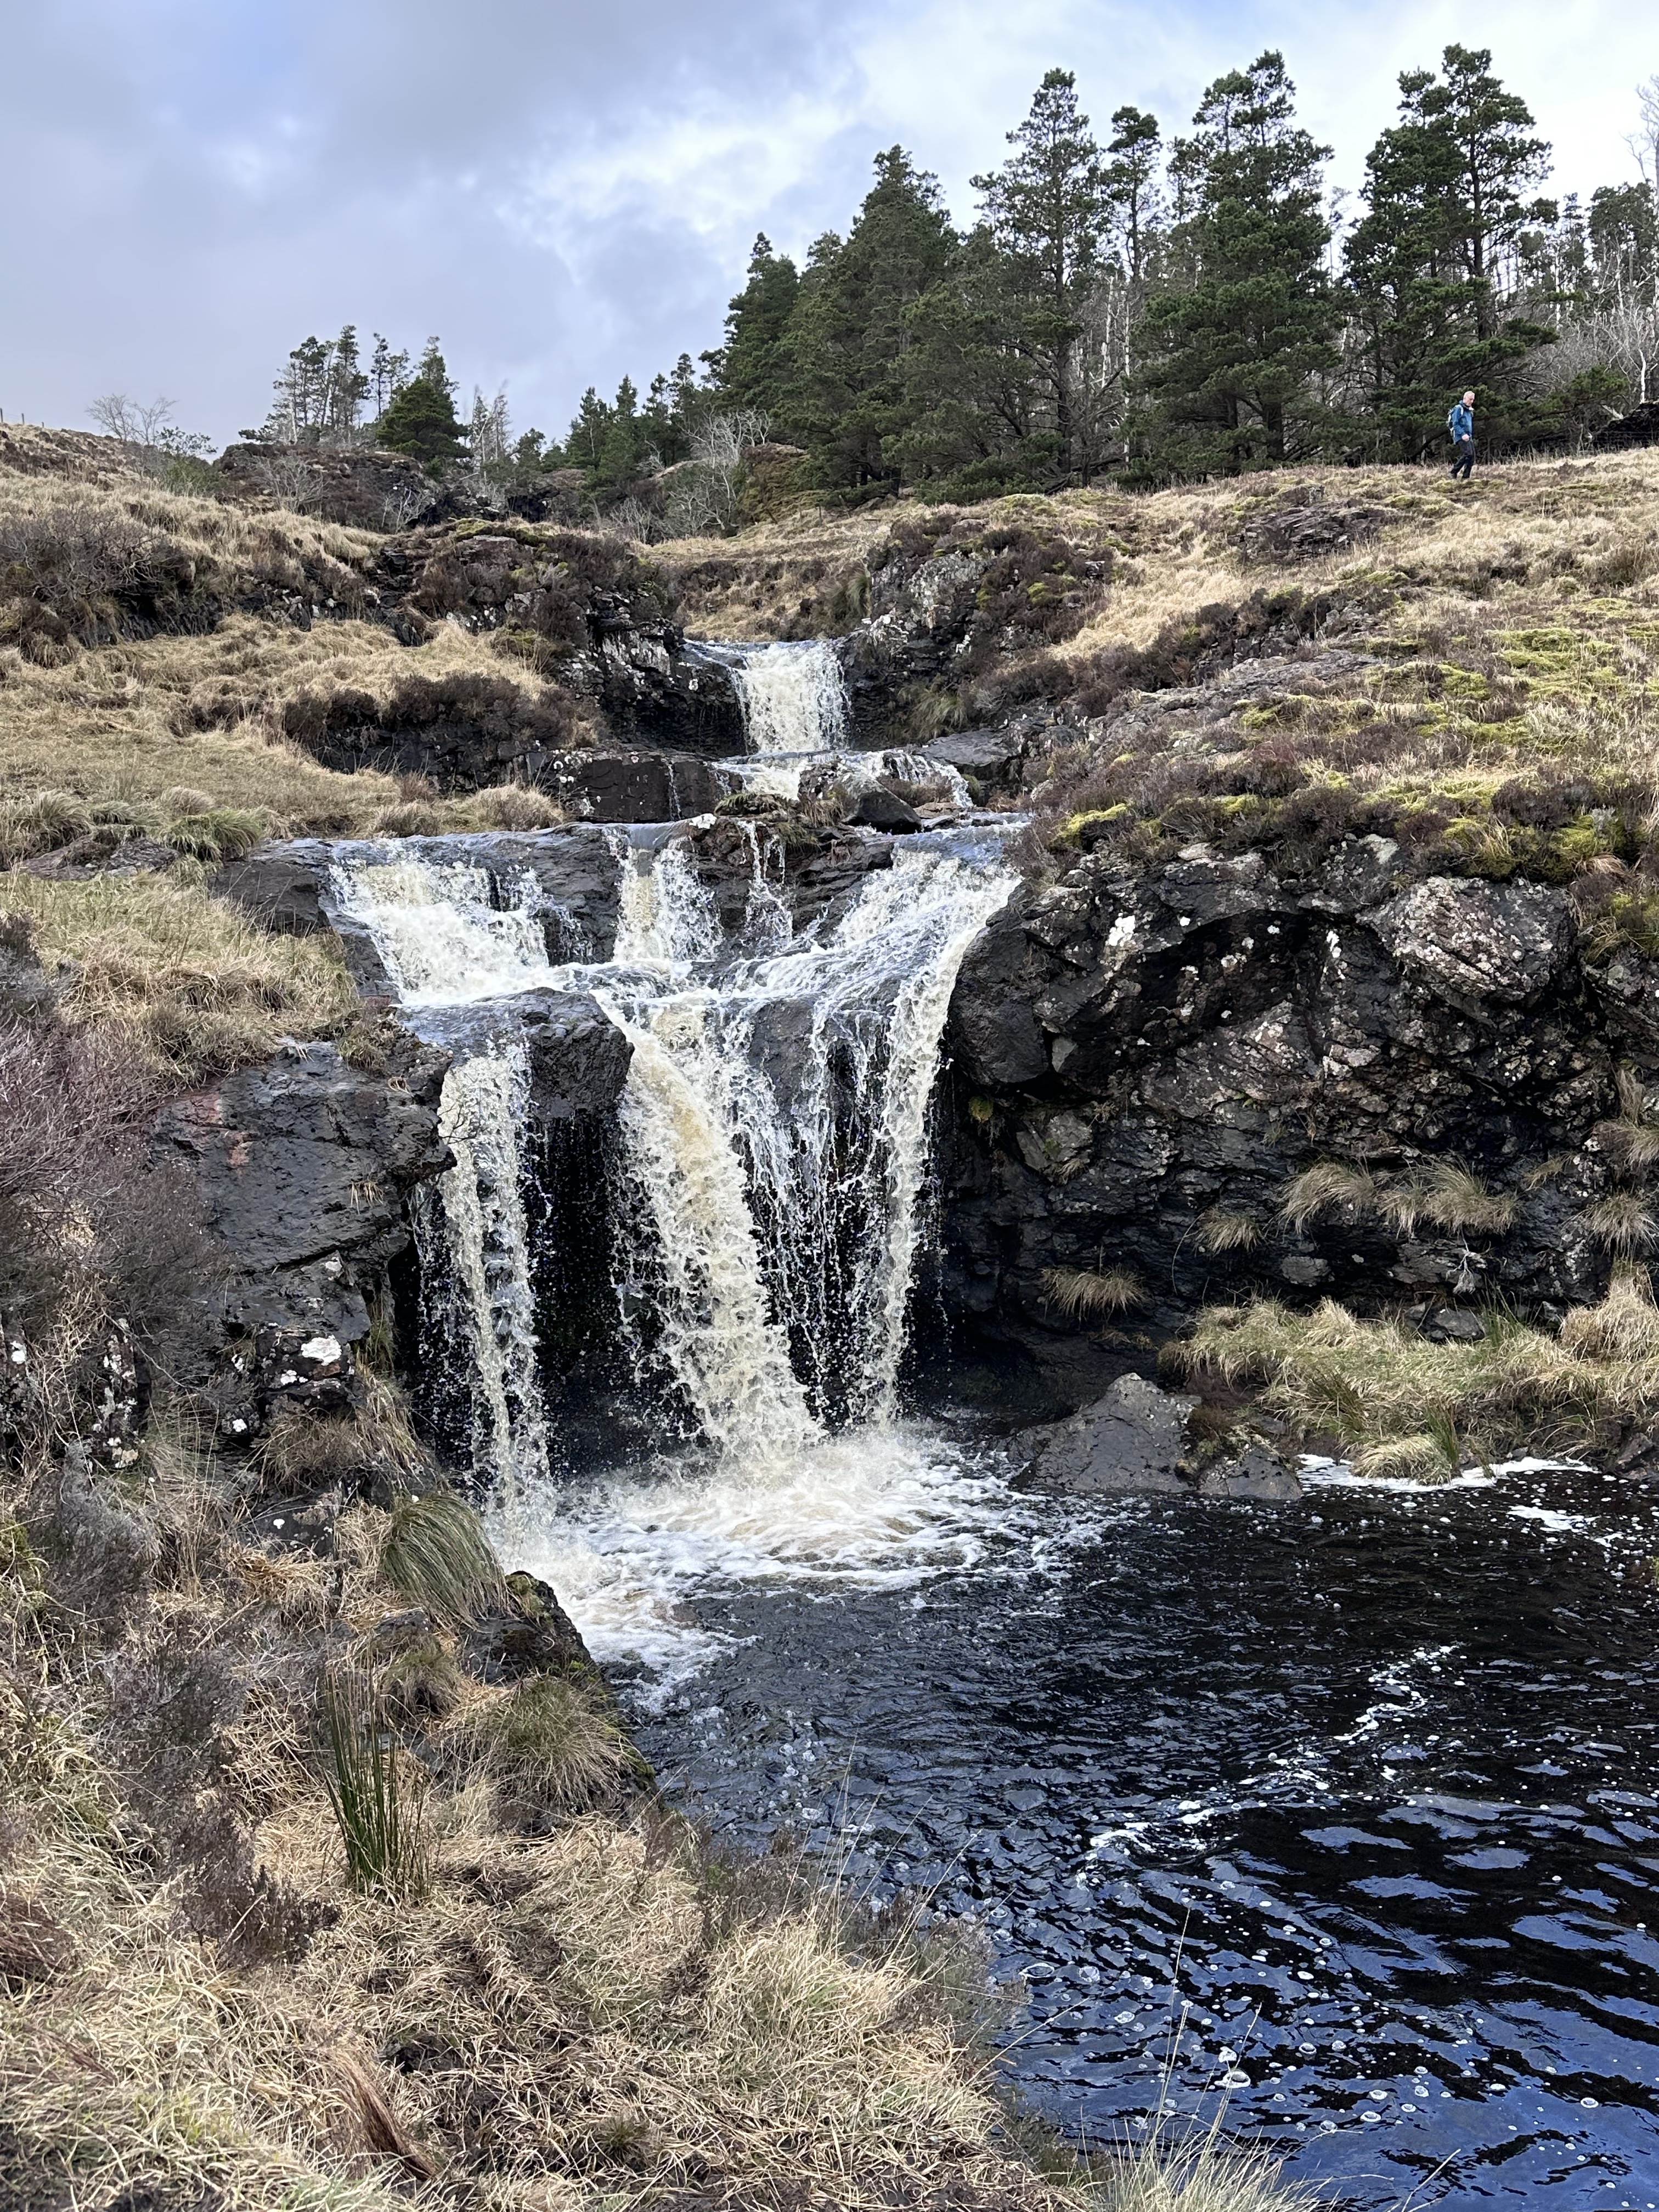
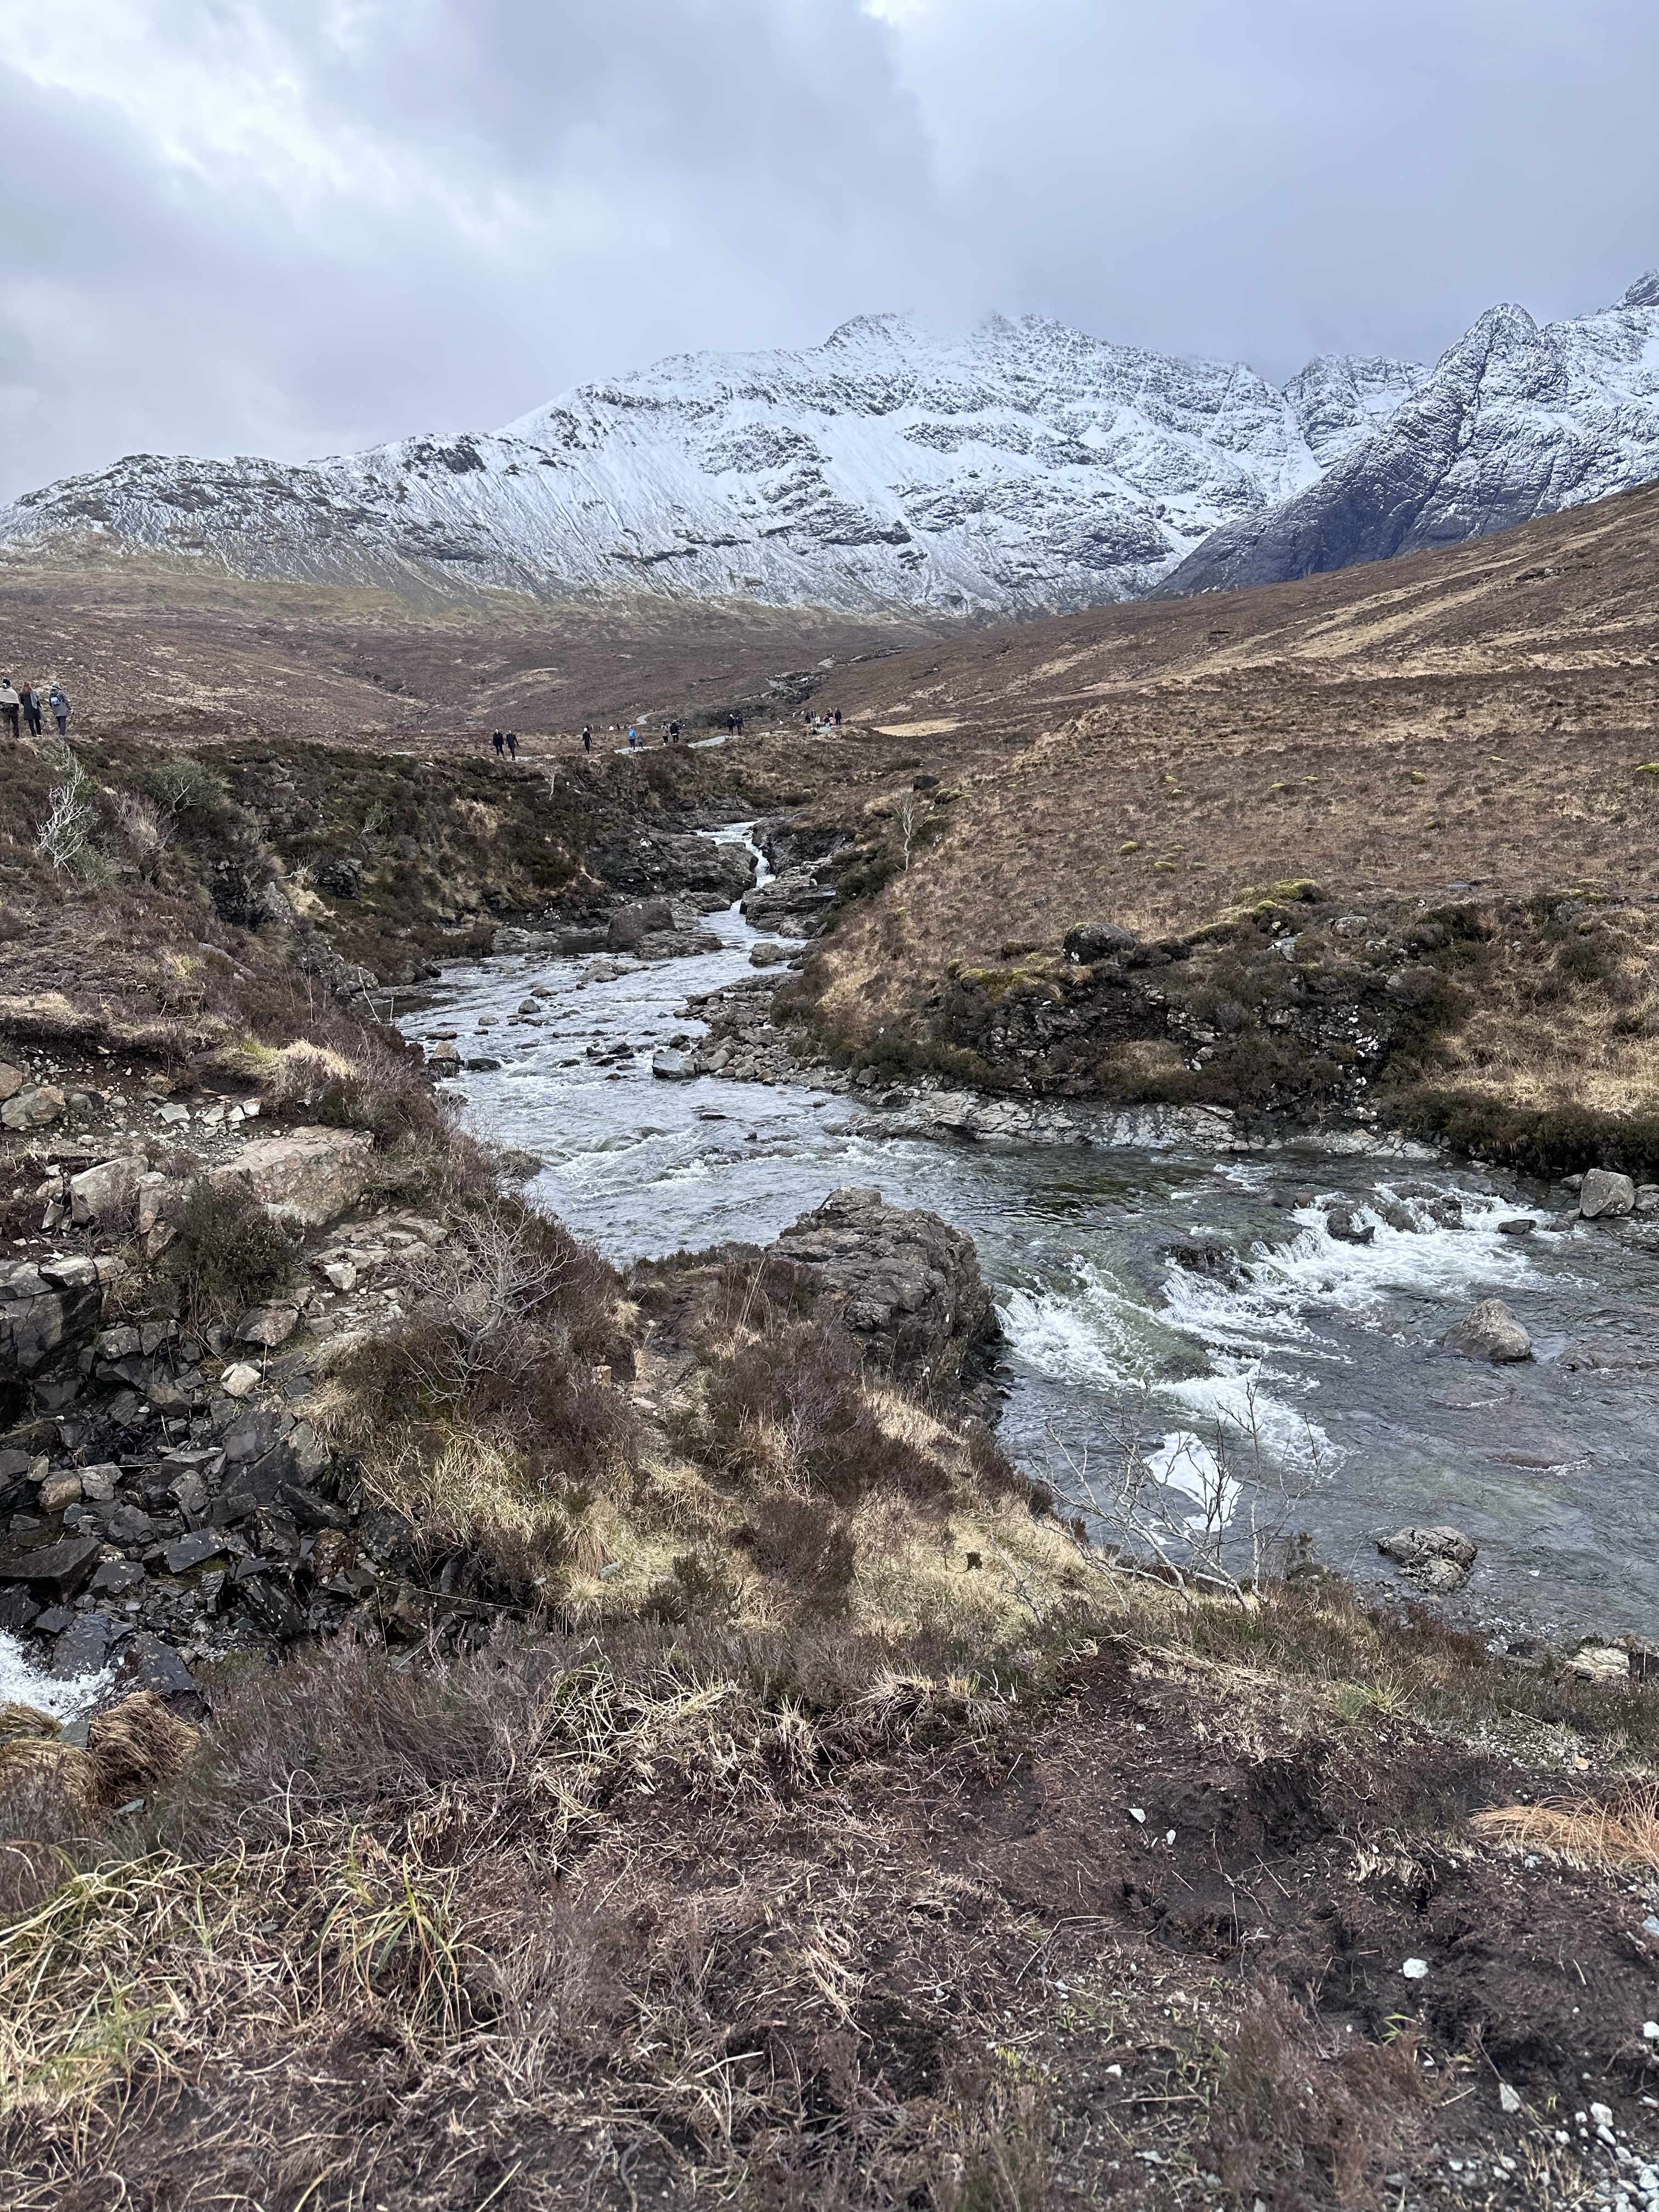
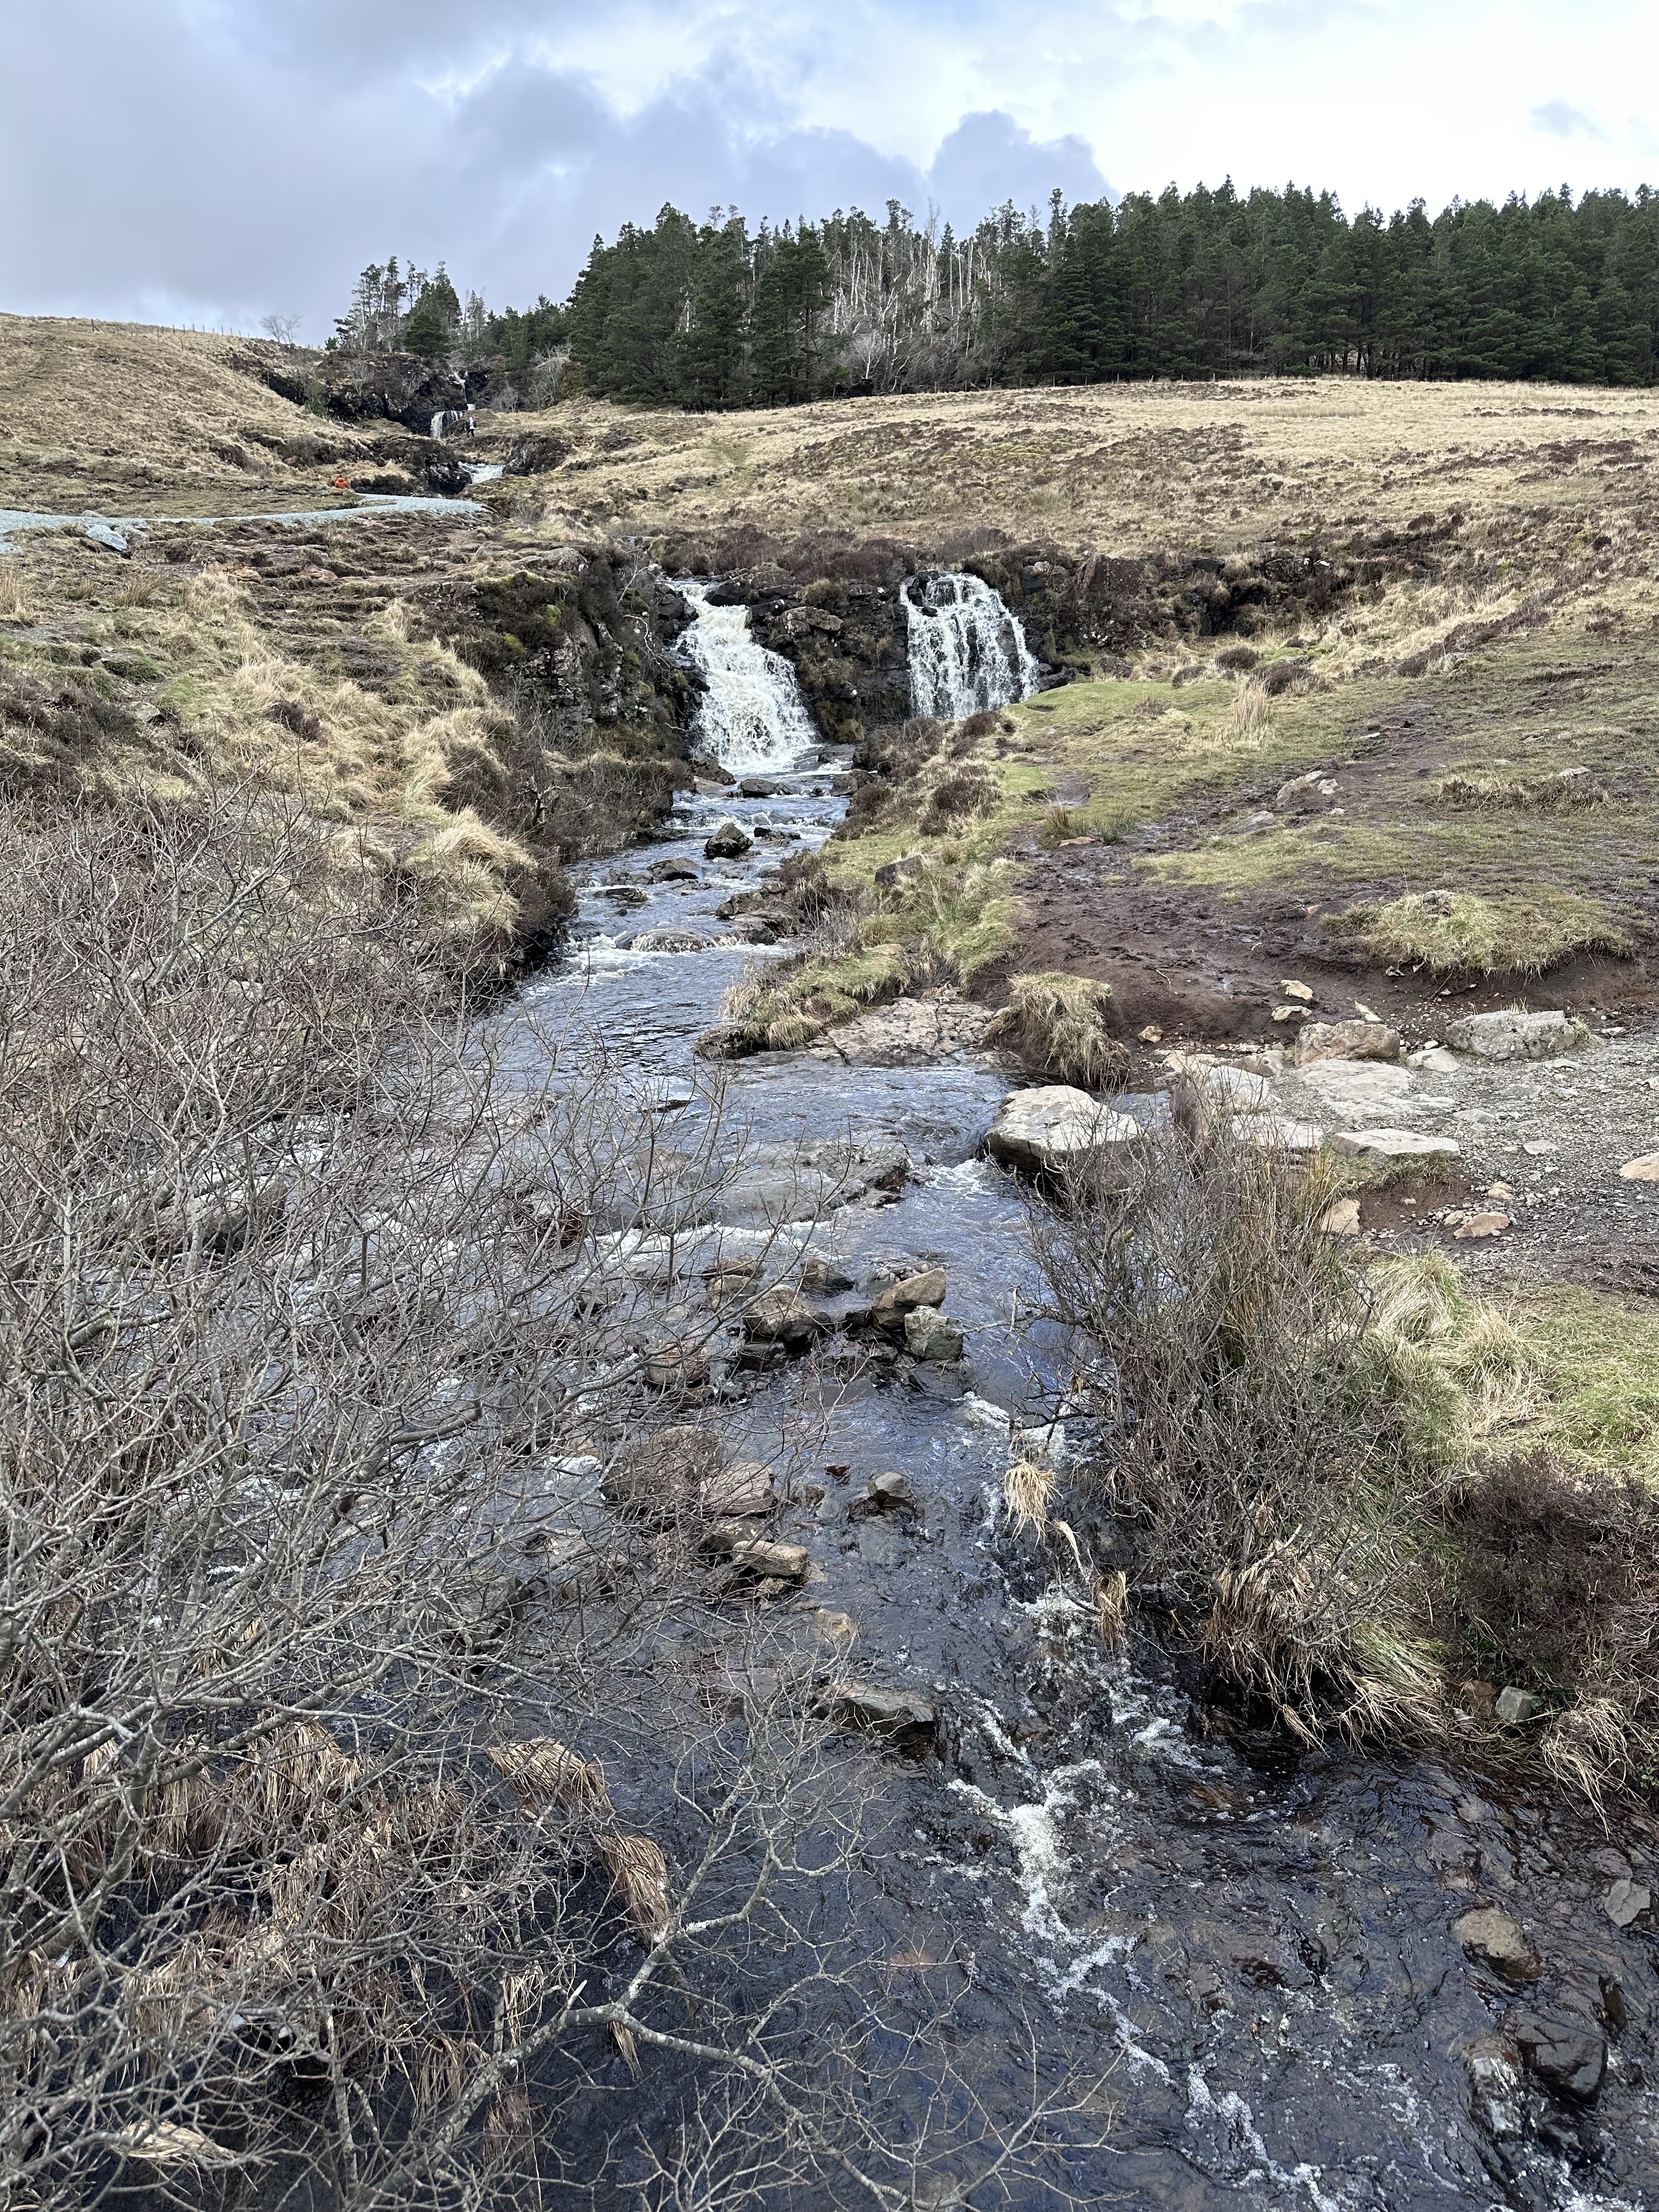
Fairy Pools
The Fairy Pools on the Isle of Skye were one of my favorite places to visit! The snowmelt from the Black Cuillin Mountains feeds these amazing waterfalls and pools. You can see the snowcapped mountain in the background of the middle photo below. The photos don’t begin to do justice to just how beautiful this area is!
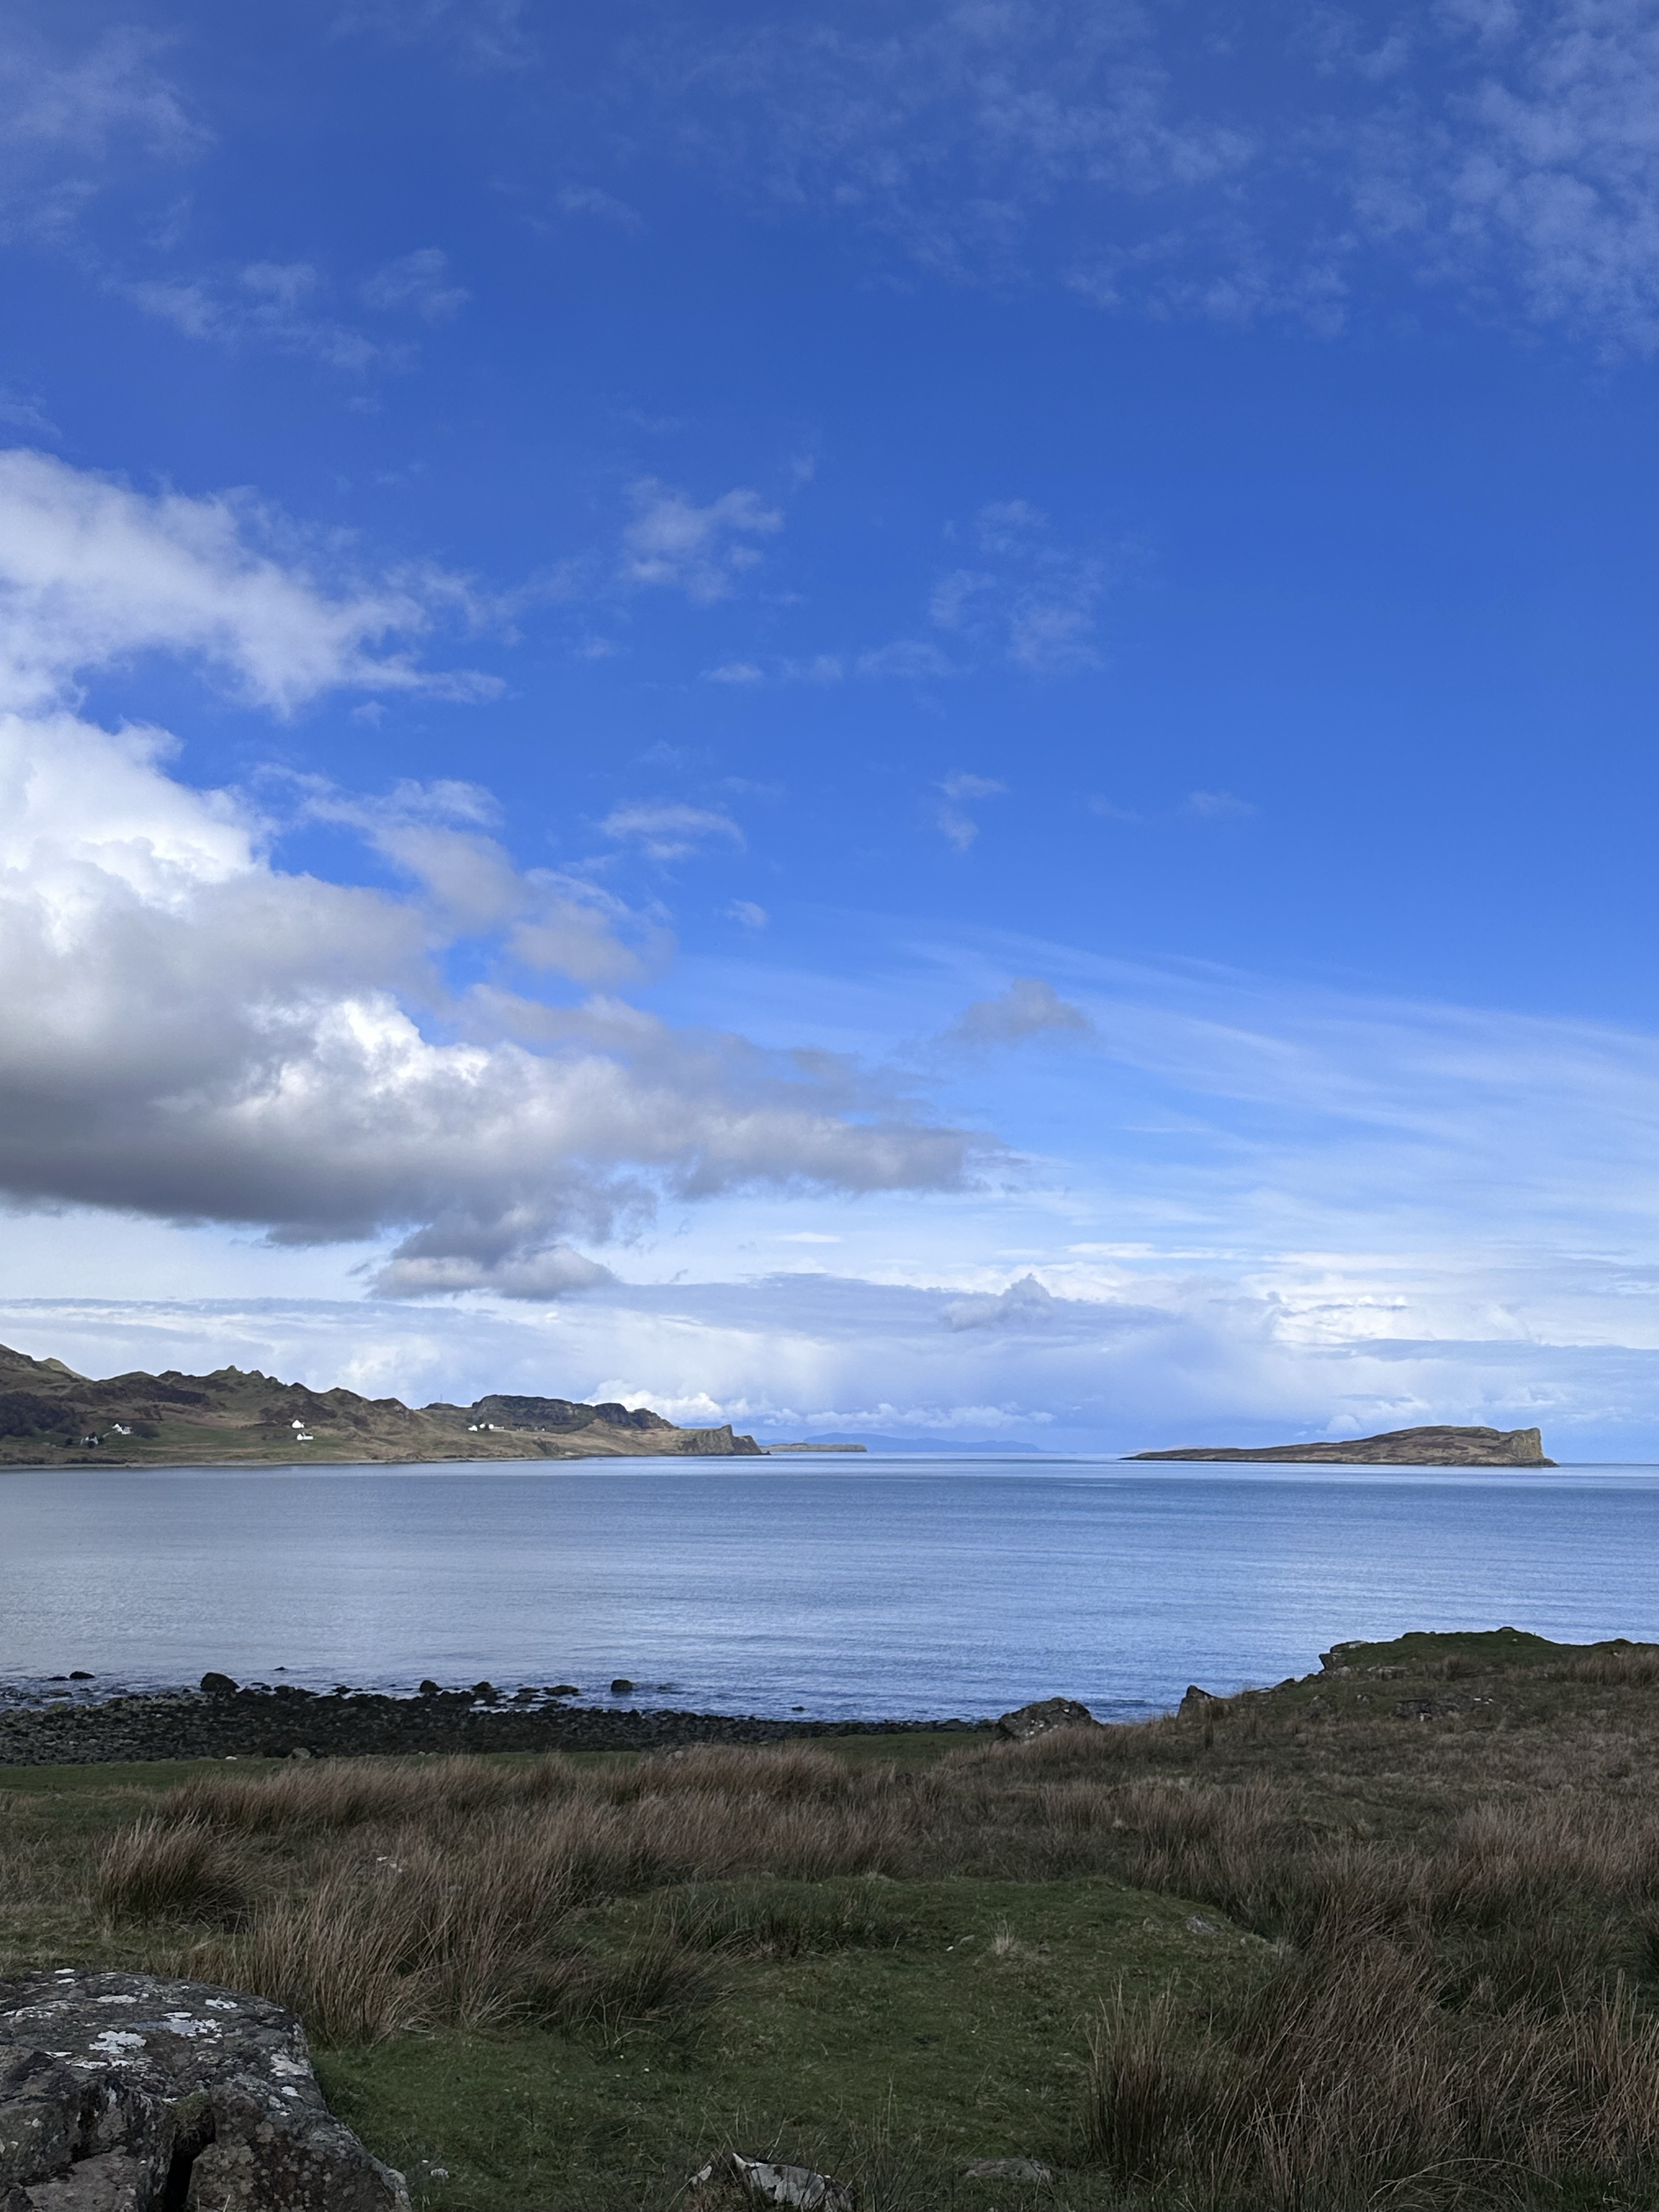
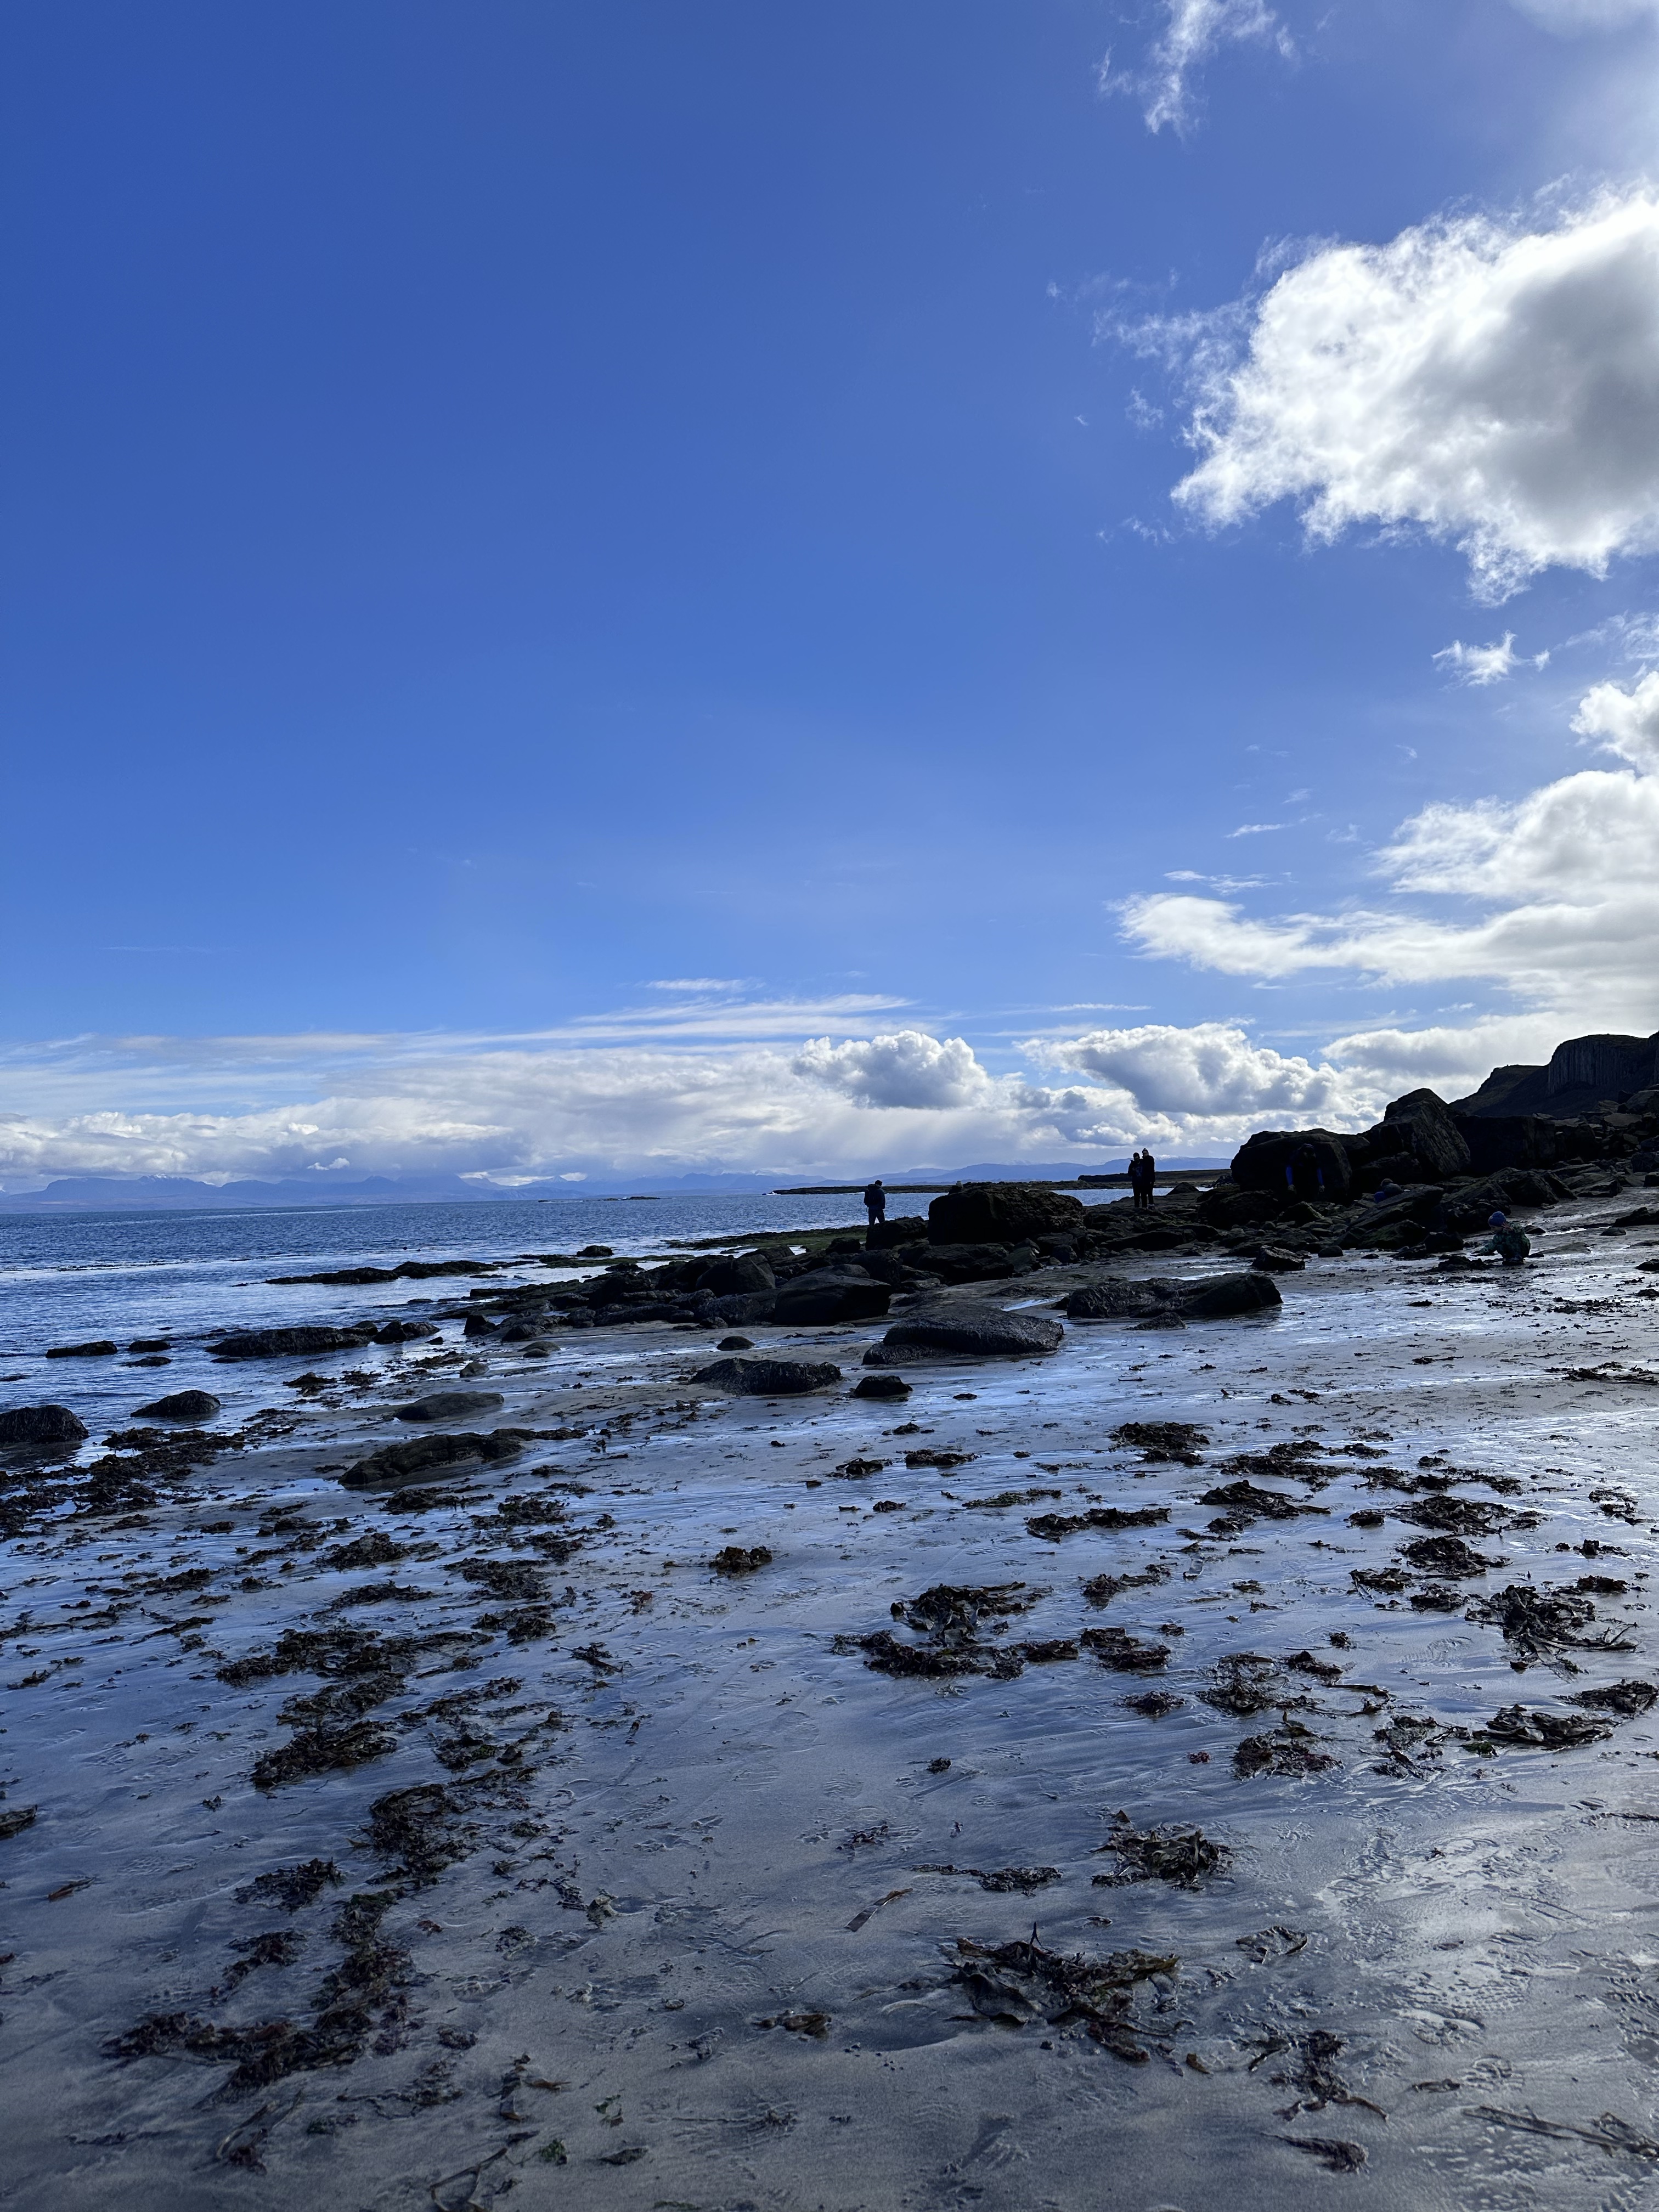
An Corran Beach
Not only does An Corran Beach on the Isle of Skye have amazing views, there are also 18 dinosaur footprints scattered across the rocks.
Portree Harbour
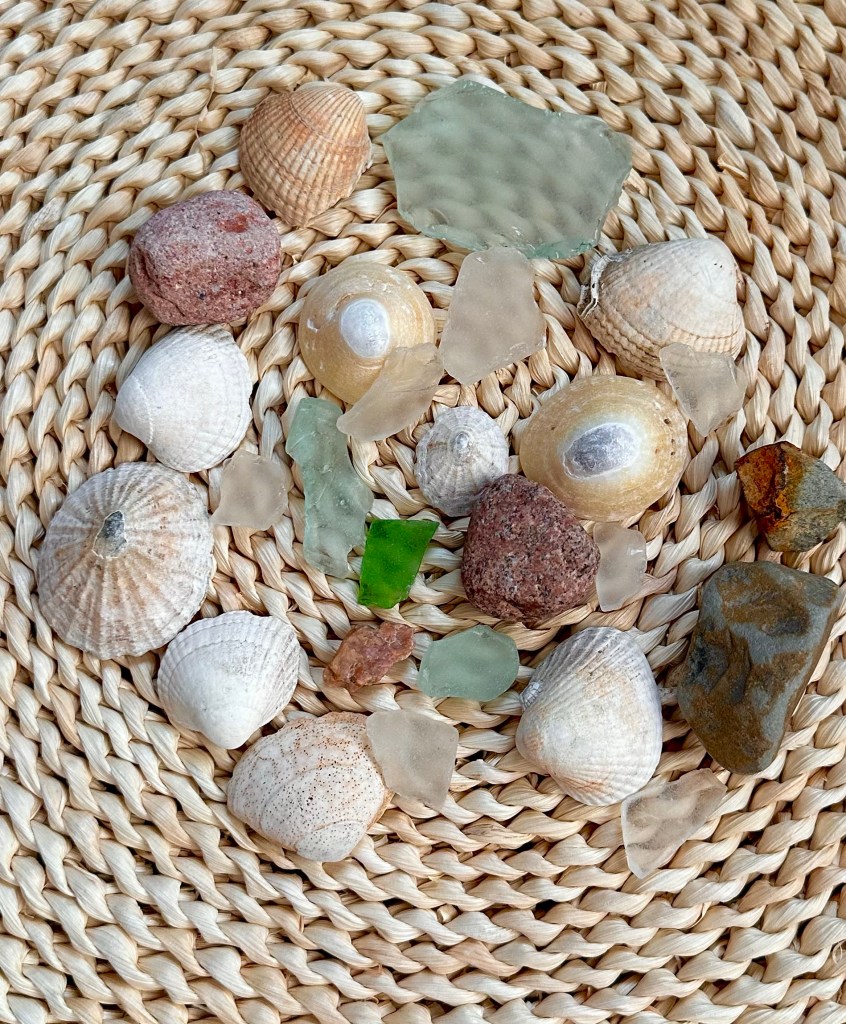
The quaint village of Portree on the Isle of Skye sits along a picturesque harbour formed by Loch Portree. You will find the iconic colorful buildings in the first photo below in just about any article you read about Portree. Both that photo and the middle photo were taken from our hotel across the harbour – we couldn’t have asked for a better view! The last photo below is sea glass that I found along the shore of the harbour.
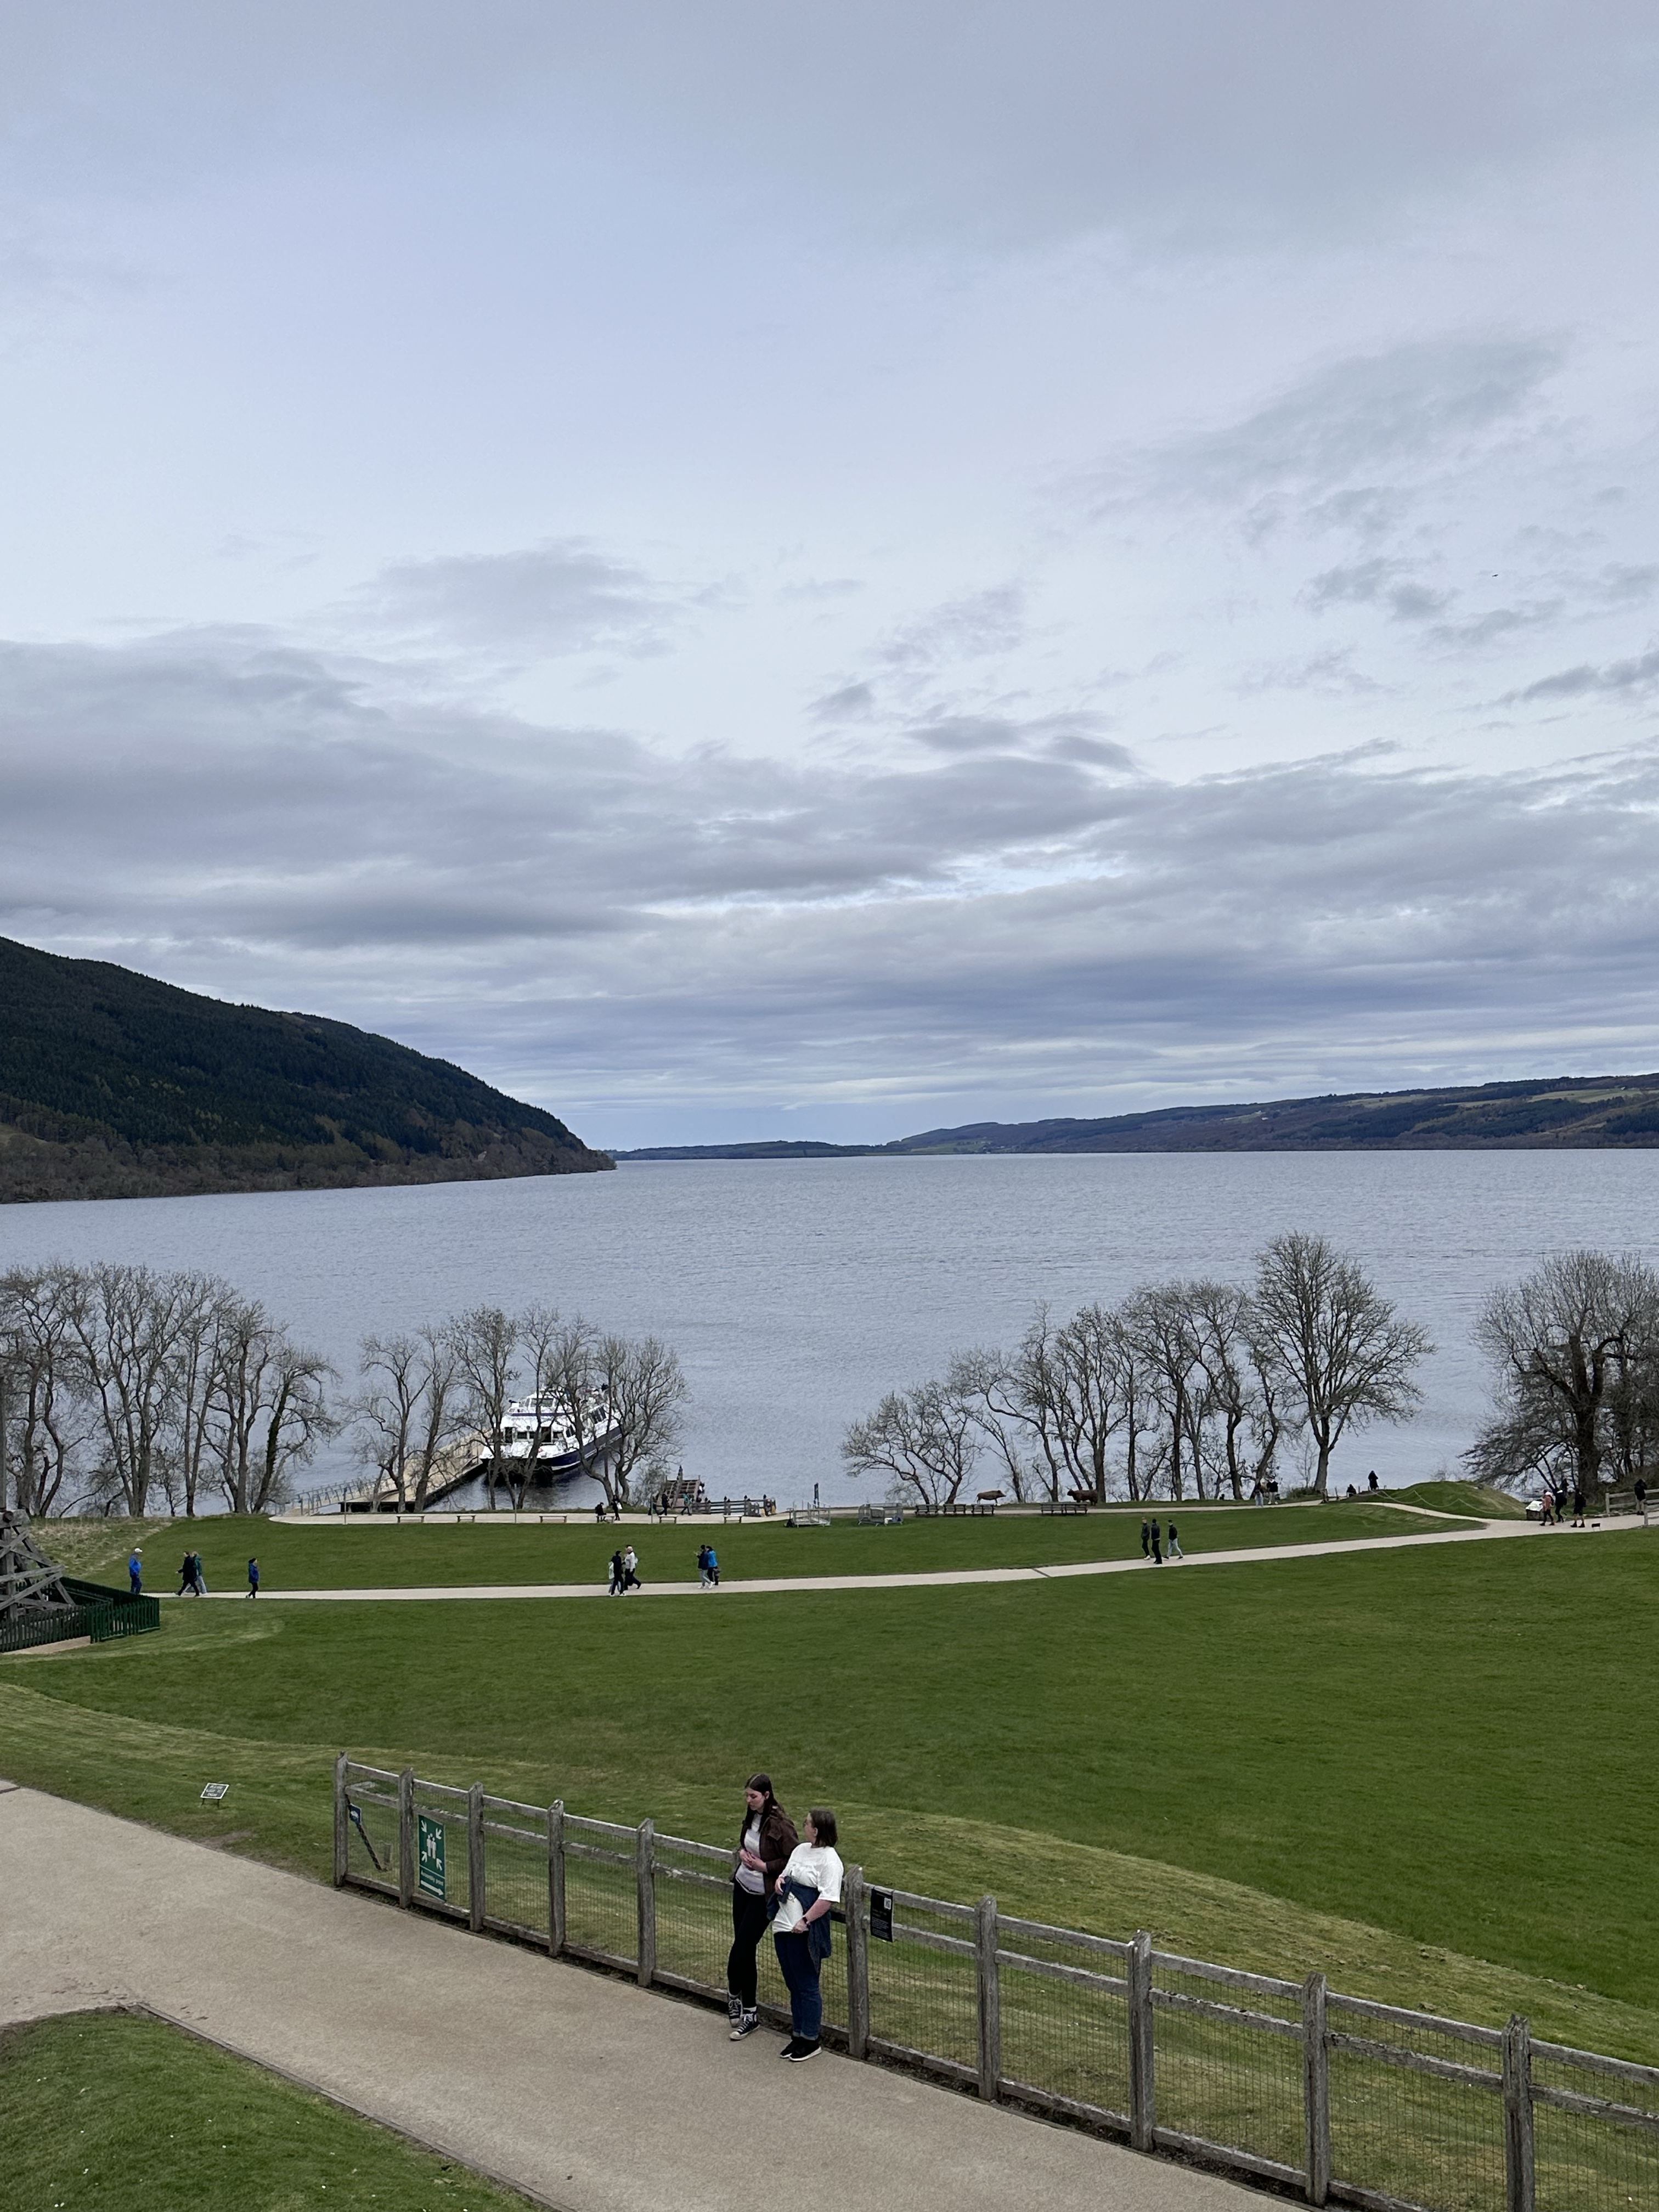
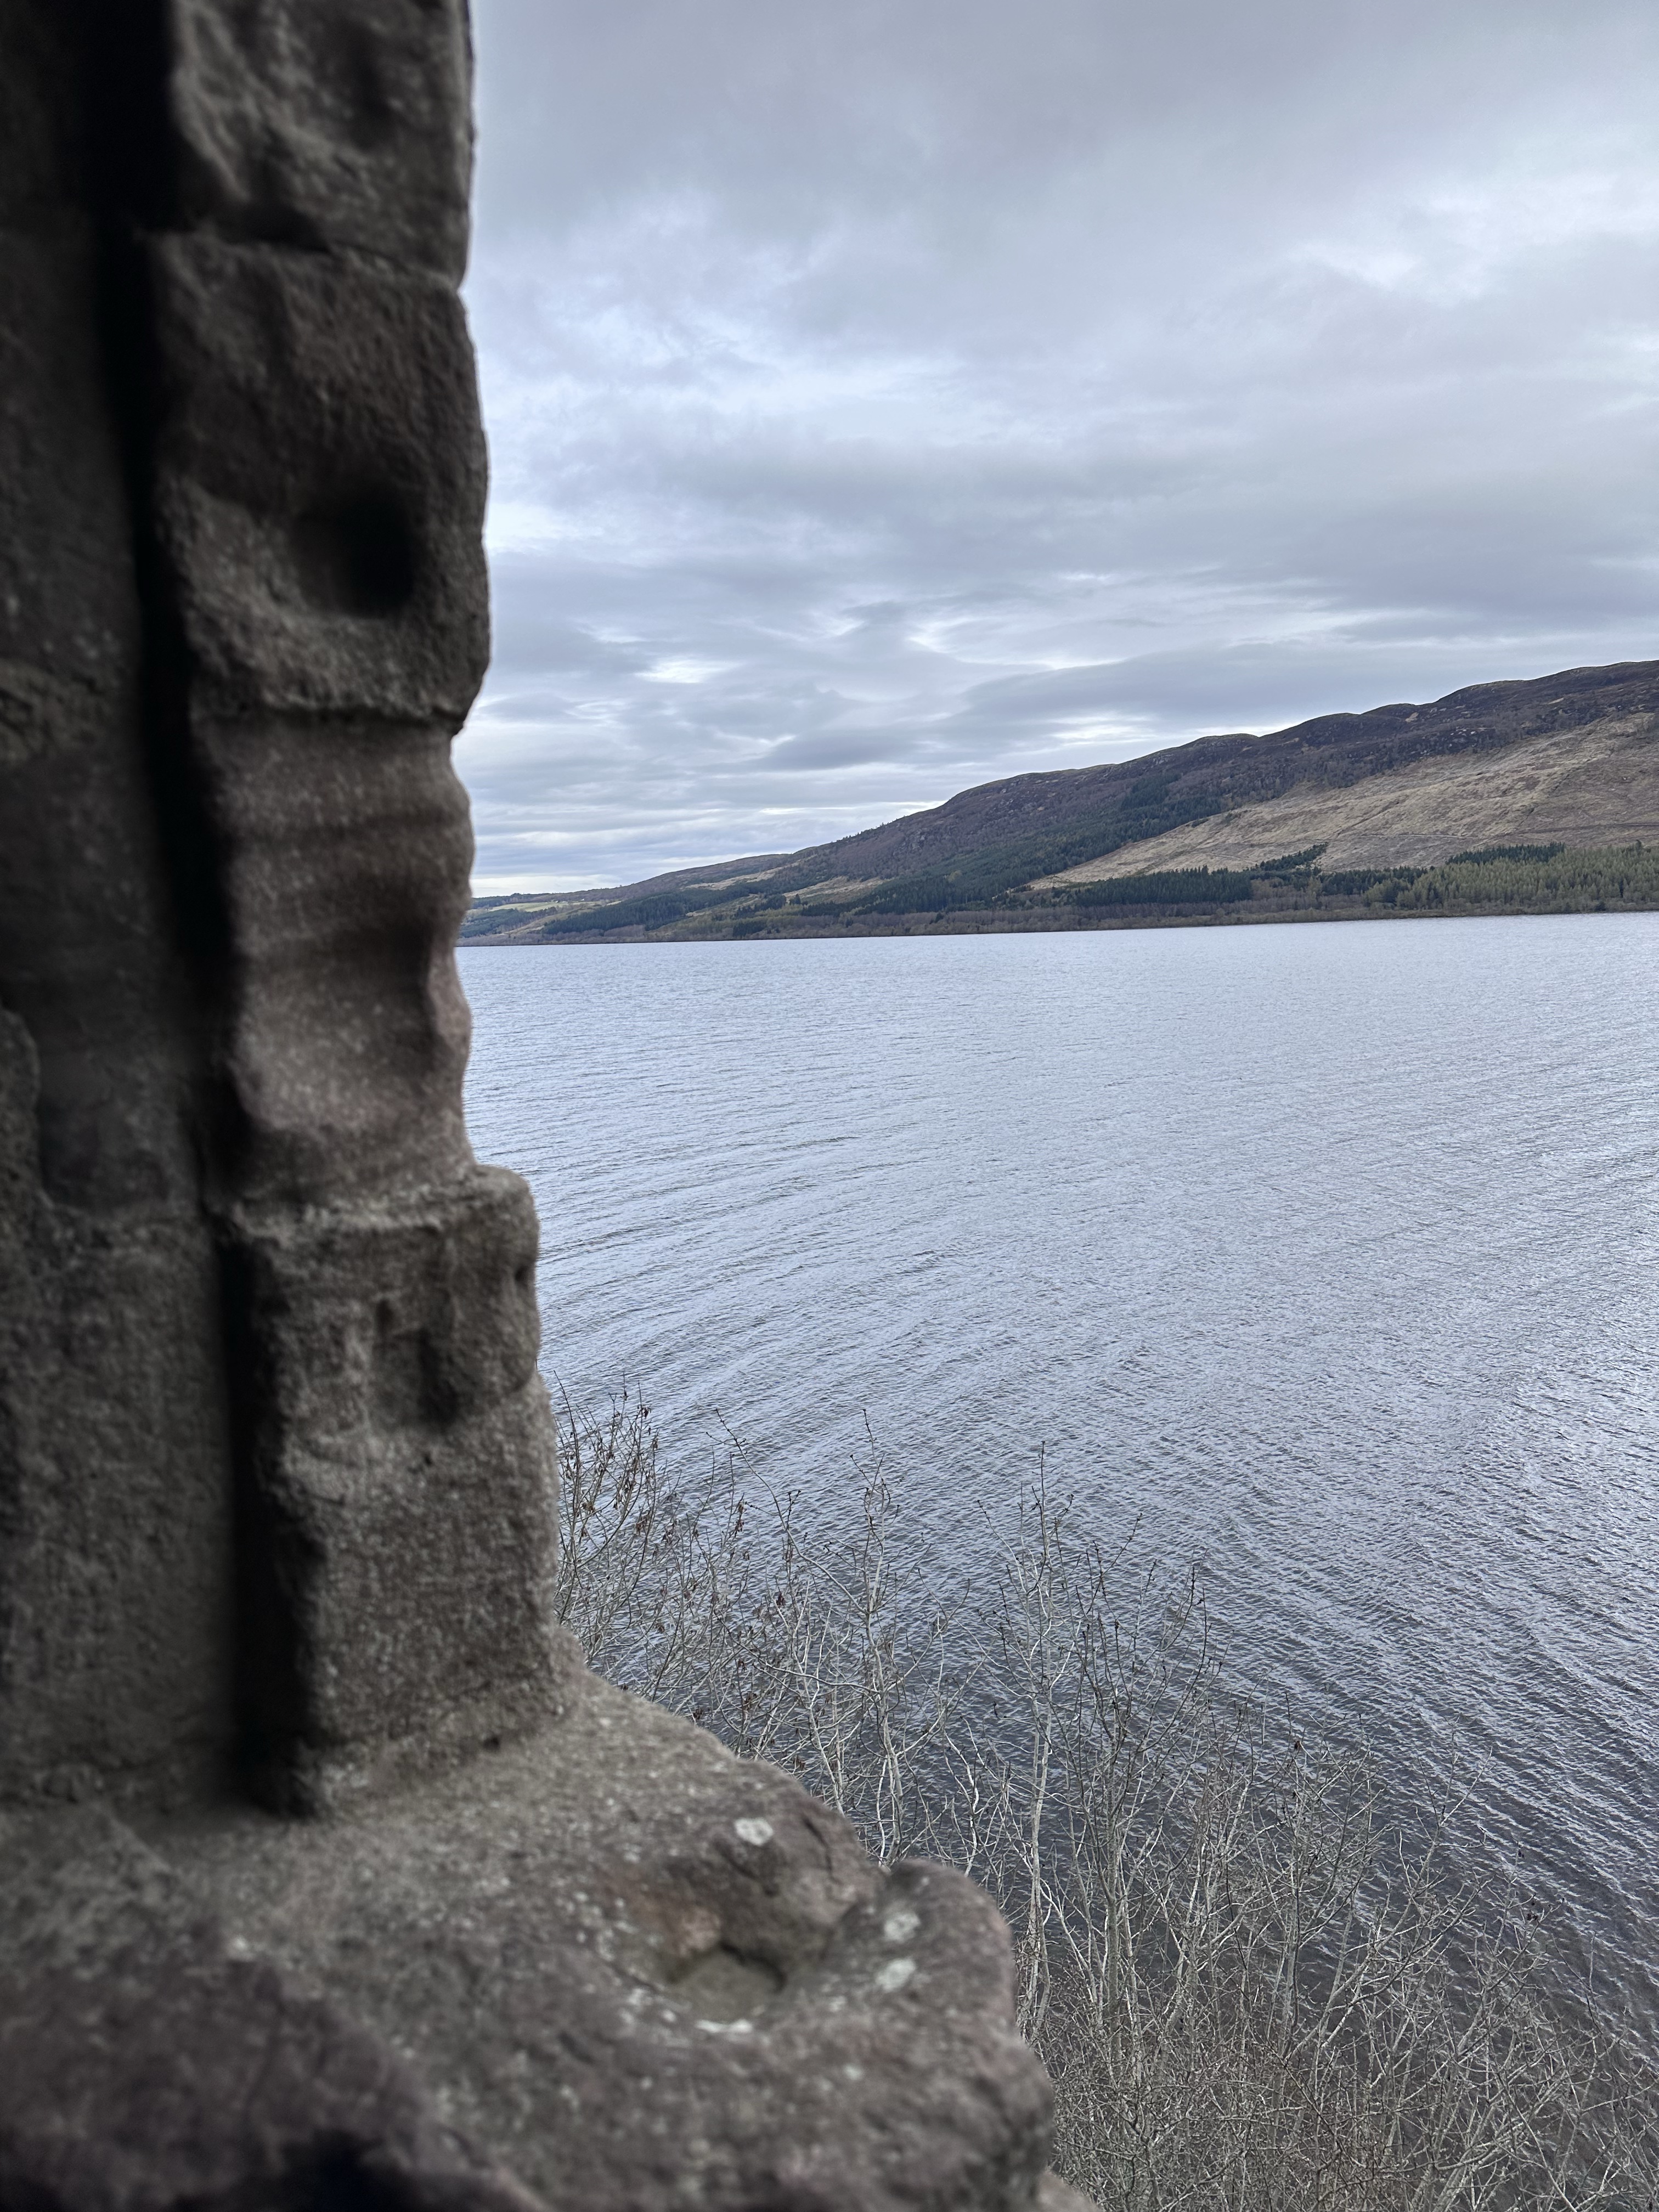
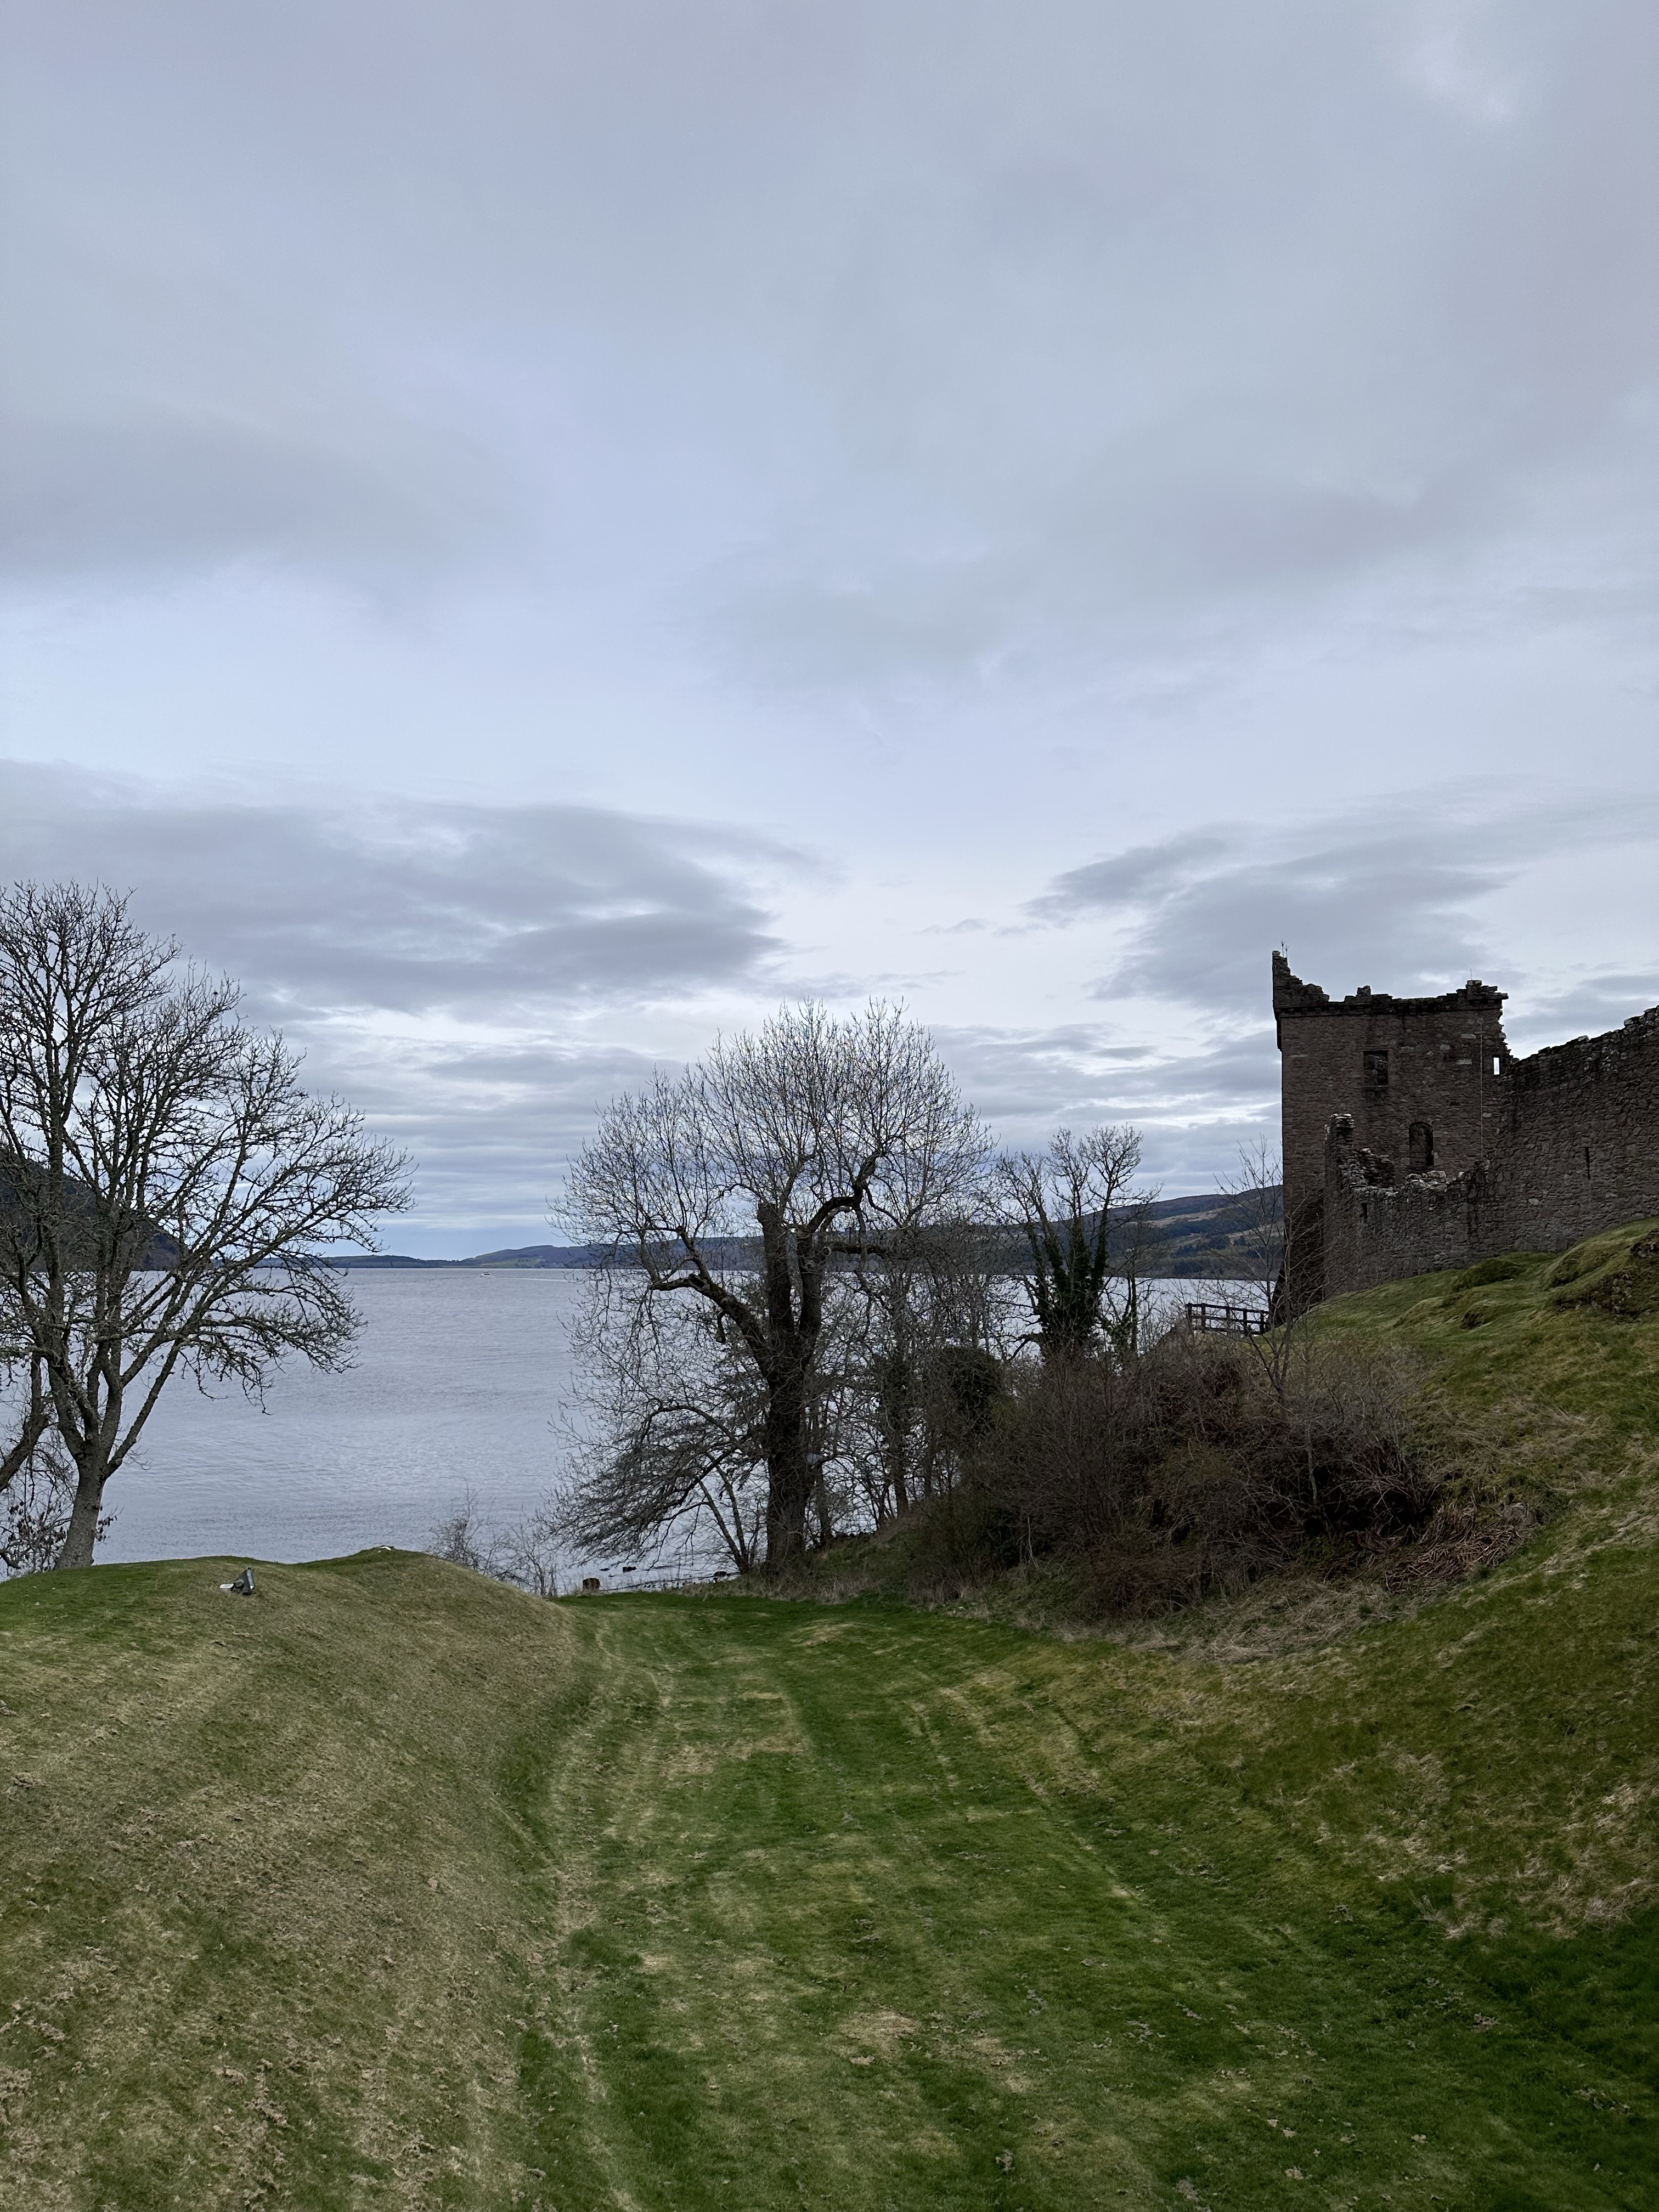
Loch Ness
Along the famous Loch Ness sits the ruins of Urquhart Castle. I shared a little about our visit to the castle in this post. We searched for Nessie, but never did see her! 😉 We did see some absolutely beautiful views, though.
I love to hunt for sea shells whenever I am near the ocean and was delighted to find shells, sea glass, and a few rocks to bring home to remember our trip!
I hope you enjoyed seeing some of the most beautiful places we visited on our trip to Scotland! I’ll be back soon with one more post sharing some of my favorite things from our trip. 🙂
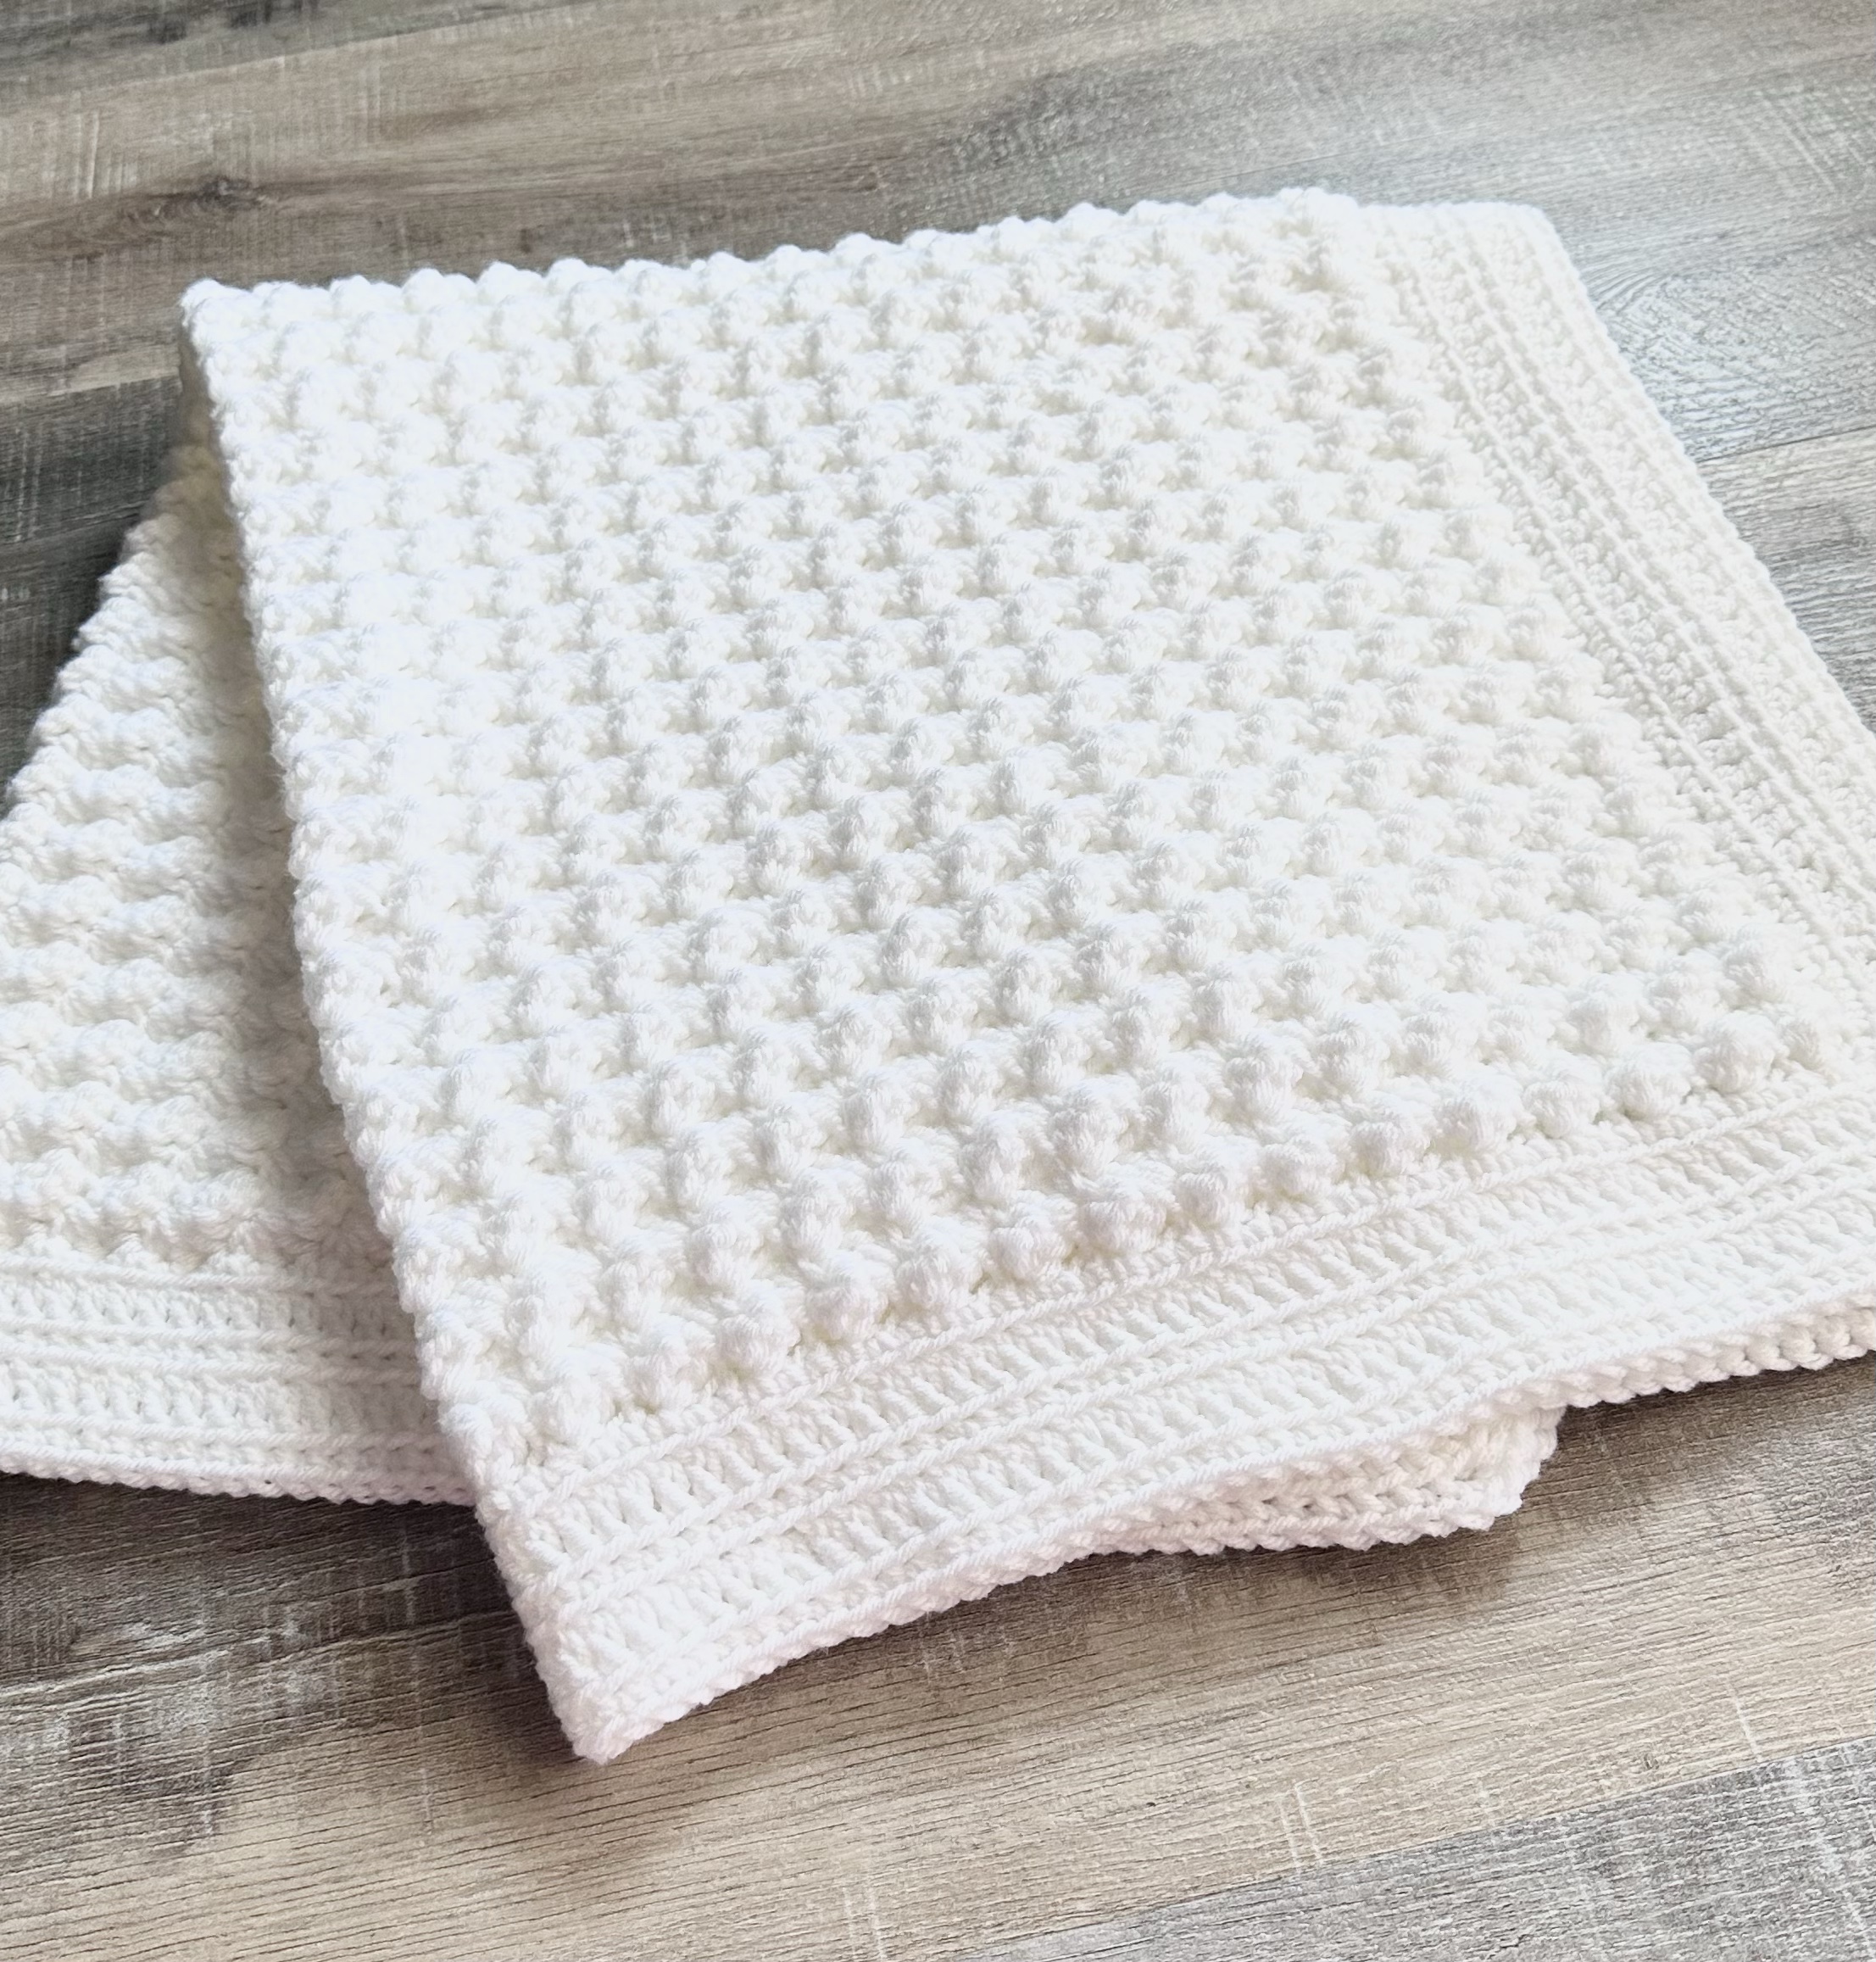
I have a fun new crochet baby blanket to share with you. 🧶 It’s a super easy pattern that is great for beginners as well as seasoned crocheters. It’s made using the blanket stitch, which is a simple combination of single and double crochet stitches. The pattern is a repeat of a single row, so it’s a great project to work on while watching your favorite movie or Netflix show.
Disclosure: Some of the links on my site are affiliate links, meaning, at no additional cost to you, I will earn a small commission if you click through and make a purchase. As an Amazon Associate I earn from qualifying purchases.
The blanket stitch has such a beautiful texture! I added a simple border of single crochet and double crochet to my blanket. I stitched it up with I Love This Yarn in White with an I/5.5mm crochet hook. You can find the pattern below along with a link to a free PDF if you’d like to print it. 😊
Crochet Blanket Stitch Baby Blanket
Worsted Weight Yarn, about 21 ounces – I used I Love This Yarn in White
I/5.5mm crochet hook
Stitches used in US terms:
Chain – ch
Single Crochet – sc
Double Crochet – dc
Slip Stitch – ss
Back Loop Only – blo
Chain 99.
Row 1: work 2 dc in 3rd ch from hook. *skip 2 stitches, work 1 sc and 2dc in next stitch* Repeat from * to * across to last 3 stitches, skip 2 stitches, sc in last stitch. Turn. (32 “blocks” across)
Row 2: ch 1 (counts as a sc). Work 2 dc in first stitch. *skip 2 stitches, work 1 sc and 2 dc in next stitch* Repeat from * to * across to last 3 stitches. Skip 2 stitches, sc in ch 1 of previous row. (32 “blocks” across)
Rows 3-72: Repeat Row 2 for each row.
Do not turn at the end of Row 72.
Begin working in Rounds.
Round 1: ch 1. sc evenly around, working 3 sc in each corner. Join with ss to first sc.
Round 2: ch 2 (does not count as a stitch). dc in blo of same stitch as ss and in each stitch around, working 3 dc in each corner. Join with ss to first dc.
Round 3: ch 1. sc in blo of same stitch as ss and in each stitch around, working 3 sc in each corner. Join with ss to first sc.
Round 4: ch 2 (does not count as a stitch). dc in blo of same stitch as ss and in each stitch around, working 3 dc in each corner. Join with ss to first dc.
Round 5: ch 1. sc in blo of same stitch as ss and in each stitch around, working 3 sc in each corner. Join with ss to first sc.
Fasten off and weave in ends.
Finished blanket measures approximately 30 by 32 inches.
You can easily change the width of the blanket by increasing or decreasing your starting chain. Just make sure your starting chain is in multiples of 3. To increase or decrease the length, add or subtract rows.
Disclosure: Some of the links on my site are affiliate links, meaning, at no additional cost to you, I will earn a small commission if you click through and make a purchase. As an Amazon Associate I earn from qualifying purchases.
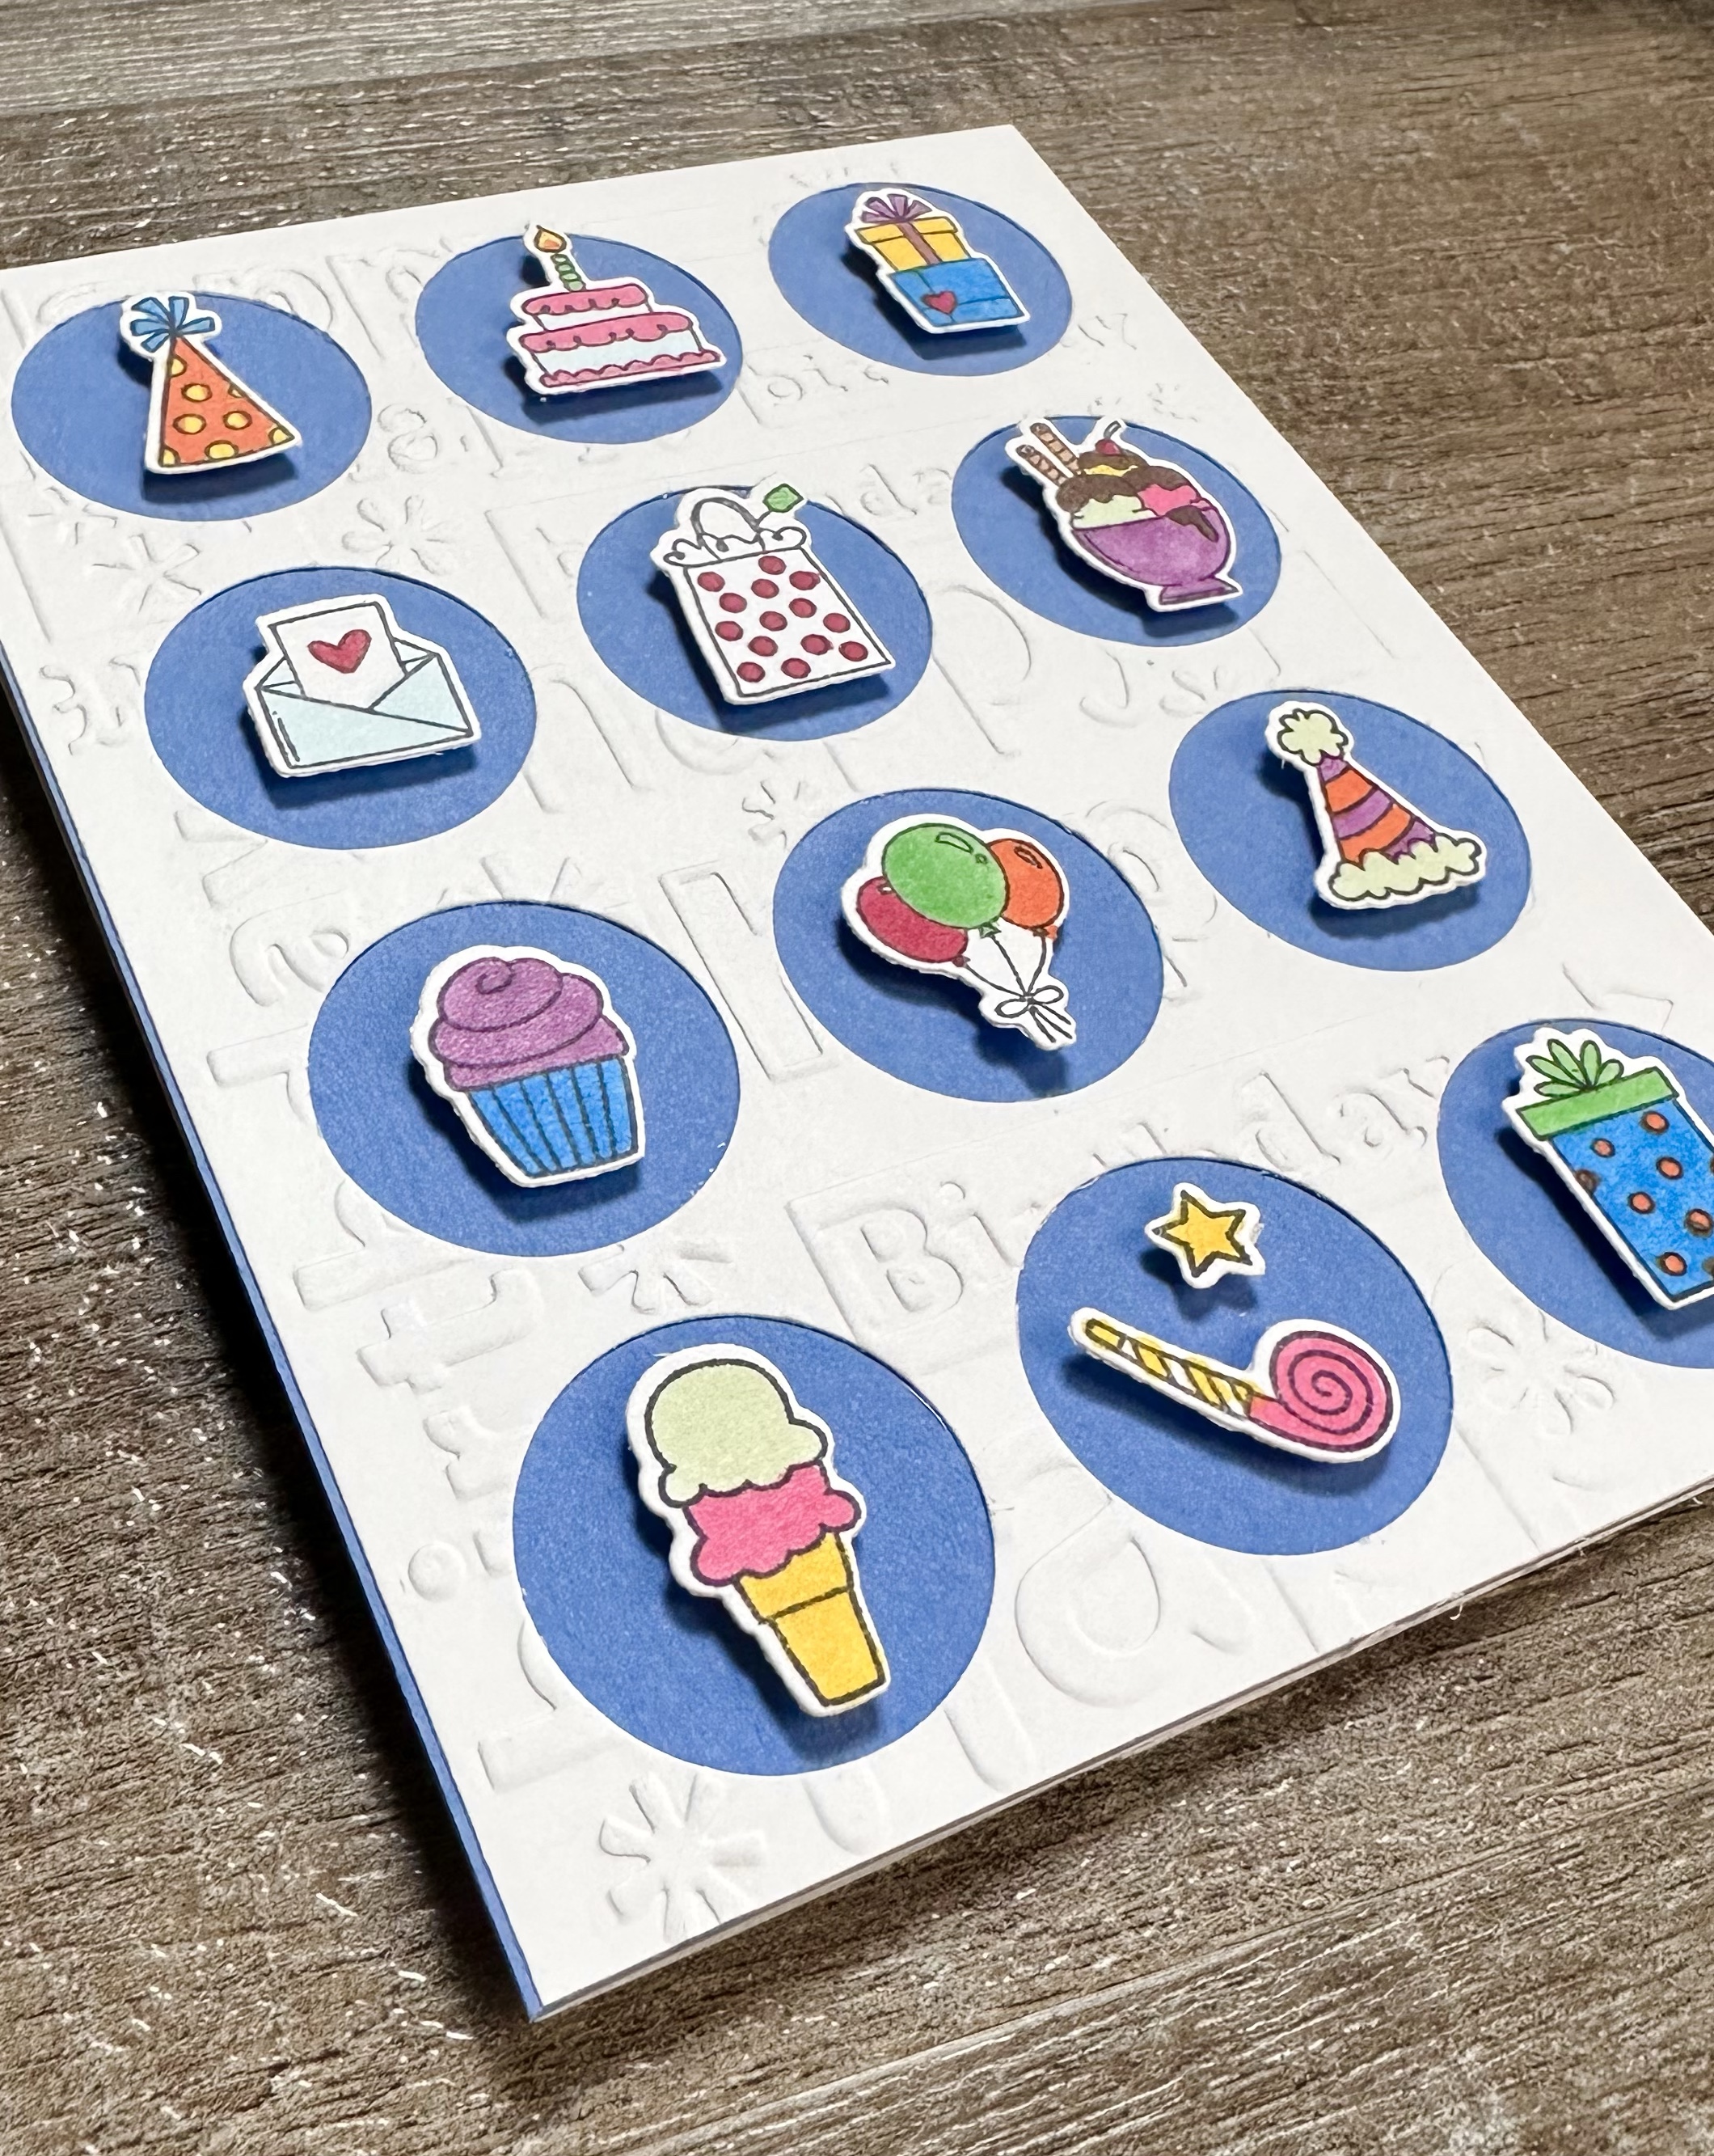
I stamped the birthday images with Memento Tuxedo Black ink on white card stock, colored them with Copic markers, and die cut them with the matching die.
I used a birthday embossing folder (similar to this one) on a piece of white card stock. Then I die cut it with the Big Circles Cutting Plate and attached it to a blue card. Each of the birthday images is attached to the card using foam tape.
This is such a fun stamp set! I colored the images with bright colors, but they would also be so cute in pastel colors. What a great way to send Birthday Fun! 🎉🎂🥳🎈
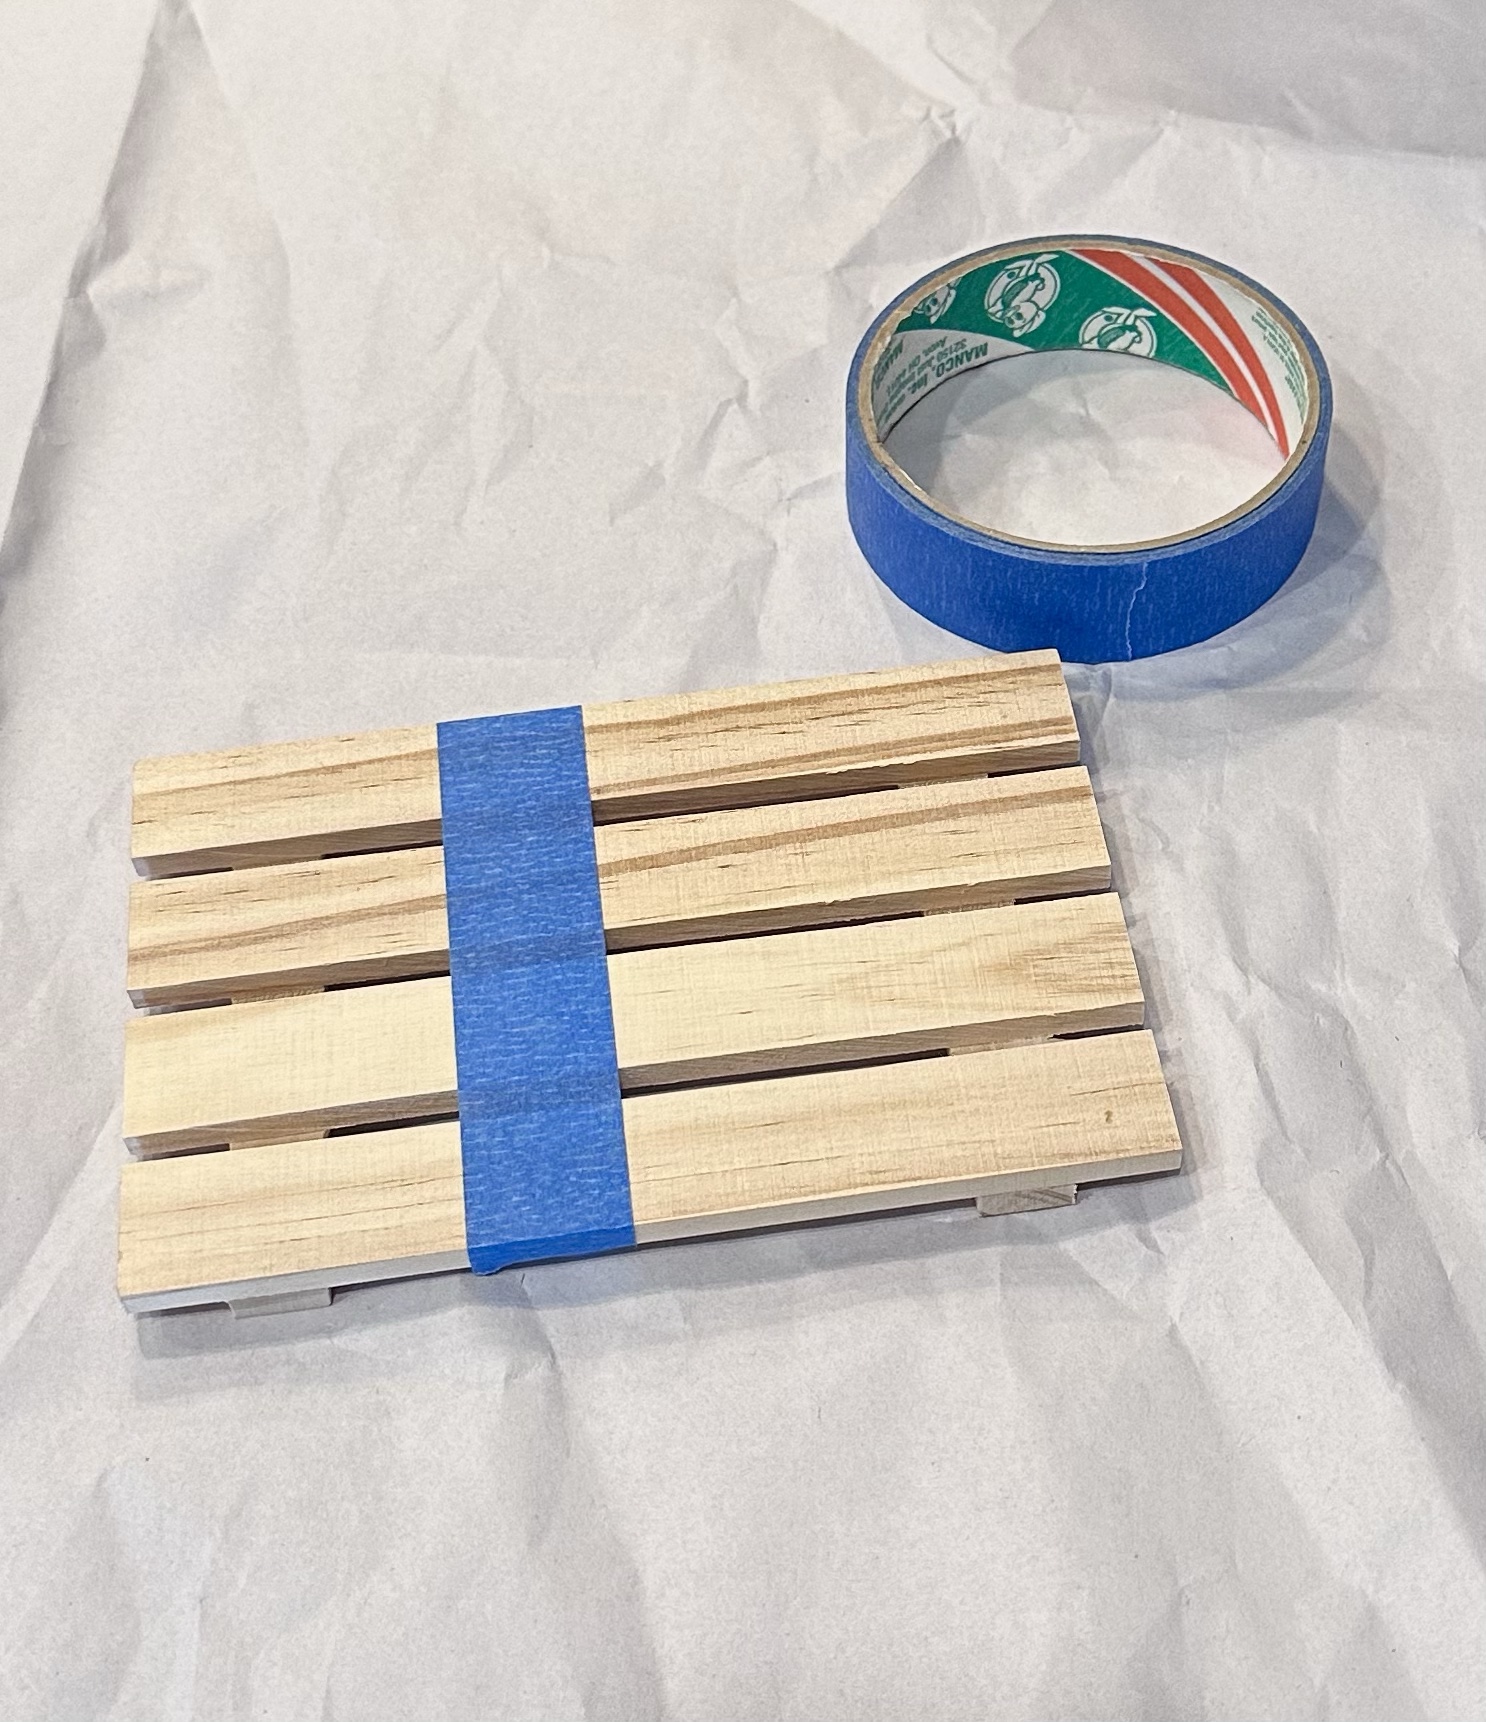
Do you have any of these mini wood pallets from Dollar Tree in your craft stash? It makes the cutest flag just in time for the 4th of July. 🇺🇸
Disclosure: Some of the links on my site are affiliate links, meaning, at no additional cost to you, I will earn a small commission if you click through and make a purchase. As an Amazon Associate I earn from qualifying purchases.
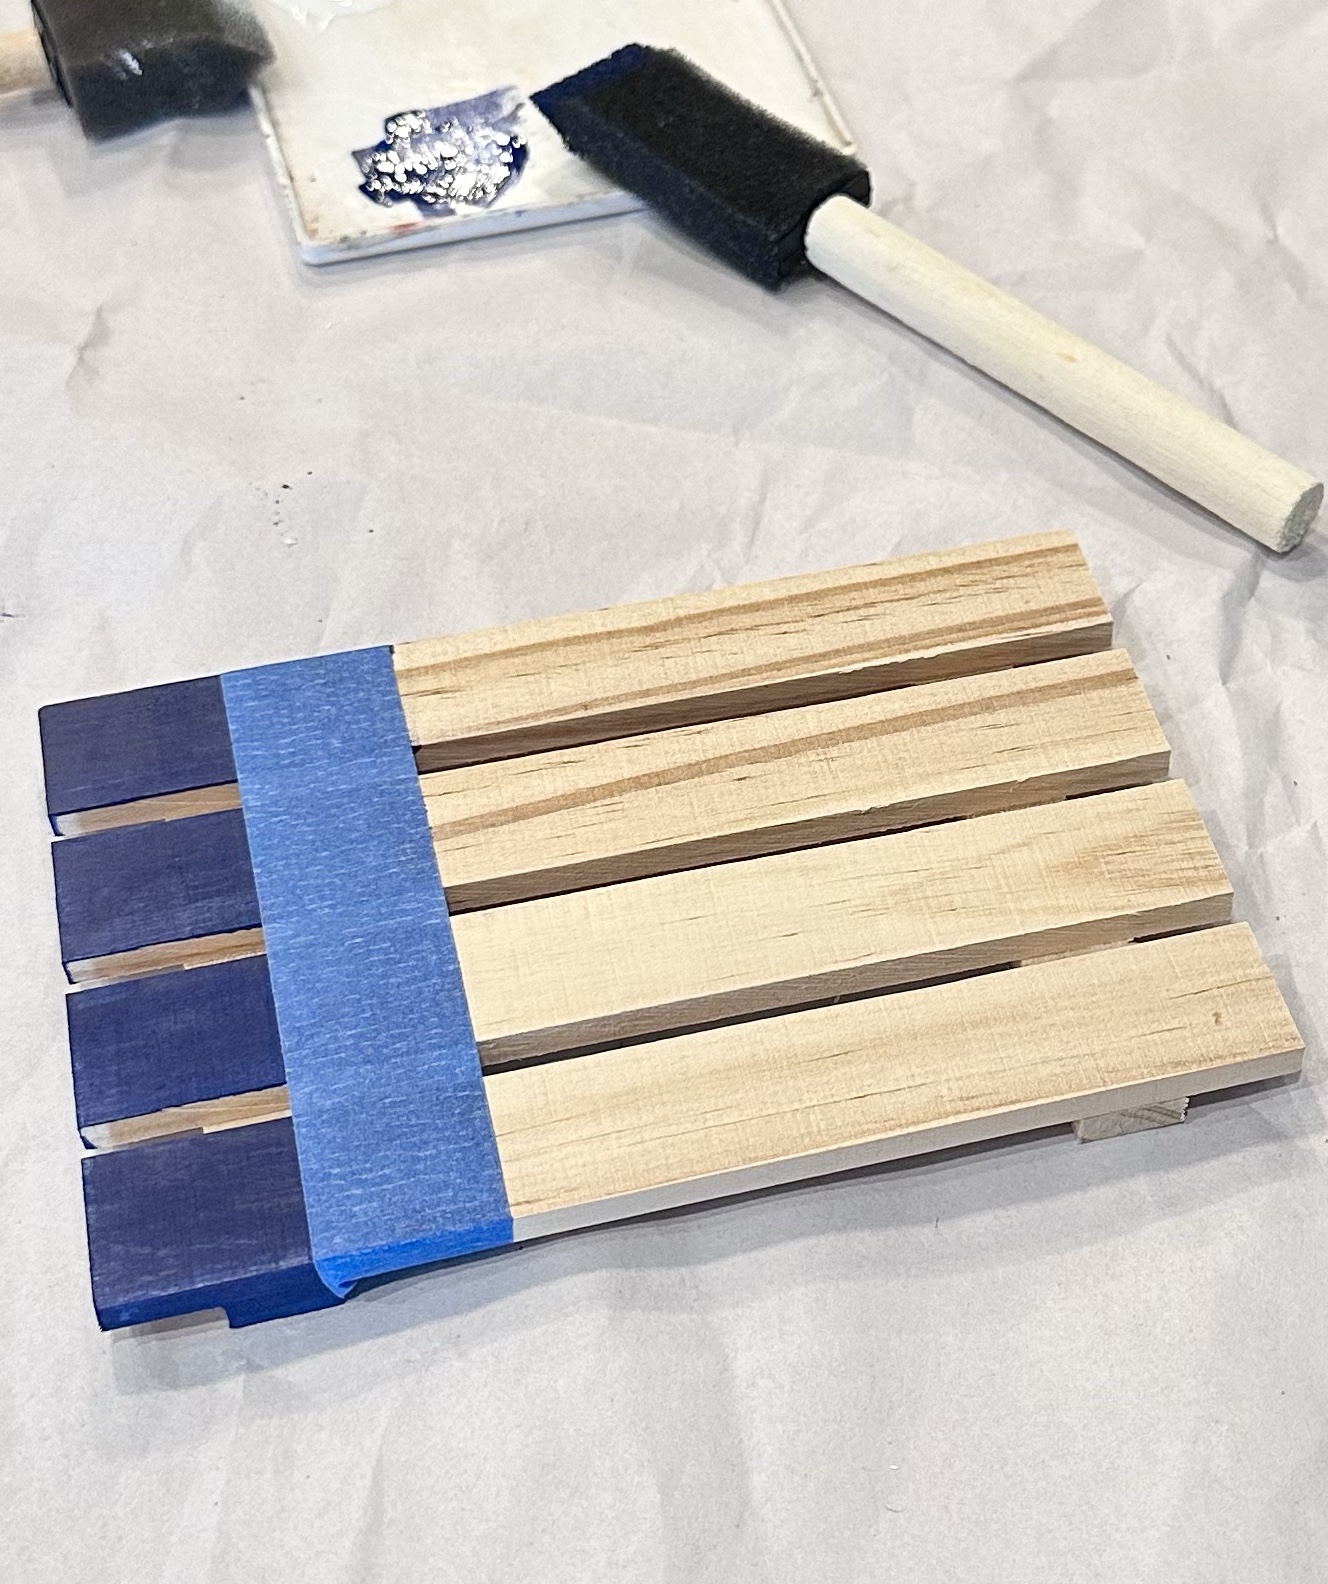
Place a piece of painters tape where you want the blue section to end – my blue section is roughly one third of the pallet. Using a foam brush, apply 2 coats of blue paint to the pallet letting it dry between coats. Once the blue paint is completely dry, place a piece of painters tape along the edge of the blue paint. With a foam brush, apply 2 coats of red and white paint to create the stripes. Paint your stars with 2 coats of white paint.
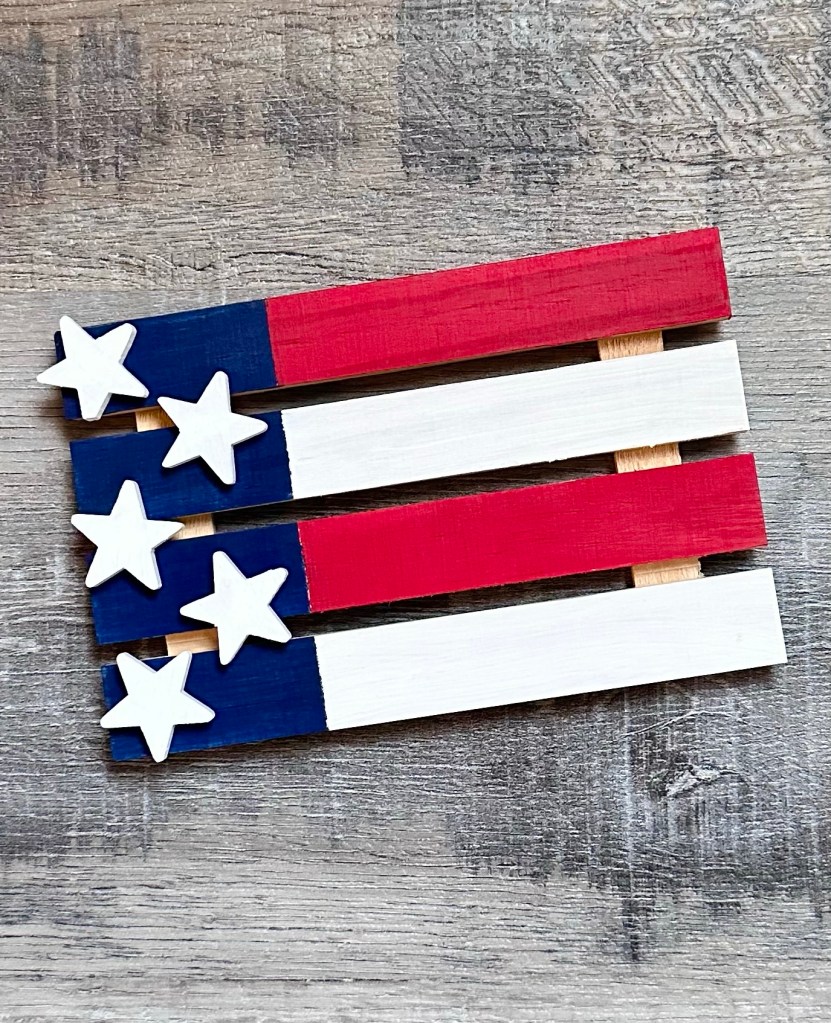
Using E6000 clear adhesive or another strong adhesive, glue your stars to the pallet as shown in the photo below.
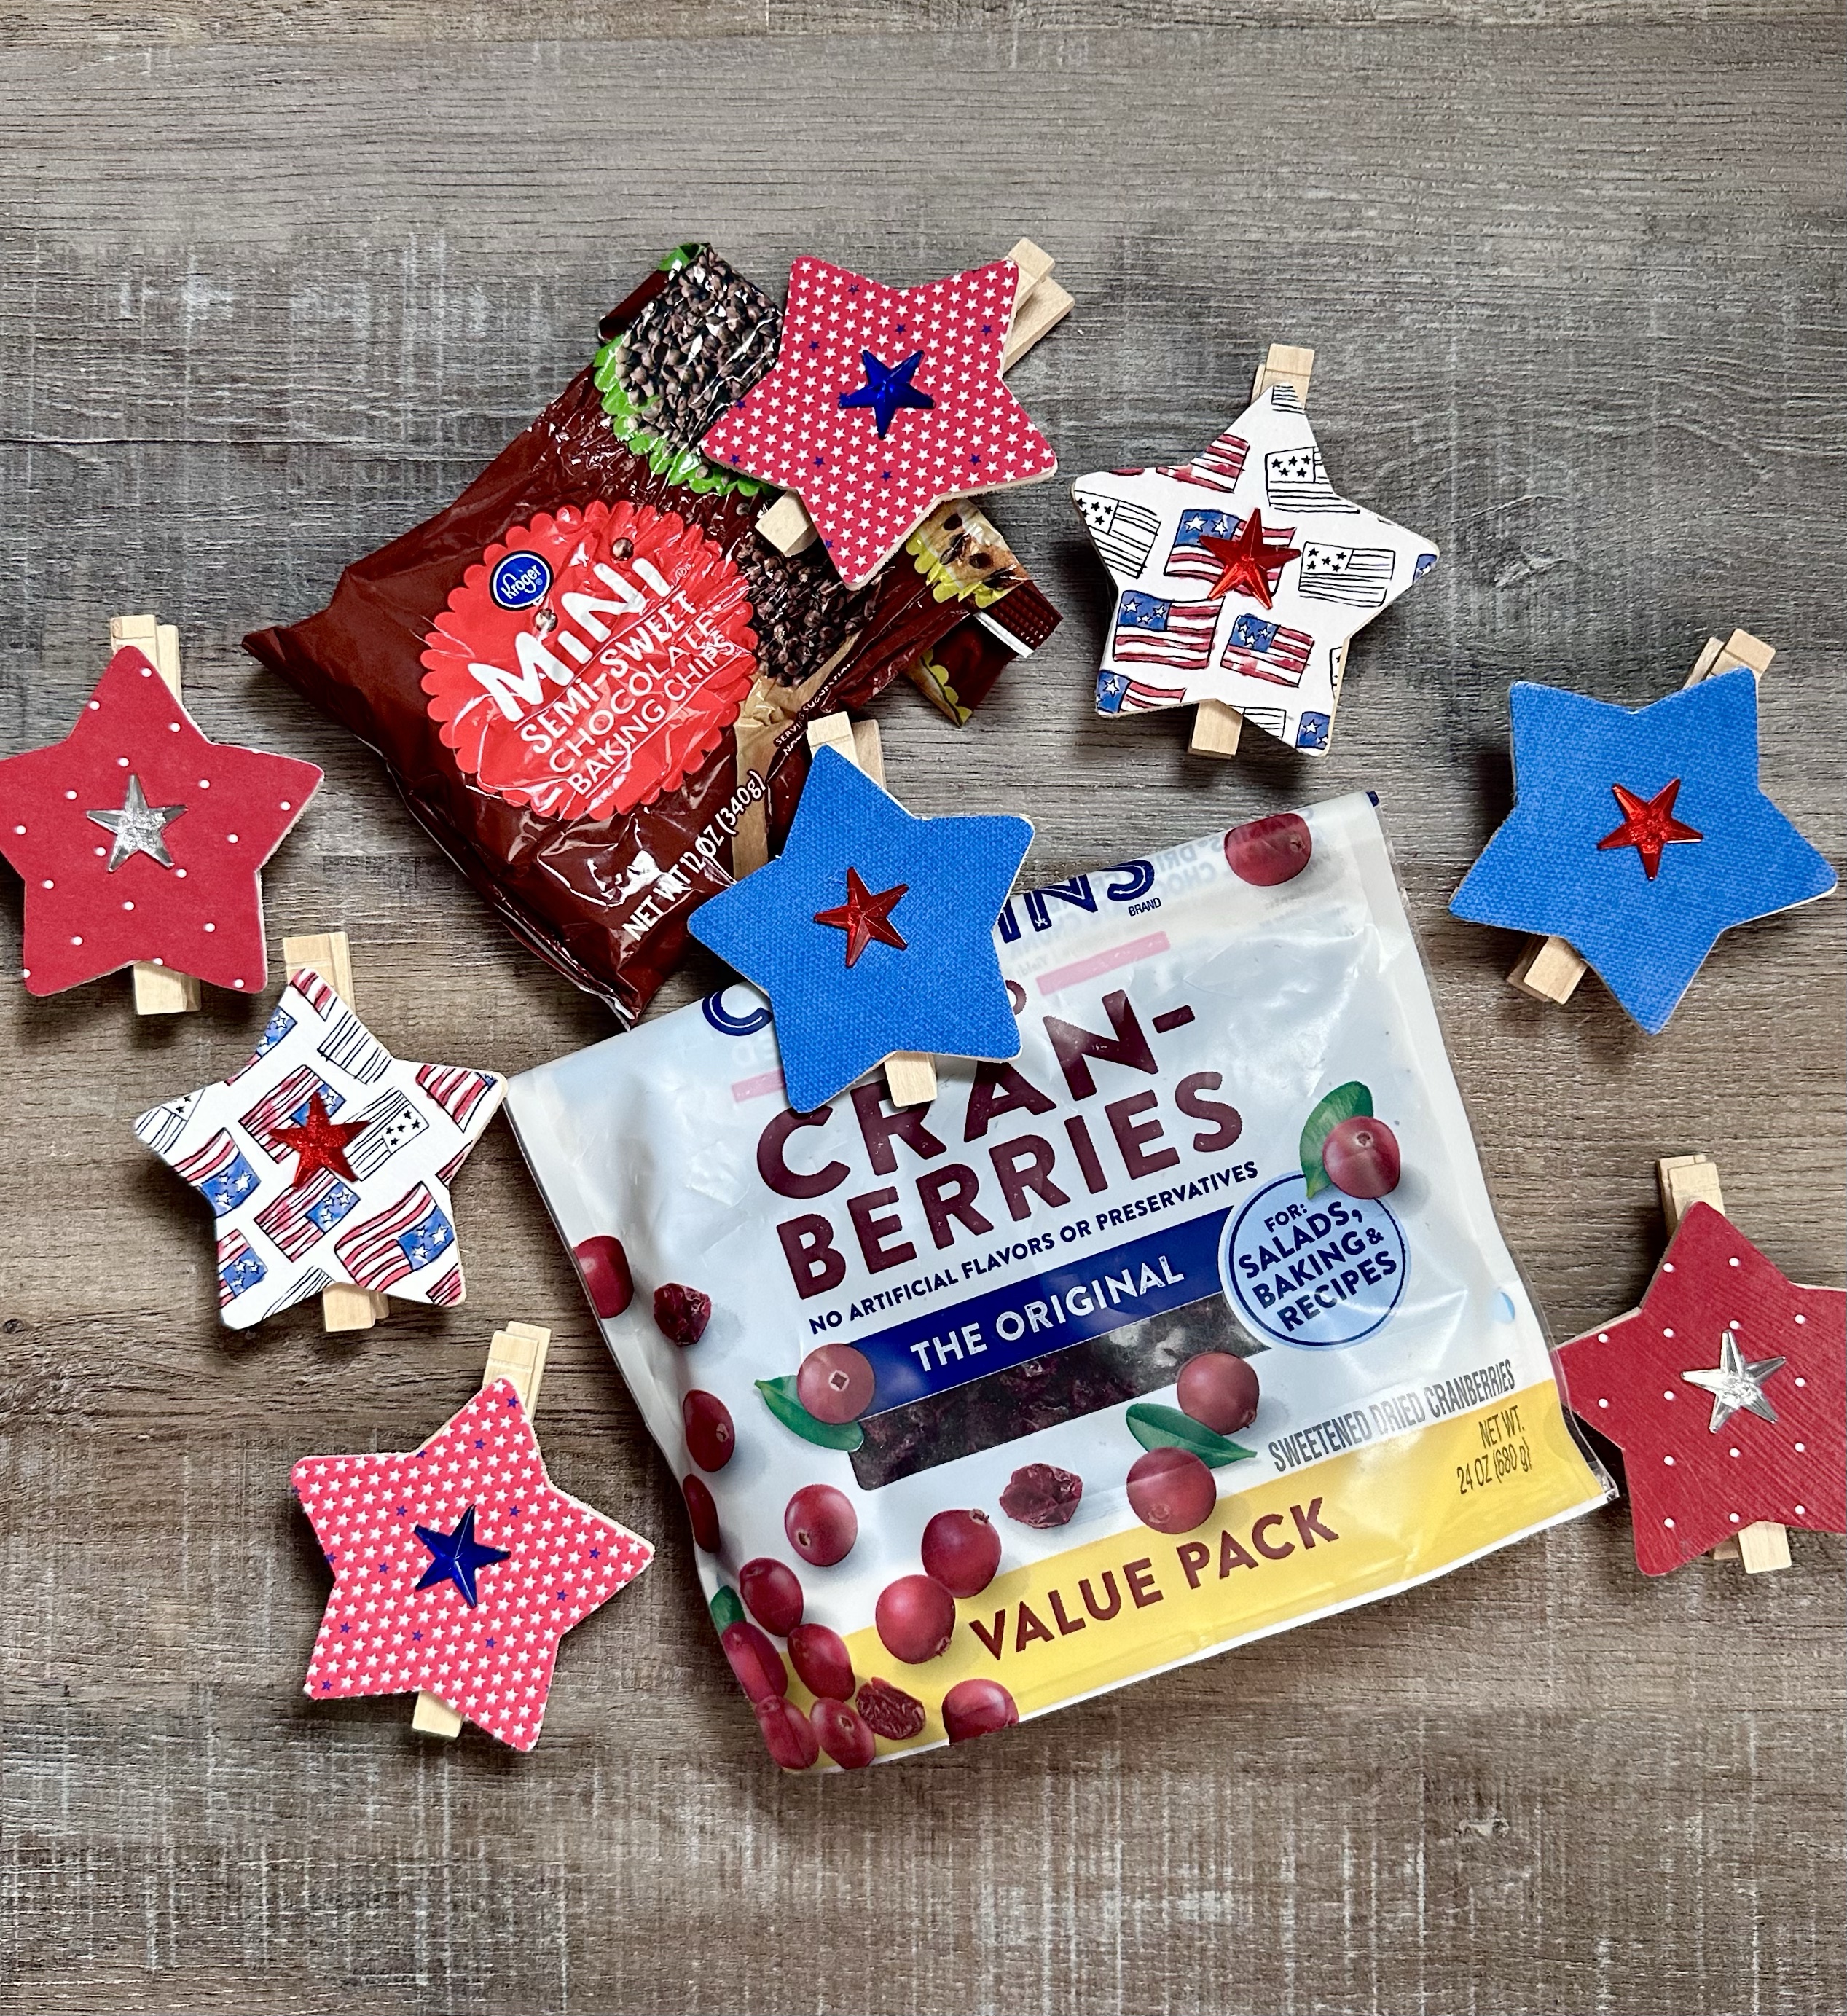
Do you have open bags of chips, baking chips, pastas, and other foods in your pantry? I have a fun way to close them up – Summer Chip Clips! They are easy and inexpensive to make, not to mention super cute! 😊
Disclosure: Some of the links on my site are affiliate links, meaning, at no additional cost to you, I will earn a small commission if you click through and make a purchase. As an Amazon Associate I earn from qualifying purchases.
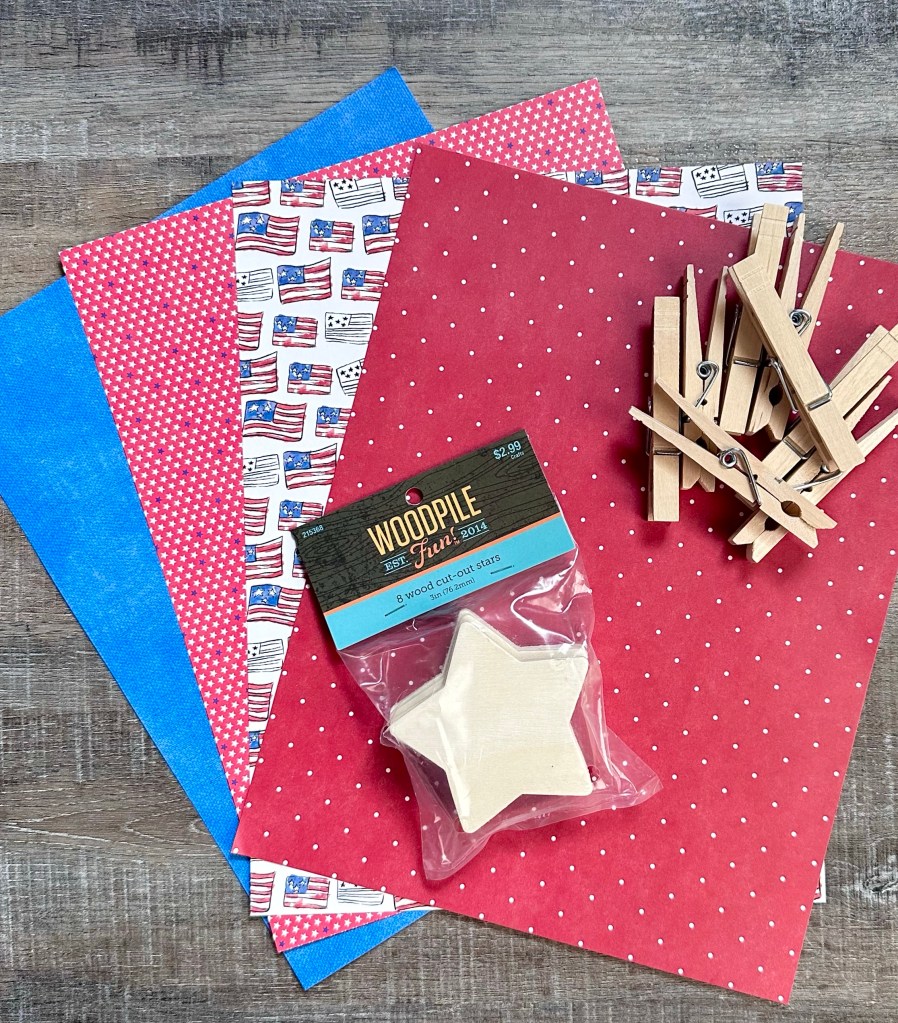
You’ll need some clothespins, 3-inch wood stars, scrapbook paper, and Mod Podge. I found my stars at Hobby Lobby in the unfinished wood section. There are 8 stars in the package for $2.99 – pretty good deal even if they aren’t on sale! 😉
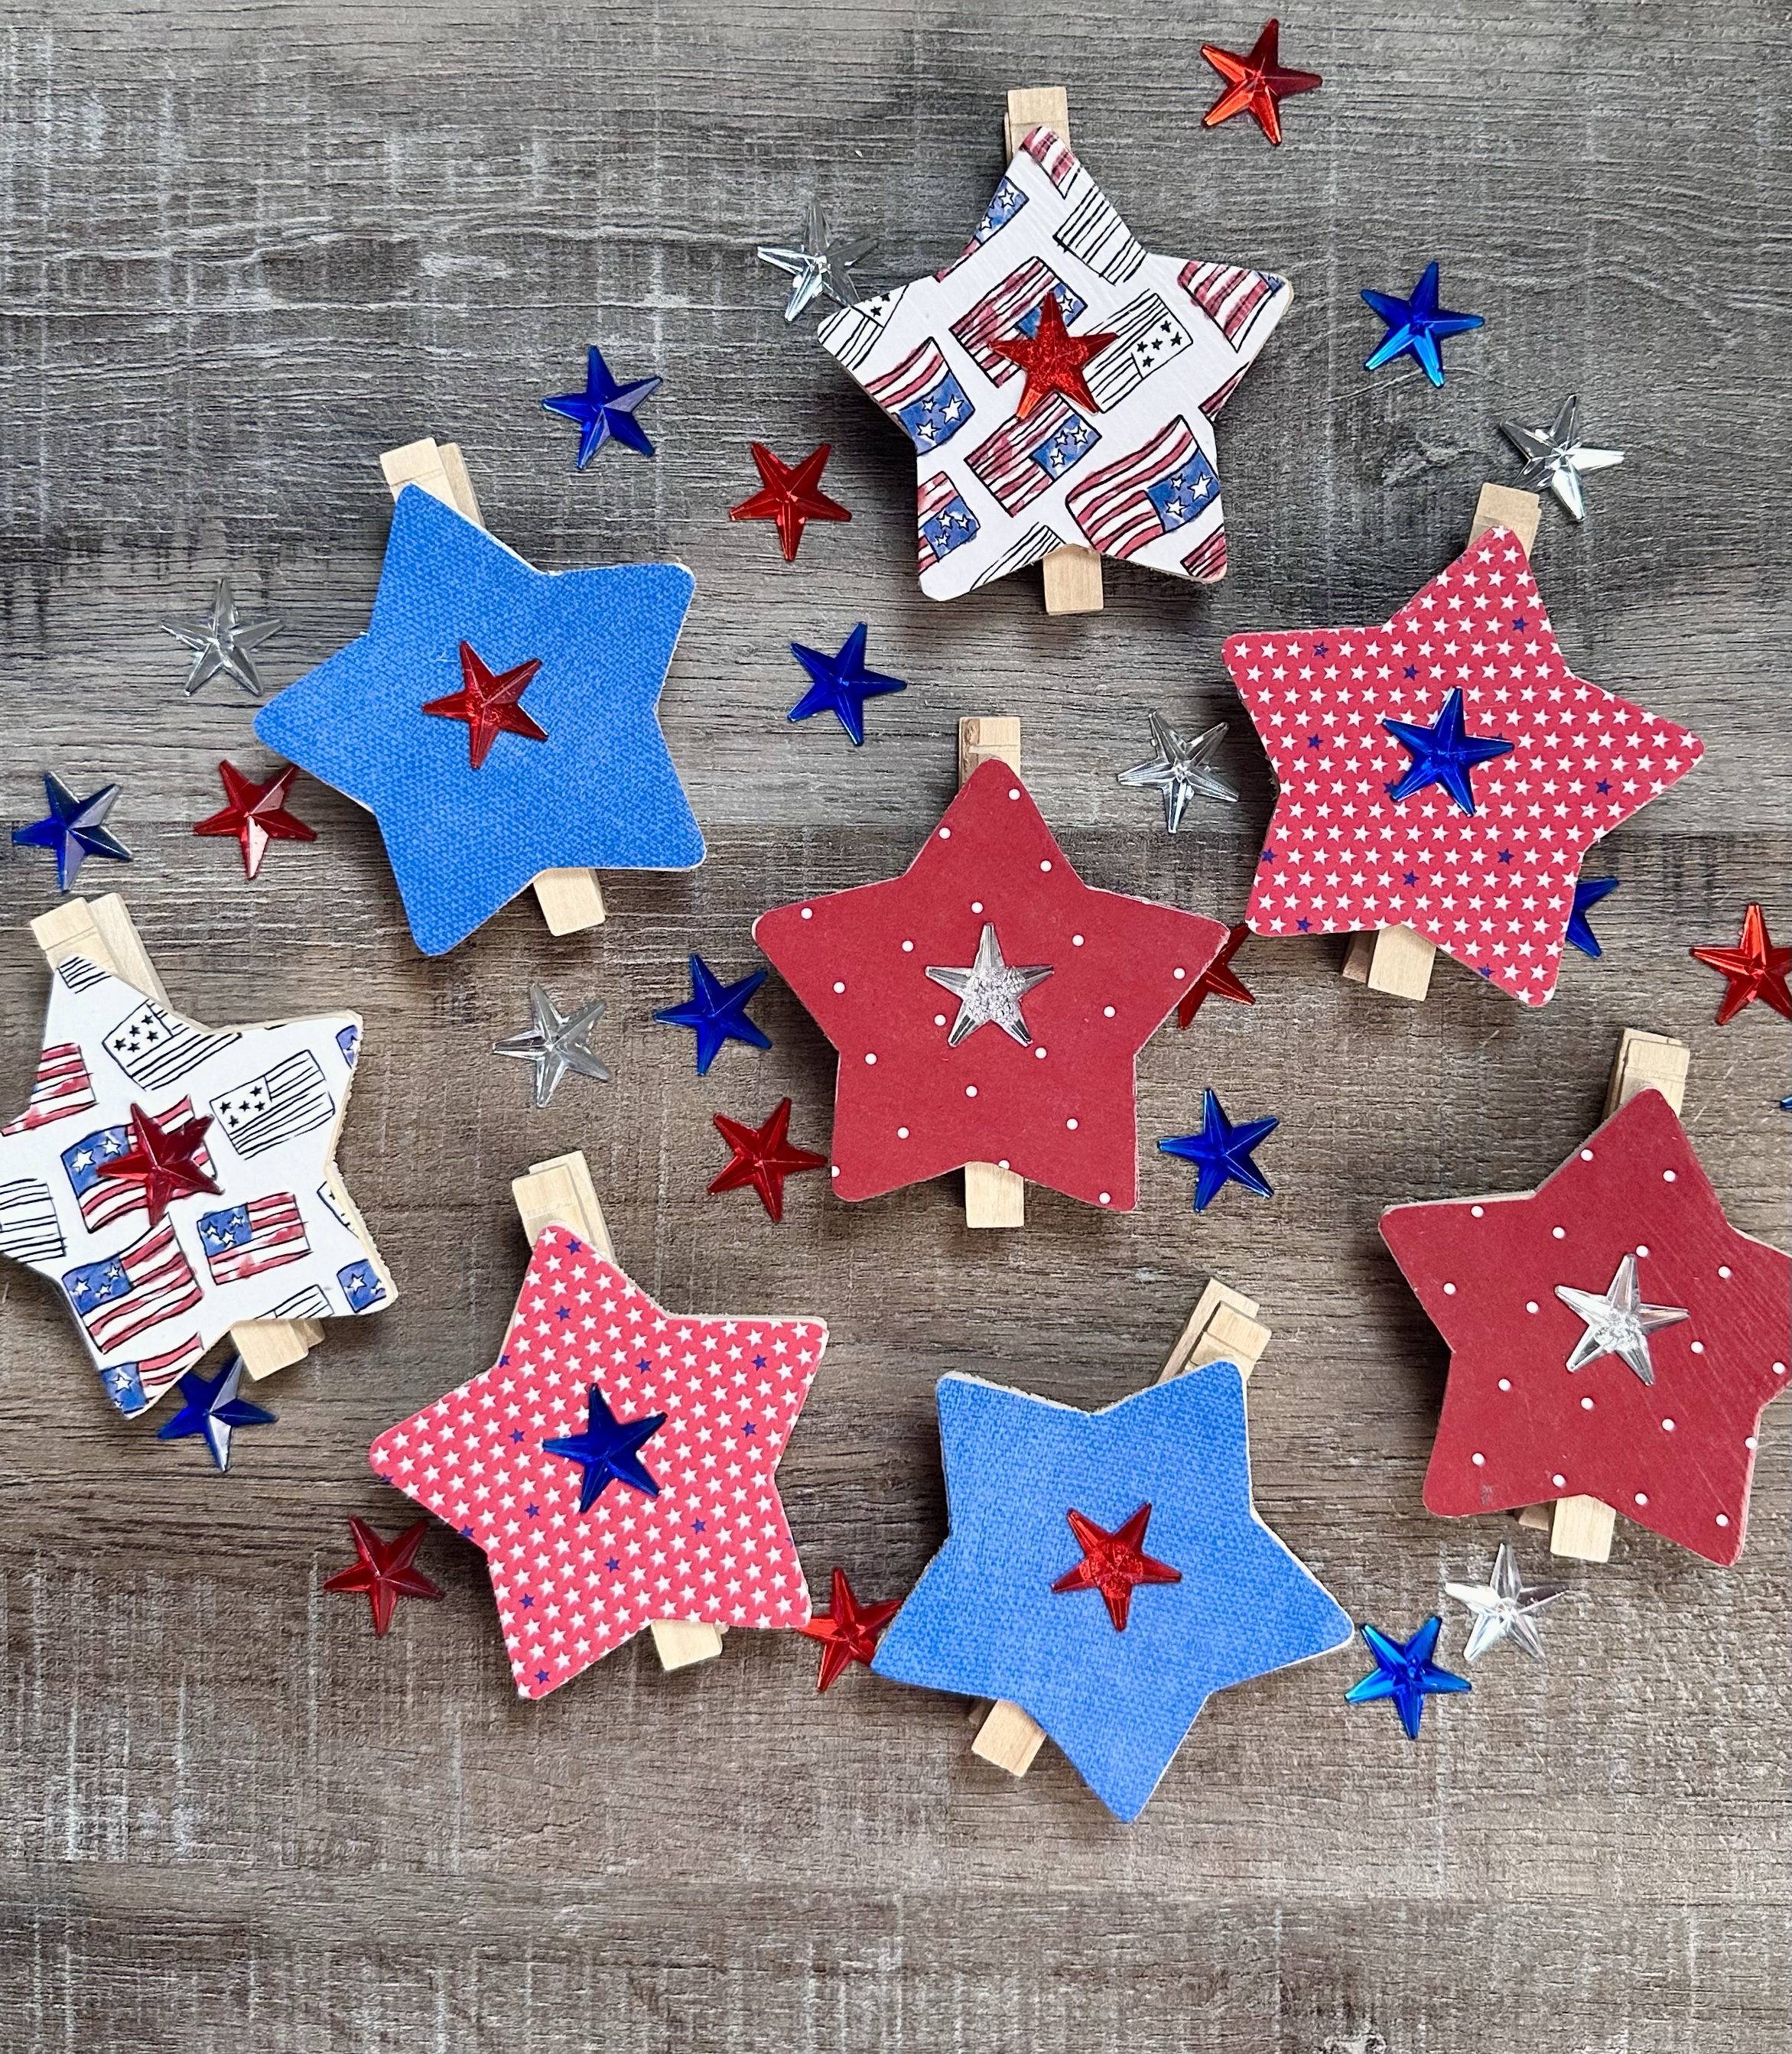
Trace around your stars on the back of the scrapbook paper and cut them out. Using a foam brush, apply a thin coat of Mod Podge to the wood star. Apply the paper star to the wood star, smoothing out any wrinkles and lining up the edges – let dry for a few minutes. Apply a thin layer of Mod Podge over the top of the paper and let dry. Use a sanding block along the edges of the stars to remove any excess paper if needed.
Using E6000 clear adhesive, apply a thin line of glue to the star and attach it to the clothespin. If your scrapbook paper has a pattern that needs to go a certain way, make sure that you check your star before glueing it to your clothespin! You can see that I didn’t pay attention to that on one of my flag stars in the photo. And let me just say that the E6000 clear adhesive will hold that star to the clothespin forever once it’s dry!!😮 I could not get it off to turn it the right way!
I found the cute little red, blue, and clear stars in the seasonal section at Hobby Lobby. I used E6000 clear adhesive to attach a little star to each clip. This is optional, but I really like the extra little bling they add. 🙂
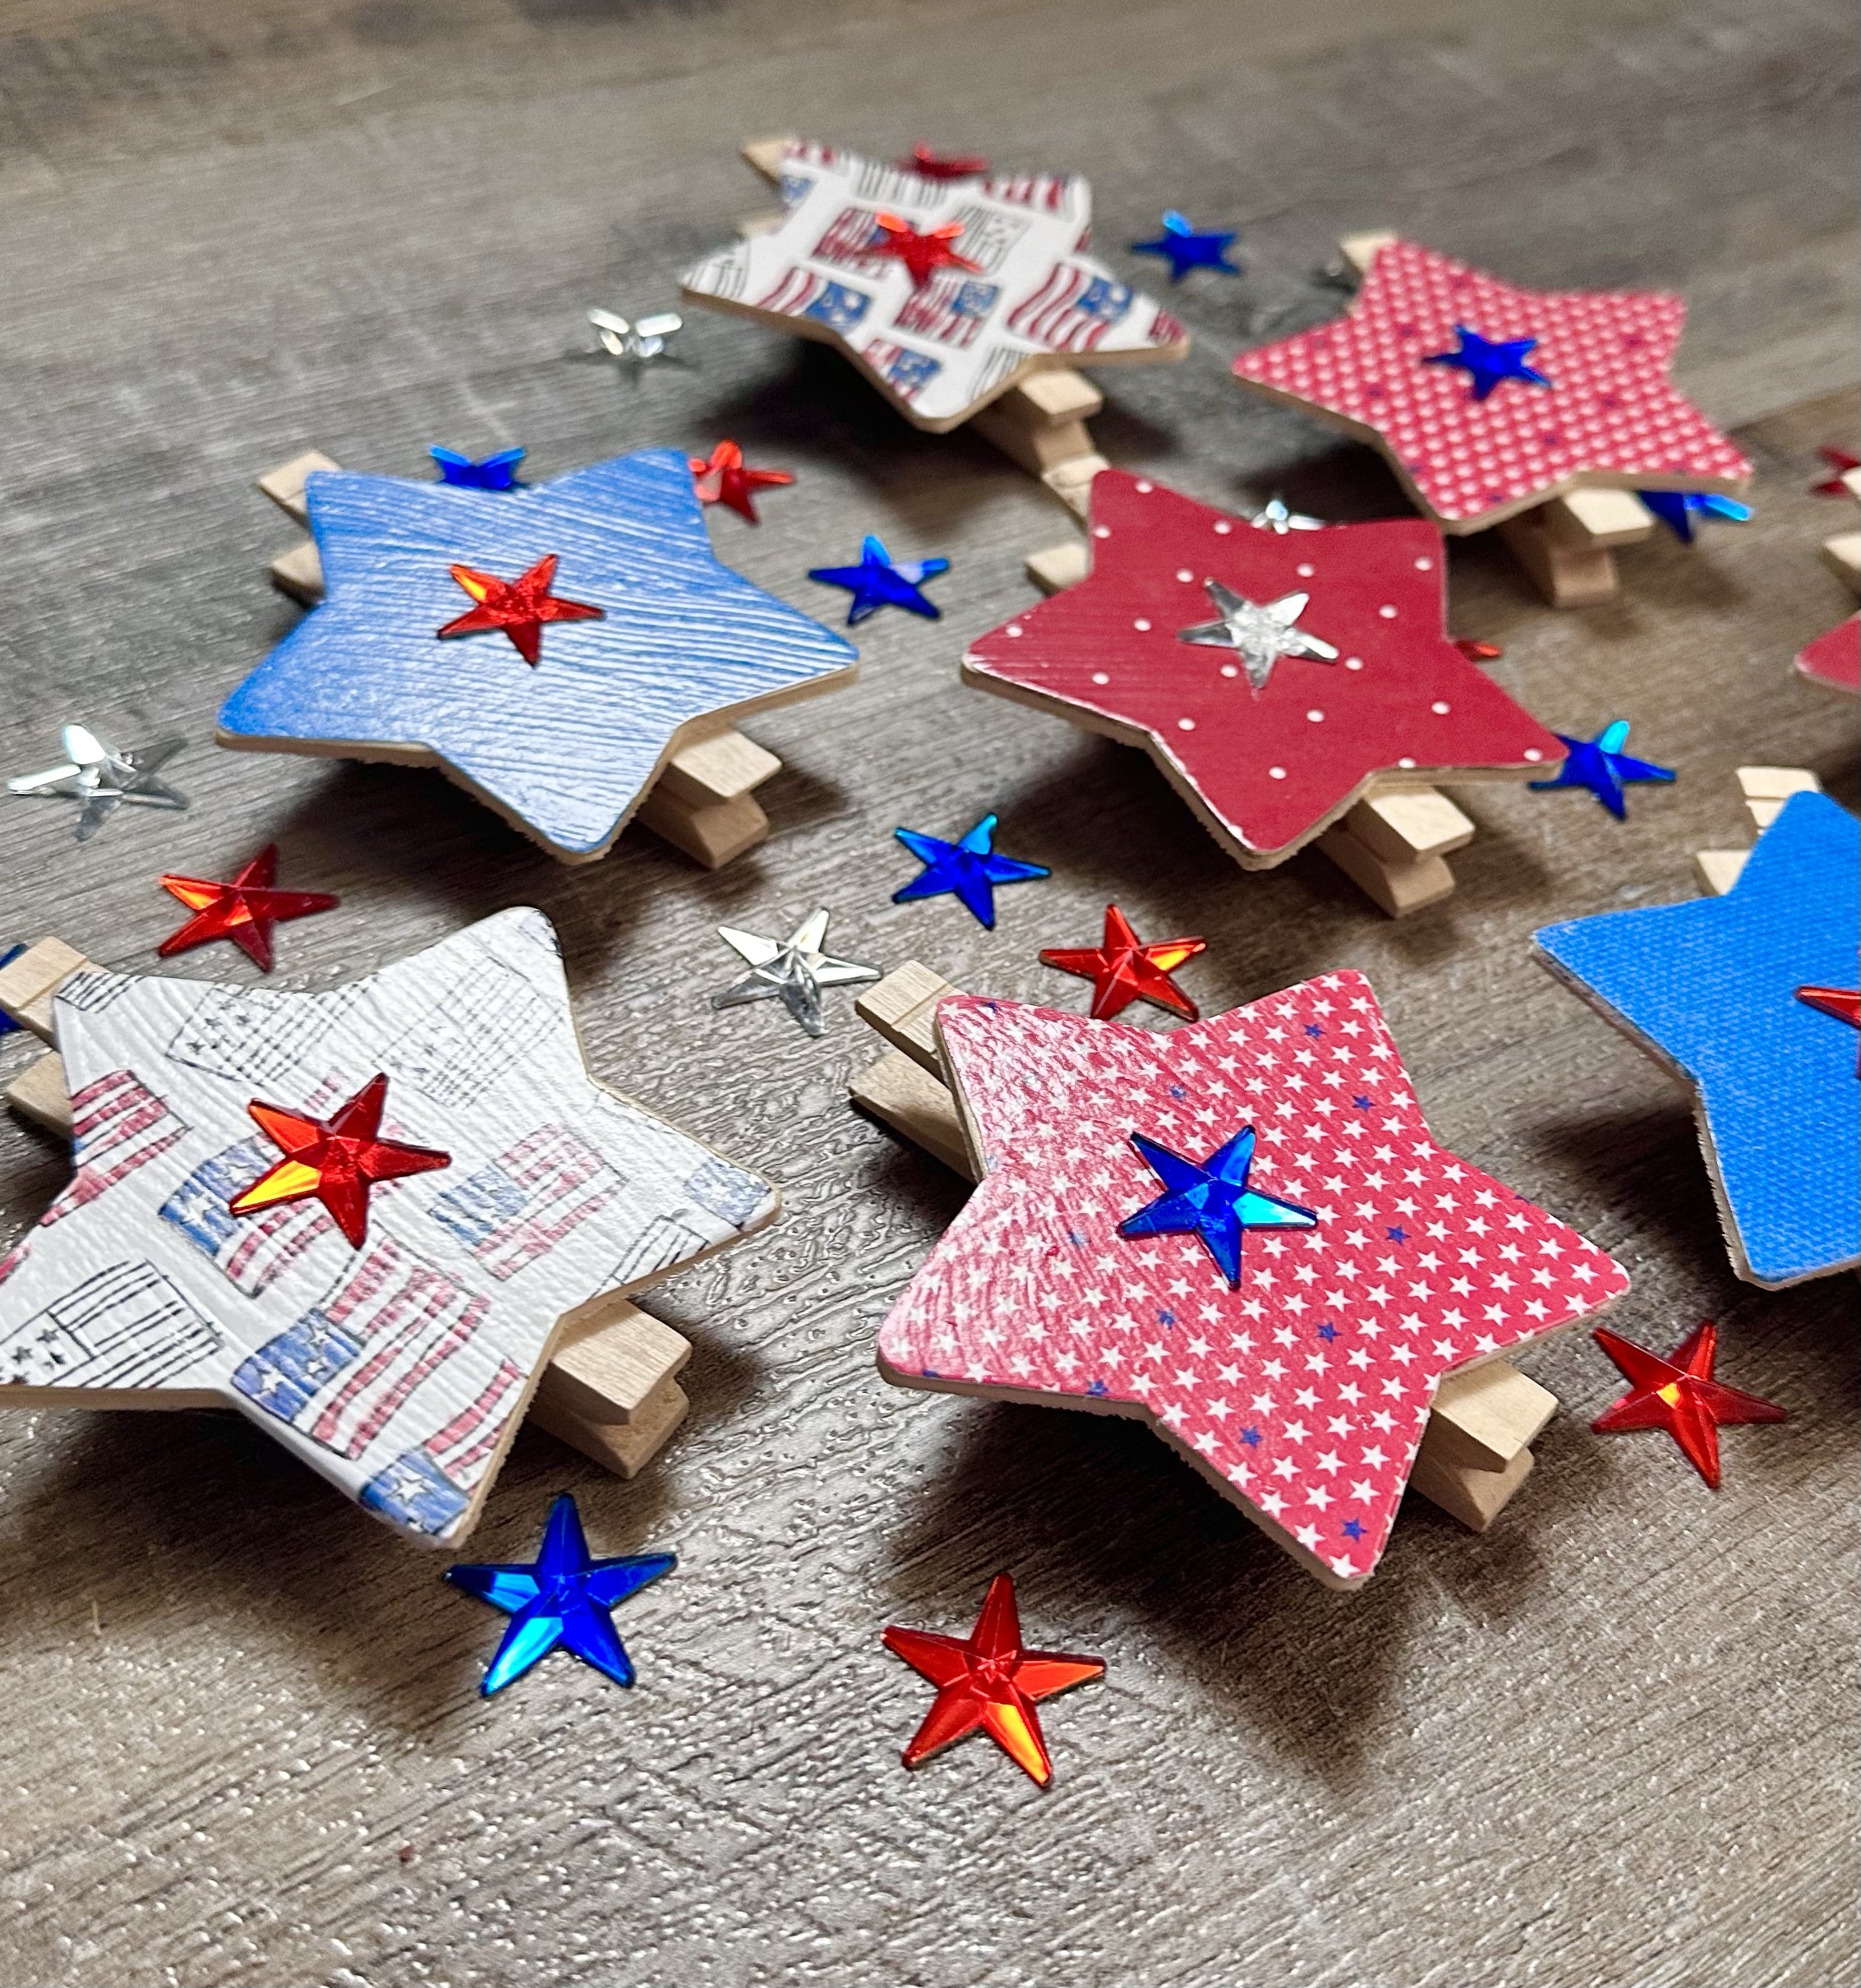
These Summer Chip Clips are perfect to have on hand for all the picnics and BBQs this summer. Or slip a few into your beach or pool bag to close up bags after snack time.
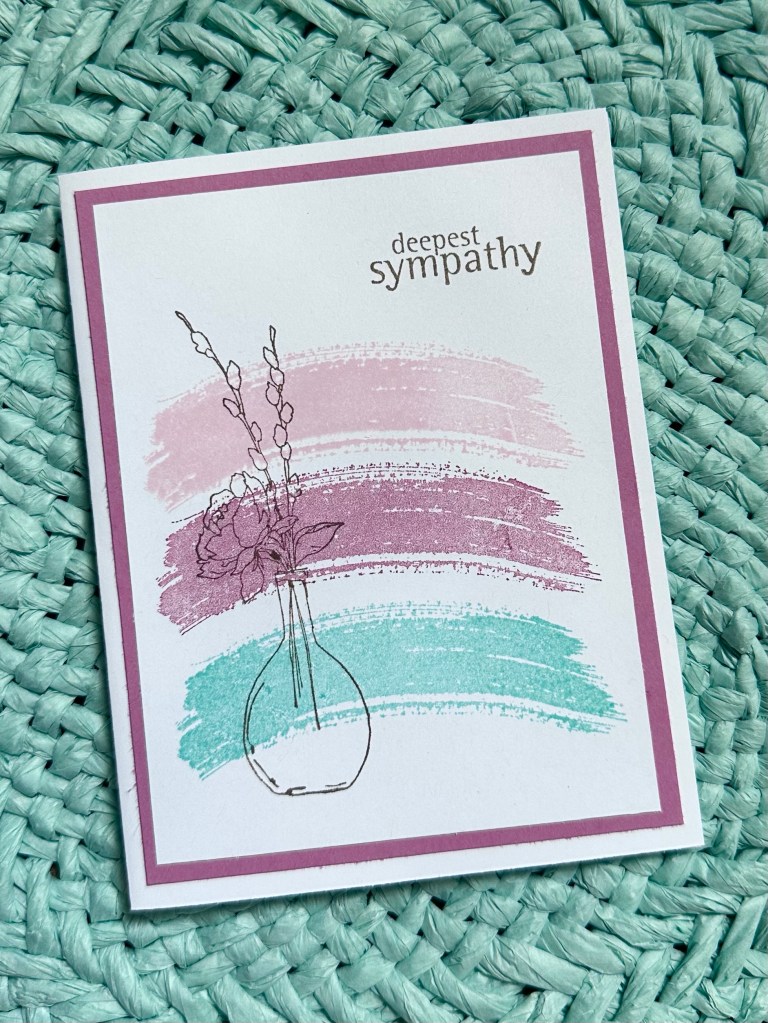
Sympathy cards mean so much to the recipient. I try to keep them simple and heartfelt. This card comes together very quickly and would be beautiful in any color combination.
Disclosure: Some of the links on my site are affiliate links, meaning, at no additional cost to you, I will earn a small commission if you click through and make a purchase. As an Amazon Associate I earn from qualifying purchases.
I stamped the color swoosh in 2 colors of pink and once in turquoise. I stamped the vase of flowers over the swooshes and the sentiment (here’s a similar sentiment stamp) using Memento Rich Cocoa ink. I layered the piece to dark pink card stock and attached it to a white card.
Such a simple card, but it can mean so much.
This easy card can also be used for birthday, thank you, or thinking of you cards simply by changing the sentiment. It’s a great card design when you are short on time and need to send a card quickly.
We were blessed to finally be able to take our bucket list trip to Scotland in April! It was the most amazing trip in such a beautiful country! We planned our trip through Nordic Visitor Travel Agency and we can’t say enough about how great they were to work with. From the first phone call they wanted to make the trip what we wanted. Shout out to Duncan for all his help!! We even had a couple of issues come up during the trip – flat tire and ferry not running – and they were on top of things helping us and changing hotel bookings. If you’re ever heading to that area of the world, I highly recommend Nordic Visitor to help plan your trip. 😊
Disclosure: Some of the links on my site are affiliate links, meaning, at no additional cost to you, I will earn a small commission if you click through and make a purchase. As an Amazon Associate I earn from qualifying purchases.
We opted to do a self-driving tour around Scotland. Our trip lasted 16 days so we were able to see a lot of the country, but not nearly all of it! By having our own rental car, we were able to see and do the things we wanted without being part of a tour. It worked great for us even though my husband was ready to turn the car in by the end of the trip! 😉 Driving was on the opposite side of the road for us with the steering wheel on the opposite side of the car – took some getting used to. Also the roads, especially in the rural areas, are narrow with lots of curves. And lots of single track roads, too.
Scotland is filled with castles and castle ruins. We didn’t even begin to see them all! Here are the castles we did see and a little about each one. The history of this country is just incredible and I don’t pretend to know even a fraction of it, but I’ll share a bit of what I’ve learned. 😊 I’ve also included some links if you want to learn more about any of the castles.
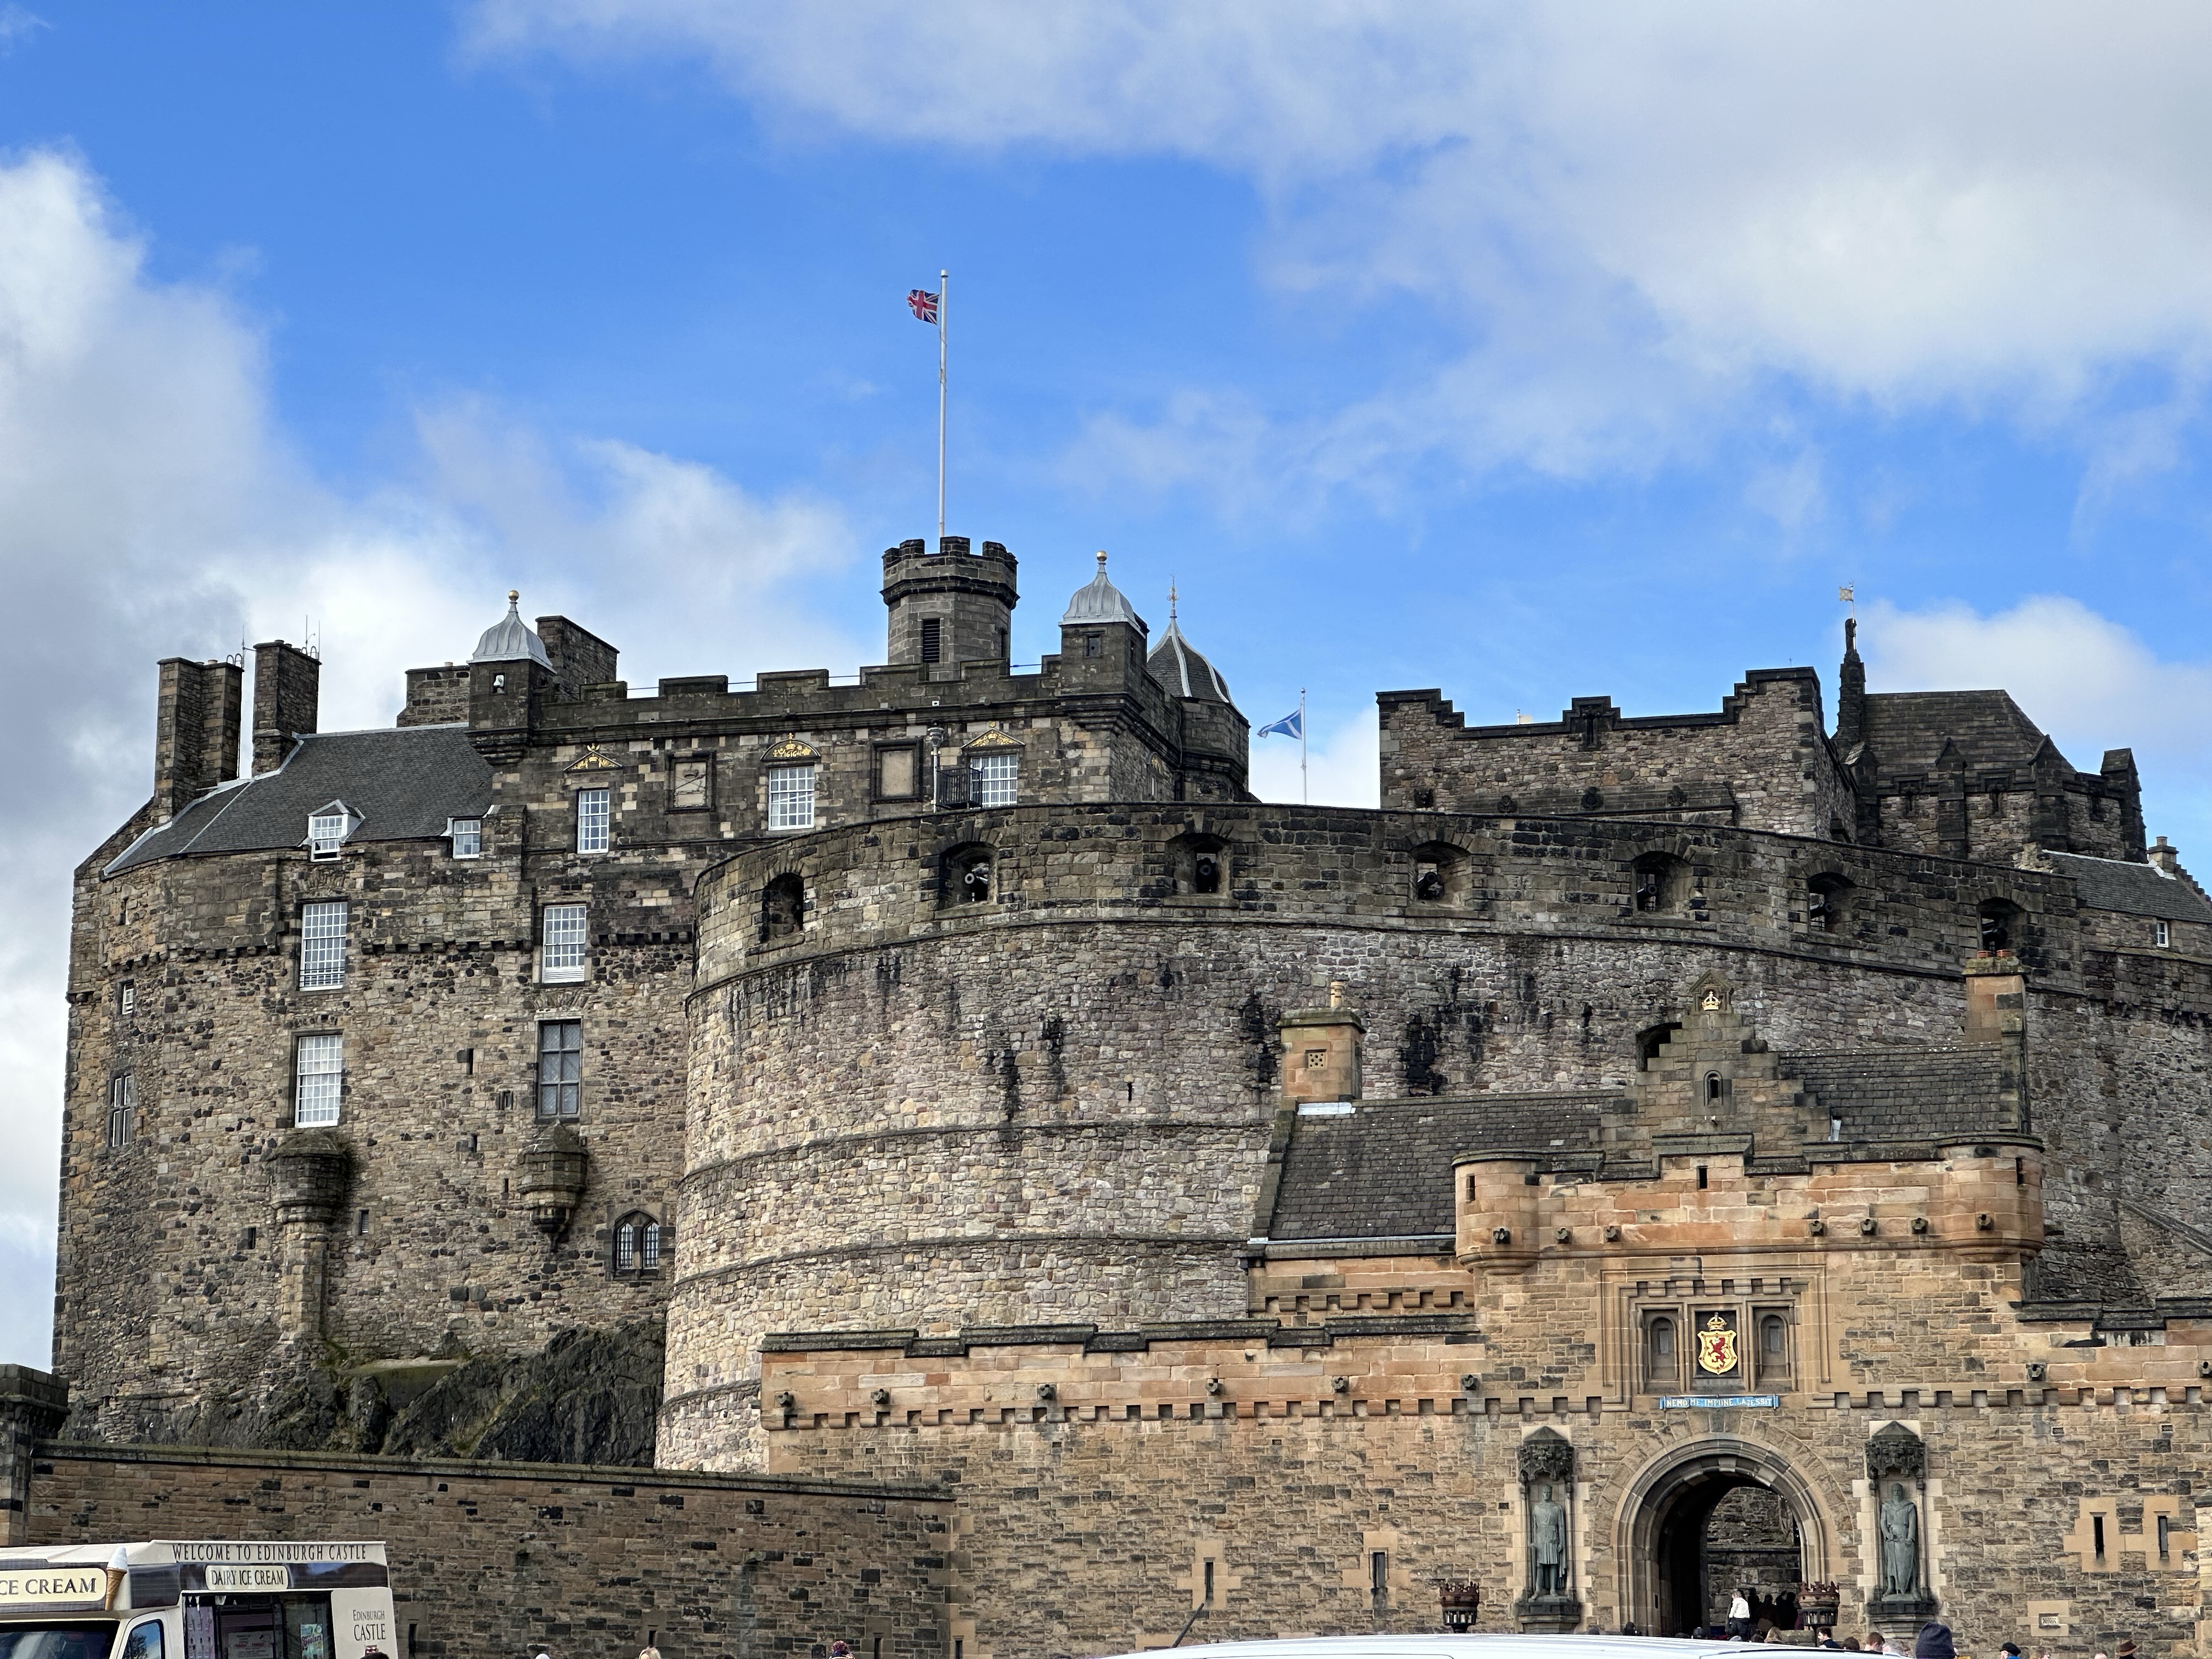
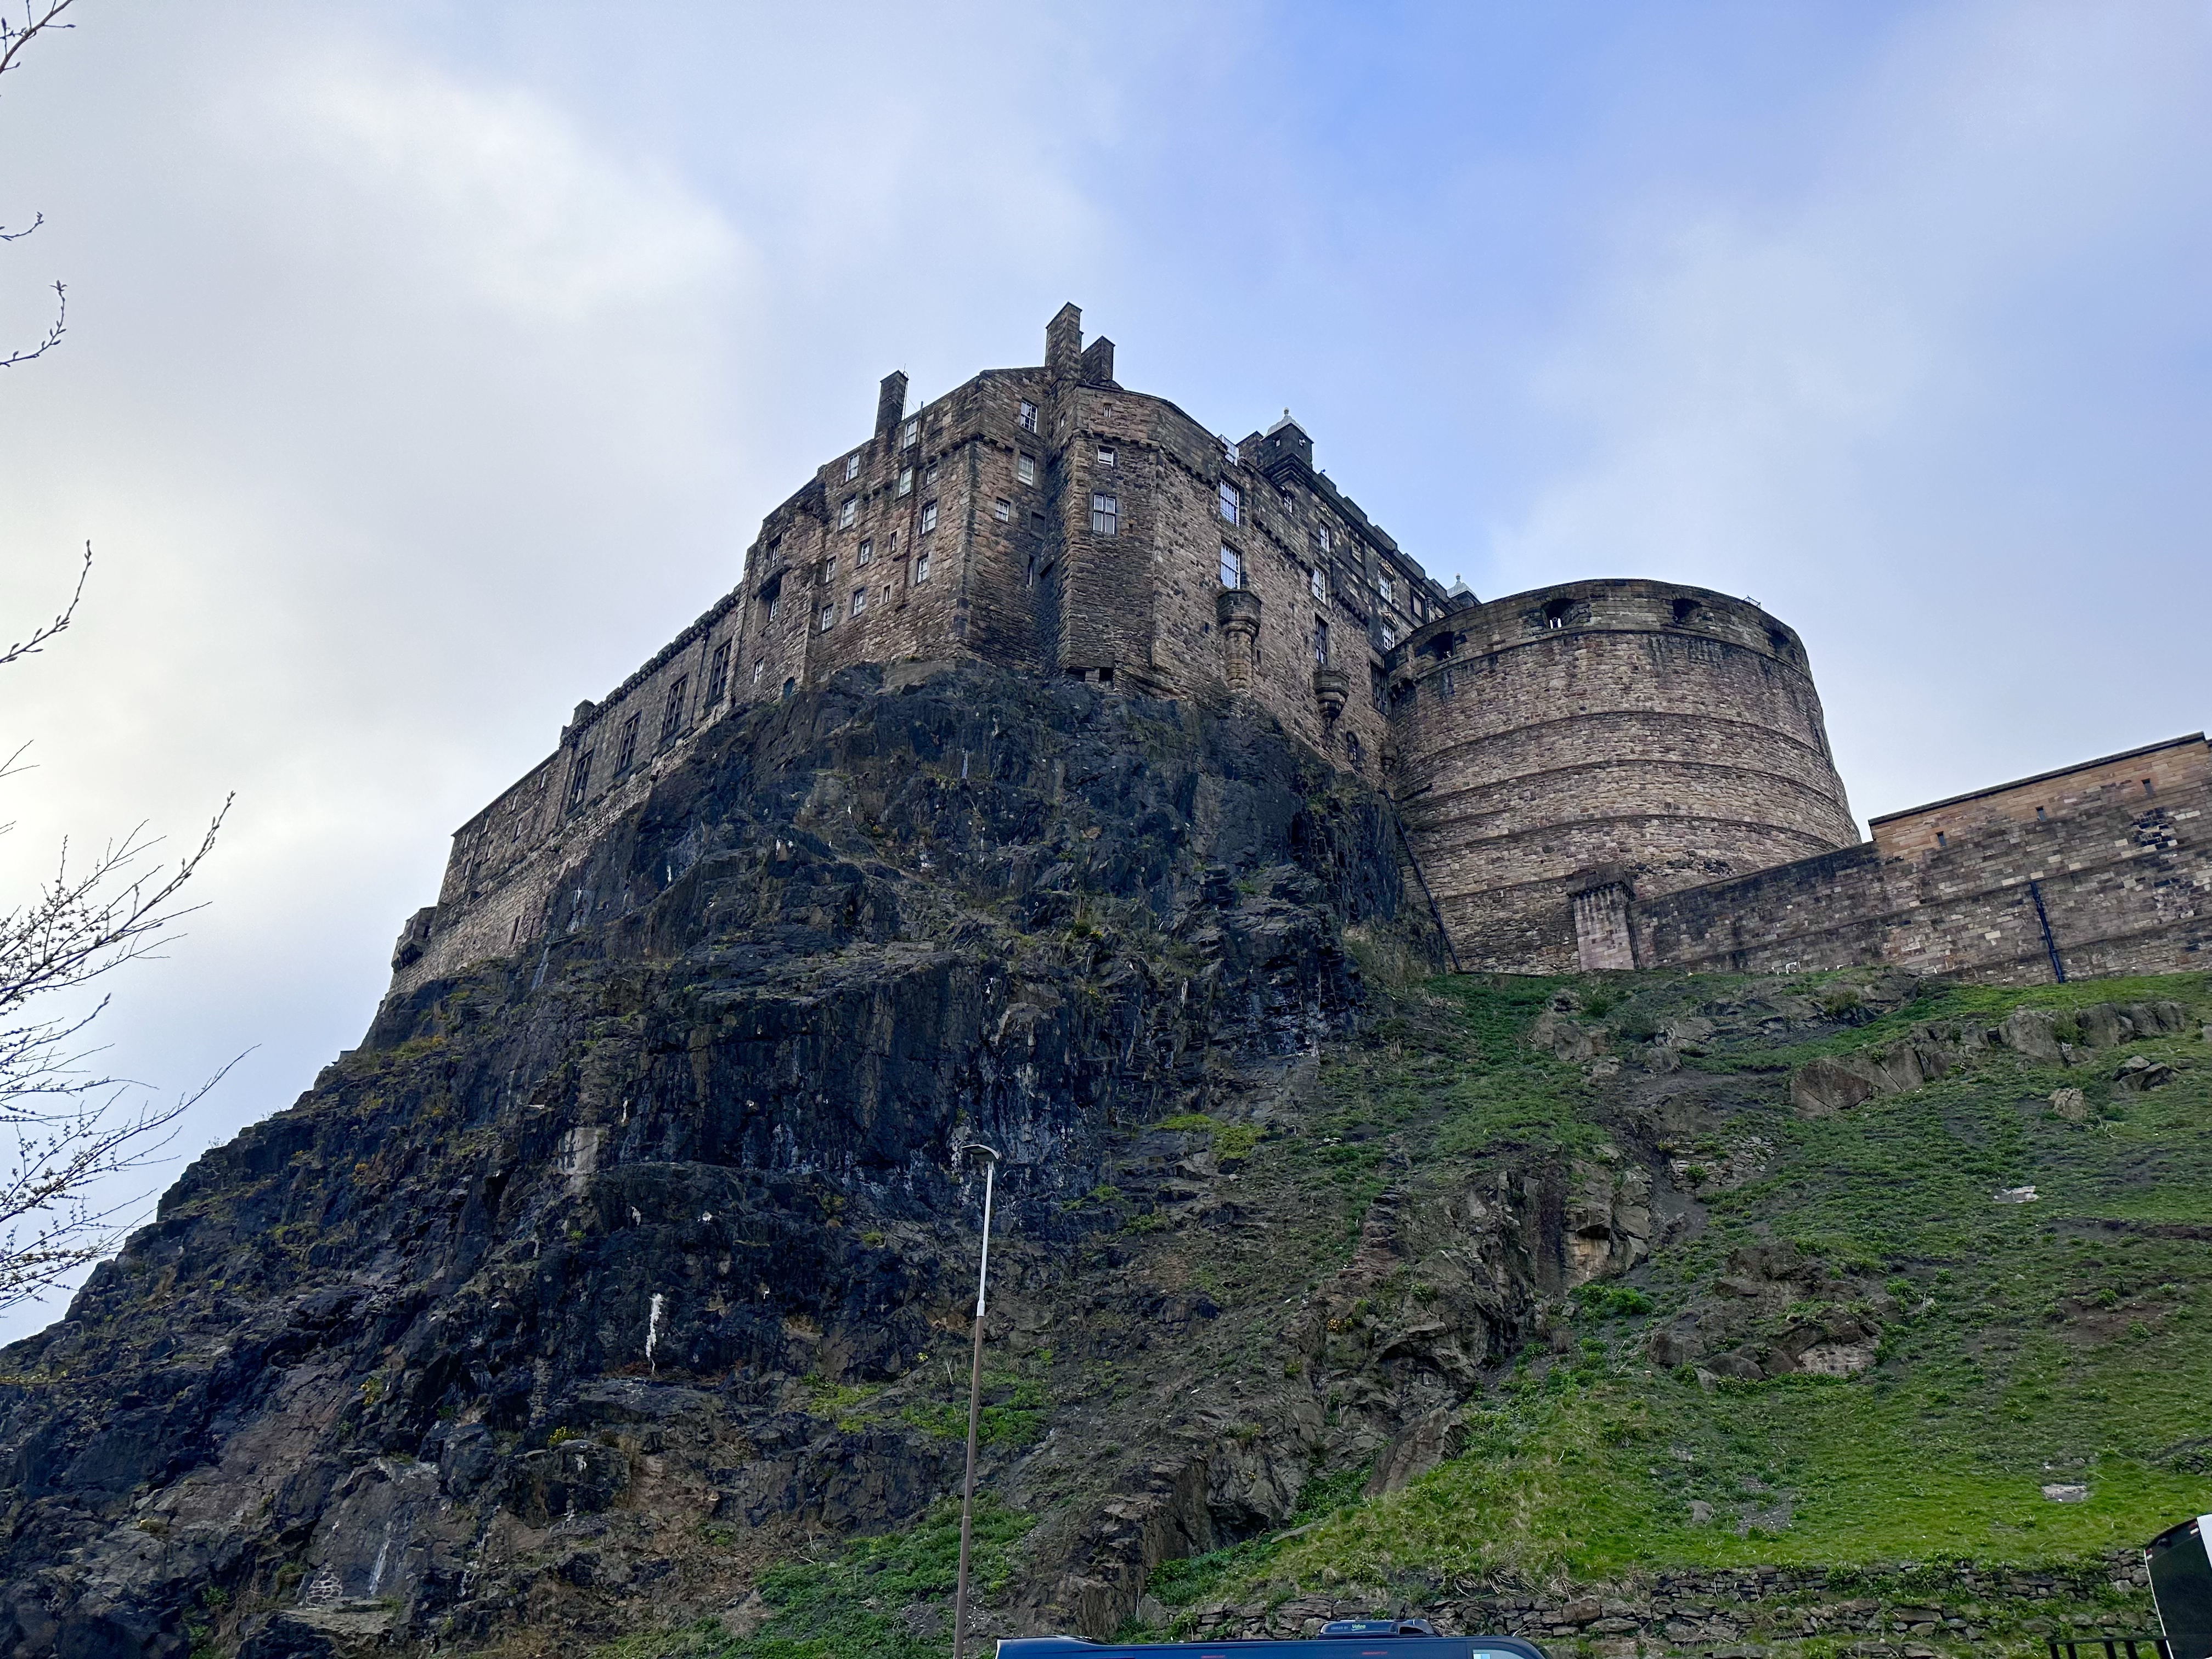
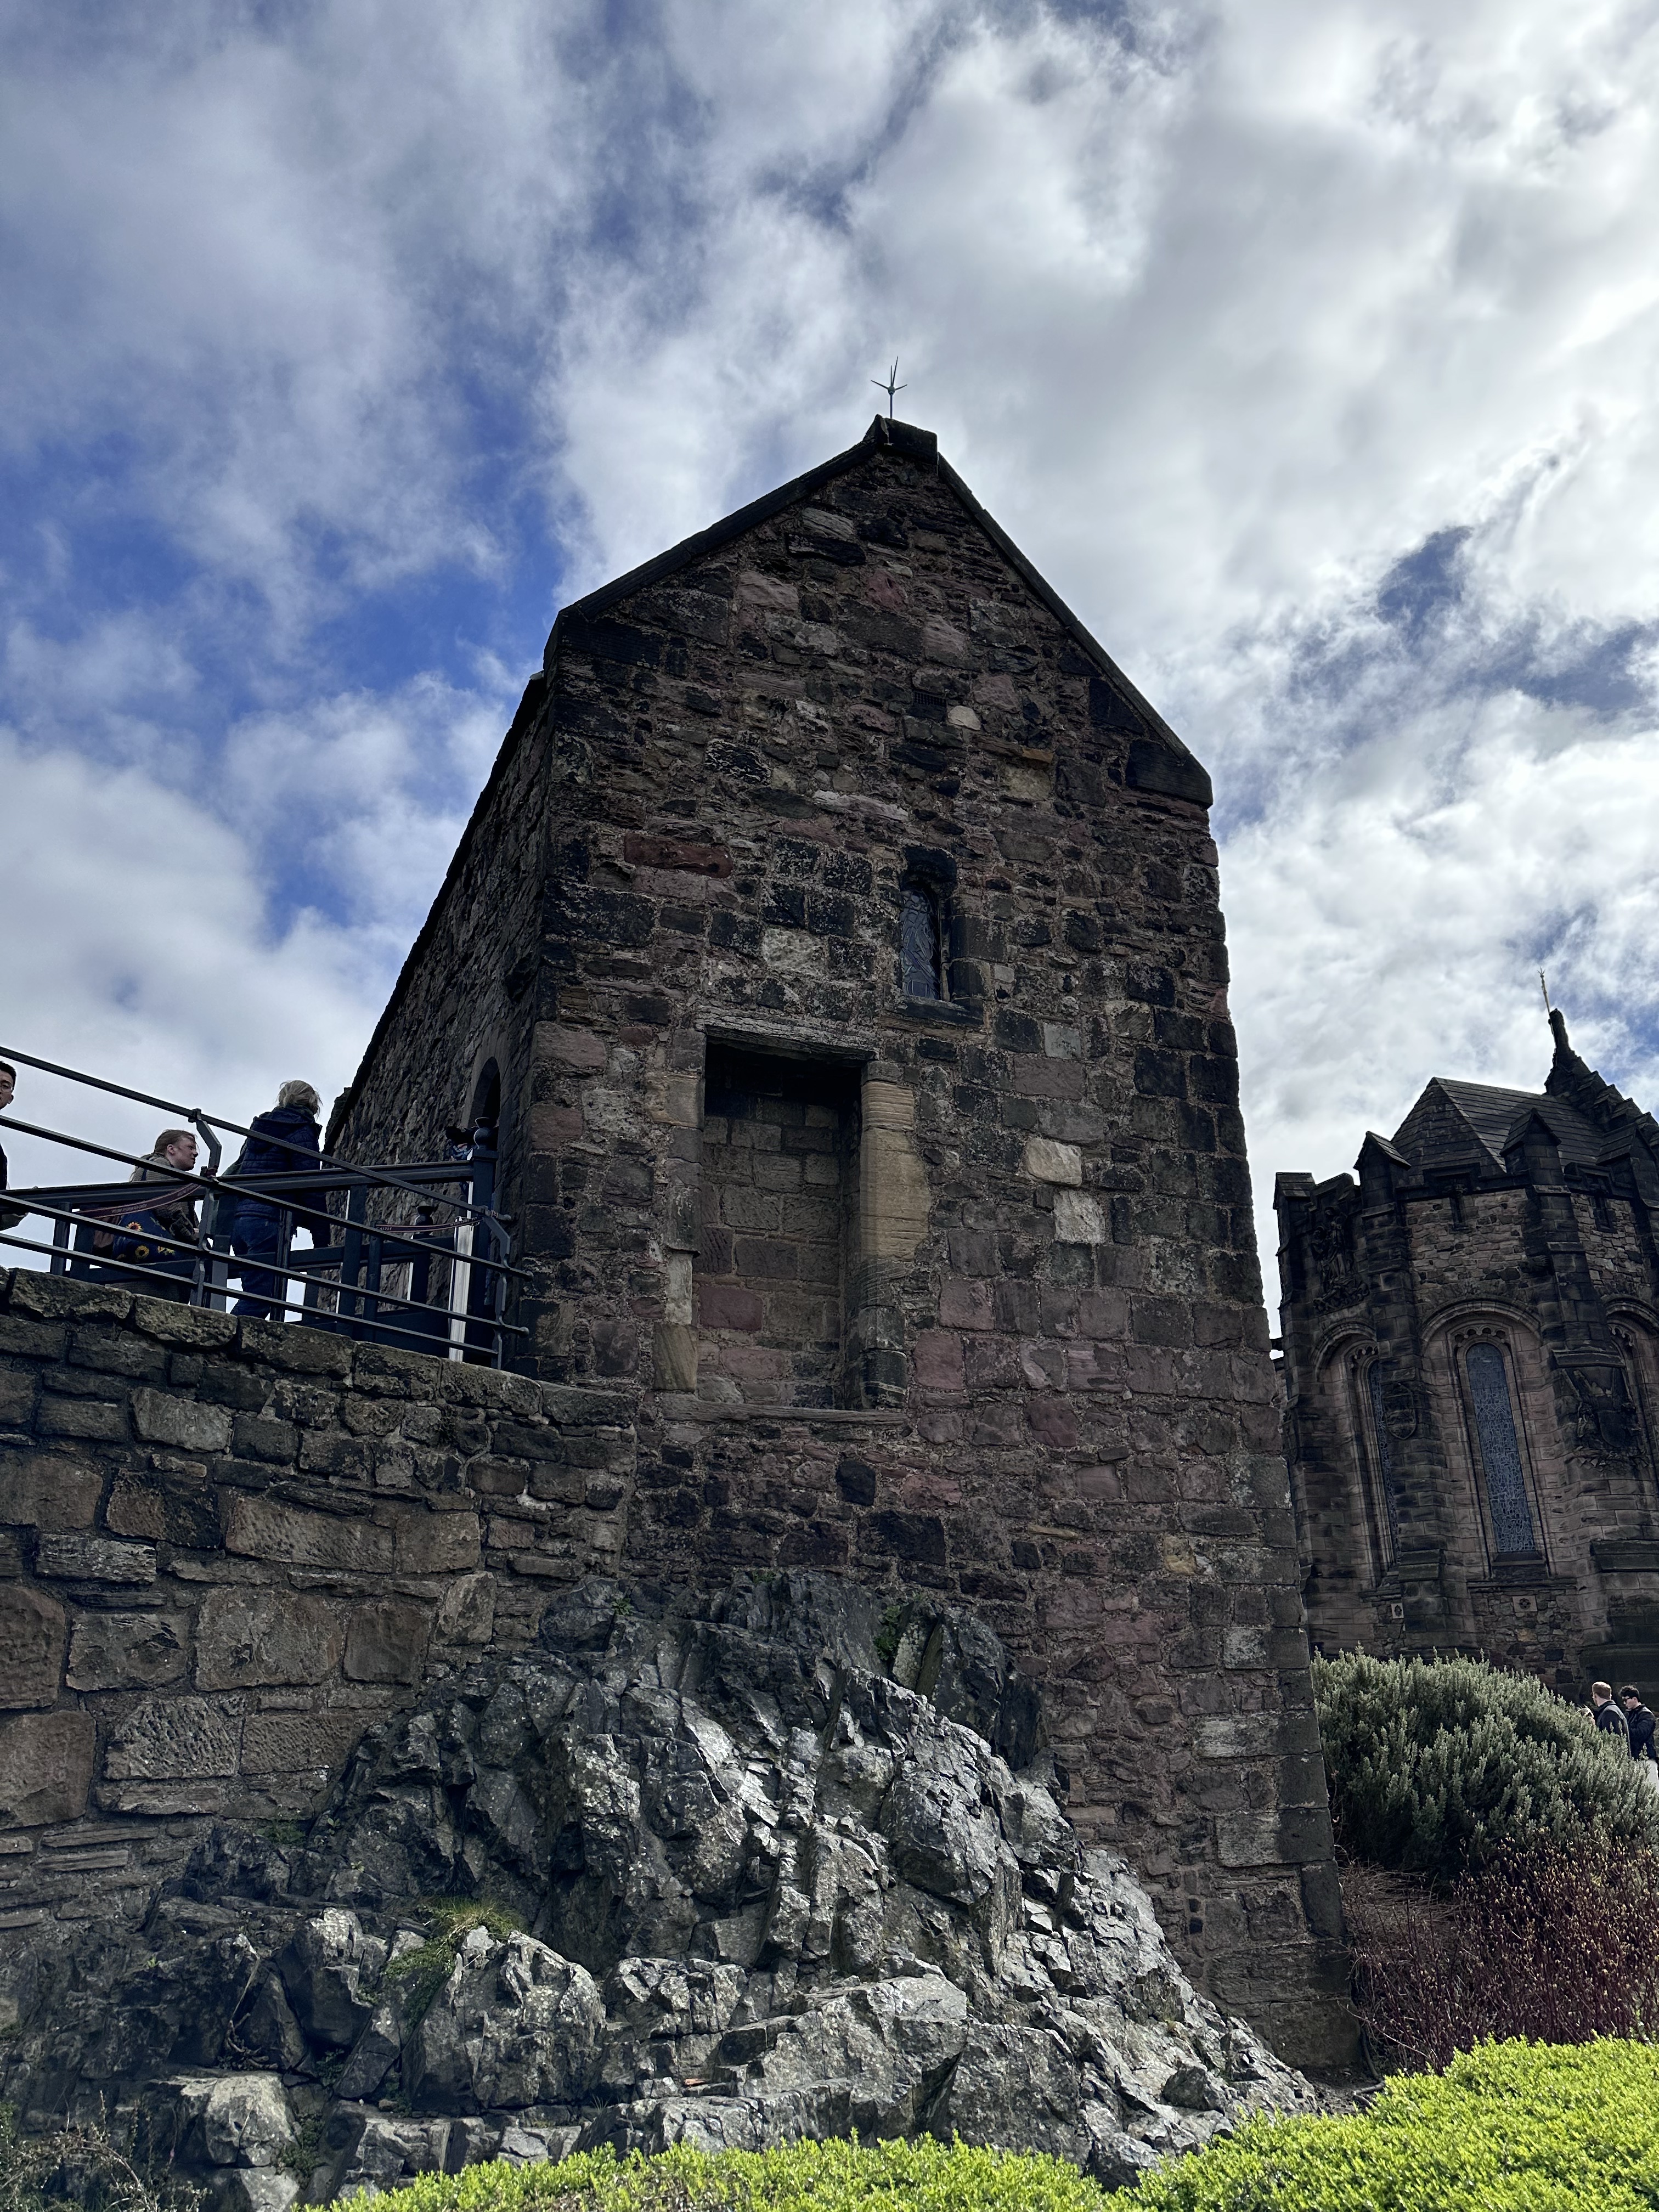
Edinburgh Castle sits high above the city at the top of the Royal Mile with a gorgeous view of Old Town. The oldest building on the castle grounds is St. Margaret’s Chapel built in the 12th century – it’s the photo on the right below. The castle was damaged over and over, but repaired and rebuilt with most of the buildings now dating from the 16 century. There is so much Scottish history here. I highly recommend joining a tour as you visit Edinburgh Castle.
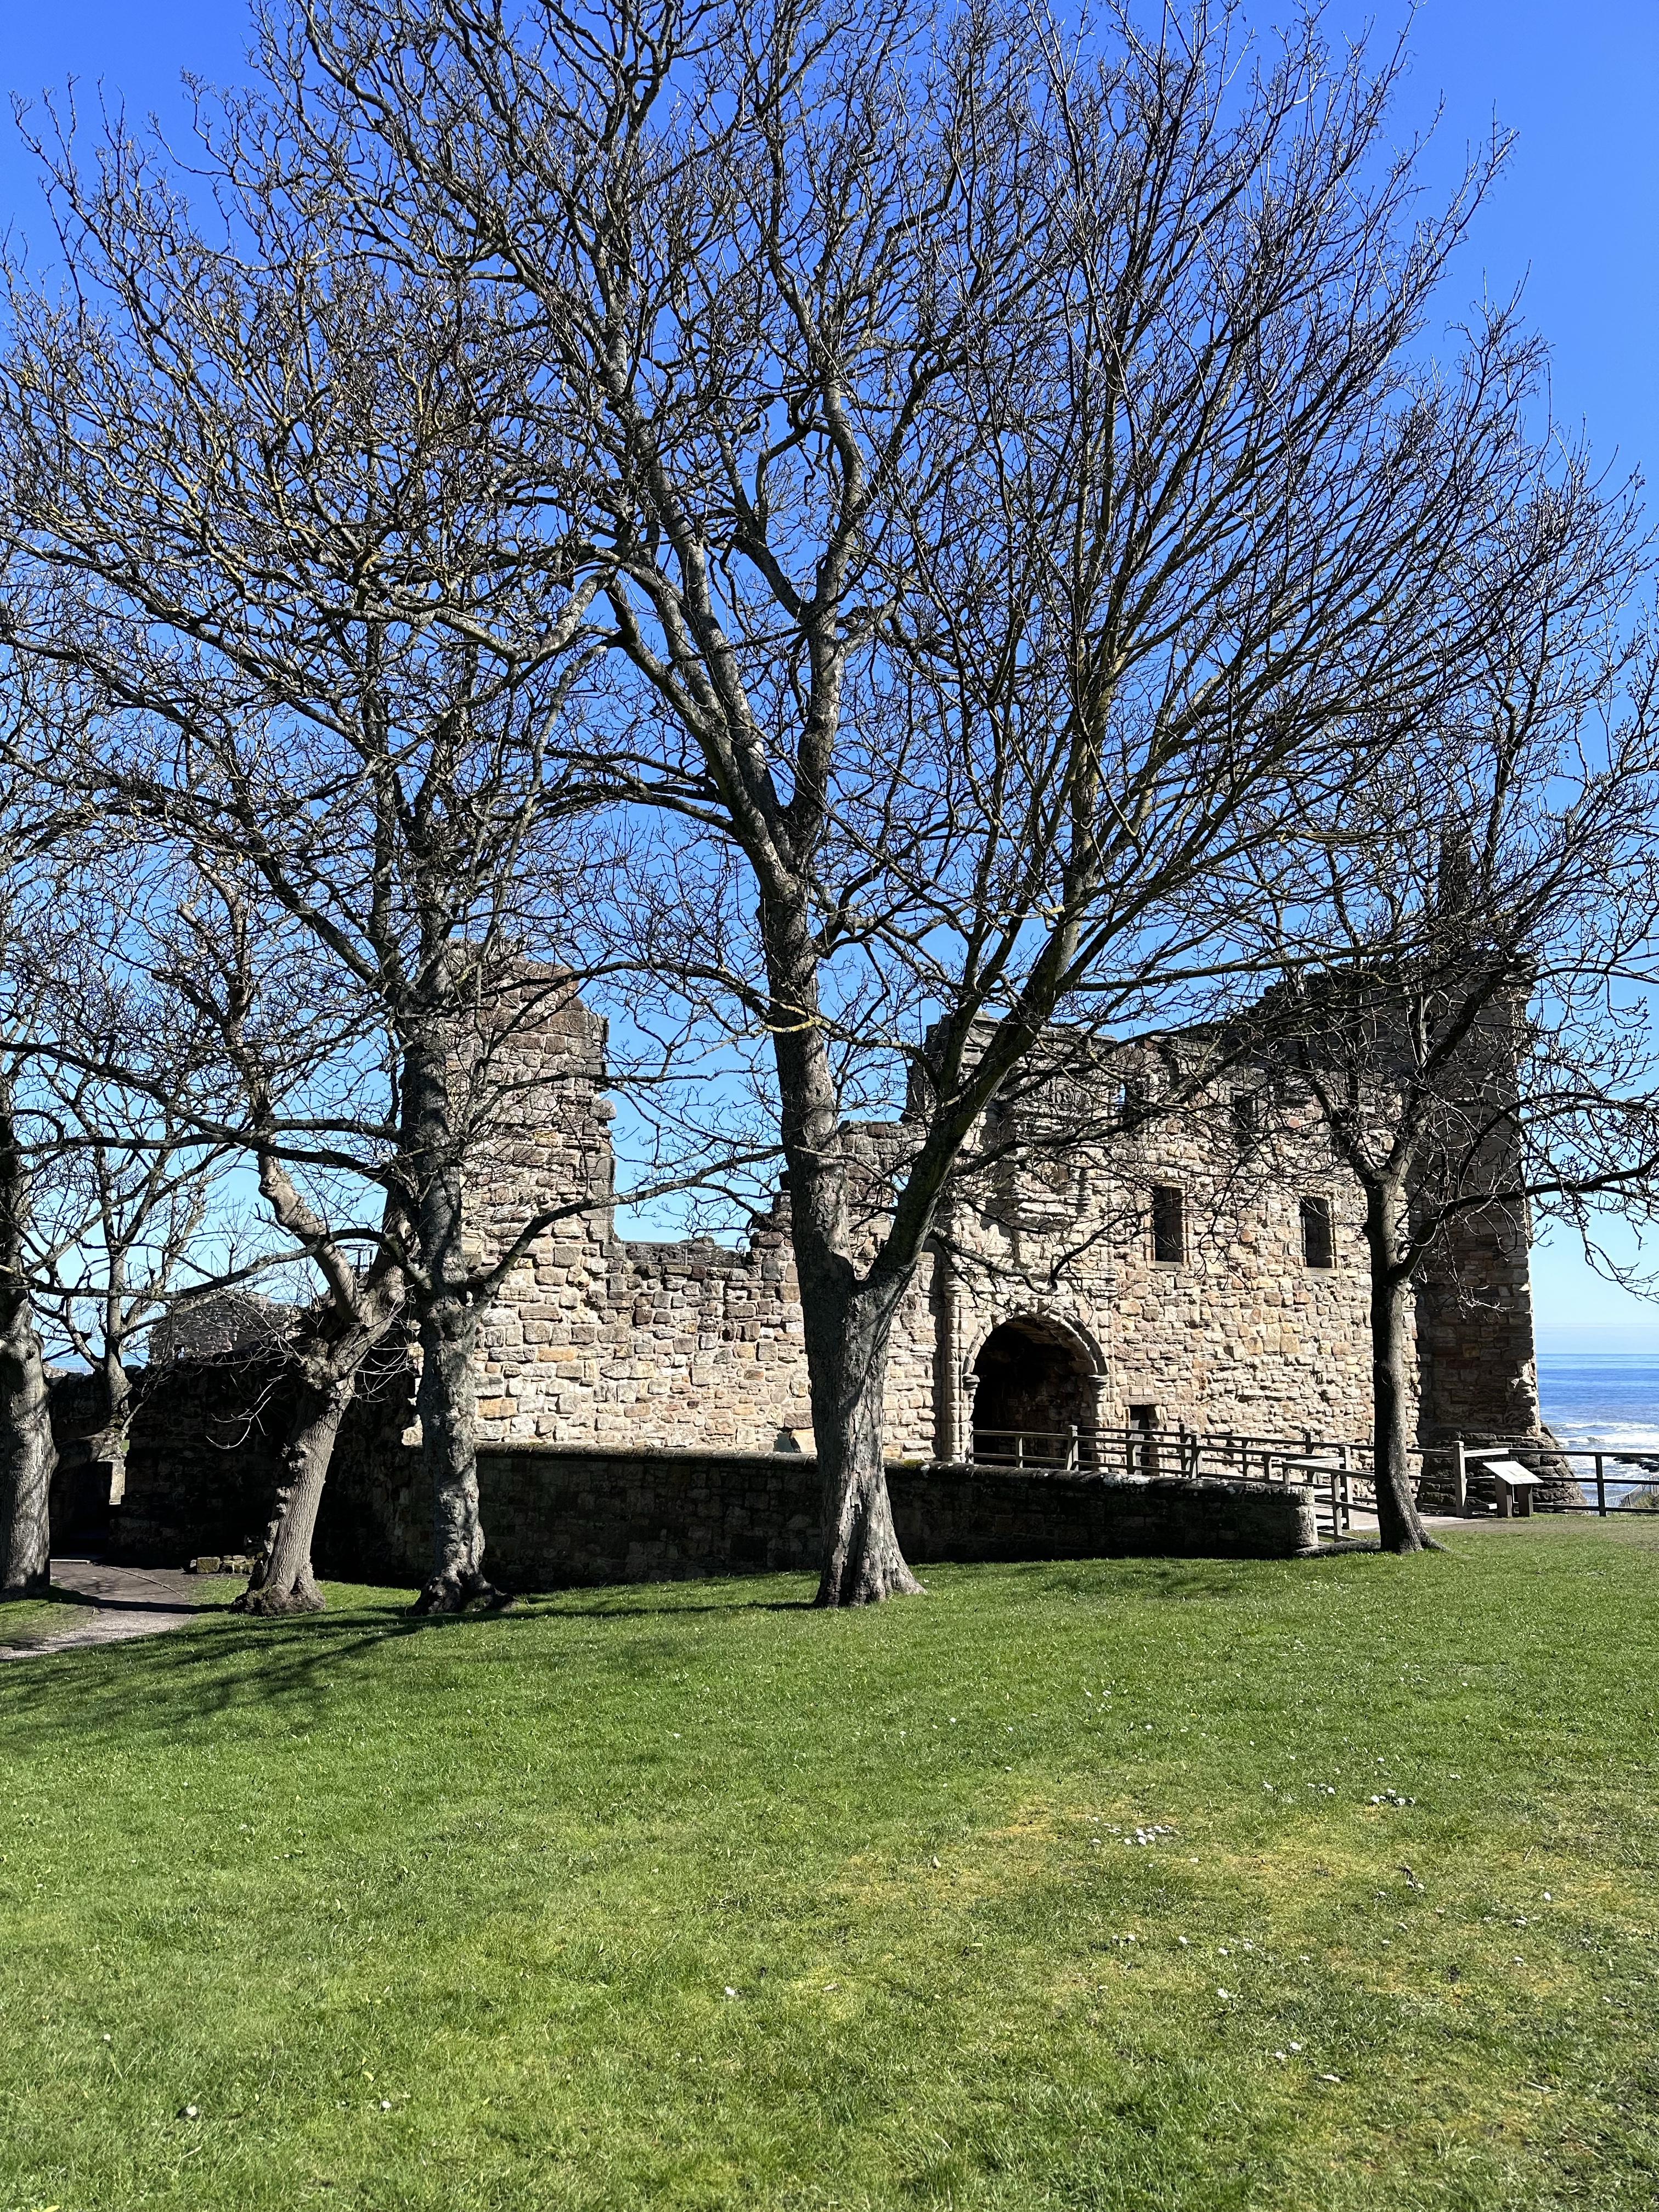
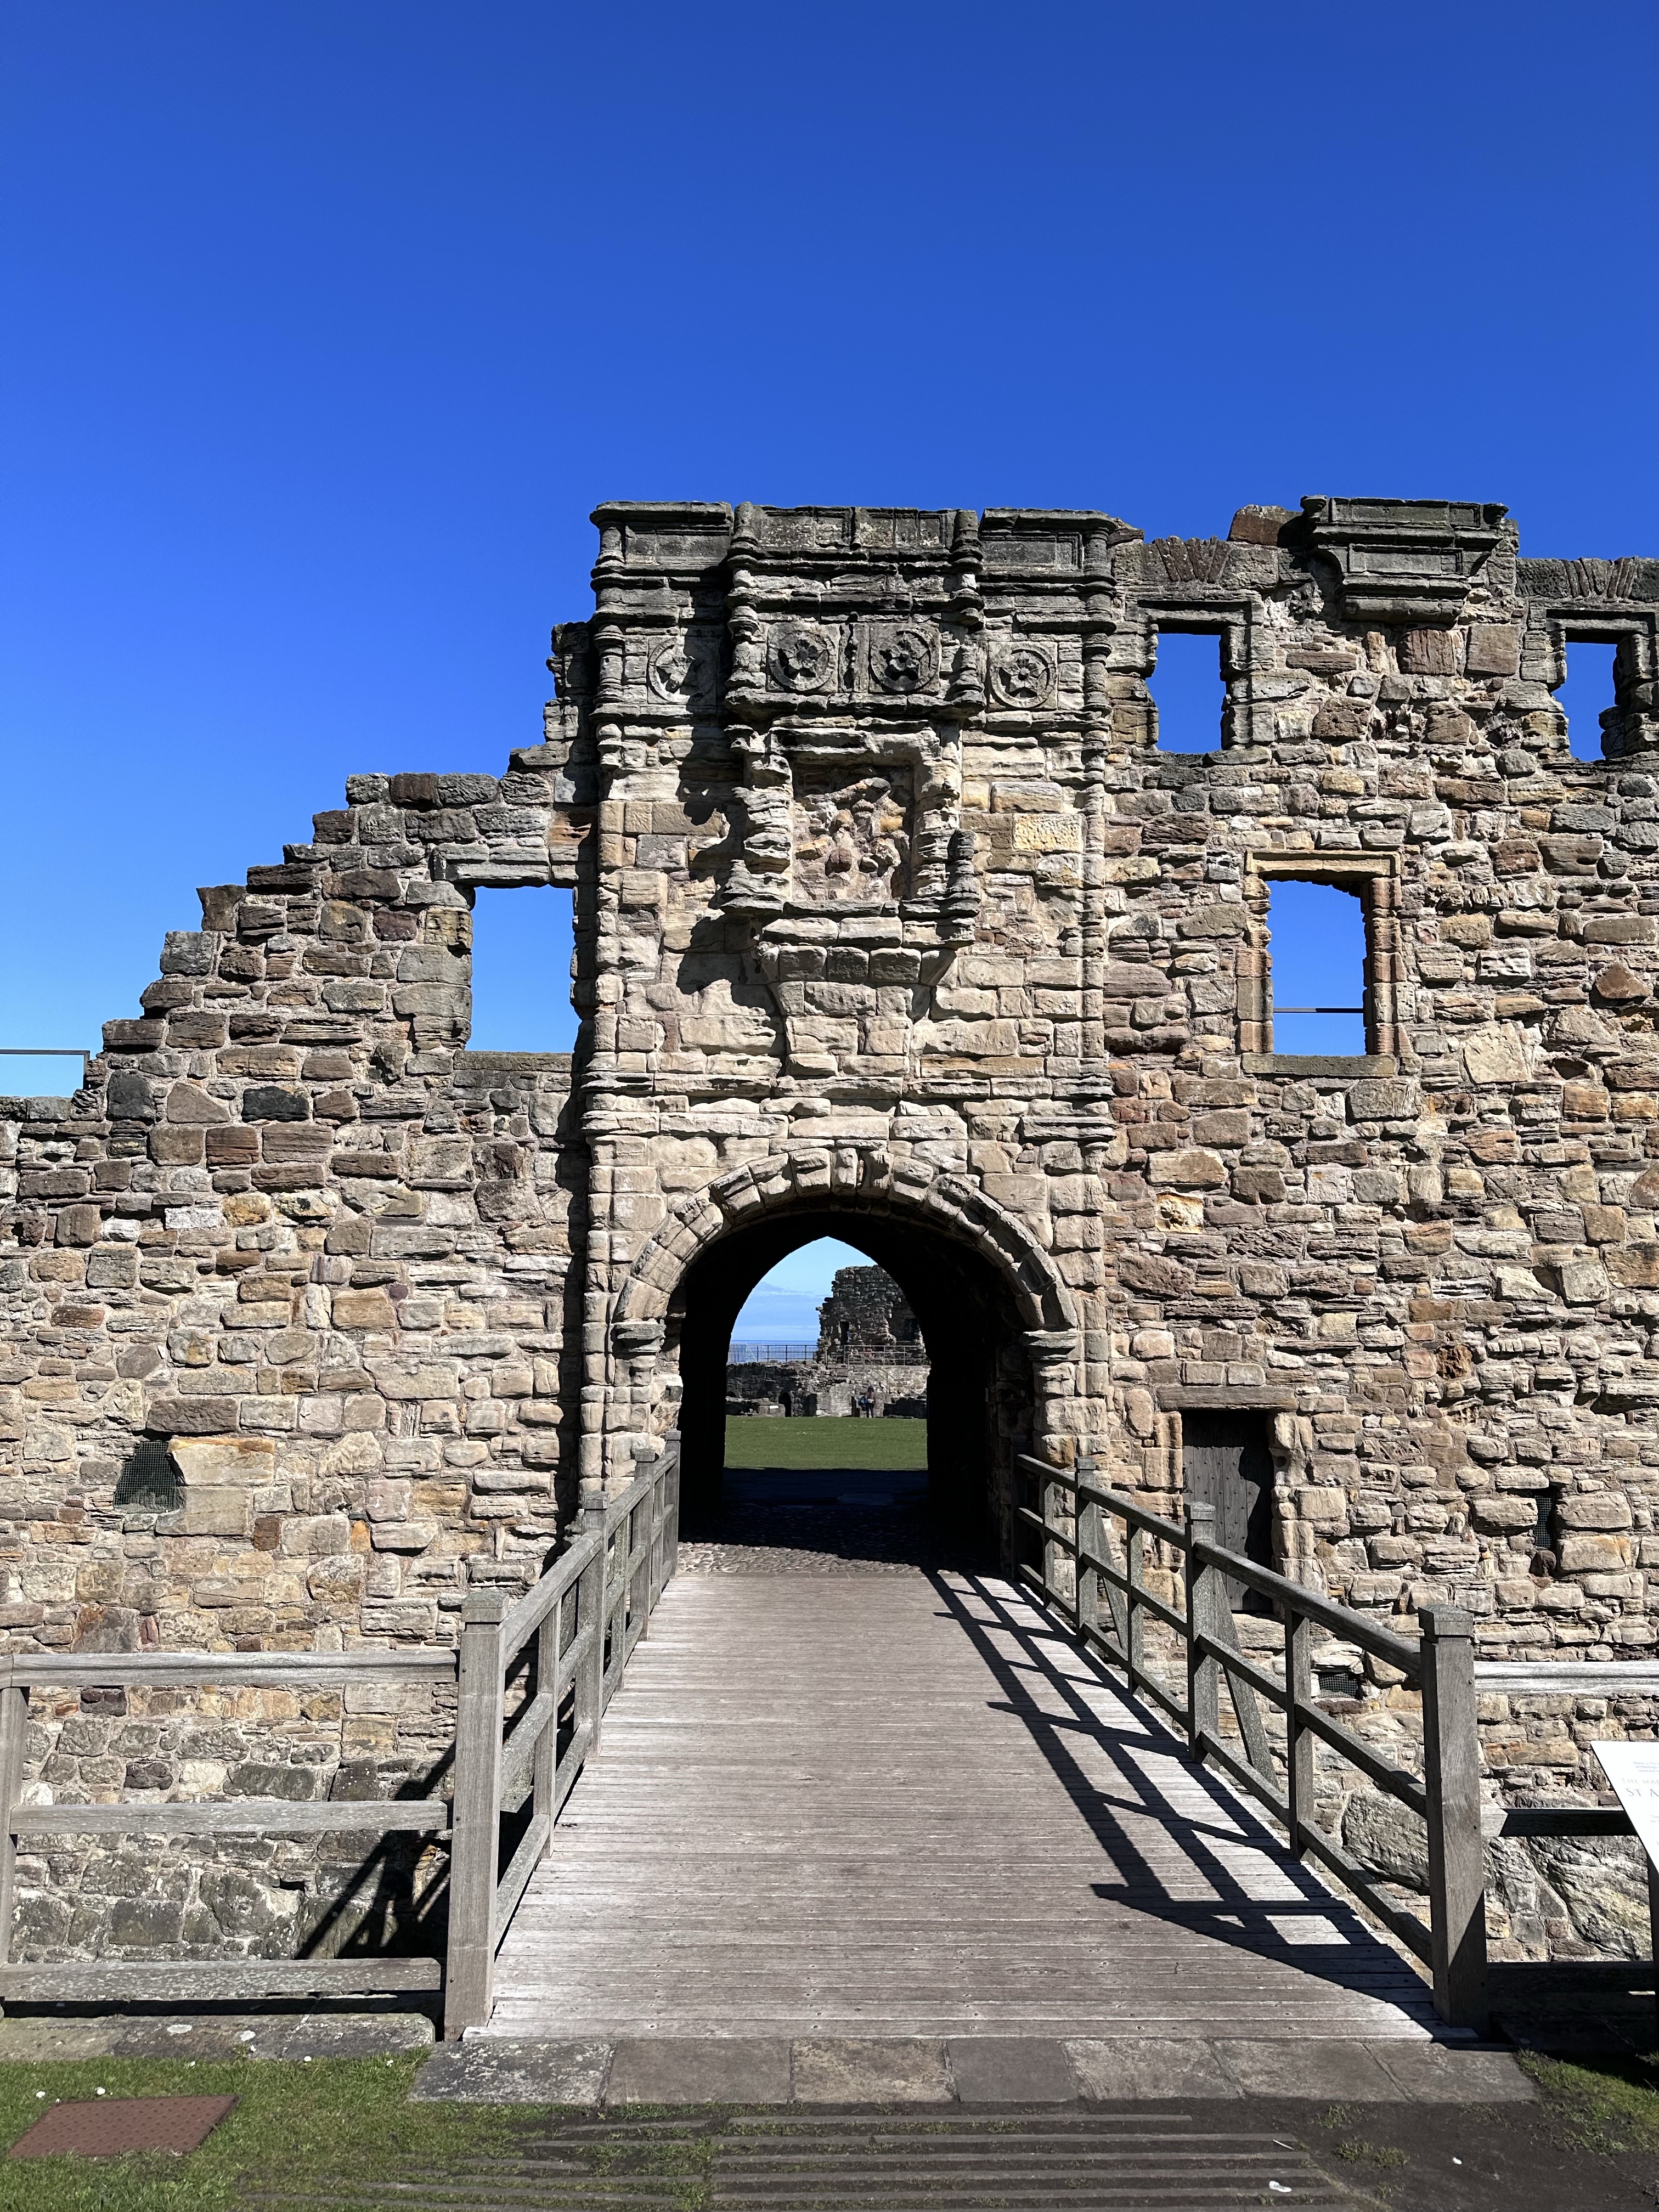
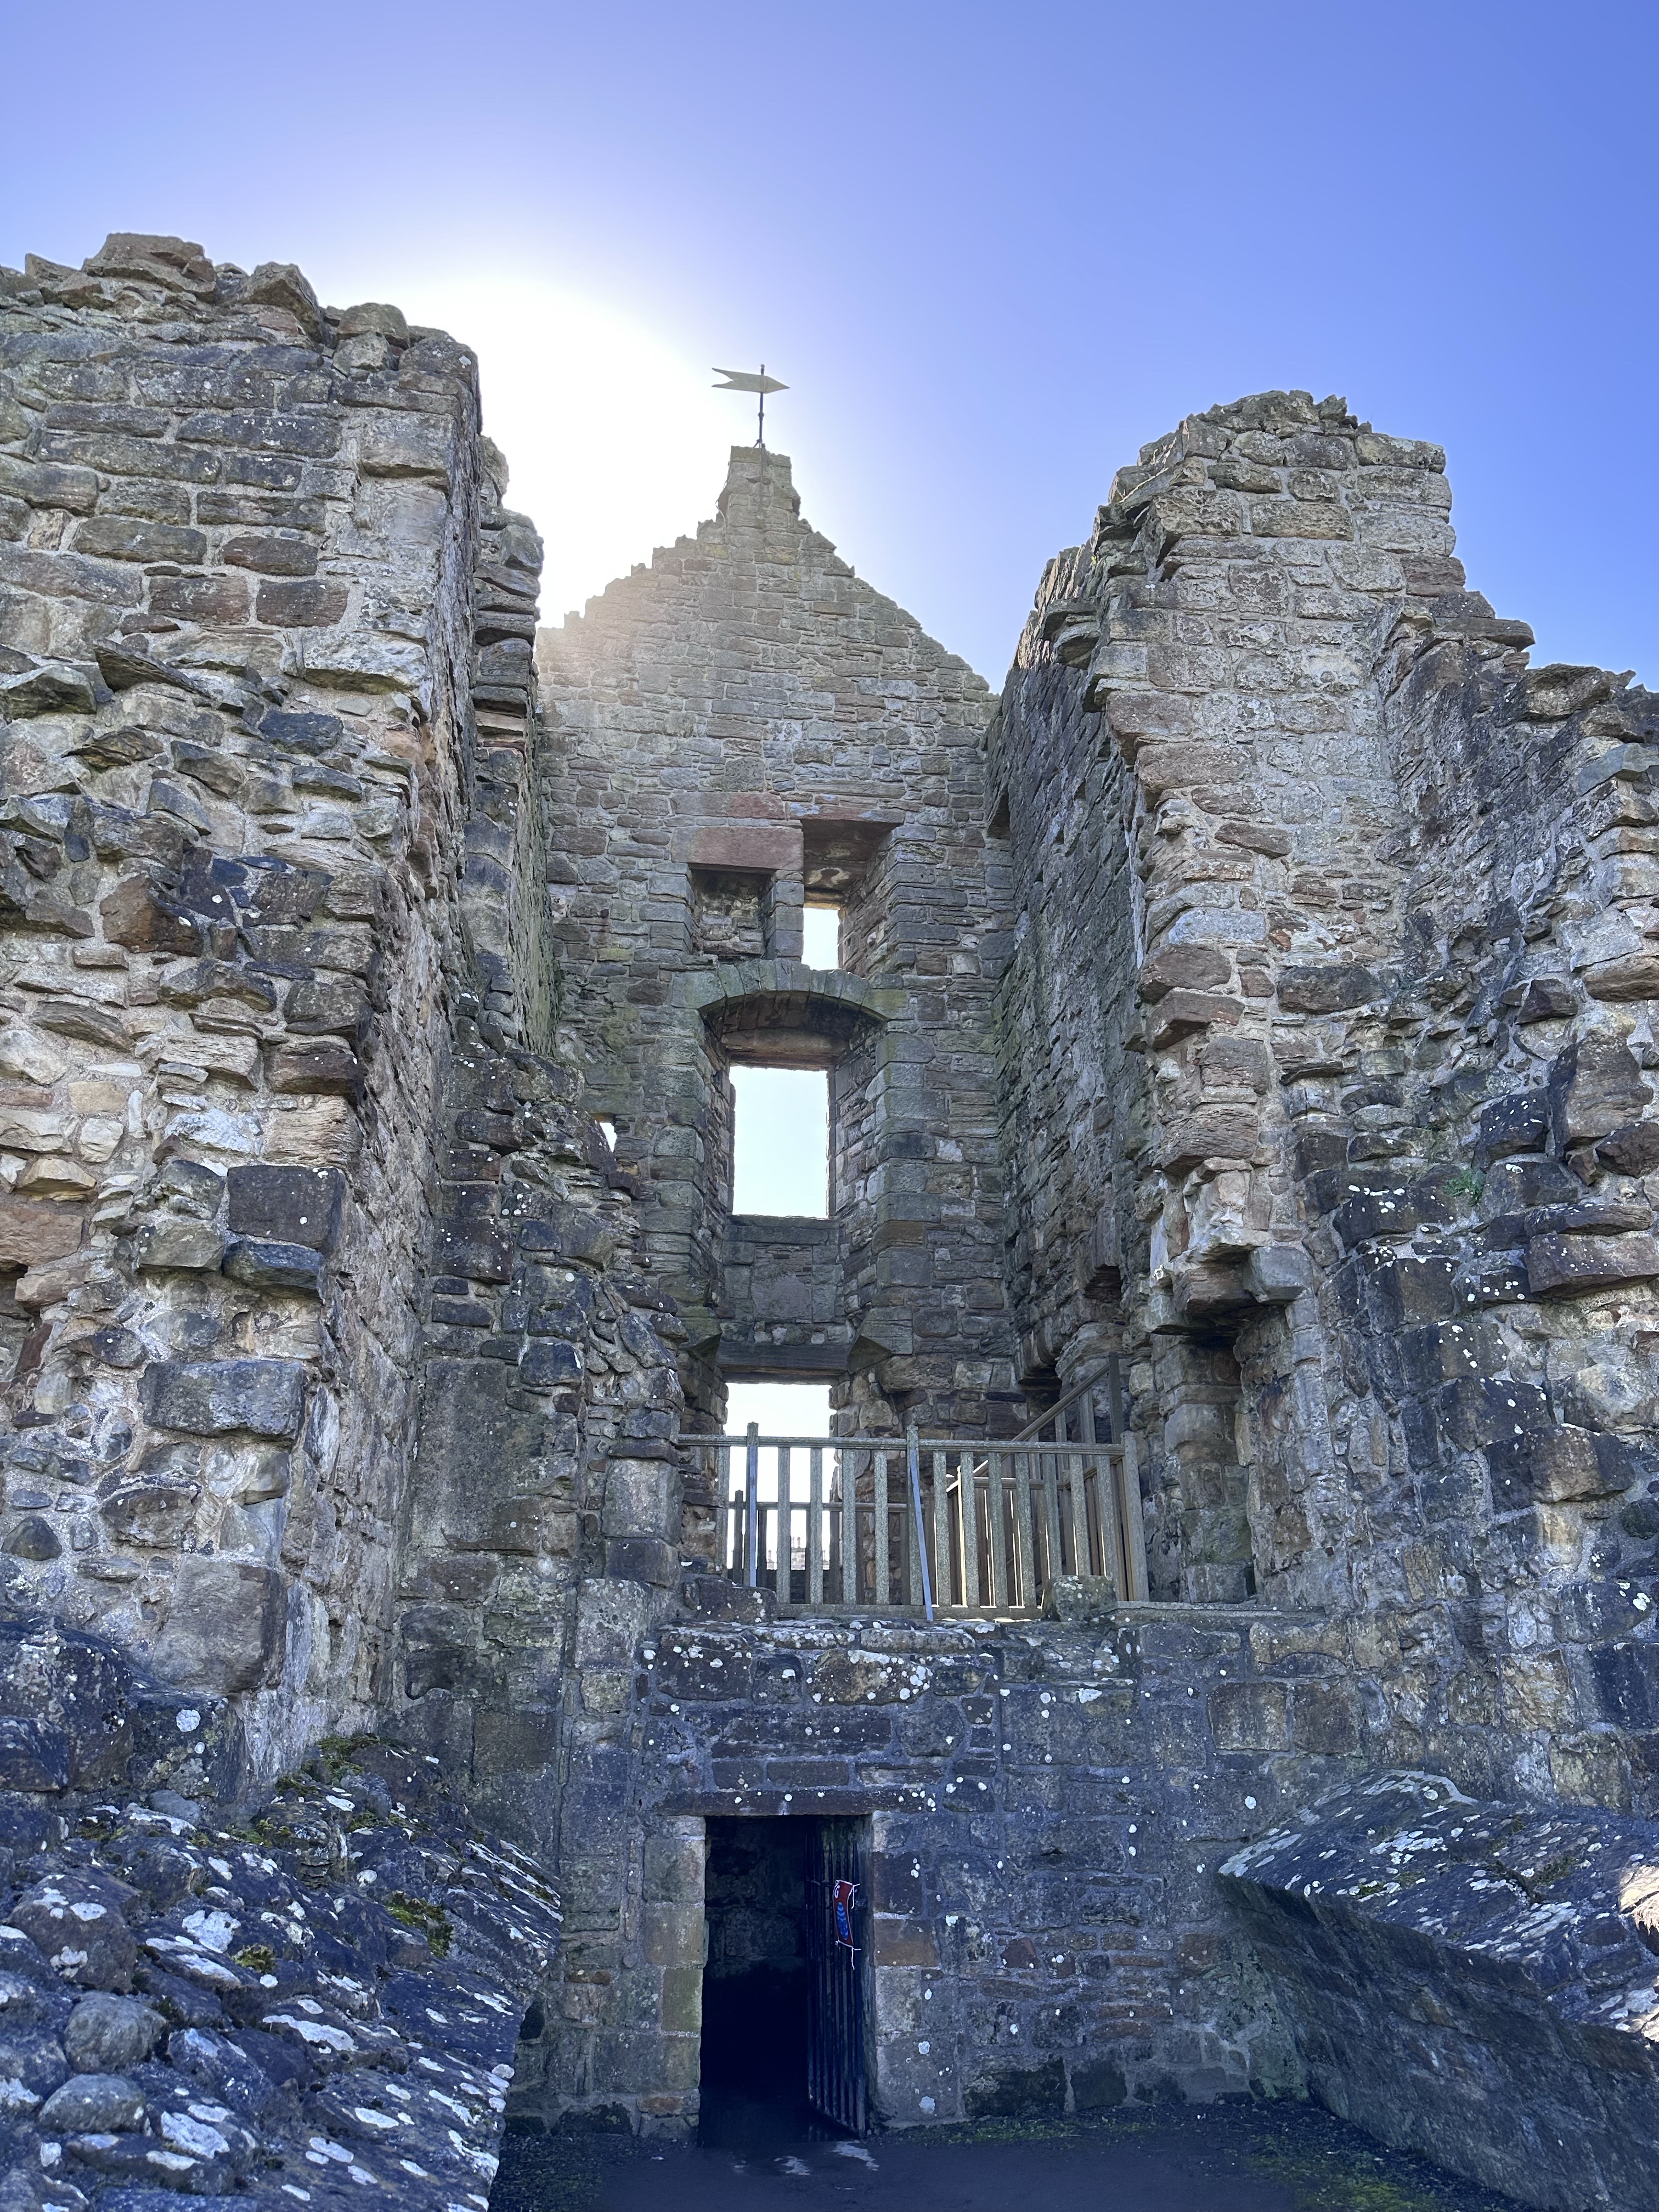
St. Andrews Castle is on the east coast of Fife. Built originally around 1200, it was captured, dismantled, and rebuilt by both sides during the Wars of Independence until 1337. Eventually, it was abandoned in 1592 and fell into ruin. The Great Hall collapsed into the sea in 1801 and more of the castle was lost until a sea wall was built in 1886.
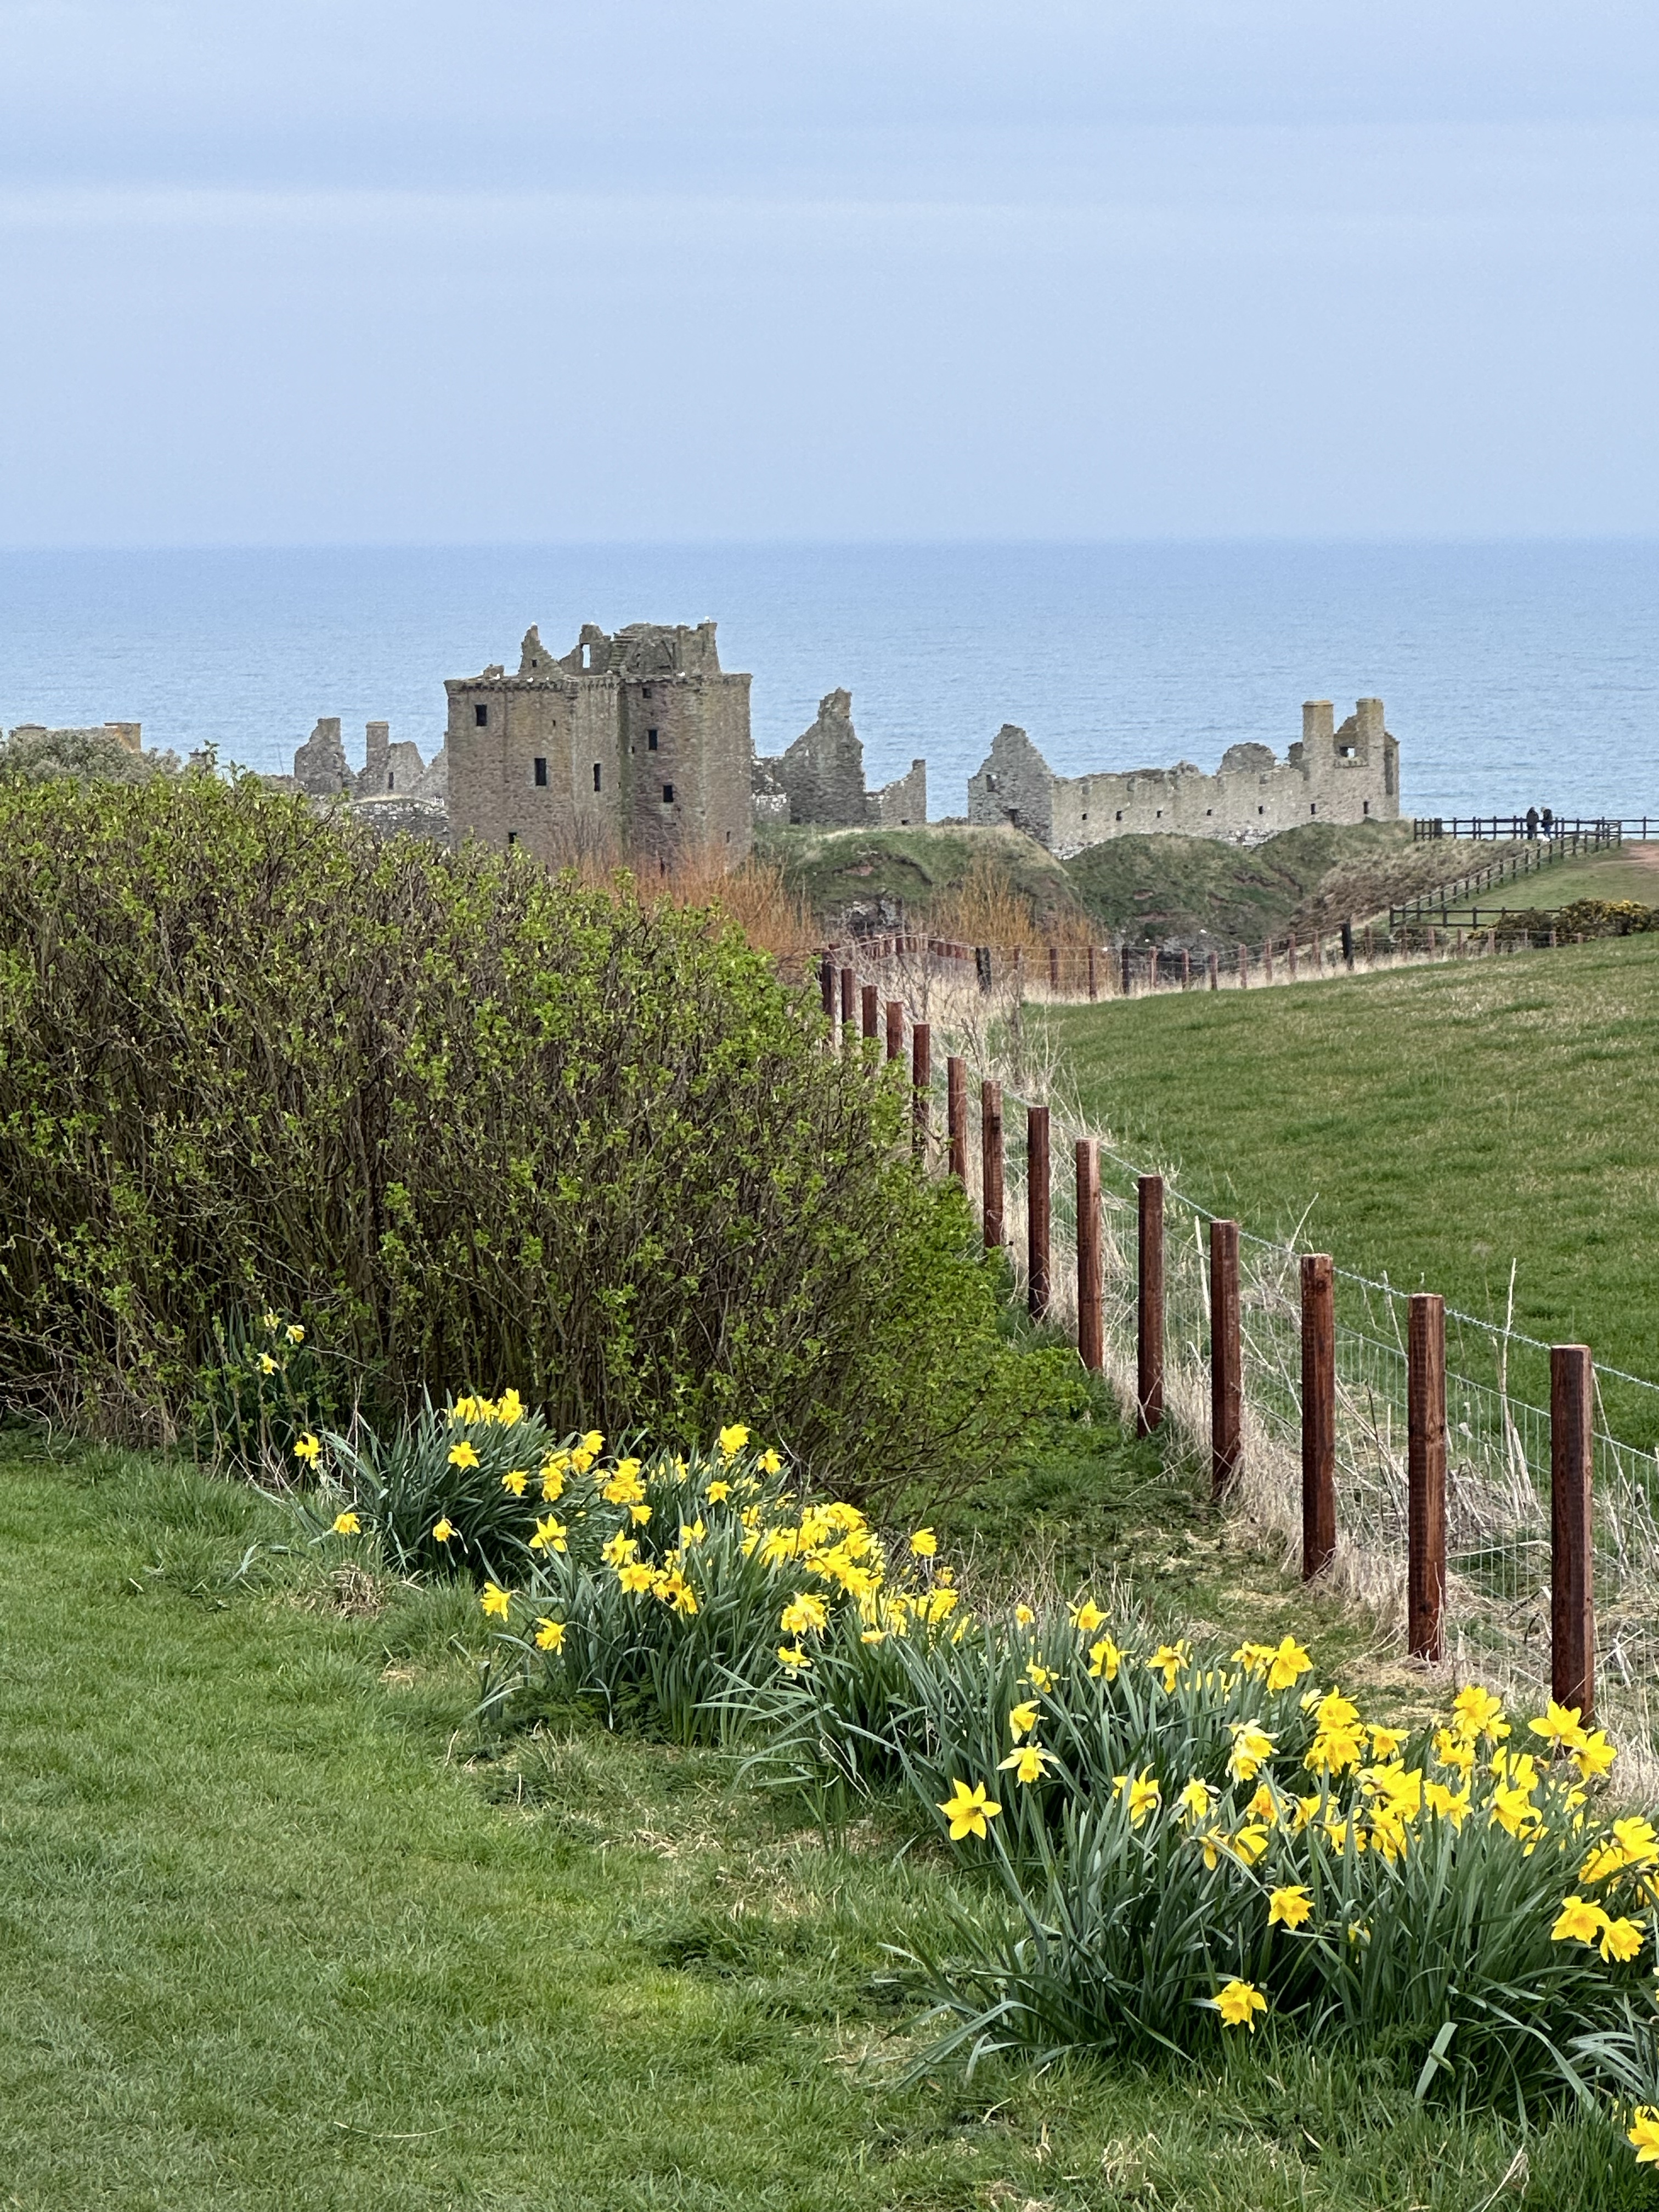
Dunnottar Castle was by far the most striking of the castle ruins we saw. It sits on a rock outcrop in Aberdeenshire surrounded on 3 sides by water and rocky cliffs – a true stronghold! William Wallace and Mary Queen of Scots were both hosted in this castle. In the 1650’s, the castle played a role in the safekeeping of the Scottish Crown Jewels from the army led by Oliver Cromwell. It was a very cold and windy day and our time was limited, so we opted to not make the hike up to the ruins. I can only imagine how amazing it would be up close!
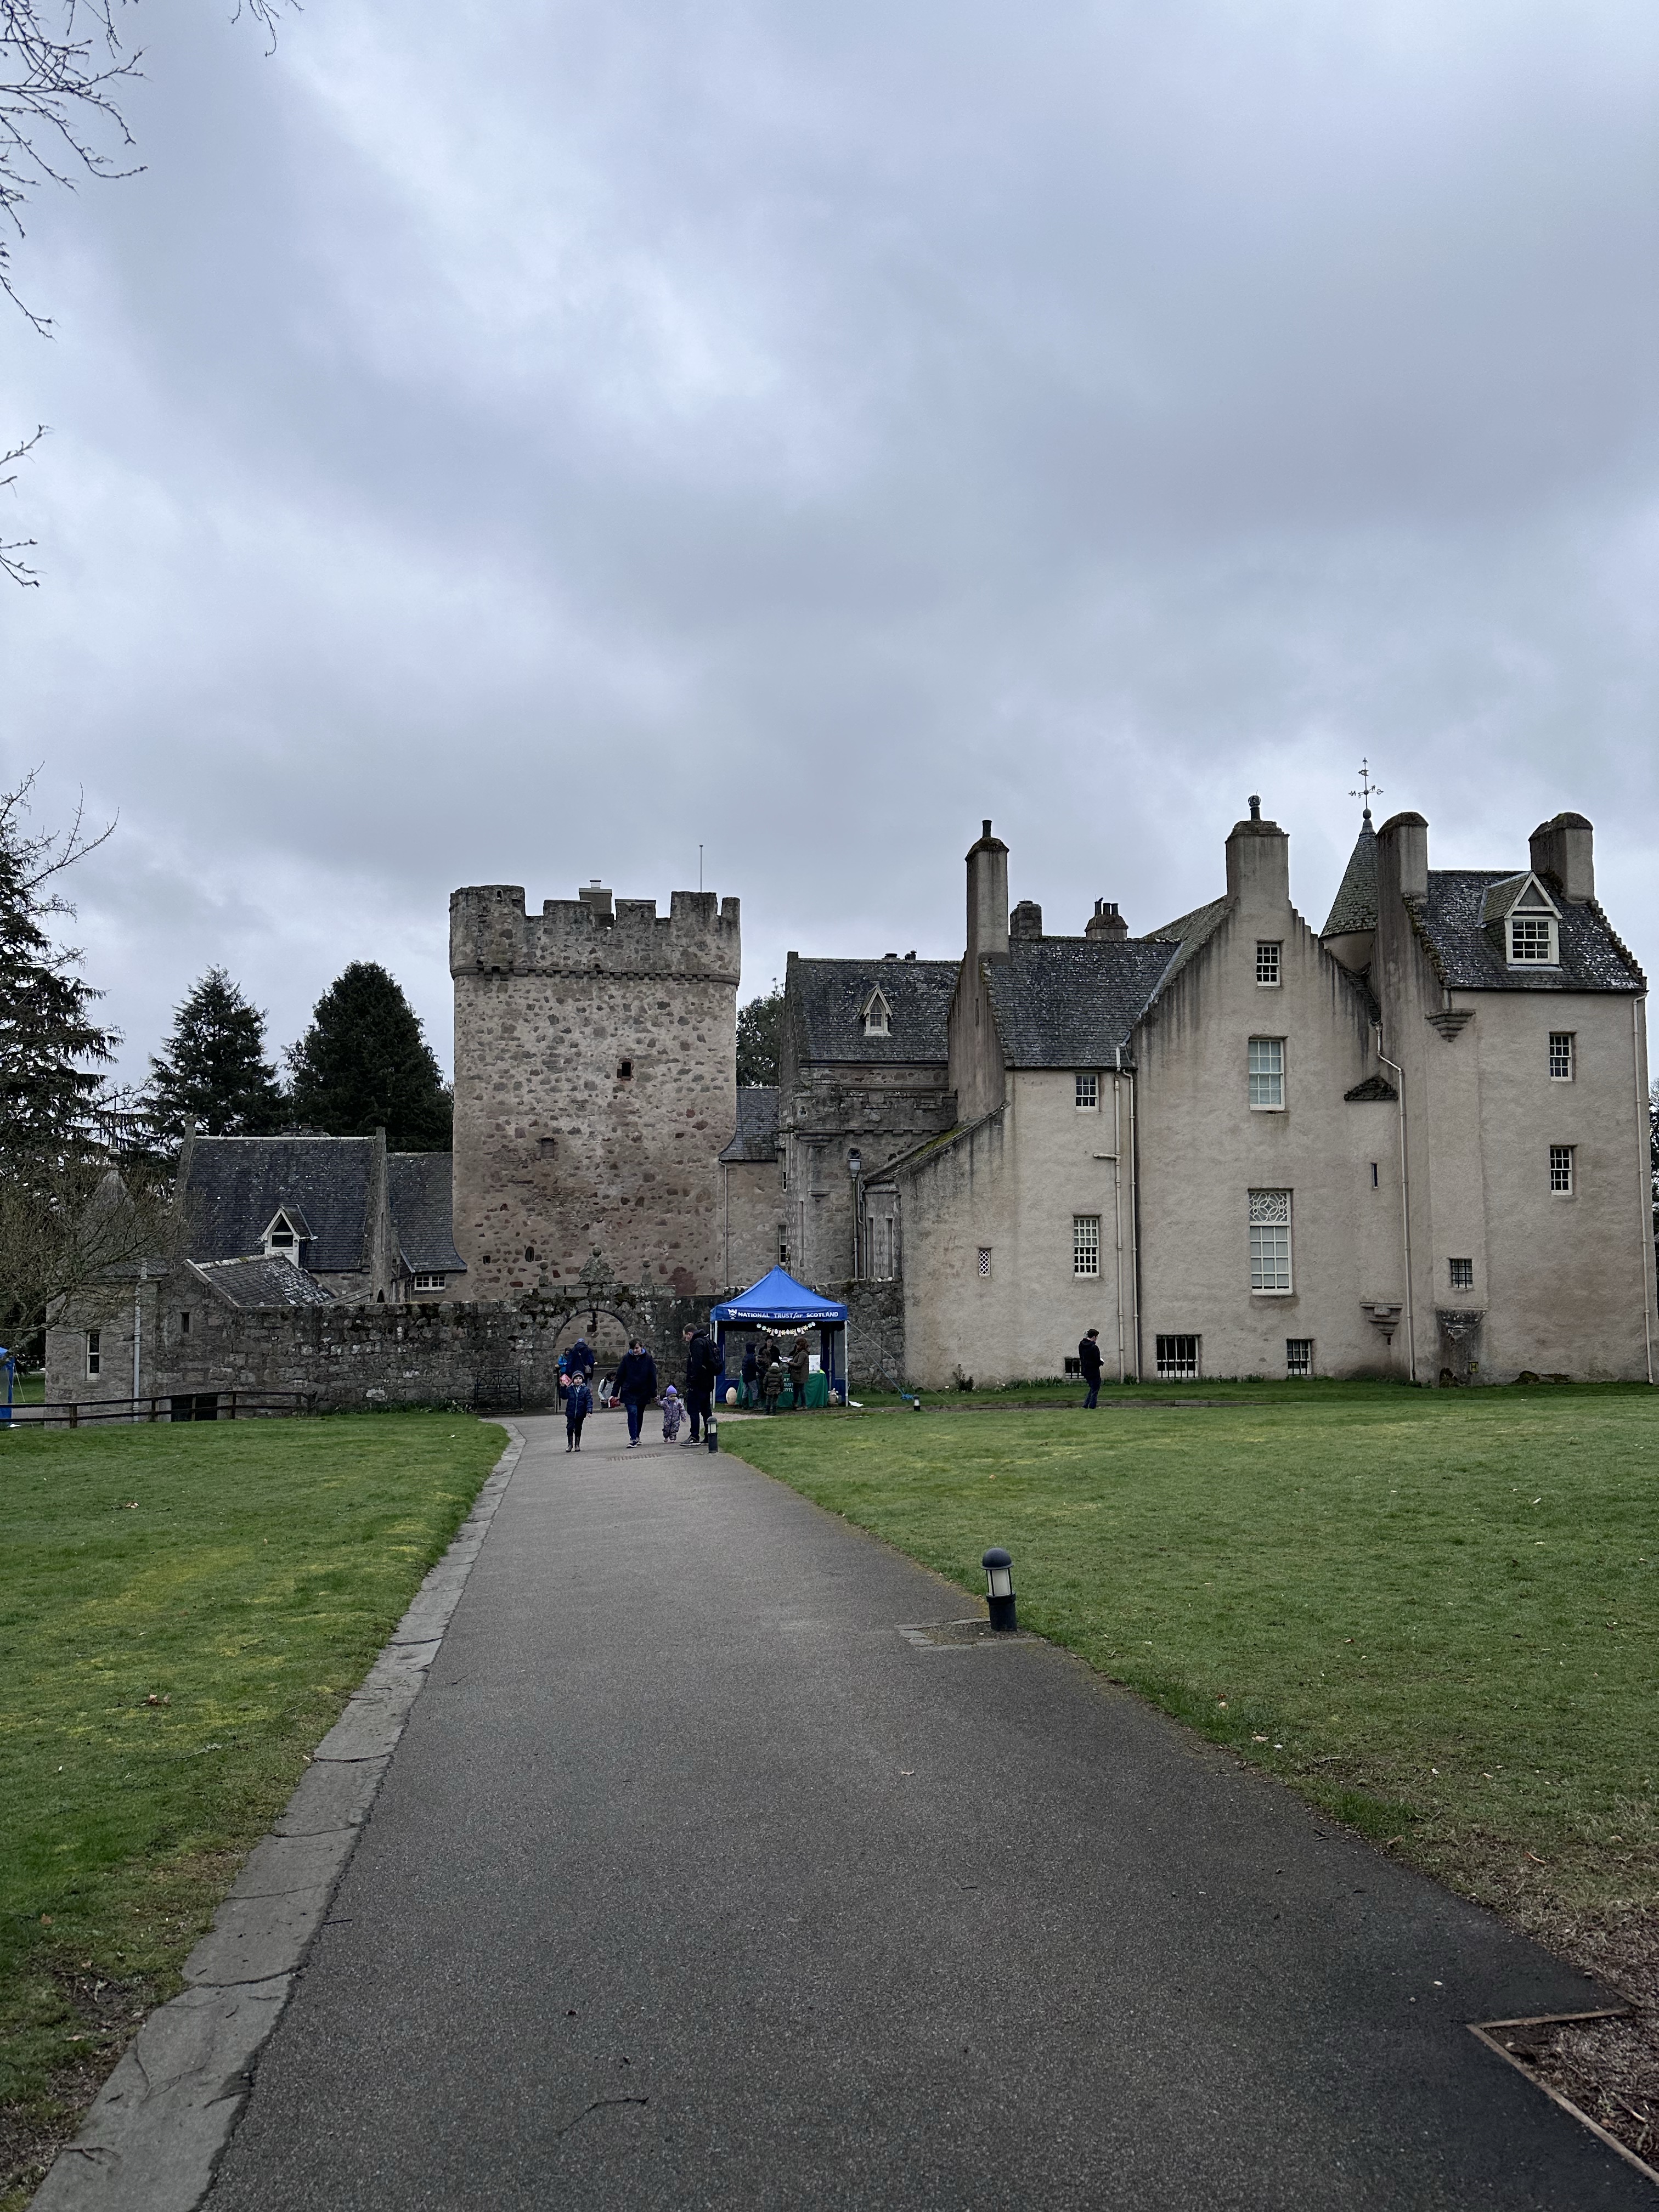
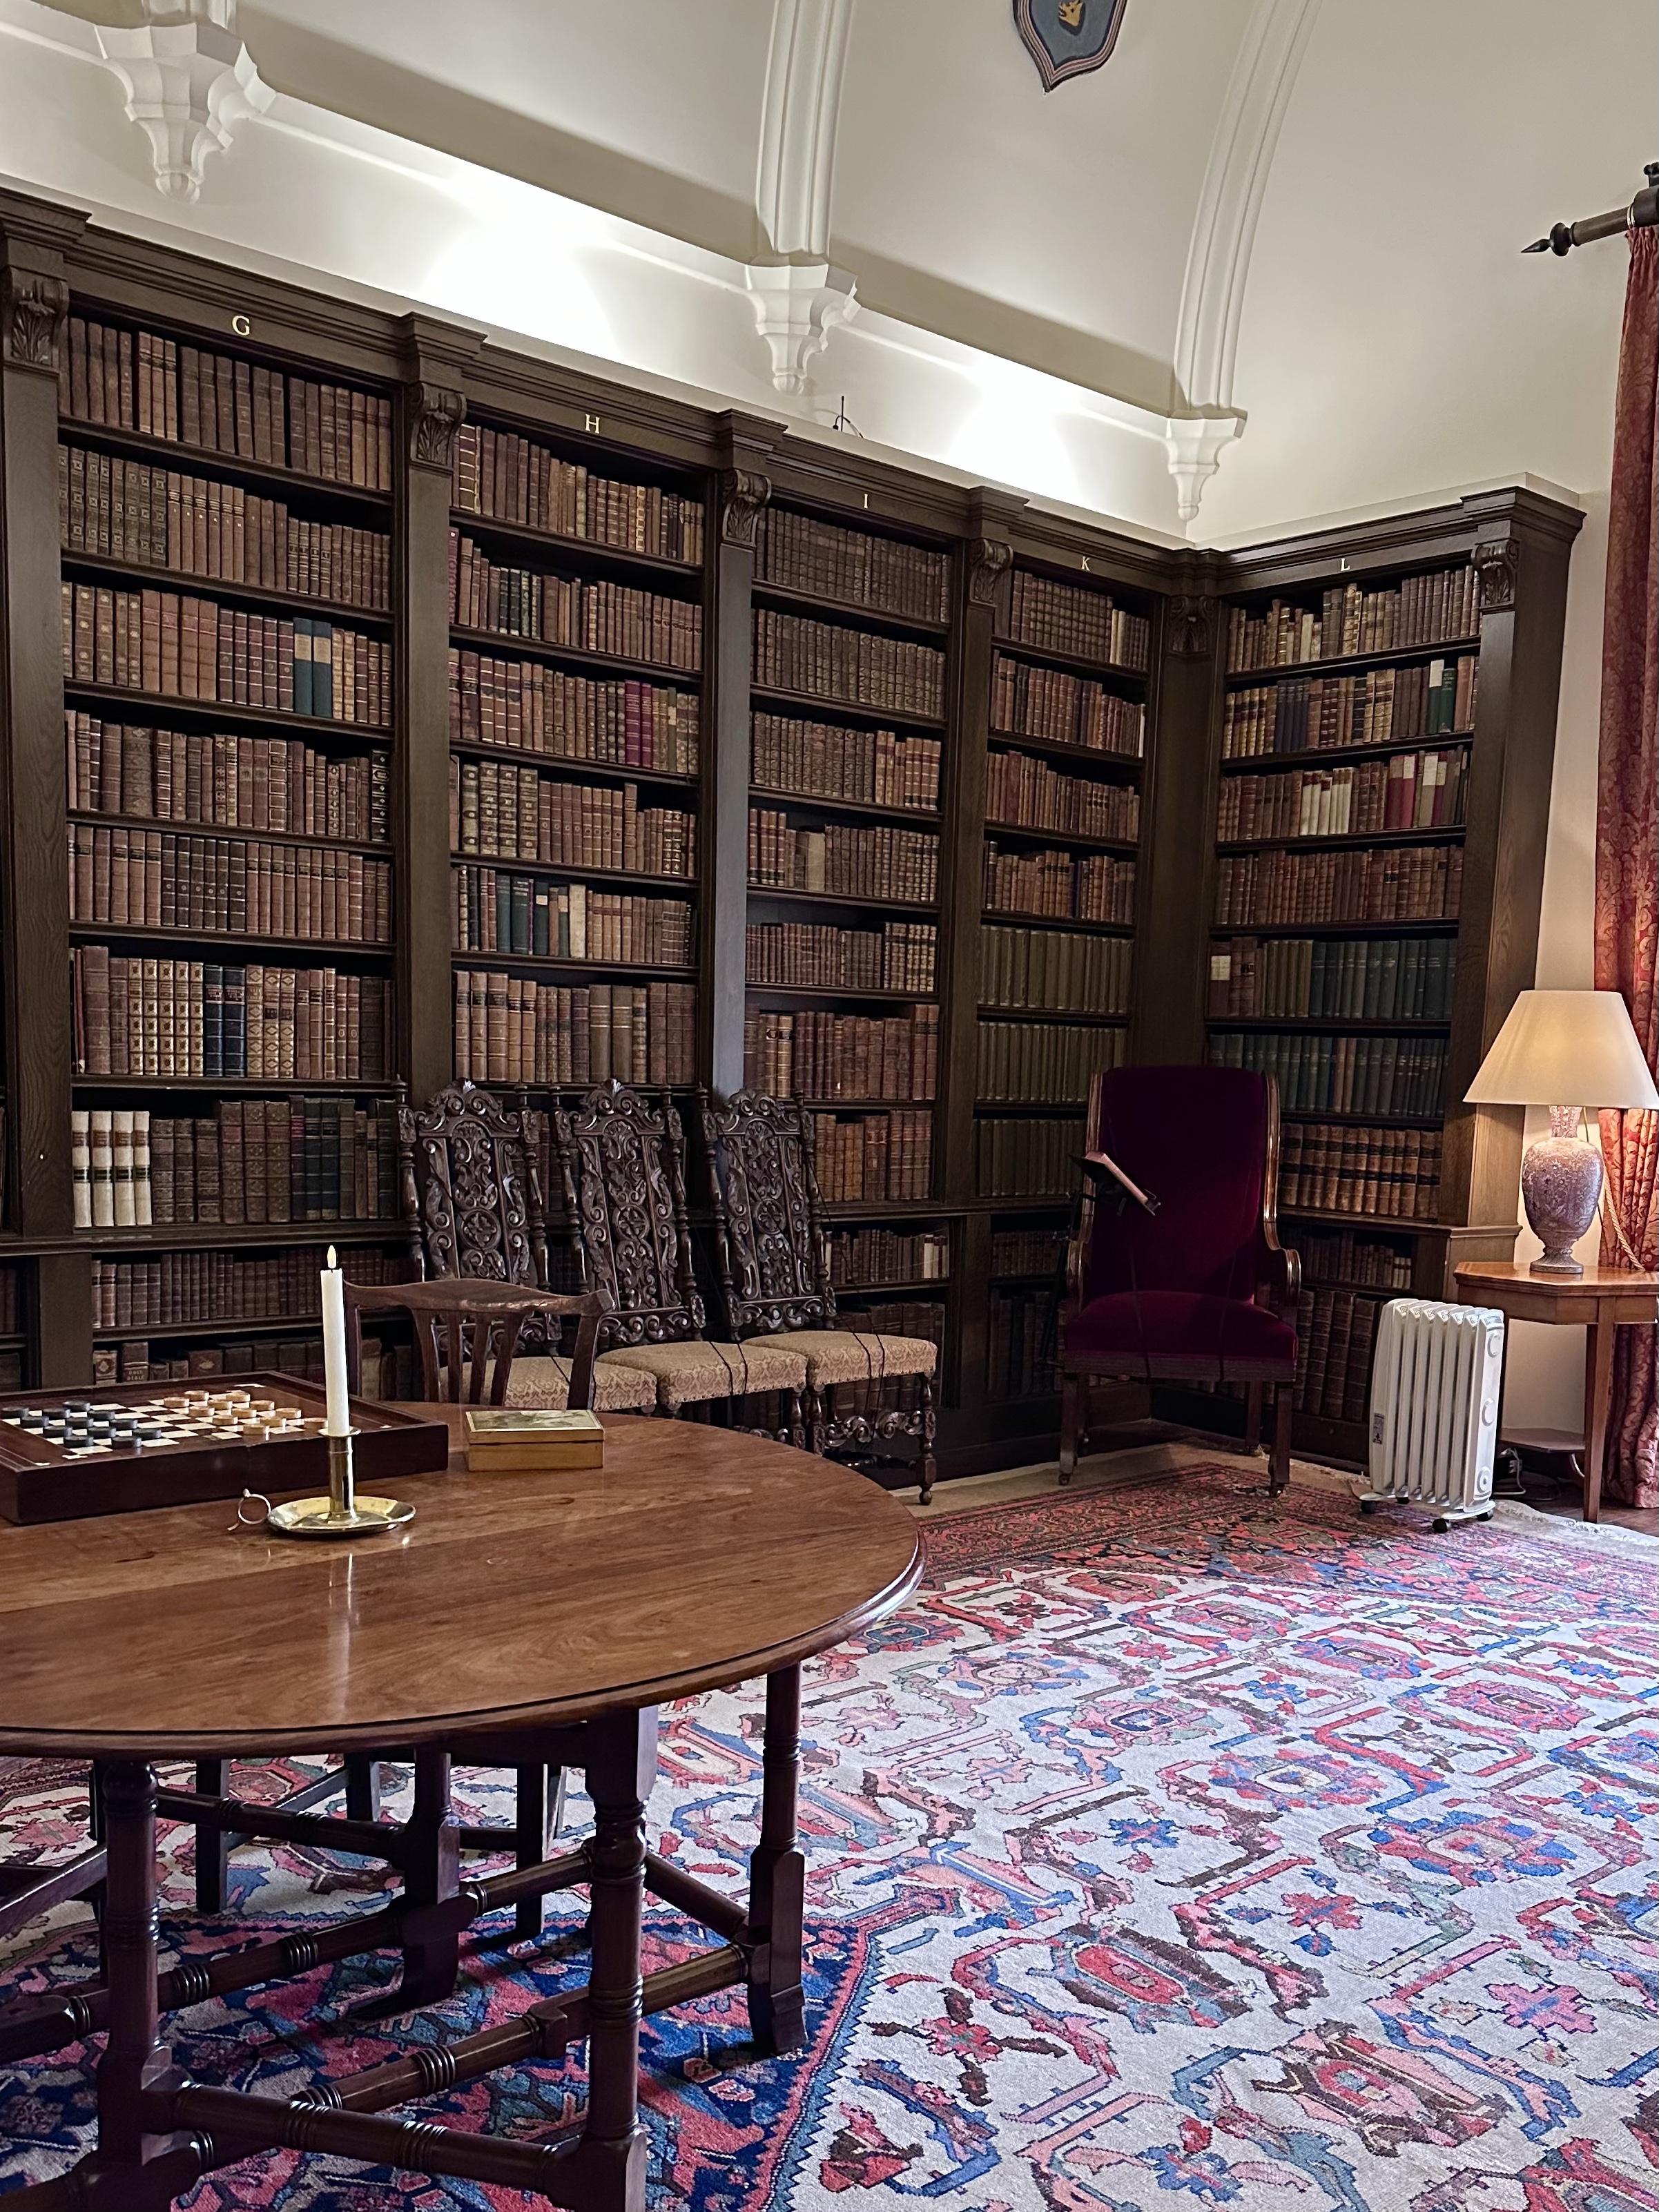
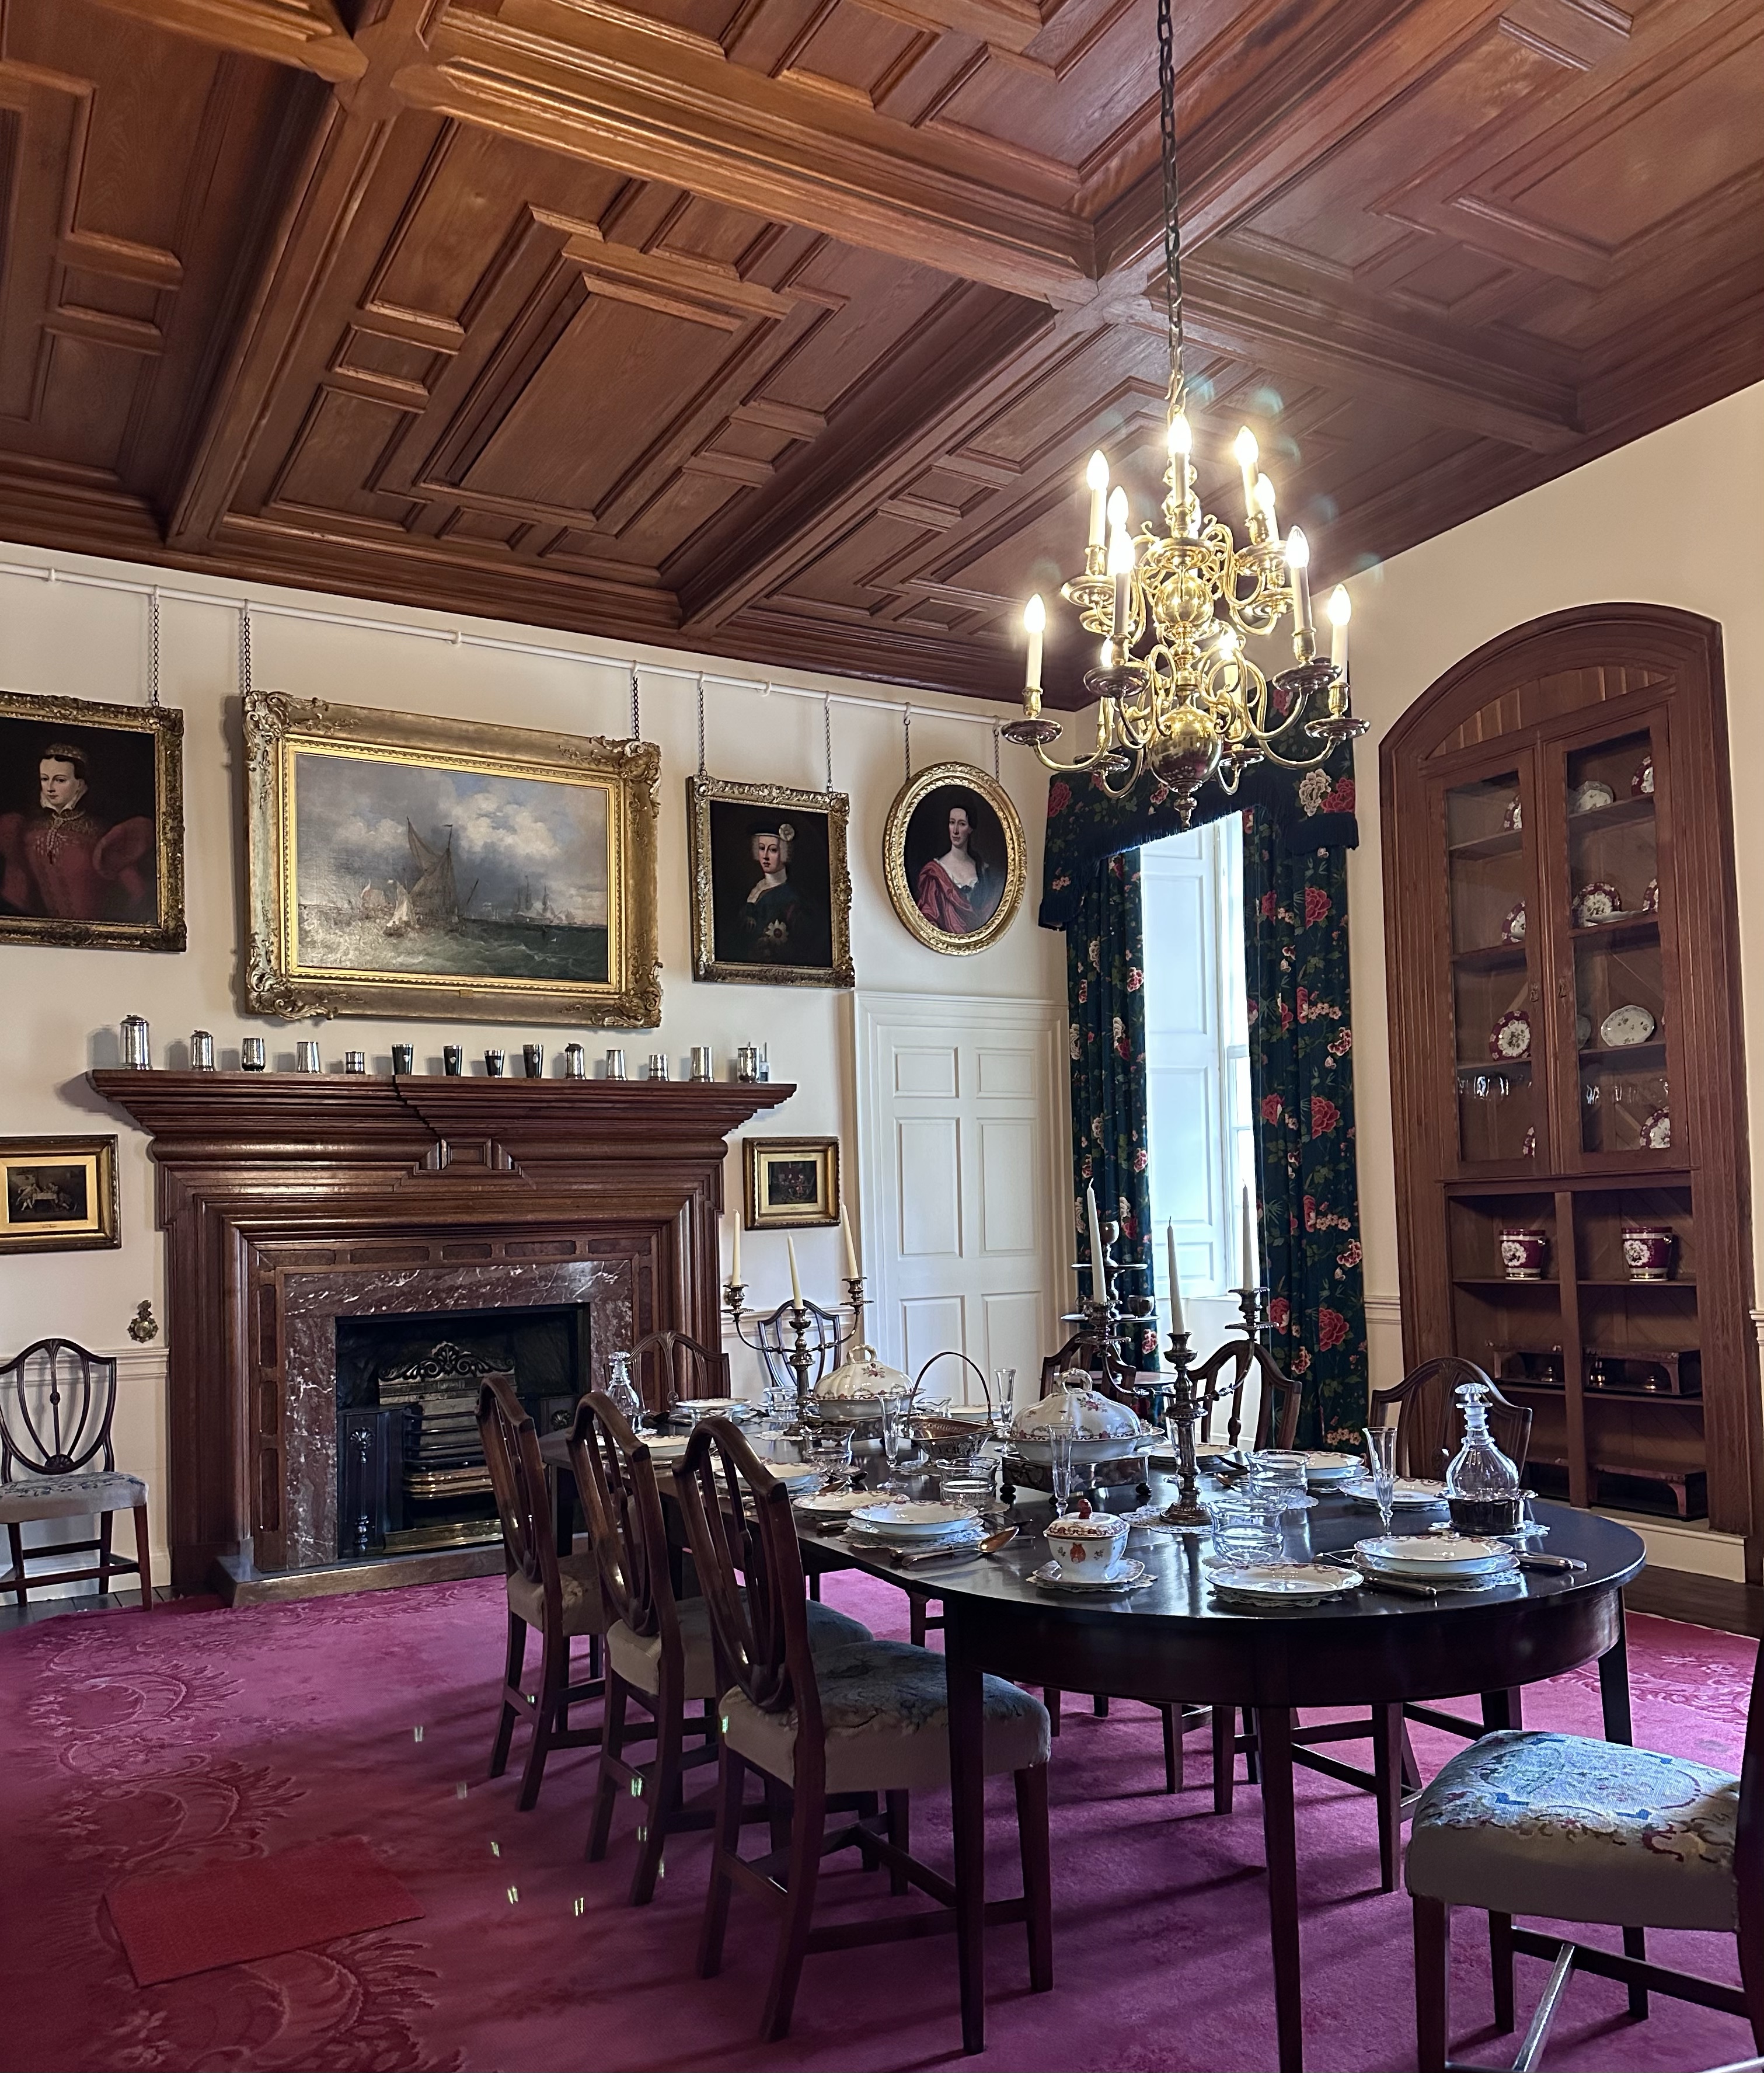
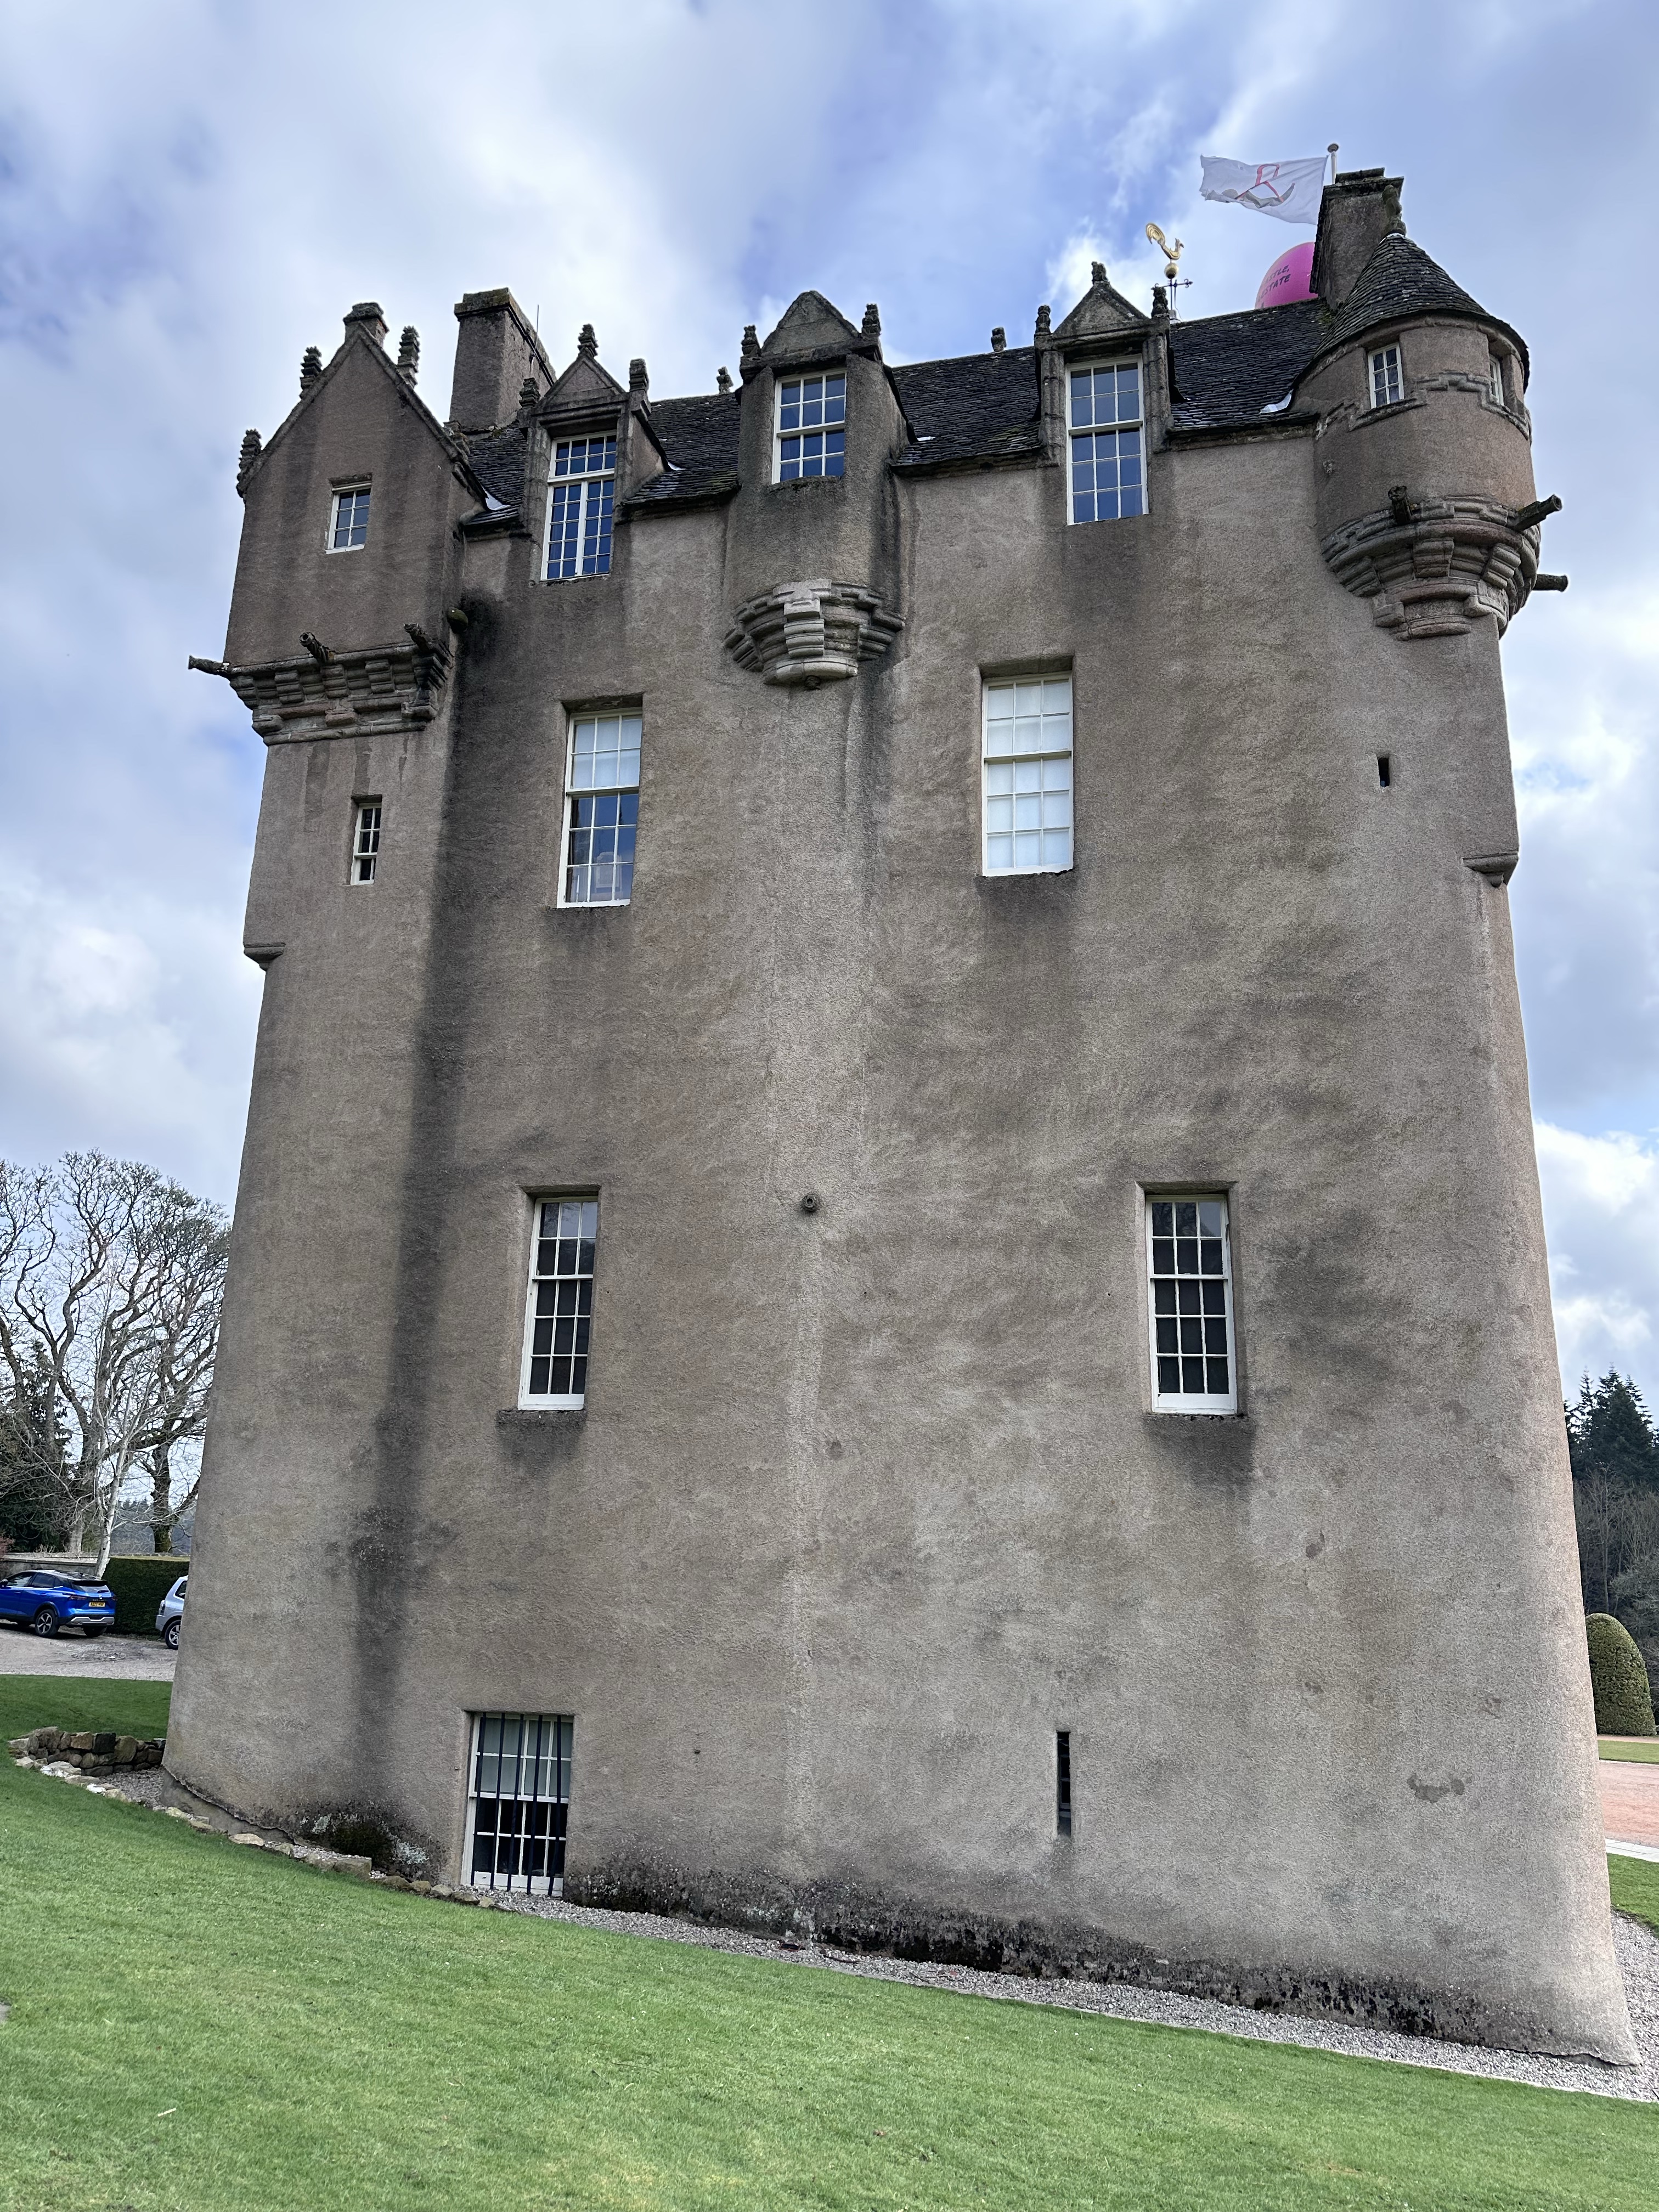
Drum Castle also in Aberdeenshire has a square tower-house, one of the three oldest surviving in Scotland. You can see it on the left in the first photo below. It was built in the late 13th century. Drum was granted by Robert the Bruce to his standard-bearer William de Irwyn and had stayed in the Irwyn family until 1976 when it was bequeathed to The National Trust for Scotland. Below are photos of the library and the dining room.
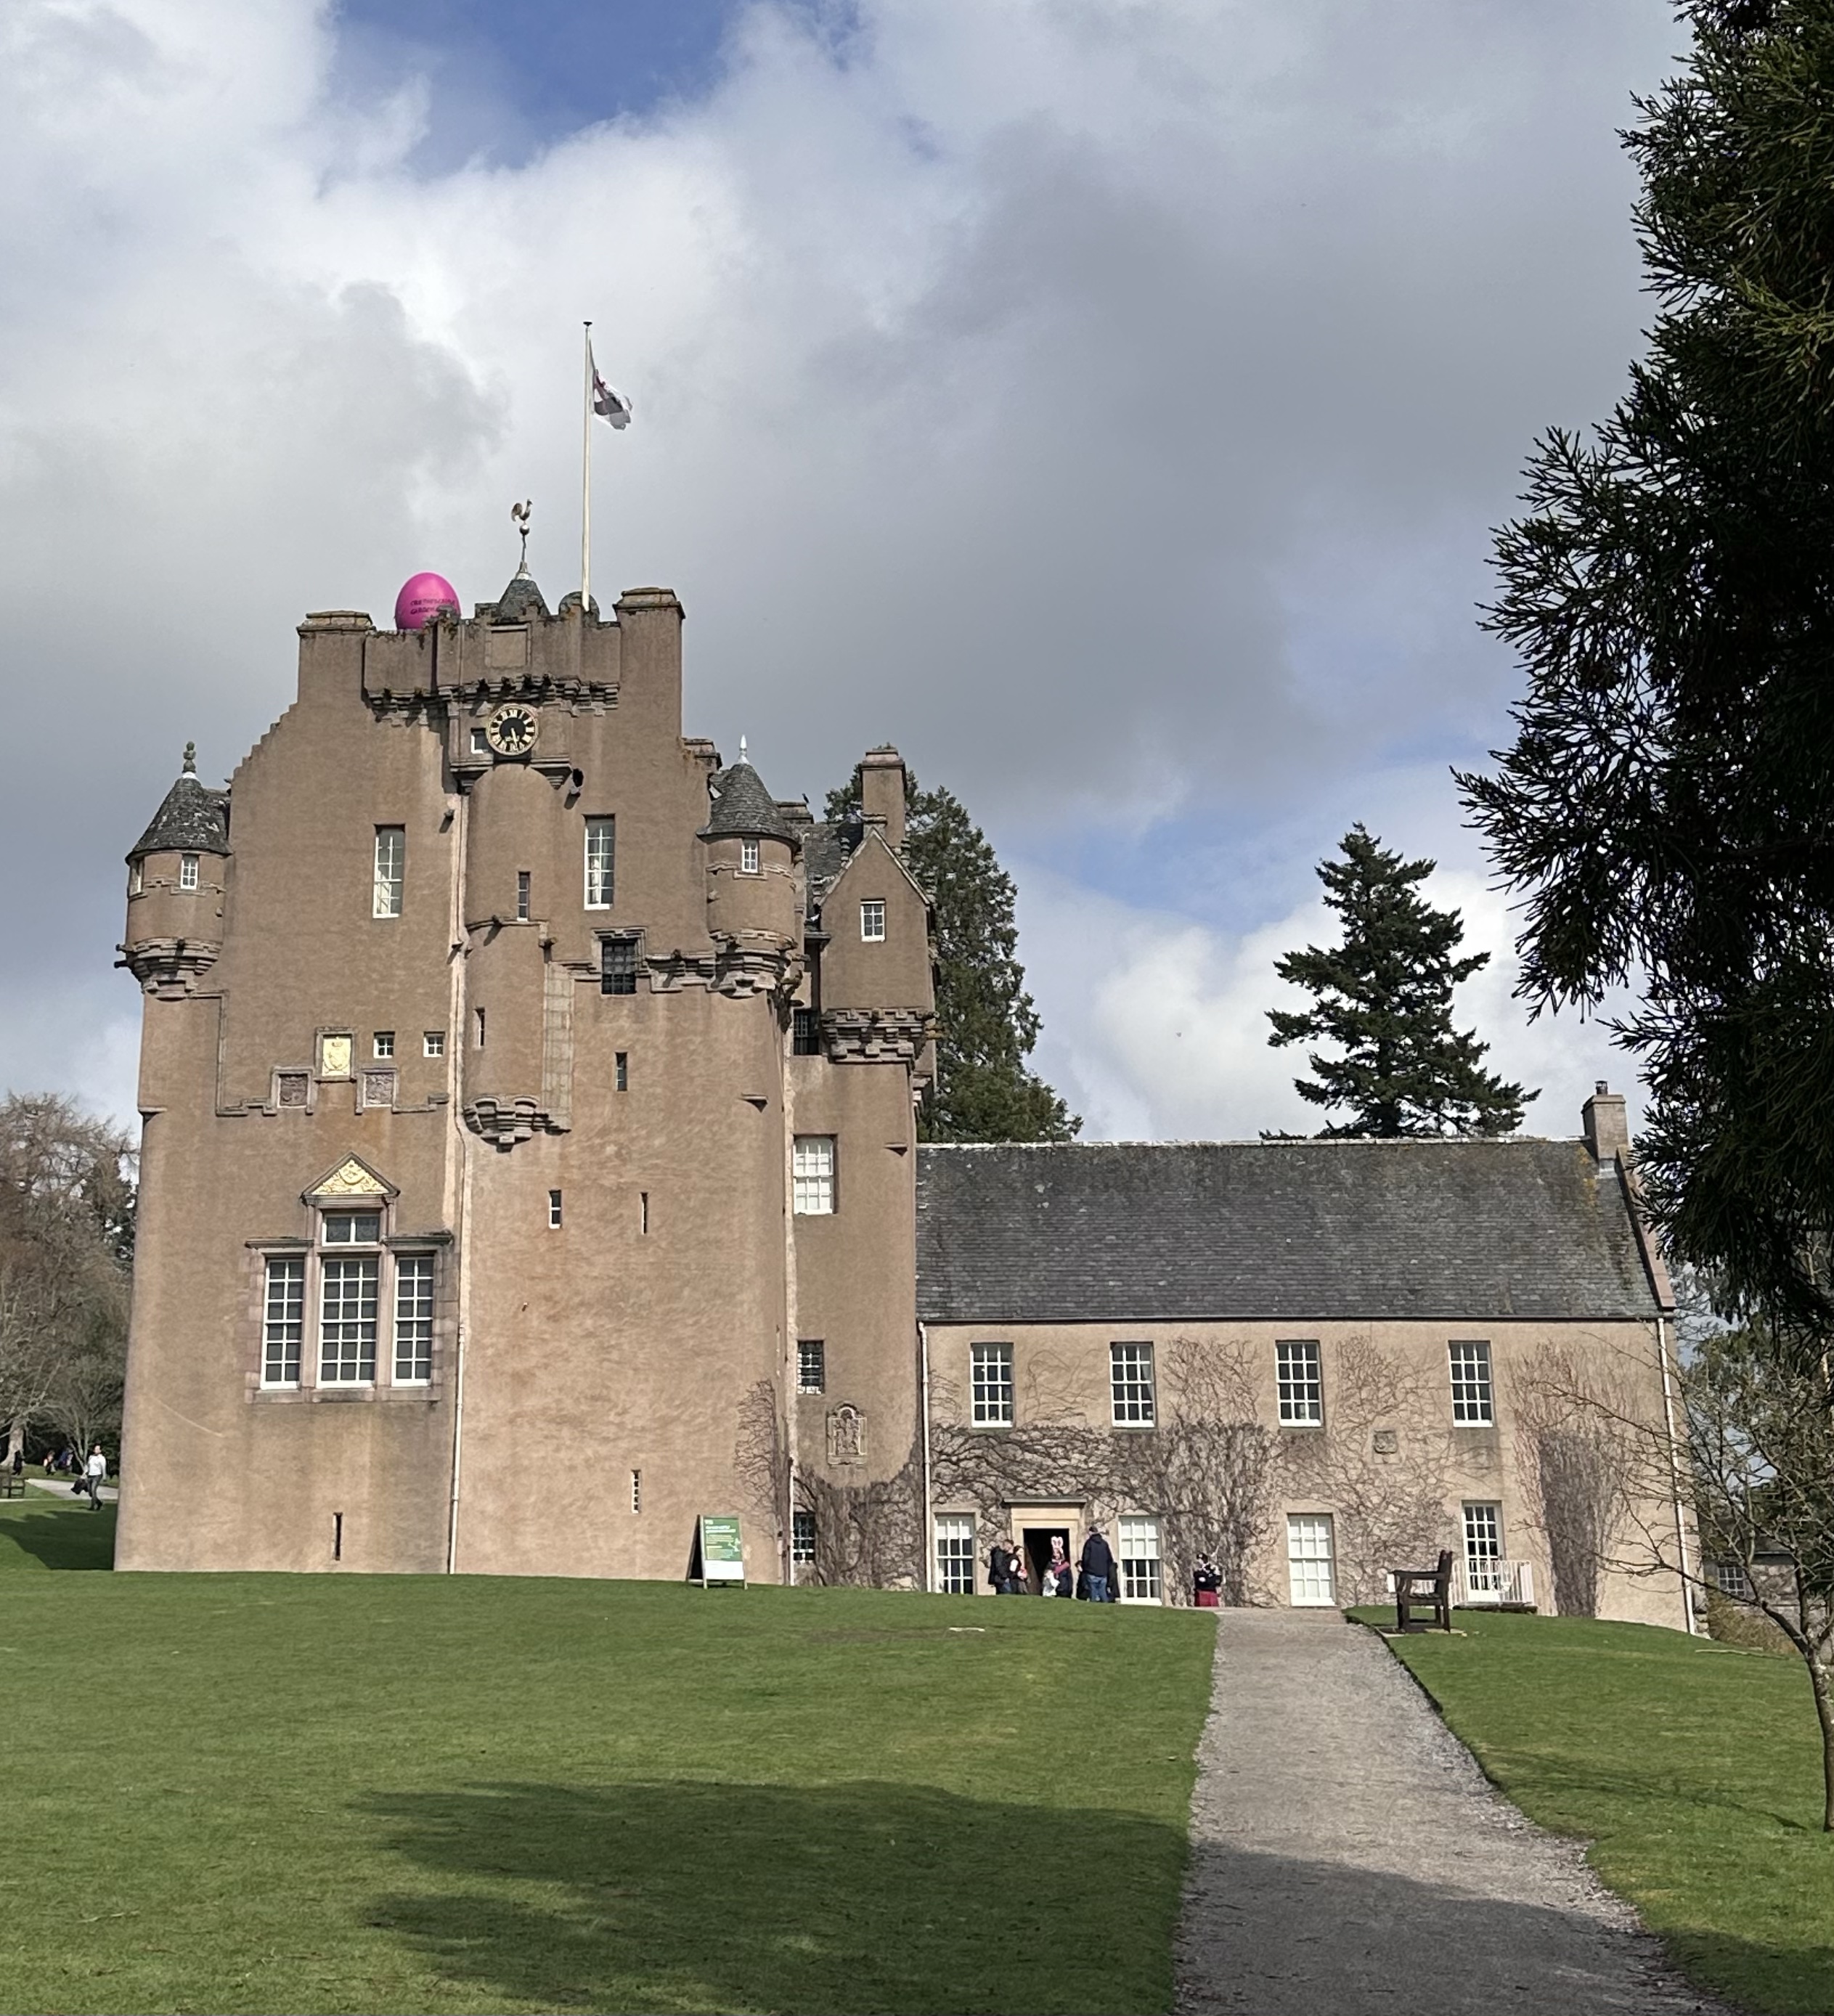
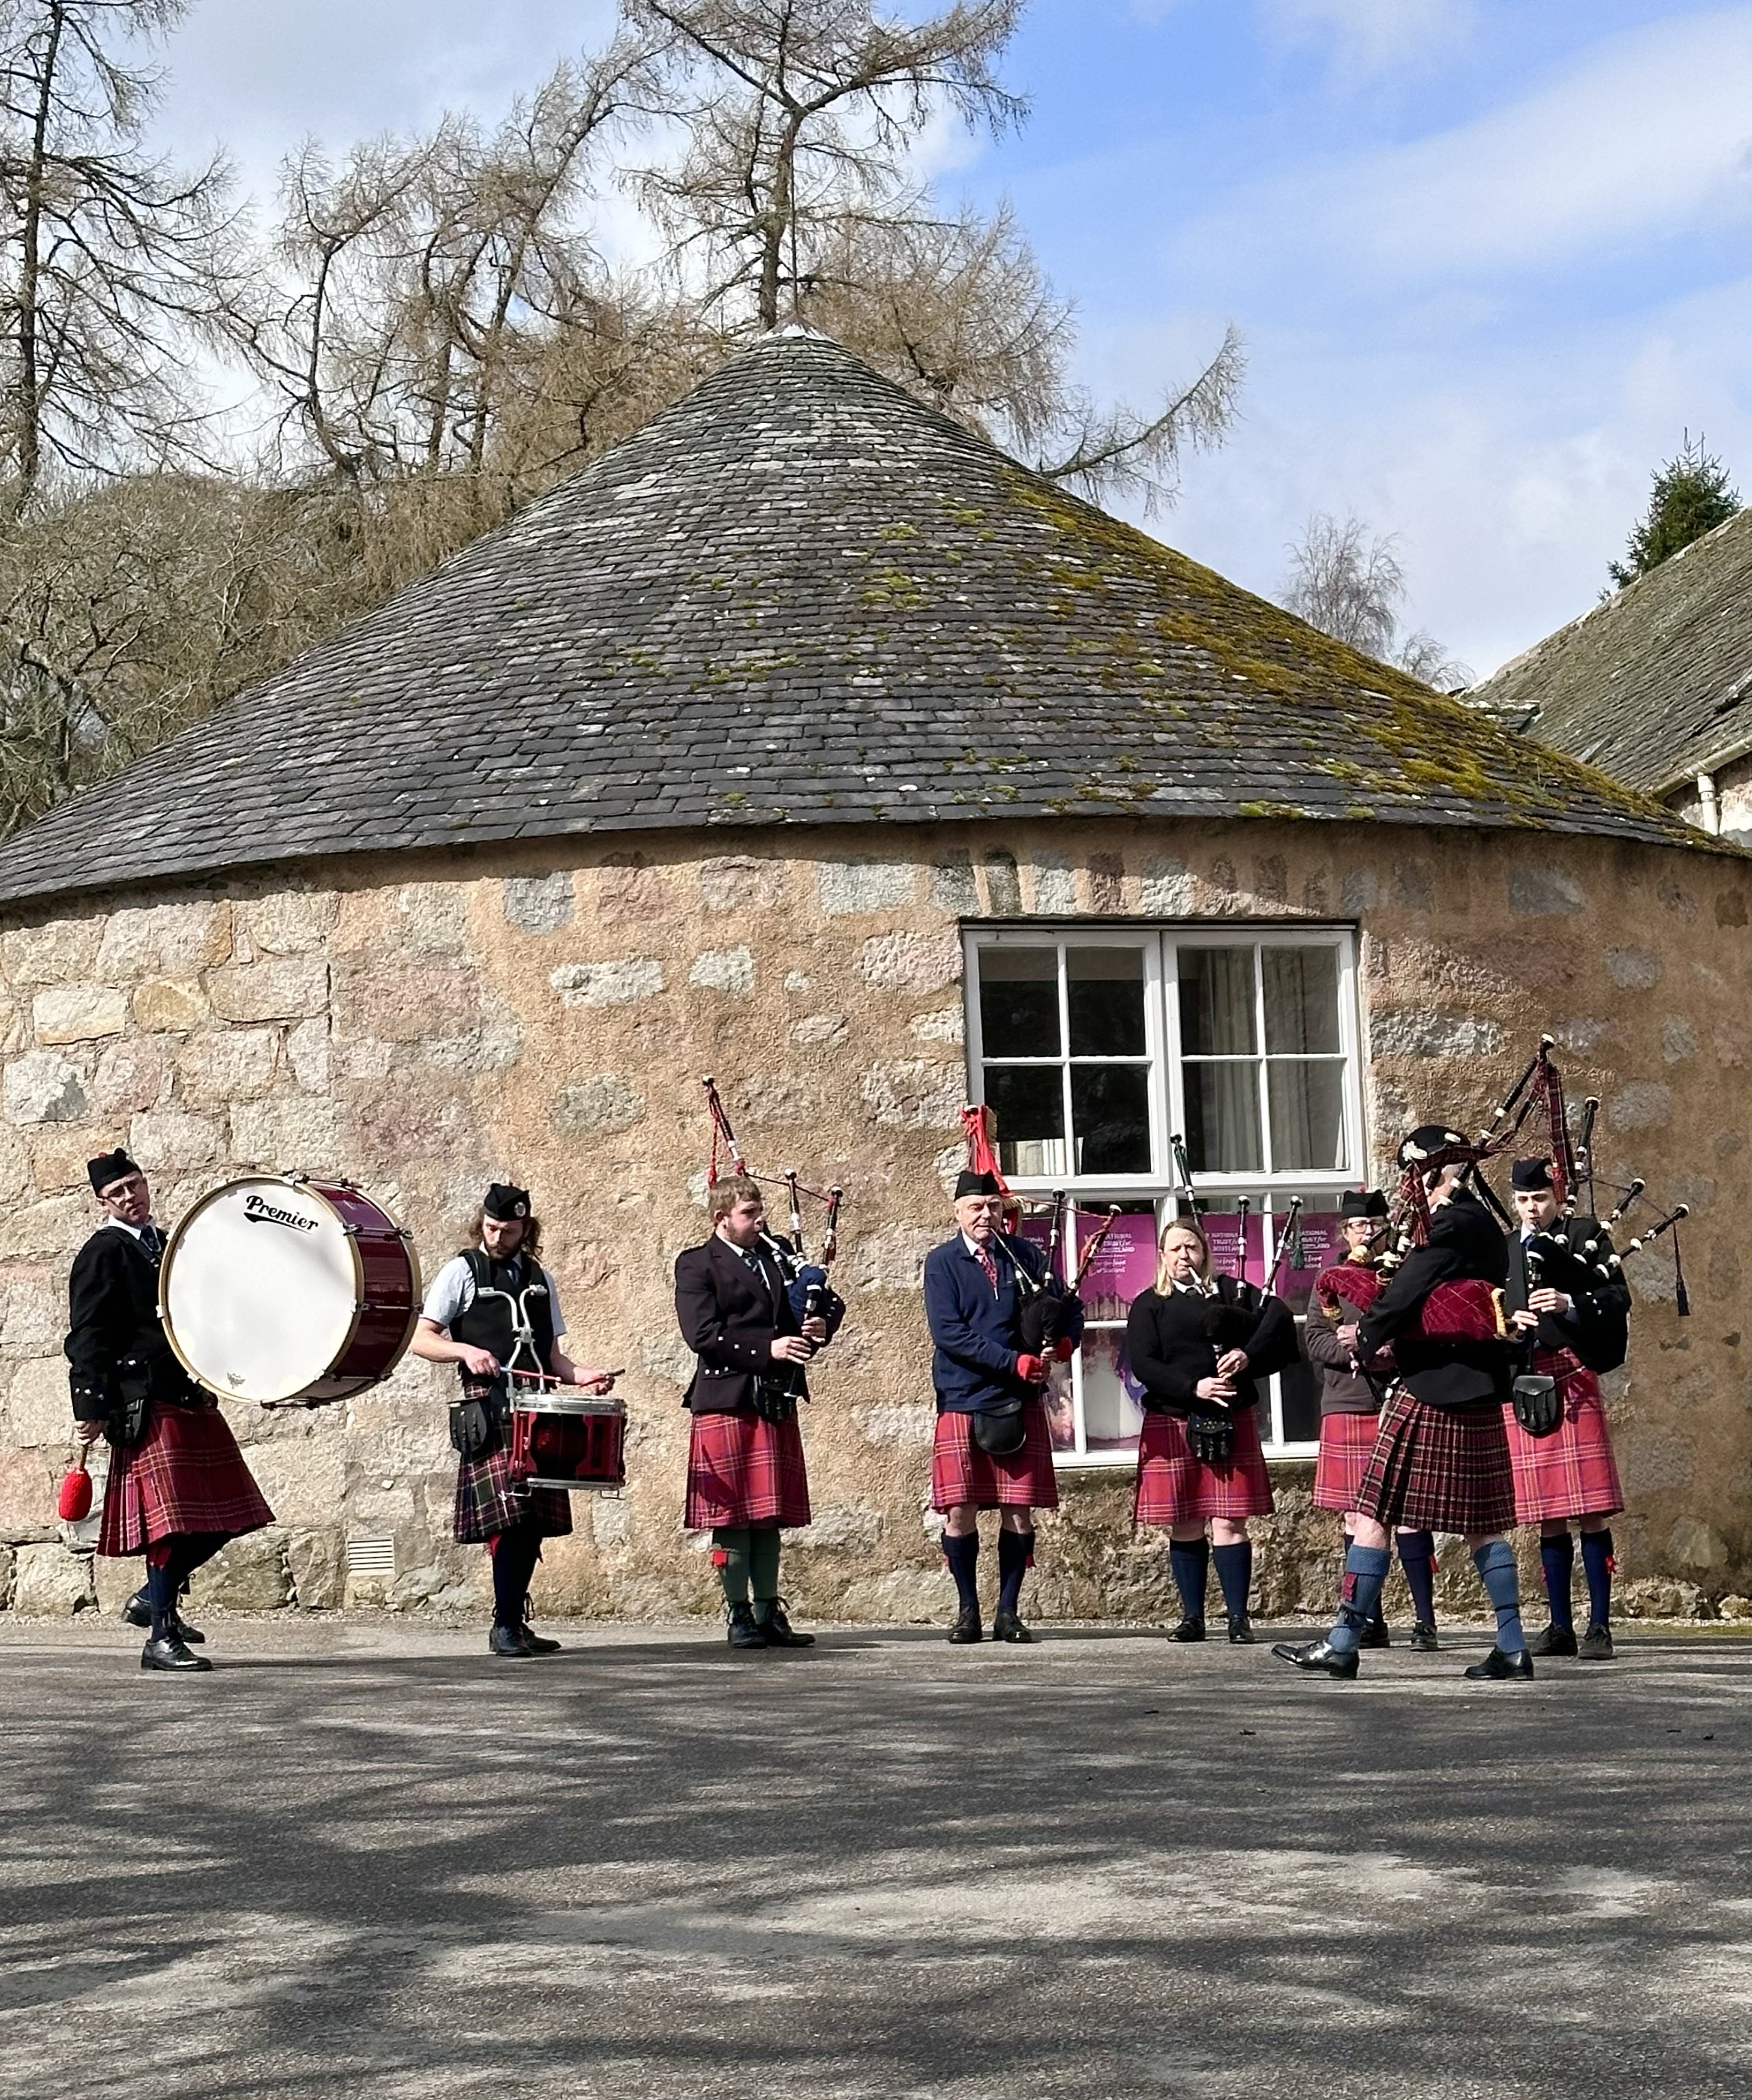
Crathes Castle is just a few miles down the road from Drum Castle. It was built in the 16th century. We didn’t tour the inside of the castle, but walked around the grounds and gardens – and were lucky enough to hear a pipe band!
Corgarff Castle in the left photo below is sadly not open to the public right now. The tower was built in the mid 1500’s and then abandoned in the 1600’s. The lower tower was used as a Redcoats barracks from the mid 1700’s until 1831 when it was abandoned again.
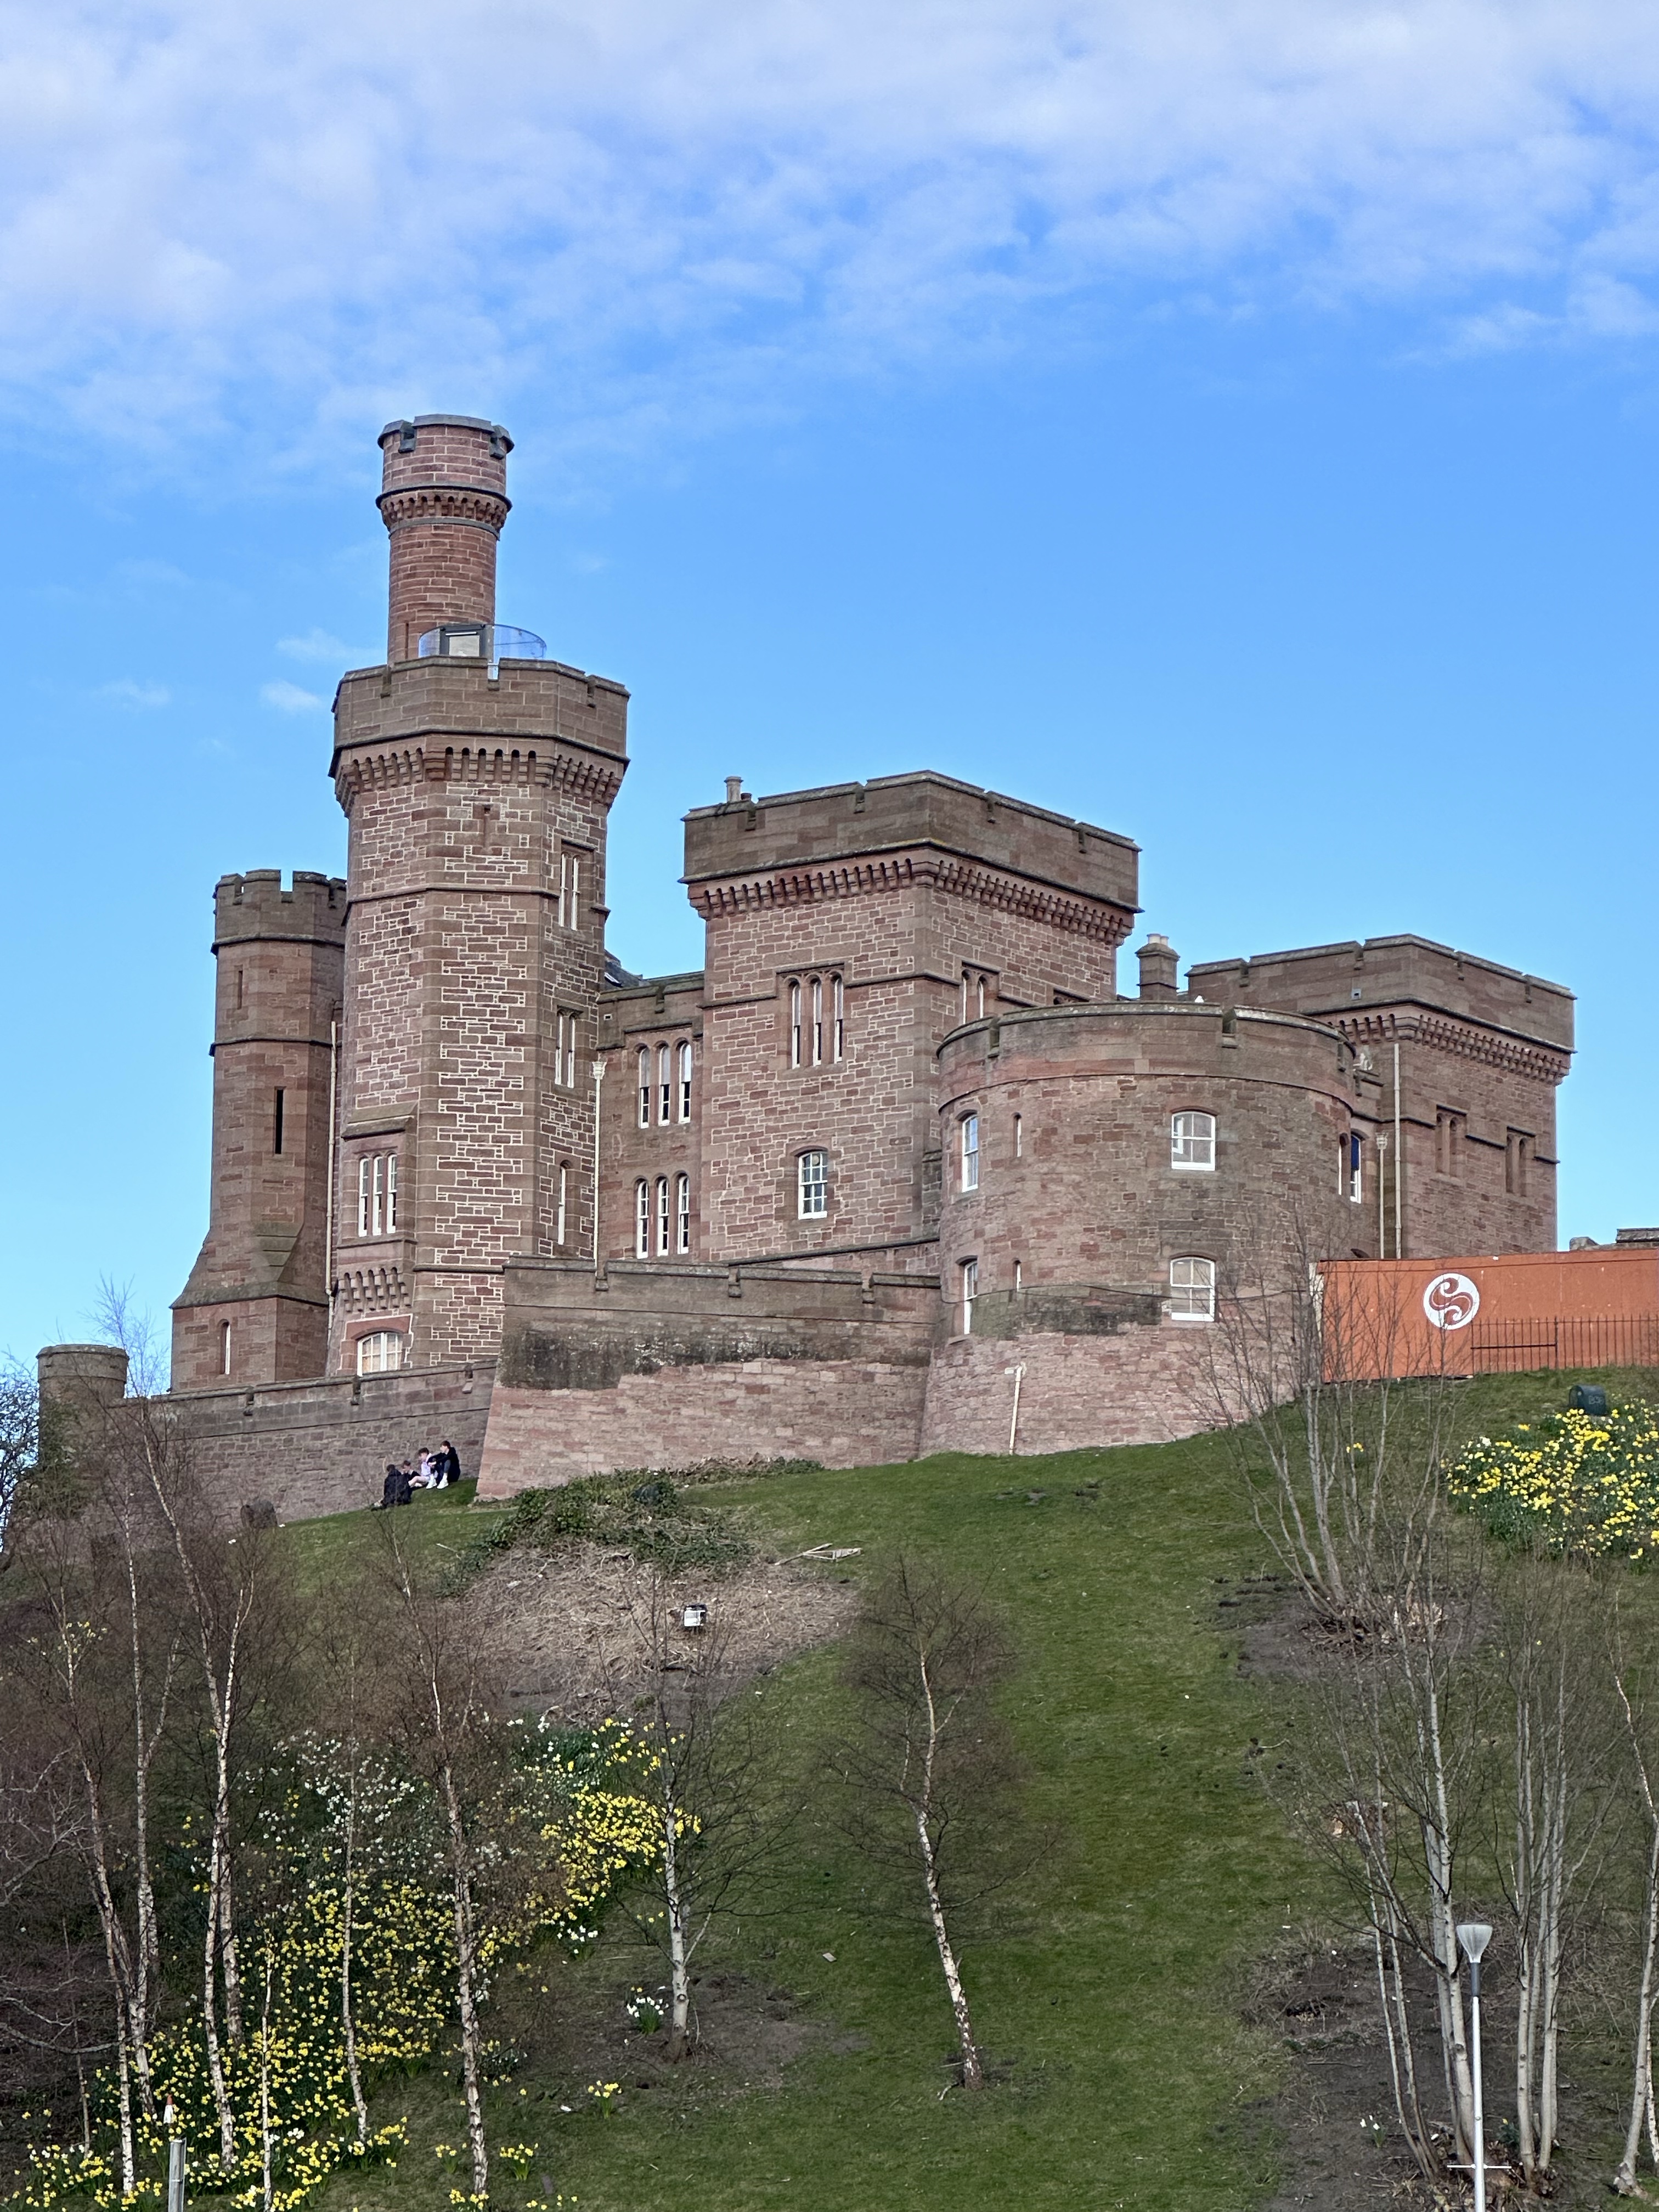
Inverness Castle sits on Castle Hill overlooking the River Ness in Inverness. A fortification has existed on this site since the 6th century. There were several different castles built and destroyed until the castle that is there today. It was built in the 1800’s when it was rebuilt as a courthouse and prison. There are renovations going on now and they hope to open it to the public in 2025.
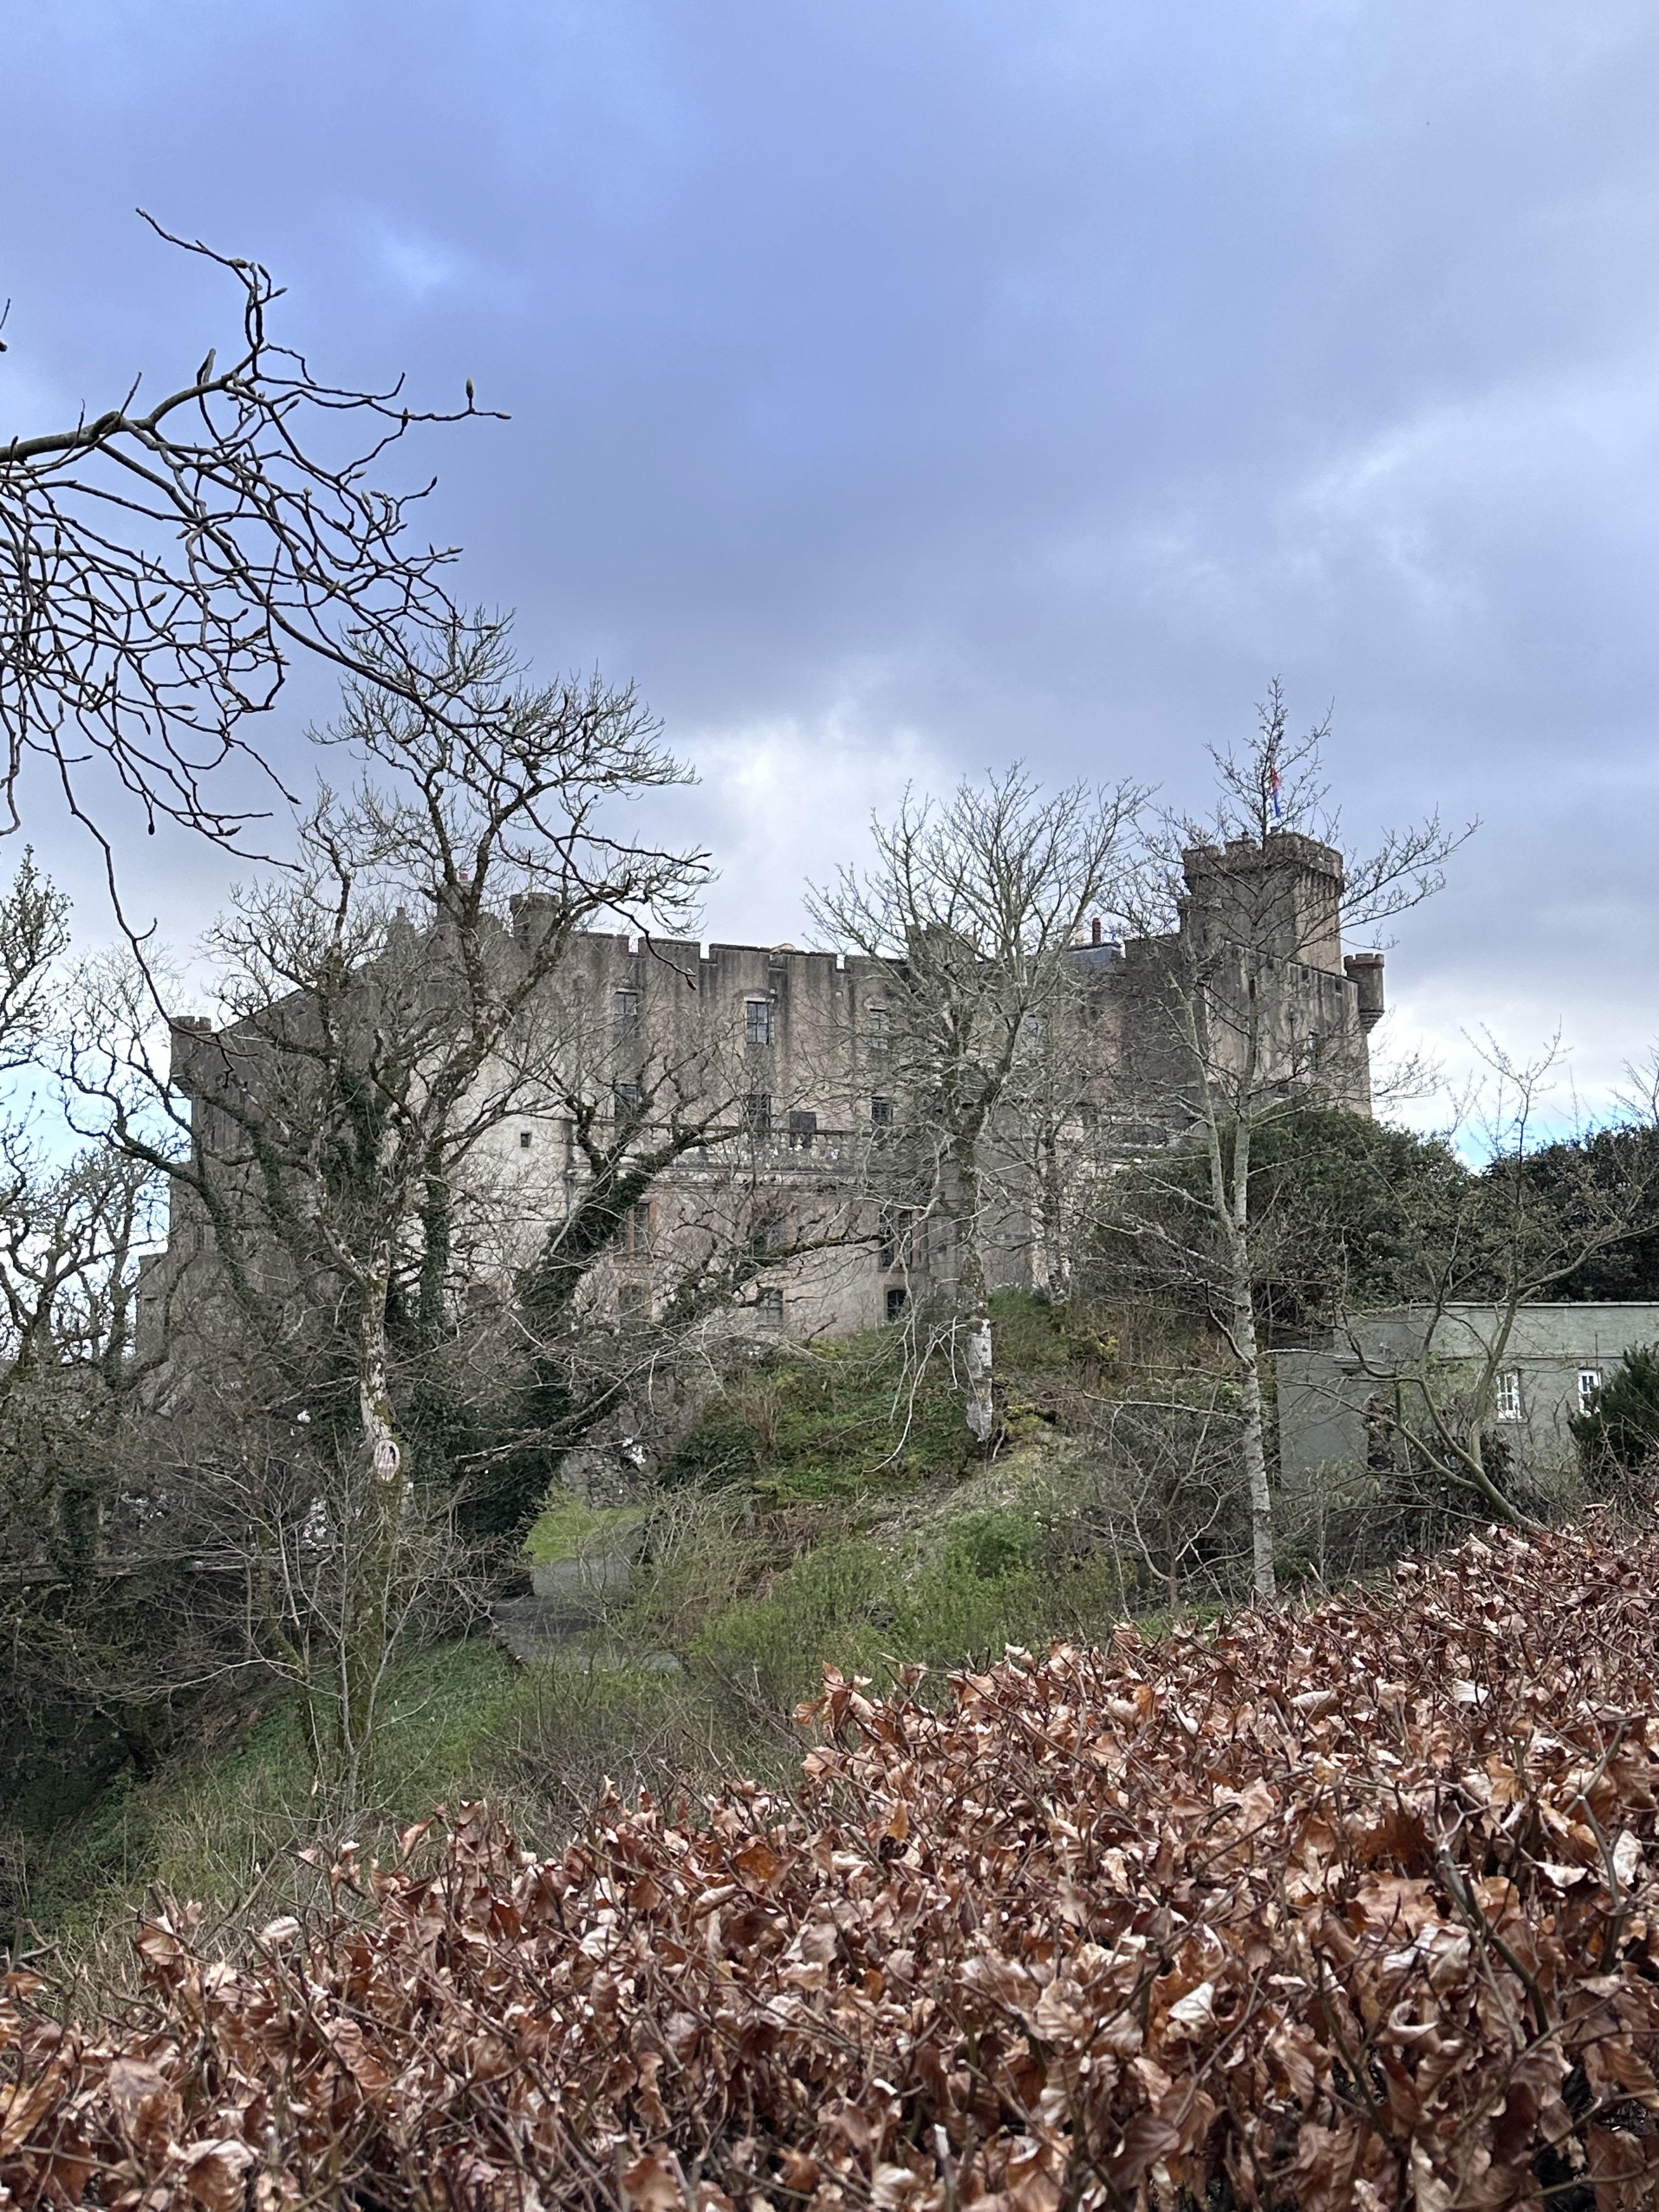
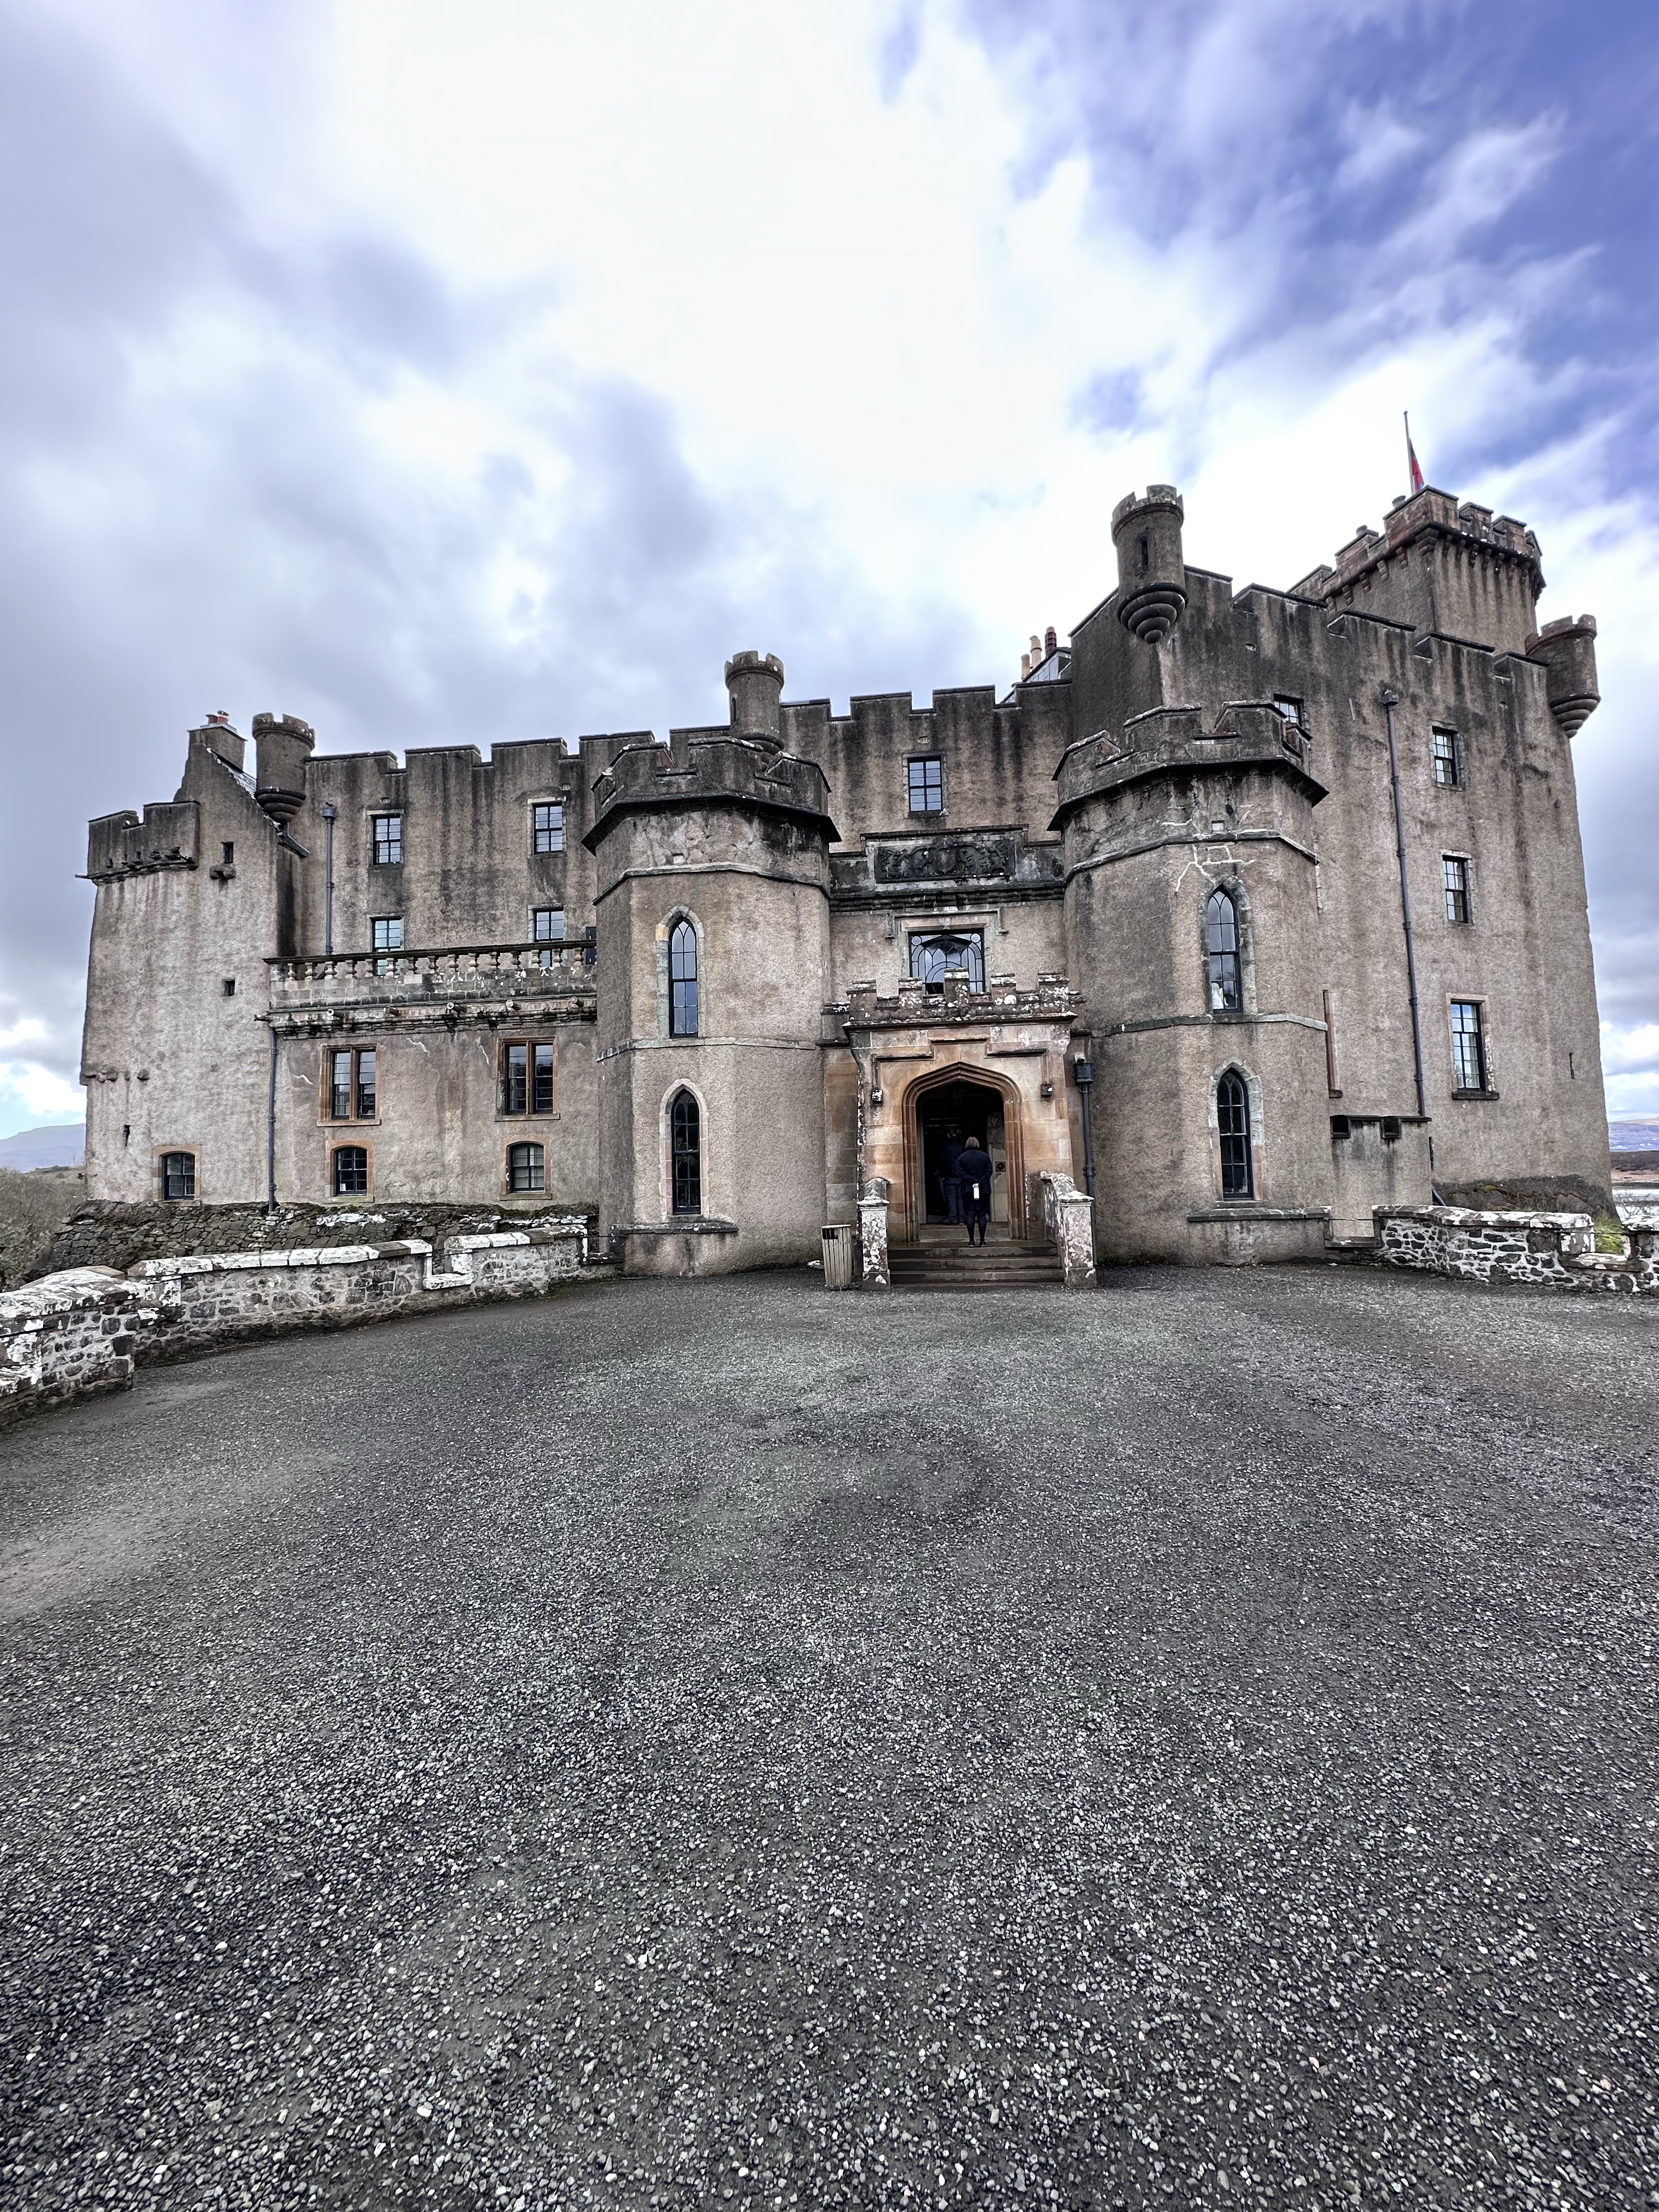
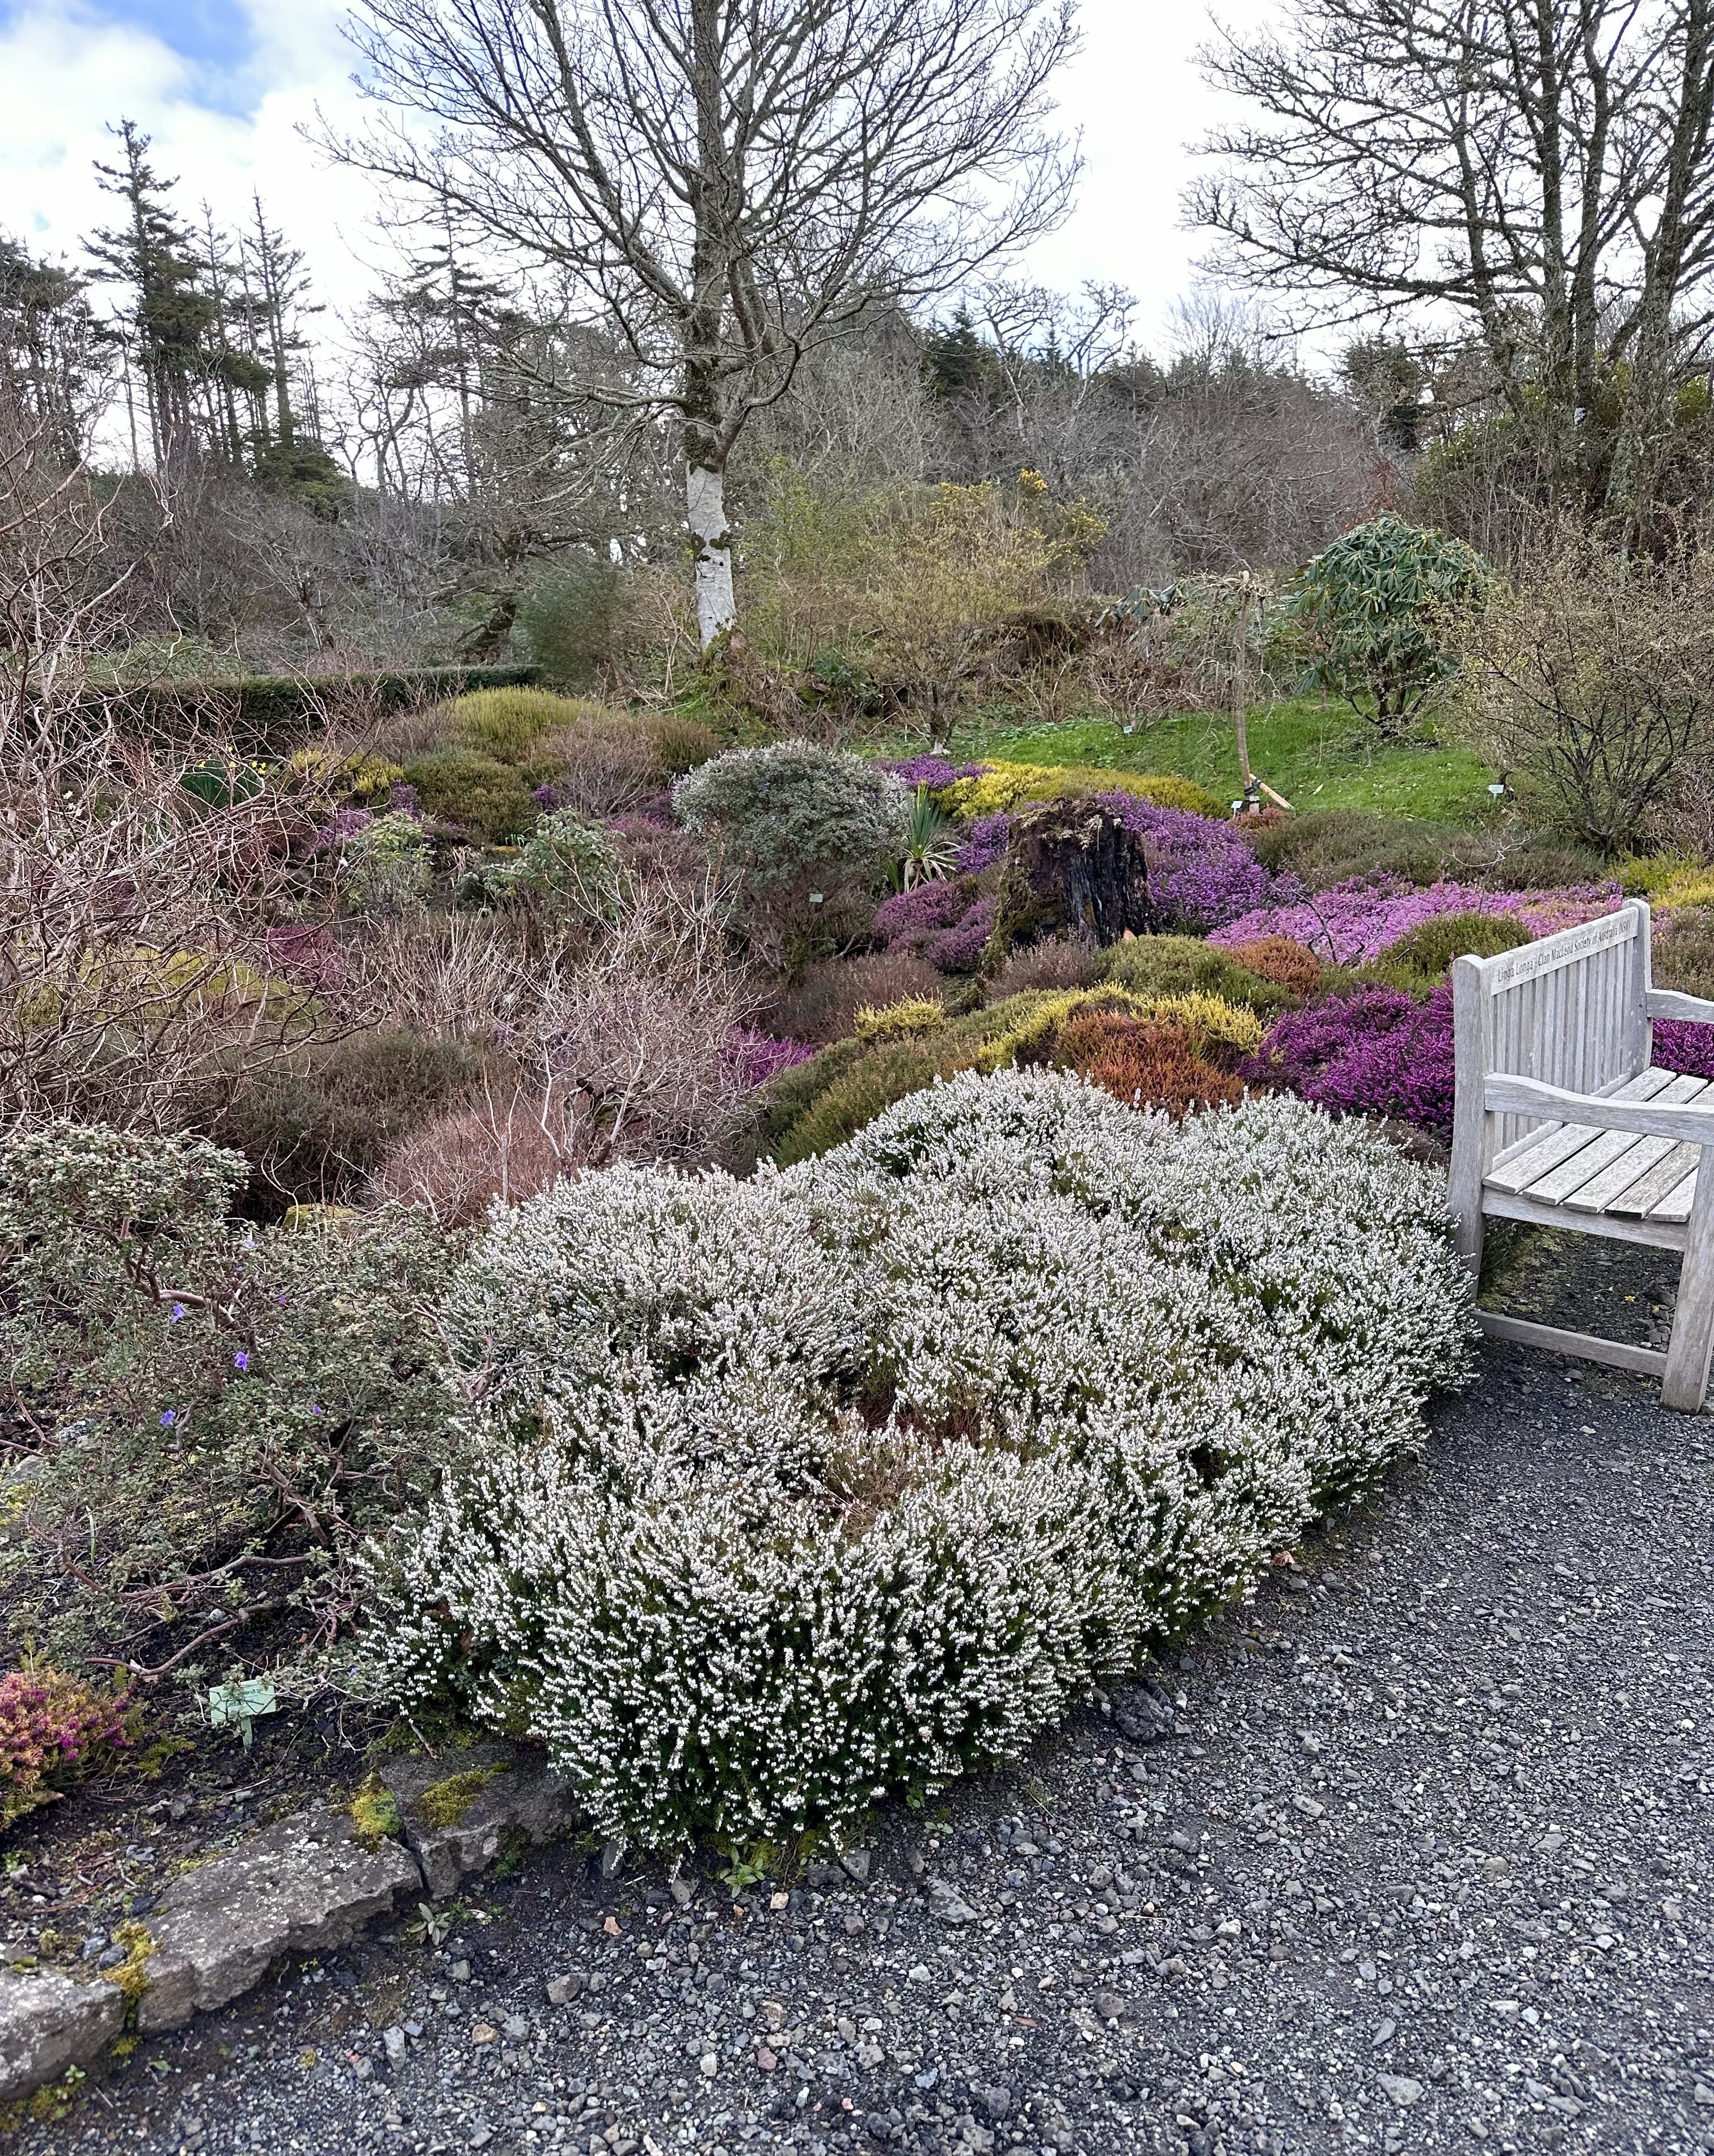
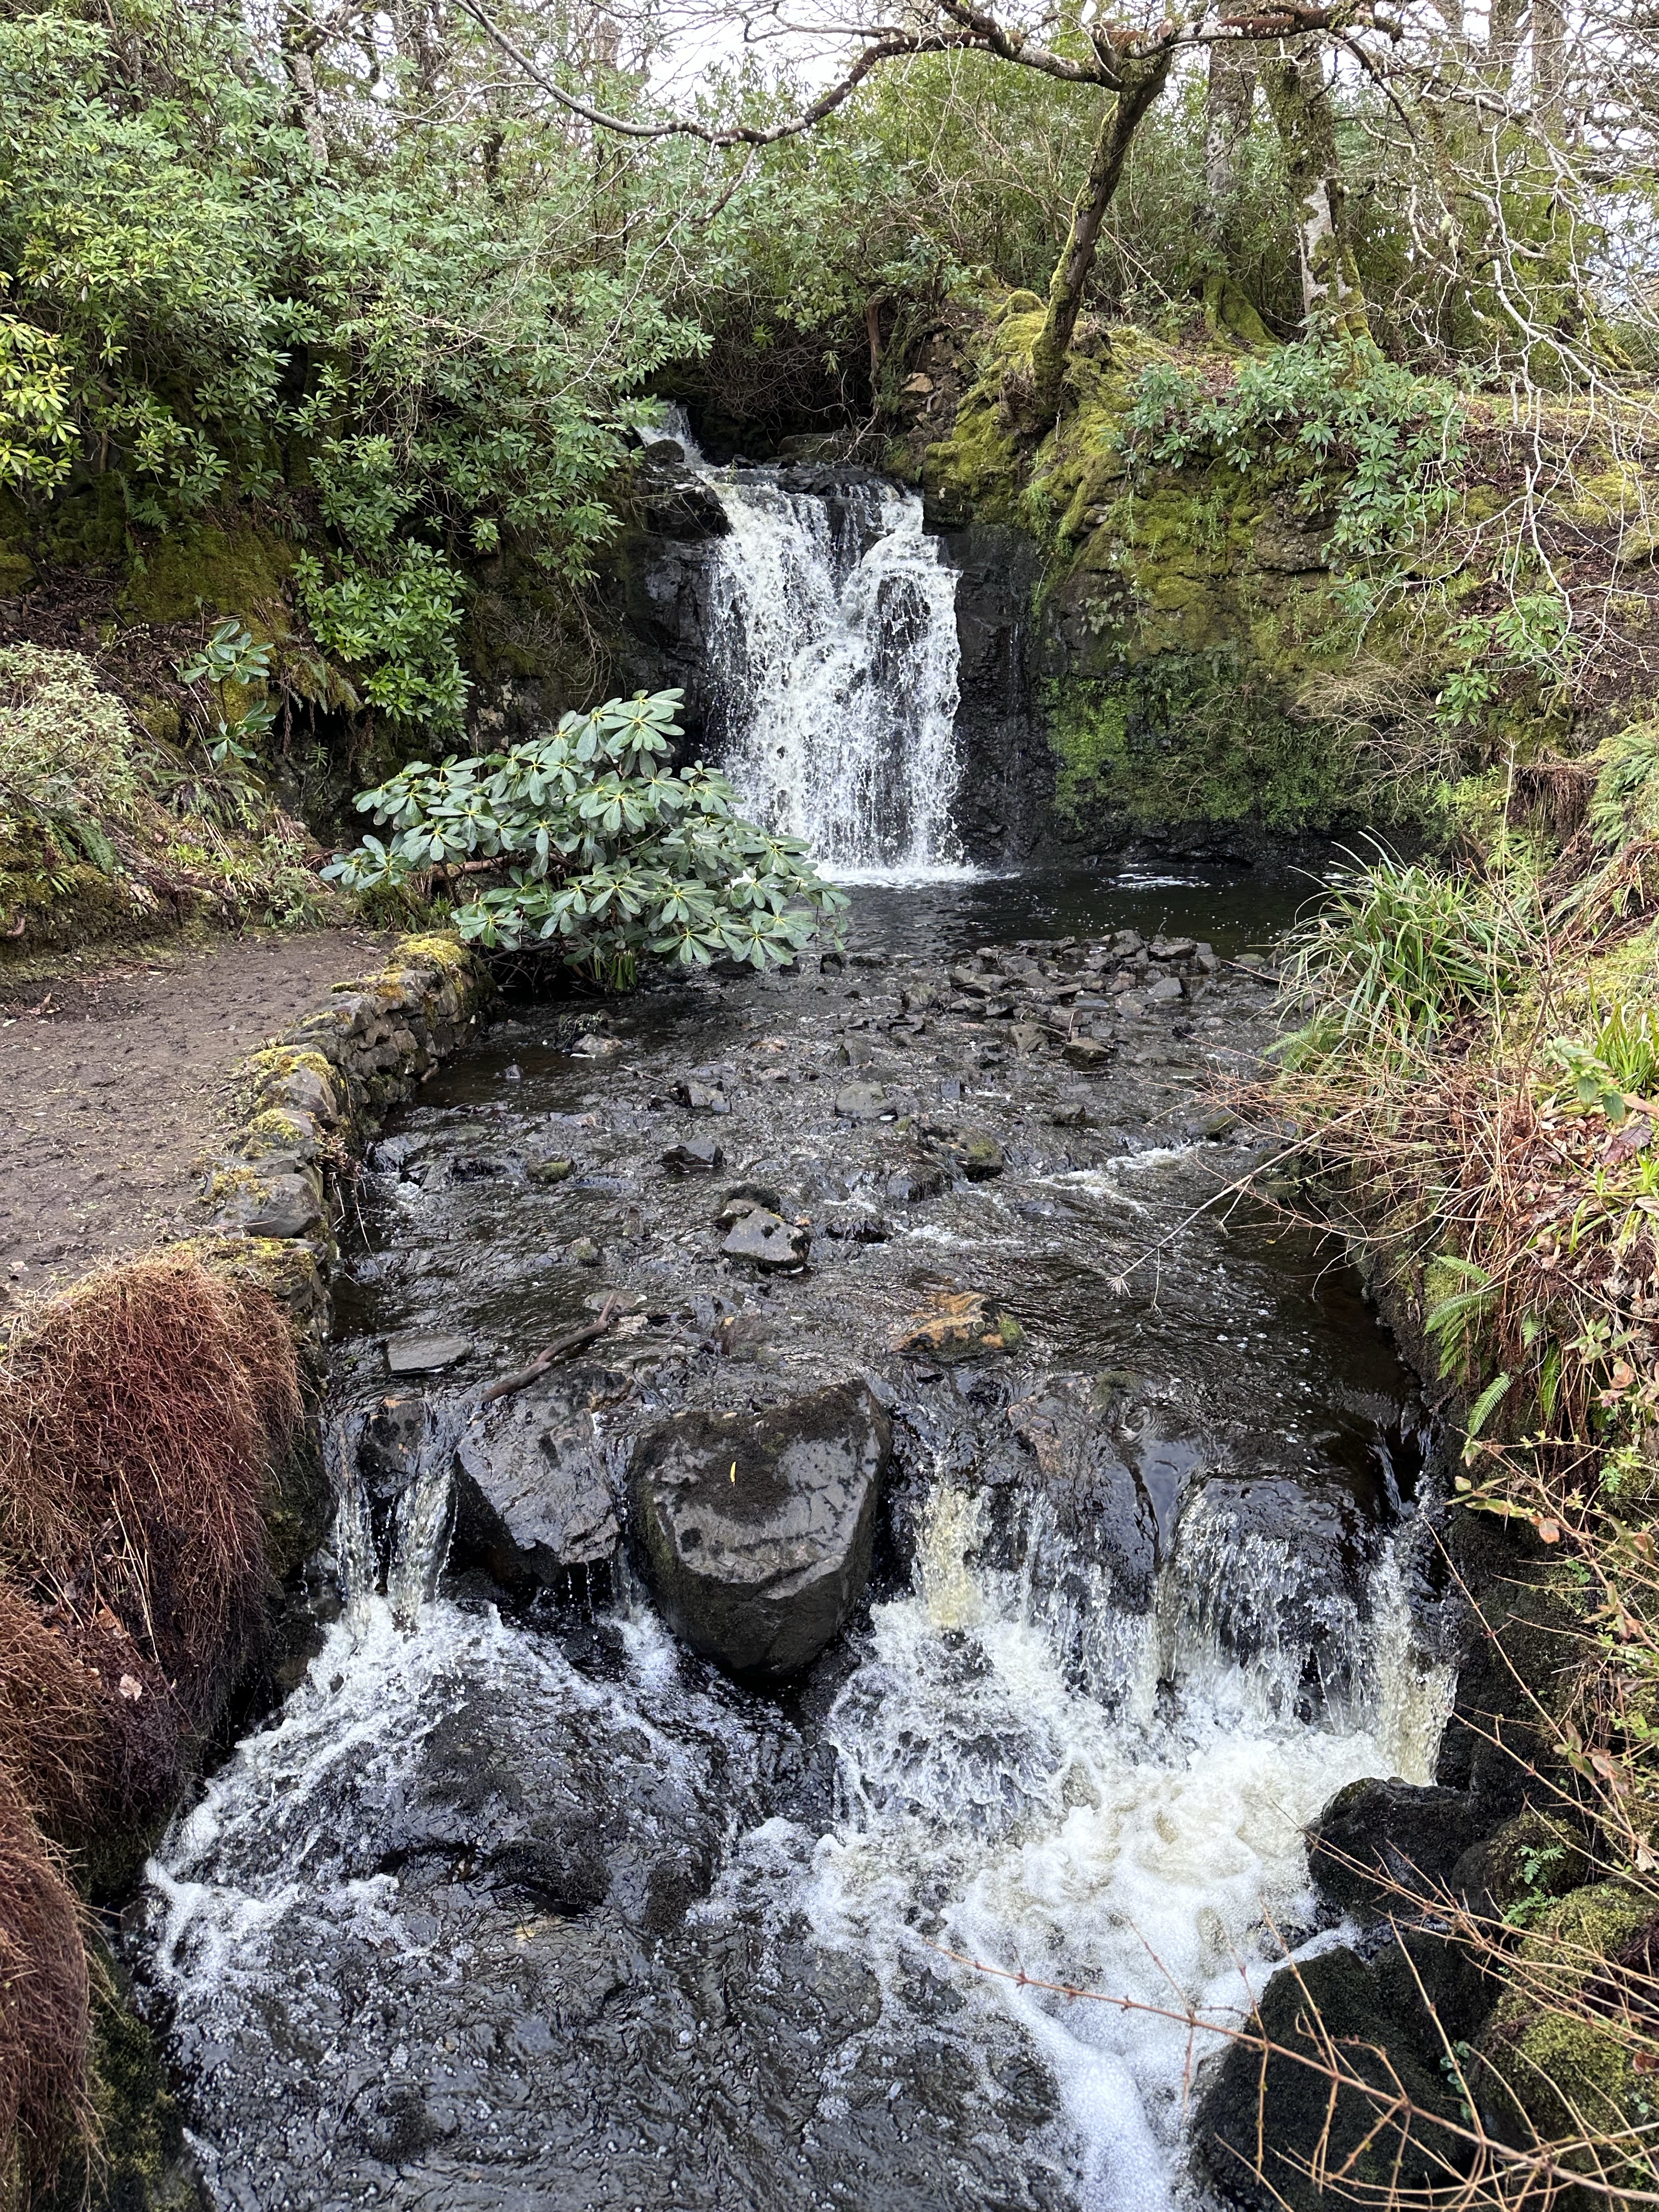
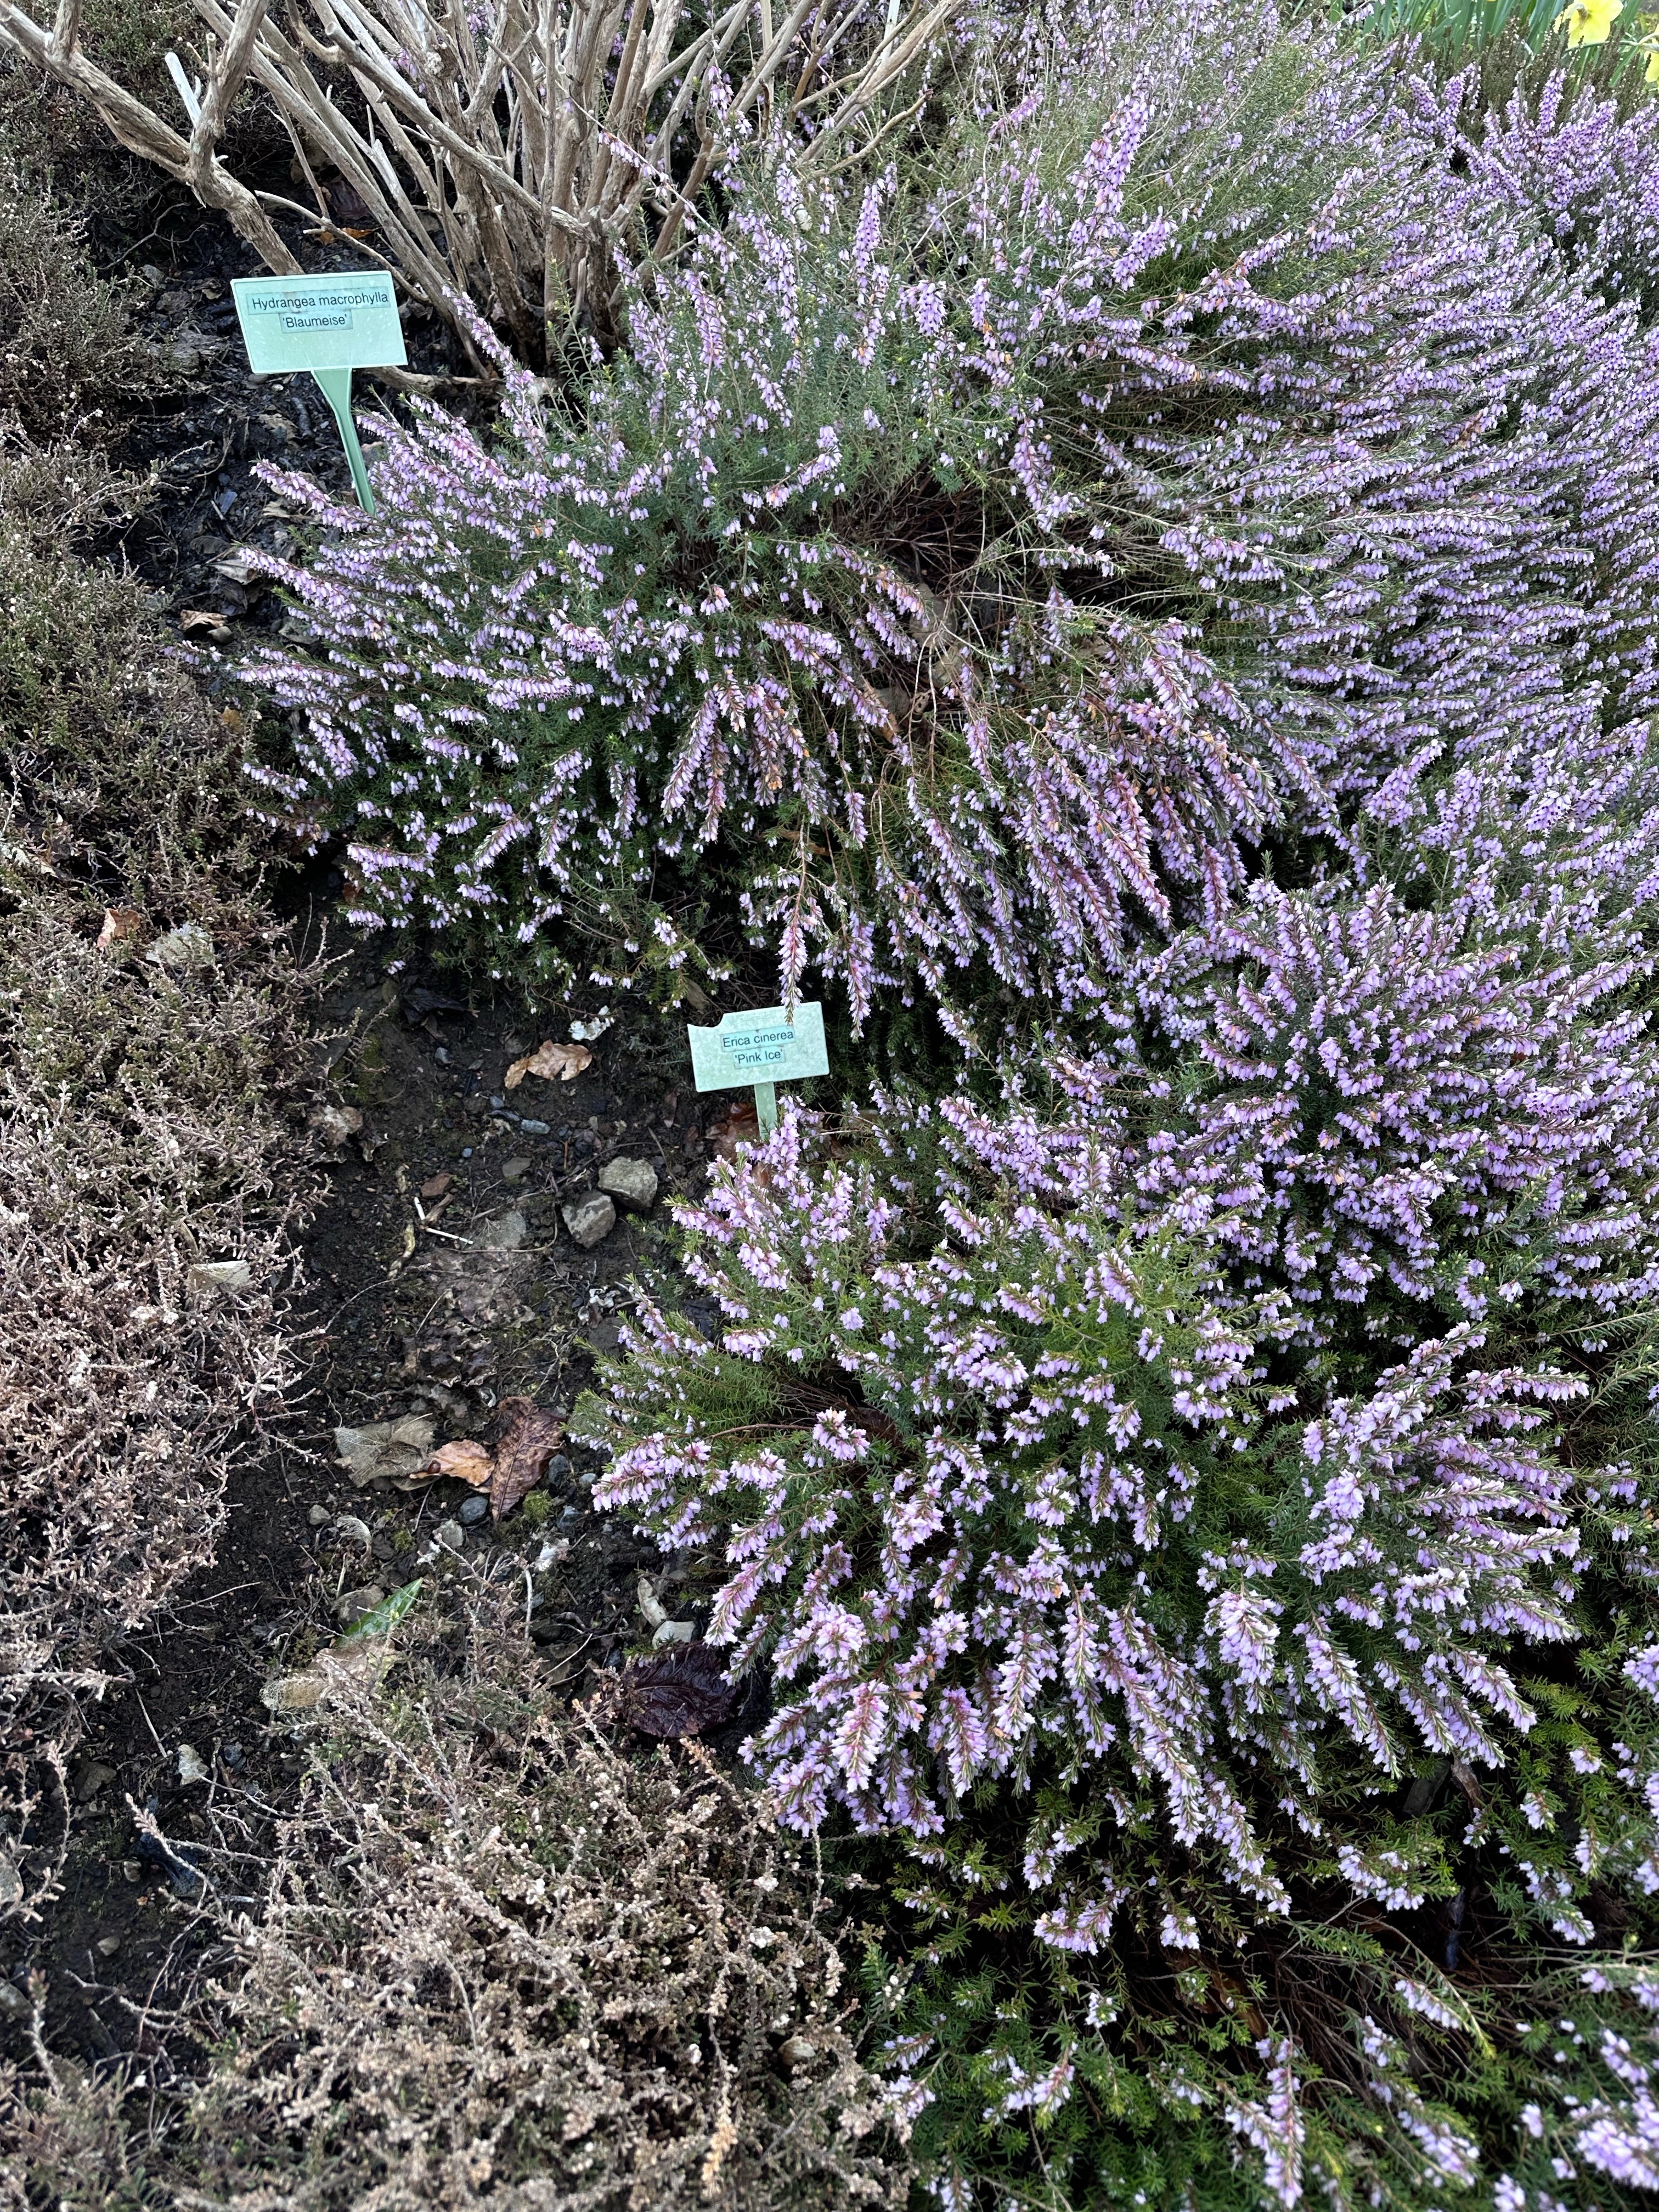
Dunvegan Castle and Gardensis on the Isle of Skye. It is the ancestral seat of the MacLeods for 800 years with the 30th Chief of Clan MacLeod, Hugh Magnus MacLeod, living in the family quarters now. It is worth the time to take the tour and then stroll through the magnificent gardens. They were just coming into bloom when we were there.
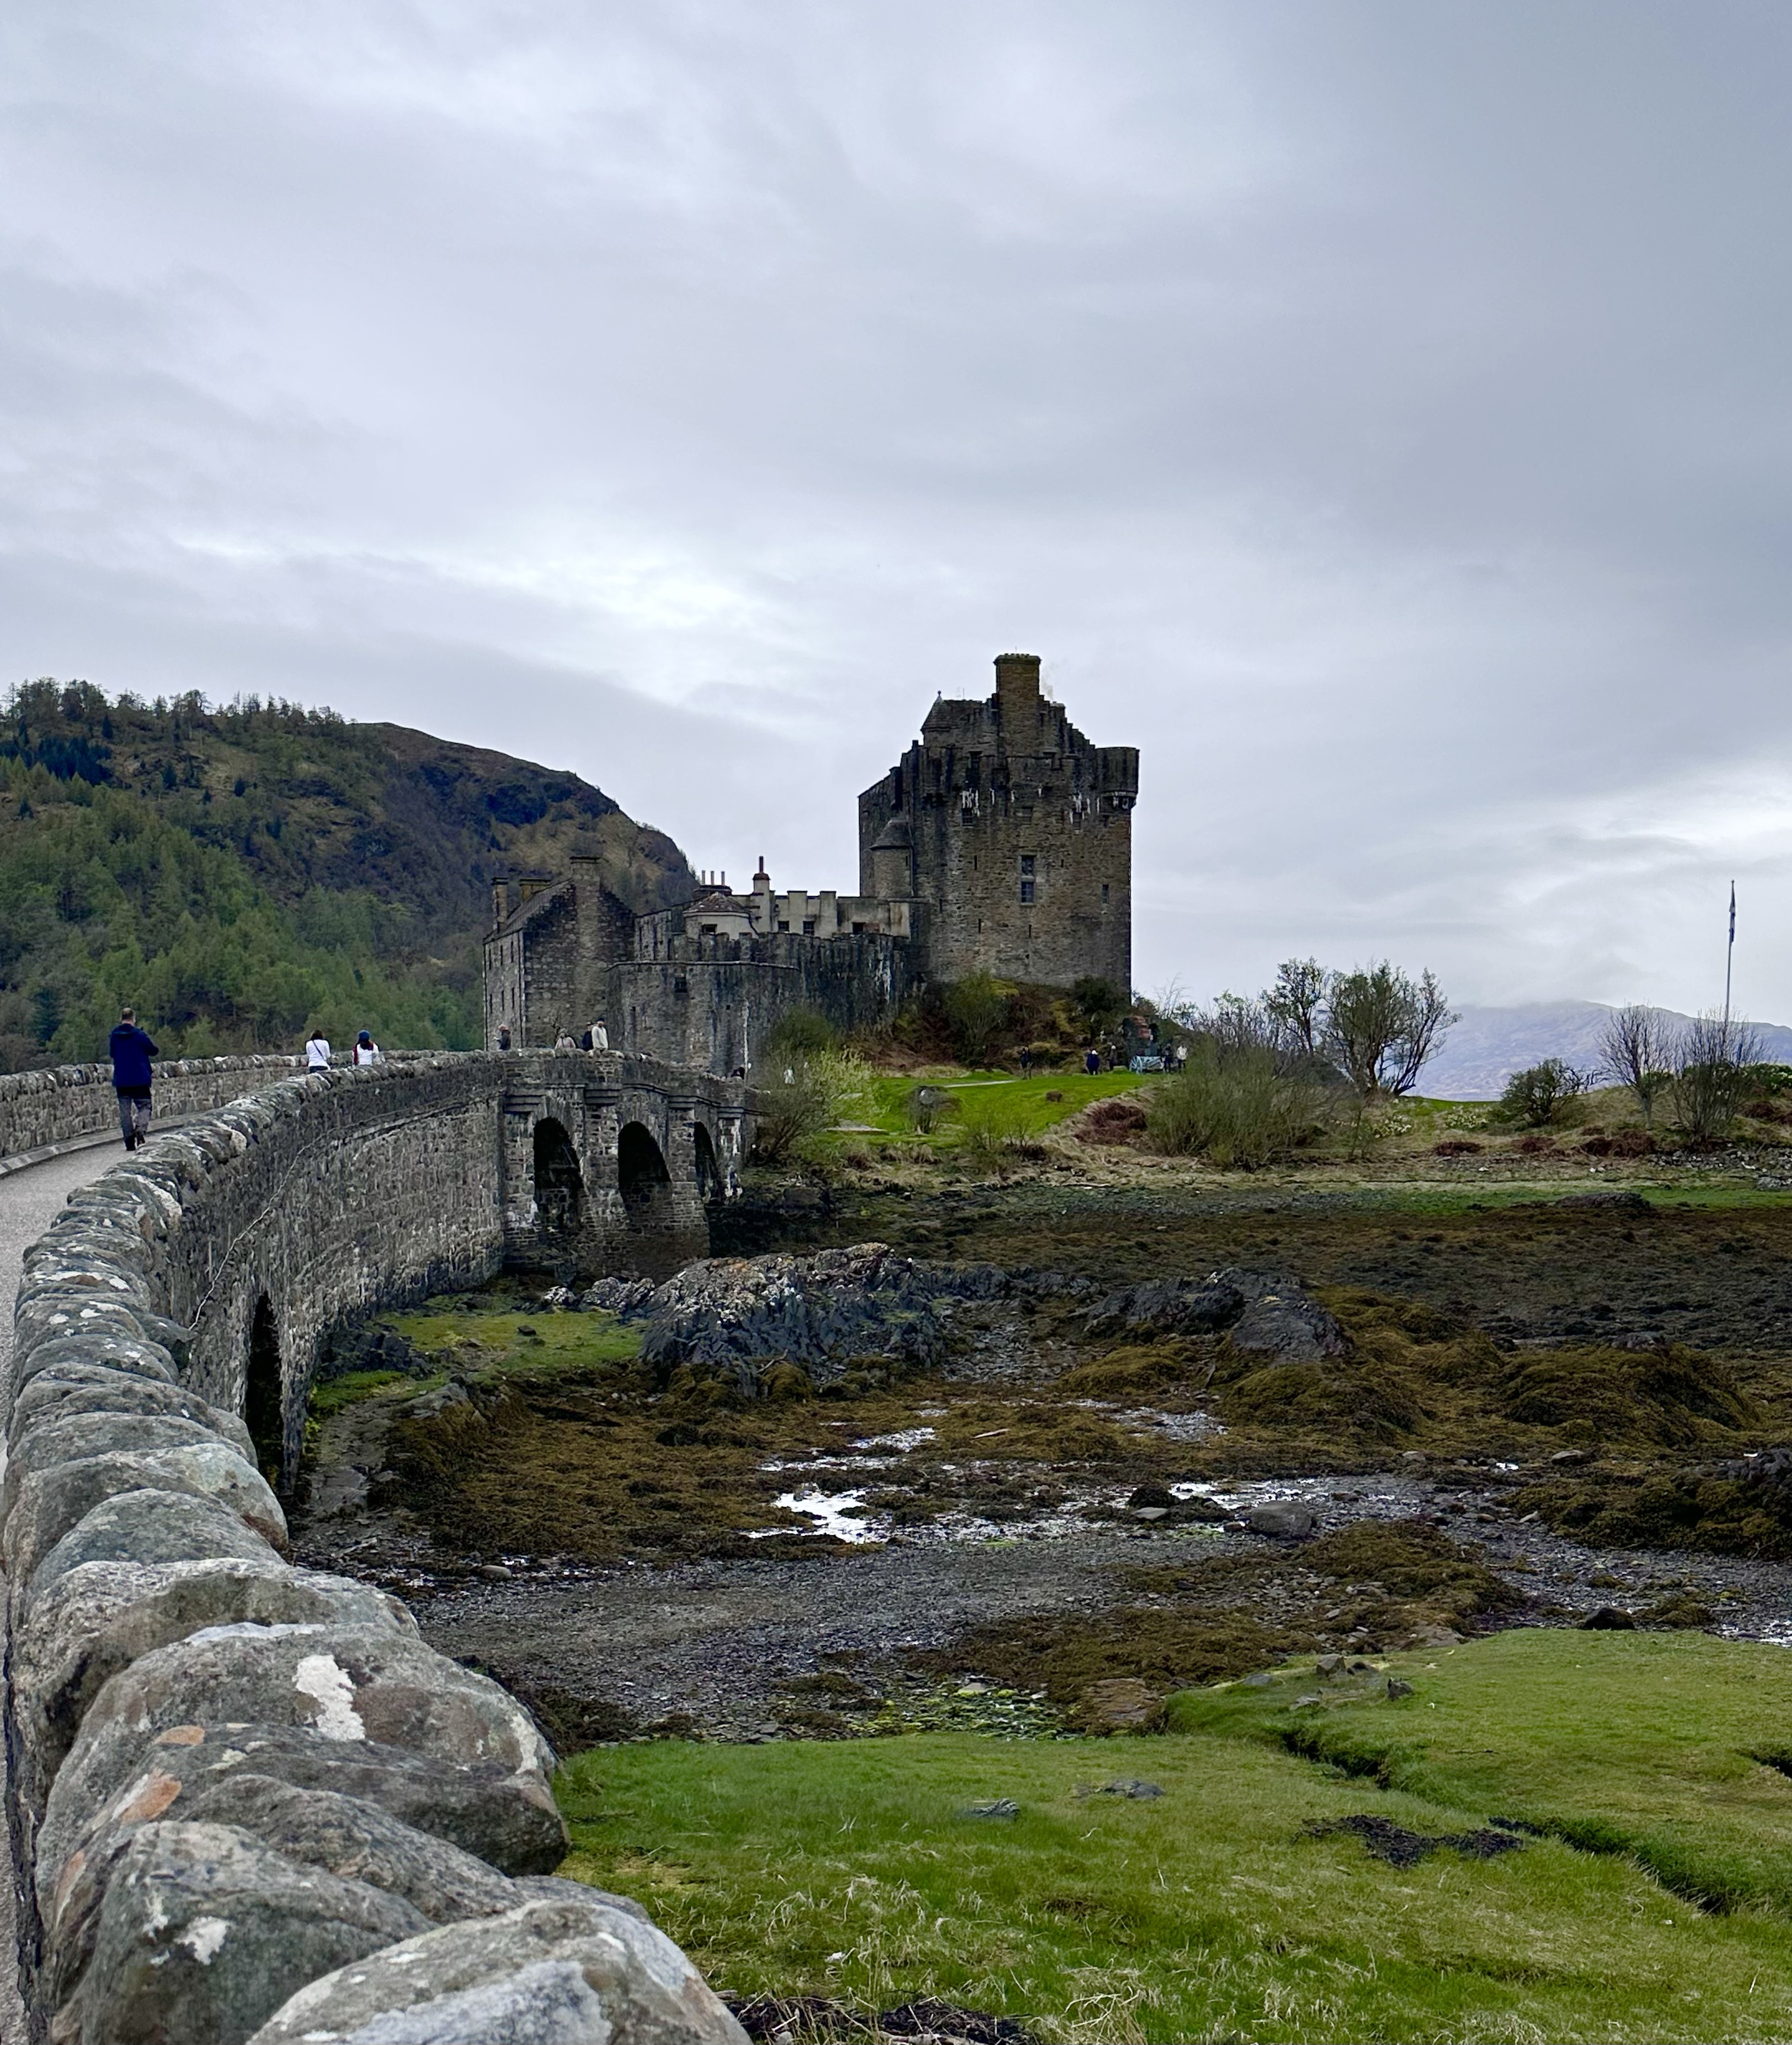
Eilean Donan Castle sits on rocky island where 3 lochs come together near the road coming back to the mainland from the Isle of Skye. It’s connected to the mainland by a causeway. The first fortified structure was built in the early 13th century. The castle went through many changes during different battles and eventually went to ruin after being neglected for 200 years. In 1911 Lt Colonel John Macrae-Gilstrap bought the island, restored the castle, and opened it to the public in 1932.
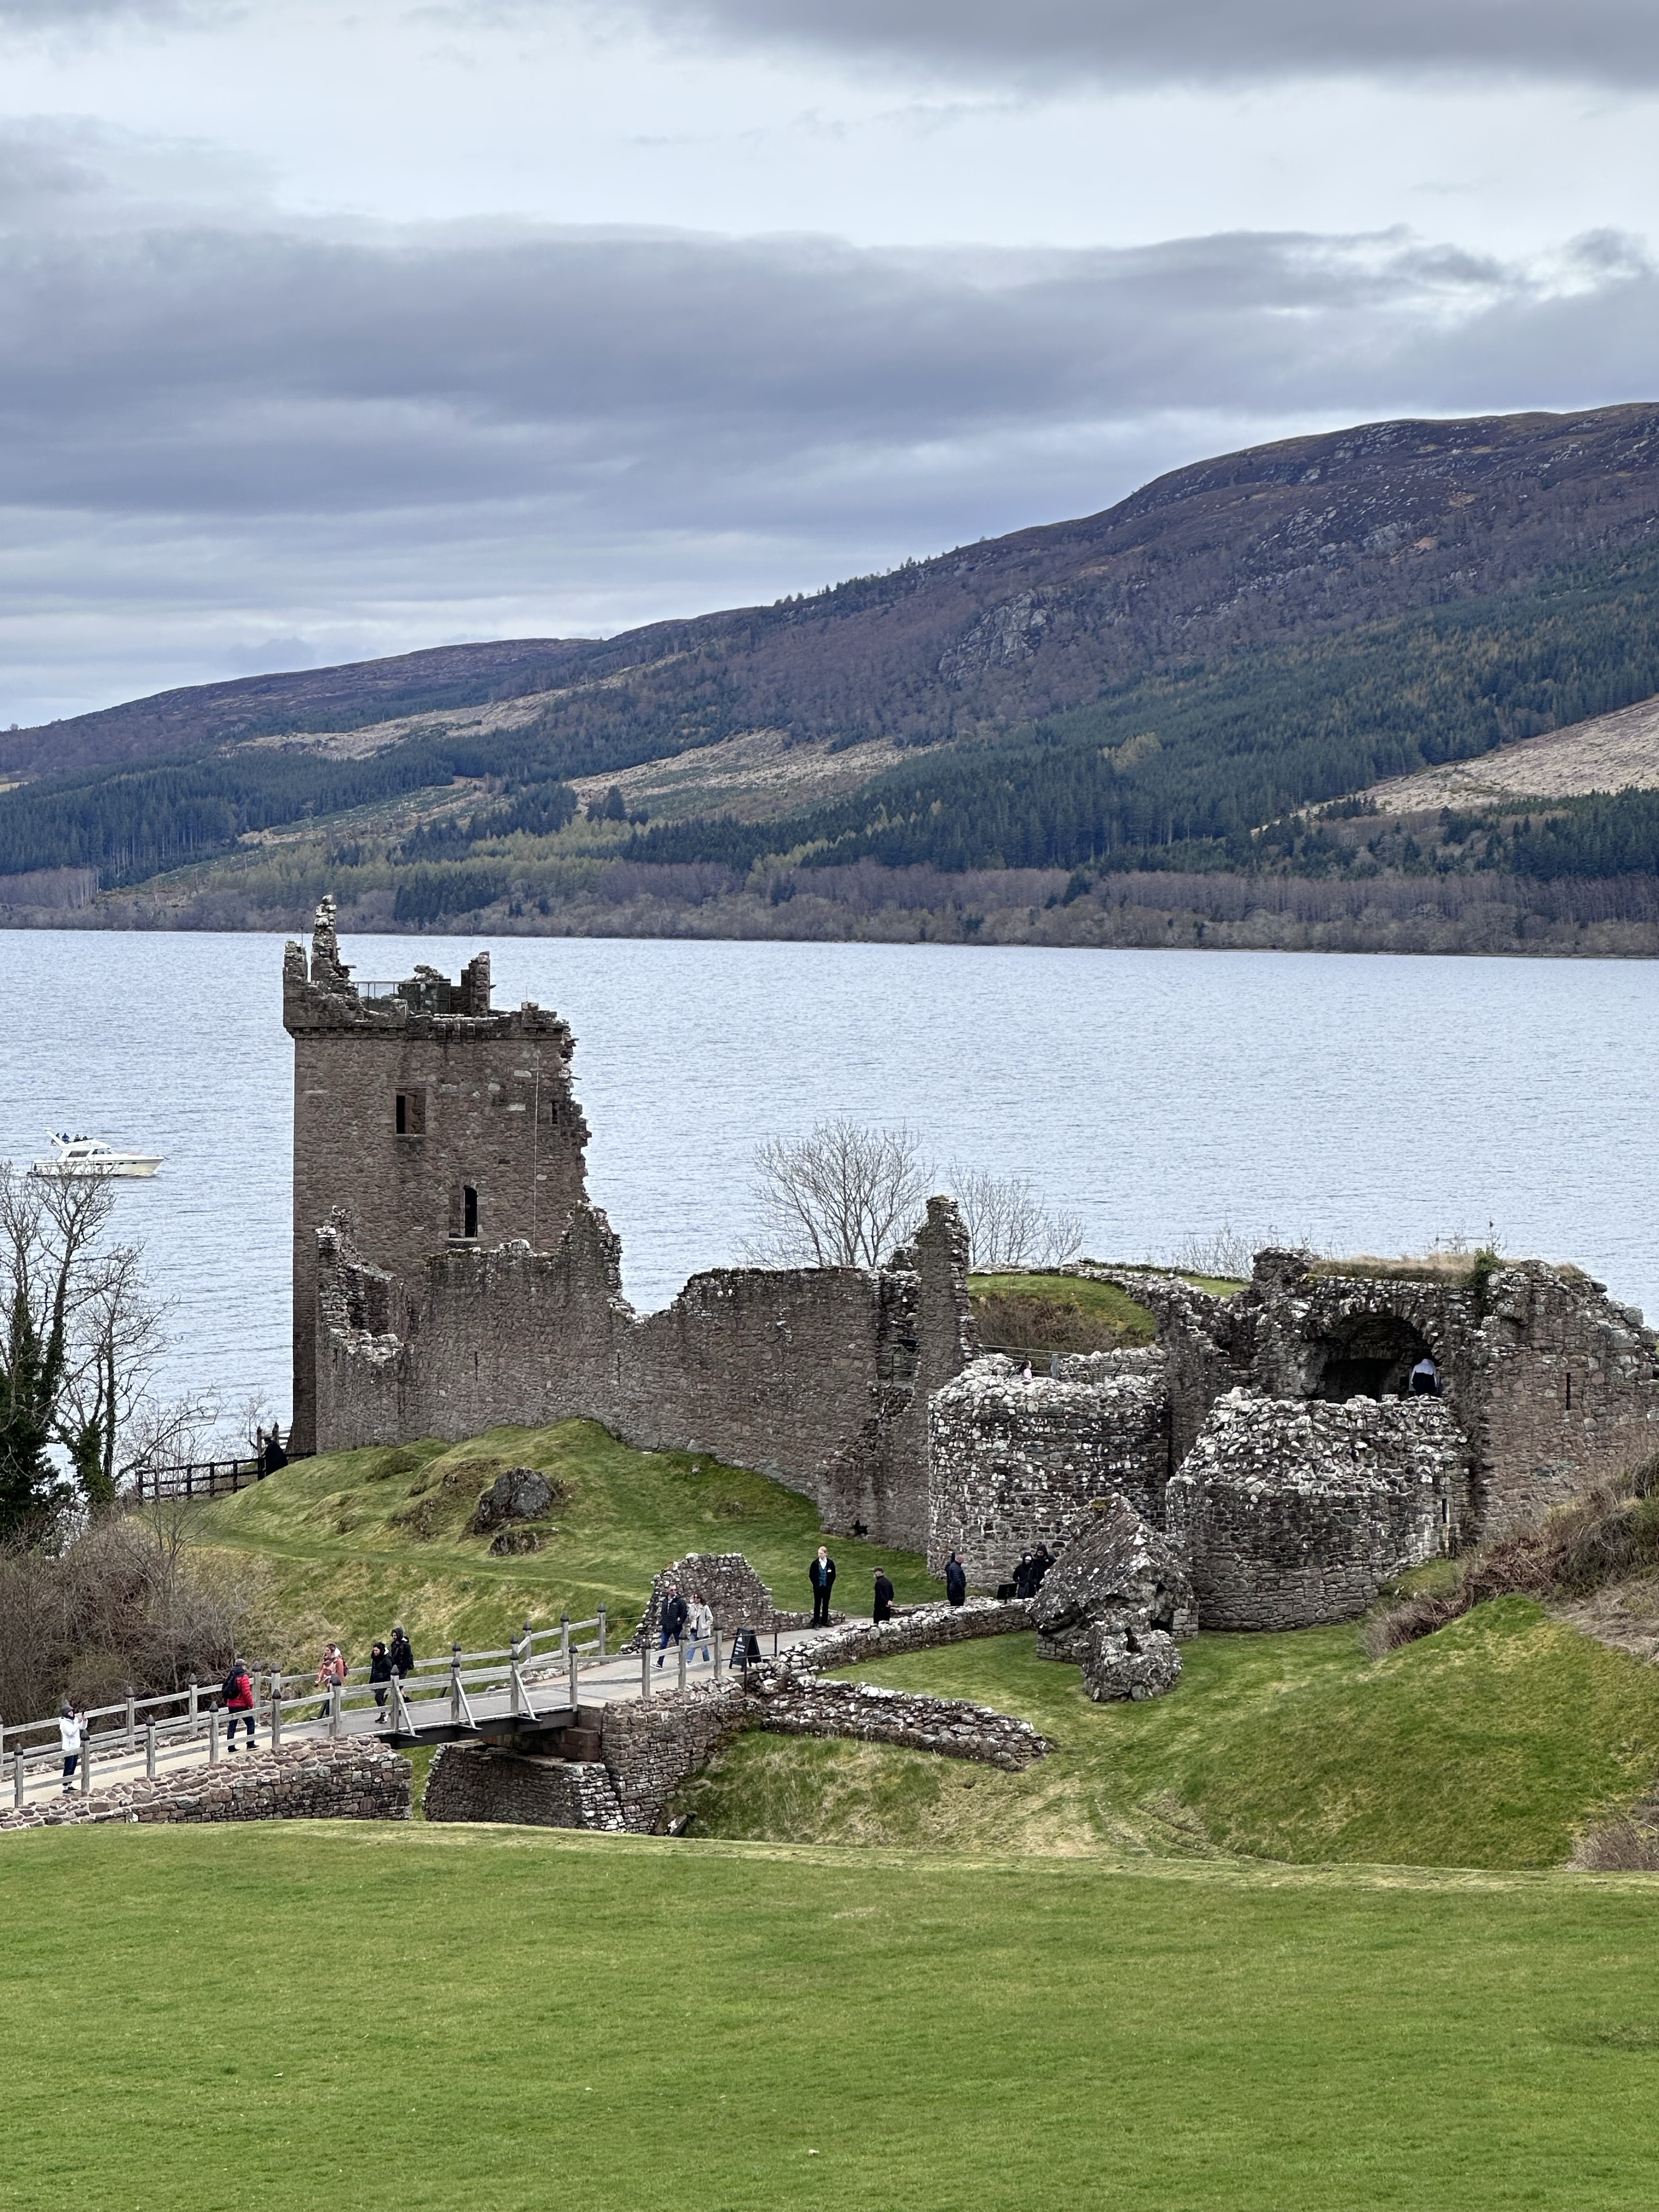
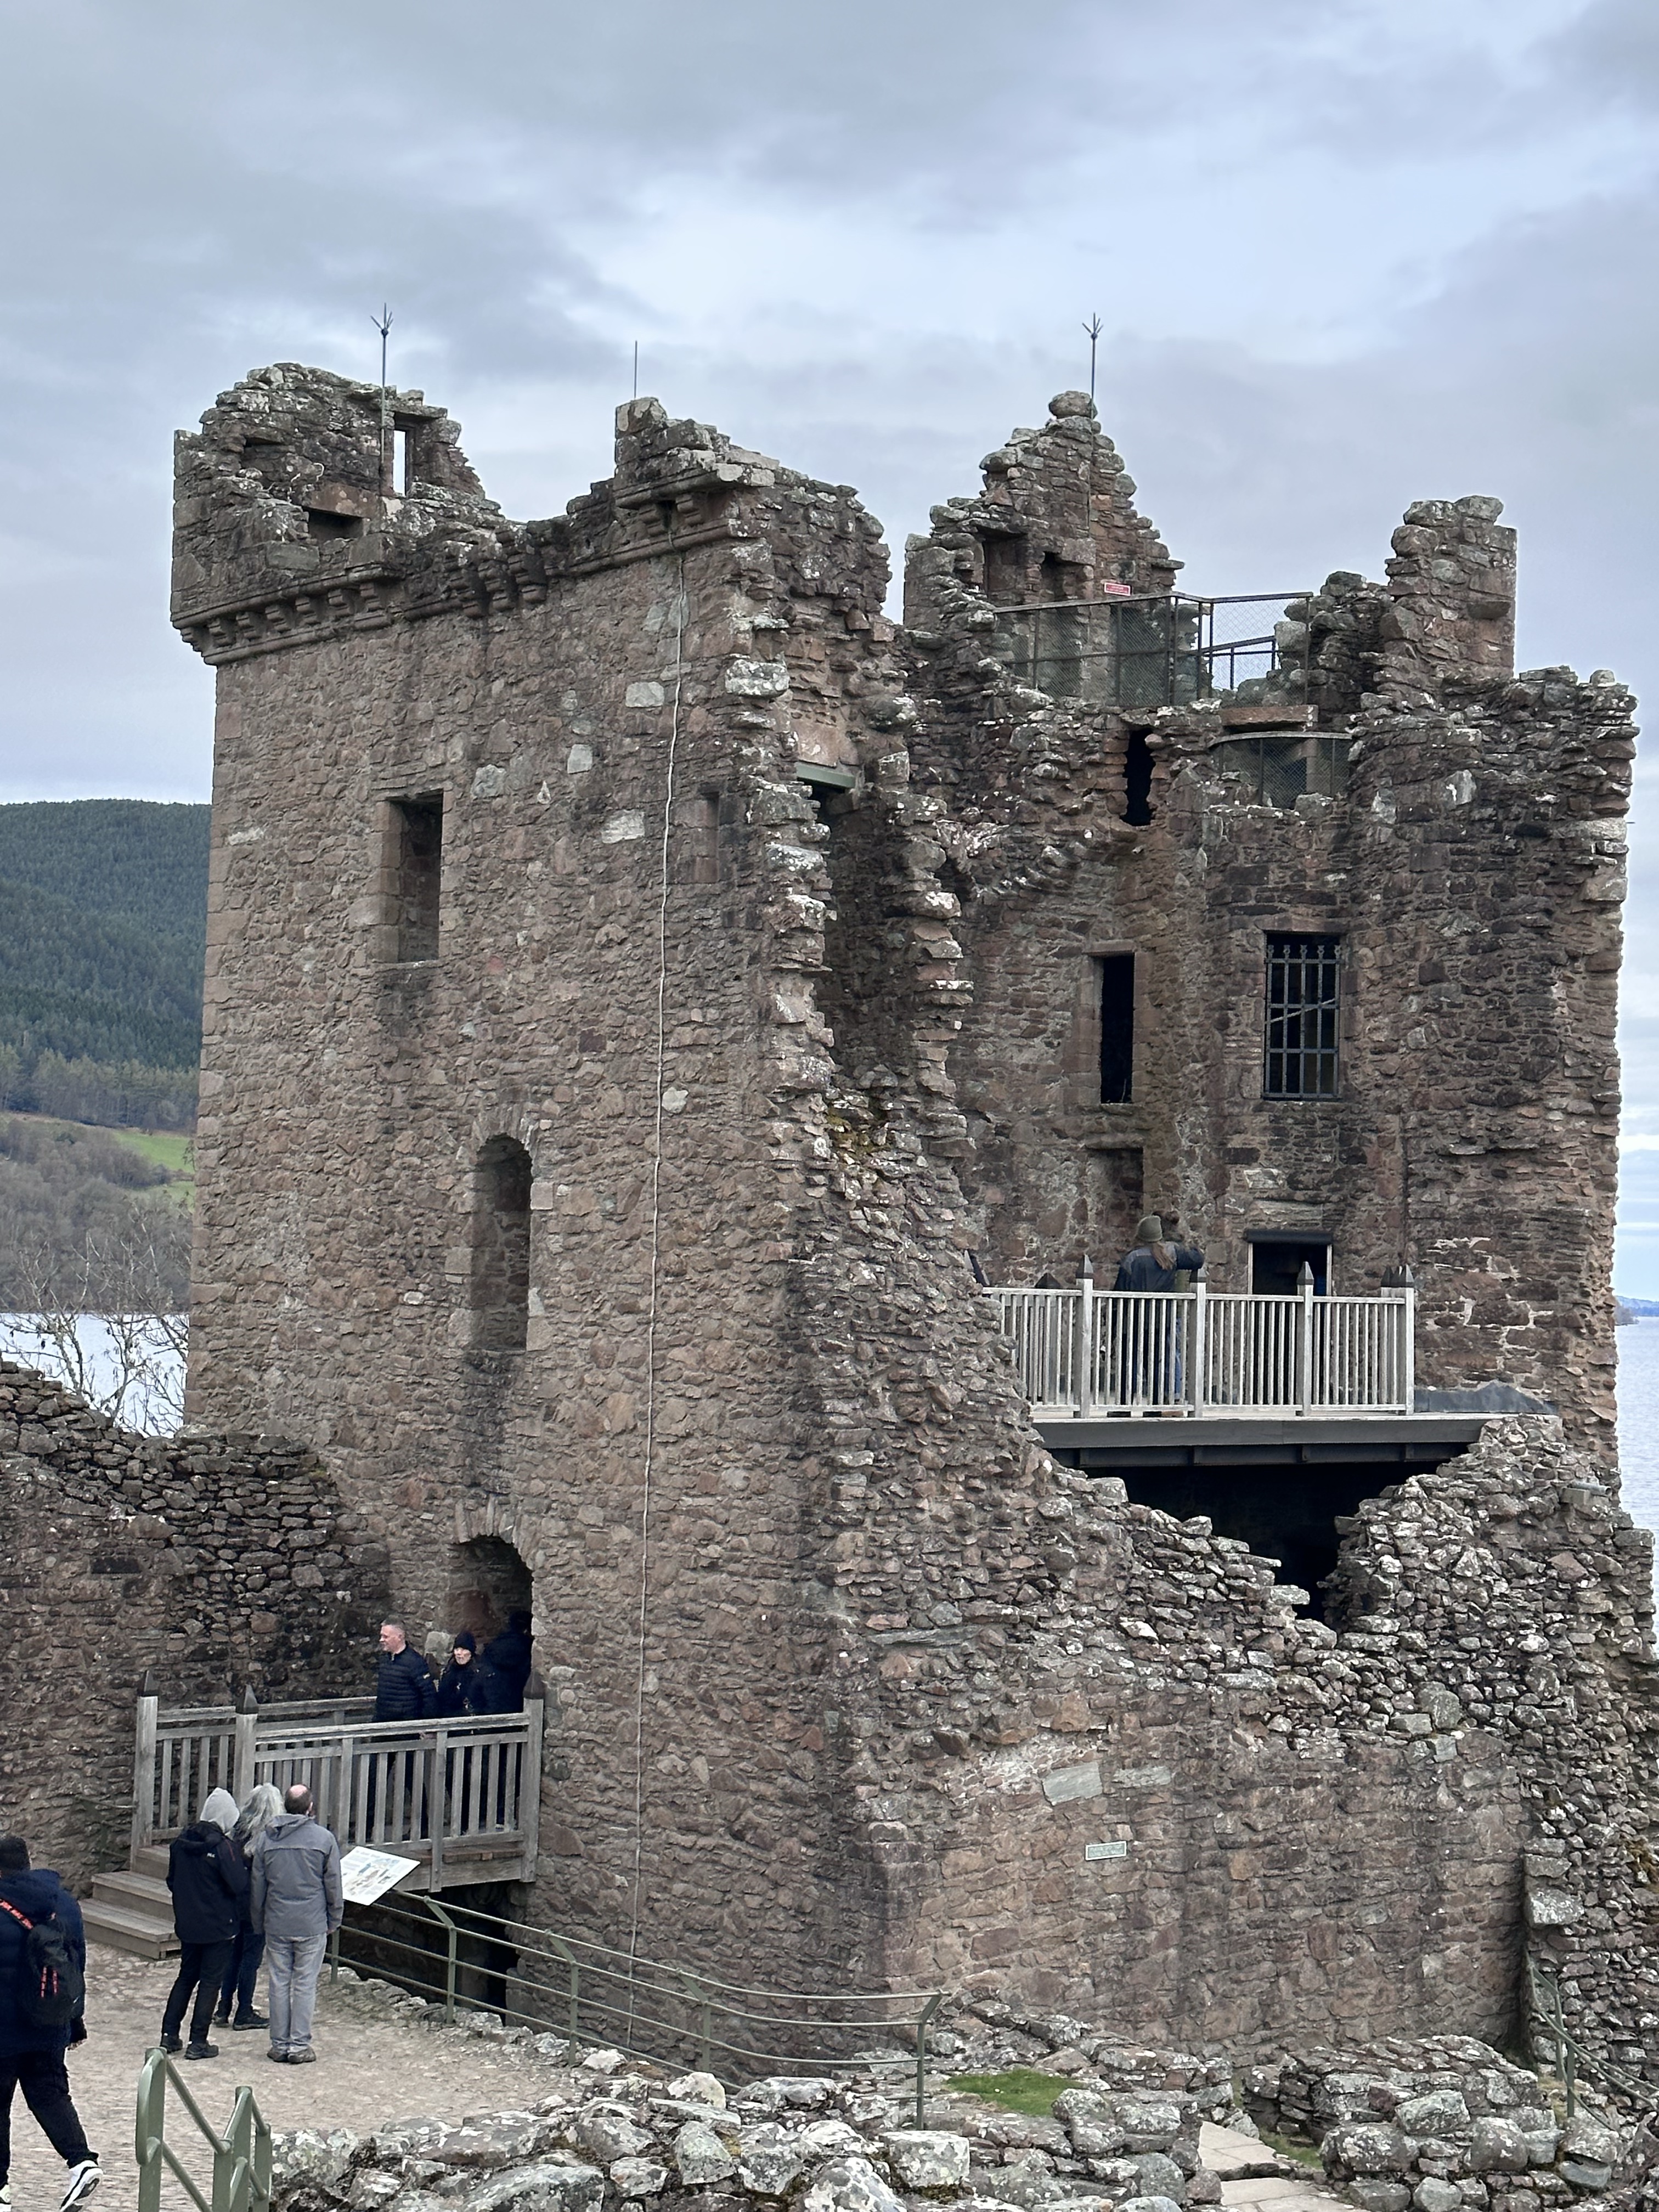
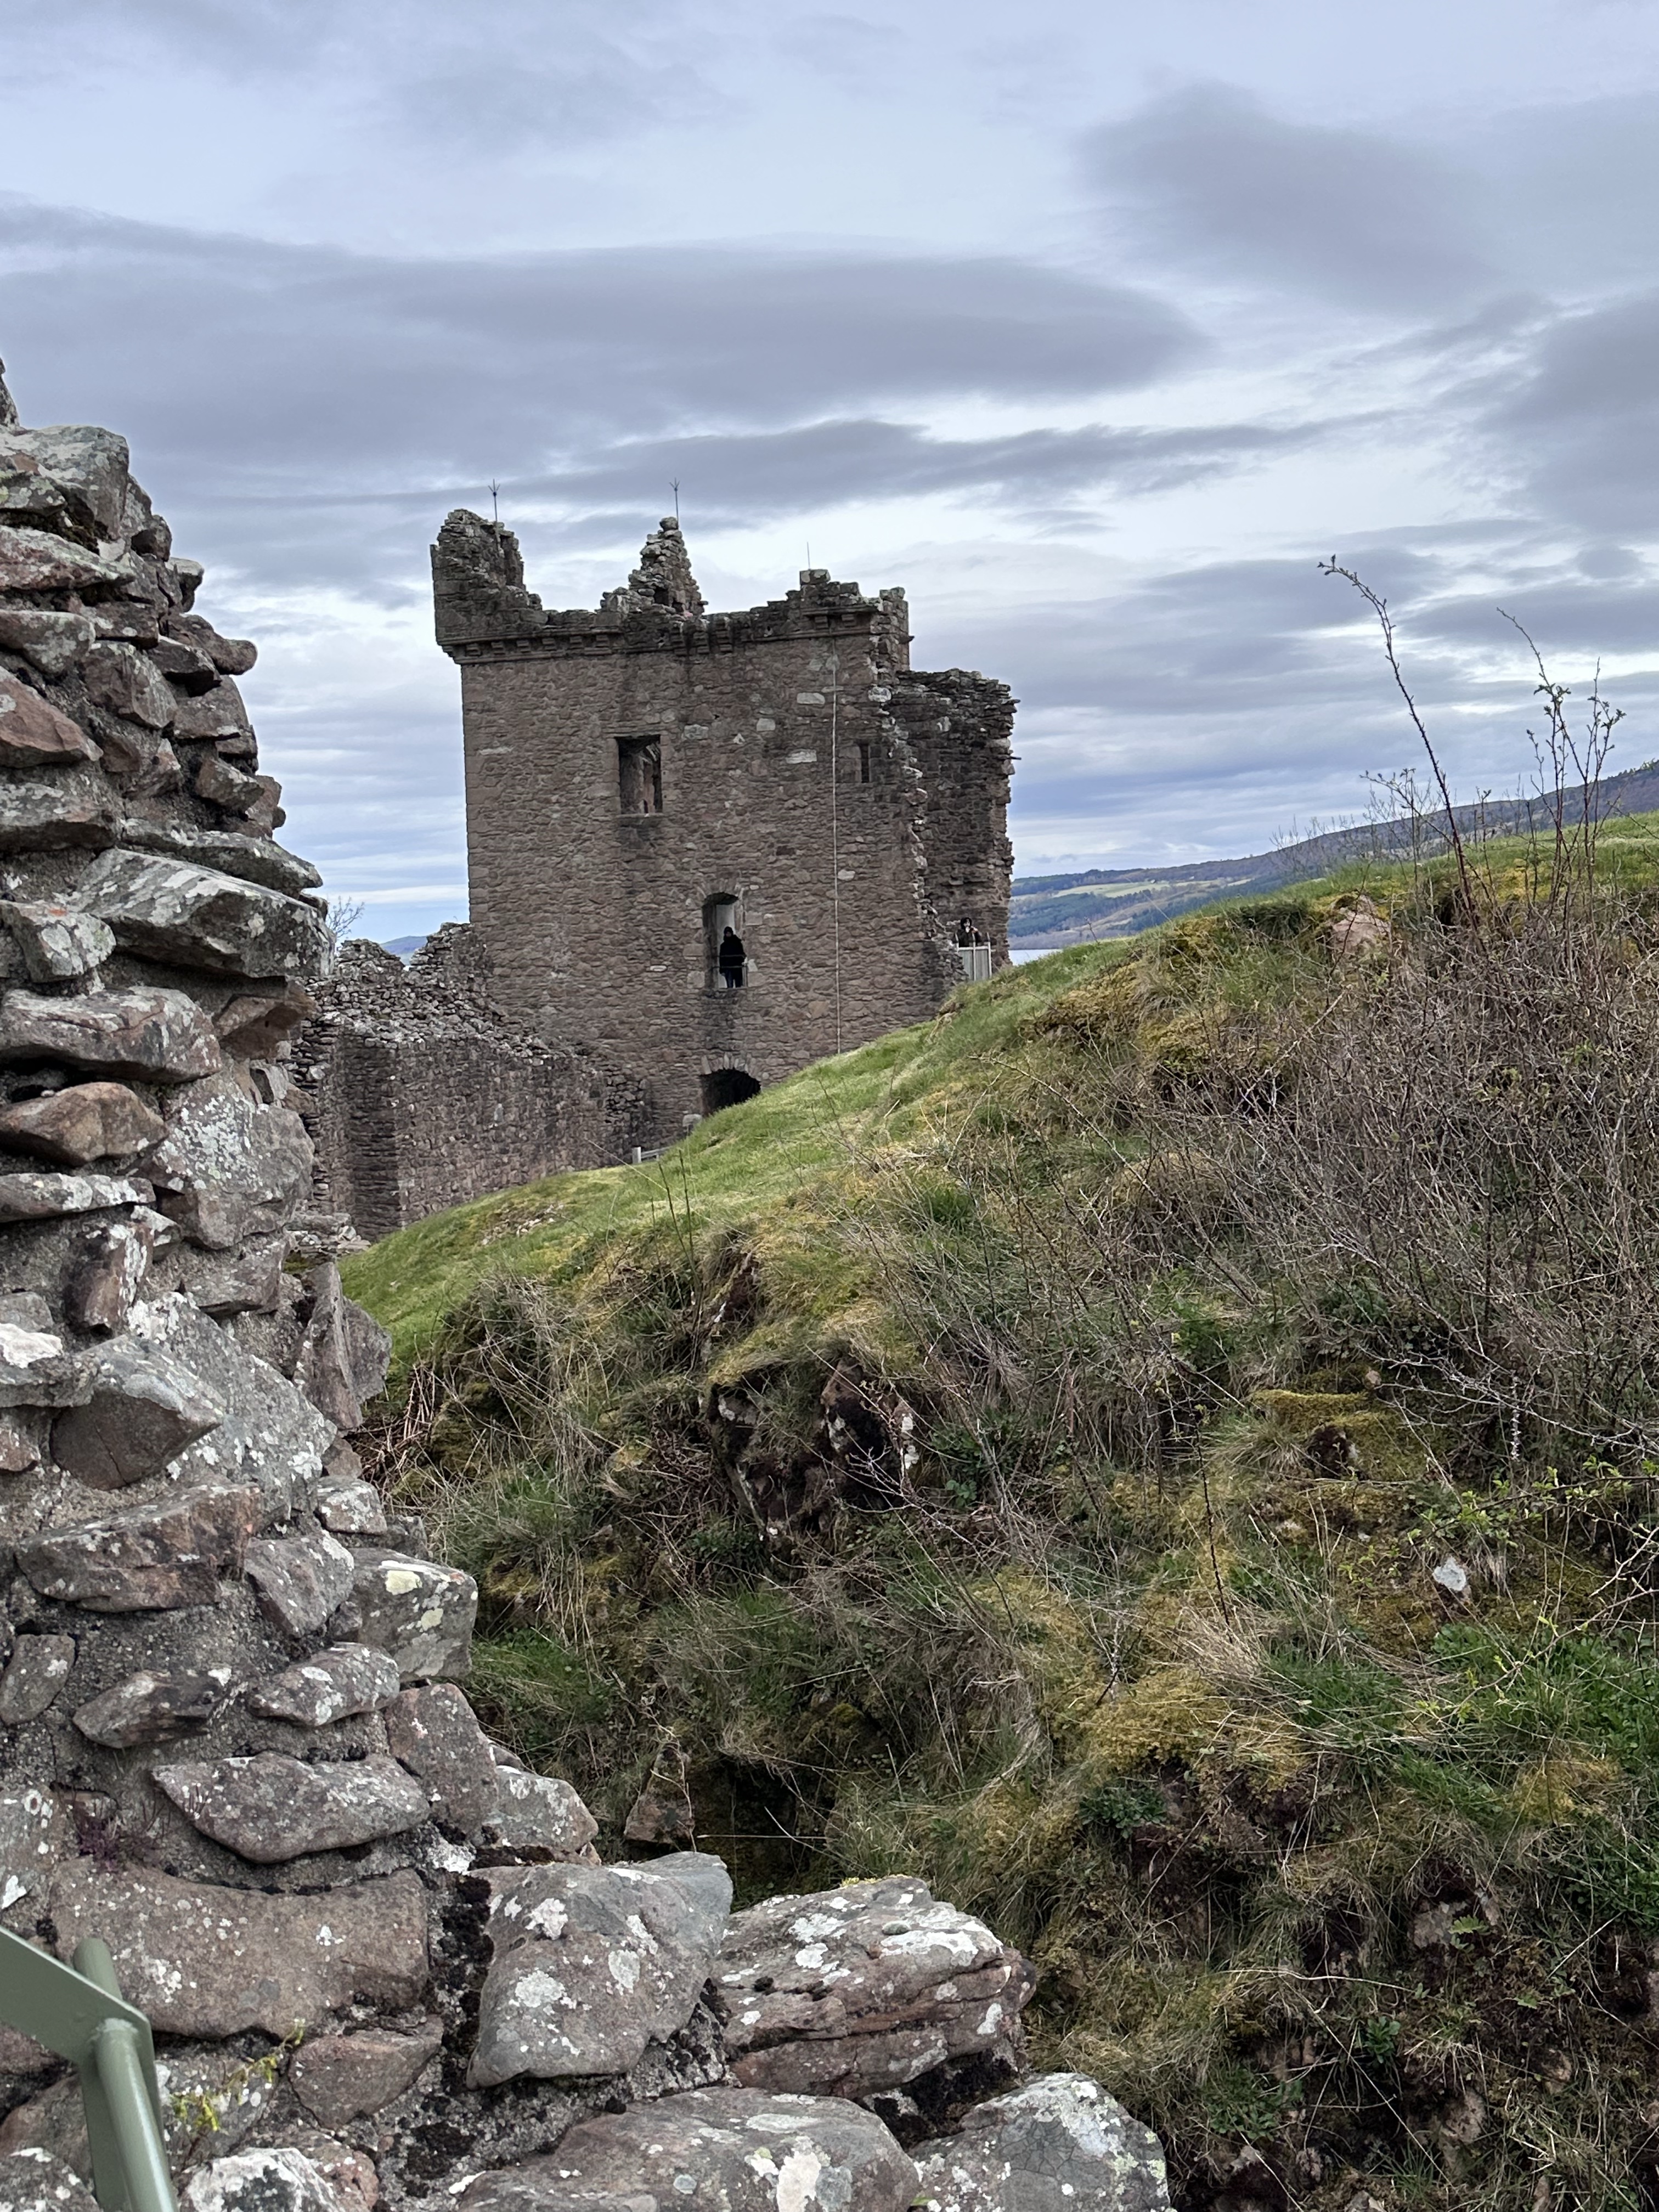
Urquhart Castle is along the shores of Loch Ness. It was one of Scotland’s largest castles. The original castle was built in the 13th century, but the ruins there now are mostly from when the castle was rebuilt in the 16th and 17th century. The castle passed back and forth between the Scots and English during the Wars of Independence. It was blown up in 1692 by the troops who had occupied it after the Jacobite uprising of 1689 so that it could not become a Jacobite base in the future. We looked for Nessie but we didn’t see her. 😉
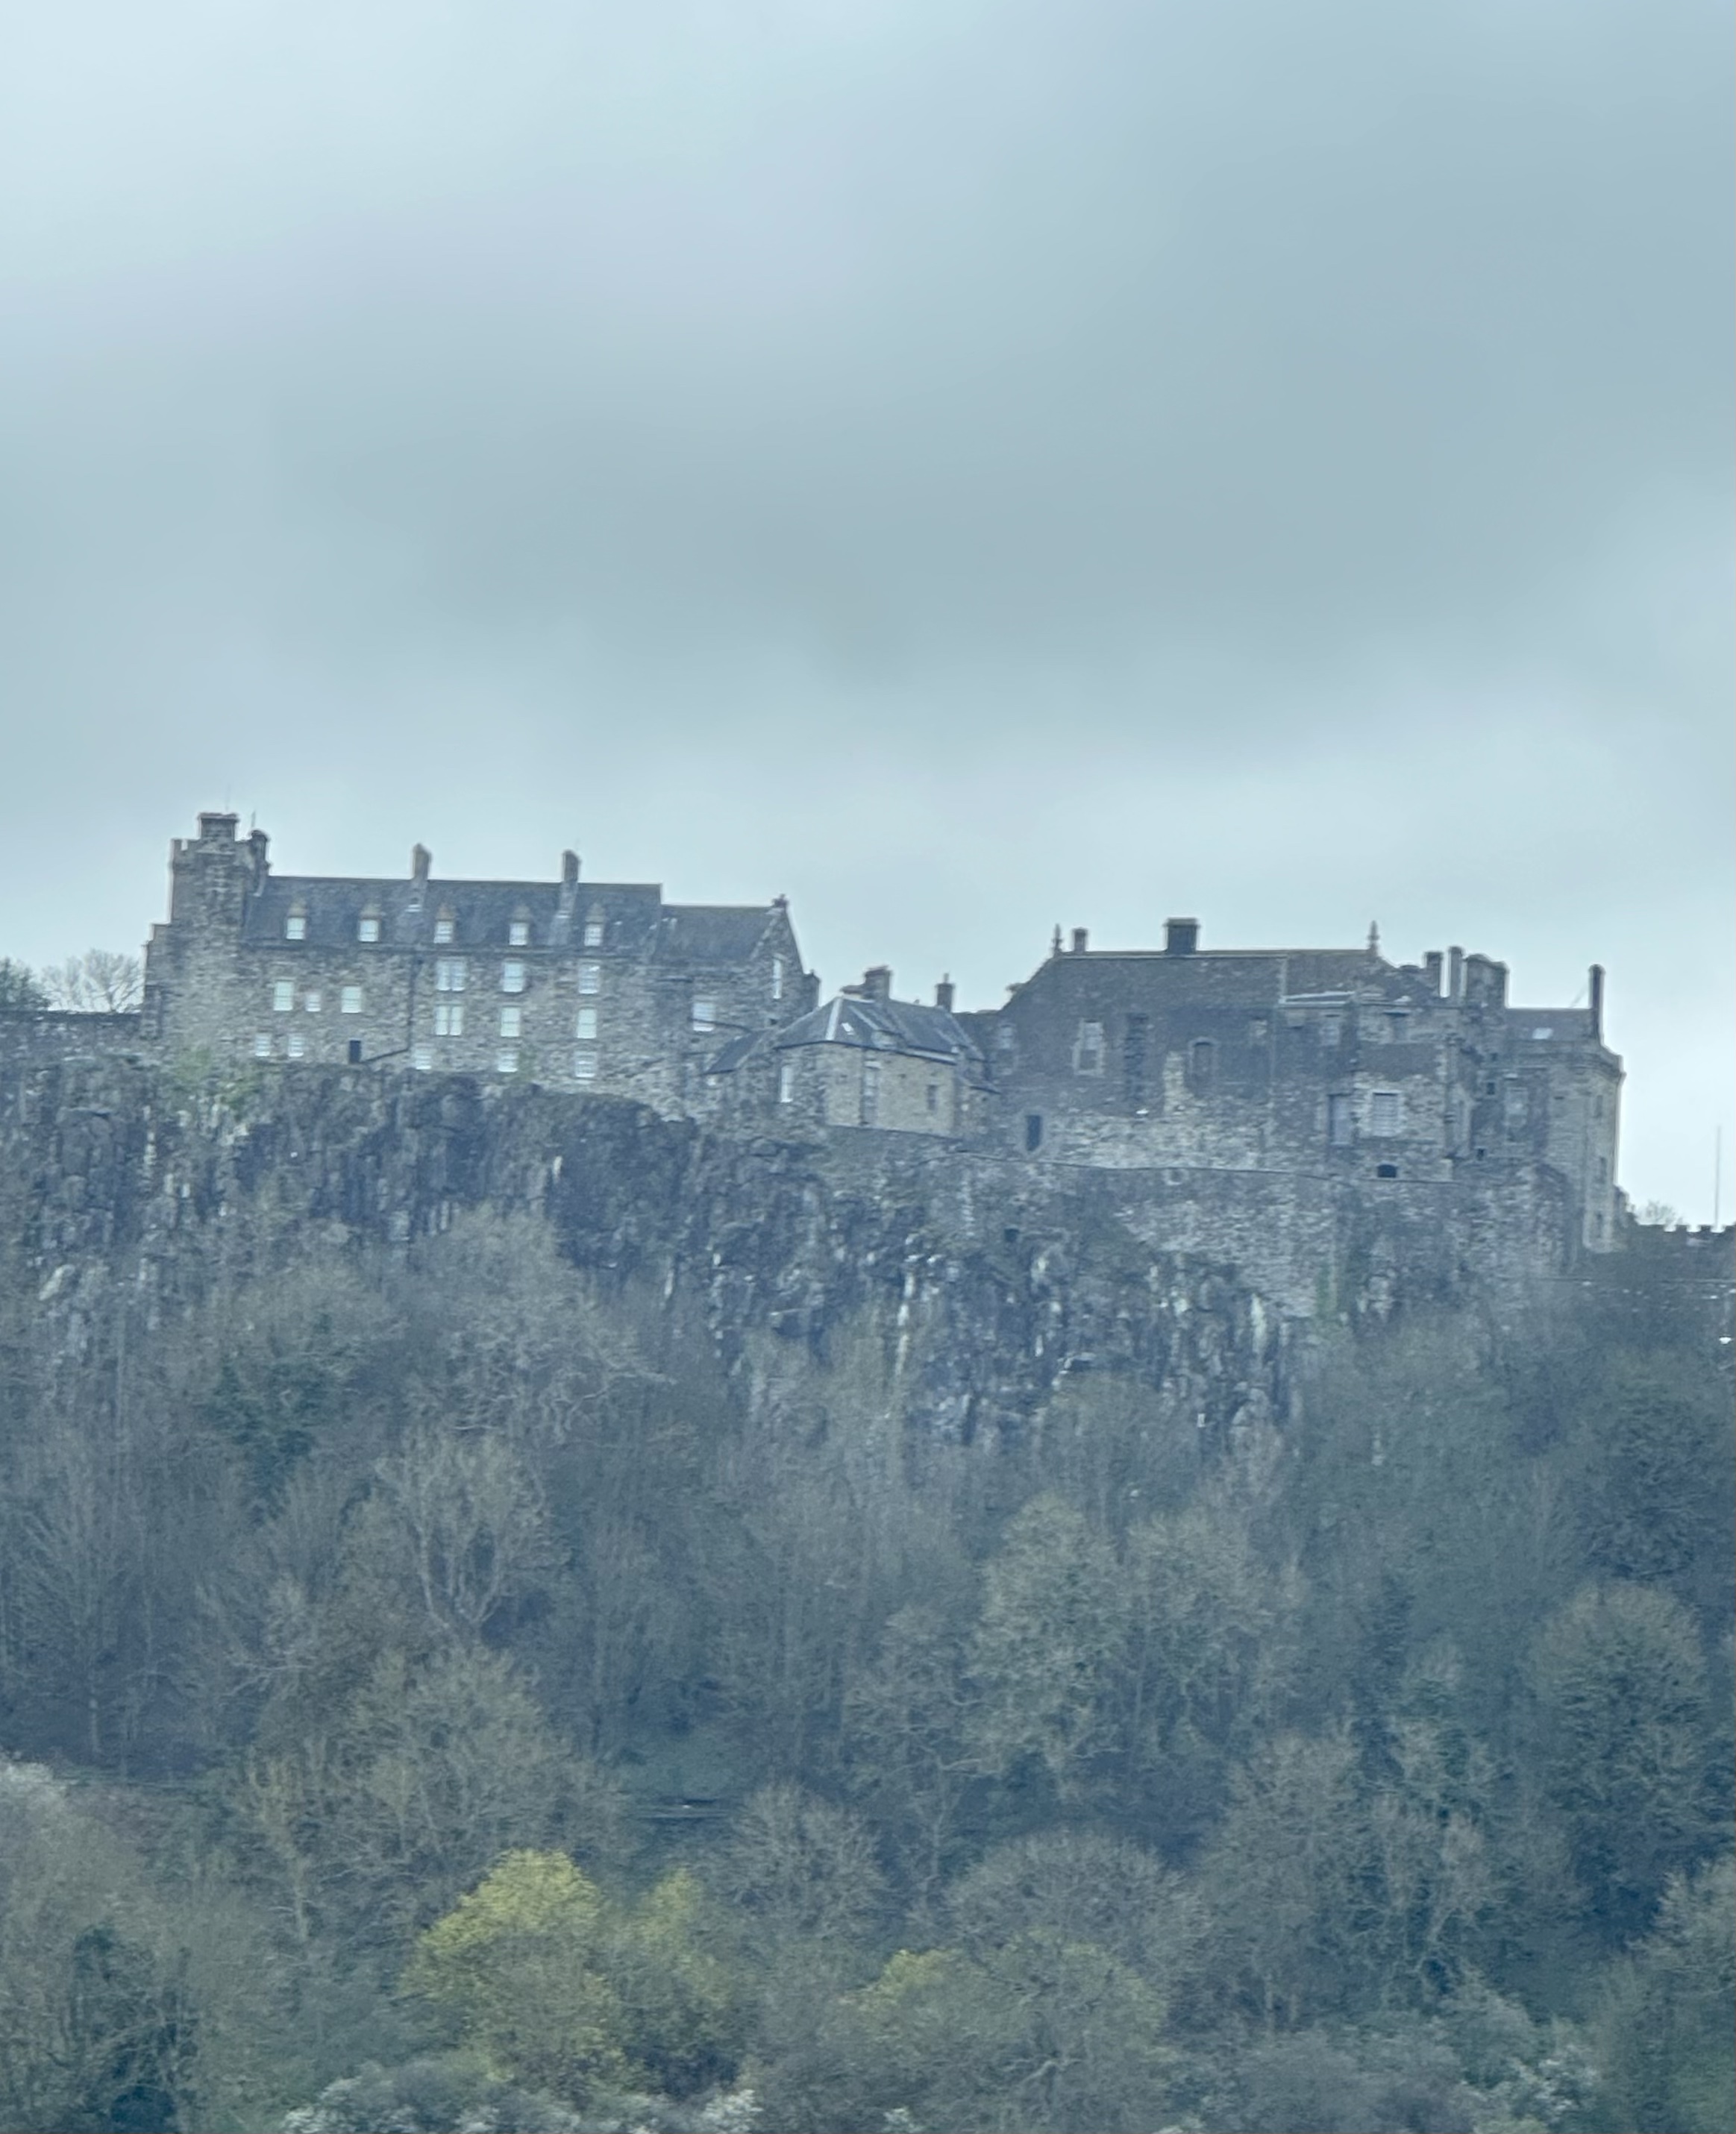
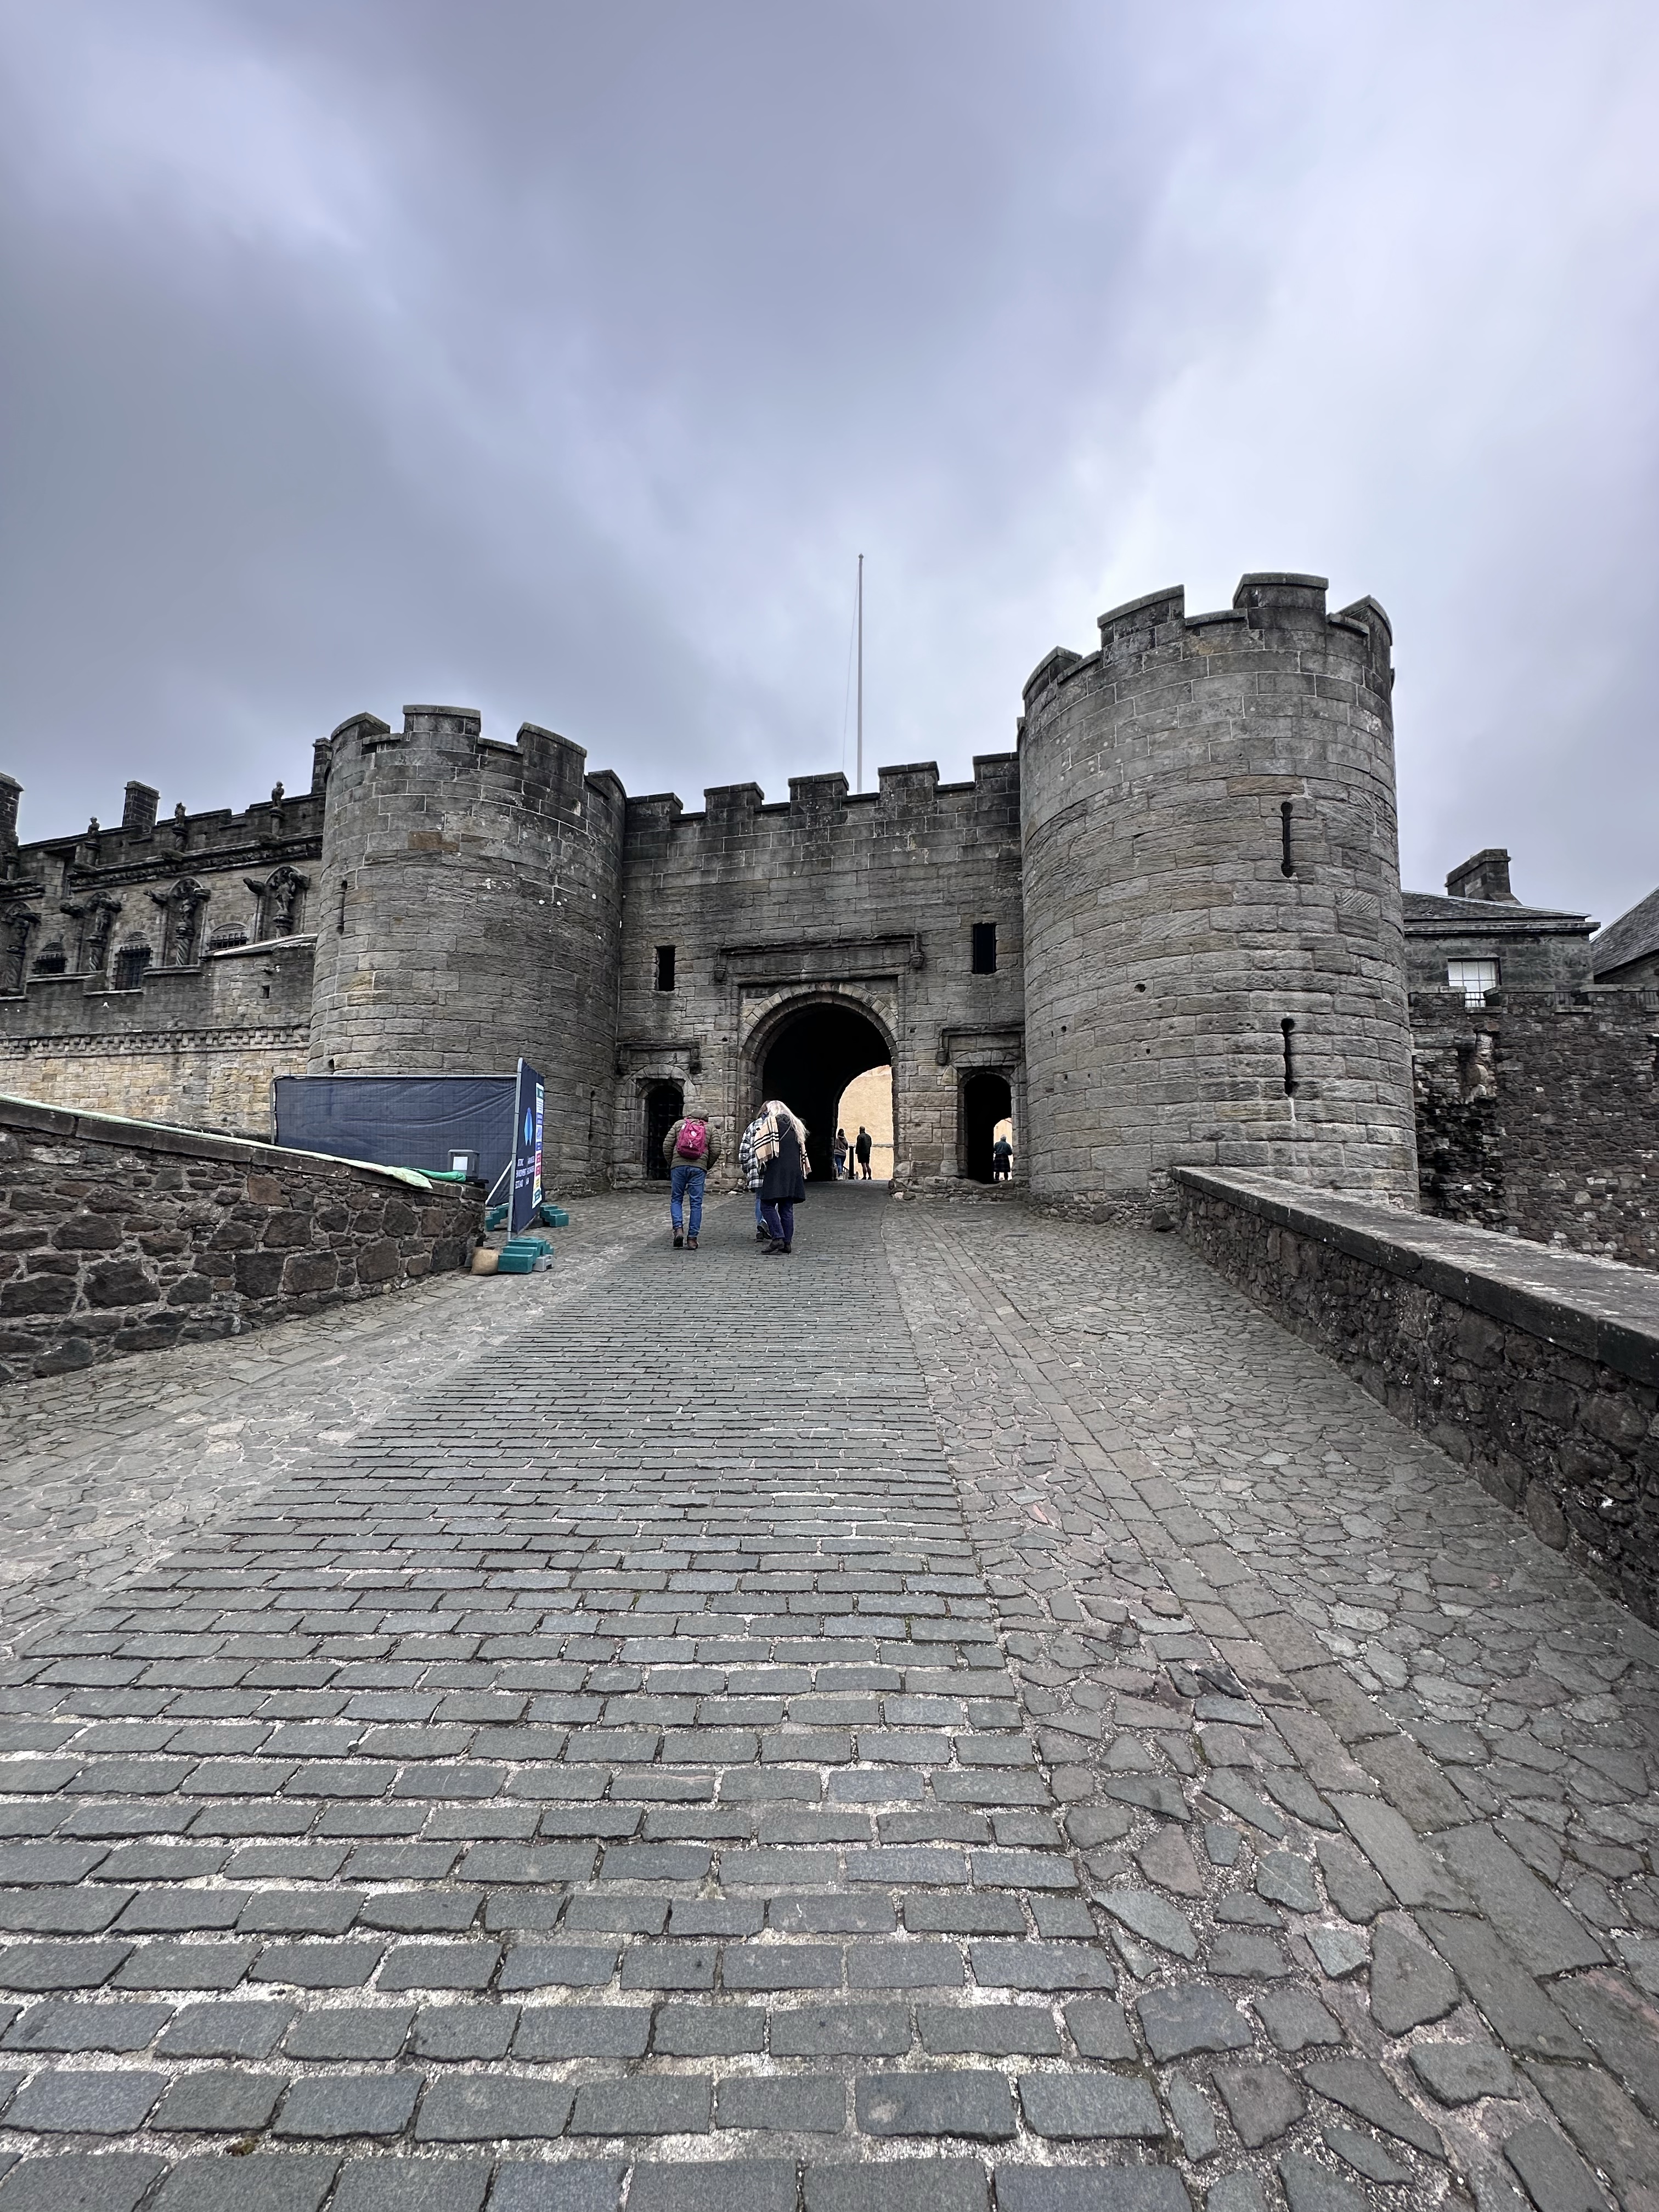
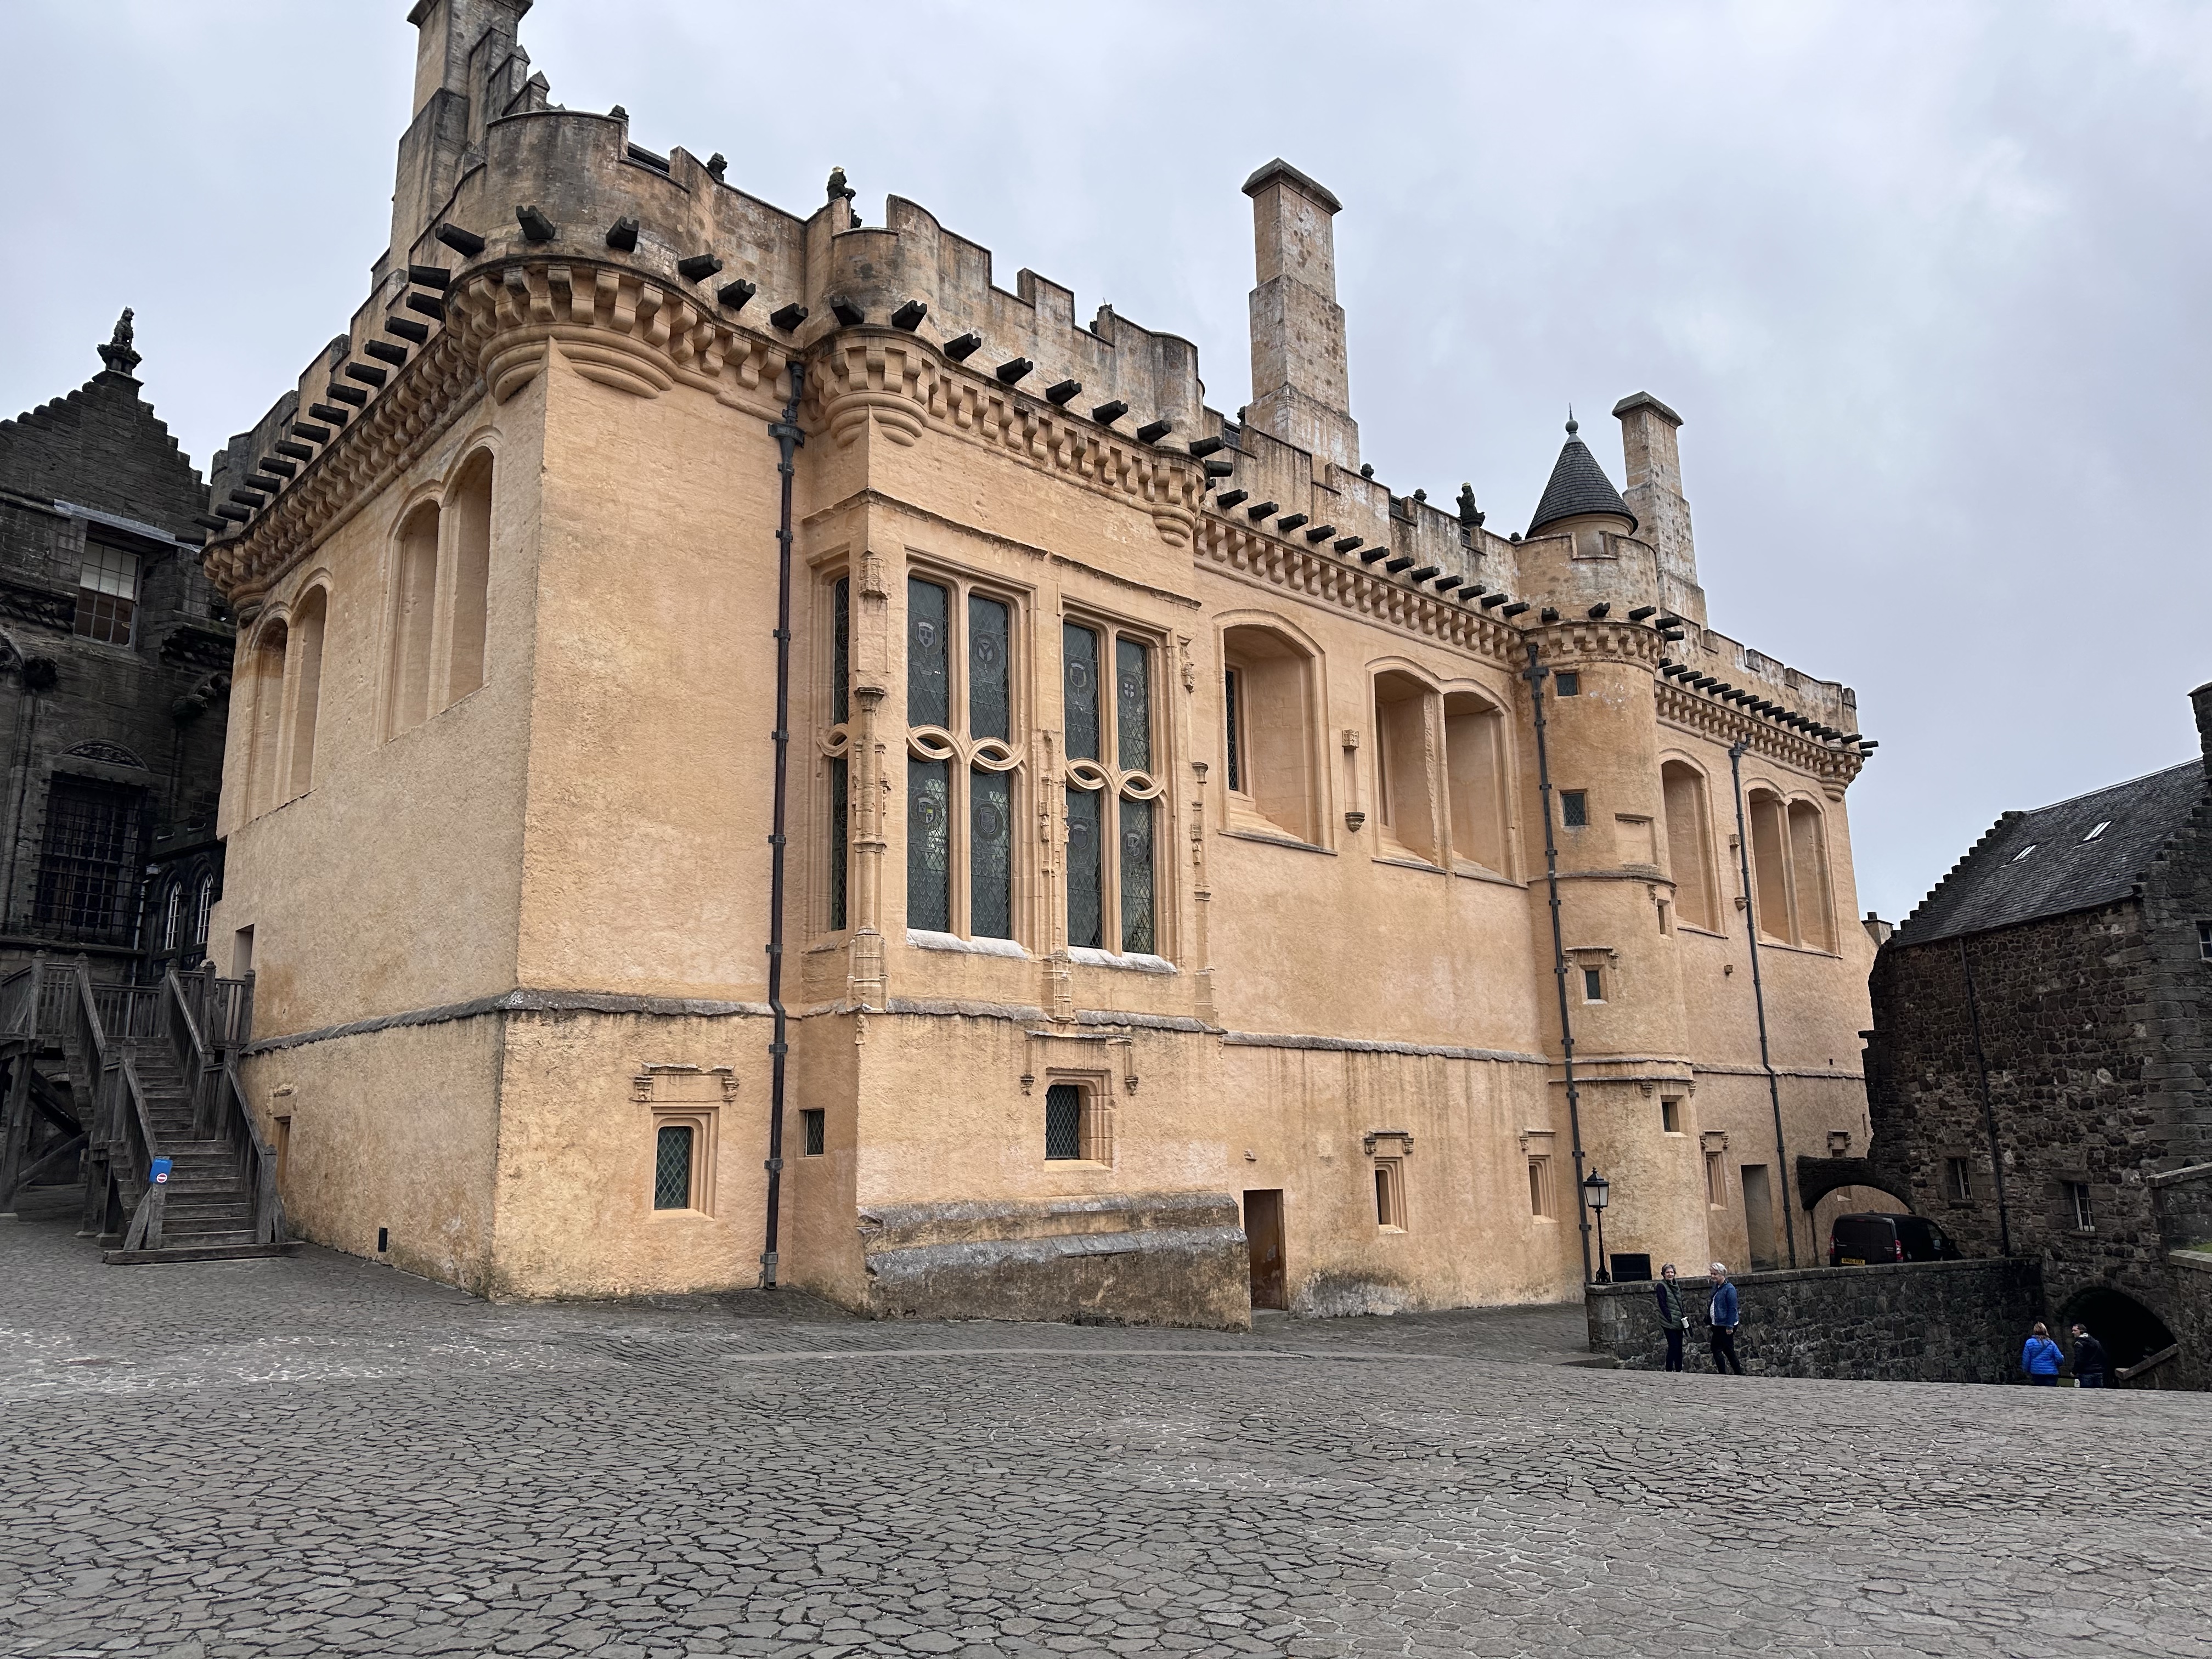
Stirling Castle, in Stirling, is surrounded on 3 sides by steep cliffs. The first photo is from afar as we were driving into Stirling on a cloudy, misty day. The second is the entrance to the castle and the third is the outside of the Great Hall. The castle dates from the early 12th century with most buildings there now built between 1490 and 1600. The castle changed hands 8 times in 50 years during the Wars of Independence.
I’ve just barley touched on the history of these fascinating castles and castle ruins. It is truly amazing when you think of how long ago they were built without all of our modern equipment!
I have lots more to share with you about our trip but since this post is so long, it will have to wait until another day. 🙂
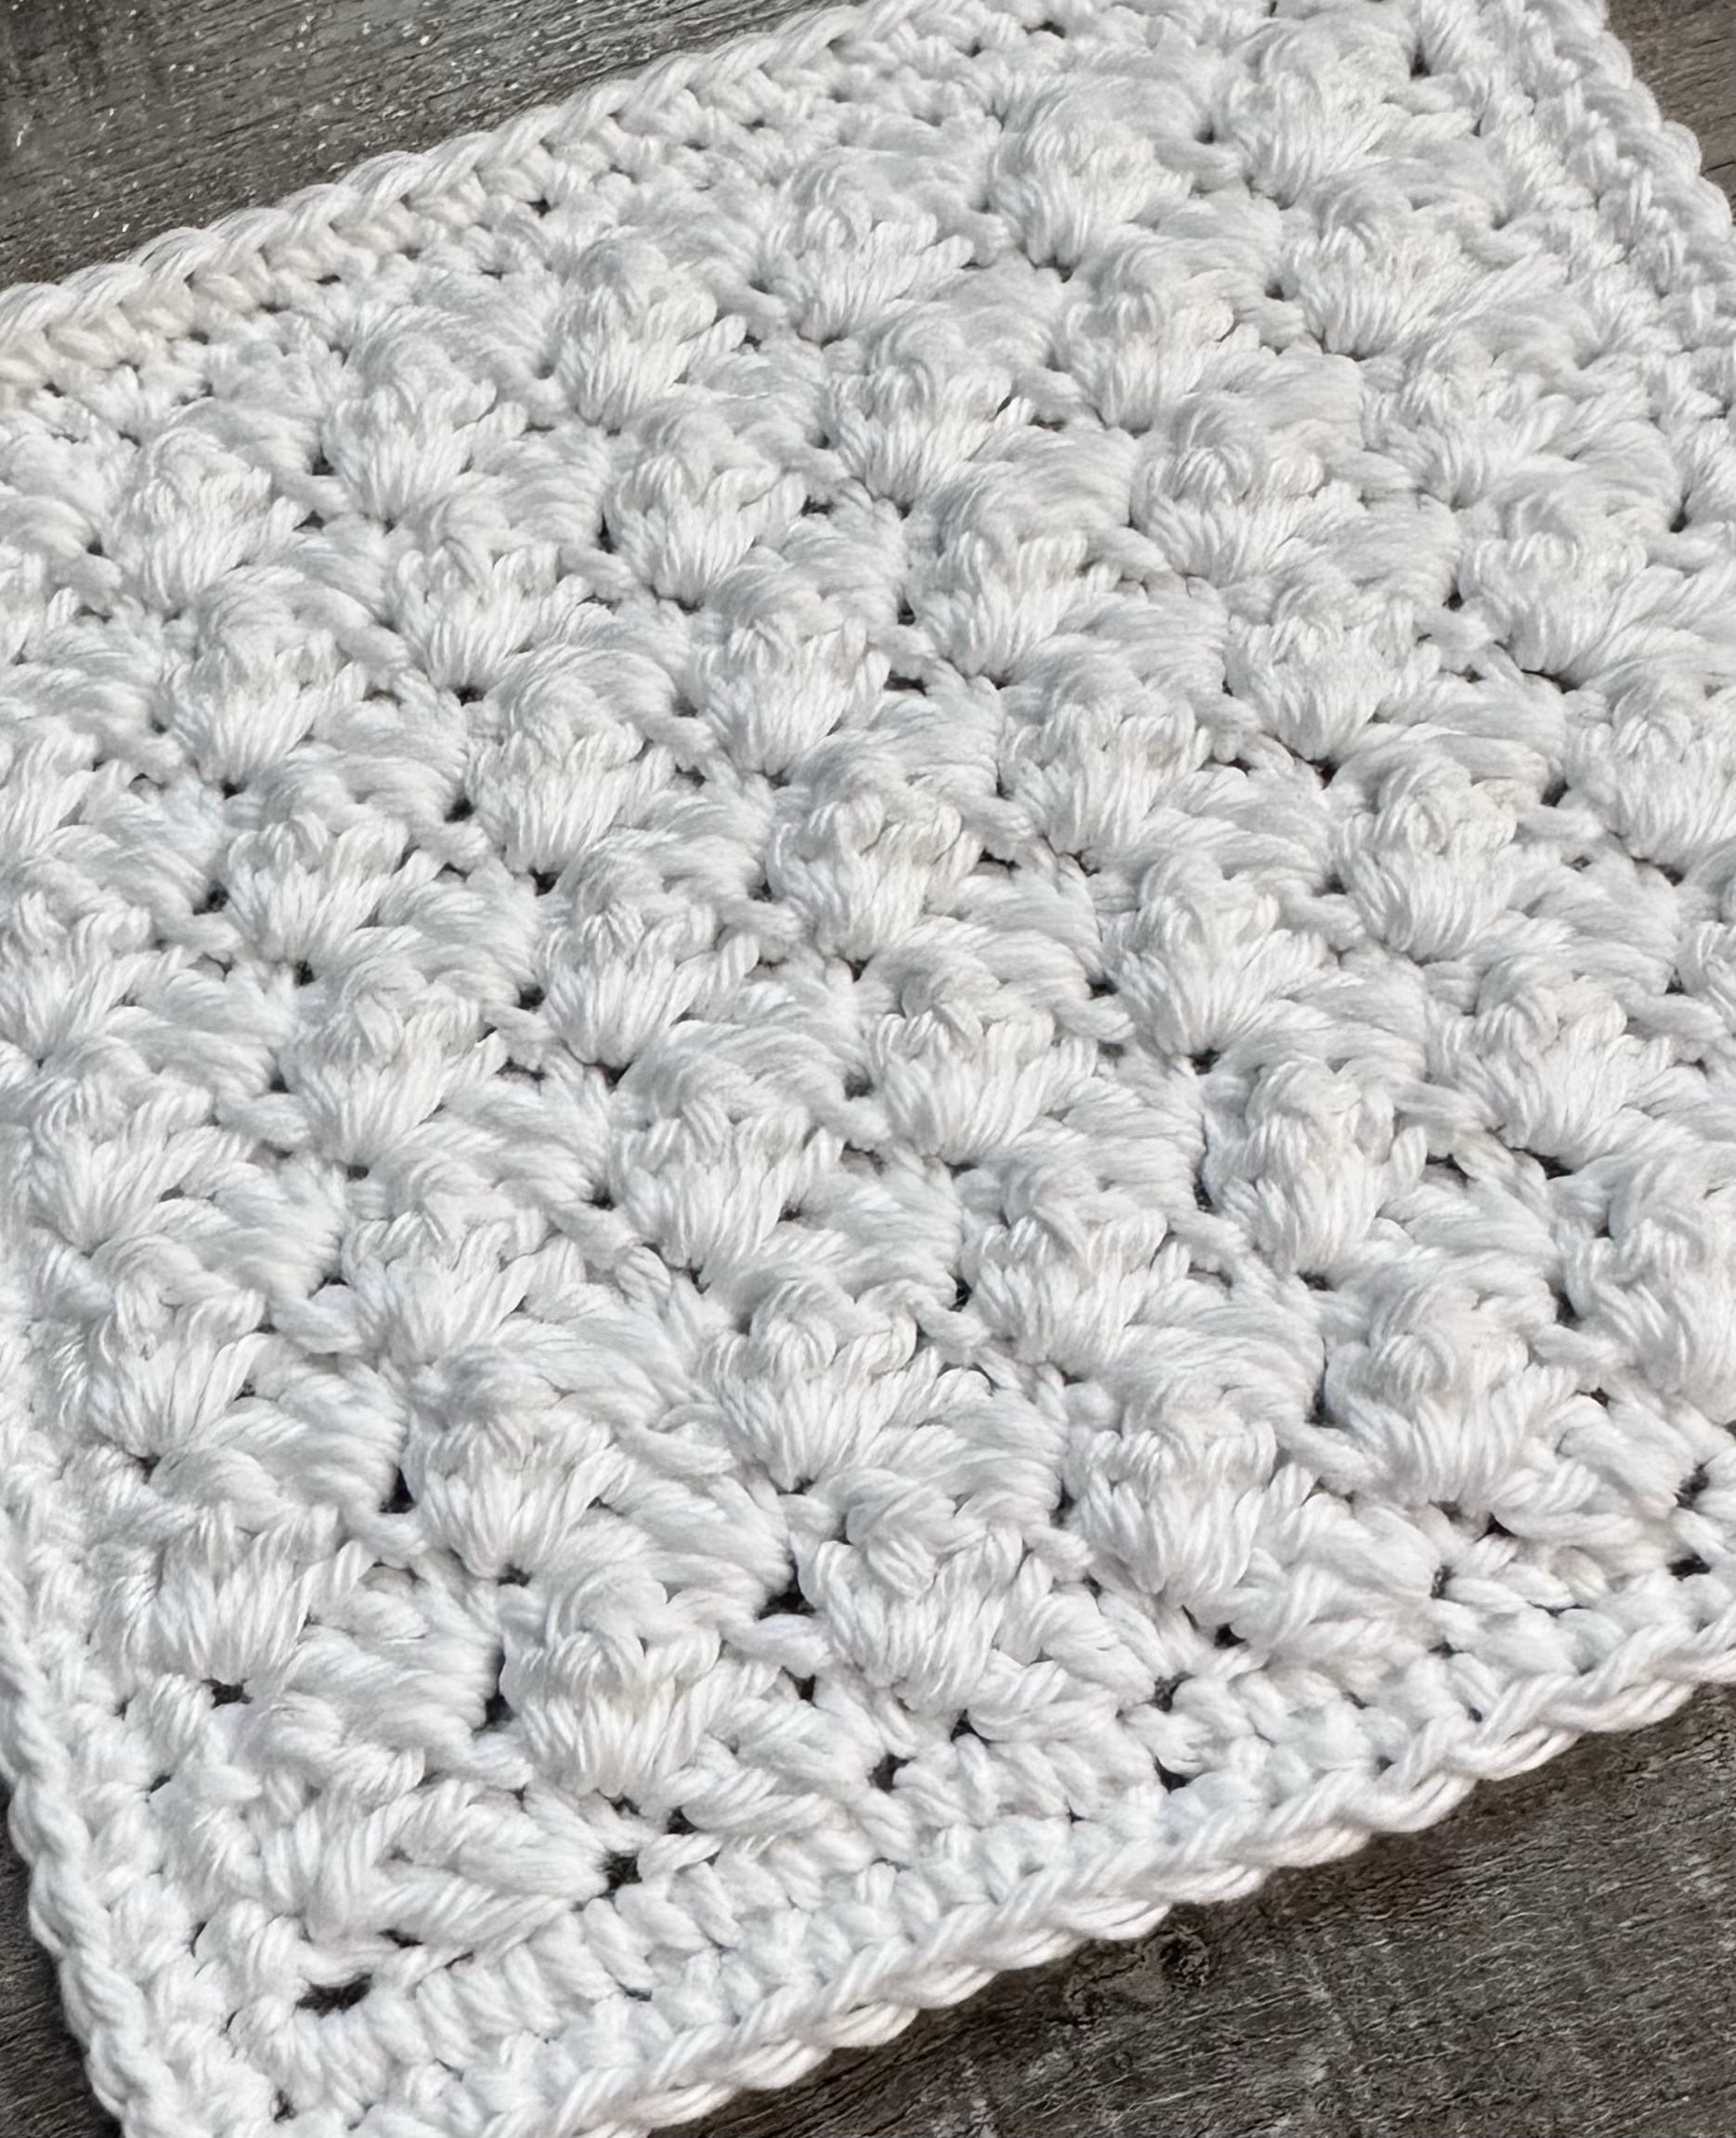
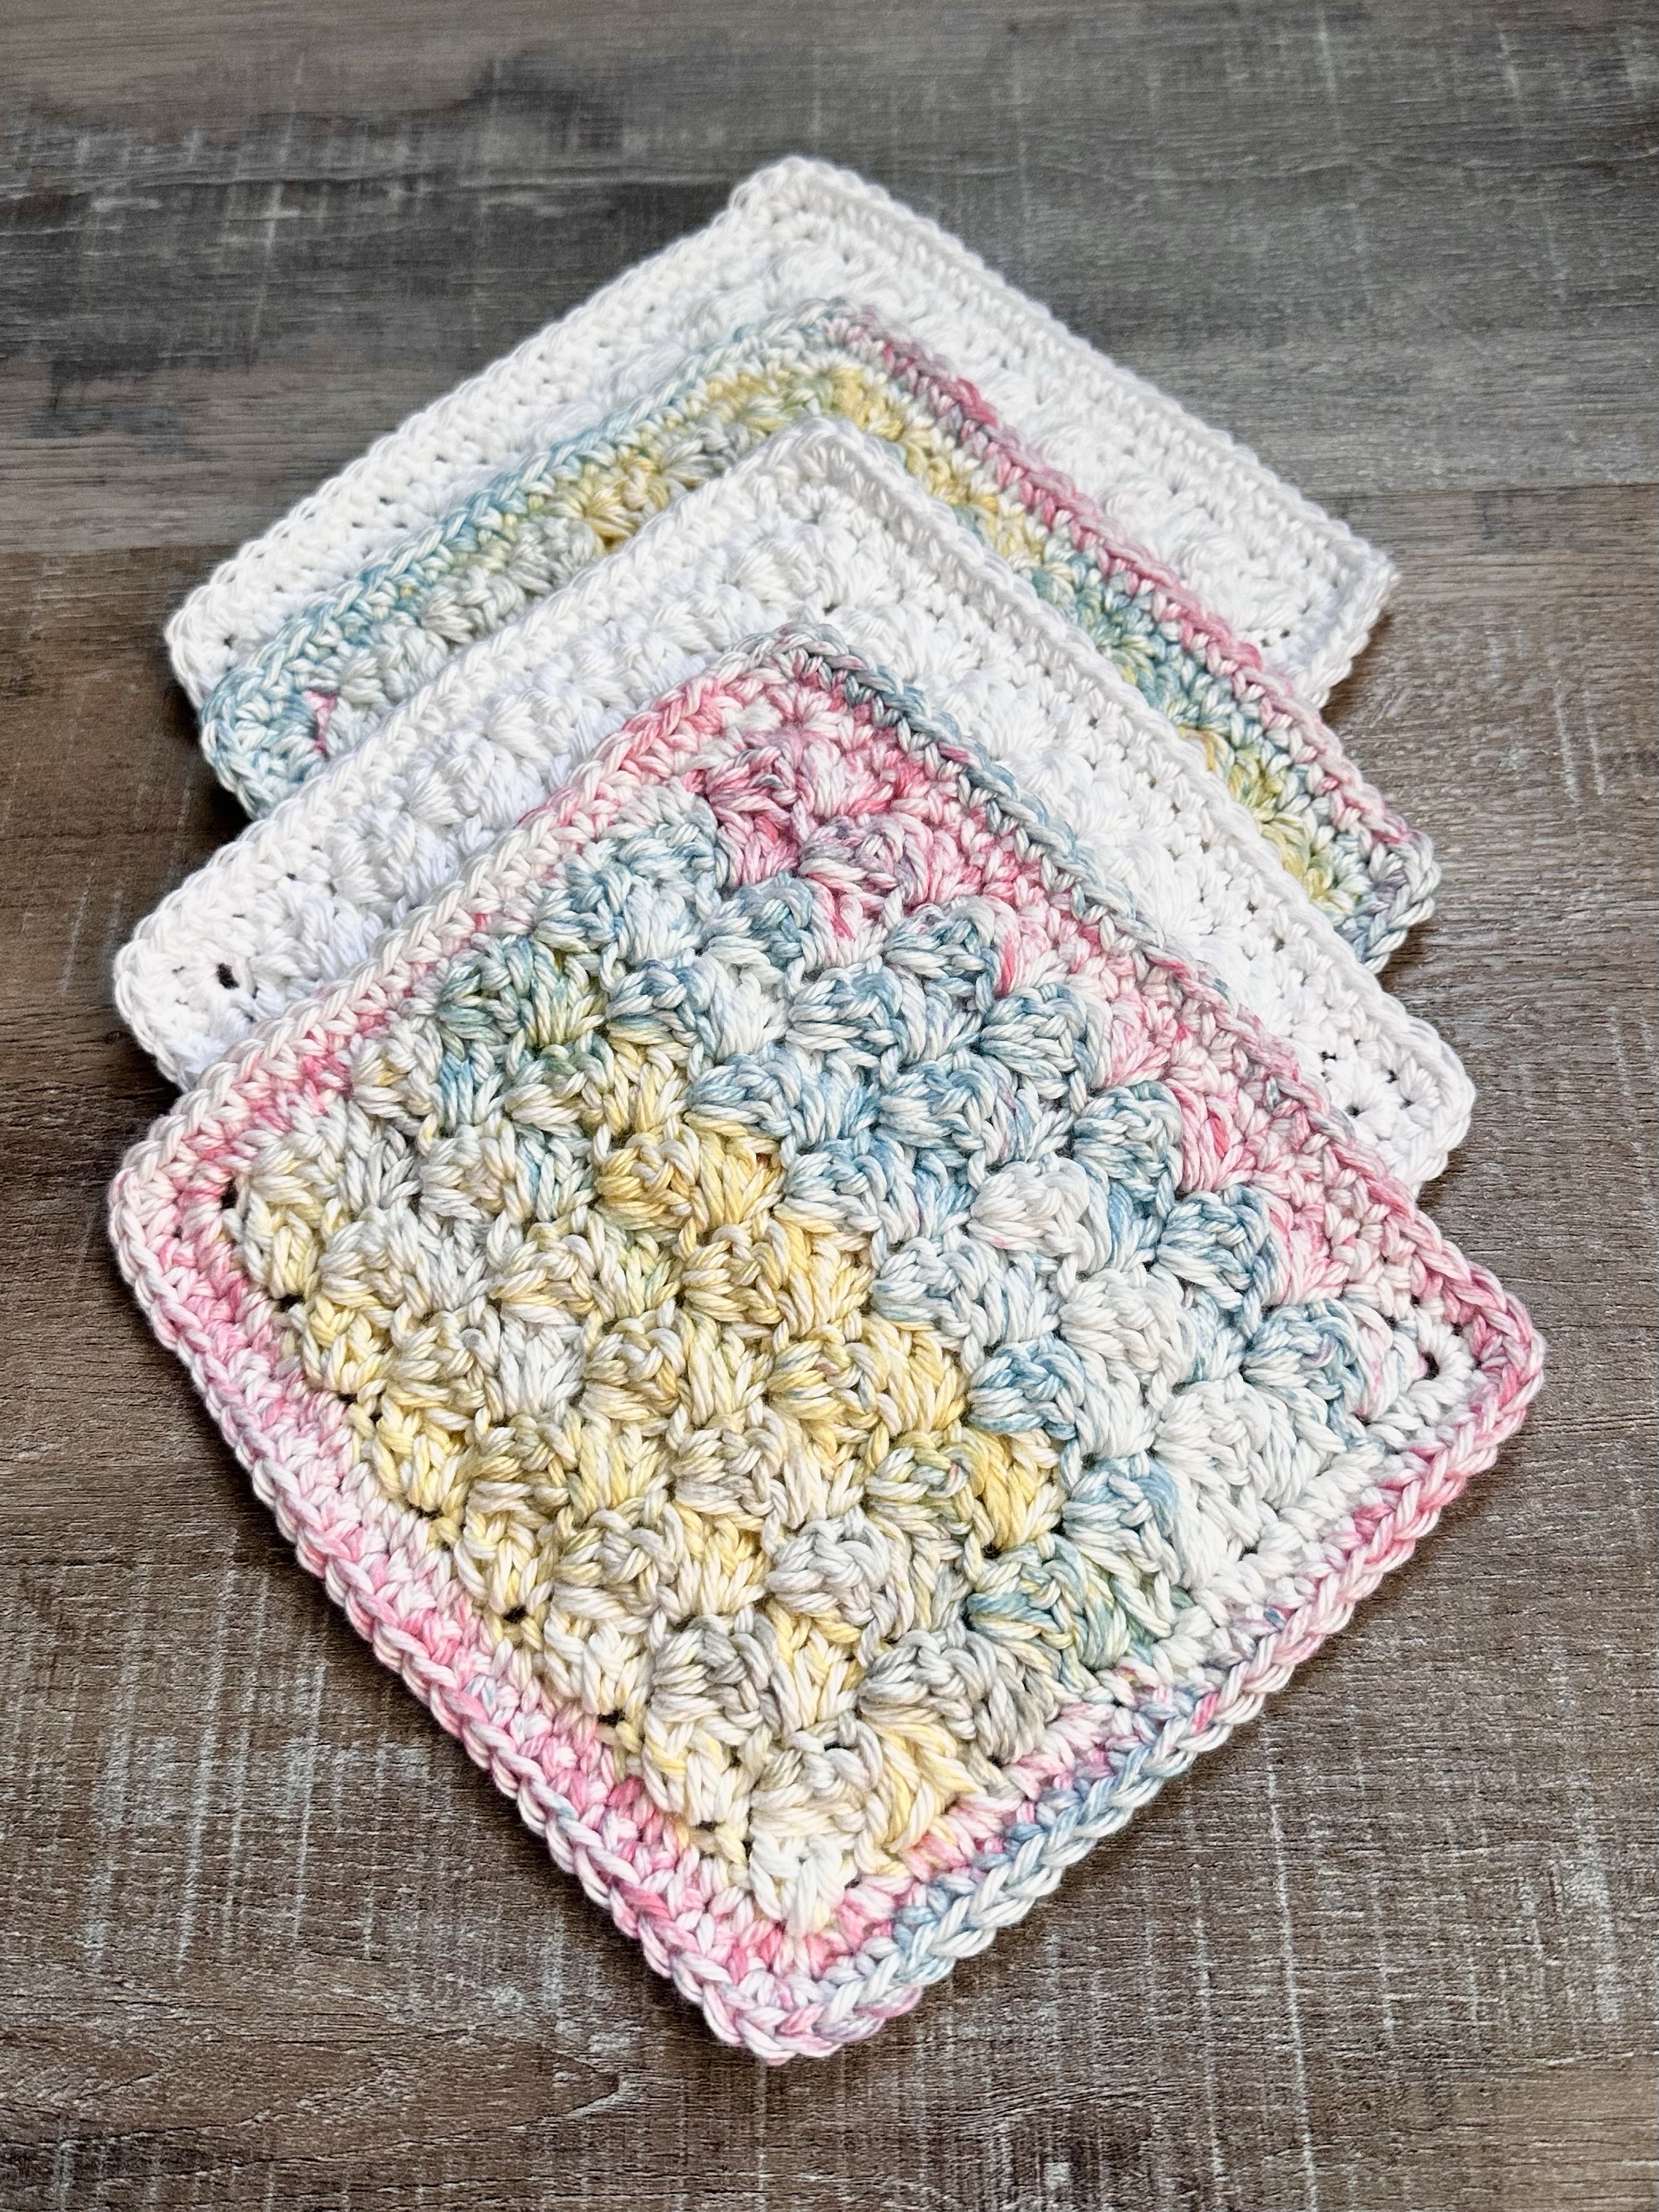
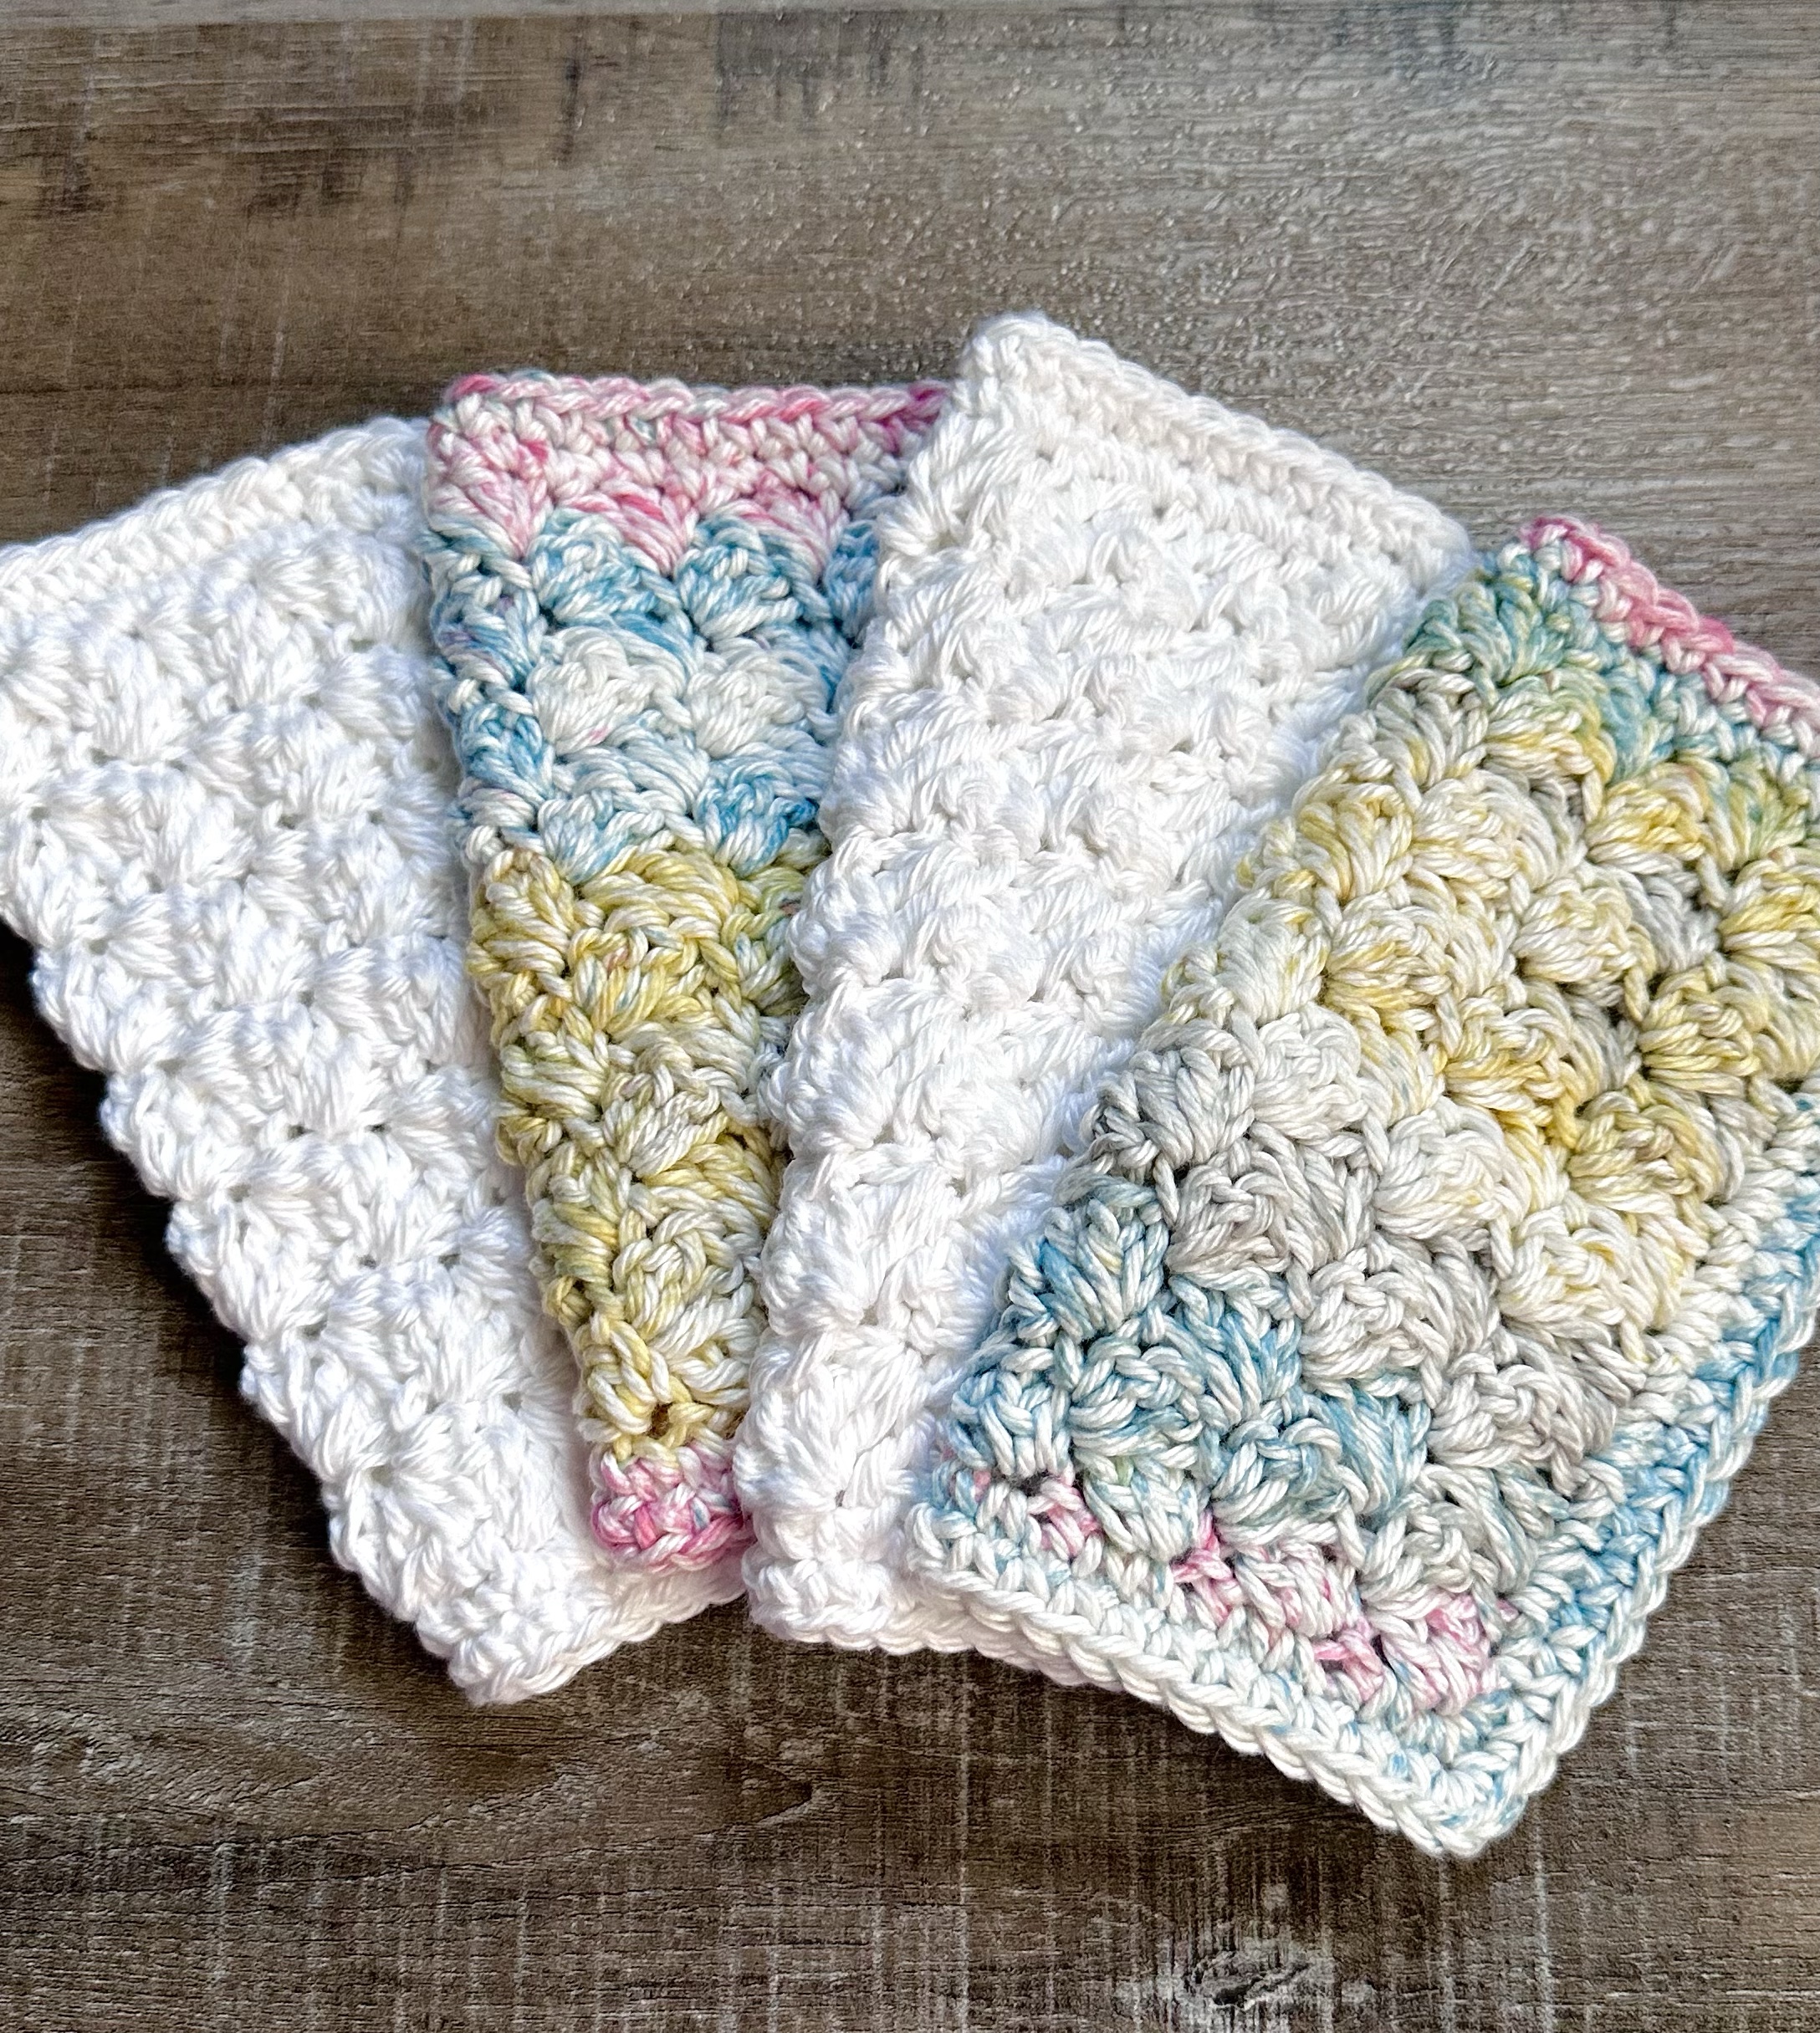
The Crochet Blanket Stitch Pattern is great for more than just blankets! It’s a super easy pattern created with single crochet and double crochet stitches that has a great texture. This Crochet Blanket Stitch Dishcloth is the perfect project for learning this fun stitch.
Disclosure: Some of the links on my site are affiliate links, meaning, at no additional cost to you, I will earn a small commission if you click through and make a purchase. As an Amazon Associate I earn from qualifying purchases.
I stitched up my dishcloths using I Love This Cotton yarn and an H/5mm crochet hook. I used the colors White and Waterlily to stitch up my dishcloths. Waterlily is discontinued but there are several other variegated colors available.
I’ve included my easy pattern for the Crochet Blanket Stitch Dishcloth below along with a link to a free PDF if you want to easily print it.
Crochet Blanket Stitch Dishcloth
I Love This Cotton yarn
H/5mm crochet hook
Stitches used in US terms:
Chain – ch
Single Crochet – sc
Double Crochet – dc
Slip Stitch – ss
Chain 24
Row 1: work 2 dc in 3rd ch from hook. *skip 2 stitches, work 1 sc and 2dc in next stitch* Repeat from * to * across to last 3 stitches, skip 2 stitches, sc in last stitch. Turn. (7 blocks across)
Row 2: ch 1 (counts as a sc). Work 2 dc in first stitch. *skip 2 stitches, work 1 sc and 2 dc in next stitch* Repeat from * to * across to last 3 stitches. Skip 2 stitches, sc in ch 1 of previous row. (7 blocks across)
Rows 3-15: Repeat Row 2 (13) times.
Do not turn after last Row.
Border – Begin working in Rounds
Round 1: ch 1. sc evenly around, working 3 sc in each corner. ss to first sc.
Round 2: ch 1. sc in each stitch around, working 3 sc in each corner. ss to first sc.
Fasten off and weave in ends.
Finished size of dishcloth is approximately 6.5 by 6.5 inches.
You can easily adjust the size of this pattern by simply increasing or decreasing the number of stitches in your beginning chain. Just make sure that your chain is in multiples of 3 and you can make your project any width you’d like. Then repeat Row 2 of the pattern to your desired length.
This is a great project for beginners or seasoned crocheters alike! And because you stitch up these cloths with cotton yarn, they can also make wonderful spa cloths. 😊
Disclosure: Some of the links on my site are affiliate links, meaning, at no additional cost to you, I will earn a small commission if you click through and make a purchase. As an Amazon Associate I earn from qualifying purchases.