BOO Blocks

Hi friends,

It’s time to start your Halloween crafting it you haven’t yet! 🎃

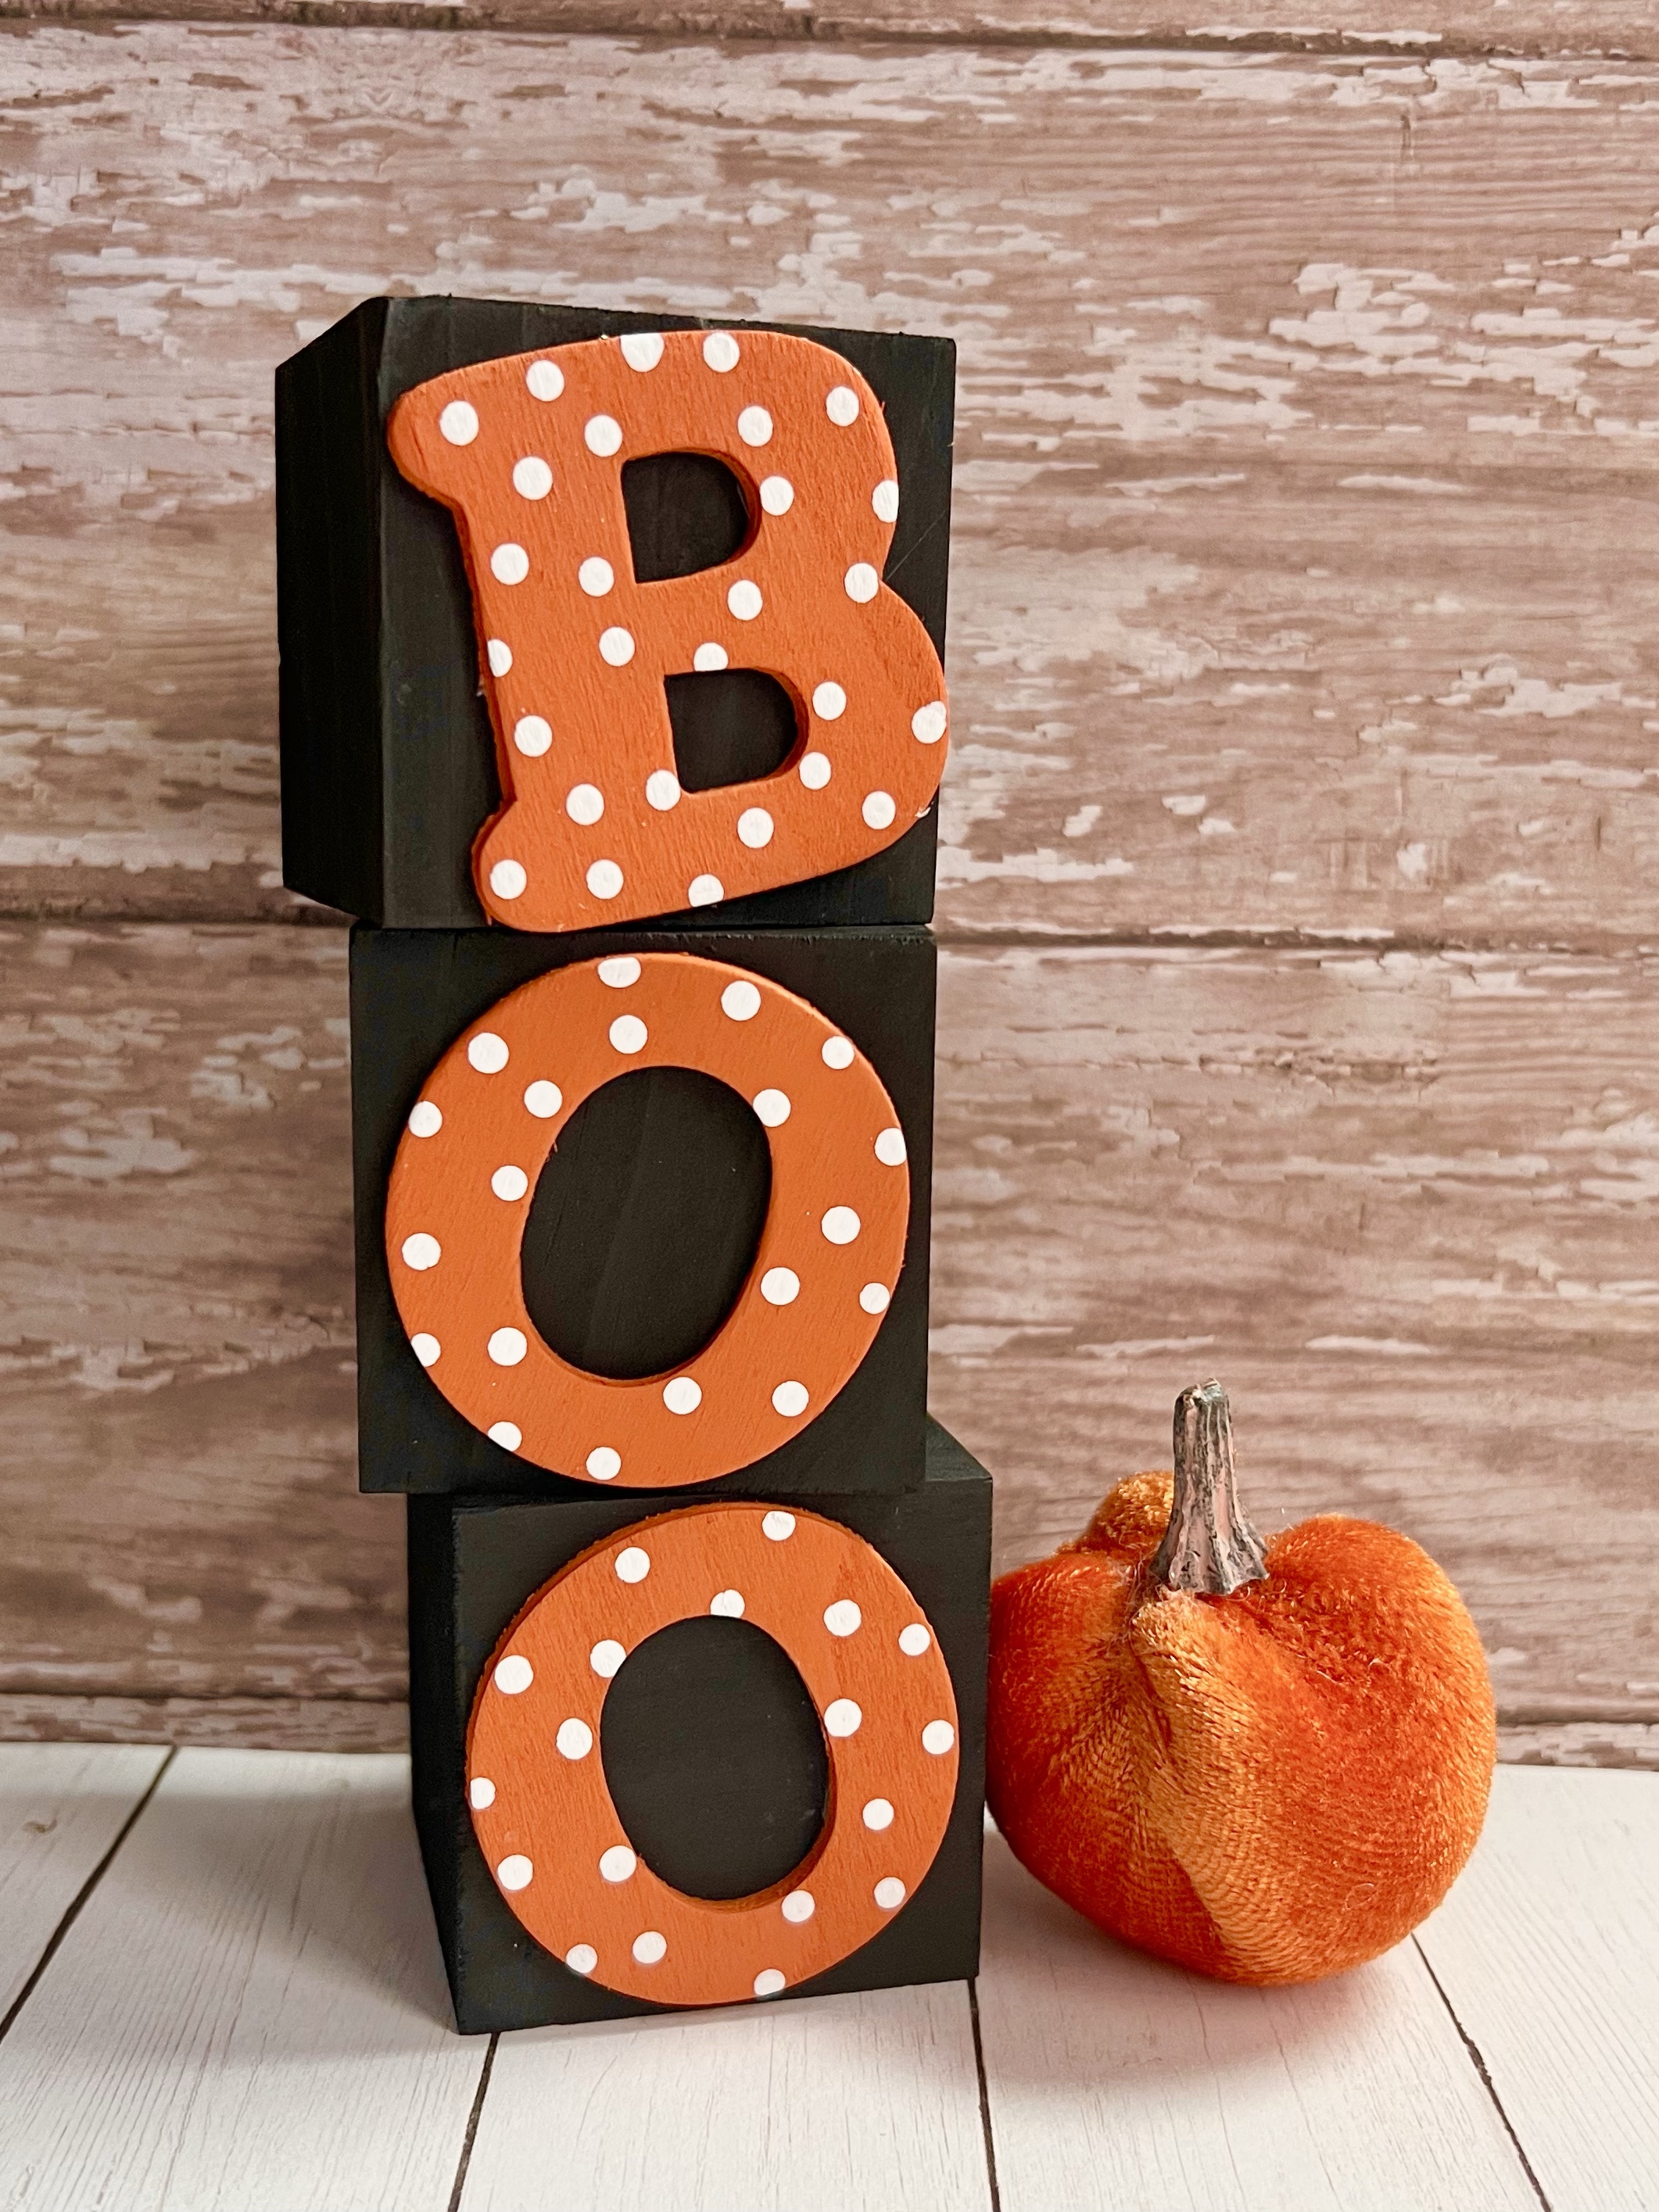
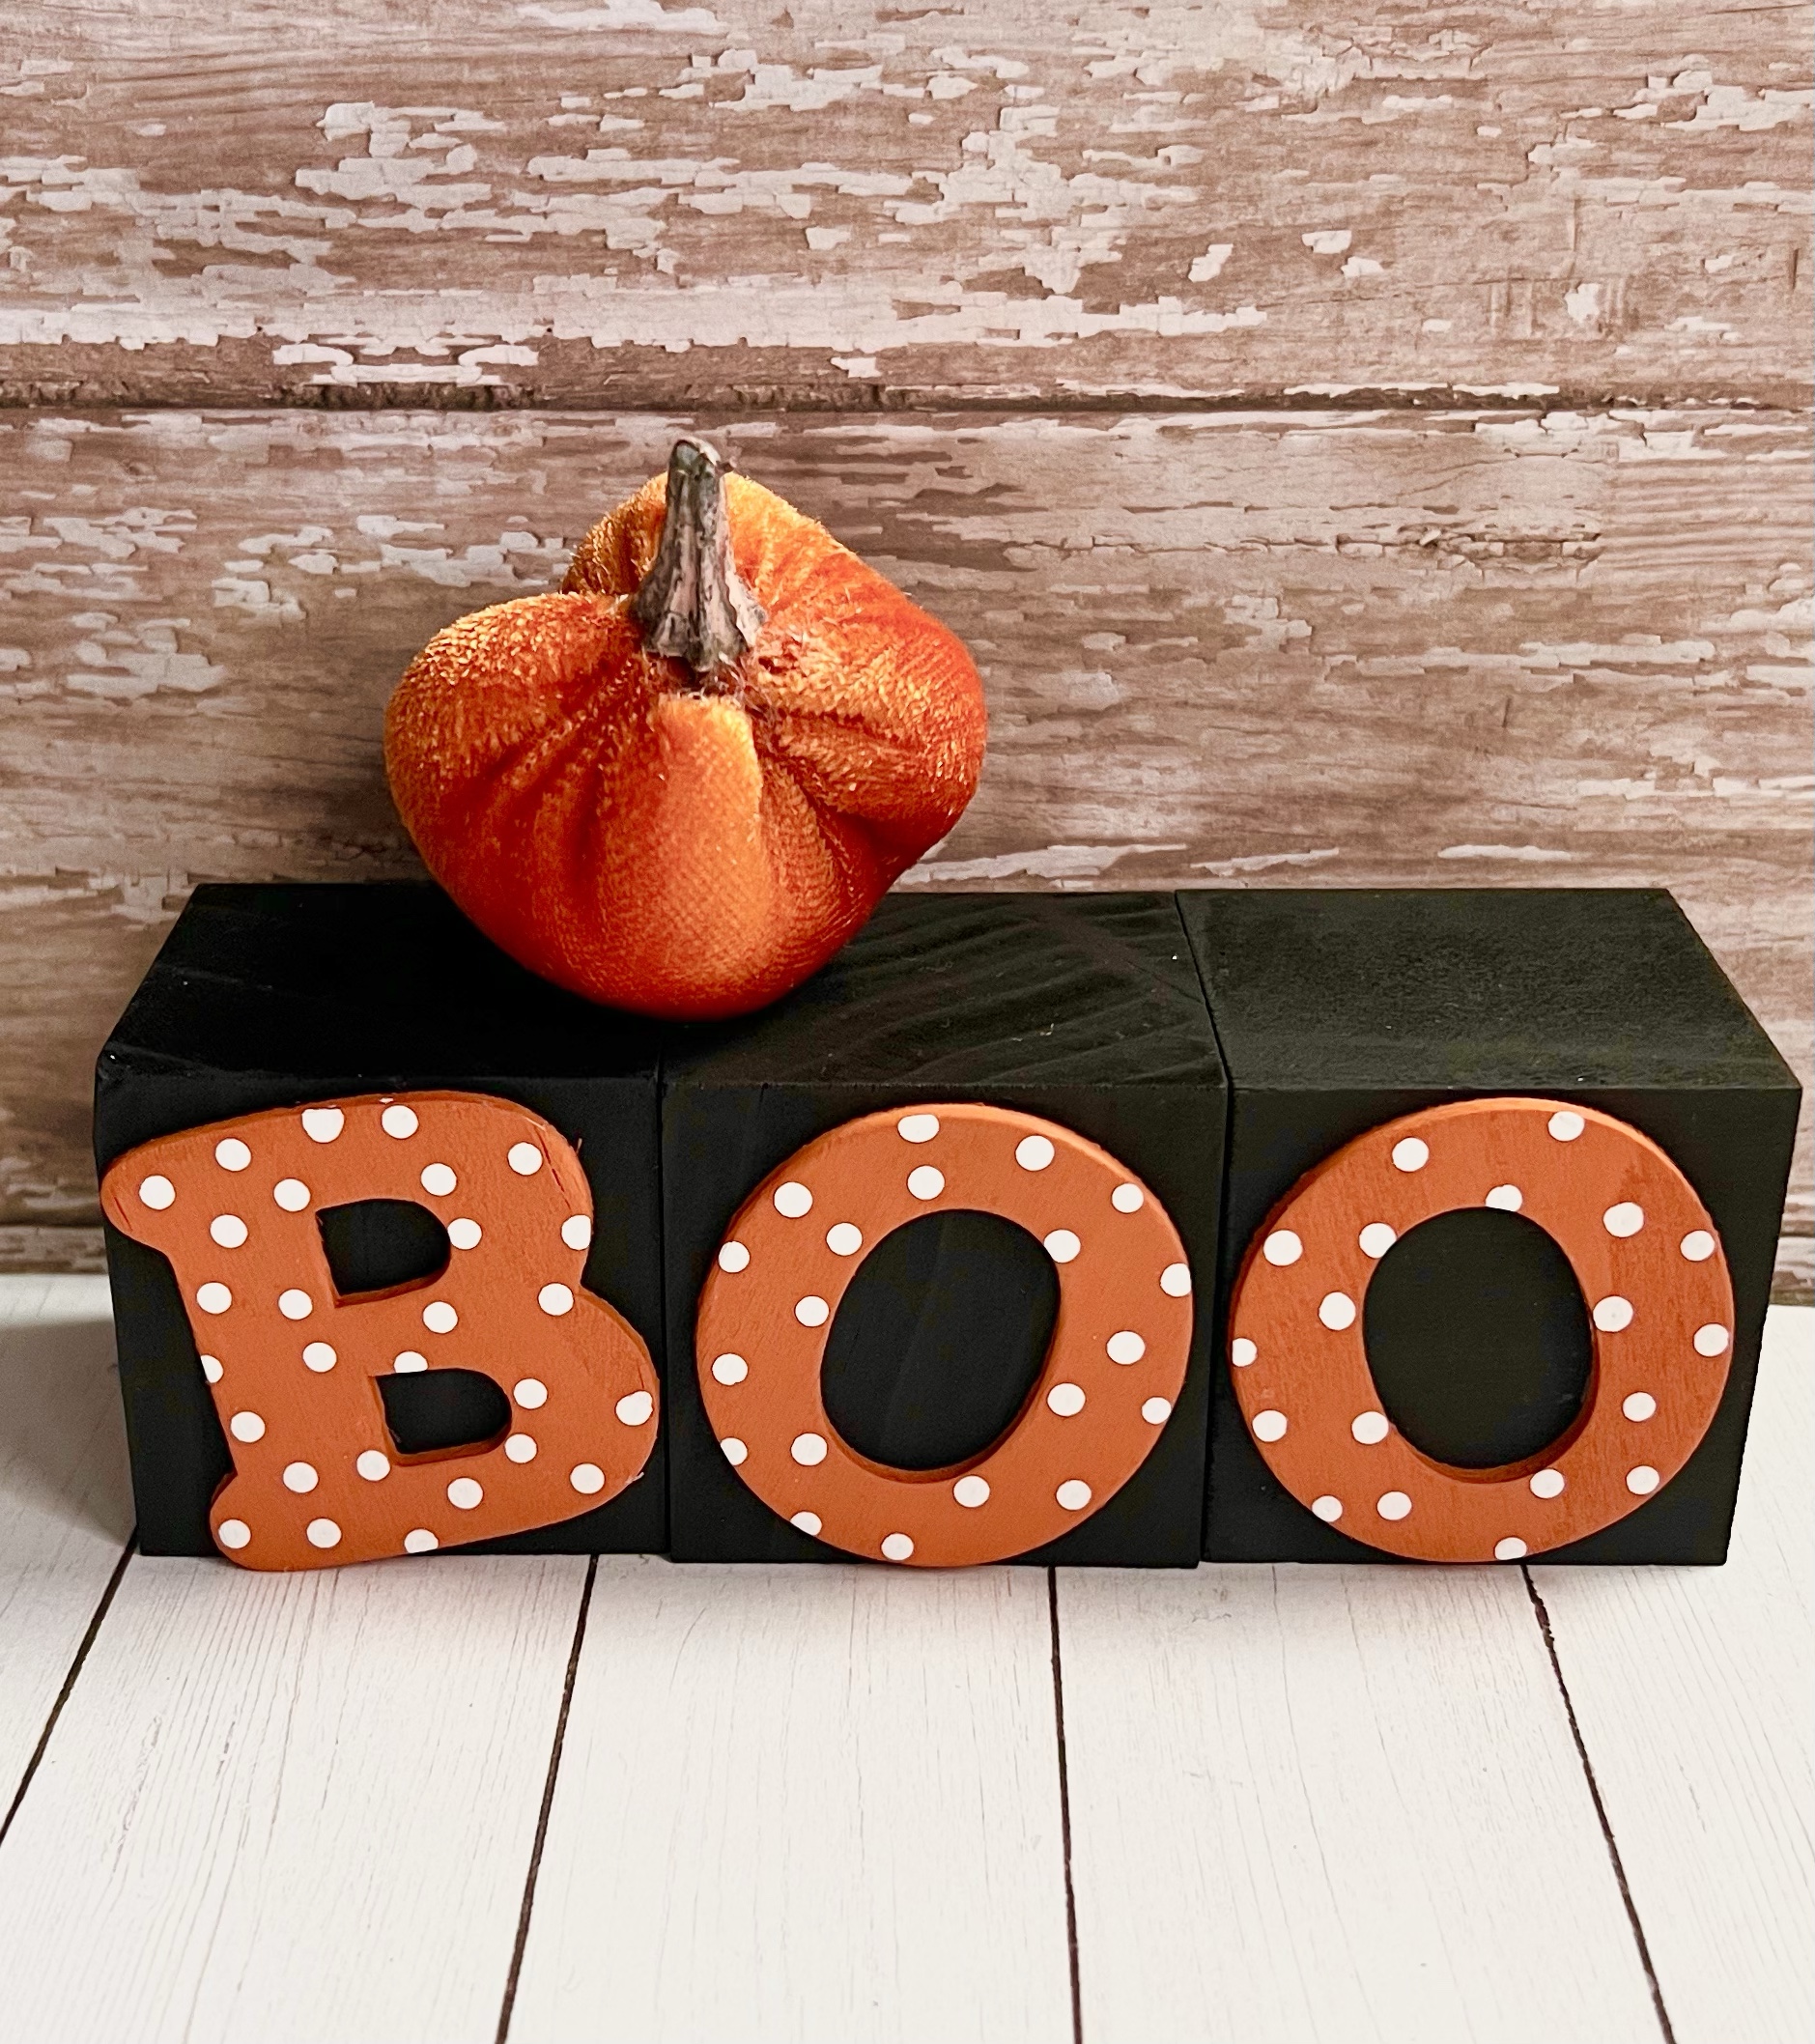
I have a fun and easy project for you today. These cute BOO blocks are the perfect size to add to your tiered tray or to tuck onto your mantel with your other Halloween things.

Disclosure: Some of the links on my site are affiliate links, meaning, at no additional cost to you, I will earn a small commission if you click through and make a purchase. As an Amazon Associate I earn from qualifying purchases.

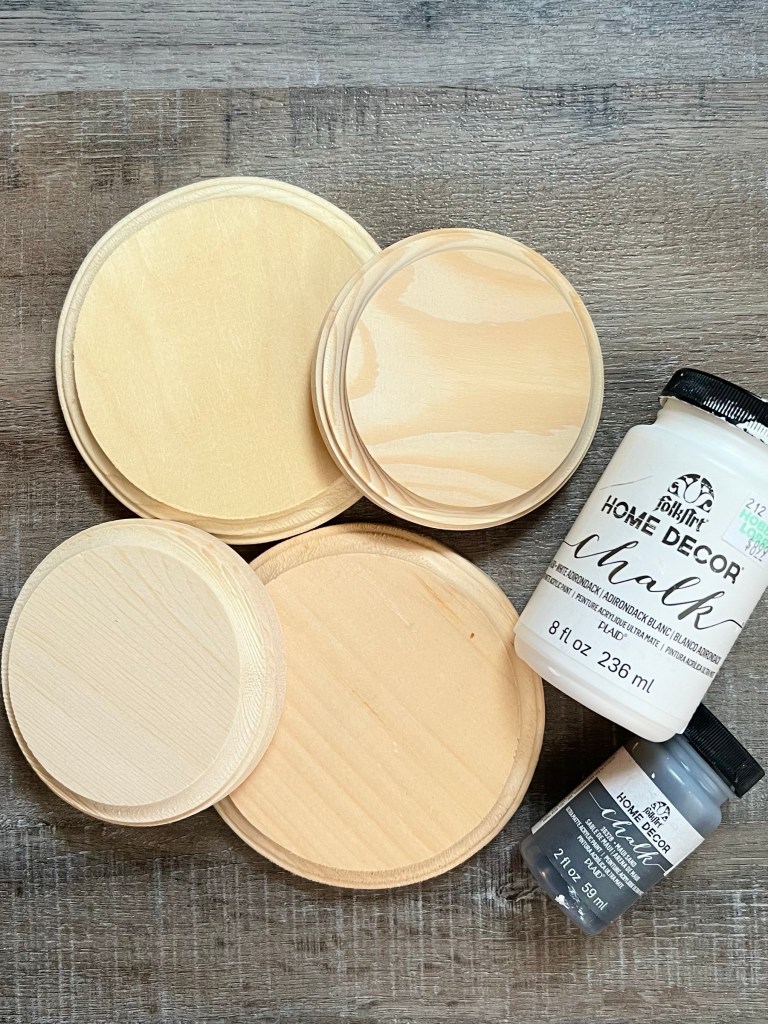
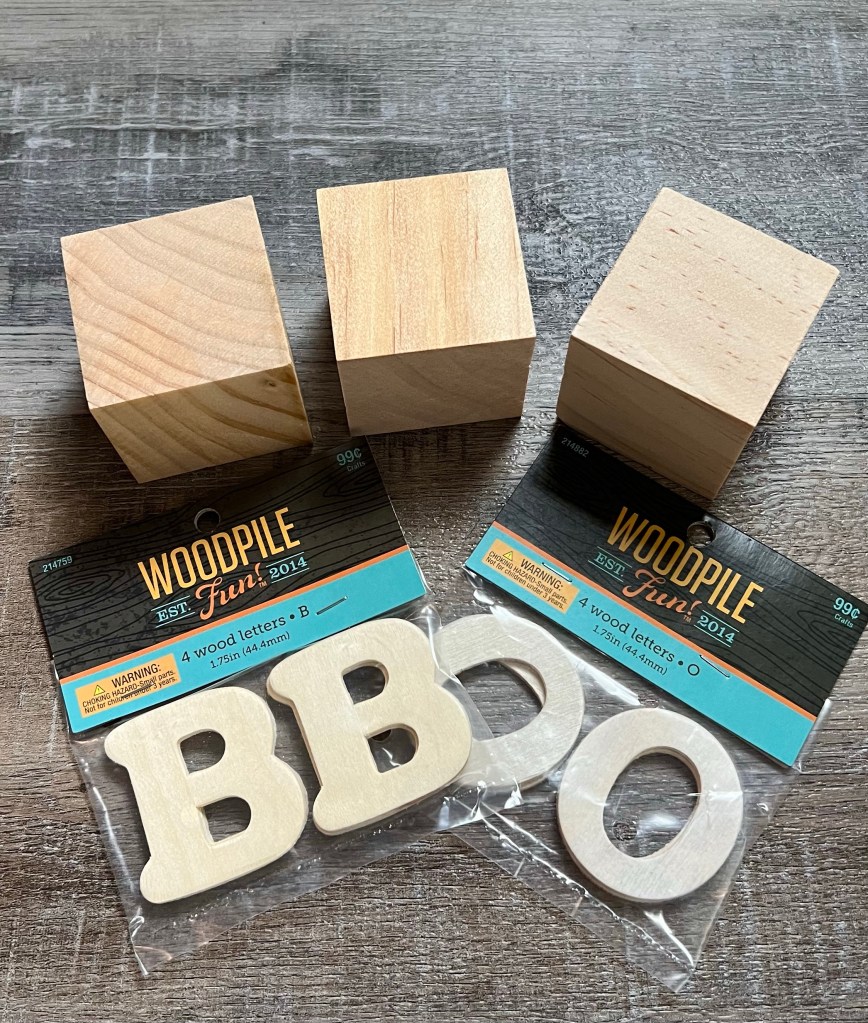
You’ll need three 2-inch wood blocks (I found mine here) and 1.75 inch wood letters (I found mine at Hobby Lobby). You’ll also need acrylic paint in black, orange, and white. (This is a great set of acrylic paints if you need to resupply your craft room.)

I painted my blocks with 2 coats of black paint using a foam brush, letting it dry between coats. I painted the sides and front of my letters with 2 coats of orange paint. Once the paint was dry, I used the tip of the handle of a small paint brush to apply random dots of white paint on the letters. I used E6000 clear adhesive to attach my letters to the blocks at an angle.

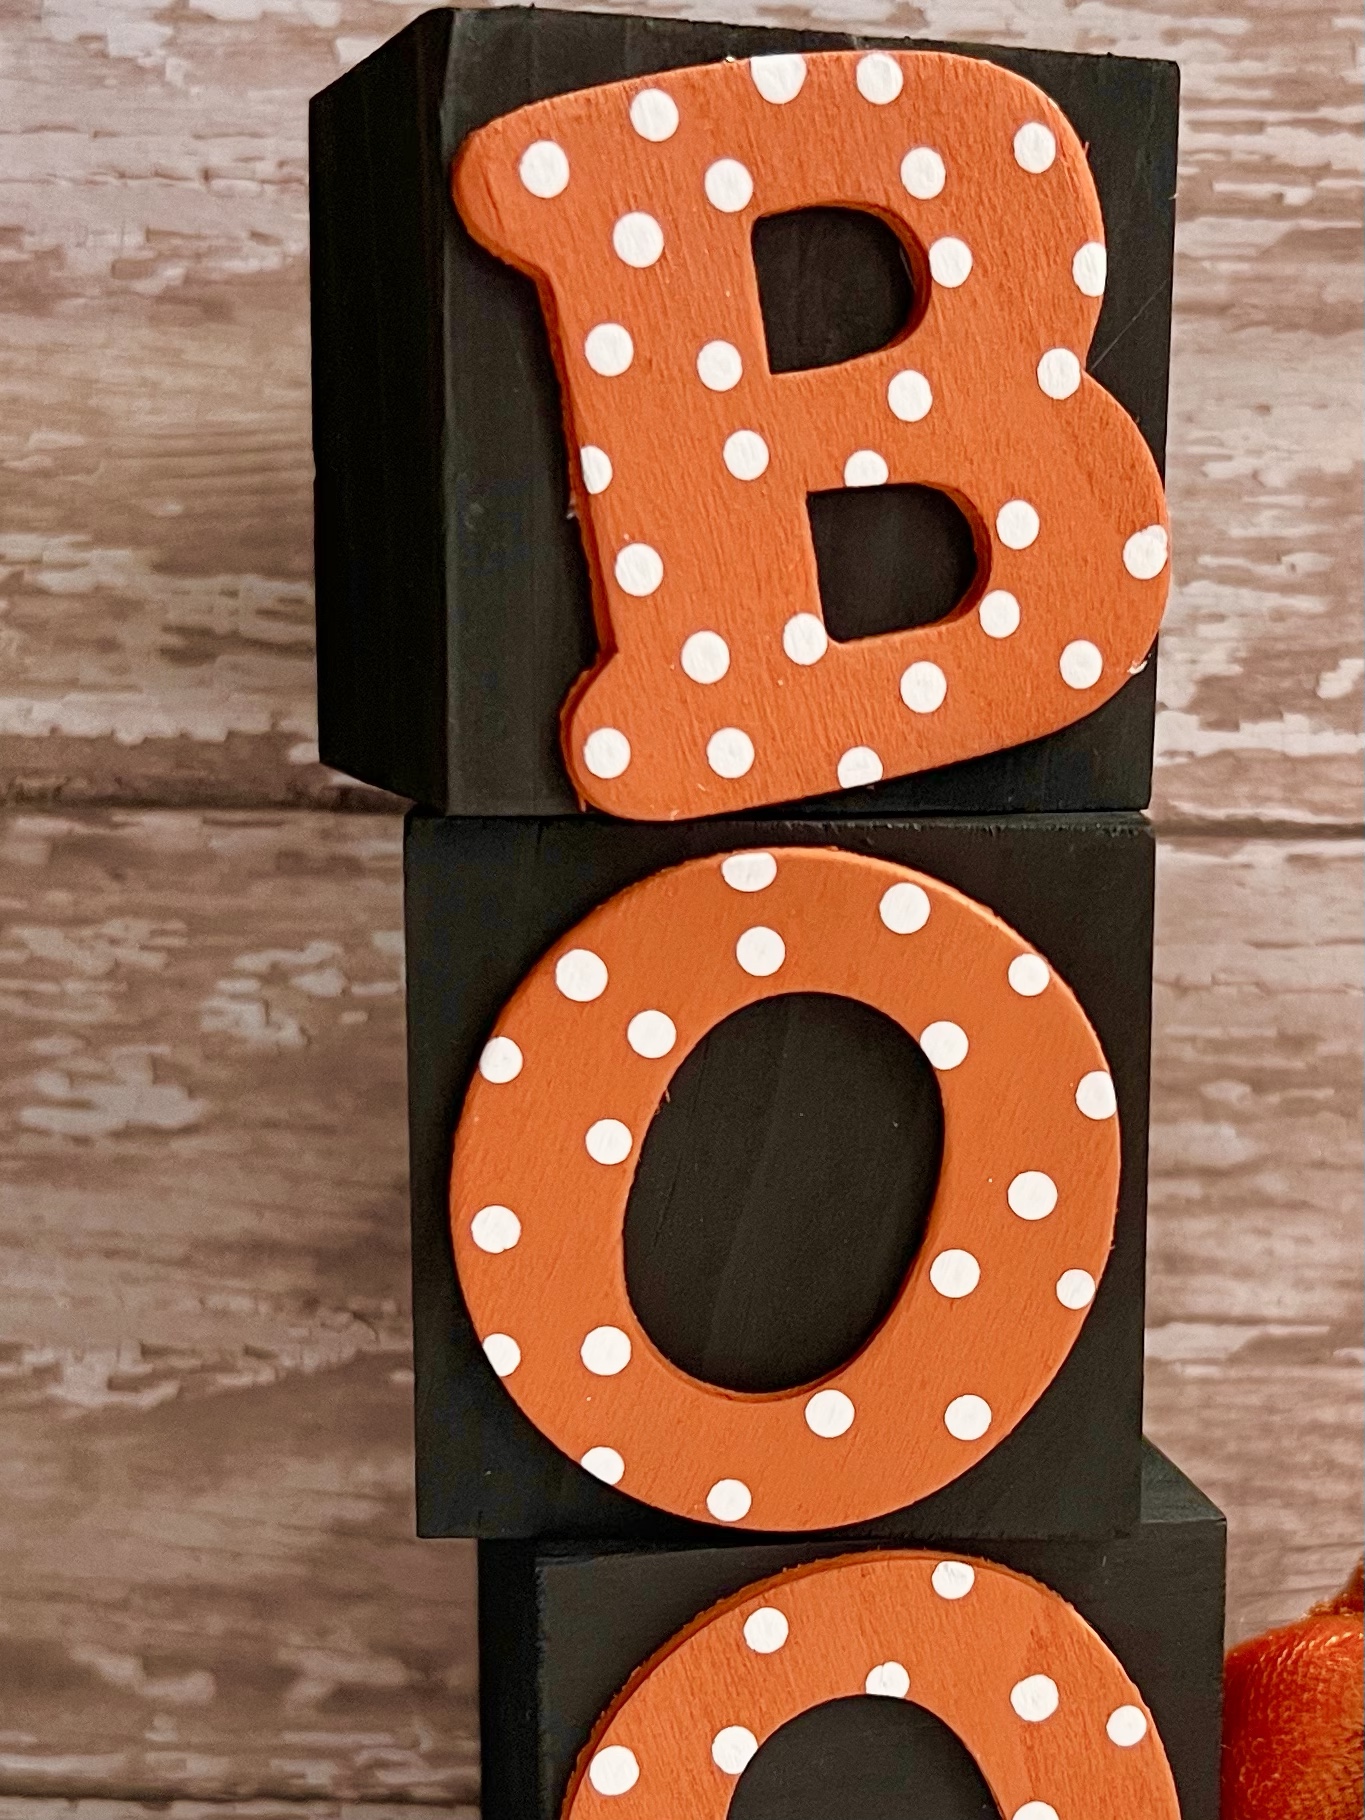
The BOO blocks can be stacked on top of each other or side by side. They also match my BOO! sign I made in this post. 🙂

I’m ready to get out all my Halloween things! How about you? 🎃

Anita

Posted in Decor, Fall | Tagged , | 1 Comment

Daisy Greetings Handmade Card

Hi friends,

On a rainy afternoon recently I decided to do a little coloring. I pulled out this Daisy stamp from the Be Unstoppable stamp set from Unity Stamp Company and stamped it on several panels of white card stock with Memento Tuxedo Black ink. I colored the images with Copic markers in shades of blue because I wanted something a little different. 😉

Disclosure: Some of the links on my site are affiliate links, meaning, at no additional cost to you, I will earn a small commission if you click through and make a purchase. As an Amazon Associate I earn from qualifying purchases.

Then I took each panel and embossed them with a small dot embossing folder to add a bit of texture.

I trimmed the stamped piece and layered it to a piece of matching blue card stock. Then I attached it to a white card. I stamped my sentiments with blue ink on a strip of white card stock and layered it to a strip of blue card stock. I attached the sentiments to the cards with foam tape.

This is a great card to use for almost any occasion. Just by changing the sentiment it can be a thank you, wedding shower, birthday, thinking of you, or sympathy card. And of course you can color your flower any way you’d like or even use a different flower as your focal point. One of my favorite things about this card is the embossing – I love the texture it adds!

Happy card making!

Anita

Posted in Cards, Stamping | Tagged , | Leave a comment

Velvet Pumpkin Spruce-Up

Hi friends,

Were you able to snag any of these velvet pumpkins from Dollar Tree? Their seasonal merchandise goes so quickly, it’s sometimes hard to get all the things! I loved these pumpkins except for the plastic stems…so my husband cut some sticks into pieces about 2.75 to 3 inches long to replace them.

Disclosure: Some of the links on my site are affiliate links, meaning, at no additional cost to you, I will earn a small commission if you click through and make a purchase. As an Amazon Associate I earn from qualifying purchases.

I pulled the plastic stems out of each pumpkin. They were attached with some hot glue so I had to twist them a bit to get them out. Don’t worry if the fabric comes out a little – you can just push it back in with the tip of your scissors.

I used my scissors to make the hole where the plastic stem was just a little bigger. I put a little hot glue on the end of the stick and pushed it into the pumpkin. Then I tied some natural jute twine into a bow around the stem. I used 3 strands of twine together to tie my bows. You can also use raffia or your favorite ribbon.

It’s amazing how just a little sprucing up can change the look of something! This only took a few minutes to do and I love how they turned out!

Anita

Posted in Decor, Fall | Tagged , | Leave a comment

Christmas Crochet Cups

Hi friends,

Have you seen these adorable Christmas Crochet Cups from Repeat Crafter Me? If you are working on your Christmas makes, you need to add these to your crochet schedule! They are super fun and quick to stitch up. You make them holding 2 strands of yarn together so they are very sturdy.

Disclosure: Some of the links on my site are affiliate links, meaning, at no additional cost to you, I will earn a small commission if you click through and make a purchase. As an Amazon Associate I earn from qualifying purchases.

I stitched up my Christmas Crochet Cups using I Love This Yarn from Hobby Lobby and a K/6.5mm hook. I used various buttons and safety eyes that I had in my stash to finish off each one.

They are so cute! A little cellophane bag filled with Christmas candy or other treats tucked inside will make a fun little gift. 🎁

There are also some really cute Halloween Crochet Cups at Repeat Crafter Me, too!

Anita

Posted in Christmas, Crochet, Gifts | Tagged , , | Leave a comment

Donut Birthday Card

Hi friends,

Unity Stamp Company released this adorable stamp set called Donut Birthday a few months ago. It includes 2 different sizes of donut stacks and 2 sentiments. Anyone who knows my husband knows that this is the perfect set for making him a birthday card! 🍩

Disclosure: Some of the links on my site are affiliate links, meaning, at no additional cost to you, I will earn a small commission if you click through and make a purchase. As an Amazon Associate I earn from qualifying purchases.

I stamped the donut stack with Memento Tuxedo Black ink on white card stock and colored it with Copic markers. Then I trimmed the image and layered it to brown card stock. I attached a piece of patterned paper (also from Unity Stamp Company) to a turquoise card. I attached the donut stack to the card using foam tape.

The “happy birthday” sentiment is from the Extended Celebration stamp set from Unity Stamp Company. I stamped it with Memento Rich Cocoa ink on white card stock and punched around it with a label punch. I used the same punch on brown card stock, then cut it in half and attached it to the back of the white card stock leaving some of the brown showing on the edges. The sentiment is attached to the card with foam tape. The punch I used is discontinued, but this is a similar punch or set of dies.

Almost as sweet as the real thing! This would be a cute card to give with a dozen donuts for a special birthday treat! 🍩

Anita

Posted in Cards, Stamping | Tagged , | Leave a comment

Farmhouse Pillar Candle Risers

Hi friends,

I love the Pinterest app! I find so many great ideas and inspiration, especially when I’m in a crafting slump. 🙃 You can find all of my Pinterest boards here. I’ve saved way more pins than I can ever make, but I’ve found it to be a great resource for diving into my next project.

I was inspired while scrolling on Pinterest recently to make these Farmhouse Pillar Candle Risers. They are super quick and easy to make!

Disclosure: Some of the links on my site are affiliate links, meaning, at no additional cost to you, I will earn a small commission if you click through and make a purchase. As an Amazon Associate I earn from qualifying purchases.

You’ll need round unfinished wood plaques in 2 different sizes. I found mine at my local Michaels (I think they were around $1.49 each). They measure about 4 and 5 inches across the bottom. You’ll also need white and gray paint. I used Home Decor Chalk paint because that’s what I had on hand. You can use acrylic paint, too.

You may want to sand the rough edges of the plaque before you paint them. I didn’t since the roughness didn’t bother me – it’s totally personal preference. I painted the wood plaques with 2 coats of white paint using a chip brush. Be sure to let the paint dry between coats. Once the second coat is dry, dry brush the entire plaque with the gray paint.

Then using E6000 clear adhesive, I glued the smaller plaque to the larger plaque. And that’s it! Super easy and they will add a little farmhouse touch to your decor.

Since my fireplace mantel is stained, I chose to paint my Farmhouse Pillar Candle Risers white so there would be some contrast. If your mantel or shelf is white, you may want to use a wood stain on your candle risers or you can paint them any color and then sand the edges to distress them a bit.

It’s fun to make something so simple that can add a little creative touch to your decor. 😊

Anita

Posted in Decor | Tagged , | 3 Comments

Crochet Canyon Views Pocket Clutch

Hi friends,

I have been making the Crochet Canyon Views Pocket Clutch on repeat! I love the option of using a pre-made zippered canvas bag as a liner since sewing is not my thing. 😉 The pattern also includes instructions for crocheting pockets inside the clutch if you want to do that. It’s a paid pattern by Twisted Knot Crochet and you can find it here.

Disclosure: Some of the links on my site are affiliate links, meaning, at no additional cost to you, I will earn a small commission if you click through and make a purchase. As an Amazon Associate I earn from qualifying purchases.

I found my zippered canvas bags at Hobby Lobby. They measure 4.75 by 6.75 inches and fit perfectly into the shell of the Canyon Views Pocket Clutch. And they are only 99 cents! 🙂

I used Yarn Bee Soft & Sleek yarn and an I/5.5 mm hook to stitch up my clutches. I followed the pattern through Round 10. Then I did 2 rounds of half double crochet in the 3rd loop and finished the clutch with one round of single crochet in the 3rd loop. (This is a great tutorial on crocheting in the 3rd loop.)

To attach the canvas bag to the crocheted shell, I simply used fabric hot glue. No sewing required! Slip the canvas bag into the crocheted shell and run a thin bead of glue around the canvas bag along the edge of the zipper. I did small sections at a time, attaching the crocheted shell as I went. I have this Surebonder hot glue gun that I only use with these fabric hot glue sticks. I keep it separate from my regular hot glue gun so I don’t mix the types of glue. The fabric glue worked great to attach the crocheted shells to the canvas bags.

Twisted Knot Crochet has also released a new Shell Shocked Pouch Shells set with 3 new patterns for making the shell part of the clutch bag. You can find the new pattern pack here. I’ll be making some with the new patterns! 🙂

These clutch bags are so fun to make and they work up really quickly. They have so many uses – carrying your necessities when you’re running errands, holding your makeup or jewelry as you travel, storing your hooks, scissors, and stitch markers in your project bag, or pencils, pens, and paper in your backpack. What will you put in your Crochet Canyon Views Pocket Clutch?

Anita

Posted in Crochet, Gifts | Tagged , | 3 Comments

Merry Christmas Pooh – August Christmas Card

Hi friends,

Wow! I can’t believe August is just about over! It’s time for another Christmas card.🎄

If you’ve been following me for a bit, you know I have been creating a new Christmas card each month. You can find the previous month’s cards here – January, February, March, April, May, June, and July.

Disclosure: Some of the links on my site are affiliate links, meaning, at no additional cost to you, I will earn a small commission if you click through and make a purchase. As an Amazon Associate I earn from qualifying purchases.

Unity Stamp Company recently released this adorable Winnie the Pooh: Merriest Time stamp set and of course I had to add it to my collection. 🙂 It was the perfect stamp to use for my August Christmas card.

To make the card, I stamped Pooh with Memento Tuxedo Black ink on white card stock and colored the image with Copic markers. Using the Scallops & Rectangles nesting dies from Unity Stamp Company, I die cut the image and layered it to green card stock (die cut with the same die set) using foam tape. I attached a piece of patterned paper to a white card and attached the stamped image to the card. Then I stamped “Merry Christmas!” with red ink on the card.

This is such a fun image to color and Pooh makes a very cute Christmas card!🎄

Anita

Posted in Cards, Christmas, Stamping | Tagged , , | 4 Comments

Celebration Wishes Birthday Cards

Hi friends,

This is just the cutest birthday stamp set! It’s called Sending Sweet Celebration Wishes from My Favorite Things. There is also a set of matching dies available to make cutting out the images so easy!

Disclosure: Some of the links on my site are affiliate links, meaning, at no additional cost to you, I will earn a small commission if you click through and make a purchase. As an Amazon Associate I earn from qualifying purchases.

My Favorite Things also has this great Happy Birthday Circle Frame Die-namics that I used on my cards. And I used their Wonky Stitched Square STAX Die-namics to cut the square of patterned paper. My Favorite Things has so many fun products – you should check them out!

To make my cards, I stamped the Fox and Penguin images with Memento Tuxedo Black ink on white card stock, colored them with Copic markers, and die cut them using the matching dies. I die cut the Happy Birthday Circle from coordinating card stock and attached it to a square of patterned paper die cut with the Wonky Stitched Square dies. This is my favorite glue pen for attaching smaller paper pieces and intricate dies.

I embossed a panel of white card stock with a large dot embossing folder (similar to this) and attached it to a white card. Using a 3/8-inch hole punch (or the size that matches your embossing folder), I punched circles from matching paper and randomly attached them to the embossed panel. I attached the square of patterned paper to the card with foam tape and then attached the Fox and Penguin with foam tape.

Sometimes my creations just make me smile – this is one of those times. I hope they make you smile, too. 🙂

Anita

Posted in Cards, Stamping, Uncategorized | Tagged , | 1 Comment

Farmhouse Recipe Card Holder

Hi friends,

Do you struggle with where to put your recipe card while you’re cooking or baking? I must move mine around on the counter 50 times during the process – well, maybe not 50 but a lot! 🙃 This Farmhouse Recipe Card Holder just takes a few minutes to make and will hold your recipe so you can easily see the next step.

Disclosure: Some of the links on my site are affiliate links, meaning, at no additional cost to you, I will earn a small commission if you click through and make a purchase. As an Amazon Associate I earn from qualifying purchases.

You’ll need a slatted wood pallet with an easel back (I found mine at Hobby Lobby), a mini clothespin, and some white chalk paint. I like chalk paint for this project because of the matte finish. You’ll also need a chip brush and strong glue – I used E6000 clear adhesive.

Using the chip brush, apply a thin layer of paint over the slatted wood pallet easel leaving some of the wood showing through. I also painted the back to give it a finished look. Paint the clothespin white and glue to the easel.

And that’s it! You’re done! It literally only takes a few minutes to make. 😊

You can also use this to display a favorite photo or to keep a “to do” list handy.

If Farmhouse isn’t your style, you can paint the easel to match your kitchen – covering it completely and not leaving the wood showing through.

The Farmhouse Recipe Card Holder would make a great inexpensive gift along with a cute set of recipe cards. You could even include a card with one of your favorite recipes. 😊

Anita

Posted in Gifts, Organization, Uncategorized | Tagged , | Leave a comment