Americana USA Wood Blocks

Hi friends,

Last year I made these cute Americana Wood Blocks to add to my patriotic decor. I thought it would be fun to add some USA blocks this year. They are super quick and easy to make!

Disclosure: Some of the links on my site are affiliate links, meaning, at no additional cost to you, I will earn a small commission if you click through and make a purchase. As an Amazon Associate I earn from qualifying purchases.

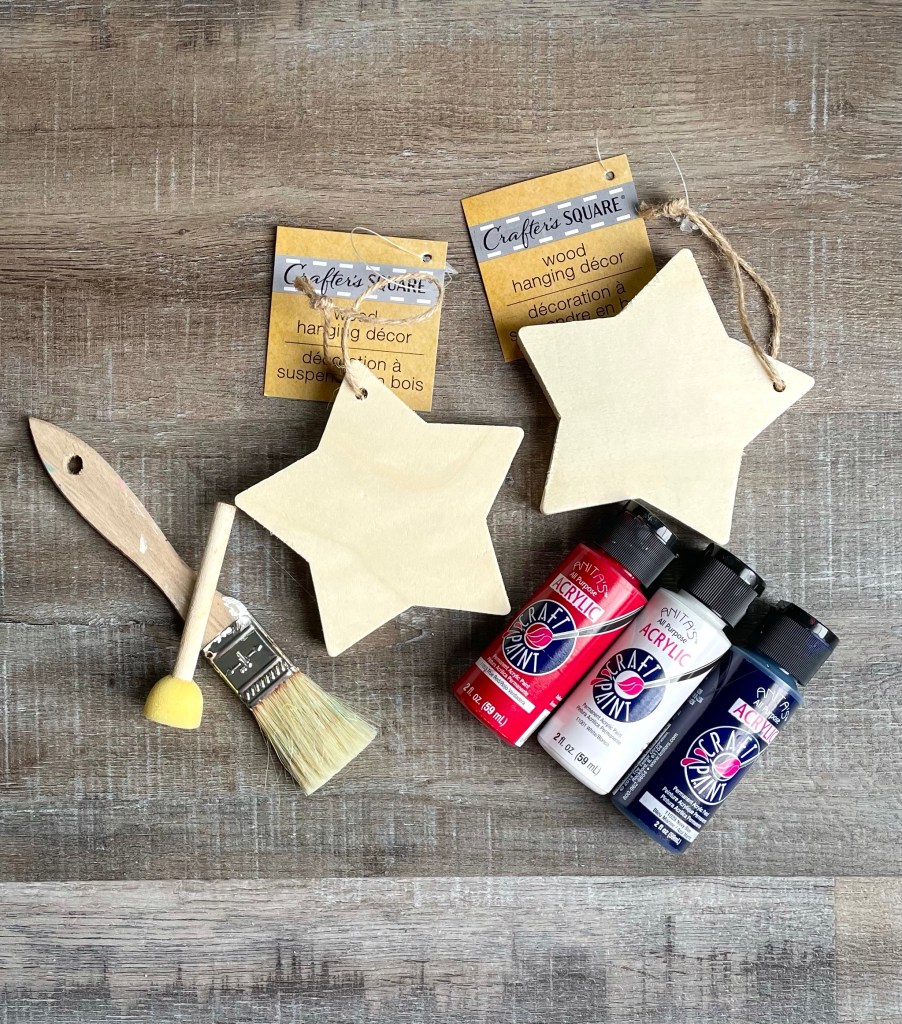
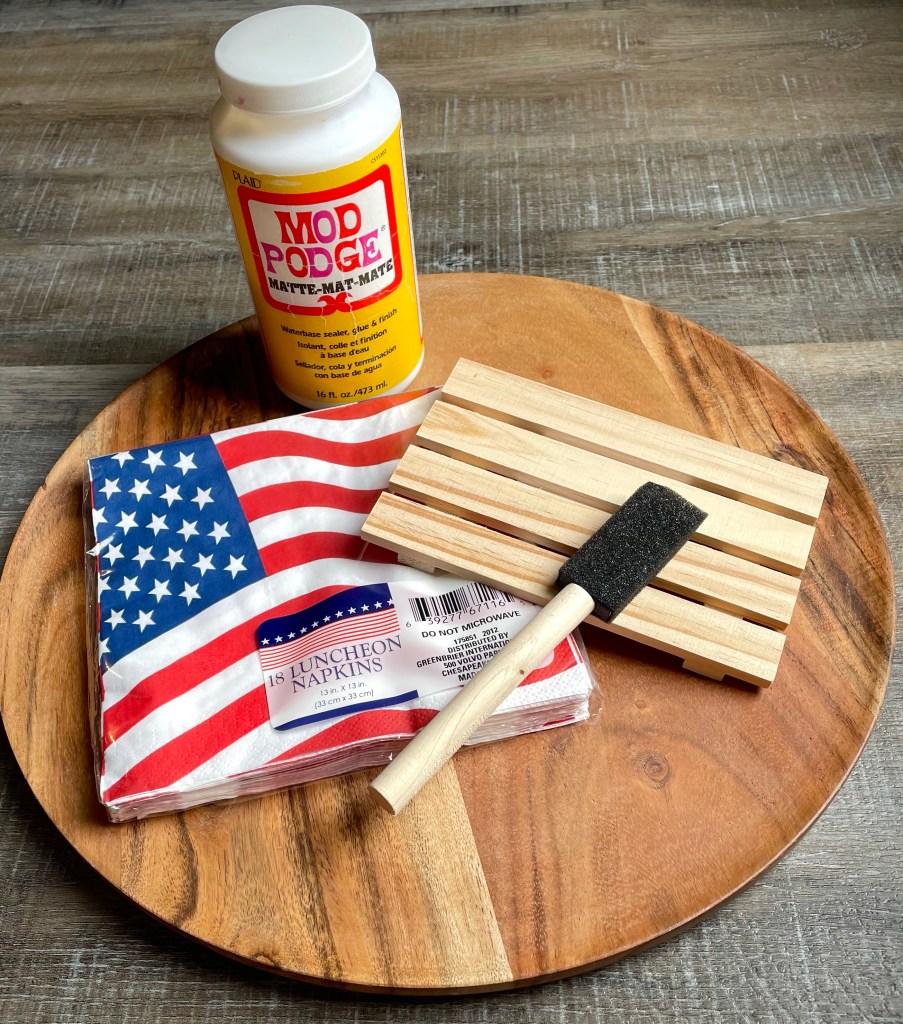
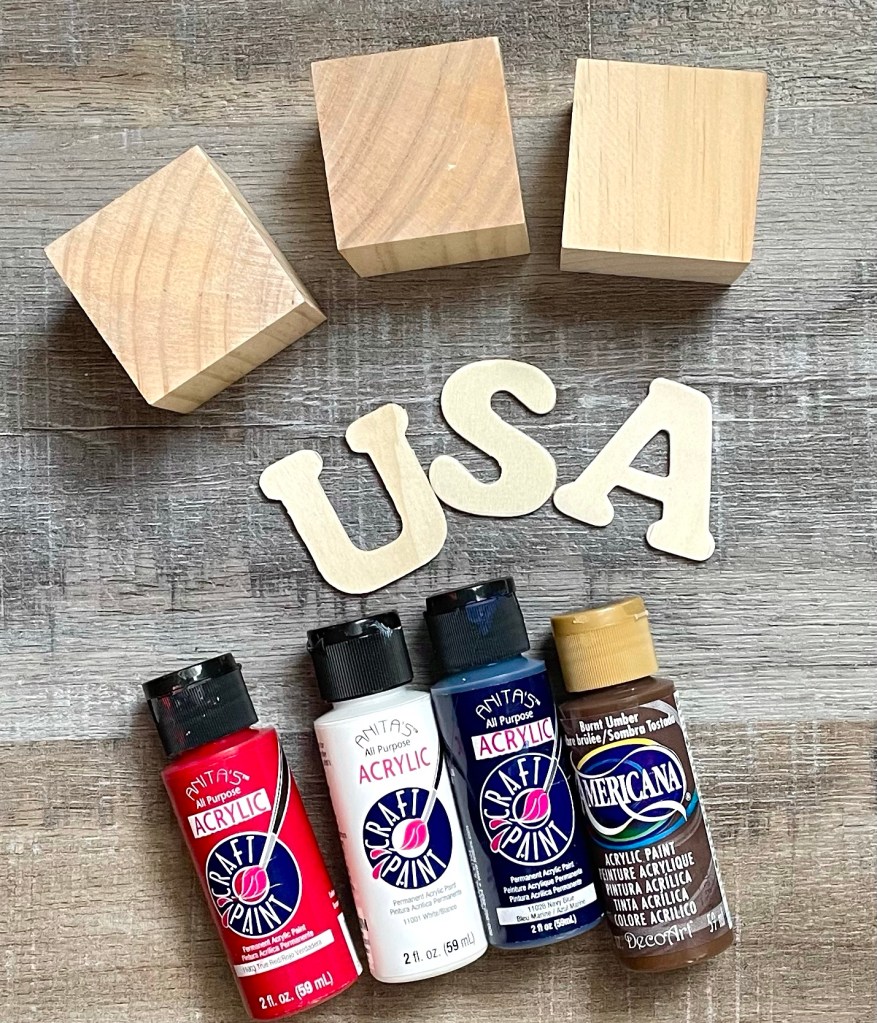
Here’s what you’ll need…

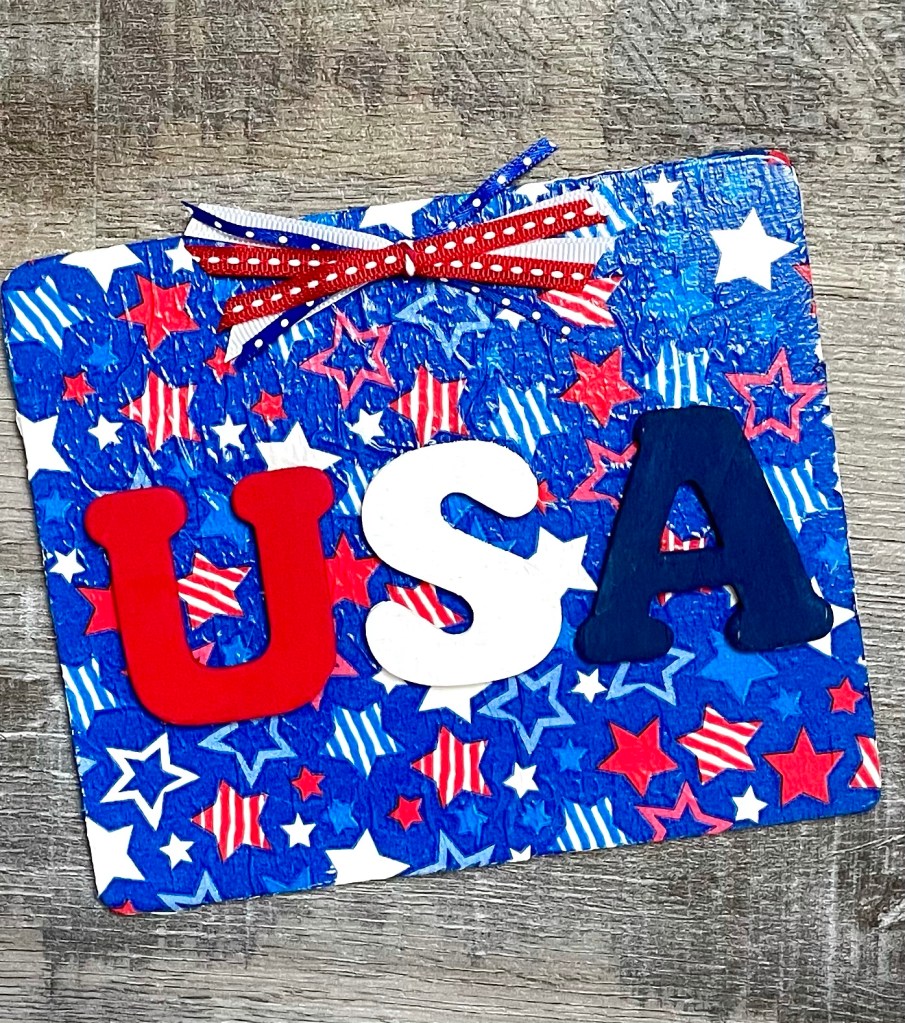
Apply 2 coats of paint to your blocks – one block each of red, white, and blue – letting the paint dry between coats. Paint your “U” white, your “S” blue, and your “A” red. Once the paint is dry, dry brush your blocks and letters with brown paint to give them a vintage look.

Using E600 clear adhesive or another strong glue, glue your letters to the blocks – the “U” to the red block, the “S” to the white block, and the “A” to the blue block.

Next I glued my blocks together, slightly offsetting them. This step is totally optional – you may not want to glue them together. 🙂 You can either stack them like I did or put them side by side.

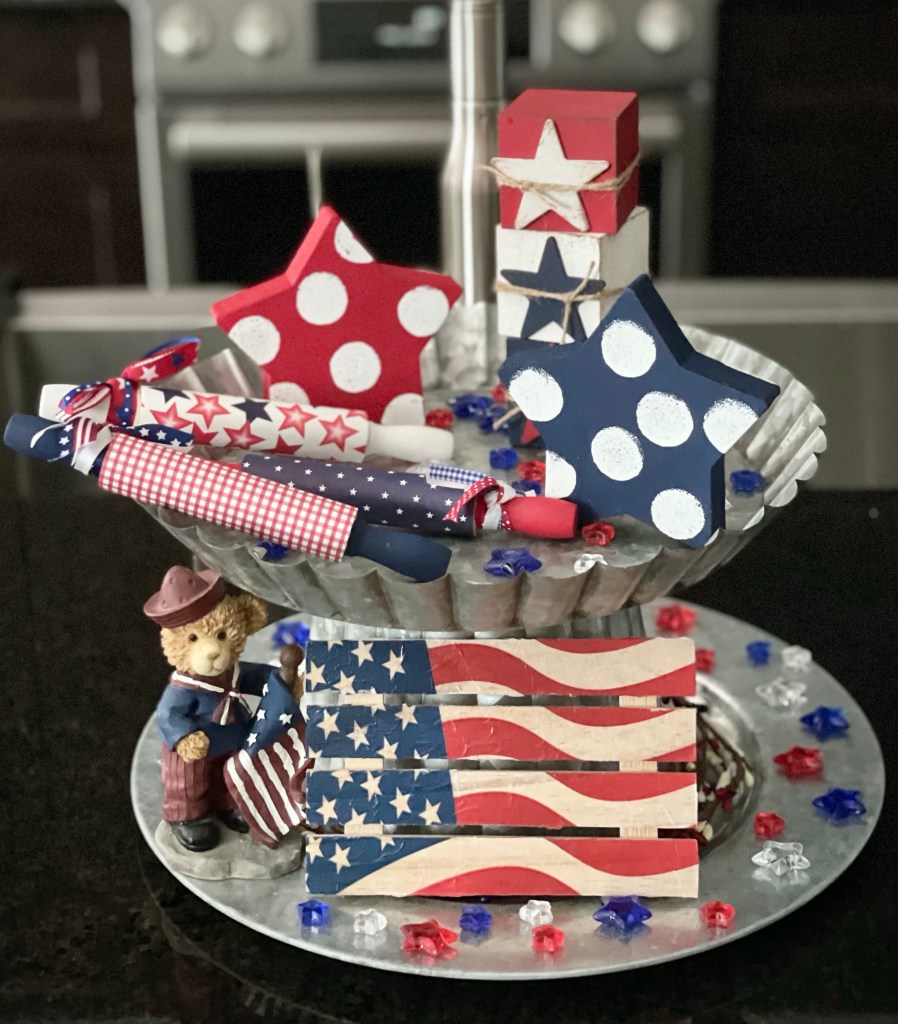
I added them to my tired tray along with my other fun patriotic decor. 🇺🇸

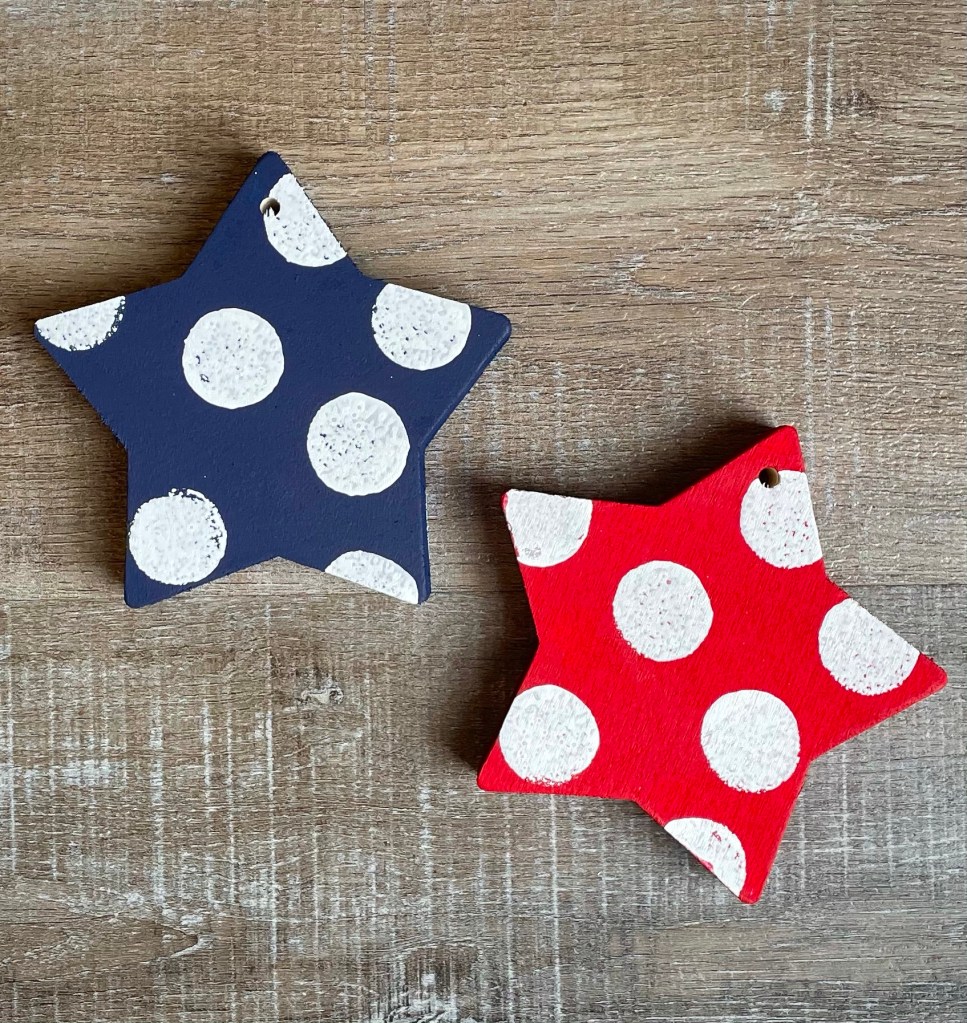
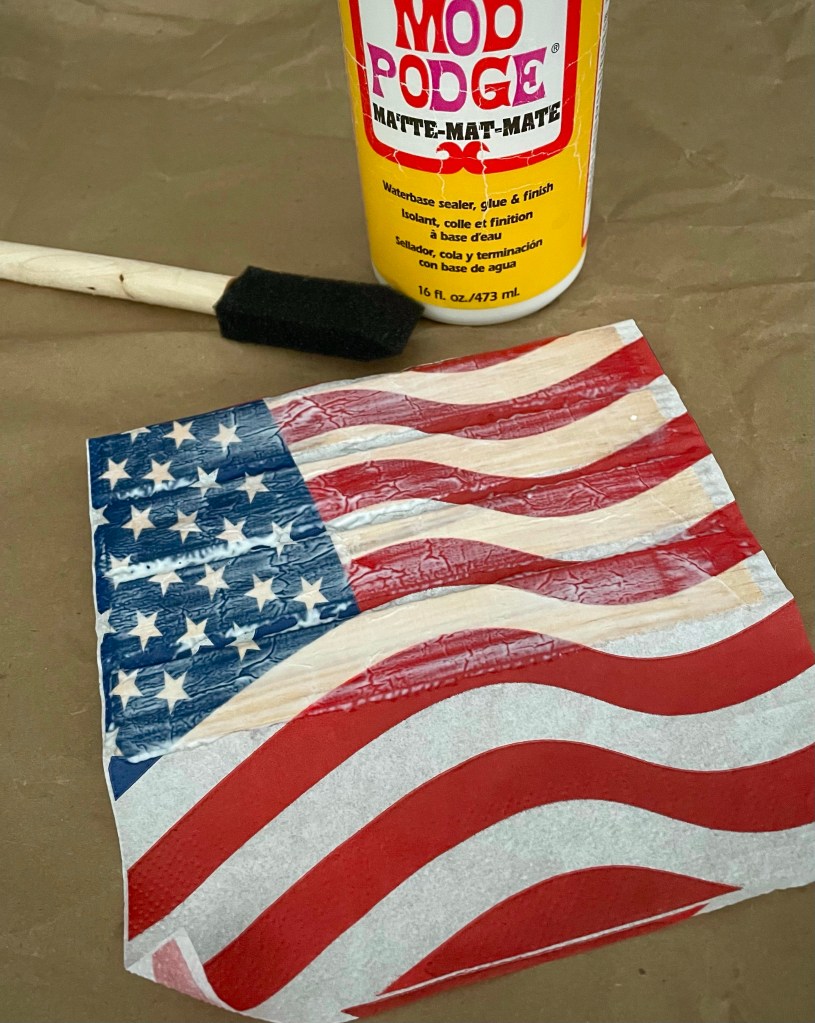
If you are interested, you can find the info for my Chunky Polka Dot Wood Stars here, my Mini Patriotic Rolling Pins here, and my Patriotic Mini Pallet here.

Happy Crafting!

Anita

Posted in Decor, Summer, Vintage | Tagged , , | Leave a comment

Mini USA Sign

Hi friends,

Need a little something extra to add to your 4th of July decor or to spruce up your picnic table for your backyard BBQ? This Mini USA Sign is super easy to make! It measures 5 by 6 inches so it’s the perfect size to tuck anywhere you want to. 🇺🇸

Disclosure: Some of the links on my site are affiliate links, meaning, at no additional cost to you, I will earn a small commission if you click through and make a purchase. As an Amazon Associate I earn from qualifying purchases.

You’ll need a thin wood rectangle (I found these at Hobby Lobby), 1.75 inch letters (these are what I used), red, white, and blue acrylic paints, a napkin printed with a patriotic design (I found mine at Dollar Tree), and some Mod Podge. You may also want some ribbon if you want to add a simple bow to the top of your sign.

The first thing you’ll need to do is to separate the very top printed layer of the napkin from the layers below it. You want to make sure that you only have one layer of the paper napkin.

I painted my rectangle with 2 coats of white paint using a foam brush, letting it dry between coats. I painted both the front and the back to give it a more finished look. Then I brushed a thin layer of Mod Podge with a foam brush onto the rectangle and carefully smoothed the napkin over the top. You’ll need to be gentle so the napkin doesn’t tear. There will be some small wrinkles, but I like the texture it adds. If you’d rather have a smooth surface, I’d suggest using scrapbook paper since it is thicker than a napkin. Let it dry for a few minutes and then trim the excess napkin from around the rectangle using sharp scissors (these are my favorite). Apply another thin layer of Mod Podge over the top.

While the Mod Podge is drying, paint your letters with 2 coats of paint. Attach your letters using a strong glue – I used E600 clear adhesive. I used red, white, and blue ribbon to make a small bow using the super easy Re-Fabbed bow method.

Here’s my finished Mini USA Sign! 😊

Super fun and easy to make! It will add a little patriotic touch wherever you decide to put it. 🇺🇸

Happy Crafting!

Anita

Posted in Decor, Summer | Tagged , | 2 Comments

Chunky Polka Dot Wood Stars

Hi friends,

I promised in this post that I would be sharing all the info on my Chunky Polka Dot Wood Stars…you can find the details on these fun stars below!

Disclosure: Some of the links on my site are affiliate links, meaning, at no additional cost to you, I will earn a small commission if you click through and make a purchase. As an Amazon Associate I earn from qualifying purchases.

I found my chunky wood stars in the craft section at Dollar Tree. The stars measure about 4.5 by 4.5 inches and are 3/4 inch thick. Dollar Tree has really stepped up their craft section – but if you see something you think you might want to use in future projects be sure and snap it up because things go fast!

You’ll need red, white, and blue acrylic paint (this is a great set), a paint brush, and a 3/4″ (or smaller) spouncer for making your polka dots. I like this set of spouncers because it has several different sizes to use on all your polka dot projects.

I removed the twine hanger from my stars and painted one star blue and one red. I used a chip brush to apply my paint, but a foam brush would work, too. I painted the stars with 2 coats, letting it dry completely between coats.

Then using my spouncer, I randomly applied polka dots with white paint. I did this on both sides of my star because they will be used on my tiered tray. If you want to hang them, you can tie the twine hanger back on. I just made sure that the hole is at the bottom of the star on my tray so it’s not so noticeable. You could also cover up the hole by tying the twine (or a ribbon) into a bow and glueing it onto the star.

Here they are on my tiered tray. I love how they turned out! 🇺🇸

The details on my Americana Wood Blocks is here. The info for my Mini Patriotic Rolling Pins is in this post and you can find my post about the Patriotic Mini Pallet here.

Decorating my tiered tray for July 4th has been so fun! What will you put on your tray?

Happy Crafting!

Anita

Posted in Decor, Summer | Tagged | 4 Comments

Crochet Squishy Facial Round

Hi friends,

I have a quick and easy Crochet Squishy Facial Round pattern for you today. It’s squishy because it’s made with Bernat Blanket Twist yarn which is incredibly soft and thick. The yarn is 100% polyester so you can throw these facial rounds into the washer and dryer and they will come out wonderfully squishy. 🙂

Disclosure: Some of the links on my site are affiliate links, meaning, at no additional cost to you, I will earn a small commission if you click through and make a purchase. As an Amazon Associate I earn from qualifying purchases.

I used Bernat Blanket Twist yarn in Cream and an L/8mm hook to stitch up my facial rounds. They work up in just a few minutes – so quick and easy. You can find the pattern below.

I’ve included a link below to a free PDF for easy printing. I’ve also included a link to the free PDF for the labels I made. I simply printed them out on kraft card stock, cut them into strips, and secured the label around 2 facial rounds with a piece of tape on the back.

Simple Crochet Squishy Facial Round

Bernat Blanket Twist yarn in Cream

L/8 mm hook

Stitches used in US terms:

Chain – ch

Single Crochet – sc

Half Double Crochet – hdc

Slip Stitch – ss

Back Loop Only – blo

Chain 3. Slip stitch to first ch to form a ring. 

Round 1: ch 1. Work 10 hdc in ring. ss to first hdc. (10 stitches)

Round 2: ch 1. Working in blo, work 2 sc in each stitch around. Join with ss to first sc. (20 stitches)

Round 3: ch 1. Working in blo, work 2 sc in same stitch as ss. sc in next stitch. *2 sc in next stitch, sc in next stitch* Repeat from *to* around. Join with ss to first sc. (30 stitches)

Fasten off and weave in ends.  

Here’s the PDF for the pattern…

And here’s the PDF for the labels…

I added a few of the Squishy Facial Rounds to a basket I made from the same yarn (details in this post) along with a lavender scented soap to make a fun, pampering gift.

Bernat Blanket Twist yarn comes in several colors – what color will you make your Squishy Facial Rounds?

Happy Stitching!

Anita

Posted in Crochet, Gifts | Tagged , | 4 Comments

Mini Patriotic Rolling Pins

Hi friends,

Do you remember my Mini Easter Rolling Pins from this post? Well…since the 4th of July holiday is coming up soon, I thought it would be fun to make some Mini Patriotic Rolling Pins to add to my tiered tray! 🇺🇸

Disclosure: Some of the links on my site are affiliate links, meaning, at no additional cost to you, I will earn a small commission if you click through and make a purchase. As an Amazon Associate I earn from qualifying purchases.

I found my mini rolling pins here. They are about 7 inches long and are really good quality. You’ll also need some scrapbook paper, acrylic paint, and ribbon if you want to tie that to the rolling pin.

I used Mod Podge this time to adhere my paper to the rolling pin and I highly recommend using it. It just makes it so easy! 😊

First I painted the handles of my rolling pins using my acrylic paints and a small paint brush. (If you need to resupply your craft room, this is a great set of acrylic paints .) Then I trimmed my scrapbook paper to about 3-1/4 by 3-7/8 inches. You’ll want to make sure that the edge of your paper will overlap a little when you wrap it around your rolling pin.

Brush a thin layer of Mod Podge onto the rolling pin with a foam brush. Attach one edge of your paper to the rolling pin and wrap it around. To secure the other edge of your paper, brush a little Mod Podge onto the back and adhere it over the first edge.

Then tie some patriotic ribbon (similar to this) in a double knot around one of the handles and you’re done! I think they turned out so cute and they are super quick and easy to make.

And here they are in my tiered tray. I love changing this up for the different holidays and seasons!

You can find the details for my Americana Wood Blocks here and my Patriotic Mini Pallet here. Stayed tuned for my post about the Chunky Polka Dot Stars coming soon!

Happy Crafting!

Anita

Posted in Decor, Summer | Tagged | 5 Comments

Happy Birthday Sweet Friend

Hi friends,

When you live in Alabama, this Jar of Flowers in the Simply Blessed stamp set from Unity Stamp Company looks like cotton stems! 🙂 So that’s how I colored them up for this birthday card.

Disclosure: Some of the links on my site are affiliate links, meaning, at no additional cost to you, I will earn a small commission if you click through and make a purchase. As an Amazon Associate I earn from qualifying purchases.

I stamped the image with Memento Rich Cocoa ink on white card stock and colored it with Copic markers. The sentiment is from a set called Sweetness from Unity Stamp Company. I stamped it with the Rich Cocoa ink on white card stock, punched it with a scalloped oval punch (similar to this), and inked the edges with green ink.

I embossed a panel of green card stock with the Weathered embossing folder from Taylored Expressions and attached it to a white card. I attached the stamped image over the green panel and added the sentiment to the card with foam tape.

This is a great card to use for so many different occasions. Just change the sentiment and of course you can color it up as flowers instead of cotton. 😉

How will you color up this beautiful stamp?

Happy Stamping!

Anita

Posted in Cards, Stamping | Tagged , | 1 Comment

Crochet Textured Color Block Baby Blanket

Hi friends,

I have a beginner friendly crochet baby blanket pattern for you today. It works up with simple half double crochet and single crochet stitches. By working in the back loop only of your stitches, it adds a nice texture to the blanket. If you are looking for a blanket pattern that is more “solid” with less “holes”, this might be just perfect for you!

Disclosure: Some of the links on my site are affiliate links, meaning, at no additional cost to you, I will earn a small commission if you click through and make a purchase. As an Amazon Associate I earn from qualifying purchases.

I stitched up my blanket using Yarn Bee Soft & Sleek yarn with a J/6mm hook. Any of your favorite worsted weight (4) yarn will work. Although I made my blanket in White and Silver Grey, this blanket would be so pretty in lots of other color combos to match a new little one’s nursery.

This is a great tutorial for learning the Foundation Half Double Crochet Stitch. I love using foundation row stitches to begin my crochet projects rather than a chain if I can, especially if I will be adding a border. It gives you a great beginning edge that’s easy to crochet into later.

Here’s the pattern for the Crochet Textured Color Block Baby Blanket. I’ve also included a free PDF below if you’d like to easily print the pattern. I hope you enjoy it! 🙂

Crochet Textured Color Block Baby Blanket

Yarn Bee Soft & Sleek yarn – White and Silver Grey – Two (5 oz) skeins of each color

J/6mm hook

Stitches used in US terms:

Foundation Half Double Crochet – fhdc

Chain – ch

Half Double Crochet – hdc

Back Loop Only – blo

Slip Stitch – ss

Row 1: With White, work 100 fhdc. Turn. (100 stitches)

Rows 2-12: ch 1 (does not count as a stitch). hdc in blo of each stitch across. Turn. (100 stitches)

Change to Silver Grey.

Rows 13-24: ch 1 (does not count as a stitch). hdc in blo of each stitch across. Turn. (100 stitches)

Change to White.

Rows 25-36: ch 1 (does not count as a stitch). hdc in blo of each stitch across. Turn. (100 stitches)

Change to Silver Grey.

Rows 37-48: ch 1 (does not count as a stitch). hdc in blo of each stitch across. Turn. (100 stitches)

Change to White.

Rows 49-60: ch 1 (does not count as a stitch). hdc in blo of each stitch across. Turn. (100 stitches)

Change to Silver Grey.

Rows 61-72: ch 1 (does not count as a stitch). hdc in blo of each stitch across. Turn. (100 stitches)

Change to White.

Rows 73-84: ch 1 (does not count as a stitch). hdc in blo of each stitch across. Turn. (100 stitches)

Do not turn after last row.

Change to Silver Grey.

Begin working in Rounds. Do not turn at the end of each round.

Round 1: ch 1. sc evenly around, working 3 sc in each corner. Join with ss to first sc.

Rounds 2-3: ch 1. Working in blo, sc in each stitch around, working 3 sc in each corner. Join with ss to first sc.

Fasten off and weave in ends.

Finished size of blanket is approximately 29 by 35 inches.

What color will you make your Crochet Textured Color Block Baby Blanket?

Happy Stitching!

Anita

Posted in Crochet, Gifts | Tagged , | Leave a comment

Patriotic Mini Pallet

Hi friends,

The Memorial Day and July 4th holidays are just around the corner – the perfect time for crafting something red, white, and blue to celebrate the USA! 🇺🇸 This Patriotic Mini Pallet is just the right size to add to your tiered tray or mantel and is super easy to make.

Disclosure: Some of the links on my site are affiliate links, meaning, at no additional cost to you, I will earn a small commission if you click through and make a purchase. As an Amazon Associate I earn from qualifying purchases.

I found these cute mini wood pallets at Dollar Tree. They measure 4 by 6 inches and are unfinished wood just waiting for your creative touch. I picked up a package of Patriotic themed napkins while I was there. I already had Mod Podge and a foam brush at home so this project only cost me $2.00! 🙂

First you’ll want to separate the layers of the napkin so you are left with just the printed top layer. Then trim off one section of the napkin to use on your pallet.

Using your foam brush, brush a thin layer of Mod Podge over the slats of your pallet. Carefully apply your napkin onto the pallet. Be gentle because the napkin will tear very easily! But don’t worry if it does – run your pallet under some water and the napkin will rub off (Trust me, this works. 😉 ) and just start over. You may also have a few wrinkles in your napkin. I didn’t worry about that because I liked the vintage feel to my finished pallet. You’ll have some overhang of the napkin that you will trim off later. Let this dry completely and then brush a thin layer of Mod Podge over the top and let dry.

After the top coat of Mod Podge is dry, trim around the edges with sharp scissors (these are my favorite). Then carefully trim between the slats of the pallet.

I love how the wood grain shows through the napkin and how the wrinkles give the pallet a vintage look. If you want the stars and stripes to look more white, you can paint the slats of the pallet with white acrylic paint before applying the napkin.

I think this will be a great addition to my patriotic decor! And it was so inexpensive and easy to make! 🇺🇸

You can make these cute pallets using any pretty printed napkin – flower or lemon printed napkins would be so cute all Summer long. 🌸🍋

Happy Crafting!

Anita

Posted in Decor, Summer | Tagged | 7 Comments

Have a Beautiful Day

Hi friends,

I know I’ve shared with you before how much I love Unity Stamp Company! I’m always discovering new stamp sets that I just have to have. 😉

This set called First Friend, Best Friend, Forever was first released in 2015 and I just recently added it to my collection. I used it to make my Mom’s Mother’s Day card – yellow roses are her favorite. But of course you can make them any color.

Disclosure: Some of the links on my site are affiliate links, meaning, at no additional cost to you, I will earn a small commission if you click through and make a purchase. As an Amazon Associate I earn from qualifying purchases.

The sentiment is from another Unity Stamp Company set called Gingko Greetings. The set includes 3 sentiments and a gingko floral bunch and corner that will make stunning cards.

I stamped the image using Memento Rich Cocoa ink onto white card stock. I colored the image with Copic markers and stamped the sentiment with the Rich Cocoa ink. I used a paper distresser on the stamped panel as well as on a panel of yellow card stock to add some texture to the edges.

I attached the yellow panel to a white card and then attached the stamped panel to the card. I added 3 Dew Drops to finish the card. I used Tombow Mono Adhesive Dots to attach my paper layers together and Art Institute Glitter Designer Dries Clear Adhesive to attach my Dew Drops.

This image can be used on so many different cards…Mother’s Day, birthday, thinking of you, and even for a sympathy card. I think this layout would be so pretty in pink or shades of lavender.

I love when stamps are so versatile. And this one is fun to color, too! What color will you make your card?

Happy Stamping!

Anita

Posted in Cards, Stamping | Tagged , | 3 Comments

Slow Cooker Chicken Pot Pie

Hi friends,

Sometimes we just need a little comfort food! This Slow Cooker Chicken Pot Pie recipe from Passionate Penny Pincher is so easy and is just like a warm hug for your tummy. 😉

Disclosure: Some of the links on my site are affiliate links, meaning, at no additional cost to you, I will earn a small commission if you click through and make a purchase. As an Amazon Associate I earn from qualifying purchases.

It’s so simple to make! It will cook it in your slow cooker on low for 6.5 hours. During the last 30 minutes, you’ll bake up some biscuits.

Serve the yummy goodness on top of the warm biscuits and your tummy will smile! 😋 Add a side salad for an easy weeknight dinner.

You can find the full recipe here along with all kinds of other helpful info to make your life easier. 😊

Happy Cooking (and Eating!)

Anita

Posted in Recipes | Tagged | Leave a comment