End of Summer Beach Trip

Hi friends,

I wrote this post before hurricane Sally hit the gulf coast. My prayers are with all who have been affected by the storm.

We took an end of Summer trip to the gulf coast to celebrate my birthday…we were supposed to go to Scotland, but…Covid…so hopefully next year! I’m very thankful we were able to take this trip and relax while listening to the waves. Not much better than that in my book! Although I am willing to give Scotland a try! 😉

Disclosure: Some of the links on my site are affiliate links, meaning, at no additional cost to you, I will earn a small commission if you click through and make a purchase. As an Amazon Associate I earn from qualifying purchases.

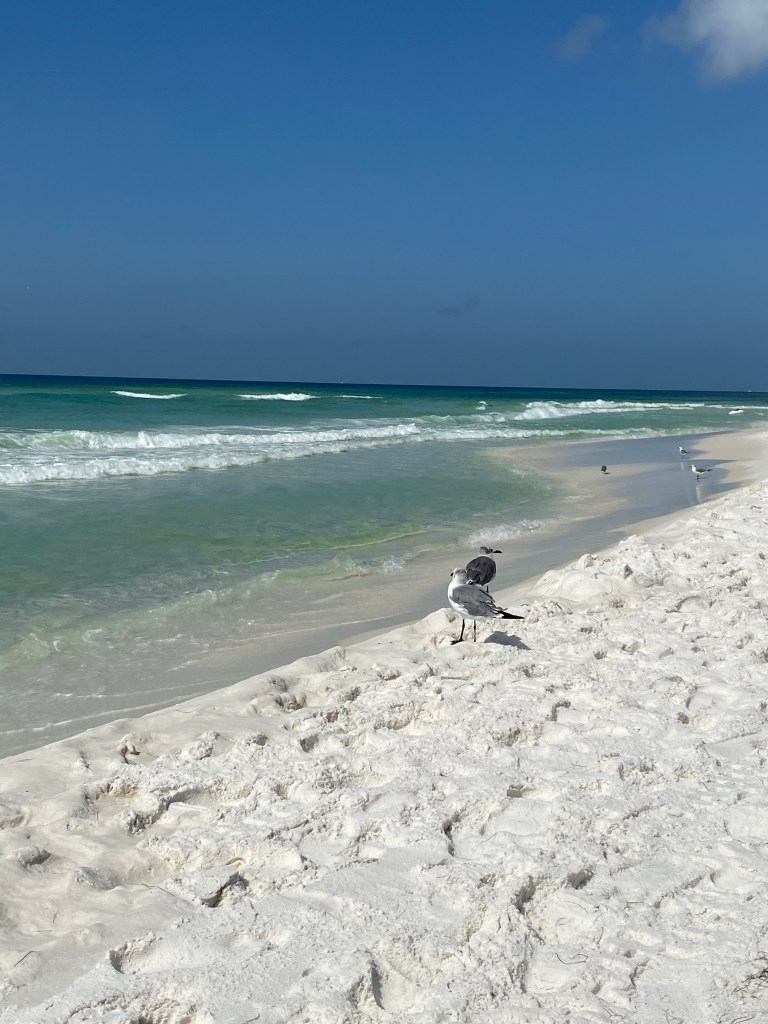
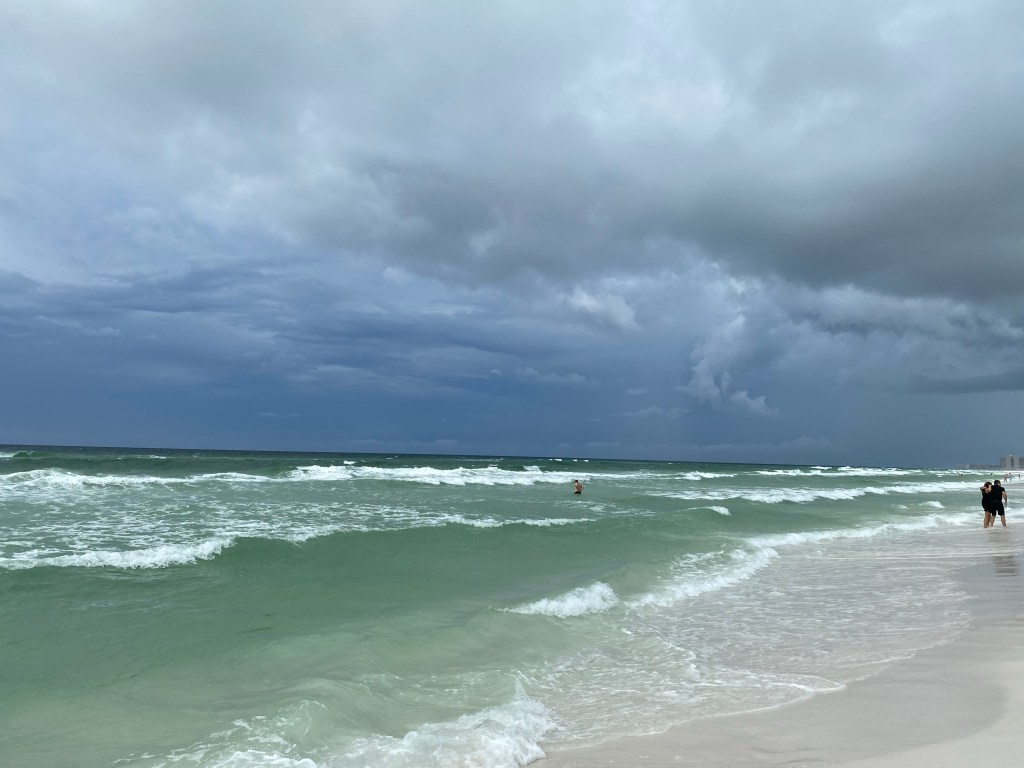
We like to stay in Destin, Fl in the Florida panhandle. There are beautiful white sand beaches and the water colors range from a beautiful blue to a gorgeous emerald green. They call it the Emerald Coast and it certainly lives up to its name – even when storms are rolling in!

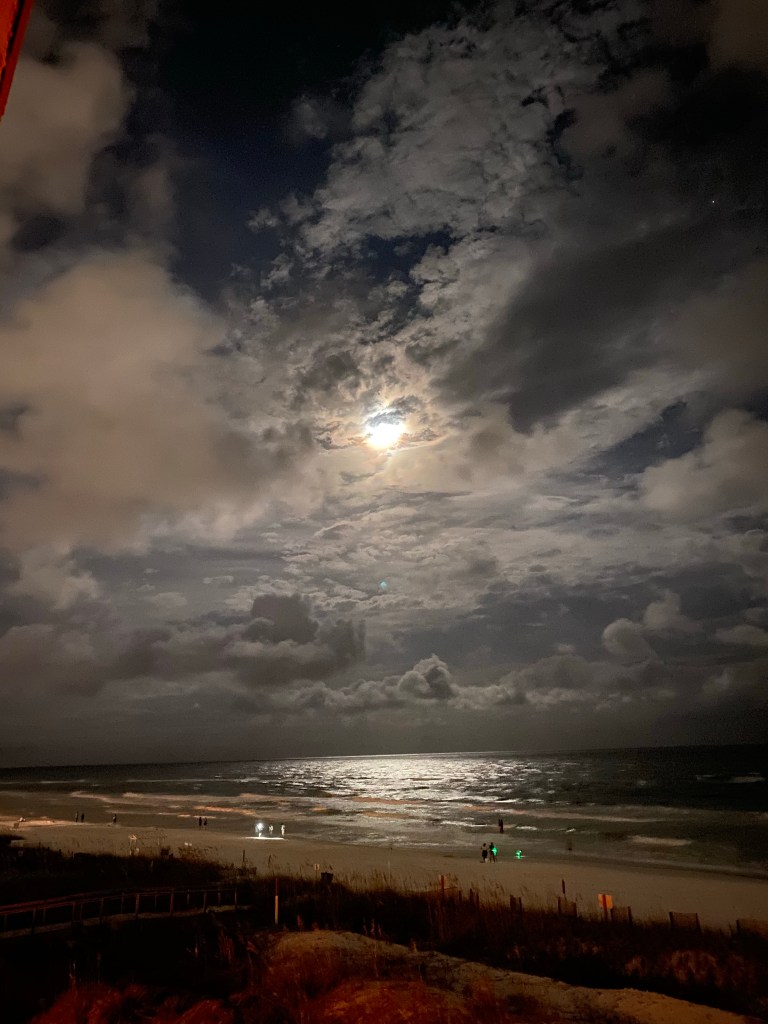
There was a beautiful full moon while we were there with amazing clouds surrounding it.

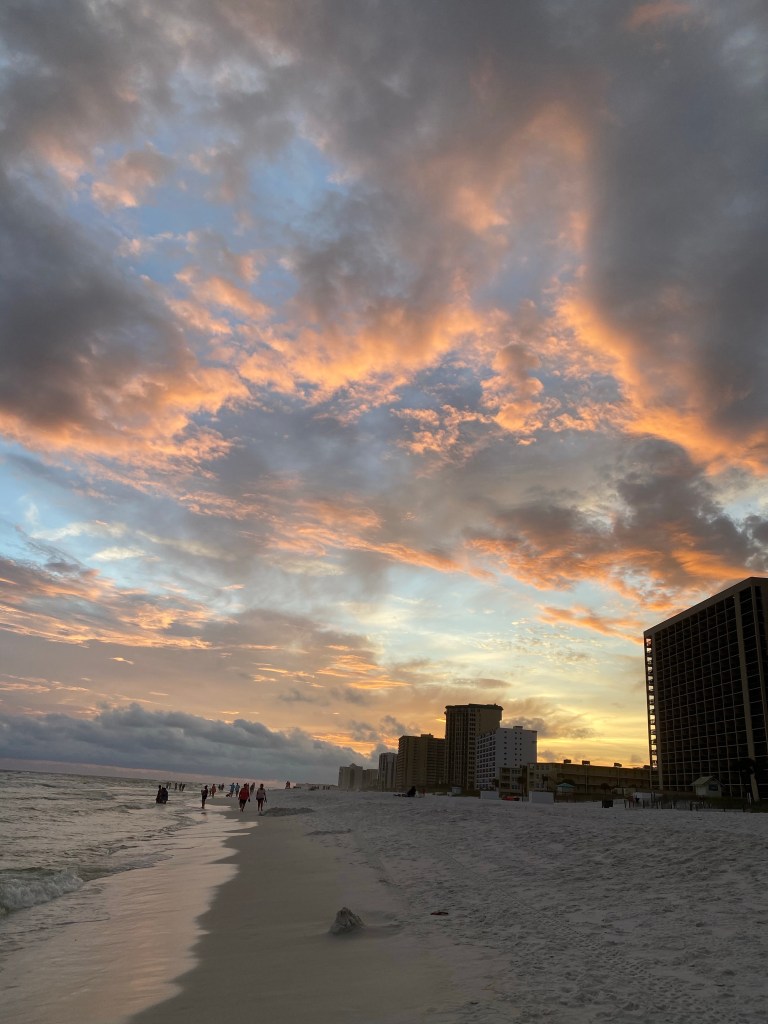
And of course sunset over the water is always incredible!

I hope you enjoyed a peek of our week at the beach. We really didn’t do much besides walking and relaxing on the beach! It was truly a great way to end the Summer. 🙂

Anita

Posted in Travel | Leave a comment

Buffalo Plaid Ribbon Tassel Necklace

Hi friends,

I’ve seen a lot of Ribbon Tassel Necklaces on Pinterest and thought it would be fun to make my own. I went “shopping” in my craft room to see what supplies I already had that I could use.

So here’s my version of a Buffalo Plaid Ribbon Tassel Necklace…

Disclosure: Some of the links on my site are affiliate links, meaning, at no additional cost to you, I will earn a small commission if you click through and make a purchase. As an Amazon Associate I earn from qualifying purchases.

You’ll need ribbon – I used 4 different ribbons. A split key ring – mine measures just over an inch in diameter. A small jump ring (this set has a variety of sizes) and a necklace chain that will fit through your jump ring. My chain was a premade one measuring about 30 inches that I had picked up at Michael’s. You can also buy chain in bulk on a spool, cut it to your desired length, and add your own jewelry findings to the ends to make your necklace chain.

I cut 2 pieces of the buffalo plaid ribbon, 2 of the black ribbon, and one each of the 2 different white ribbons for a total of 6 ribbons. Each piece measured about 12 inches long. I folded the ribbons in half and slipped the loop through my split key ring. Then I pulled the ends of the ribbon through the loop and pulled it tight.

Next, I attached the jump ring to the split key ring. You could also slide this onto the key ring before you tie the ribbon on – I realized I could do that after I already had my ribbon tied on. 🤦‍♀️

Then simply thread the necklace chain through the jump ring. Finally, trim the ends of your ribbon to your desired length. Super easy to make and so cute!

I made sure the the knot from my ribbons covered up the “split” part of my key ring – you can easily slide the tassel around the ring if you need to.

The sky is the limit when it comes to make these fun necklaces! You can use any ribbons in any colors. You can also use different size key rings and necklace chains. The key rings and chains also come in different colors and finishes – I just found these colorful rings on Amazon and they have the jump ring already attached! And here are some black ones! I need to go shopping. 🙂

Are you thinking of Christmas yet? These would make great gifts! Don’t forget to pin this post to your favorite Pinterest board using the button below so you’ll have it handy when you want to make some of these fun Ribbon Tassel Necklaces.

Happy Crafting!

Anita

Posted in Gifts, Jewelry | Tagged , | 4 Comments

Dollar Tree Christmas Craft Supplies are in the store!

Hi friends,

Dollar Tree is beginning to fill the aisles with Christmas craft supplies! I picked up a few things and I don’t even know what I will do with them yet. 😉

If you think you might want to do some Dollar Tree Christmas crafting, you’ll want to stop by your local store soon and stock up. You know they will sell out quickly!

Disclosure: Some of the links on my site are affiliate links, meaning, at no additional cost to you, I will earn a small commission if you click through and make a purchase. As an Amazon Associate I earn from qualifying purchases.

Here is what I picked up. The wood shapes in this picture are roughly 10-12 inches in size. How could I pass them up??

Each of these packages included 5 ornaments and the words Peace, Joy, and Believe are metal!

There was a lot more that I didn’t get and they were still unboxing Fall things so I suspect there might be more Christmas coming. But don’t wait! Because if you don’t get it when you see it, it will be gone!!

Stay tuned to the blog over the next few weeks to see what I do with some of this. 🎄

What will you make?

Anita

Posted in Christmas, Decor, Uncategorized | Tagged , | Leave a comment

Flower Thank You Card

Hi friends,

I have a simple and quick thank you card to share with you today. It comes together quickly using the Mother’s Day Daisies stamp set from Unity Stamp Company. The simple flower image is quick to color, and with a few extras, it makes a cute card.

Disclosure: Some of the links on my site are affiliate links, meaning, at no additional cost to you, I will earn a small commission if you click through and make a purchase. As an Amazon Associate I earn from qualifying purchases.

I stamped the image with Memento Rich Cocoa ink on white card stock, colored it with Copic markers, trimmed the image, and layered it to pink card stock.

I stamped “thank you” with the Rich Cocoa ink on white card stock, punched it with an oval punch (similar to this one), and layered it to a scalloped oval punched from green card stock (here’s a similar punch – it’s a little larger than the one I used). The sentiment is also from Unity Stamp Company, but I’m not sure what set it is from. I got it in one of their fabulous grab bags that they make available every now and then.

To make the card, I attached a pink ribbon to a panel of patterned paper and then attached the panel to a white card. I attached the stamped flower image to the card and then attached the sentiment to the card with foam tape. I finished the card off with 3 green sequins in the bottom left corner of the card. I used my Tombow Dots tape runner to adhere the paper layers together and Art Institute Glitter Glue to attach the sequins.

I chose to make this a thank you card, but by changing the sentiment it would also make a great birthday or thinking of you card. And, of course, the color scheme can be changed to any color combination.

Happy Stamping!

Anita

Posted in Cards, Stamping | Tagged , | 1 Comment

Crochet Jack-O-Lantern Tote Bag

Hi friends,

I shared this Crochet Snowman Tote Bag from Repeat Crafter Me that I stitched up a few weeks ago. In that post, I mentioned that she has several other tote bag patterns. And this cute Jack-O-Lantern is one of them! 🎃

It works up really quickly using 2 strands of yarn. I used Yarn Bee Soft & Sleek in Pumpkin Spice to stitch up my tote. I made his face using Red Heart Super Saver in Black because that’s what I had on hand. 😊

Disclosure: Some of the links on my site are affiliate links, meaning, at no additional cost to you, I will earn a small commission if you click through and make a purchase. As an Amazon Associate I earn from qualifying purchases.

You can find the free pattern from Repeat Crafter Me here. I added 3 extra rounds before I started the round to make the handles (so 36 rounds before starting the handles.)

I used a J/6mm hook (the pattern calls for an I/5.5mm hook). My finished tote measures about 10.5 inches wide by 14 inches tall including the handles. A great size for little ones to carry while Trick or Treating – if we get to do that this year!! Or it would be fun to use in your Fall decor in your home.

Happy Stitching! 🎃

Anita

Posted in Crochet, Fall, Gifts | Tagged , , | 3 Comments

Bunnies in a Balloon

Hi friends,

It’s my birthday! 🎉 So I thought it would be fun to share a new birthday card in today’s post. 😊

Have you noticed all the slimline cards popping up everywhere? They measure 3.5 by 8.5 inches and easily fit into a business size envelope. It’s a fun and different size card to make.

The stamp set I used is called Bunnies in a Balloon and it’s from Unity Stamp Company.

Disclosure: Some of the links on my site are affiliate links, meaning, at no additional cost to you, I will earn a small commission if you click through and make a purchase. As an Amazon Associate I earn from qualifying purchases.

I stamped the Bunnies in a Balloon with Memento Tuxedo Black ink on white card stock and colored it with Copic markers. I die cut the image using the Pinkfresh Studio Slim Ornate Banner Die Set. Then using a cloud template, I sponged a cloud background around the image with turquoise ink. I attached the image to kraft card stock die cut using the same die set.

I stamped “happy birthday” from the Bunnies in a Balloon stamp set with turquoise ink on white card stock, punched it with an oval punch, and sponged the edges with the same ink.

I cut my card base to 7 by 8.5 inches from white card stock and folded it in half lengthwise for a finished size of 3.5 by 8.5 inches. I cut a panel of turquoise card stock and layered it to the front of the card. I then attached the stamped image to the card. The sentiment is attached with foam tape. I finished the card by adding 3 turquoise Dew Drops.

My favorite adhesive for card making is this tape runner by Tombow – you can get refills for it, too. I like this Art Institute Glitter Glue for attaching small embellishments to my cards.

These cute little bunnies are sure to bring a smile!

Happy Stamping!

Anita

Posted in Cards, Stamping | Tagged , | 6 Comments

Repurposed Picture Frame

Hi friends,

I’ve had this frame in my garage for I don’t even know how long! 🙃 I picked it up at a thrift store thinking it would be a great project with all the detail it has. I just wasn’t sure what I wanted to do with it until now. 🙂

I love using chalk paint on my craft projects because it will adhere to just about any surface and comes in so many great colors. I wanted my frame to have a farmhouse feel so I used my go to Americana Décor Acrylic Chalky Finish Paint in Everlasting White to paint my frame. It’s my favorite white chalk paint to use on smaller craft projects.

Disclosure: Some of the links on my site are affiliate links, meaning, at no additional cost to you, I will earn a small commission if you click through and make a purchase. As an Amazon Associate I earn from qualifying purchases.

Here’s what my frame looked like before I started. Lots of detail, but it didn’t really go with my decor. The first thing I did was to remove the wire hanger from the back – it was rusted and unusable. Then I cleaned the frame with warm soapy water and let it dry thoroughly.

I painted the entire frame – front and back – with 2 coats of Americana Décor Acrylic Chalky Finish Paint in Everlasting White. Make sure to let the paint completely dry between coats. I used a chip brush to apply the paint which worked great getting into all the nooks and crannies on the front of the frame.

Once the paint was dry, I brought out the detail on the frame by dry brushing gray acrylic paint over the entire frame. (This is a great set if you need to add acrylic paint to your craft supplies.)

I had a 6-inch grapevine wreath that I wanted to hang in my frame. I put a 1.5-inch wide ribbon through the wreath, tied a knot at the top, and hot glued the knot to the top of the frame. Because of the thickness of my frame, the knot didn’t show. If you use a thinner frame, you can glue the ribbon to the back of the frame.

And here is my finished frame. I love the way it turned out! I think I may hang it in my bathroom – I haven’t completely decided yet. I have gray walls and think it will look really pretty against the darker hue. 🙂

Keep your eyes open as you are thrifting or shopping garage sales. It’s amazing what a couple coats of paint can do!

Happy Crafting!

Anita

Posted in Decor | Tagged , | 2 Comments

Crochet Candy Corn Hand Sanitizer Holder

Hi friends,

We are all keeping hand sanitizer close by these days so why not make it a little fun? I whipped up this cute Crochet Candy Corn Hand Sanitizer Holder that you can use all Fall. It attaches easily to your purse, backpack or even your belt loop. 😁

It works up super fast using I Love This Cotton yarn with an H/5mm hook. You can literally stitch this up in just a few minutes – and it’s a great stash buster! As of writing this post, Amazon has a 4 pack of Purell Travel Hand Sanitizer available if you are having trouble finding small bottles near you. (Just remember that prices and availability often change on Amazon.)

Disclosure: Some of the links on my site are affiliate links, meaning, at no additional cost to you, I will earn a small commission if you click through and make a purchase. As an Amazon Associate I earn from qualifying purchases.

You can find the pattern below along with a link to a free PDF if you’d like to easily print it out.

Crochet Candy Corn Hand Sanitizer Holder

I Love This Cotton yarn – White, Glowing, Curry

H/5mm hook

1/2 inch yellow button

Stitches used in US terms:

Chain – ch

Slip Stitch – ss

Single Crochet- sc

Chain 12 with White. Join with ss to first ch to form a ring.

Round 1: ch 1. sc same stitch as ss and in each ch around. Join with ss to first sc. (12 stitches)

Round 2: ch 1. sc in same stitch as ss. *2 sc in next stitch, sc in next stitch.* Repeat from * to * 4 times. 2 sc in last stitch. Join with ss to first sc. (18 stitches)

Round 3: ch 1. sc in same stitch as ss and in each stitch around. Join with ss to first sc. (18 stitches)

Change to Glowing.

Rounds 4-9: ch 1. sc in same stitch as ss and in each stitch around. Join with ss to first sc. (18 stitches)

Change to Curry.

Rounds 10-12: ch 1. sc in same stitch as ss and in each stitch around. Join with ss to first sc. (18 stitches)

Do not fasten off.

Handle:

Ch 20. sc in 6th ch from hook. sc in next 14 ch. Join with ss to top of Round 12.

Fasten off and weave in ends.

Sew button to opposite side of holder from handle. Insert hand sanitizer and button handle around purse or backpack strap.

Here’s the link to the PDF…

I hope you enjoy this fun little pattern. Stay well, friends!!

Anita

Posted in Crochet, Fall | Tagged , | 15 Comments

Chalk Painted Pumpkin Jar

Hi friends,

I love the Fall season and all the fun decor that comes along with it. I especially love when I can make new and inexpensive things to add to my Fall decorating. I found this cute little jar at Dollar Tree and I thought it would make a great pumpkin!

Disclosure: Some of the links on my site are affiliate links, meaning, at no additional cost to you, I will earn a small commission if you click through and make a purchase. As an Amazon Associate I earn from qualifying purchases.

To make your own pumpkin, you’ll need chalk paint (I found mine at Michael’s) in orange and green along with some antique wax.

Apply 2-3 coats of orange paint to the jar and 2-3 coats of green paint to the lid of the jar, being sure to let the paint dry thoroughly between coats. I like to apply the paint with a chip brush. Once the last coat is completely dry, apply the wax with a chip brush and immediately wipe off the excess with a paper towel. I finished my pumpkin by spraying it with matte sealing spray.

I had raffia in the supply picture above, but decided I liked tying the stem of my pumpkin with natural jute twine better. But of course you can use raffia, ribbon, or even baker’s twine.

And here’s my finished pumpkin! Such a fun addition to my Fall decor. 🍁

Have fun making your own pumpkin – or a whole pumpkin patch! 😉

Happy Crafting!

Anita

Posted in Decor, Fall | Tagged , , | 4 Comments

Crochet Candy Corn Can Cozy

Hi friends,

Candy Corn – I think you either love it or hate it! Me? I love it! 😋 You can find my 5 Minute Snack Mix using candy corn in this post.

Not a fan of the sweet treat? You can still enjoy the fun colors of candy corn in this cute Crochet Candy Corn Can Cozy. It stitches up quickly using cotton yarn and is great for the whole Fall season. 🍁

Disclosure: Some of the links on my site are affiliate links, meaning, at no additional cost to you, I will earn a small commission if you click through and make a purchase. As an Amazon Associate I earn from qualifying purchases.

I used I Love This Cotton yarn in Curry, Glowing, and White with an H/5mm hook to stitch up my cozy.

You’ll find the pattern below and I’ve included a link to a free PDF below.

Crochet Candy Corn Can Cozy

I Love This Cotton yarn – Curry, Glowing, White

H/5mm hook

Yellow, Orange, and White buttons (optional)

Stitches used US terms:

Magic Ring

Single crochet – sc

Half double crochet – hdc

Slip stitch – ss

Back loop only – blo

Using Curry, make Magic Ring, ch 1.

Round 1: Work 9 hdc in ring. Join with ss to first hdc. Pull ring closed. (9 stitches)

Round 2: ch 1. 2 hdc in same stitch as ss and in each stitch around. Join with ss to first hdc. (18 stitches)

Round 3: ch 1. 2 hdc in same stitch as ss. *hdc in next stitch, 2 hdc in next stitch* Repeat from * to * around to last stitch. hdc in last stitch. Join with ss to first hdc. (27 stitches)

Round 4: ch 1. Working in blo, sc in same stitch as ss and in each stitch around. Join with ss to first sc. (27 stitches)

Rounds 5-7: ch 1. Working in both loops, sc in same stitch as ss and in each stitch around. Join with ss to first sc. (27 stitches)

Change to Glowing.

Rounds 8-14: ch 1. hdc in same stitch as ss and in each stitch around. Join with ss to first hdc. (27 stitches)

Change to White.

Rounds 15-19: ch 1. sc in same stitch as ss and in each stitch around. Join with ss to first sc. (27 stitches)

Fasten off and weave in ends.

Layer and sew on buttons if desired.

Here’s the free PDF link…

I hope you enjoy this pattern!

Happy Stitching!

Anita

Posted in Crochet, Fall, Gifts | Tagged , , | 3 Comments