A while back, I made this Crochet Classic Coverlet pattern from Lion Brand in white with a baby blue border. Here’s my post with all of the details on my finished blanket. Just FYI, to access the pattern you will need to set up a free account with Lion Brand – but they have tons of patterns so it will be worth it. 🙂
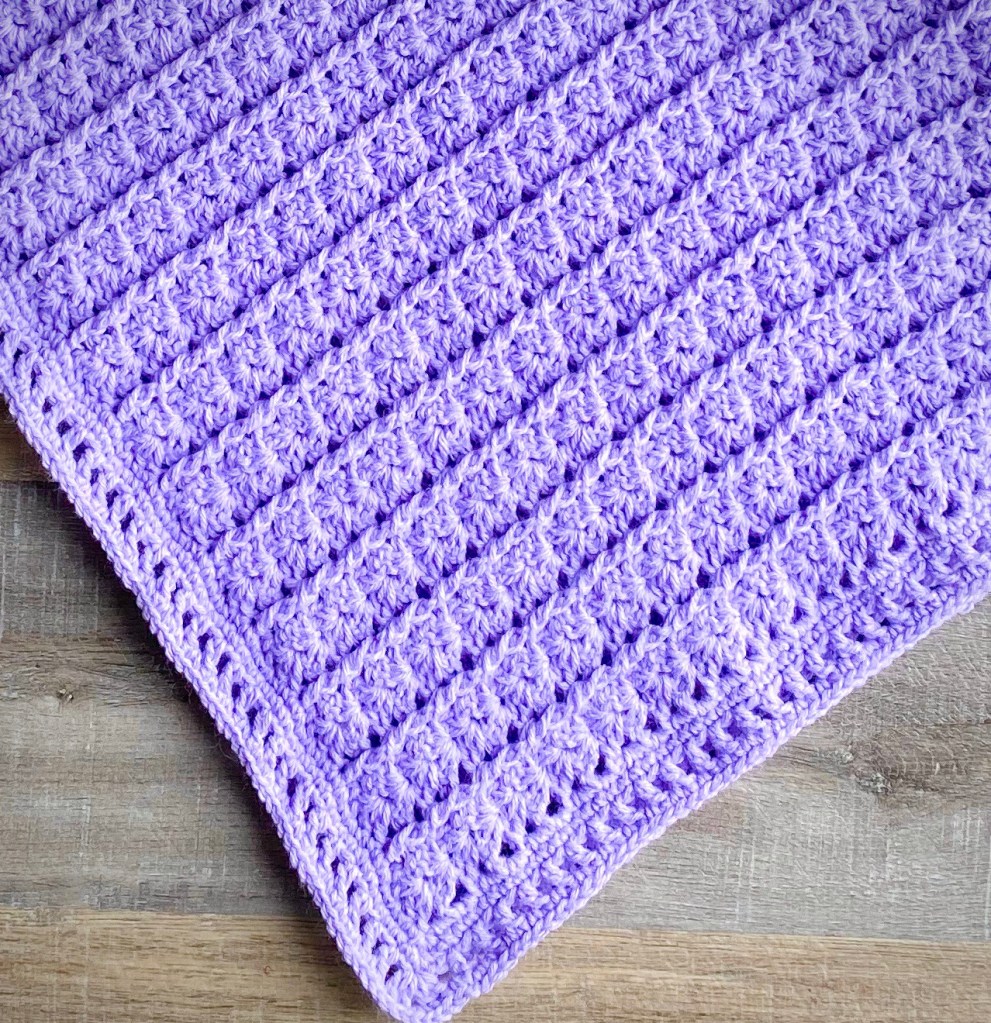
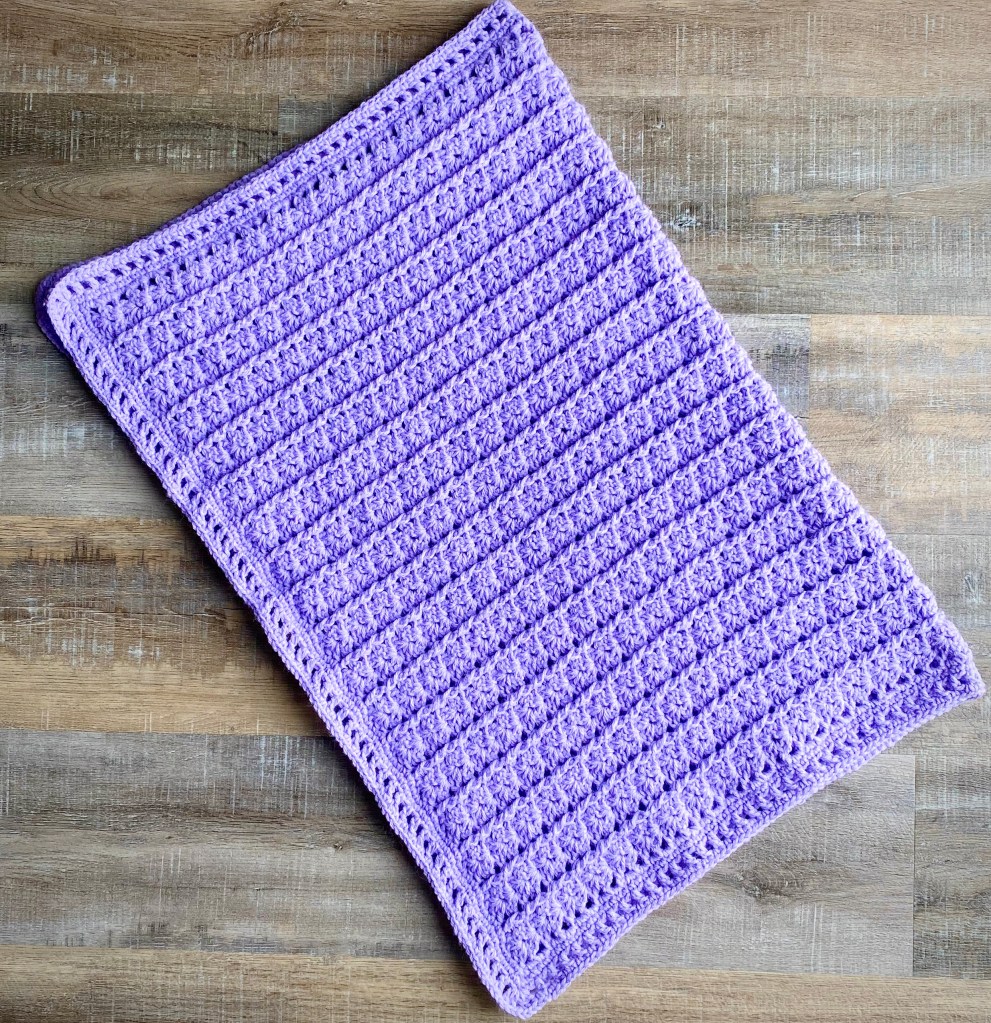
In a box of yarn I was gifted, there was a skein of Lion Brand Pound of Love in Lavender that I thought would look so pretty in this pattern. I followed the pattern until the last row of the border. I decided to stop at round 4 and leave off round 5 just to give it a little different look.
Disclosure: Some of the links on my site are affiliate links, meaning, at no additional cost to you, I will earn a small commission if you click through and make a purchase. As an Amazon Associate I earn from qualifying purchases.
I really like how it looks this way and also with the shell border on the first one I made. This is one of those patterns that works up quickly and is great to work on while watching your favorite movie or TV program.
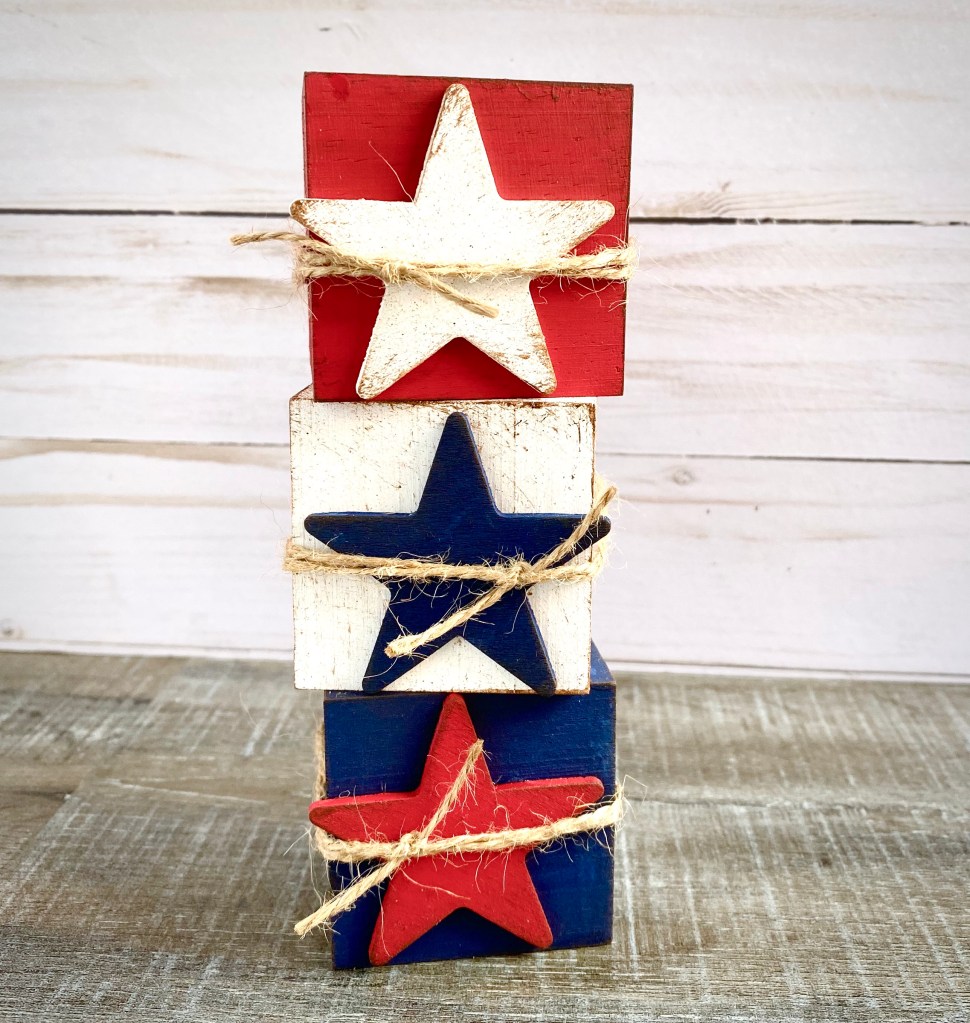
I’ve got a fun 4th of July decor project to share with you today! This cute set of Americana Wood Blocks were inspired by this pin I found on Pinterest. I gave mine a vintage feel by dry brushing everything with some brown paint.
Disclosure: Some of the links on my site are affiliate links, meaning, at no additional cost to you, I will earn a small commission if you click through and make a purchase. As an Amazon Associate I earn from qualifying purchases.
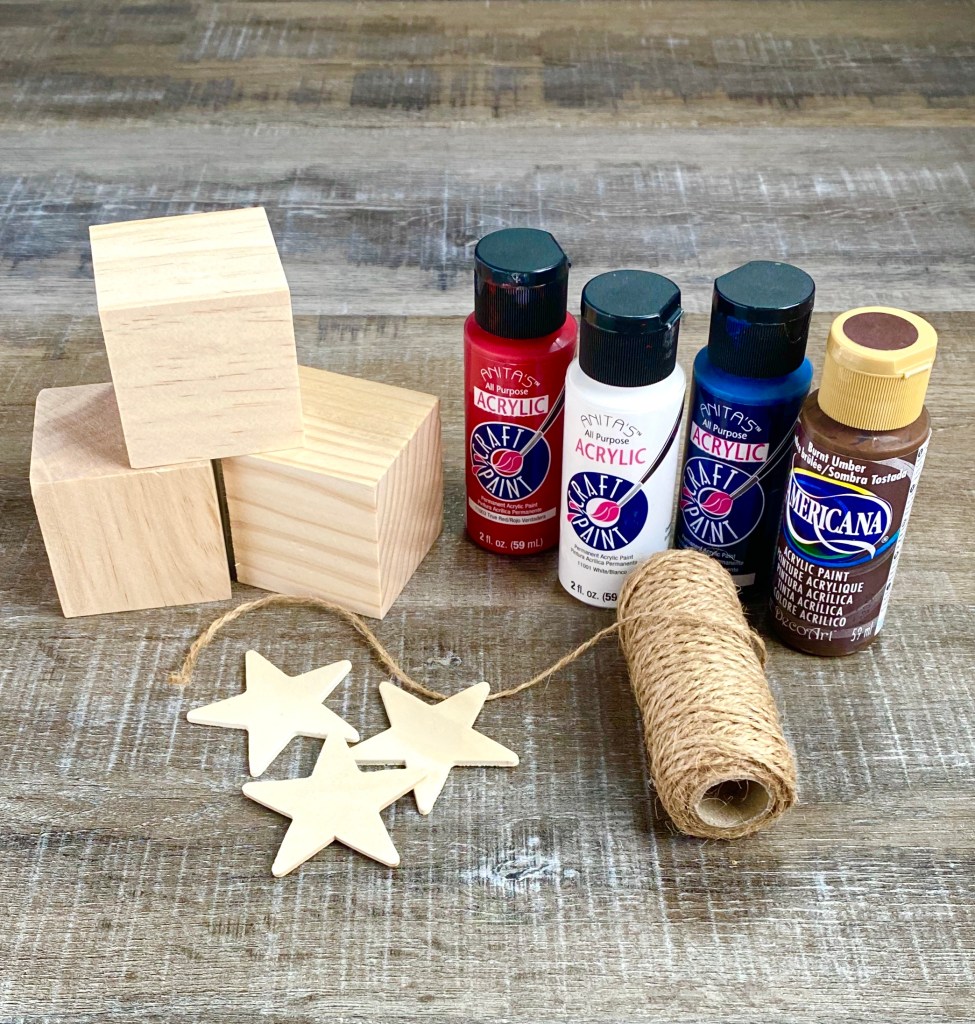
Here’s what you’ll need to make your own set of Americana Wood Blocks…
First paint one block and one star each in red, white, and blue. I painted 2 coats on each of them. After the blocks and stars are dry, using the brown paint, dry brush all of the pieces adding extra around the edges.
Using the E6000 adhesive, glue the stars to the blocks. I offset them just a little so one point of the star went over the edge of the block. Give the adhesive some time to dry, then wrap twine around the block and tie a knot.
I decided to glue my blocks together using the E6000 adhesive. I glued them together at an angle. Of course this is optional. You can leave them separate so you can stack them any way you want. 🙂
This is a fun little decoration to add to your mantel. Or make several blocks to scatter around your 4th of July picnic table.
Stay tuned to the blog – I’ll be sharing another fun project using these 2-inch blocks soon!
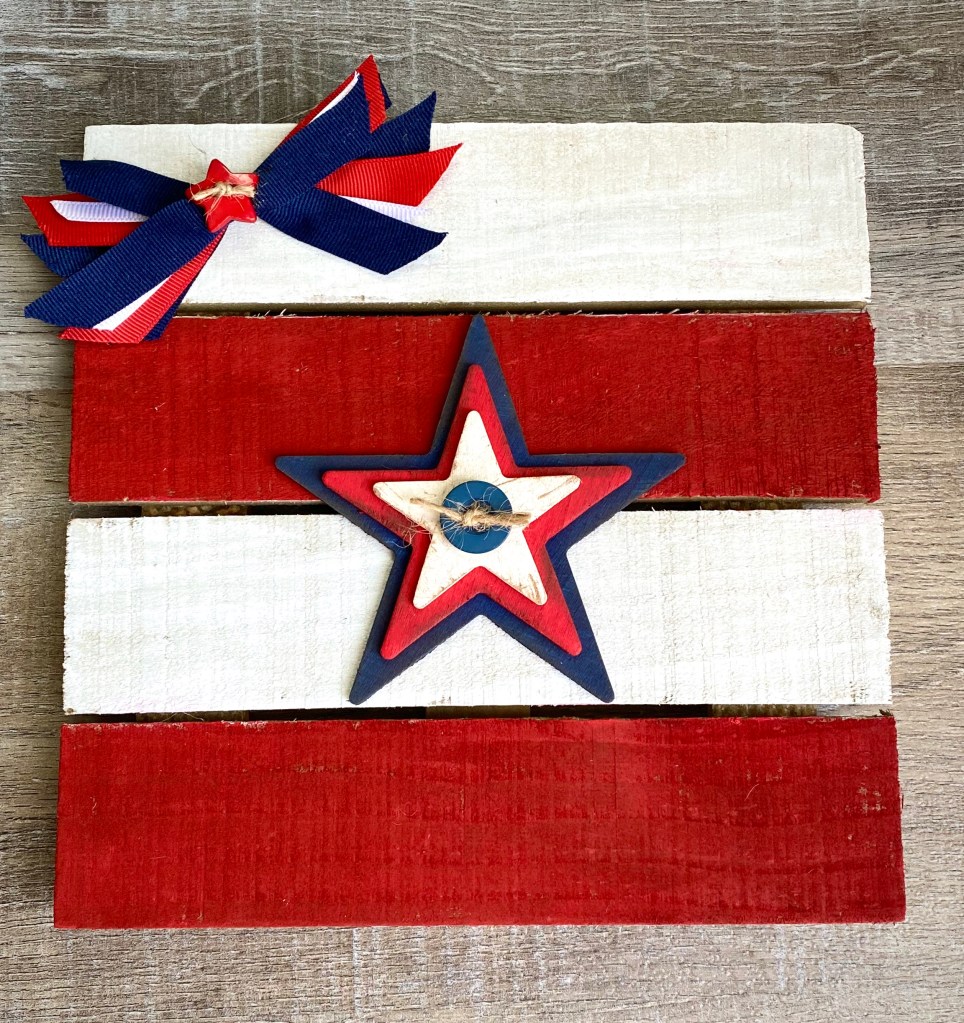
Do you like to decorate for the Summer patriotic holidays? I have a fun and easy project that you can make now and use all the way until Labor Day.
This would be a great project to make with your kids during a fun arts and crafts afternoon! My board measures about 8 by 8 inches and it has an easel back or can hang on the wall.
Disclosure: Some of the links on my site are affiliate links, meaning, at no additional cost to you, I will earn a small commission if you click through and make a purchase. As an Amazon Associate I earn from qualifying purchases.
First, paint 2 slats of the pallet board white and 2 of them red. I painted 2 thin coats, letting the paint dry between coats. I made sure that the paint didn’t completely cover the pallet so that some of the wood grain showed through.
Paint the 4-inch star blue, the 3-inch star red, and the 2-inch star white. Using a chip brush with brown paint, dry brush each star to give them a vintage look. To dry brush, dip your brush in brown paint and brush most of it off onto a paper towel so there is just a little paint left on the brush. Then brush over the surface of your stars. You can also dry brush the pallet board if you’d like.
Glue the 3 stars together using E6000 clear adhesive and glue to the center of the board. Tie a blue button with twine and glue to the center of the star.
I made a bow using this super duper simple method from Re-Fabbed and glued it to the top corner of the board. I finished off the bow by glueing on a red star button tied with twine.
Grab your kids and supplies and make your own Vintage-Look Patriotic Star Pallet Board! 🙂
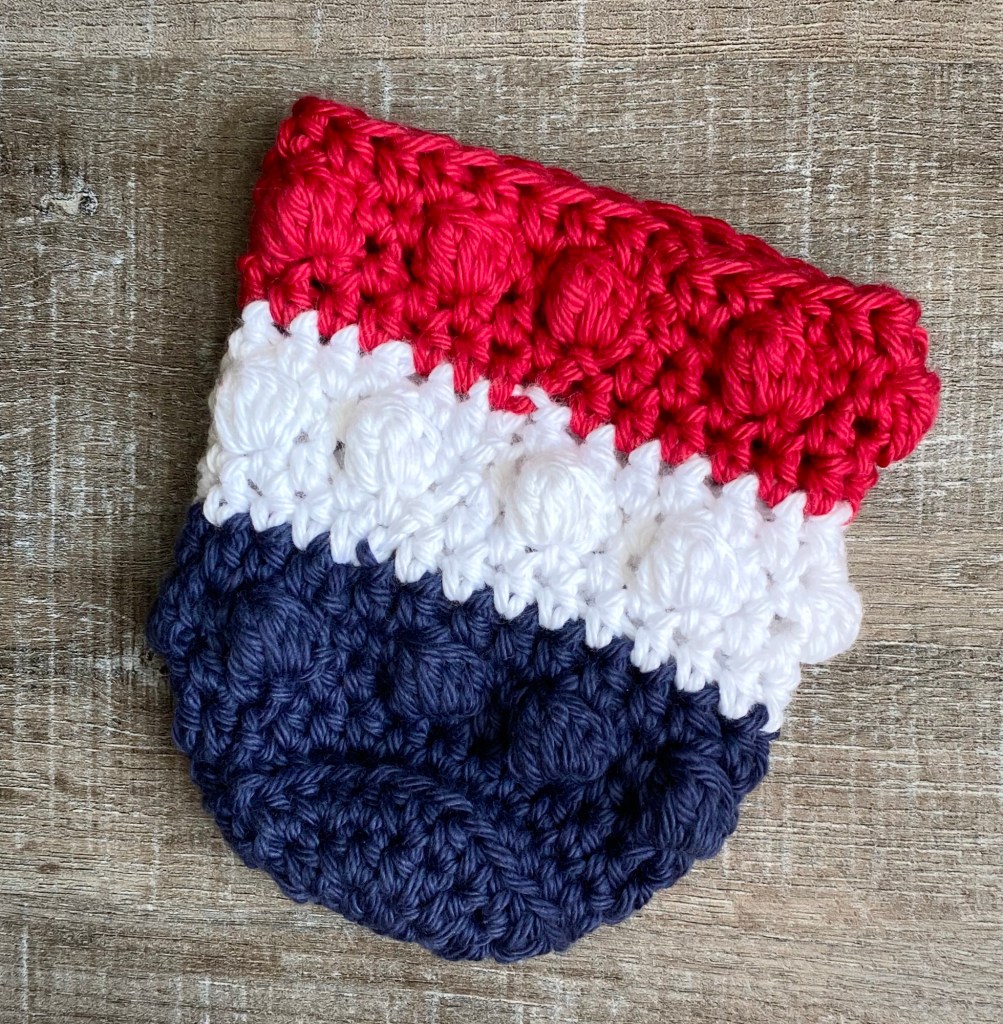
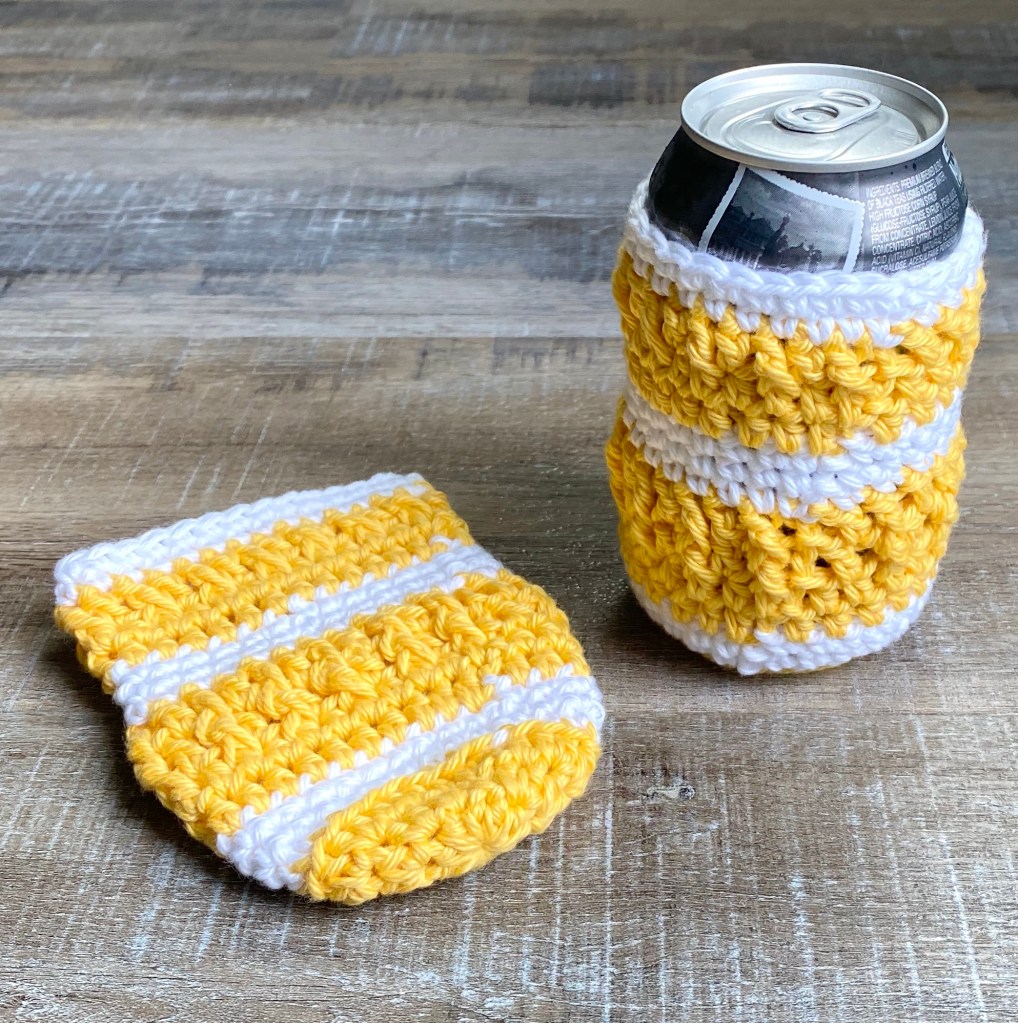
Summer is almost here! Backyard barbecues, picnics, lounging on the porch or by the pool are all just around the corner. You’ll want to whip up a few of these Crochet Patriotic Can Cozies to help keep your drinks cold and absorb the condensation. They will be perfect for your July 4th celebrations!
The rows of bobble stitches add some fun and texture. I made my cozies in USA colors, but of course you can make them in any color you choose! They would be great in school or team colors – or even just one solid color.
Disclosure: Some of the links on my site are affiliate links, meaning, at no additional cost to you, I will earn a small commission if you click through and make a purchase. As an Amazon Associate I earn from qualifying purchases.
Crochet Patriotic Can Cozy
I Love This Cotton Yarn – I used Red, White, and Dark Denim
H/5mm hook
Stitches used – US terms:
Magic ring
Chain – ch
Slip Stitch – ss
Single crochet – sc
Double crochet – dc
Back loop only – blo
Bobble Stitch – Bobble
Special stitch: Bobble Stitch – Yarn over, insert hook into stitch, and pull up a loop. Yarn over, pull through two loops. Repeat 4 times – there will be 6 loops on the hook. Yarn over and pull through all 6 loops. Sc in next stitch to complete the Bobble stitch.
Make magic ring with Dark Denim chain one.
Round 1: Work 9 hdc in ring. Join with ss to first hdc. Pull ring closed. (9 stitches)
Round 2: ch 1. 2 hdc in same stitch as ss and in each stitch around. Join with ss to first hdc. (18 stitches)
Round 3: ch 1. 2 hdc in same stitch as ss. *hdc in next stitch, 2 hdc in next stitch* Repeat from * to * around to last stitch. hdc in last stitch. Join with ss to first hdc. (27 stitches)
Round 4: ch 1. Working in blo, sc in same stitch as ss and in each stitch around. Join with ss to first sc. (27 stitches)
Rounds 5-6: ch 1. hdc in same stitch as ss and in each stitch around. Join with ss to first hdc. (27 stitches)
Round 7: ch 1. Work bobble in same stitch as ss. *sc in next stitch, work bobble in next stitch.* Repeat from * to * around to last stitch. sc in last stitch. Join with ss to first bobble stitch. (9 Bobbles)
Round 8: ch 1. hdc in same stitch as ss and in each stitch around. Join with ss to first hdc. (27 stitches)
Change to White.
Rounds 9-10: ch 1. hdc in same stitch as ss and in each stitch around. Join with ss to first hdc. (27 stitches)
Round 11: ch 1. sc in same stitch as ss. *Work bobble in next stitch, sc in next stitch.* Repeat from * to * around until last 2 stitches. Work one more bobble. Join with ss to first sc. (9 Bobbles)
Round 12: ch 1. hdc in same stitch as ss and in each stitch around. Join with ss to first hdc. (27 stitches)
Change to Red.
Rounds 13-14: ch 1. hdc in same stitch as ss and in each stitch around. Join with ss to first hdc. (27 stitches)
Round 15: ch 1. Work bobble in same stitch as ss. *sc in next stitch, work bobble in next stitch.* Repeat from * to * around to last stitch, sc in last stitch. Join with ss to first bobble stitch. (9 Bobbles)
Round 16: ch 1. hdc in same stitch as ss and in each stitch around. Join with ss to first hdc. (27 stitches)
If there is such a thing as “Bracelet Season”, I think Spring and Summer would be it. 🙂 Since we are wearing shorter sleeves, all of those pretty bracelets can be seen.
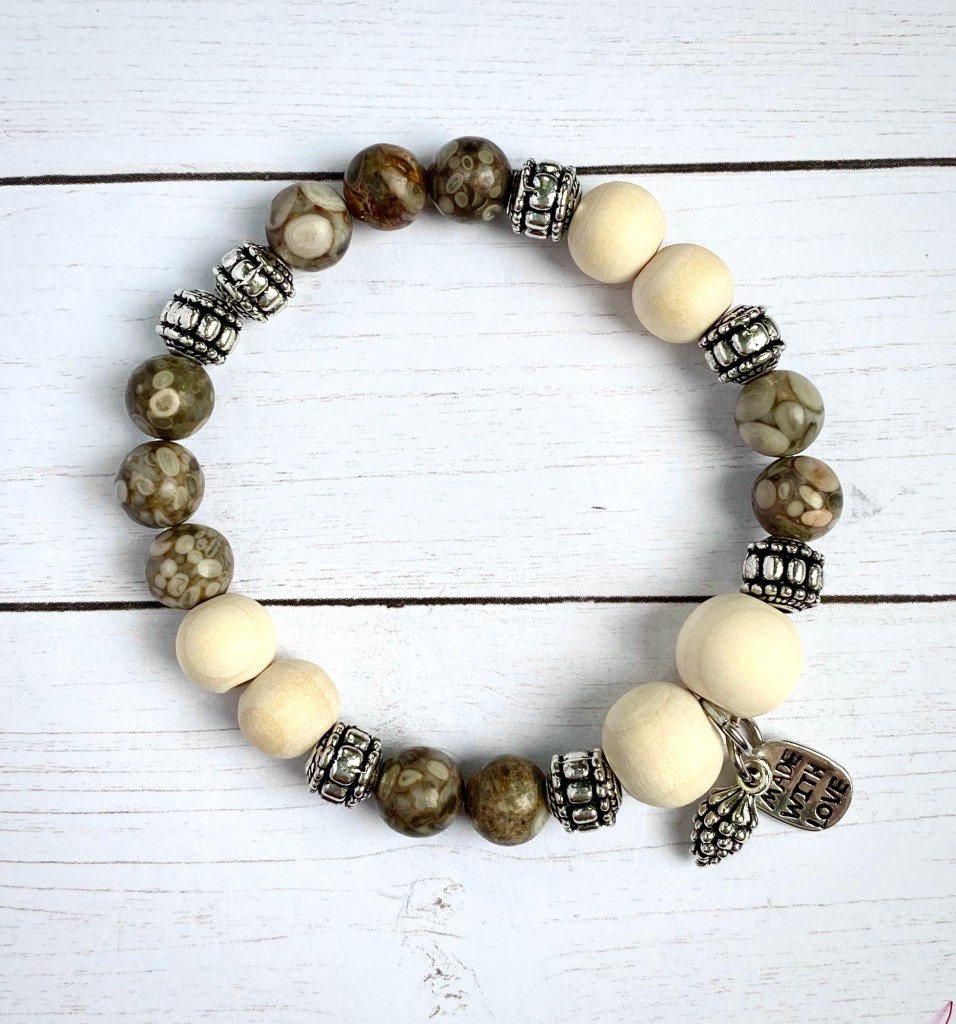
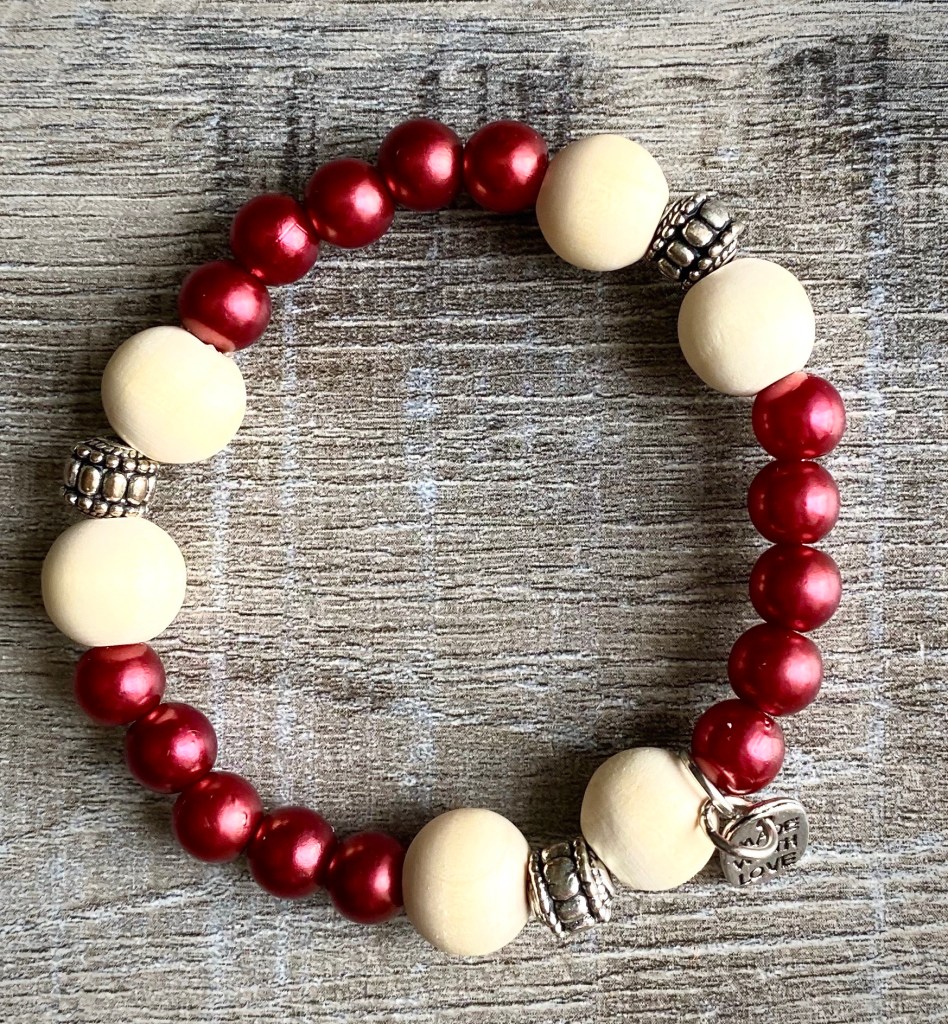
Making stretch bracelets is so easy and fun. All you need is some elastic cord, beads, and charms if you want to add them.
Disclosure: Some of the links on my site are affiliate links, meaning, at no additional cost to you, I will earn a small commission if you click through and make a purchase. As an Amazon Associate I earn from qualifying purchases.
Some of the beads and charms I used were already in my craft stash so I’m not sure exactly where they came from. But the links above are filled with lots of supply ideas – I’m sure you’ll find something that you love!
To make your bracelet, cut a piece of Stretch Magic cord about 12-inches long. Give the piece of cord a good stretch before stringing on your beads. Tie a temporary knot near one end to keep the beads from sliding off. Then just string your beads on in any pattern you like! Your imagination is the limit – there is no right or wrong here.
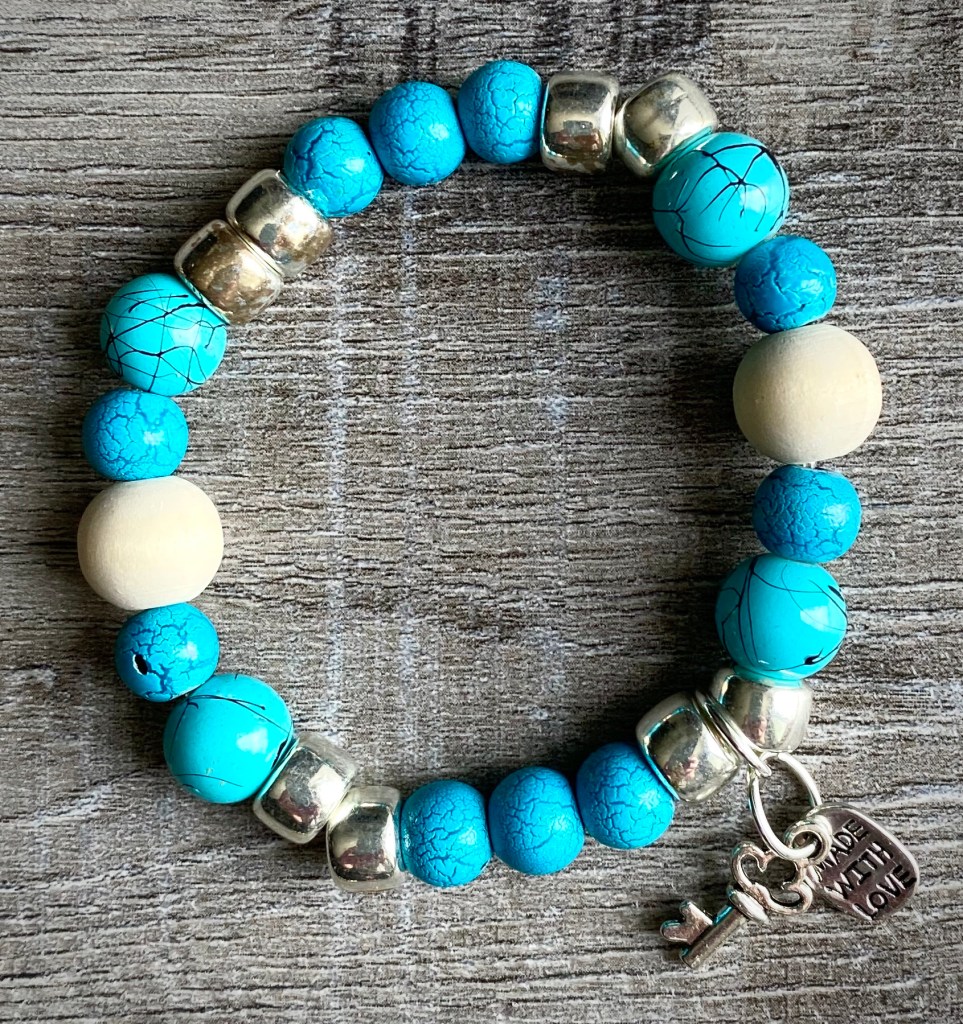
If you are adding charms, attach a jump ring (here’s a great tutorial) to the charm and then attach another jump ring to the first jump ring. You will thread the cord through the second jump ring. This allows the the charm to “dangle” from the bracelet. I usually add the charm about half way through stringing on the beads. I like to add a “Made with Love” charm to all of my bracelets. If I’m adding another charm with it, I put them both on the same jump ring.
Once you are happy with your design, untie the temporary knot and finish the bracelet by tying a surgeon’s knot tightly between the first and last bead. Trim off any excess cord. I like to add a drop of E600 clear adhesive to the knot and then try to slip the knot into one of the beads if it will fit.
An average size of a bracelet is about 8-inches. You can increase or decrease the size depending on the measurement of the wrist or how loosely you want the bracelet to fit.
These are really fun and easy to make. The colors and designs are endless! There are charms for any theme, season, sport, or activity to personalize your bracelets for anyone. Just have fun! 🙂
This is such an odd year for all those who are graduating. Walks across the stage are either cancelled or postponed. Celebration parties aren’t happening and caps are not being tossed into the air. But…they ARE still graduating and it’s an important milestone for them.
This is a card I made for one of those special grads in my life. I used the university’s colors for my card. Of course, you’ll want to use whatever color scheme works best for your graduate!
Disclosure: Some of the links on my site are affiliate links, meaning, at no additional cost to you, I will earn a small commission if you click through and make a purchase. As an Amazon Associate I earn from qualifying purchases.
I used the embossing folder to emboss a panel of blue card stock and attached it to a white card. I die cut “congrats” from red card stock and attached it to the card. I stamped the graduation cap and year on white card stock. I punched it with the circle punch and layered it to a scalloped circle punched from red card stock. I attached the image to the card using foam tape. Then I added 3 silver sequins to the card.
In case you were wondering about adhesives, here are a few of my favorites. I like this tape runner and refills from Tombow for adhering paper and card stock. This Quickie Glue Pen is perfect for adhering small pieces of card stock and die cuts to your cards. Foam tape is a staple for adding dimension to your cards. And this glue is great to add embellishments.
Congratulations to all the graduates! May your futures be filled with love and adventure!
Disclosure: Some of the links on my site are affiliate links, meaning, at no additional cost to you, I will earn a small commission if you click through and make a purchase. As an Amazon Associate I earn from qualifying purchases.
These can cozies work up super quick and are great to absorb the condensation from your can or bottle. (Looking for some new hooks? These Boye hooks are nice!)
You can find my free pattern in this post. Or if you’d like to print it, here’s a link to the free PDF. 🙂
A few weeks ago I shared this post of the wood tray that I repurposed. It turned out great! I also had this picture frame in my garage that I picked up at the local thrift shop. This is not my decorating style, but I loved the detail in the frame and the center piece with the chair on it actually pops out.
A little chalk paint, a wooden word and I turned this into a great farmhouse piece for my home!
Disclosure: Some of the links on my site are affiliate links, meaning, at no additional cost to you, I will earn a small commission if you click through and make a purchase. As an Amazon Associate I earn from qualifying purchases.
So this is the before pic…the frame measures about 18 by 18 inches.
I found the word “home” at Michaels craft store. It measures about 7 inches across.
I used Americana Décor Acrylic Chalky Finish Paint in Everlasting White to paint the frame and the insert piece. I painted 3 coats, making sure to let the paint dry thoroughly between coats. (If you’re impatient like me, a hair dryer on warm helps to speed up the drying process. 😉 ) I painted the word “home” with 2 coats of FolkArt Home Décor Chalk Paint in Maui Sand. Then, using Maui Sand, I dry brushed the frame and insert piece to bring out some of the detail. I put the insert piece into the frame and glued the word to the insert piece using clear E6000 adhesive. I sealed the piece with a light coat of matte sealing spray.
And here is the finished project. I love the way it turned out!
Keep your eyes open – look around your house, in the attic or garage – or visit your local thrift shops. You may be surprised at what you find that you can spruce up for your home. I would love to see what you repurpose!
Crochet Boss rounded up some quick free crochet patterns for Mother’s Day and included my Farmhouse Inspired Coasters!! How fun is that?!?! There are some great ideas for last minute Mother’s Day crochet gifts in her blog post.
Disclosure: Some of the links on my site are affiliate links, meaning, at no additional cost to you, I will earn a small commission if you click through and make a purchase. As an Amazon Associate I earn from qualifying purchases.
To check out her blog post and the other featured patterns, click the image below…
Thanks so much Crochet Boss for including my pattern! 🙂
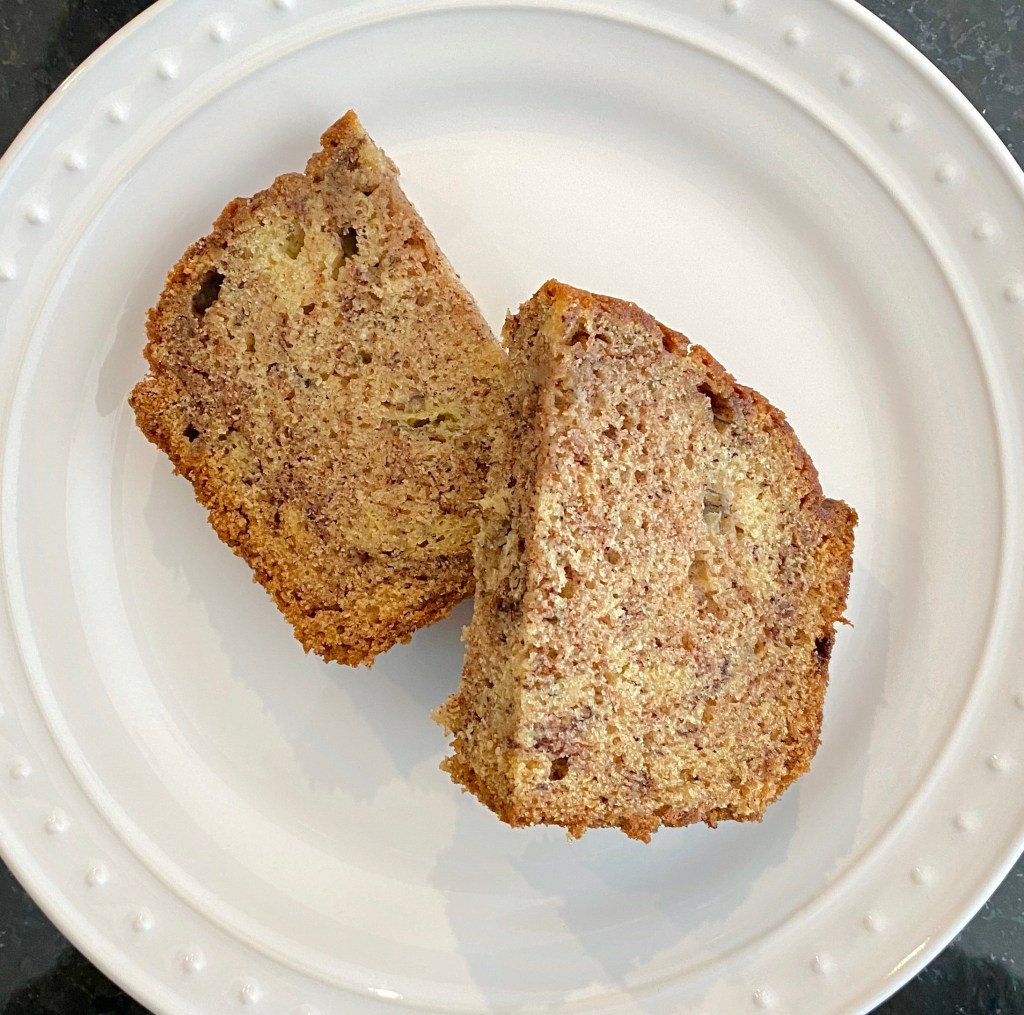
If you’re like me, you end up with a few very ripe bananas now and then. I found this recipe for Cinnamon Swirled Banana Bread here – it’s a little different twist on the traditional recipe by adding a swirl of cinnamon. It’s a super easy recipe to follow. I didn’t even pull out my mixer – I just used a whisk to mix up the batter and then poured it into my loaf pan.
By the way, did you know you can freeze very ripe bananas? Just peel them and put them in a freezer bag. I usually put 3 to a bag because that’s what a lot of recipes call for. You can also leave the peel on if you’d like. I just find it easier to peel first because they get quite mushy when you thaw them out.
Disclosure: Some of the links on my site are affiliate links, meaning, at no additional cost to you, I will earn a small commission if you click through and make a purchase. As an Amazon Associate I earn from qualifying purchases.
Here’s the batter all mixed up and ready for the oven.
And look how pretty it is fresh from the oven…it smells amazing!!
I may or may not have swirled it a little too much. 🤷🏼♀️ Still, it tastes so yummy!
You probably have everything you need to make this tasty treat in your kitchen right now!
Disclosure: Some of the links on my site are affiliate links, meaning, at no additional cost to you, I will earn a small commission if you click through and make a purchase. As an Amazon Associate I earn from qualifying purchases.