White Texas Sheet Cake

Hi friends,

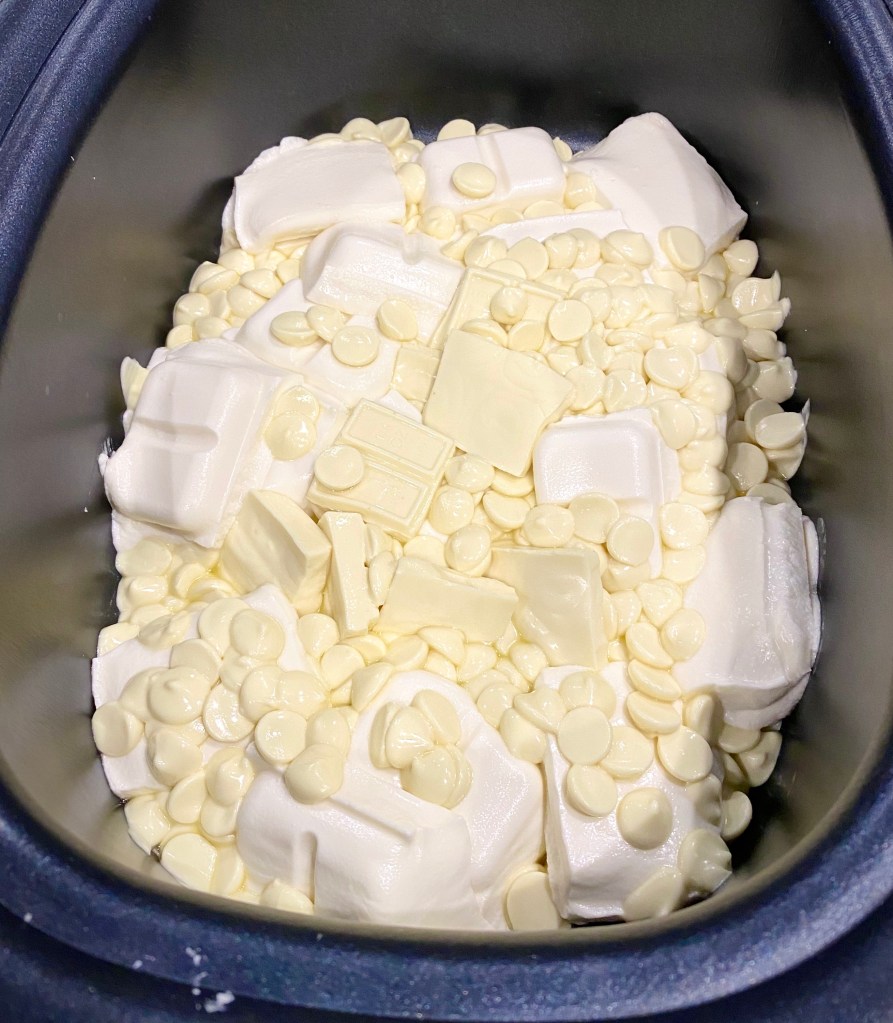
I have a great recipe to share with you today! White Texas Sheet Cake from The Semisweet Sisters. I made it for a Thanksgiving potluck (hence the Fall sprinkles) and it was so yummy! It would be a great dessert for your New Year’s Eve (or day) gathering – change the color of the sprinkles or just leave them off. 🙂

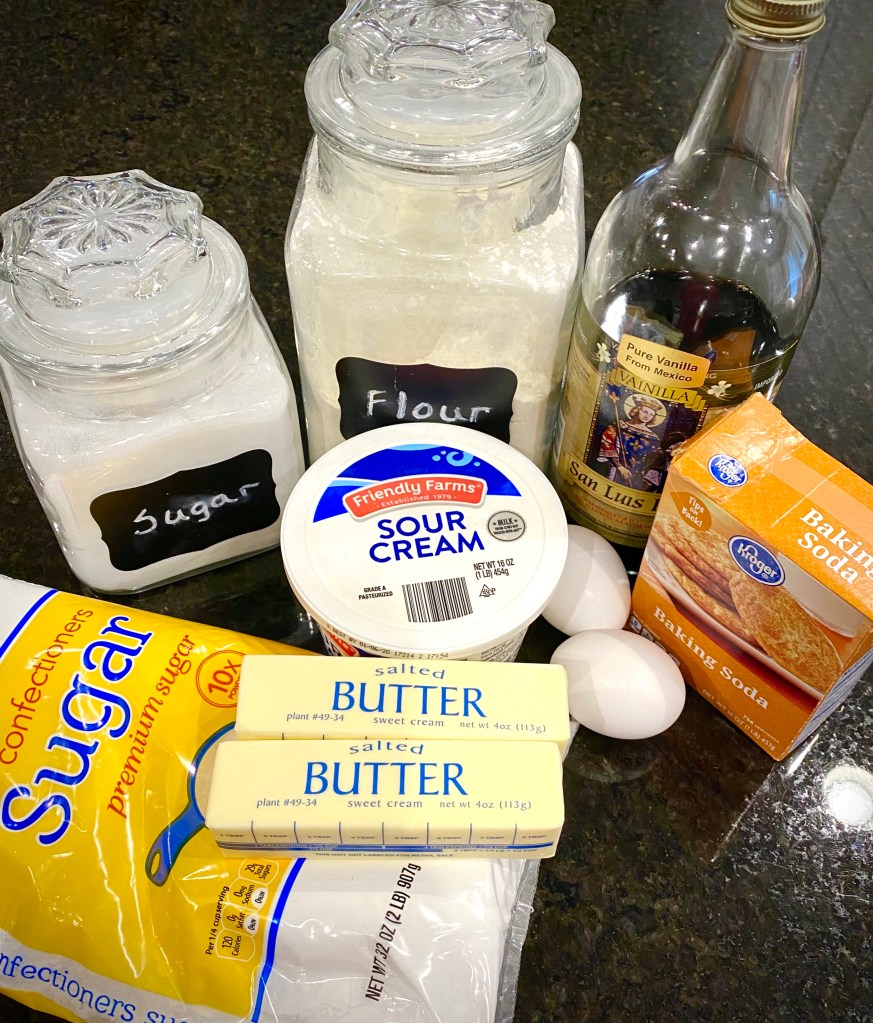
You may have most of the ingredients you’ll need in your kitchen right now. You can find the full recipe here at The Semisweet Sisters. It’s made in a jelly roll pan so there will be plenty for everyone to have a piece.

Disclosure: Some of the links on my site are affiliate links, meaning, at no additional cost to you, I will earn a small commission if you click through and make a purchase. As an Amazon Associate I earn from qualifying purchases.

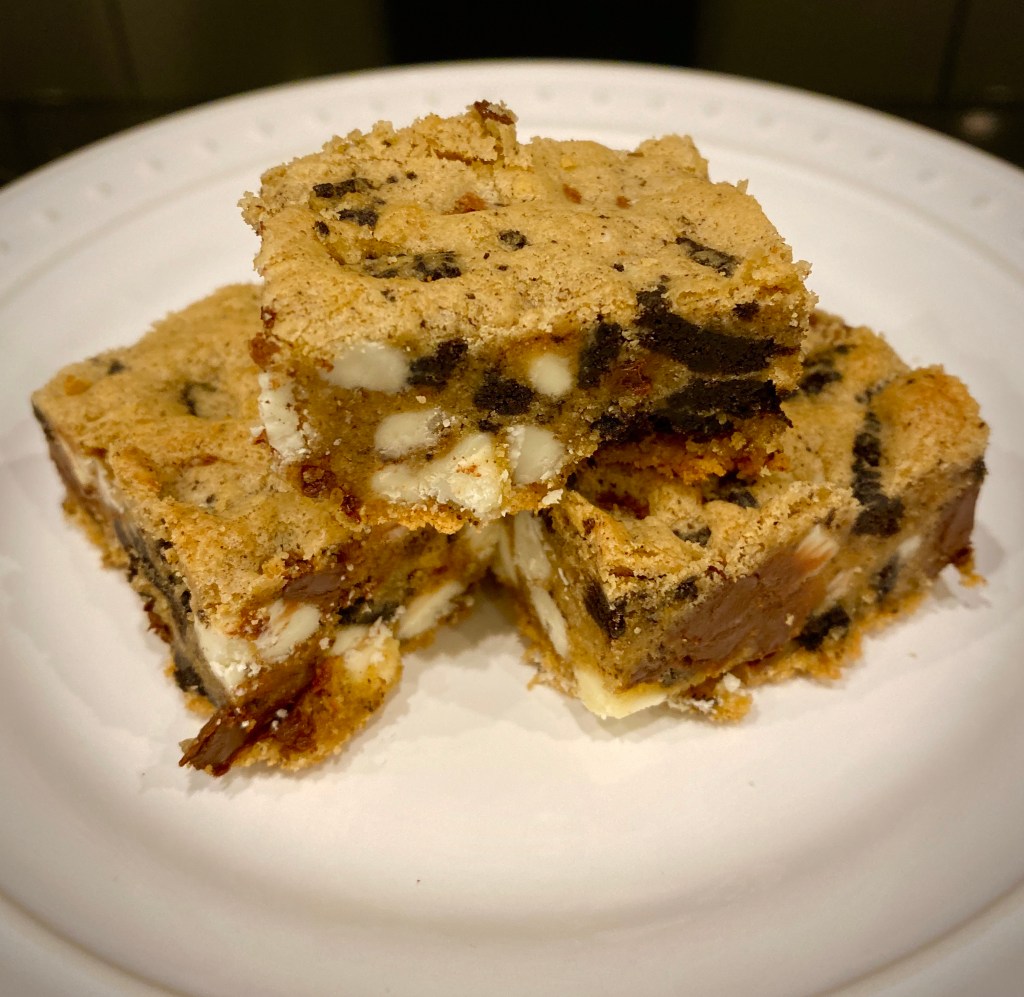
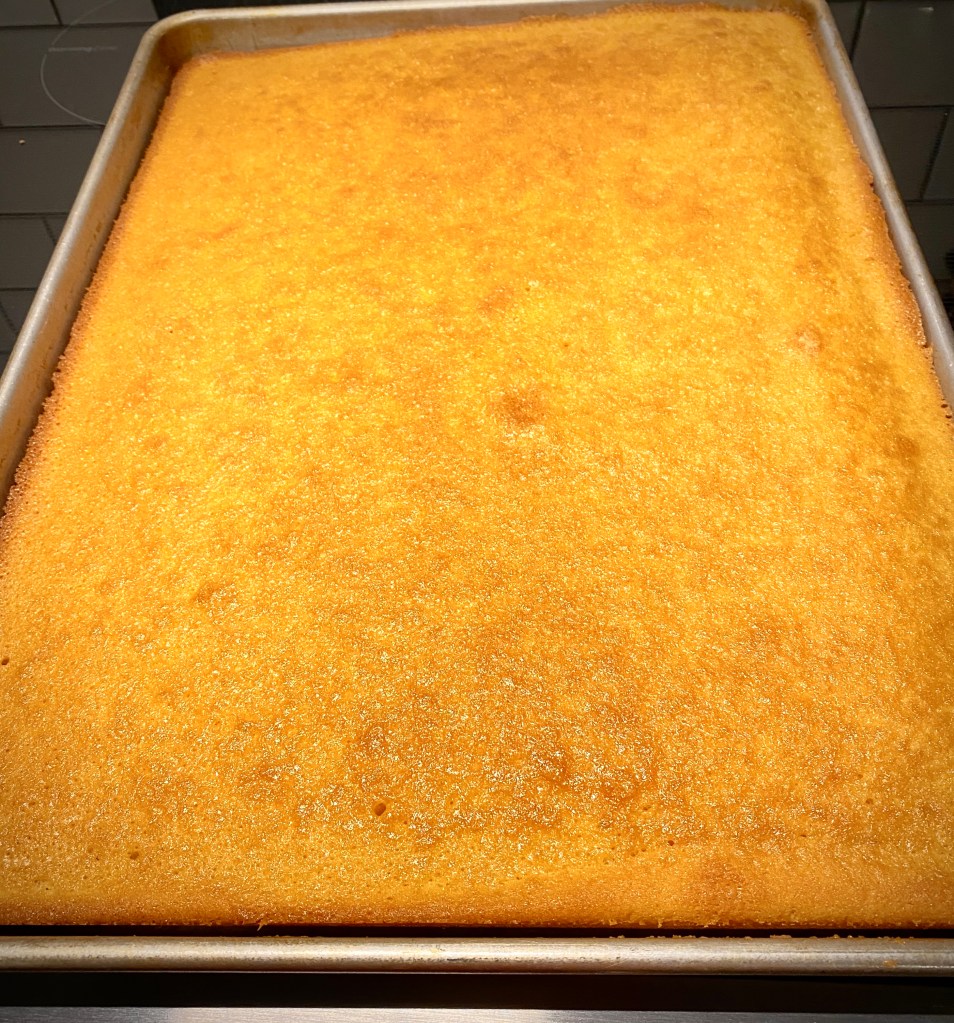
This is how it looks fresh from the oven waiting for the icing.

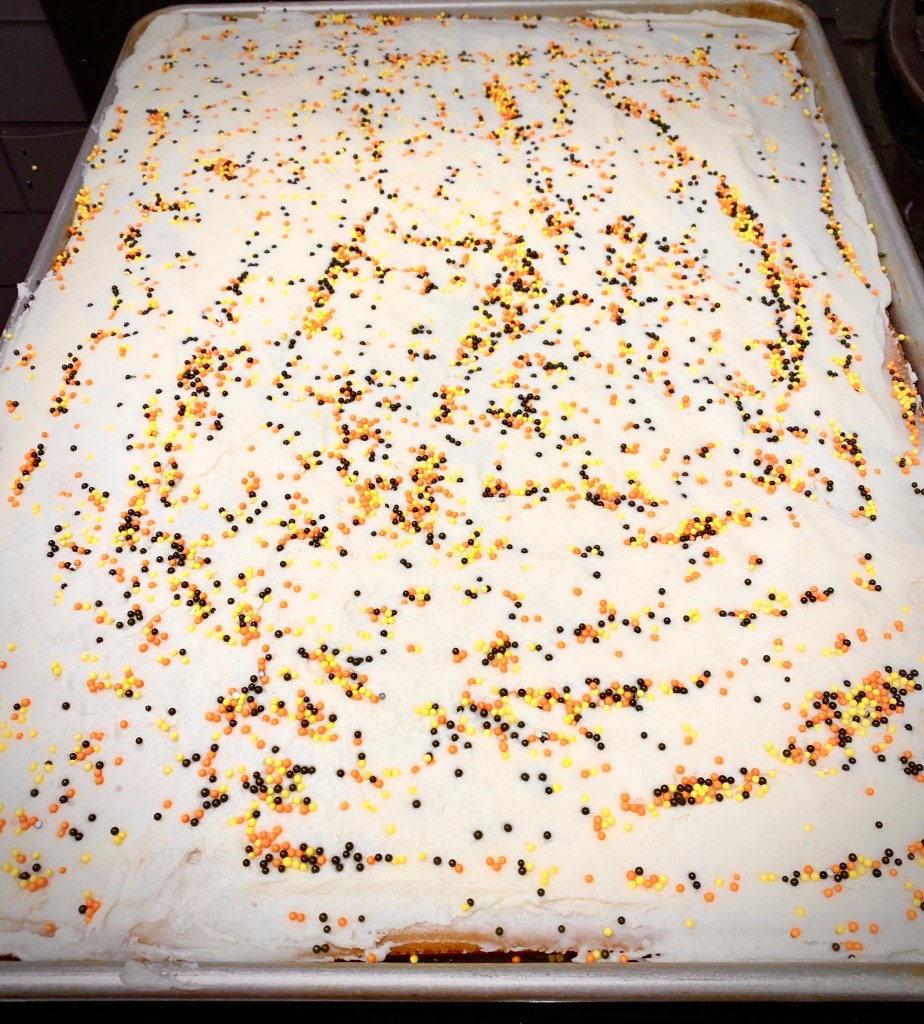
After adding the icing and sprinkles.

White Texas Sheet Cake anyone? 🙂

The recipe can by made with either vanilla extract or almond extract. I made mine with vanilla – next time I want to try it with almond extract. I think that would be so tasty!

White Texas Sheet Cake is easy to make and would be a great dessert any time of the year!

Happy Baking!

Anita

Posted in Recipes | Tagged | 2 Comments

Merry Christmas

Hi friends,

Merry Christmas from our house to yours!

I hope your day is filled with love and wonder! 🎄

Anita

Posted in Uncategorized | Leave a comment

Slow Cooker Salty Sweet Candy

Hi friends,

Need a last minute sweet treat for Christmas? This Slow Cooker Salty Sweet Candy is super easy to make. You can find the full recipe here at Real Housemoms.

You put all the white chocolate goodness in your slow cooker (this is the slow cooker I have and I love it!!) and walk away for an hour! You can go wrap those last minute gifts while you’re waiting for everything to melt. 🙂

Disclosure: Some of the links on my site are affiliate links, meaning, at no additional cost to you, I will earn a small commission if you click through and make a purchase. As an Amazon Associate I earn from qualifying purchases.

This is what it looks like after an hour on low in the slow cooker.

Stir it all together until it is smooth.

Add in the peanuts and pretzel pieces.

Drop by spoonfuls onto wax paper and add sprinkles. They set up pretty quickly!

These aren’t just for Christmas – change the color of sprinkles for Valentine’s Day, Easter, or Halloween. So easy and so yummy – good for anytime of the year! 🙂

Thanks for stopping by!

Anita

Posted in Christmas, Recipes | Tagged , | 2 Comments

Cookies & Cream Oreo Blondies

Hi friends,

Do you need another yummy cookie for those Christmas celebrations – or just to have on hand for guests who pop by? These tasty Cookies & Cream Oreo Blondies are easy to make, and since they are baked in a 9 x 13 pan (I love my pyrex baking dish), it will save you time in the kitchen. 🙂

I found the recipe here at Six Sisters’ Stuff. These ladies have THE BEST recipes – browse their site and you’ll see what I mean…

Disclosure: Some of the links on my site are affiliate links, meaning, at no additional cost to you, I will earn a small commission if you click through and make a purchase. As an Amazon Associate I earn from qualifying purchases.

Here are the blondies ready to go in the oven.

And fresh from the oven. My kitchen smells so good! 😋

A big glass of cold milk or a hot cup of coffee or tea would go perfectly with this yummy treat.

Happy Baking!

Anita

Posted in Recipes | Tagged | Leave a comment

Mini Chalkboard Ornaments

Hi friends,

Do you ever shop at the Dollar Spot in Target? Sometimes I can find the cutest things there! I found these adorable chalkboard signs and just knew they had to come home with me. 🙂 There are 3 in the package for just $3.00 and measure about 3 1/2 by 5 inches – a great deal!

Disclosure: Some of the links on my site are affiliate links, meaning, at no additional cost to you, I will earn a small commission if you click through and make a purchase. As an Amazon Associate I earn from qualifying purchases.

They had packages of sprigs – 4 to a package – for $1.00 each. They also had peel and stick vinyl sheets for $1.00 each. I thought by putting this all together, I could make some cute Christmas ornaments.

Since the chalkboard frames are already painted red, I just kept them that way. There was a red and green plaid ribbon on them for hanging, but I took that off and changed it to twine. That’s just a personal preference, leave the ribbon if you love it!

I tried die cutting the letters from the vinyl using an alphabet set I’ve had forever. They cut fine, but didn’t want to stick to the chalkboard. 🙁 So I cut the letters from white card stock and glued them to the chalkboard using a Quickie Glue Pen. I also punched a few snowflakes (here’s a similar punch) from white card stock and glued them on. I hot glued a sprig or two of greenery to the frame of the chalkboard.

Super cute! You can put any phrase or name you’d like on the chalkboard. They would make great gift tags for all your Christmas gifts. 🎄

Happy Crafting!

Anita

Posted in Christmas, Decor, Gifts | Tagged , , , | 4 Comments

Mini Ornament Christmas Tree Plaque

Hi friends,

I have a cute, quick, little Christmas project for you today. It’s super easy and takes only a few minutes to make!

You’ll need 15 mini Christmas ornaments – I found mine at Target. You’ll also need a wood plaque. I found mine at Hobby Lobby – it measures 8 by 8 inches. It has an easel back as well as a sawtooth hanger, so it can sit on a tabletop or hang on your wall. (I think it was only $3.99 – maybe $4.99. Don’t forget to use your coupon!) I used this white chalky finish paint on my project – I like how it helps the ornaments pop! You could also use white acrylic paint.

Disclosure: Some of the links on my site are affiliate links, meaning, at no additional cost to you, I will earn a small commission if you click through and make a purchase. As an Amazon Associate I earn from qualifying purchases.

First paint a thin layer of white paint onto the plaque, feathering it out toward the edges so it’s not completely covered. Let that dry a couple of minutes while you decide what color order you want to make your tree. I had another box of ornaments that isn’t in the picture so that’s why there are some silver ornaments in my tree even though they aren’t showing in the box above. 🙂

I used my hot glue gun to glue my ornaments to the plaque. Center the middle ornament of the bottom row and glue in place. Be sure to hold it there for a few seconds for the glue to cool so it doesn’t roll away! Then glue on the rest of the ornaments, building around the first one.

And that’s all there is to it! Told you it was easy and quick! 🎄

Happy Crafting!

Anita

Posted in Christmas, Decor, Gifts | Tagged , , , | 7 Comments

Mini Hand-Stamped Christmas Gift Bags

Hi friends,

Do you struggle with creative ways to give gift cards or cash for Christmas? I love to make those gifts a little more special by giving them in a fun way and not just in a card. These cute little Hand-Stamped Christmas Gift Bags are super quick and easy to make – you can make as many as you need in just a few minutes!🎄🎄🎄

Disclosure: Some of the links on my site are affiliate links, meaning, at no additional cost to you, I will earn a small commission if you click through and make a purchase. As an Amazon Associate I earn from qualifying purchases.

I found the muslin bags here on Amazon. They are 4 by 5.8 inches and are the perfect size to add a gift card or cash along with a chocolate or two. 🙂

I used Memento Luxe Mixed Media Ink in Pear Tart to stamp my tree and Memento Luxe Mixed Media ink in Rose Bud to stamp “Merry Christmas”. I slipped a piece of card stock into the bag before I stamped my images just to be sure the ink didn’t bleed through onto the back of the bag. The stamps I used are older ones I have had in my collection for a long time – use your favorites to create your own gift bags.

Super fast, super easy and it adds just a little something extra to your gift! 🎄

Happy Stamping!

Anita

Posted in Christmas, Gifts, Stamping | Tagged , , | 5 Comments

Wood Snowflake Ornaments

Hi friends,

I have a really fun and simple Wood Snowflake Ornament to share with you today. ❄️

This would be such a fun project to make with the kids – they could give them to their friends for Christmas and have a day of making memories as they create with you. 🙂

Disclosure: Some of the links on my site are affiliate links, meaning, at no additional cost to you, I will earn a small commission if you click through and make a purchase. As an Amazon Associate I earn from qualifying purchases.

You’ll need some wood snowflake ornaments (mine are about 4 1/2-inches), wood circles (mine are 3-inches), white and gray chalk or acrylic paint, Christmas/Winter rubber stamps with ink pads, adhesive to glue the circles to the snowflakes, and matte sealing spray.

Here are links to some of the supplies I used…

Paint both sides of the snowflake and circle with 2 coats of white paint, letting it dry between coats. Stamp the sentiments/snowflakes onto the circles. Dry brush some of the gray paint onto the snowflakes and circles. Glue the circle to the center of the snowflake. Spray a light coat of matte sealing spray on both sides of the ornament. Attach your favorite cord or ribbon for hanging.

Here they are all finished and hanging on my tree…

Have Fun and Happy Crafting! ❄️❄️❄️

Anita

Posted in Christmas, Gifts, Stamping | Tagged , , | 1 Comment

Crafty Christmas Gift Ideas

Hi friends,

It’s officially Christmas shopping season! 🎄 Have you started yet?

I thought I would share some of my favorite gift ideas for your crafty friends and family. I’ve included ideas for crochet lovers, paper crafters, rubber stampers, and a couple for general crafting. I hope these ideas will give you a little inspiration and make your shopping just a bit easier. Or maybe share this with your loved ones so they know what’s on your wish list. 😊🎄

Disclosure: Some of the links on my site are affiliate links, meaning, at no additional cost to you, I will earn a small commission if you click through and make a purchase. As an Amazon Associate I earn from qualifying purchases.

Crochet Gift Ideas…

These Clover Crochet Hooks are great! This set includes sizes B/2.25mm through J/6mm. I love mine!

Large-Eye Blunt Needles and Stitch Markers make great stocking stuffers!

This Crochet Key Chain or these Stork Scissors would come in handy…

A yarn bowl is great to keep your yarn from rolling away! I have to admit that I don’t own one – but this one is pretty and I may have to add it to my own list 😉

And for the crocheter who has everything…the Clover Yarn Cutter Pendant!

Here are a few ideas for paper crafters, rubber stampers, and general crafters…

I absolutely adore these Blender Brushes from Taylored Expressions – they are amazing and work so well adding ink to your project. You can also get a Storage Caddy so they are handy on your crafting desk.

TE Blender Brushes

The Misti Stamp Tool is such a great tool for positioning stamps just where you want them and so good for stamping multiple cards with the same image.

A Stamping Pad gives you the perfect surface to stamp your images. And Acrylic Stamping Blocks are a must for unmounted or clear stamps.

I love Memento Dye Ink pads! These Finger Sponge Daubers are a great tool for applying ink to your projects.

A good ruler is always a welcome crafting tool. I like this clear Westcott ruler – I use mine all the time!

And finally, a good pair of detail scissors is a must!

And there you have it – a few ideas to get your gift giving juices flowing. 🙂

Happy Shopping!

Anita

Posted in Cards, Christmas, Crochet, Gifts, Stamping | Tagged , | Leave a comment

Happy Thanksgiving

Hi friends,

Happy Thanksgiving! I hope you are able to spend some time today with family and friends.

I am thankful for so much! One thing I am especially thankful for is the support you all have given my little blog. 🙂 I love sharing my creative side with you and can’t thank you enough for continuing to take a minute out of your busy day to stop by and see what I’m up to.

Disclosure: Some of the links on my site are affiliate links, meaning, at no additional cost to you, I will earn a small commission if you click through and make a purchase. As an Amazon Associate I earn from qualifying purchases.

I made this fun little card using the Cuddlebug Turkey from Unity Stamp Company. He is stamped with Memento Tuxedo Black ink on white card stock and colored with Copic markers. I embossed a panel of brown card stock with the Scattered Leaves embossing folder from Taylored Expressions. I tied some brown and white baker’s twine around the panel and attached it to a card made from kraft card stock. The stamped image is attached to the card with foam tape.

Feeling Thankful!!

Anita

Posted in Cards, Fall, Stamping | Tagged , | 2 Comments