When I found the pattern for this Crochet Classic Coverlet on the Lion Brand website, I knew I wanted to make it! You’ll need to create an account to access the free pattern download, but then you’ll have access to all their free patterns. And who doesn’t want free patterns?!? 😉
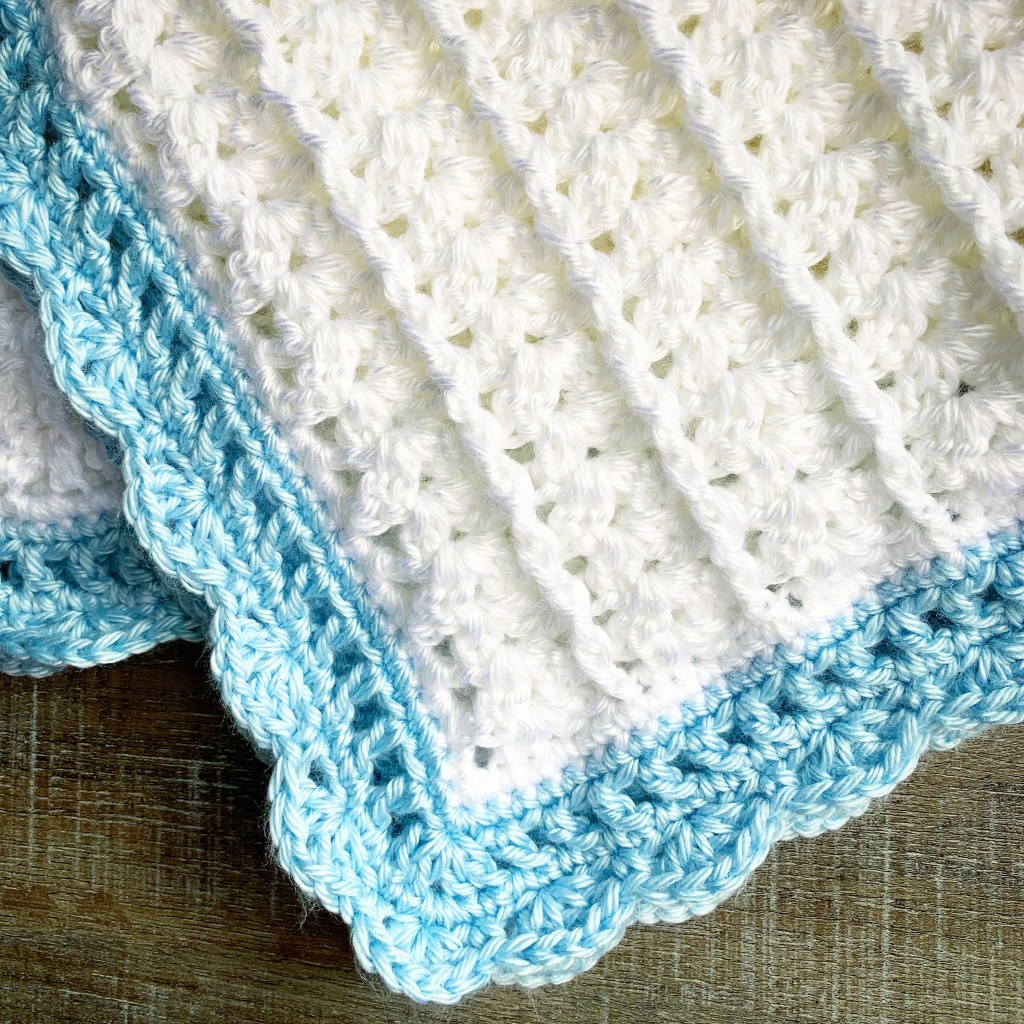
I used Caron Simply Soft yarn in White and Soft Blue with an H/5mm hook to stitch up my blanket. (I used 2 and 1/2 skeins of white and part of a skein of soft blue.) The pattern is really easy to follow. I did the 1st row of the border in white and then switched to blue for rows 2-5. The pattern also calls for a smaller hook to do the border, but I didn’t do that. I just stitched the whole blanket with my H/5mm hook.
I love the texture of this blanket! I like the way it turned out with the contrasting border, too. I’m sure I will make more in different color combos.
I think you will enjoy this pattern the next time you need to make a baby blanket. I would love to see your creations!
I was inspired by this pin to make a Rustic Patriotic Star, but I wanted to make a smaller version of it. This pin used wood paint stirrers and I knew they would be the perfect size for what I had in mind. So I combined the inspiration from both projects and here’s what I came up with!
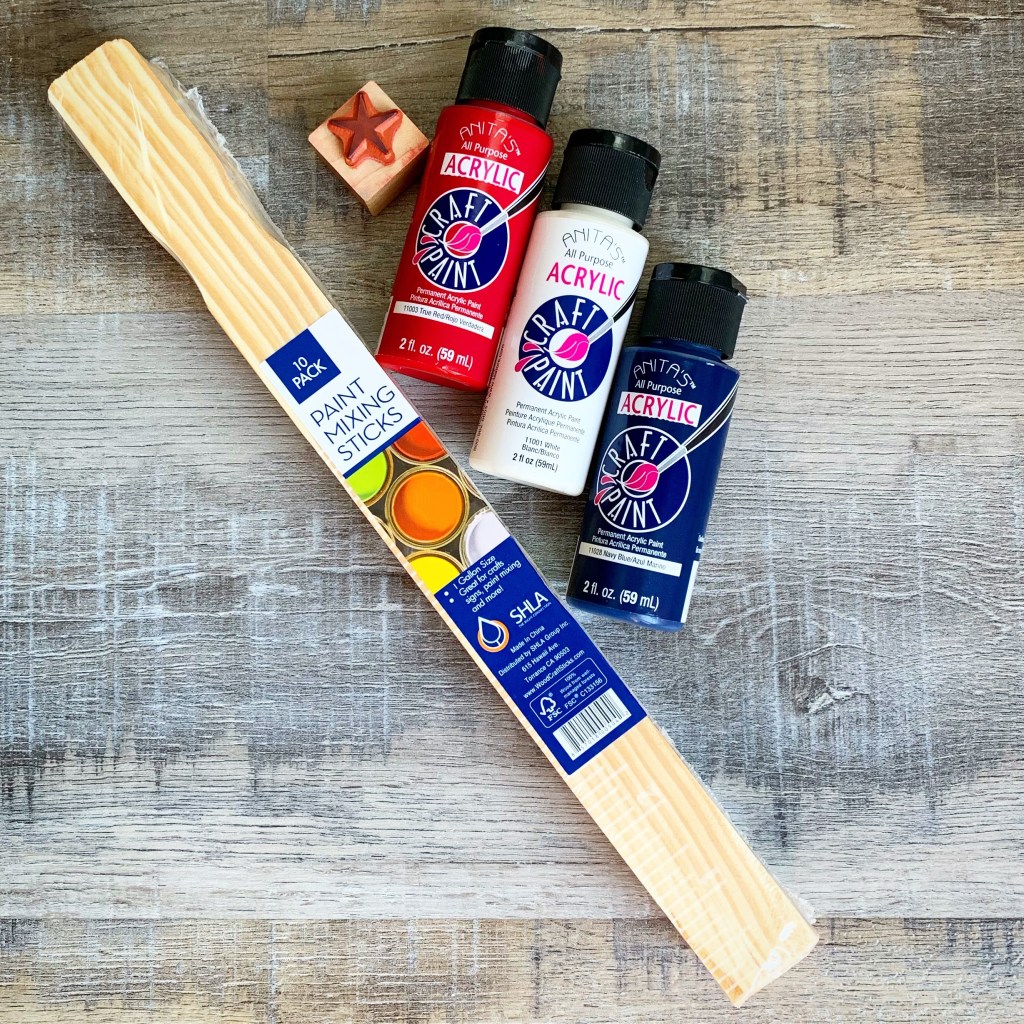
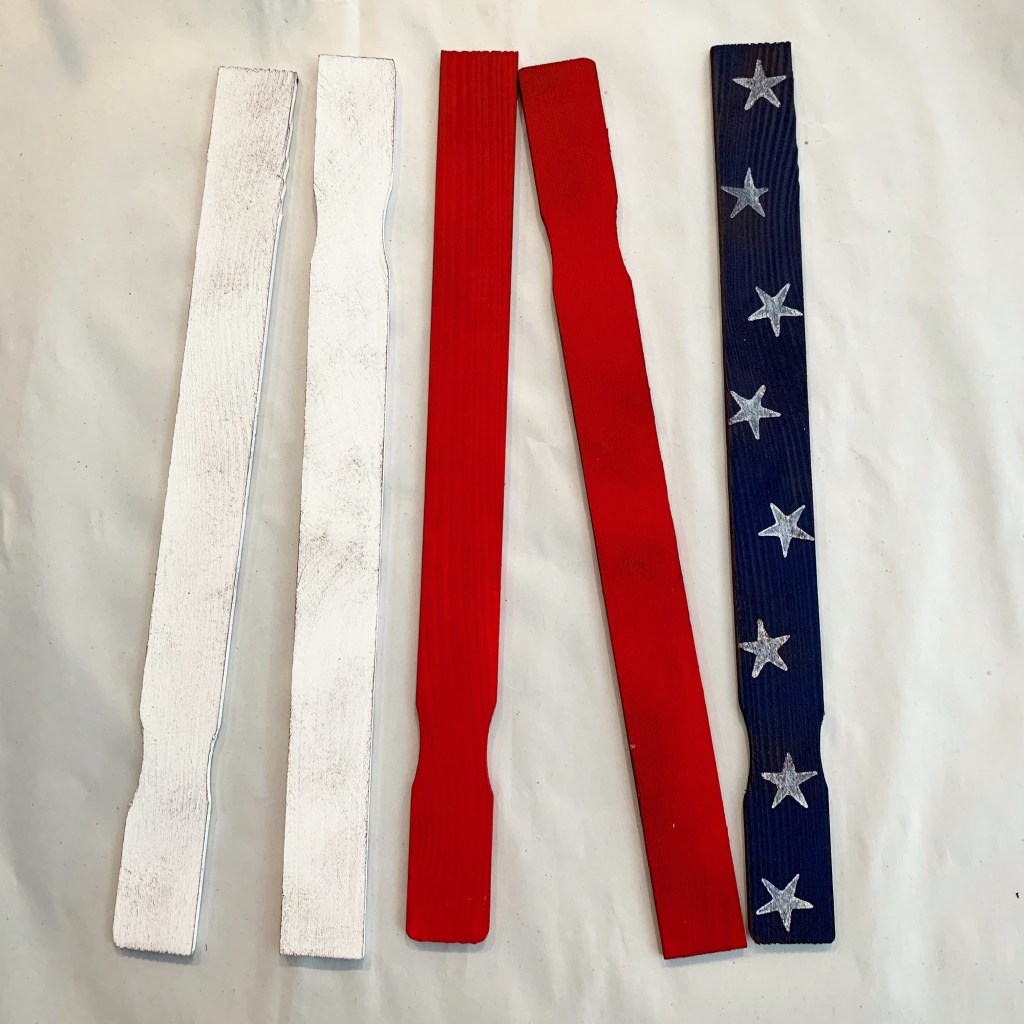
You’ll need some wood paint stirrers – I picked up a package of 10 in the paint department of my local home improvement store. You’ll also need acrylic paint in red, white, and blue, and a star rubber stamp. I used dark brown acrylic paint to add a little distressing to the star, but I forgot to add it to the pic below.
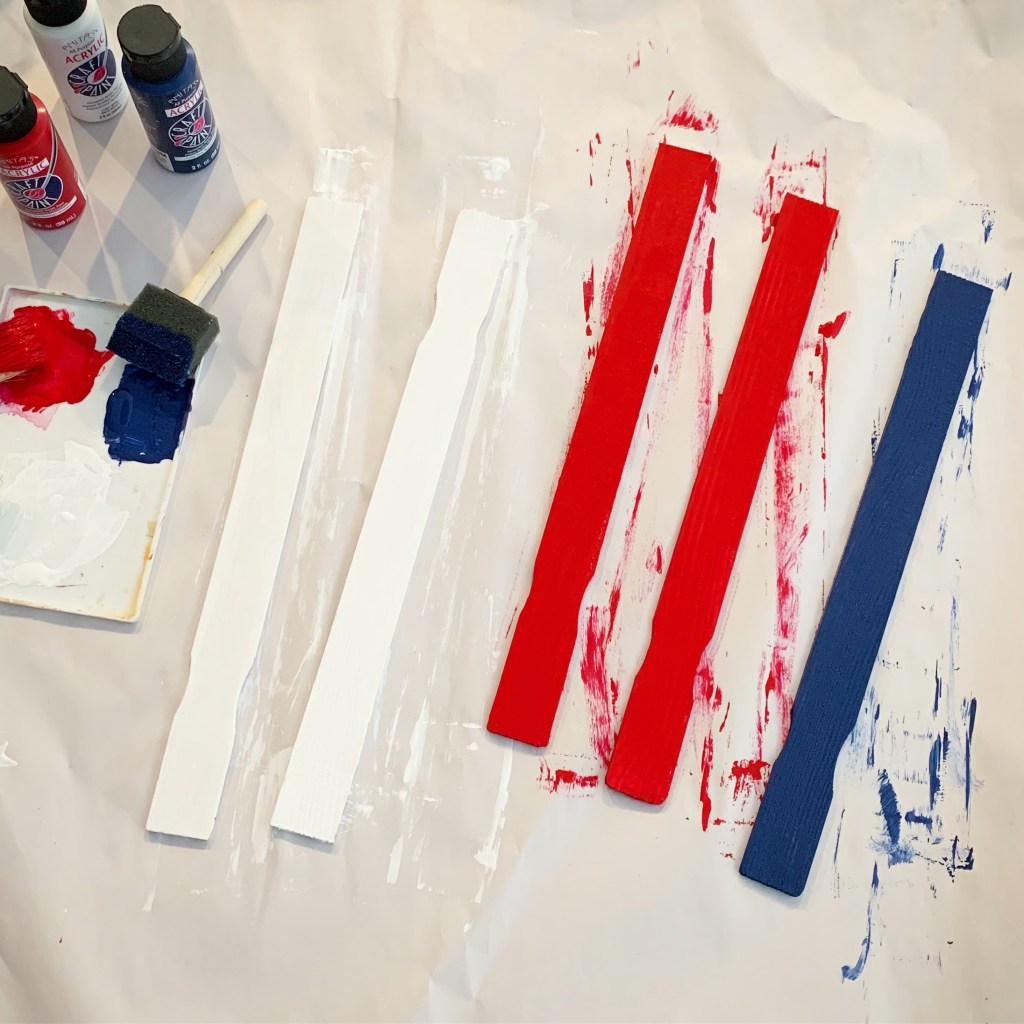
Paint 2 of the stirrers red, 2 of them white, and 1 of them blue. I painted both the front and back along with the sides to give it a more finished look. I painted 2 coats, letting it dry completely between coats.
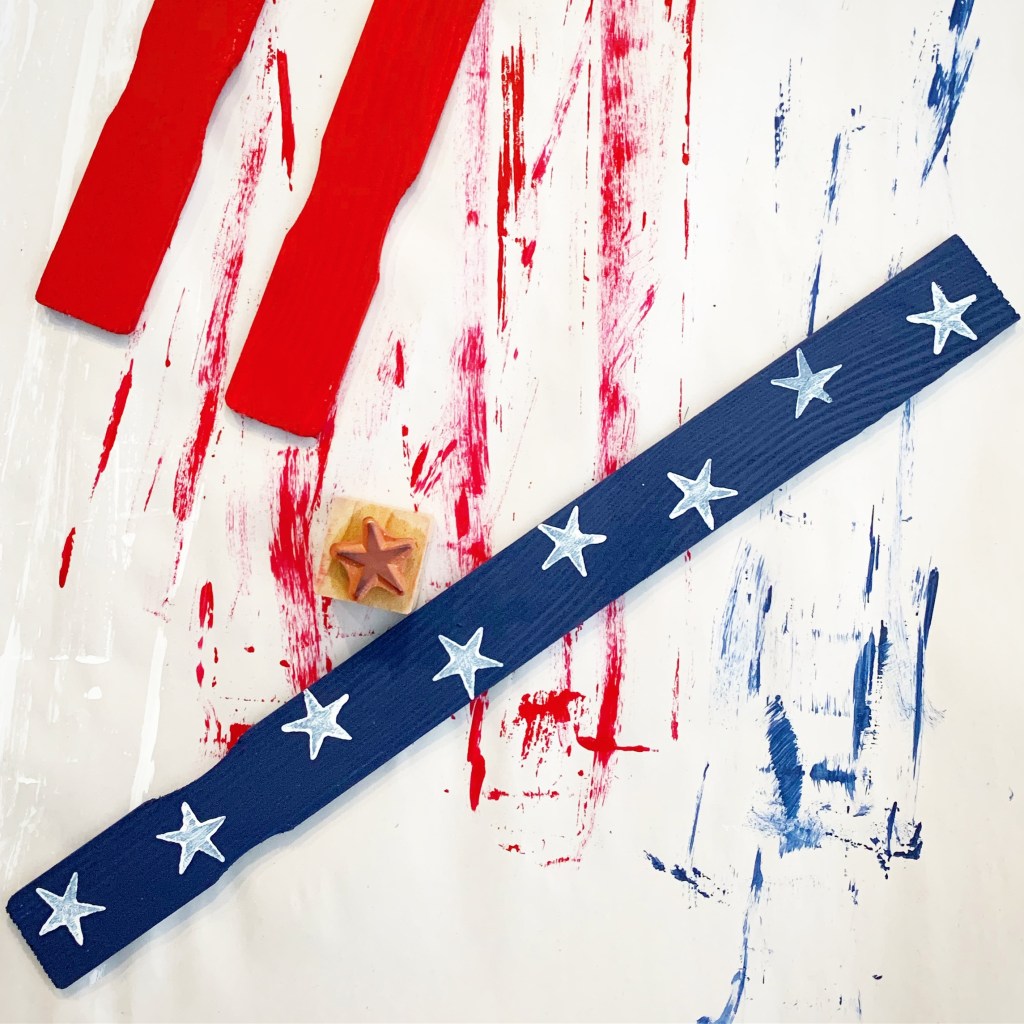
Next, using white paint with the star stamp, randomly stamp stars onto the blue paint stirrer. I used a foam brush to apply a thin coat of the white paint to the star stamp. Don’t worry if some of the blue paint shows through the star – that’s part of what makes it rustic. 🙂
Then, I used my dark brown paint and lightly dry brushed all of the painted stirrers.
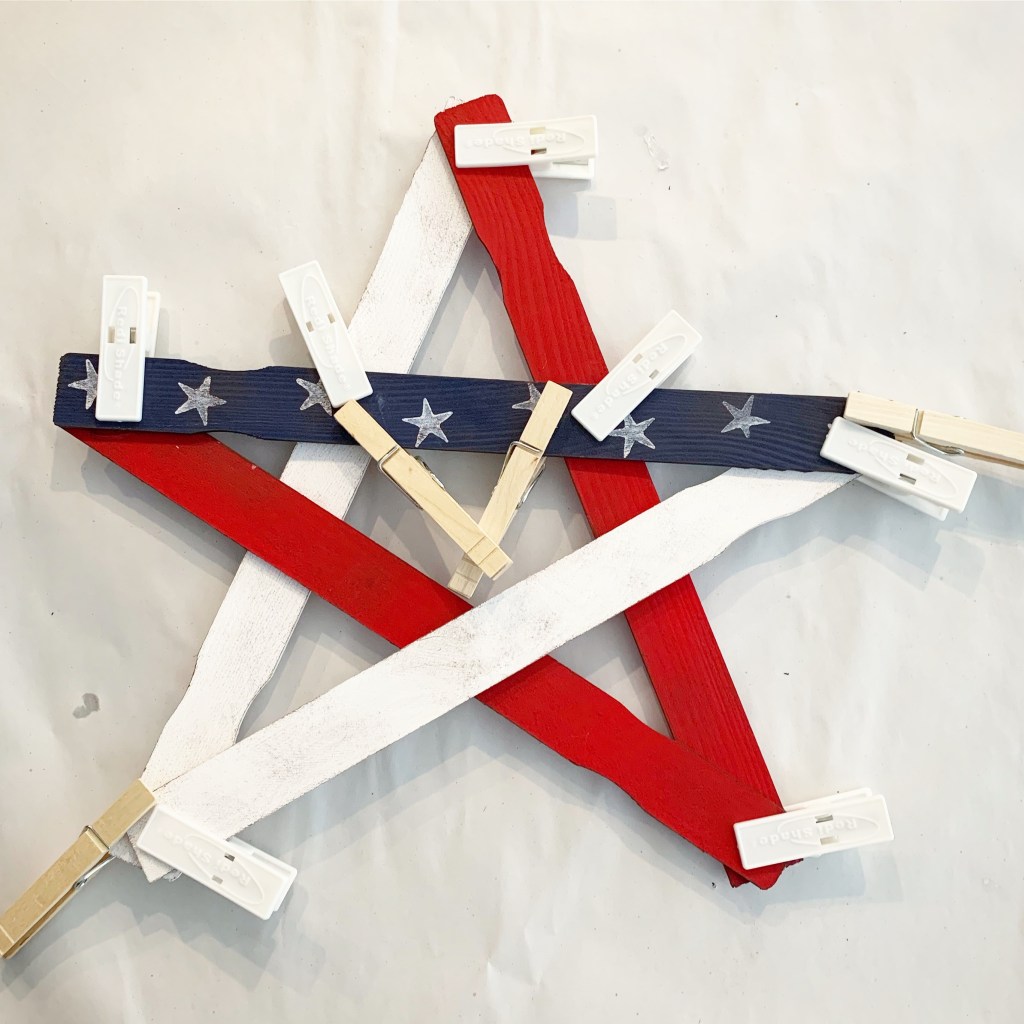
Using a strong glue, like e6000, glue the stirrers together in a star shape like in the photo below. I used clips to hold everything together until it was dry.
And here’s the finished star! I think it turned out pretty cute! 🙂
I have a fun 4th of July project to share with you today. I saw a picture of this project, but there weren’t any instructions. I thought it would be so quick and easy to make – and it was!
I picked up all my supplies at Hobby Lobby. My wood number 4 is about 8-inches tall. (Make sure that your number is able to freely stand.) The star paper is from the scrapbook department. You can find red/white bakers twine in the scrapbook or cake decorating department. You’ll need a small amount of red acrylic paint. You’ll also need matte finish Mod Podge to attach the paper to the 4.
Trace the wood 4 on the back of the scrapbook paper. I decided to put it on both sides of the 4, so I flipped it over and traced it both ways. (You can also paint the back of the 4 red.) Carefully cut out both images.
Paint the edges of the 4 red, including the center part (and the back if you are not adhering the star paper). Apply a thin coat of Mod Podge to the front of the 4 and carefully attach the star paper, smoothing out any wrinkles or bubbles. Let dry. Apply a thin coat of Mod Podge over the top to seal. Let dry. Repeat on the back.
After it is dry, wrap the bakers twine around the 4 several times and tie with a knot in the front.
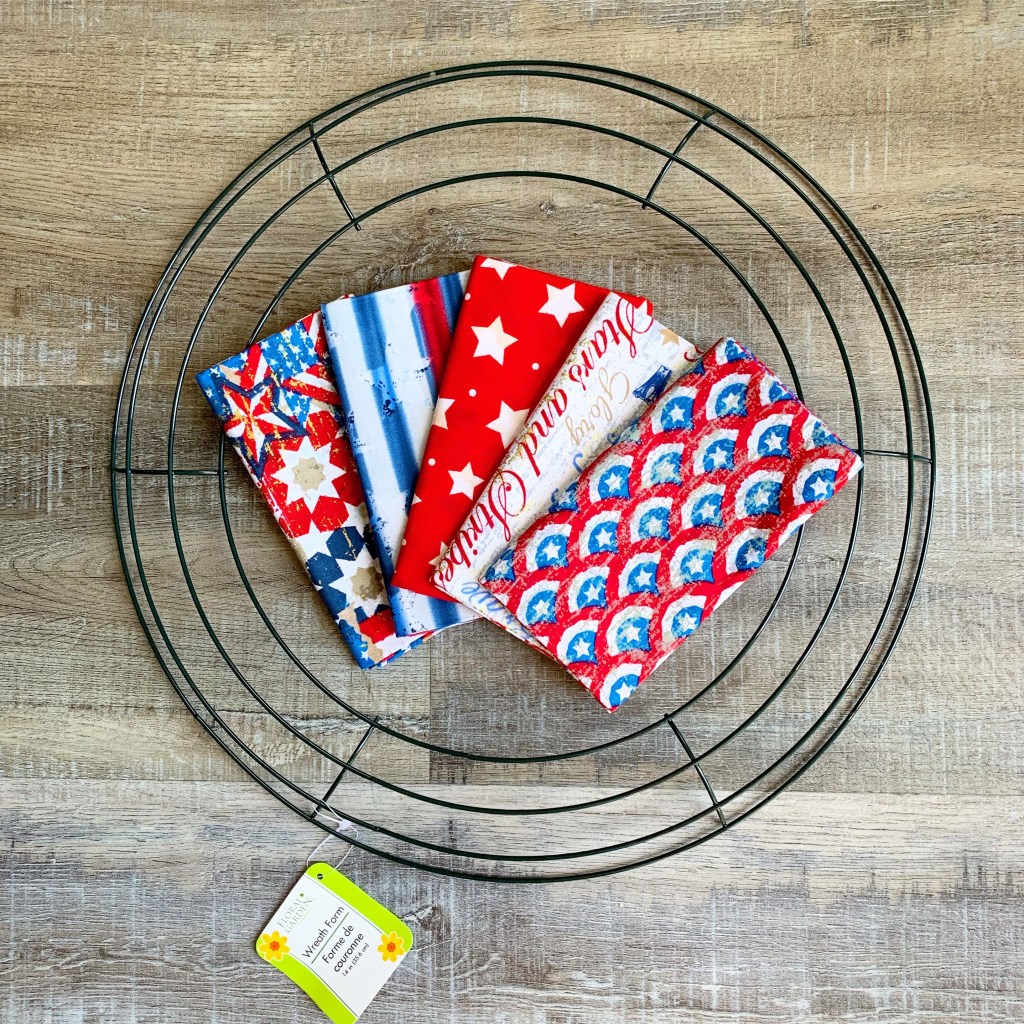
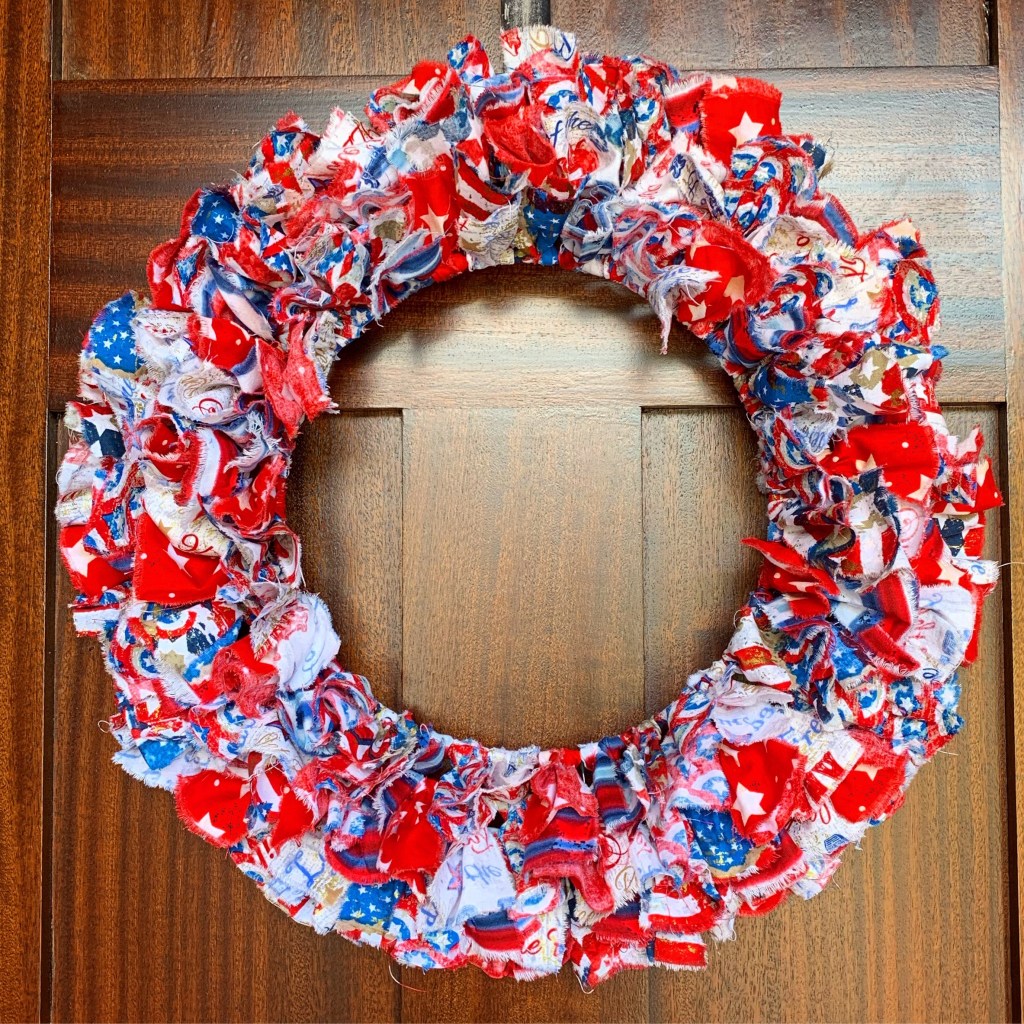
I recently saw this post on Pinterest and thought it would be fun to make a rag wreath to match the Patriotic Rag Balls I made in this post since I had fabric leftover. I did have to buy another fabric bundle from Hobby Lobby to have enough to complete the wreath. I used one full bundle and about half of another one.
My wire wreath form came from the Dollar Tree and is 14-inches in diameter.
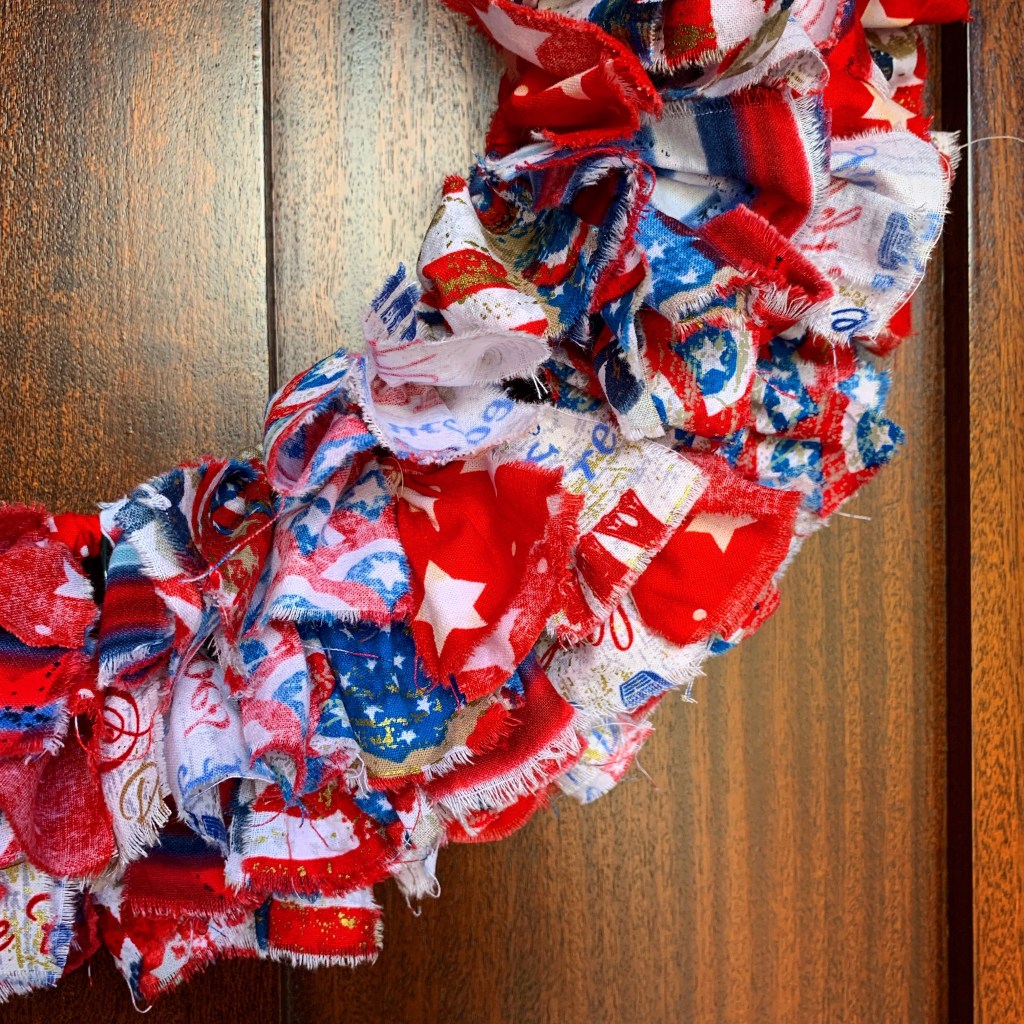
First you’ll need to wash, dry, and iron your fabric. Next you will need to tear it into strips. My strips were 2-inches wide by 7-inches long. Simply snip the edge of the fabric and then tear. It will tear easily and straight.
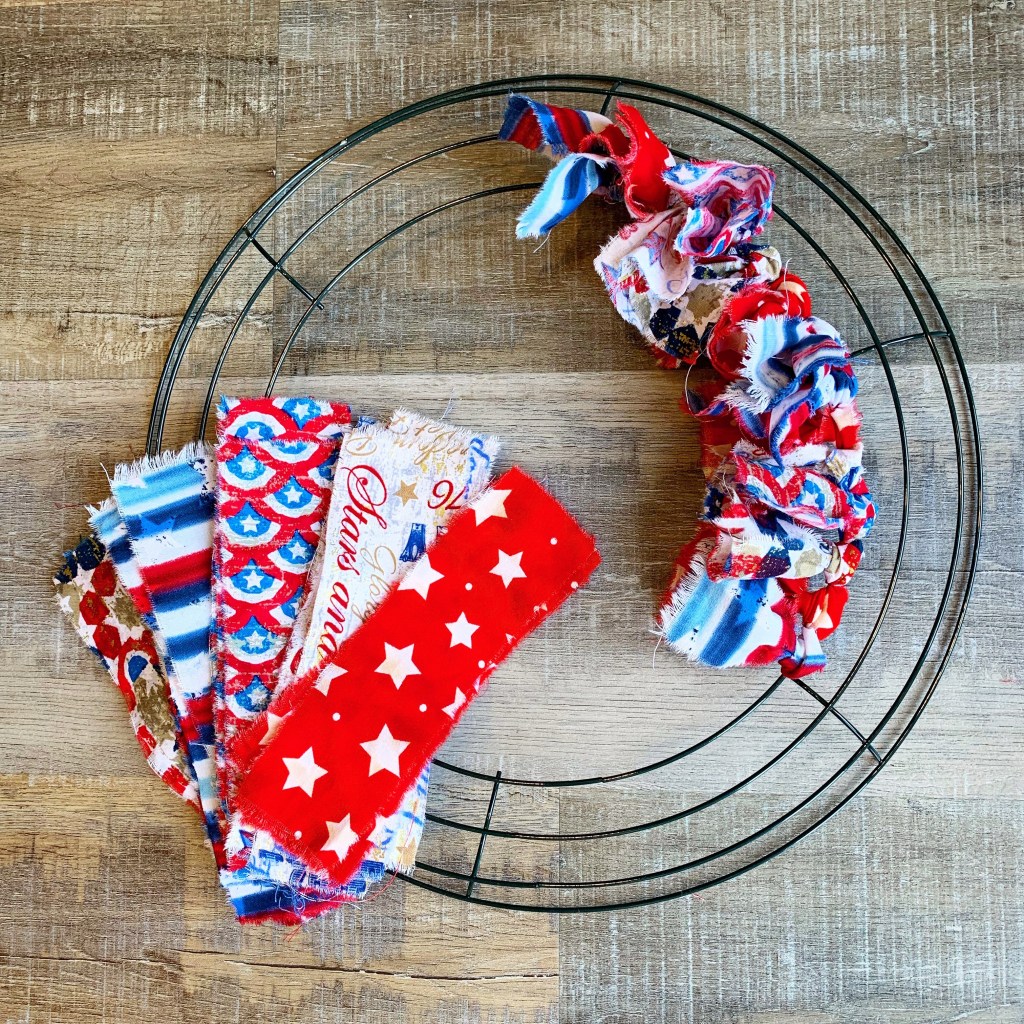
You will need a lot of strips! I ended up using 180 strips – 6 on each section of the inner ring, 7 on each section of the next ring, 8 on each section of the next ring, and 9 on each section of the outer ring.
To tie the fabric strips onto the wreath form, fold the strip in half and insert it from front to back – beginning with the inner ring. Then, wrapping the ends around the wire, pull them through the loop of the strip and pull tight.
Continue adding strips of fabric until you have covered the entire wreath form. I just tied them on randomly without any specific order.
When finished, fluff up your fabric and you have a fun Patriotic Rag Wreath for your front door!
Of course you can use fabric for any holiday or something to match your everyday decor…the possibilities are endless! And the fabric tearing step is a great stress reliever!! 😉
I stamped the image with Memento Tuxedo Black ink on white card stock and colored it with Copic markers. (I forgot to write down the colors I used 🙁) I sponged around the truck with a light brown ink, layered the panel to blue card stock, and attached it to a white card.
I stamped the sentiment with brown ink on white card stock and punched it with a label punch. This one is discontinued, but here is a similar one from Stampin’ Up. I layered the sentiment to a scalloped oval die cut from blue card stock using foam tape. (Here’s a great set of scalloped oval dies.) Then I attached the piece to the card with foam tape.
UPDATE: I just found out that the link for this pattern doesn’t work and may lead to a problem website. I have removed the link and apologize for any problems this has caused. The pattern was available when I wrote this post so I’m not sure what has gone wrong. Again, my apologies!!
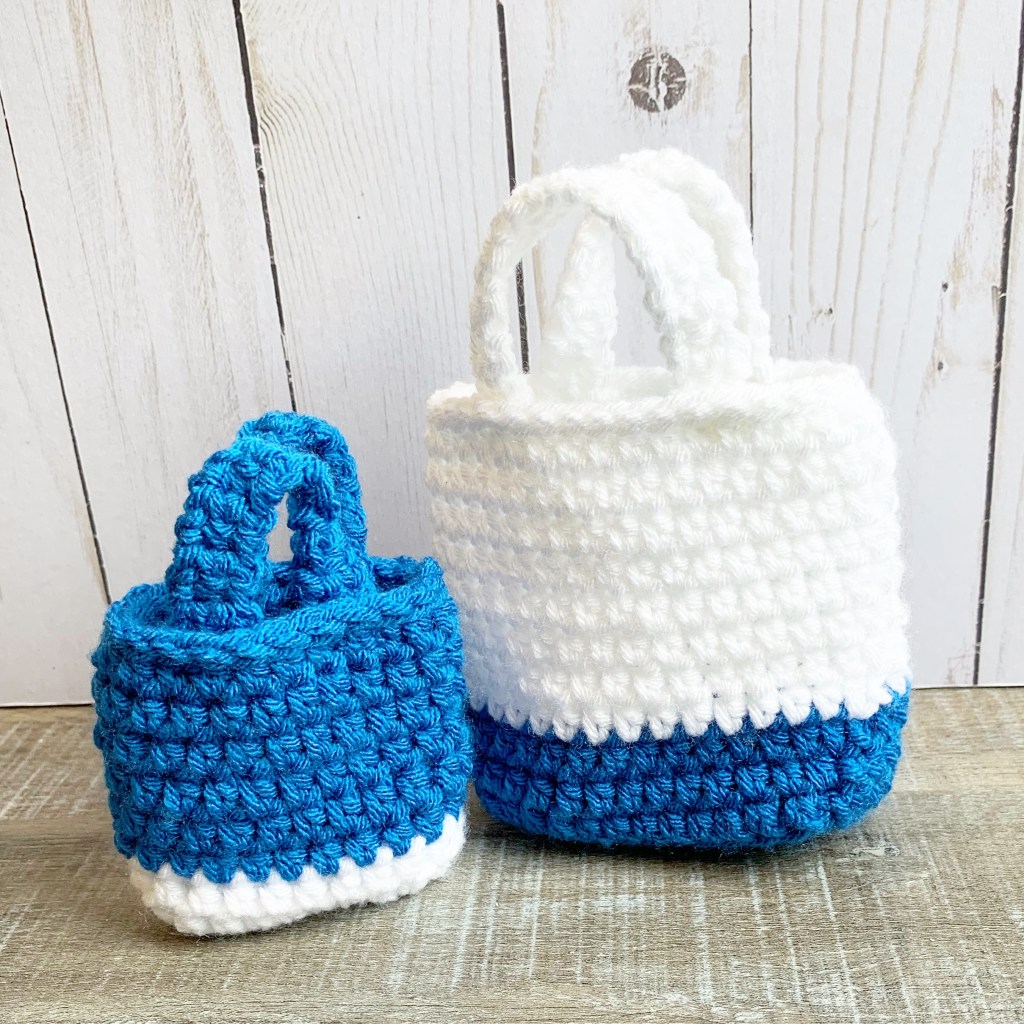
I used Yarn Bee Soft & Sleek yarn in White and Cobalt with a 4.5mm hook to stitch up my gift bags. (The Cobalt color has been discontinued – I got mine on clearance a few months ago – but there is a Teal Blue that is really pretty.) I made the small and medium sized bags – they are the perfect size for a jewelry gift. The small one is also a great size for a gift card or cash gift.
I think you could also use a chunkier yarn with a larger hook to make these cute gift bags – of course that would make the finished size larger than the measurements in the pattern. Color combos are limited only by your imagination! 🙂
I made this super easy, super fun, super tasty Holiday Snack Mix to share with friends on Easter. It has just the right mix of salty and sweet – and by changing the type of chocolate candy, it’s perfect for any holiday gathering!
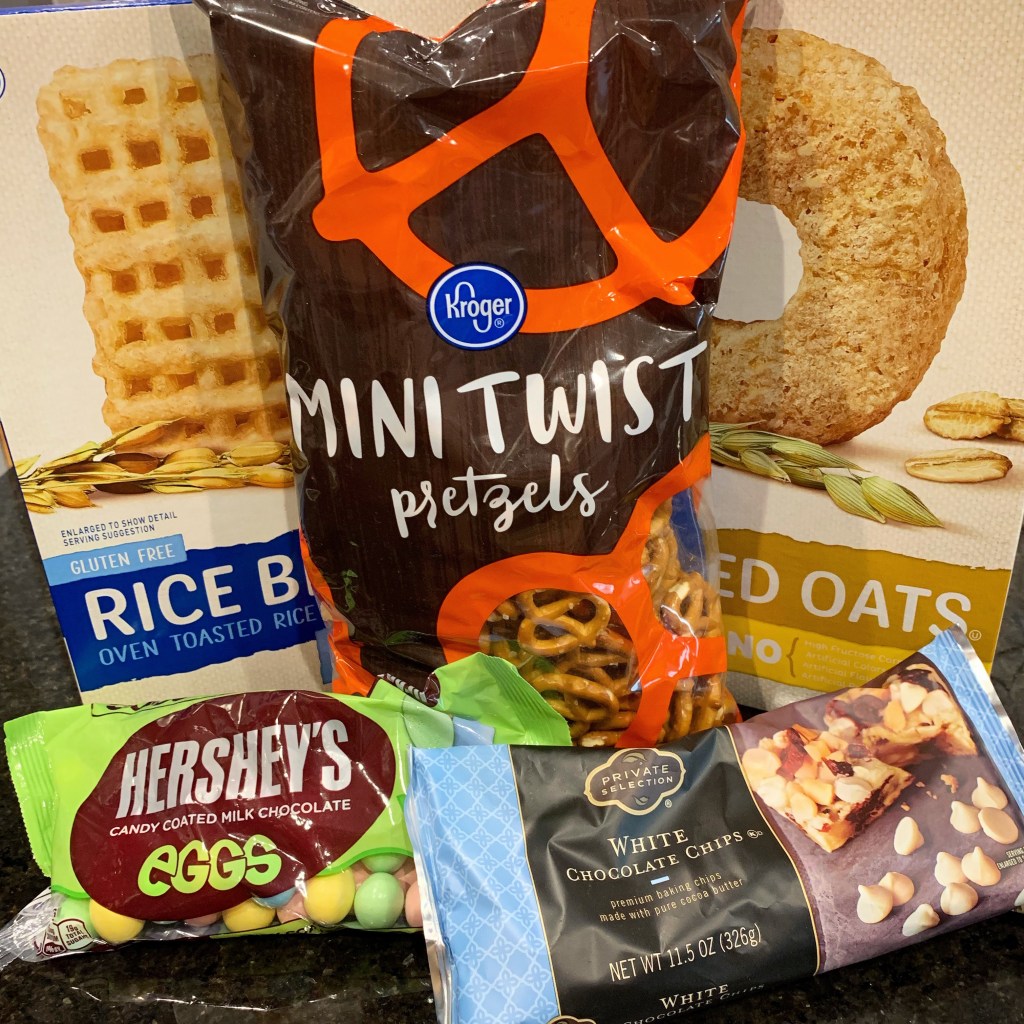
You can use just about any type of cereal you want to make this snack mix. Here’s what I used…
4 cups toasted rice cereal
2 cups toasted oat cereal
2 cups pretzels
1 bag Hershey’s candy coated eggs
1 bag white chocolate chips
First mix the cereals, pretzels, and candy eggs together in a large bowl. Place the white chocolate chips in a microwave safe bowl. Microwave on high for 30 seconds. Stir and microwave on high for another 30 seconds. Stir until smooth, microwave for another few seconds if needed. Immediately pour over snack mix and toss gently until well coated.
Spread mix onto wax paper and let set.
When cool and set, break into pieces. Store at room temperature in an airtight container.
Change the candy to red, white, and blue M&M’s for 4th of July, or Fall colored M&M’s for Halloween or Thanksgiving, or red and green M&M’s for Christmas. You can also use colored candy melts in place of the white chocolate chips – or chocolate or butterscotch chips. I think Reese’s pieces would be yummy in this mix, too! Or maybe add some peanuts – really it’s just whatever tickles your taste buds! 😋
I layered black card stock to a white card and then added a panel of light turquoise card stock. I attached the stamped image with foam tape. I stamped the sentiment using Memento Tuxedo Black ink on white card stock and die cut it with a scalloped oval die (here’s a great set!). It is attached to the corner of the stamped flower image.
By the way, if you are in the market for a die cutting and embossing machine, I love my Cuttlebug. It sits on my desk and I use it all the time!
So simple, yet so pretty! My sister enjoyed receiving it. 🙂 This stamp set is so versatile – you can color it in so many ways for so many different occasions.
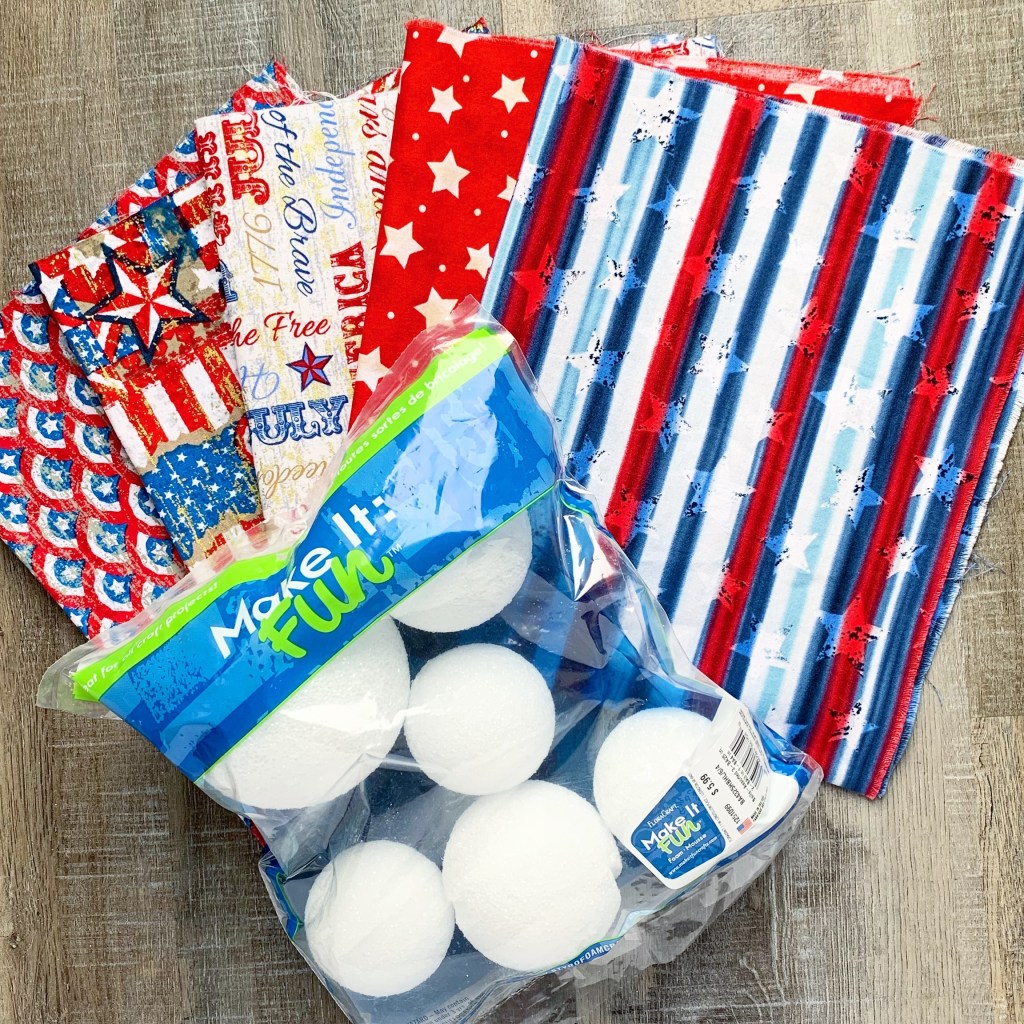
I love the look of decor balls in a clear vase or dough bowl, but they can be expensive! I have an easy way to add some fun Patriotic Rag Balls to your decor just in time for Memorial Day inspired by this pin I found on Pinterest. They are great for your 4th of July decor and all Summer long, too!
You’ll need several different patriotic fabrics, some styrofoam balls, and straight pins. I found my fabrics in a bundle at Hobby Lobby – each one measures about 18 x 21 inches.
First you’ll need to wash and dry your fabric. I ironed mine, too, but that’s totally up to you if you want to do that. The rag balls have a rustic feel so a few wrinkles won’t matter. 😉
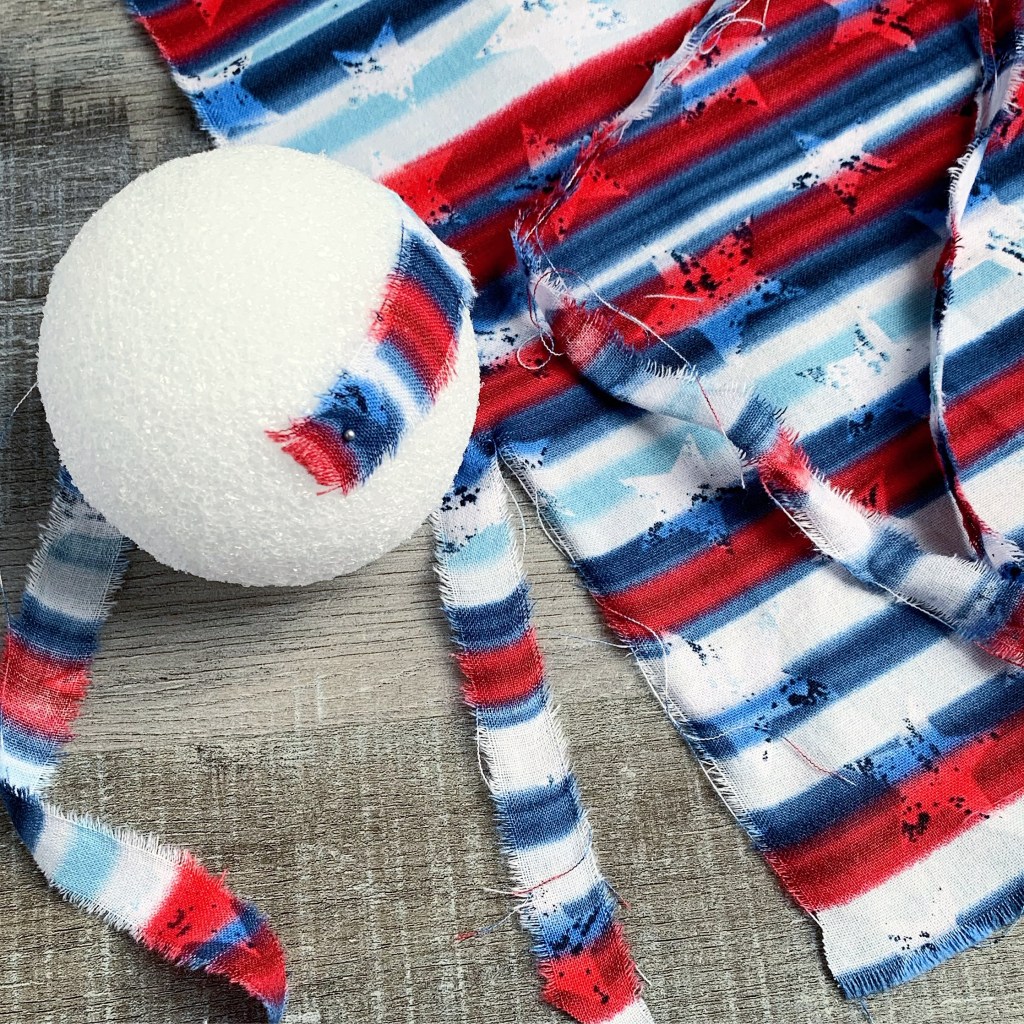
Next you’ll need to tear strips of fabric. I snipped the fabric about 1/2-inch from the edge and then simply tore the fabric so it would have rough edges. Then, using a straight pin, pin the end to the styrofoam ball.
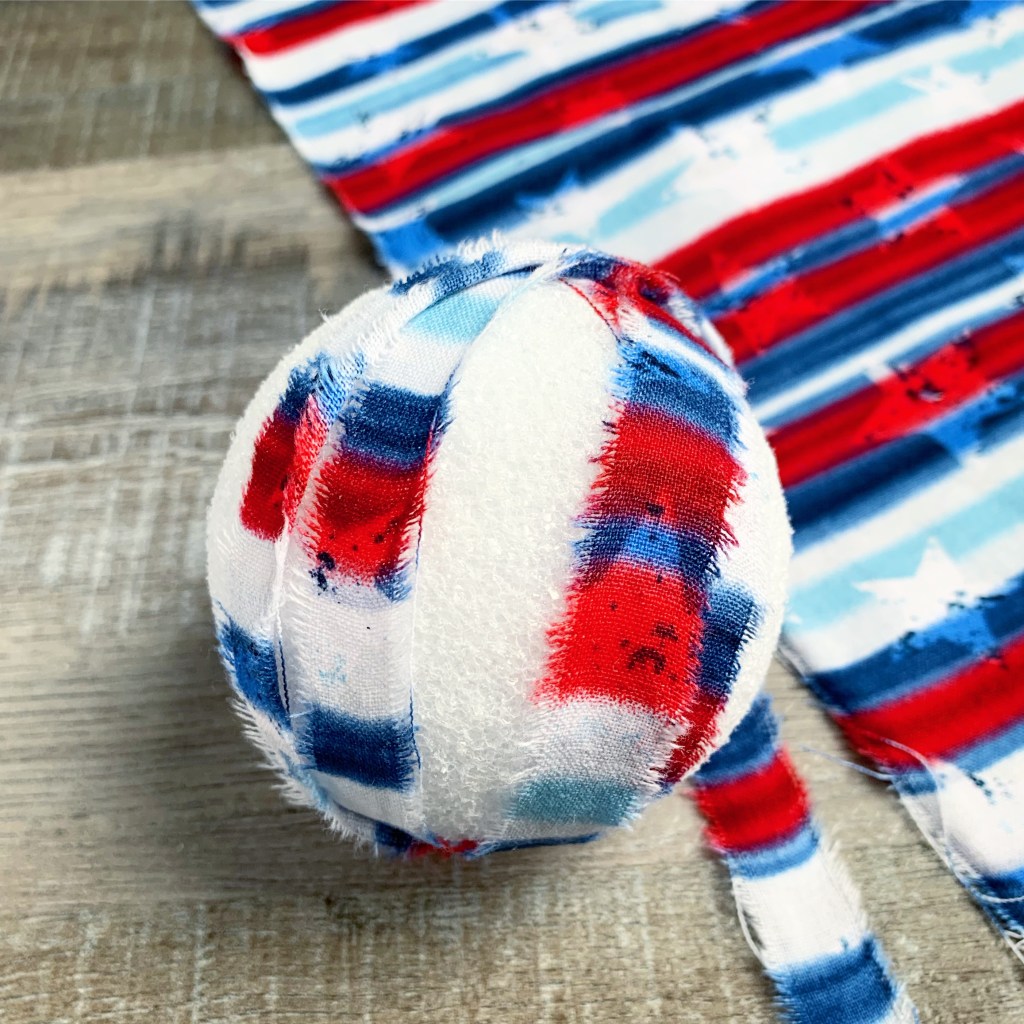
Wind the strips of fabric around the ball overlapping and covering up the straight pins as needed. Just keep adding strips of fabric by overlapping the ends and securing with straight pins as you go. When you get the entire ball covered, use a little Aleene’s Tacky Glue to secure the end of the final fabric strip.
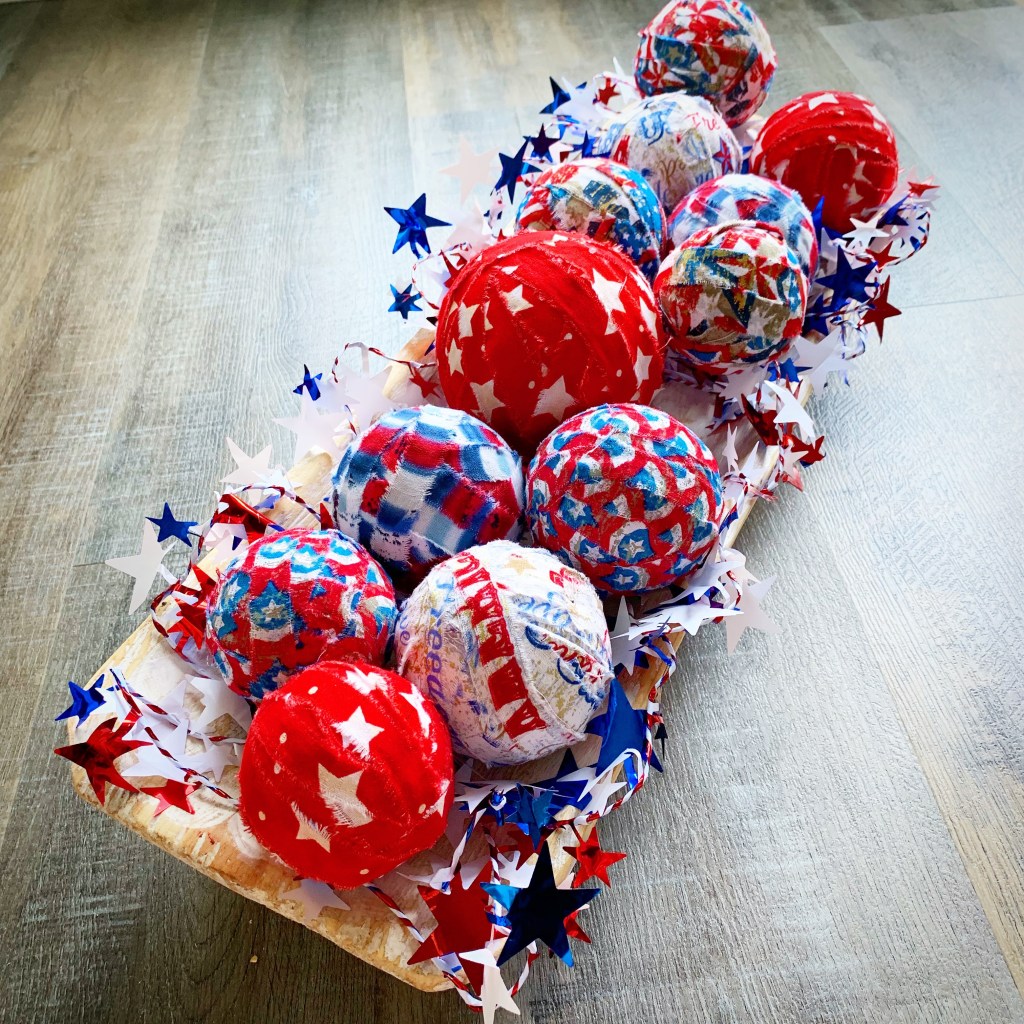
And that’s it! Easy Peasy! Here they are in my dough bowl – I picked up my star garland at Hobby Lobby. I may have to make some of these for every season! They would also look so cute in a neutral fabric like muslin for a pretty farmhouse look.
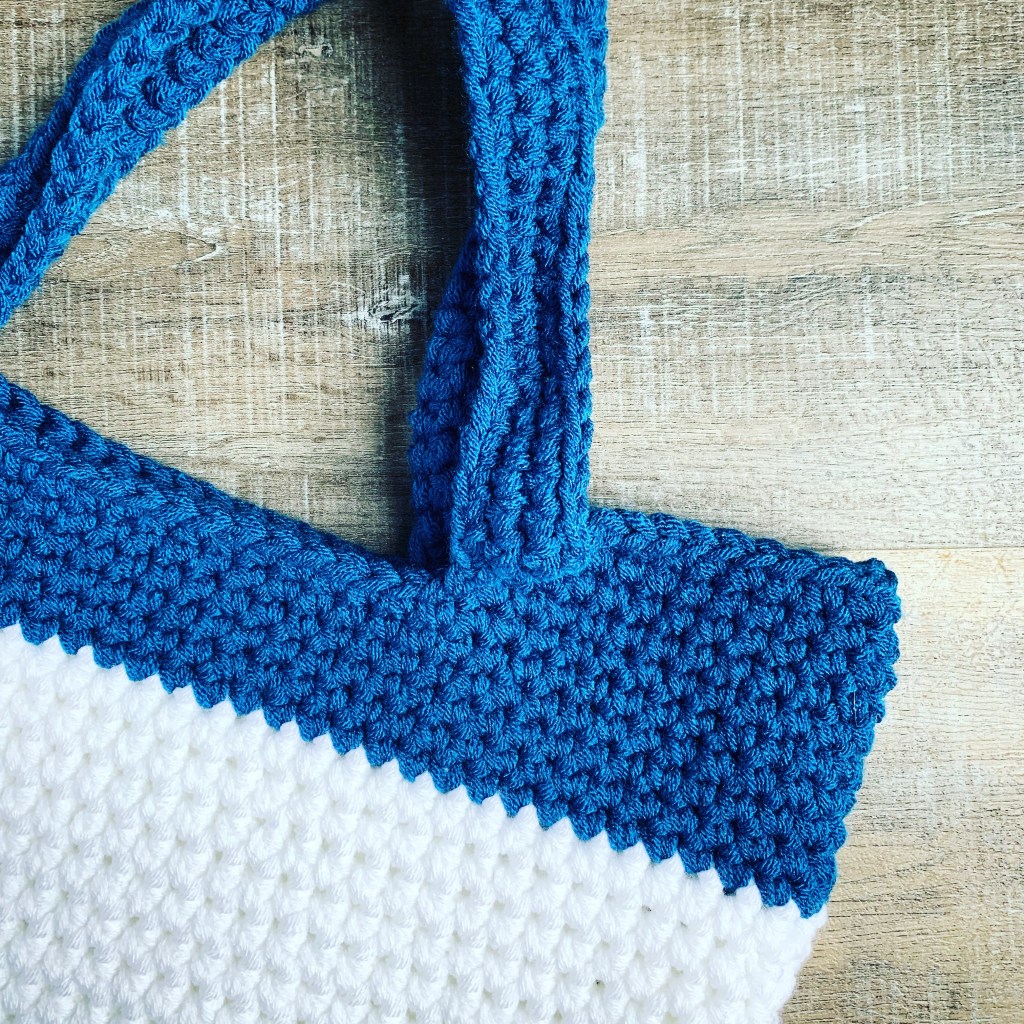
There are probably a million different tote bag crochet patterns out there – well, maybe not a million, but there are A LOT! And I’m going to add one more. 🙂
I thought it would be fun to try my hand at designing a simple Color Block Tote Bag and this is what I came up with. It’s super easy to make and goes quickly because the bag is stitched holding 2 strands of worsted weight yarn together. I’ve written the pattern below.
Crochet Color Block Tote Bag
Finished size is approximately 17 by 17 inches plus the handles.
Gauge is not important for this project. My bag measures about 17 inches wide by 15 inches high (without the handles) and 3 inches wide across the bottom.
Stitches used: US terms
Chain – ch
Single crochet – sc
Half double crochet – hdc
Slip stitch – ss
Back loop only – blo
Note: Bag is crocheted using 2 strands of yarn held together
Note: By alternating which stitch you begin the rounds with, it helps to keep your seam straighter.
Ch 36 with blue (holding 2 strands together)
Row 1: sc in 2nd ch from hook and each ch across. Ch 1 and turn. (35 stitches)
Rows 2-5: sc in each stitch across. Ch 1 and turn. (35 stitches)
Row 6: sc in each stitch across. Ch 1. DO NOT TURN (35 stitches)
Begin working in rounds.
Round 1: Work 4 sc across end of rows. Work 2 sc in next stitch. sc in next 33 stitches. (This is the opposite side of the beginning ch.) 2 sc in last stitch. Work 4 sc across end of rows. 2 sc in next stitch. sc in next 33 stitches. 2 sc in last stitch. Join with ss to 1st sc. (82 stitches)
Round 2: ch 1. sc in blo only of same stitch as ss and in each stitch around. Join with ss to 1st sc. (82 stitches)
Round 3: ch 1. Skip stitch that has the ss. sc in next stitch and in each stitch around, ending with final sc in skipped sc at the beginning of the round. Join with ss to 1st sc. (82 stitches)
Round 4: ch 1. sc in same stitch as ss and in each stitch around. Join with ss to 1st sc. (82 stitches)
Rounds 5-10: Repeat rounds 3 and 4 (3 times). Change to white (holding 2 strands together) at the end of round 10. (82 stitches)
Round 11: ch 2. Skip stitch that has the ss. hdc in next stitch and each stitch around, ending with the final hdc in skipped stitch at the beginning of the round. Join with ss to 1st hdc. (82 stitches)
Round 12: ch 2. hdc in same stitch as ss and in each stitch around. Join with ss to 1st hdc. (82 stitches)
Rounds 13-26: Repeat rounds 11 and 12 (7 times). Change to blue (holding 2 strands together) at the end of round 26. (82 stitches)
Round 33: ch 1. Skip stitch that has ss. sc in next 13 stitches. Ch 40. Skip next 14 stitches. sc in next 28 stitches. Ch 40. sc in next 12 stitches. End the round with a sc in the stitch that was skipped at the beginning of the round. Join with ss to first sc. (134 stitches)
Round 34: ch 1. sc in same stitch as ss and each sc and ch around. Join with ss to first sc. (134 stitches)
Round 35: ch 1. Skip stitch that has the ss. sc in next stitch and in each stitch around, ending with the final sc in skipped stitch at the beginning of the round. Join with ss to first sc. (134 stitches)
Round 36: ch 1. sc in same stitch as ss and in each stitch around. Join with ss to first sc. (134 stitches)
Fasten off and weave in ends.
Click on the link below if you’d like to print out a copy of the pattern.
Disclosure: Some of the links on my site are affiliate links, meaning, at no additional cost to you, I will earn a small commission if you click through and make a purchase. As an Amazon Associate I earn from qualifying purchases.