Country Mouse Birthday

Hi friends,

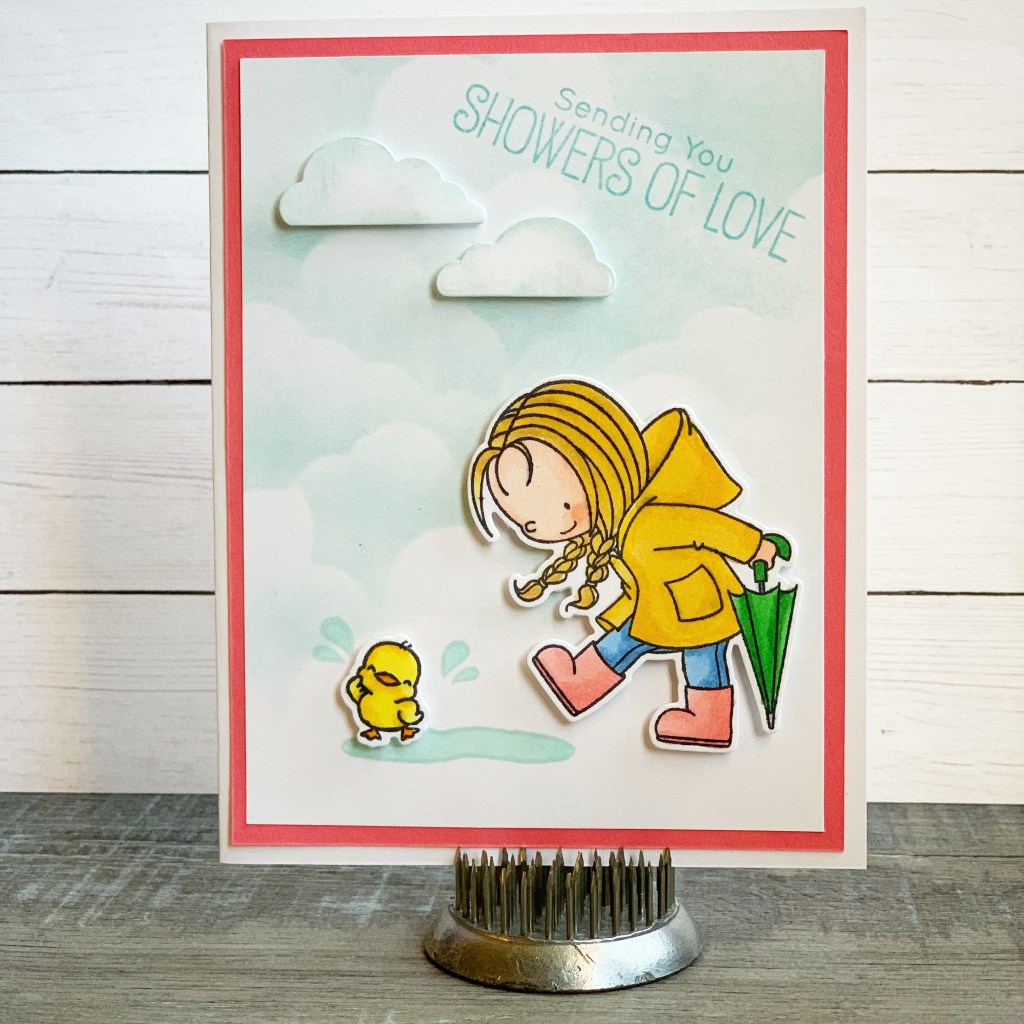
I am in love with this cute little mouse from the Country Mouse Hello stamp set from Unity Stamp Company. There’s another adorable mouse in the set as well as a couple more images and 3 sentiments. Be sure to check it out!

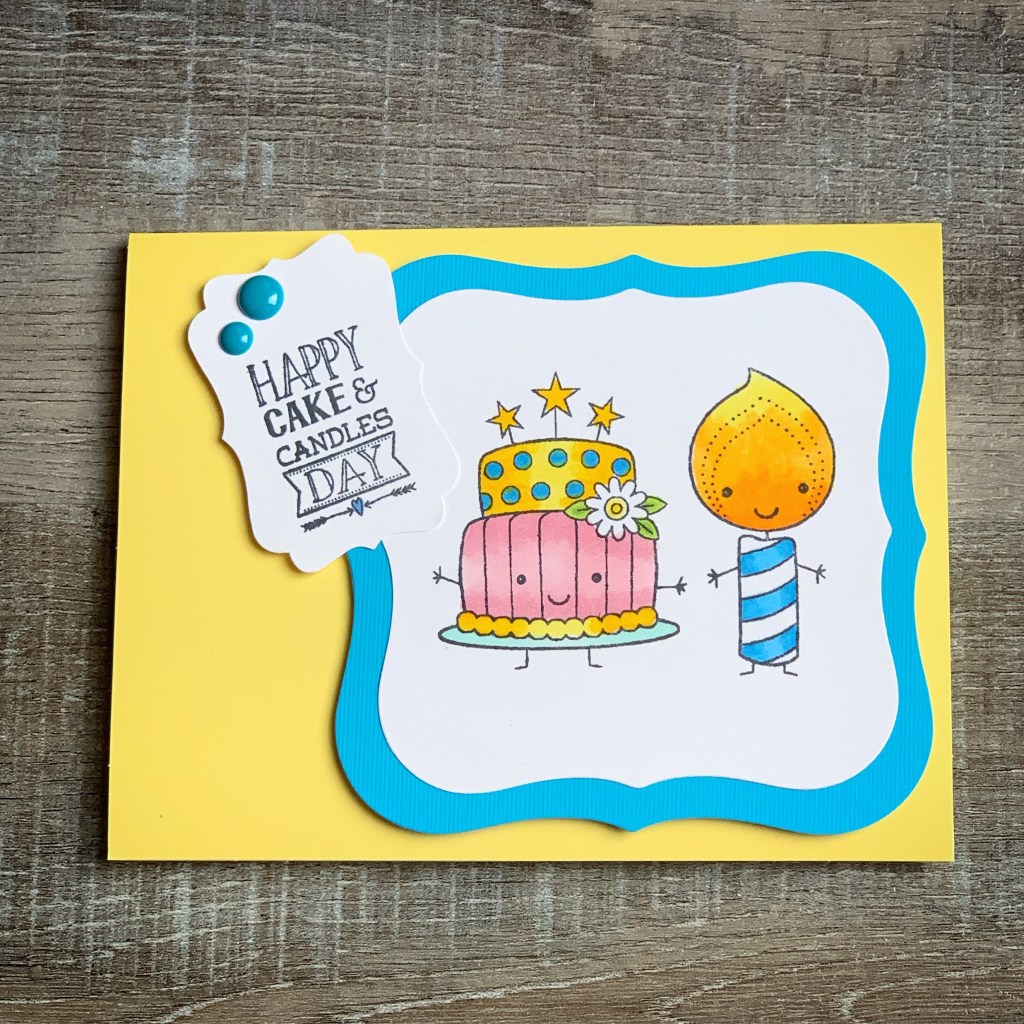
The “happy birthday sentiment” is from the Hugs, Kisses & Birthday Wishes set, also from Unity Stamp Company. This set includes a cute owl along with lots of birthday sentiments.

The bubble embossing folder I used is no longer available, but this one is similar. I used this set of dies from Spellbinders to die cut my stamped image and the layer behind it. I used an oval punch and scalloped oval punch that I’ve had forever to punch out the sentiment. (This is a great set of oval dies if you are looking for some. And here is a set of scalloped oval dies that would be great if you need those.)

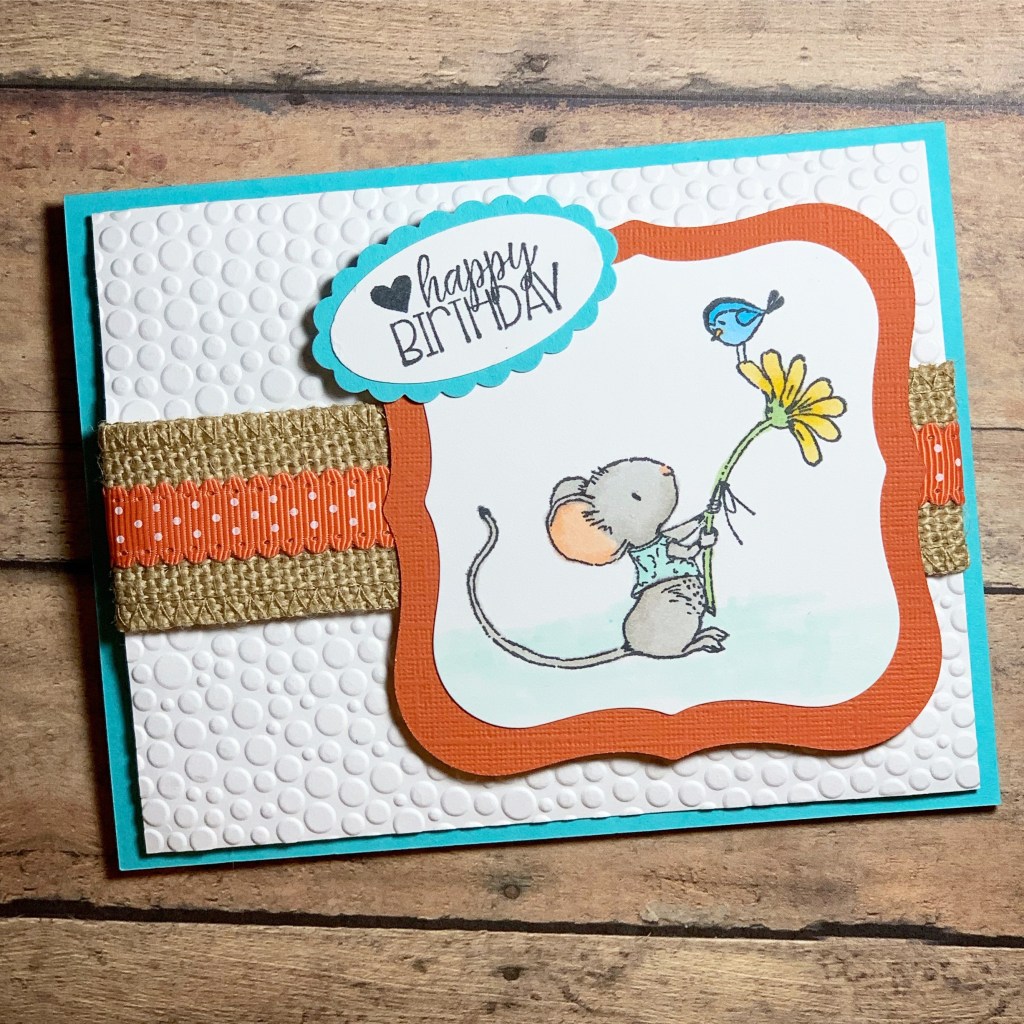
To make the card, stamp the mouse with Memento Tuxedo Black ink on white card stock and color with Copic markers. Die cut the image and layer to a larger die cut from terra-cotta card stock. Emboss a panel of white card stock with the embossing folder, layer burlap and dotted ribbon to the panel, and attach the panel to a turquoise card. Attach the mouse image to the card with foam tape. Stamp sentiment with Memento Tuxedo Black ink on white card stock. Punch or die cut with an oval punch and layer to a scalloped oval punched from turquoise card stock. Attach the sentiment to the corner of the mouse image.

Change the sentiment to “thinking of you”, “just for you”, or leave it off completely and this card can be used for just about any occasion!

Happy Stamping!

Anita

Posted in Cards, Stamping, Uncategorized | 6 Comments

Easy Black Bean Salad

Hi friends,

I have a super easy recipe for a quick weeknight dinner to share today. It comes together in just minutes so it’s perfect for even the busiest of days!

Here’s what you’ll need…

1 lb lean ground beef

1 (15.25 oz) can black beans

1 (10 oz) can diced tomatoes with green chilies

your favorite bagged salad mix

shredded cheddar cheese

sour cream

Simply brown the ground beef in a skillet and drain. Add the black beans and tomatoes. Cook, stirring occasionally, for a few minutes until heated through. Place desired amount of salad mix on serving plates. Top with the black bean mixture. Sprinkle with desired amount of cheese and add a dollop of sour cream.

It couldn’t be easier! You can also season the ground beef with taco seasoning for even more flavor. Or if you’re more adventurous than me, you could add some jalapeños to spice it up!

It’s a simple recipe to double – and it freezes well. So make up a batch or 2 to have on hand for a quick dinner when you need it.

Thanks for stopping by,

Anita

Posted in Recipes, Uncategorized | Leave a comment

Crochet Ribbed Cord Keeper

Hi friends,

Do you have charger cords EVERYWHERE??? Phone, tablet, laptop, kindle – just to name a few! What to do?? Crochet some cord keepers, of course. 🙂

I wrote up the pattern I used to crochet my Ribbed Cord Keeper and shared it below. I found my cute buttons at Hobby Lobby and used Baby Bee Hushabye yarn in Toy Elephant with a 4mm hook to stitch up my cord keepers. The gray color is discontinued, but there are several other colors and any 4 weight yarn will work. So use what you have – these are great stash busters!

Crochet Ribbed Cord Keeper

Worsted weight yarn

4mm hook

3/4-inch button

Stitches used (US terms)

Chain – ch

Single Crochet – sc

Back Loop Only – blo

Single Crochet Decrease – sc dec

Ch 6

Row 1: sc in 2nd ch from hook and in next 4 ch. ch 1 and turn. (5 stitches)

Row 2: 2 sc in blo of 1st stitch. sc in blo of next 3 stitches. 2 sc in blo only of last stitch. ch 1 and turn. (7 stitches)

Rows 3-5: sc in blo of each stitch across. ch 1 and turn. (7 stitches)

Row 6: 2 sc in blo of 1st stitch. Sc in blo of next 5 stitches. 2 sc in blo of last stitch. ch 1 and turn. (9 stitches)

Rows 7-18: sc in blo of each stitch across. ch 1 and turn. (9 stitches)

Row 19: Work sc dec in blo over 1st 2 stitches. sc in blo of next 5 stitches. Work sc dec in blo of last 2 stitches. ch 1 and turn. (7 stitches)

Row 20: Button hole row. sc in blo of 1st 2 stitches. ch 3. Skip next 3 stitches. sc in blo of last 2 stitches. ch 1 and turn. (2 sc, ch 3 space, 2 sc)

Row 21: sc in blo of 1st 2 stitches. Work 3 sc in ch 3 space. sc in blo of last 2 stitches. ch 1 and turn. (7 stitches)

Row 22: sc in blo of each stitch across. ch 1 and turn. (7 stitches)

Row 23: Work sc dec in blo over 1st 2 stitches. sc in blo of next 3 stitches. Work sc dec in blo of last 2 stitches. (5 stitches)

Fasten off and weave in ends.

Sew on button.

Here’s a closer look at the Ribbed Cord Keeper.

Click below for a printable pdf of the pattern.

Get organized and use up some of your stash at the same time!

Happy Crocheting!

Anita

Posted in Crochet, Organization, Uncategorized | 6 Comments

Beary Special Birthday Card

Hi friends,

A couple of times a year we find ourselves in the Atlanta area. The last time we were there, I discovered a fun rubber stamp/scrapbook store called Impressive Ideas in Norcross, GA. If you are stamper or scrapbooker, I highly recommend stopping by if you are in the neighborhood – I don’t think you will be disappointed.

I found this cute Beary Special Birthday stamp from Whipper Snapper Designs during my visit. I knew it would be great for making birthday cards for special little ones – or really for anyone!

I stamped the bear with Memento Tuxedo Black ink on white card stock and colored it with Copic markers. I embossed a panel of turquoise card stock that has a white core with a birthday embossing folder similar to this one. I lightly sanded the raised areas to expose the white core and attached the panel to a white card. I attached the bear with foam tape.

The sentiment is from the Itty Bitty Greetings set from Stampin’ Up. I stamped it with red ink on white card stock and punched it with a label punch similar to this one. It’s attached to the card with foam tape. I finished the card with one red sequin next to “Happy Birthday”.

Super cute and super easy to make!

Happy Stamping!

Anita

Posted in Cards, Stamping, Uncategorized | Leave a comment

DIY Mother’s Day Ideas 2019

Hi friends,

There is still time to craft something special for your favorite Mom for Mother’s Day! I’ve linked a few ideas below.

If you are a crocheter, this Crochet Zippered Pouch works up quickly and can be used for so many things.

Crochet Zippered Pouch

This DIY Jewelry Organizer is practical as well as pretty!

DIY Jewelry Organizer

Maybe some DIY Farmhouse Candlesticks made with items from the home improvement store.

DIY Farmhouse Candlesticks

Want to make her a yummy treat? Try The Best Oatmeal Cake!

The Best Oatmeal Cake

This is another great crochet idea – Crochet Microwaveable Bowl Cozy.

Crochet Microwaveable Bowl Cozy

Maybe a DIY Patriotic Clothespin Wreath to get her ready for Summer.

DIY Patriotic Clothespin Wreath

And of course you’ll need a card…

Thinking of You Card
Simple Flower Card
Thinking of You

I hope these ideas inspire you to make something special for your Mom!

Anita

Posted in Cards, Crochet, Decor, Gifts | 6 Comments

Faux Leather Handmade Jewelry

Hi friends,

Have you seen all the faux leather earrings everywhere lately? They are so cute and the possibilities are endless!!

Taylored Expressions has made it so easy to make your own creations using their Designer Dangles dies. They have several die sets and craft leather sheets to mix and match so you can make jewelry to match all your outfits. 🙂 I’ve made a few pairs of earrings, some with matching pendants, and I’m am hooked! I will be making more…

You will need a die cutting machine if you don’t already have one. I used my Cuttlebug machine to cut all my earrings. This little machine is great – I use it all the time!

You can also find jump rings and earring wires at Taylored Expressions. I picked up my chains for the necklaces at my local craft store in the jewelry department.

The earrings below are made using the Designer Dangles die set and Designer Dangles Shape Shifter set. I used Craft Leather Metallic Basics for the silver pair and a woven craft leather (it seems to be unavailable now 😦 ) for the brown earrings. For the silver earrings, I die cut 2 of the teardrop shapes for each earring and glued them back to back. I also cut 1 each of the leaf shape for each earring and layered it on top of the teardrop. I attached 2 jump rings to each earring and then attached the earring wires. The brown earrings are even easier – simply die cut the shapes and attach the earring wires. So simple!!

The earring and pendant set below are made using the Designer Dangles die set and the Designer Dangles The Bigger The Better die set. I used Craft leather in Colorful, Black & White, and Metallic Basics – all from Taylored Expressions. I layered 3 different colors and attached earring wires for the earrings and a jump ring with a chain for the pendant necklace. The largest teardrop shape is about 2 1/2-inches long – I think it’s the perfect size for a pendant.

This set is made with the Designer Dangles die set and the the Designer Dangles The Bigger The Better die set. I used Craft Leather in Colorful and Metallic Basics.

I really love the way this last set turned out! I used the Designer Dangles die set and the Designer Dangles The Bigger The Better die set along with Craft Leather in Metallic Basics and Burnished.

This jewelry is incredibly light to wear and so easy to make! You can find videos from Taylored Expressions over on their YouTube channel for how-tos and inspiration.

Happy Crafting!

Anita

Posted in Gifts, Uncategorized | 4 Comments

Cauliflower Chicken Fried “Rice”

Hi friends,

It can be difficult to eat lower carb and add more veggies into your diet – and try to keep the calorie count under control! Pinterest is a great place to search for new recipes to add into your rotation. I found the recipe for this Cauliflower Chicken Fried “Rice” here at That Low Carb Life during one of my searches.

It’s super easy to make! I used frozen riced cauliflower from the grocery store to save time, but of course you can make your own “rice” from fresh cauliflower. If you cook your chicken ahead of time, you can literally have this on the table in less than 15 minutes!

The cauliflower works great in place of traditional rice – lowers the carbs and adds veggies! It’s easy to adjust the soy sauce, chili paste and other seasonings to taste – just add more or less to suit your palate.

Next time I make this, I think I will add some frozen peas and maybe a little dice carrot…

Happy eating!

Anita

Posted in Recipes, Uncategorized | Leave a comment

Clean and Simple Birthday Cards

Hi friends,

If you’ve been following me for a while, you know that I love to make cards! Sometimes they are more elaborate…sometimes they are clean and simple. I have a few clean and simple cards to share with you today. All of these cards can be made in just a few minutes, but they are sure to bring a smile to the birthday boy or girl. 🙂

This card is made using Party Pandas from Stampin’ Up (it’s an older retired set) and an embossing folder similar to this one from Cuttlebug. The balloon is colored with Copic markers and the white accent is added with a Signo white pen.

This one is made with the Happy Birthday Balloon from Unity Stamp Company. The embossing folder is discontinued – any fun background would work (maybe one like this?)

This little elephant is Sweet Elle and the sentiment is from the Hugs, Kisses & Birthday Wishes set – both from Unity Stamp Company. I used Copic markers to color the image.

This cute set is called Cake and Candles from Darcie’s. I used this die set to cut out the image. The punch for the sentiment is discontinued but here’s a similar one from Stampin’ Up. I colored the image with Copic markers.

My favorite black ink to use with Copic markers is Memento Tuxedo Black. It stamps well and doesn’t smear at all when coloring with alcohol markers.

I hope these clean and simple cards will inspire you to make some of your own!

Happy Stamping!

Anita

Posted in Cards, Stamping, Uncategorized | Leave a comment

Showers of Love

Hi friends,

I have a fun Springtime card for you today. I sent this card to a very sweet girl on her 3rd birthday – the cute image reminded me of her splashing in the puddles after a Spring rain shower. ☔️

The images are from the Rain or Shine stamp set from My Favorite Things. They also have a matching die set called Rain or Shine Die-namics. They make it so much easier to cut out your images if you want to add a little dimension to your card!!

I stamped the girl and one of the little birds on white card stock with Memento Tuxedo Black ink. I colored them with Copic markers and then used the dies to cut them out.

I sponged the cloud background on white card stock with Pool Party ink from Stampin’ Up using a cloud template similar to the one found here. I stamped the puddle, water drops, and sentiment from the Rain or Shine stamp set with the Pool Party ink on the sponged panel. I layered the panel to deep coral card stock and attached it to a white card.

Using the dies in the Rain or Shine Die-namics set, I cut out the 2 clouds and sponged the edges with the Pool Party ink. The girl, little bird, and clouds are attached to the card with foam tape.

This sweet card is sure to bring a smile even on the rainiest of days! ☔️

Thanks for stopping by,

Anita

Posted in Cards, Stamping, Uncategorized | Leave a comment

Fudge Stuffed Chocolate Chip Cookie Bars

Hi friends,

I’ll admit it, I have a sweet tooth – a big one! I enjoy baking and usually try to make yummy things only when I have others to share them with because, you know, that sweet tooth of mine… 😉

These Fudge Stuffed Chocolate Chip Cookie Bars are a different twist on regular chocolate chip cookies. And you make them in a 9 x 13 pan so the whole batch is finished in under an hour! You can find the recipe here at Back For Seconds.

Ready for the oven…

Golden brown and they smell wonderful!!!

Oh my! Just look at that fudgey layer…

I shared these with some friends at a ladies lunch and they were a big hit! So chocolatey and yummy! 😋

Happy Baking!

Anita

Posted in Recipes, Uncategorized | 2 Comments