
Stretch bracelets are everywhere! I have several that I’ve picked up over the last couple of years and kept thinking “I should make these!” I mean, the craft stores are filled with all manner of beautiful beads – I could make them in any color or style I wanted! So I finally took the plunge, bought some supplies, and tried my hand at this simple craft.
Here is what I got for my first attempt at making these bracelets…
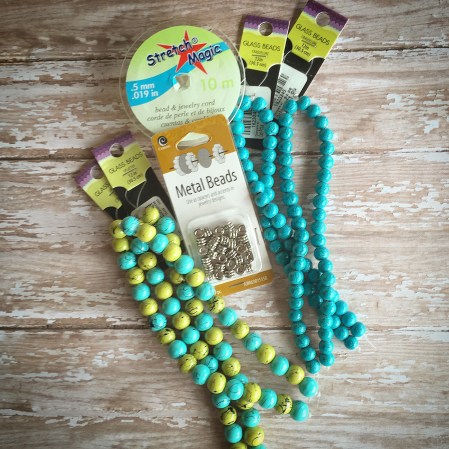
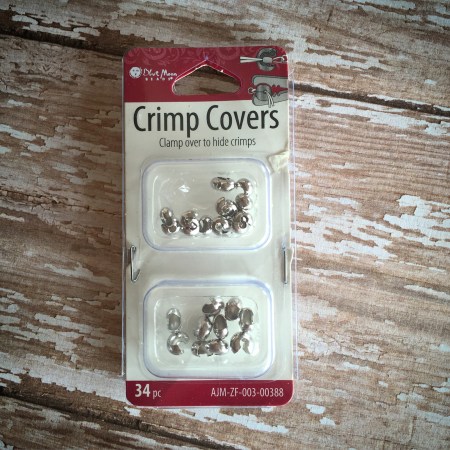
I opted for glass beads with metal beads to use as spacers. The options are truly endless! I found this spool of Stretch Magic in the jewelry section with all the other cording. I also got some of these Crimp Covers to cover the knot after tying off the Stretch Magic.
I’ve seen several different ideas on how to determine the length of elastic you’ll need to make your bracelet. What I did was to measure loosely around my wrist and add about an inch to that to get the finished size of my bracelet (I like them to be a little loose). Then I added 5-6 inches to that measurement so I would have plenty of room to string the beads without them falling off the other end and to have enough to tie it off when I was finished.
So here are the measurements for my bracelets. My wrist measures about 6 inches (I have tiny wrists 🙂 ). Add an inch so the bracelet fits loosely and you get 7 inches. Then add 5 inches to that and I cut my elastic 12 inches long. I cut 2 pieces to use on each bracelet since my elastic was pretty thin. I’m sure they make it in different thicknesses – get the thickest you can for your beads or double it up like I did. You want it to be strong enough to hold up to a lot of wear!
Plan the pattern you want to make. I placed the beads in a row until I got the pattern and length that I wanted. Before stringing your beads, give the elastic a good stretch to loosen it. Then simply string your beads onto the elastic. To finish the bracelet, tie a surgeon’s knot (here’s a great video). Then put a drop of glue on the knot to make it stronger and trim off excess elastic. I covered the knot with a crimp cover but you can also slip it inside one of the beads if it will fit.
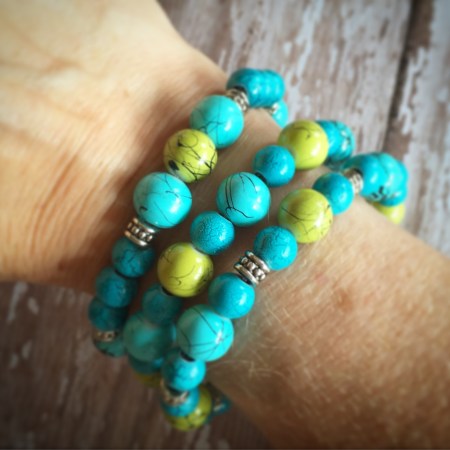
And here they are…

I love them all stacked together!
I was able to make all 3 bracelets using just one package of each of the bead strings – with a few left over. I also have several of the metal beads left, too.
These were so easy and fun to make! So many bead choices, so many colors, and even themed beads to personalize your bracelets. They would make great gifts!
Thanks for stopping by,
Anita


