Farmhouse Crochet Pumpkins 

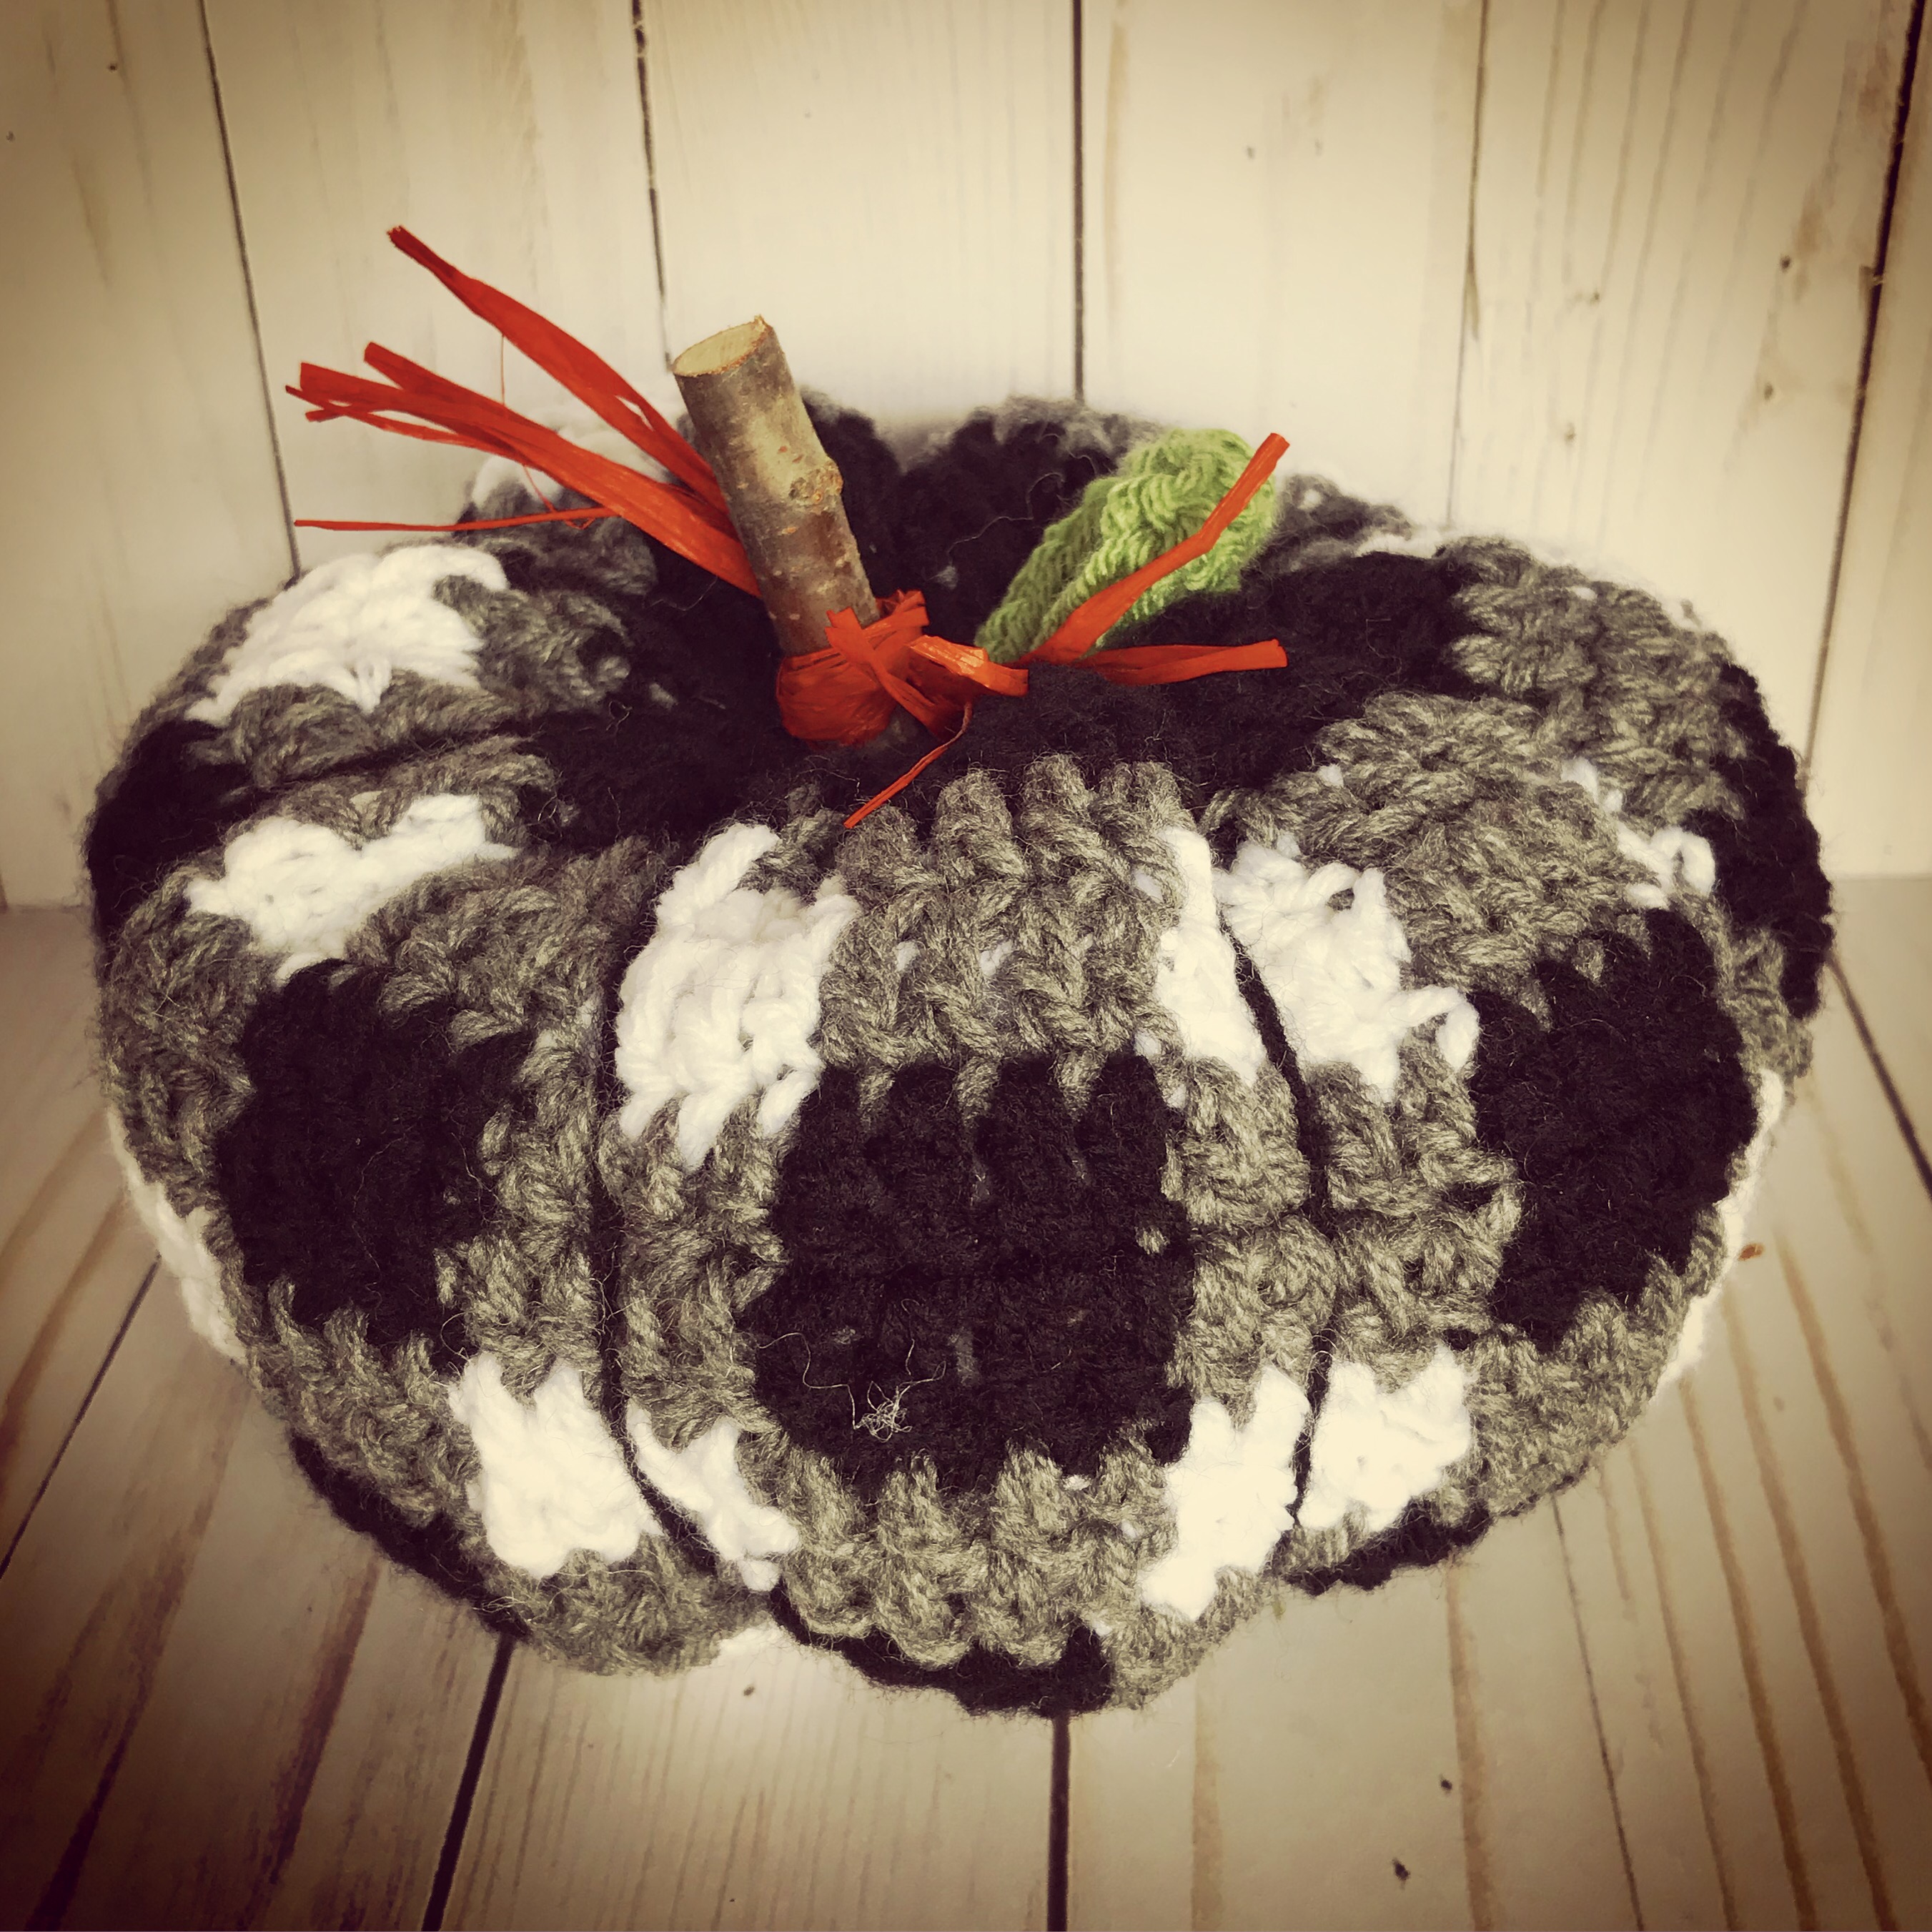
As soon as I saw them, I fell in love with these Farmhouse Crochet Pumpkins!! The wonderful patterns are available free here on Megmade with Love – or you can get a pdf file in her Etsy shop for just $2! So worth it to have a nice printout to work from… 

The pumpkins stitch up really quickly and are so fun to make! The plaid one takes a bit longer because of the color changes and it is bigger – but you can still whip it up in an evening. 

For the plaid pumpkin, I used Red Heart Super Saver Yarn in black, white, and gray heather. The leaf is made with I Love This Yarn in Mid Green. 


For the yellow pumpkin, I used Lion Brand Wool-Ease Thick & Quick Yarn in Butterscotch. I didn’t read the pattern close enough to see that it called for crocheting in the back loop only on this one so I didn’t make it that way…and I didn’t want to start all over when I realized it.😳 But I really like the way it turned out!

For the orange ribbed pumpkin, I used Red Heart Super Saver Yarn in Carrot. This one is stitched using 2 strands of yarn together – I just used one skein, pulling from the center and the outside of the skein at the same time. 

img_9661

The stems are pieces of a stick cut to about 2-inches or so and hot glued to the pumpkins. I also hot glued the leaf to the plaid pumpkin. Then I tied some raffia and twine around the stems. 

img_9662

They look so cute grouped together and add such a warm touch to your Fall decor!

Thanks for stopping by,

Anita

Posted in Crochet, Decor, Fall, Gifts | 3 Comments

Hope I didn’t Scare You

Boo! Hope I didn’t Scare You! 😉 Today I’m sharing another sweet little owl card. You can find him here at Unity Stamp Company. I love all the owl stamps they have!

I stamped the owl with black ink on white card stock and colored him with Copic markers. I rounded the corners and layered it to orange card stock. I stamped the sentiment with black ink on white card stock and trimmed it close.

To make the card, emboss a panel of purple card stock with your favorite embossing folder and attach to a green card. Attach a strip of patterned paper to the card. Attach owl image with foam tape over the patterned paper. Attach sentiment to the card. Finish the card by attaching a pumpkin and bat charm.

Happy Halloween! 🎃

Thanks for stopping by,

Anita


Posted in Cards, Fall, Stamping | Leave a comment

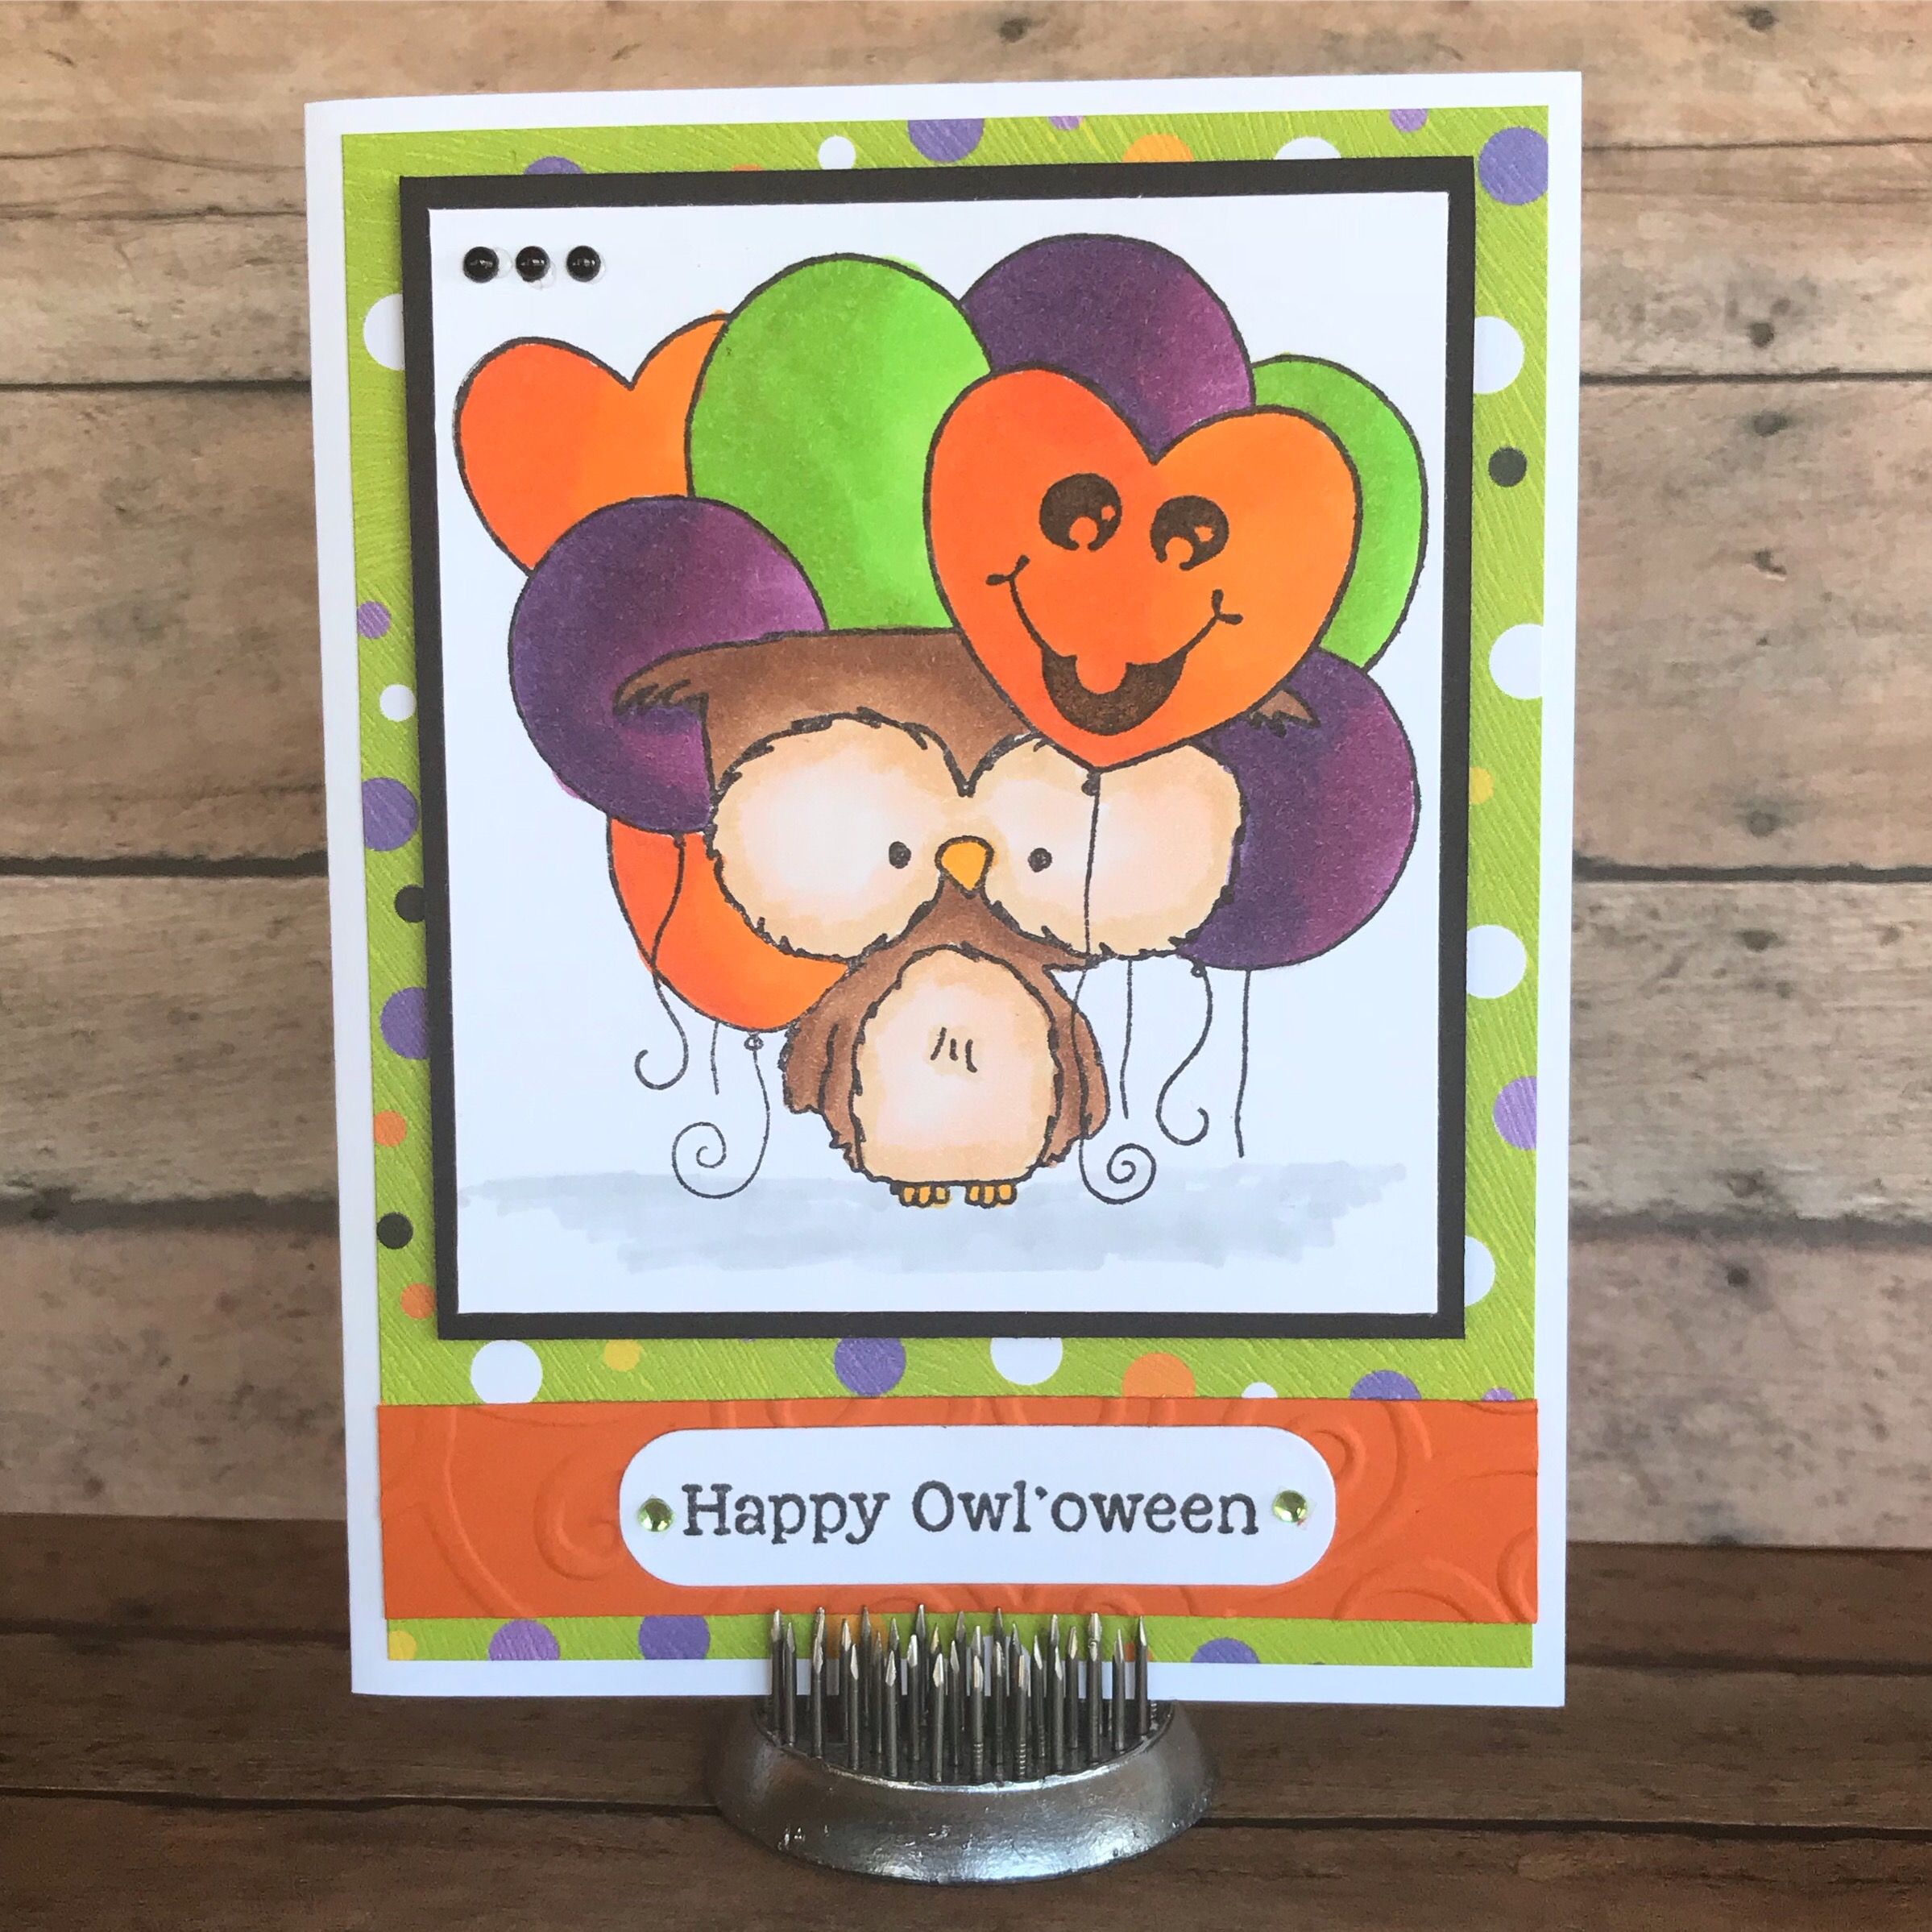
Happy Owl’oween

It’s almost Halloween! 🎃 Do you still need to make cards to send? Here’s a cute little owl who would be happy to send your greetings! 🦉

You can find this fun stamp here at Unity stamp Company. The cute Happy Owl’oween sentiment is also from Unity and you can find it in this set. I’ve mentioned this before, but I absolutely love Unity Stamp Company!! They have the best stamps, the best sales, and the best people!! You really need to check them out – I think you will love them, too. 😊

I stamped the owl with black ink on white card stock, colored the image with Copic markers, and layered it to black card stock. I stamped the sentiment with black ink on white card stock and die cut it with a label die.

To make the card, attach a piece of patterned paper to a white card. Emboss a strip of orange card stock with your favorite embossing folder and attach to the card. Attach the sentiment over the embossed strip. Attach the owl image with foam tape. Add 2 green gems to the sentiment and 3 black pearls to the top of the owl panel. And he’s all ready to pop in the mail!🎃🦉

Happy Owl’oween! 

Thanks for stopping by,

Anita


Posted in Cards, Fall, Stamping | 1 Comment

Cuddly Crochet Candy Corn 

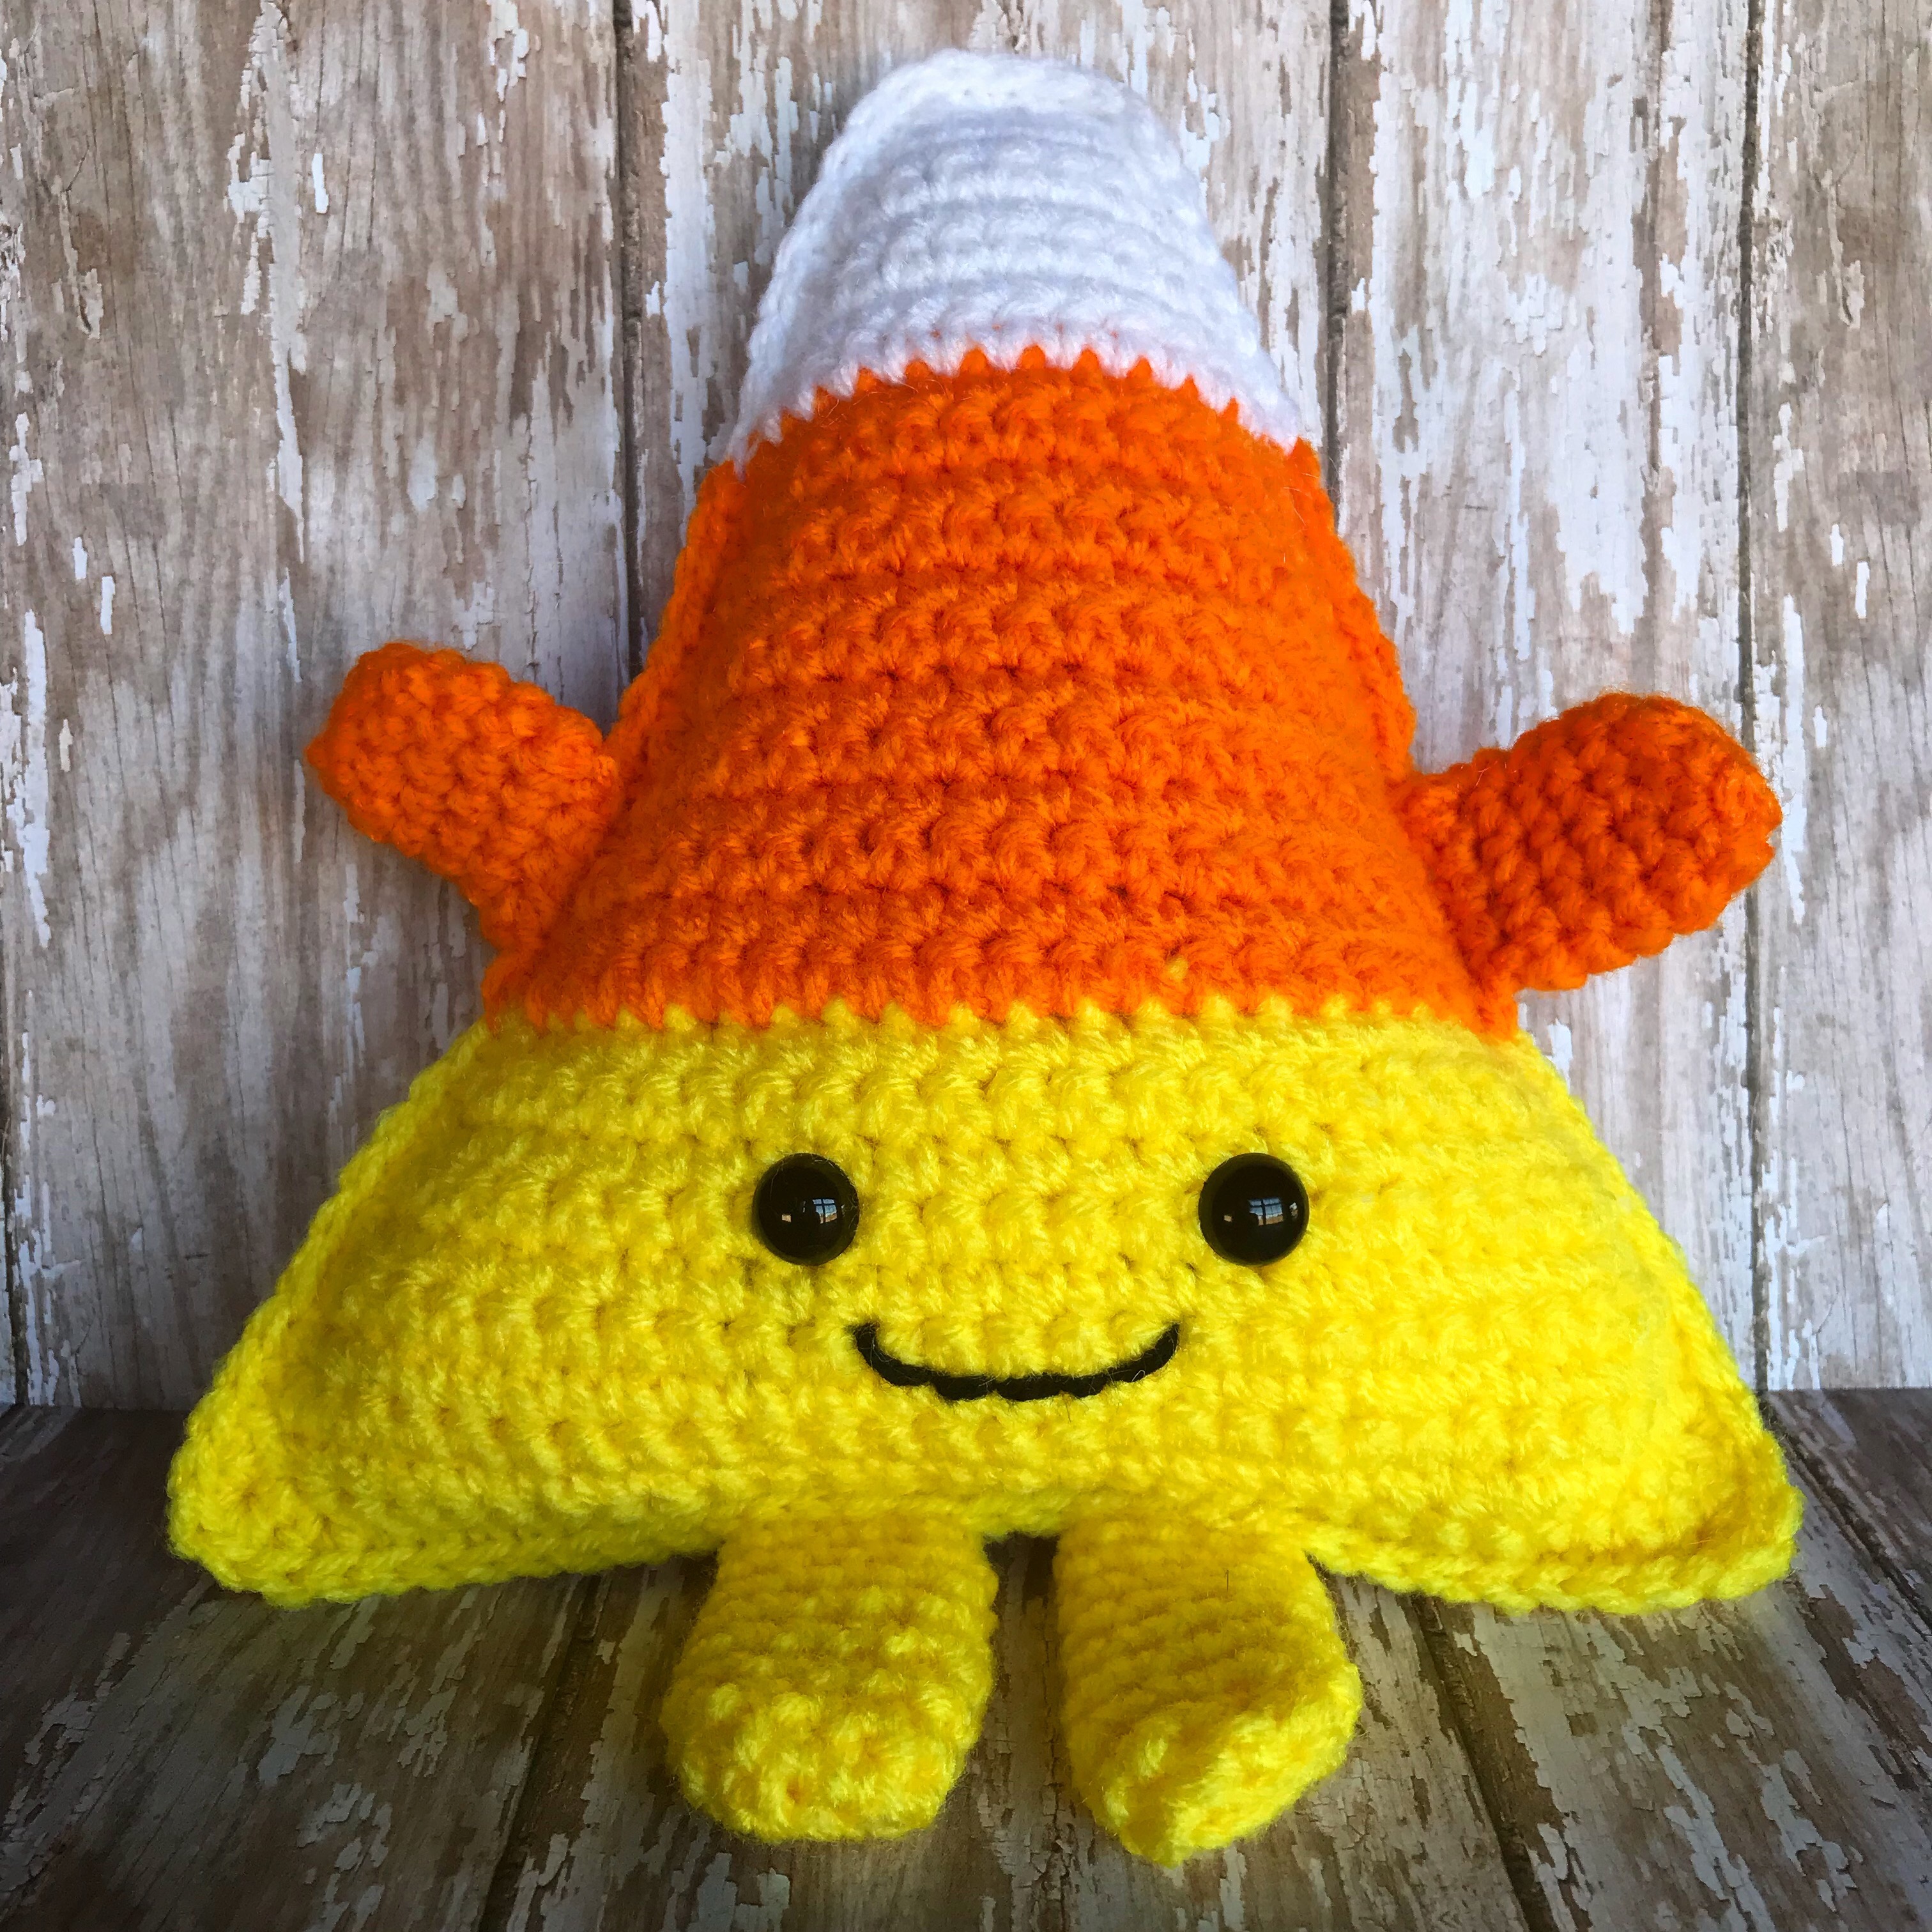
Isn’t he just the cutest?!?! This little guy is sure to bring a smile to a special little one – or maybe he’d be a cute addition to your Fall decor. 😊

The free pattern is available here at Repeat Crafter Me. If you don’t follow Sarah’s blog Repeat Crafter Me you NEED to!! She also has a Facebook page you can find here. She is incredibly talented and shares so many free patterns with us – and no, I don’t know her personally, I am just a huge fan of her work! 


I used Red Heart Super Saver yarn in yellow, orange, and white to stitch up my Cuddly Candy Corn. I used 12mm safety eyes because that’s what I had on hand. I purchased them here at Amazon. He measures about 10 inches tall and 8 inches wide – the perfect size for little hands. You can easily stitch him up in an evening!

Thanks for stopping by,

Anita

Posted in Crochet, Fall, Gifts | 3 Comments

Fall Deco Mesh Wreath

I’ve always loved the way deco mesh wreaths looked, but had never tried my hand at one. My sweet friend Ginger was kind enough to show me how to make this fun Fall wreath. Thanks, Ginger – I think I’ll be making more of these!! 😊

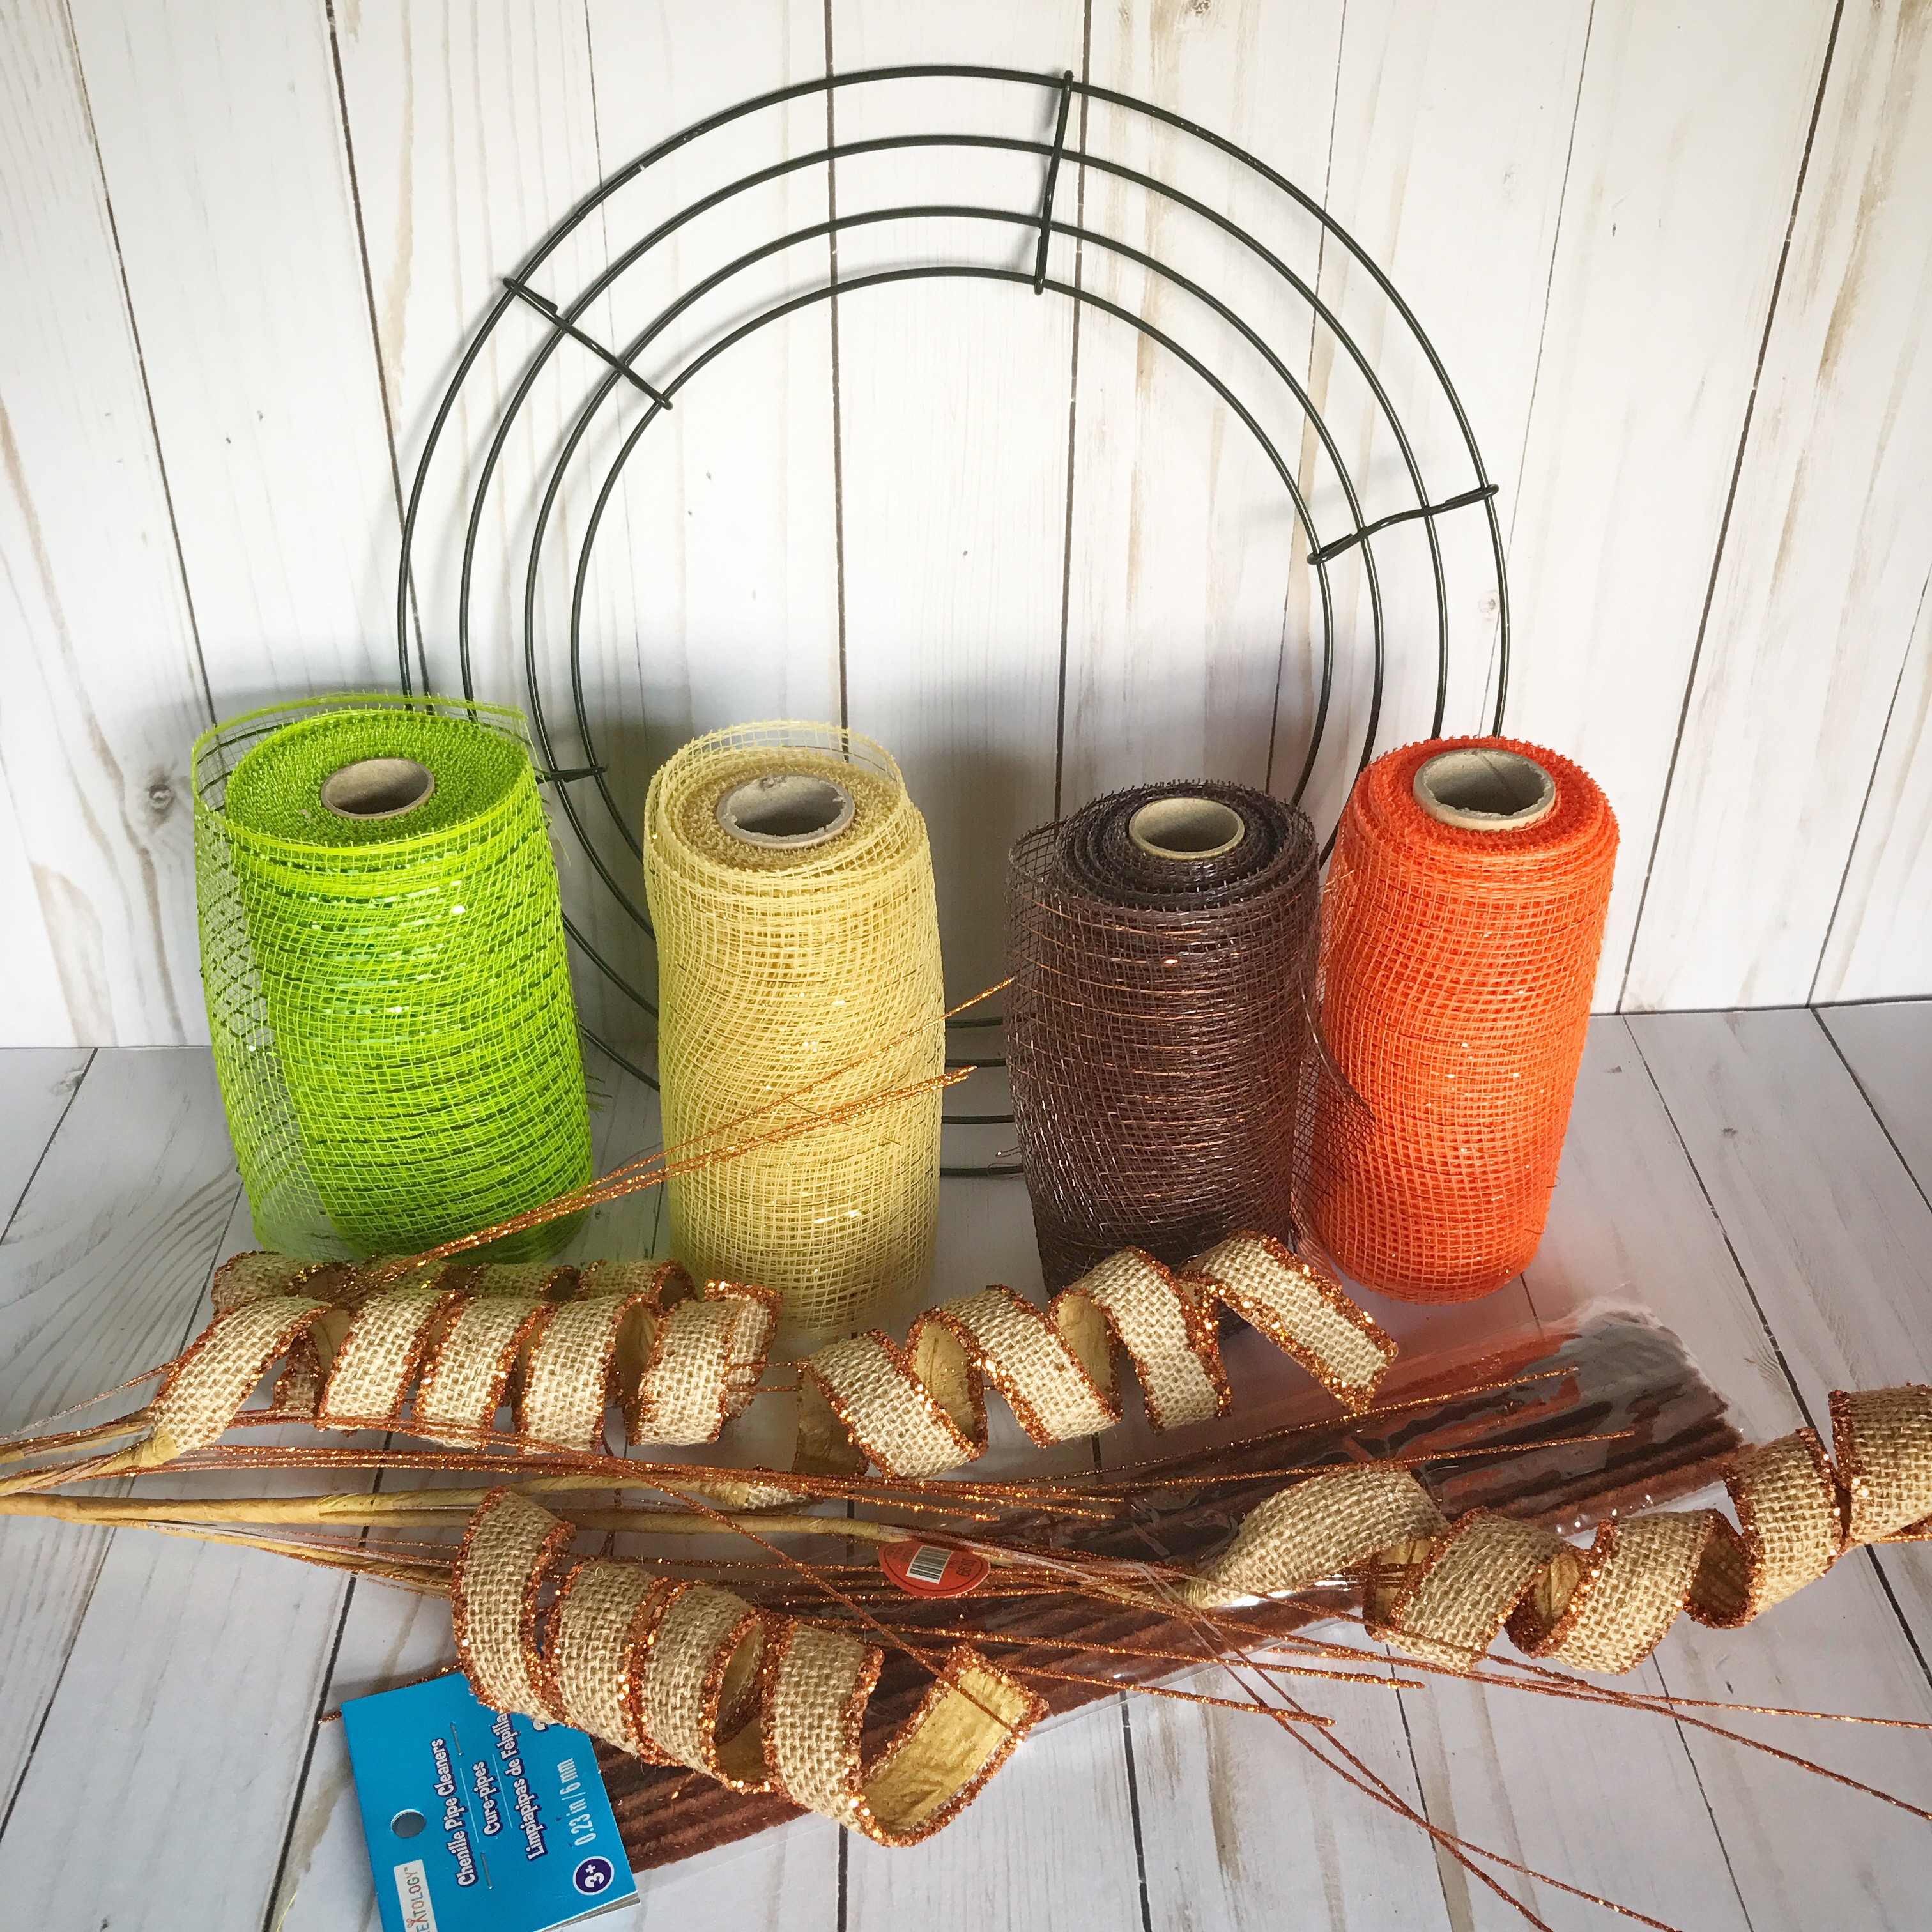
Here’s what you’ll need:

  • 5.5-inch wide deco mesh in your choice of colors (I chose lime green, orange, gold, and brown)
  • Wire wreath form – this one is a 12-inch form. The 14 or 16-inch forms work great for a larger wreath
  • Chenille stems
  • Some type of accent like my curly stems  in the picture below – flowers or berry stems would work great, too. Just add whatever you like!
  • Monogram or seasonal sign for the center of the wreath (this is optional). I found my monogram in the scrapbook section of Michael’s. It was white so I painted it with some brown chalk paint. 
  • Wire cutters
  • You may also need thin wire or hot glue for your accent pieces
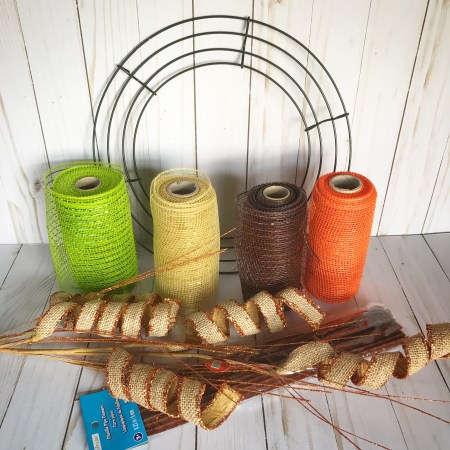

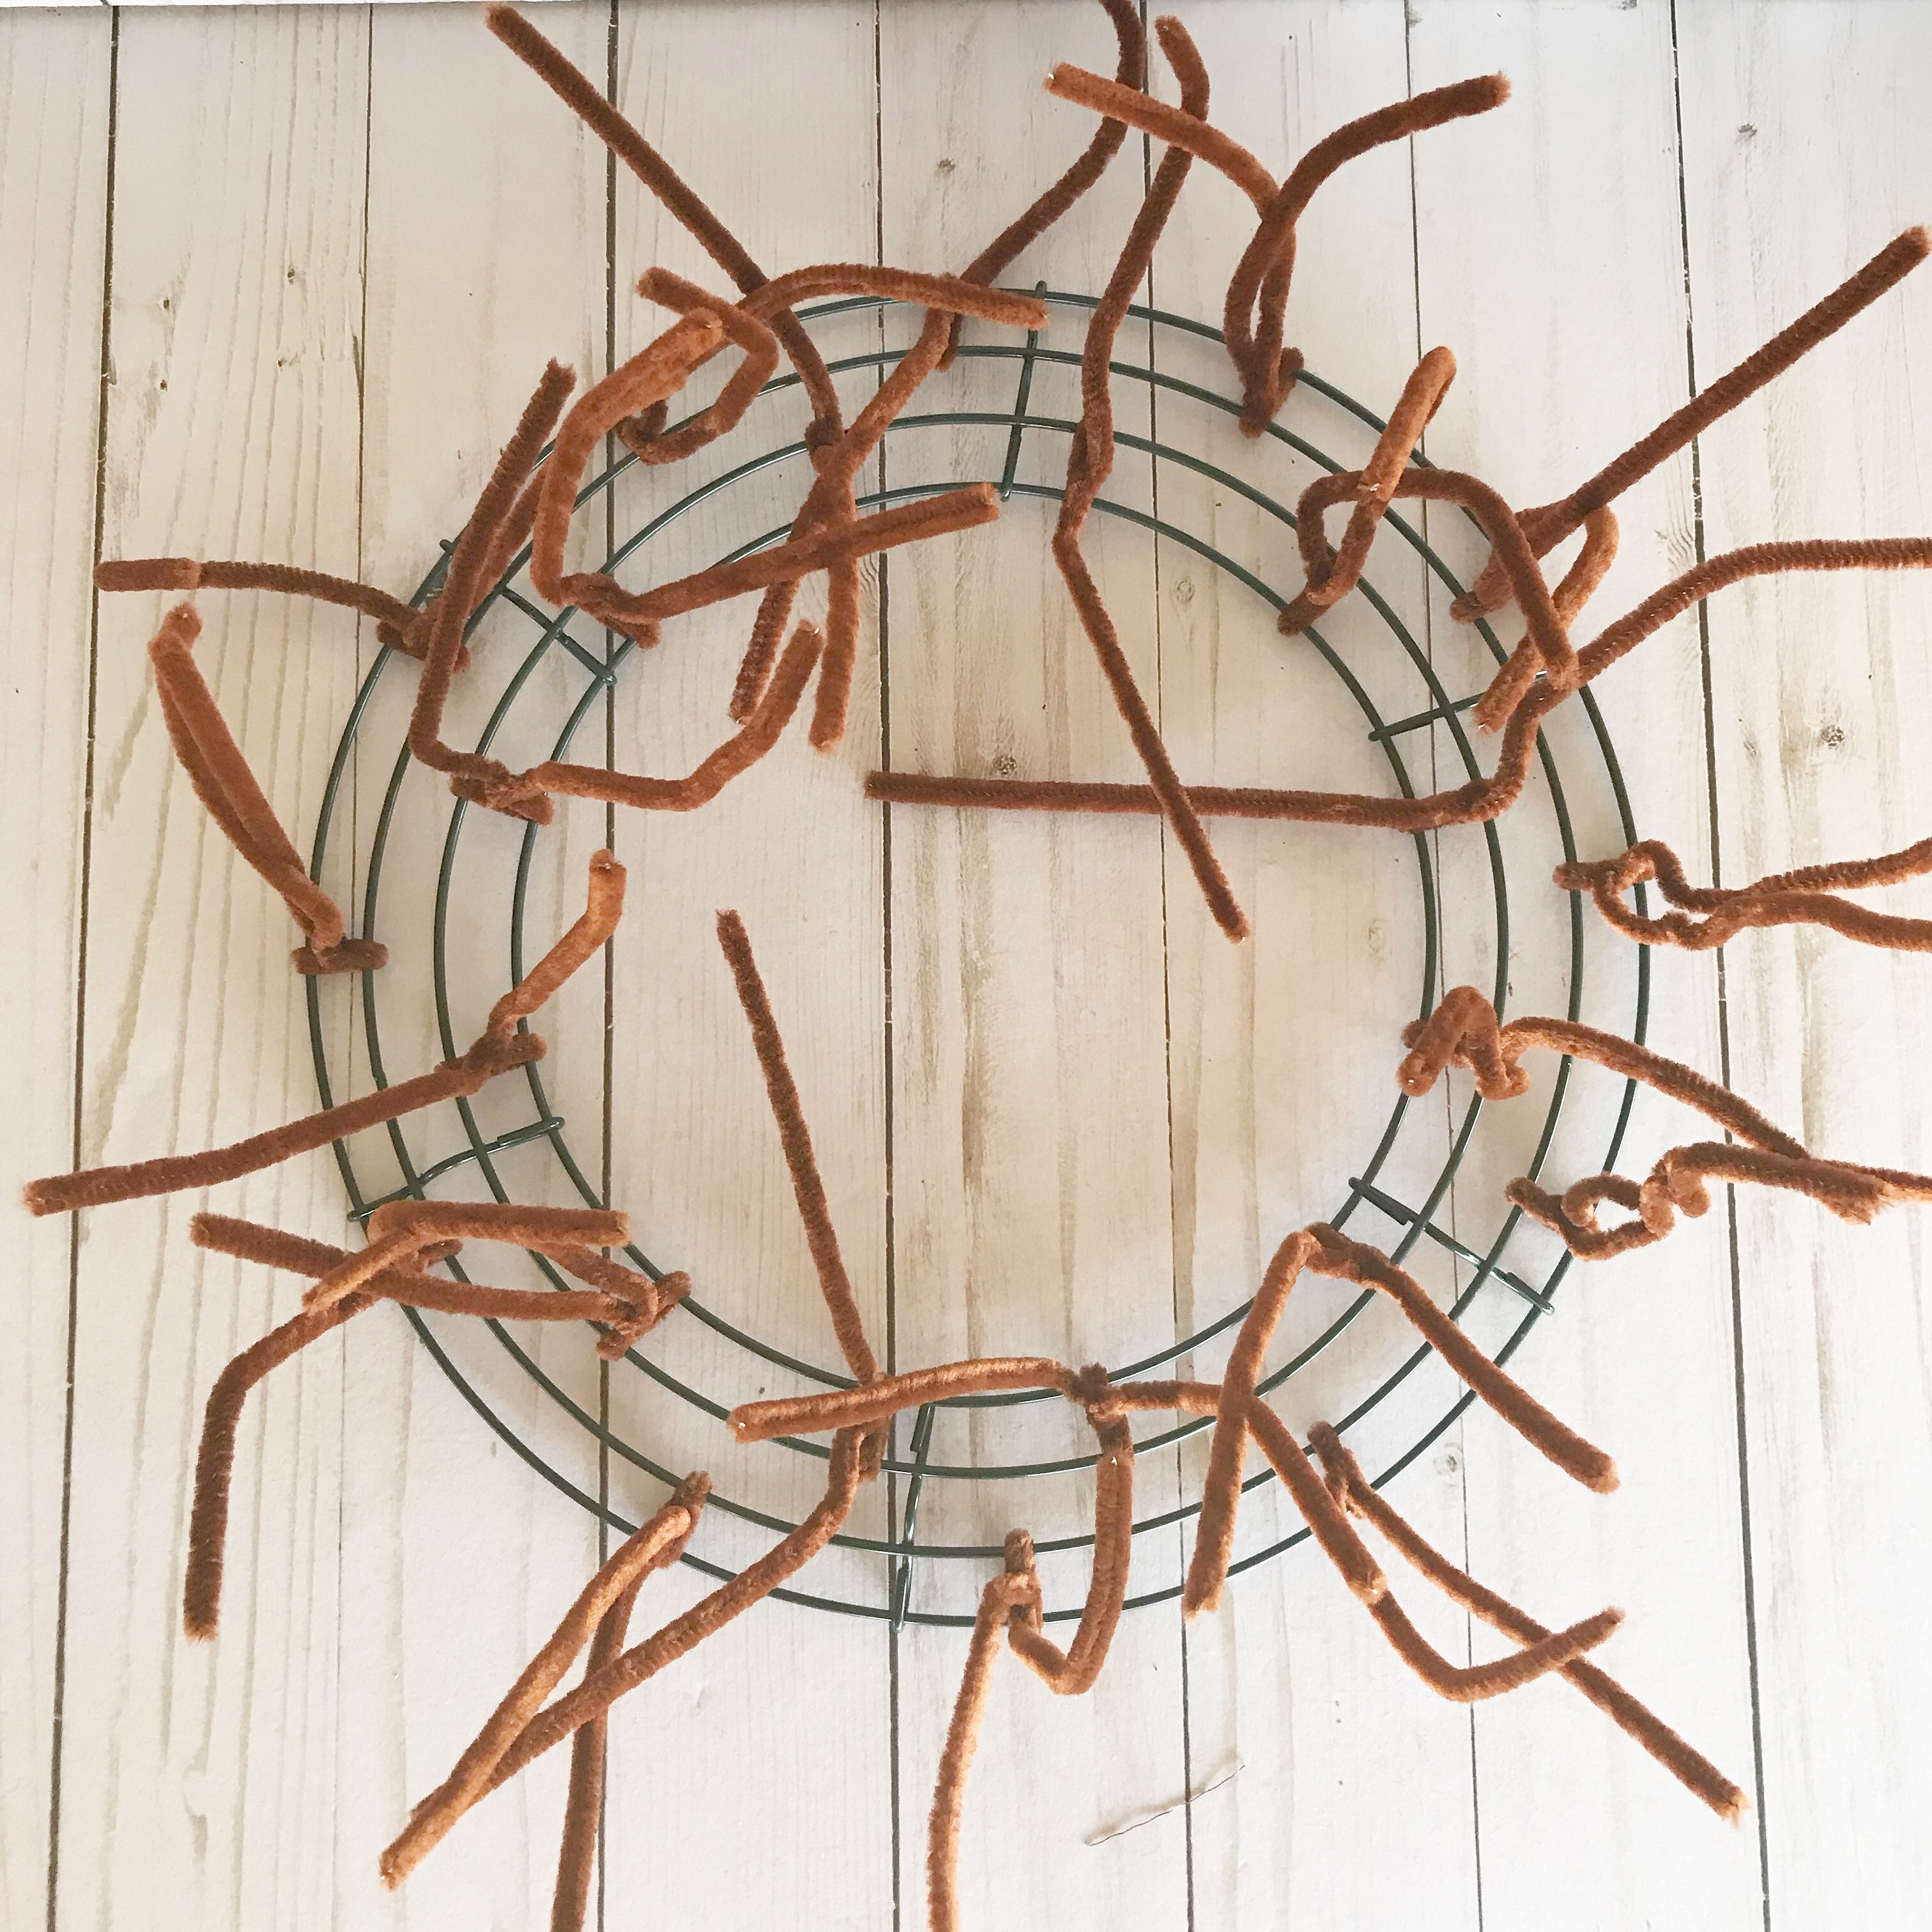
You will need to cut 9-inch lengths of the deco mesh. I just measured and cut them with my scissors. There are 8 sections to the frame and I twisted 4 chenille stems around each section. Each chenille stem will hold 3 pieces of the deco mesh so you will need to cut 96 pieces of the mesh. Don’t worry – it won’t take that long!! 😊

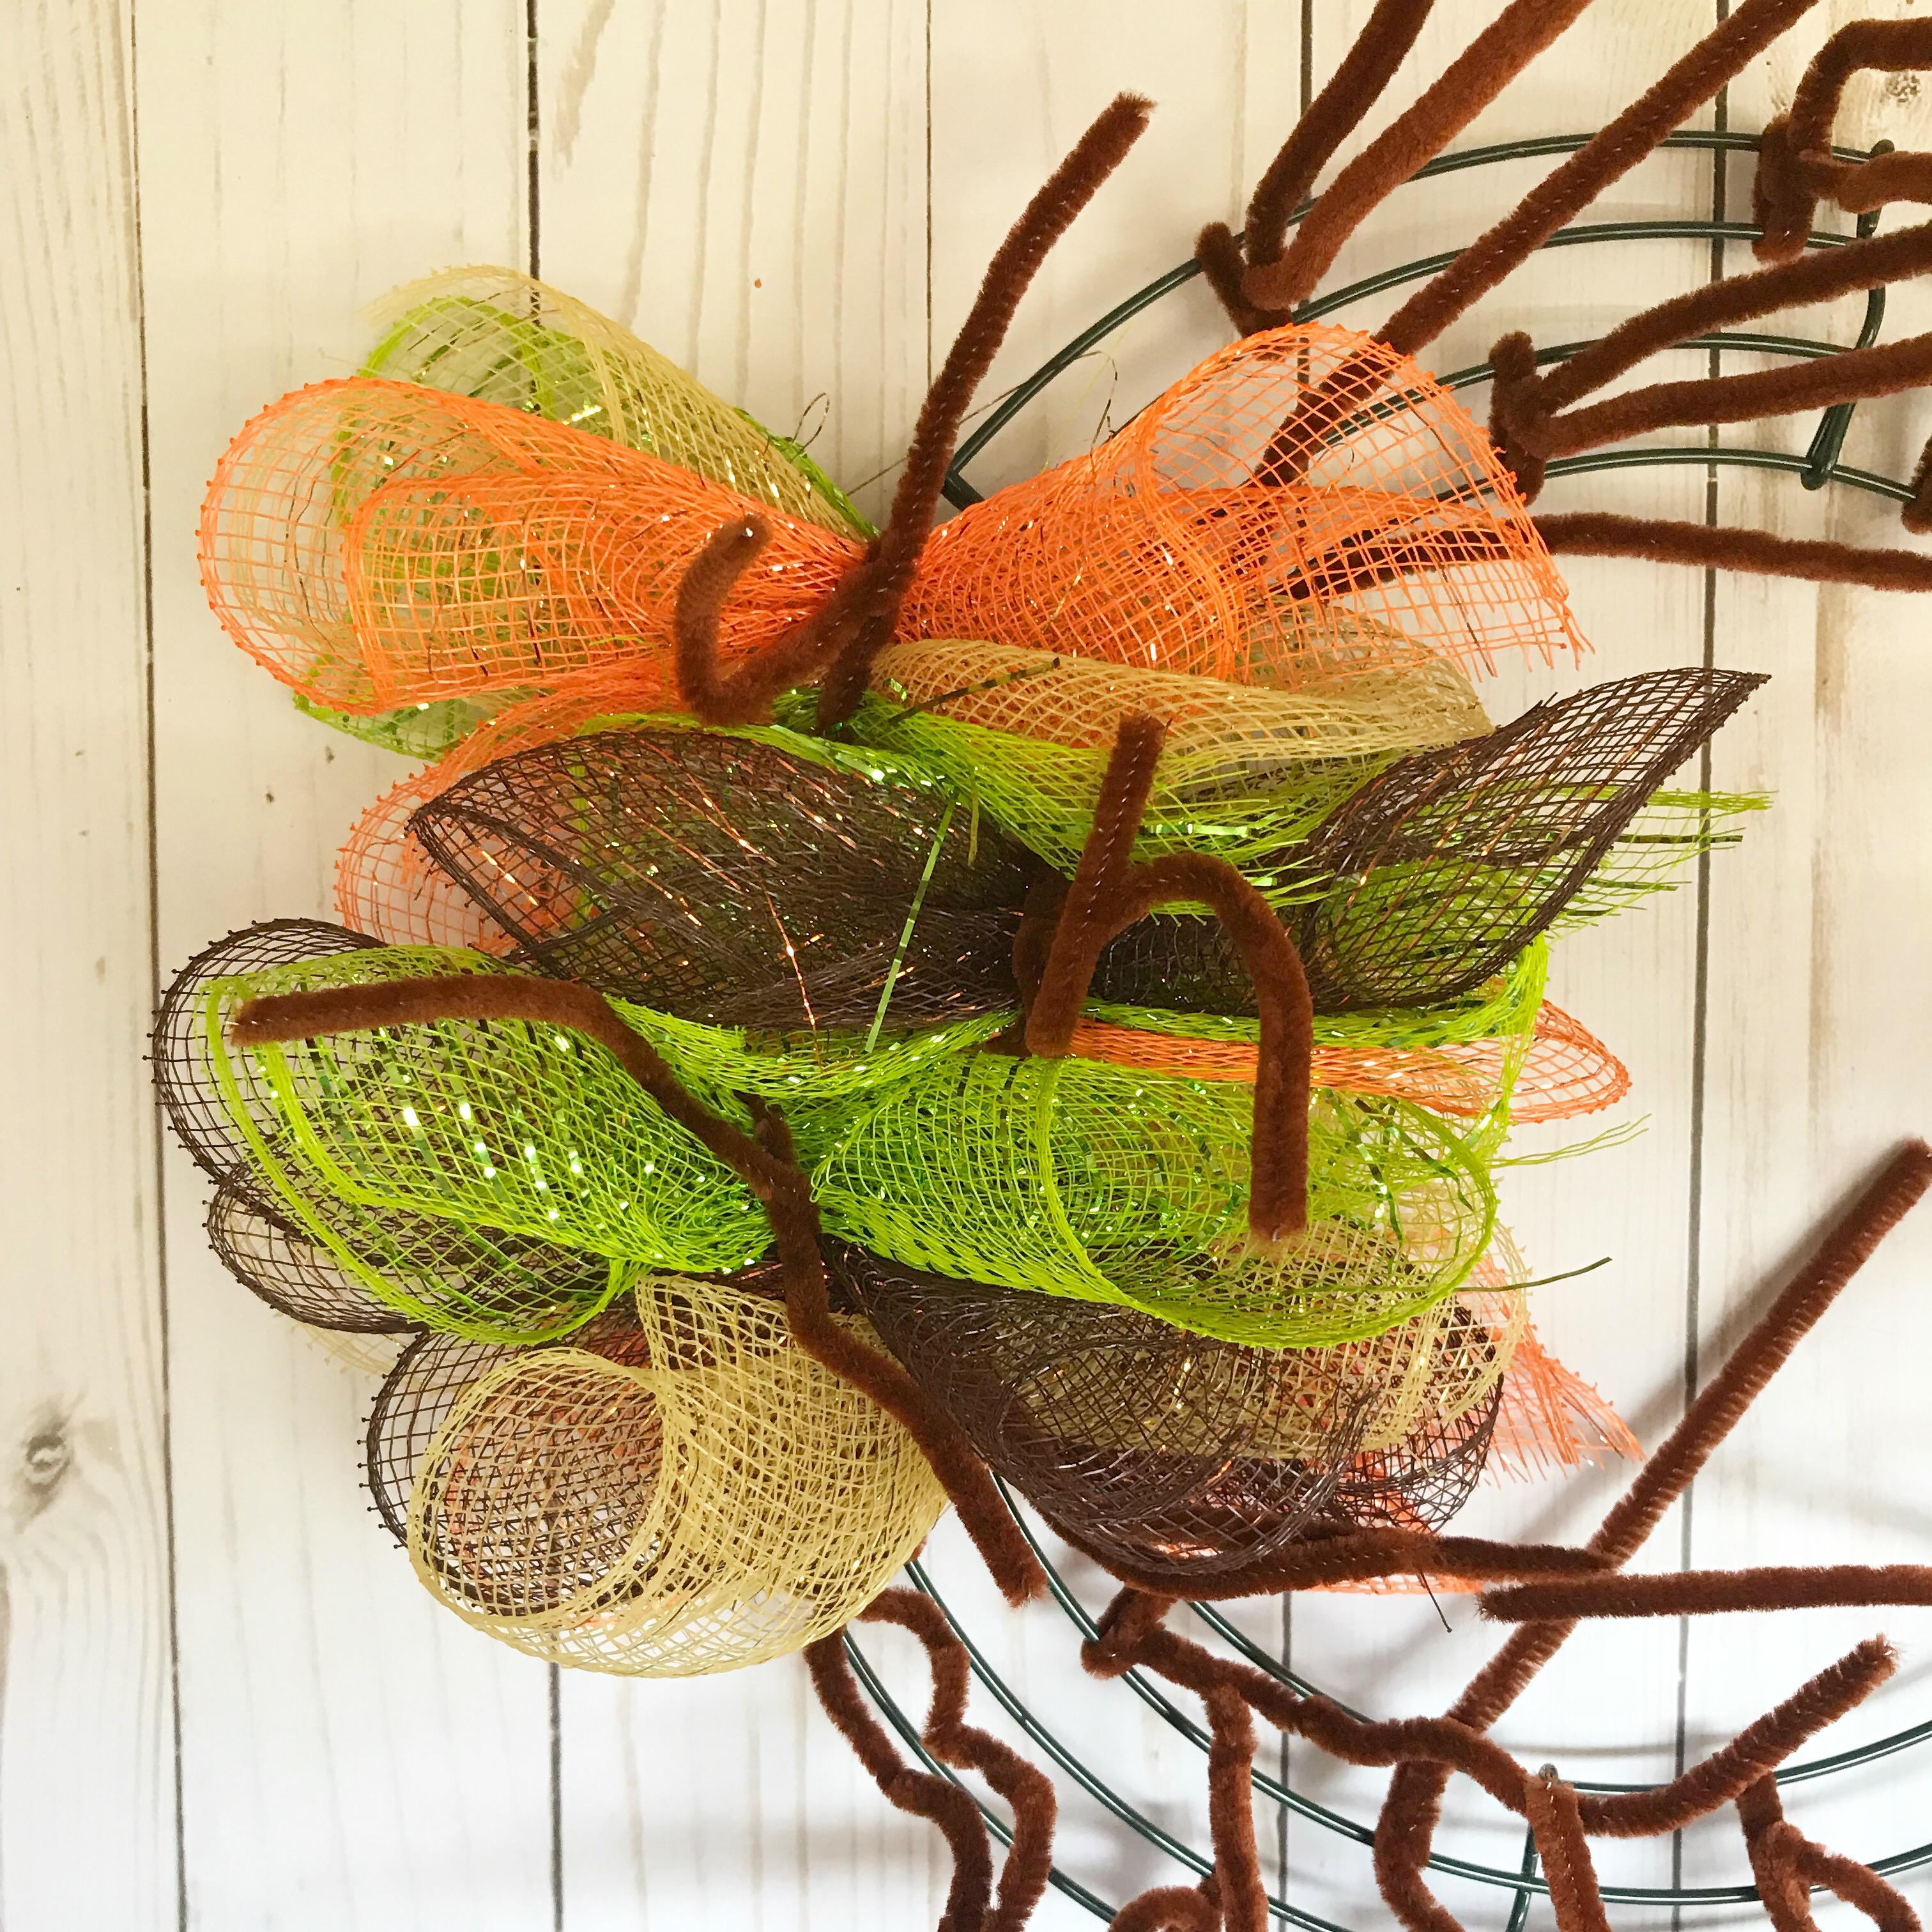
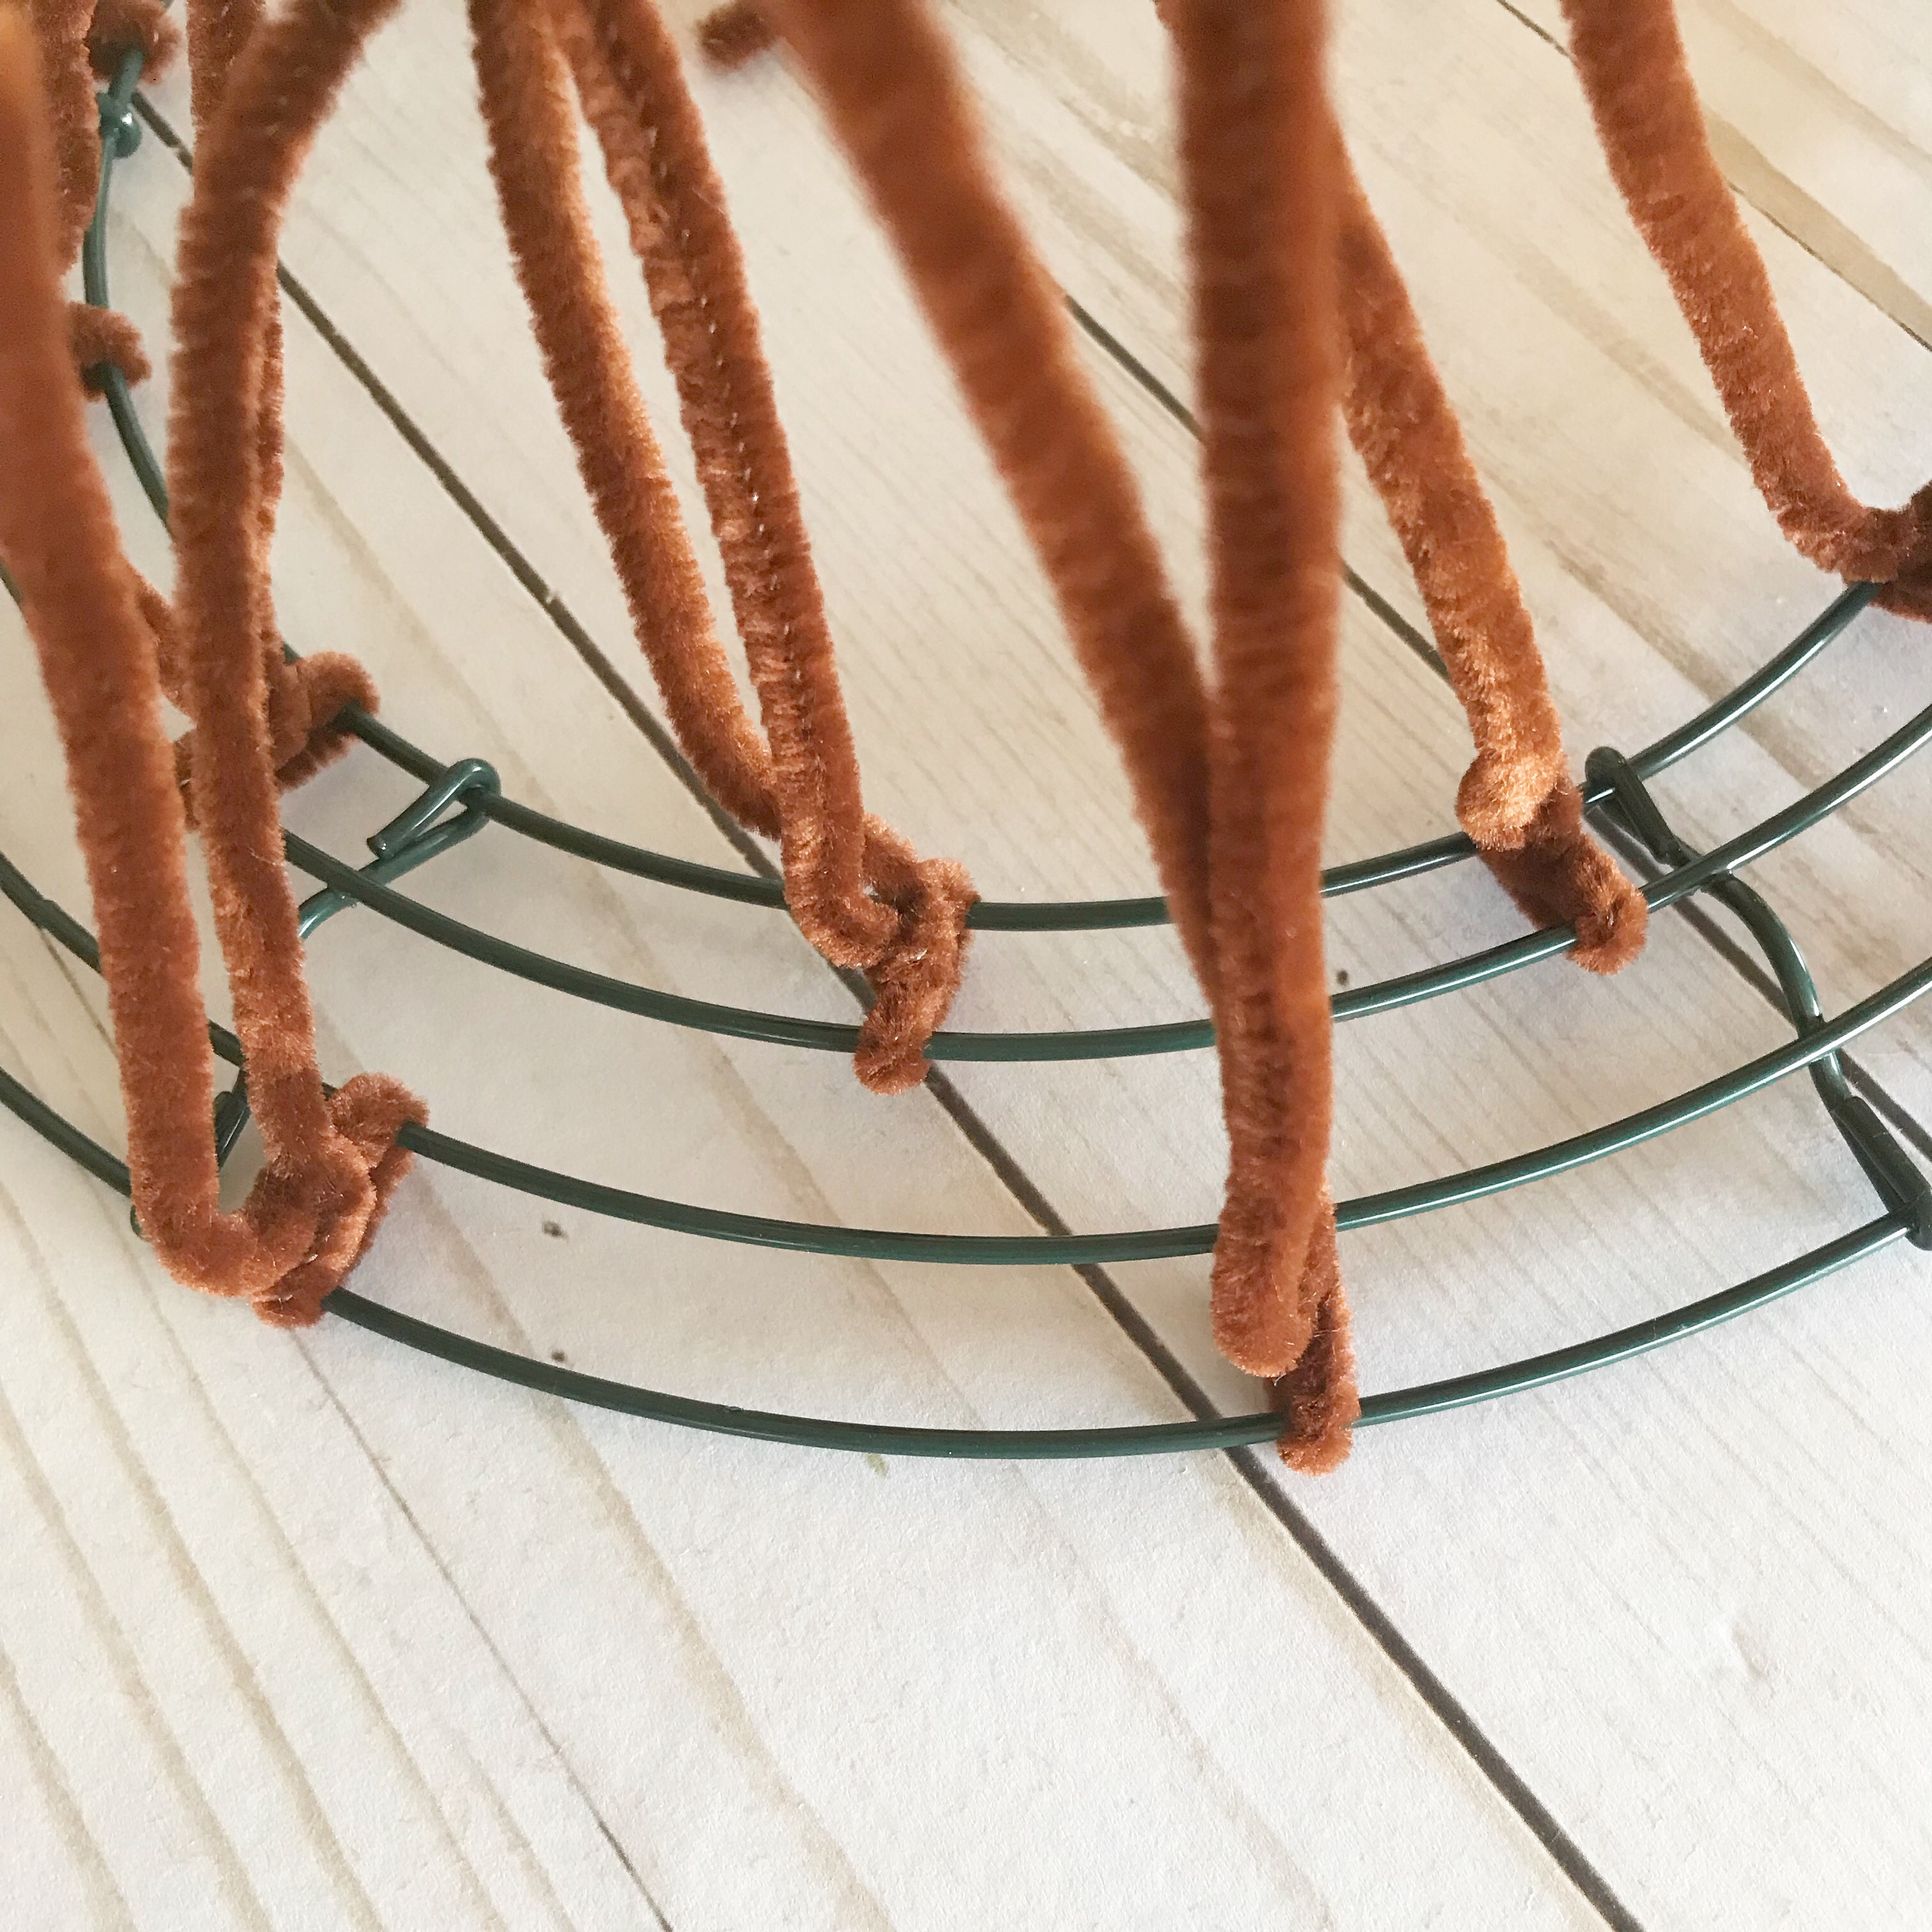
I twisted the chenille stems around the wreath frame, alternating them by twisting around the 2 outer rings and then the 2 inner rings. Here’s a close up of  one of the sections of the frame. 
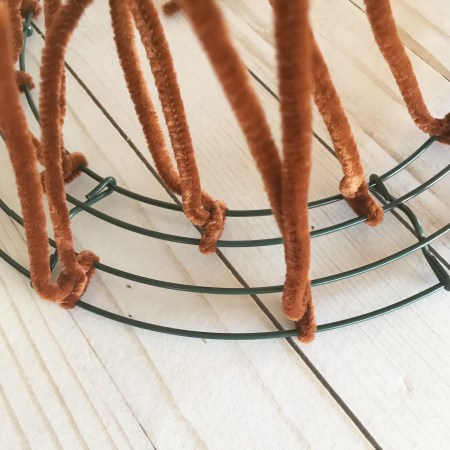

Be sure to twist them tight so they don’t slide easily on the frame. Here’s the wreath frame with all of the chenille stems twisted on. 
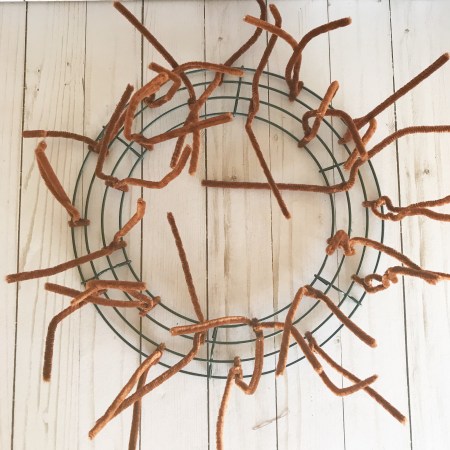

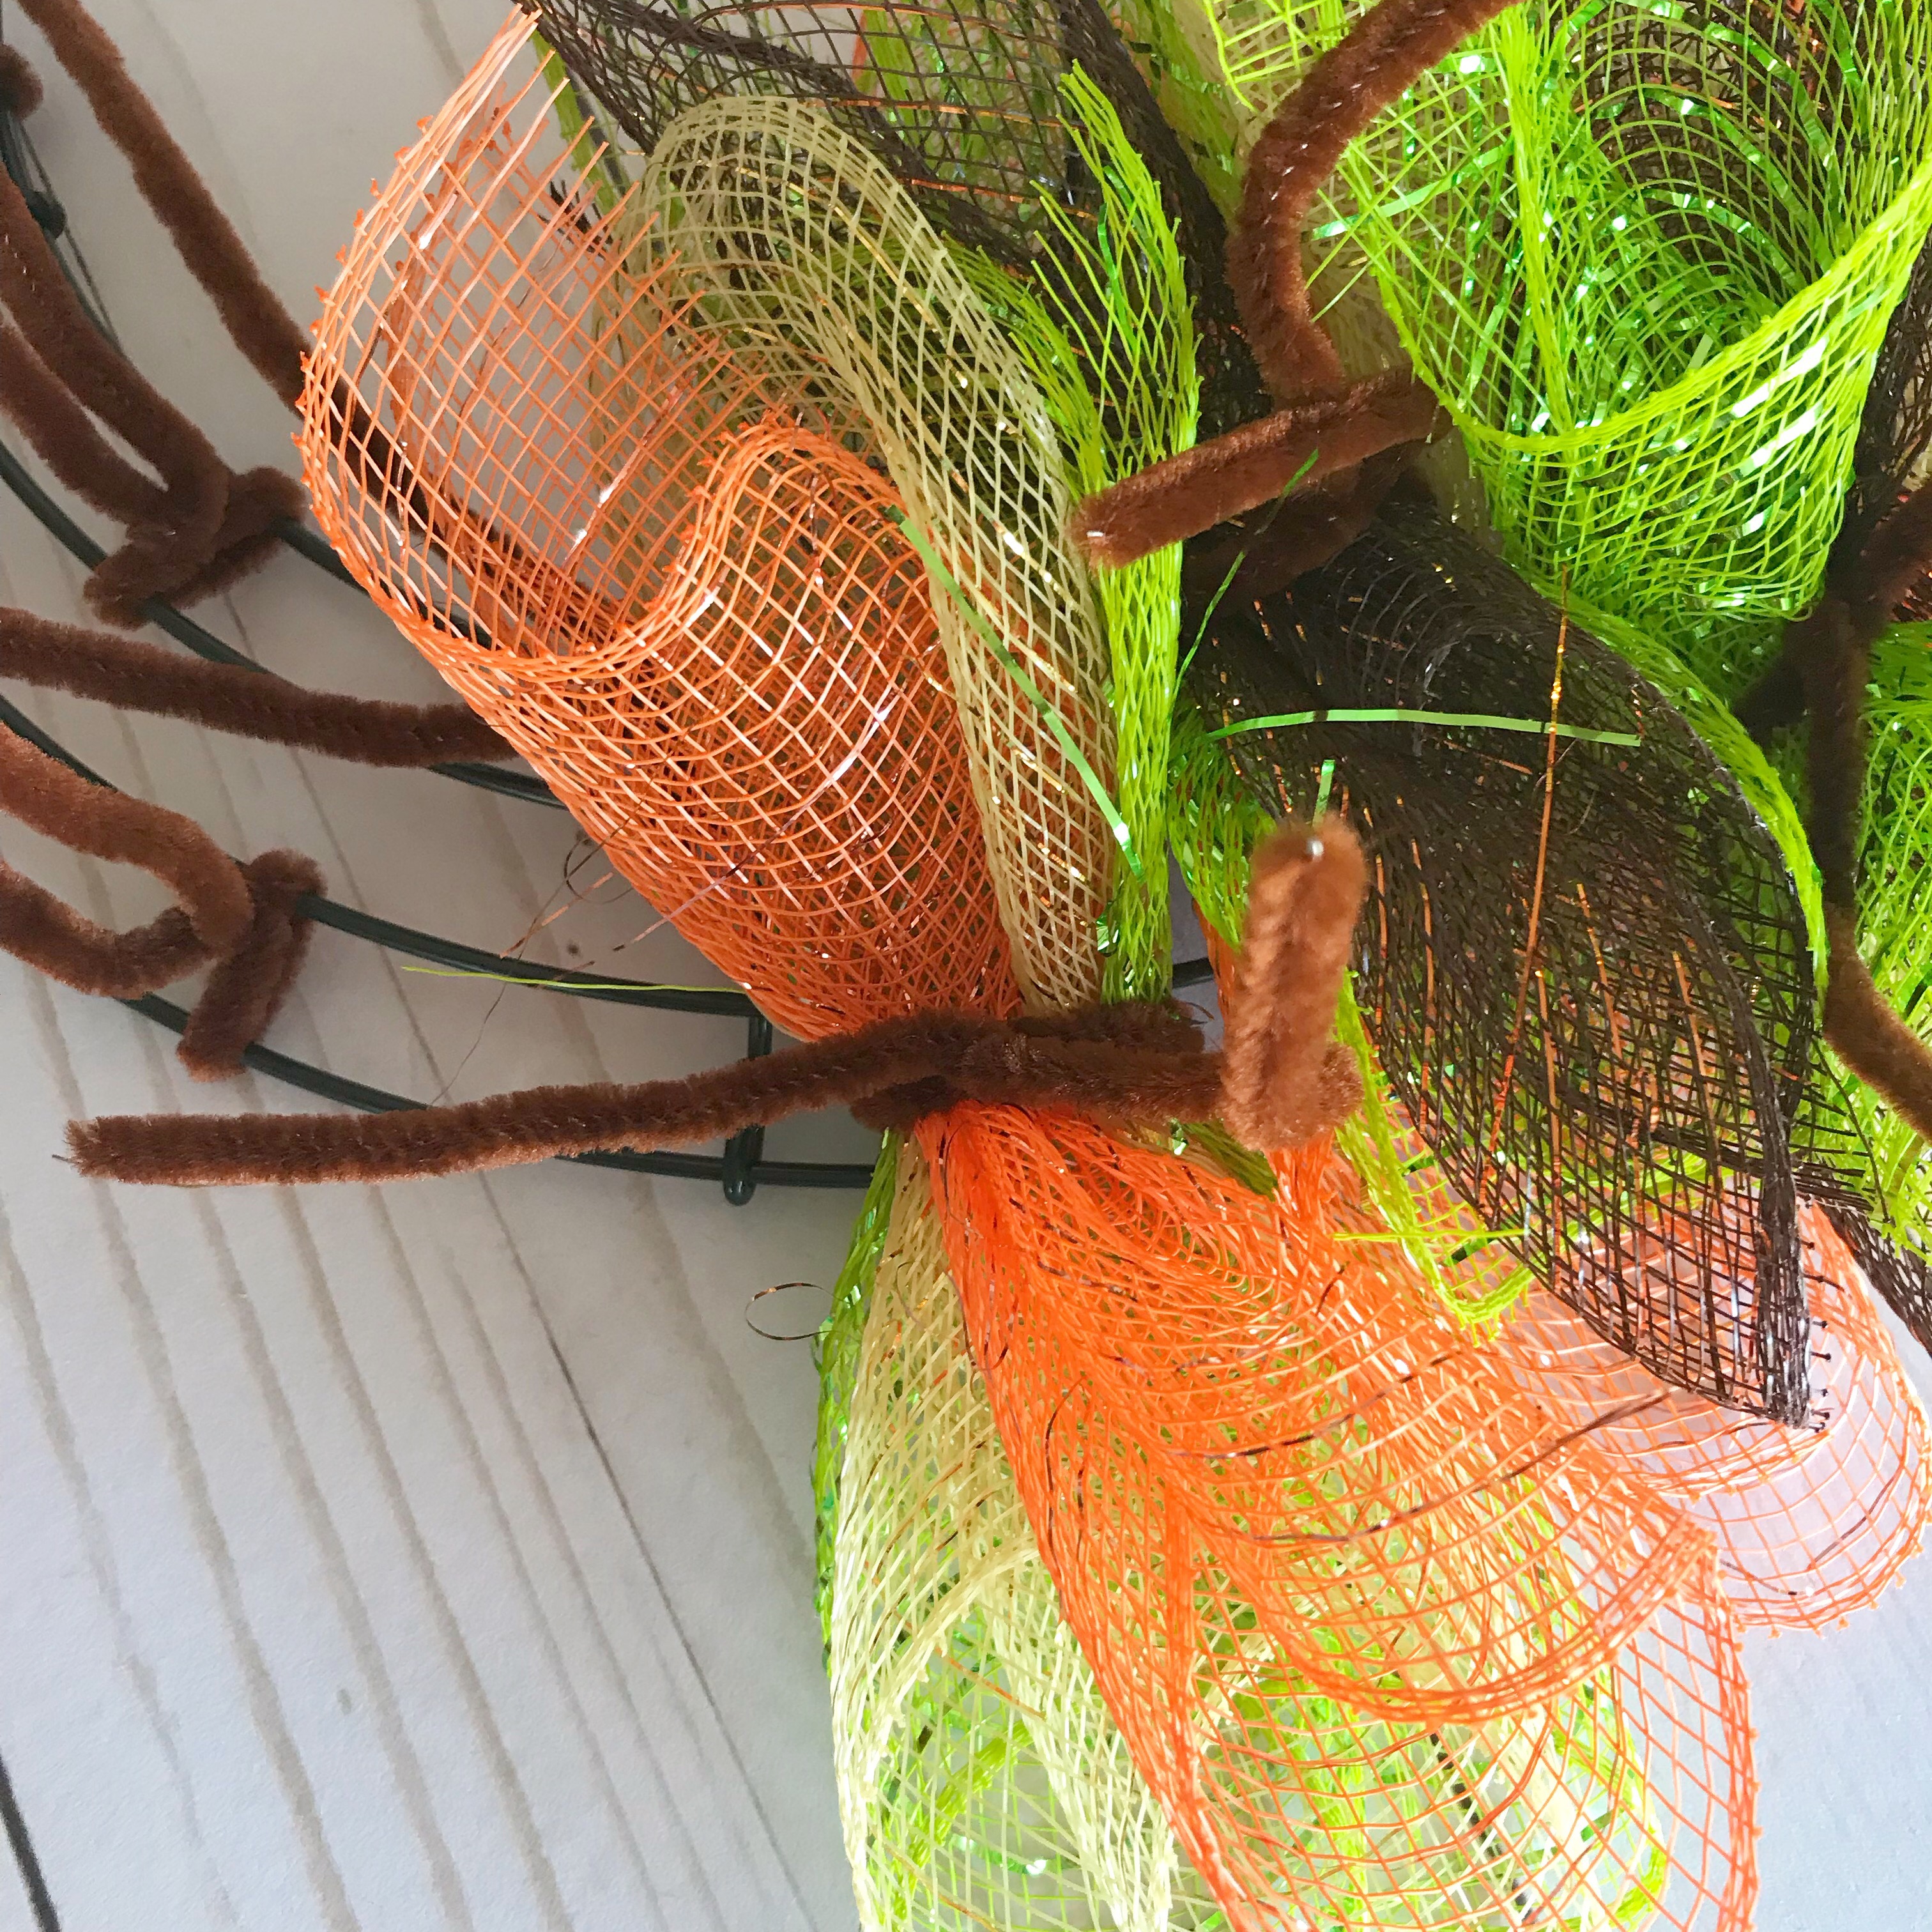
Now comes the fun part! Take a piece of the deco mesh and roll it up. I folded my ends to the center and then just folded it over so the ends were on the inside. Roll and stack 2 more pieces on top of your first one. Don’t worry about trying to make it perfect – it will look great once you are completely finished! Then place your stack of 3 pieces on the center of one of the chenille stems and twist the stems tightly several times to secure the mesh to the wreath. 
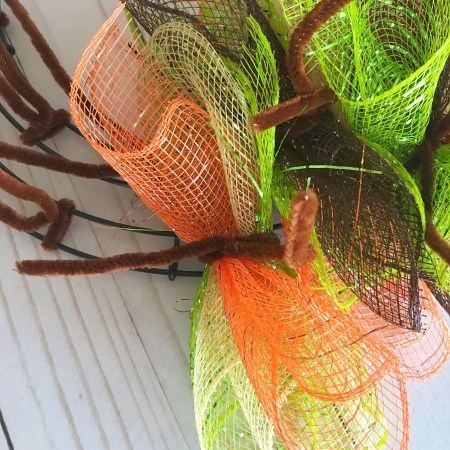

Here’s a picture of one section of the wreath with mesh attached to each chenille stem. 
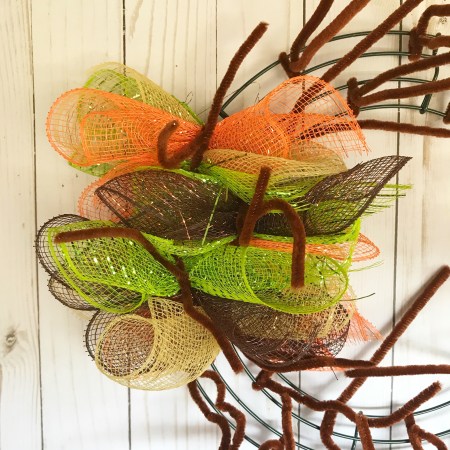

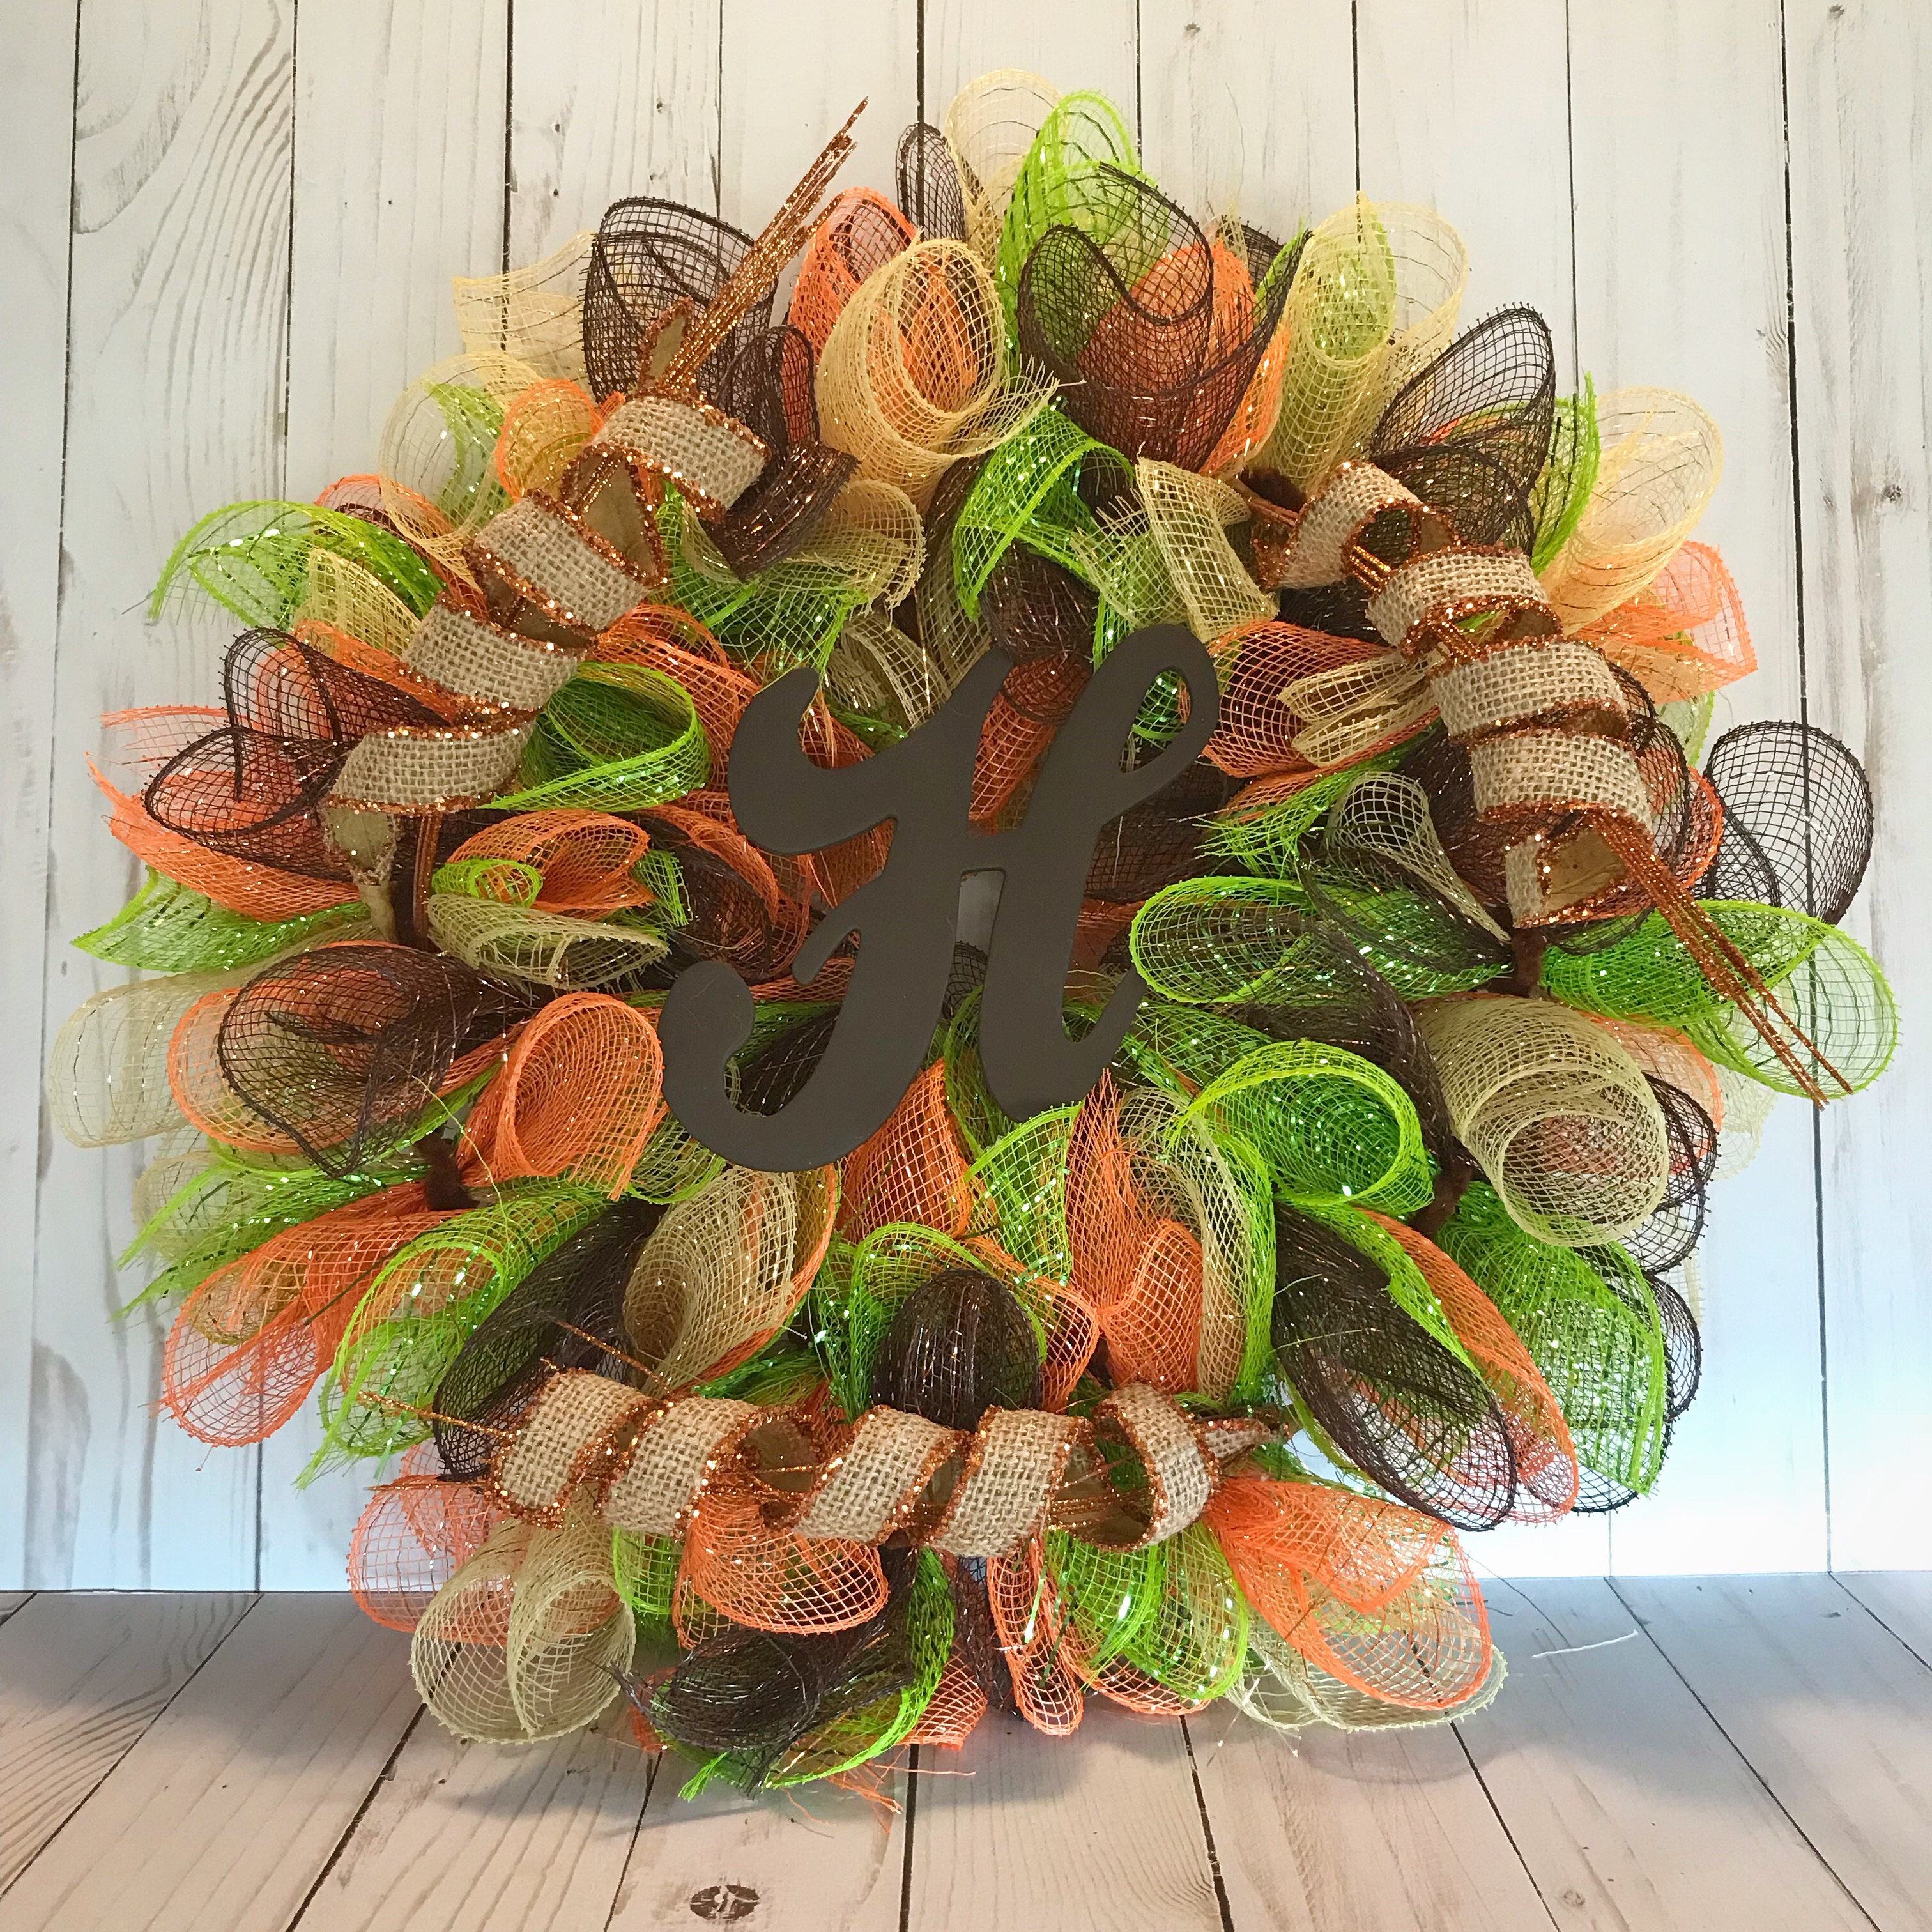
I didn’t follow any pattern for the colors as I was making the wreath. I just randomly stacked 3 colors of mesh together as I went around the wreath. After you have attached all the mesh, cut the chenille stems with wire cutters. Be careful to not cut too close – you don’t want them untwist!! Then just bend the ends of the stems down. Fluff up the deco mesh sections if you need to.

Attach your accent pieces using hot glue or wire – my curly stems had wire in them so I just wrapped that around the wreath frame and added a dab of hot glue to keep them in place. I also used hot glue to attach the monogram to the center of the wreath, gluing it directly to the mesh. 

And here it is all finished!
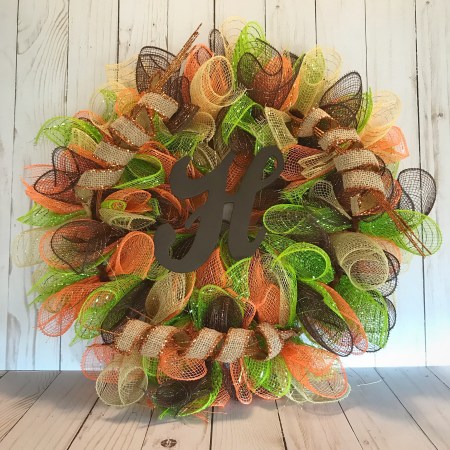

I think it took me about 2 to 2-1/2 hours to make the wreath start to finish – including cutting the deco mesh pieces! It was really fun to make and you can let your imagination run wild with color combos. Make one for every season, in school colors, for a baby shower, or to match your decor…so many possibilities!!

Thanks for stopping by,

Anita

Posted in Decor, Fall, Gifts | Leave a comment

Crochet Pumpkin Coasters

I shared this post of these adorable Crochet Pumpkin Coasters last year and I wanted to share them again in case you missed it! They are so quick and easy to make and will add a little splash of color to your table for the entire Fall season…It’s pumpkin season…Happy Fall!!  🍂🍁🍂

Original post below from November 1, 2016…

It’s November! Where has the year gone?!?! The pumpkin season is in full swing and Thanksgiving is only a few weeks away.🦃

These cute pumpkin coasters will add a little touch of whimsy to your Thanksgiving table. They work up quickly using worsted weight yarn. I used I Love This Cotton Yarn from Hobby Lobby to stitch up my coasters.

img_7378

The quick and easy pattern is from IraRott Designs and can be found HERE – and it’s free! You’ll be able to crochet several of these in just an evening.

img_7377

Aren’t they just adorable? 🙂  Stitch up a few of these now before things get too busy!

Thanks for stopping by.

Anita

Posted in Crochet, Decor, Fall, Gifts, Uncategorized | 1 Comment

Happy Fall

Happy Fall! It’s finally starting to feel like Fall in Alabama – just a touch of crispness in the air! 😊🍁🍂

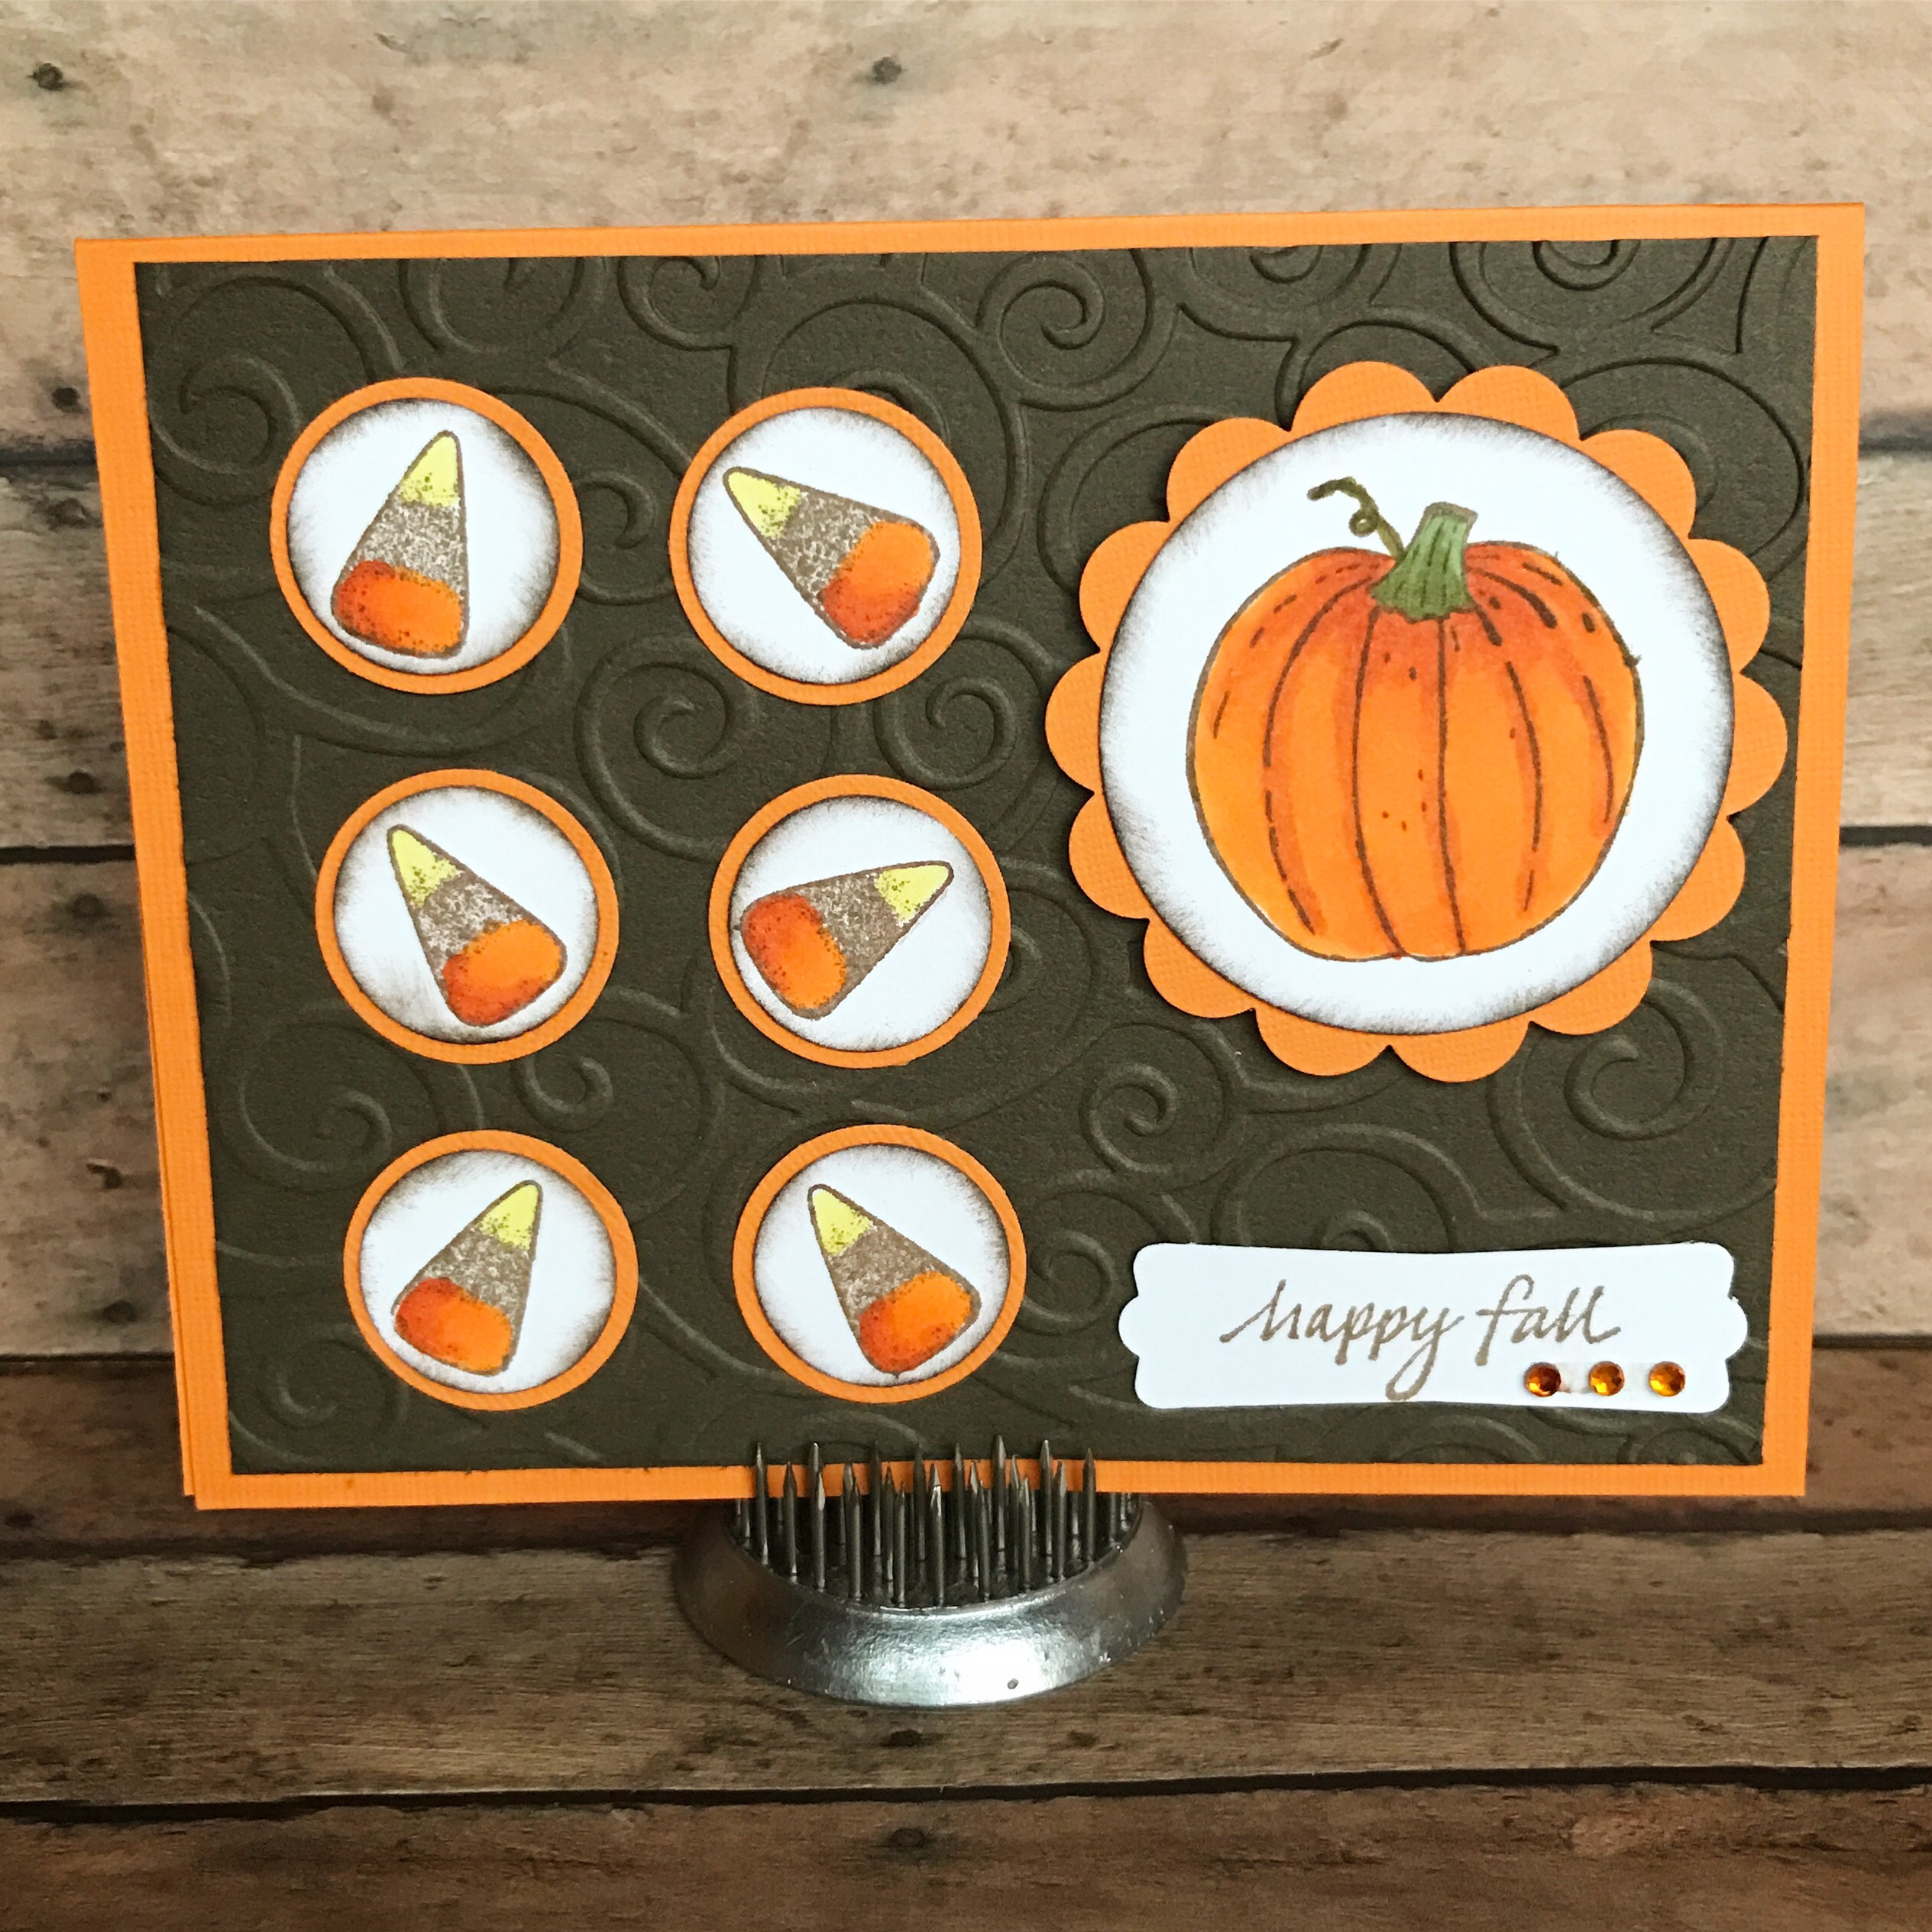
Here’s a card to usher in my favorite season. It’s using the same basic layout as the cards you can find here, here, and here in a few of my previous posts. 

The pumpkin stamp is from Hero Arts, the candy corn is from PSX, and the sentiment is from Savvy Stamps. The embossing folder is from Cuttlebug. The stamps have been in my collection for a long time and are no longer available (PSX has even gone out of business), but there are plenty of cute Fall stamps out there – you probably have some fun ones in your collection! I hope you’ll find inspiration in my card to create your own card to welcome Fall. 😊🍁🍂

To make the card, emboss a panel of brown card stock with the embossing folder and attach to an orange card. Stamp the pumpkin with brown ink on white card stock and color with Copic markers. Punch with a circle punch and ink the edges with brown ink. Layer to a scalloped circle punched from  orange card stock. Attach to the card with foam tape. 

Stamp the candy corn with brown ink on white card stock and color with Copic markers. Punch with a circle punch and ink the edges with brown ink. Layer to orange card stock circles and attach to card with foam tape. 

Stamp sentiment with brown ink on white card stock. Punch with a label punch, attach to card, and attach 3 brown gems to add a little bling. 

Change the sentiment to “Happy Thanksgiving” and you’ll have a great card for turkey day. 🦃

Happy Fall Y’all!! 😊🍁🍂

Thanks for stopping by,

Anita

Posted in Cards, Fall, Stamping | Leave a comment

Fast and Easy Crochet Cup Cozy

I love these! So quick to stitch and you can make them in any color! 

I found the free pattern here at oftheOtherEarth. They really are so fun and quick to make – you can whip up several in an evening!

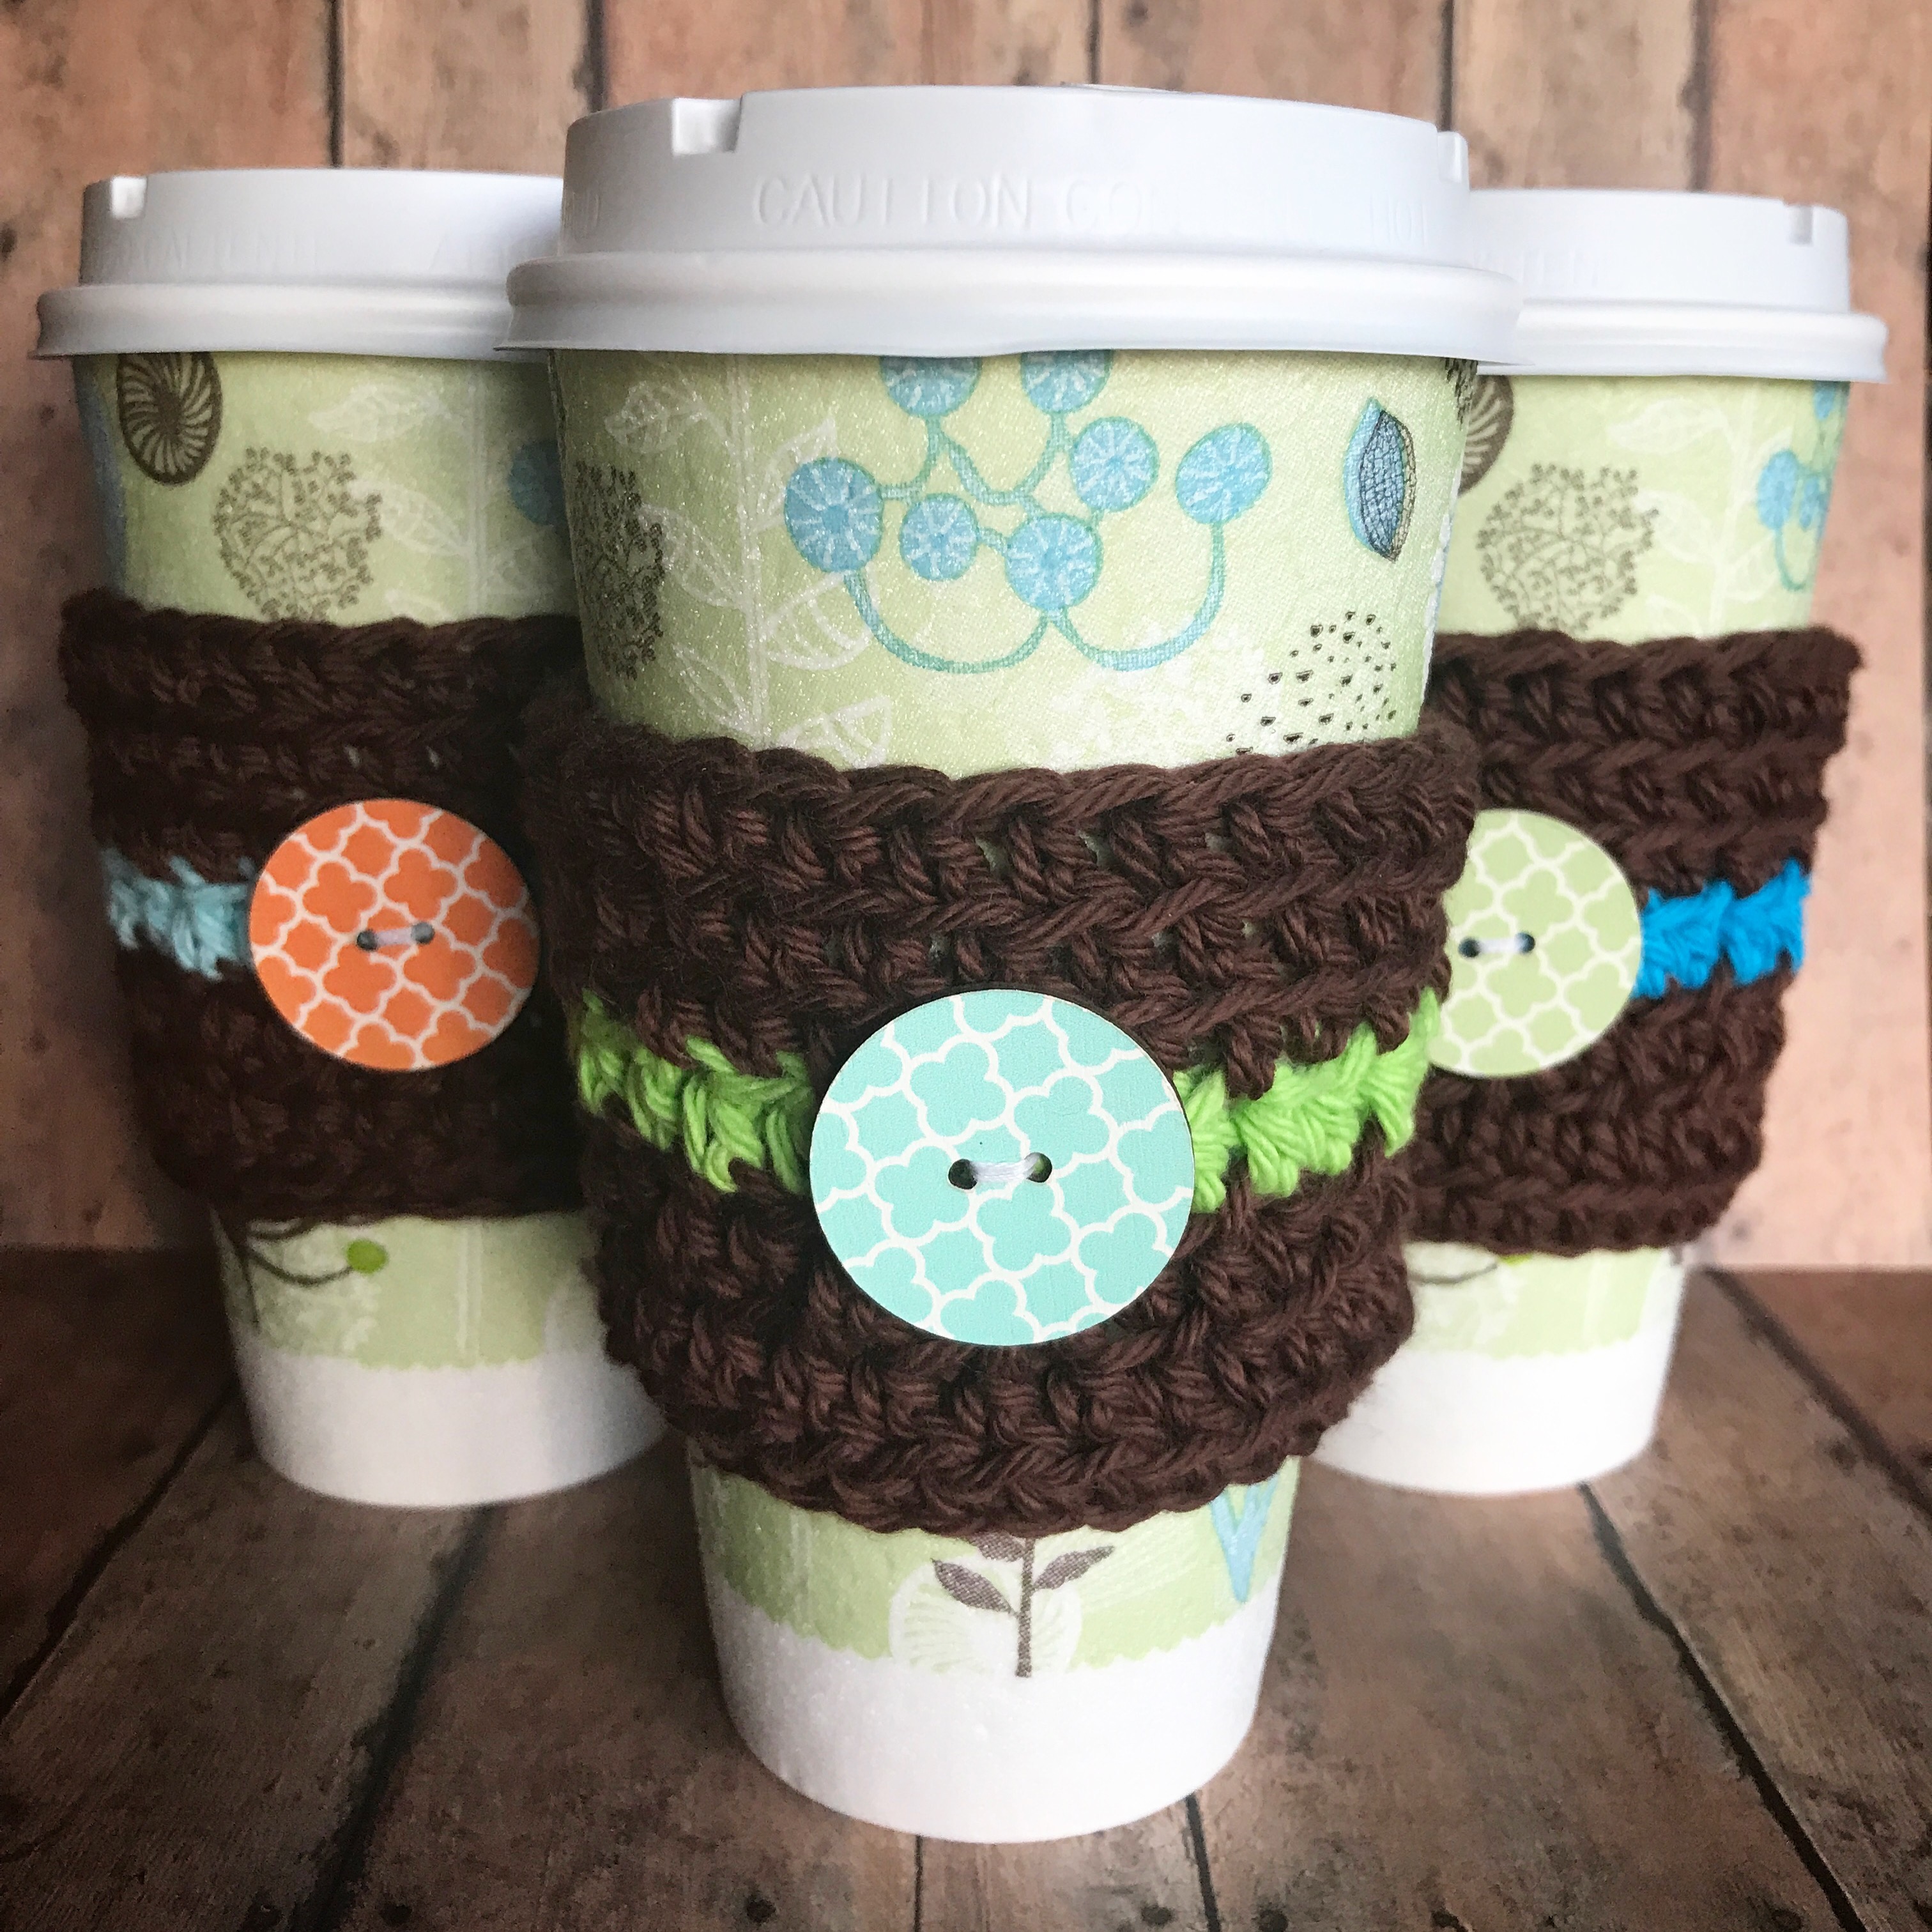
I used I Love This Cotton yarn from Hobby Lobby to crochet my cozies. It’s my favorite cotton yarn and comes in some great colors. I crocheted the first 3 rounds of the pattern in brown and then added one round (round 4) of an accent color before crocheting the final 3 rounds. 

I found the cute wooden buttons at Joann’s. The brand is Favorite Findings. The package had nine 1 1/4-inch buttons -3 orange, 3 turquoise, and 3 green. They added the perfect finishing touch to the cozies. 

These cups are Dixie To Go cups I found at Target. I think they will be so cute filled with coffee packets or tea bags for a fun gift – maybe with a little chocolate thrown in to make it a little sweeter. 😊

This is such a versatile pattern! Your color choices are endless…Christmas colors with a cute button to match…School colors…Fall colors…Colors to match your kitchen. Just use your imagination and have fun!

Thanks for stopping by,

Anita
Posted in Crochet, Gifts, Uncategorized | Leave a comment

Chunky Wooden Pumpkins 

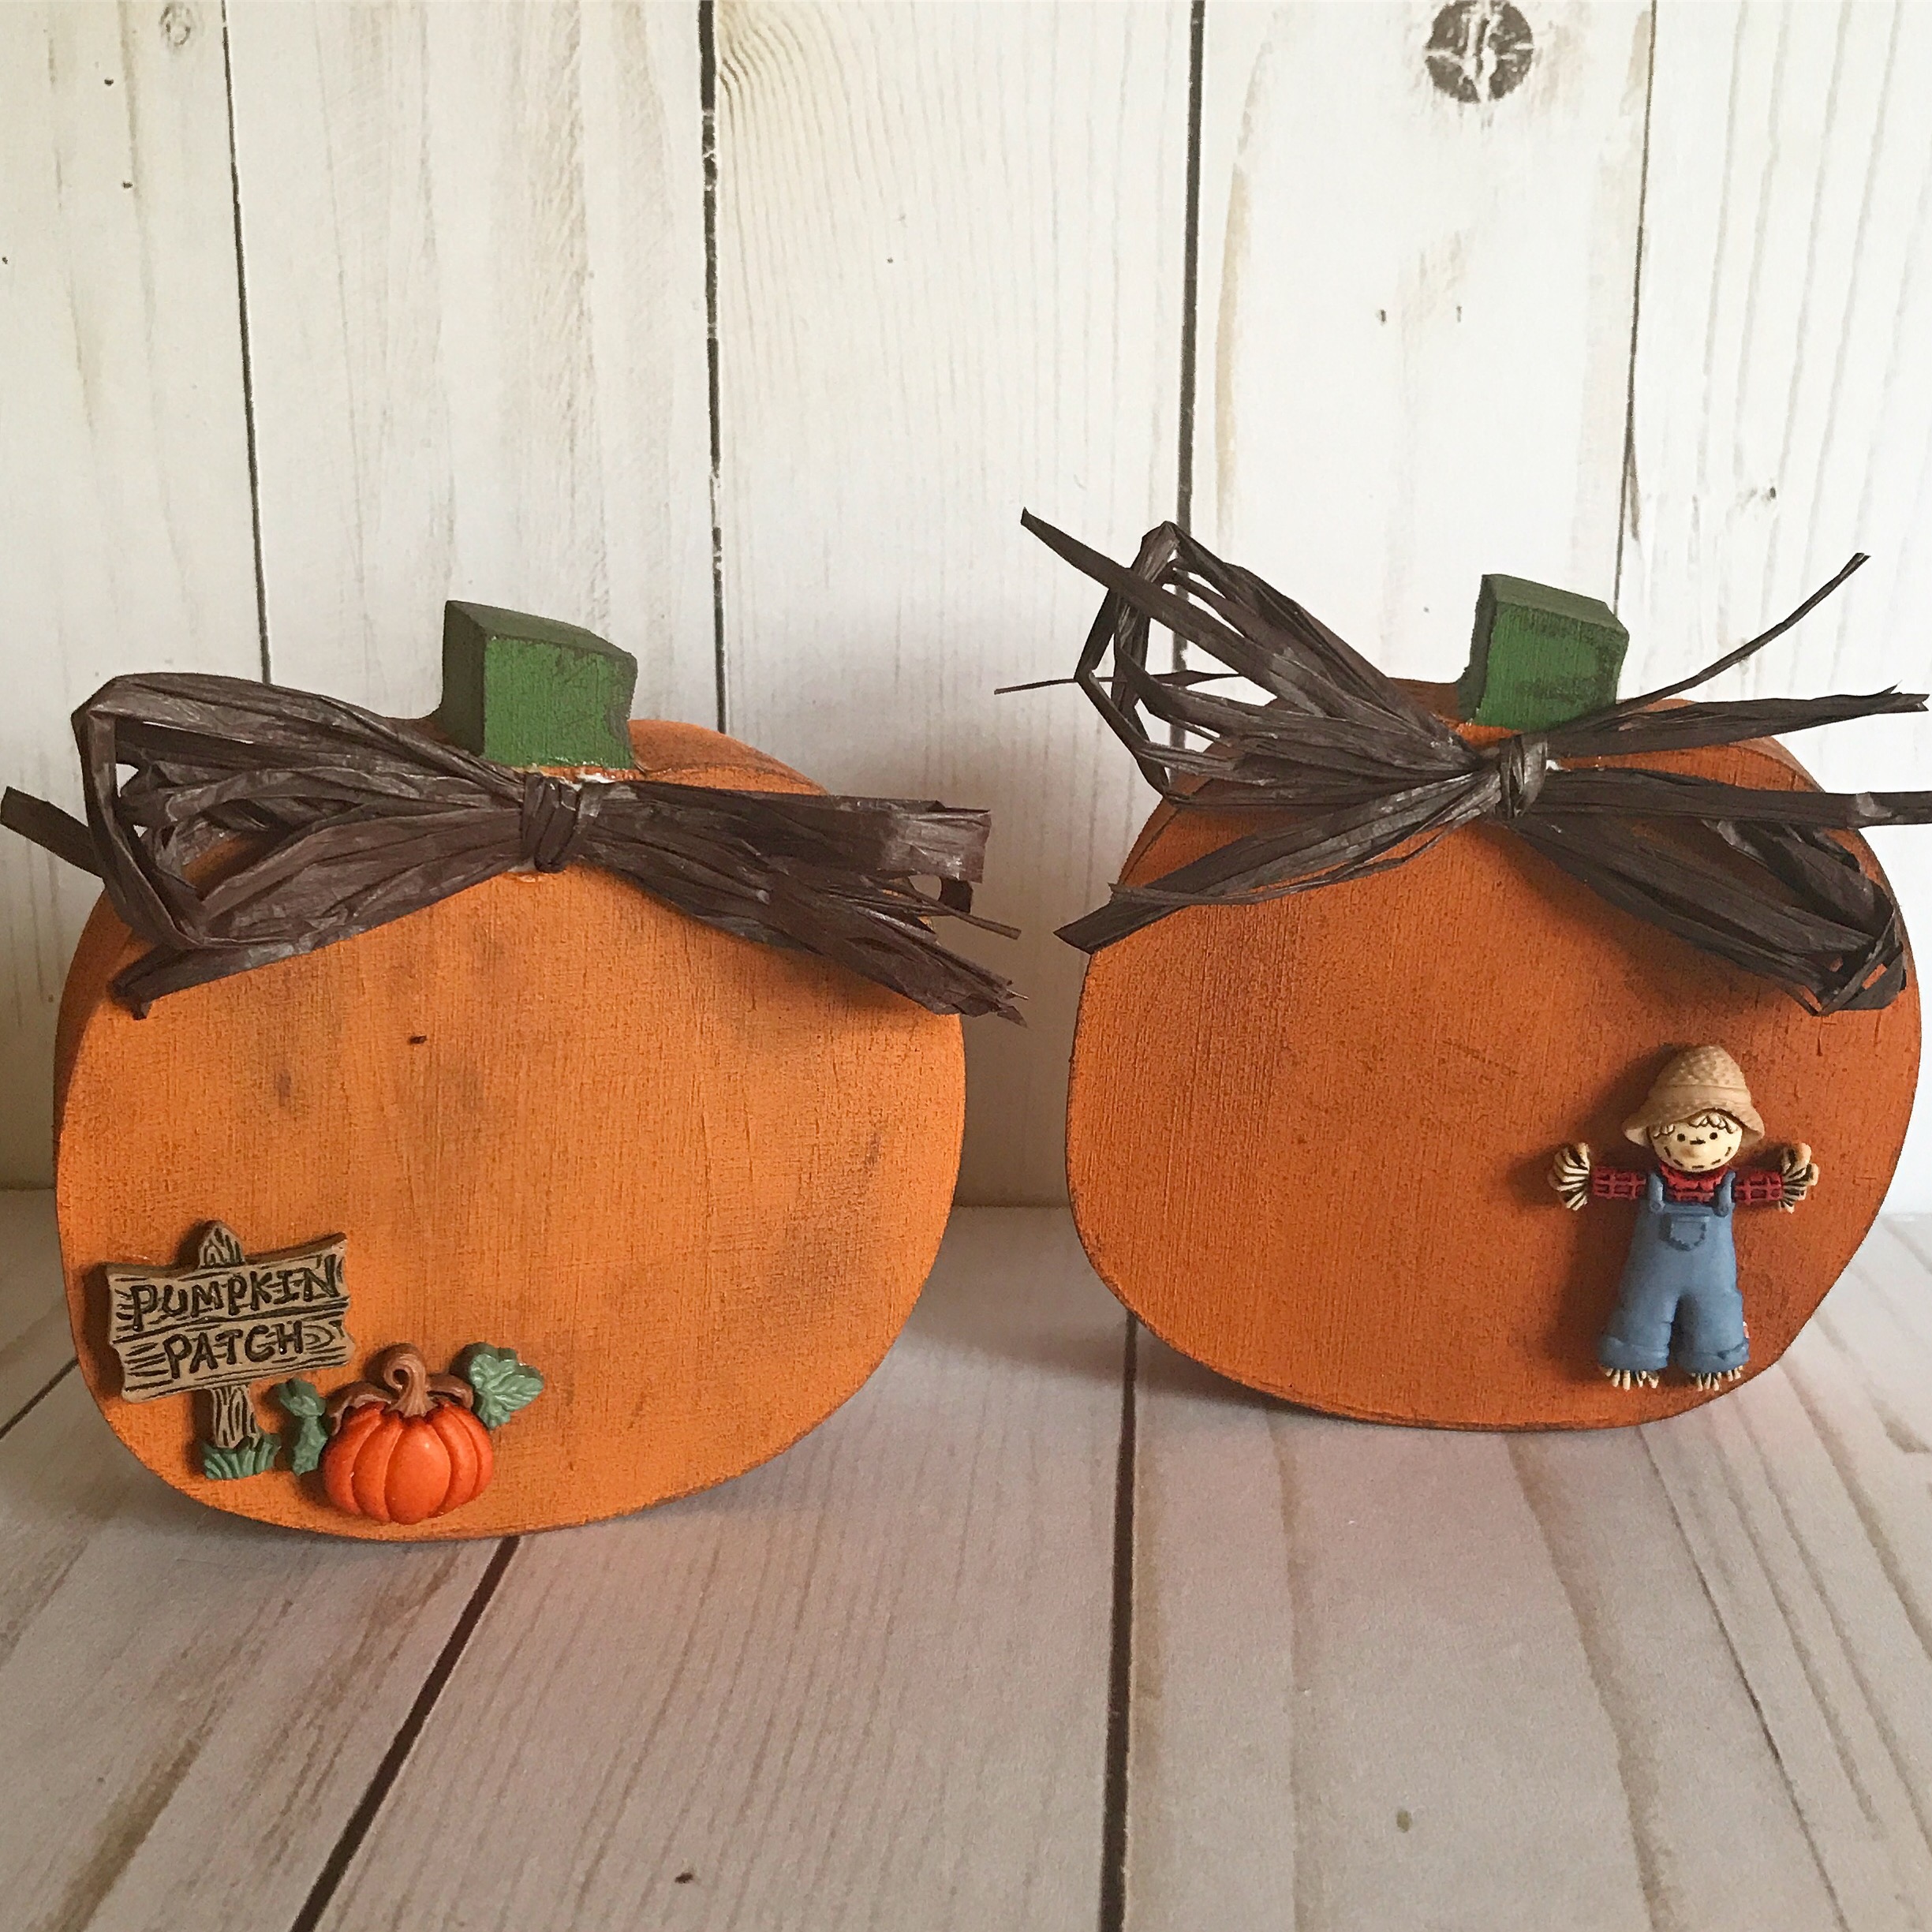
I have a super easy project to share with you today. I found these cute chunky pumpkins in the craft aisle at Target. I loved that the were so thick – they are 1-inch wide and measure about 3-1/2 by 3-1/2 inches.

I painted them with Craft Smart Chalky Finish Paint in Burnt Orange and Camouflage and then dry-brushed them with a little Rich Brown to antique them a bit. 

My little scarecrow, pumpkin, and sign are actually buttons I found at my local craft store. I think the brand was Favorite Findings and they are available at lots of different craft stores. I clipped off the shank on the back and glued them to the front of the pumpkins. I tied bows from brown raffia and glued them just under the stem of each pumpkin.

 
And here they are…a little cuteness for your Fall decor! 


Thanks for stopping by,

Anita
Posted in Decor, Fall, Uncategorized | Leave a comment

Happy Pumpkin Plaque

This cute, happy pumpkin is sure to bring a smile to your face. 🎃

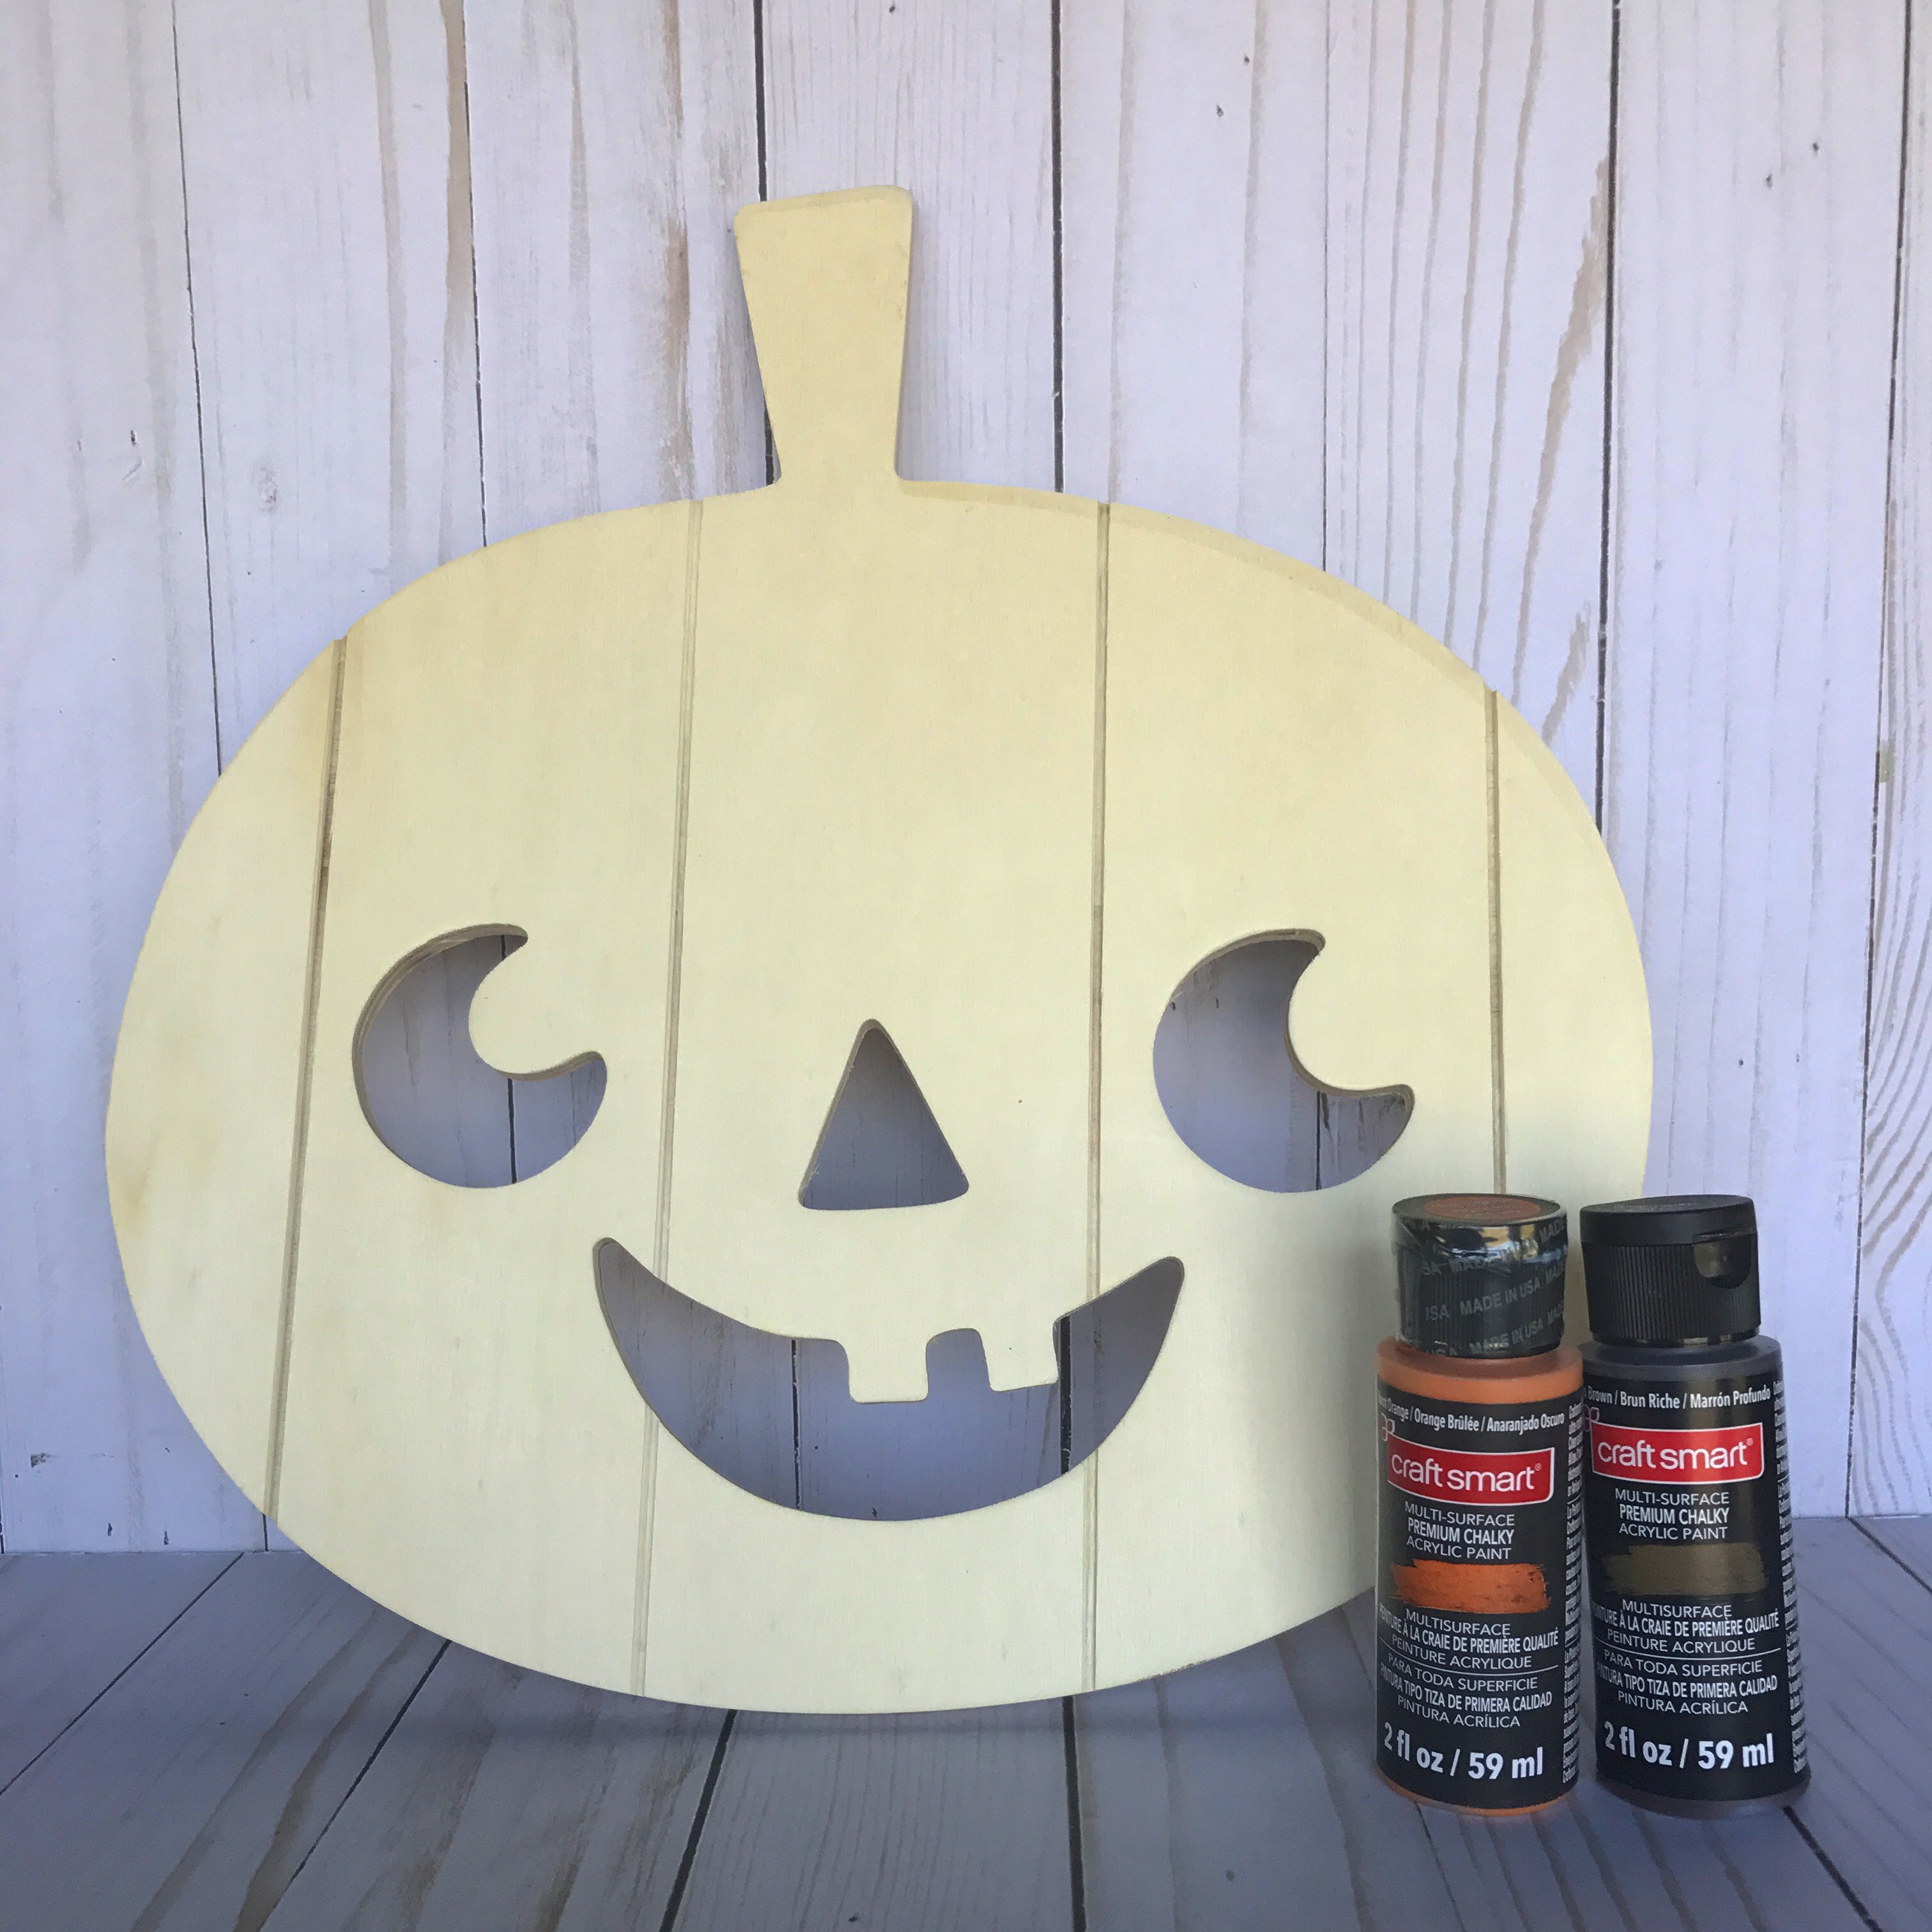
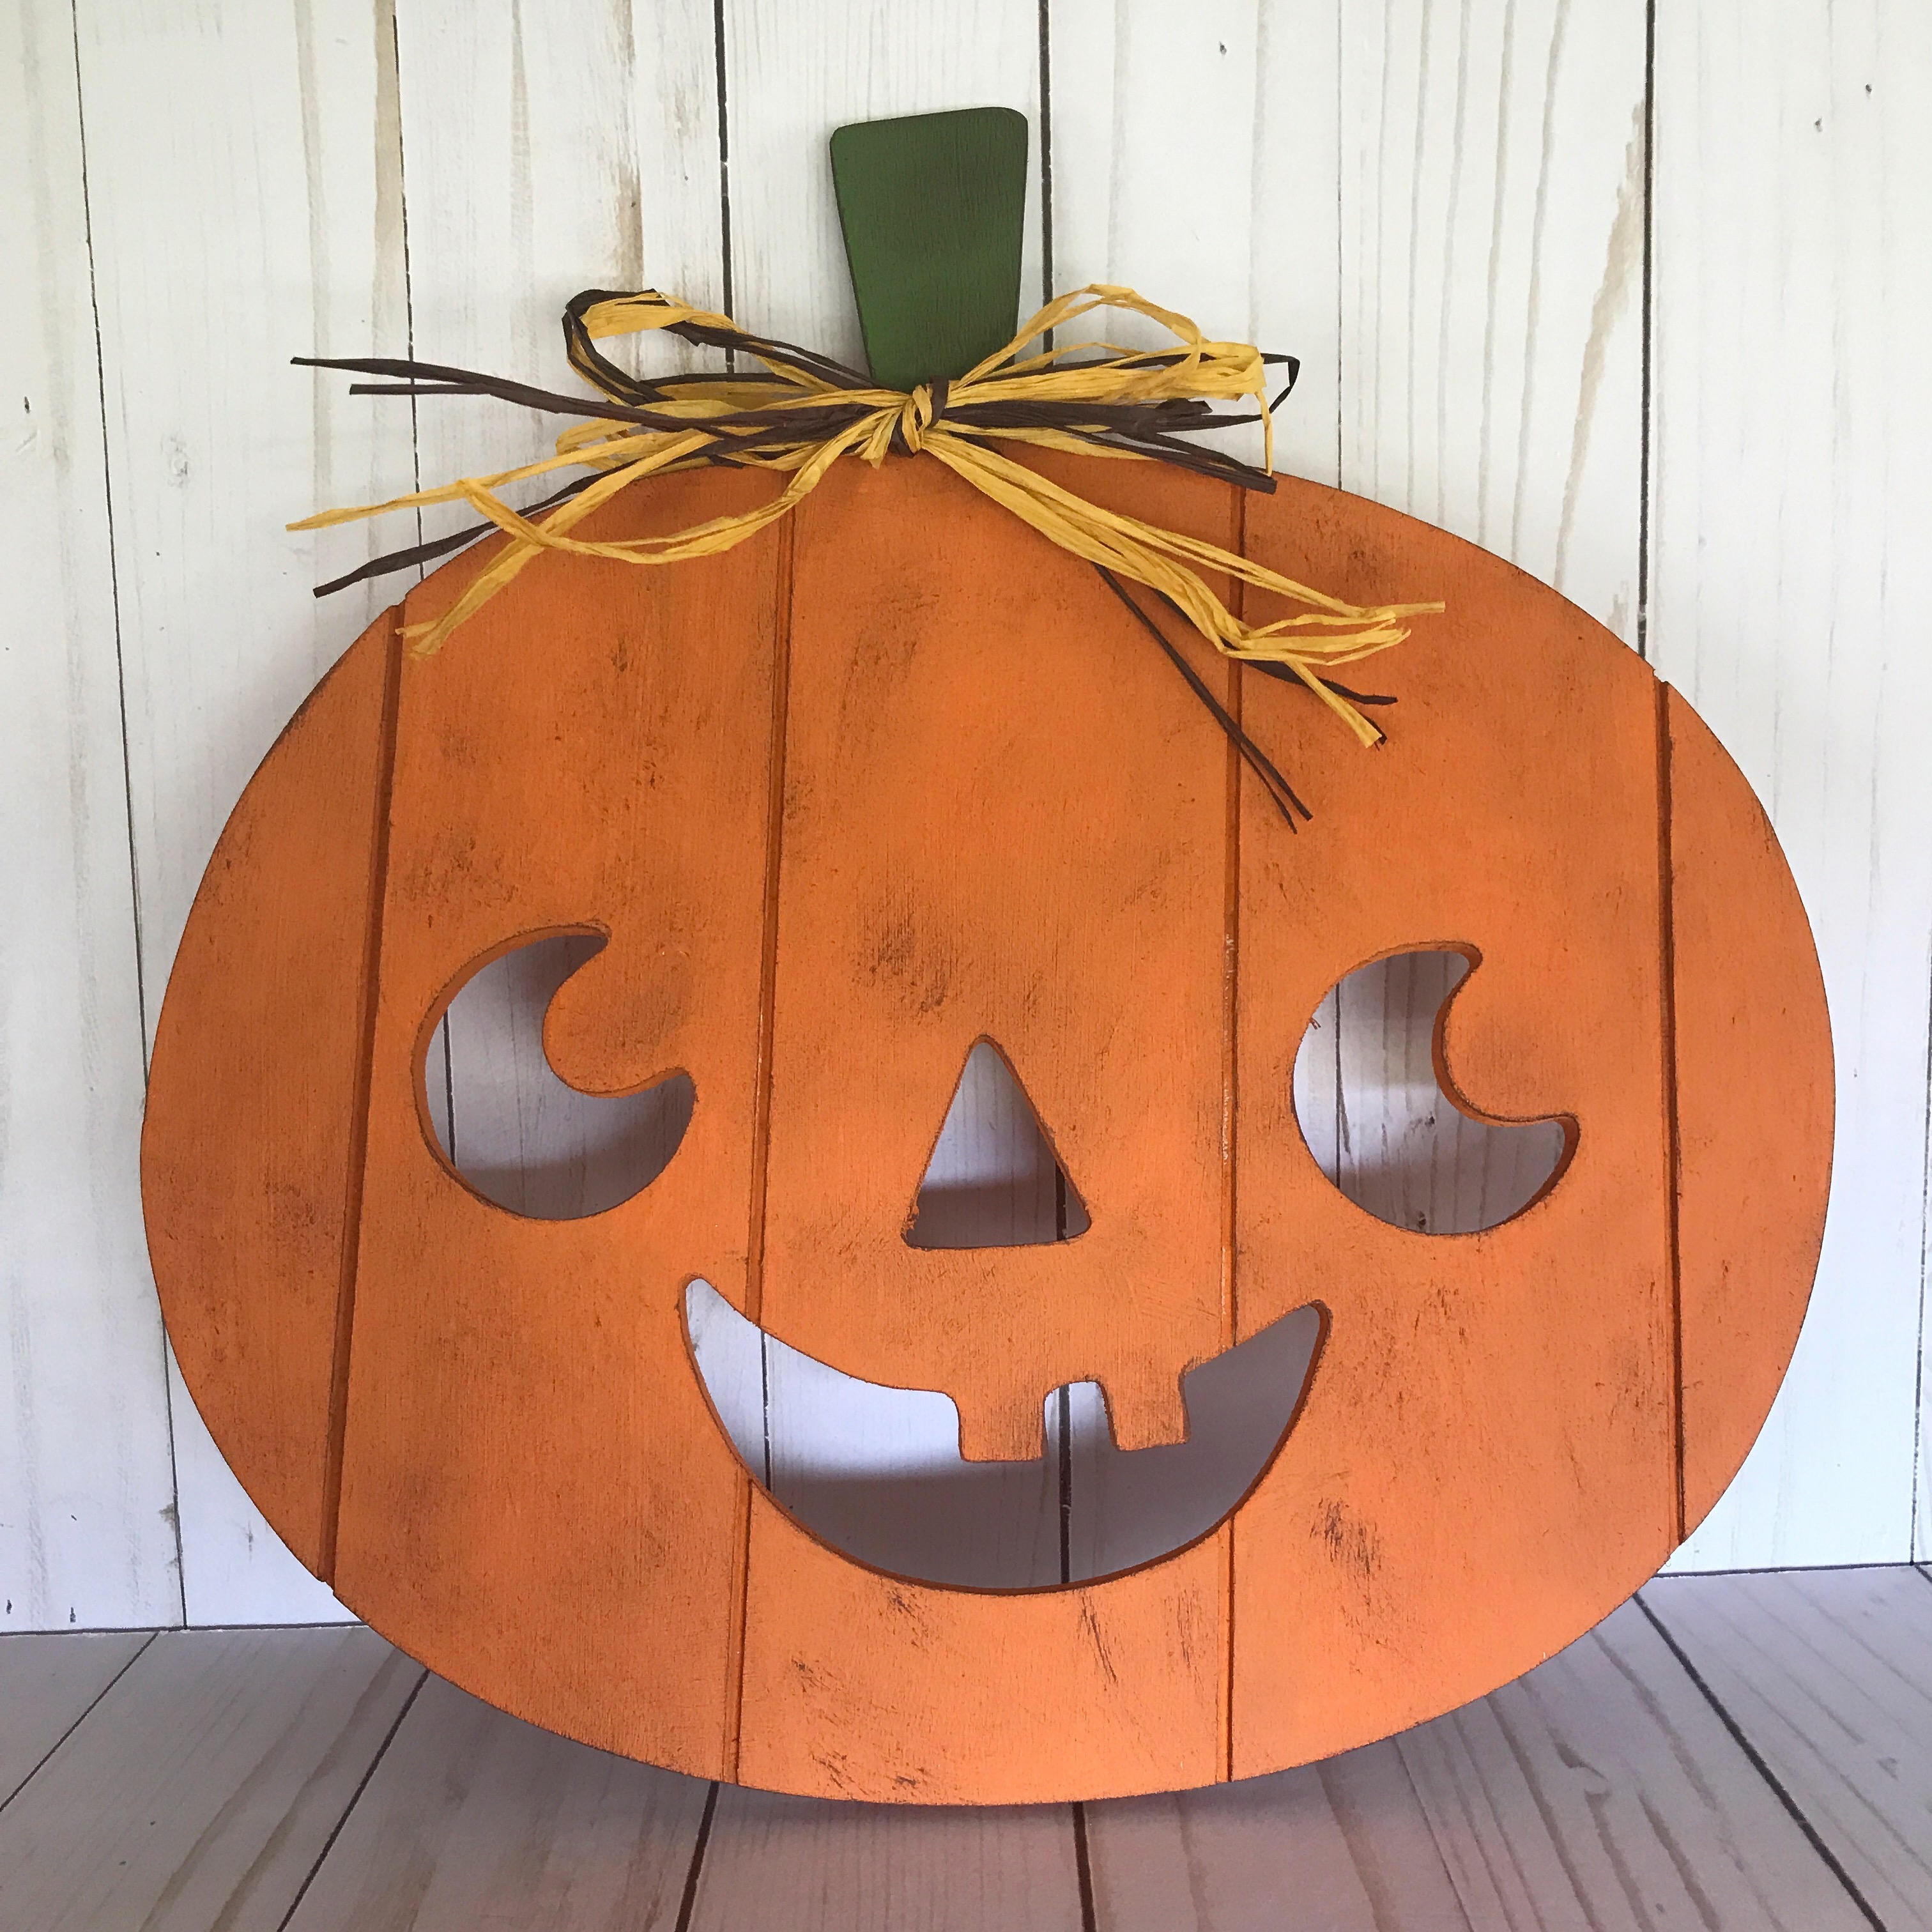
I found this unfinished wood pumpkin plaque in the Dollar Spot at Target for just $3.00 and I fell in love with his cute face! He measures about 12 inches across and 12 inches from the top of the stem to the bottom of the pumpkin. I knew that with a little paint he would make a fun addition to my Fall decor. 

I used Craft Smart Chalky Finish paint (available at Michael’s) in Burnt Orange and Camouflage to paint the pumpkin; and Rich Brown to add some distressing and to give it some depth. (I forgot to put the Camouflage paint in the picture 😜)


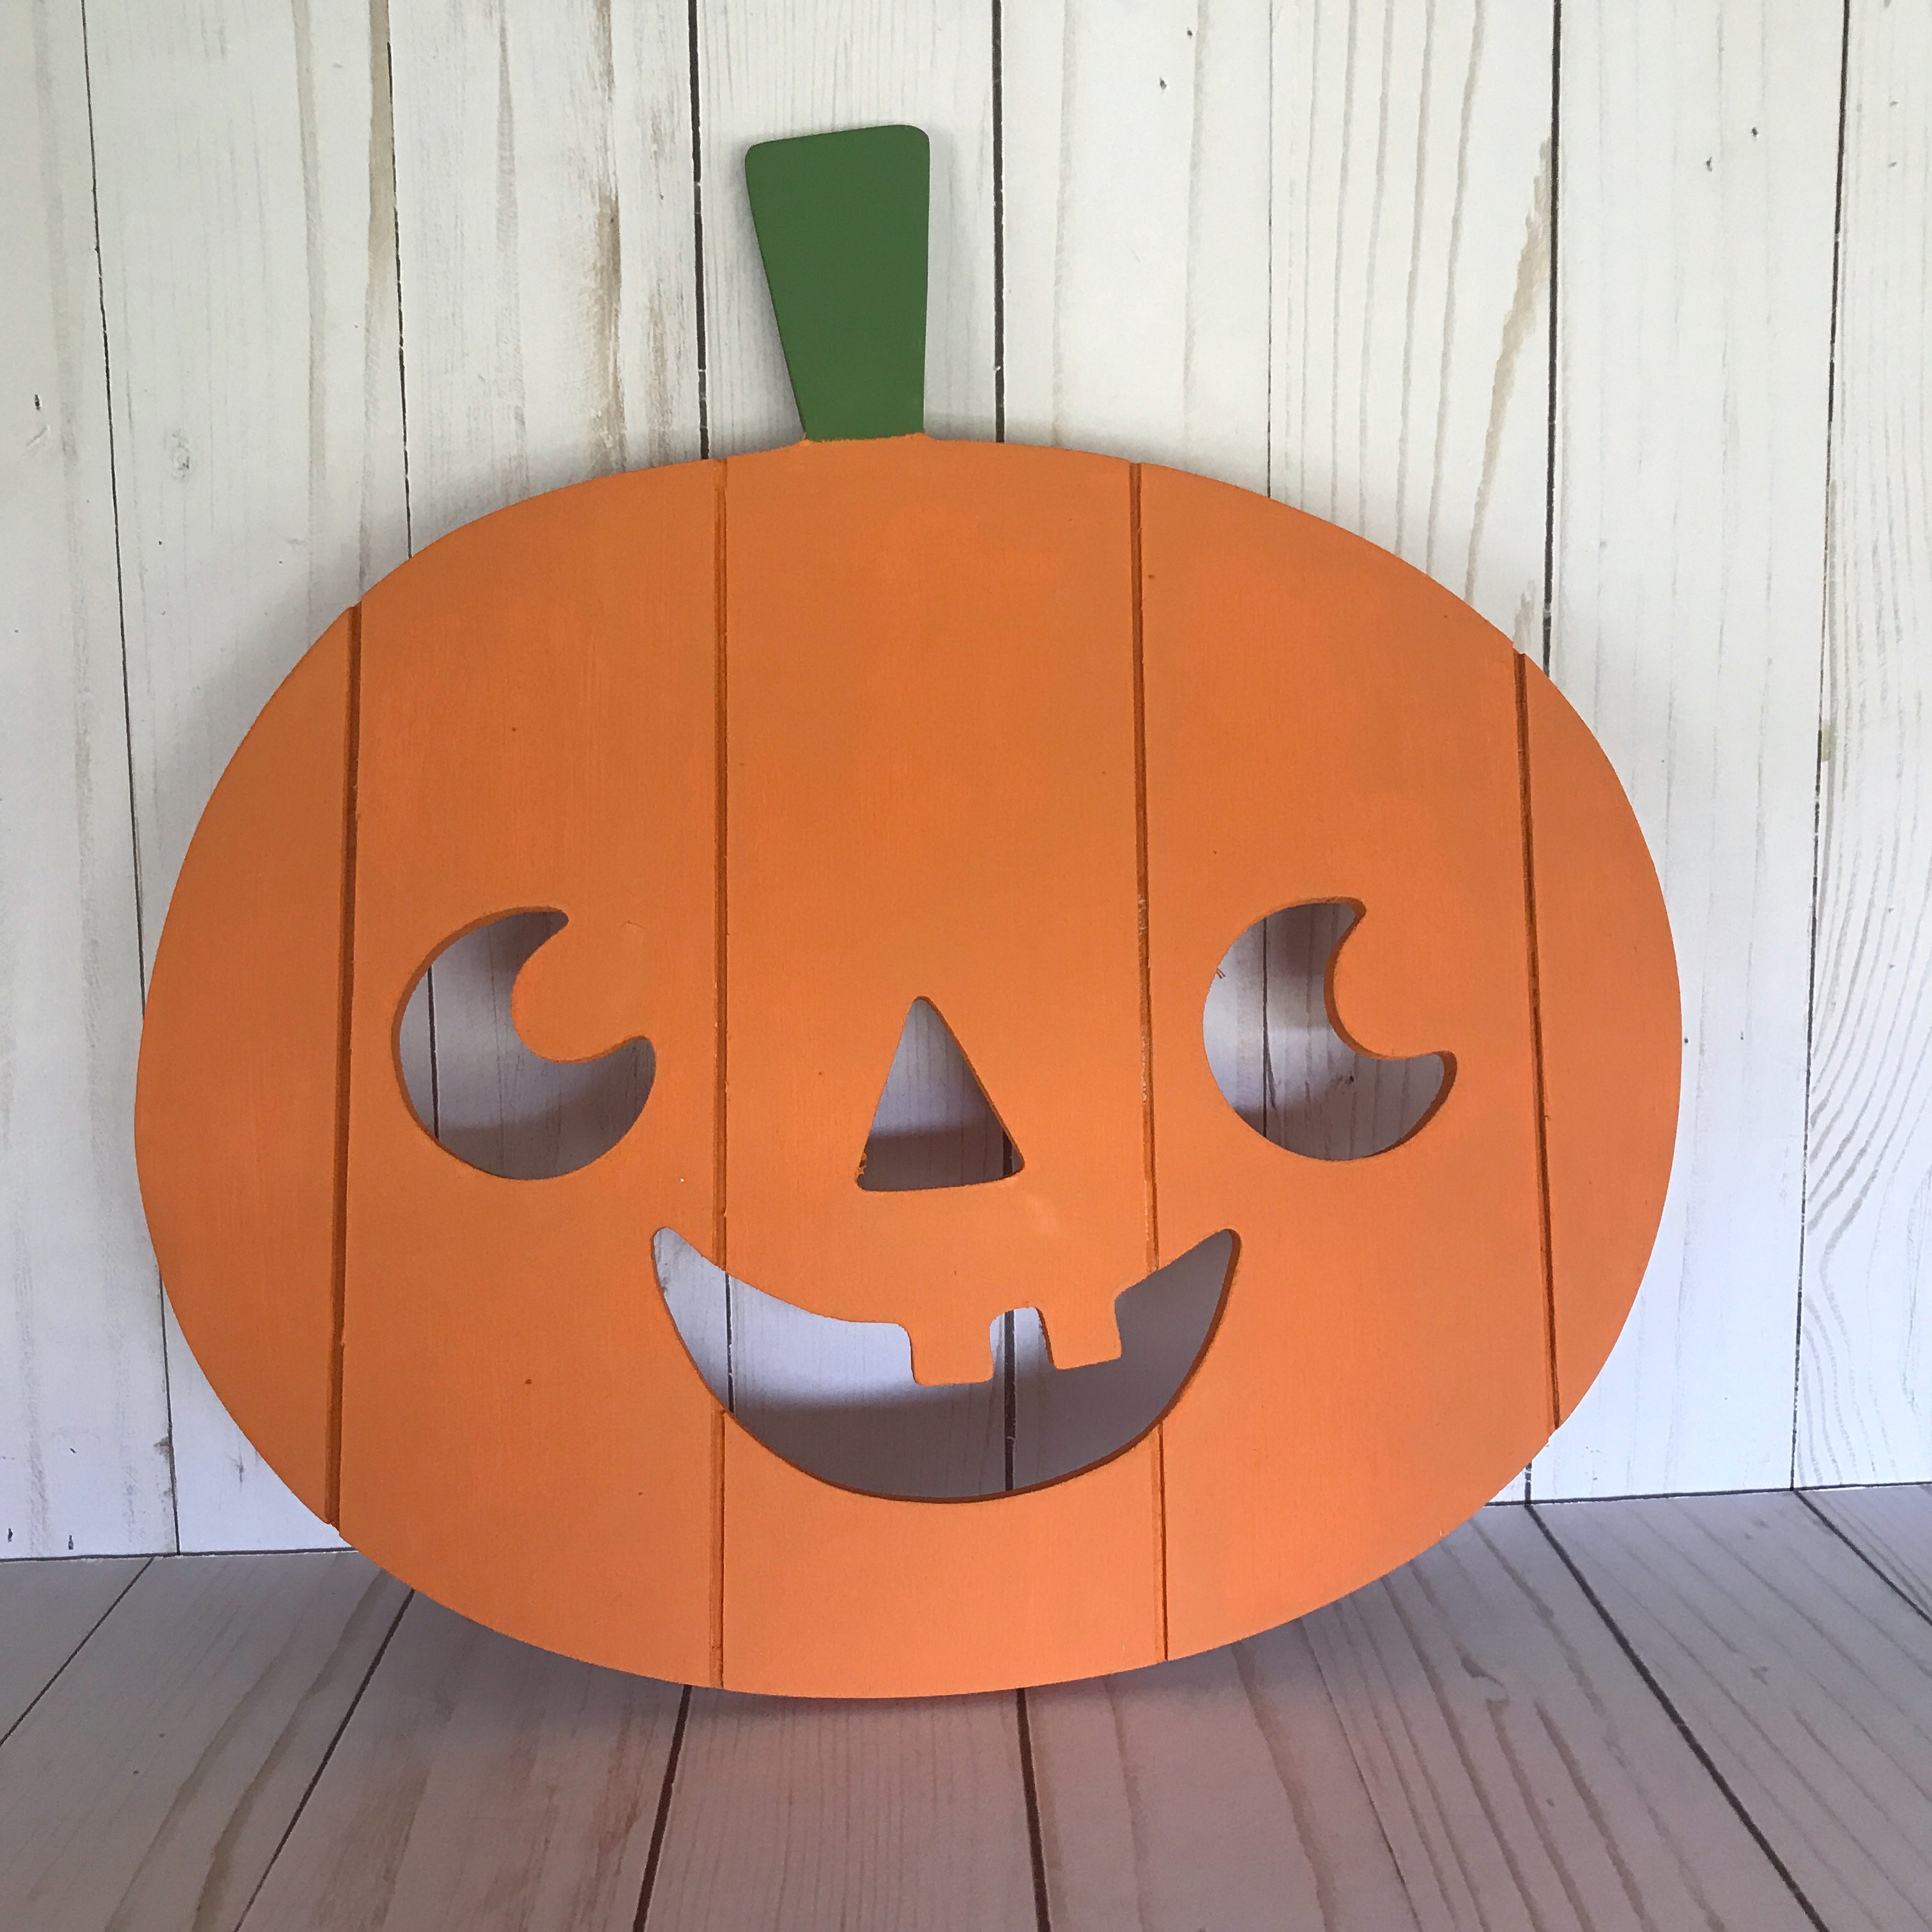
Here is my pumpkin with 2 coats of paint. I also painted the back. It’s an optional step, but I think it gives the project a more finished look. 

After the paint was dry, I dry-brushed brown paint over the front of the pumpkin. I sprayed both the front and the back with a clear matte sealing spray. You can find the spray in the paint section of your local craft store. I tied a raffia bow around the stem and here he is! 


He will look so cute propped on the mantel or a shelf. You can also add a hanger to the back if you’d like to hang him on the door or wall. He’ll make you happy wherever you put him! 🎃

Thanks for stopping by,

Anita
Posted in Decor, Fall, Gifts, Uncategorized | Leave a comment