Boo!

It’s the middle of September and that means Halloween can’t be far away! 🎃

If you enjoy sending Halloween cards, here’s a cute card you can put together in just minutes.  I’m using the same basic layout I used as the cards in this post and the one in this post. Just by changing stamps and colors you end up with a completely different card!

I’ve had the stamps I used to make this card FOREVER!! I know people who get rid of stamps after a company has discontinued them – but I rarely do that. That would be why my stamp drawers are so full. 😳 And just because they’re discontinued doesn’t mean you can’t use them…So in case you are wondering, the jack-o-lantern and boo! are from Hero Arts and the ghost is from Amuse Studio. Just use whatever cute Halloween stamps you have in your craft room. 😊

I stamped the jack-o-lantern and the ghost 4 times with black ink on white card stock, colored them with Copic markers, and punched them with a circle punch. I stamped boo! with orange ink on white card stock and punched it with a circle punch. I lightly inked the edges of all the circles with black ink. 

I layered a panel of black card stock onto a white card. Then layered a piece of patterned paper over the black, leaving some space at the bottom. The stamped circles are attached to the card with foam tape. To finish the card, I added 1 ghost and 2 jack-o-lantern charms. 

A super quick and easy card – and not too scary!! 🎃

Thanks for stopping by,

Anita

Posted in Cards, Fall, Stamping | 1 Comment

Thinking of You – New Card!

I have a new card for you today! This one measures 5.5 inches x 5.5 inches – a little different size than the standard 4.25 x 5.5 inch card. 

The Pinwheel stamps are an older set from Hero Arts that is no longer available – but you can use flowers, circles, or any other stamps in your stash. The sentiment is from the Tiny Wishes set from Stampin’ Up. The embossing folder is also from Stampin’ Up, but it is discontinued – just use your favorite folder to create the background. Companies change their inventories so quickly – if you see a product that you like, grab it up! There’s no telling how long it will be available! 🙂

To make the card base, take a piece of 12 x 12 inch card stock, trim it to 5.5 x 11 inches, and fold in half. Emboss a piece of turquoise card stock that has a white core. Lightly sand the embossed areas to expose the white core for a distressed look. Stamp 5 turquoise and 4 brown pinwheels on white card stock. Punch with a circle punch and layer to brown and turquoise card stock circles. Attach to card. Stamp sentiment with brown ink on white card stock, punch with a label punch, and layer to a larger label punched from brown card stock. (Sadly, Stampin’ Up has discontinued both of these punches, but here is one similar to the smaller one.) Attach the label with foam tape and add 2 turquoise gems.

Change the sentiment on the card to Happy Birthday or Congratulations. Change the pinwheels to Christmas images, change the sentiment to Merry Christmas, and it would make a cute Christmas card. Flowers for Spring, leaves and pumpkins for Fall, baby images for a baby shower…The possibilities are endless! 😉

I have two cards I made using the same basic layout in this post and will be sharing a couple more Fall themed cards with the same layout soon…

Thanks for stopping by,

Anita

Posted in Cards, Stamping | 2 Comments

Crochet Santa Gift Card Holder

UPDATE: It was brought to my attention that the original link I had for the pattern was to a copyright piracy site where they copy patterns from magazines and claim them as their own. I had no idea this was the case and I sincerely apologize for leading anyone to this site. I have updated the link below to give credit to the original creator of this pattern. 

I have been having so much fun crocheting different gift card holders! I’ve made this cute Mini Shopping Bag and these Candy Cane Bags so far. And now I’ve made this adorable Santa that can also double as an ornament for your tree!

The pattern can be found here on Ravelry. Santa’s Got a Secret was published in the December 2015 issue of Crochet World Magazine.

I changed a couple of minor things while I was making my Santa – mainly because I didn’t have chenille stems and cabochons and didn’t want to make a run to the craft store. 😉

I used Red Heart Soft yarn in Really Red and White with I Love This Cotton yarn from Hobby Lobby in Warm Blush for Santa’s face. I used two small black beads for his eyes in place of the cabochons. I sewed them on with black embroidery floss before I crocheted the pieces together. I also put a tiny stitch with white yarn in the center top of the white trim on the hat to keep it in place. I left out the chenille stem (because I didn’t have any!) and crocheted all the pieces together. Then I folded the tip of the hat down and tacked it in place with red yarn.

I am absolutely terrible at making pom poms, so I used a pre-made 1-inch one that I had on hand. I threaded white yarn through the jingle bell and then threaded both ends through the pom pom. The pom pom is tied to the tip of the hat. Then I added a hanging loop with red yarn to the back.

Santa is perfect for giving a gift card or cash – and they end up with a cute ornament that can be used for years to come! 

Ho, Ho, Ho!!🎅🏻

Thanks for stopping by,

Anita


Posted in Christmas, Crochet, Gifts, Uncategorized | 8 Comments

Super Fast Framed Art

This is an incredibly fast and easy way to spruce up that corner of your home that needs a little something. 

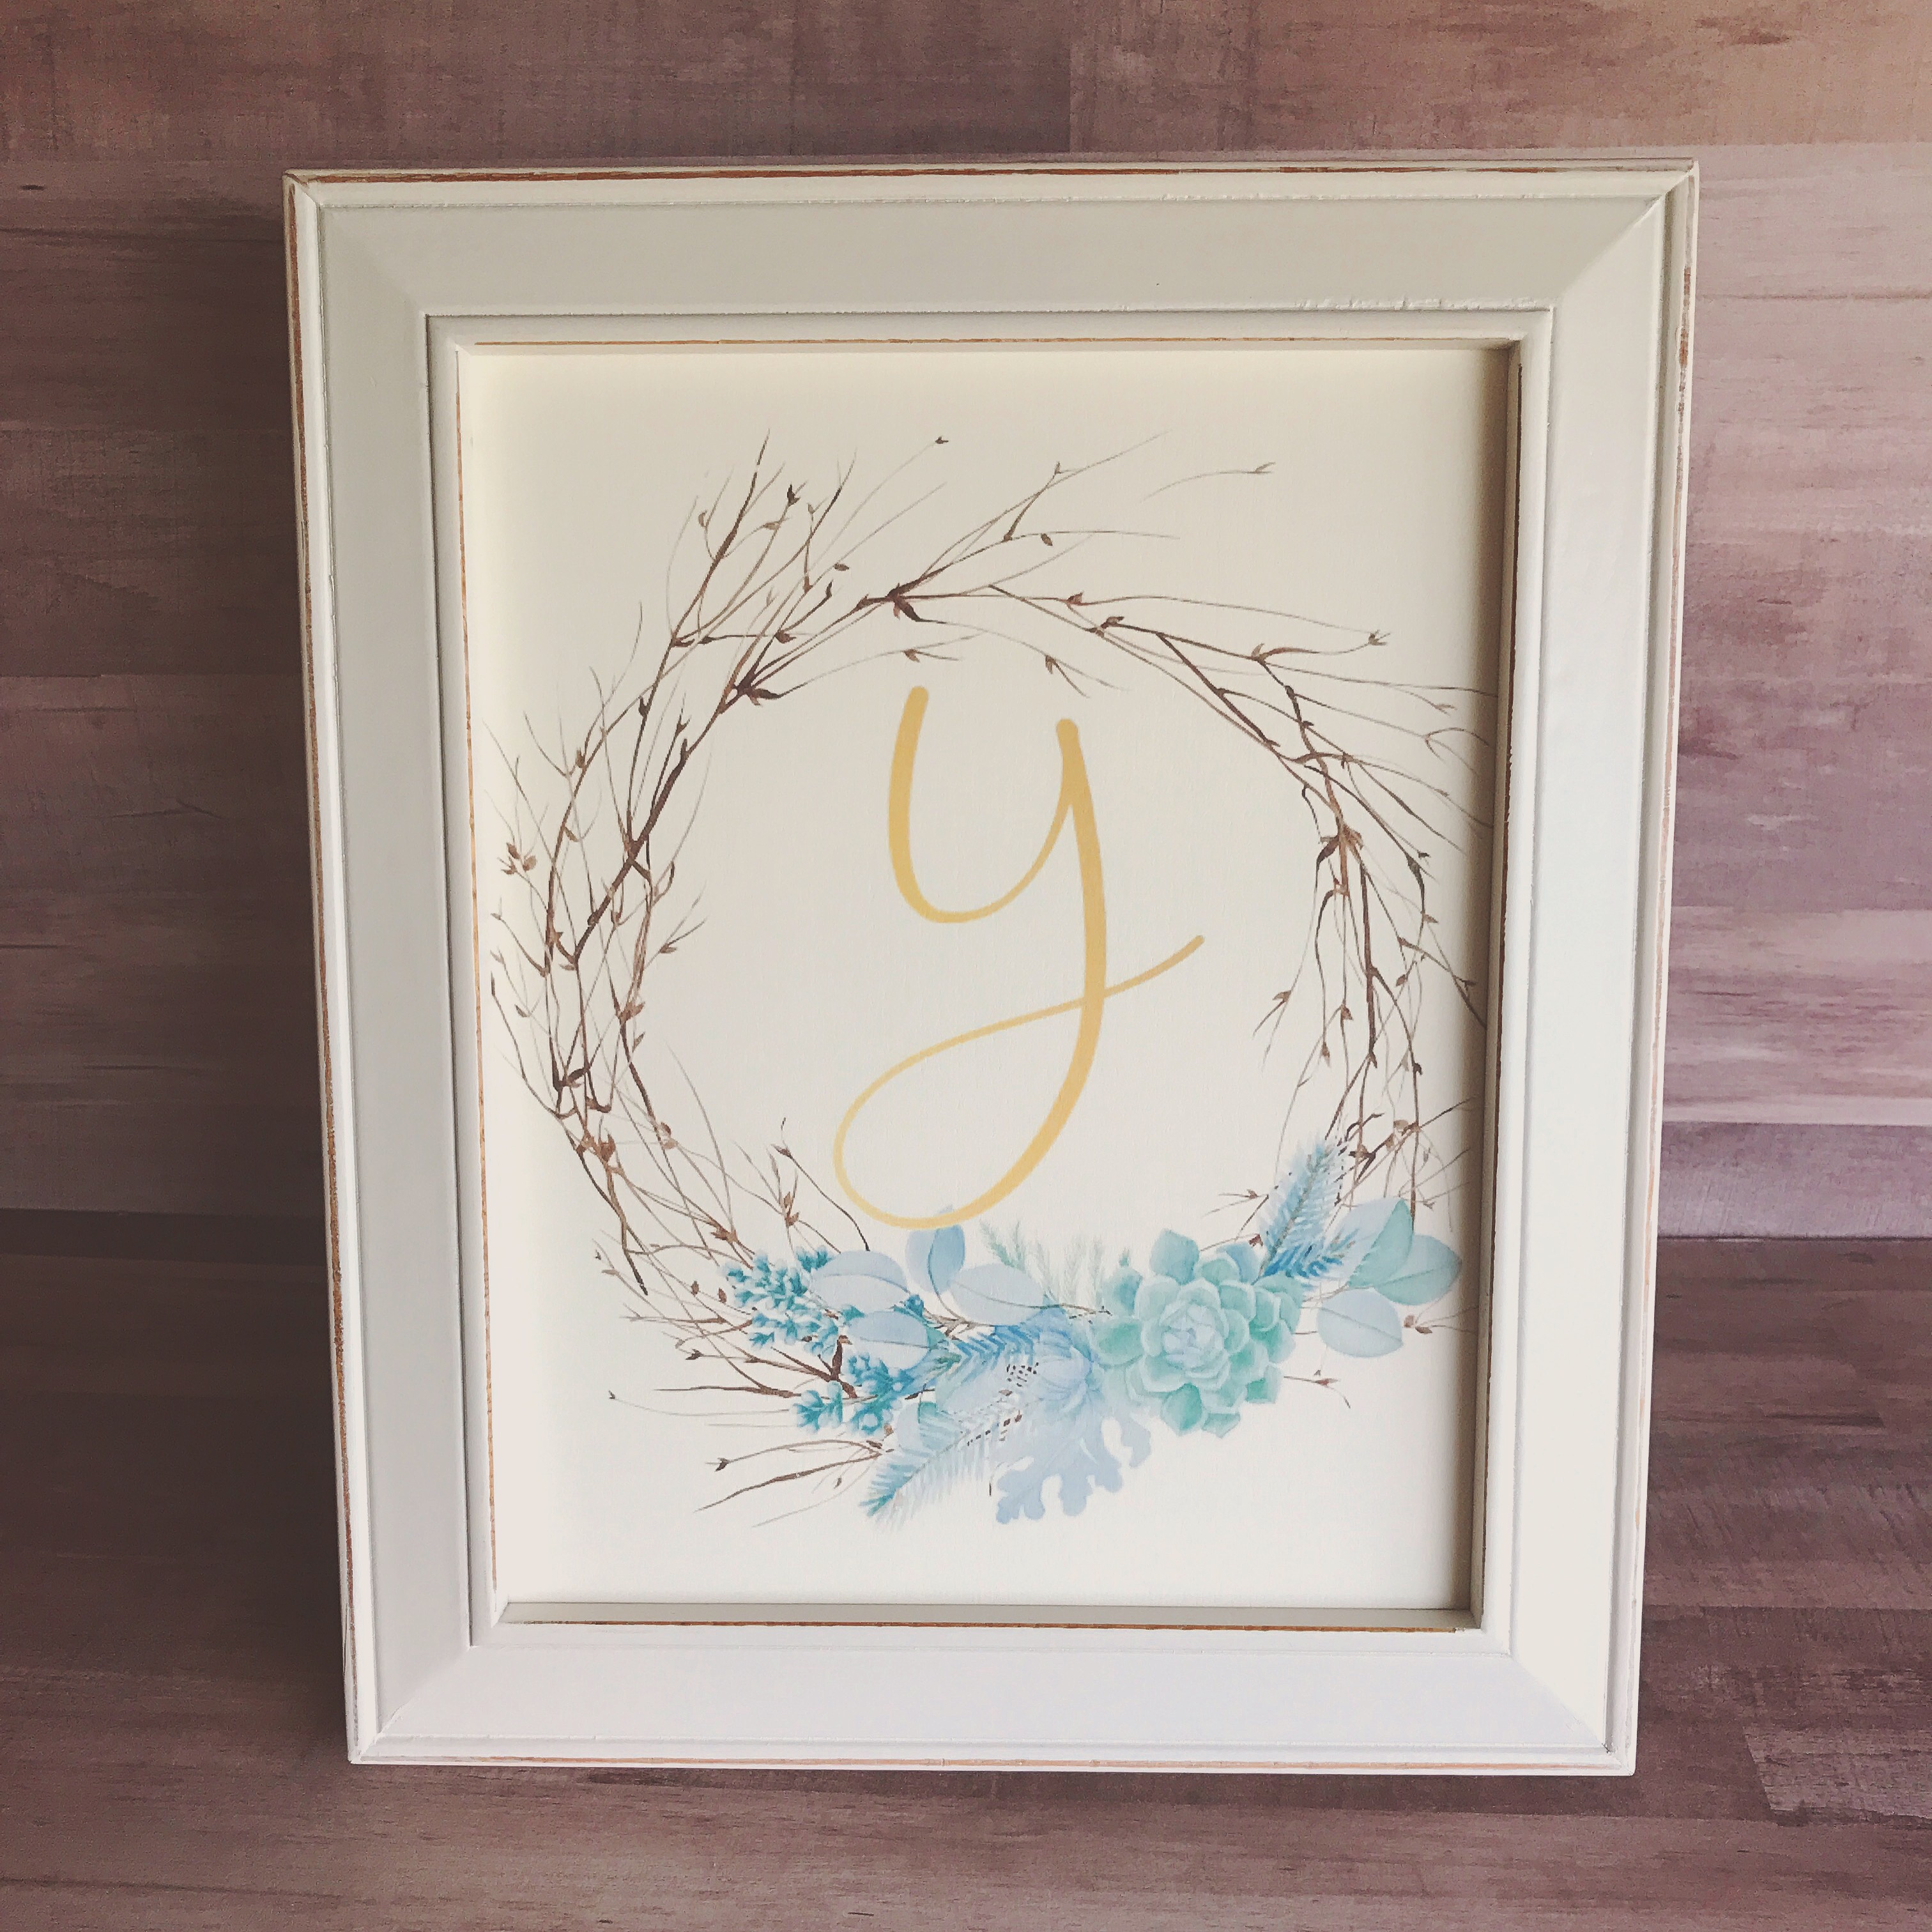
All you have to do is go to Pinterest, search “printables”, and 100’s of options will come up. You’ll find everything from farmhouse prints, to kitchen themed options, to florals, to subway art, to monograms like this one that I printed. You can find the link to this monogram wreath here. 


I printed the wreath on card stock, trimmed it to fit my 8×10 frame, and that’s it! So easy! I spent way more time searching for the printable I wanted than printing and framing it. And it will be so simple to change it when I want something new. 

If you don’t have a Pinterest account, it’s really simple to set up. Just go here and sign up. I get so much inspiration on so many things! I apologize for how much time you may spend perusing this site! 🙄 But it truly will give you so many ideas – the recipes alone are worth it!

Happy Pinning!!

Thanks for stopping by,

Anita

Posted in Decor, Gifts | Leave a comment

Published in the Fall Issue of Take Ten!!

I am so excited to be published in the current issue (Autumn 2017) of Take Ten Magazine!! It is so fun to get the magazine and see my creations in print! 🙂 There are so many talented artists and I am honored to have my cards published next to theirs.

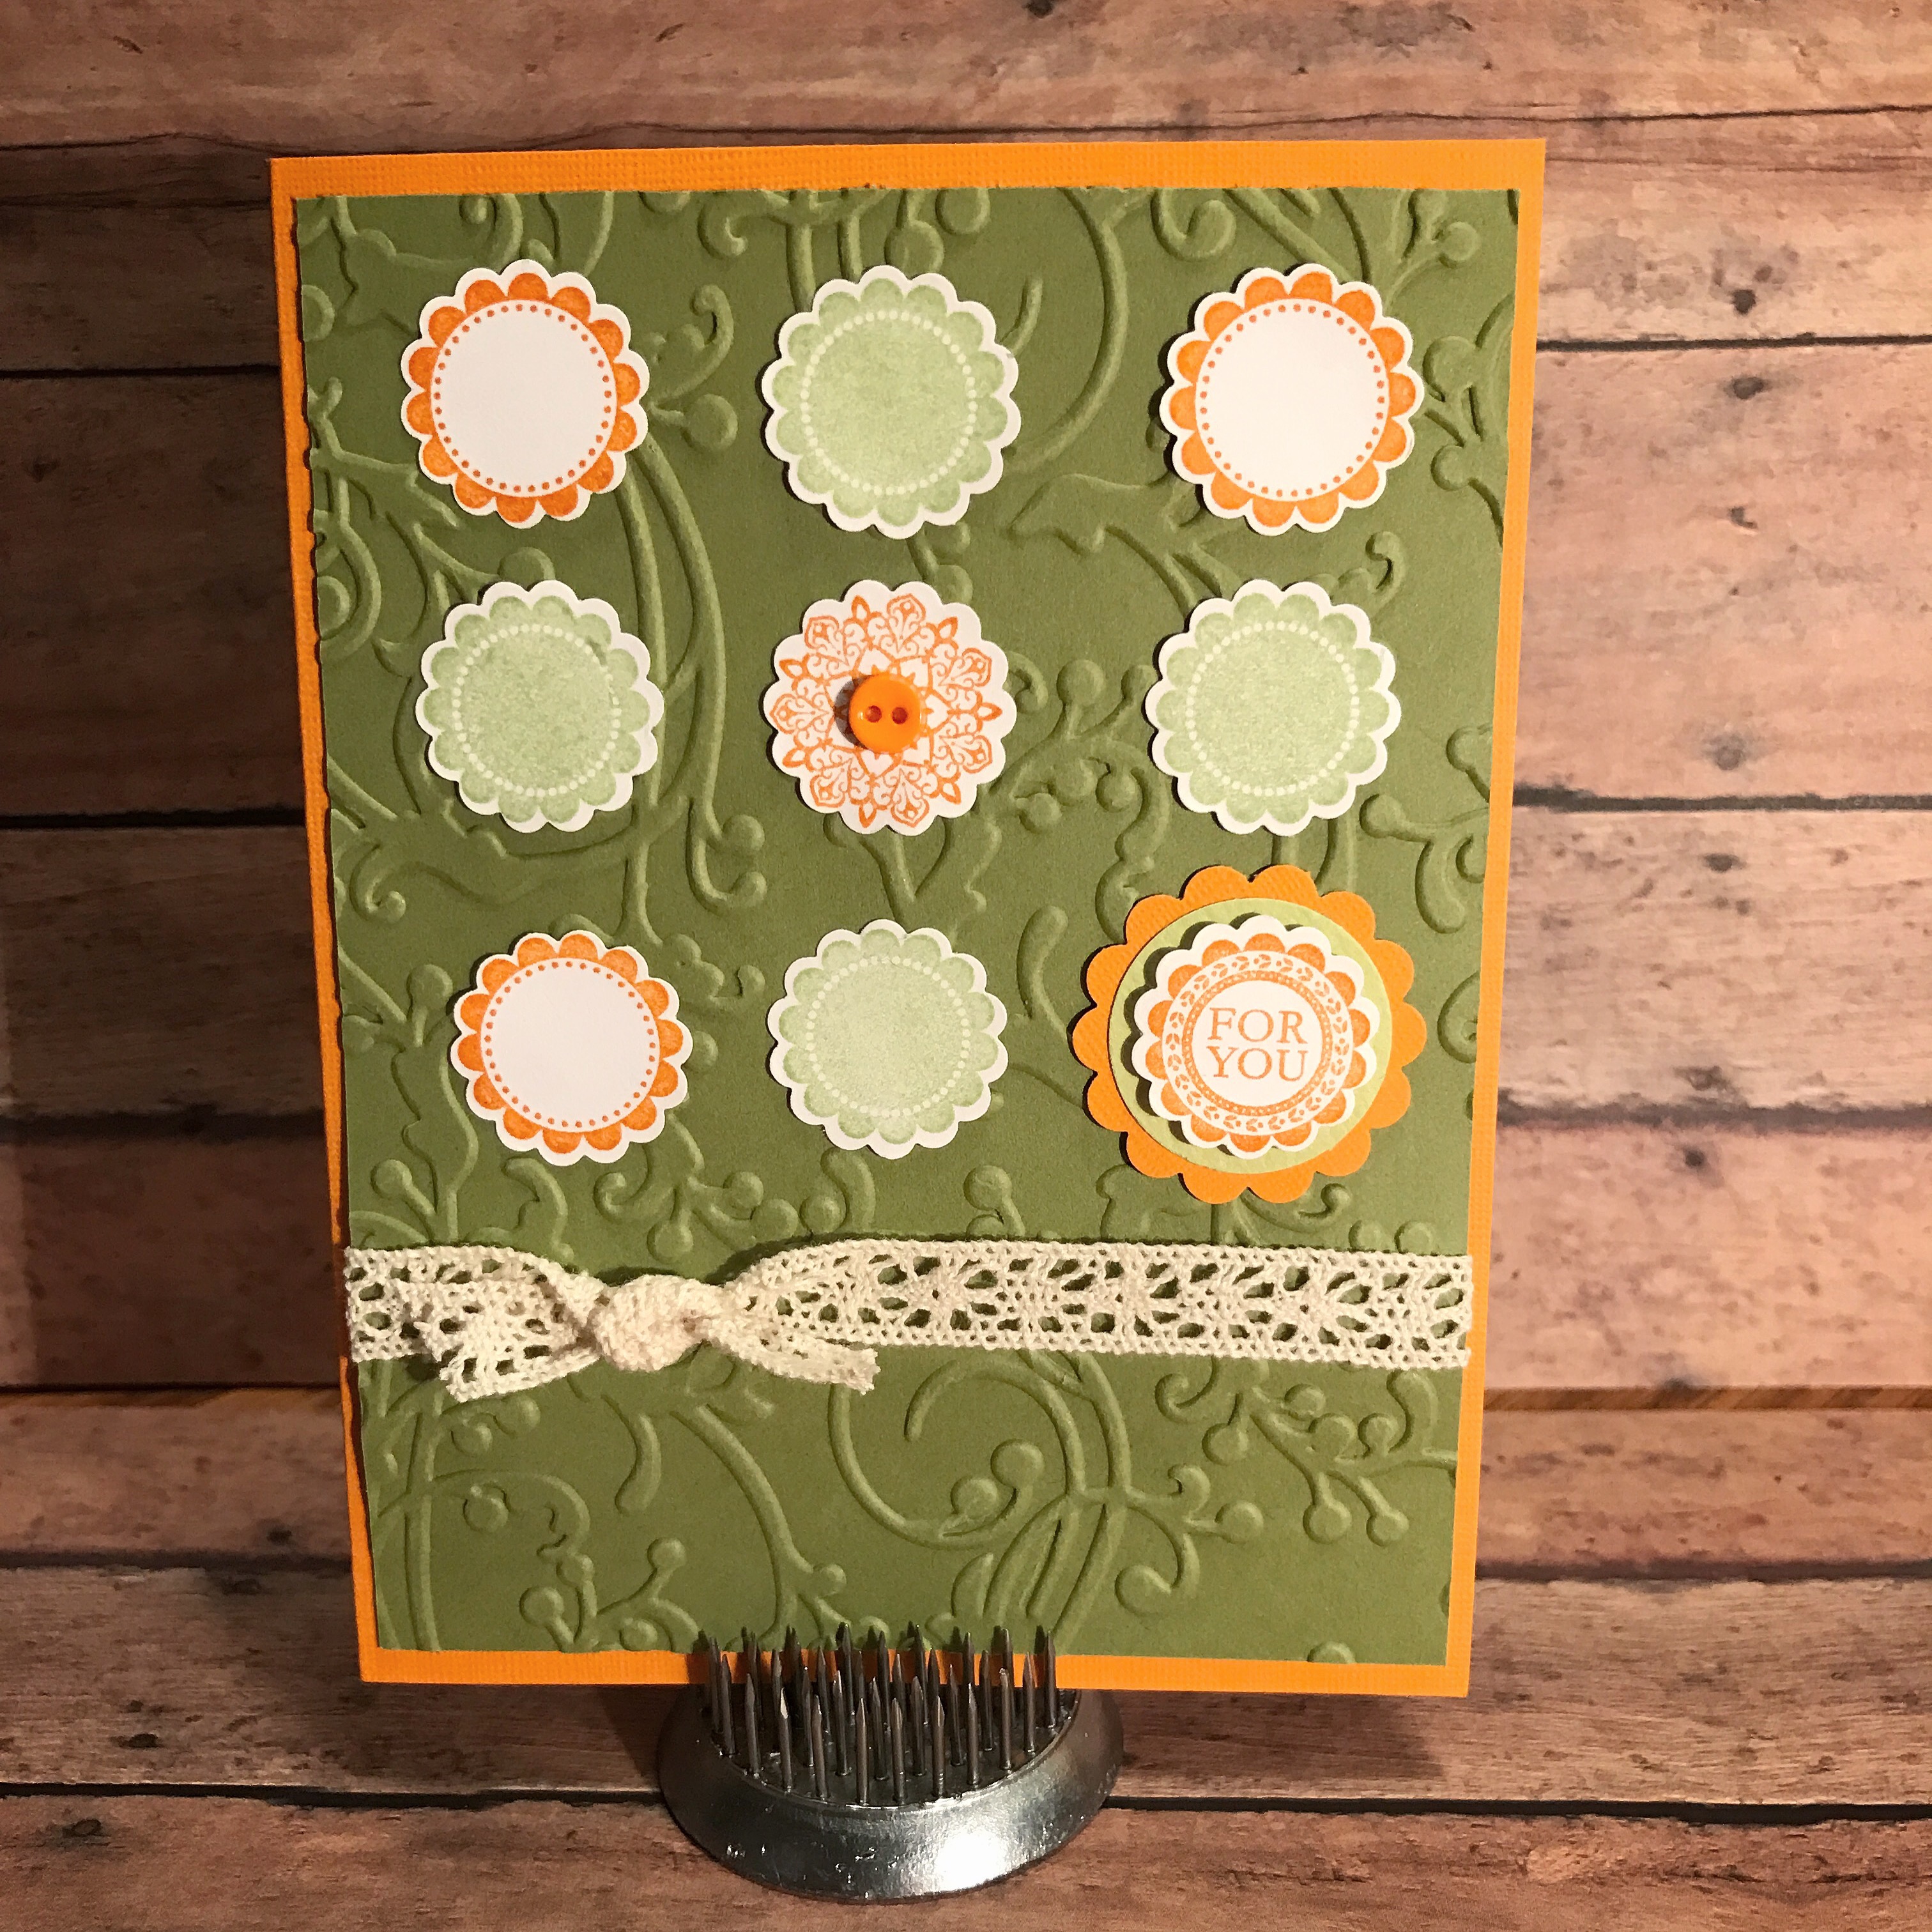
Here’s the first one. The stamps are from an older Stampin’ Up set called A Round Array and they also had a matching flower punch. Both the stamp set and punch are discontinued, but you can use any small circular stamp or flower you have to get the same effect. The vine embossing folder is from Sizzix. Again just use what you have – or even a pretty embossed or patterned paper. 

I embossed a panel of green card stock, tied it with lace ribbon, and attached it to an orange card. I stamped 5 flowers with orange ink and 4 with green ink on white card stock. I punched them out and attached all but 1 orange flower to the card. For the last flower, I punched a larger scalloped circle from orange card stock and layered a small green card stock circle to the center. The orange flower is then attached with foam tape. To finish the card, I added a tiny orange button to the middle flower. 


Below you’ll find the 2nd card I have published in this issue. The circle stamp is from Hero Arts and the Thank You stamp is from Inkadinkado. These are older stamps, too. I’ve been stamping for a long time so I have quite the collection. 😉 Look at the stamps you have in your craft room – I’m sure you have something you could use to get the same effect! The embossing folder is from Cuttlebug. 

I embossed a panel of turquoise card stock and attached it to an orange card. I stamped the circle 4 times each with turquoise and orange ink on white card stock, then punched them out with a circle punch. I stamped Thank You with turquoise ink on white card stock and punched it with a circle punch. The circles are then attached to the card using foam tape on the middle row. To finish the card, I added orange and turquoise buttons.

These are cards that you can put together in 10 minutes or less – which is what Take Ten is all about! If you need inspiration, you will find lots of it in this quarterly publication . It’s my very favorite stamping magazine!

Thanks for stopping by,

Anita

Posted in Cards, Stamping, Uncategorized | 5 Comments

DIY Composition Notebook Journal

These composition books are good for schoolwork…and also work great for journals. But…it needs a little prettying up!!

Start with a composition book (you can them find anywhere they sell school supplies) and some Mod Podge from the craft store. The size of my book is 9-3/4 inches by 7-1/2 inches. Pick out some coordinating scrapbook papers. I like to use the thicker papers, the ones that are closer to light card stock weight. Sometimes they are double-sided. The green flowered paper below is thinner text weight paper that I used around the binding of the book. This weight works well because you are bending the paper around the book. 

Trim your main papers to 6 inches by 10-3/4 inches – one for the front and one for the back. Score both short sides and one long side 1/2 inch from the edge so it will fit around the cover like in the picture below. Using a foam brush, brush a light coat of Mod Podge on the front cover. Attach paper to the cover, being careful to line up the scored lines with the edges of the cover. Smooth out any air bubbles. Open the cover and, using Mod Podge, glue the top and bottom edges of the paper first. Then glue down the long edge. Repeat these steps on the back cover. 

Trim the paper you are using to cover the binding to 6 inches by 7-1/2 inches. Attach to the book with Mod Podge, overlapping the main papers by about 1/2 inch. Be sure to brush Mod Podge on the edge of the binding and smooth out any air bubbles. This is where I like using a thinner paper because it is easier to work with. Here are the front and back covers of the book. 

To finish the inside, trim card stock to 9-1/2 inches by 7-1/4 inches and glue to the inside of the cover with Mod Podge. Repeat for the inside of the back cover.

img_8845

Trim another coordinating paper to 1 inch by 7-1/2 inches and attach over the “seam” of the 2 papers on the front and repeat on the back.

You may have noticed that the corners of the actual composition book are rounded, but my papers are not. I did that on purpose because it is hard to get the paper smooth if you try to match the rounded corner. This is another reason I like using the thicker paper, it makes your straight corners sturdier.

Then decorate the front of your journal however you would like!! I stamped Wakely Girl from Unity Stamp Company with brown ink on white card stock. She is colored with Copic markers, trimmed, layered to orange card stock, and attached to the front of the book. I tied 3 buttons with twine and attached them to the left corner.

And now you have a beautiful journal to write your thoughts in – or maybe to keep track of all those craft projects on your to do list! 

Happy Crafting!!

Anita

Posted in Gifts, Organization, Stamping | 2 Comments

Lemon Buddies

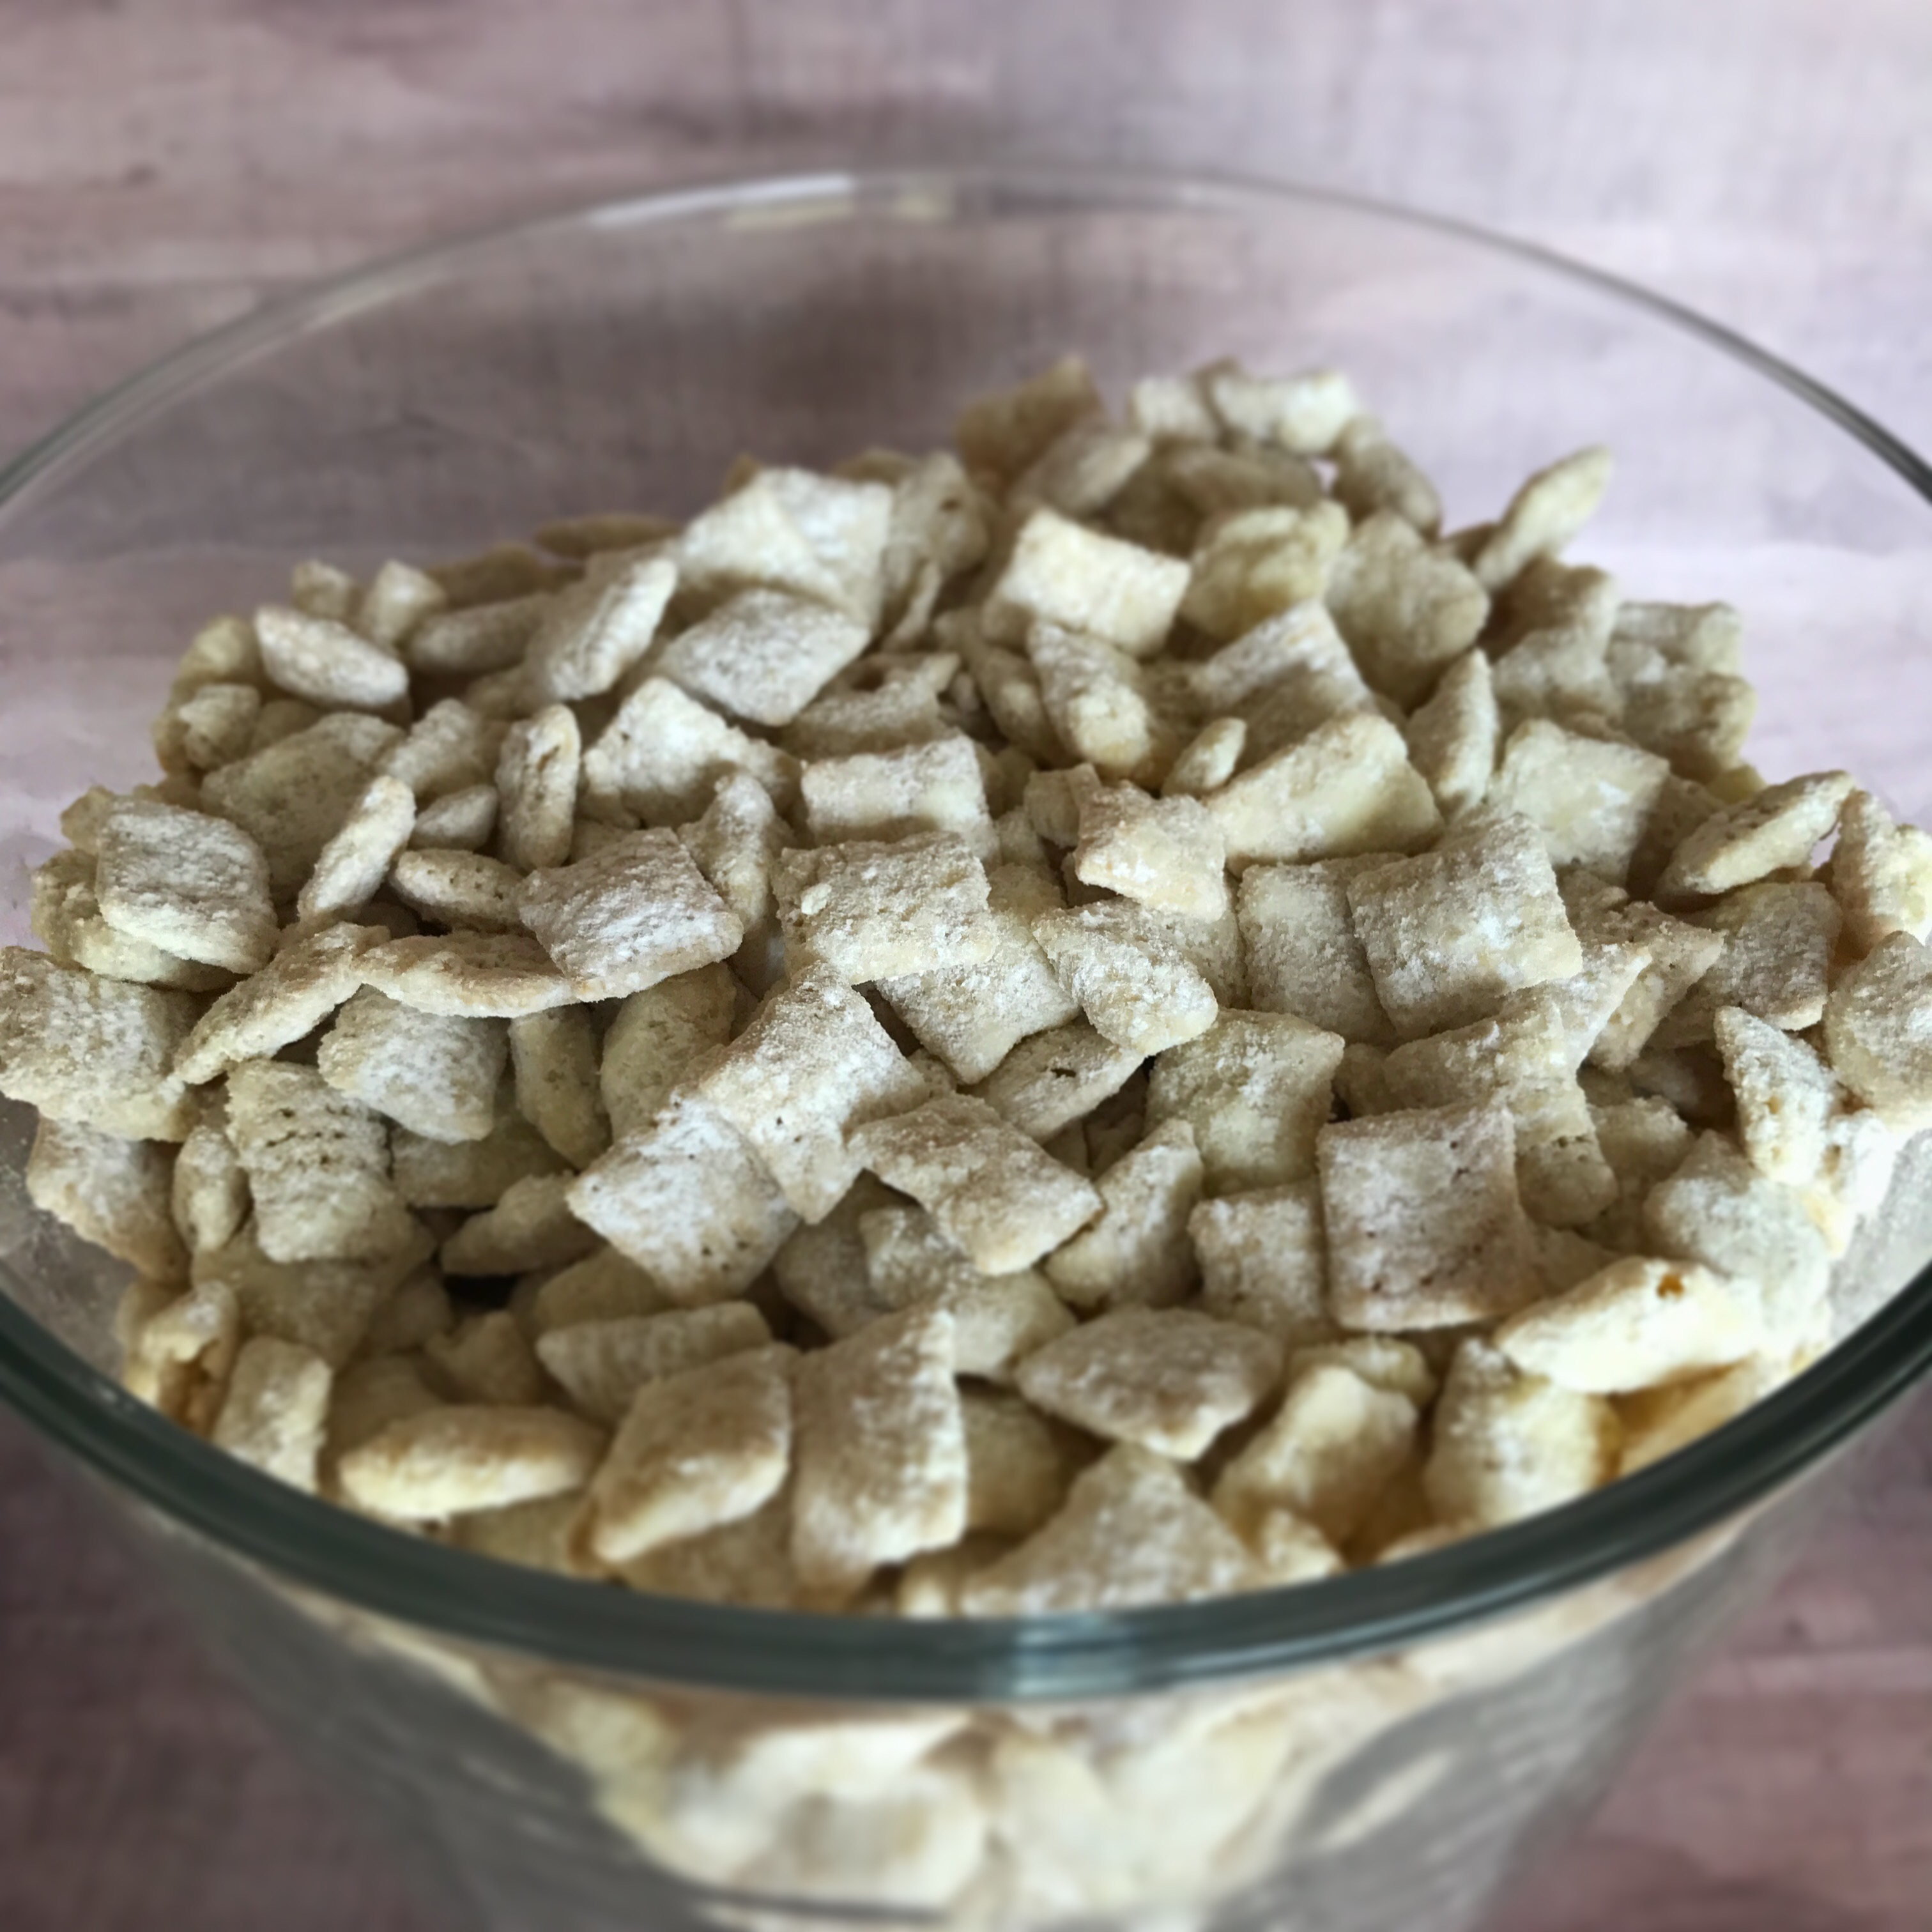
Sometimes called “muddy buddies” sometimes called “puppy chow”, there are so many ways to make this yummy snack! Just do a quick search on Pinterest for “muddy buddies” and you will find lots of recipes for different flavor combinations. I love lemon – I think I may have mentioned that in this post for Lemon Lemonies. 🙂 So when I found this recipe for Lemon Buddies Chex Mix I knew I would have to try it!

It only takes 4 ingredients – Rice Chex cereal, white chocolate chips, lemons, and powdered sugar. Click the link above to get all the details. It’s a quick and easy snack to make!


Here it is ready to eat! 


A couple of tips for things I did a little differently from the recipe directions.  I used a 12 ounce bag of white chocolate chips – just seemed like I needed more to coat the cereal. Also, I melted the chips in the microwave and then stirred in the lemon peel and lemon juice before pouring over the cereal. The recipe says to melt them all together. I think the melted chips come out smoother if you melt them by themselves. 

A great after school snack or something to munch on while you watch your favorite movie.🍋

Happy Snacking!!

Anita

Posted in Recipes, Uncategorized | 2 Comments

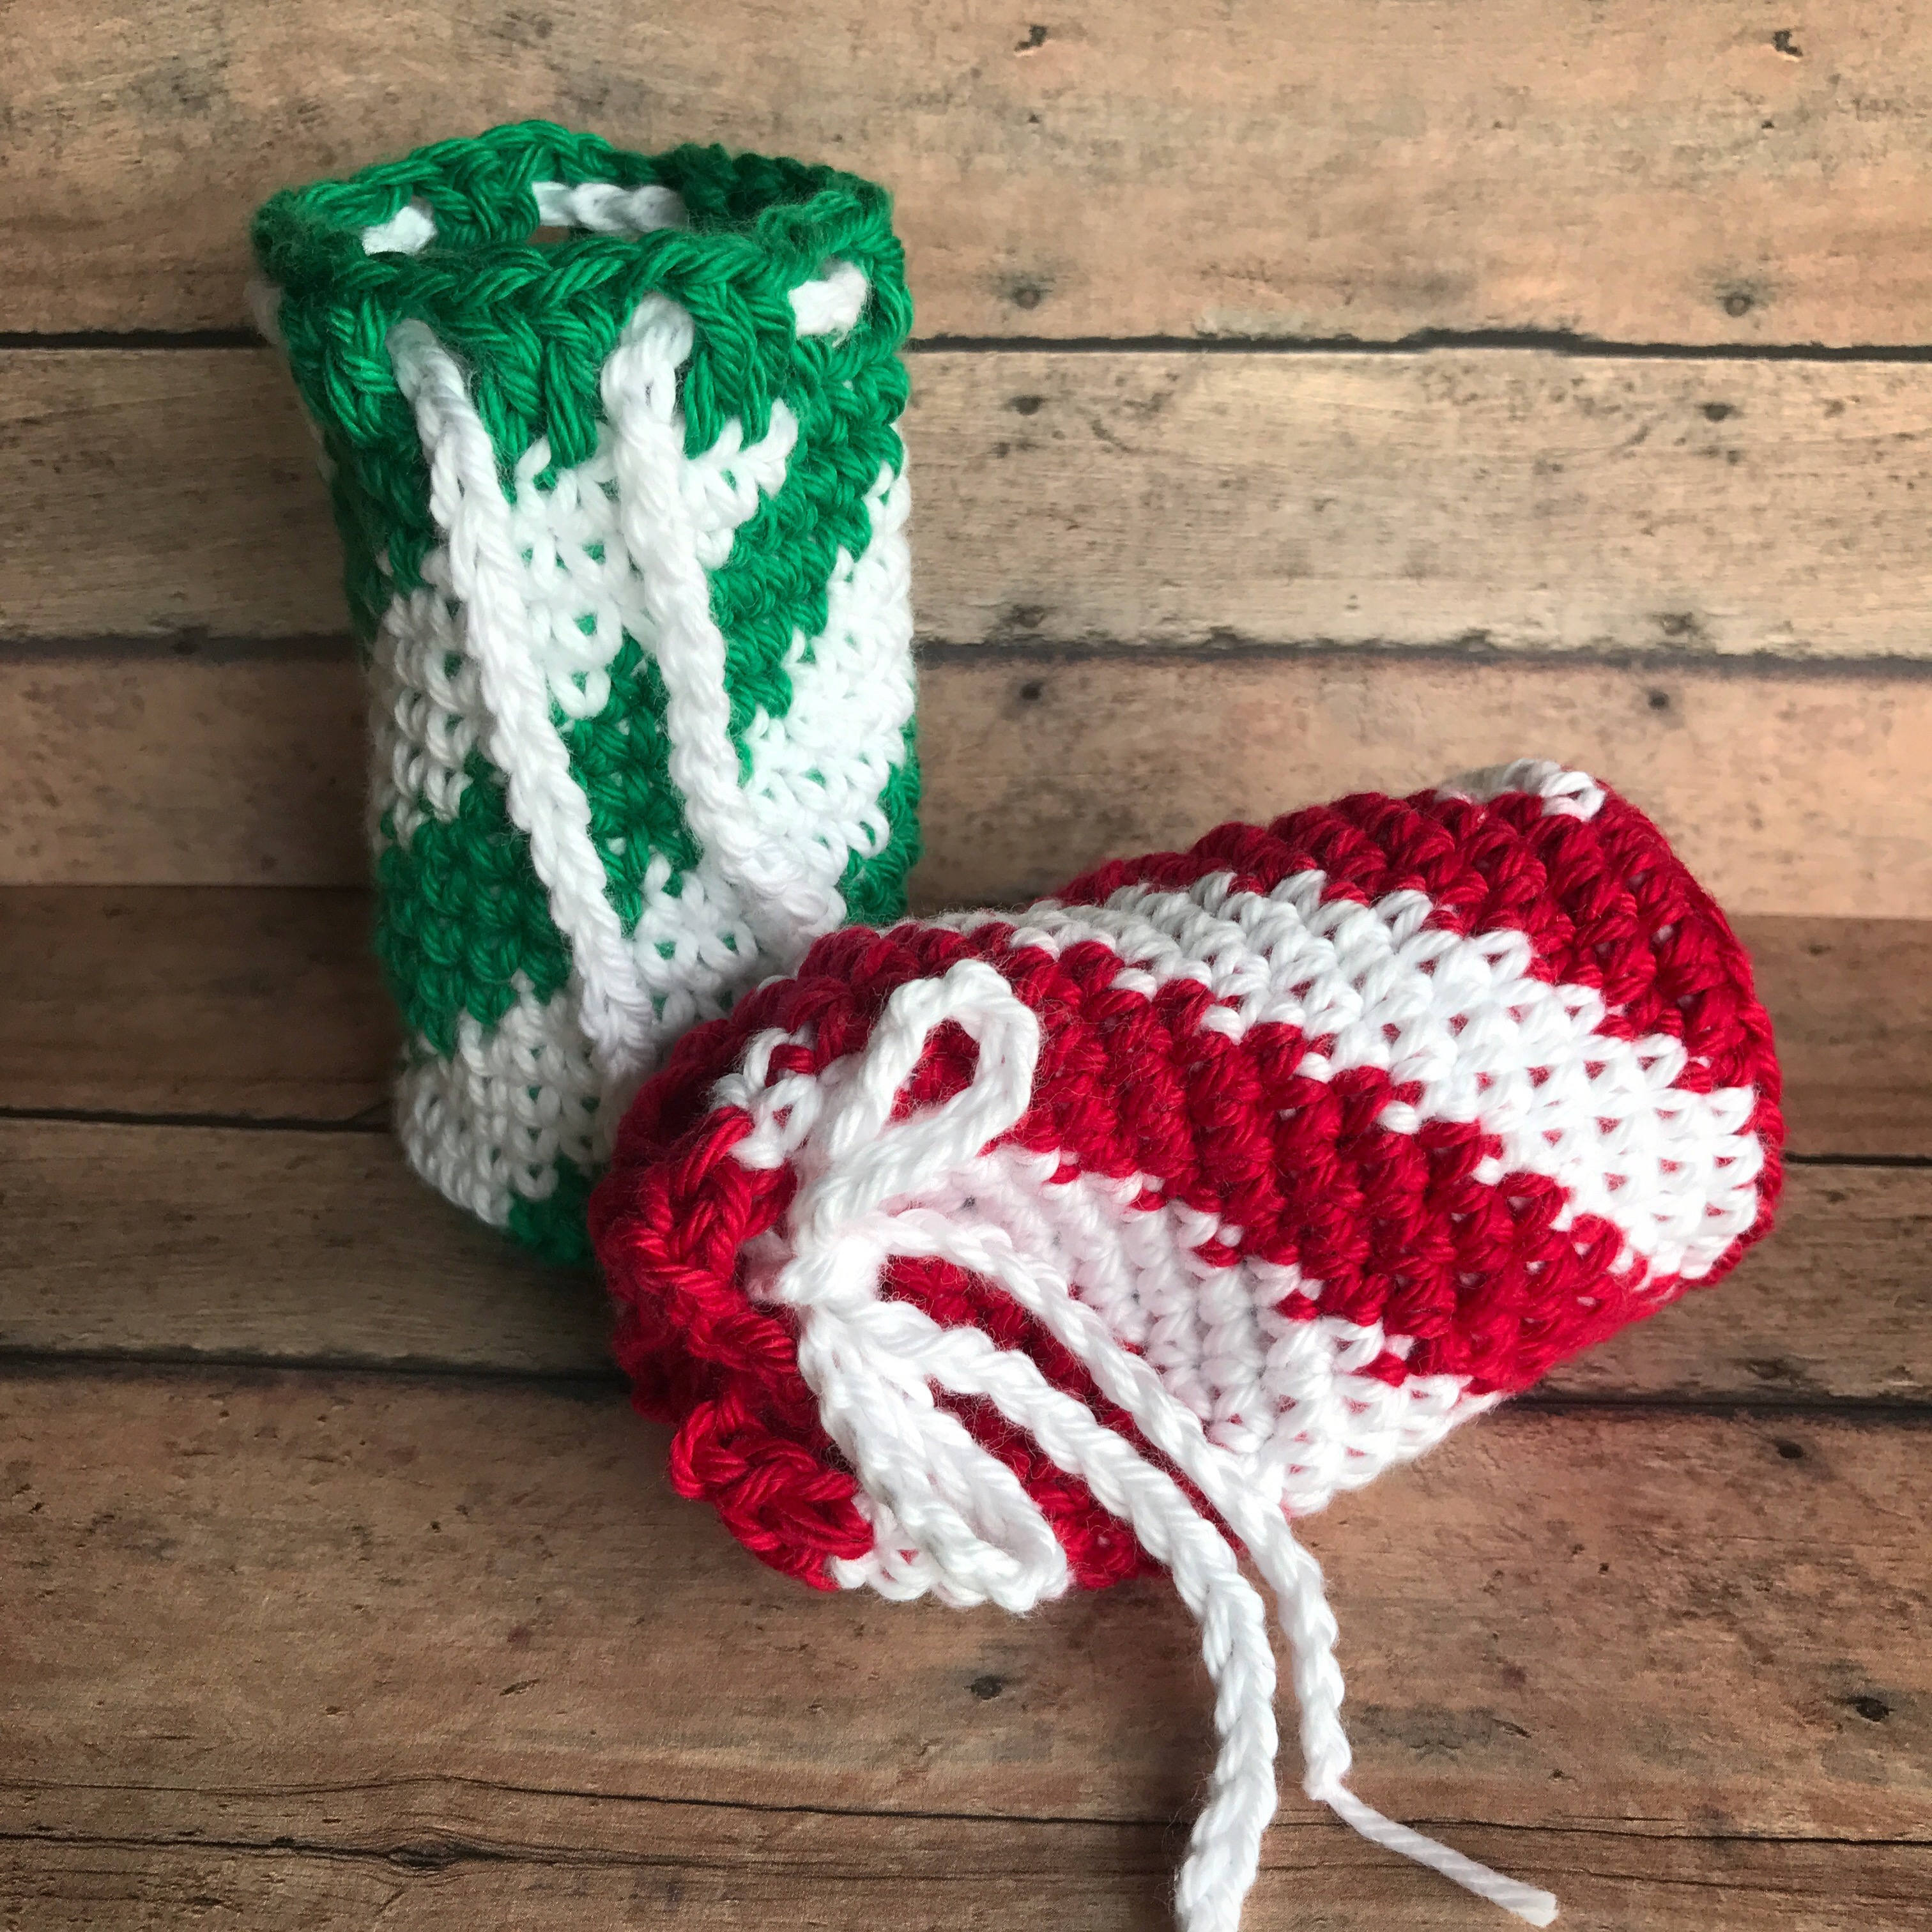
Crochet Candy Cane Bag for Gift Cards

Last week I shared this cute Mini Crocheted Shopping Bag that is the perfect size to hold a gift card for Christmas. Today I have another cute way to make giving gift cards or cash a little more fun.

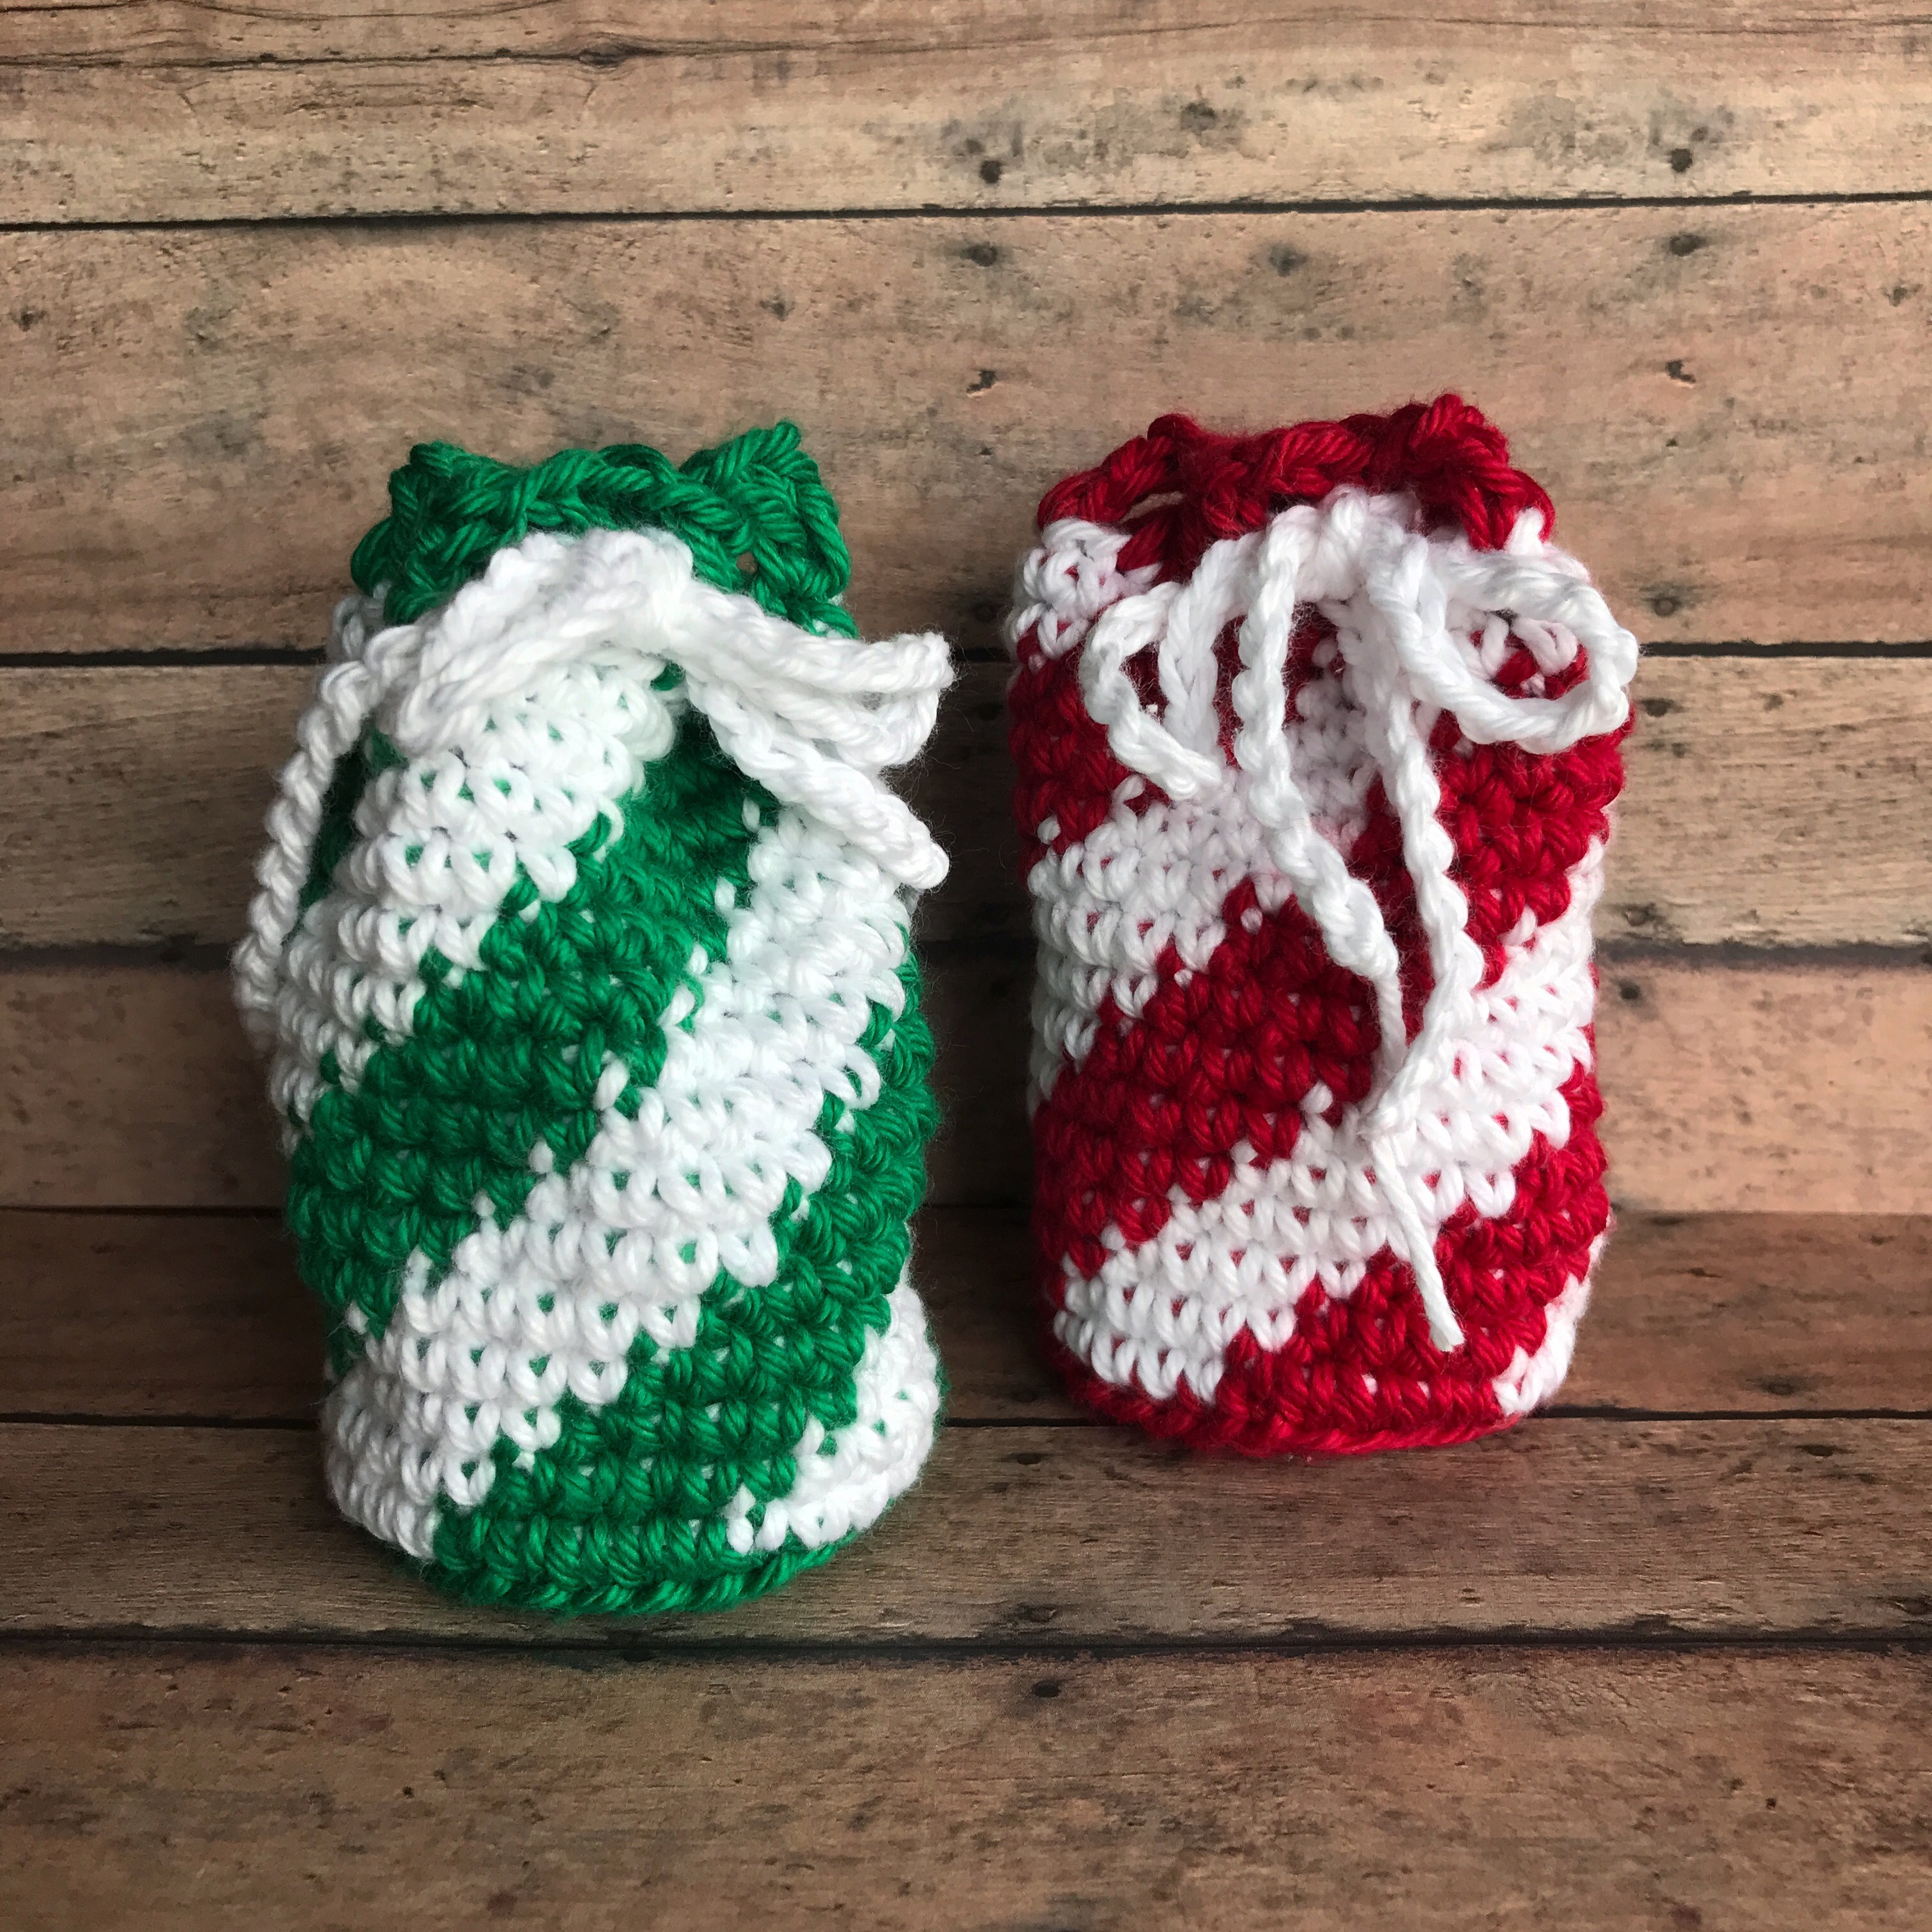
The crochet pattern for these fun drawstring bags can be found here at AllFreeCrochet. I used I Love This Cotton yarn from Hobby Lobby in white, red, and bright green.

They work up quickly and could be made in any color combination. I’m planning ahead for Christmas, but I think they would be so cute in bright colors for a birthday, or soft pastels for a baby shower. Or maybe orange and black for Halloween filled with treats.

These bags are big enough to hold some yummy chocolates along with a gift card or cash. They are also the perfect size for a small gift.

Christmas will be here before we know it! 😳 But you still have plenty of time to make several of these sweet bags!

Thanks for stopping by,

Anita

Posted in Christmas, Crochet, Gifts, Uncategorized | 3 Comments

A Simple Thank You

Sometimes a simple Thank You is just the thing. Even though this is a clean and simple card, the heartfelt “Thank You” can’t be missed. Add your own handwritten message inside to thank them for their kindness.

The large “Thank You” is from the So Very Much set from Stampin’ Up. It was a special set during one of their Sale-A-Bration promotions, so it is no longer available. There are all kinds of thank you stamps available from lots of different companies or you could even find a fun font on your computer and print it out onto card stock. The heart washi tape stamp is from the Washi This Love set from Unity Stamp Company.

To make the card, stamp “Thank You” with pool ink on a white card stock panel. Stamp the washi tape stamp with orange ink, stamping off the left edge. Layer the panel to pool card stock and attach to a white card. Attach 3 gold sequins.

A clean and simple card filled with heartfelt thanks!

Thanks for stopping by,

Anita


Posted in Cards, Stamping | Leave a comment

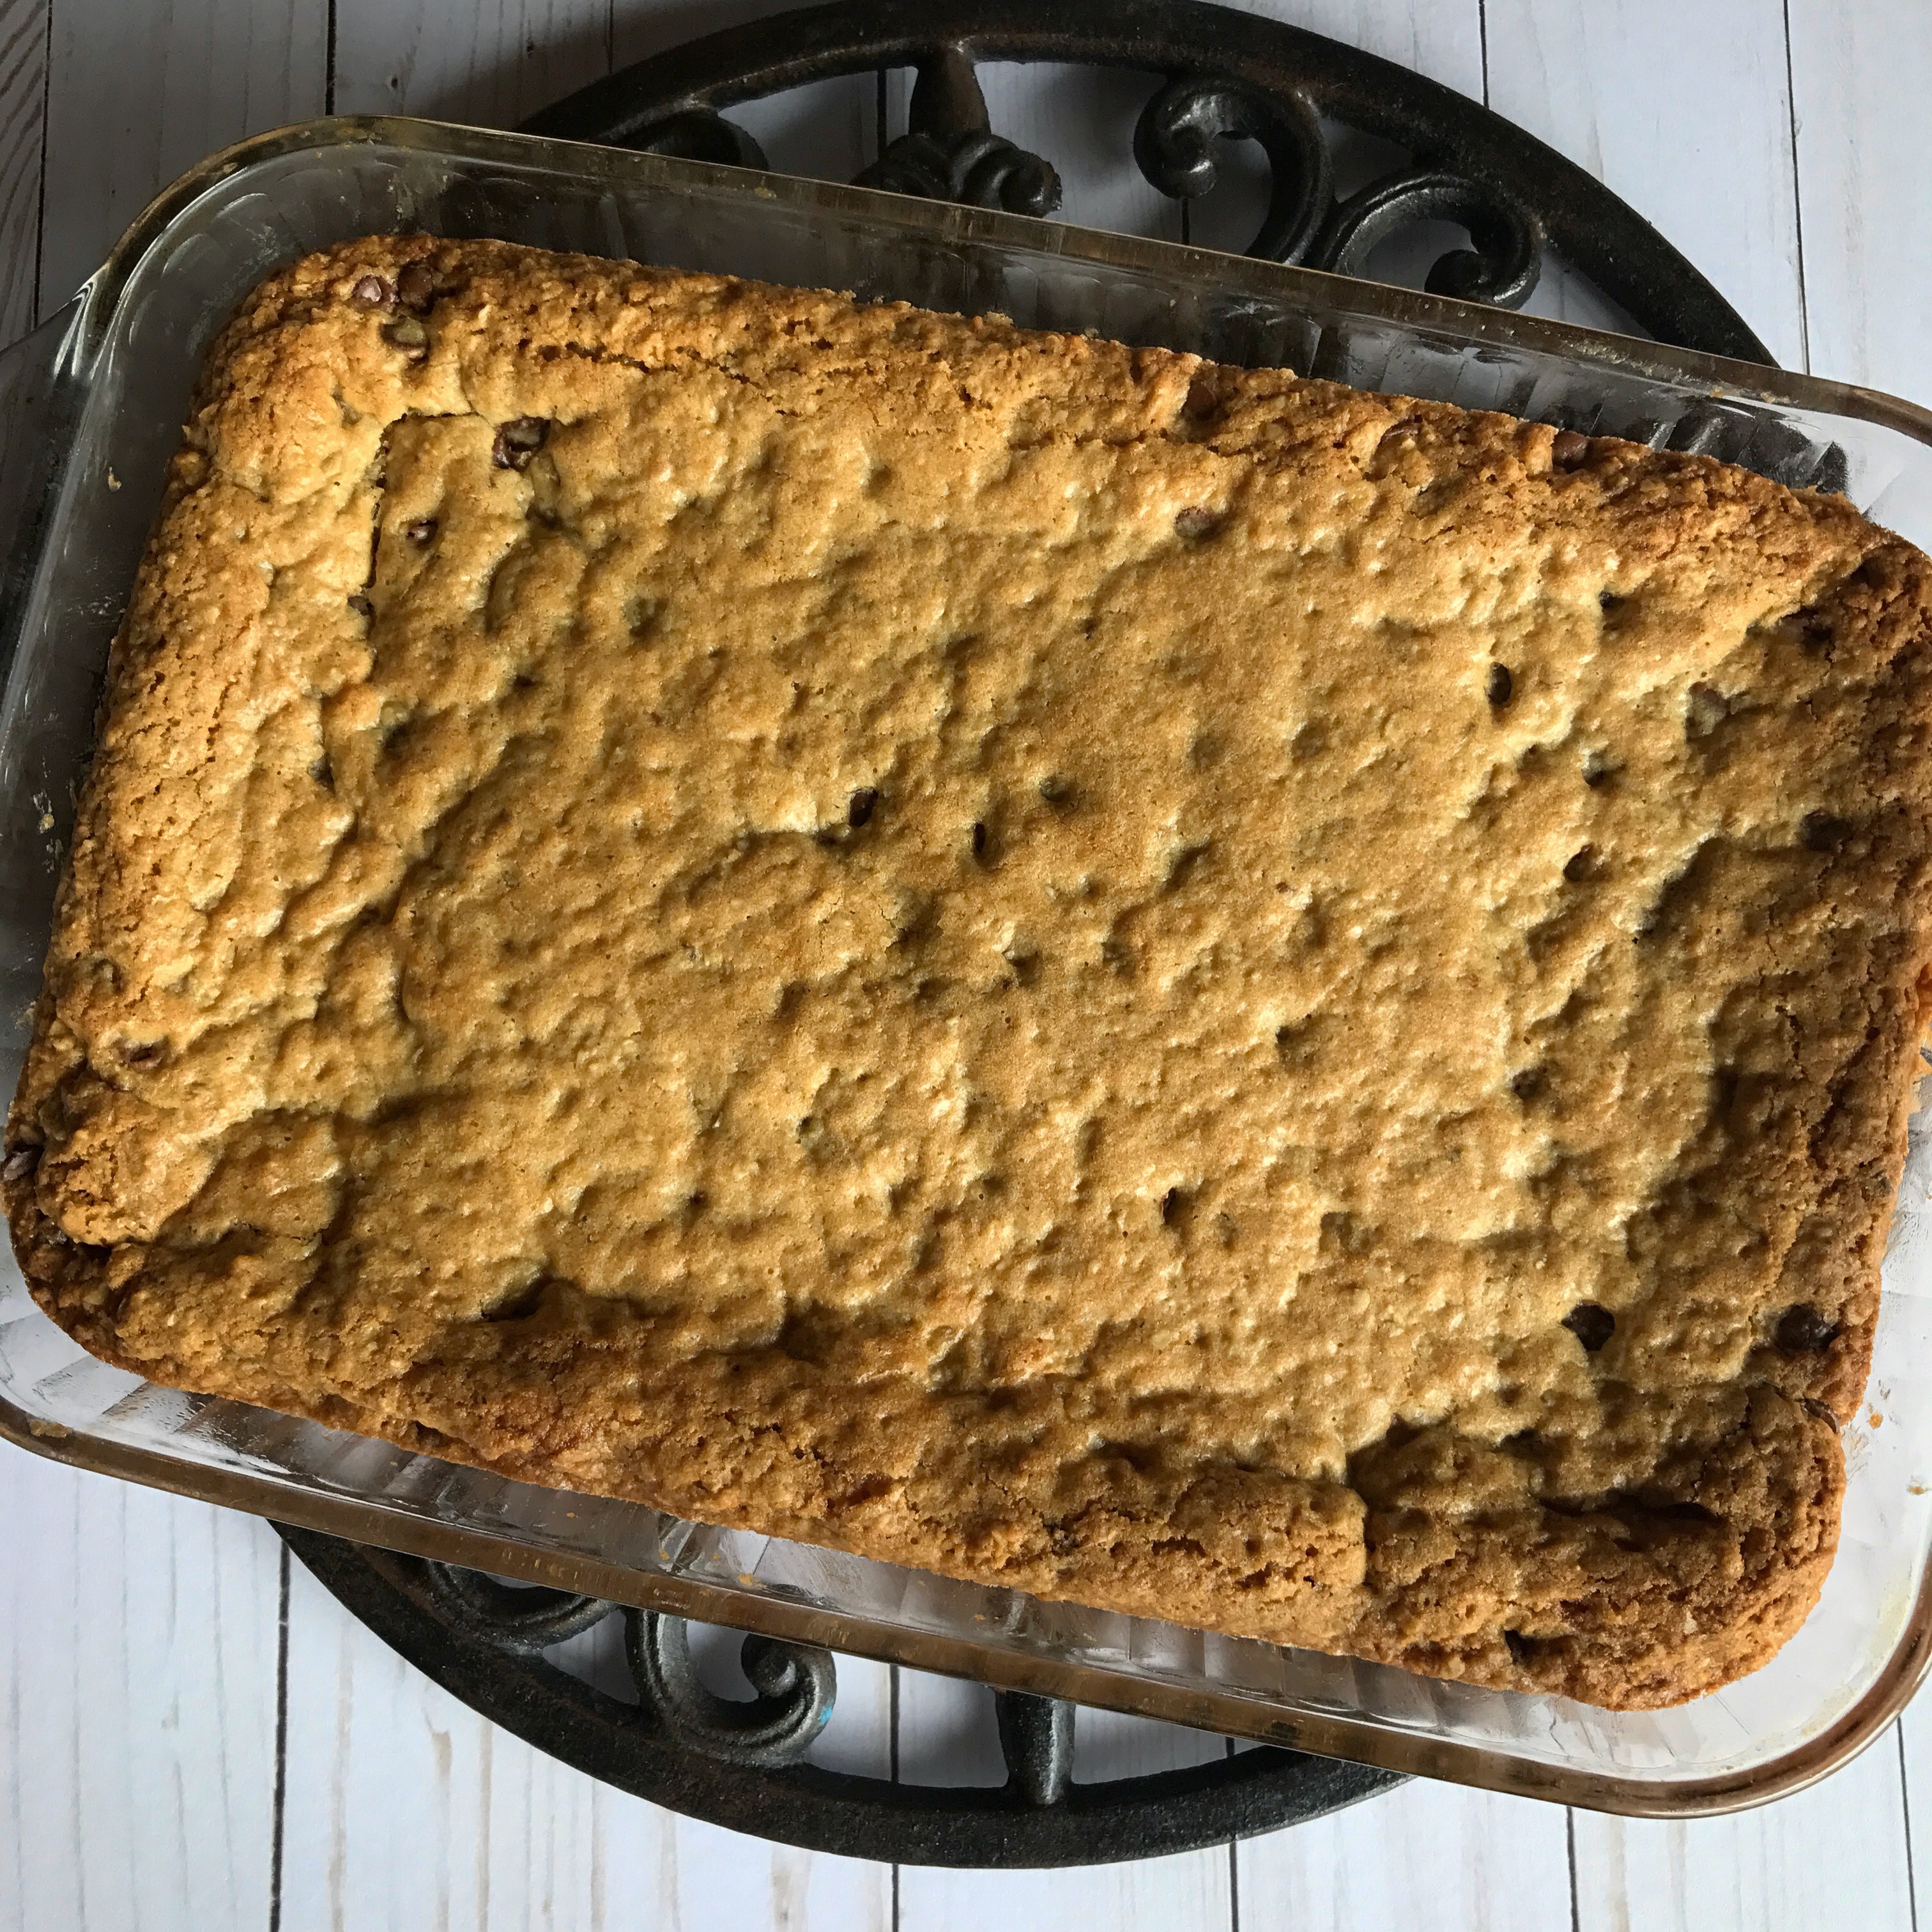
Oatmeal Chocolate Chip Cookie Bars

I love making cookies! My Dad used to call me the Cookie Monster because I rarely meet a cookie I don’t like! 🍪 🙂

If you don’t have time to bake several cookie sheets full of cookies, but still want that fresh, homemade taste, cookie bars are the answer! Mix up the dough, press it into the pan, and put it in the oven – 25 to 30 minutes later and your cookies are done. Takes less time out of your day and you still have a tasty treat.

I found this recipe for Oatmeal Chocolate Chip Cookie Bars here on Pinterest. You may have everything you need to make these yummy bars in your kitchen right now! The recipe says you can use semi-sweet chips, milk chocolate chips or a mixture of both. I used all semi-sweet chips because that’s what I had in my pantry. I saw some comments on the blog post from Tastes Better From Scratch about substituting peanut butter chips for half of the chocolate chips – I may have to try that next time, sounds yummy!

Here they are fresh from the oven. My kitchen smells so good!! It’s going to be hard to wait until they cool so I can sample one…

Finally cool and ready to eat!! These bars are so delicious, gooey, and chocolatey! They would be great with a cup of hot coffee or a big glass of ice-cold milk…and they have oatmeal in them so that makes them healthy, right?!?! 😉

These Oatmeal Chocolate Chip Cookie Bars would make a great after school treat or a tasty dessert to take to your next potluck. Enjoy!!

Thank you for stopping by,

Anita


Posted in Recipes | Leave a comment