This is a great little gift idea for your girlfriends or daughters on Valentine’s Day. 💕 Everyone needs a little pampering! 😉
Disclosure: Some of the links on my site are affiliate links, meaning, at no additional cost to you, I will earn a small commission if you click through and make a purchase. As an Amazon Associate I earn from qualifying purchases.
I found my flavoring and food coloring in the cake/candy section of Hobby Lobby. The rest of the ingredients can be found at your favorite grocery store.
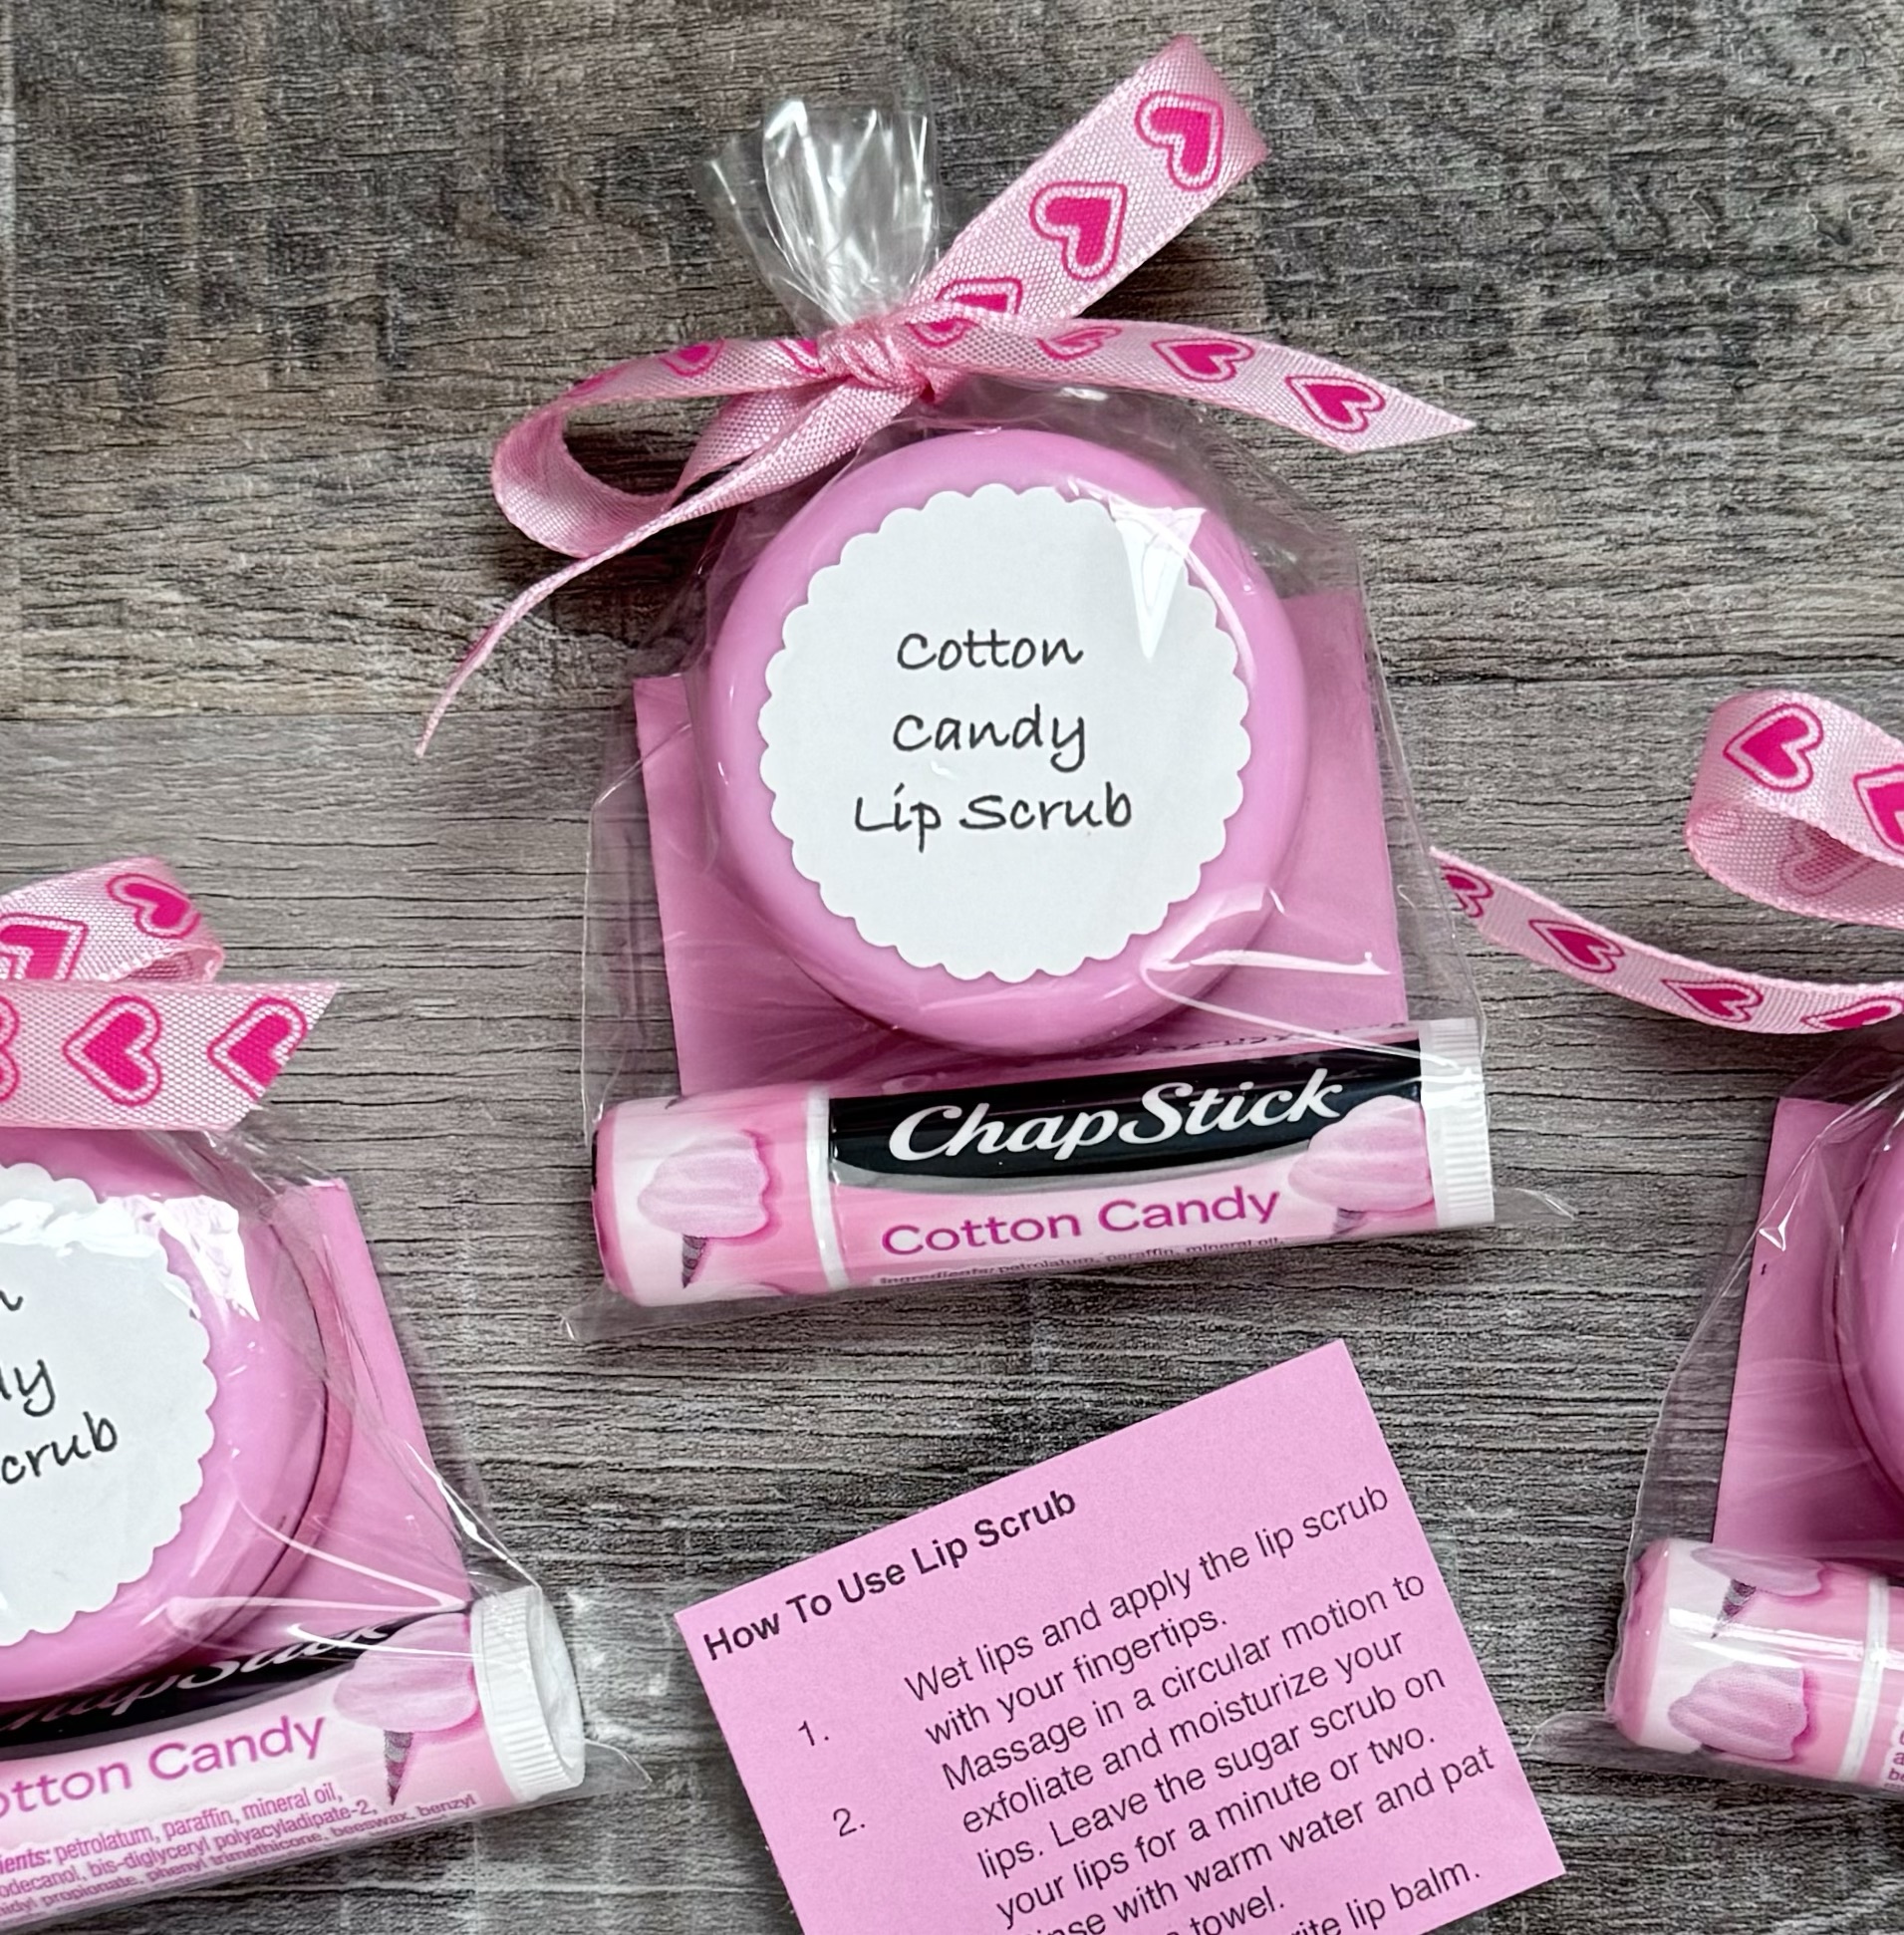
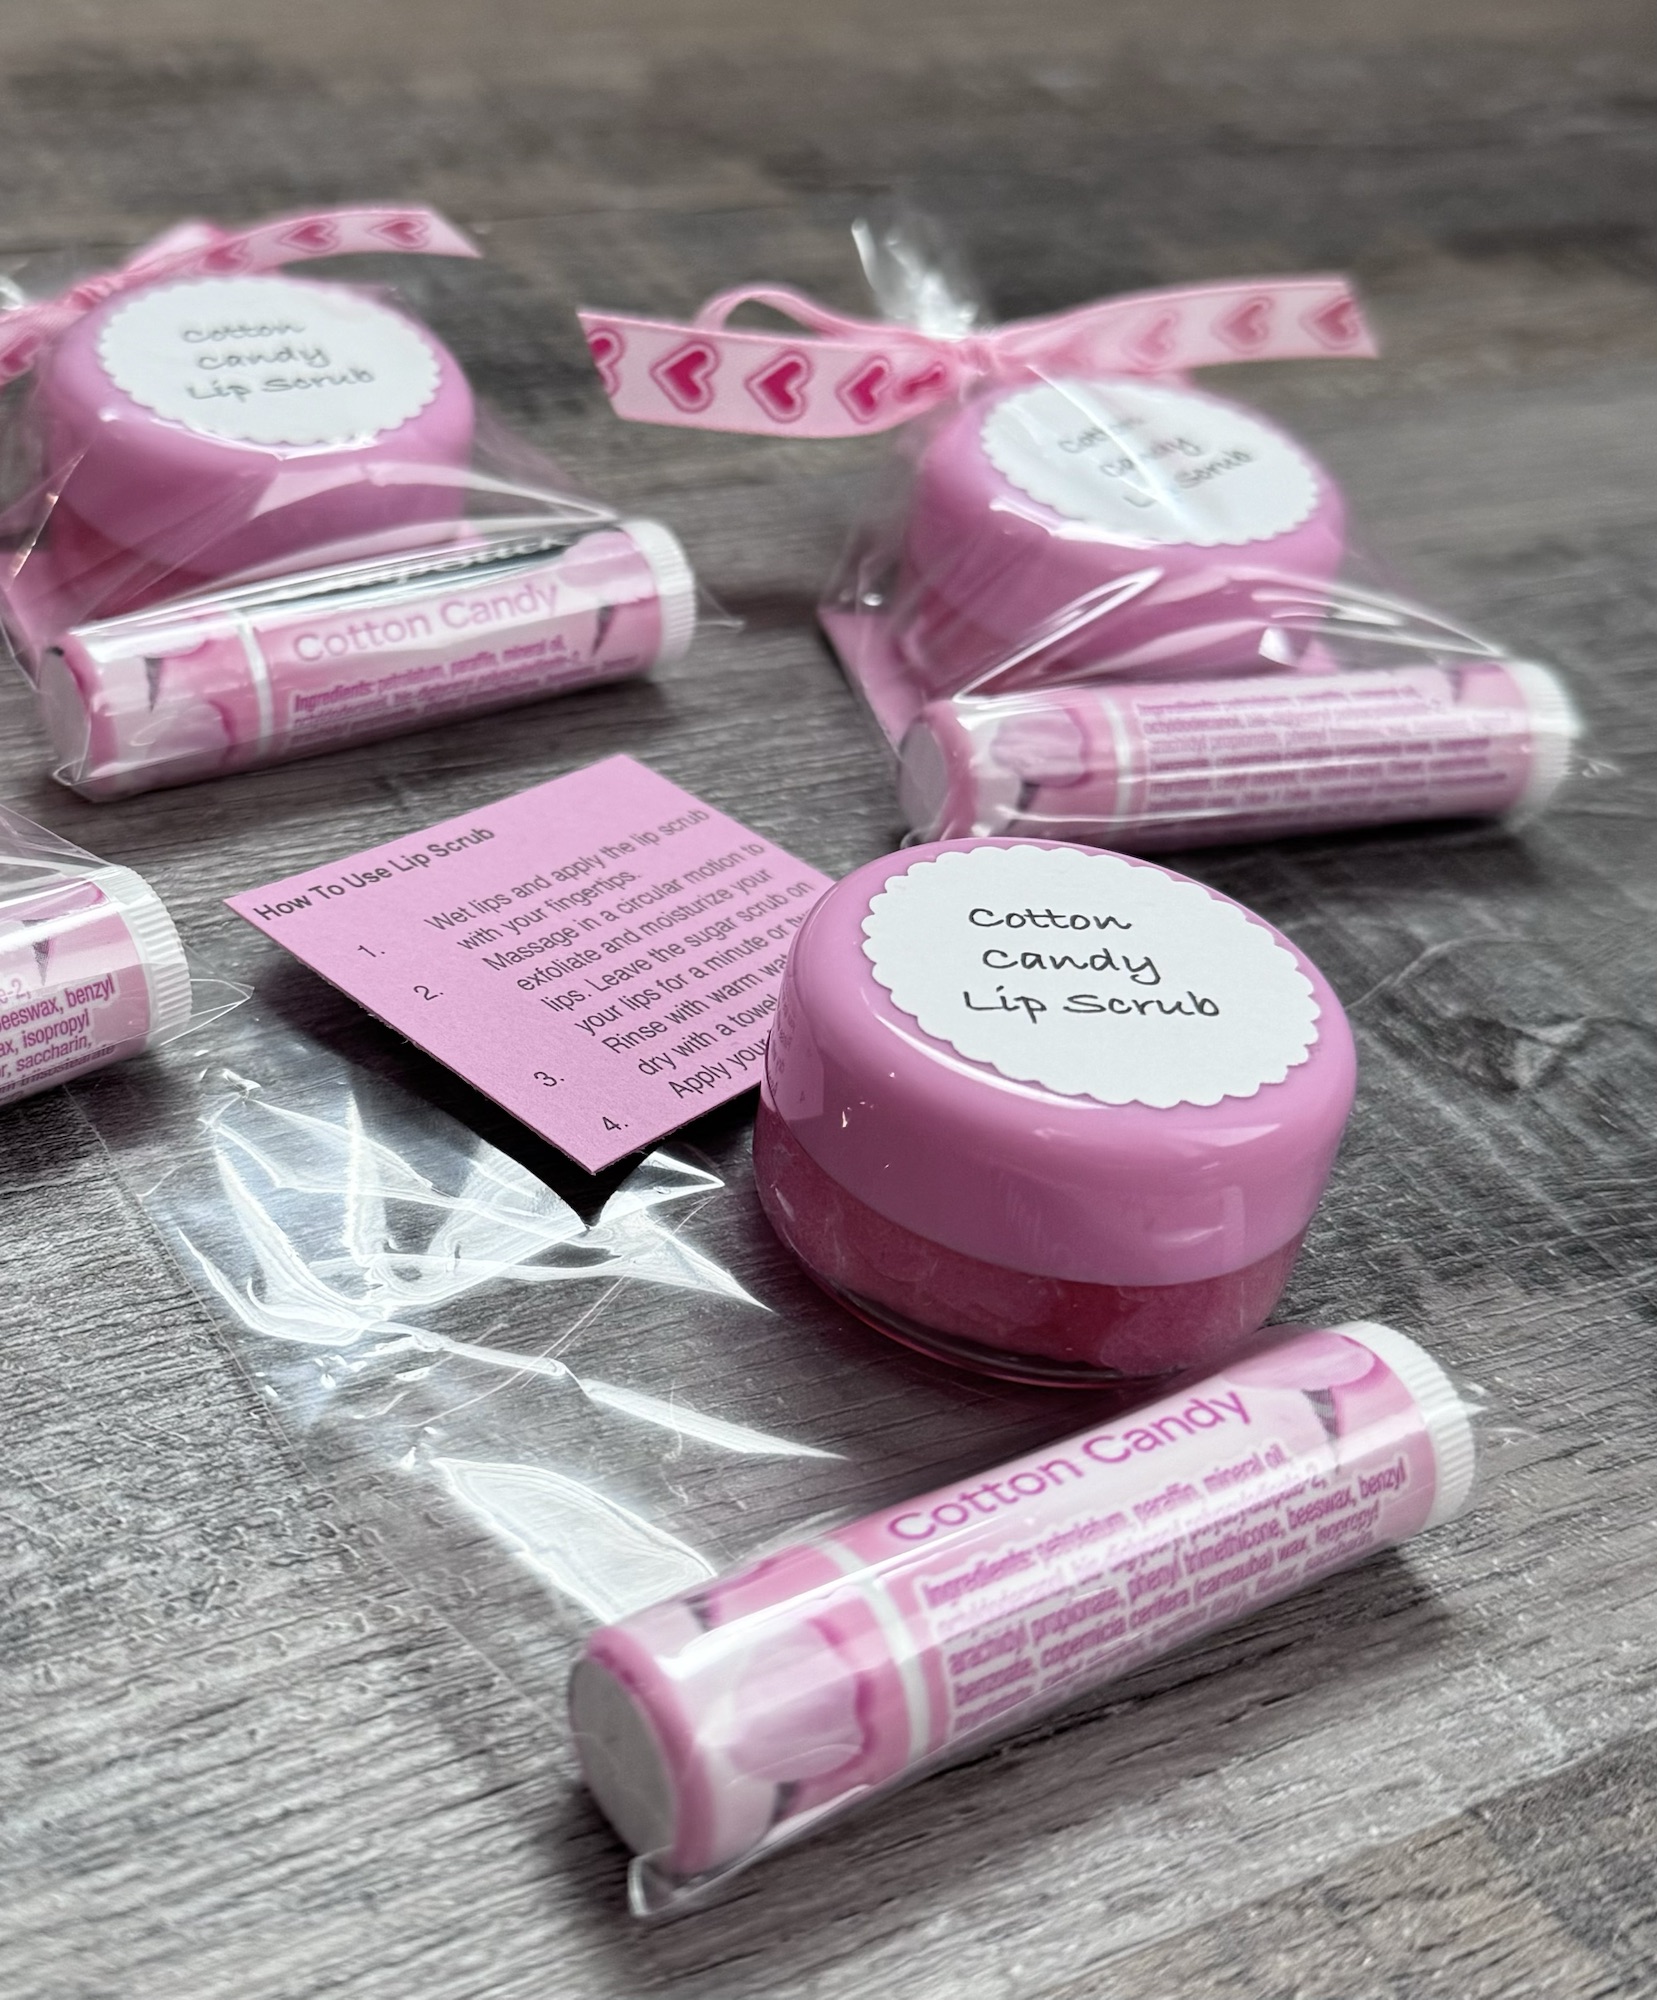
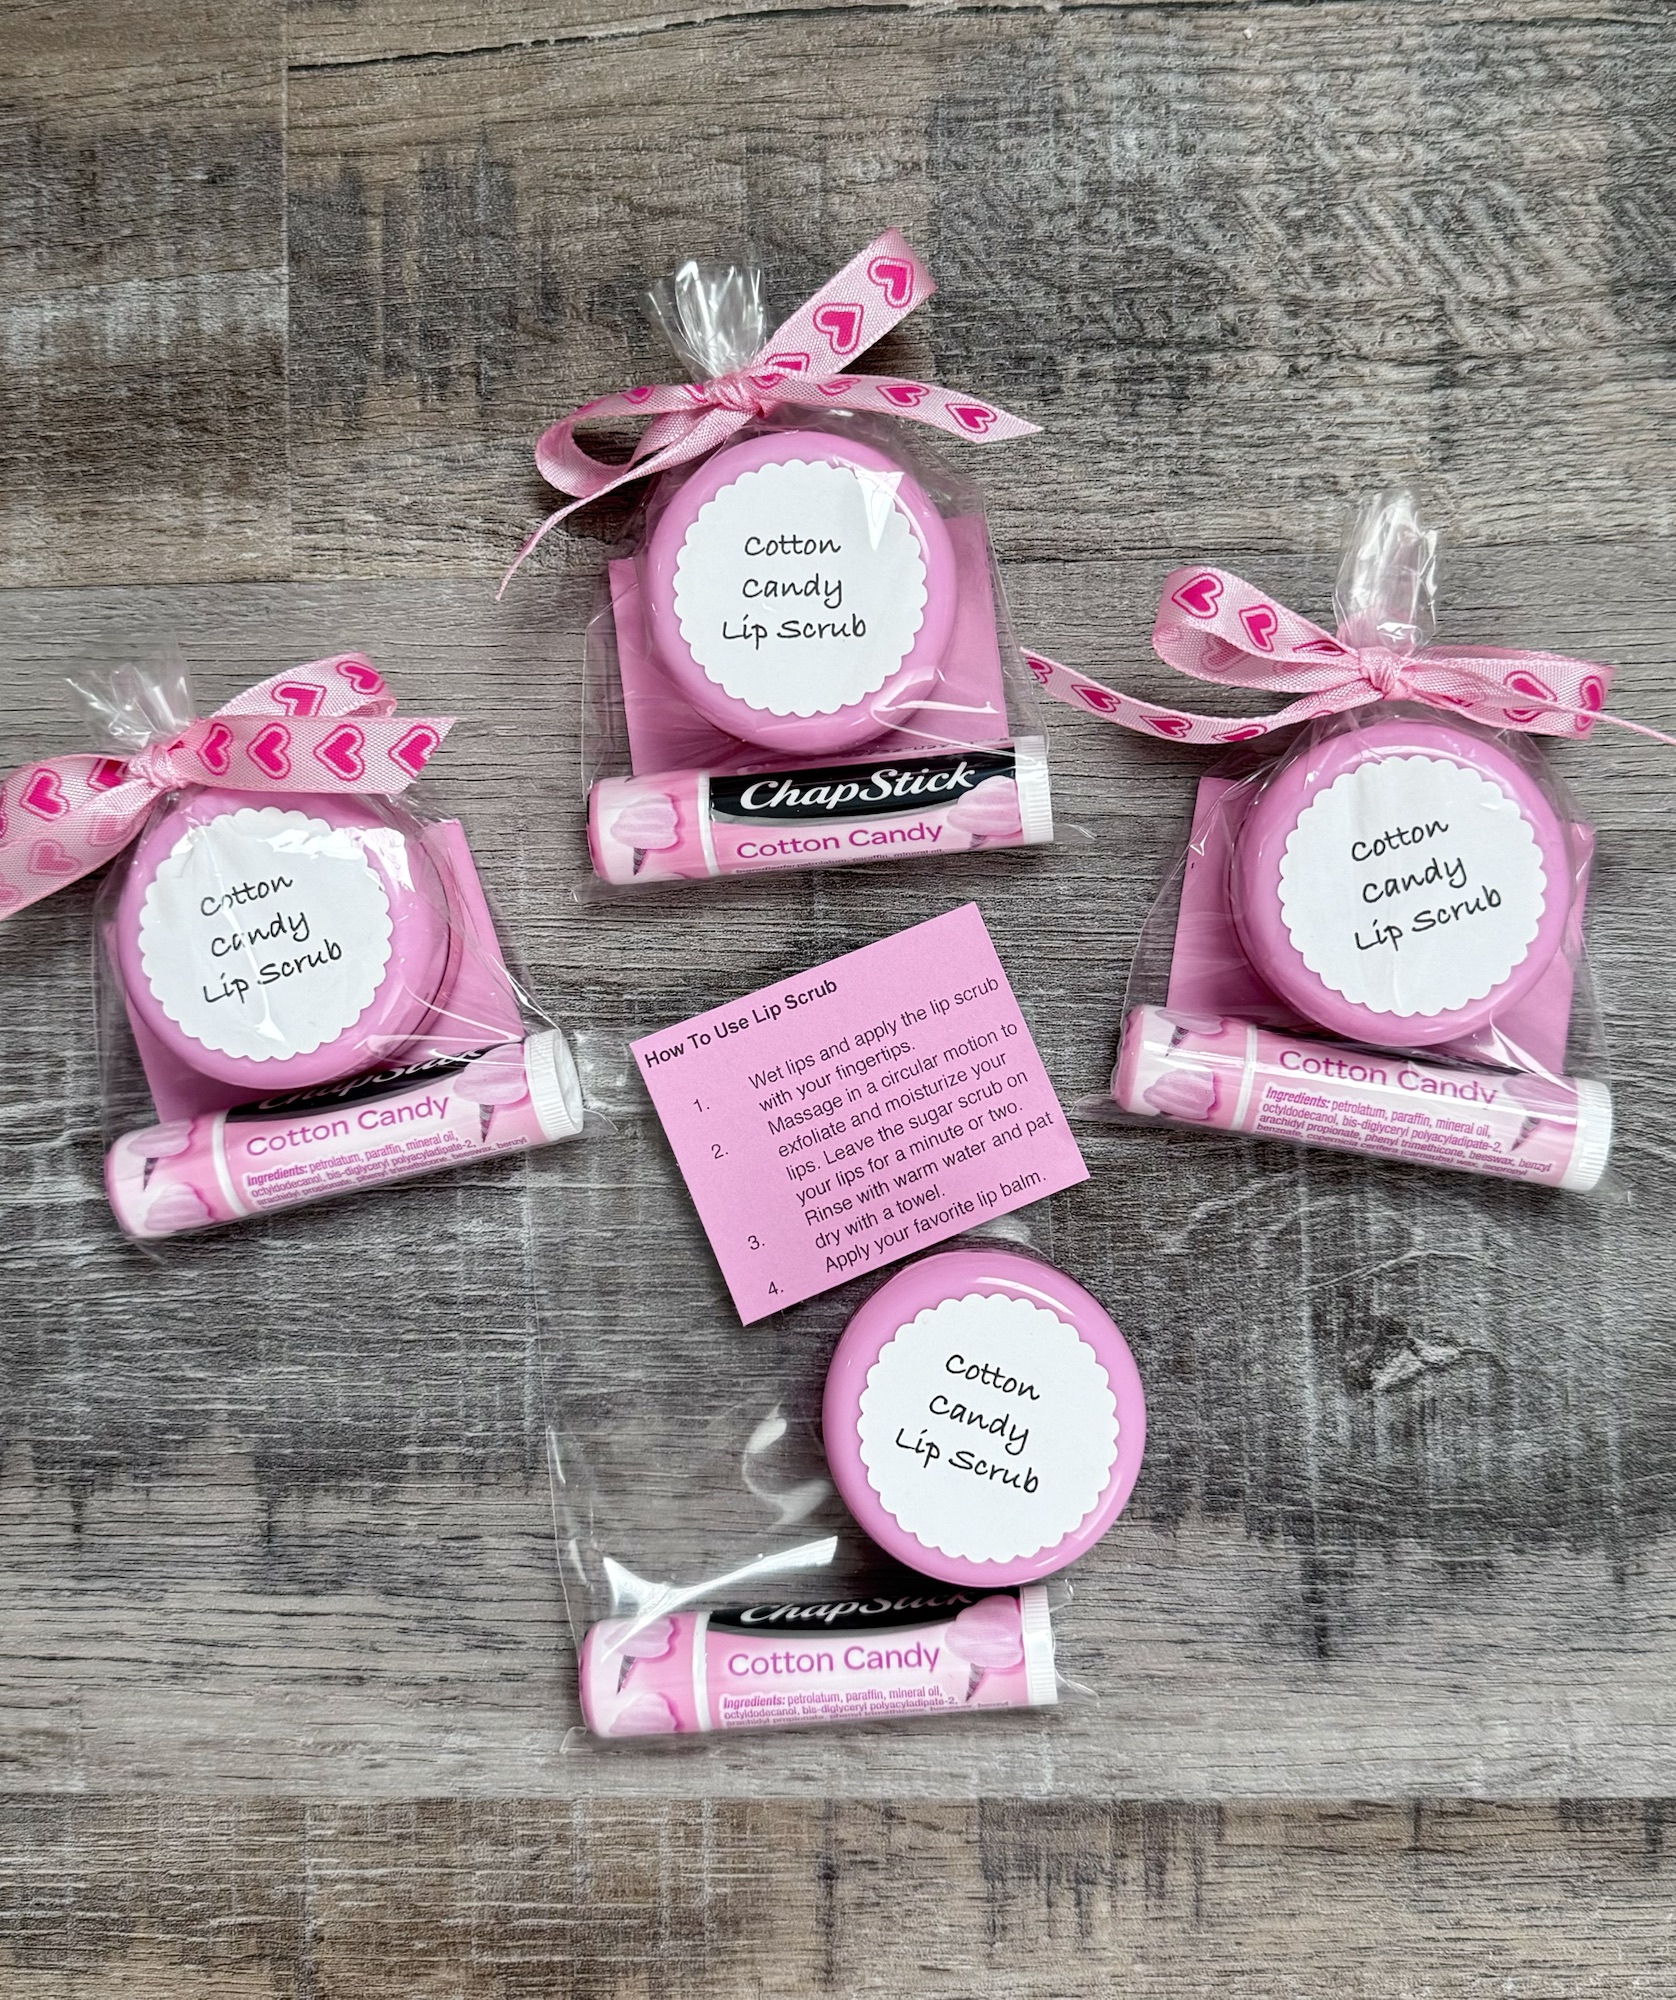
I printed “Cotton Candy Lip Scrub” on sticker paper, punched the labels out with a 1.5 inch scalloped circle punch, and put them on the lids of the containers. Then I filled the containers with the lip scrub.
Here’s a free PDF if you’d like to print the labels…
I put the chapstick in the bottom of a small treat bag and added the container of lip scrub. I also printed out directions for using the lip scrub on pink card stock and slipped it inside. I tied the bag closed with a Valentine ribbon.
I pulled out one of my older stamp sets from Unity Stamp Company to make this fun Sent With Love Valentine card. ❤️ The set is called Do Not Bend and includes the envelope stamp along with 3 sentiment stamps.
Disclosure: Some of the links on my site are affiliate links, meaning, at no additional cost to you, I will earn a small commission if you click through and make a purchase. As an Amazon Associate I earn from qualifying purchases.
I used a heart stencil to create the background on white card stock. This particular stencil is no longer available, but this one or this one would work great. I used a Blender Brush from Taylored Expressions to apply red ink, layered the piece to red card stock, and attached it to a white card.
I stamped the envelope with red ink on white card stock and layered it to red card stock. I stamped the sentiment with red ink on white card stock and die cut it with the Scallops & Banners Nesting Dies from Unity Stamp Company then layered it to a red banner die cut from the same die set.
The envelope and the banner are attached to the card using foam tape. To finish the card I added 2 heart buttons – one to the banner and one to the envelope.
It was so fun to pull out some old stamps that I haven’t used in a long time to create a new card. Challenge yourself to take a look at your stamp collection and use something you haven’t used in a while. 🙂 ❤️
Do you decorate for Valentine’s Day? ❤️ I love to add touches of red, pink, and white to my house to brighten up those gray, cold days of winter. And this year we had some really cold days here in Alabama! 🥶 A couple of weeks ago we had so much ice and such cold temps that we all stayed home for the week if we could. That doesn’t happen here very often, thank goodness! I know some of you have much, much worse winters than we do – but we are just not prepared for that here. 🌨️🥶
Disclosure: Some of the links on my site are affiliate links, meaning, at no additional cost to you, I will earn a small commission if you click through and make a purchase. As an Amazon Associate I earn from qualifying purchases.
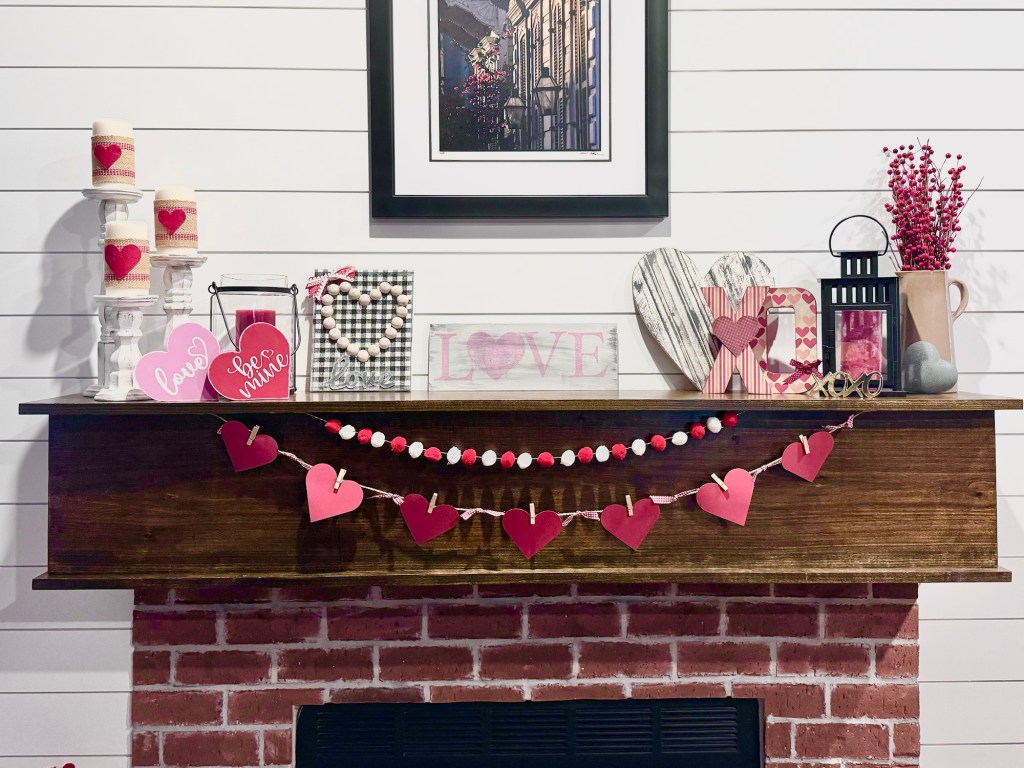
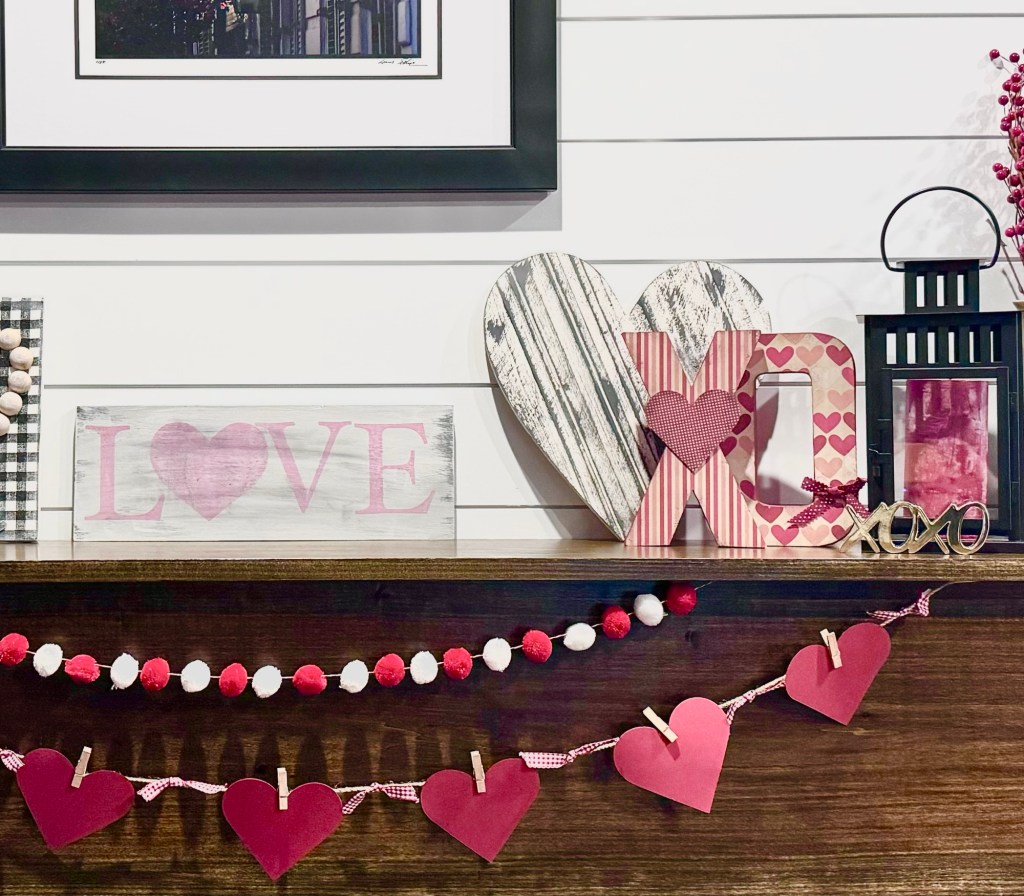
This is my fireplace mantel all decked out for Valentine’s Day. ❤️ I’ve added a couple of photos below with a closer look at some of my Valentine creations from over the years. I’ve added links to the blog posts where you can find all the details.
The Valentine Candles are here and the DIY Farmhouse Candlesticks they are sitting on are in this post. The info for the fun Valentine Wood Hearts is here. The cute Farmhouse Valentine Canvas is in this post.
My Love Wood Sign was made using a scrap piece of wood – you can find the details here. The “XO” are large papier mâché letters and details are in this post. The Rustic Wood Heart is something I repurposed and all the details are here.
Looking for more Valentine’s Day decorating and crafting ideas? Just type”Valentine” in the search box on the right above for a lot more inspiration. ❤️
Disclosure: Some of the links on my site are affiliate links, meaning, at no additional cost to you, I will earn a small commission if you click through and make a purchase. As an Amazon Associate I earn from qualifying purchases.
I used Bernat Blanket Brights Yarn in School Bus Yellow and Carrot Orange with a K/6.5mm crochet hook to stitch up Quackers. I also used a little black worsted weight yarn to crochet circles for the eyes. I sewed them onto my duck instead of using safety eyes since I was gifting this to a little one and I wanted to be extra safe.
Quackers is about 15 inches tall by 11 inches wide and my photos of him are in my old toddler size rocking chair so you can see that he’s a good size. 🙂
I made him for a little one’s first Christmas, but he was also a big hit with his not quite 2 year old brother. Quackers is irresistible! 😉🐥
If you haven’t checked out Repeat Crafter Me, you need to! She has the best patterns! 🧶
Disclosure: Some of the links on my site are affiliate links, meaning, at no additional cost to you, I will earn a small commission if you click through and make a purchase. As an Amazon Associate I earn from qualifying purchases.
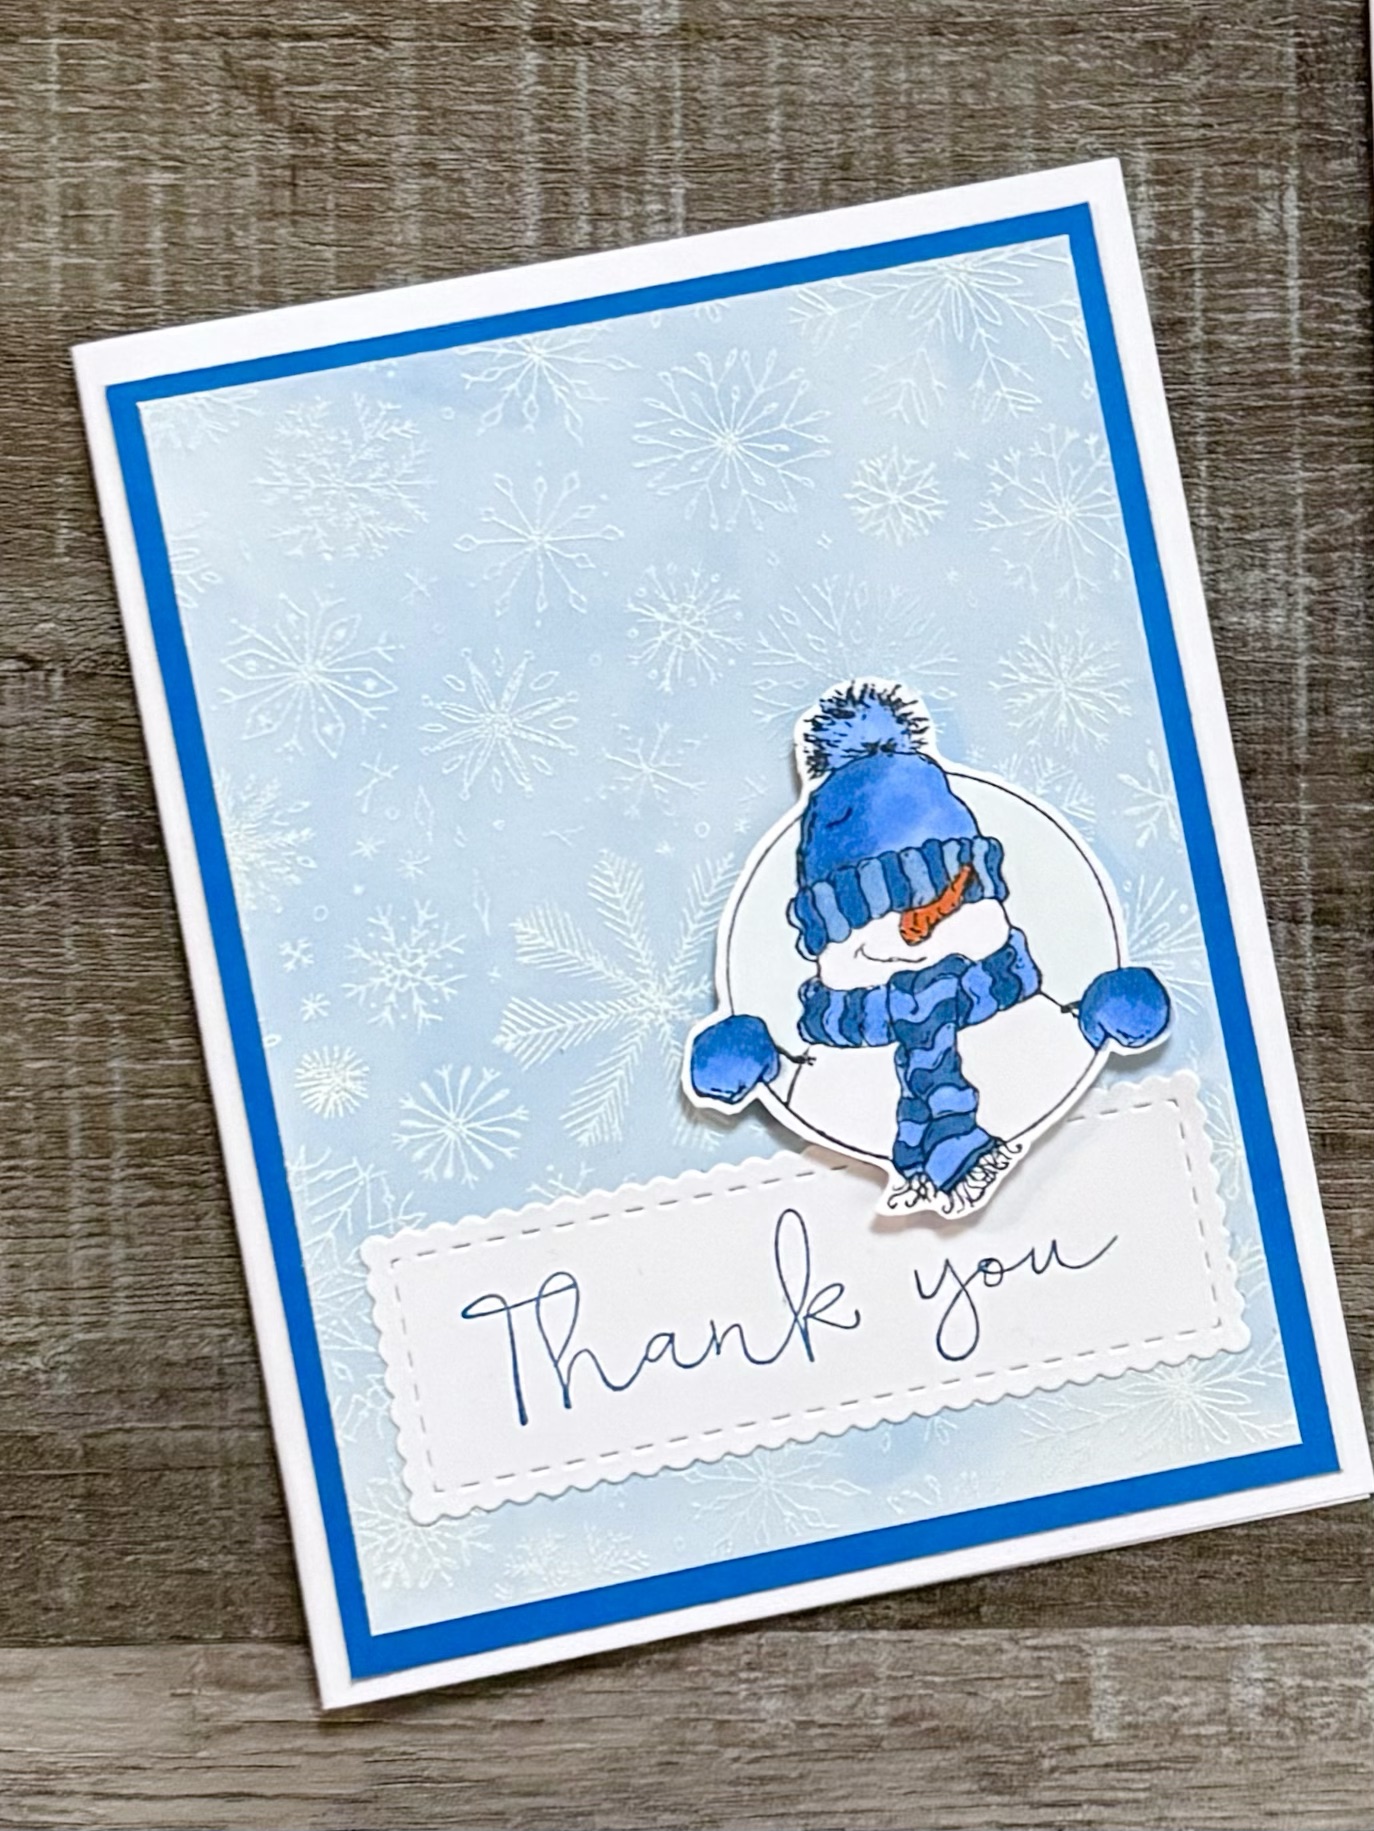
To make the snowflake background, I stamped the Blanket of Snow Background with Versamark ink on white card stock and embossed it with white embossing powder. Then using a Blender Brush from Taylored Expressions, I applied light blue ink over the entire embossed piece. After that, I used a paper towel to rub off any ink that stuck to the embossed snowflakes. The background piece is layered to blue card stock and then attached to a white card.
As you can see below, I changed the sentiment on the card to also make a fun birthday card. You can change the sentiment to the “stay cozy” sentiment in the stamp set, thinking of you, hello, or just about any other greeting stamp you have in your stash.❄️❄️
I hope you’ll try the technique I used to make the snowflake background. It will work with almost any background stamp and is a fun way to add a little shine and texture to your cards.❄️❄️
These cute Gumball Canisters were available at Hobby Lobby in several colors a while back and I picked up a few to decorate for different holidays. You can find my Christmas Gumball Machine here and my Halloween Gumball Canister here. They are so fun to play with and you can decorate them any way you want! 😊
Disclosure: Some of the links on my site are affiliate links, meaning, at no additional cost to you, I will earn a small commission if you click through and make a purchase. As an Amazon Associate I earn from qualifying purchases.
I still had a red one in my craft stash and thought it would be perfect to decorate for Valentine’s Day! ❤️ I pulled out some unfinished wood heart cutouts along with some 1-inch red and white pom poms I had in my craft room to fill the canister. You should be able to find them at Hobby Lobby.
I forgot to take a picture, but I painted the wood hearts with red, pink, and white acrylic paints – 2 coats on each side. I painted 3 large hearts and 15 small hearts. After the hearts were dry, it was time to fill up my gumball canister. I crumpled up a couple sheets of tissue paper and added them to the canister to fill up the bottom. Then I simply added the hearts along with the pom poms to the canister. To finish it off, I tied 4 different Valentine themed ribbons in a knot around the canister. Super easy! ❤️
The Valentine Gumball Machine Canister adds a touch of whimsy and fun to your Valentine decor. I’m not sure if you can still find this type of canister, but I did see some smaller ones at Hobby Lobby in the seasonal section that had a little heart for the knob on the lid. They were so cute! You can make the same type of decoration just by using small hearts and smaller pom poms with the smaller canisters.
If you’re interested in the Crochet Heart Dishcloth in the photos above, you can find all the info in this post including a link to the free pattern. Somehow, when I made this a few years ago, my white border ended up being ruffly – not sure what I did but I like it. 🙂
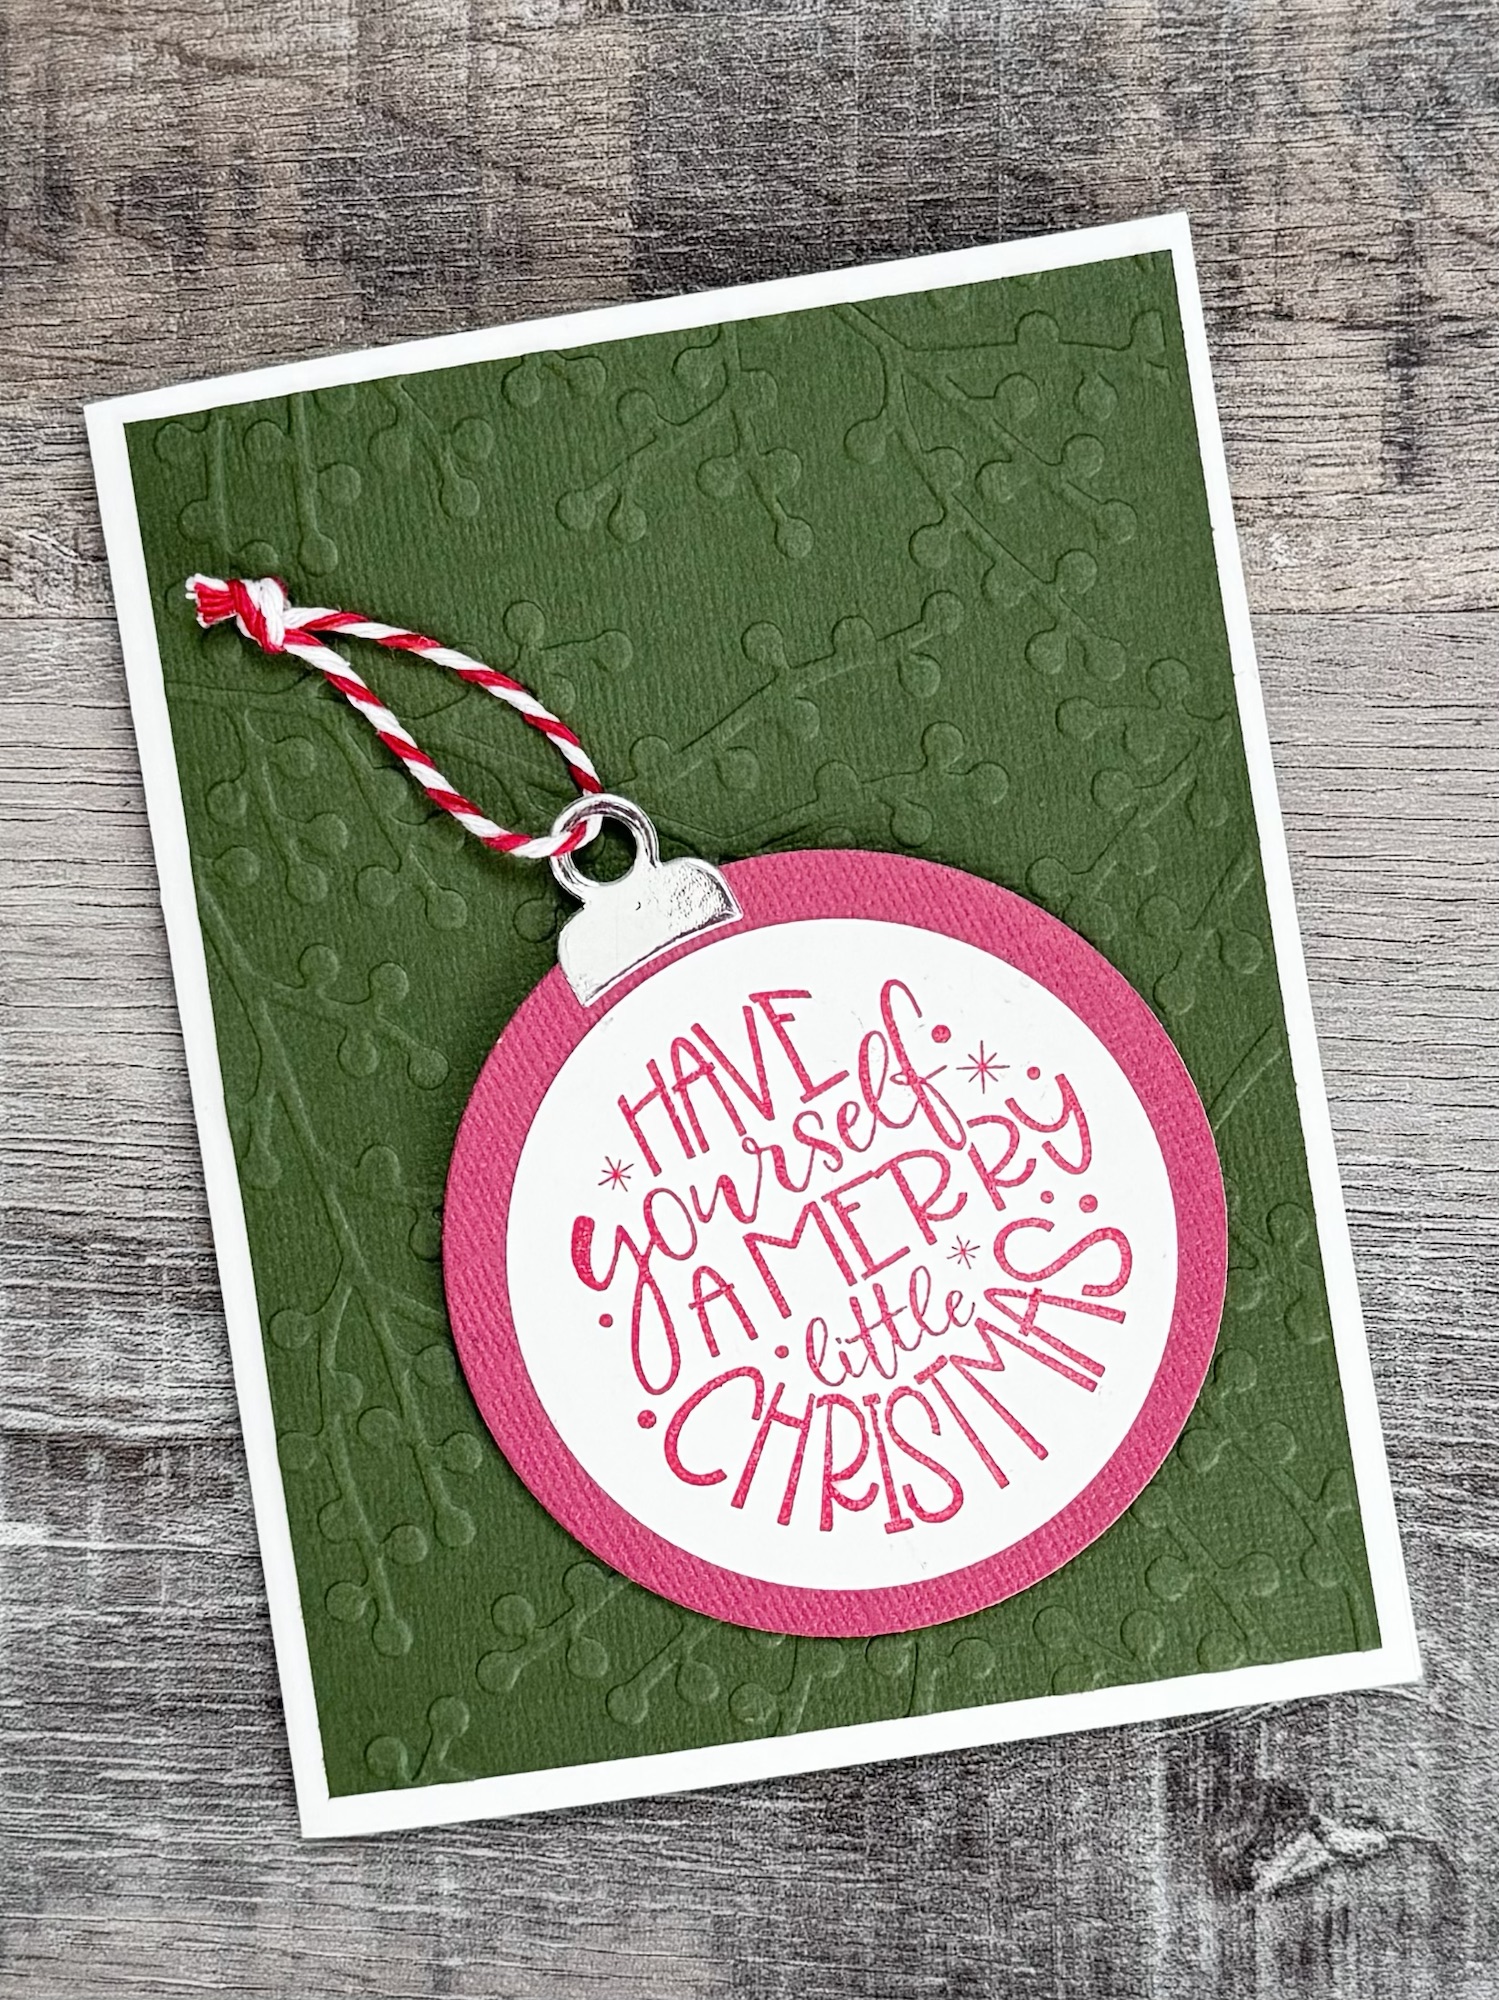
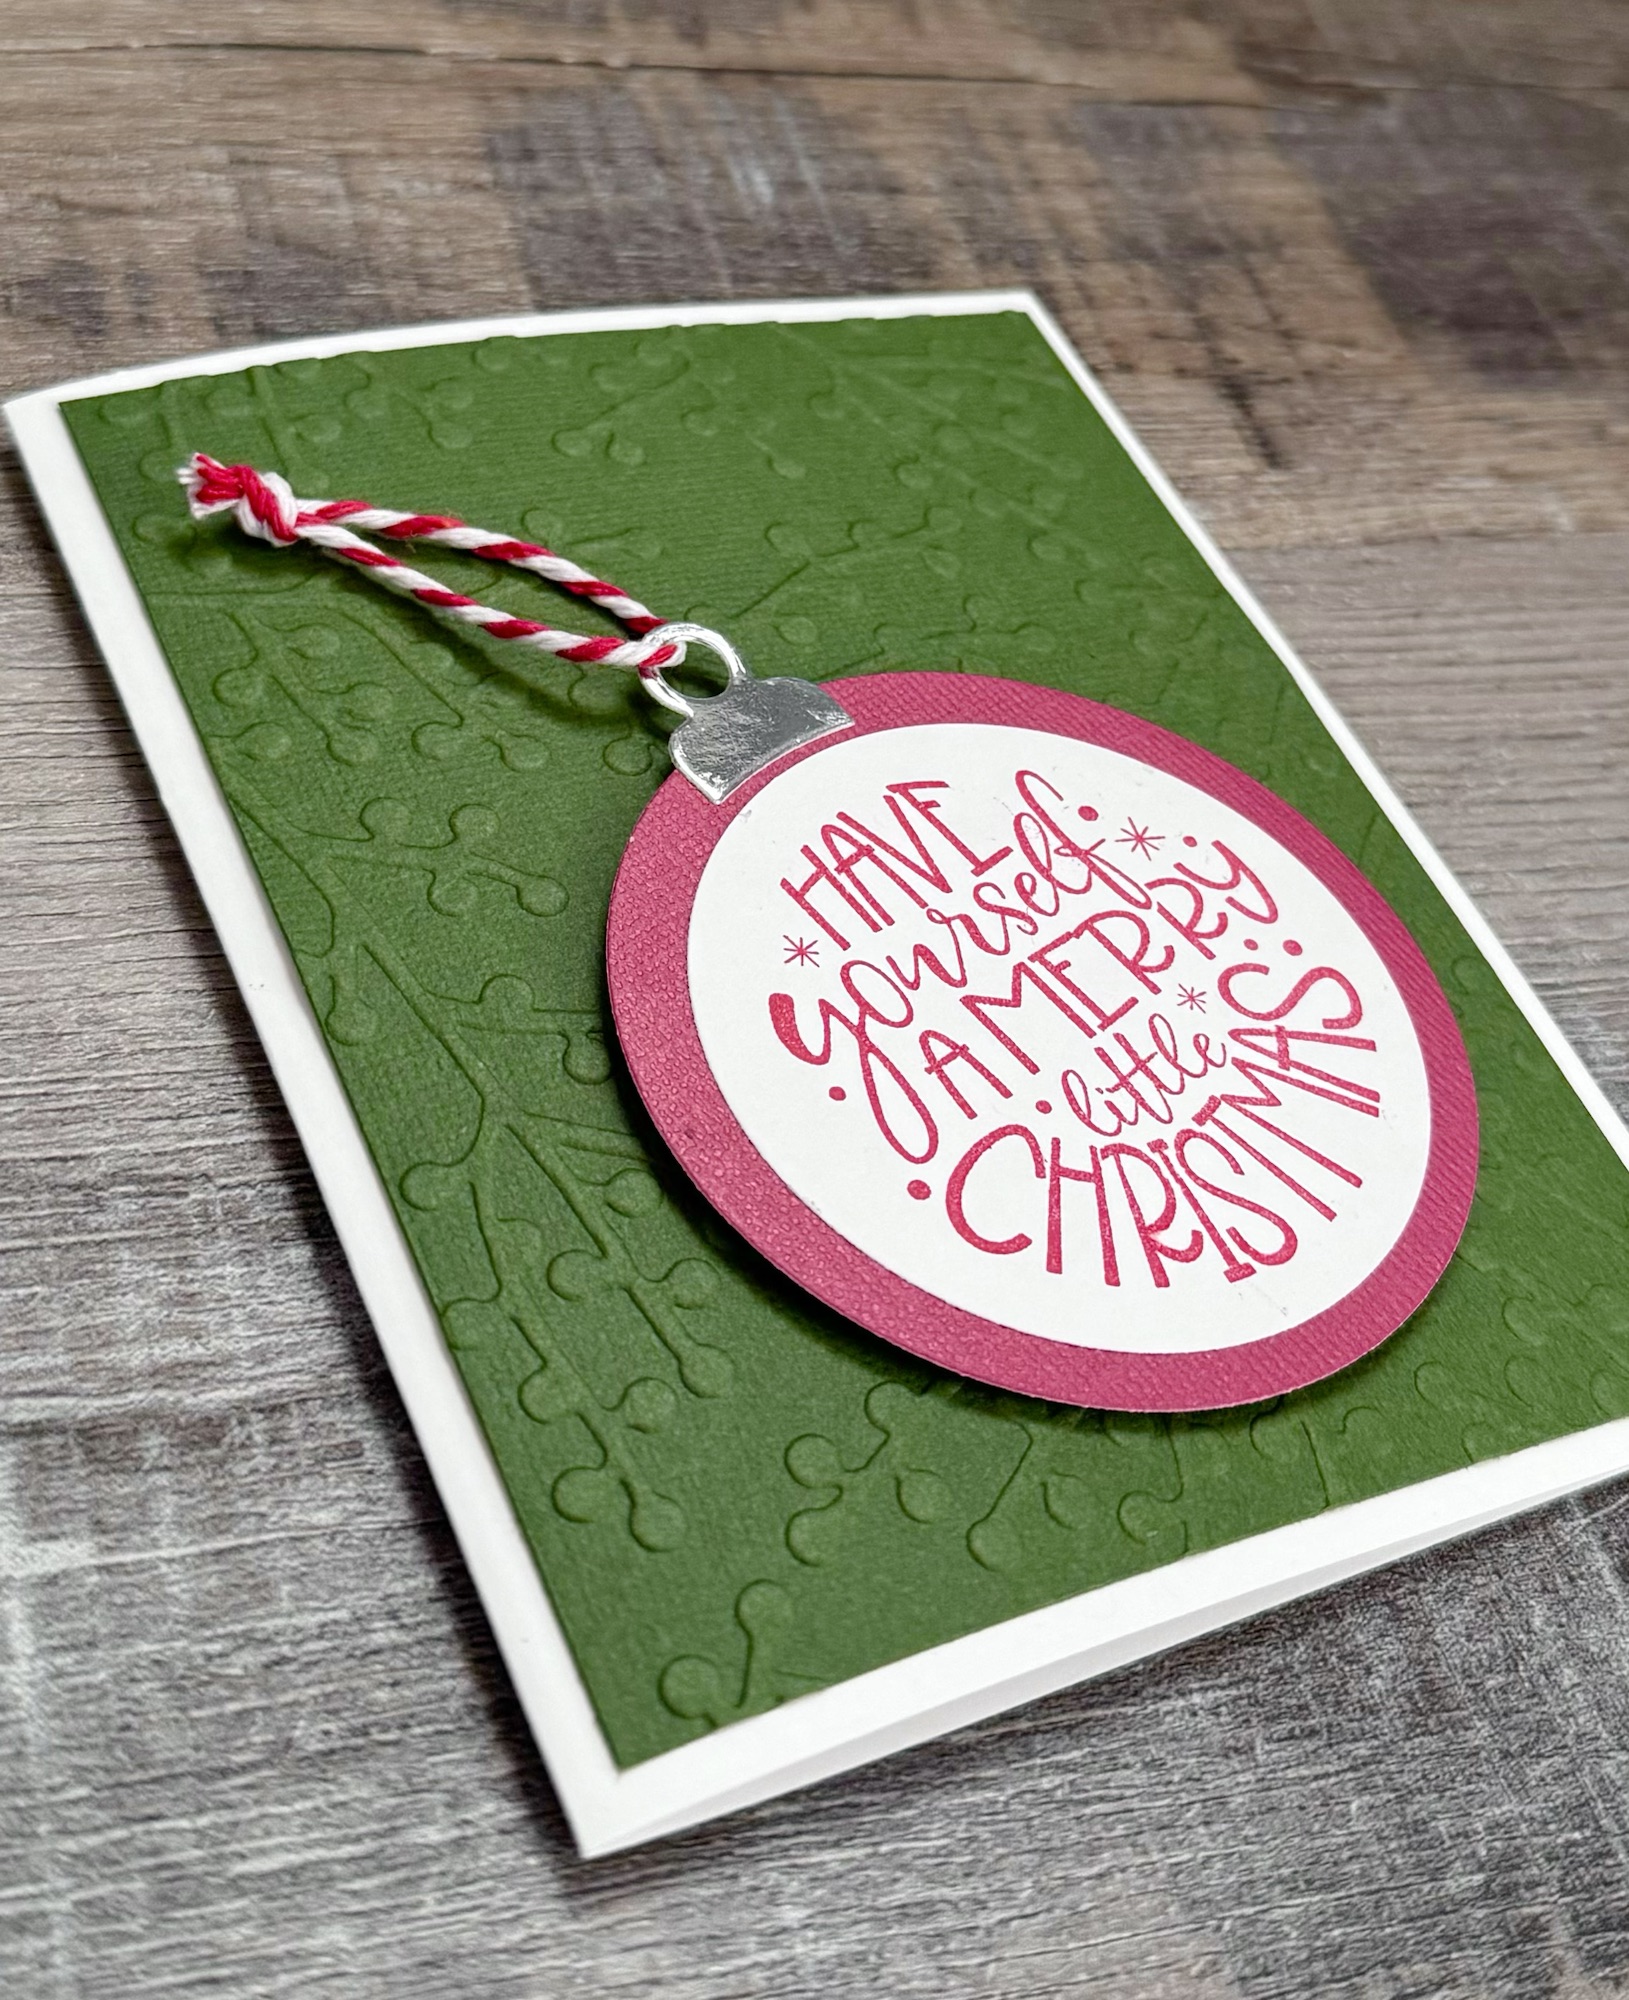
It’s time to start making a few Christmas cards each month to be ready when the season comes to send them out. 🙂 This will be my 3rd year of doing this and it’s made such a difference! I hope you’ll join me this year in building up your Christmas card stash. 🎄
Disclosure: Some of the links on my site are affiliate links, meaning, at no additional cost to you, I will earn a small commission if you click through and make a purchase. As an Amazon Associate I earn from qualifying purchases.
If I’m being honest, I wasn’t feeling much Christmas inspiration this month so January’s card is clean and simple. 🙂
I used the Ornamental Greetings stamp set from Unity Stamp Company to create a simple ornament for the front of my card. The set includes 4 different stamps for making ornaments. My set also included 2 circle dies and the ornament topper die – but I’m not sure they are still available. 🤔
I stamped the sentiment with red ink on white card stock and die cut it with a 2.5 inch circle die and layered it to a 3 inch circle die cut from red card stock. (This is a great set of circle dies.) I die cut the ornament topper from silver mirrored card stock and attached it to the top of the circle. Then I tied on a piece of red and white bakers twine for the hanger. You can also punch a hole in place of the ornament topper and turn it into a tag instead.
I embossed a piece of green card stock with a berry branch embossing folder and attached it to a white card. This embossing folder is discontinued, but any “Christmas-y” folder will work great – I think this one would be pretty. Then I attached the ornament to the card with foam tape.
Sometimes just getting into your craft room can get your creative juices flowing. I like the way this card turned out! It’s a simple and quick card with a heartfelt Christmas wish. And it can be made with any simple Christmas sentiment or image stamp that fits into a circle. 🙂
Looking forward to making more Christmas cards in 2024! 🎄
This sweet snowman with his little heart patch and heart balloon is perfect for Sending Warm Valentine Wishes. ❤️ He’s from the Unity Stamp Company stamp set called Love to My Heart and that cute tiny penguin just adds to his charm. 😊
Disclosure: Some of the links on my site are affiliate links, meaning, at no additional cost to you, I will earn a small commission if you click through and make a purchase. As an Amazon Associate I earn from qualifying purchases.
To make the card, I embossed a piece of red card stock with a heart embossing folder and attached it to a white card. My embossing folder is discontinued, but this one would be cute. I attached the snowman image with foam tape and then attached the sentiment piece with foam tape onto the snowman piece. To finish the card, I added Diamond Glaze to the balloon for a little shine.
This is a little different twist on a Valentine card, but I love how it turned out! Take a look at your stamp collection and see what you have that you can turn into a Valentine card. ❤️❤️❤️
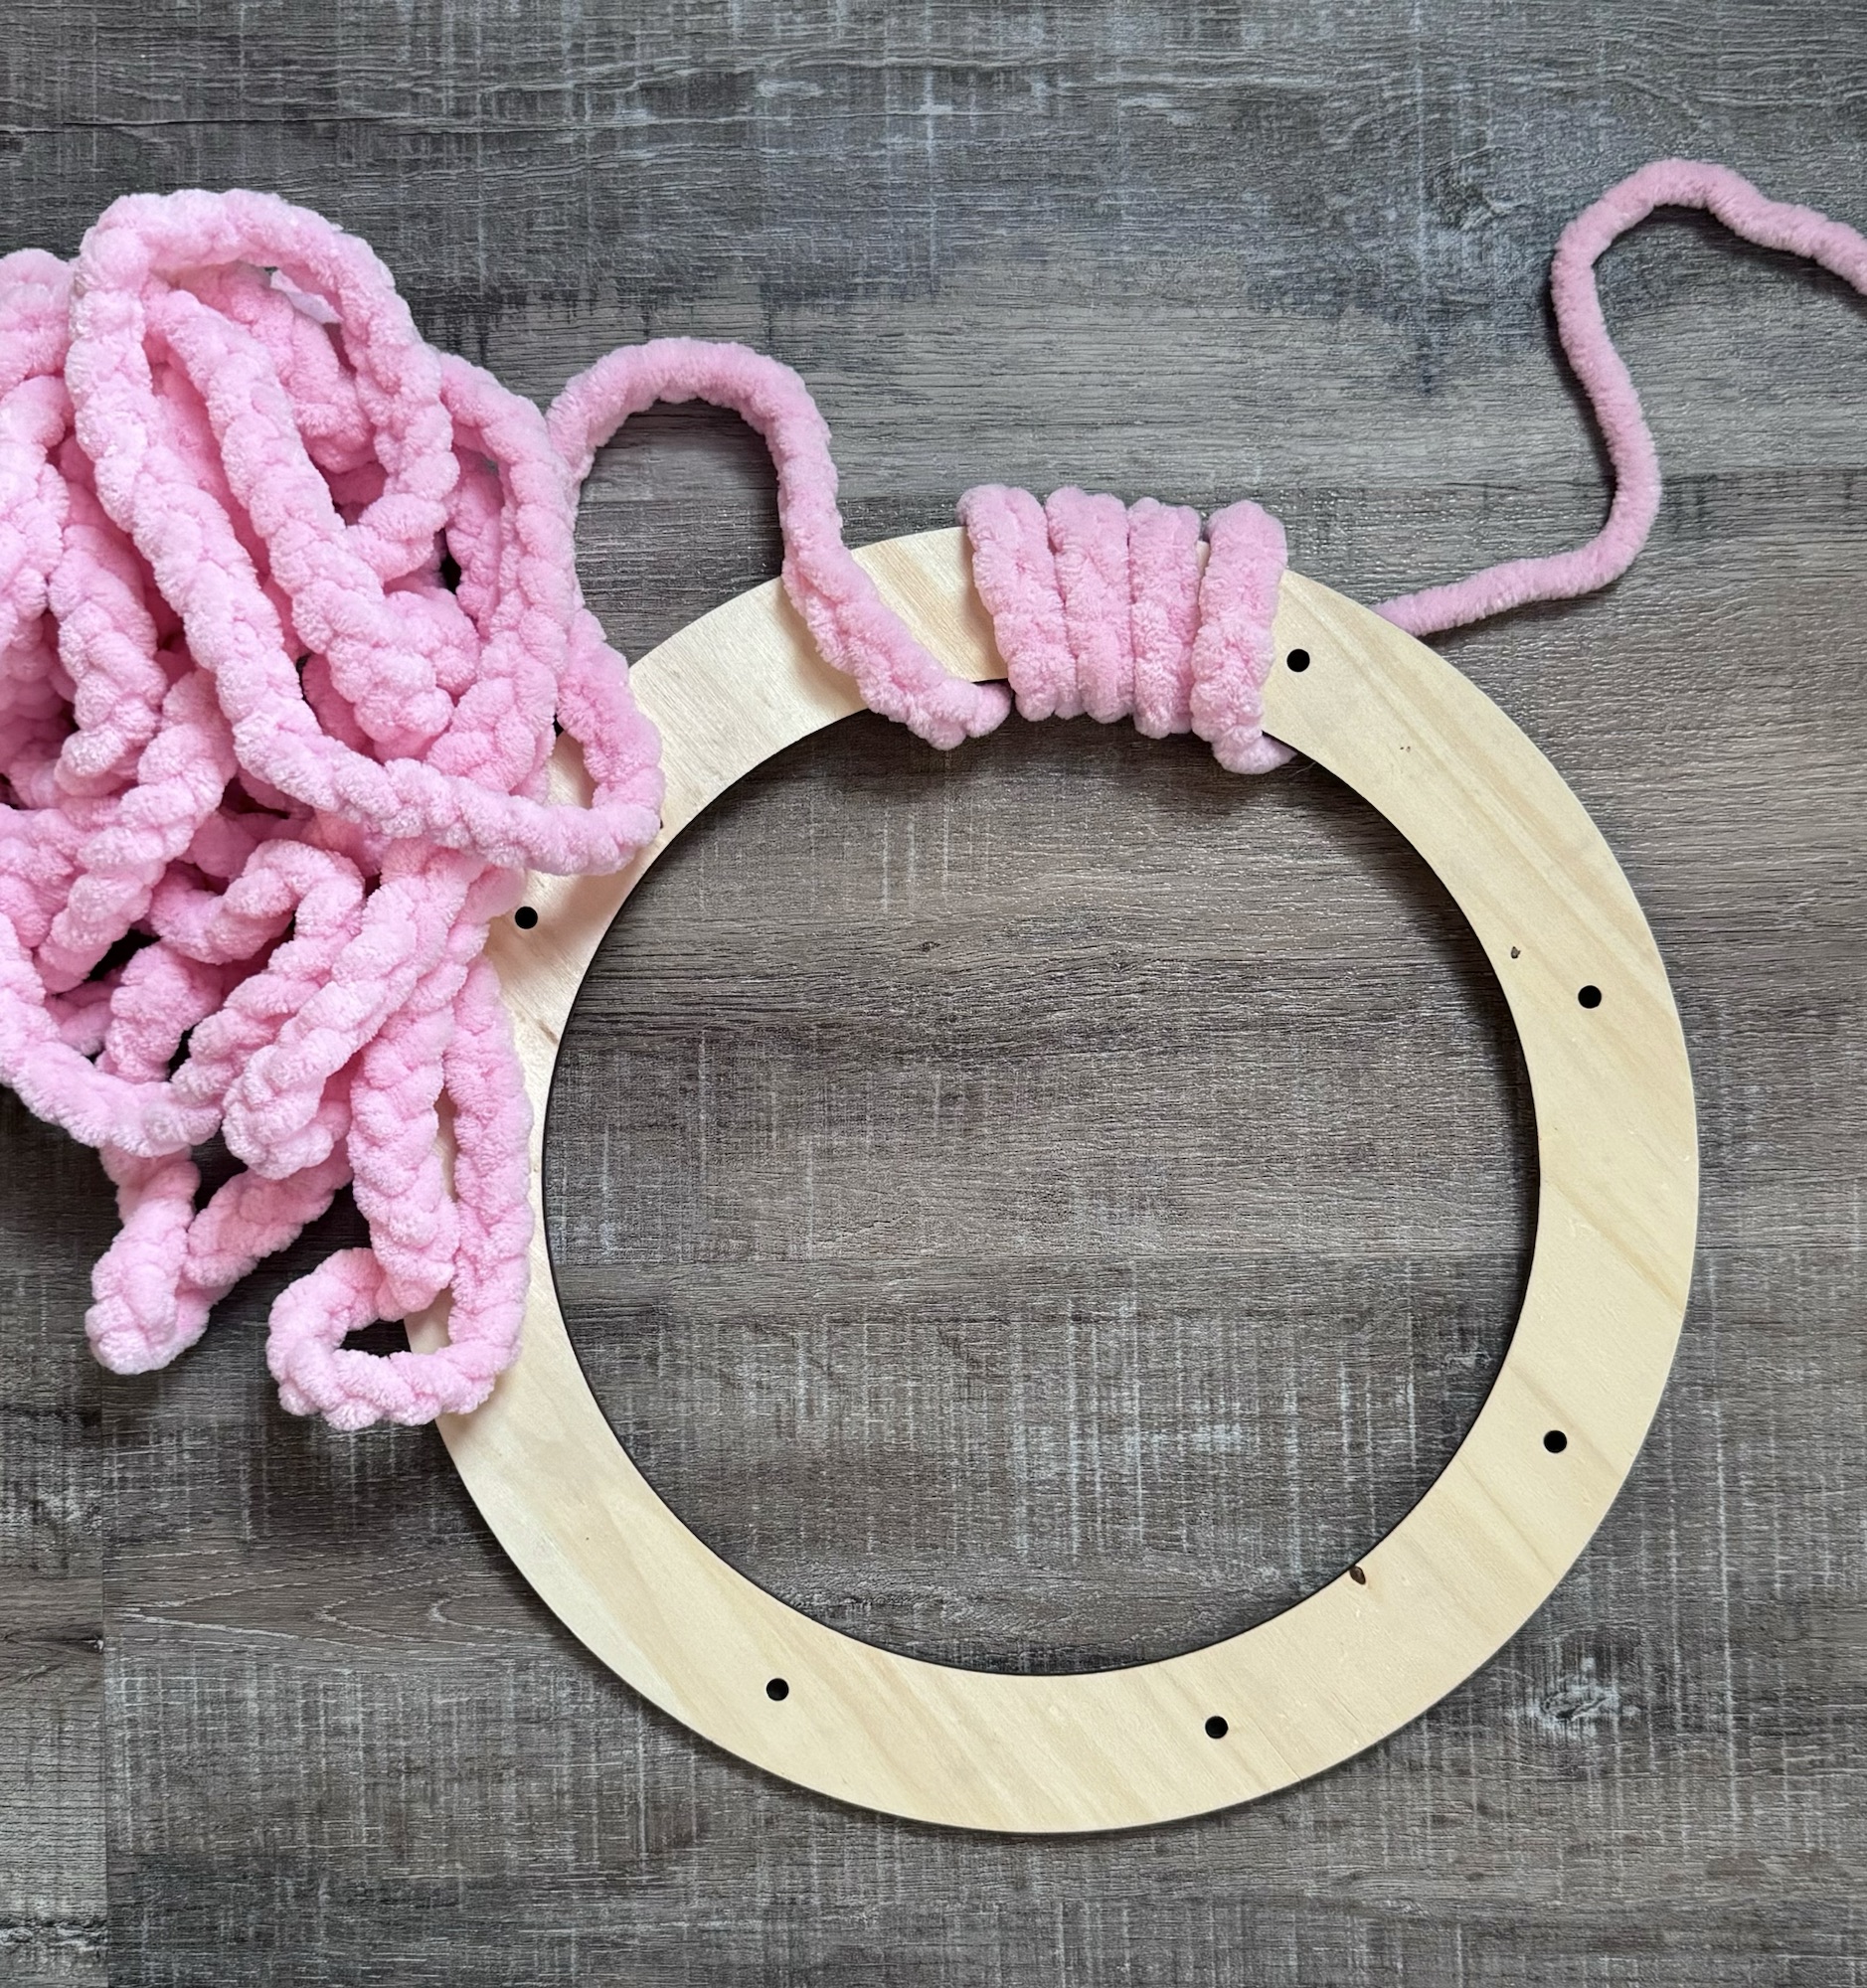
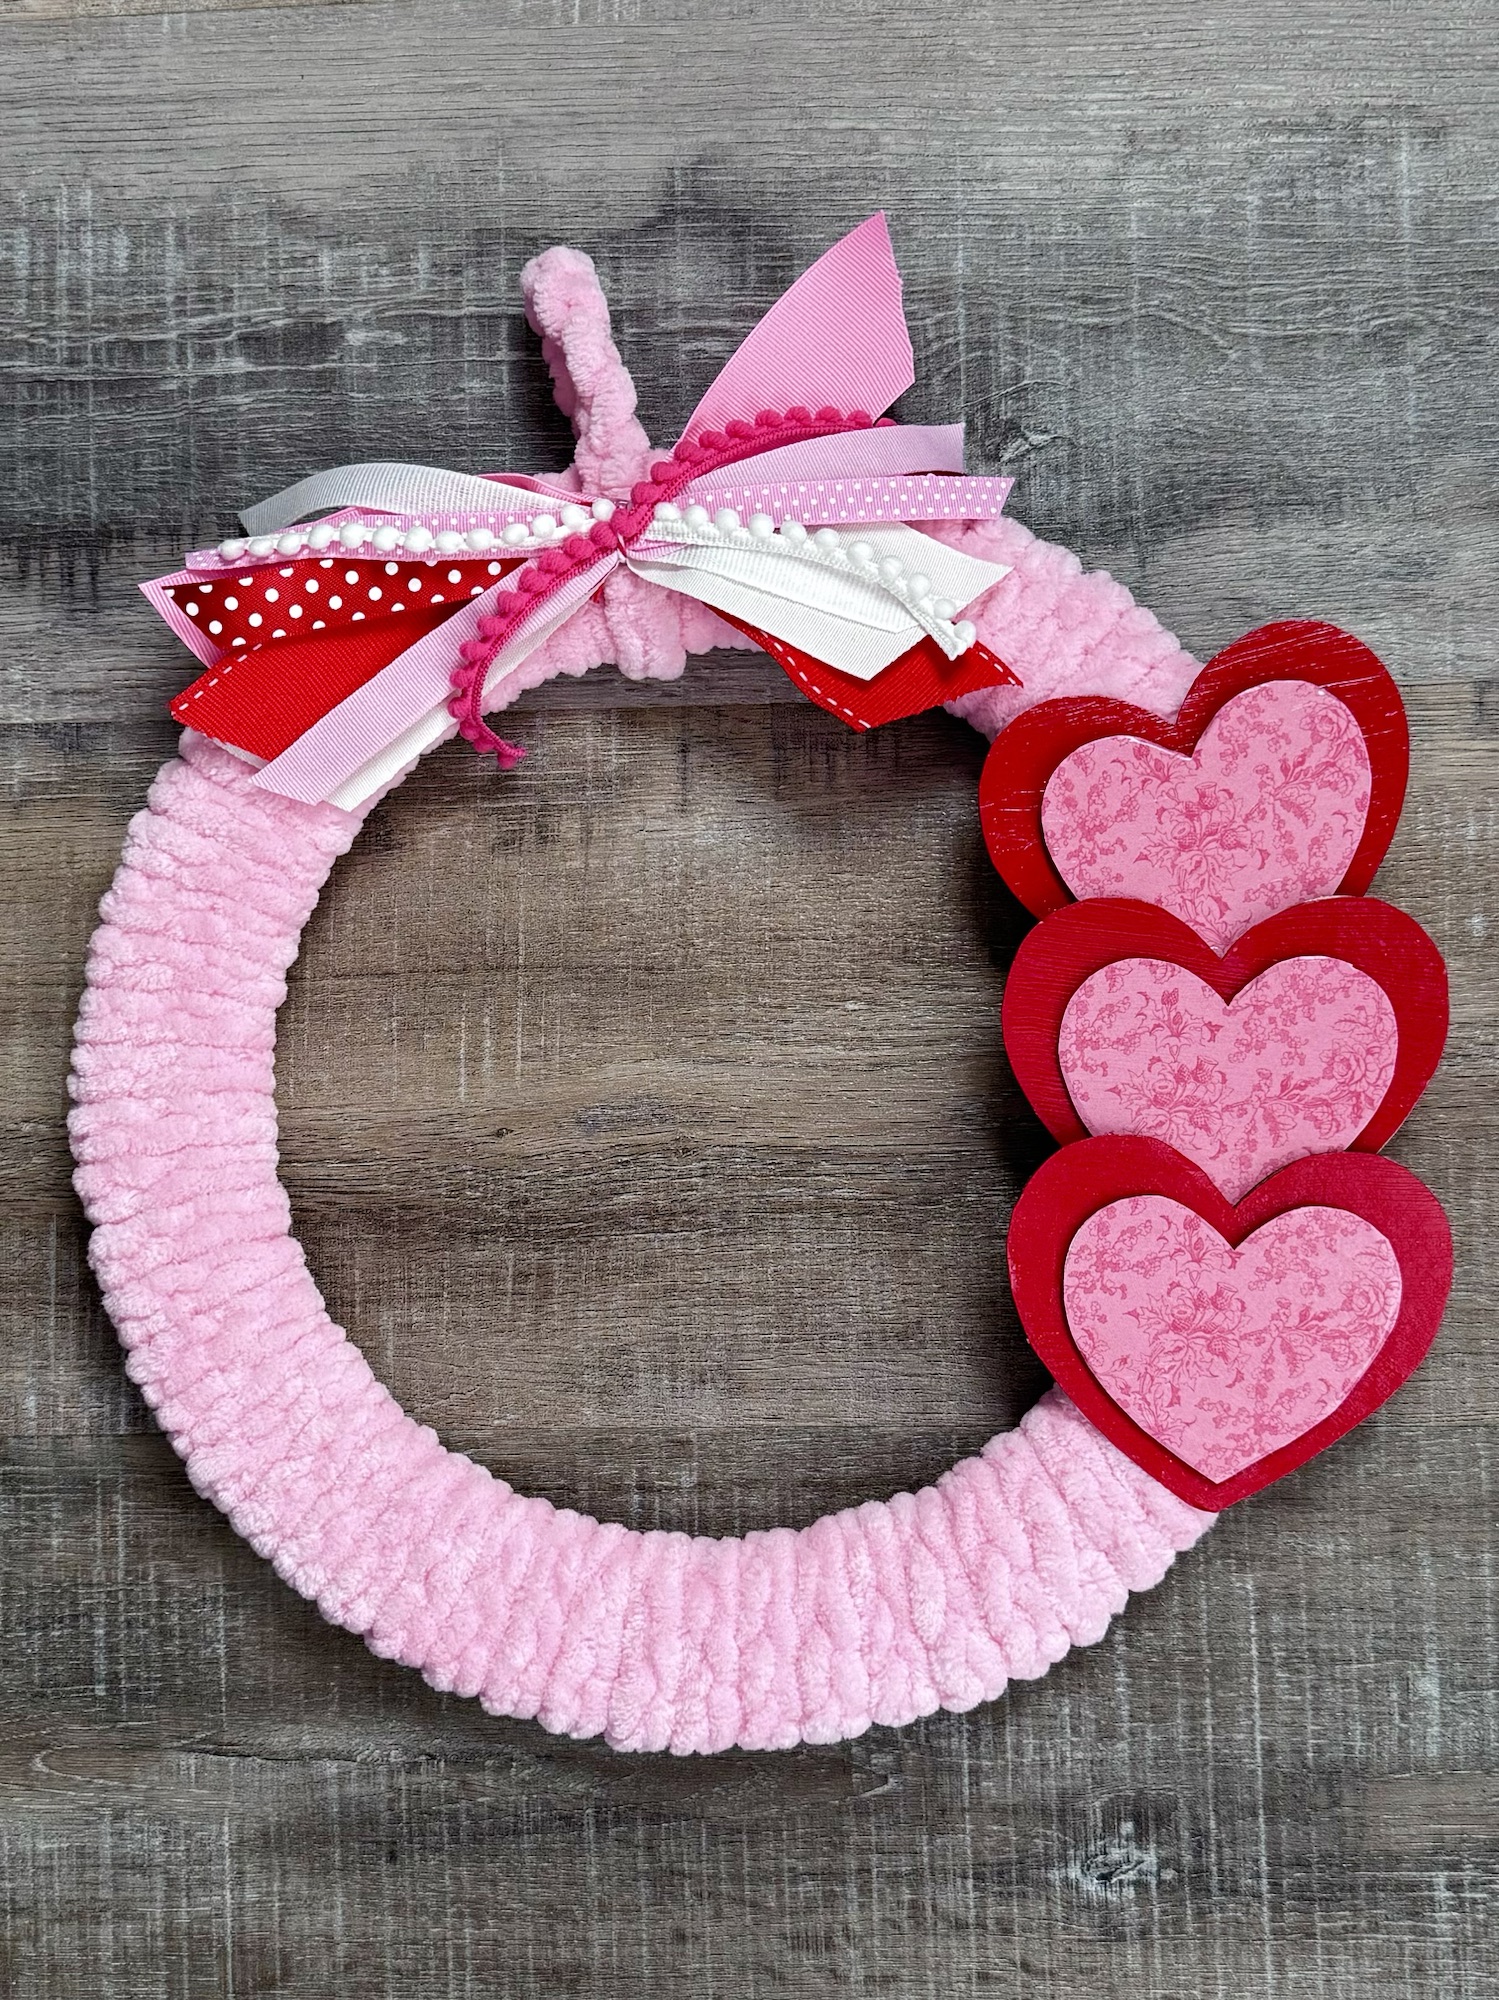
This is such a fun and easy way to make a sweet Valentine Wreath for your front door – and to use up some scrap yarn! 💕
Disclosure: Some of the links on my site are affiliate links, meaning, at no additional cost to you, I will earn a small commission if you click through and make a purchase. As an Amazon Associate I earn from qualifying purchases.
Crochet a simple chain to wrap around your wreath form. Mine measured about 18-19 feet, without stretching. Using hot glue, attach one end to the back of the wreath and wrap your chain around the form being careful not to twist it. Continue around until the wreath form is covered and attach the other end with hot glue. If your chain isn’t long enough, just add a few more stitches as needed.
Make a smaller chain to tie around the top to hang the wreath. I added a little hot glue to the front and back to keep the hanging loop in place.
You can also use a styrofoam wreath form to make your wreath but you will need to make your chain longer.
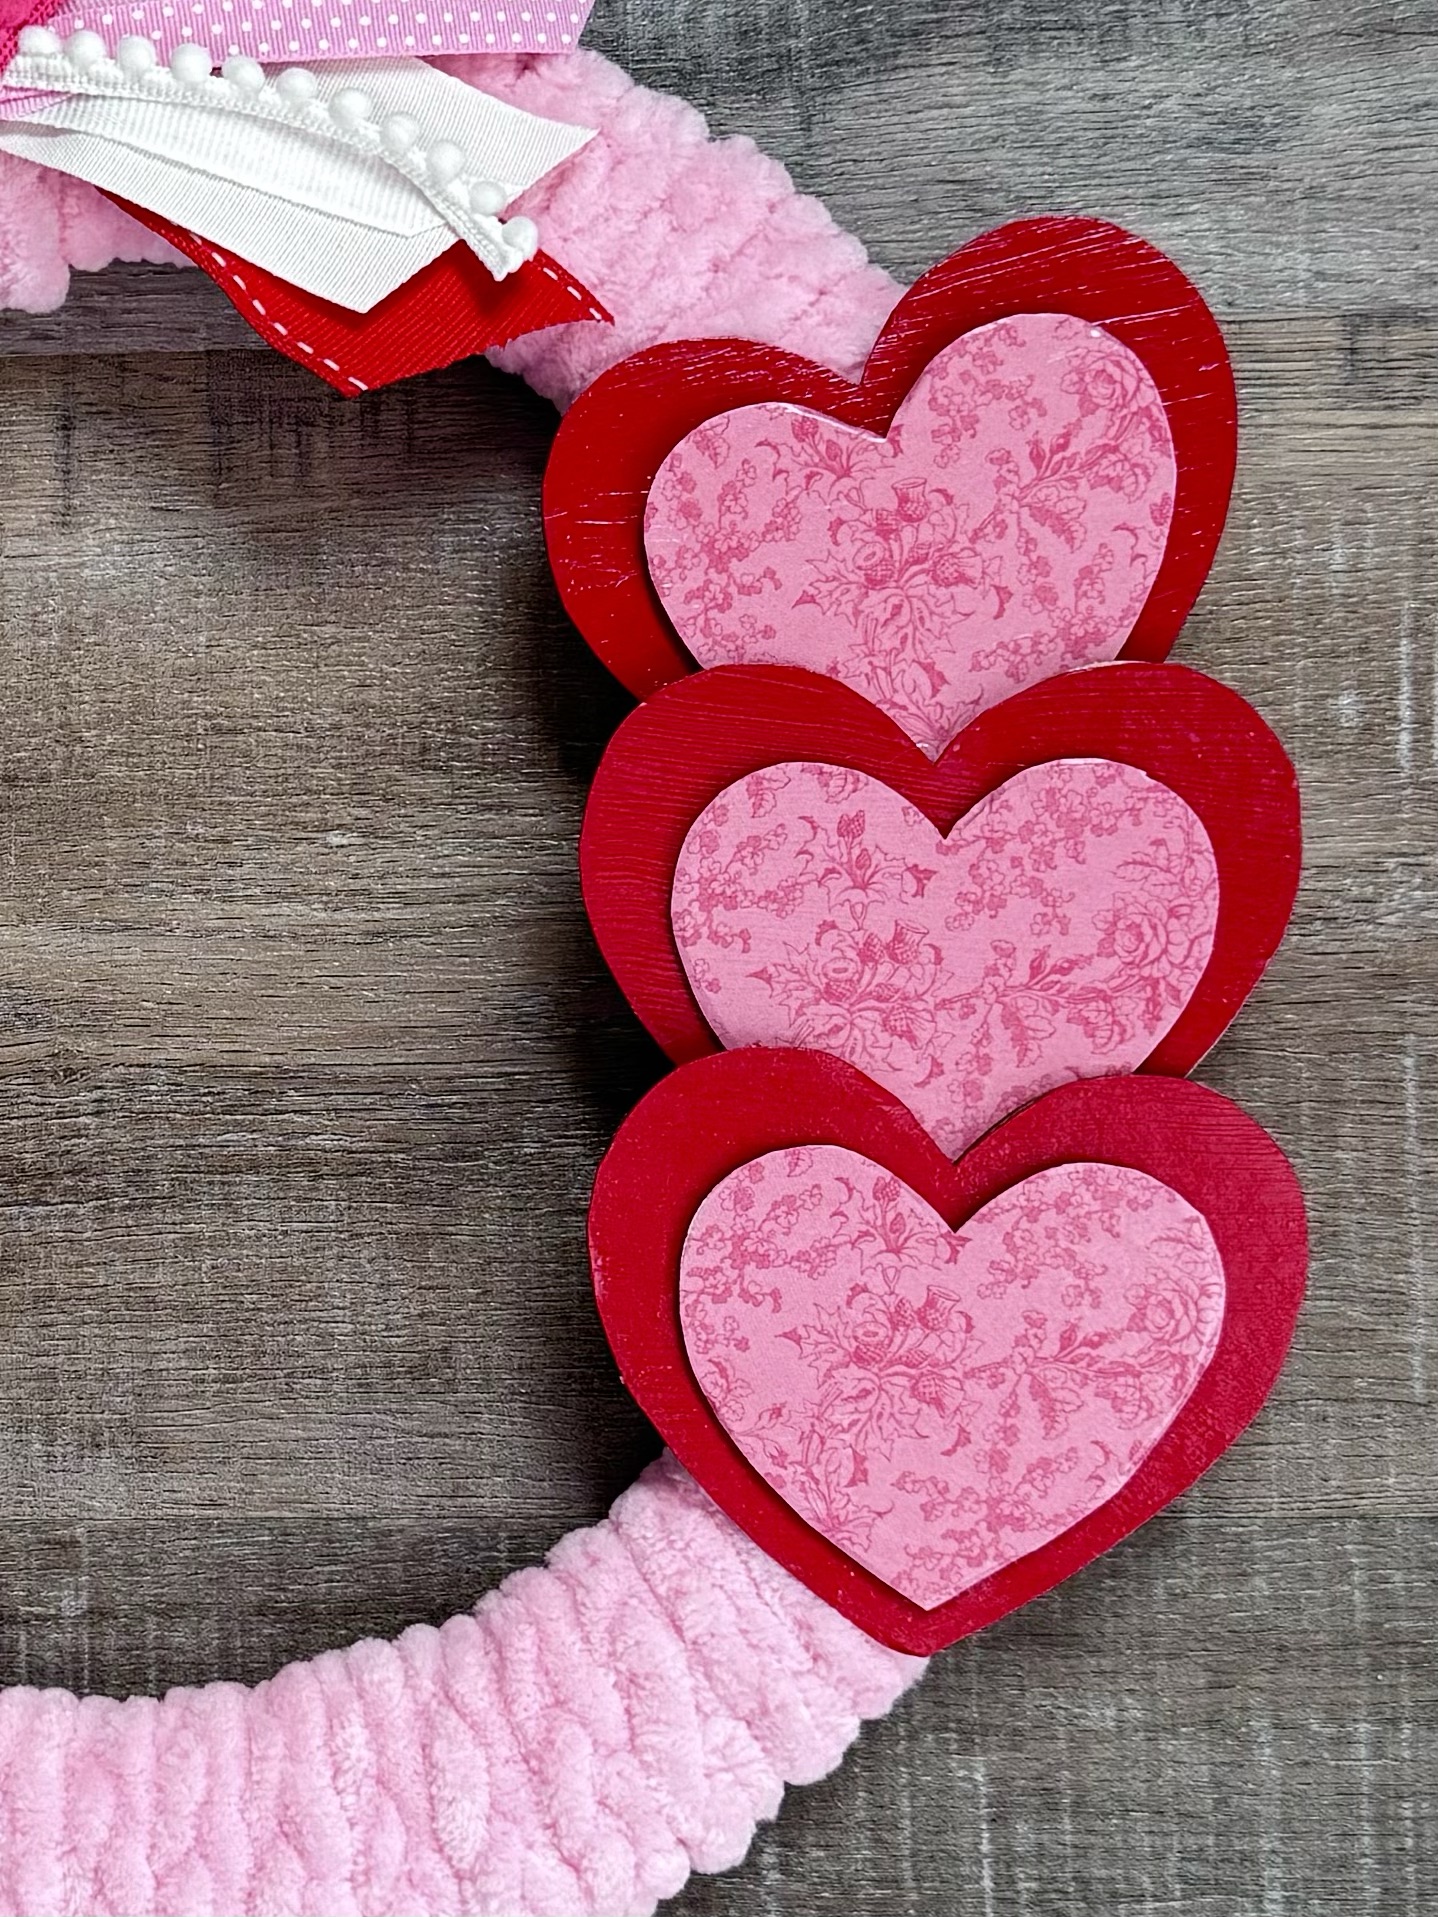
Now it’s time to embellish your wreath! I had some wood heart cutouts in my crafting stash in 2 different sizes – you can find them at Hobby Lobby or Dollar Tree in the seasonal section. I traced around the large heart on red card stock and the smaller hearts on patterned scrapbook paper and cut them out.
Using Mod Podge with a foam brush, I adhered the paper to the wood hearts. I also brushed a thin layer of Mod Podge over the top of the hearts to add a little shine. I glued the small hearts to the large hearts with hot glue and then hot glued the hearts to the wreath.
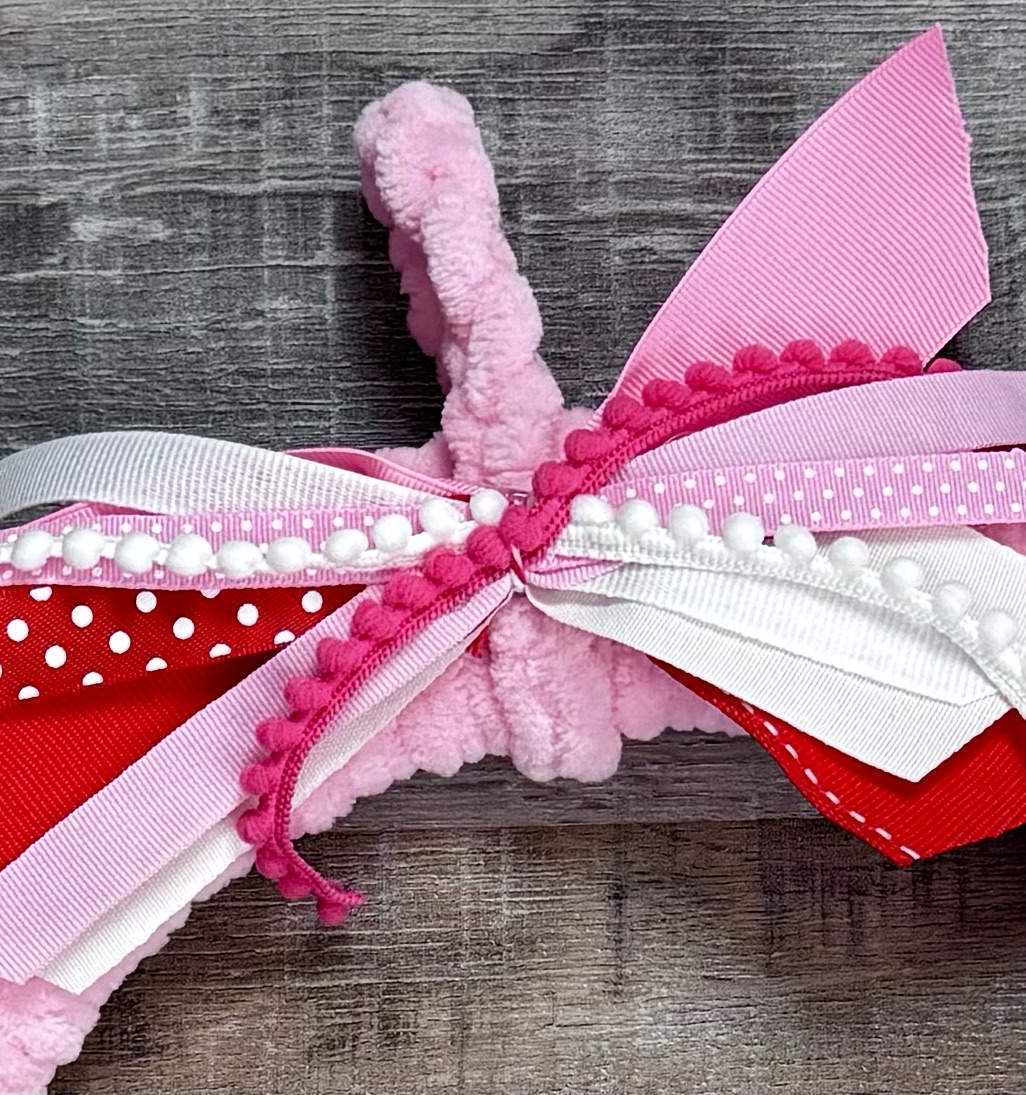
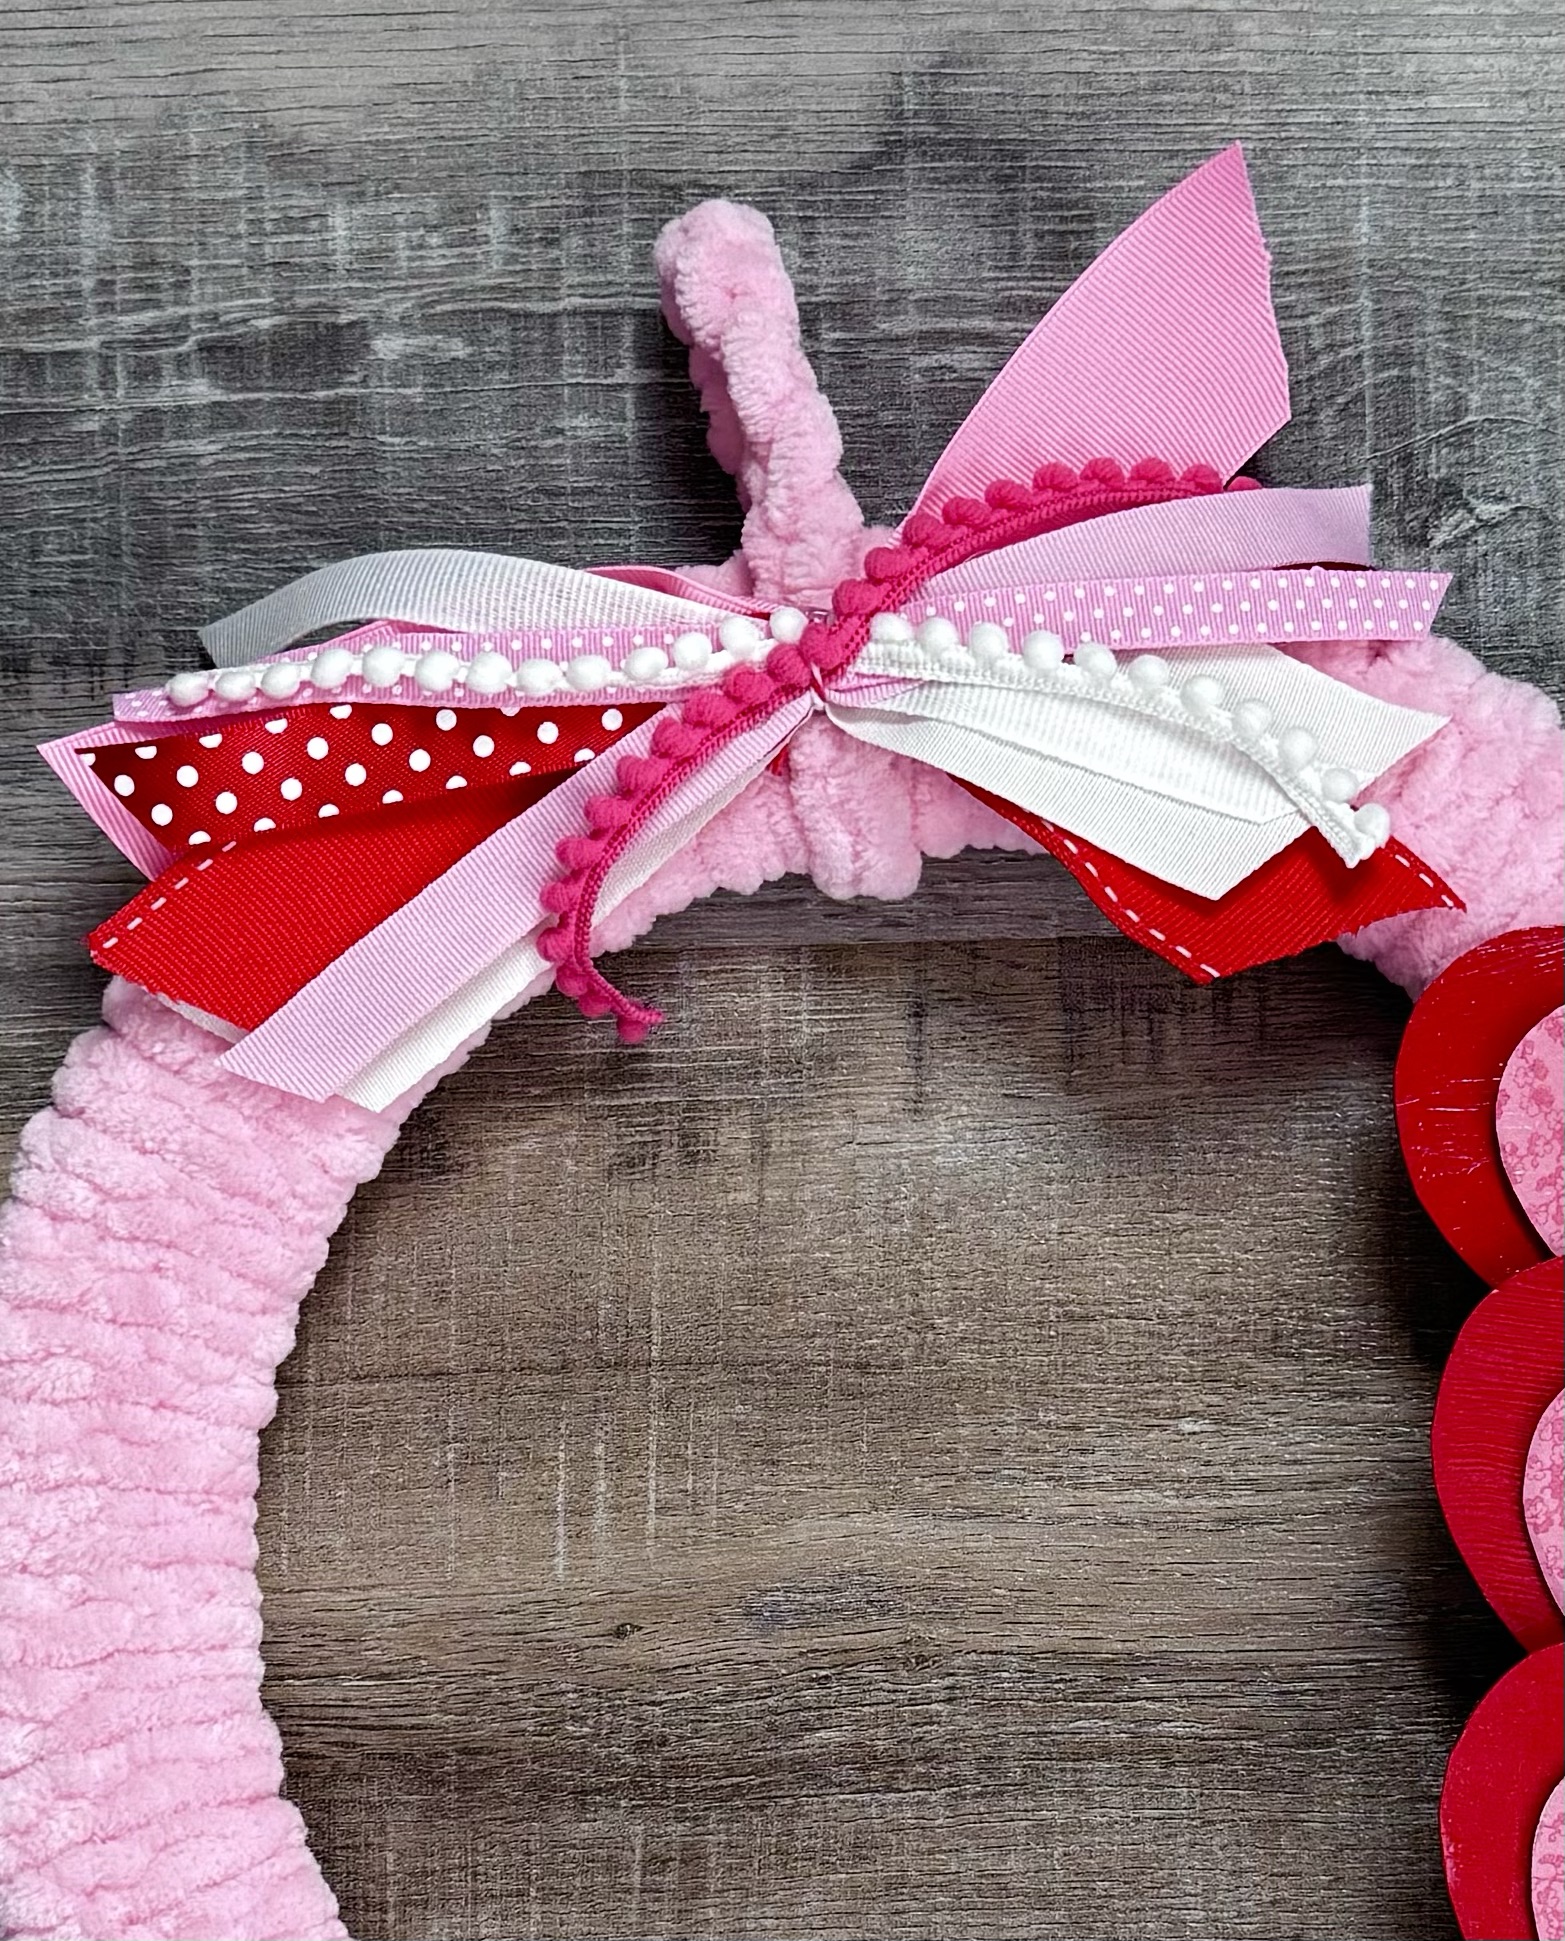
I created a bow using various ribbons and hot glued it to the top of the wreath.
It turned out so cute! 💕 And it was a great way to use up that last bit of yarn I had in my stash. 😉 This is a fun project that will add a little bit of love to your Valentine decor. 💕
Not a crocheter? No worries! You can just wrap the wreath form with the yarn and then add your embellishments. The texture will be a little different, but it will still be very cute. 💕 You can see my Yarn Wrapped Valentine Wreath in this post.
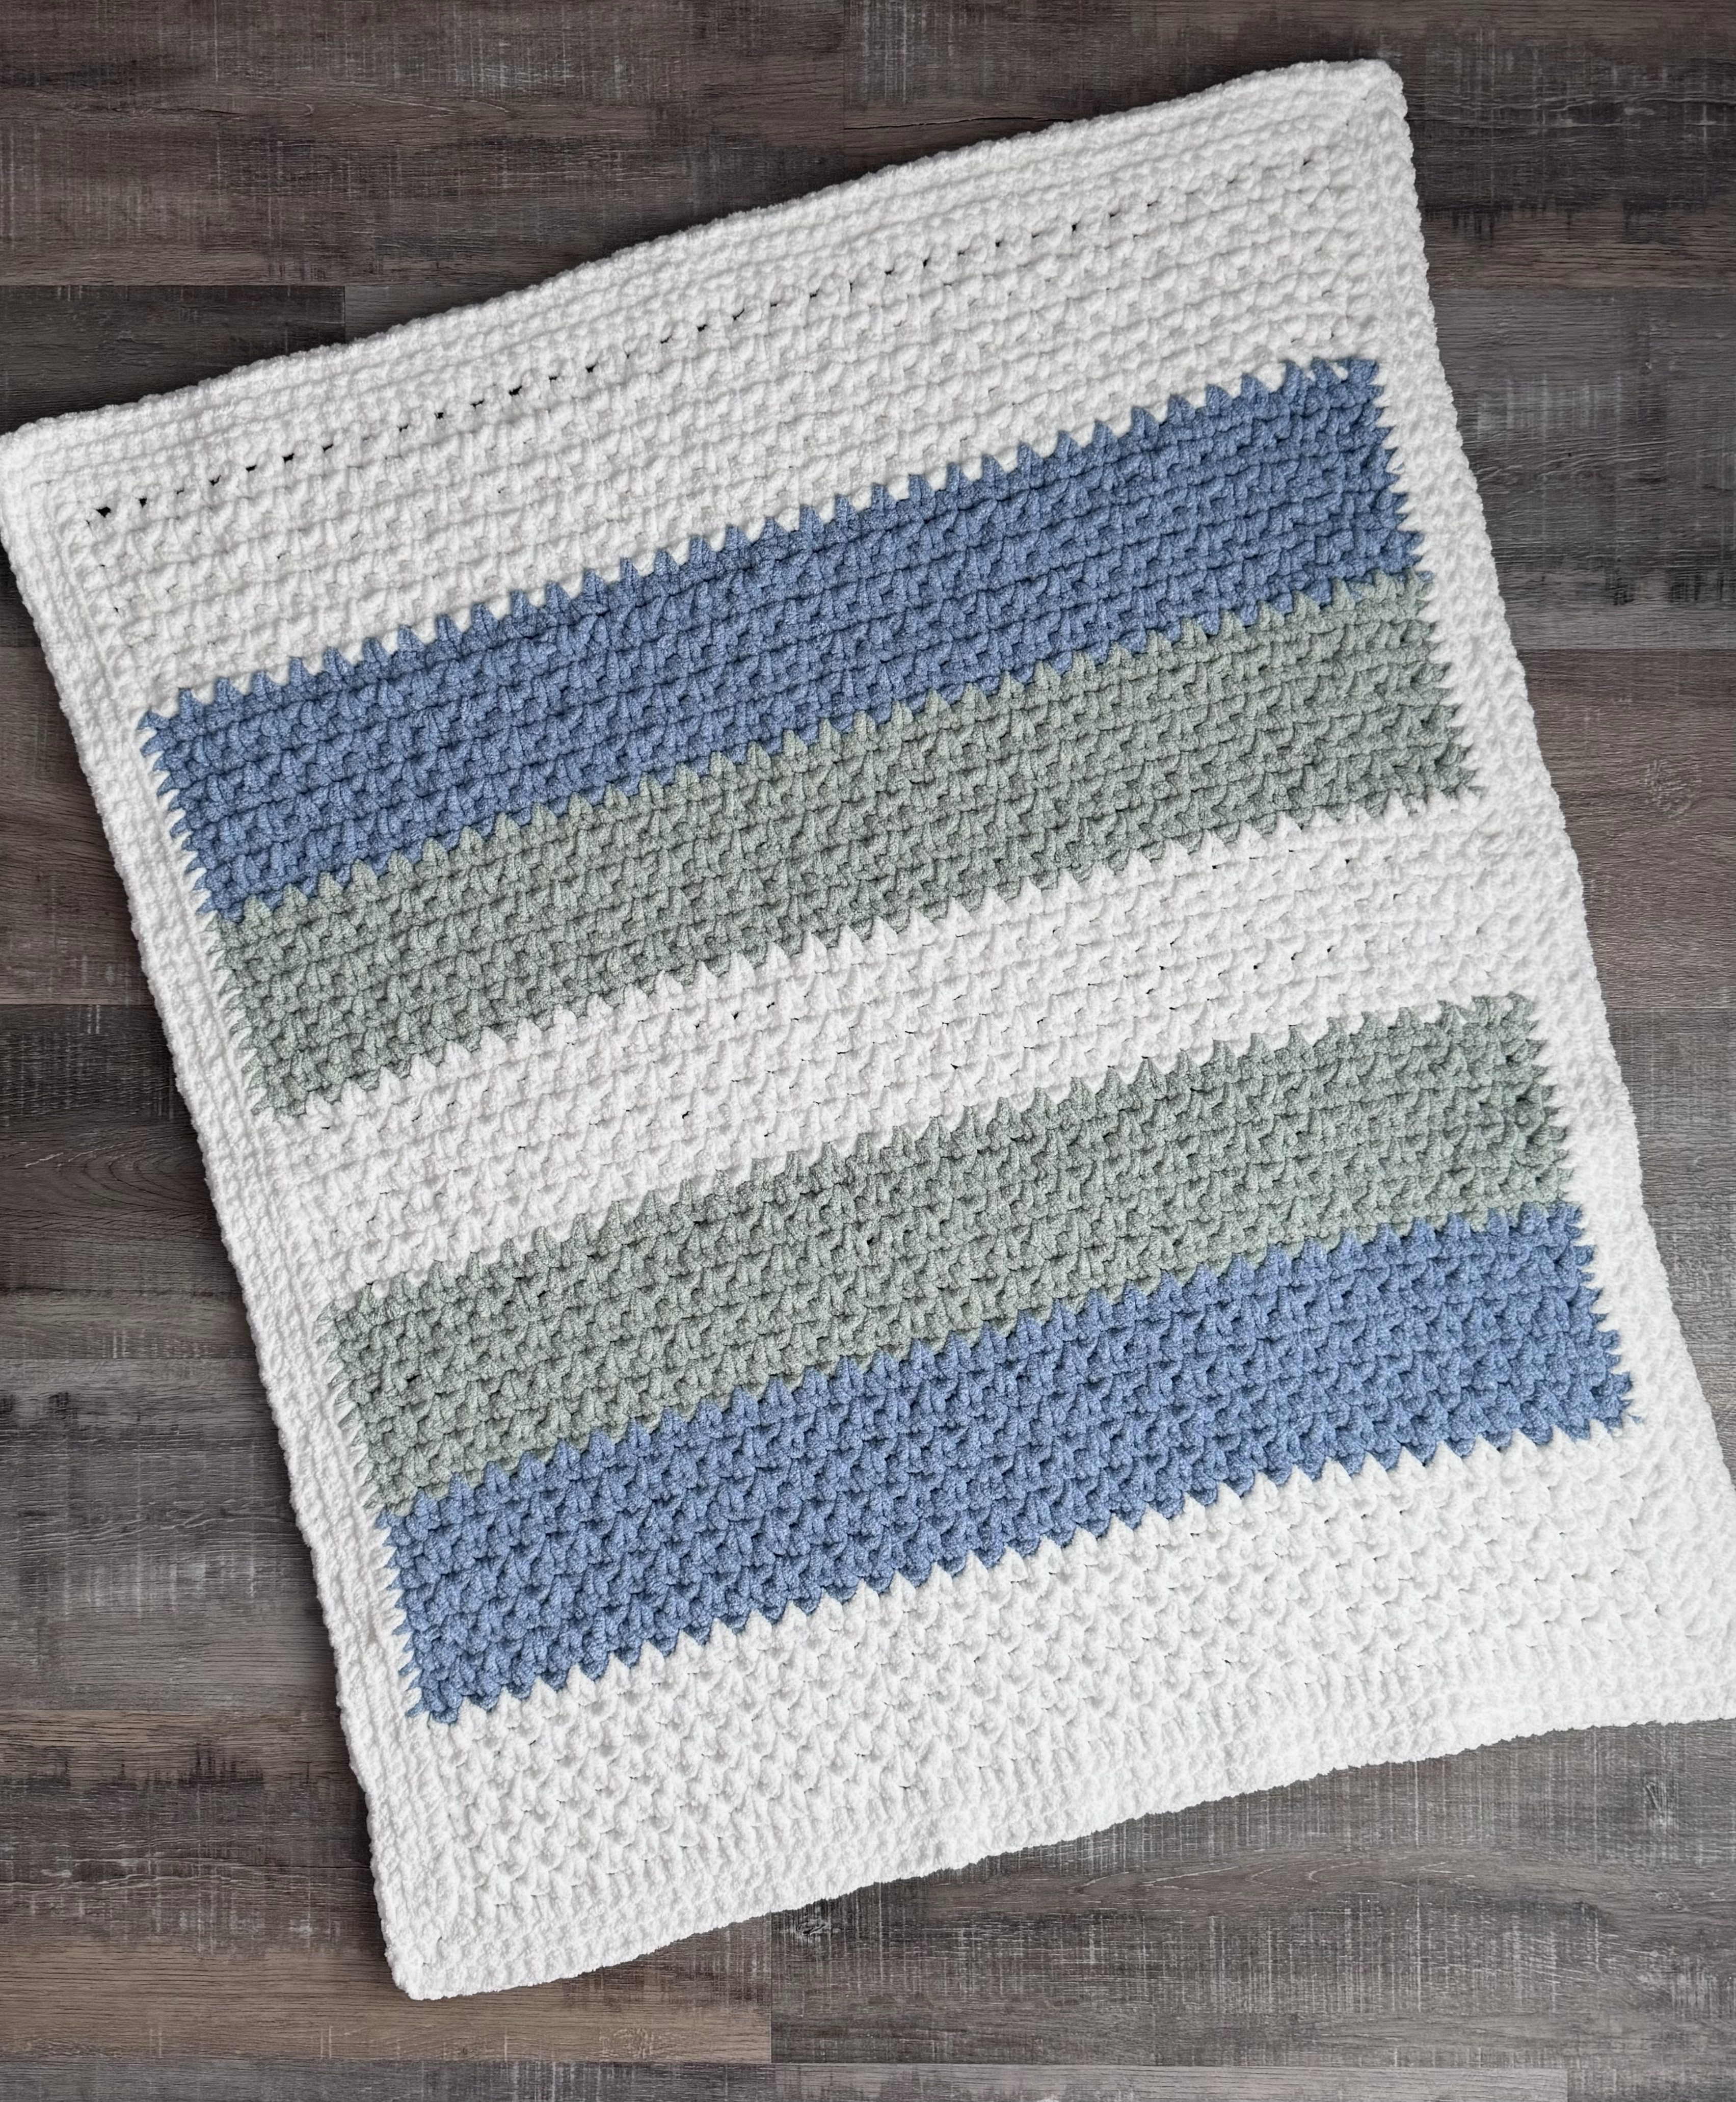
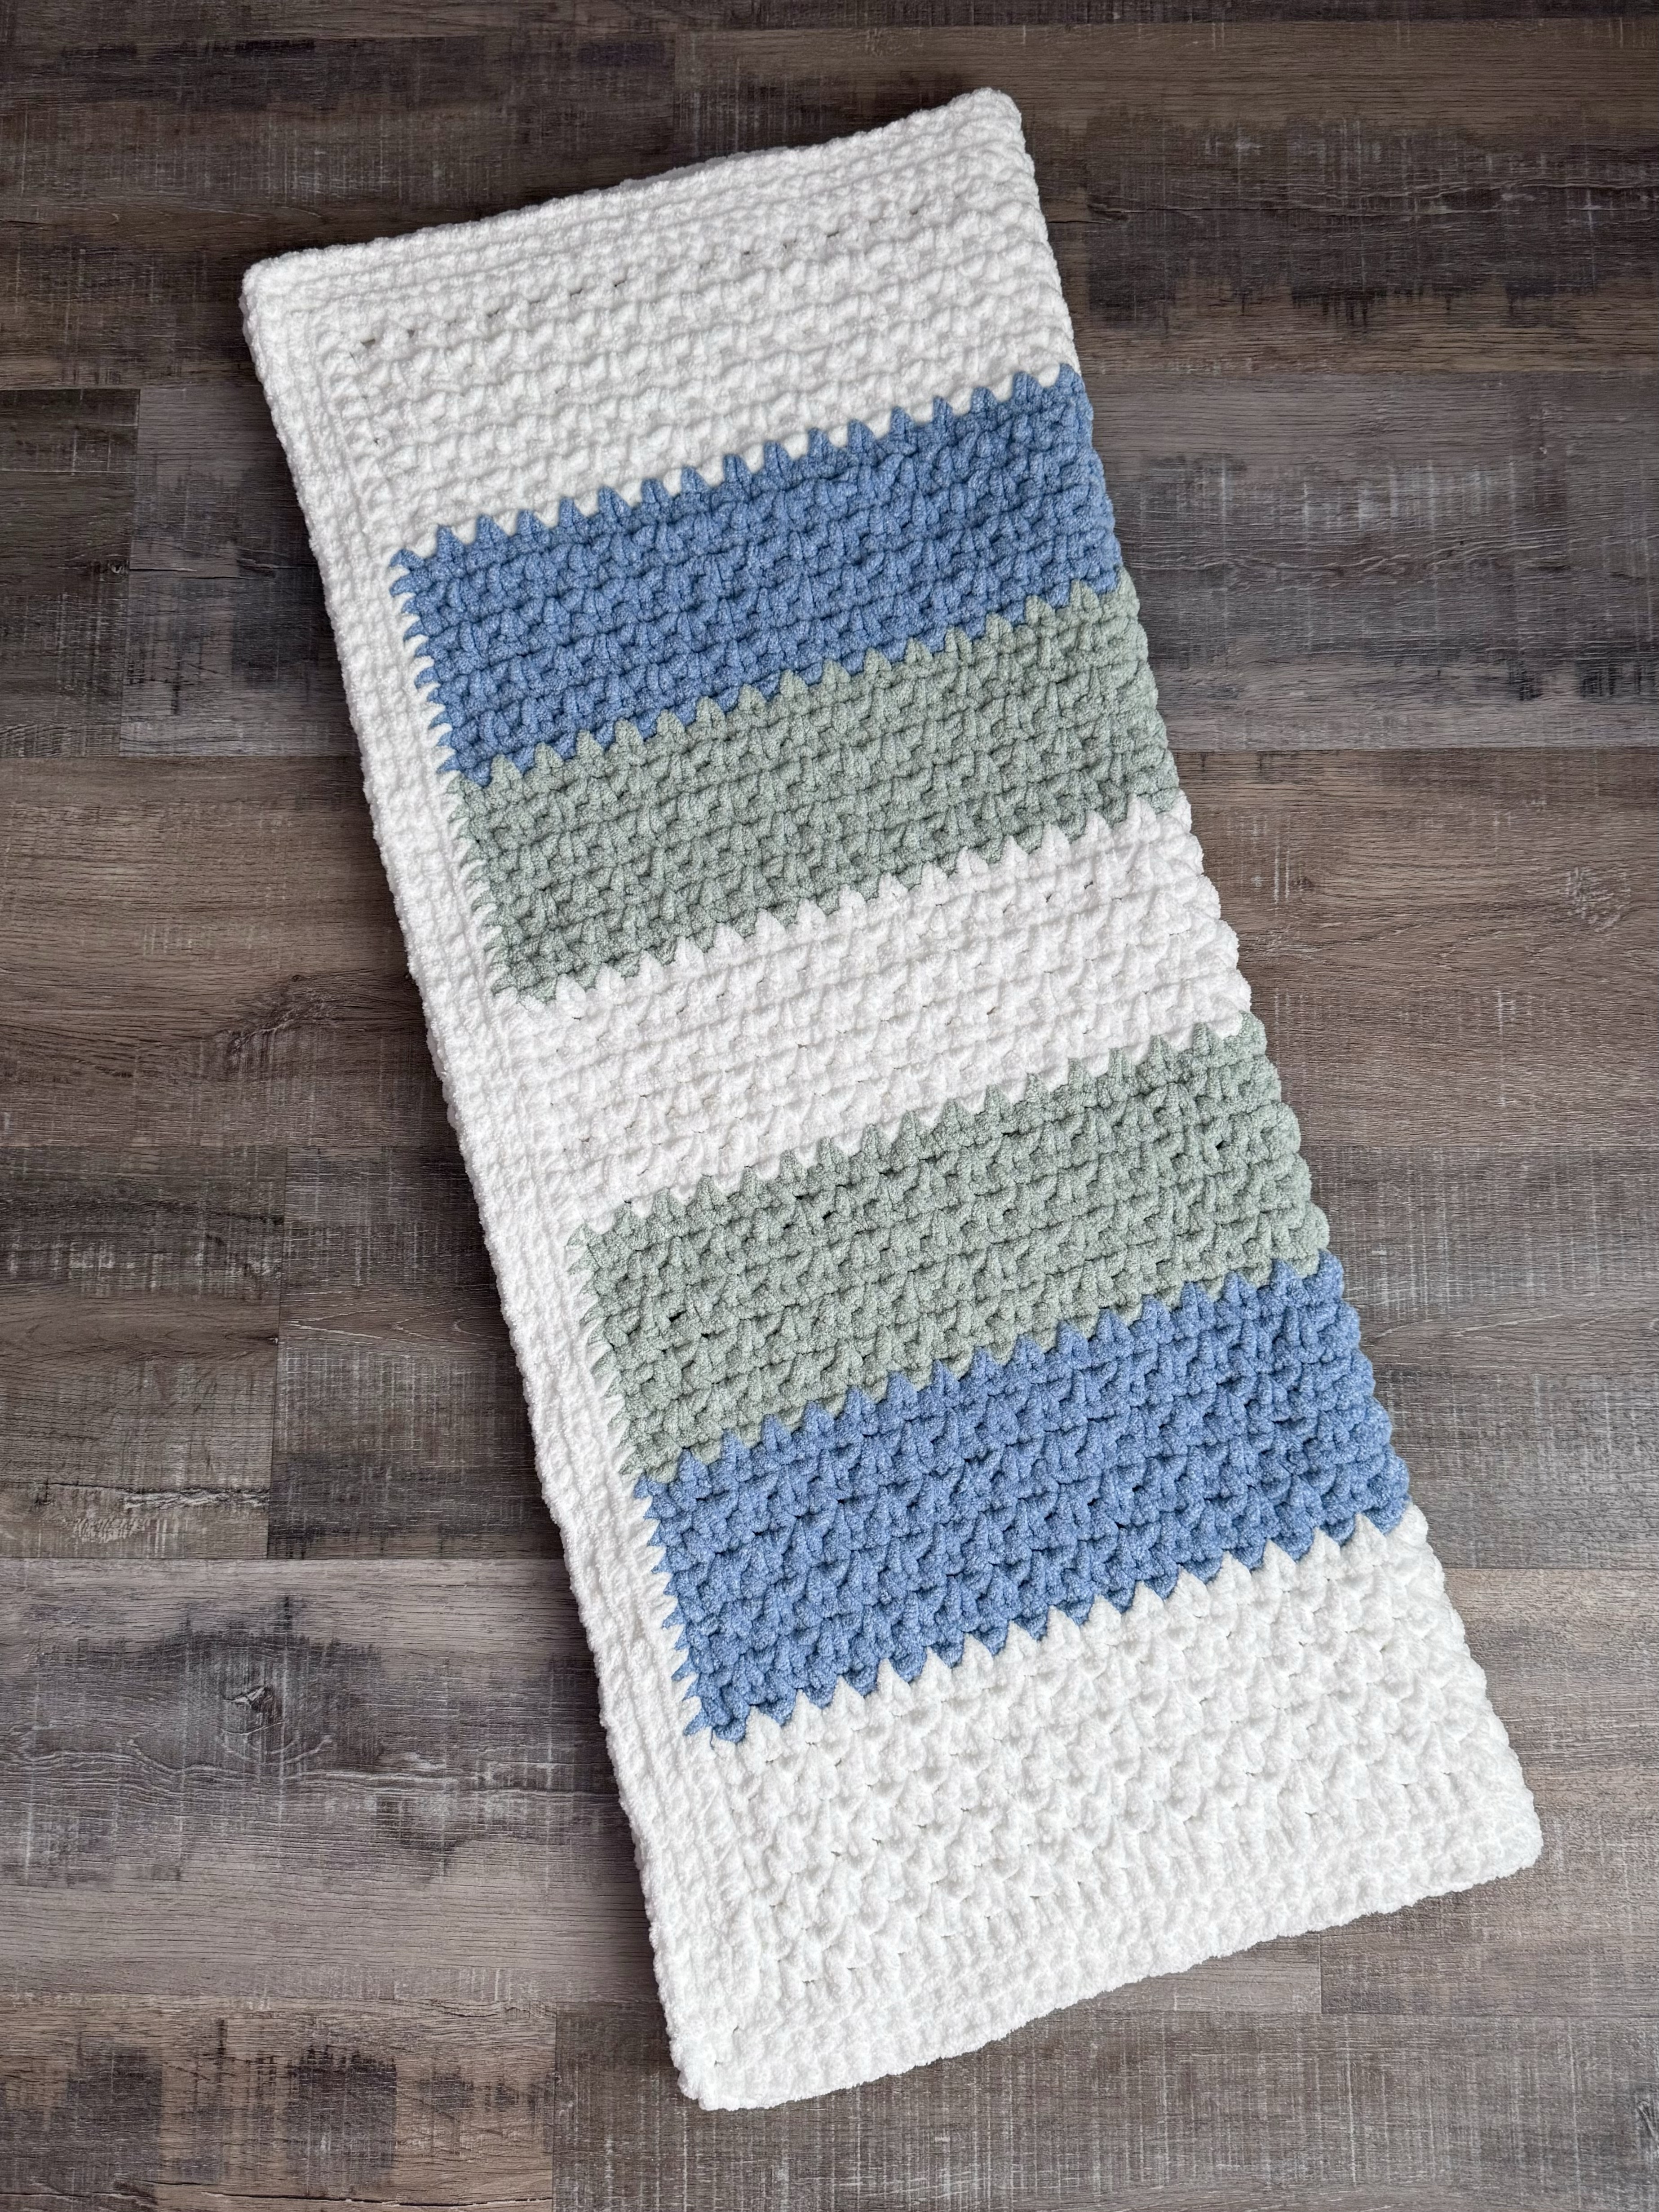
My oldest godson and his sweet wife had their second little boy in November 2023 and of course this precious little one needed his own special blanket! 🙂
The Cozy Crochet Granite Stitch Baby Blanket is made with Baby Bee Snugs & Kisses yarn which is super squishy and snuggly when it’s stitched up. The Granite Stitch (aka the Moss Stitch) is a great stitch for beginners and seasoned crocheters alike. It’s a simple repeat of single crochet and chain stitches and the texture really shows up using this super bulky yarn.
Disclosure: Some of the links on my site are affiliate links, meaning, at no additional cost to you, I will earn a small commission if you click through and make a purchase. As an Amazon Associate I earn from qualifying purchases.
Row 1: sc in the 2nd ch from the hook. *ch 1, skip 1 ch, sc in the next ch* Repeat from * to * to the end of the ch. You should end with a sc in the last ch. Turn. (67 stitches)
Row 2: ch 1. sc in the 1st sc, sc in the next ch 1 space. *ch 1, sc in next ch 1 space.* Repeat from * to * last sc, sc in the last sc. Turn. (67 stitches)
Row 3: ch 1. sc in the 1st sc. *ch 1, sc in next ch 1 space* Repeat from * to * to the last 2 sc. ch 1, skip 1 sc, and sc in the last sc. Turn. (67 stitches)
This is a thick and warm blanket – perfect to place on the floor for tummy time! You can make it striped like I did or it would also be so pretty in one solid color. Or maybe a solid color with a different color border. What color will you make your Cozy Crochet Granite Stitch Baby Blanket?
Disclosure: Some of the links on my site are affiliate links, meaning, at no additional cost to you, I will earn a small commission if you click through and make a purchase. As an Amazon Associate I earn from qualifying purchases.