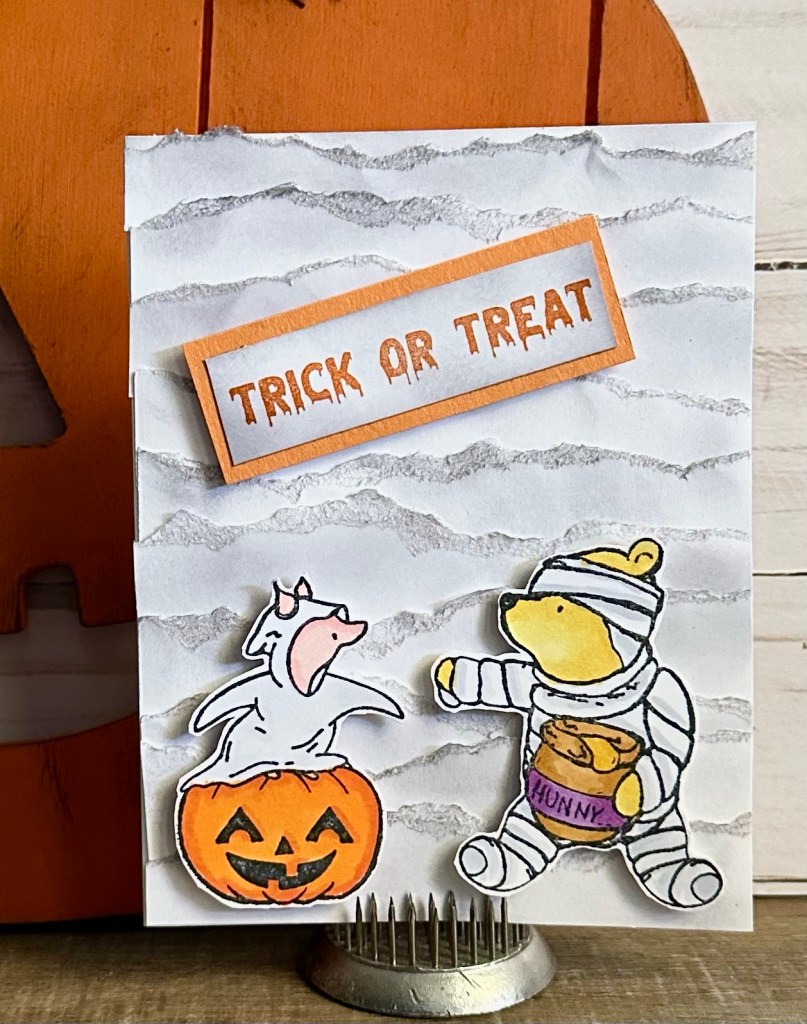
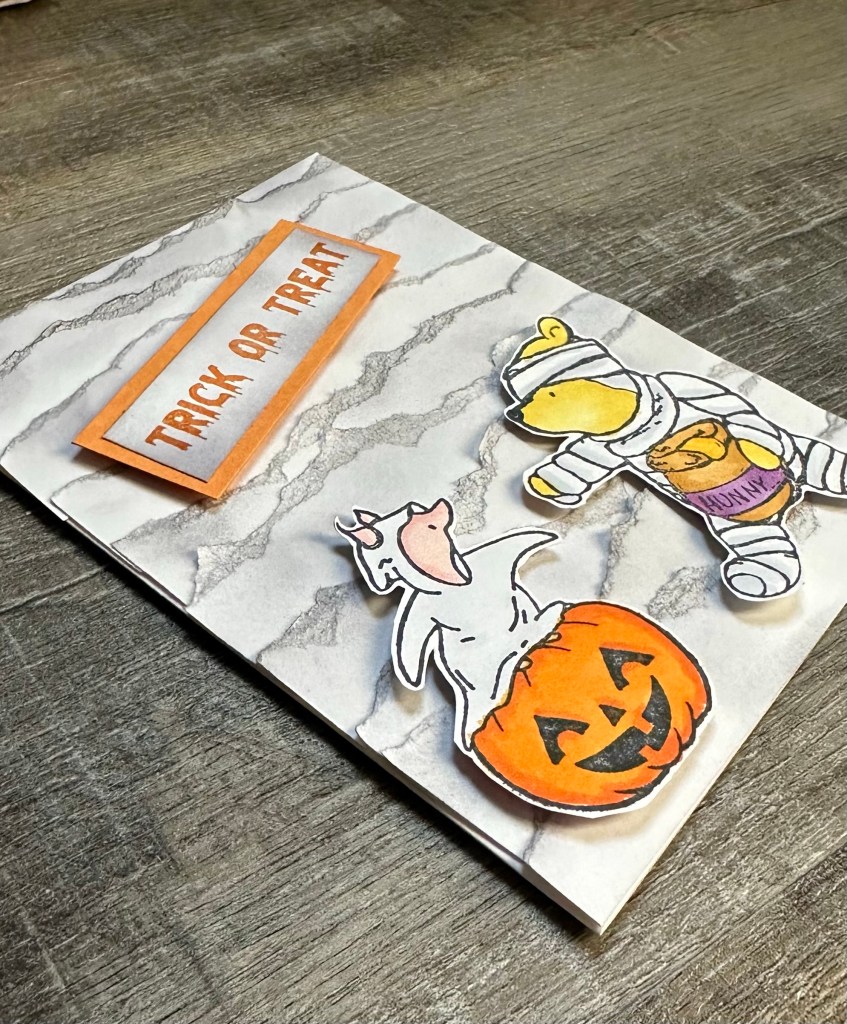
What could be more fun than Winnie the Pooh & Piglet all dressed up for Halloween? 🎃
Unity Stamp Company has done it again with this adorable stamp set called Winnie the Pooh: Trick or Treat. Pooh is dressed up as a mummy – of course holding his honey pot! And Piglet is a cute little ghost perched on a Jack-O-Lantern. The set also includes 2 sentiment stamps.
Disclosure: Some of the links on my site are affiliate links, meaning, at no additional cost to you, I will earn a small commission if you click through and make a purchase. As an Amazon Associate I earn from qualifying purchases.
I wanted to mimic the mummy costume Pooh is wearing for my background. I tore strips of white card stock and applied dark gray ink to the edges using the Blender Brushes from Taylored Expressions. I attached the strips to a white card, overlapping them.
I stamped the sentiment with orange ink on white card stock, applied gray ink with a blender brush, and layered it to orange card stock. I added Pooh, Piglet, and the sentiment to the card using foam tape.
Pooh & Piglet are the cutest way to wish everyone a Happy Halloween! 🎃
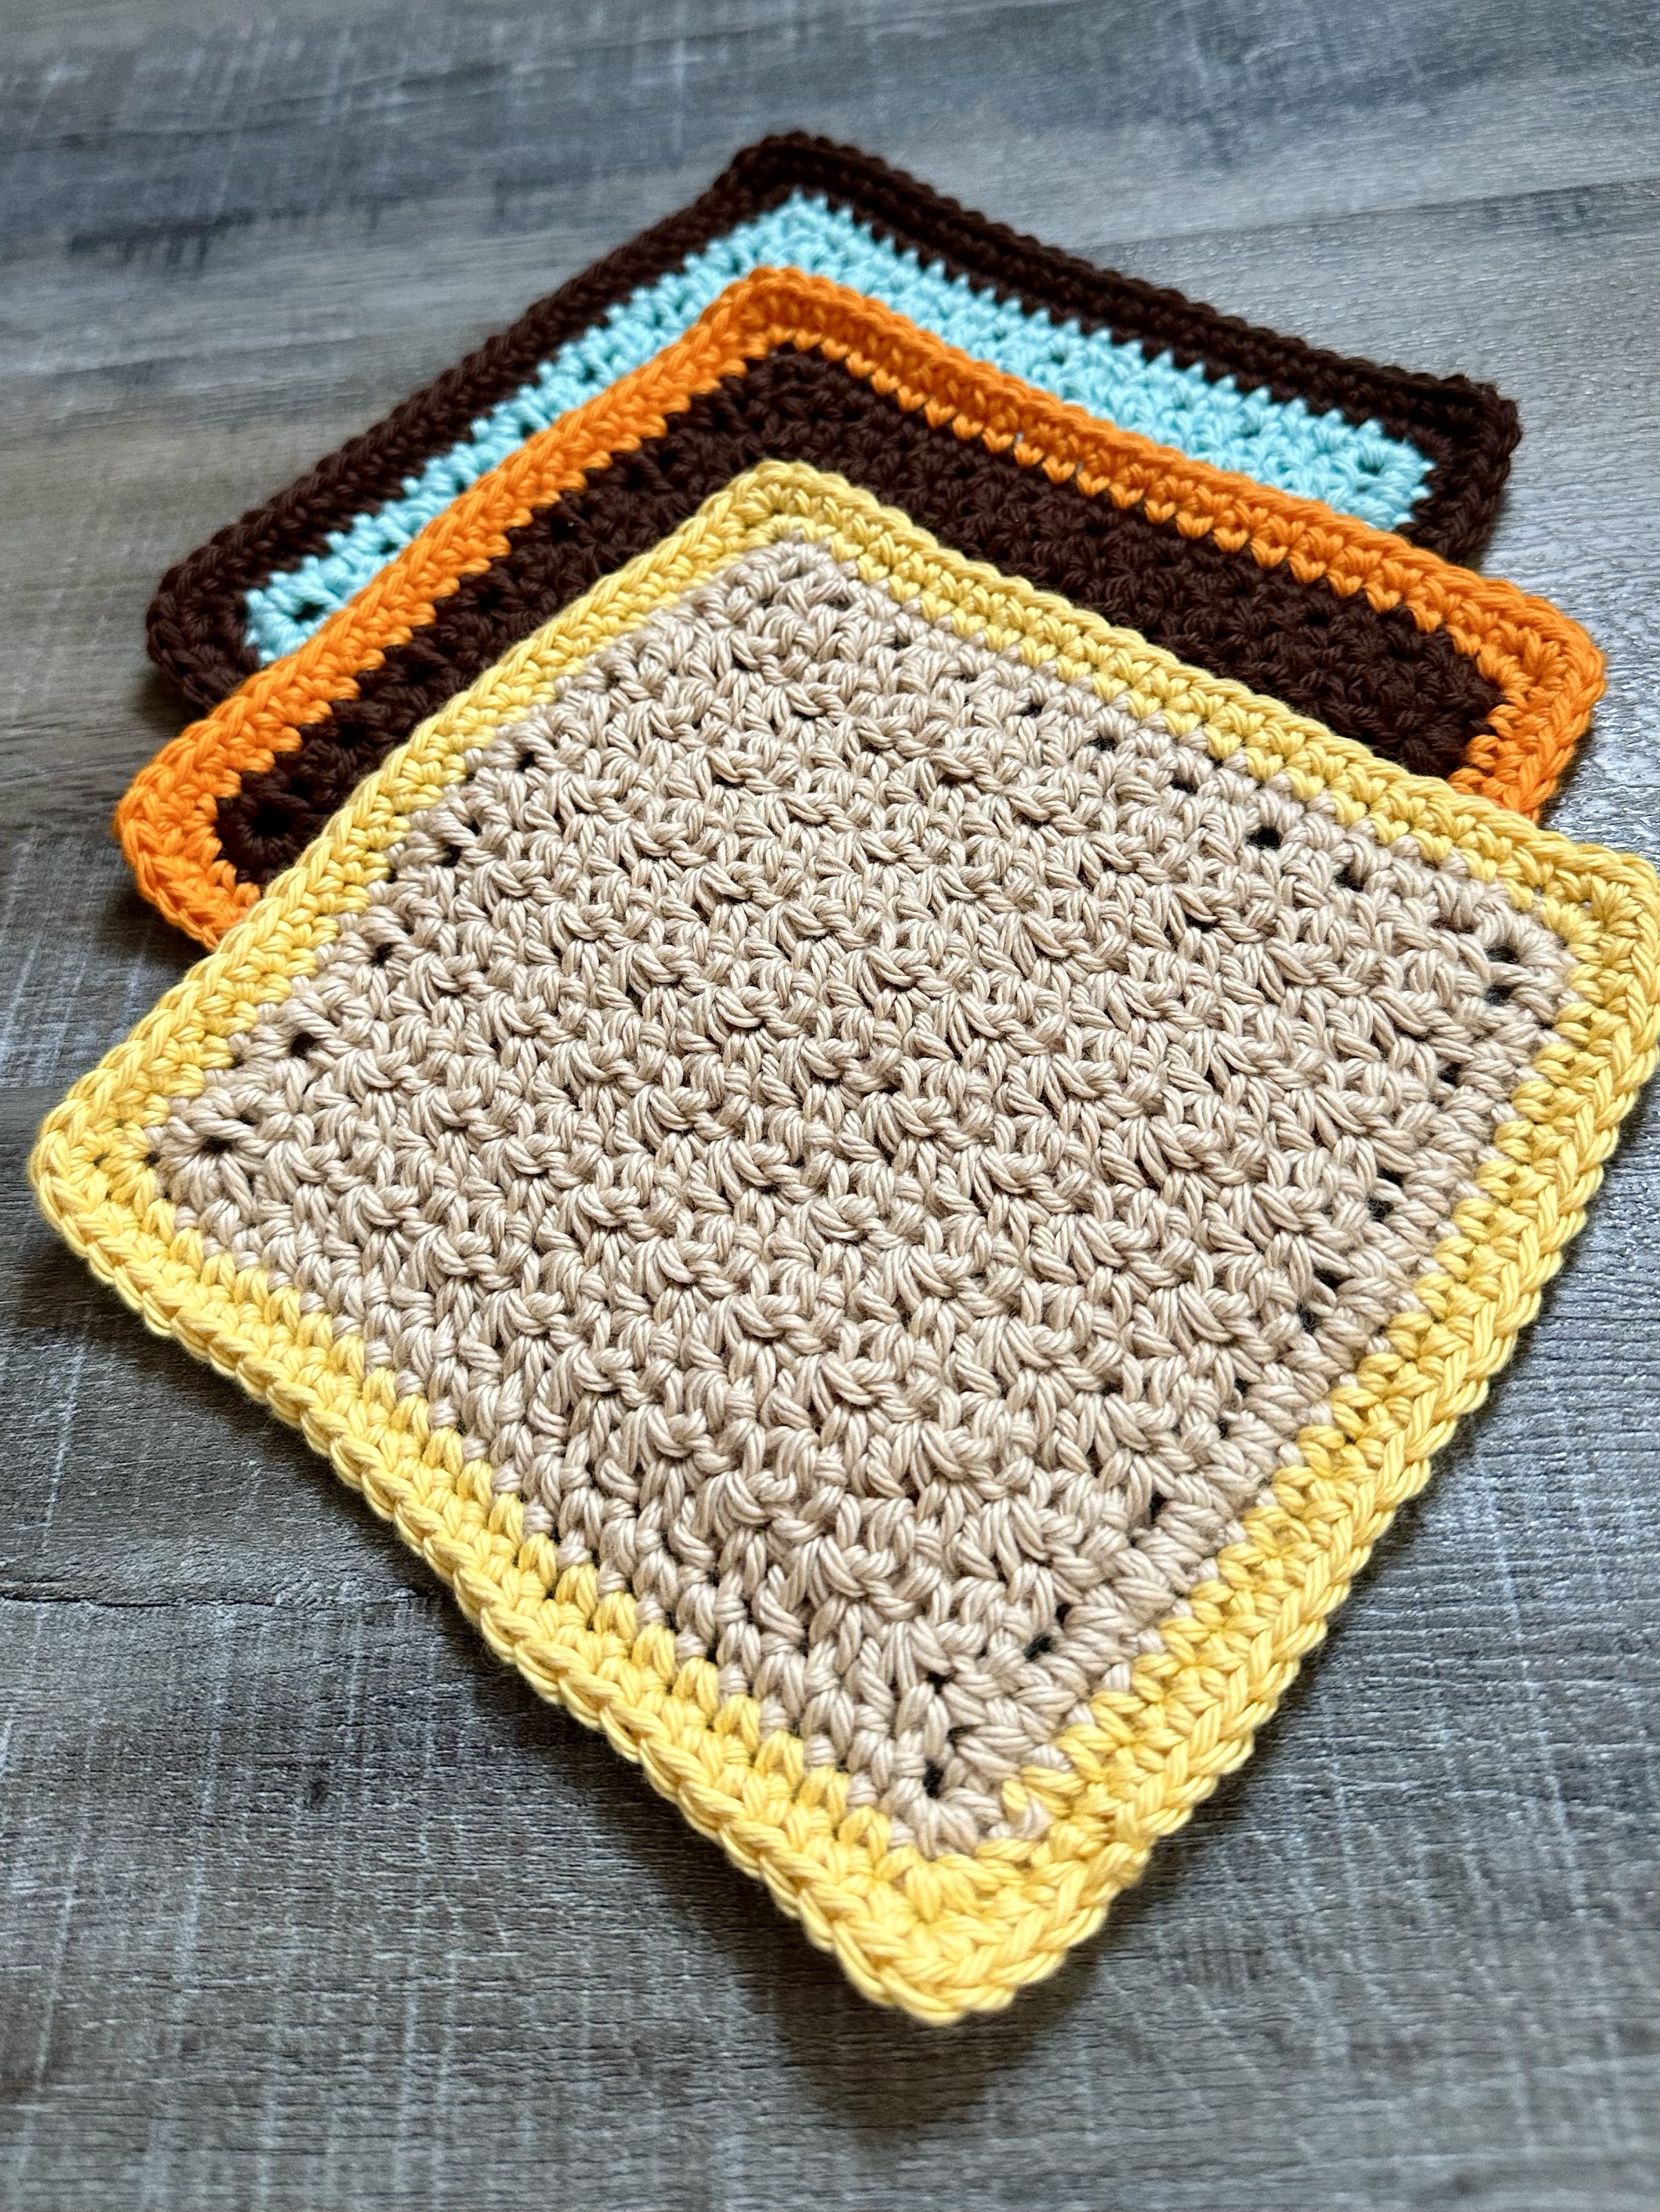
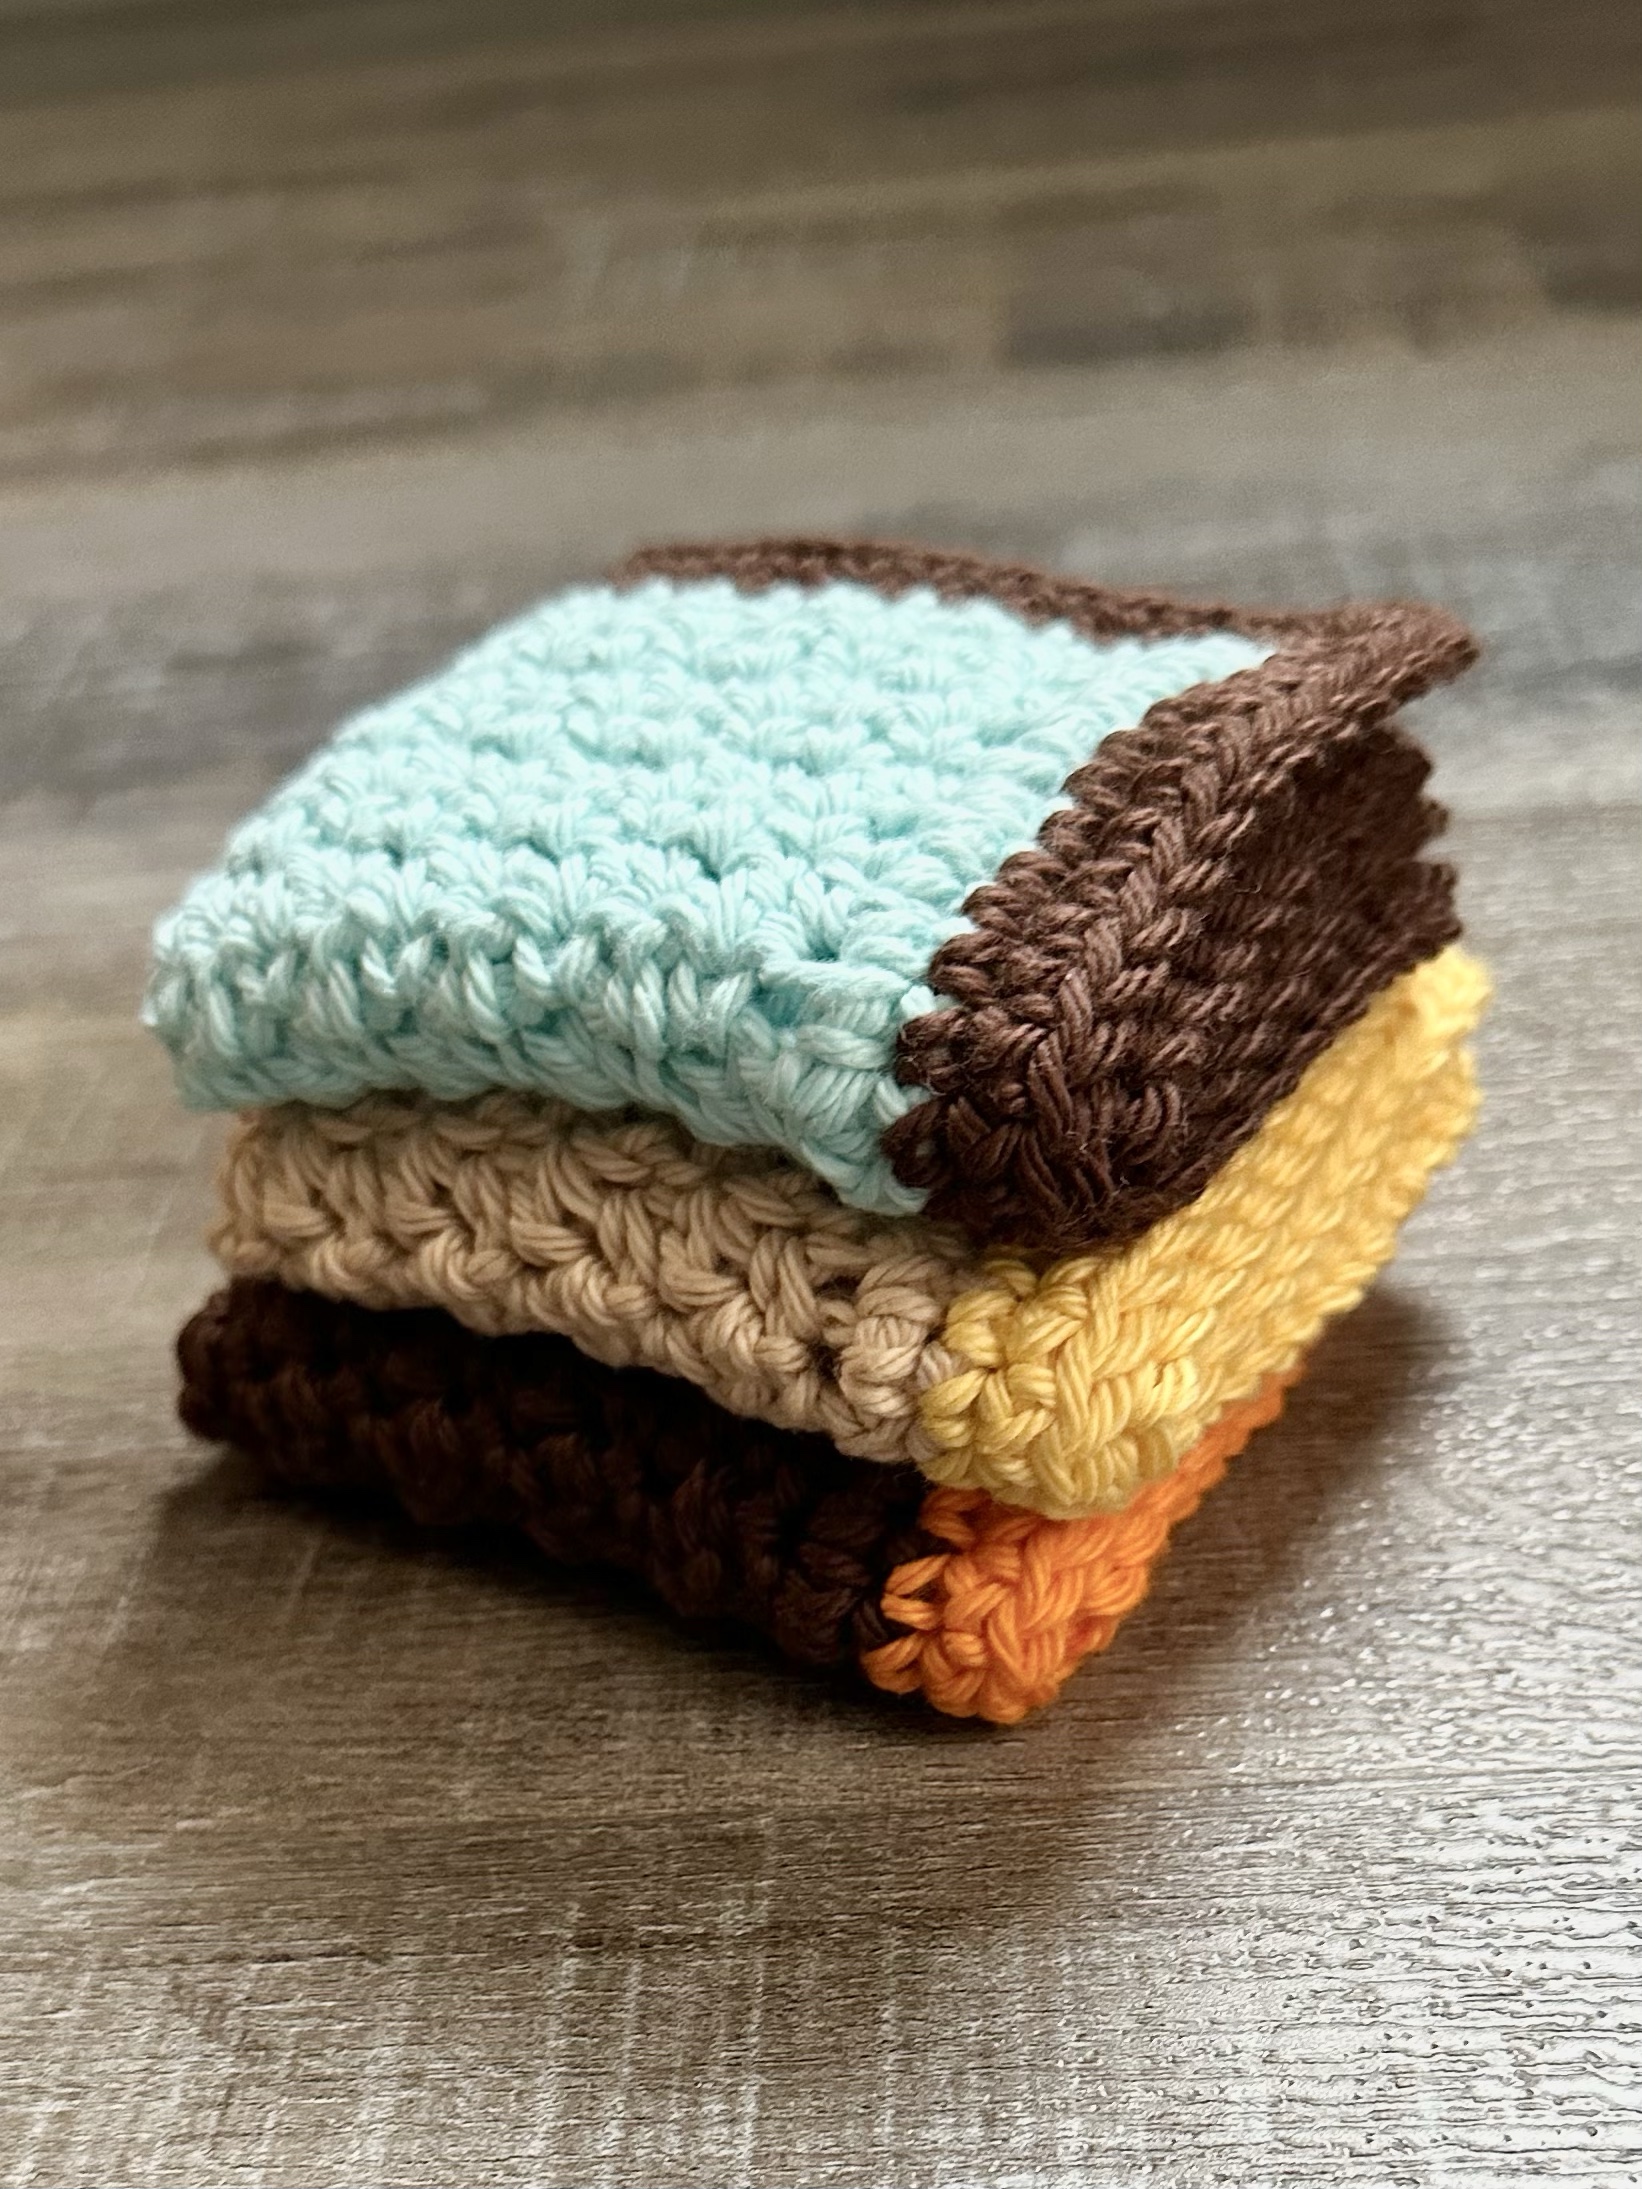
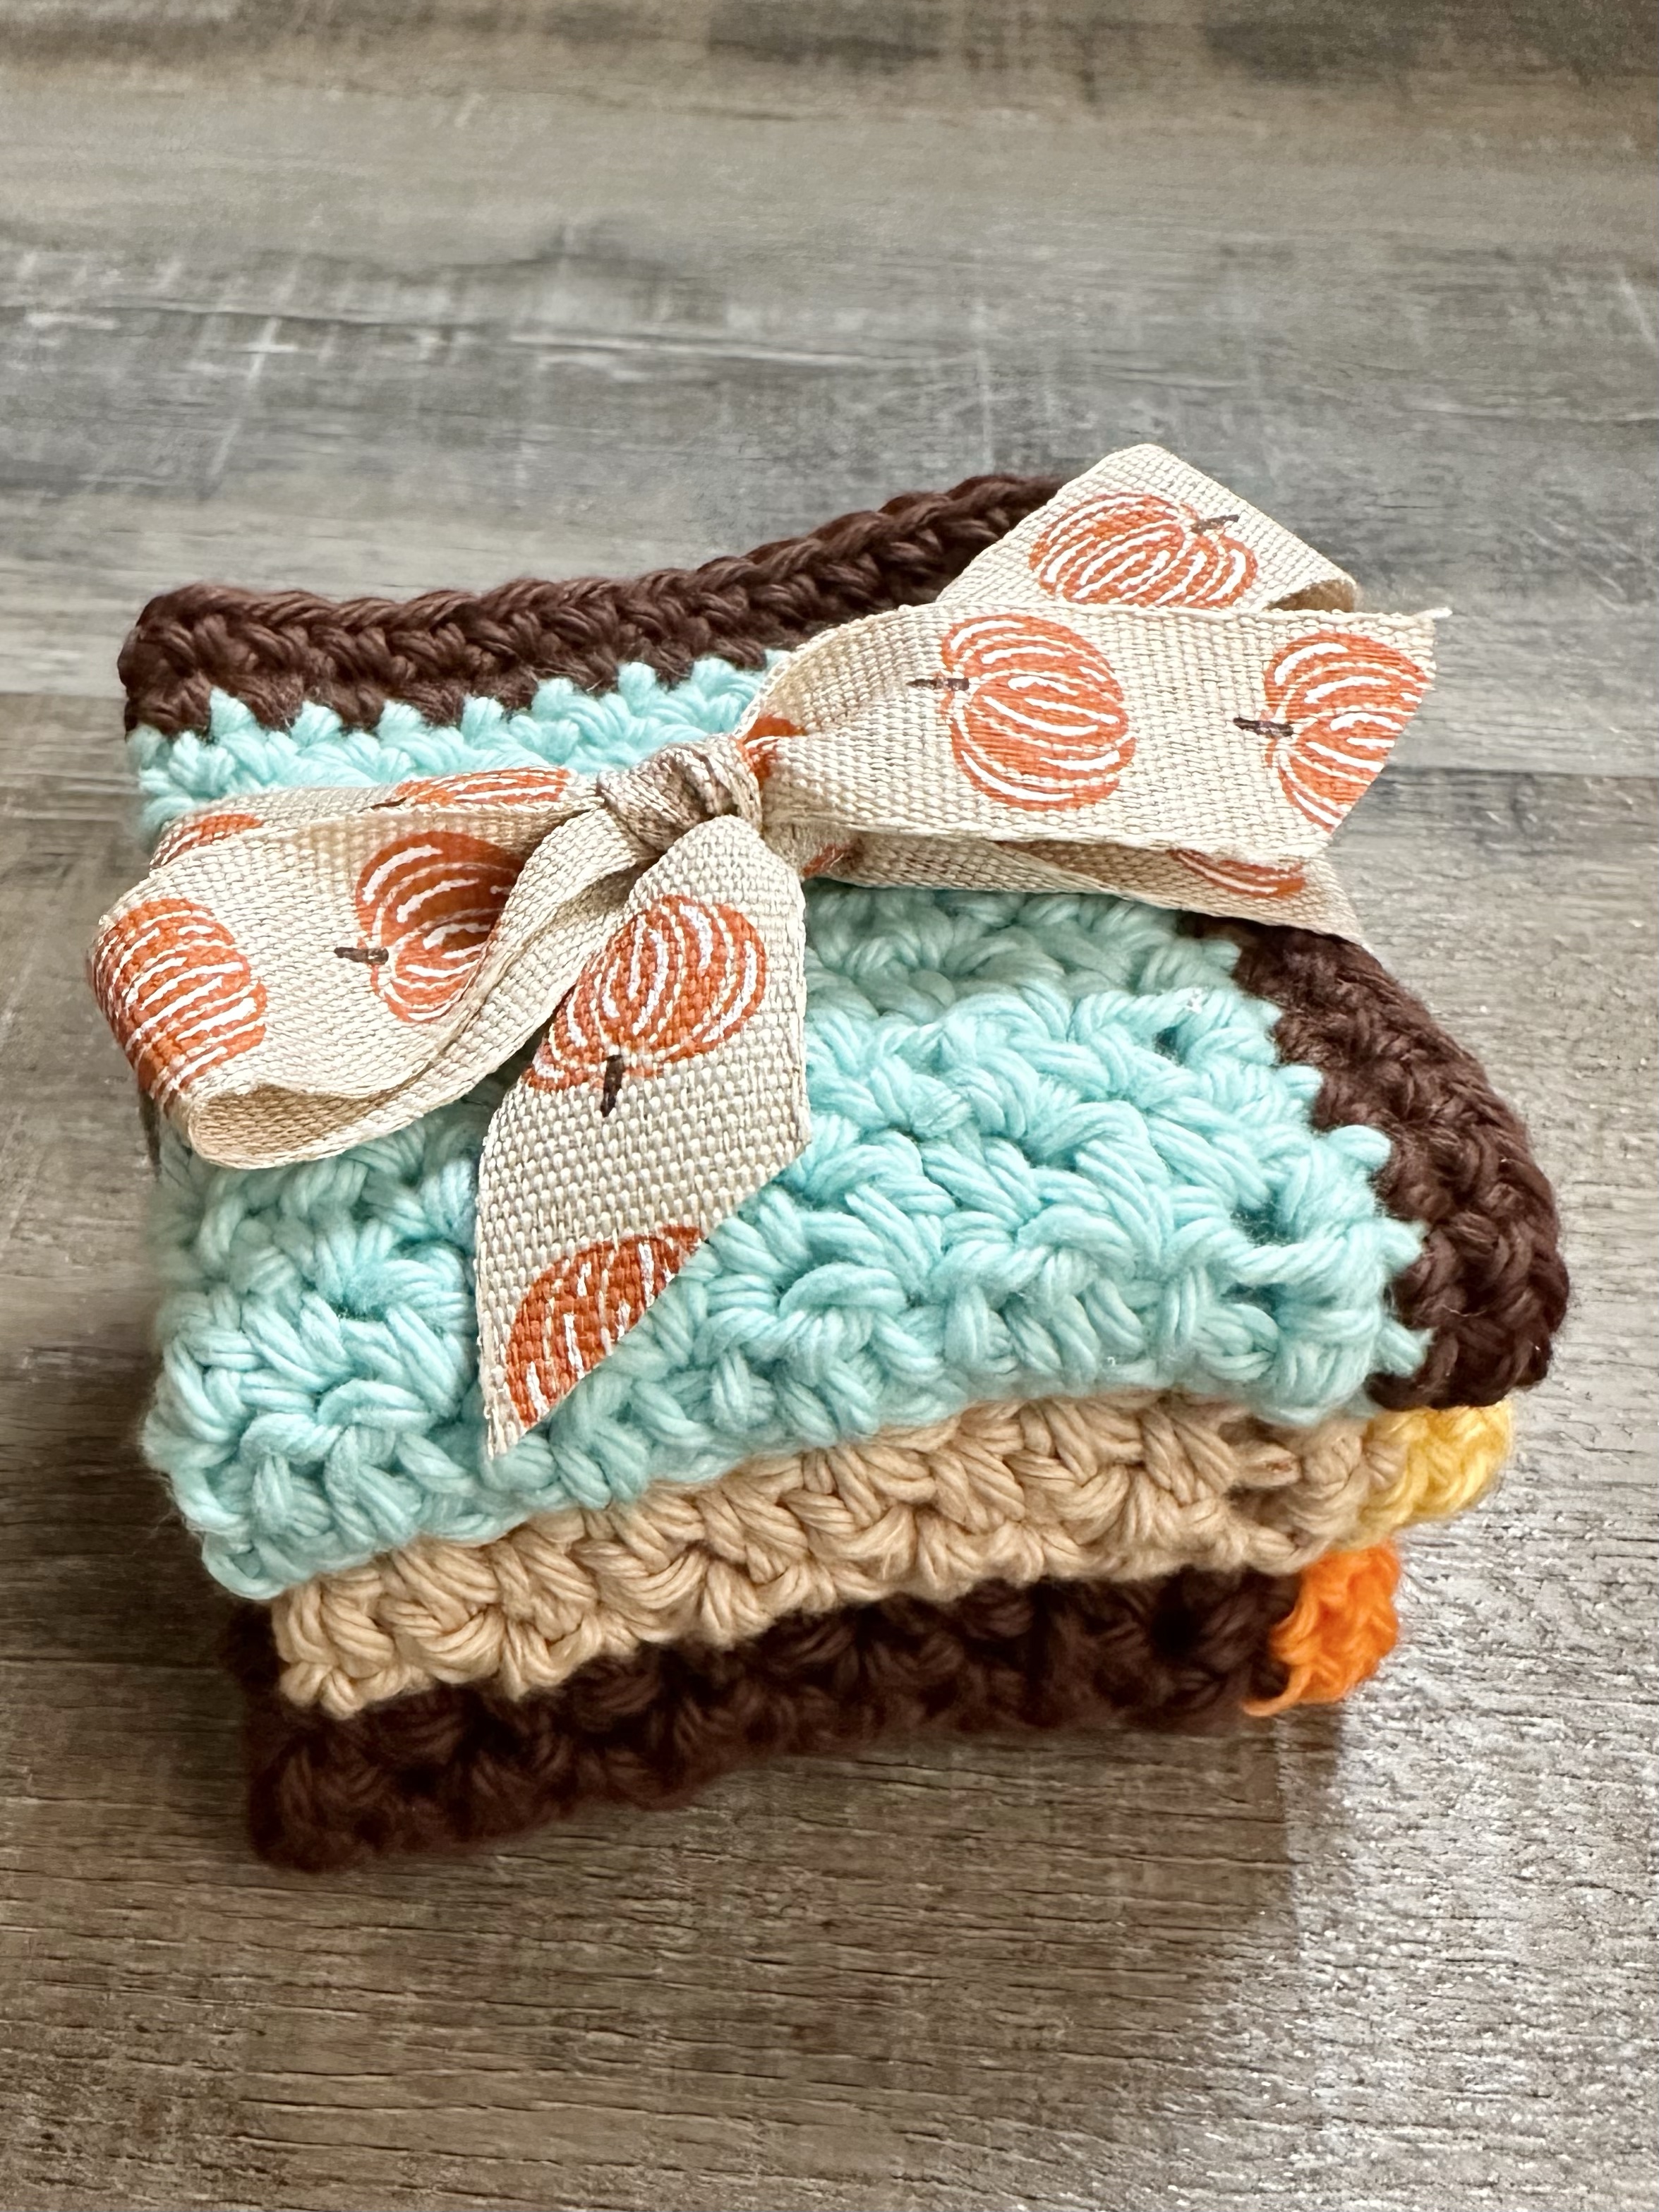
I had some cotton yarn leftover from other projects and the colors reminded me of Fall. So I created the It’s Fall Y’all Crochet Dishcloth pattern! It’s super quick and easy using simple stitches.
Disclosure: Some of the links on my site are affiliate links, meaning, at no additional cost to you, I will earn a small commission if you click through and make a purchase. As an Amazon Associate I earn from qualifying purchases.
The dishcloth is worked in the Lemon Peel stitch with a border of single crochet. Don’t let the name of the stitch scare you – it’s simply alternating single crochet and double crochet. It creates a beautiful texture!
I used I Love This Cotton yarn and an H/5mm crochet hook to stitch up my dishcloths. The simple pattern is below along with a link to a free PDF if you’d like to print it.
It’s Fall Y’all Crochet Dishcloth
100% cotton yarn – I used I Love This Cotton Yarn in Aqua, Brown, Taupe, Curry, and Glowing
H/5mm crochet hook
Stitches used in US terms:
Chain – ch
Single crochet – sc
Double crochet – dc
Slip stitch – ss
Chain 21.
Row 1: sc in 2nd ch from hook. dc in next stitch. *sc in next stitch, dc in next stitch* Repeat from * to * across. ch 1, Turn. (20 stitches)
Row 2: sc in first stitch, dc in next stitch. *sc in next stitch, dc in next stitch* Repeat from * to * across. ch 1, Turn. (20 stitches)
Repeat Row 2 until piece measures about 5 inches long. Do not turn after last row.
Begin working in rounds.
Round 1: ch 1. sc evenly around, working 3 sc in each corner. Join with ss to first sc.
Change to contrasting color.
Round 2: ch 1. sc in each stitch around, working 3 sc in each corner. Join with ss to first sc.
Round 3: ch 1. sc in each stitch around, working 3 sc in each corner. Join with ss to first sc.
The It’s Fall Y’all Crochet Dishcloth would make a fun little hostess gift. Just stack 3 together and tie with a cute Fall ribbon. You can also use these as spa washcloths since they are made with cotton yarn. They would be a great addition to a spa themed gift basket – and of course you can make them in any color you’d like. 🙂
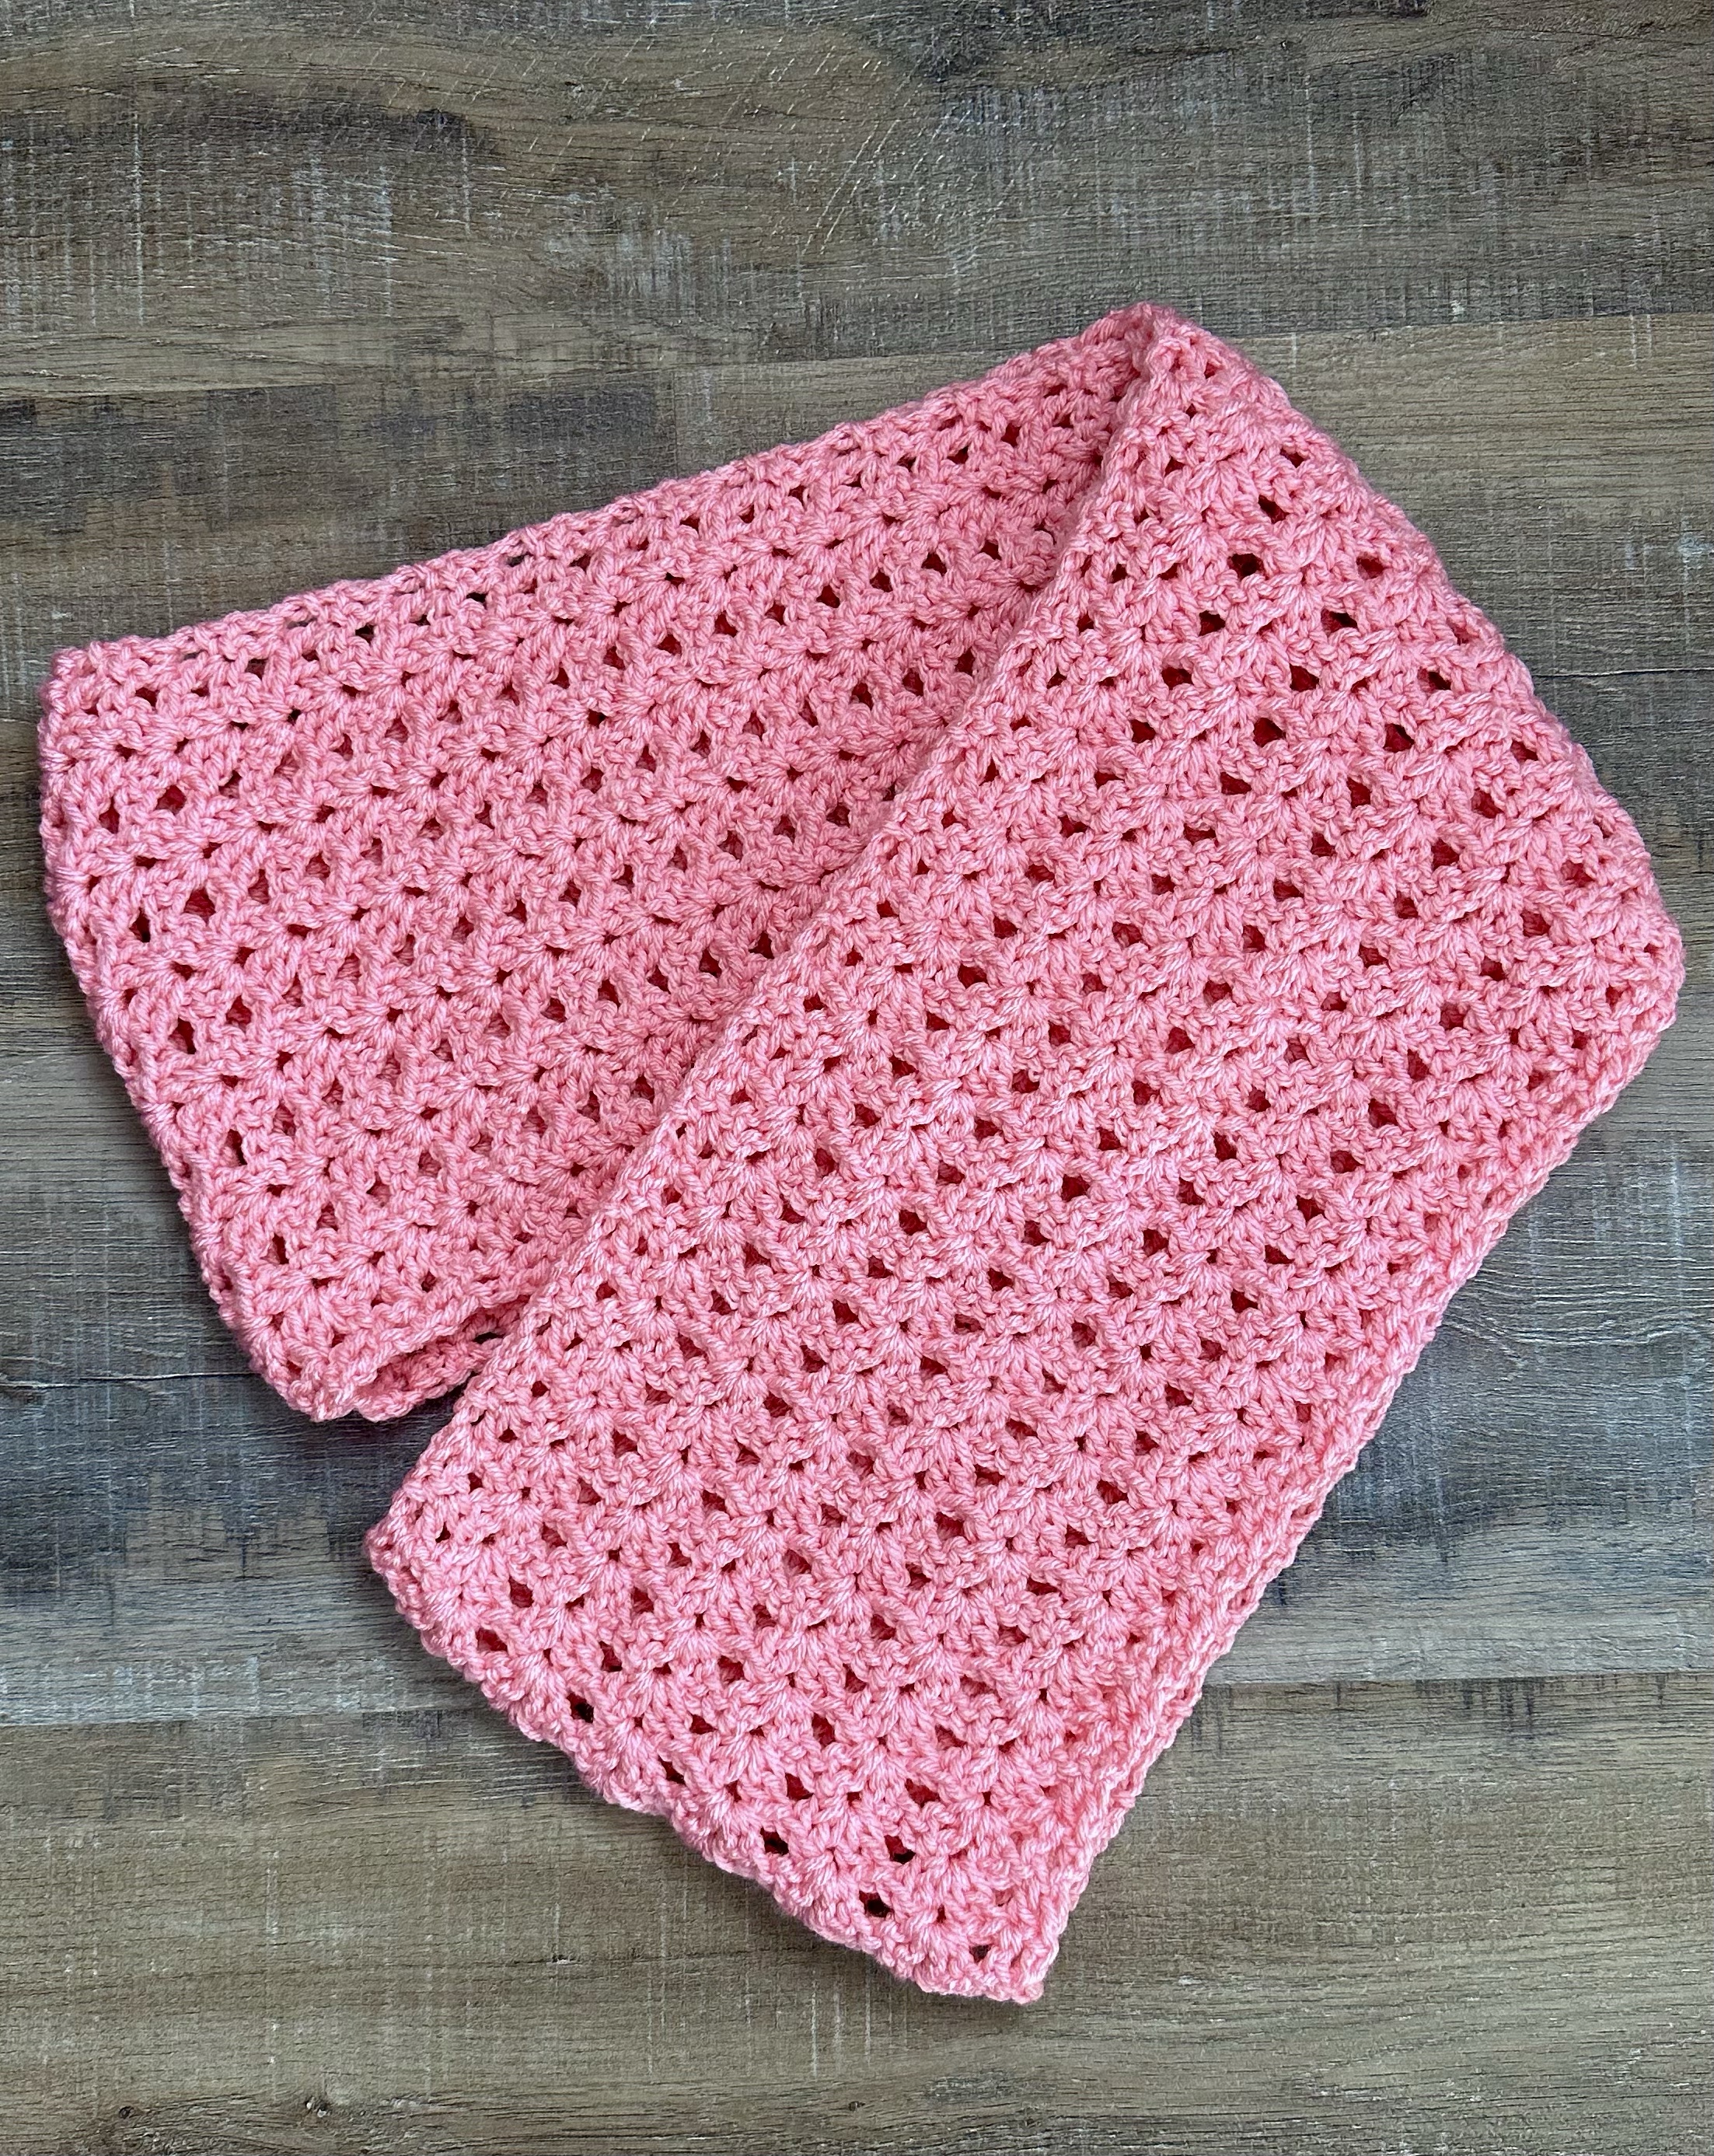
In October we wear Pink! As you probably know, October is Breast Cancer Awareness Month and pink is the color associated with it. I designed the October Crochet Infinity Scarf in honor of all those women who have fought and will fight against this horrible disease and especially for my family and friends who have bravely waged their battles.💕
If you are a woman over 40, I encourage you to schedule a mammogram. It doesn’t take long, it’s not too uncomfortable, and it could save your life. I just had mine – now it’s your turn!💕
Disclosure: Some of the links on my site are affiliate links, meaning, at no additional cost to you, I will earn a small commission if you click through and make a purchase. As an Amazon Associate I earn from qualifying purchases.
The scarf is stitched up using worsted weight yarn and an I/5.5mm hook. I used I Love This Yarn in Pink for my scarf. It’s an easy pattern using double crochet, chain stitch, and a little single crochet. You can find the pattern below and also a link to a free PDF if you’d like to easily print it.
I started the scarf with a row of Foundation Single Crochet. This is a great tutorial for learning this stitch if you need it.
October Crochet Infinity Scarf
Worsted weight yarn (about 7 ounces) – I used I Love This Yarn in Pink
I/5.5mm crochet hook
Stitches used in US terms:
Chain – ch
Foundation single crochet – fsc
Single crochet – sc
Double crochet – dc
Special Stitch: Double V-stitch (2 dc, ch 1, 2 dc) in same stitch – dv-stitch
Slip stitch – ss
Note: chain 2 at beginning of rows counts as a double crochet.
Row 1: work 34 fsc. Turn. (34 stitches) OR ch 35, sc in 2nd ch from hook and each ch across (34 stitches)
Row 2: ch 2 (counts as 1st dc). Skip 1st stitch, dc in next stitch. Skip next 2 stitches, work dv-stitch in next stitch. *Skip next 4 stitches, work dv-stitch.* Repeat from * to * 5 times. Skip next 2 stitches, dc in last 2 stitches. Turn. (6 dv-stitches with 2 dc at each end.)
Row 3: ch 2 (counts as 1st dc). Skip 1st stitch, dc in next stitch. Work dv-stitch in ch 1 space of each dv-stitch from previous row across. dc in last 2 stitches. Turn. (6 dv-stitches with 2 dc at each end.)
Repeat Row 3 until scarf measures about 60 inches.
Last row: ch 1. sc in each stitch and ch 1 space across. (34 stitches)
This is a great pattern for beginners as well as seasoned crocheters. And if Pink is not your color, you can make it in any color you choose. It would also make a great gift! 💕
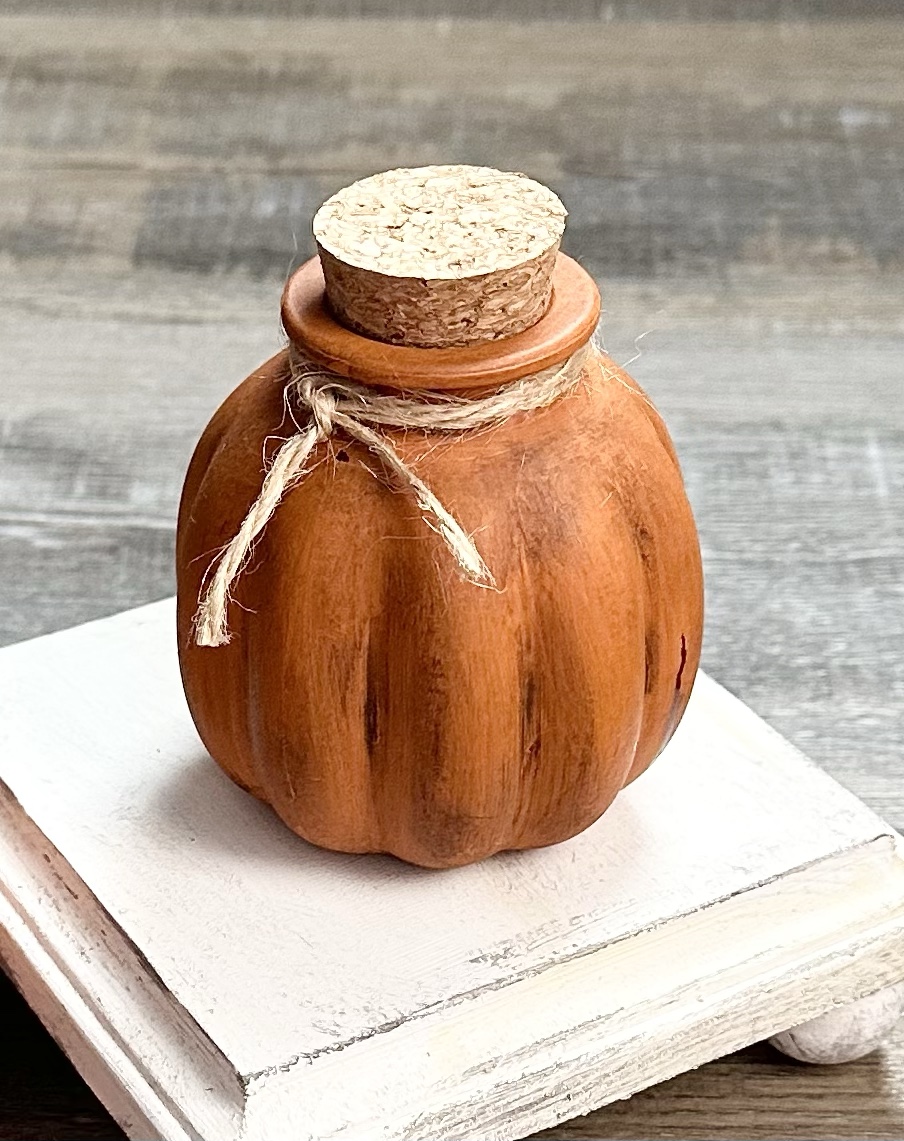
Have you seen these little spice jars in the Target Dollar Spot? They come in a pack of 2 for only $3.00! As soon as I saw them I thought they looked just like pumpkins. 😊
Disclosure: Some of the links on my site are affiliate links, meaning, at no additional cost to you, I will earn a small commission if you click through and make a purchase. As an Amazon Associate I earn from qualifying purchases.
I decided to add a little chalk paint and twine to make them look even more like pumpkins!
First I removed the cork, then washed and thoroughly dried the jars. I applied 3 coats of orange chalk paint (this is similar to what I used) with a foam brush, making sure to let it dry between coats. Then I applied a thin coat of antique wax and wiped the excess off with a paper towel. This step helps the texture of the jar to show up. To finish off my pumpkins, I tied some natural jute twine around the top and popped the cork back in.
Such a fun little Fall project. If you can’t find these particular jars, keep a lookout while you’re out shopping. You might be able to find other fun jars that will work just as well. (You can find all the info for making the Farmhouse Mini Wood Riser pictured above in this post.)
You can also use these cute little jars without painting them. They would be so cute filled with Fall candies and tied with twine. These would be great favors on your Thanksgiving table. 🦃
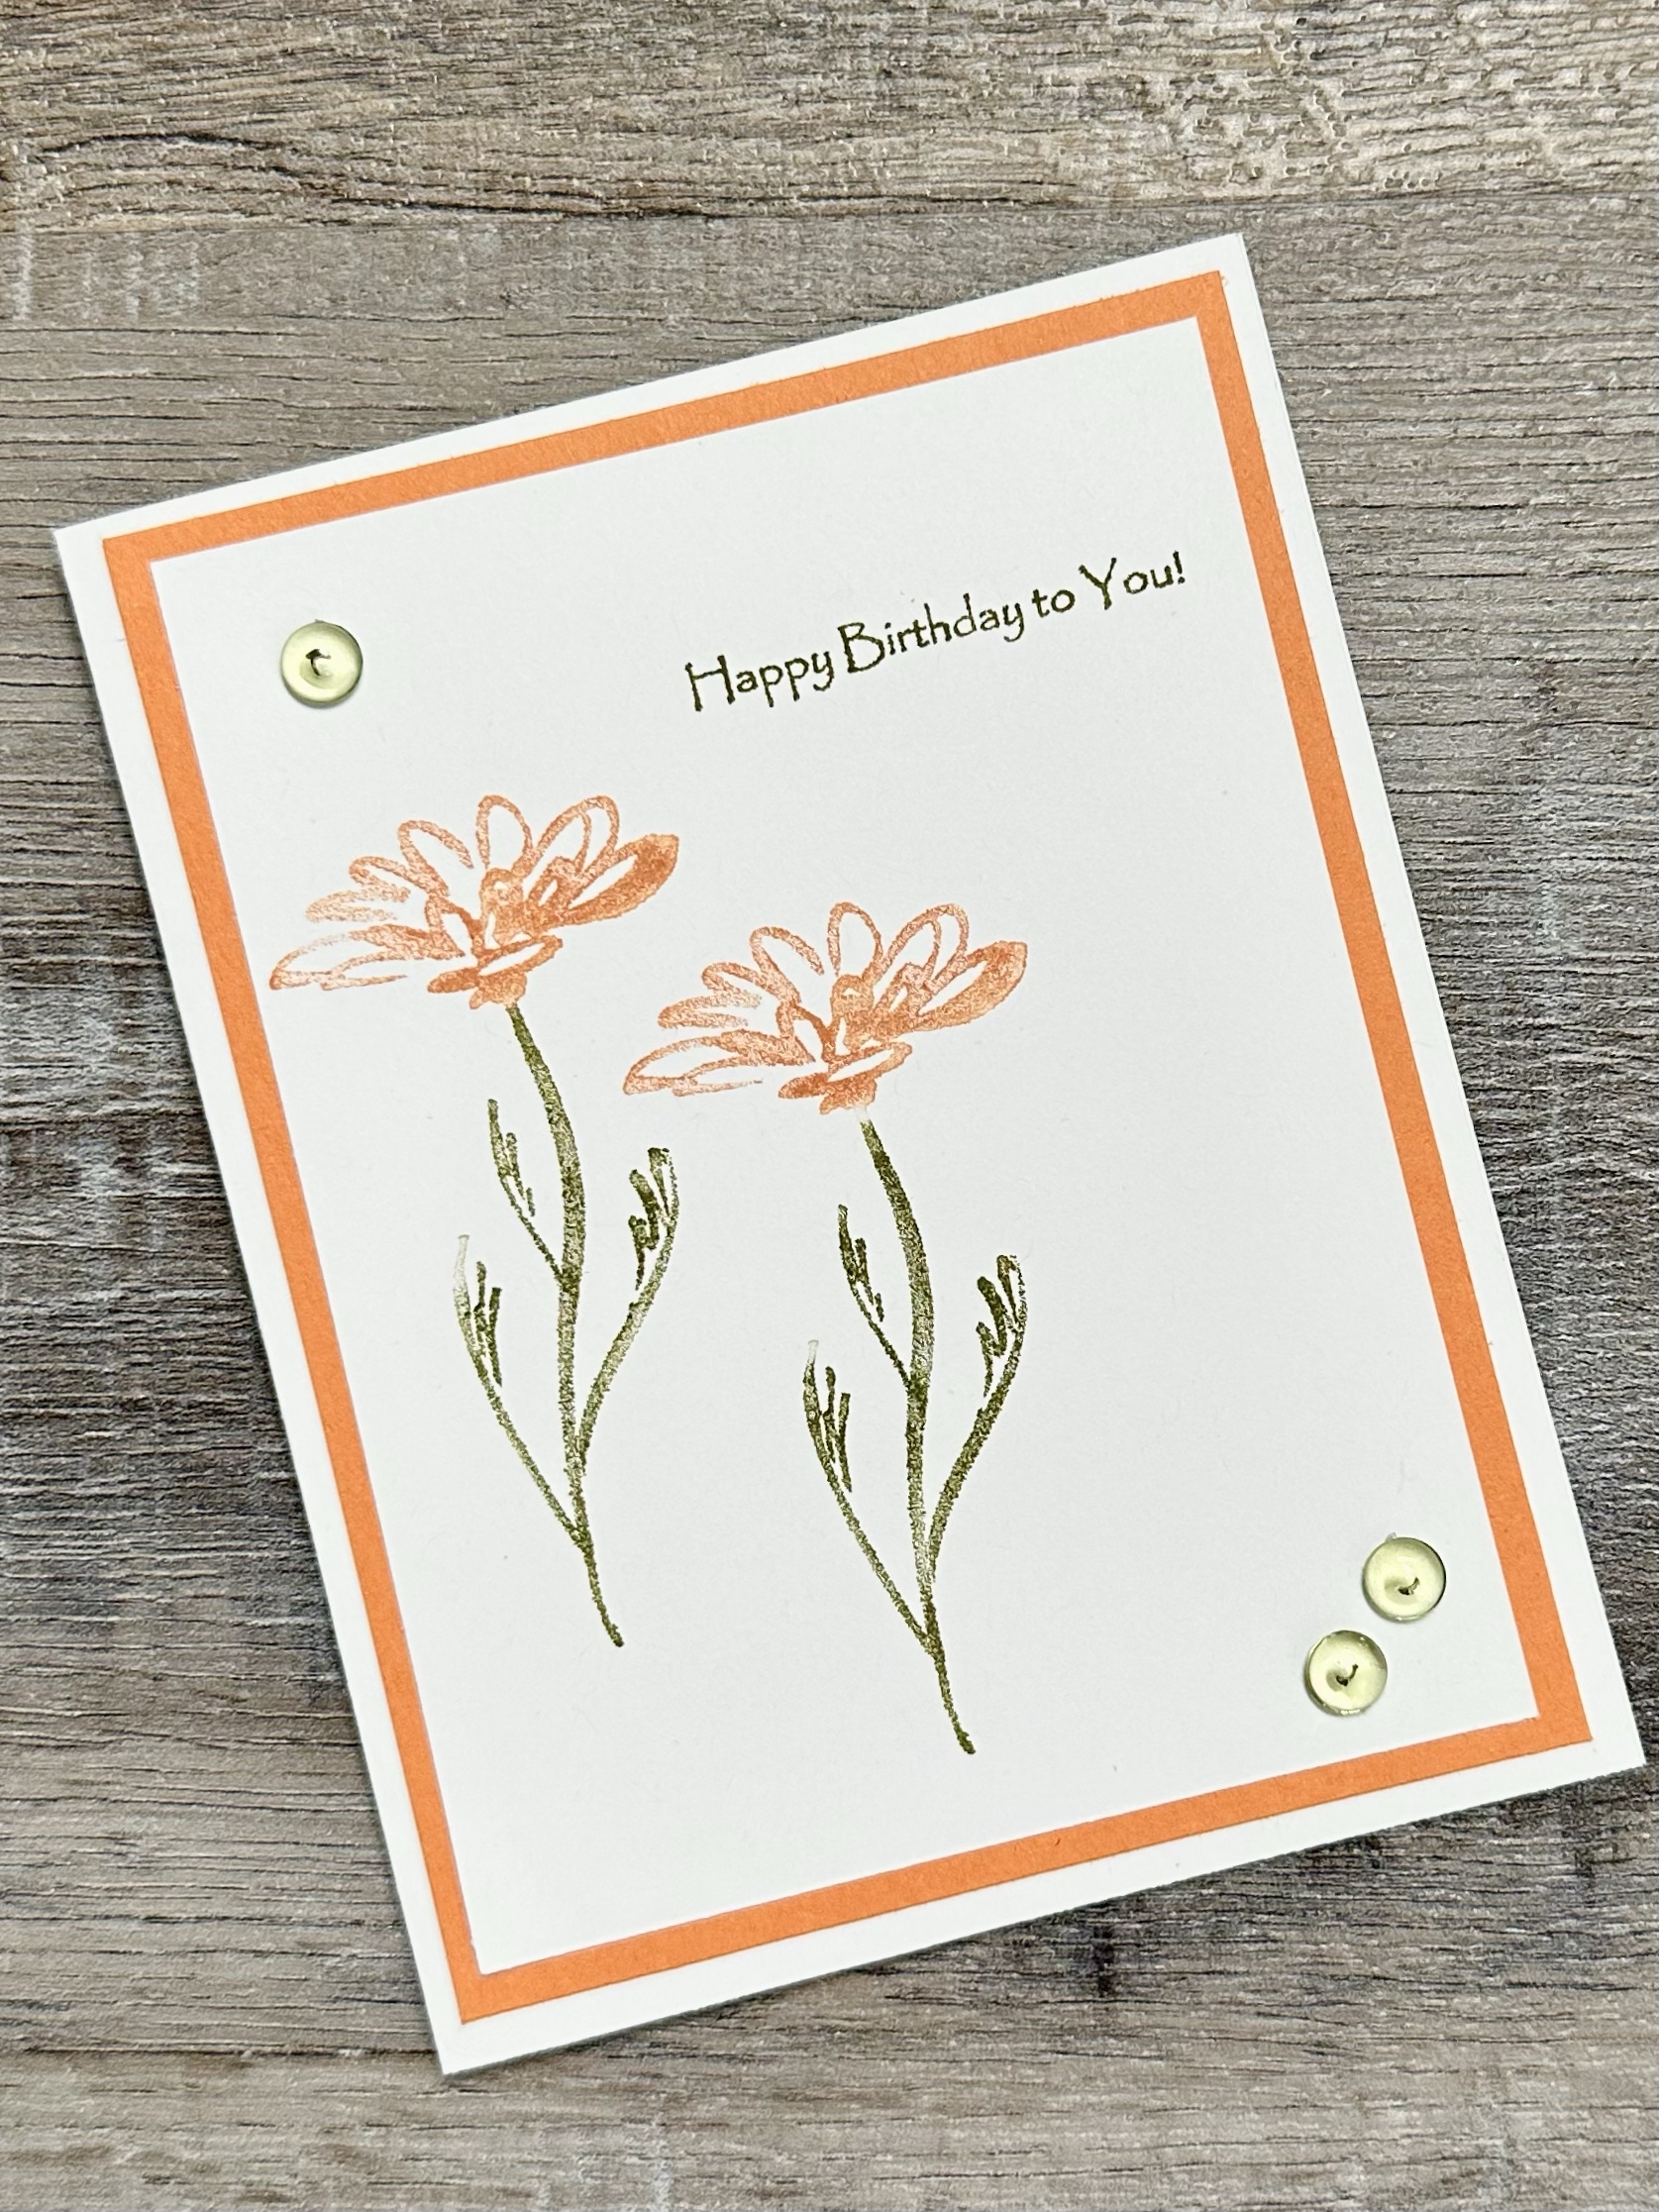
Sometimes less is more! I love everything about this clean and simple card. The Fall colors, the simple layout, and the Dew Drops to finish it off are just perfect!
Disclosure: Some of the links on my site are affiliate links, meaning, at no additional cost to you, I will earn a small commission if you click through and make a purchase. As an Amazon Associate I earn from qualifying purchases.
The flower stamp is a very old stamp from Hero Arts. Don’t forget to look through your older stamps and show them some love now and then. 😉 Any simple flower stamp you have will work on a card like this. This Real Poppy stamp from Heart Arts would be pretty on this type of card.
I colored directly onto my stamp with water-based Tombow Dual Brush Markers to ink up my stamp. Any brand of water-based markers will work – but make sure they are water-based. You can also use your die ink cubes to apply color to your stamp.
I stamped my flower twice on white card stock, re-inking the stamp before stamping each flower. I stamped my sentiment onto the card stock, using the same green marker to ink up my stamp. (I’ve had this birthday stamp in my craft room a long time 🙂 Use your favorite birthday sentiment stamp.) I layered the stamped panel to matching orange card stock and attached it to a white card. Then I added 3 green Dew Drops to finish the card.
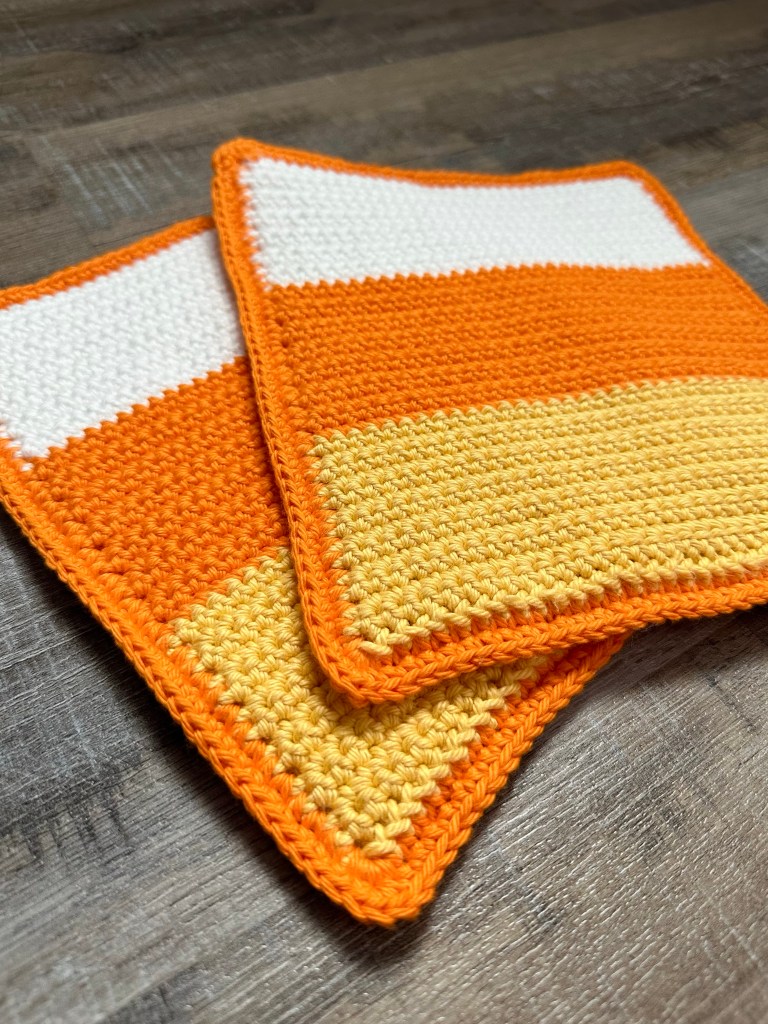
Sometimes you just need a simple, back to basics project to work on. And that’s just what the Oversized Crochet Candy Corn-Inspired Potholder is! It’s stitched up in single crochet and can work as a potholder as well as a hotpad to protect your counter or table from a hot dish. It’s a great beginner project!
Disclosure: Some of the links on my site are affiliate links, meaning, at no additional cost to you, I will earn a small commission if you click through and make a purchase. As an Amazon Associate I earn from qualifying purchases.
I used I Love This Cotton yarn in Curry, Glowing, and White with an F/3.75 crochet hook to stitch up my potholders. I chose colors to mimic candy corn since it’s the season 😉 but of course you can make your potholders in any color combo or even just one color. Just be sure to use 100% cotton yarn so it can withstand the heat.
You can find the easy pattern below along with a link to a free PDF if you want to print it. You can also click the Pinterest button below to save it to your crochet board.
Oversized Crochet Candy Corn-Inspired Potholder
I Love This Cotton yarn in Curry, Glowing, and White
F/3.75 crochet hook
Foundation Single Crochet – fsc
Single Crochet – sc
Chain – ch
Make 2
Row 1: work 34 fsc with Curry. Turn. (34 stitches)
Rows 2-14: ch 1. sc in each stitch across. Turn. (34 stitches)
Change to Glowing.
Rows 15-28: ch 1. sc in each stitch across. Turn. (34 stitches)
Change to White.
Rows 29-42: ch 1. sc in each stitch across. Turn. (34 stitches)
Fasten off and weave in ends.
Place one piece on top of the other, matching colors. Attach Glowing to top left corner of White with a slip stitch.
Round 1: sc evenly around through both layers, working 3 sc in each corner. Join with ss to first sc.
Round 2: ch 1. sc in each stitch around, working 3 sc in each corner. Join with ss to first sc.
Fasten off and weave in ends.
Finished potholder measures approximately 9 by 8.25 inches.
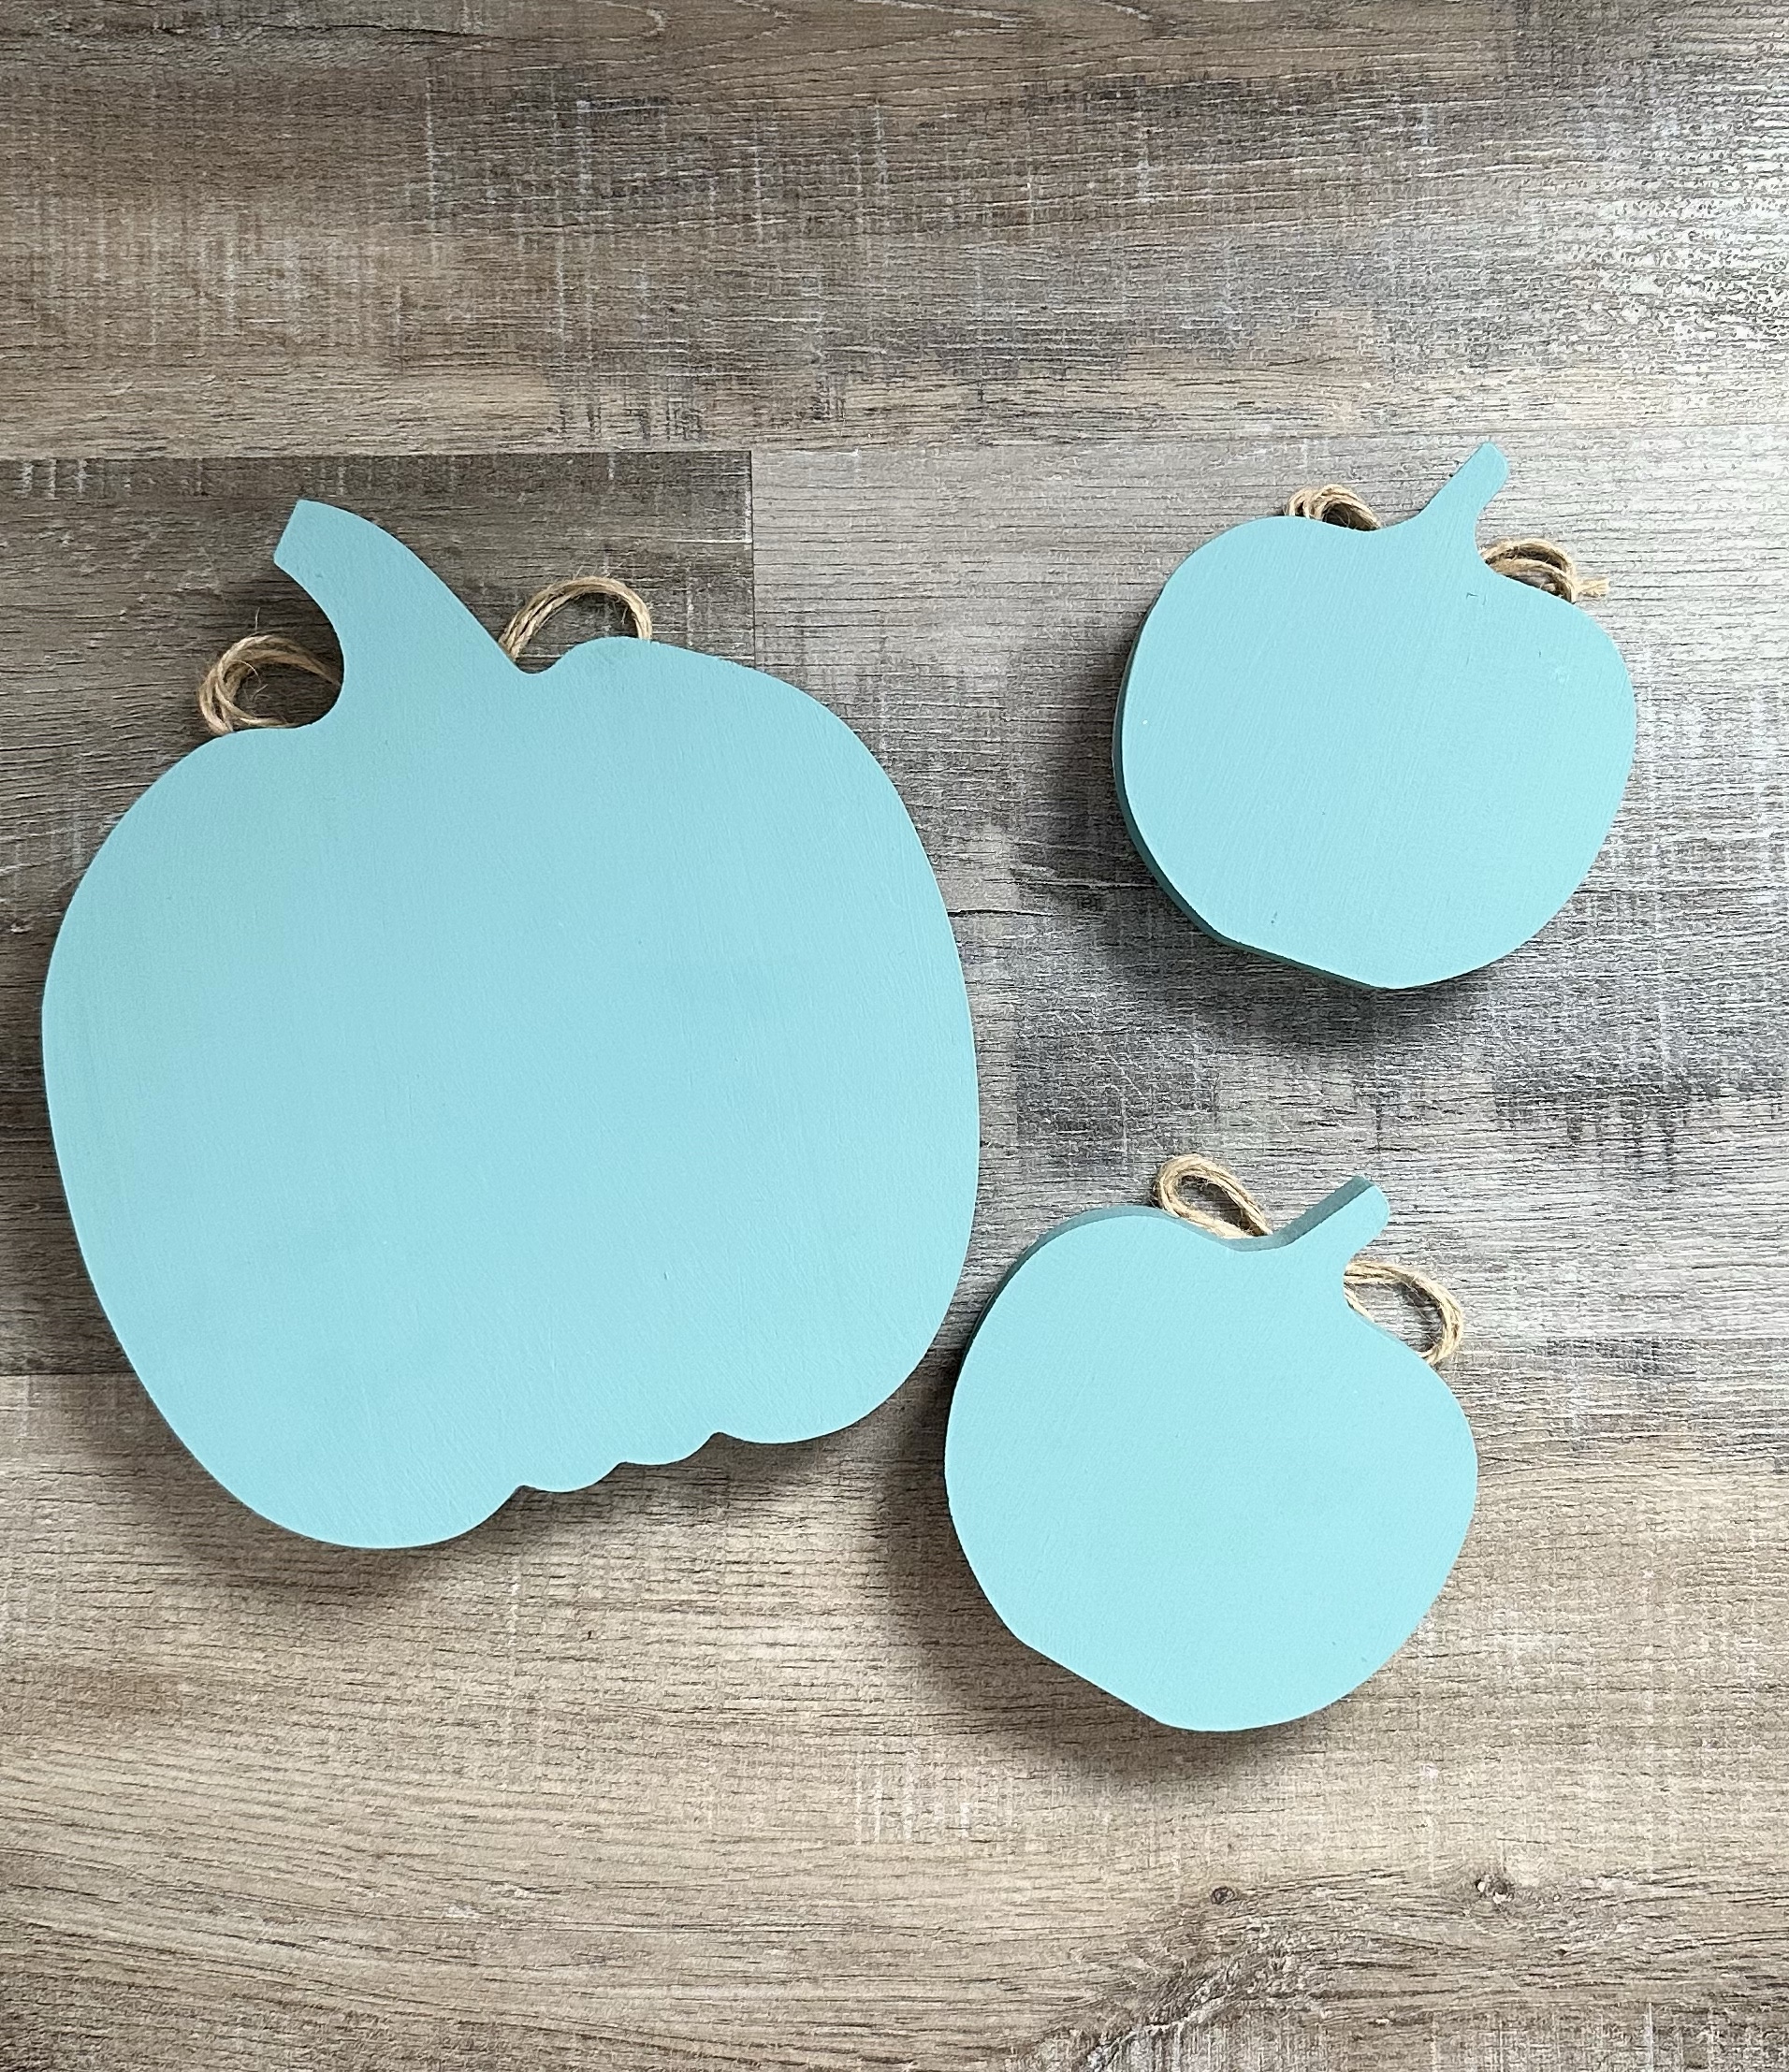
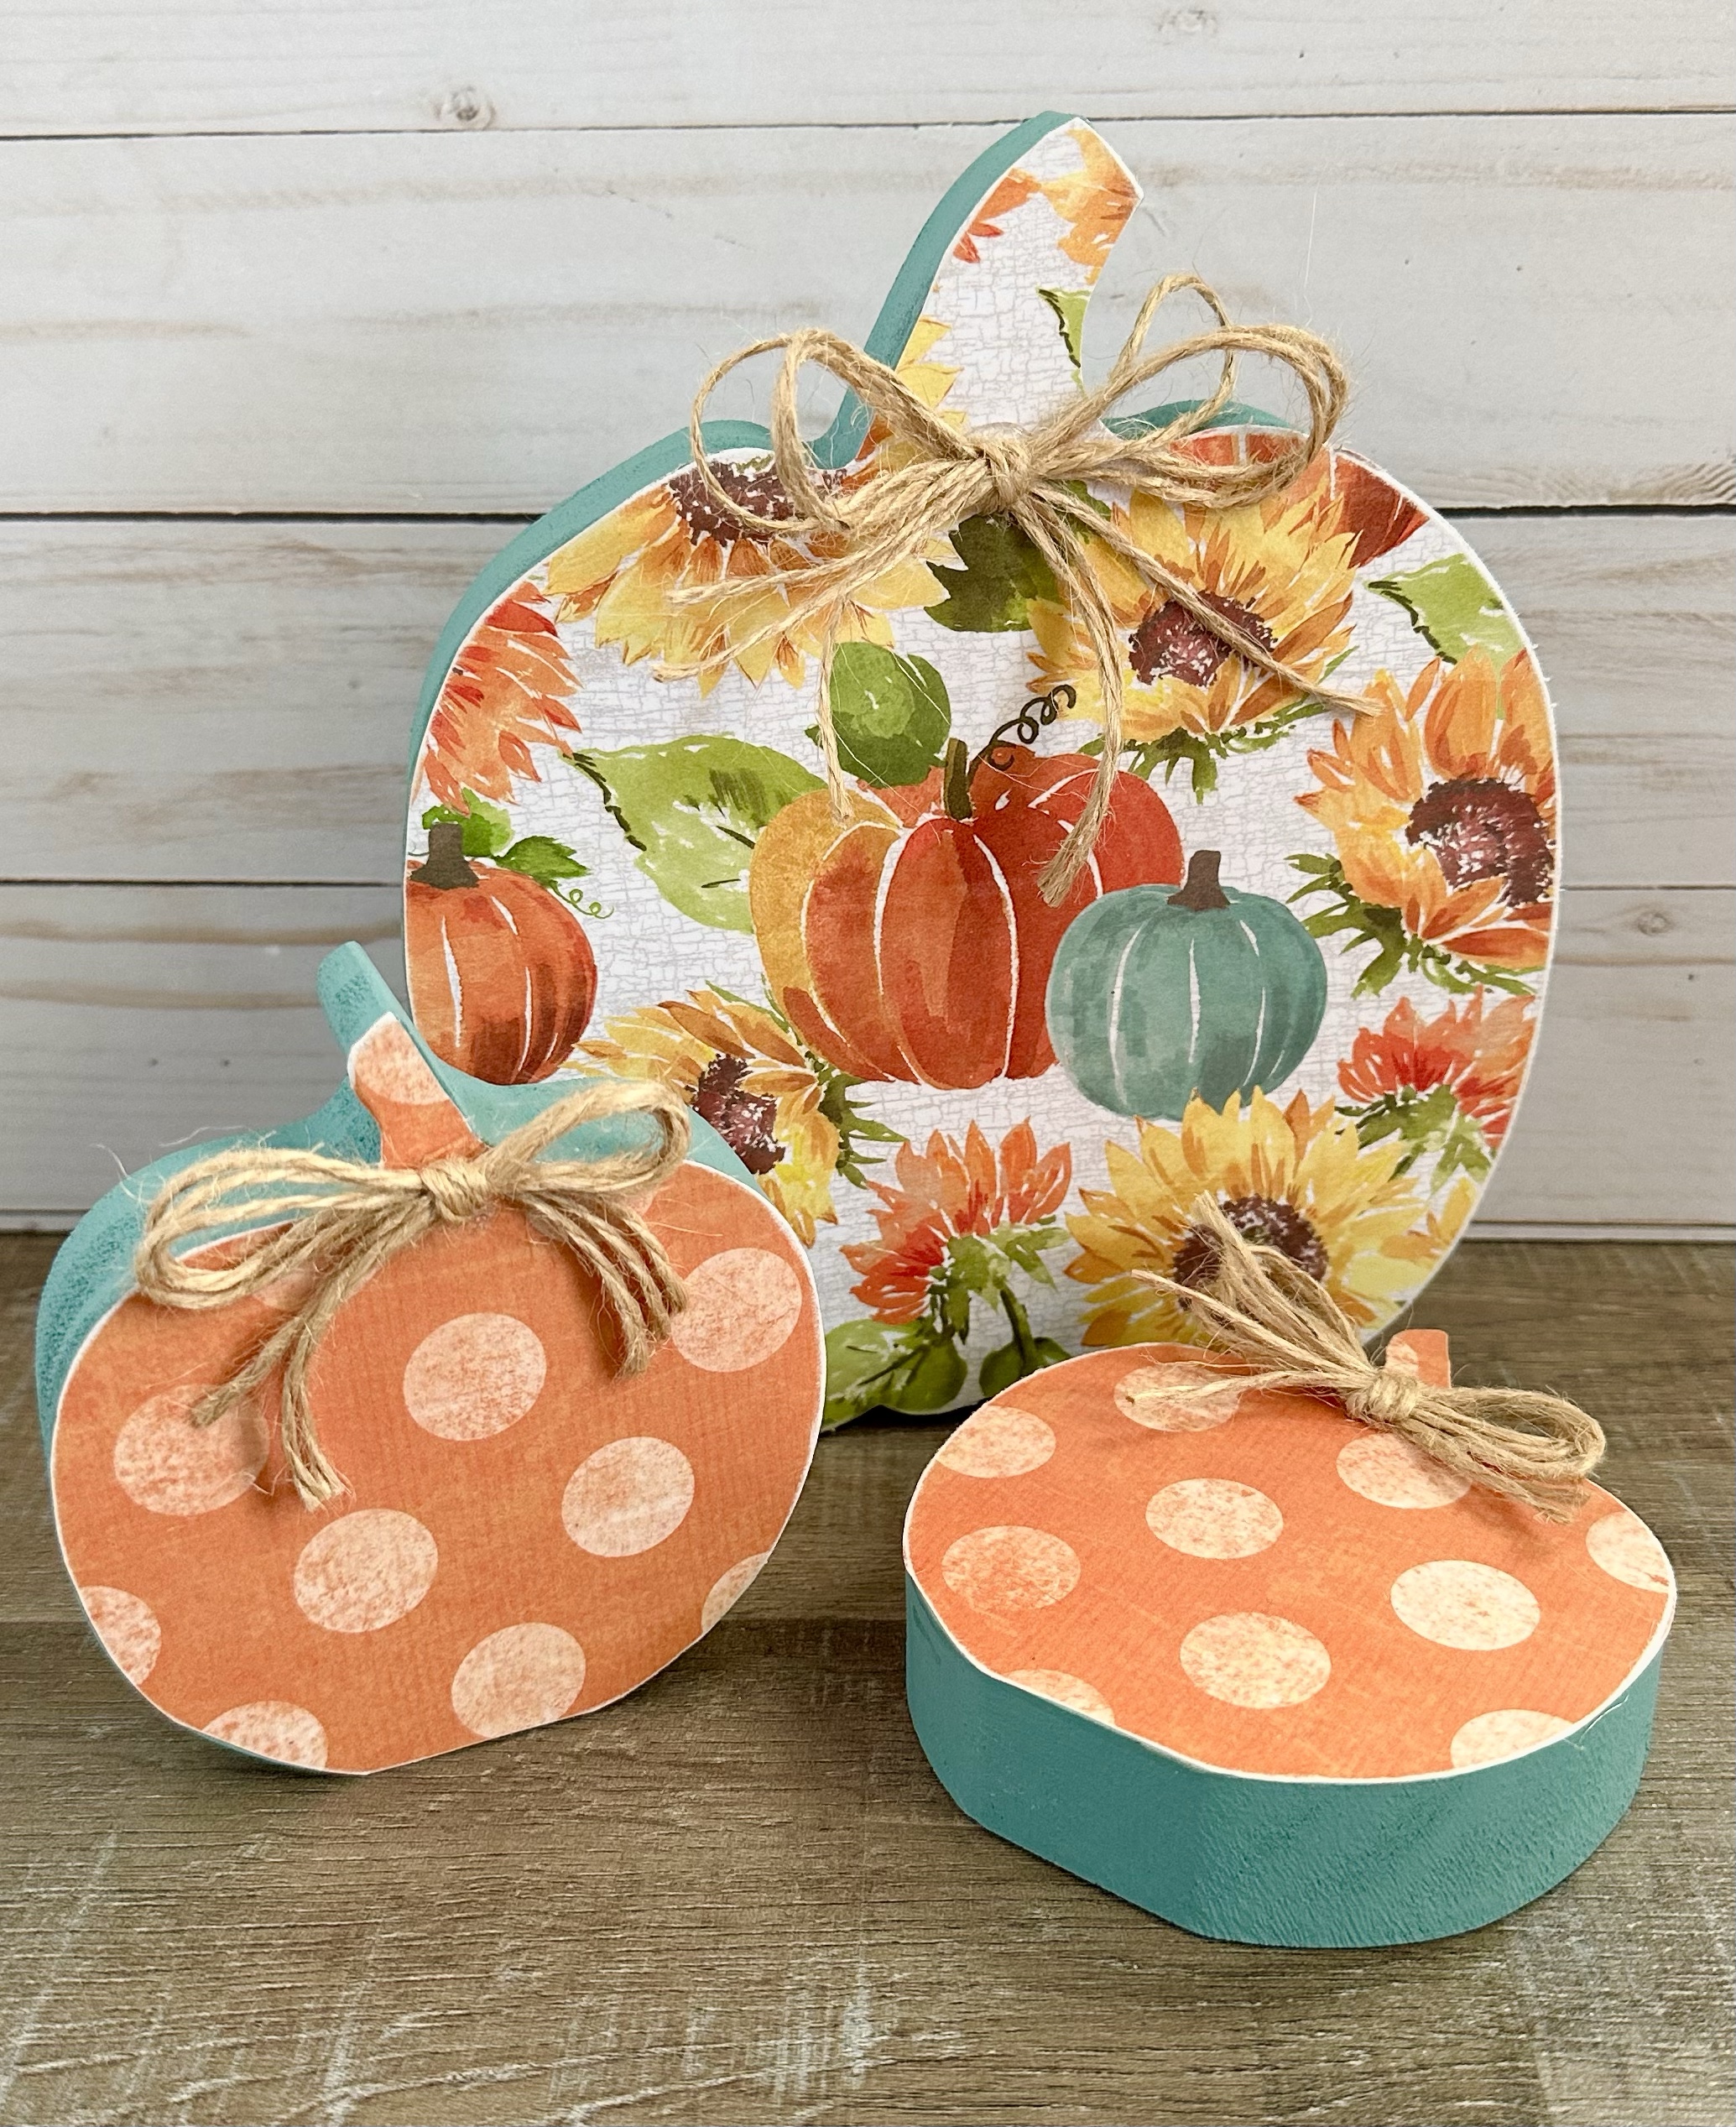
Fall is my favorite! 🍂🍁🍂 And you can never have too many pumpkins to celebrate the season. 😉 This Trio of Wood Pumpkins is fun and easy to make and will add a bit of Fall color to your decor.
Disclosure: Some of the links on my site are affiliate links, meaning, at no additional cost to you, I will earn a small commission if you click through and make a purchase. As an Amazon Associate I earn from qualifying purchases.
I found my chunky wood pumpkins in the craft aisle at Target. They are about 1-inch thick. The large pumpkin is about 6-inches tall plus the stem and the small ones are about 3.25-inches tall plus the stem. You’ll need some pretty Fall scrapbook paper, paint that coordinates with the paper, Mod Podge, and natural jute twine. I found my scrapbook paper at Hobby Lobby and my paint is Plaid FolkArt in the color Cascade also from Hobby Lobby.
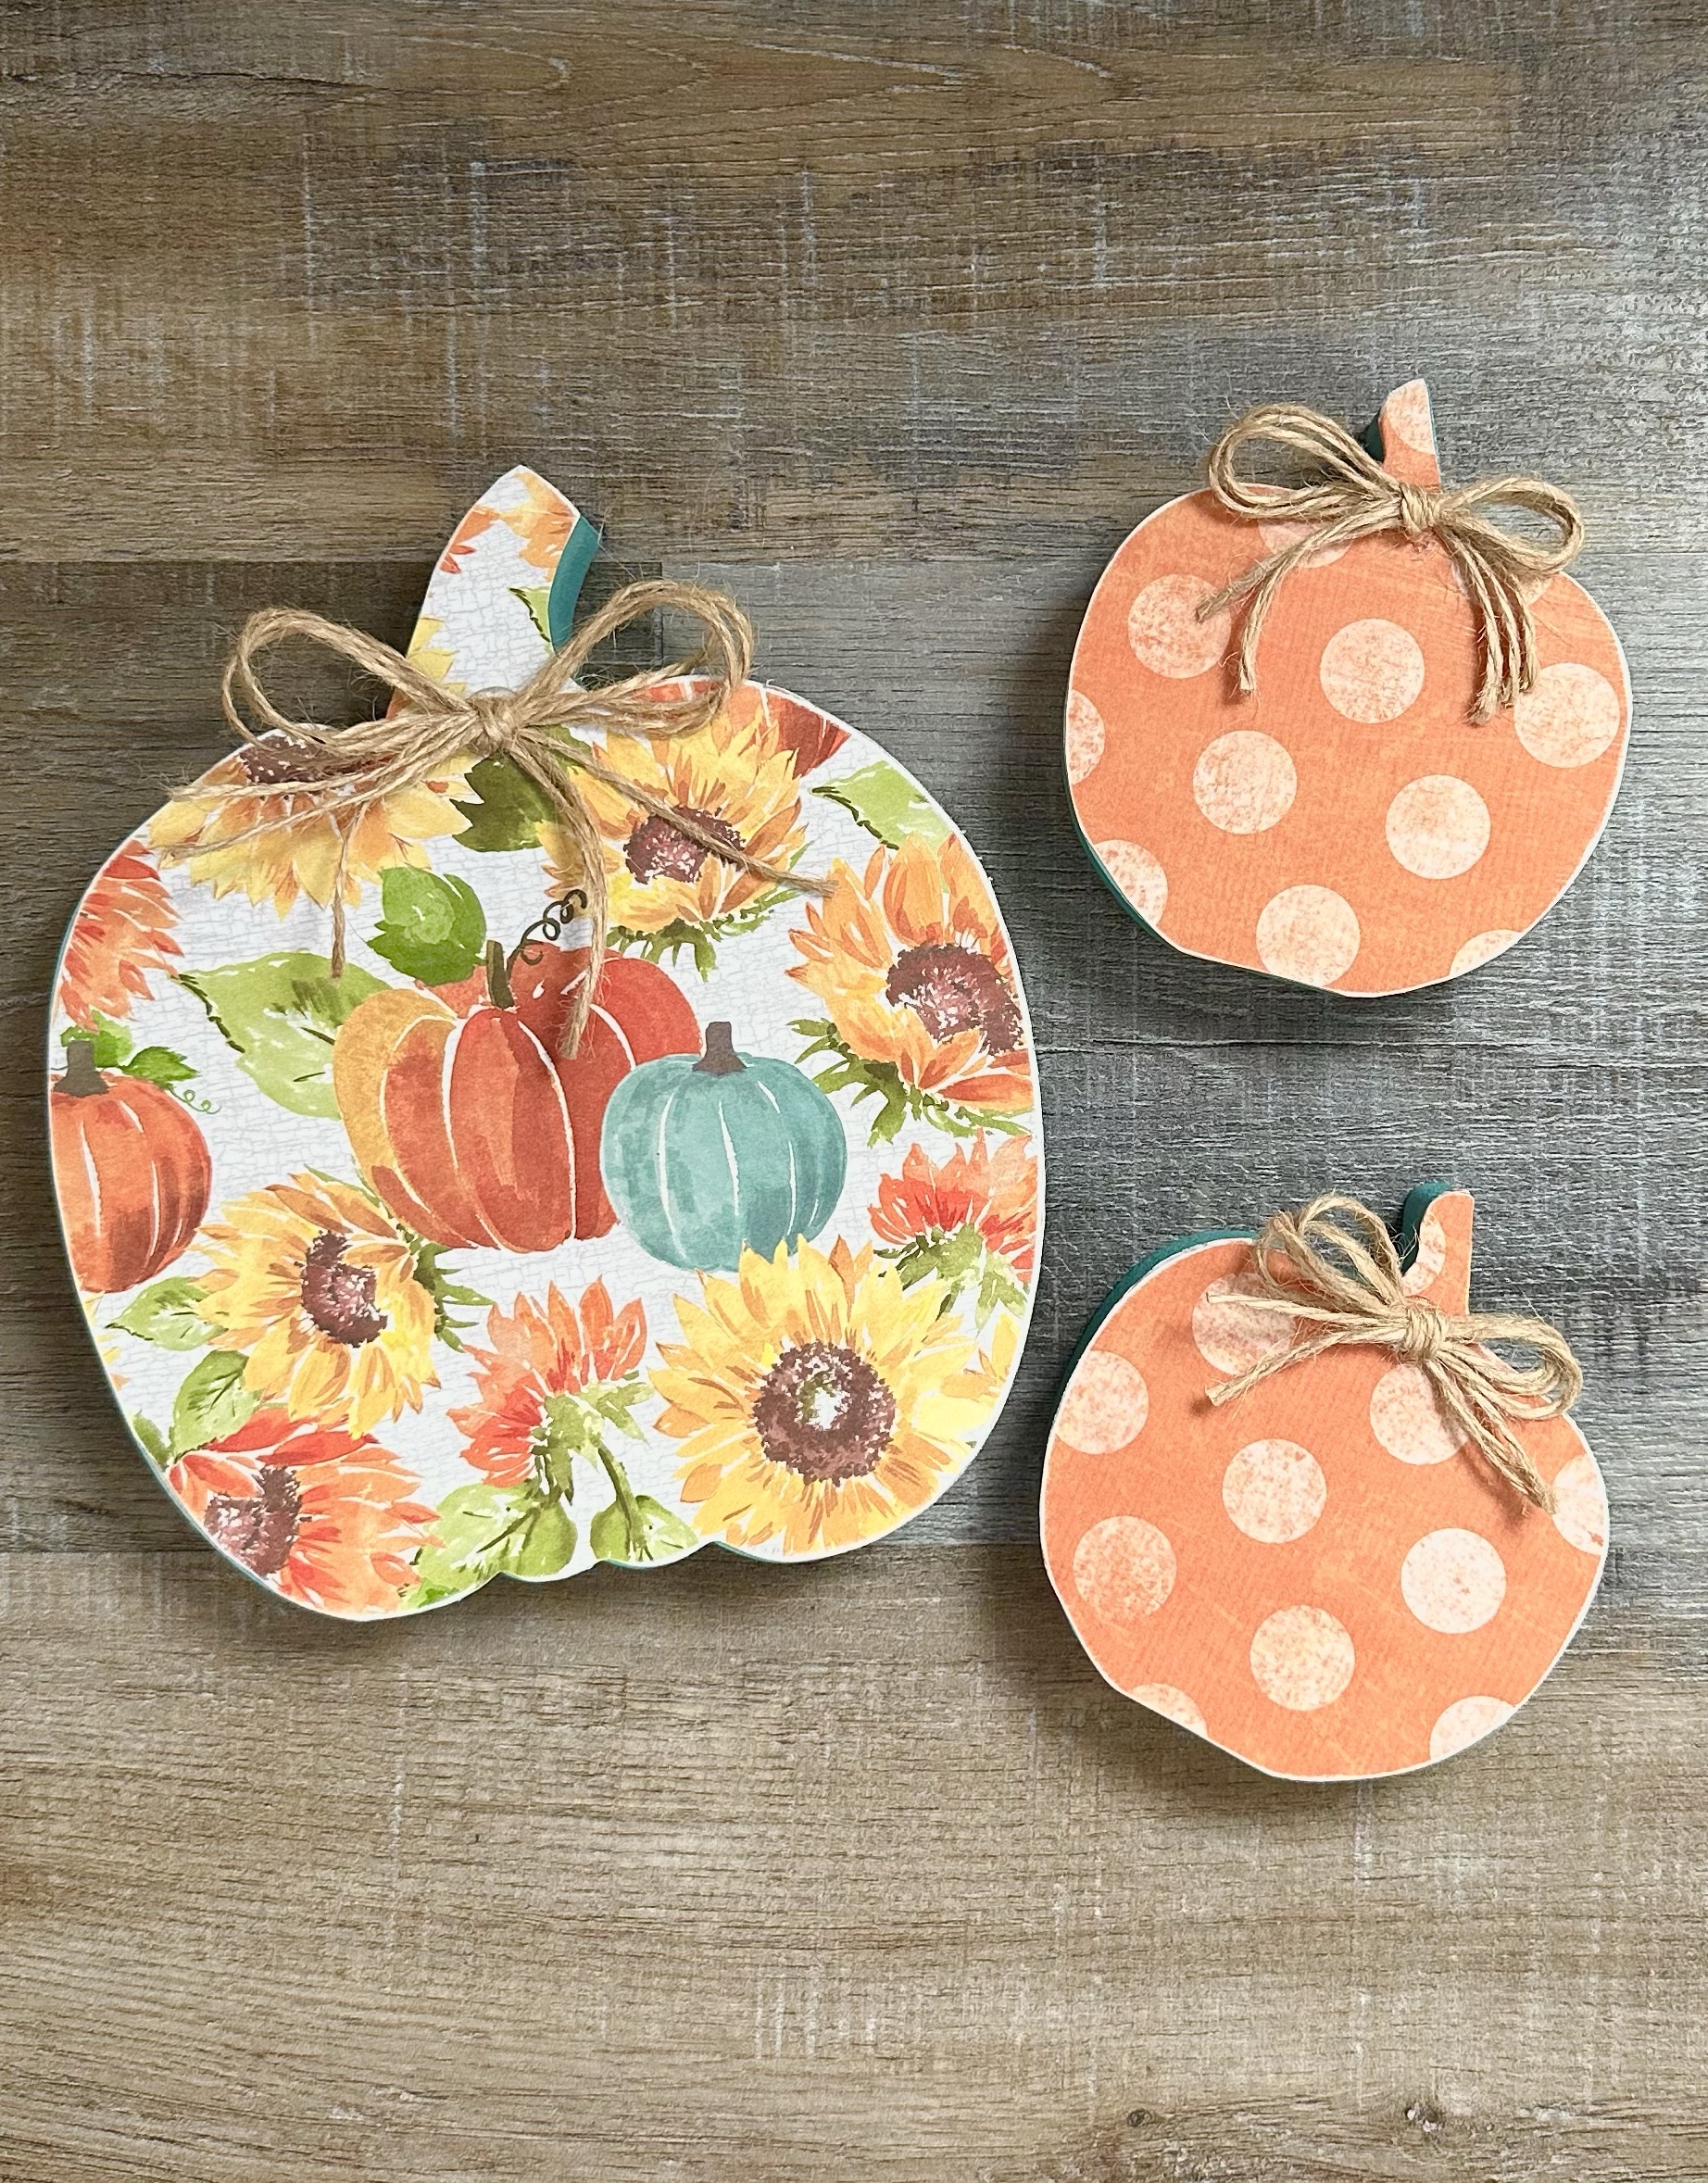
Trace the pumpkins onto the back of the scrapbook paper and cut out. (I love these Cutter Bee Scissors.) Be sure the stem is facing the opposite way you want the finished pumpkin to be!
Using a foam brush, apply 2 coats of paint to the back and sides of the pumpkin letting it dry between coats. Once dry, turn the pumpkin over and apply a thin coat of Mod Podge using another foam brush to the front of the pumpkin and apply the scrapbook paper cutout – smoothing out any wrinkles or bubbles. Once dry, apply another thin layer of Mod Podge over the top of the paper.
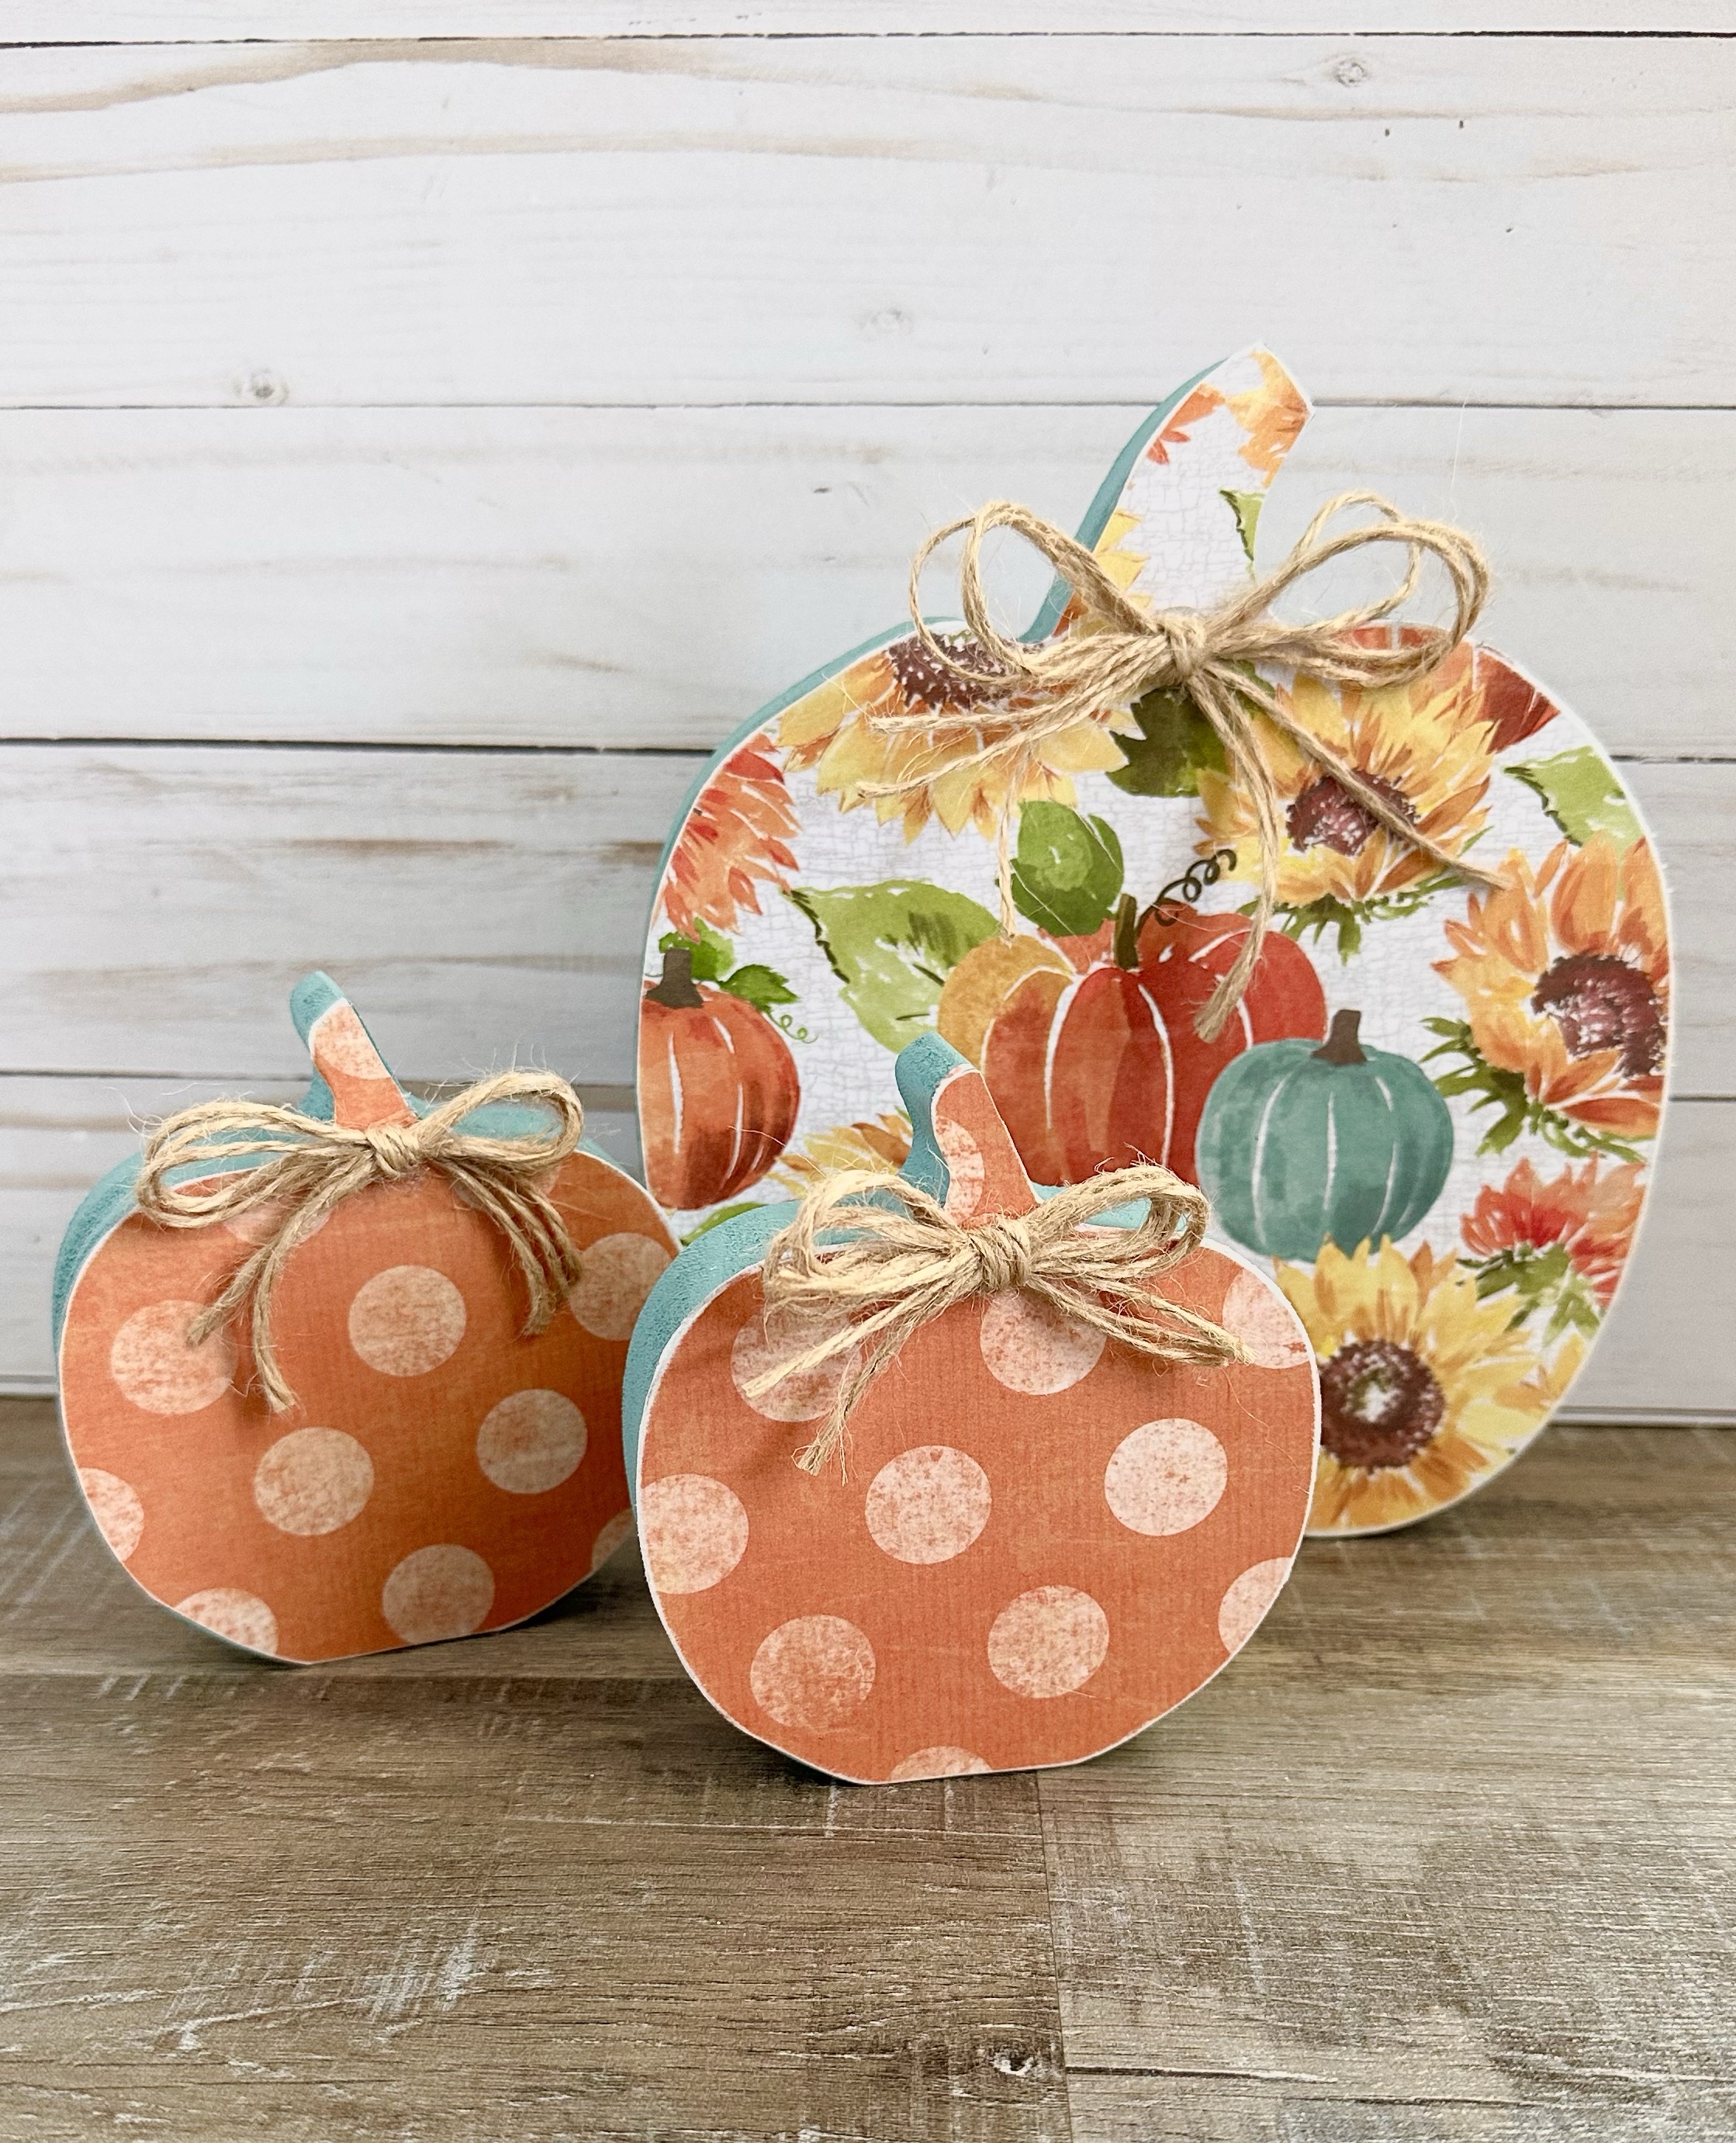
I tied 3 lengths of natural jute twine together into a bow and hot glued the bow to the front of my pumpkins.
I’m so happy with the way they turned out! The Fall colors are perfect and the patterned paper adds a little bit of whimsy. 😊
Disclosure: Some of the links on my site are affiliate links, meaning, at no additional cost to you, I will earn a small commission if you click through and make a purchase. As an Amazon Associate I earn from qualifying purchases.
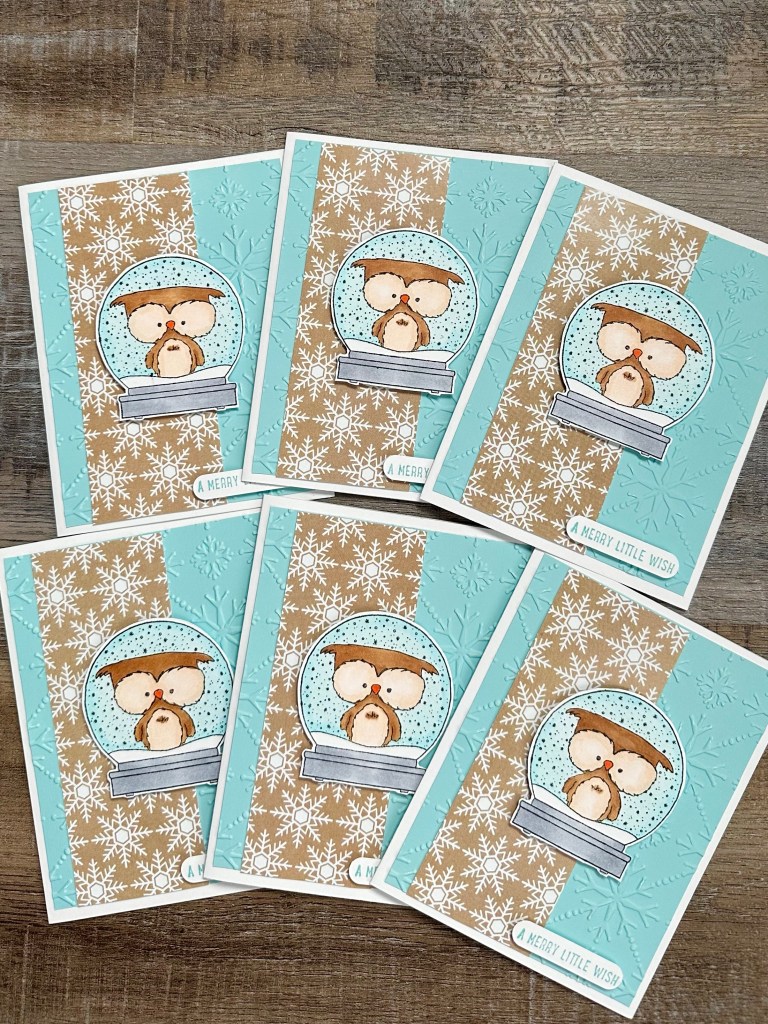
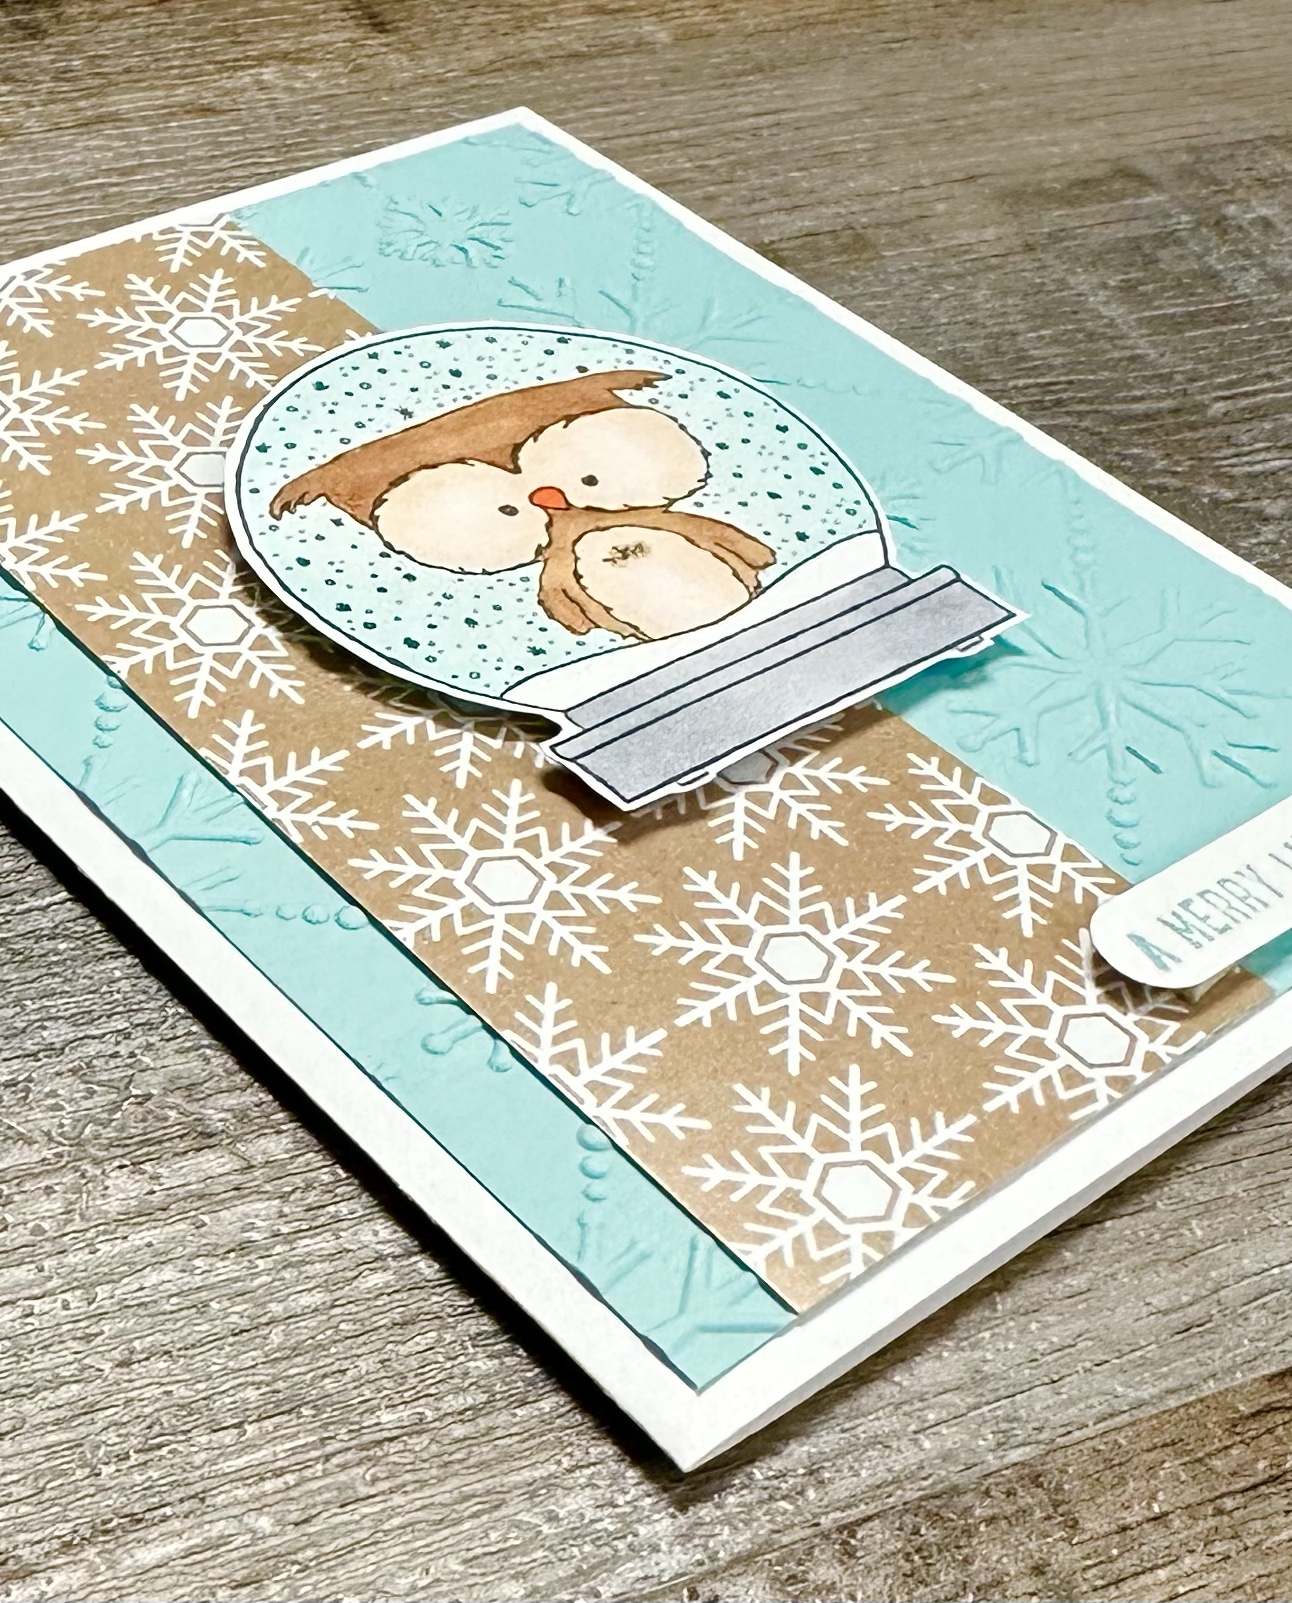
I stamped the owl with Memento Tuxedo Black ink on white card stock. I colored the image with Copic markers and then cut it out. I embossed a piece of blue card stock with a snowflake embossing folder (this is a similar one) and attached it to a white card. I attached a strip of brown snowflake patterned paper (also from Unity) to the card. I attached the owl image to the card with foam tape. I stamped the sentiment with blue ink on white card stock, punched it with a label punch, and attached it to the card with foam tape. The label punch I used is discontinued, but I like this set of Banner Dies that would work great for your sentiment!
I would love to hear if you are making a few Christmas cards each month! I think it’s going to make the holiday season a little bit easier for me this year. 🎄 🙂
Disclosure: Some of the links on my site are affiliate links, meaning, at no additional cost to you, I will earn a small commission if you click through and make a purchase. As an Amazon Associate I earn from qualifying purchases.
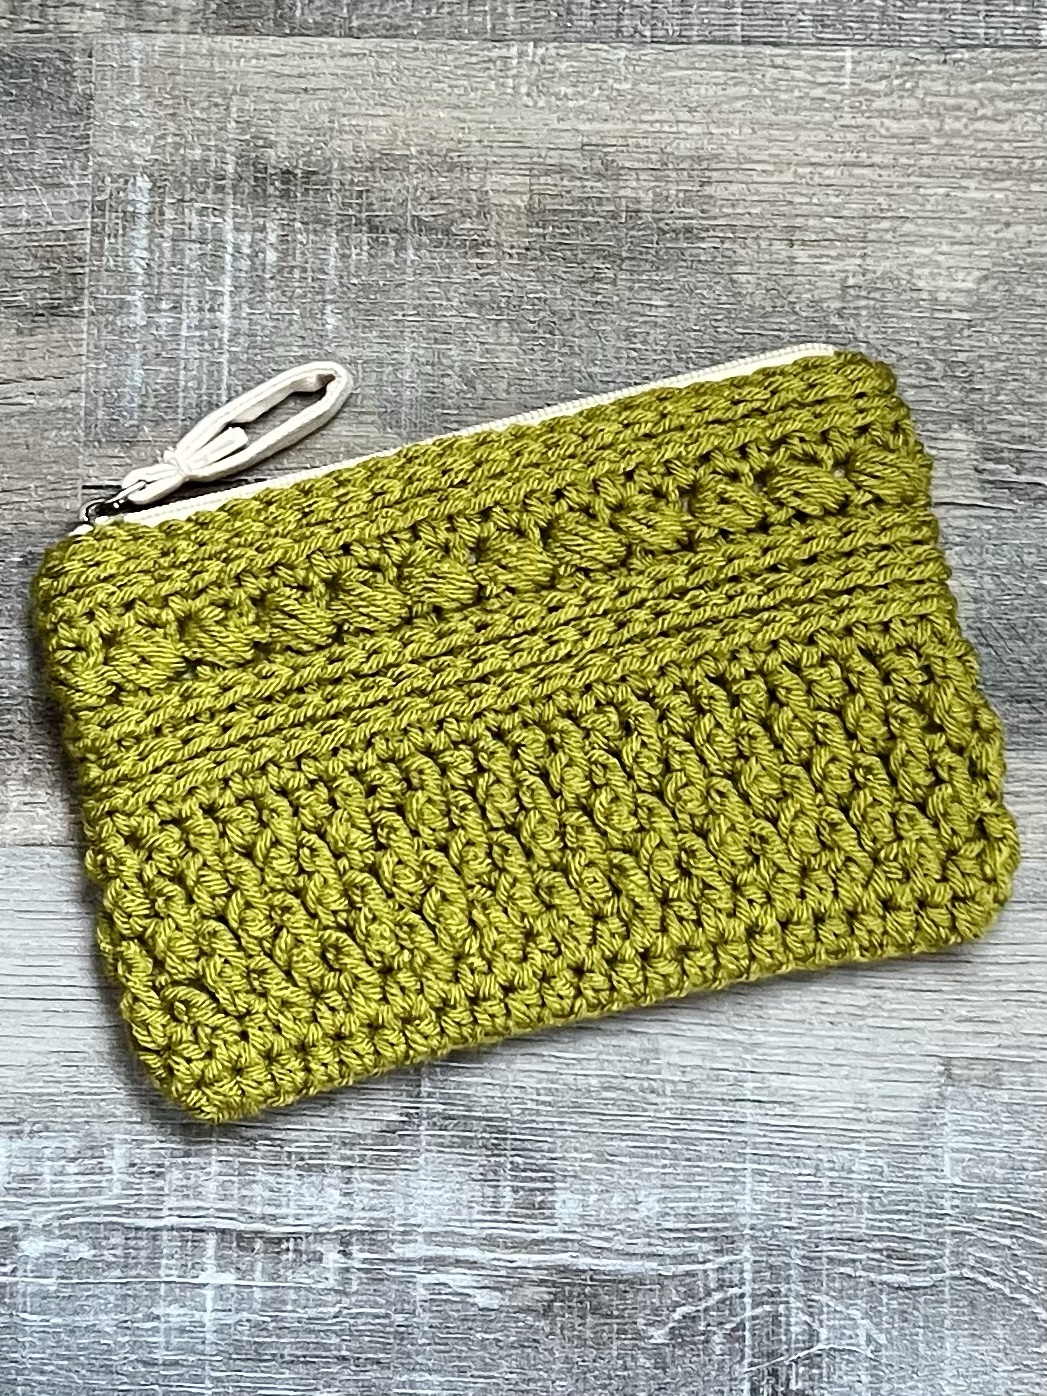
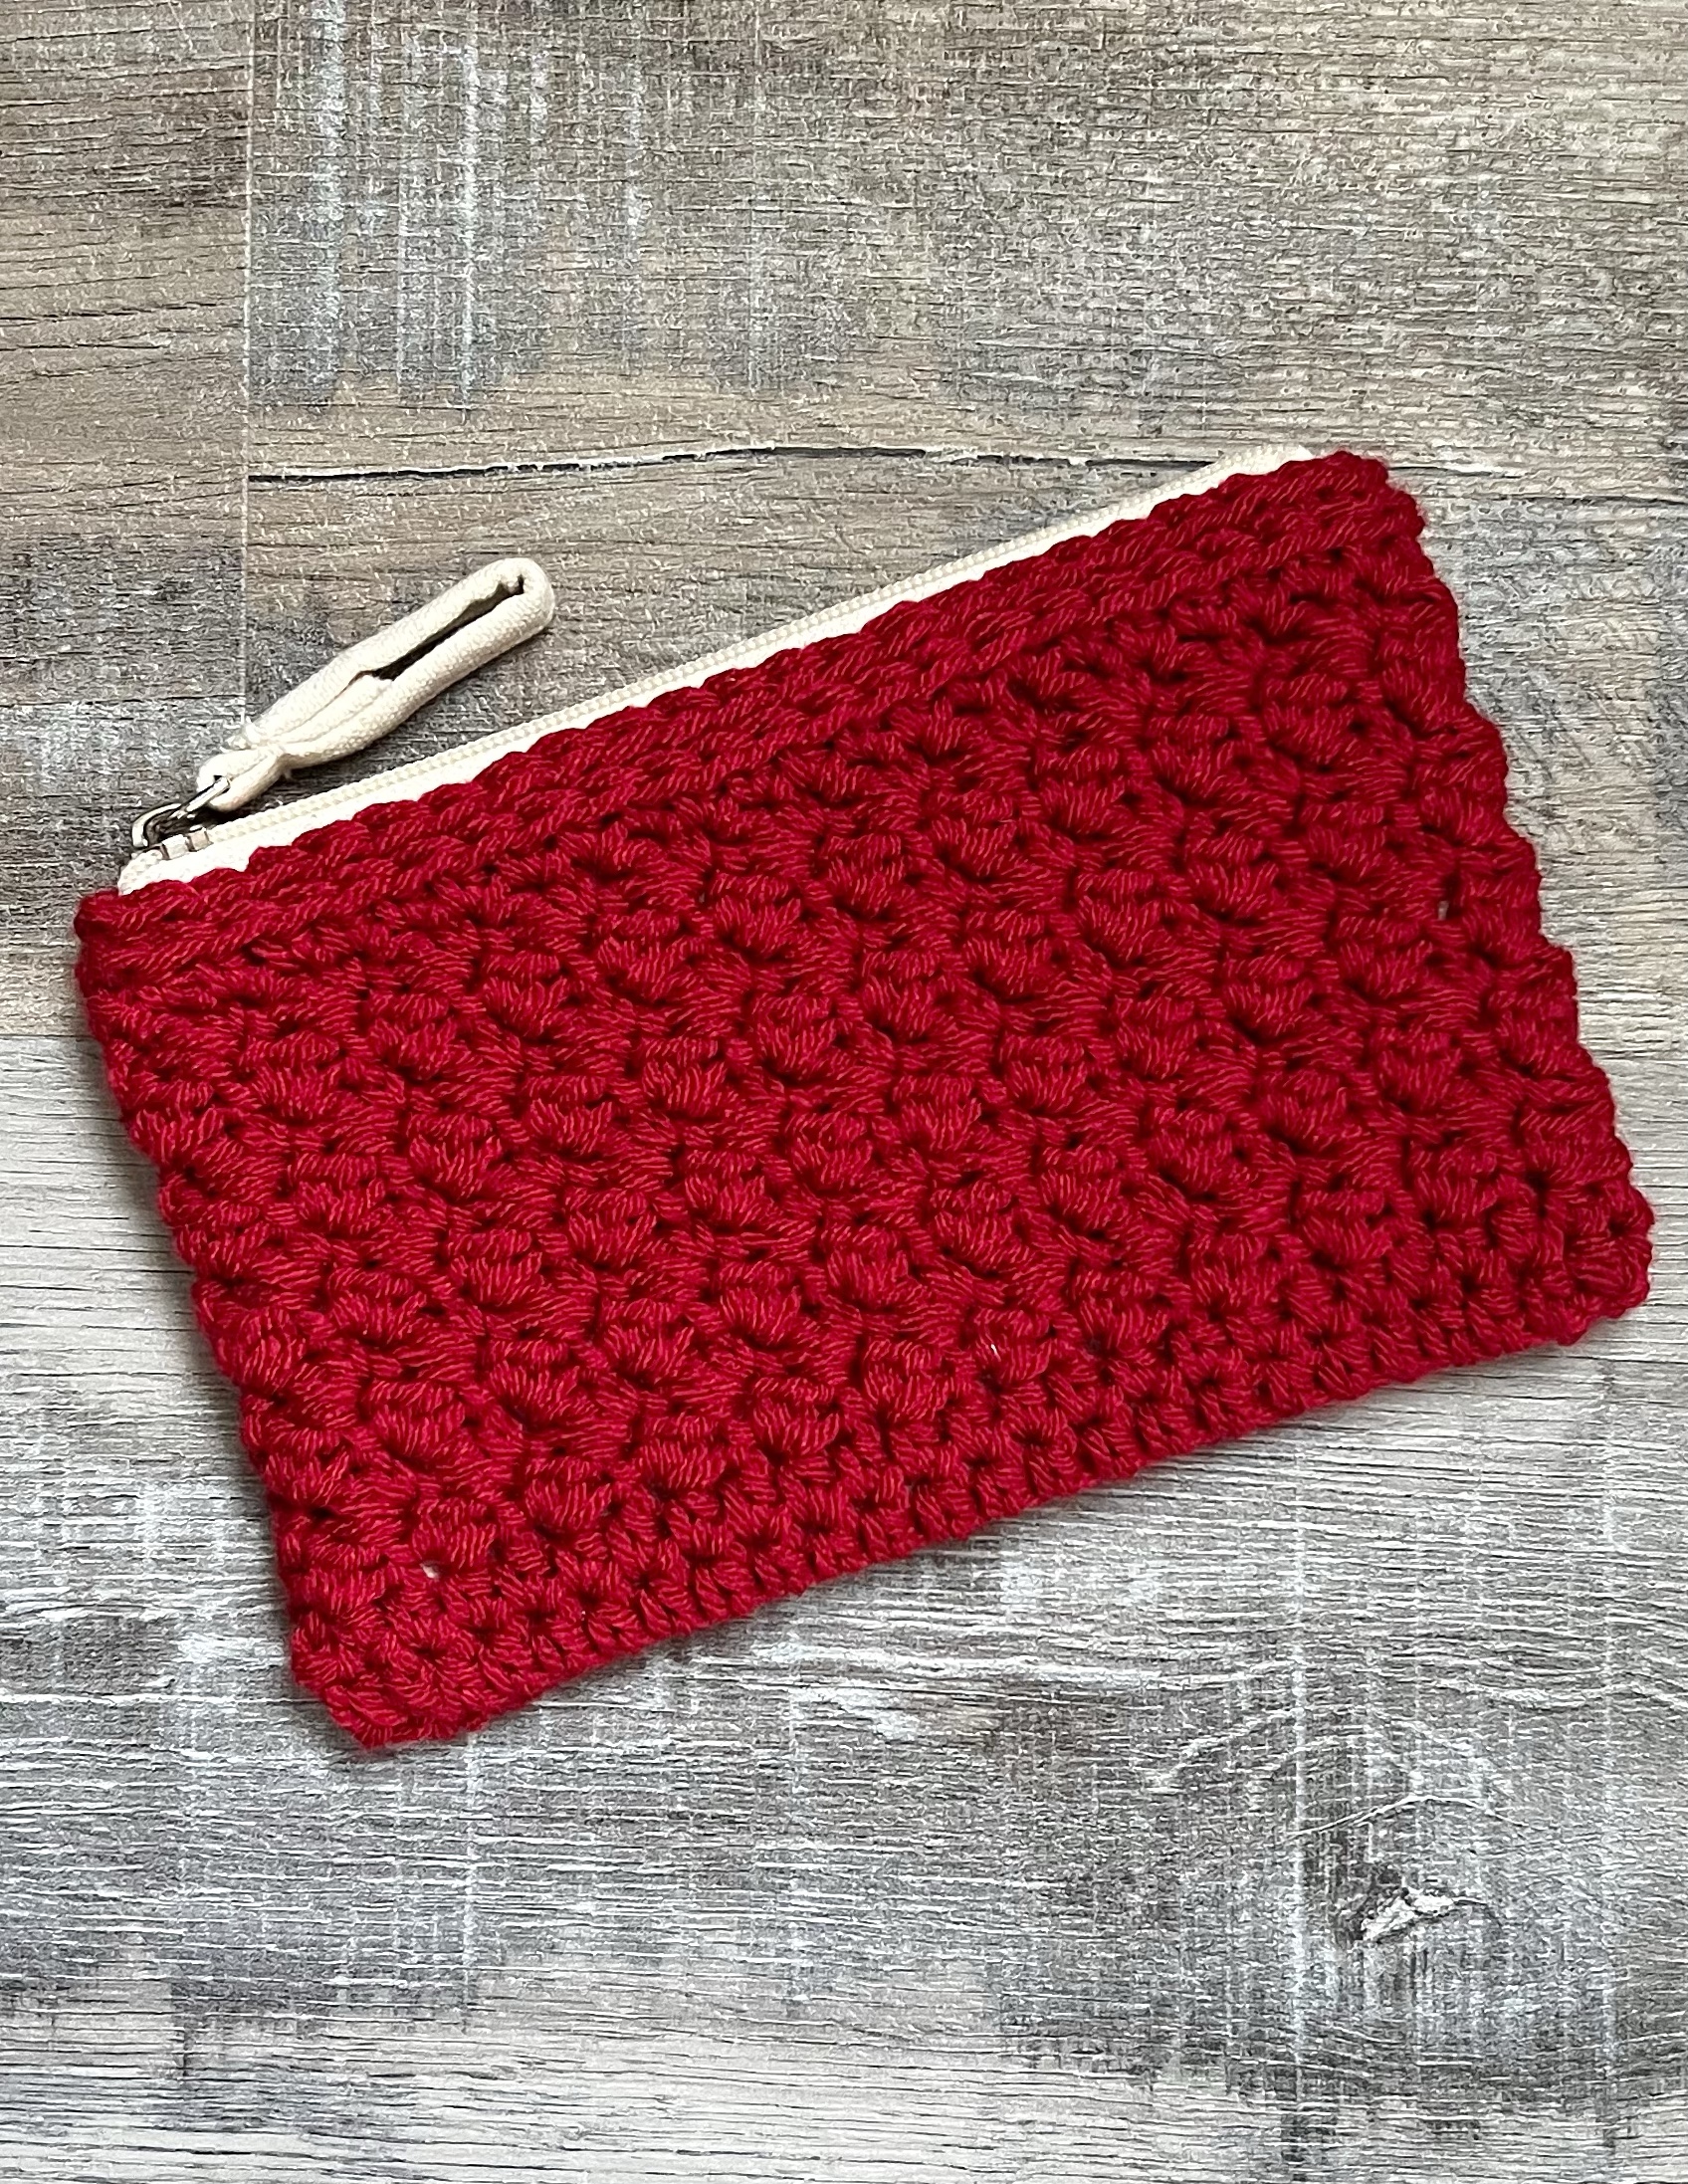
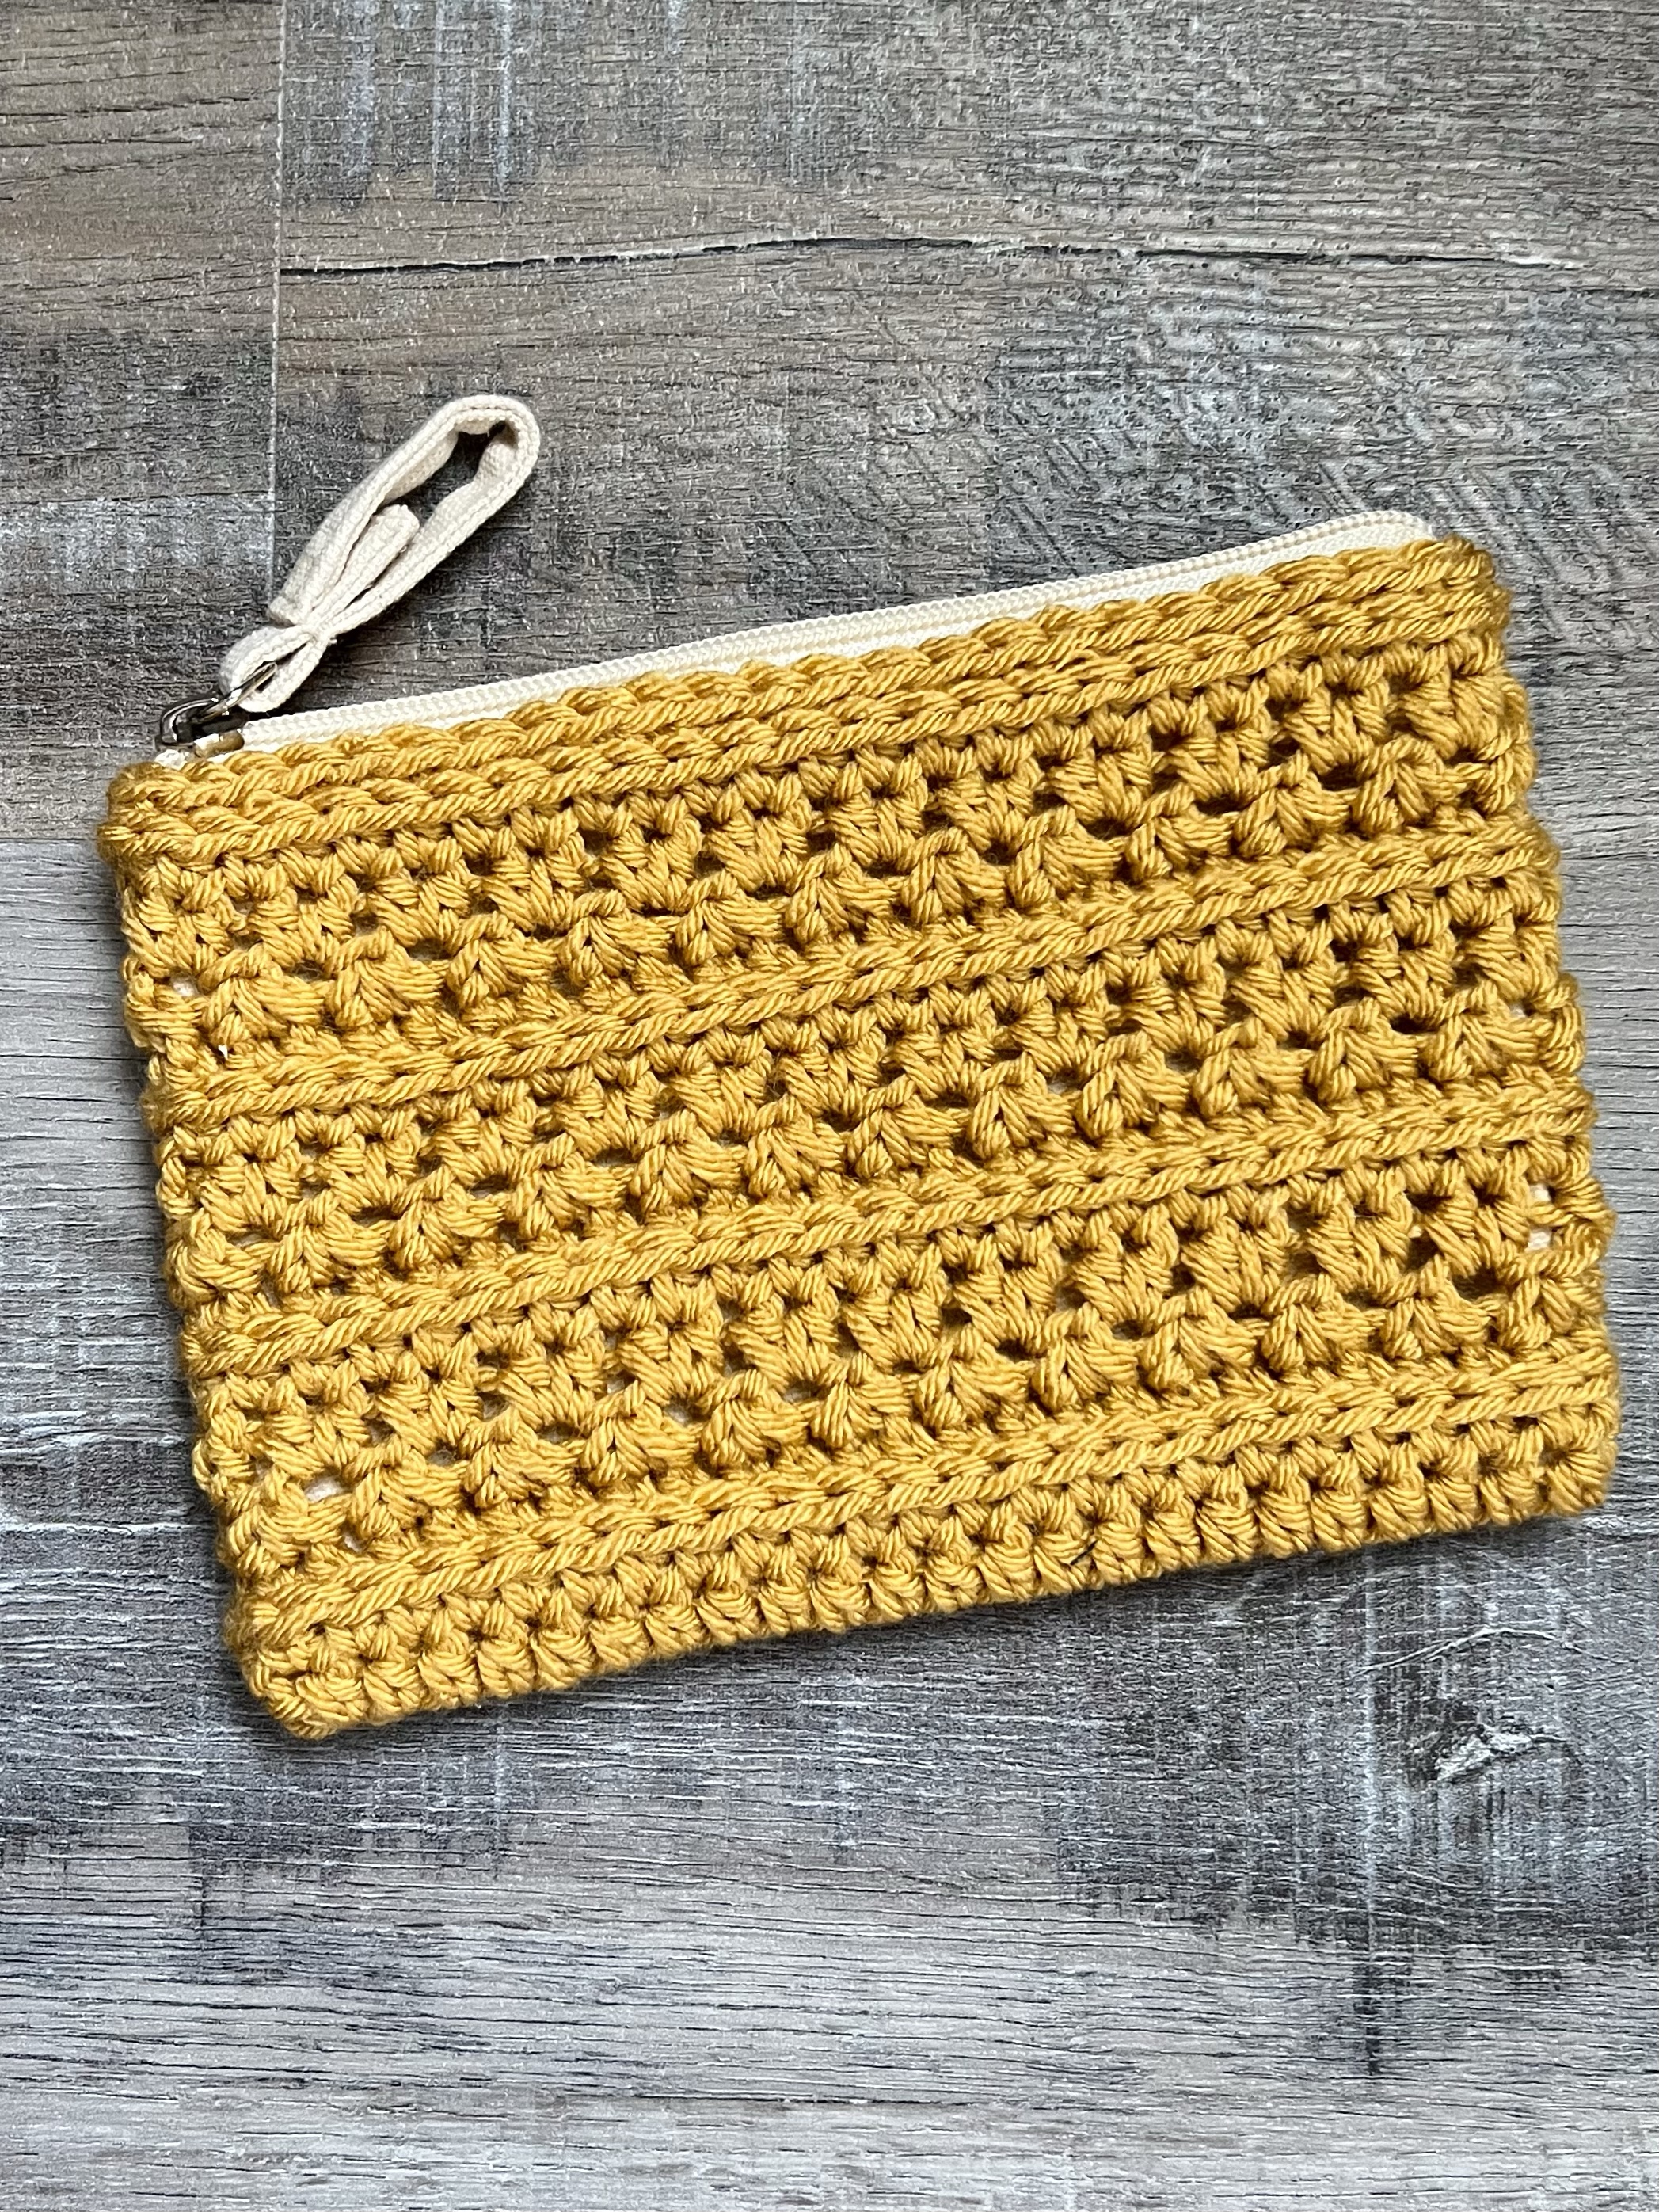
To attach the canvas bag to the crocheted shell, I simply used fabric hot glue. No sewing required! Slip the canvas bag into the crocheted shell and run a thin bead of glue around the canvas bag along the edge of the zipper. I did small sections at a time, attaching the crocheted shell as I went. I have this Surebonder hot glue gun that I only use with these fabric hot glue sticks. I keep it separate from my regular hot glue gun so I don’t mix the types of glue. The fabric glue worked great to attach the crocheted shells to the canvas bags.
These cute crochet pouches would make such great gifts just as they are or filled with something special. You can now purchase all 4 pattens (these 3 and the one in my previous post) in an ebook from Twisted Knot Crochet here.
I’m so glad I found these patterns, they work up quickly and are so fun to make!
We took an end of Summer trip to visit Mackinac Island, MI and the surrounding area. My husband and I had visited as kids with our families, but have wanted to return for a while.
If you’re not familiar with it, Mackinac Island is a small island that sits in Lake Huron off the coasts of the upper and lower peninsulas of Michigan. The island is car-free with lots of horse-drawn carriages, bicycles, and the most amazing fudge!! It’s like taking a step back in time…
Disclosure: Some of the links on my site are affiliate links, meaning, at no additional cost to you, I will earn a small commission if you click through and make a purchase. As an Amazon Associate I earn from qualifying purchases.
There are lots of options to stay on the island from bed & breakfasts to the amazing Grand Hotel. We chose to stay on the mainland in Mackinaw City at a wonderful bed & breakfast called Deer Head Inn. It was a great place just a few blocks from Sheplers Ferry dock and the breakfasts were amazing!
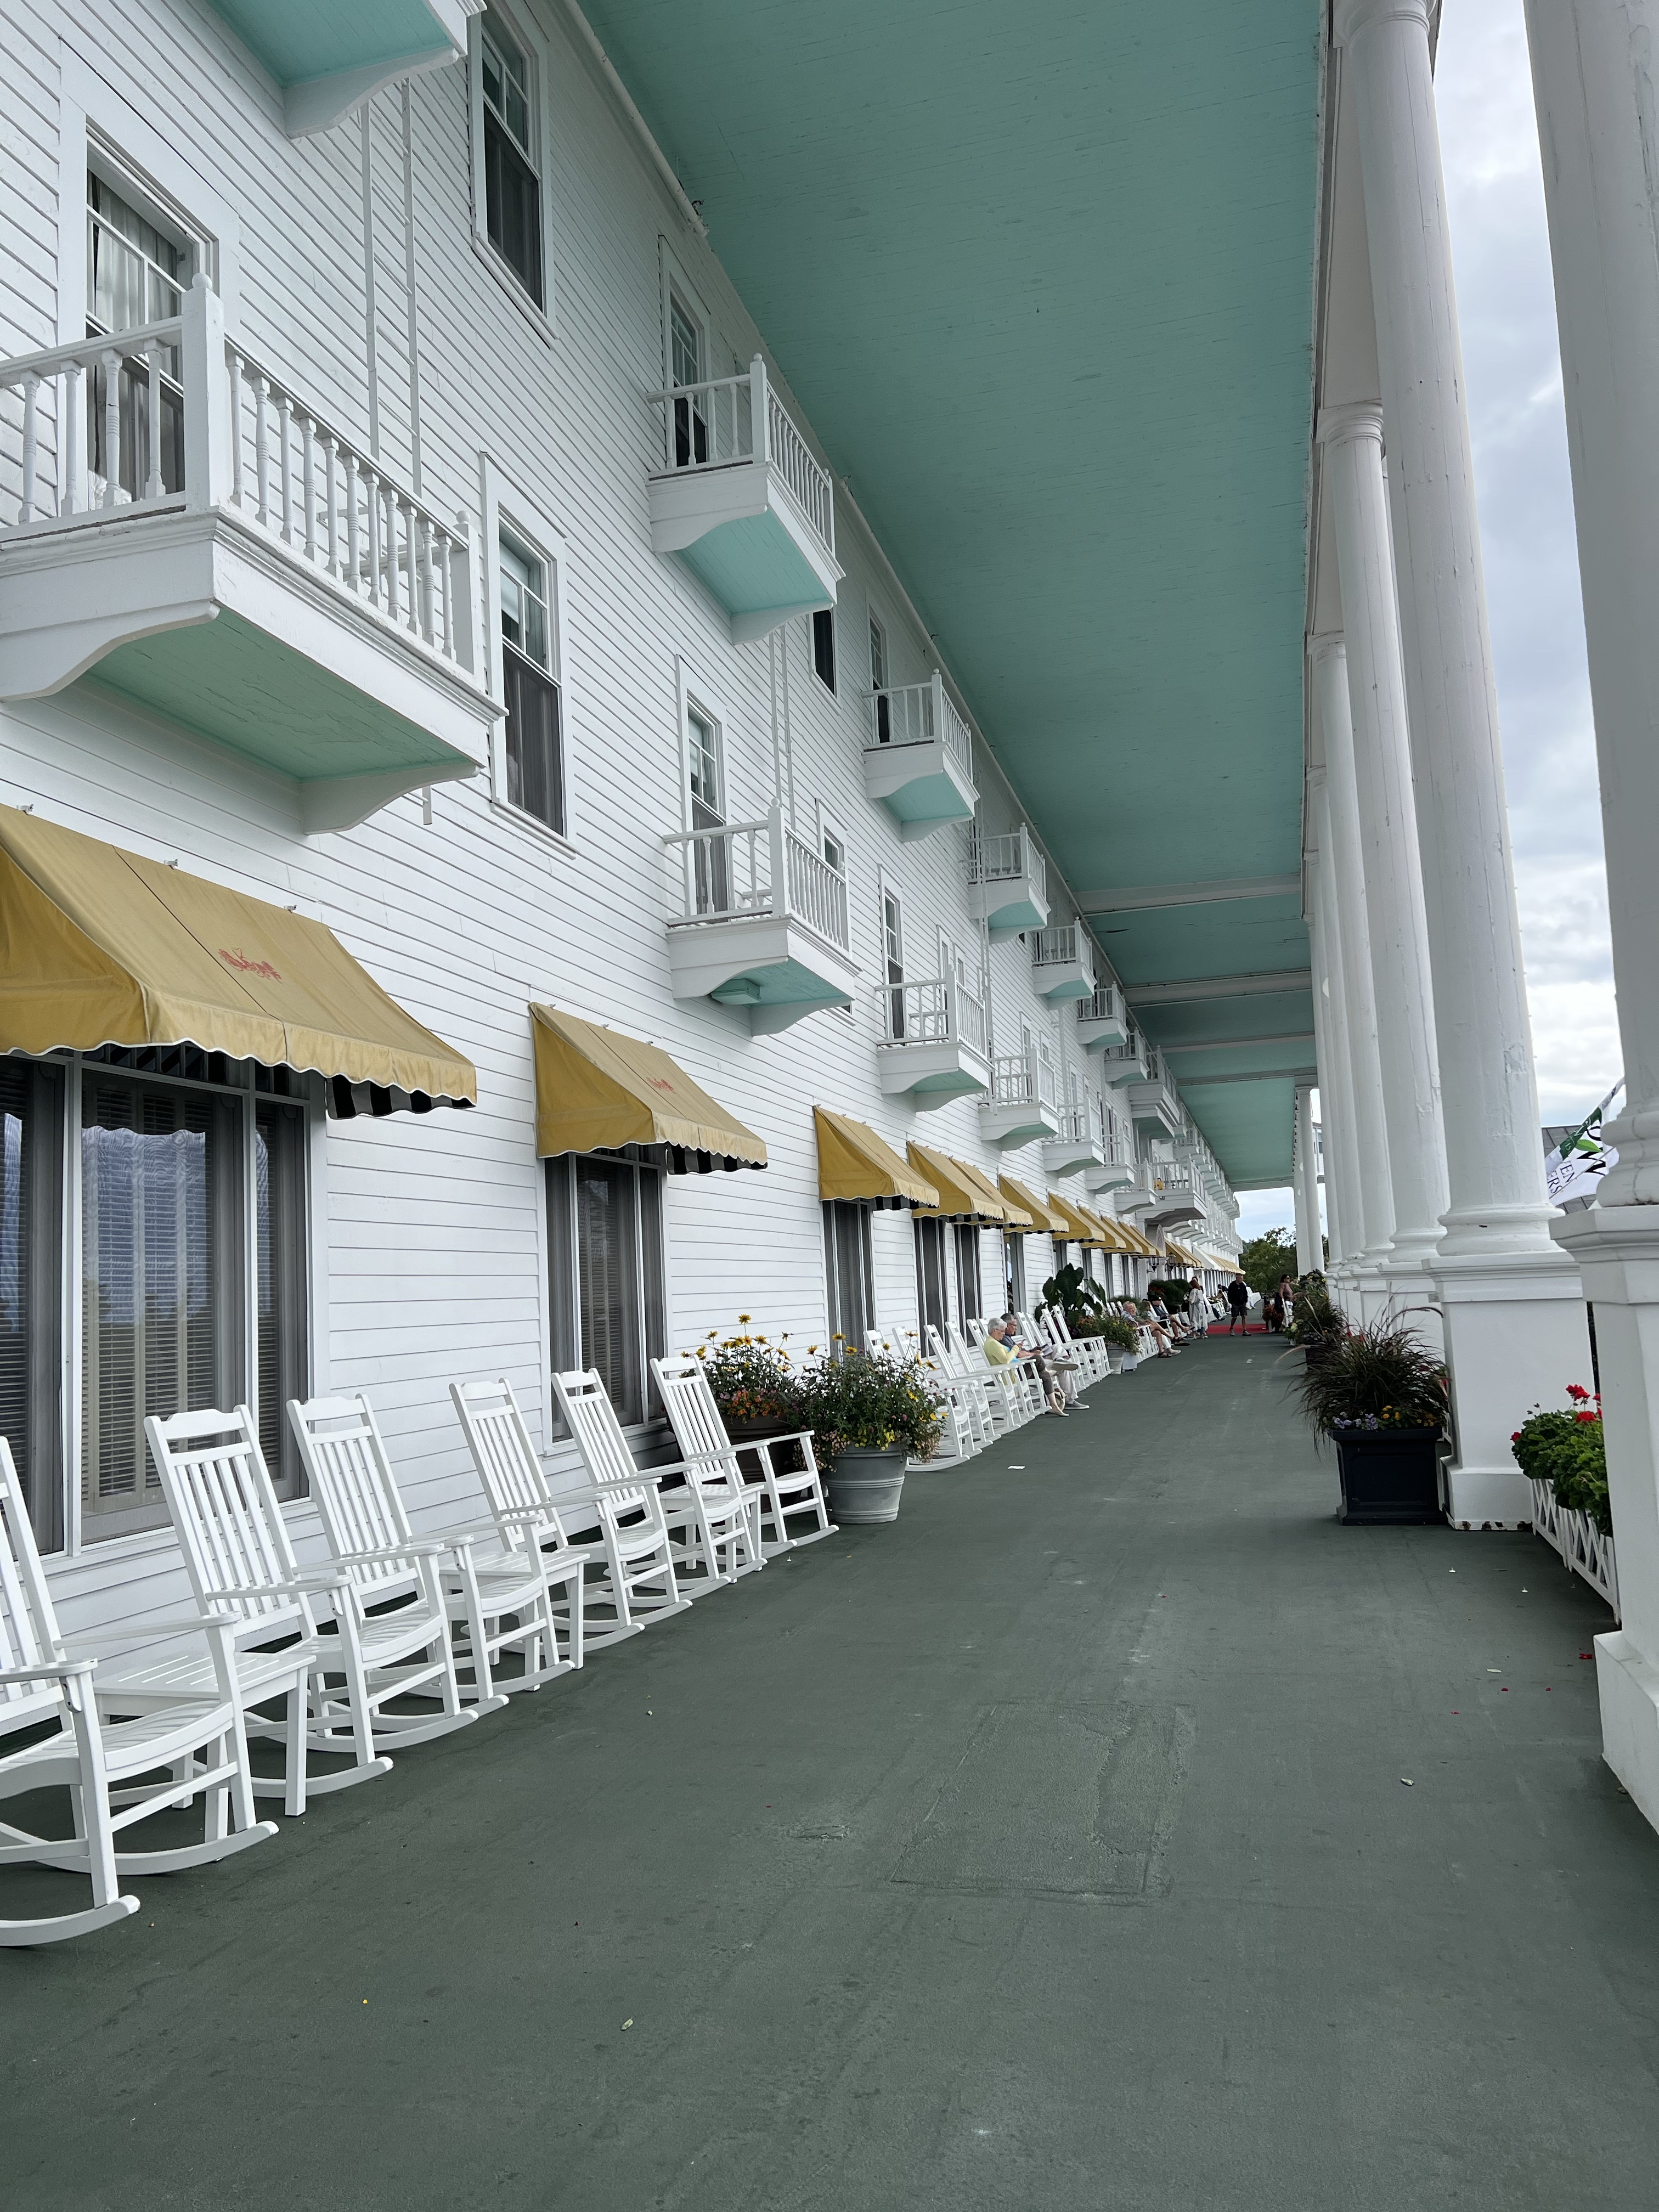
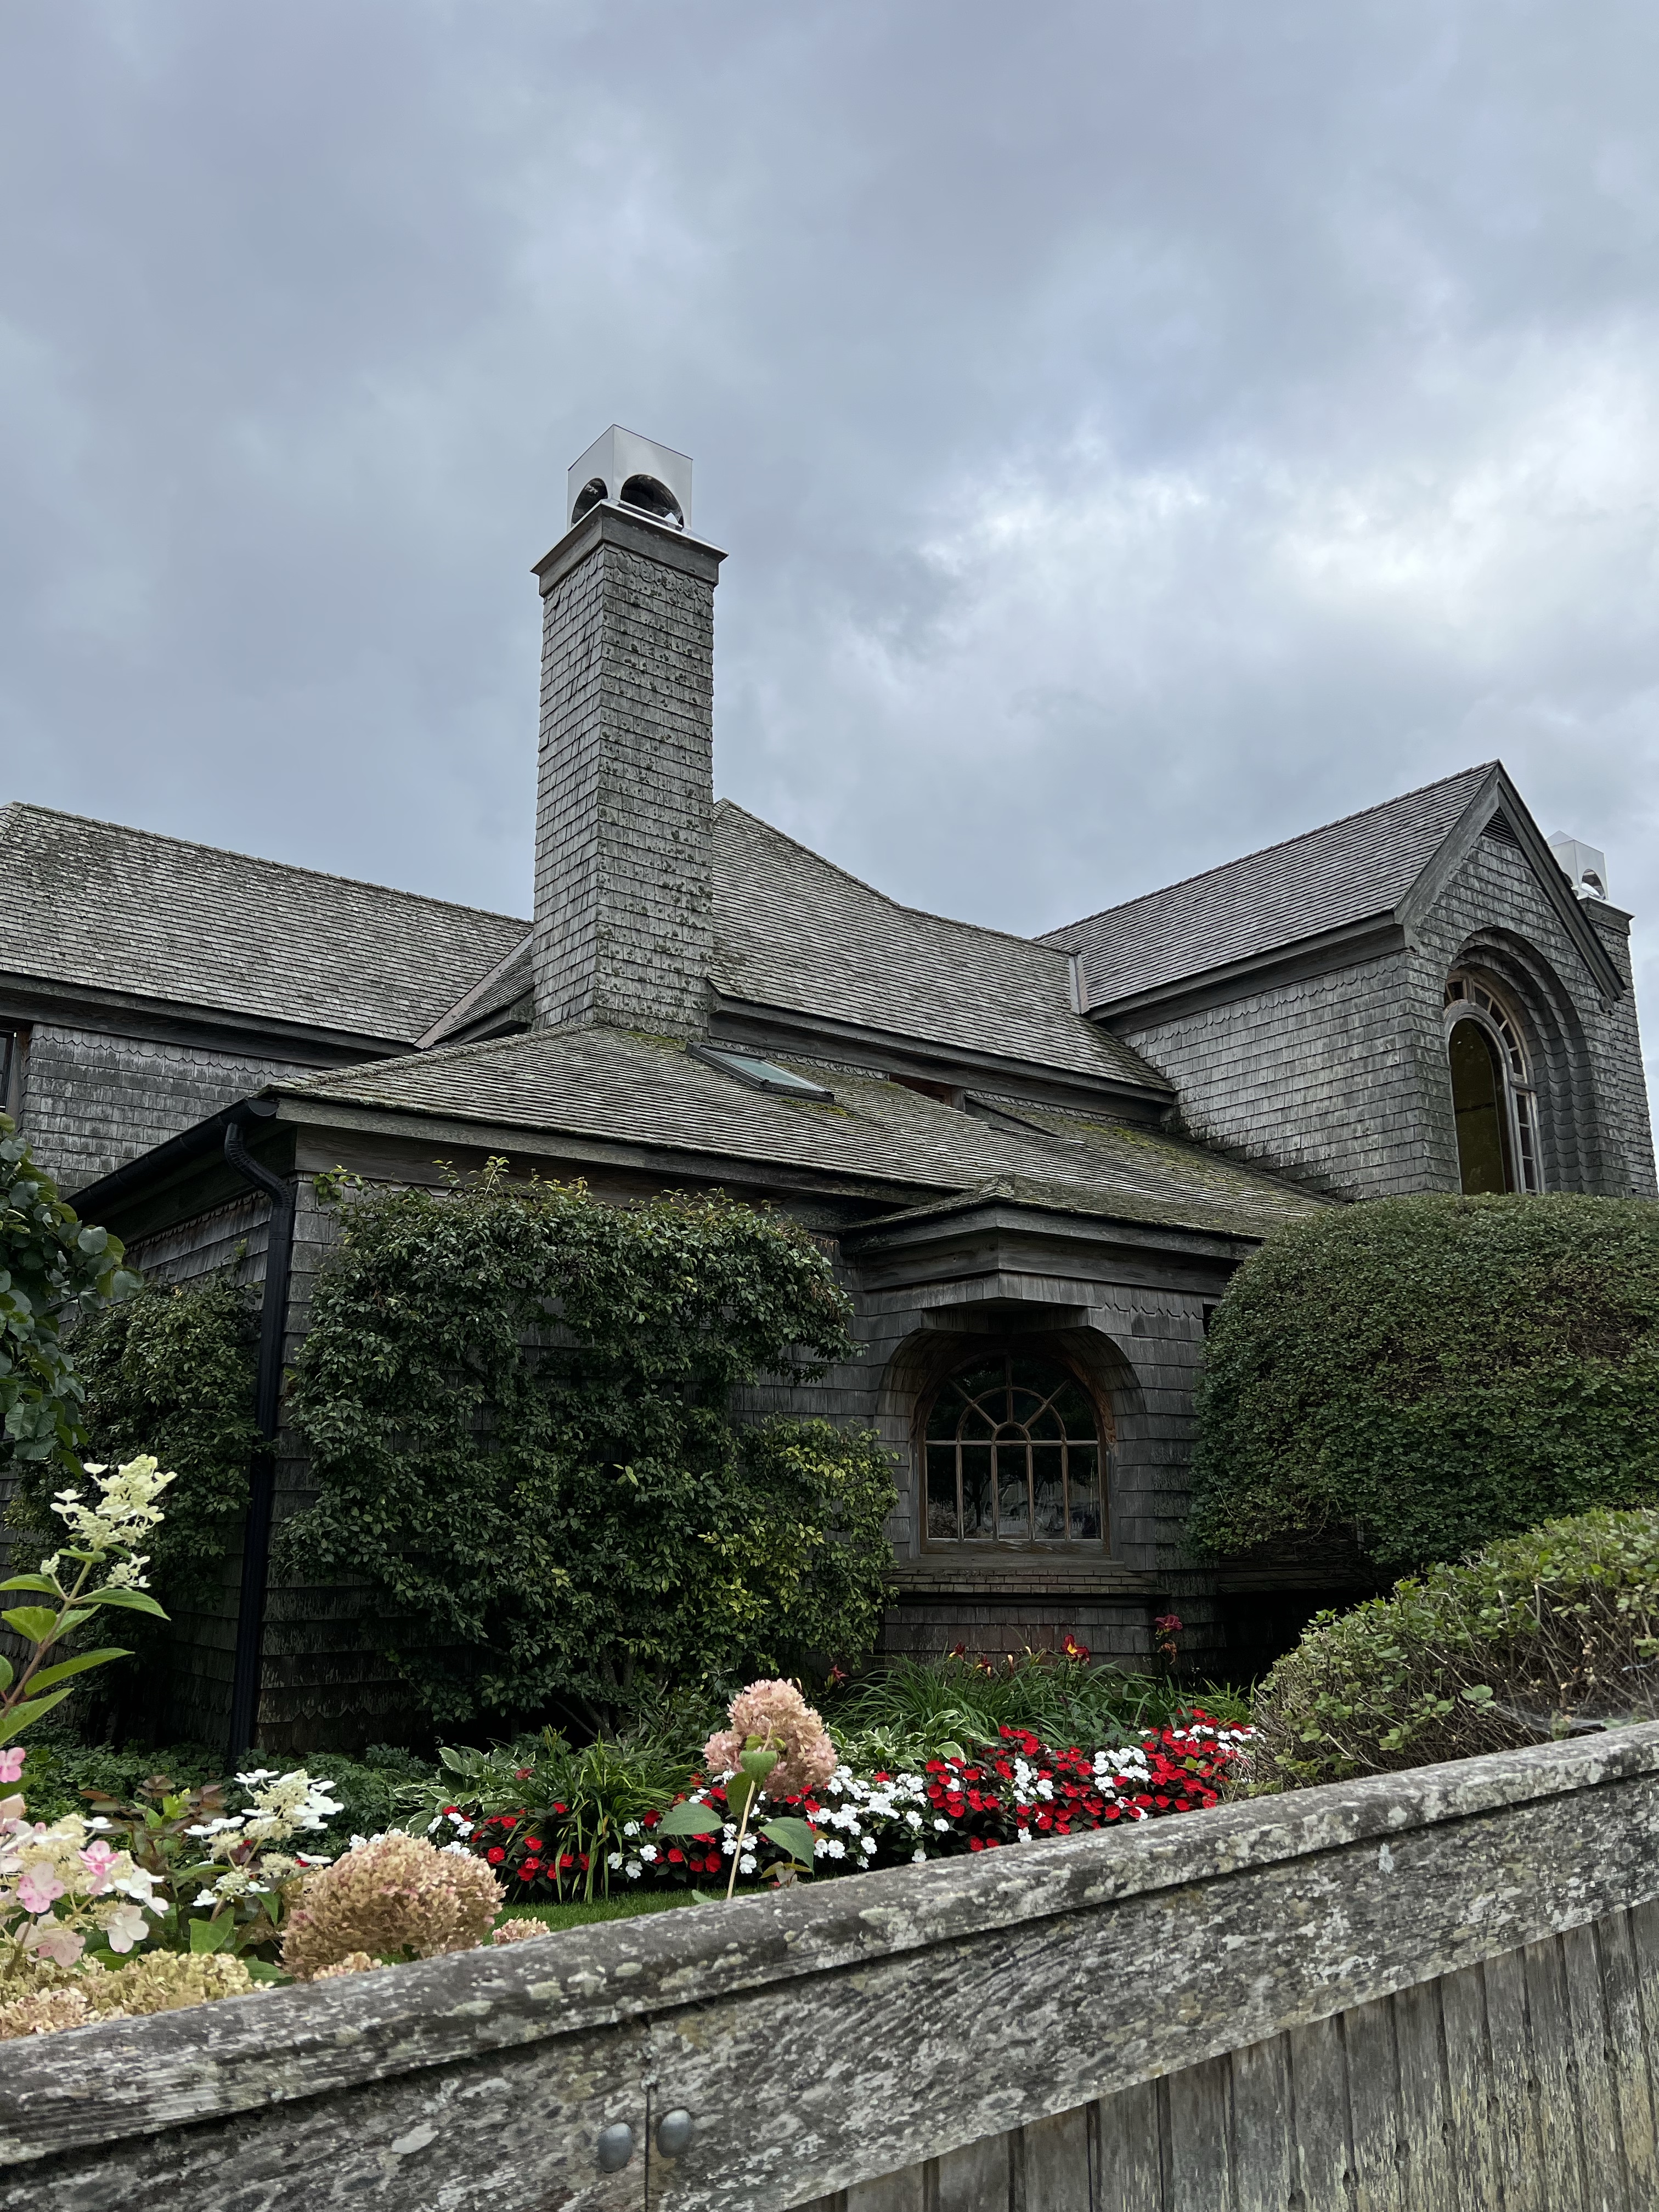
We hopped on the ferry in the morning to head over to Mackinac island. (And, yes, Mackinaw City is spelled differently but they are pronounced the same. 😊 You can read a little about that here.) As we neared the island, we were treated with a spectacular view of the Grand Hotel.
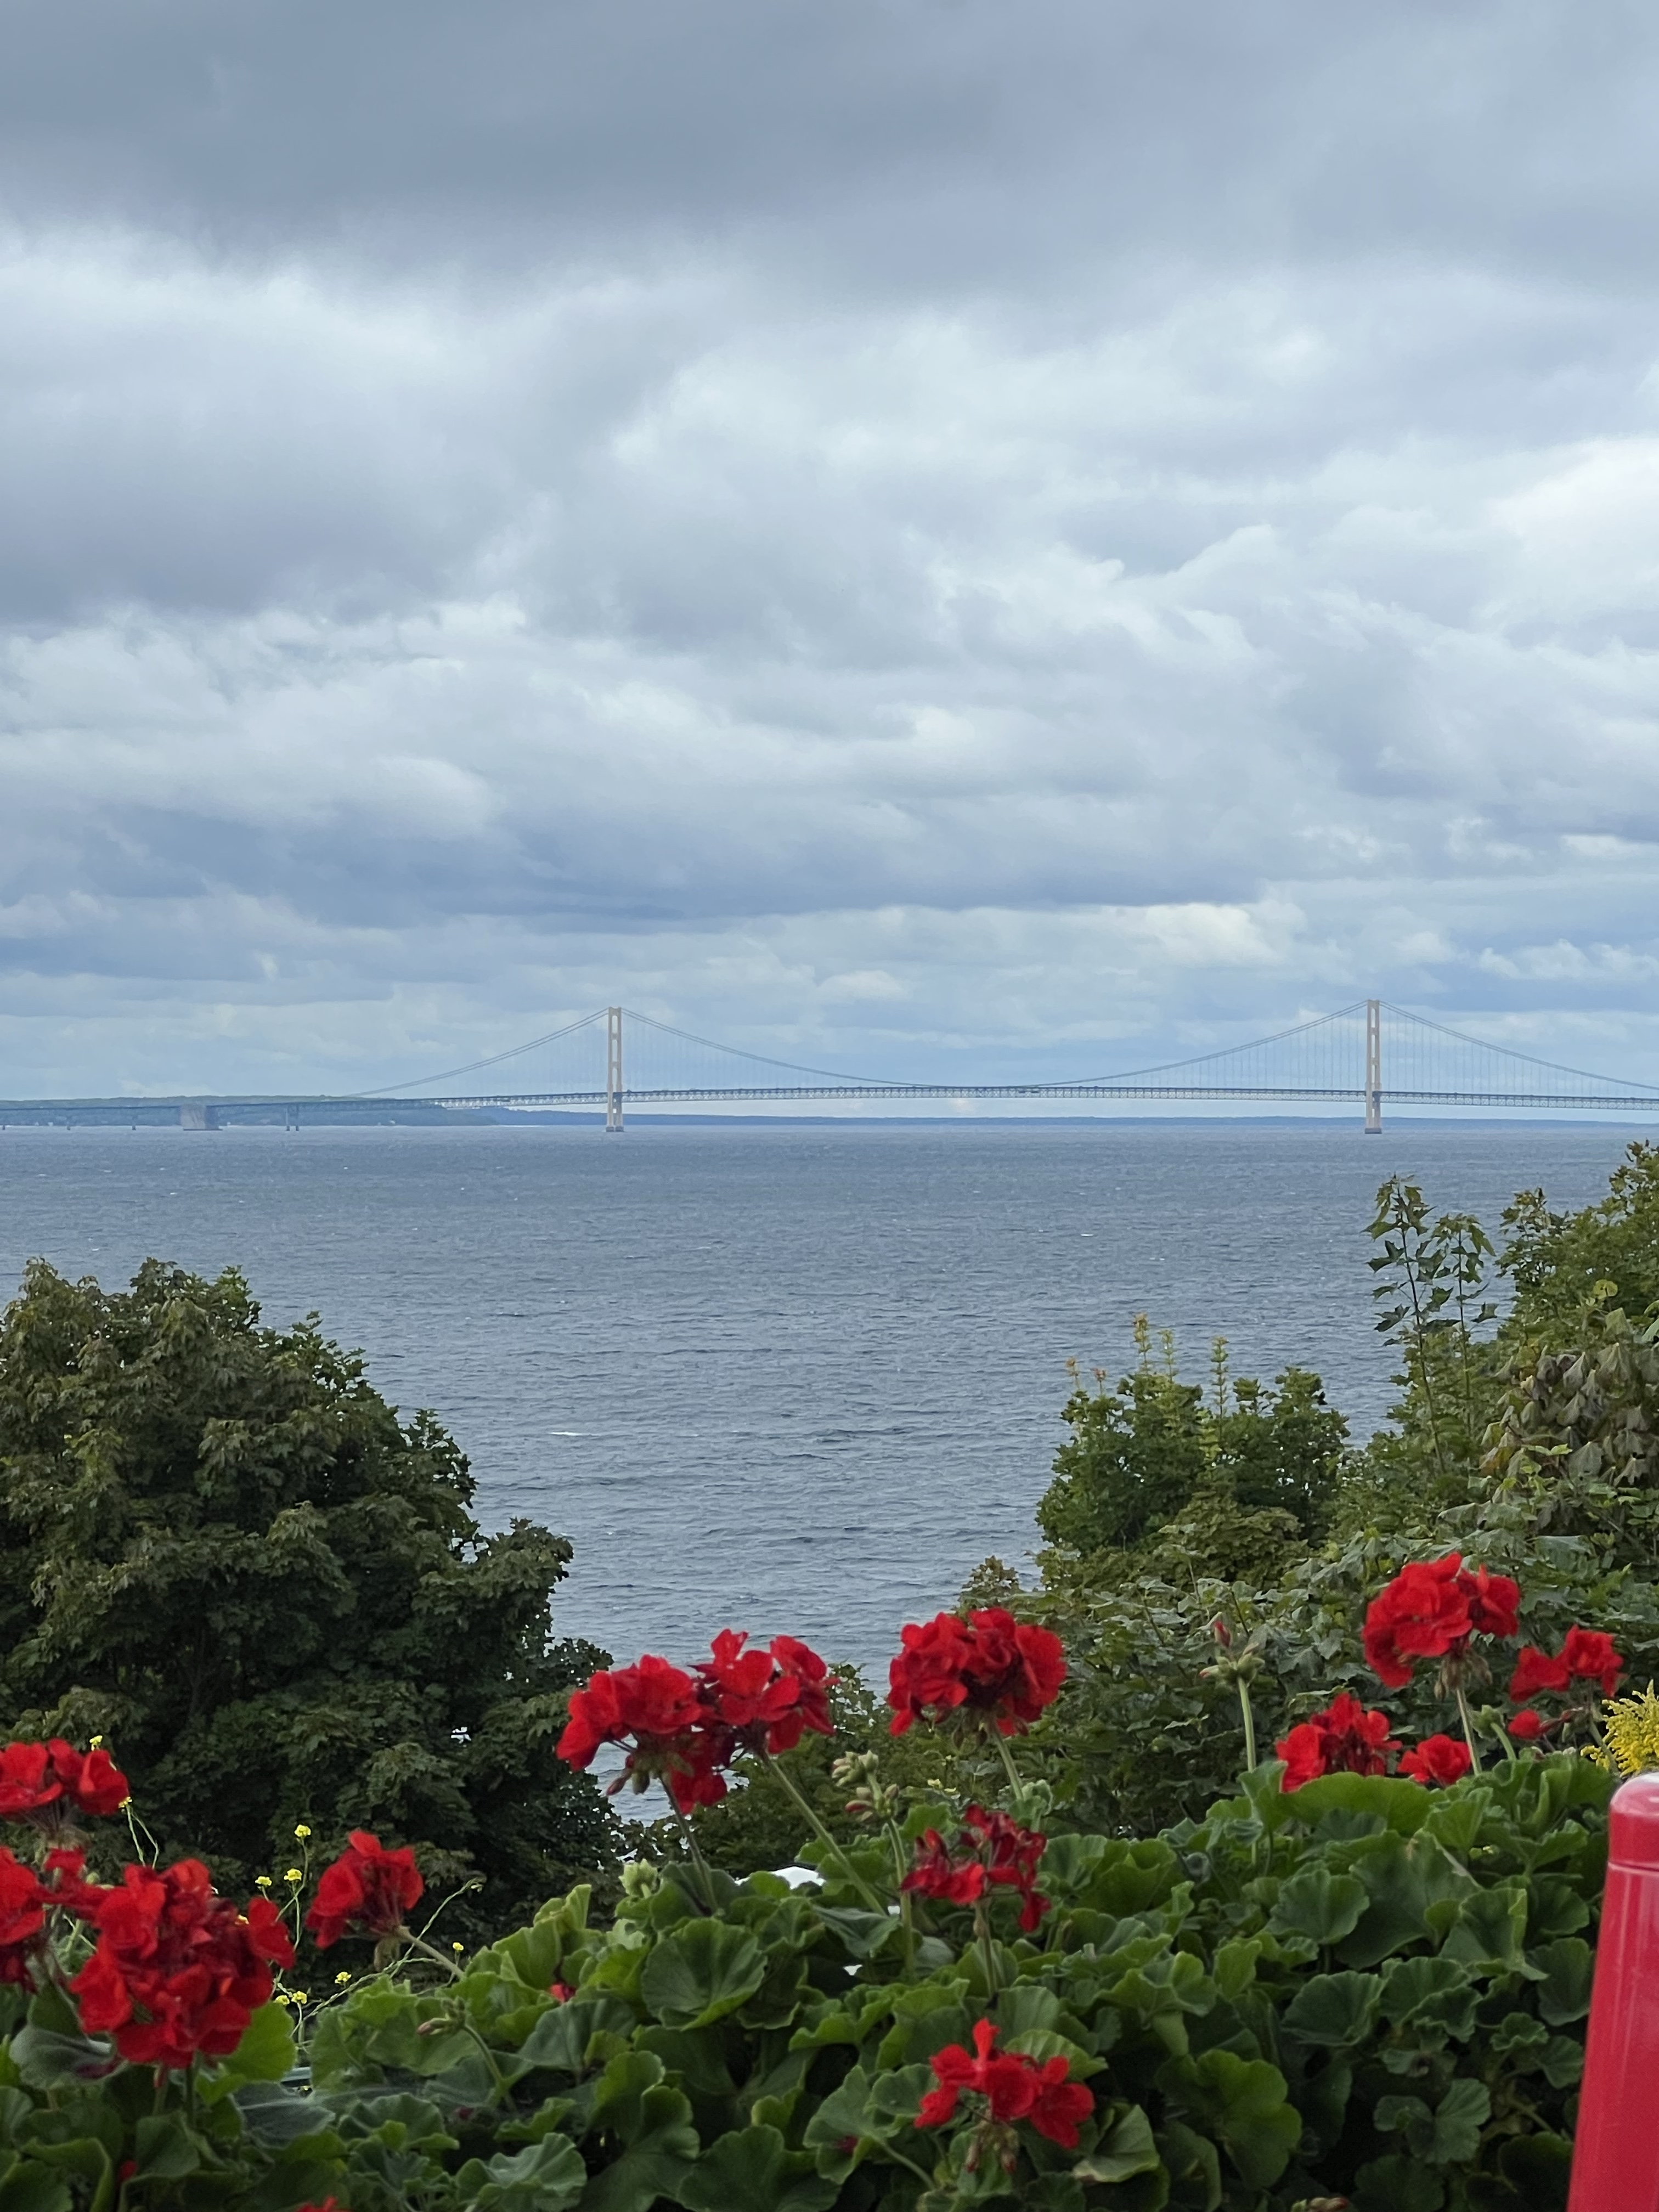
The porch of the Grand Hotel is the world’s largest at 660 feet long. It is lined with rocking chairs for relaxing, sipping a drink, and enjoying the views. The bridge in the photo below is the Mackinac Bridge as seen from the porch. The bridge connects the upper and lower peninsulas of Michigan and spans about 5 miles.
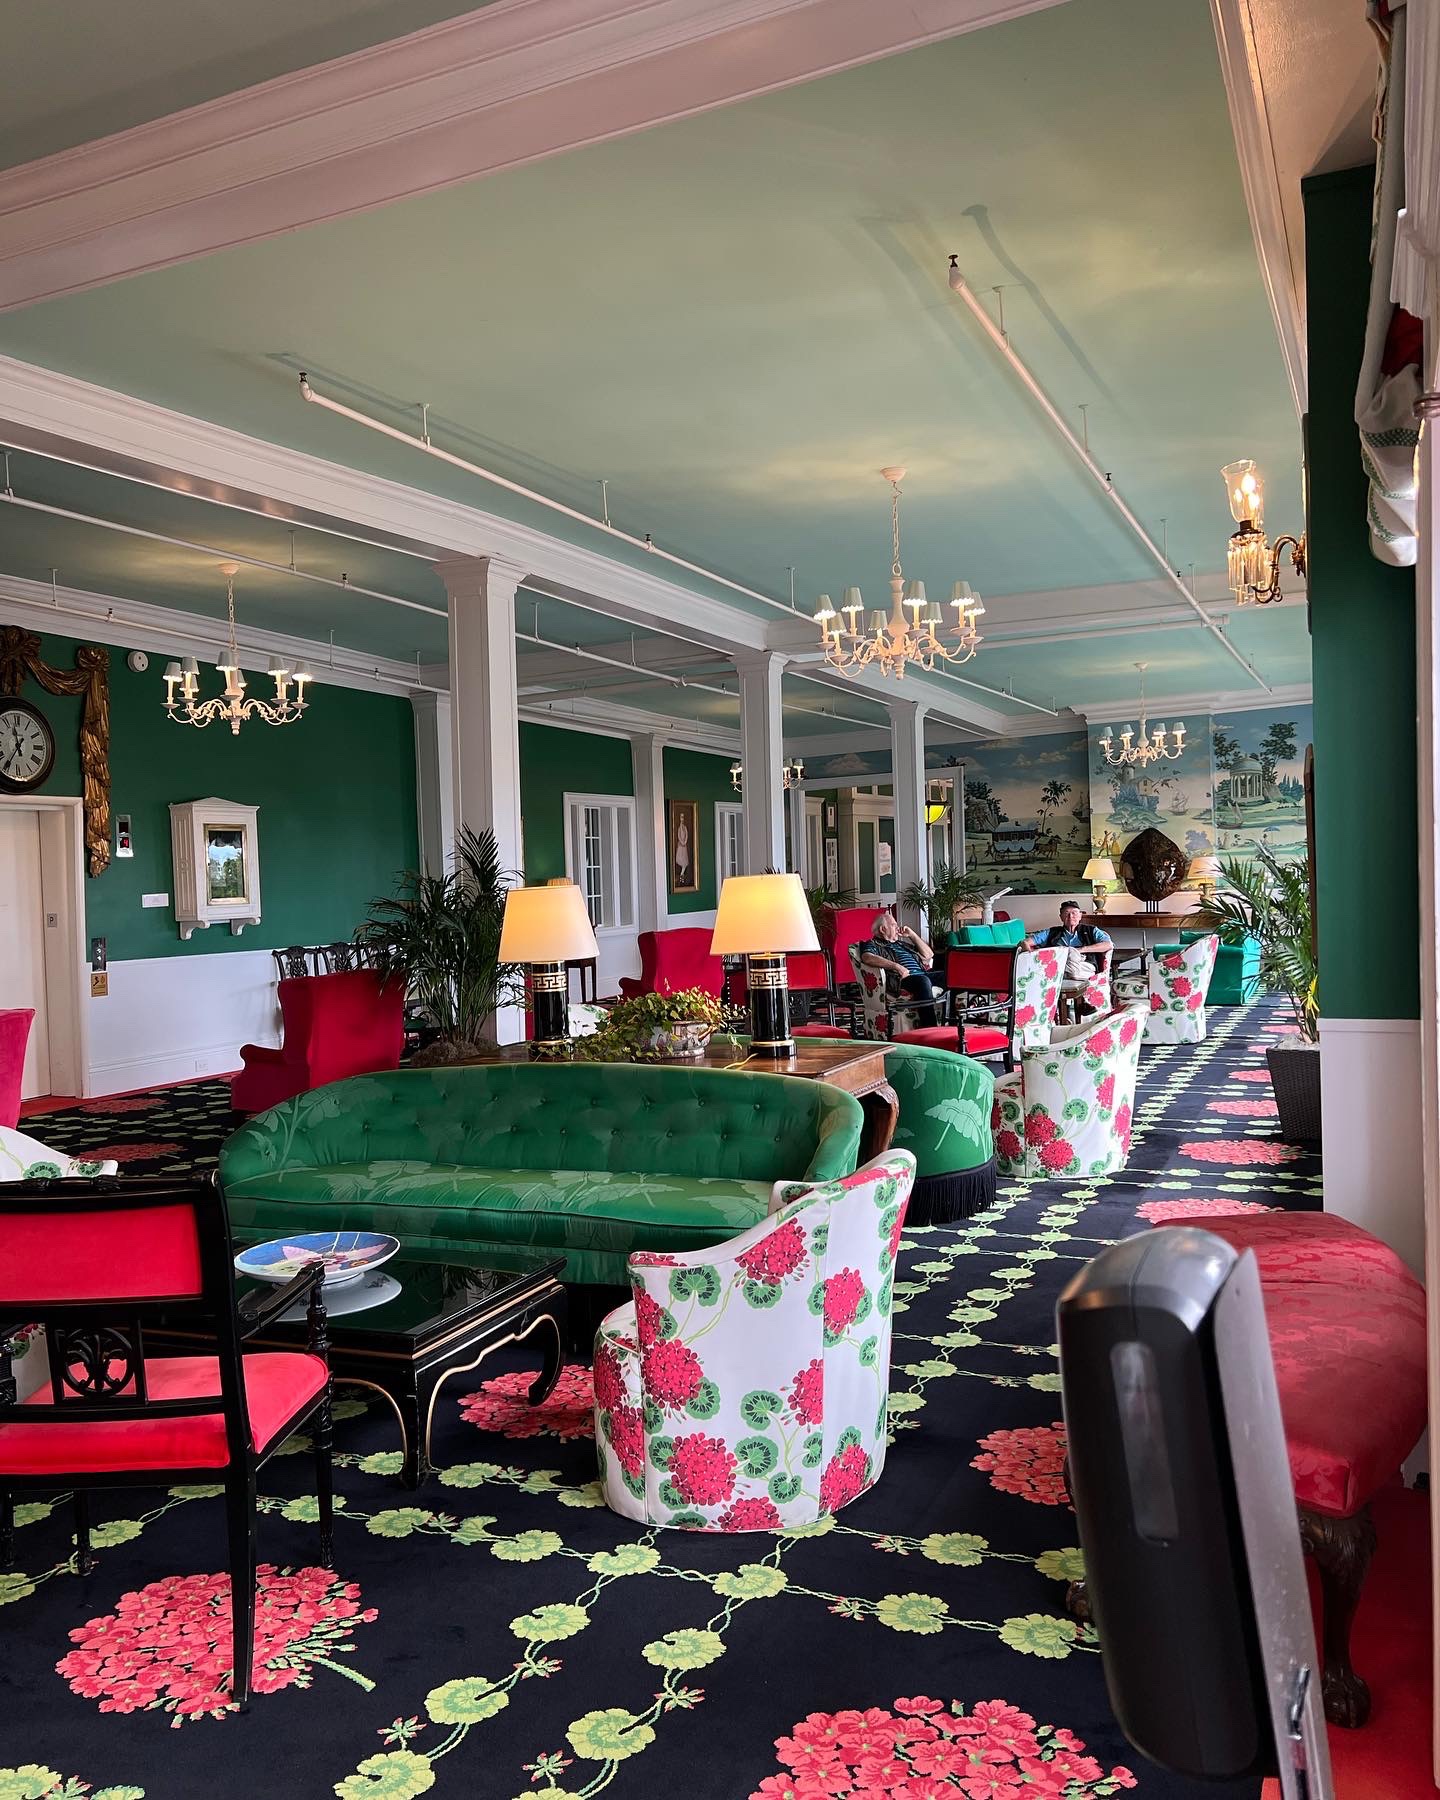
For a small fee, you can tour the first few floors of the hotel along with the porch and the grounds. It is very plush and inviting and the flowers are gorgeous.
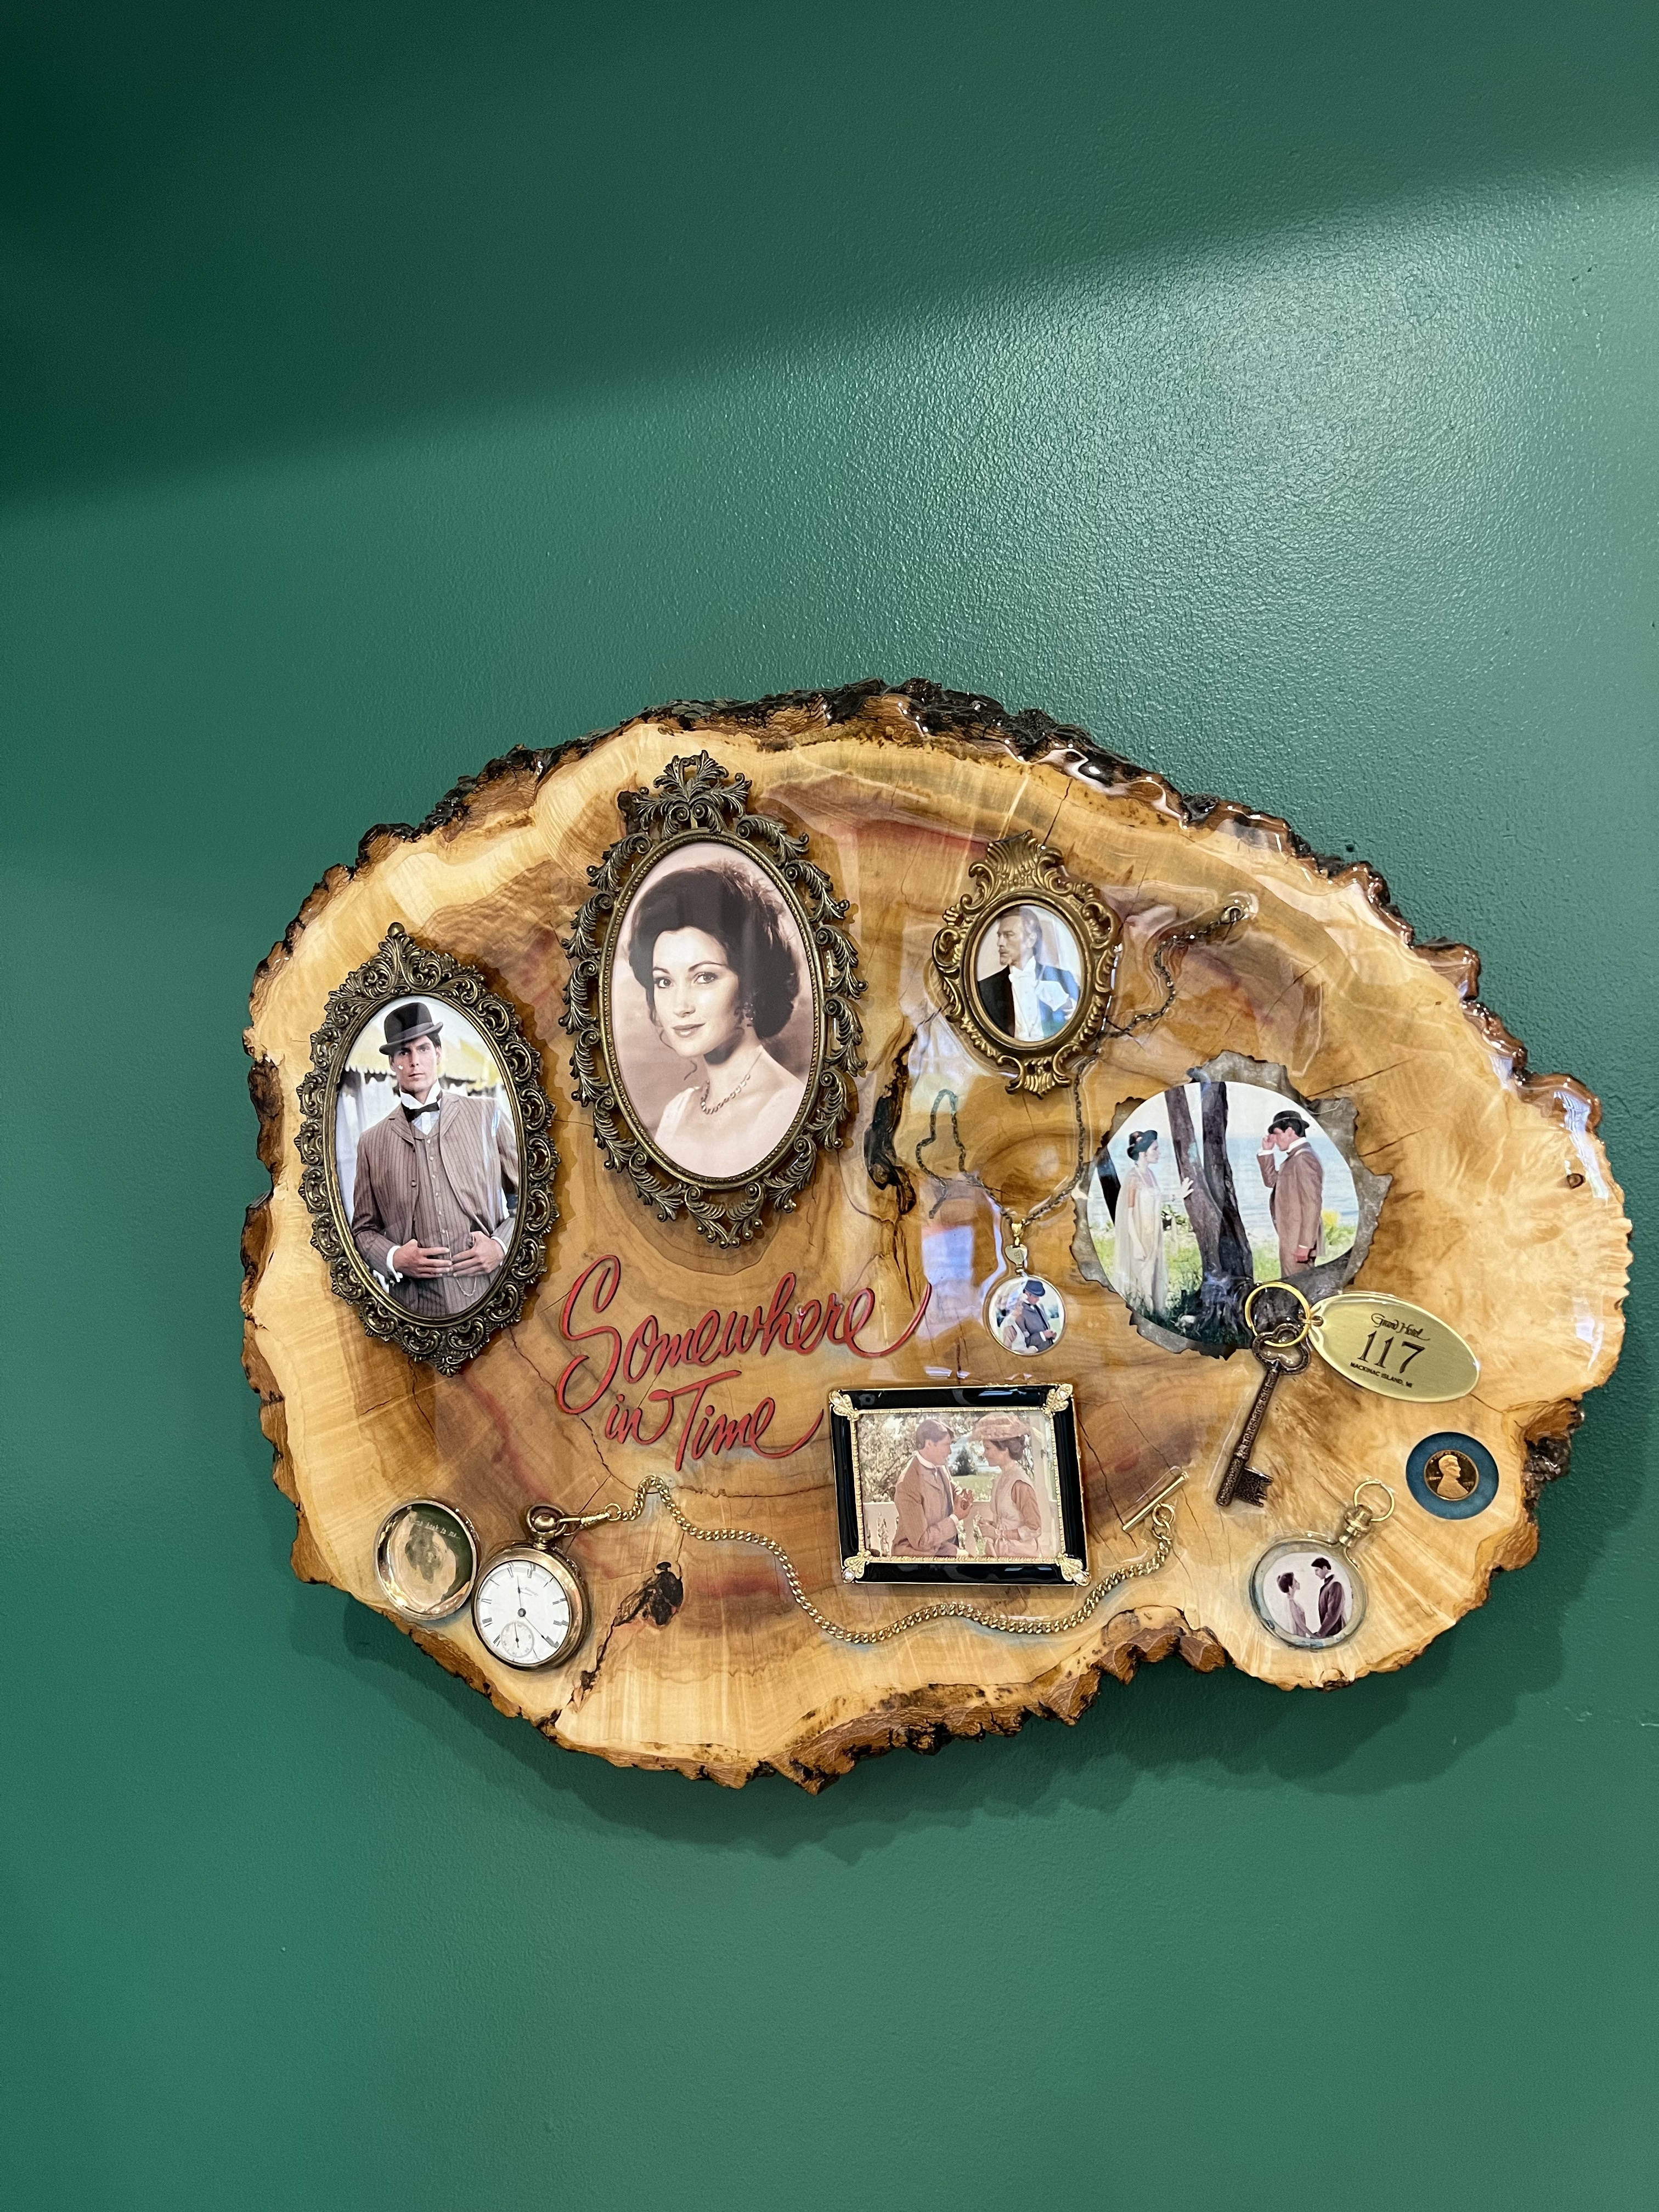
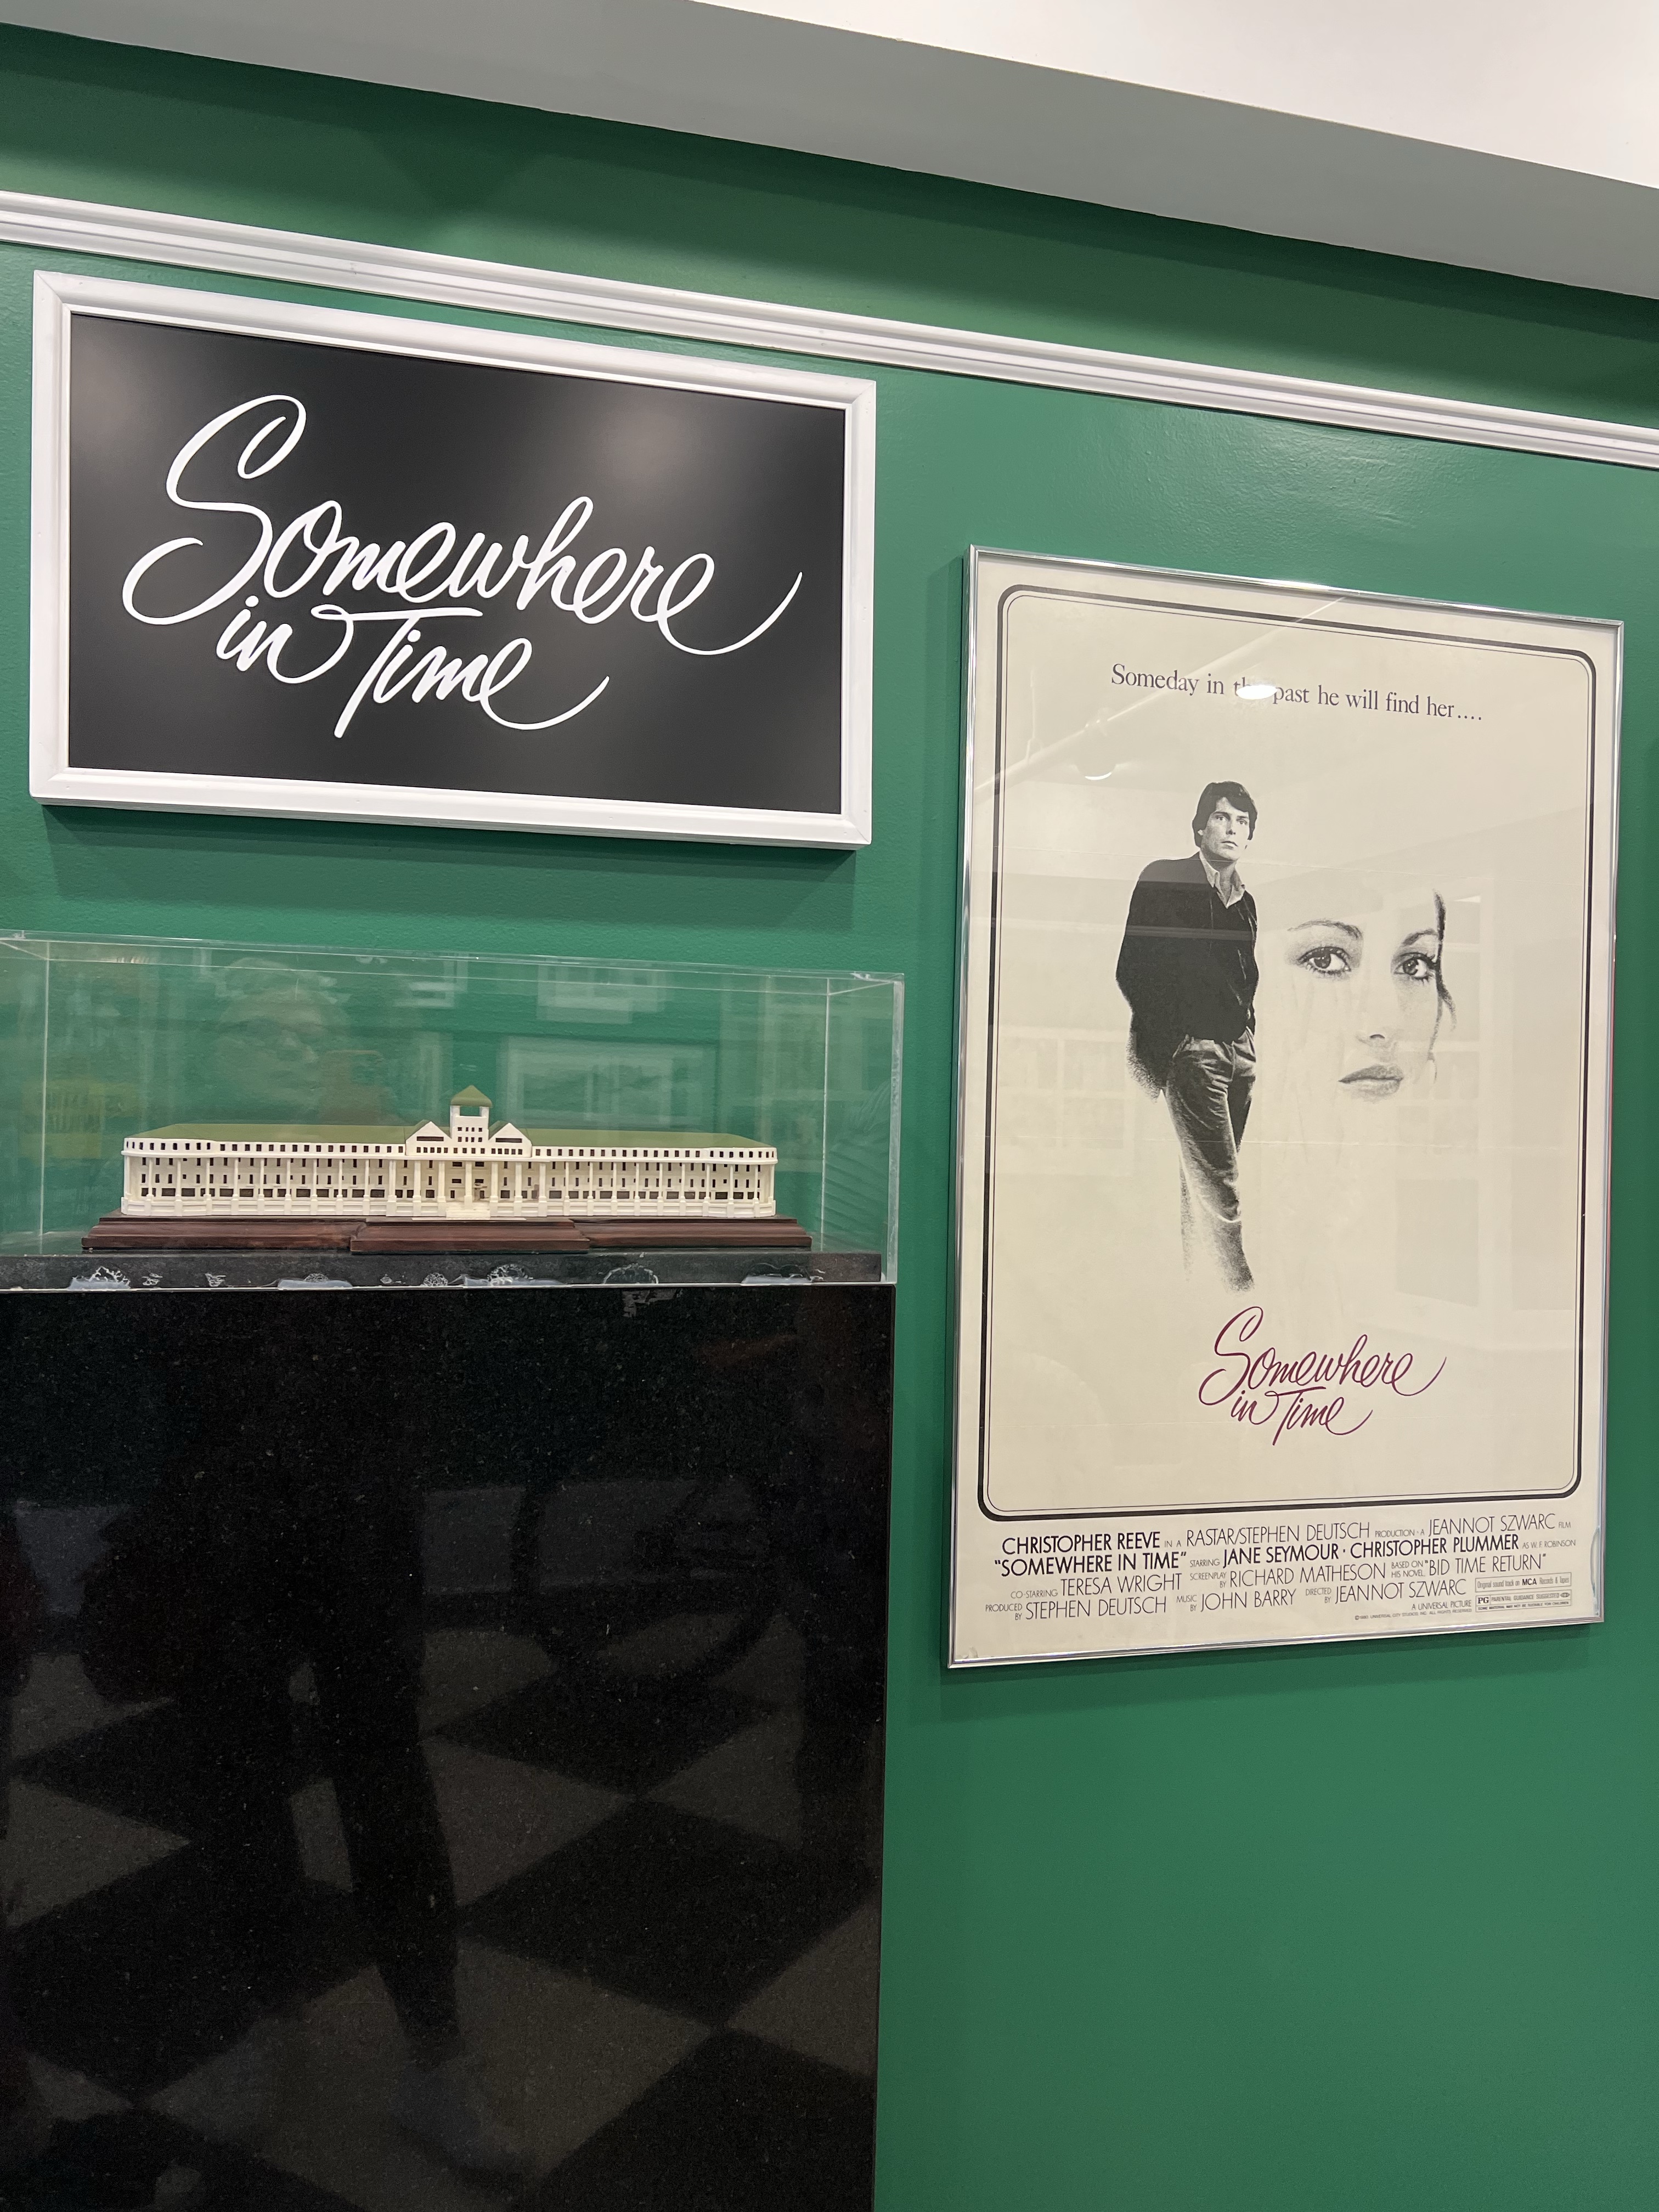
For the movie buffs, the 1980 film Somewhere In Time, starring Christopher Reeve, Jane Seymour, and Christopher Plummer, was filmed at the Grand Hotel and other Mackinac Island locations. There is a room with memorabilia from the movie. I haven’t watched the movie in quite a while – I’ll have to watch it again soon!
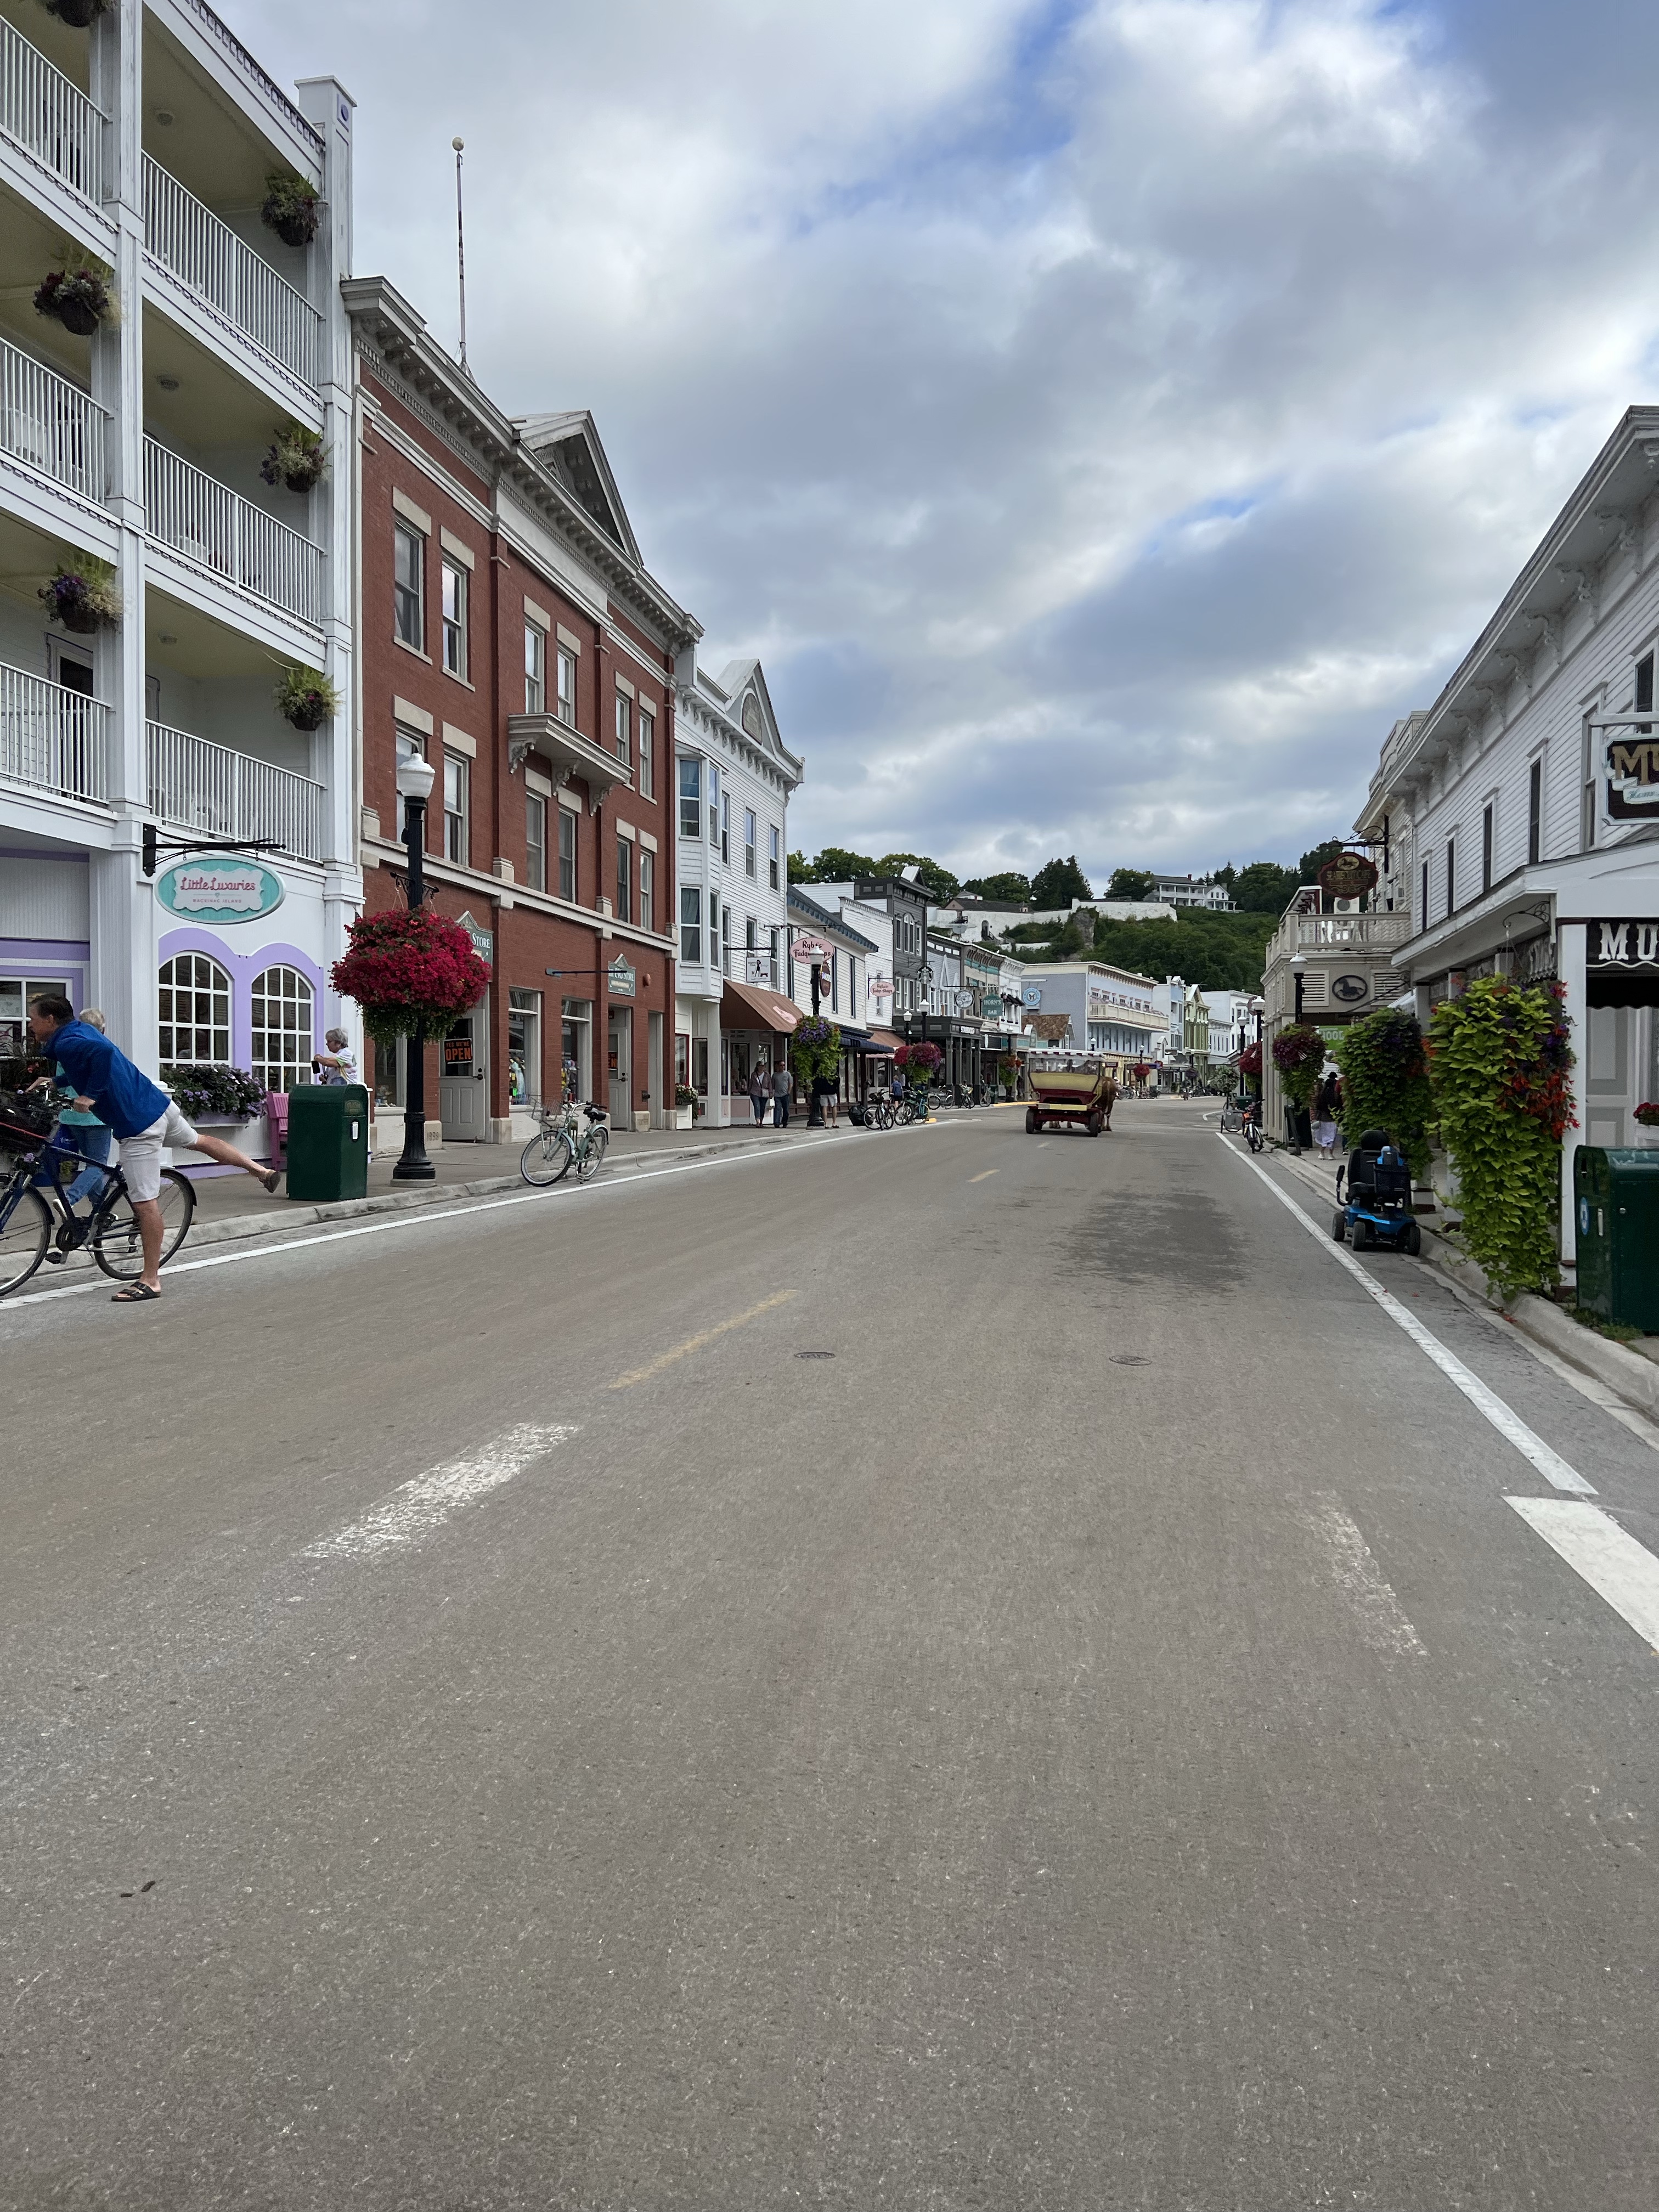
We took a horse drawn carriage tour around the island. We started in the downtown area and rode past some of the beautiful sights on the island. Below is a view of downtown which is filled with shops, restaurants, and fudge shops (I think I saw at least 6!), Little Stone Church, Saint Ann’s Cemetery, Fort Mackinac, and Arch Rock. Most of the island is a Michigan State Park left in its natural state. It was so quiet and peaceful riding in the horse-drawn carriage listening to the clip-clop of the horses with no engine noises.
A few of the sights as we walked from the Grand Hotel back to downtown…
There are a few hardy souls who live on the island full-time and you can visit anytime, but the main season is May-October. There is also a Christmas tree lighting to kickoff the holiday season and you can enjoy some winter activities. However, not everything will be open on the island. I think it would be absolutely beautiful to visit in late September or early October when the fall colors are showing off!
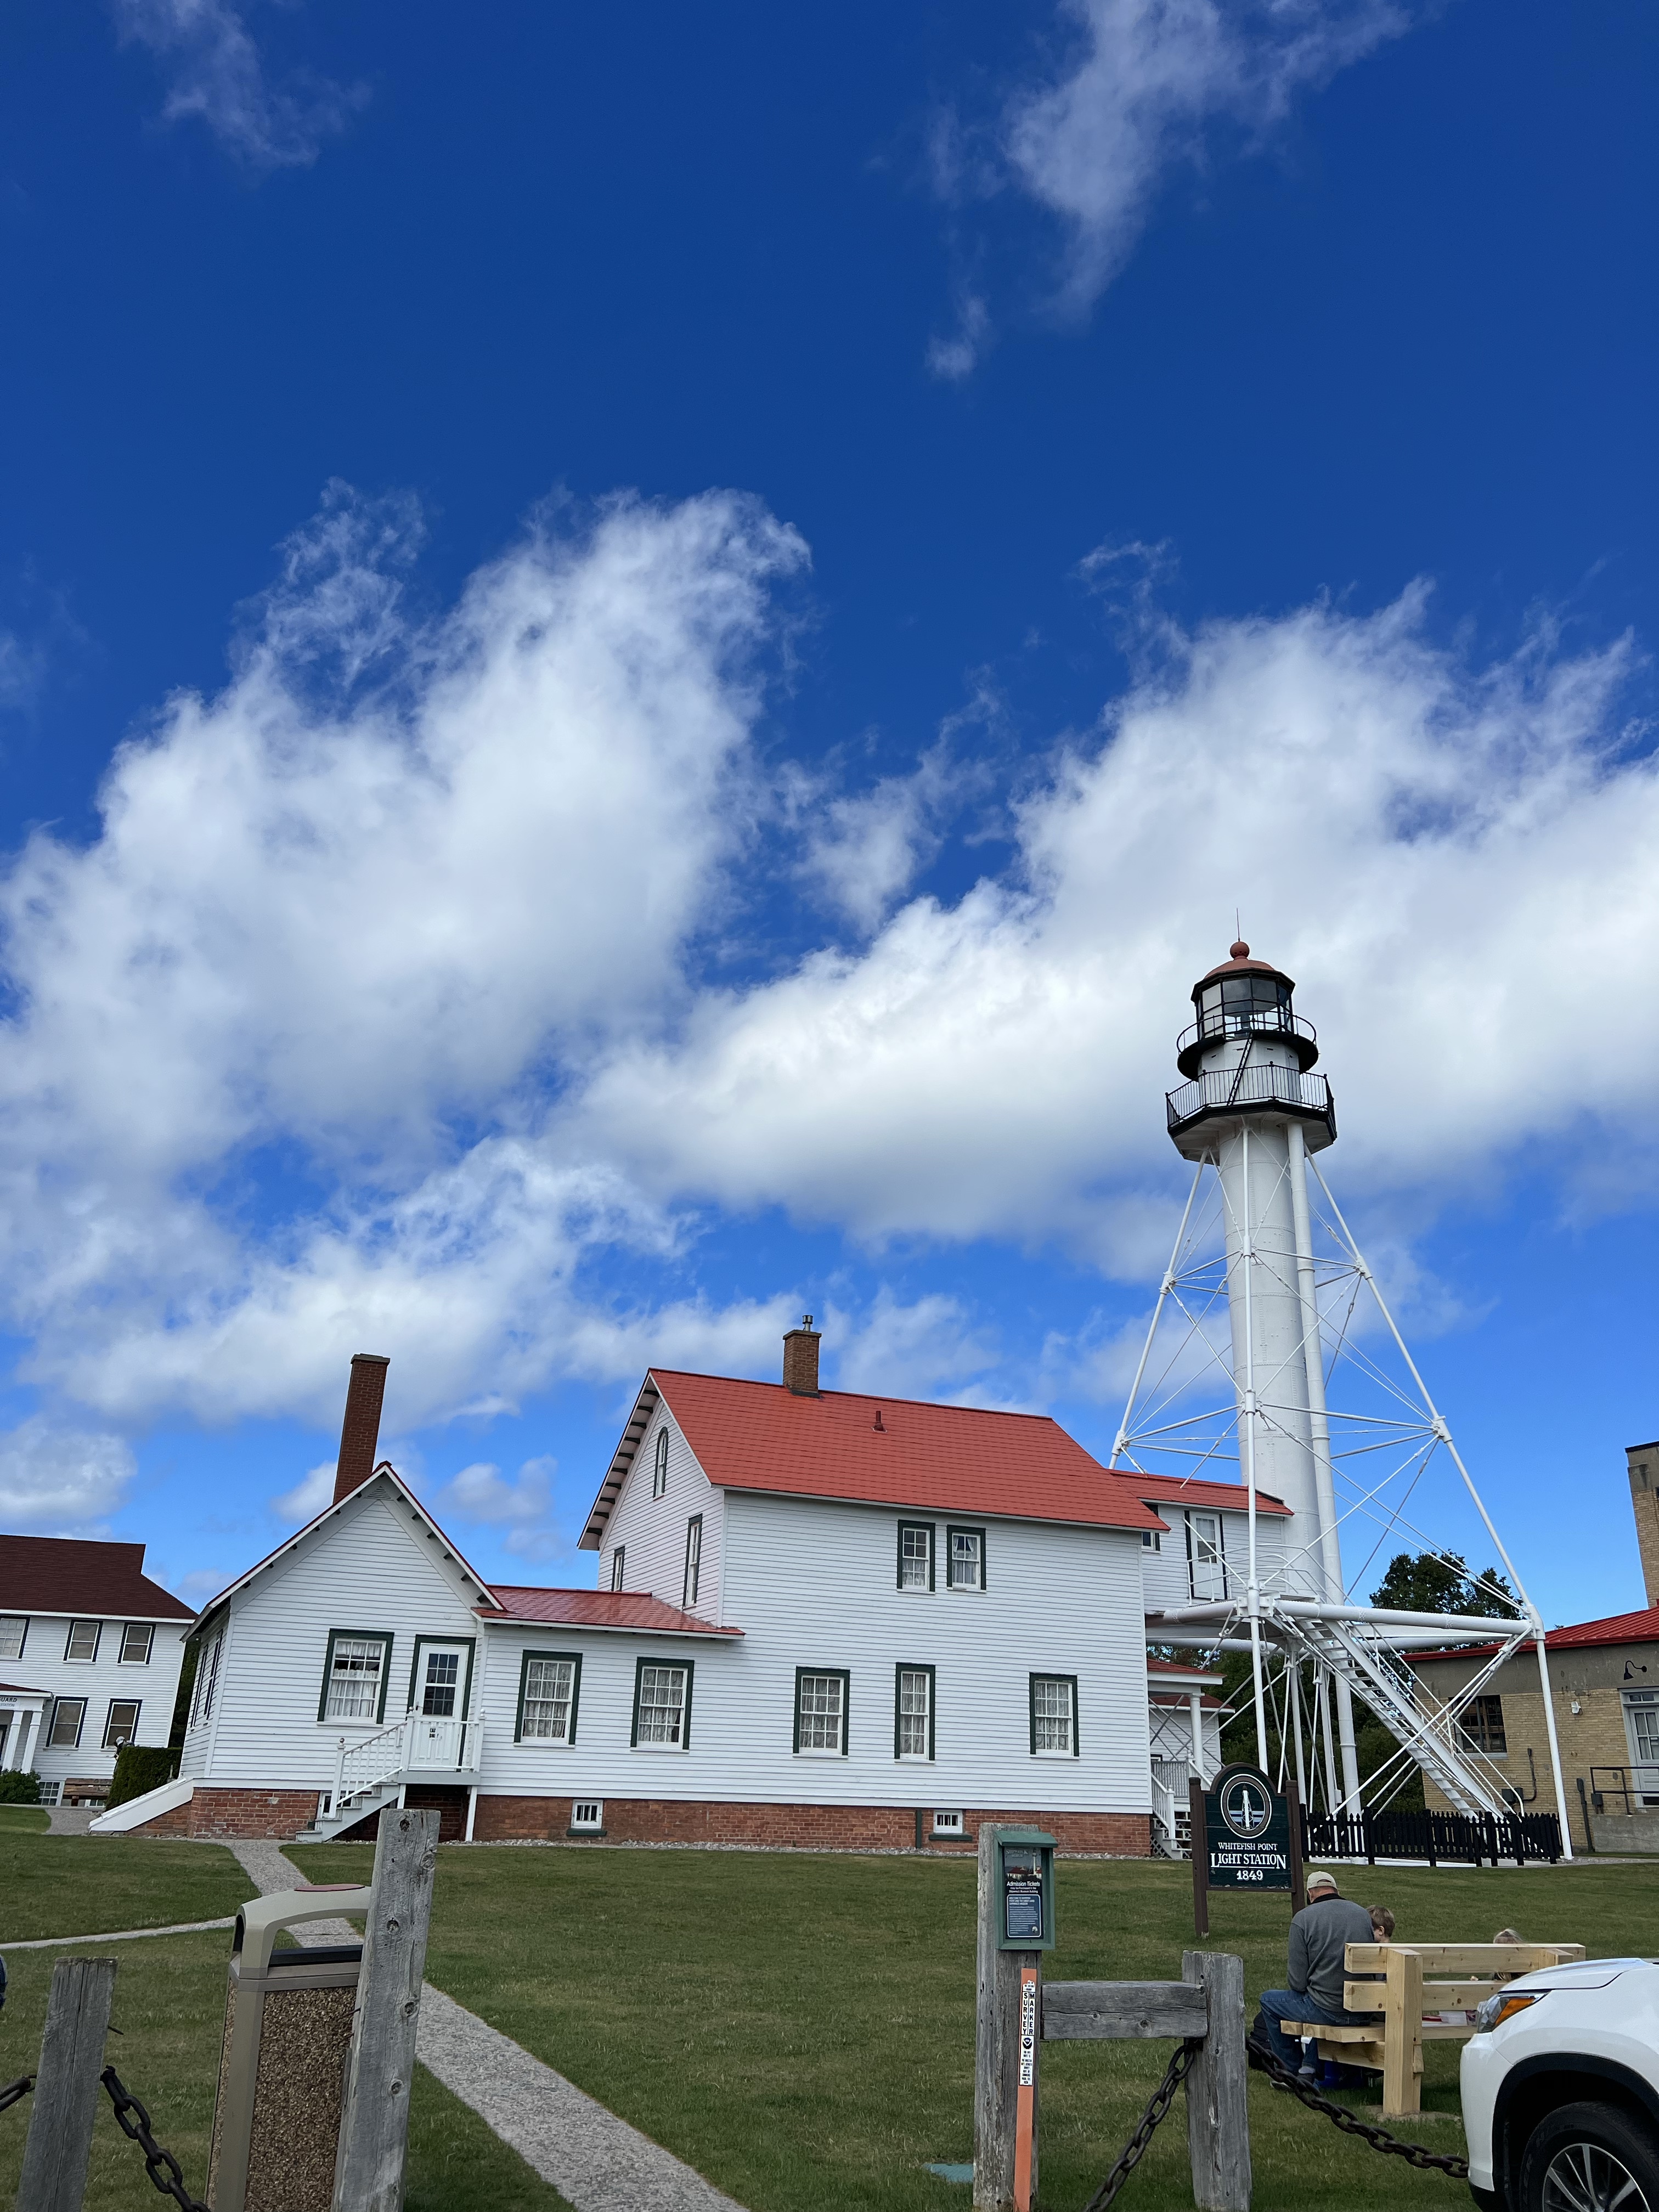
We also took a day to drive across the Mackinac Bridge to the upper peninsula of Michigan and visit the Whitefish Point Great Lakes Maritime Museum. It felt like we were driving to the end of the earth! The farther we went, the more rural it got. Michigan is a beautiful state! The museum is on the very tip of Michigan on Lake Superior – you can even see Canada in the distance in the last photo below.
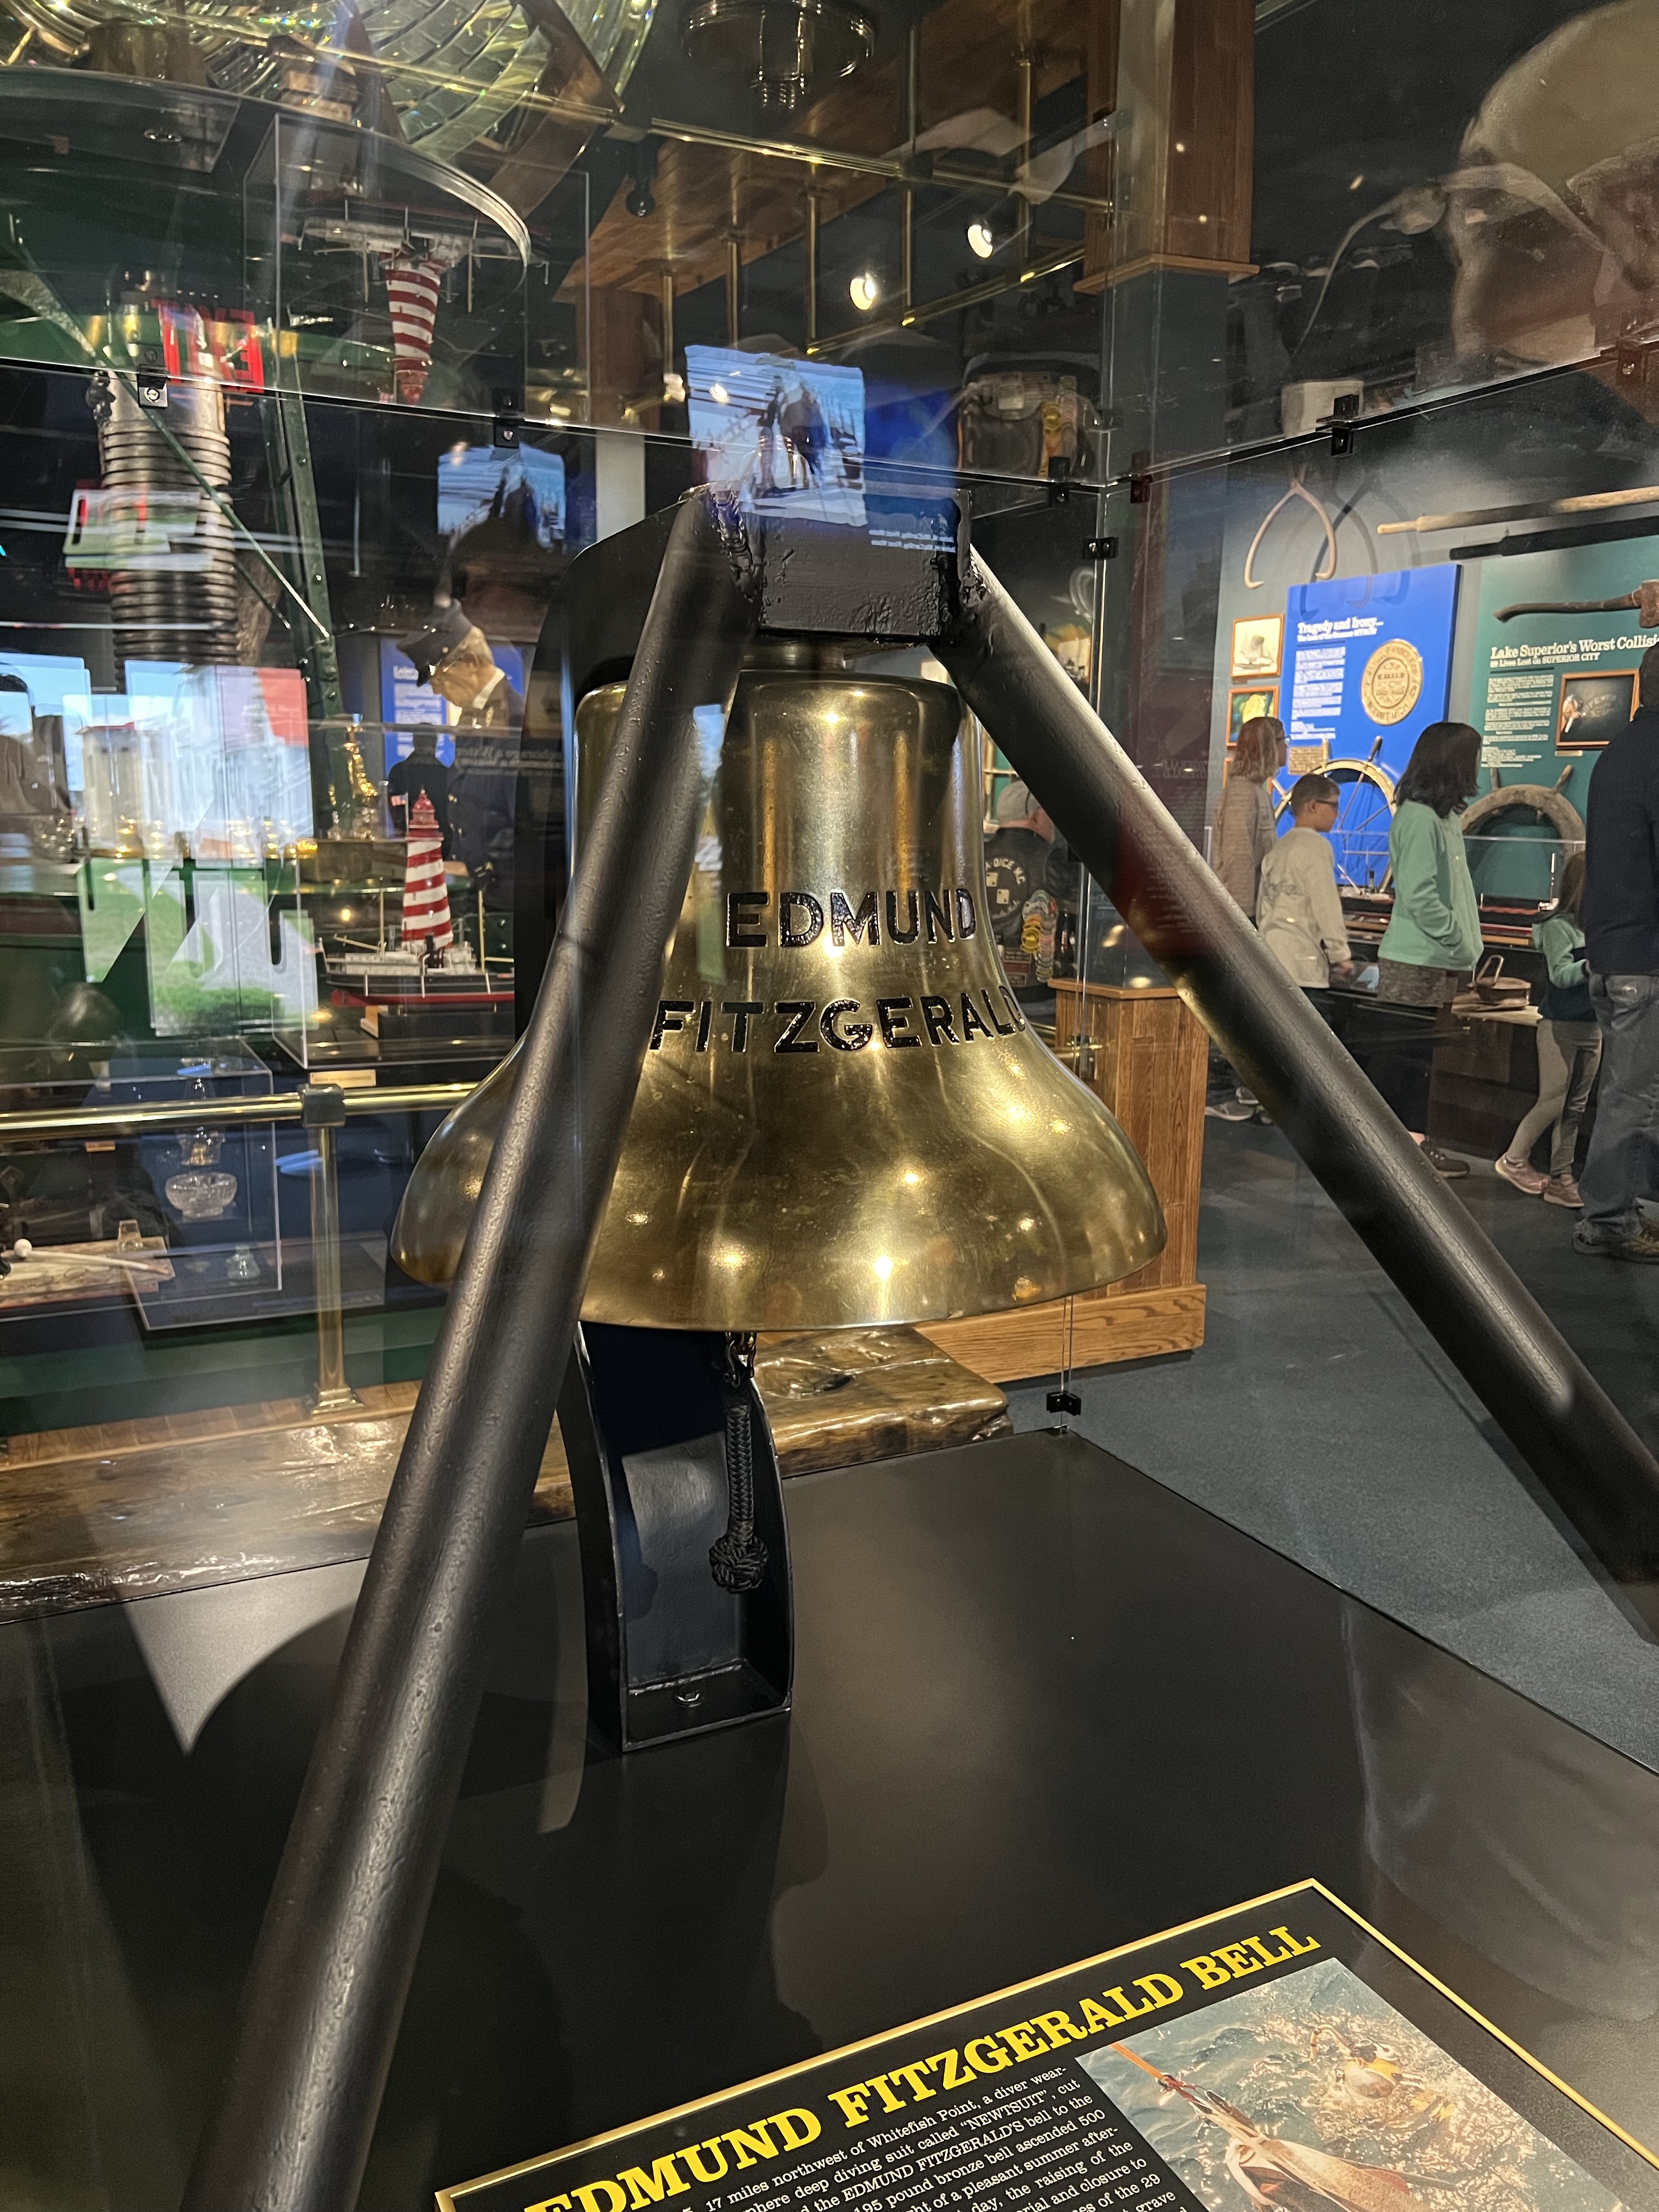
The museum remembers the shipwrecks that have occurred in the Great Lakes. One you may have heard of is the wreck of the Edmund Fitzgerald. The ship was lost on November 10, 1975 about 17 miles north-northwest of Whitefish Point and 29 men were lost. You may remember the song “The Wreck of the Edmund Fitzgerald” by Gordon Lightfoot which commemorates the sinking of the ship.
The bell of the ship was recovered on July 4, 1995 and you can see it in the museum. A replica of the bell engraved with the names of the 29 crew who were lost was placed in the same place on the sunken ship in memory of the men.
It was a chilly and windy day on Lake Superior but I’m so glad we made the drive up there! It was so beautiful!
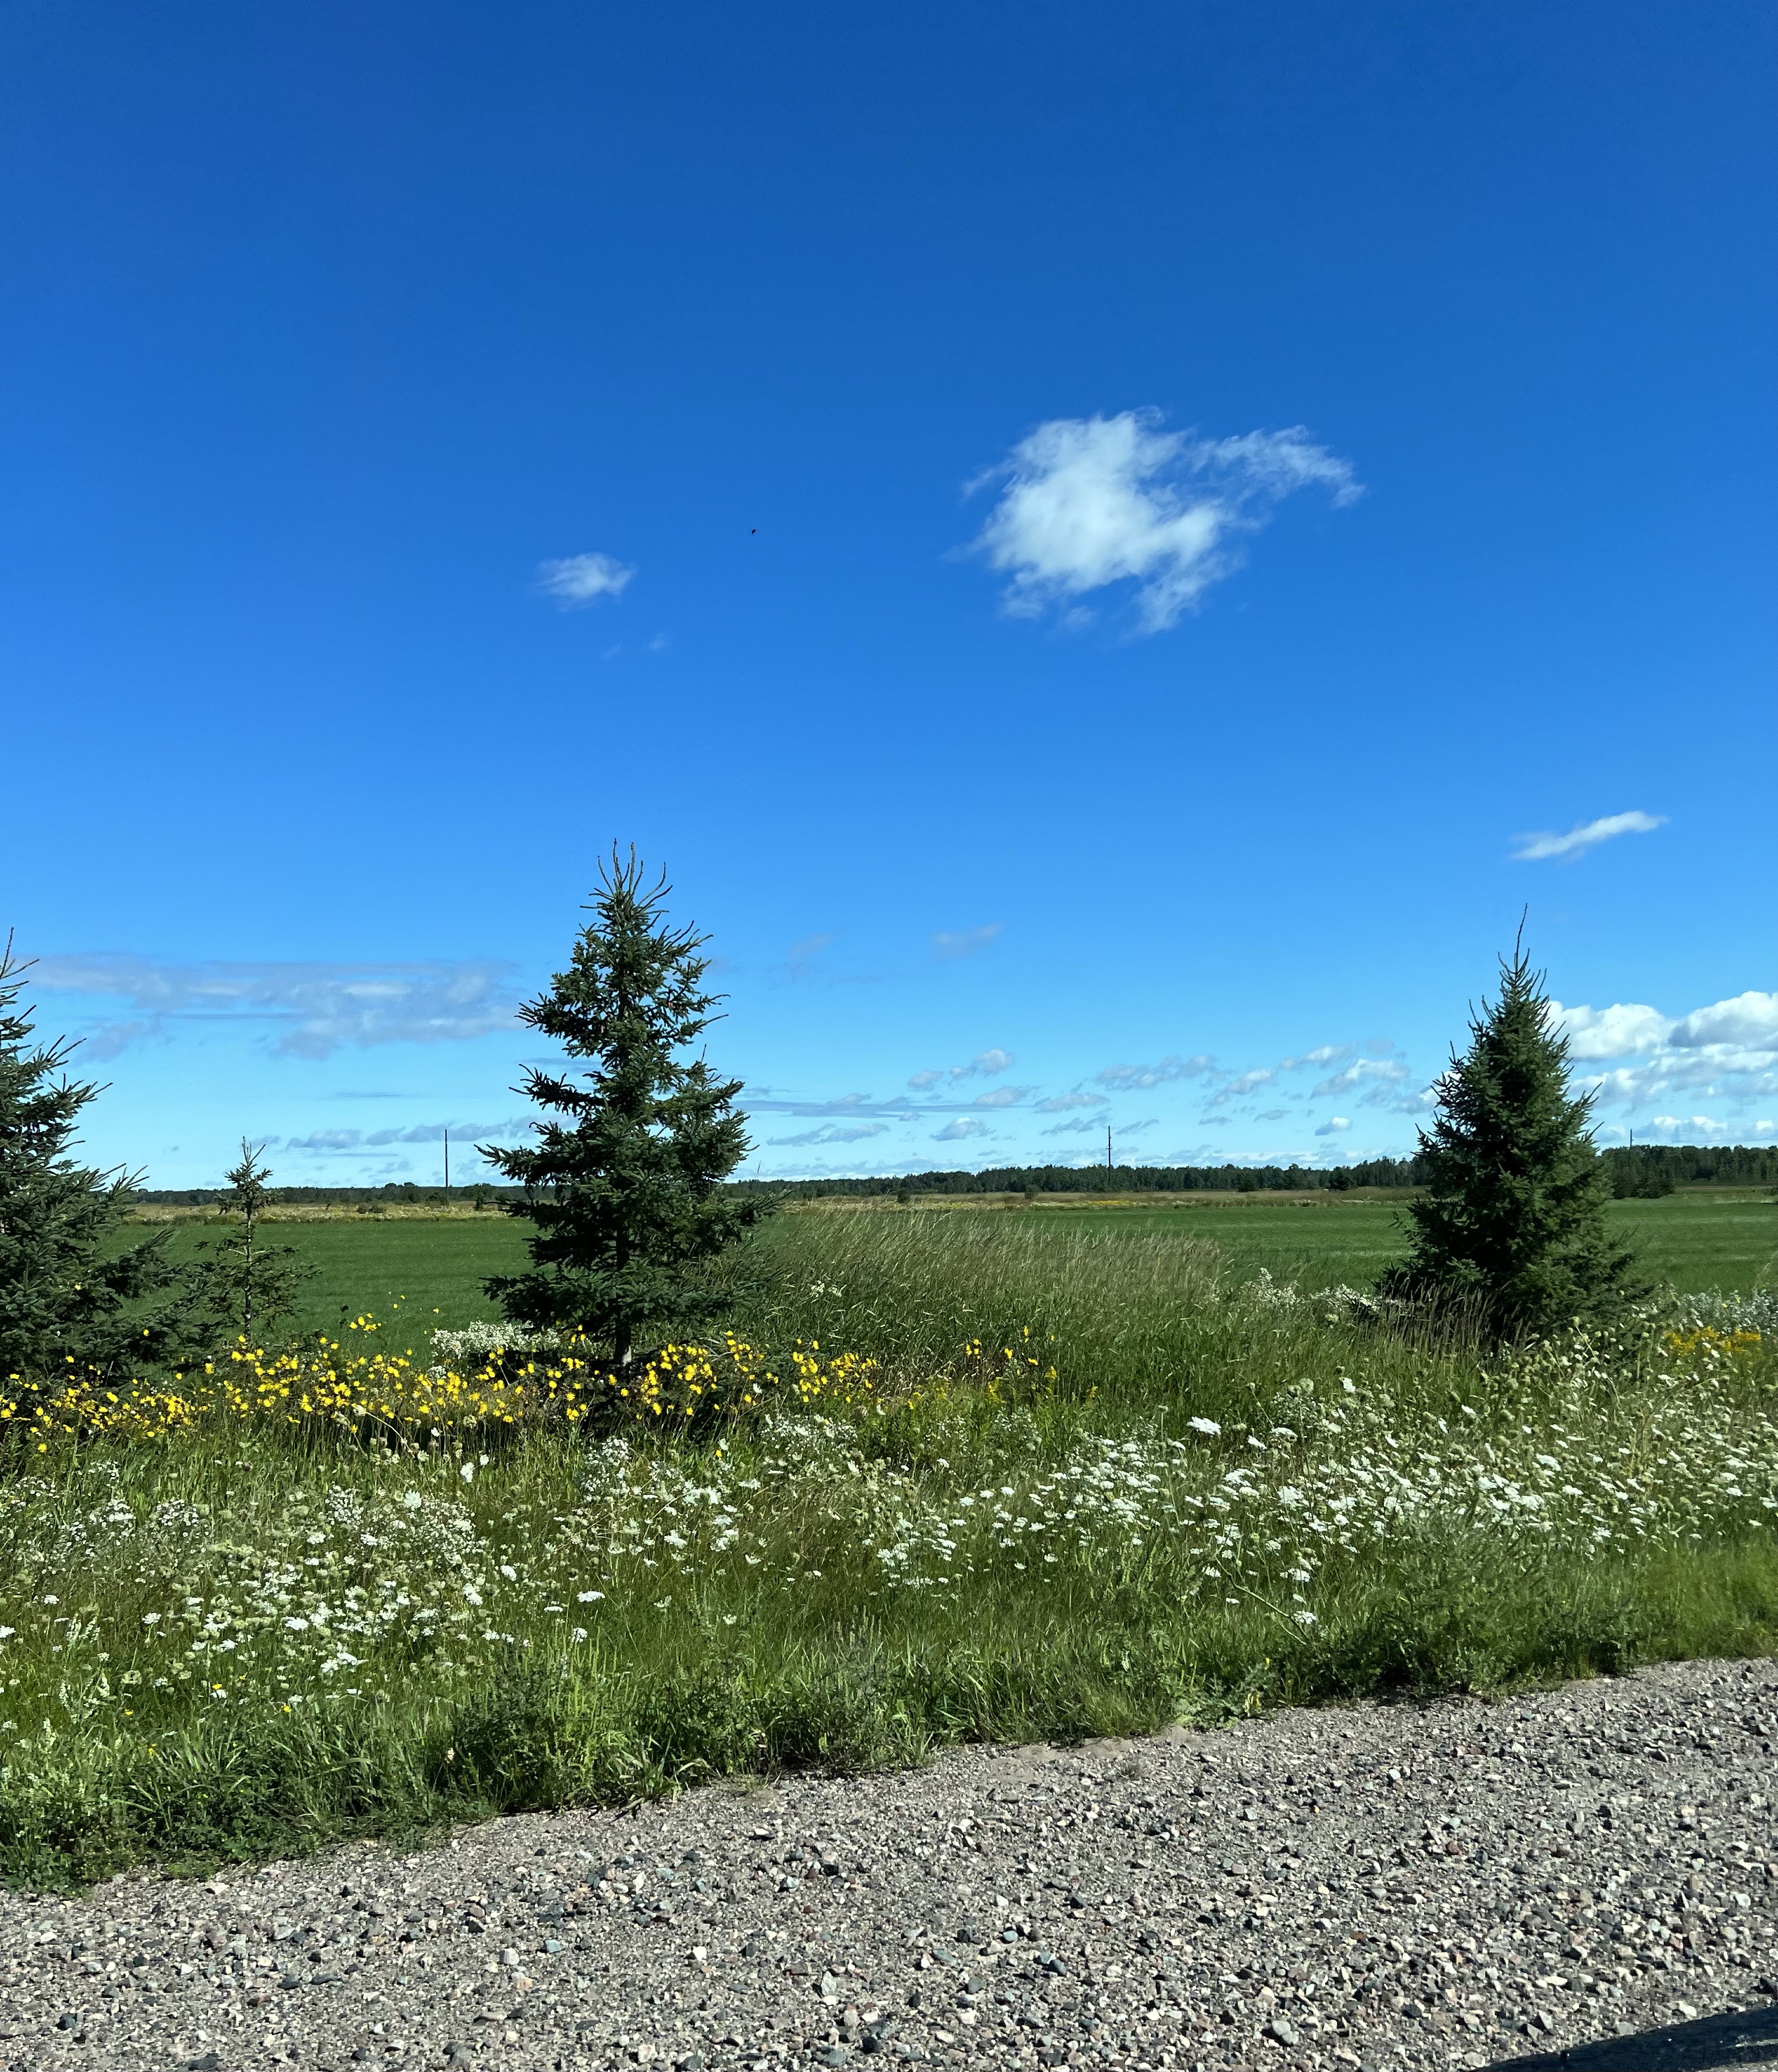
If you ever find yourself in Michigan, I highly recommend spending a day on Mackinac Island. It will take you back to simpler, slower, and quieter time – even with all the other tourists there with you. 😉 And be sure to take a drive through the countryside – it’s beautiful!
Disclosure: Some of the links on my site are affiliate links, meaning, at no additional cost to you, I will earn a small commission if you click through and make a purchase. As an Amazon Associate I earn from qualifying purchases.