Hi friends,
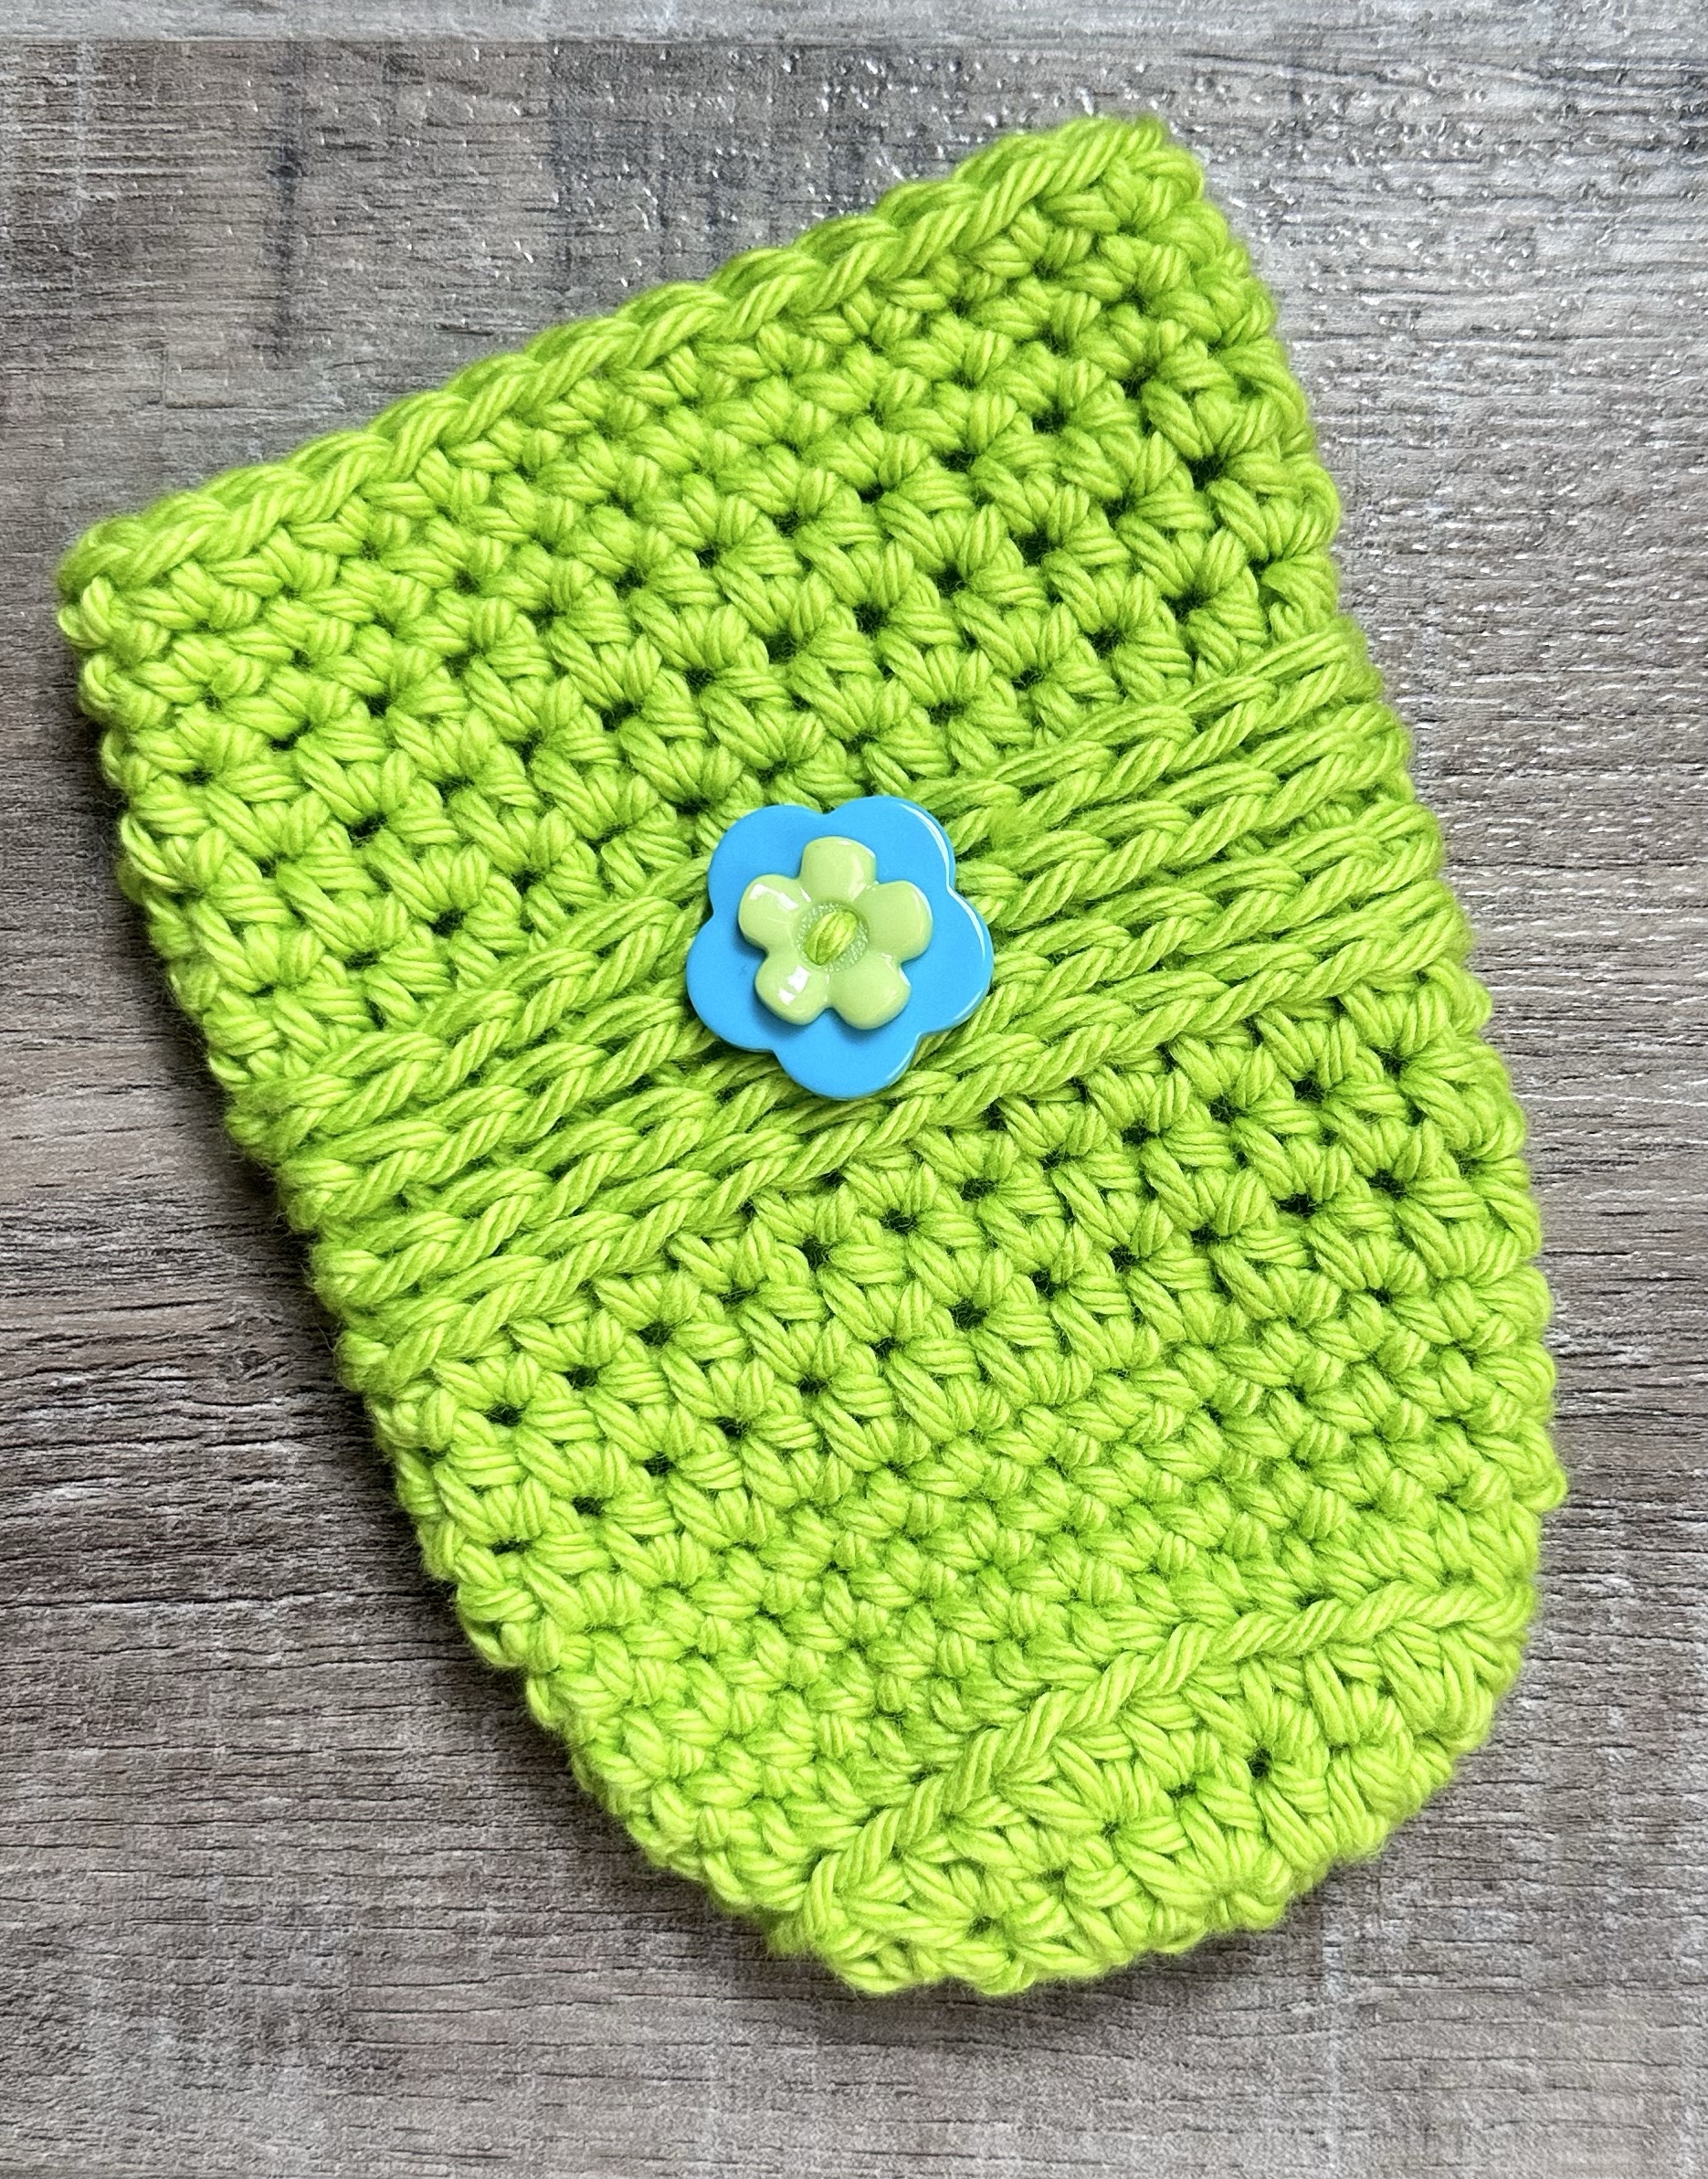
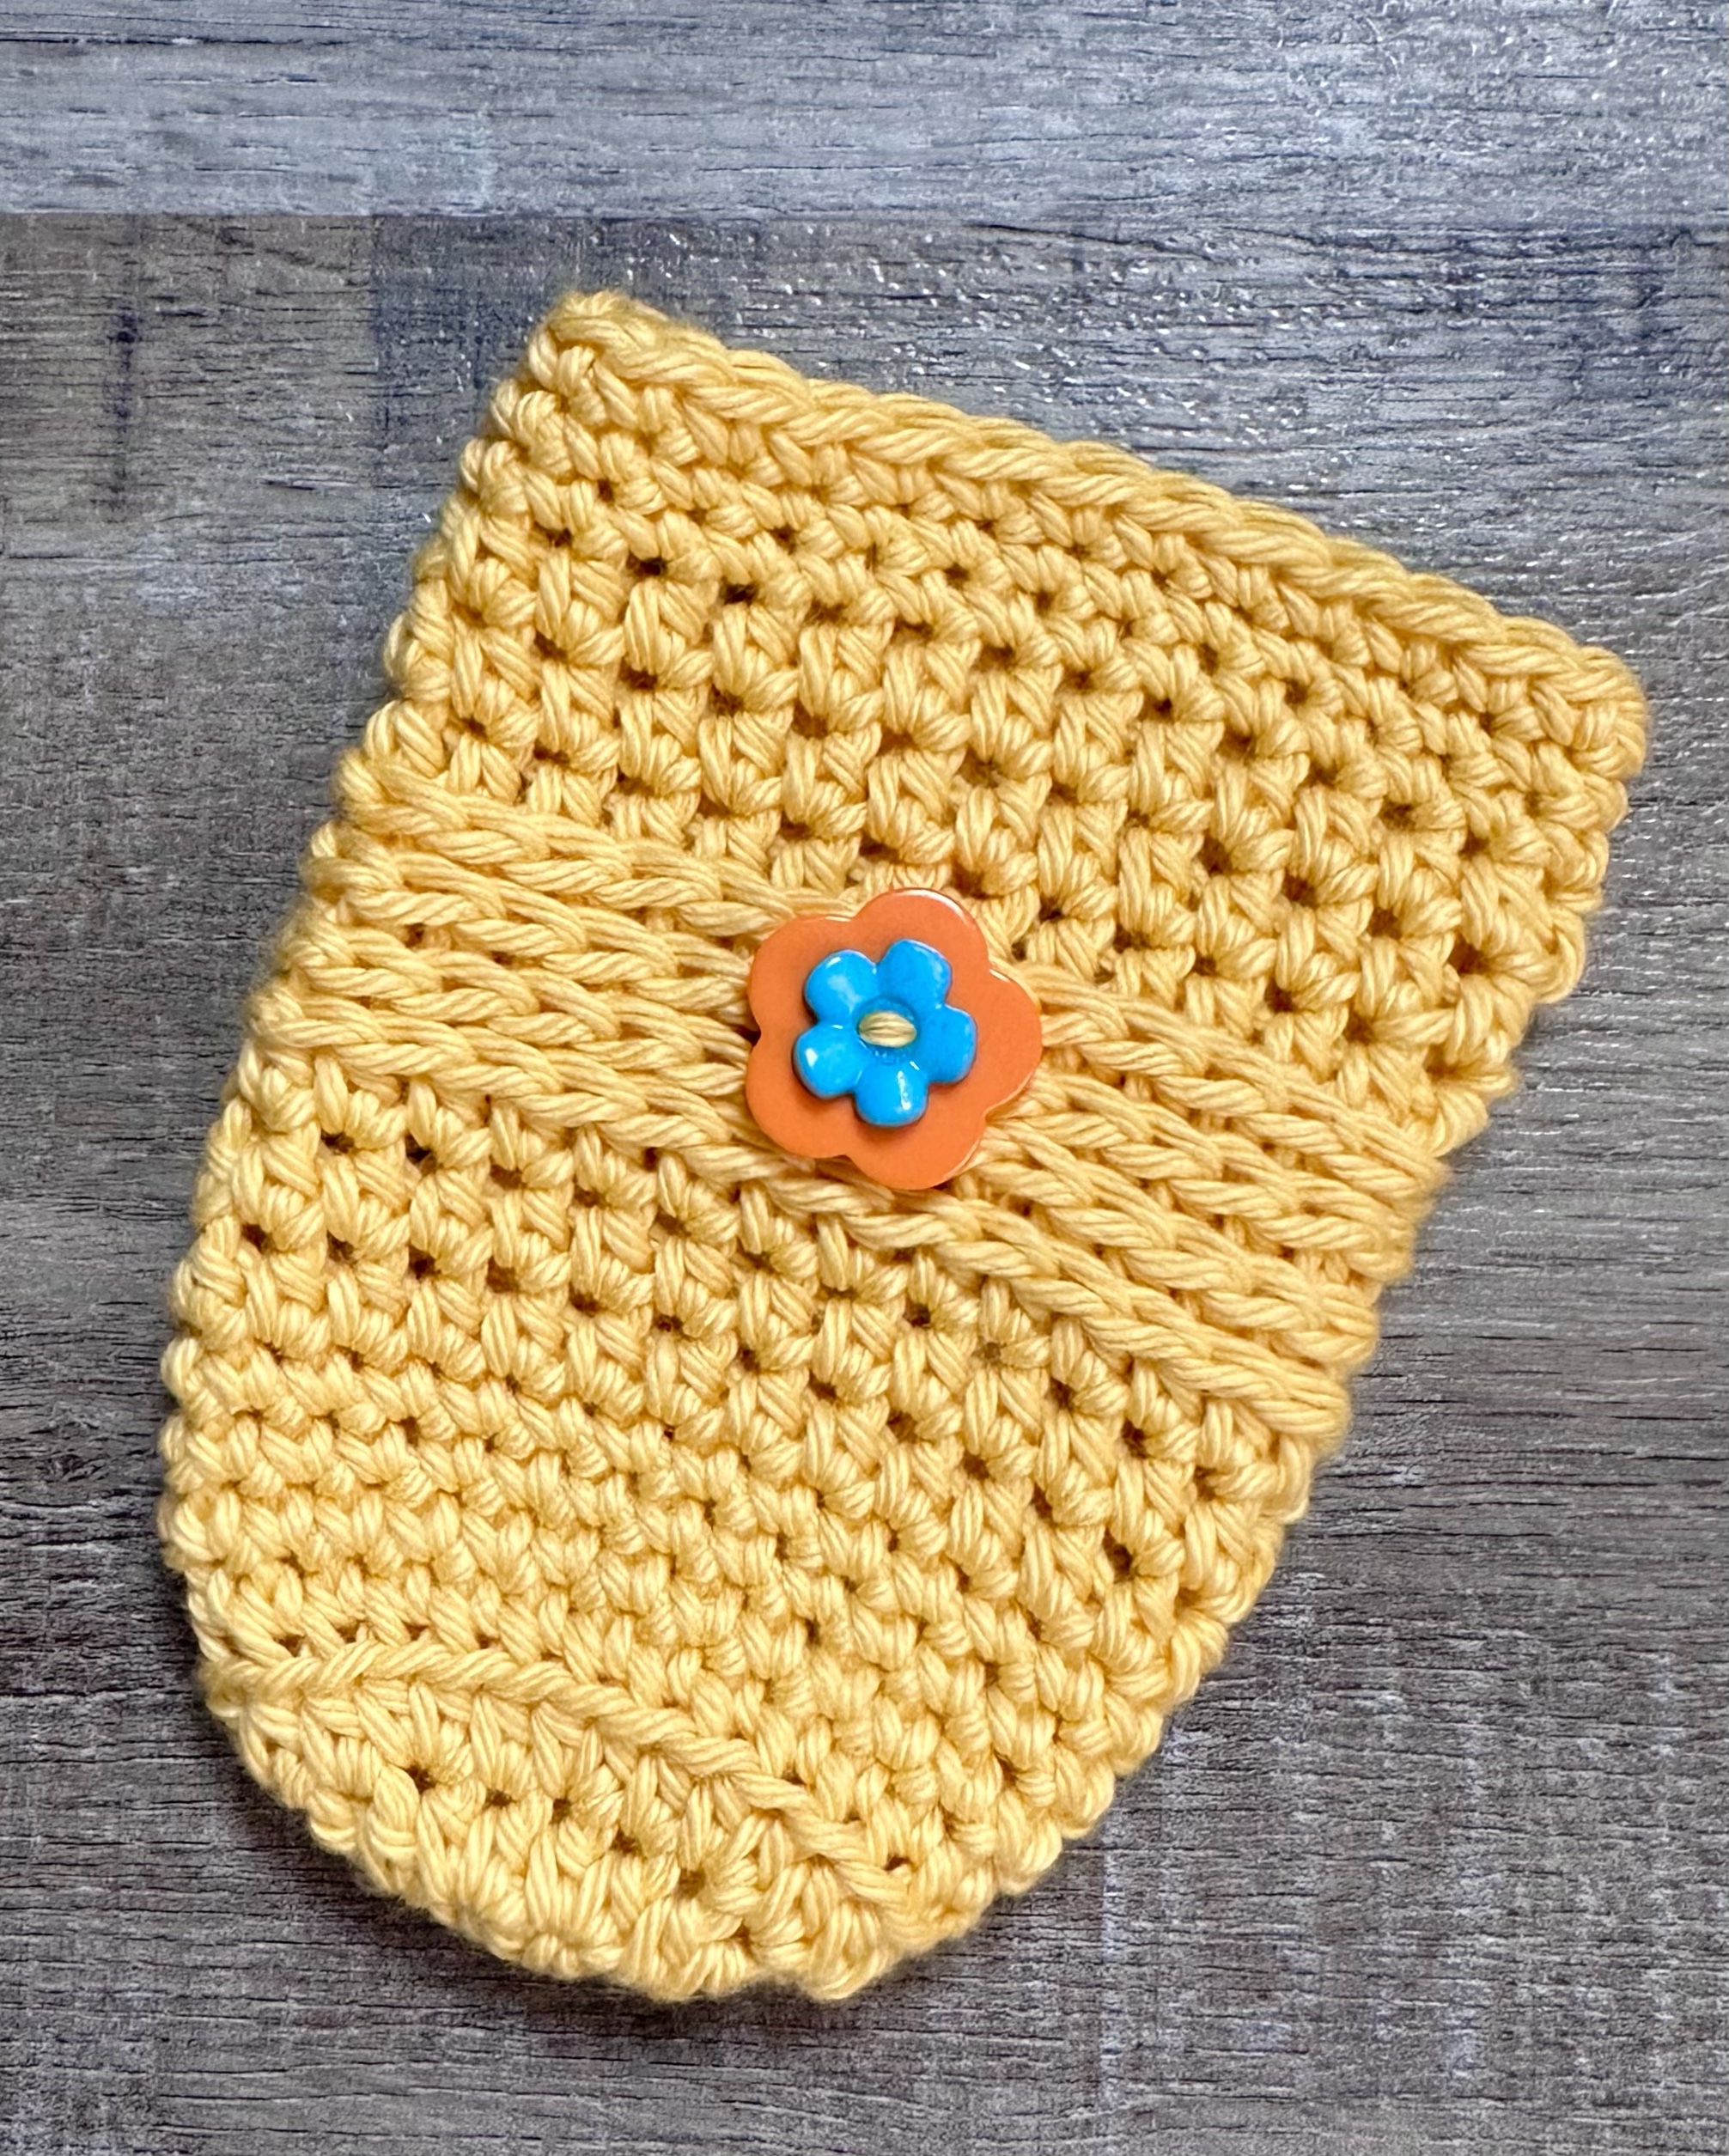
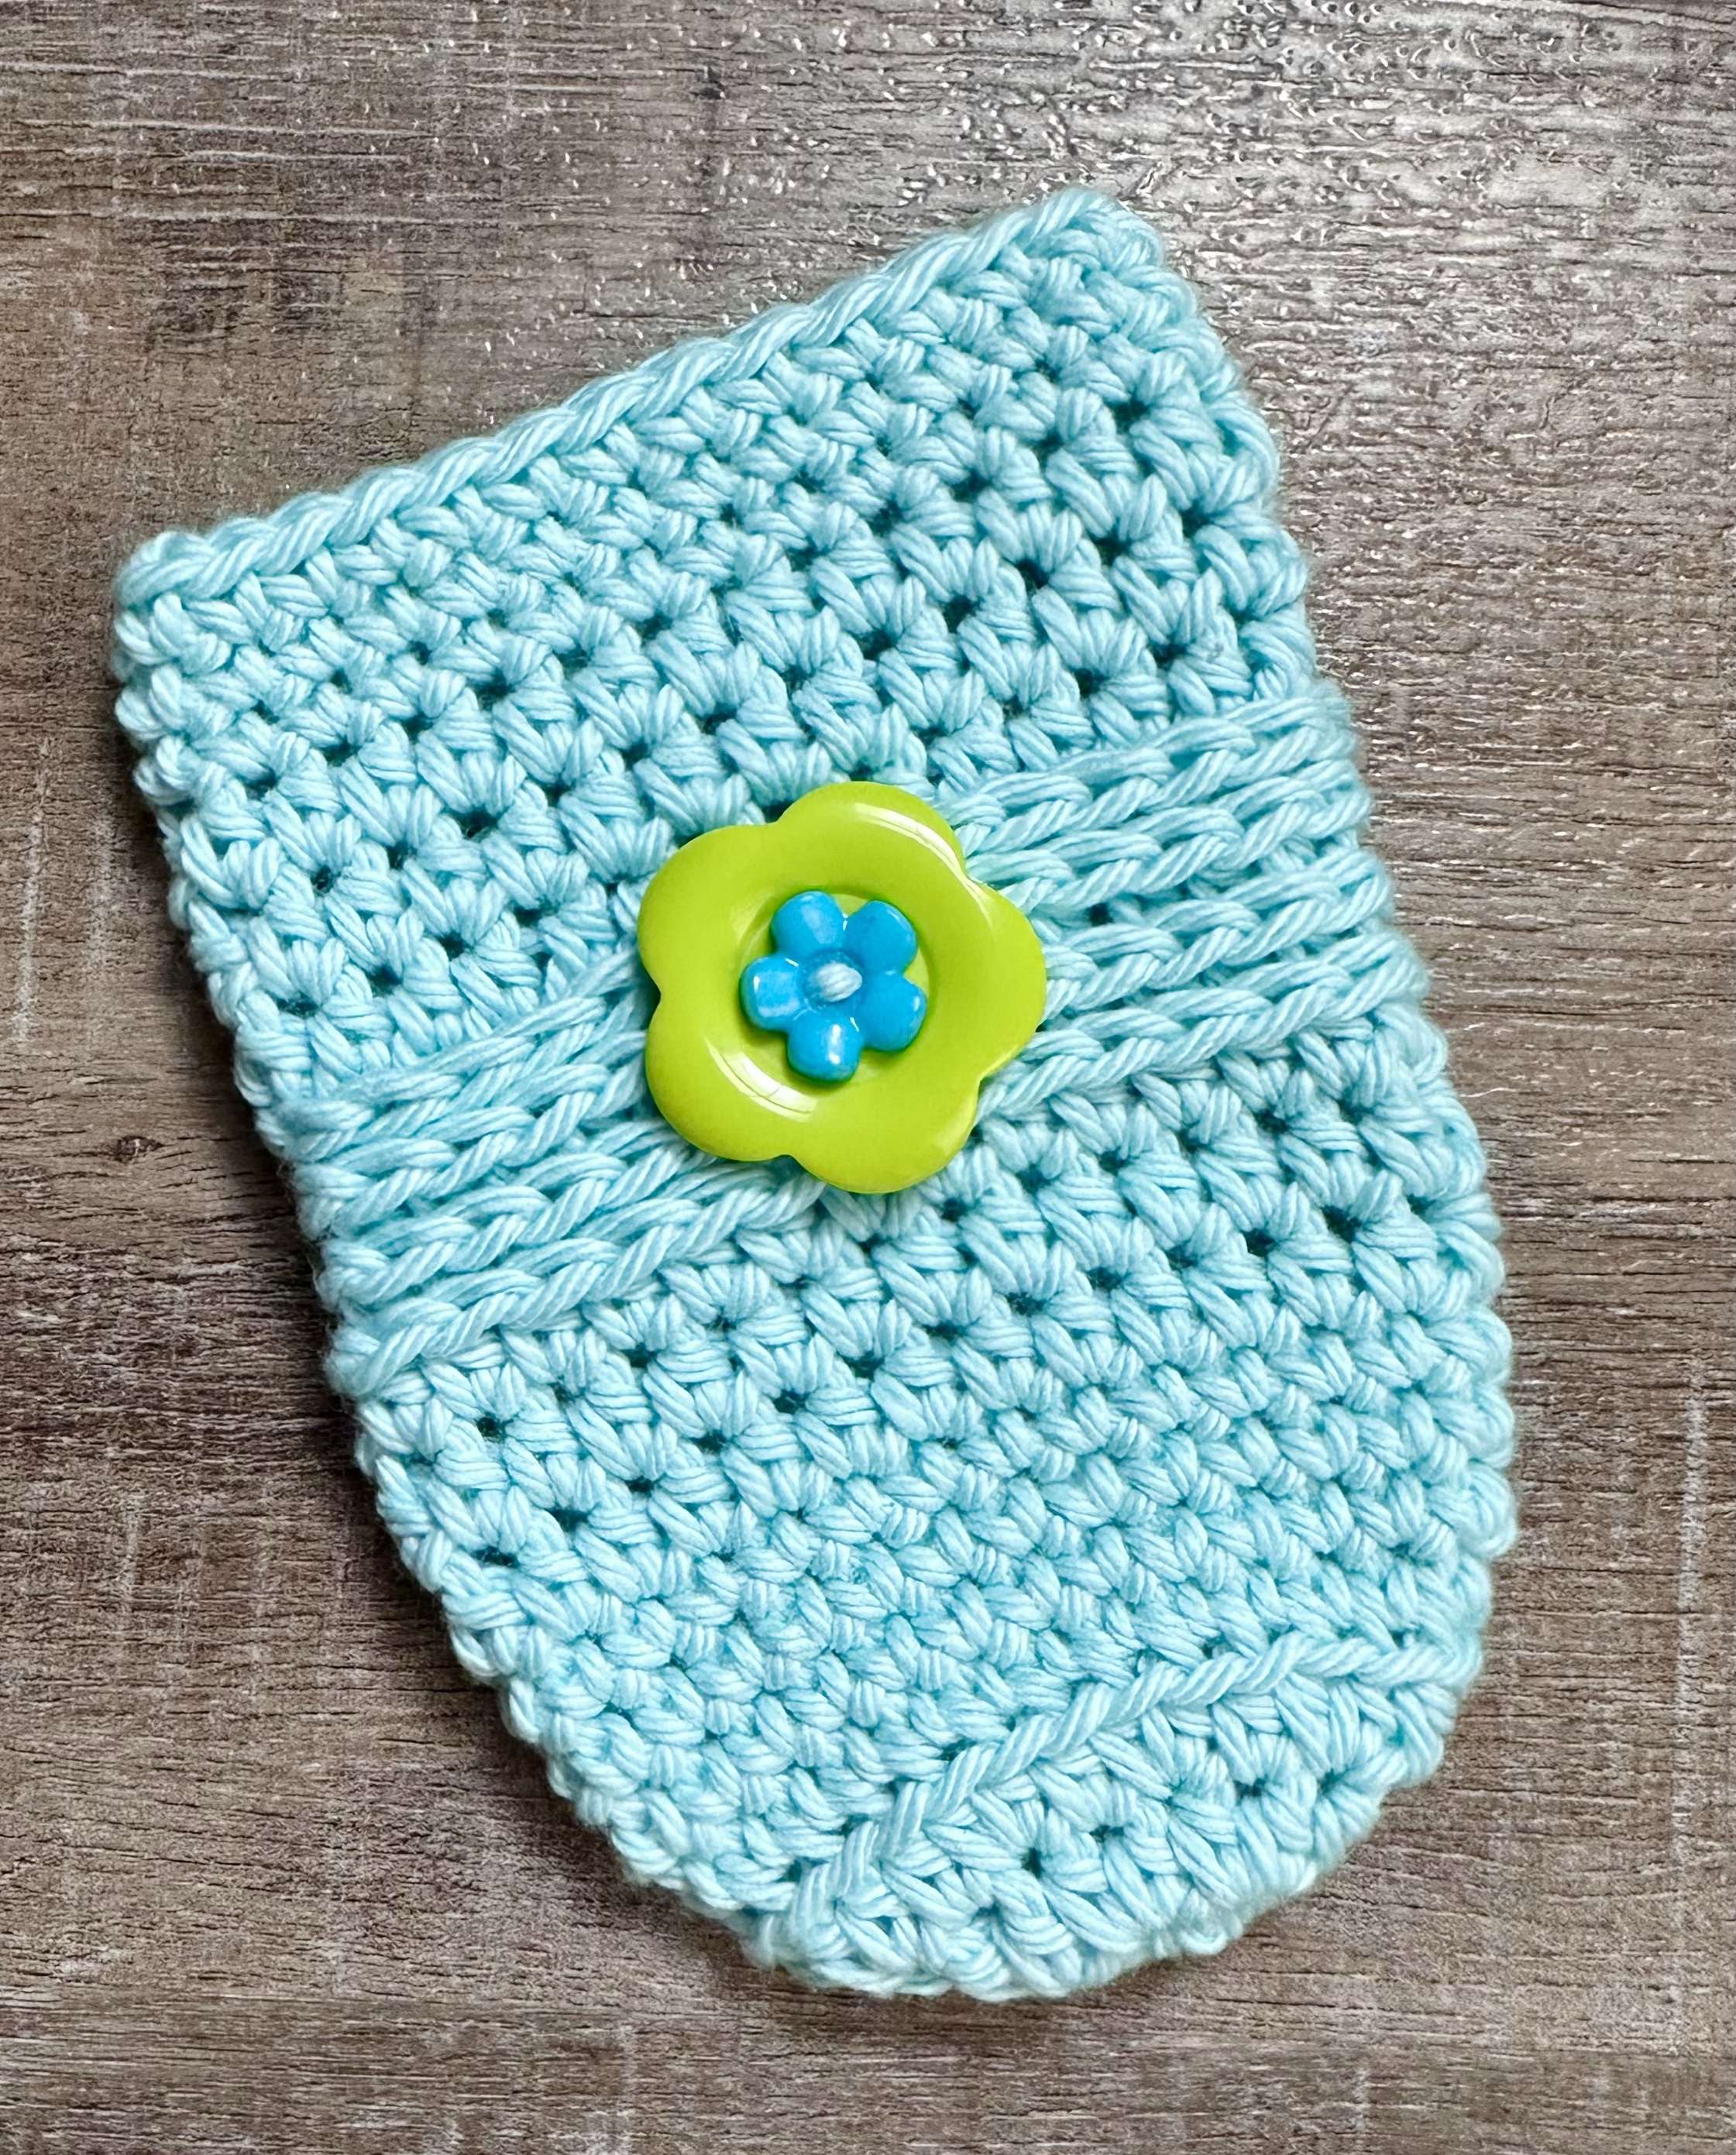
Spring is just around the corner and I’m ready for it! 🌸🌼🌺 But until it gets here, I have a Springtime Crochet Can Cozy pattern for you to brighten up the last days of winter. And they would be a cute addition to an Easter basket for an older child or teen. 🐰
It’s a super easy pattern that’s a great stash buster. You only need a couple of ounces of worsted weight cotton yarn to make each can cozy.
Disclosure: Some of the links on my site are affiliate links, meaning, at no additional cost to you, I will earn a small commission if you click through and make a purchase. As an Amazon Associate I earn from qualifying purchases.
I used I Love This Cotton yarn and an H/5mm crochet hook to stitch up my cozies. I also added some fun flower buttons for a little something extra – this is totally optional, but I like the little touch of Spring they add. 🙂
The pattern includes a few rounds of half double crochet in the third loop. Here’s a great tutorial on half double crochet in the 3rd loop if you need it.
You can find the pattern below along with a link to a free PDF if you’d like to print it.
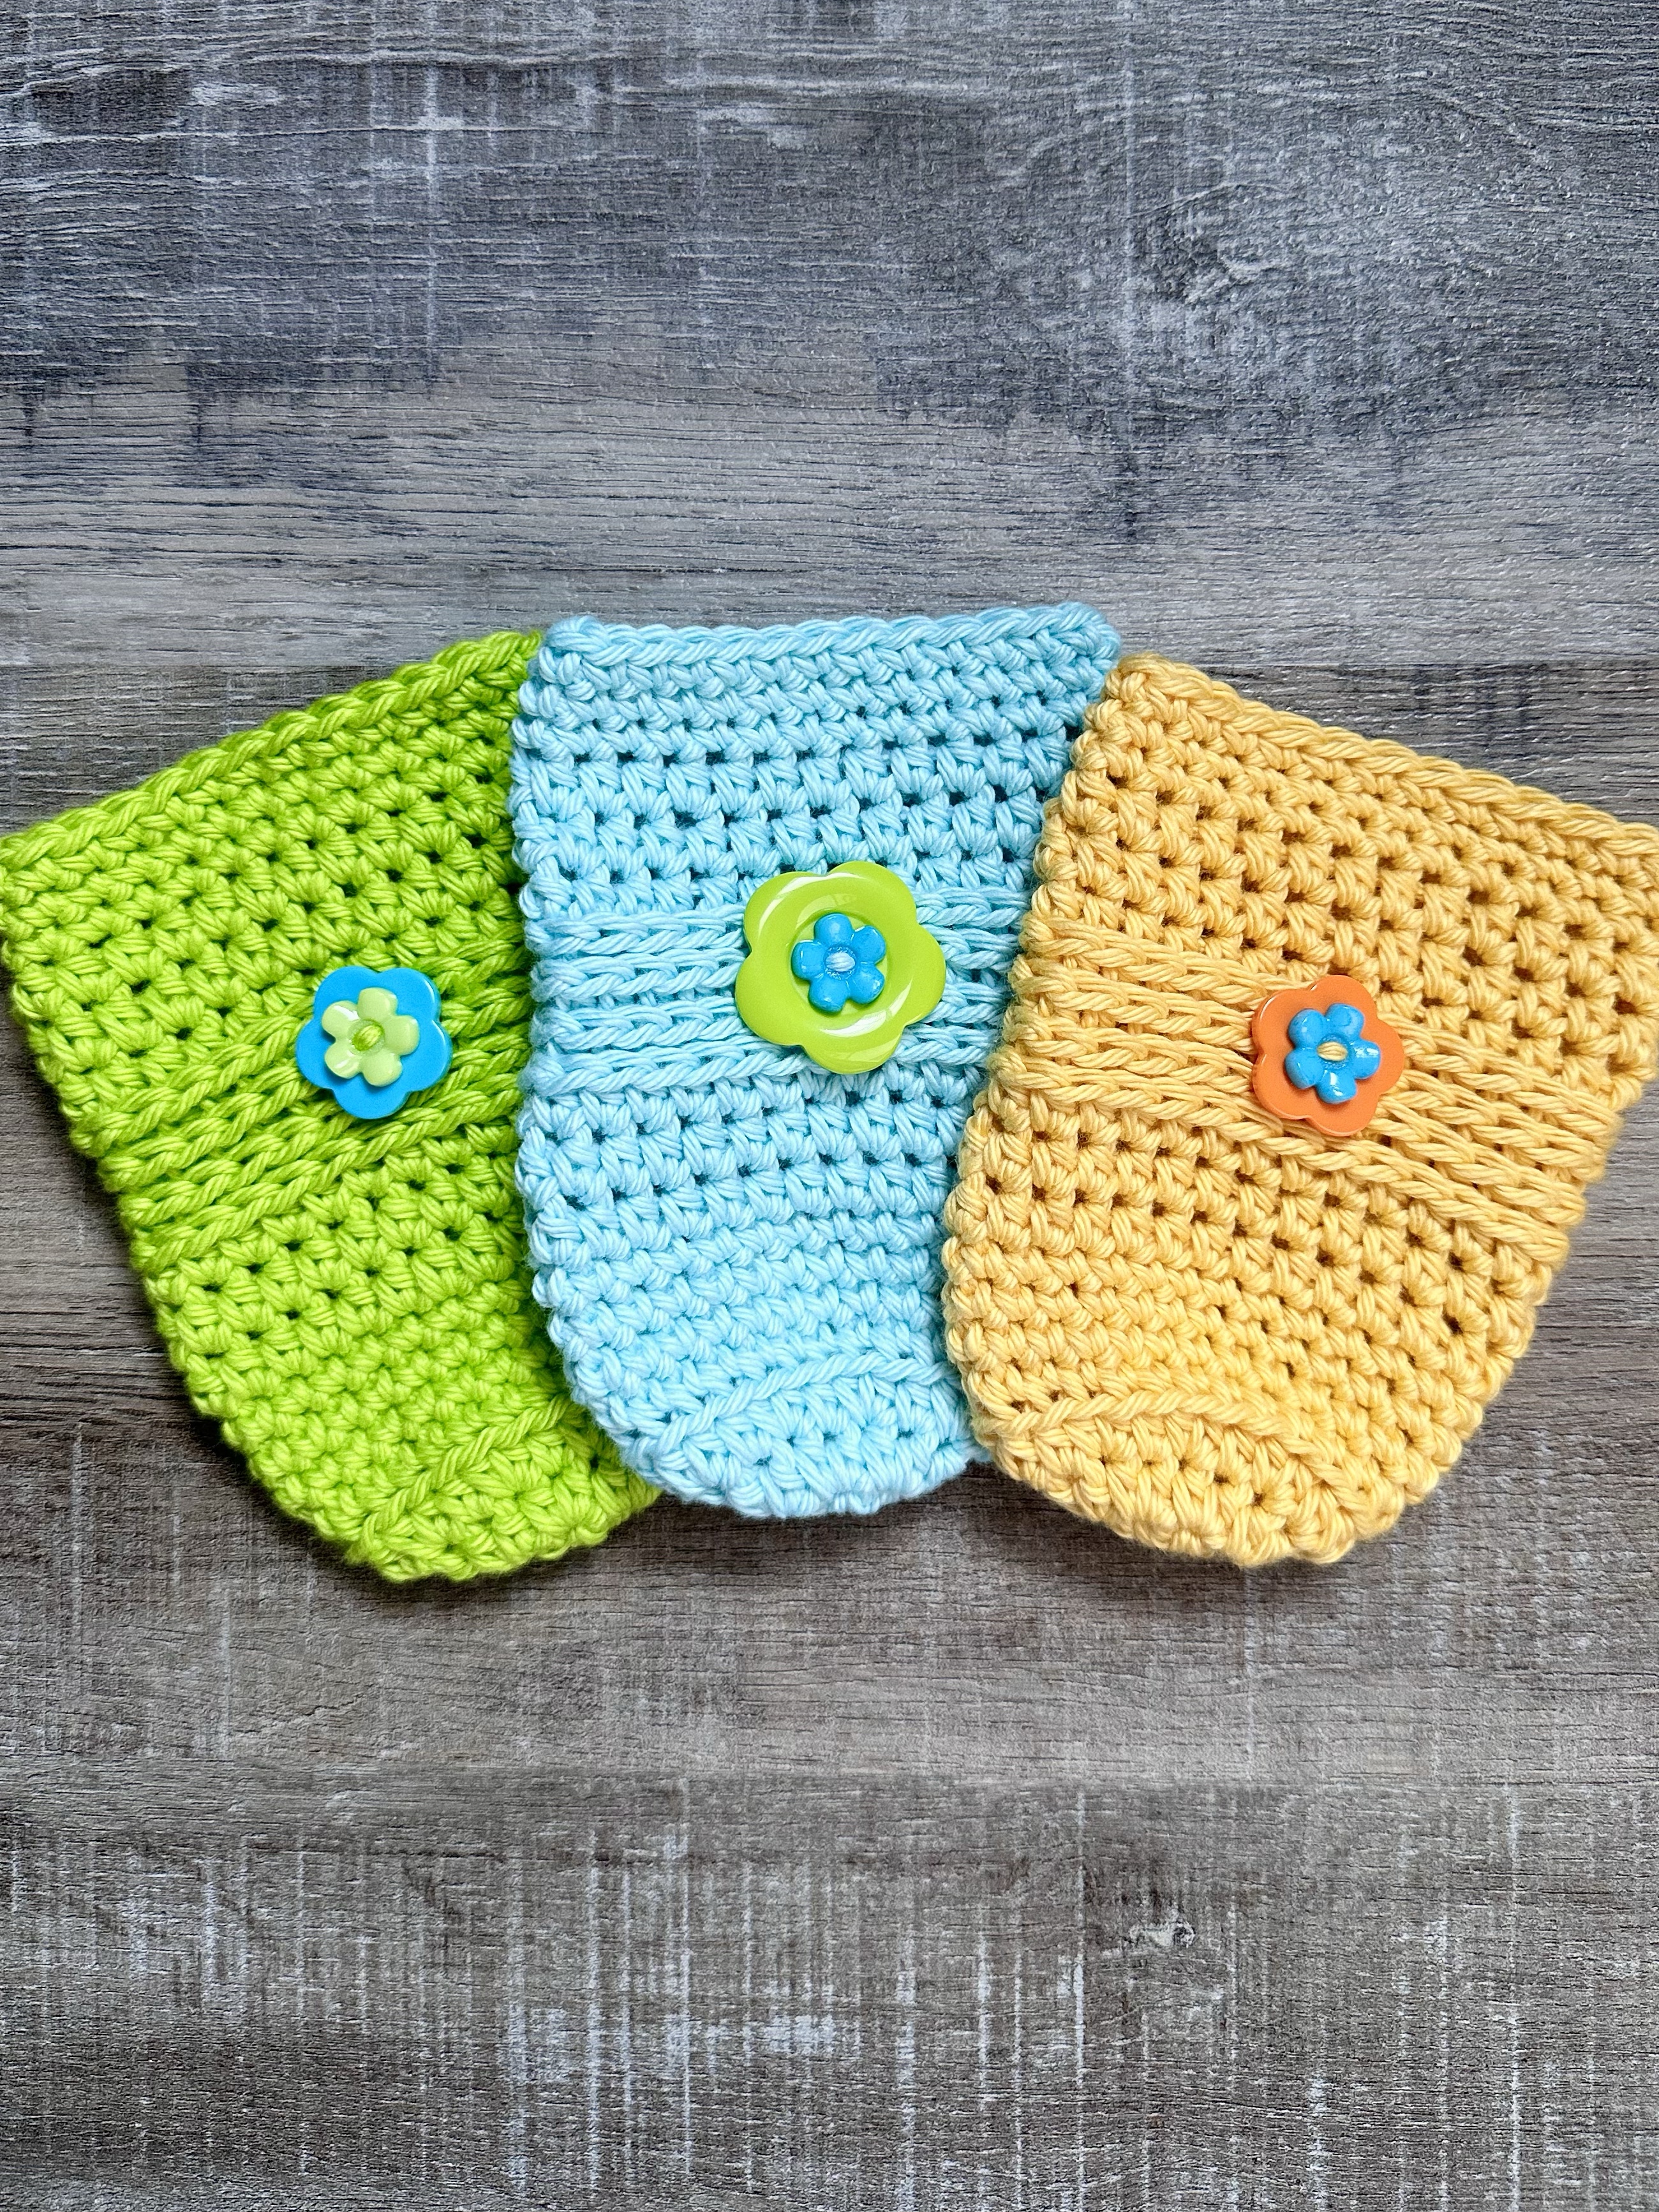
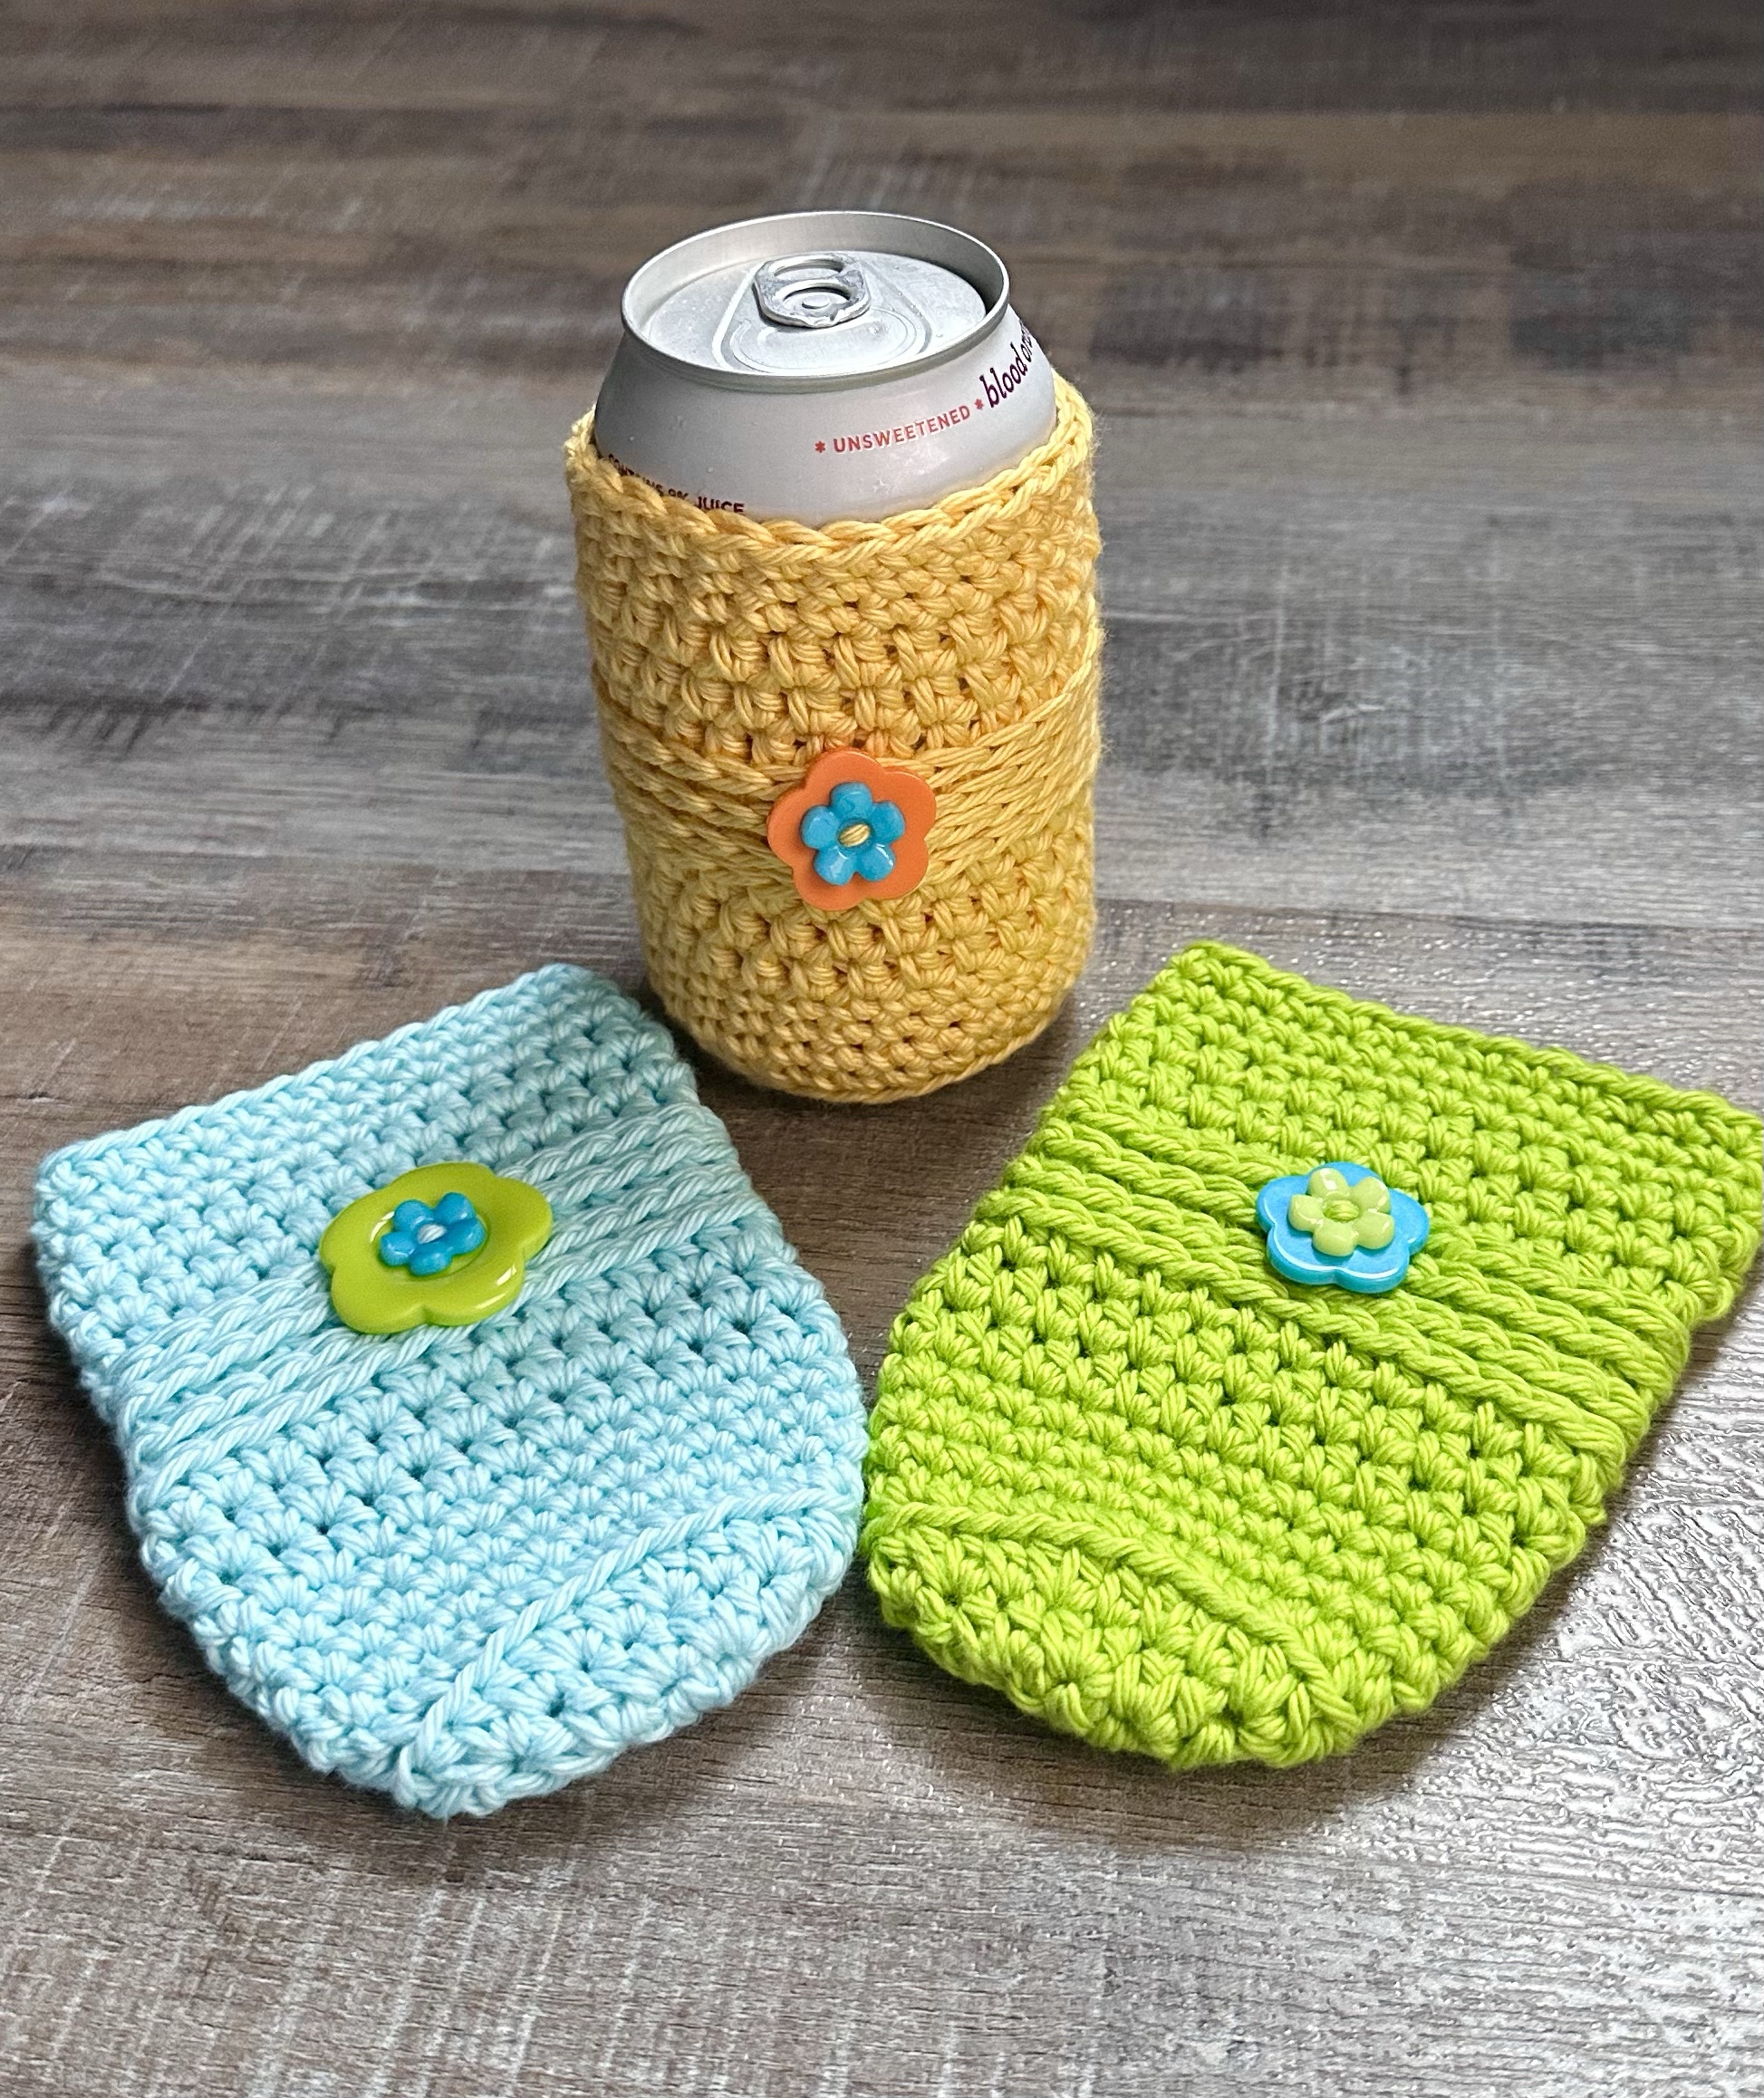
Springtime Crochet Can Cozy
I Love This Cotton Yarn
H/5mm hook
Flower buttons (optional)
Stitches used US terms:
Magic Ring
Chain – ch
Single Crochet – sc
Half Double Crochet – hdc
Back Loop Only – blo
Slip Stitch – ss
Make Magic Ring, ch 1.
Round 1: Work 9 hdc in ring. Join with ss to first hdc. Pull ring closed. (9 stitches)
Round 2: ch 1. 2 hdc in same stitch as ss and in each stitch around. Join with ss to first hdc. (18 stitches)
Round 3: ch 1. 2 hdc in same stitch as ss. *hdc in next stitch, 2 hdc in next stitch* Repeat from * to * around to last stitch. hdc in last stitch. Join with ss to first hdc. (27 stitches)
Round 4: ch 1. Working in blo, sc in same stitch as ss and in each stitch around. Join with ss to first sc. (27 stitches)
Rounds 5-7: ch 1. sc in same stitch as ss and in each stitch around. Join with ss to first sc. (27 stitches)
Rounds 8-10: ch 1. hdc in same stitch as ss and in each stitch around. Join with ss to first hdc. (27 stitches)
Rounds 11-14: ch 1. hdc in the 3rd loop of each stitch around. Join with ss to first hdc. (27 stitches)
Rounds 15-16: ch 1. hdc in same stitch as ss and in each stitch around. Join with ss to first hdc. (27 stitches)
Rounds 17-19: ch 1. sc in same stitch as ss and in each stitch around. Join with ss to first sc. (27 stitches)
Fasten off and weave in ends.
Sew on flower buttons if using.
Here’s the link to the free PDF…
What color will you make your Springtime Crochet Can Cozy? I would love to see your makes! Tag me @creatingmebyanitayoung on Instagram or Facebook. 🙂
Anita