Donut Birthday Card

Hi friends,

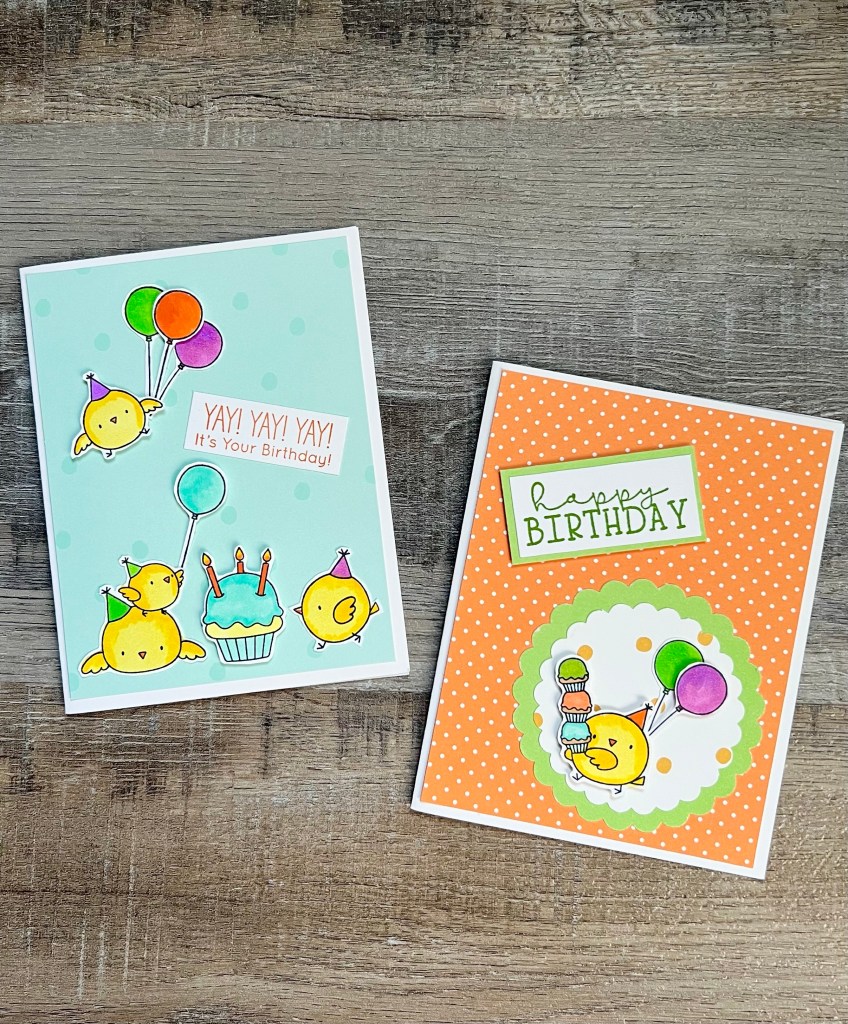
Unity Stamp Company released this adorable stamp set called Donut Birthday a few months ago. It includes 2 different sizes of donut stacks and 2 sentiments. Anyone who knows my husband knows that this is the perfect set for making him a birthday card! 🍩

Disclosure: Some of the links on my site are affiliate links, meaning, at no additional cost to you, I will earn a small commission if you click through and make a purchase. As an Amazon Associate I earn from qualifying purchases.

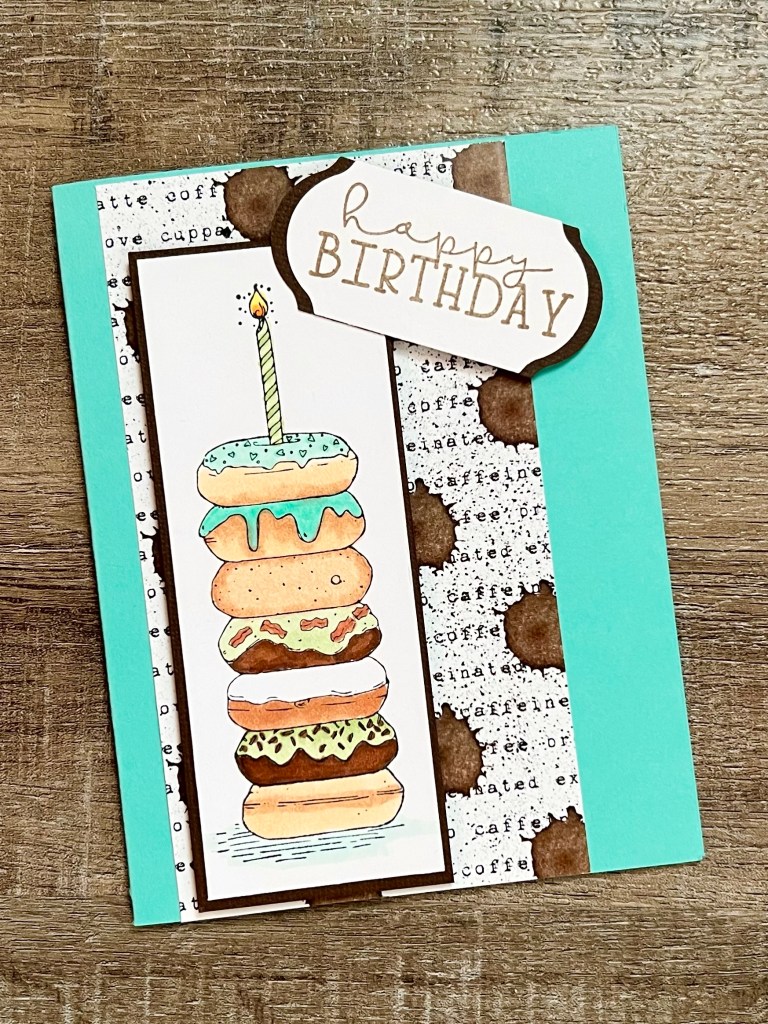
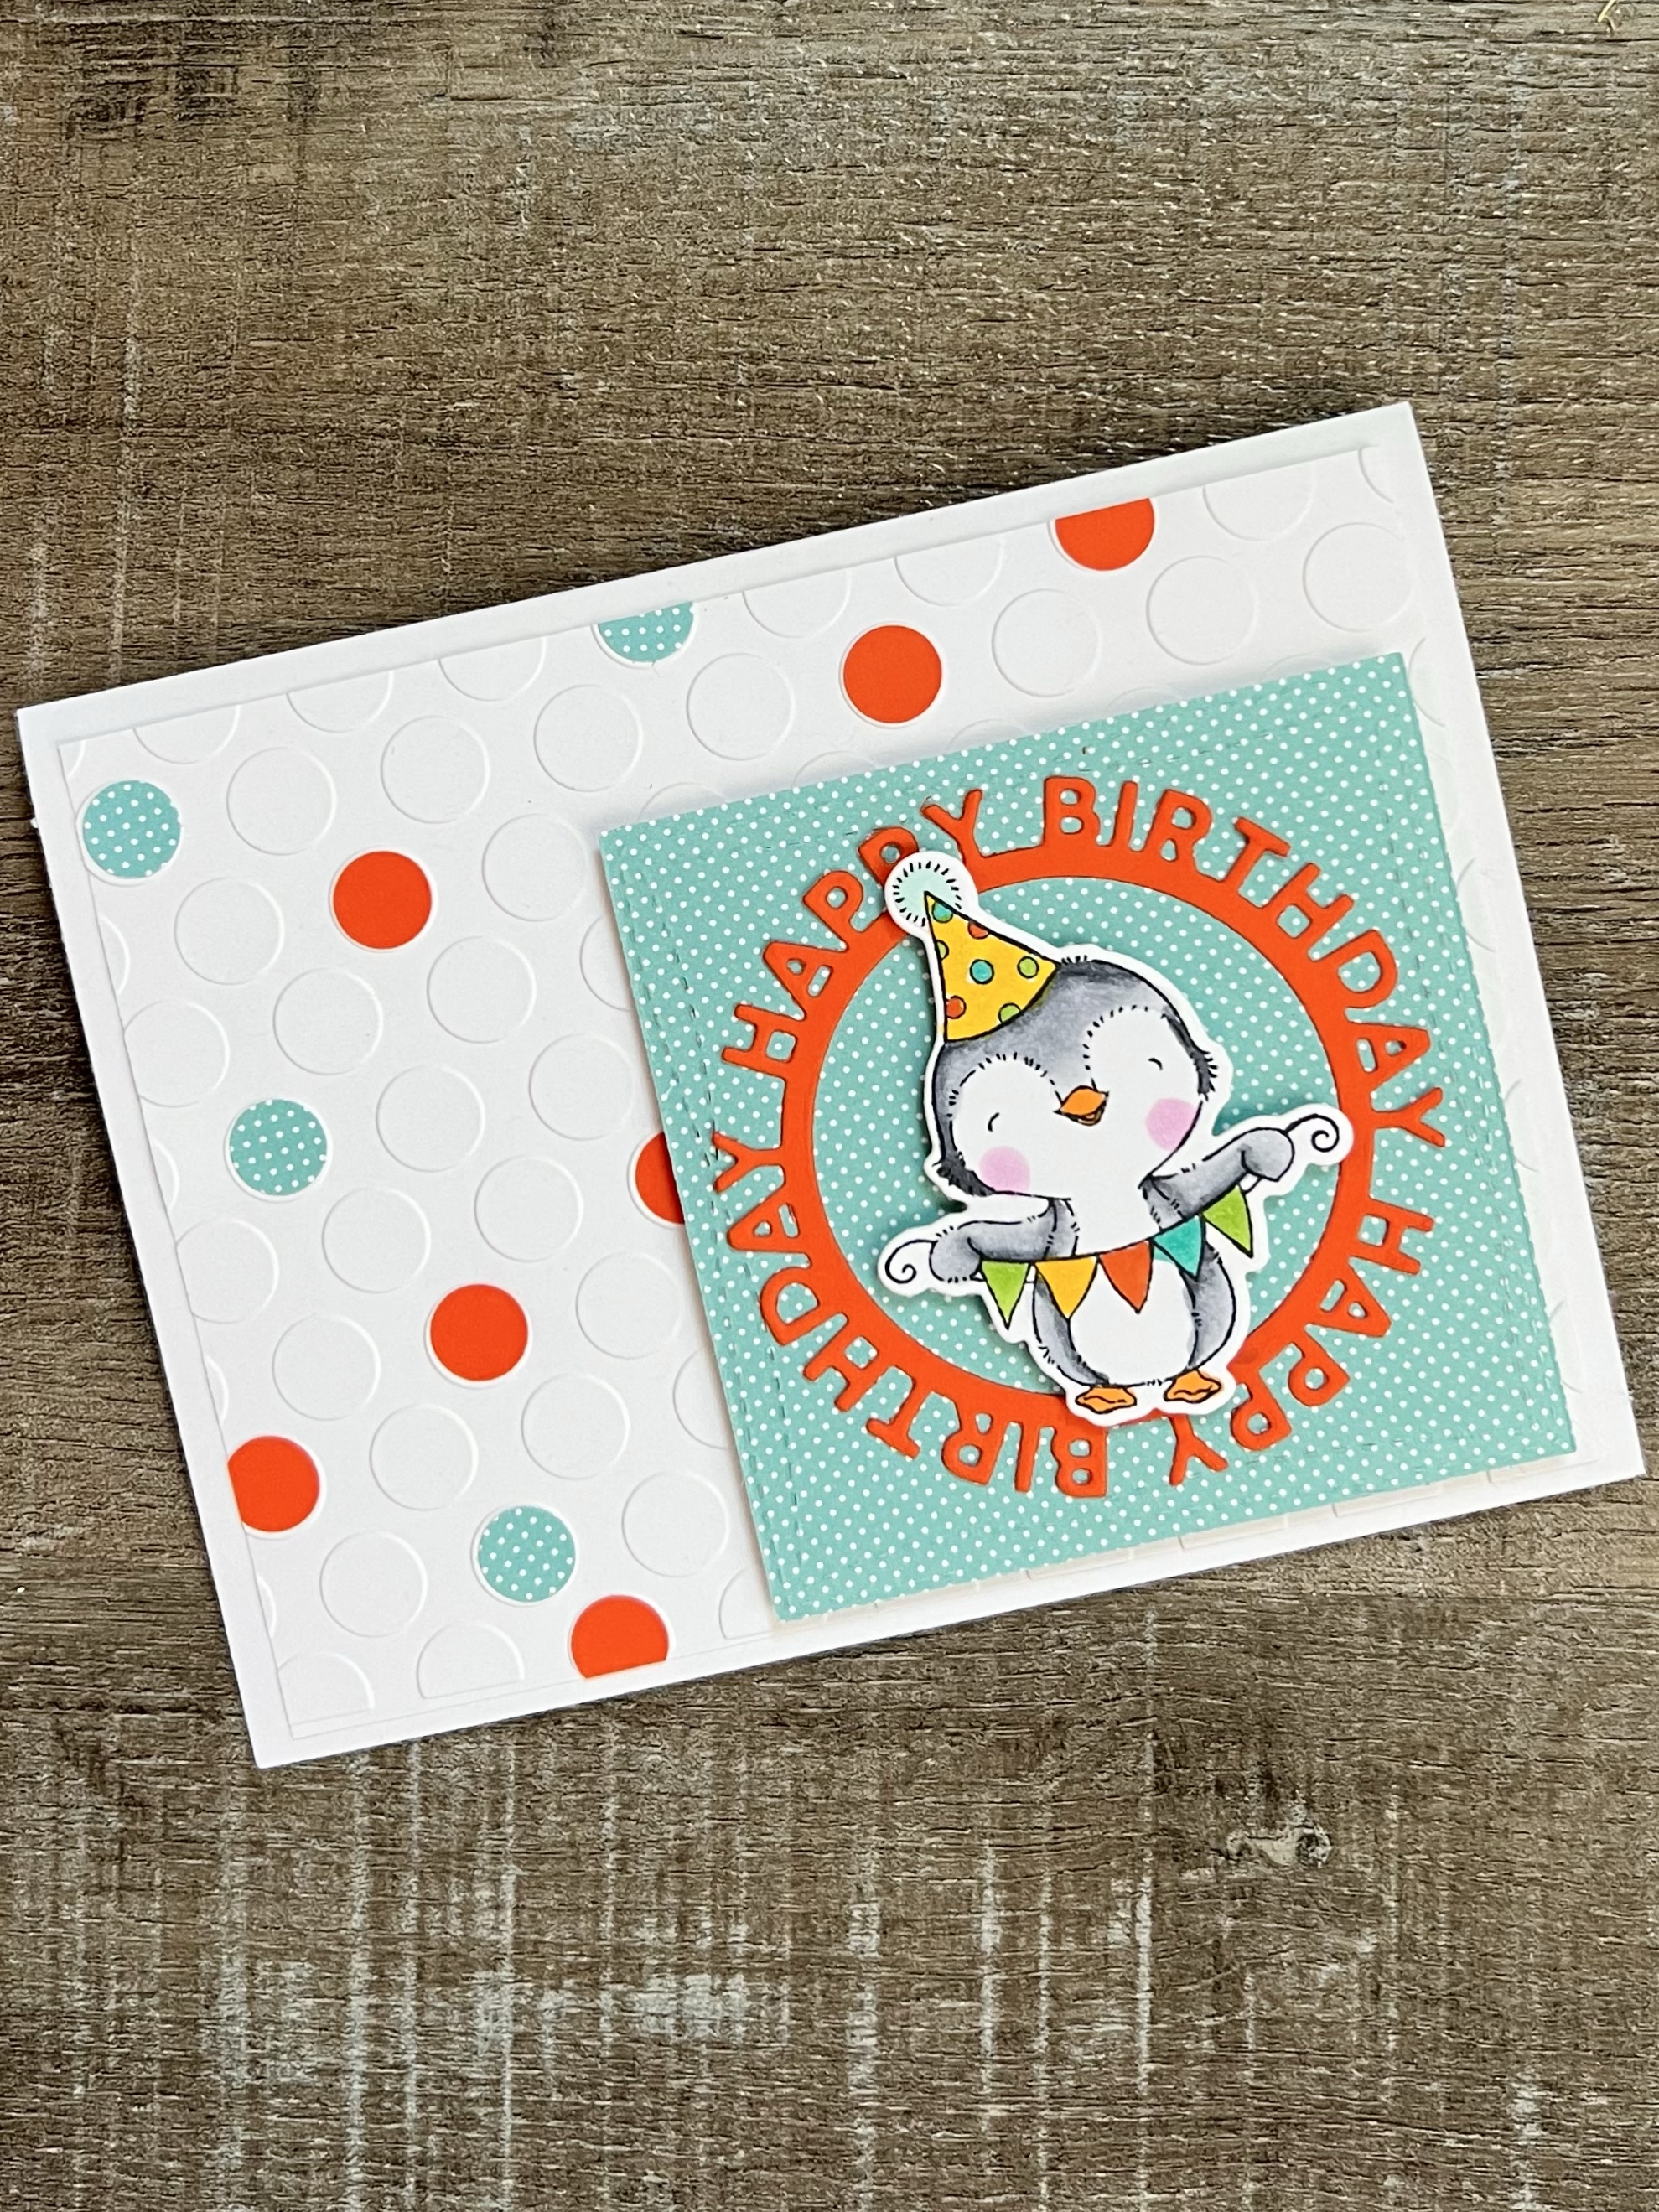
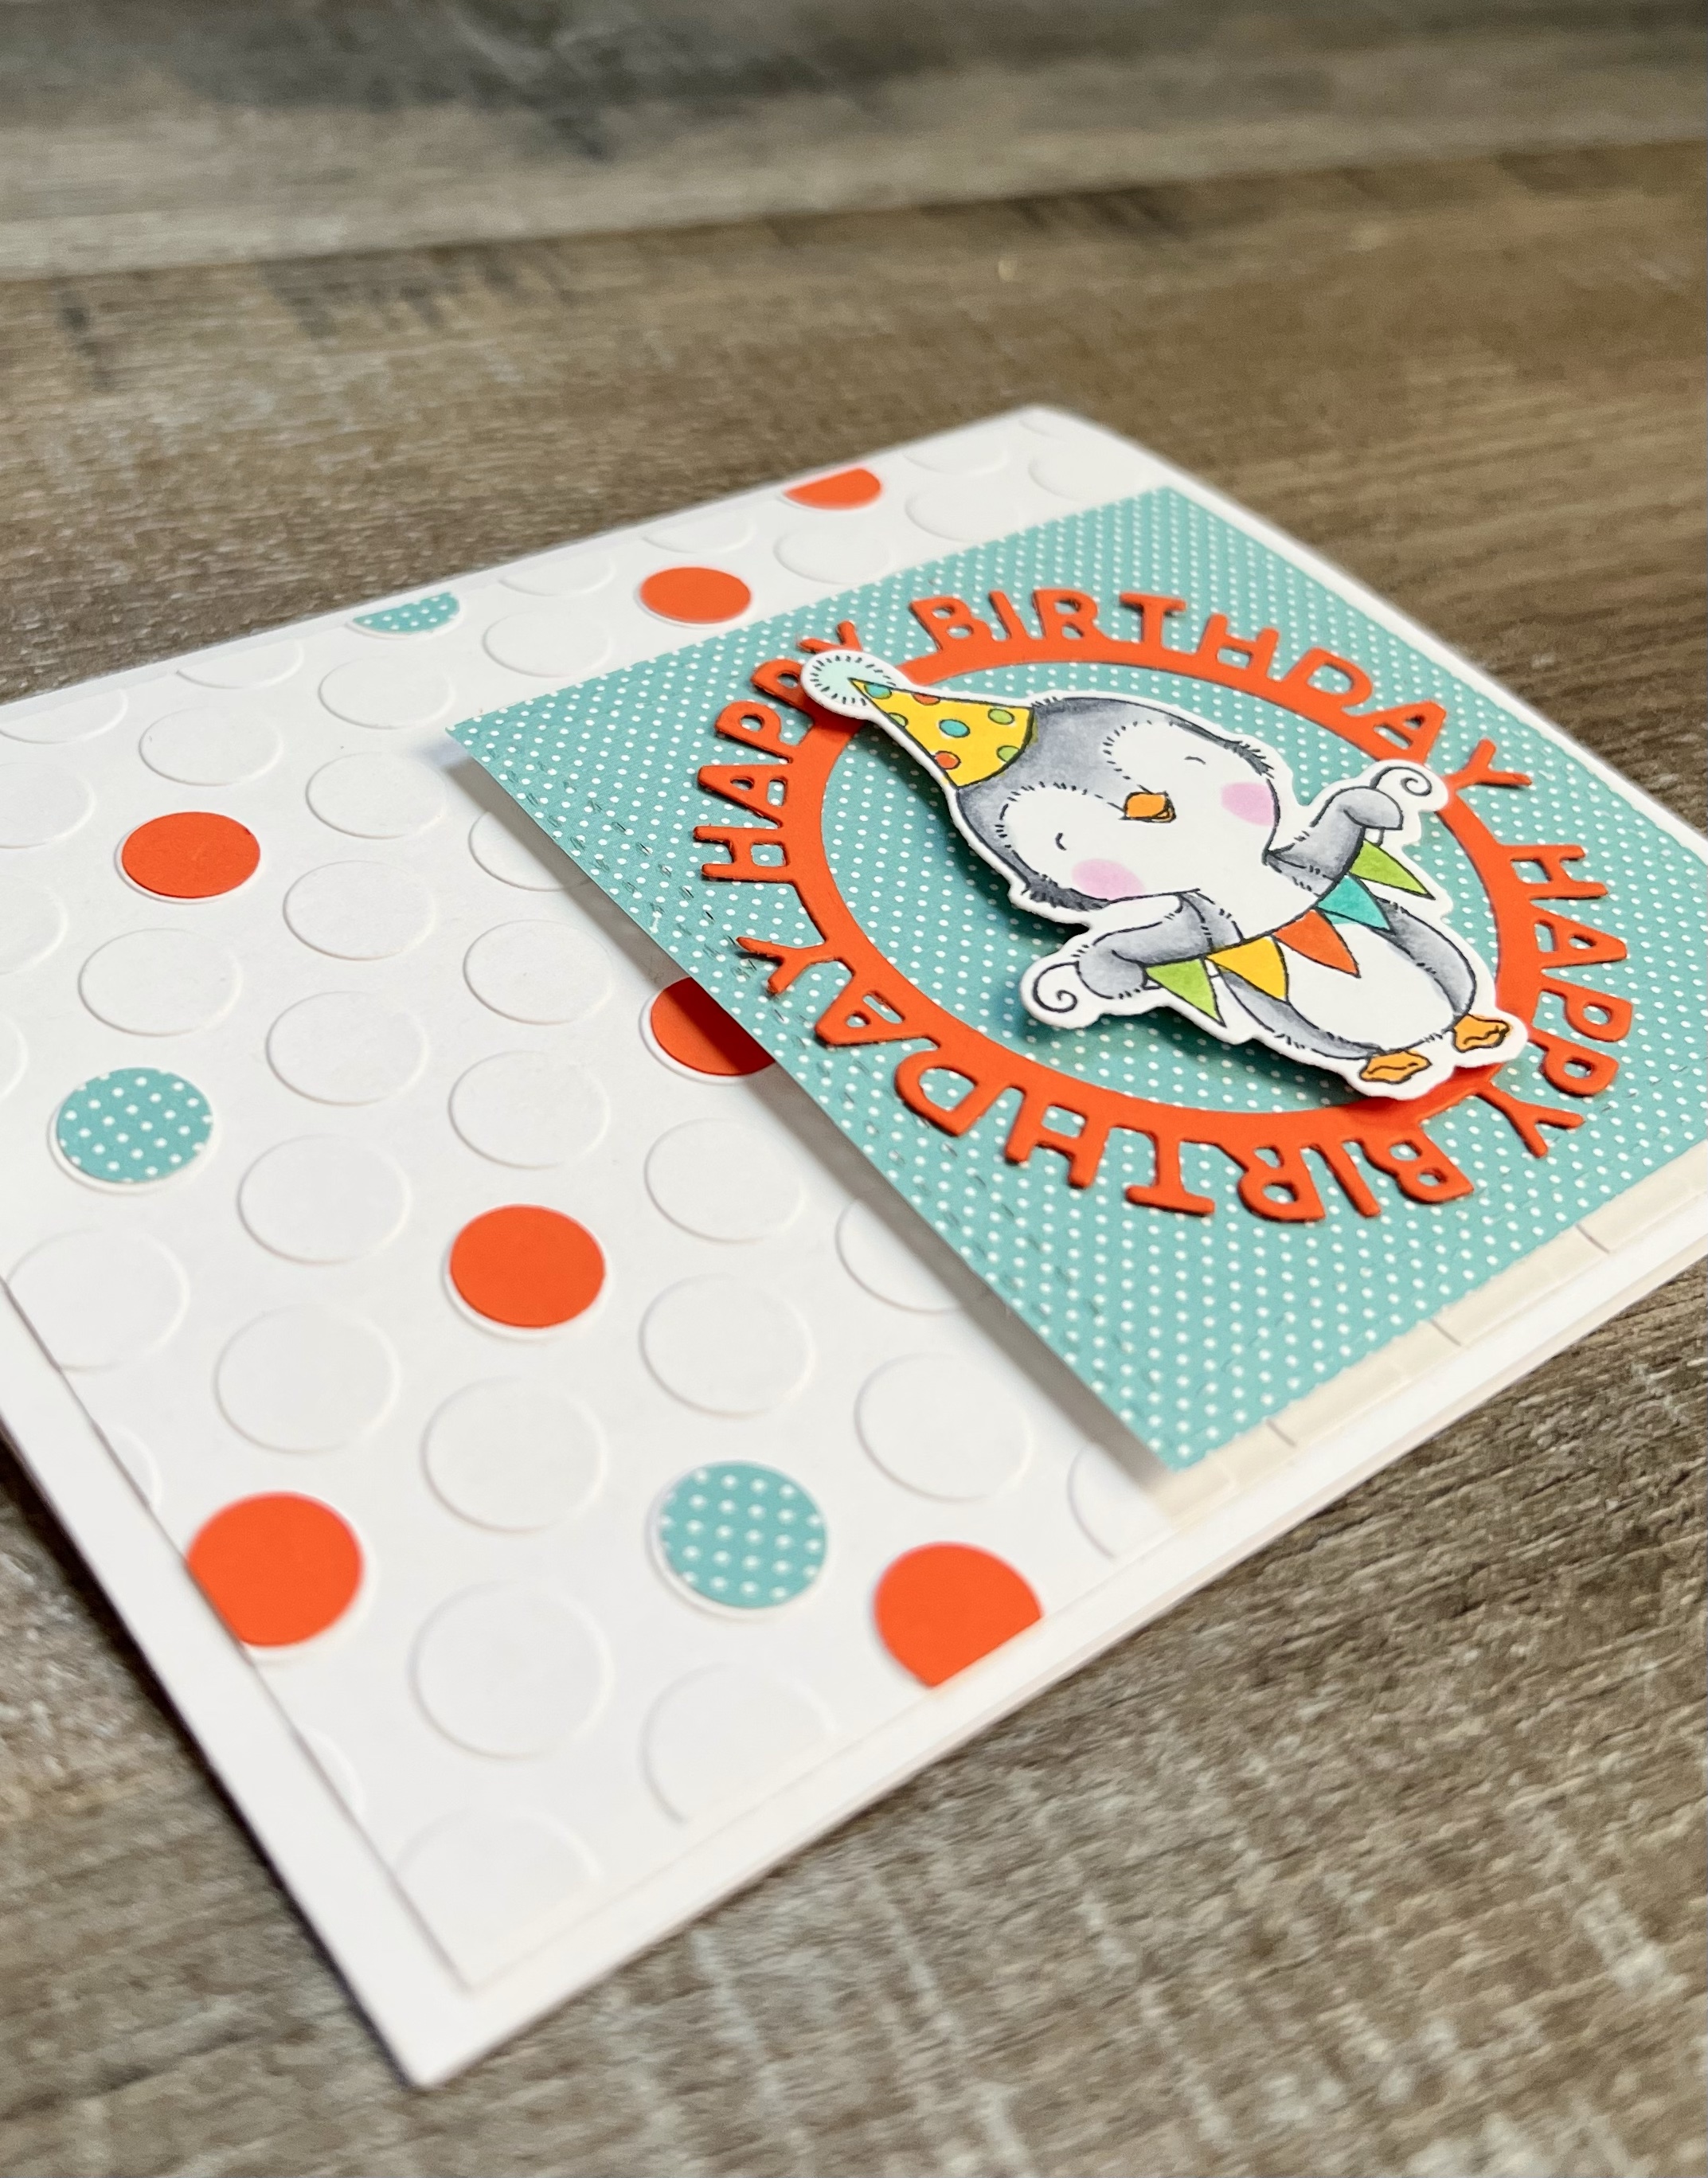
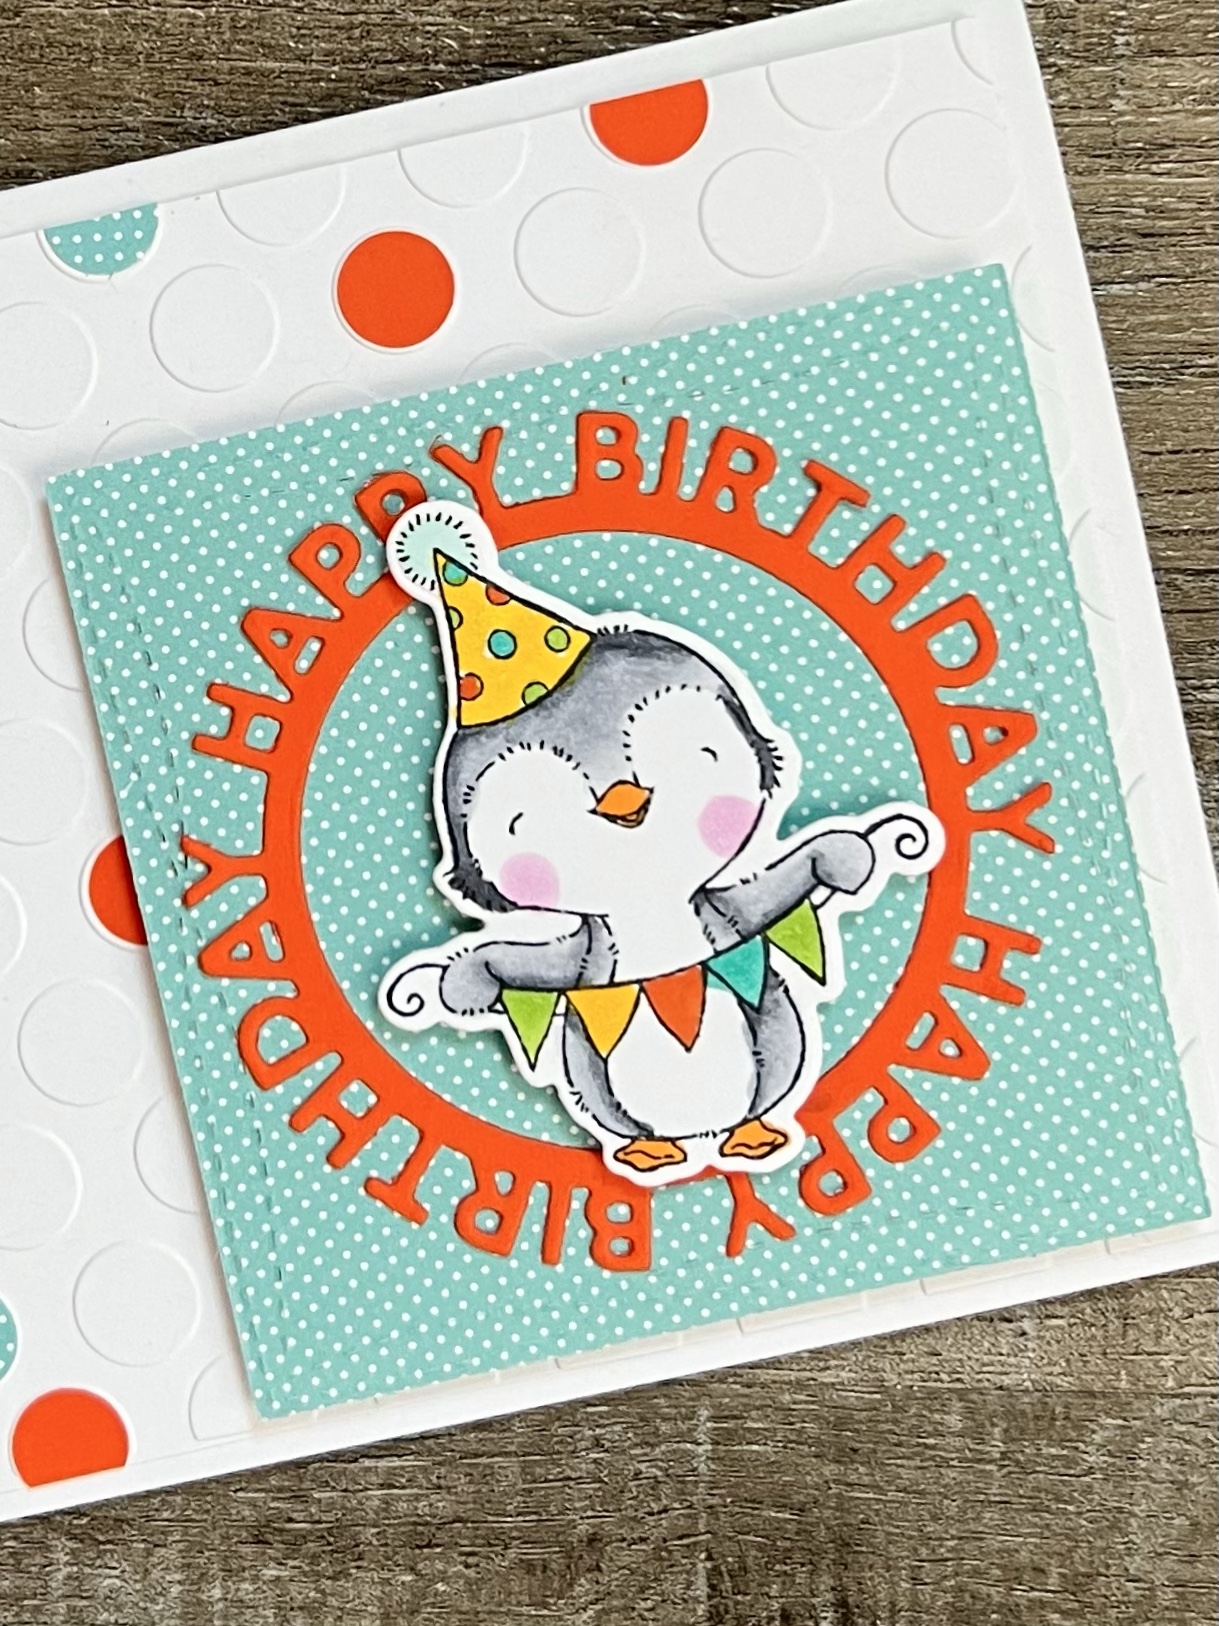
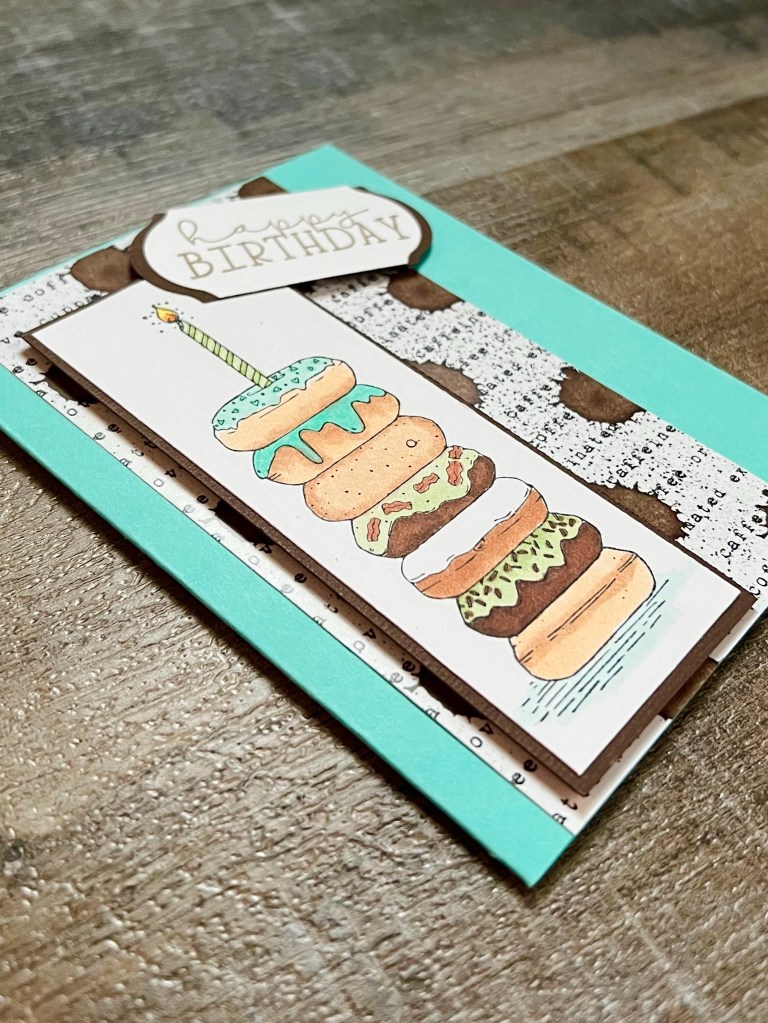
I stamped the donut stack with Memento Tuxedo Black ink on white card stock and colored it with Copic markers. Then I trimmed the image and layered it to brown card stock. I attached a piece of patterned paper (also from Unity Stamp Company) to a turquoise card. I attached the donut stack to the card using foam tape.

The “happy birthday” sentiment is from the Extended Celebration stamp set from Unity Stamp Company. I stamped it with Memento Rich Cocoa ink on white card stock and punched around it with a label punch. I used the same punch on brown card stock, then cut it in half and attached it to the back of the white card stock leaving some of the brown showing on the edges. The sentiment is attached to the card with foam tape. The punch I used is discontinued, but this is a similar punch or set of dies.

Almost as sweet as the real thing! This would be a cute card to give with a dozen donuts for a special birthday treat! 🍩

Anita

Posted in Cards, Stamping | Tagged , | Leave a comment

Farmhouse Pillar Candle Risers

Hi friends,

I love the Pinterest app! I find so many great ideas and inspiration, especially when I’m in a crafting slump. πŸ™ƒ You can find all of my Pinterest boards here. I’ve saved way more pins than I can ever make, but I’ve found it to be a great resource for diving into my next project.

I was inspired while scrolling on Pinterest recently to make these Farmhouse Pillar Candle Risers. They are super quick and easy to make!

Disclosure: Some of the links on my site are affiliate links, meaning, at no additional cost to you, I will earn a small commission if you click through and make a purchase. As an Amazon Associate I earn from qualifying purchases.

You’ll need round unfinished wood plaques in 2 different sizes. I found mine at my local Michaels (I think they were around $1.49 each). They measure about 4 and 5 inches across the bottom. You’ll also need white and gray paint. I used Home Decor Chalk paint because that’s what I had on hand. You can use acrylic paint, too.

You may want to sand the rough edges of the plaque before you paint them. I didn’t since the roughness didn’t bother me – it’s totally personal preference. I painted the wood plaques with 2 coats of white paint using a chip brush. Be sure to let the paint dry between coats. Once the second coat is dry, dry brush the entire plaque with the gray paint.

Then using E6000 clear adhesive, I glued the smaller plaque to the larger plaque. And that’s it! Super easy and they will add a little farmhouse touch to your decor.

Since my fireplace mantel is stained, I chose to paint my Farmhouse Pillar Candle Risers white so there would be some contrast. If your mantel or shelf is white, you may want to use a wood stain on your candle risers or you can paint them any color and then sand the edges to distress them a bit.

It’s fun to make something so simple that can add a little creative touch to your decor. 😊

Anita

Posted in Decor | Tagged , | 3 Comments

Crochet Canyon Views Pocket Clutch

Hi friends,

I have been making the Crochet Canyon Views Pocket Clutch on repeat! I love the option of using a pre-made zippered canvas bag as a liner since sewing is not my thing. πŸ˜‰ The pattern also includes instructions for crocheting pockets inside the clutch if you want to do that. It’s a paid pattern by Twisted Knot Crochet and you can find it here.

Disclosure: Some of the links on my site are affiliate links, meaning, at no additional cost to you, I will earn a small commission if you click through and make a purchase. As an Amazon Associate I earn from qualifying purchases.

I found my zippered canvas bags at Hobby Lobby. They measure 4.75 by 6.75 inches and fit perfectly into the shell of the Canyon Views Pocket Clutch. And they are only 99 cents! πŸ™‚

I used Yarn Bee Soft & Sleek yarn and an I/5.5 mm hook to stitch up my clutches. I followed the pattern through Round 10. Then I did 2 rounds of half double crochet in the 3rd loop and finished the clutch with one round of single crochet in the 3rd loop. (This is a great tutorial on crocheting in the 3rd loop.)

To attach the canvas bag to the crocheted shell, I simply used fabric hot glue. No sewing required! Slip the canvas bag into the crocheted shell and run a thin bead of glue around the canvas bag along the edge of the zipper. I did small sections at a time, attaching the crocheted shell as I went. I have this Surebonder hot glue gun that I only use with these fabric hot glue sticks. I keep it separate from my regular hot glue gun so I don’t mix the types of glue. The fabric glue worked great to attach the crocheted shells to the canvas bags.

Twisted Knot Crochet has also released a new Shell Shocked Pouch Shells set with 3 new patterns for making the shell part of the clutch bag. You can find the new pattern pack here. I’ll be making some with the new patterns! πŸ™‚

These clutch bags are so fun to make and they work up really quickly. They have so many uses – carrying your necessities when you’re running errands, holding your makeup or jewelry as you travel, storing your hooks, scissors, and stitch markers in your project bag, or pencils, pens, and paper in your backpack. What will you put in your Crochet Canyon Views Pocket Clutch?

Anita

Posted in Crochet, Gifts | Tagged , | 3 Comments

Merry Christmas Pooh – August Christmas Card

Hi friends,

Wow! I can’t believe August is just about over! It’s time for another Christmas card.πŸŽ„

If you’ve been following me for a bit, you know I have been creating a new Christmas card each month. You can find the previous month’s cards here – January, February, March, April, May, June, and July.

Disclosure: Some of the links on my site are affiliate links, meaning, at no additional cost to you, I will earn a small commission if you click through and make a purchase. As an Amazon Associate I earn from qualifying purchases.

Unity Stamp Company recently released this adorable Winnie the Pooh: Merriest Time stamp set and of course I had to add it to my collection. πŸ™‚ It was the perfect stamp to use for my August Christmas card.

To make the card, I stamped Pooh with Memento Tuxedo Black ink on white card stock and colored the image with Copic markers. Using the Scallops & Rectangles nesting dies from Unity Stamp Company, I die cut the image and layered it to green card stock (die cut with the same die set) using foam tape. I attached a piece of patterned paper to a white card and attached the stamped image to the card. Then I stamped “Merry Christmas!” with red ink on the card.

This is such a fun image to color and Pooh makes a very cute Christmas card!πŸŽ„

Anita

Posted in Cards, Christmas, Stamping | Tagged , , | 4 Comments

Celebration Wishes Birthday Cards

Hi friends,

This is just the cutest birthday stamp set! It’s called Sending Sweet Celebration Wishes from My Favorite Things. There is also a set of matching dies available to make cutting out the images so easy!

Disclosure: Some of the links on my site are affiliate links, meaning, at no additional cost to you, I will earn a small commission if you click through and make a purchase. As an Amazon Associate I earn from qualifying purchases.

My Favorite Things also has this great Happy Birthday Circle Frame Die-namics that I used on my cards. And I used their Wonky Stitched Square STAX Die-namics to cut the square of patterned paper. My Favorite Things has so many fun products – you should check them out!

To make my cards, I stamped the Fox and Penguin images with Memento Tuxedo Black ink on white card stock, colored them with Copic markers, and die cut them using the matching dies. I die cut the Happy Birthday Circle from coordinating card stock and attached it to a square of patterned paper die cut with the Wonky Stitched Square dies. This is my favorite glue pen for attaching smaller paper pieces and intricate dies.

I embossed a panel of white card stock with a large dot embossing folder (similar to this) and attached it to a white card. Using a 3/8-inch hole punch (or the size that matches your embossing folder), I punched circles from matching paper and randomly attached them to the embossed panel. I attached the square of patterned paper to the card with foam tape and then attached the Fox and Penguin with foam tape.

Sometimes my creations just make me smile – this is one of those times. I hope they make you smile, too. πŸ™‚

Anita

Posted in Cards, Stamping, Uncategorized | Tagged , | 1 Comment

Farmhouse Recipe Card Holder

Hi friends,

Do you struggle with where to put your recipe card while you’re cooking or baking? I must move mine around on the counter 50 times during the process – well, maybe not 50 but a lot! πŸ™ƒ This Farmhouse Recipe Card Holder just takes a few minutes to make and will hold your recipe so you can easily see the next step.

Disclosure: Some of the links on my site are affiliate links, meaning, at no additional cost to you, I will earn a small commission if you click through and make a purchase. As an Amazon Associate I earn from qualifying purchases.

You’ll need a slatted wood pallet with an easel back (I found mine at Hobby Lobby), a mini clothespin, and some white chalk paint. I like chalk paint for this project because of the matte finish. You’ll also need a chip brush and strong glue – I used E6000 clear adhesive.

Using the chip brush, apply a thin layer of paint over the slatted wood pallet easel leaving some of the wood showing through. I also painted the back to give it a finished look. Paint the clothespin white and glue to the easel.

And that’s it! You’re done! It literally only takes a few minutes to make. 😊

You can also use this to display a favorite photo or to keep a β€œto do” list handy.

If Farmhouse isn’t your style, you can paint the easel to match your kitchen – covering it completely and not leaving the wood showing through.

The Farmhouse Recipe Card Holder would make a great inexpensive gift along with a cute set of recipe cards. You could even include a card with one of your favorite recipes. 😊

Anita

Posted in Gifts, Organization, Uncategorized | Tagged , | Leave a comment

Have a Dino-Mite Birthday Card

Hi friends,

This Stomping Great Day stamp set from Unity Stamp Company is perfect for making birthday cards for all those little dinosaur lovers in your life! It includes 3 different dinosaurs and several sentiments for making some really fun cards.πŸ¦–πŸ¦•

Disclosure: Some of the links on my site are affiliate links, meaning, at no additional cost to you, I will earn a small commission if you click through and make a purchase. As an Amazon Associate I earn from qualifying purchases.

These cards are pretty simple and easy to make. I stamped the dinosaurs with Memento Tuxedo Black ink on white card stock, colored them with Copic markers, and trimmed them close. (These are my favorite detail scissors for fussy cutting images.) I used a balloon punch (similar to this) to cut a balloon from gold card stock and stamped the sentiment with black ink onto the balloon. I layered a piece of patterned paper to blue card stock and attached it to a white card.

I attached the dinosaurs to the card, popping one of them up with foam tape. The balloon is also attached with foam tape. I added a tiny bow made from black twine and used a black pen to draw the string directly onto the patterned paper.

Such fun bright cards for that special little one who loves dinosaurs! πŸ¦–πŸ¦• They are sure to bring a smile!

Anita

Posted in Cards, Stamping | Tagged , | Leave a comment

Repurposed Candle Jar

Hi friends,

I had this great smelling candle that came in a white glass container with a chrome lid. After the candle was gone, I just couldn’t throw the container away! I love the look of the Rae Dunn collection so I decided to use my Cricut Explore Air 2 and make a fun dupe for my bathroom.

Disclosure: Some of the links on my site are affiliate links, meaning, at no additional cost to you, I will earn a small commission if you click through and make a purchase. As an Amazon Associate I earn from qualifying purchases.

First, I had to get the residual wax out of the container. The best way I’ve found is to put the container in the freezer for a few hours. Then carefully using a blunt knife, crack the wax and it will fall out. Thoroughly wash the container with dish soap and hot water, dry completely.

I used my Cricut Explore Air 2 with permanent black vinyl to make my word sticker. I downloaded The Skinny font from dafont.com that is similar to the Rae Dunn font. I sized it to fit my jar – the entire sticker is about 2.5 inches tall by 2 inches wide. My jar is about 4.75 inches tall and 4.25 inches wide for reference. Using transfer tape, I applied my words to the jar.

I added a decorative knob using E6000 clear adhesive to the lid. This is totally optional, but I love how it looks!

It’s a fun, useful way to repurpose a jar after the candle has burned down. And it looks really cute in my bathroom!

Anita

Posted in Decor, Organization | Tagged , | 5 Comments

Happy Birthday Chicks Cards

Hi friends,

This Birthday Chicks stamp set from My Favorite Things is so cute! I found it on sale at a stamp store recently and I believe it’s discontinued. ☹️ Do you have it in your stash? If not, My Favorite Things has so many other cute stamp sets and fun dies to choose from.

Disclosure: Some of the links on my site are affiliate links, meaning, at no additional cost to you, I will earn a small commission if you click through and make a purchase. As an Amazon Associate I earn from qualifying purchases.

I made a couple of simple and fun birthday cards using these cute little chicks. All of the images are part of the Birthday Chicks stamp set except for the β€œhappy birthday” sentiment. That one is from the Extended Celebration set from Unity Stamp Company.

To make the cards, I stamped the images with Memento Tuxedo Black ink and colored them with Copic markers. Then I trimmed closely around the images. Many of the stamp sets from My Favorite Things have matching die sets, which makes cutting out images so much easier. Since I found this stamp set on sale, I wasn’t able to get the matching dies. ☹️

I attached a piece of patterned paper to a white card. I attached the images to the cards, popping some of them with foam tape. I stamped the sentiments on white card stock and added them to the cards.

I used 2 different scalloped circle punches (similar to this and this) on the card below and popped the images with foam tape. I also layered the sentiment to matching card stock and attached it to the card with foam tape.

I love how bright and cheery these cards turned out! They are sure to bring a smile to the birthday girl or boy. πŸ™‚

Anita

Posted in Cards, Stamping | Tagged , | Leave a comment

Dollar Tree Fall Is Here

Hi friends,

Just popping in to let you know that Dollar Tree has stocked their seasonal aisles with all the Fall and Halloween things! πŸ‚ πŸŽƒ

Disclosure: Some of the links on my site are affiliate links, meaning, at no additional cost to you, I will earn a small commission if you click through and make a purchase. As an Amazon Associate I earn from qualifying purchases.

Here’s what I picked up (at least so farπŸ˜‰)

The velvet pumpkins are really cute, but I will have to do something about the plastic stems. I’m not sure what I’ll do with the pumpkin and jack-o-lantern wood cutouts yet. Or the wood and leather words. πŸ€·πŸΌβ€β™€οΈ And the tiny wood pumpkins were just too sweet to pass up!

I have some other Dollar Tree Fall things I got last year that I haven’t used yet so I’m sure I have plenty of fun crafty items to make things with. But I may just have to visit another Dollar Tree store to see what they haveβ€¦πŸ™ƒ

Don’t forget that Dollar Tree seasonal items go out the door super fast!! Head to your local store soon if you want to stock up!

Anita

Posted in Decor, Fall | Tagged , | 1 Comment