Looking for a warm and cozy meal on a crisp Fall evening? Try this tasty White Chicken Chili. It’s super simple to make – just add a side salad and some cornbread for a perfect Fall dinner.
A sweet friend gave me this recipe years ago and it’s one that we eat often during the Fall and Winter months.
White Chicken Chili
1 lb chicken breasts (or you can use ground turkey)
1-1/4 cups chopped onion
4 oz. can diced mild chiles
1 teaspoon ground cumin
1/2 teaspoon oregano
1/4 teaspoon cayenne pepper
1 cup chicken broth
2 (15 oz.) cans Great Northern beans
10 oz. can diced tomatoes with green chiles
1/4 cup dried parsley (Sometimes I leave this out and it’s just as good!)
garlic salt to taste
Boil chicken until done and shred (or brown ground turkey). Mix together with onions, green chiles, cumin, oregano, and cayenne pepper. Place in a Dutch oven. Add chicken broth, Great Northern Beans, tomatoes, parsley, and garlic salt. Bring to a boil. Reduce heat and simmer for 1 hour. Serve with your favorite cheese sprinkled on top.
You can also place the cooked chicken with the rest of the ingredients in a slow cooker and cook on low for 2-4 hours.
This freezes well so go ahead and make a double batch and freeze half for a quick meal on a busy night!
I have a sweet and simple tag to share with you today! It’s perfect to attach to Fall treats for a little something extra. And so fun and easy to make. 🎃🍁🍂🍁
To make the tag, stamp the pumpkin and sentiment with brown ink on white card stock. (I used Memento Rich Cocoa) Color the pumpkin with Copic markers and punch with a circle punch (here’s a great set of circle dies!). Lightly sponge with brown ink. Punch a scalloped circle from kraft card stock and lightly sponge the edges with brown ink (and here’s a great set of scalloped circle dies!). Attach the stamped piece to the scalloped circle. And that’s it!
I attached the tag to a little bag filled with treats using a tiny clothespin. I love how fun this turned out!
You could also use a jack-o-lantern or leaf stamp. You can find all sorts of little treat bags and tiny clothespins in your local craft store.
I hope you are enjoying this Autumn season! Cool, crisp days filled with blue skies and colorful leaves – the perfect time for this Harvest Chicken Casserole…
You can find the full recipe here on Delish.com. It is filled with sweet potatoes, Brussels sprouts and other yummy Autumn flavors.
The recipe calls for wild rice, but I only had brown rice in my pantry so I used that and it was quite tasty. I probably should have baked it just a touch longer so the almonds were more toasted and the veggies were more roasted. I’m still getting used to my new oven…
This recipe is made in a 9×13 pan, but I think you could easily cut it in half if you need to make a smaller amount in an 8×8 pan. Also, a rotisserie chicken can save you prep time on a busy weeknight! Add a side salad and maybe some crusty bread for a wonderful Fall meal.
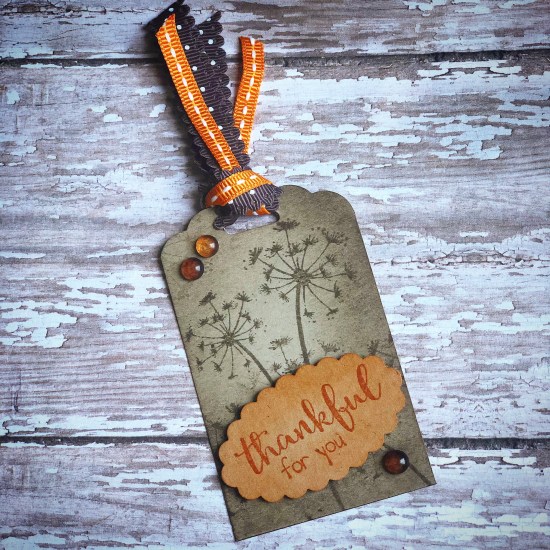
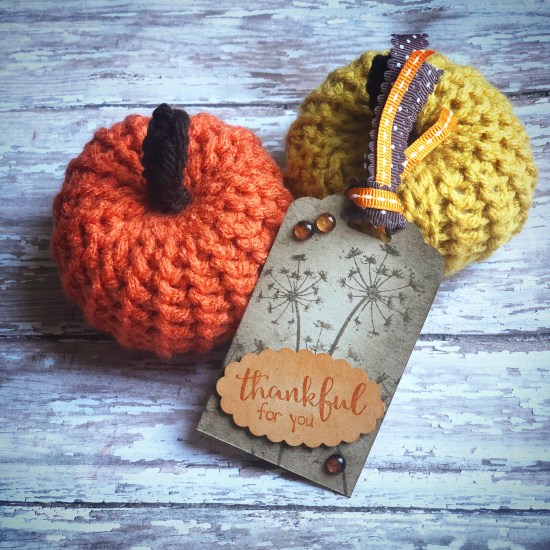
Thanksgiving is just around the corner! I know…where has this year gone?!?! I have a sweet little tag to share with you today. I made several of these to give to some of my friends along with one of these Little Crochet Pumpkins to let them know that I am so thankful for them!
I used the Scalloped Tag Topper Punch from Stampin’ Up to create a tag using kraft card stock. I stamped the flower several times with Memento Rich Cocoa dye ink and then sponged the tag with the ink. I stamped the sentiment with Pumpkin Pie ink from Stampin’ Up on kraft card stock. I punched it out with a scalloped oval punch (this one is discontinued, but this is a great set of scalloped oval dies if you’re looking for some.) Then I sponged the piece with the Pumpkin Pie ink. I attached it to the tag with foam tape.
To finish the tag, I tied the top with 2 different ribbons and attached 3 gems. (These enamel dots would be really cute, too!)
Have you seen the cute fabric Microwaveable Bowl Cozies at the craft shows? Since sewing isn’t one of my talents, I searched Pinterest to see if I could find a pattern for a crochet one – well, of course, Pinterest did not disappoint!
I found the perfect pattern here at Nicki’s Homemade Crafts. It’s a free pattern and works up quickly. Just be sure that you use only 100% cotton yarn so it will be microwave safe!!
Just place your microwave safe bowl with your favorite soup, chili, or cereal into the bowl cozy. Then pop it in the microwave. No need to grab a pot holder to remove your bowl and no more burnt fingers!
These would make great Christmas gifts! You can make them in any color to match the recipient’s kitchen.
Fall cards are so fun to make! The colors are so rich and vibrant and just make me happy! 🙂 This card is so quick and easy to make…
The stamps are from Pink Ink Stamp Company. If you’re unable to find these exact stamps, any Fall themed stamps would work wonderfully with this layout.
Stamp the pumpkin cart with black ink on white card stock, color with Copic markers, and punch with a circle punch or circle die. Layer to a larger circle of green card stock with foam tape. (Here’s a great set of circle dies if you are looking for some.)
Attach 3 Fall color grosgrain ribbons to a kraft card. Stamp sentiment above the bottom ribbon. Attach stamped piece to the card with foam tape.
You could change the sentiment to Happy Birthday or Happy Thanksgiving for the perfect Fall card!
These Chocolate Cake Mix Bars take brownies to a whole new level! Chocolate and white chocolate chips, and sweetened condensed milk make these a rich, decadent treat. 🙂
To make the card, stamp the tree with black ink on white card stock and color with Copic markers. Punch with a scalloped circle punch and layer to a scalloped circle punched from green card stock with foam tape. Layer this piece to a larger scalloped circle punched from orange card stock. (This is a great set of scalloped circle dies.)
Emboss 2 different strips of green card stock with the Fancy Fan folder. Emboss a brick and golden-yellow strip of card stock with the Dot folder. Attach all 4 strips along with a strip of orange card stock to a kraft card. Stamp the sentiment on the orange strip with black ink. Attach stamped tree piece with foam tape.
Just a simple card with all the colors of Fall! 🍁🍂🍁
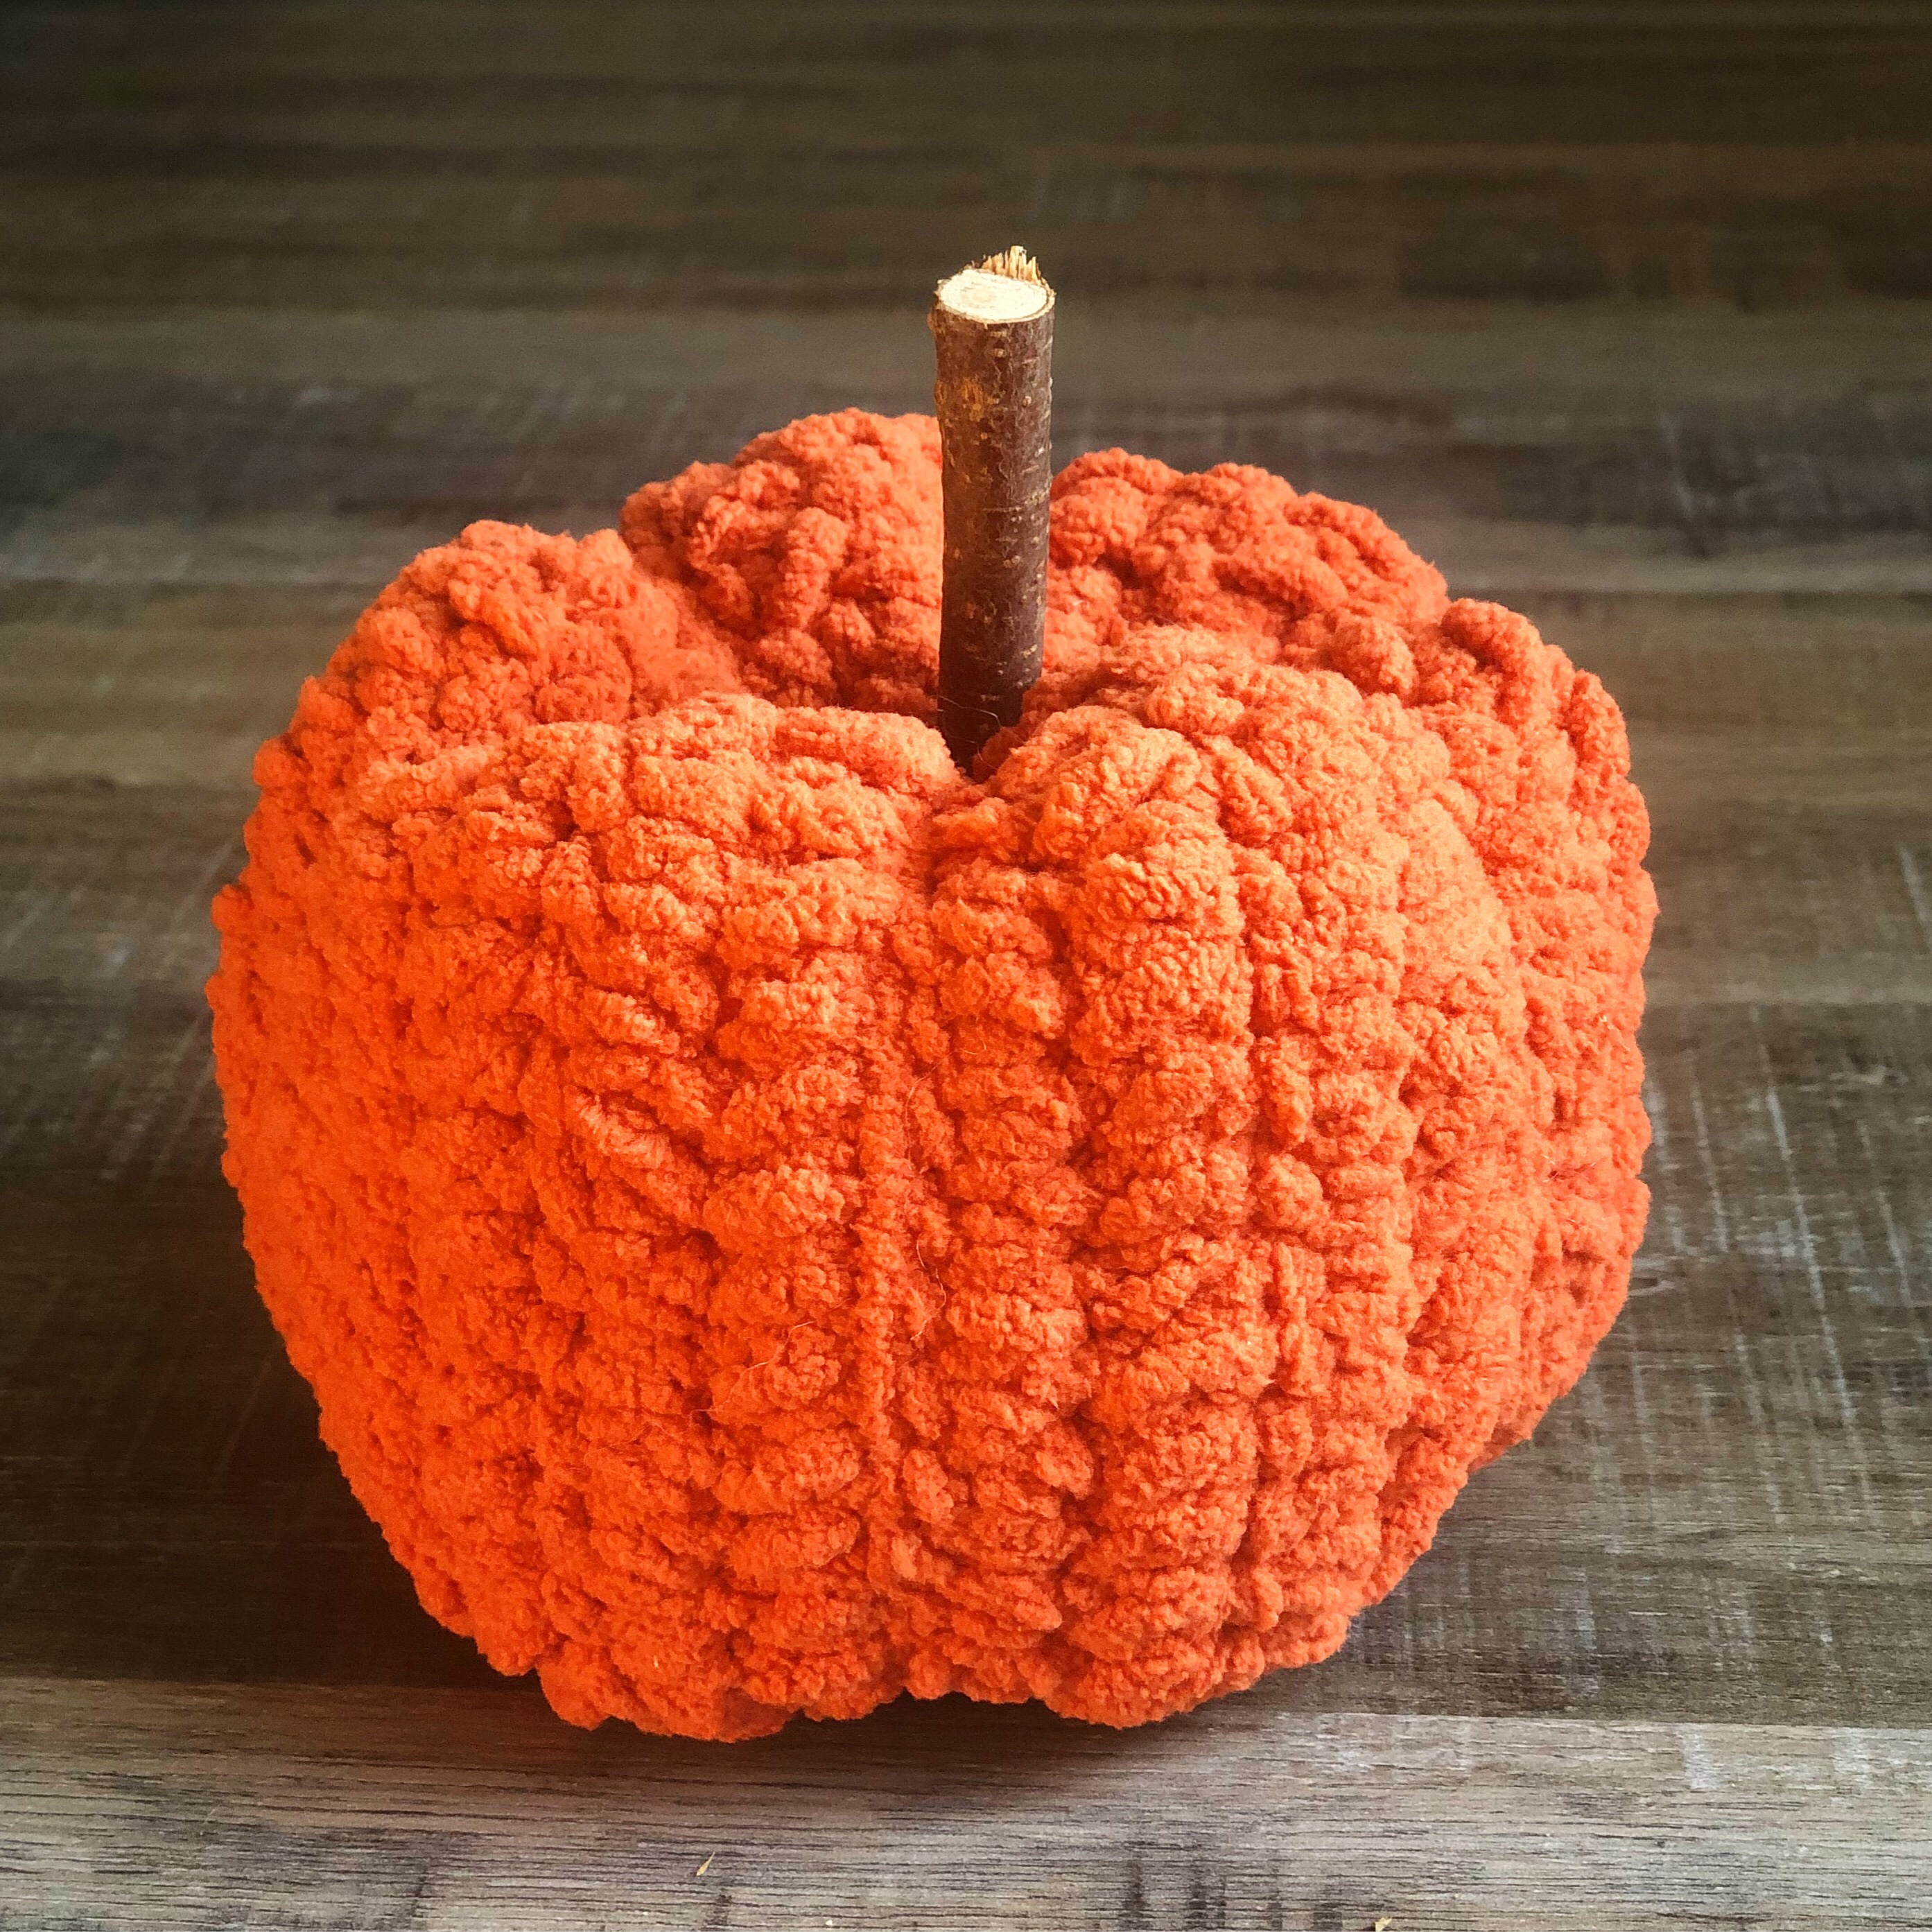
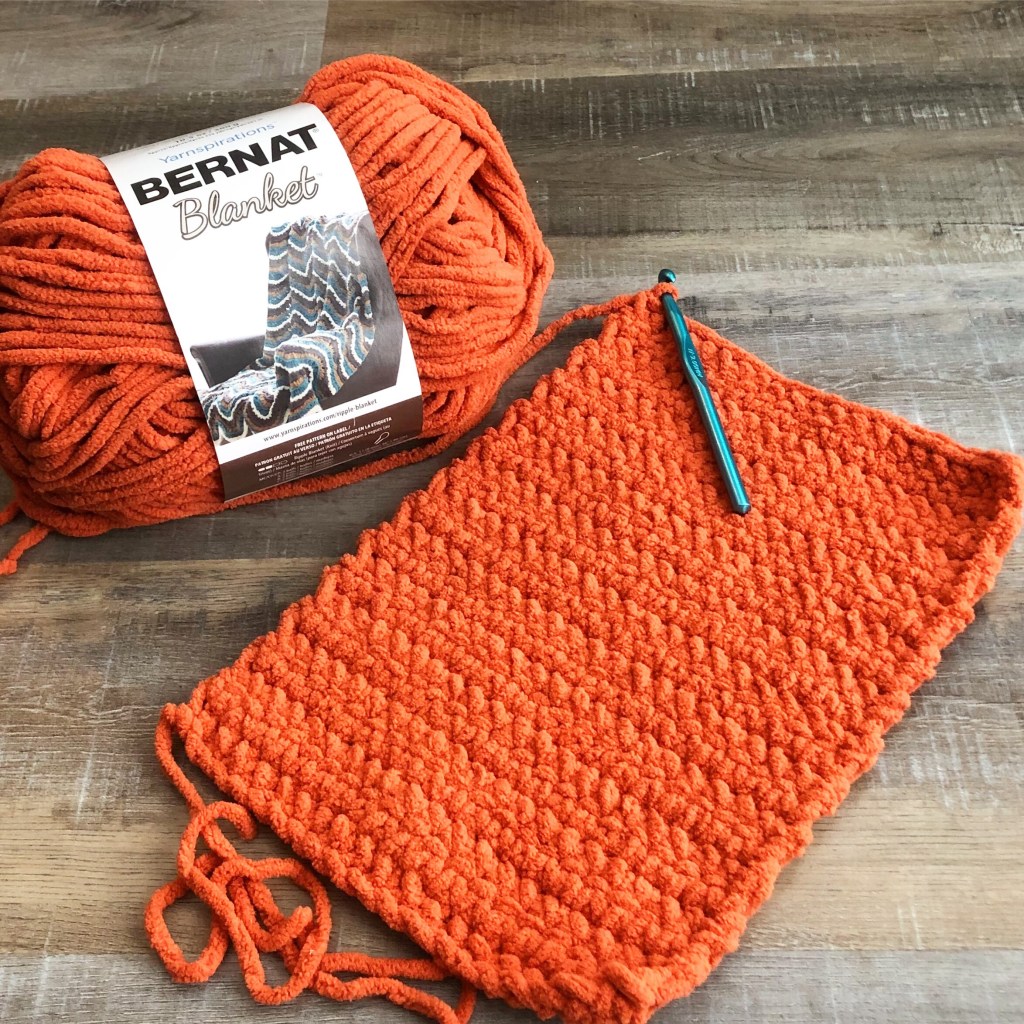
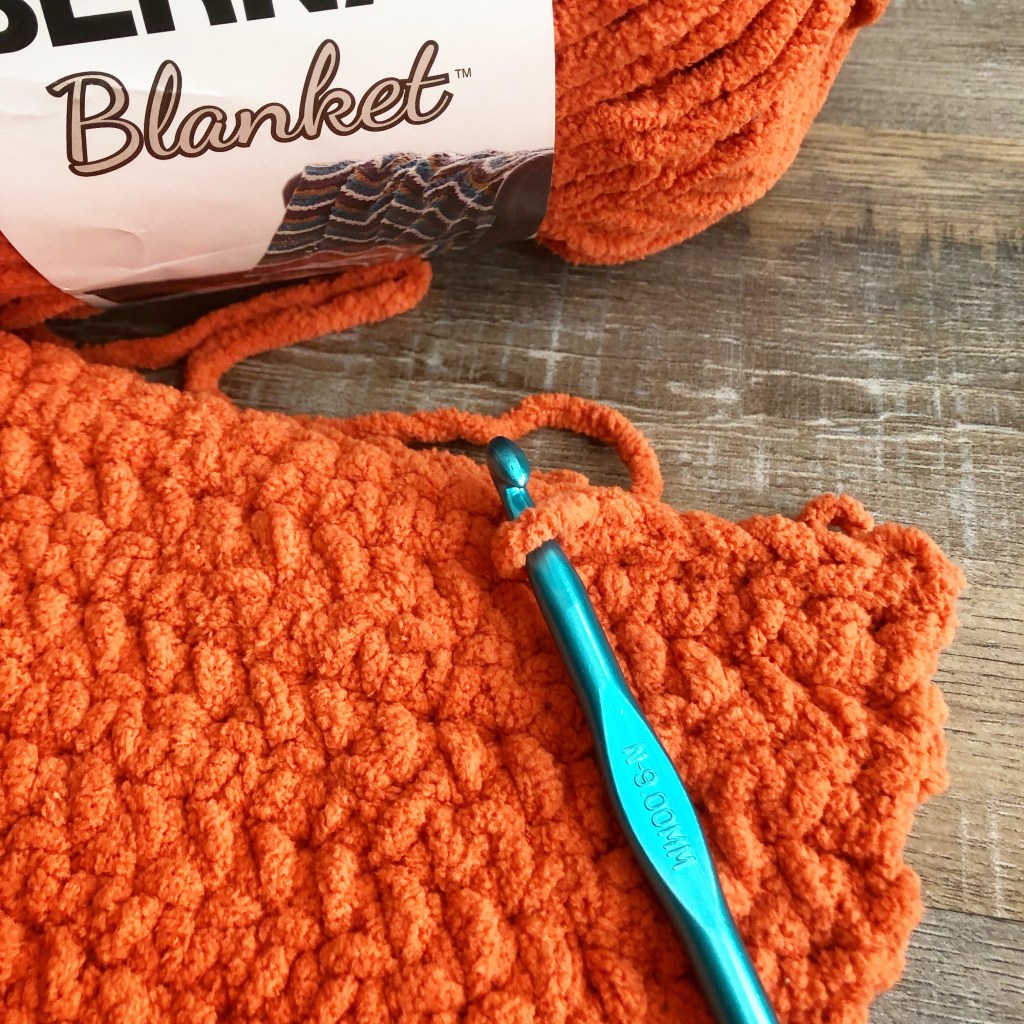
When I think of Fall, I think of pumpkins! I was playing with Bernat Blanket yarn and came up with this simple single crochet pattern for these Chunky Crocheted Pumpkins. They work up super quickly because of the weight of this super bulky yarn and an N/9mm hook.
Chunky Crocheted Pumpkins
Materials:
Bernat Blanket Yarn (I used Pumpkin Spice and Vintage White)
N/9mm hook
Gauge is not important
Stitches used:
Chain – ch
Single Crochet – sc
Slip Stitch – ss
Ch 21, leaving a long tail.
Row 1: sc in 2nd ch from hook and each stitch across. Ch 1 and turn. (20 stitches)
Row 2: sc in each stitch across. Ch 1 and turn. (20 stitches)
Rows 3 – 25: Repeat row 2. Do not turn at the end of Row 25. (20 stitches)
Fold piece in half and ss together. Finish off leaving a very long (48-50 inches or so) tail.
Turn piece so seam is on the inside.
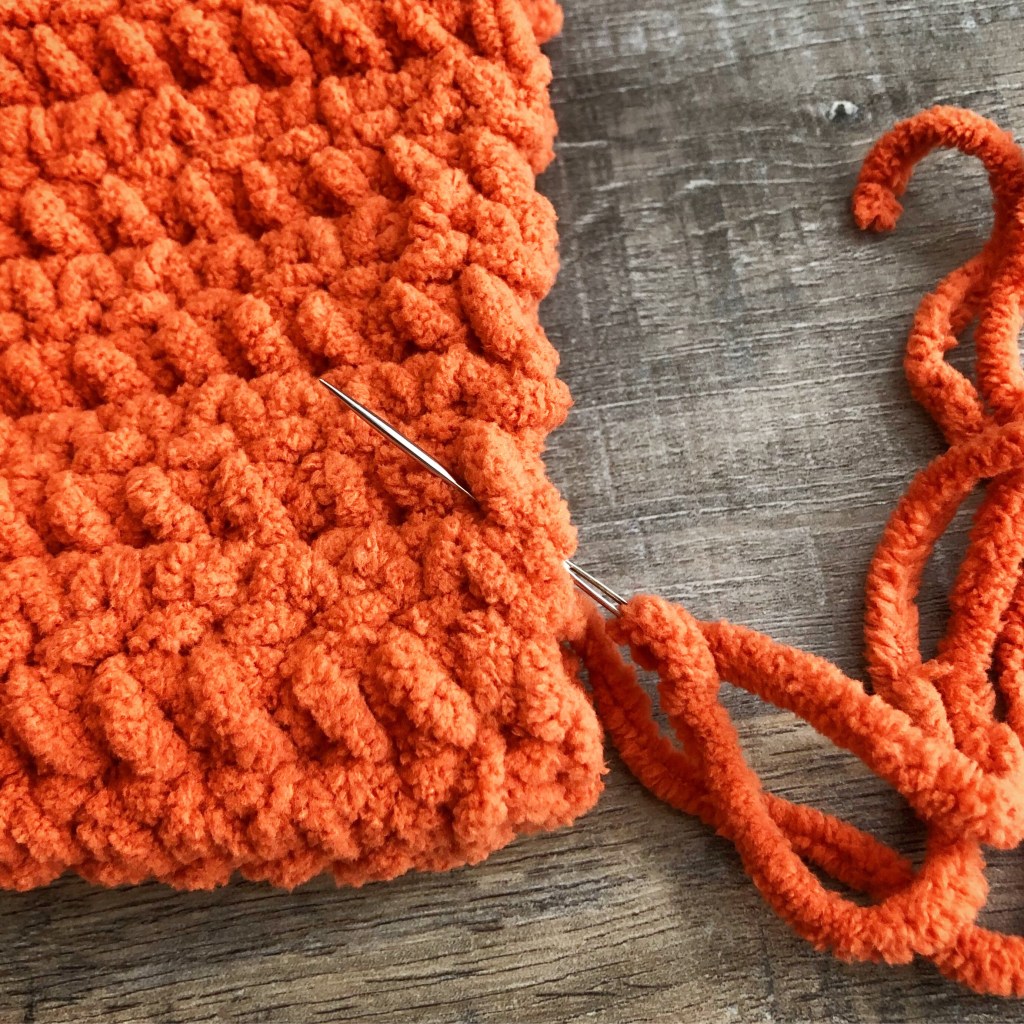
Using a yarn needle and your beginning tail, run a gathering stitch around the bottom of the pumpkin. Pull tight to close the opening, tie a knot, and weave in the end. (Because the yarn is so thick, you may have to sew a couple of stitches across the opening to close it completely.) I forgot to take a picture of this step, but once you have run your gathering stitch just pull on the yarn and it will close your opening.
Stuff pumpkin with poly-fil and gather the top in the same manner, using the very long tail. Do not cut yarn.
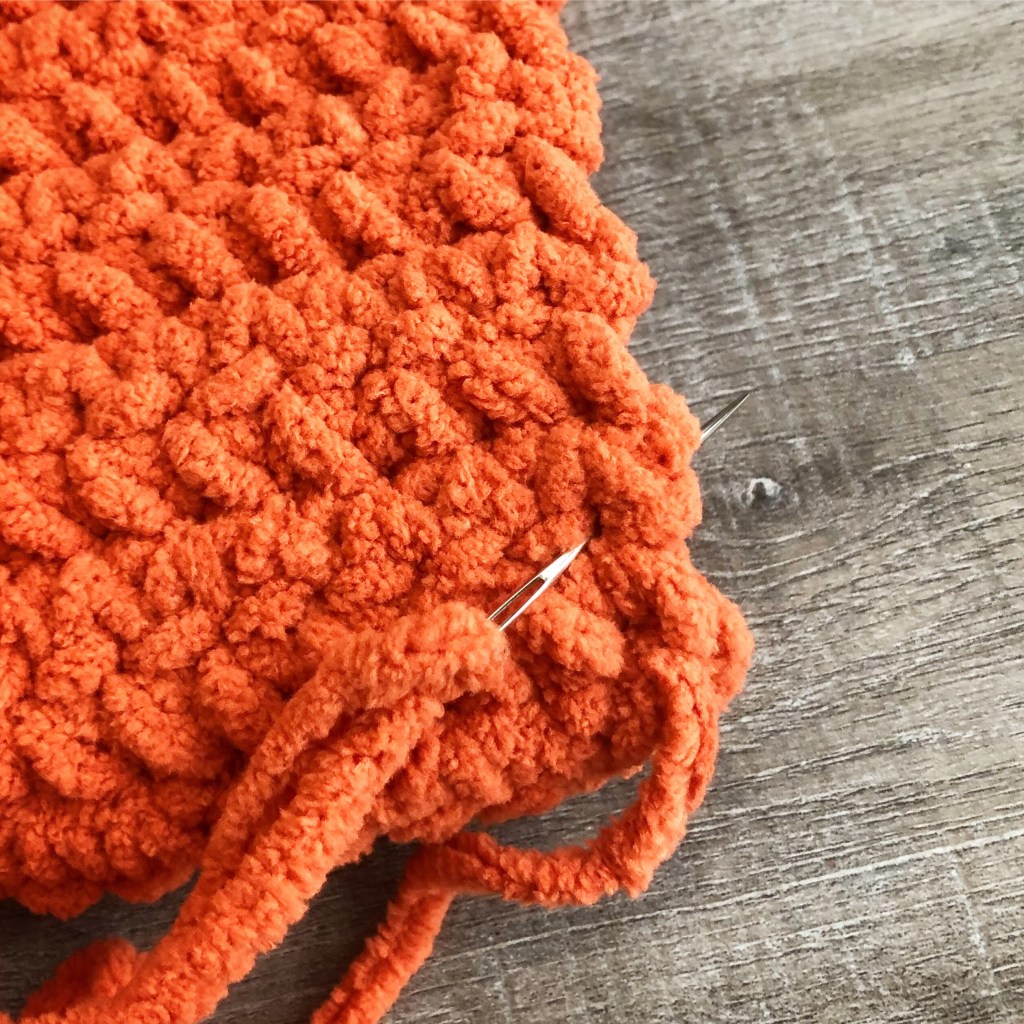
Using your needle, draw the yarn through the center top of the pumpkin to center bottom of the pumpkin. You’ll have to squish your pumpkin to get the needle through. Wrap the yarn around to the top of the pumpkin and pull it through again, pulling it tightly to form a “ridge”. Do this 5 or 6 times to give the pumpkin “ridges”. Tie it off tightly at the bottom after the last wrap around and weave in your end. The picture below shows how the ridges will look.
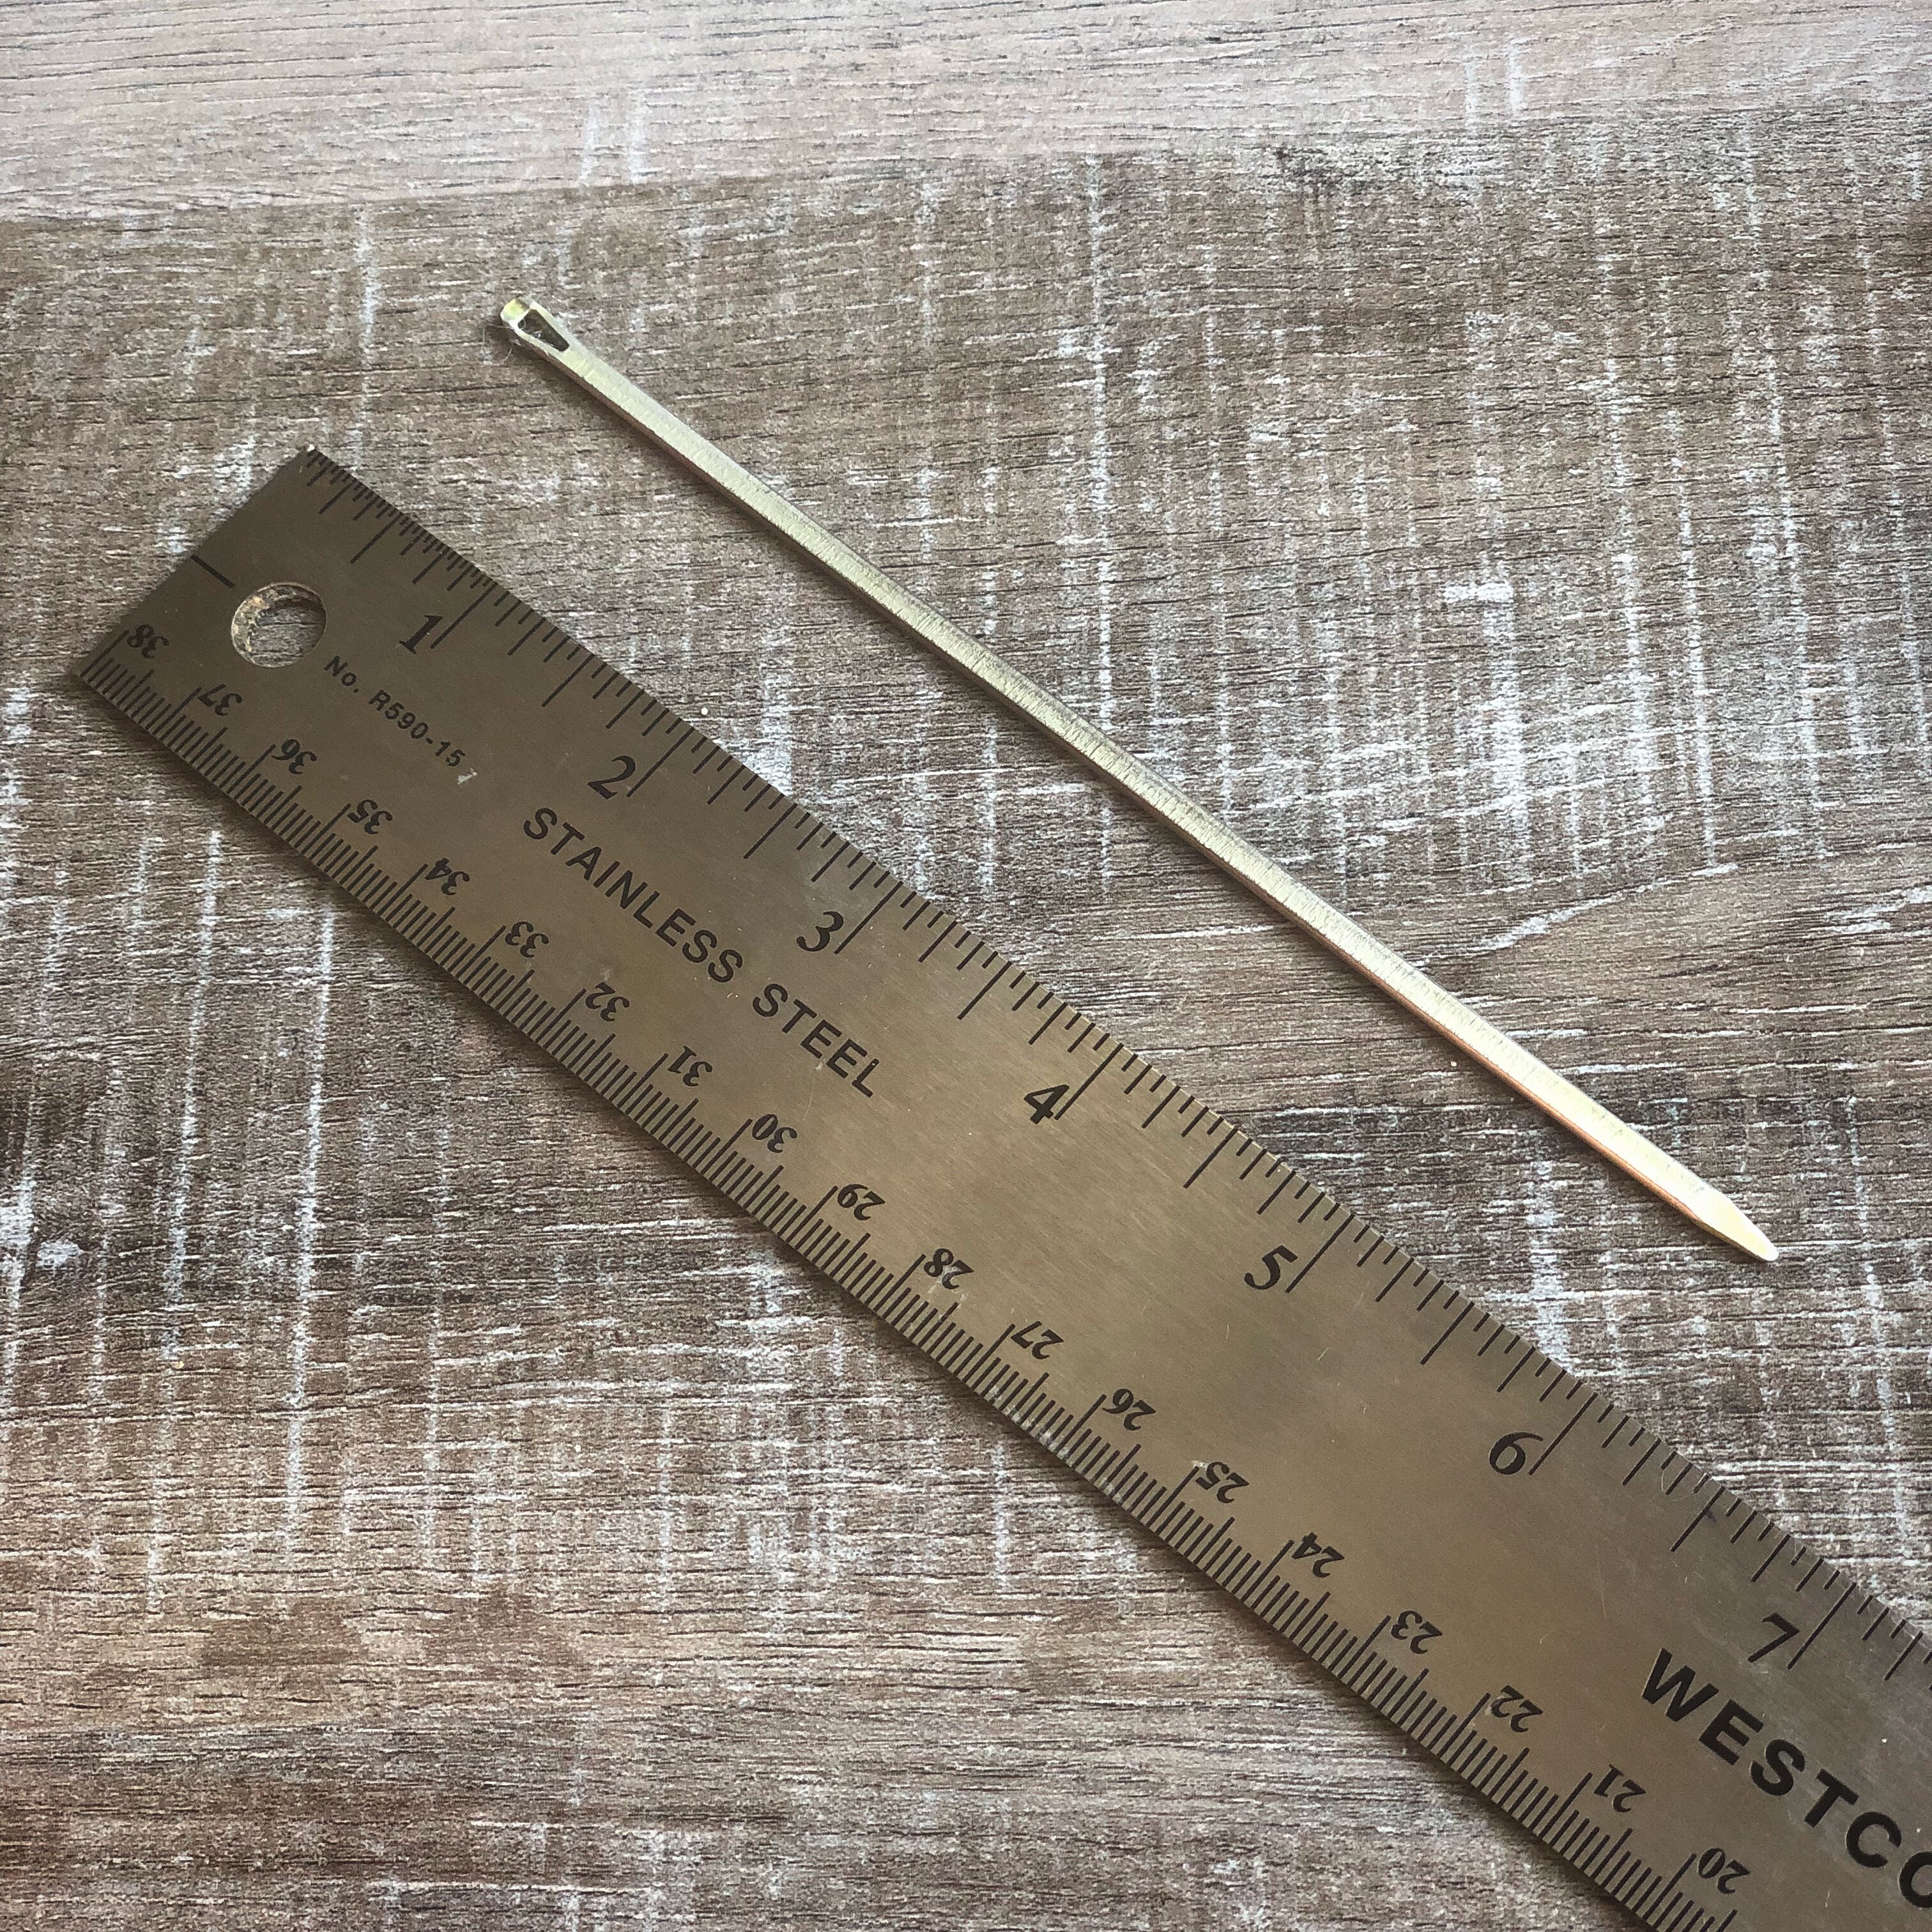
I have to share a picture of this “needle” I inherited from my grandmother. It was among all of her crochet hooks and it has been the best thing for creating the “ridges” on my pumpkins! As you can see, it is over 6-inches long and easily fit through my pumpkin from top to bottom. Such a great tool to have in my arsenal. 🙂
Glue a small stick to the center for the stem. And here are my finished pumpkins. They measure about 5-inches across and 4-inches high.
(Please link back to my pattern if you make any of these cute pumpkins. I’d appreciate it if you wouldn’t copy or rewrite my pattern onto another page. Thank you!)
You can easily change the size of these pumpkins by changing the weight of your yarn and using the appropriate hook. You can stitch up an entire pumpkin patch!
It’s finally Fall – my favorite season! 🍁🍂 Fall in Alabama, once the Summer finally lets go, is filled with days of almost perfect temps and crisp, cool nights. Time to break out the scarves and boots. 😊
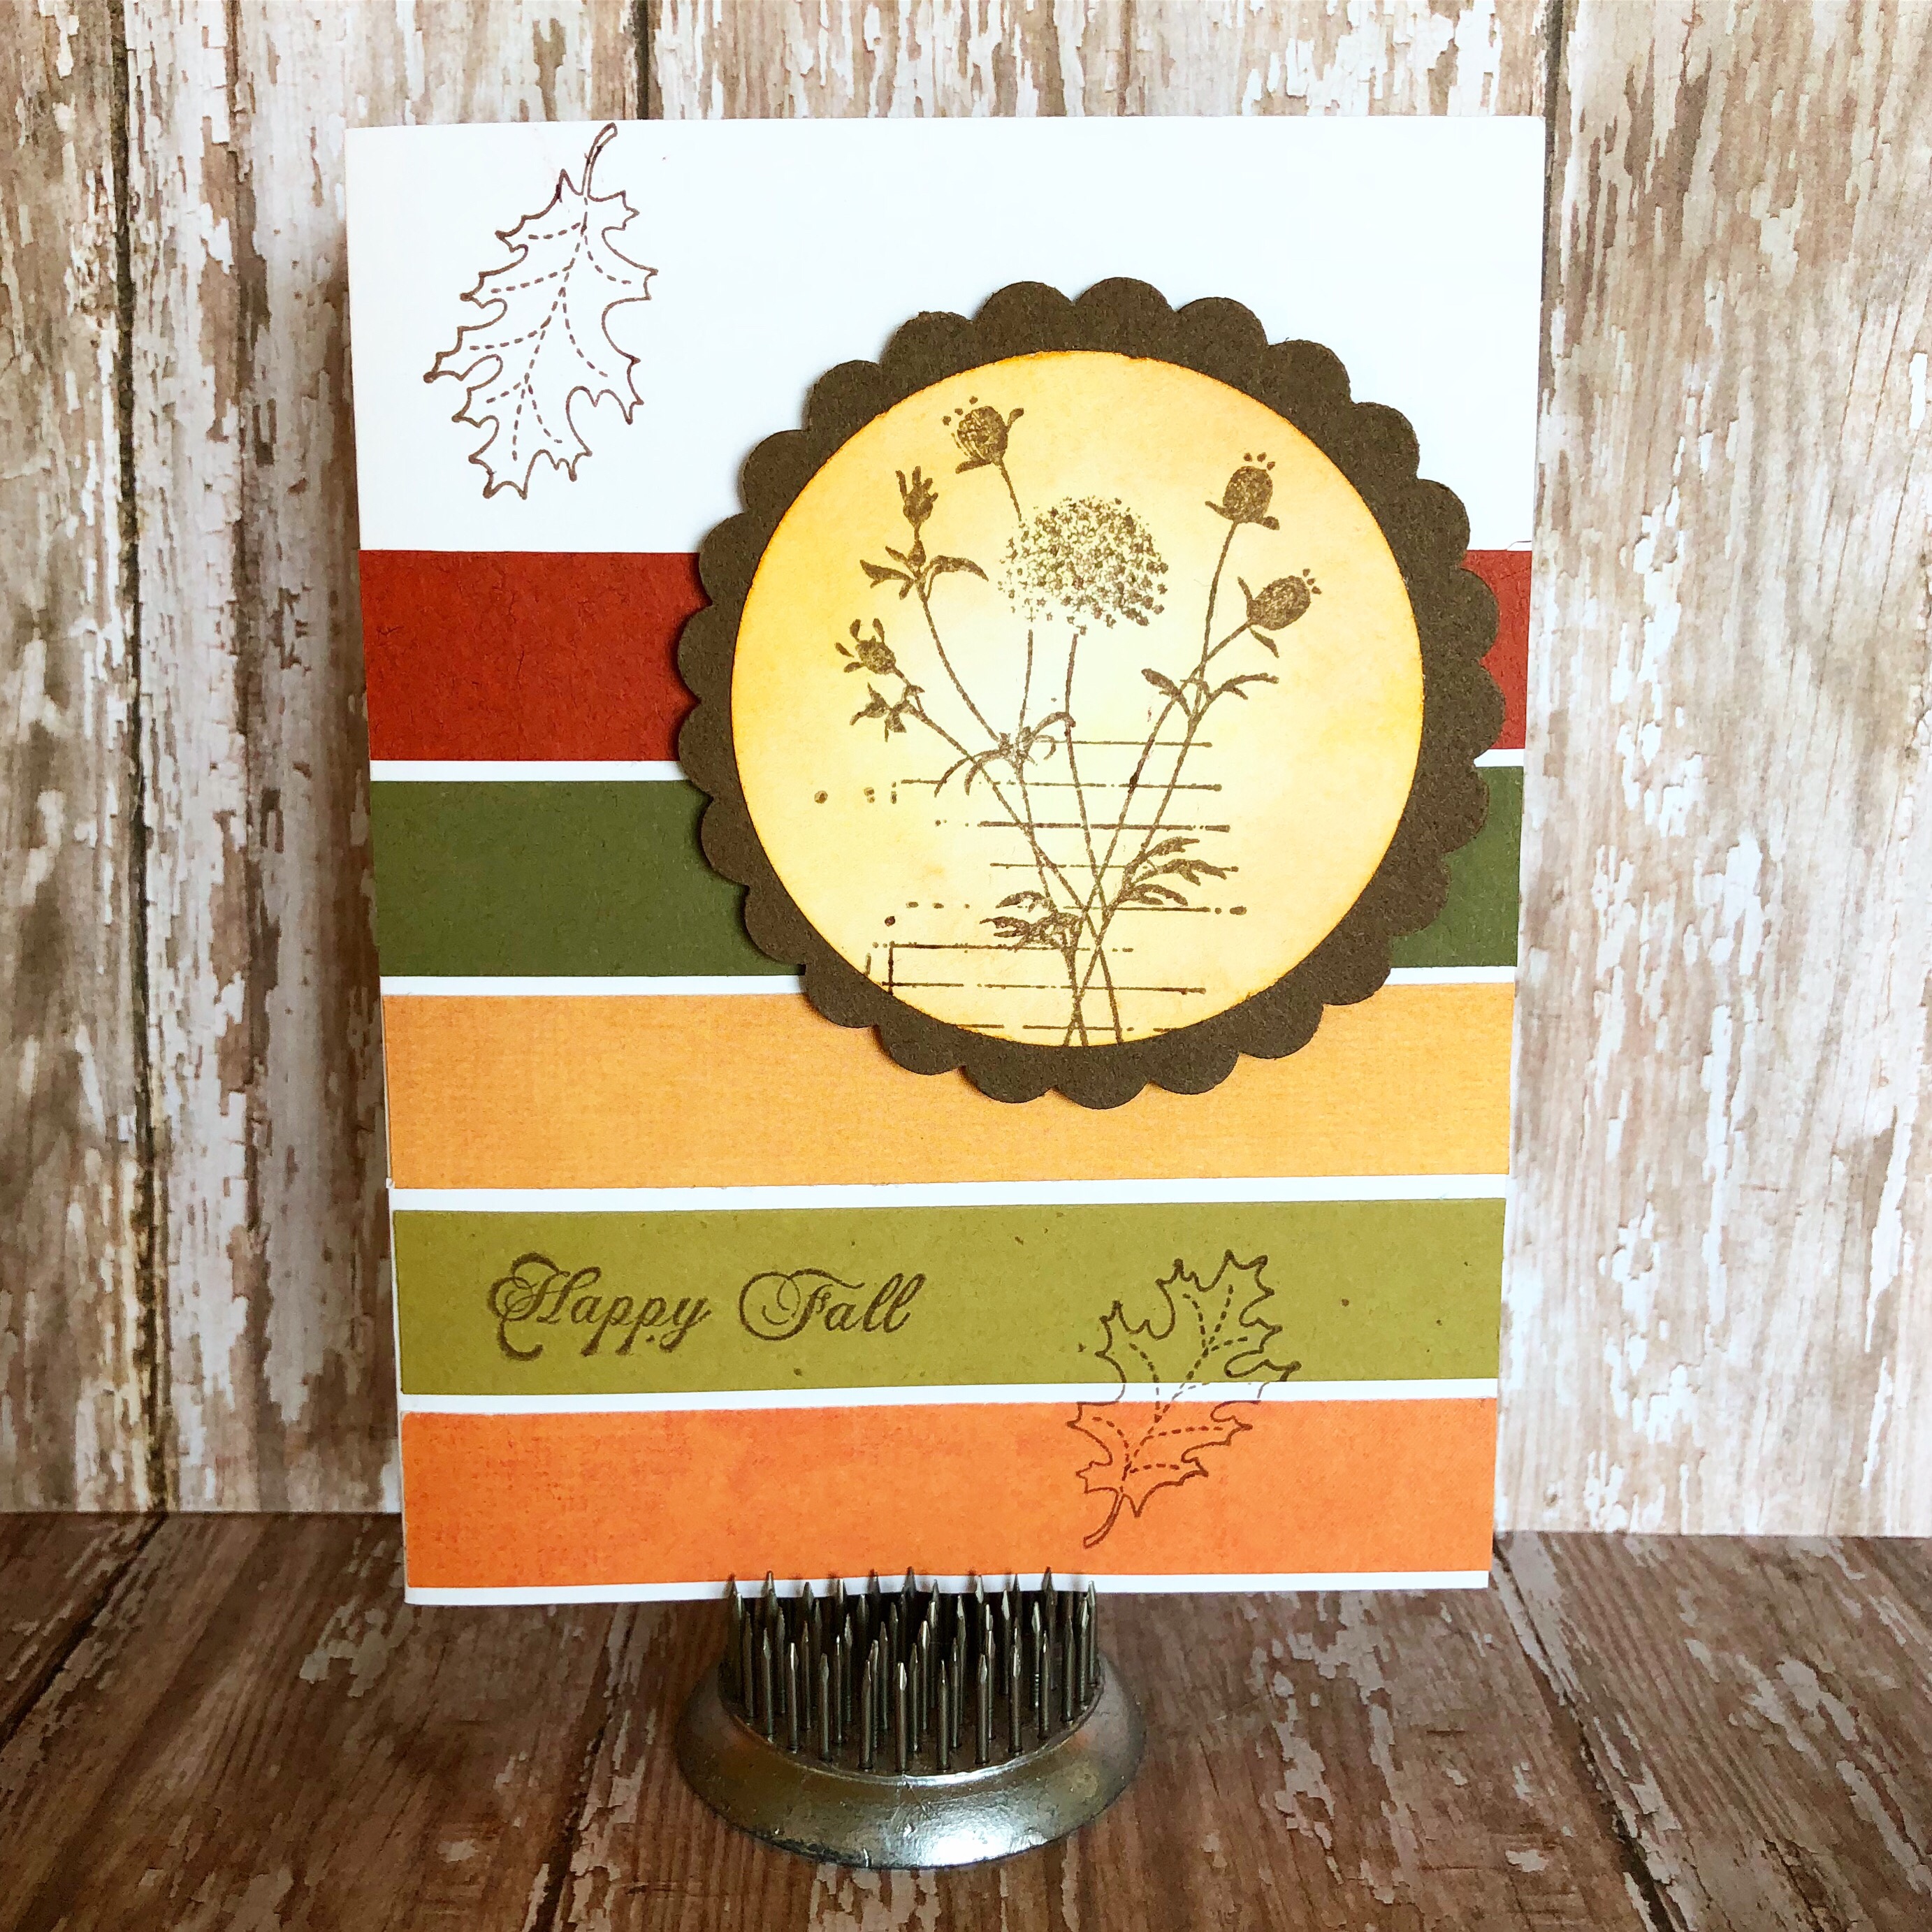
So…Happy Fall everyone! Here’s a fun little card to welcome the best of the seasons…
I have looked everywhere in my craft room for the leaf stamp so I could tell you which company it is from. But it has hidden itself very well and I can’t remember who makes this particular leaf – just use your favorite leaf stamp in your collection. (Or there’s a cute one in this set from Avery Elle or this set from Concord and 9th.)
To make the card, stamp the flower with brown ink on white card stock, punch with a circle punch, and sponge with dark yellow ink. Attach to a scalloped circle punched from brown card stock.
Attach 5 strips of Fall colored paper to a white card. Stamp the sentiment on the 2nd strip from the bottom. Stamp one leaf overlapping the bottom 2 strips and one at the top of the card. Attach the flower piece to the card with foam tape.
I hope you are enjoying all the wonderful colors, smells, and tastes of this amazing Fall season! 🍂🍁
Disclosure: Some of the links on my site are affiliate links, meaning, at no additional cost to you, I will earn a small commission if you click through and make a purchase. As an Amazon Associate I earn from qualifying purchases.