Hi friends,
You may have seen my Sunny Dreams Crochet Baby Blanket from a few years ago in this post. Here’s a picture of the sweet blanket.

Disclosure: Some of the links on my site are affiliate links, meaning, at no additional cost to you, I will earn a small commission if you click through and make a purchase. As an Amazon Associate I earn from qualifying purchases.
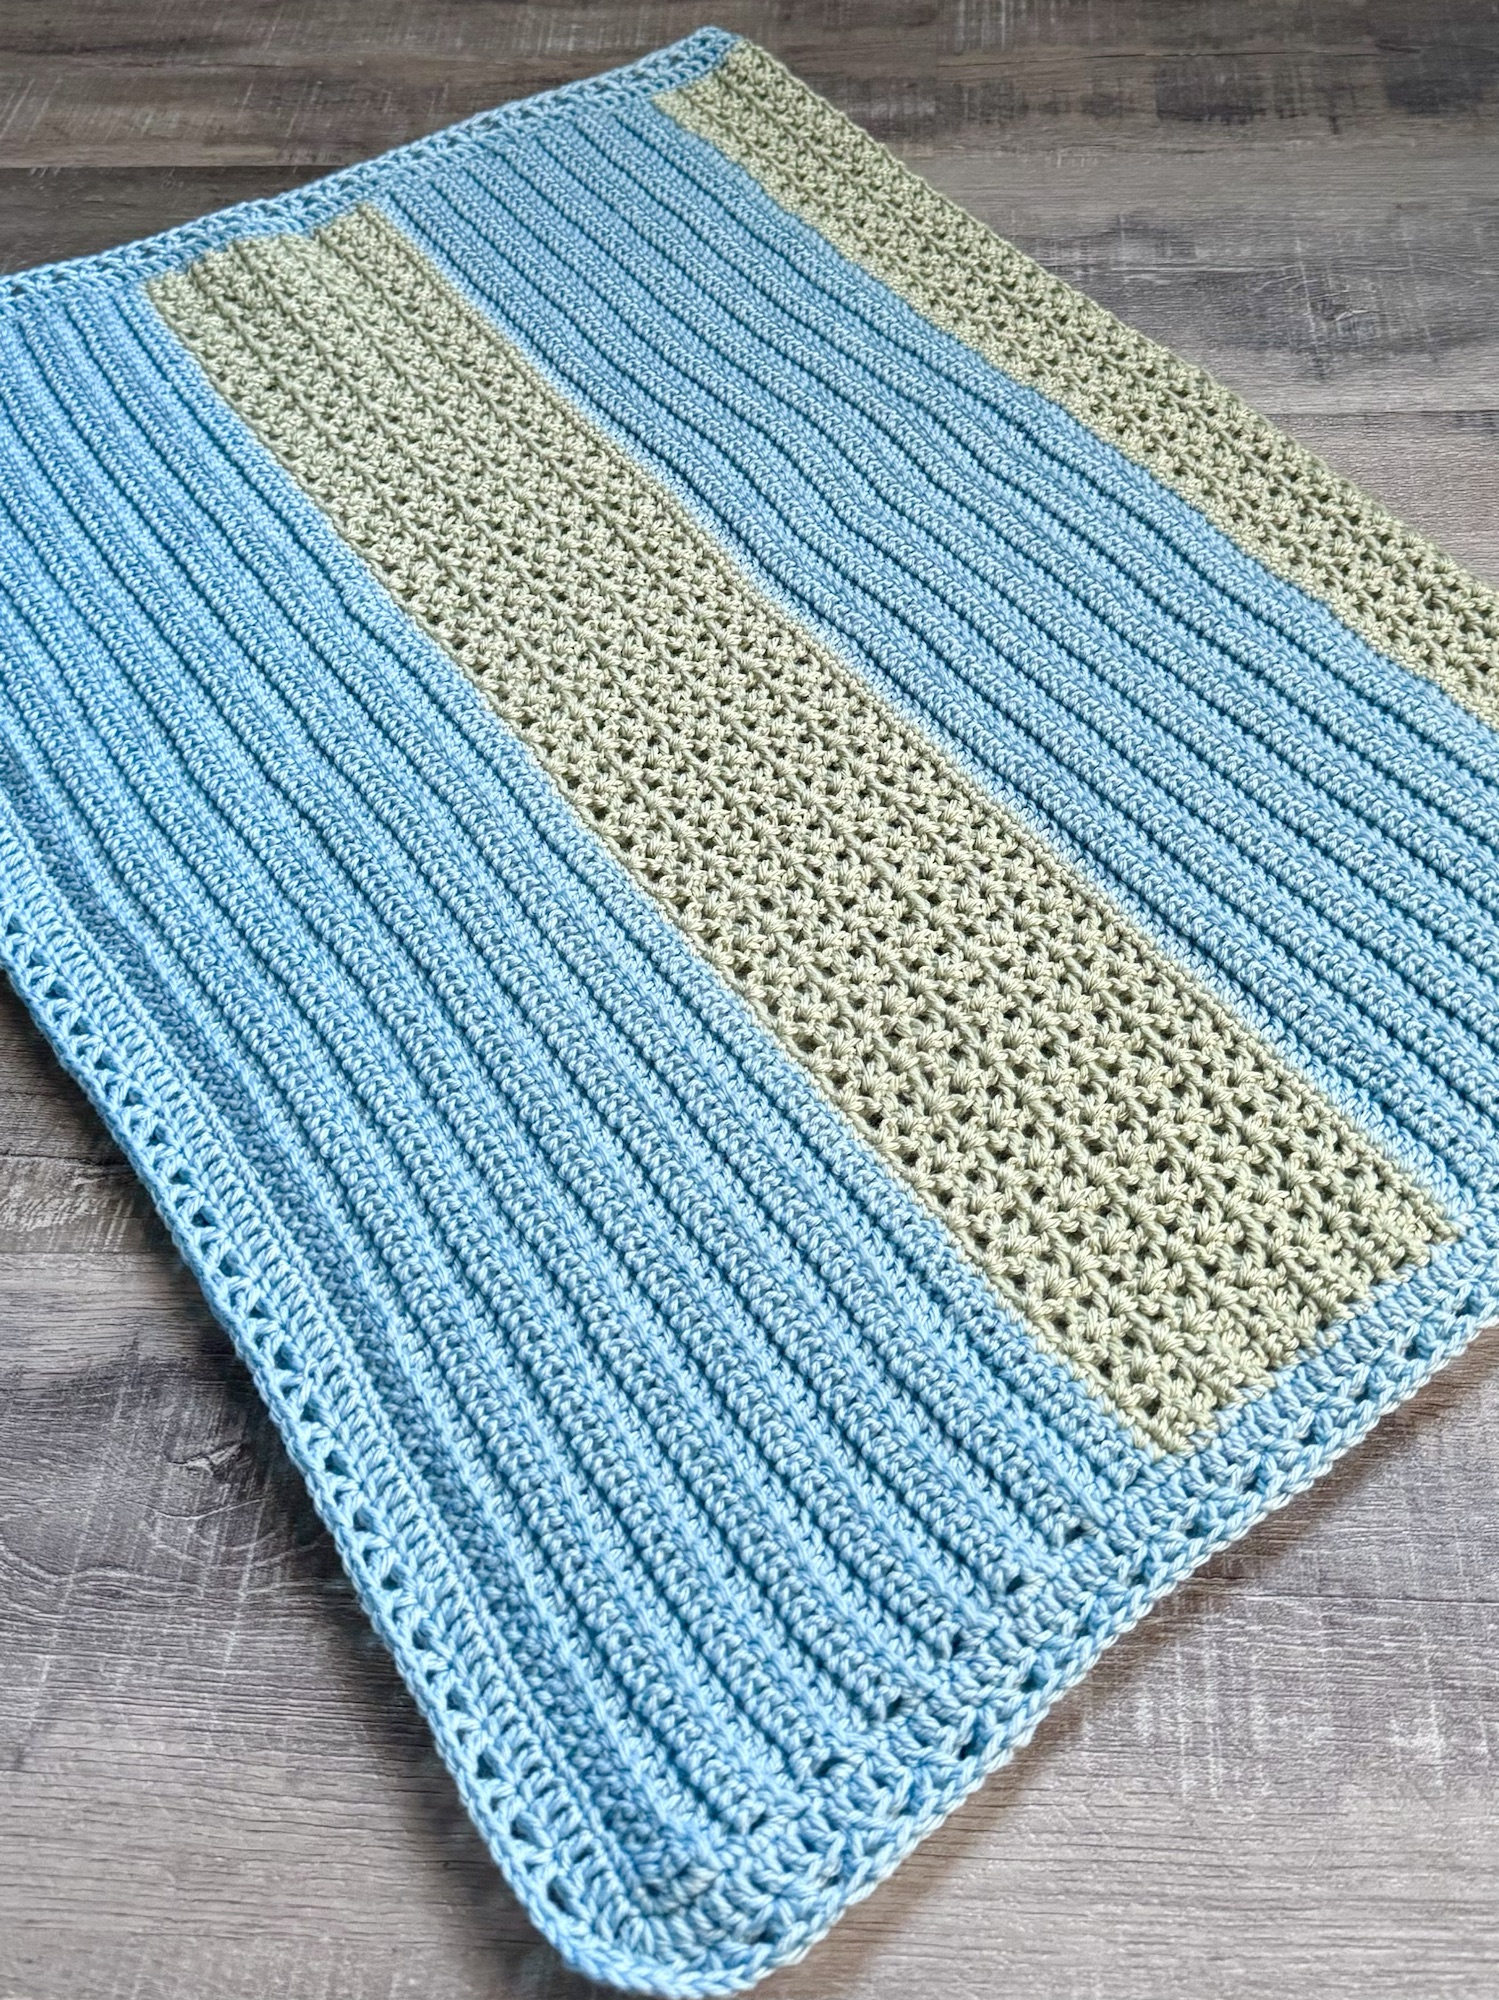
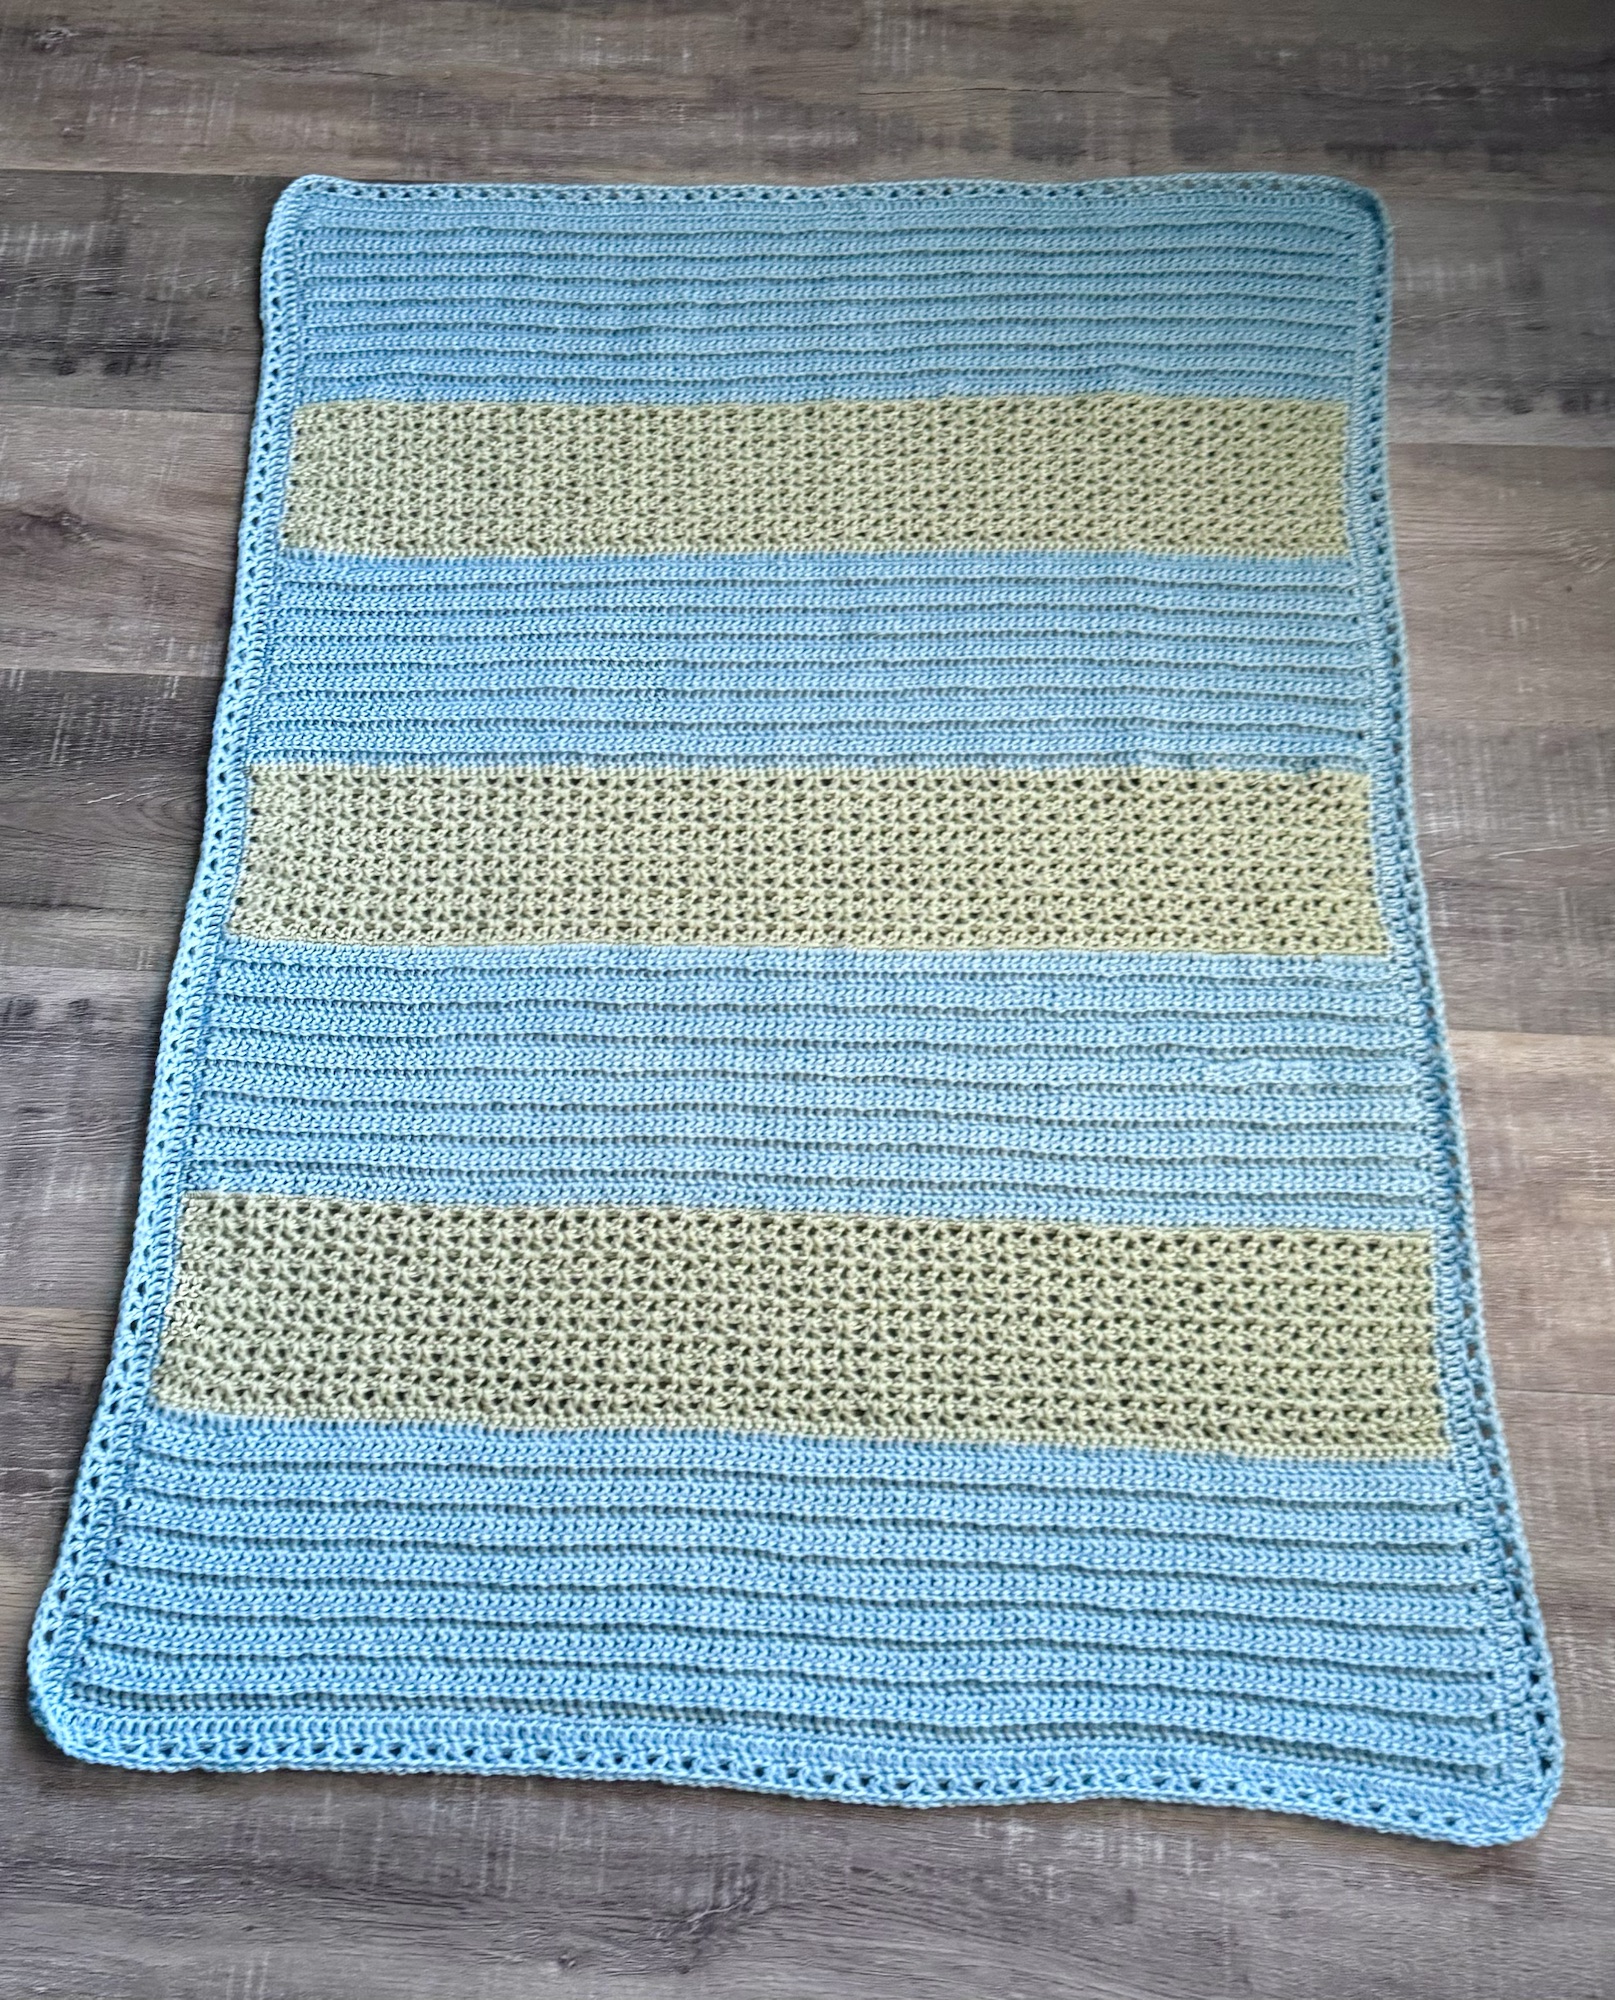
My sister asked me to crochet a blanket for her to give as baby gift and left the choice of pattern and colors up to me. I decided to use my Sunny Dreams pattern, but change it up a bit. I thought it would be cute to make it in 2 different colors. The blanket will be for a new baby boy so I chose blue and green.
The yarn I used is Baby Bee Sweet Delight in Teal, Too! and Green Light. I used a G/4mm crochet hook to stitch up my blanket. The original yellow blanket was stitched up using Bernat Softee Baby yarn in Lemon with a G/4mm crochet hook. Even though both yarns are a 3 weight, the Baby Bee Sweet Delight is a slightly thinner yarn.
Because of this, I added 2 extra sections to the blanket so it would be a little longer. I began with the same number of stitches for the width, but added an extra section of both the V-stitch and the Double Crochet. The blanket has 4 sections of blue in Double Crochet and 3 sections of green in the V-Stitch. The border is worked in blue. The finished blanket measures about 27 inches by 39 inches. You will need two 4-ounce skeins of Baby Bee Sweet Delight in Teal, Too! and one 4-ounce skein in Green Light to make the same size blanket.

You can find the original pattern here in this post. Or I’ve included a link to a free PDF below if you’d like to print it. Remember that I added sections to the blue and green blanket that won’t be listed in the pattern. All you need to do is repeat the instructions for the V-stitch section and the Double Crochet section to add more rows.
Here’s the link to the PDF…
It was fun to stitch up this pattern in a different yarn with different colors. The Baby Bee Sweet Delights yarn is so soft – perfect for cuddling with a new little one!
Anita