Crochet Mini Tote Gift Bag

Hi friends,

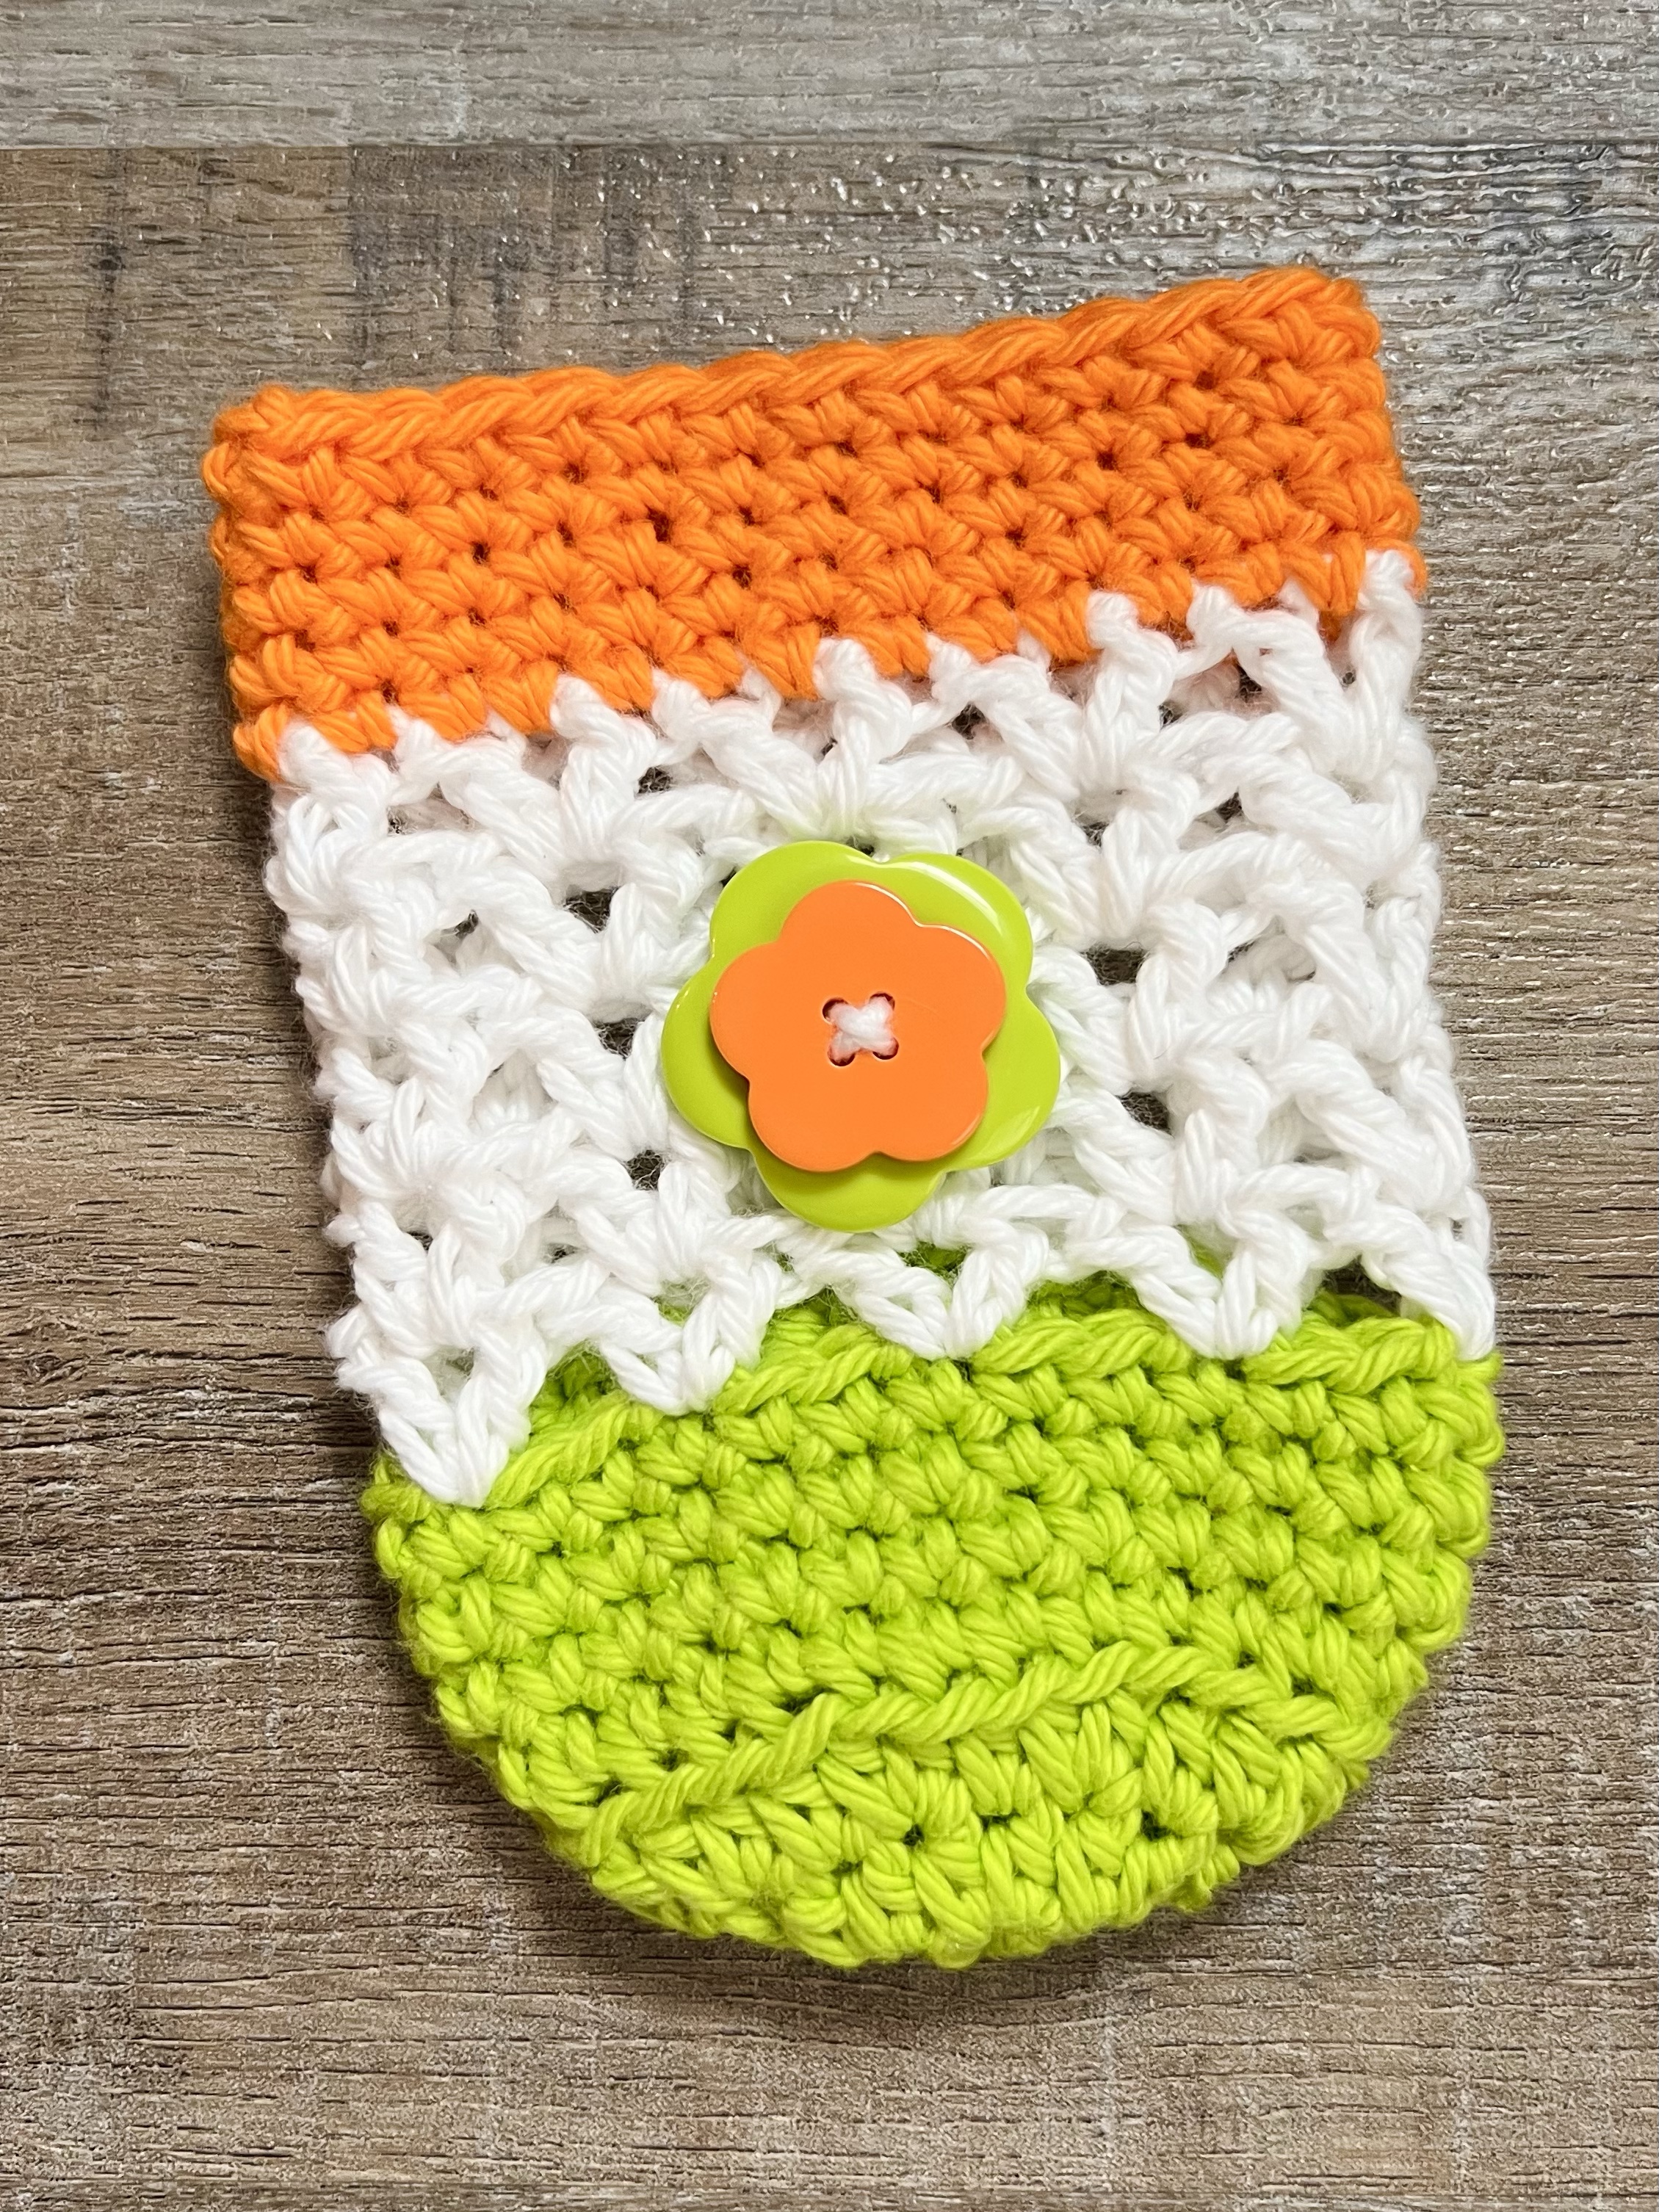
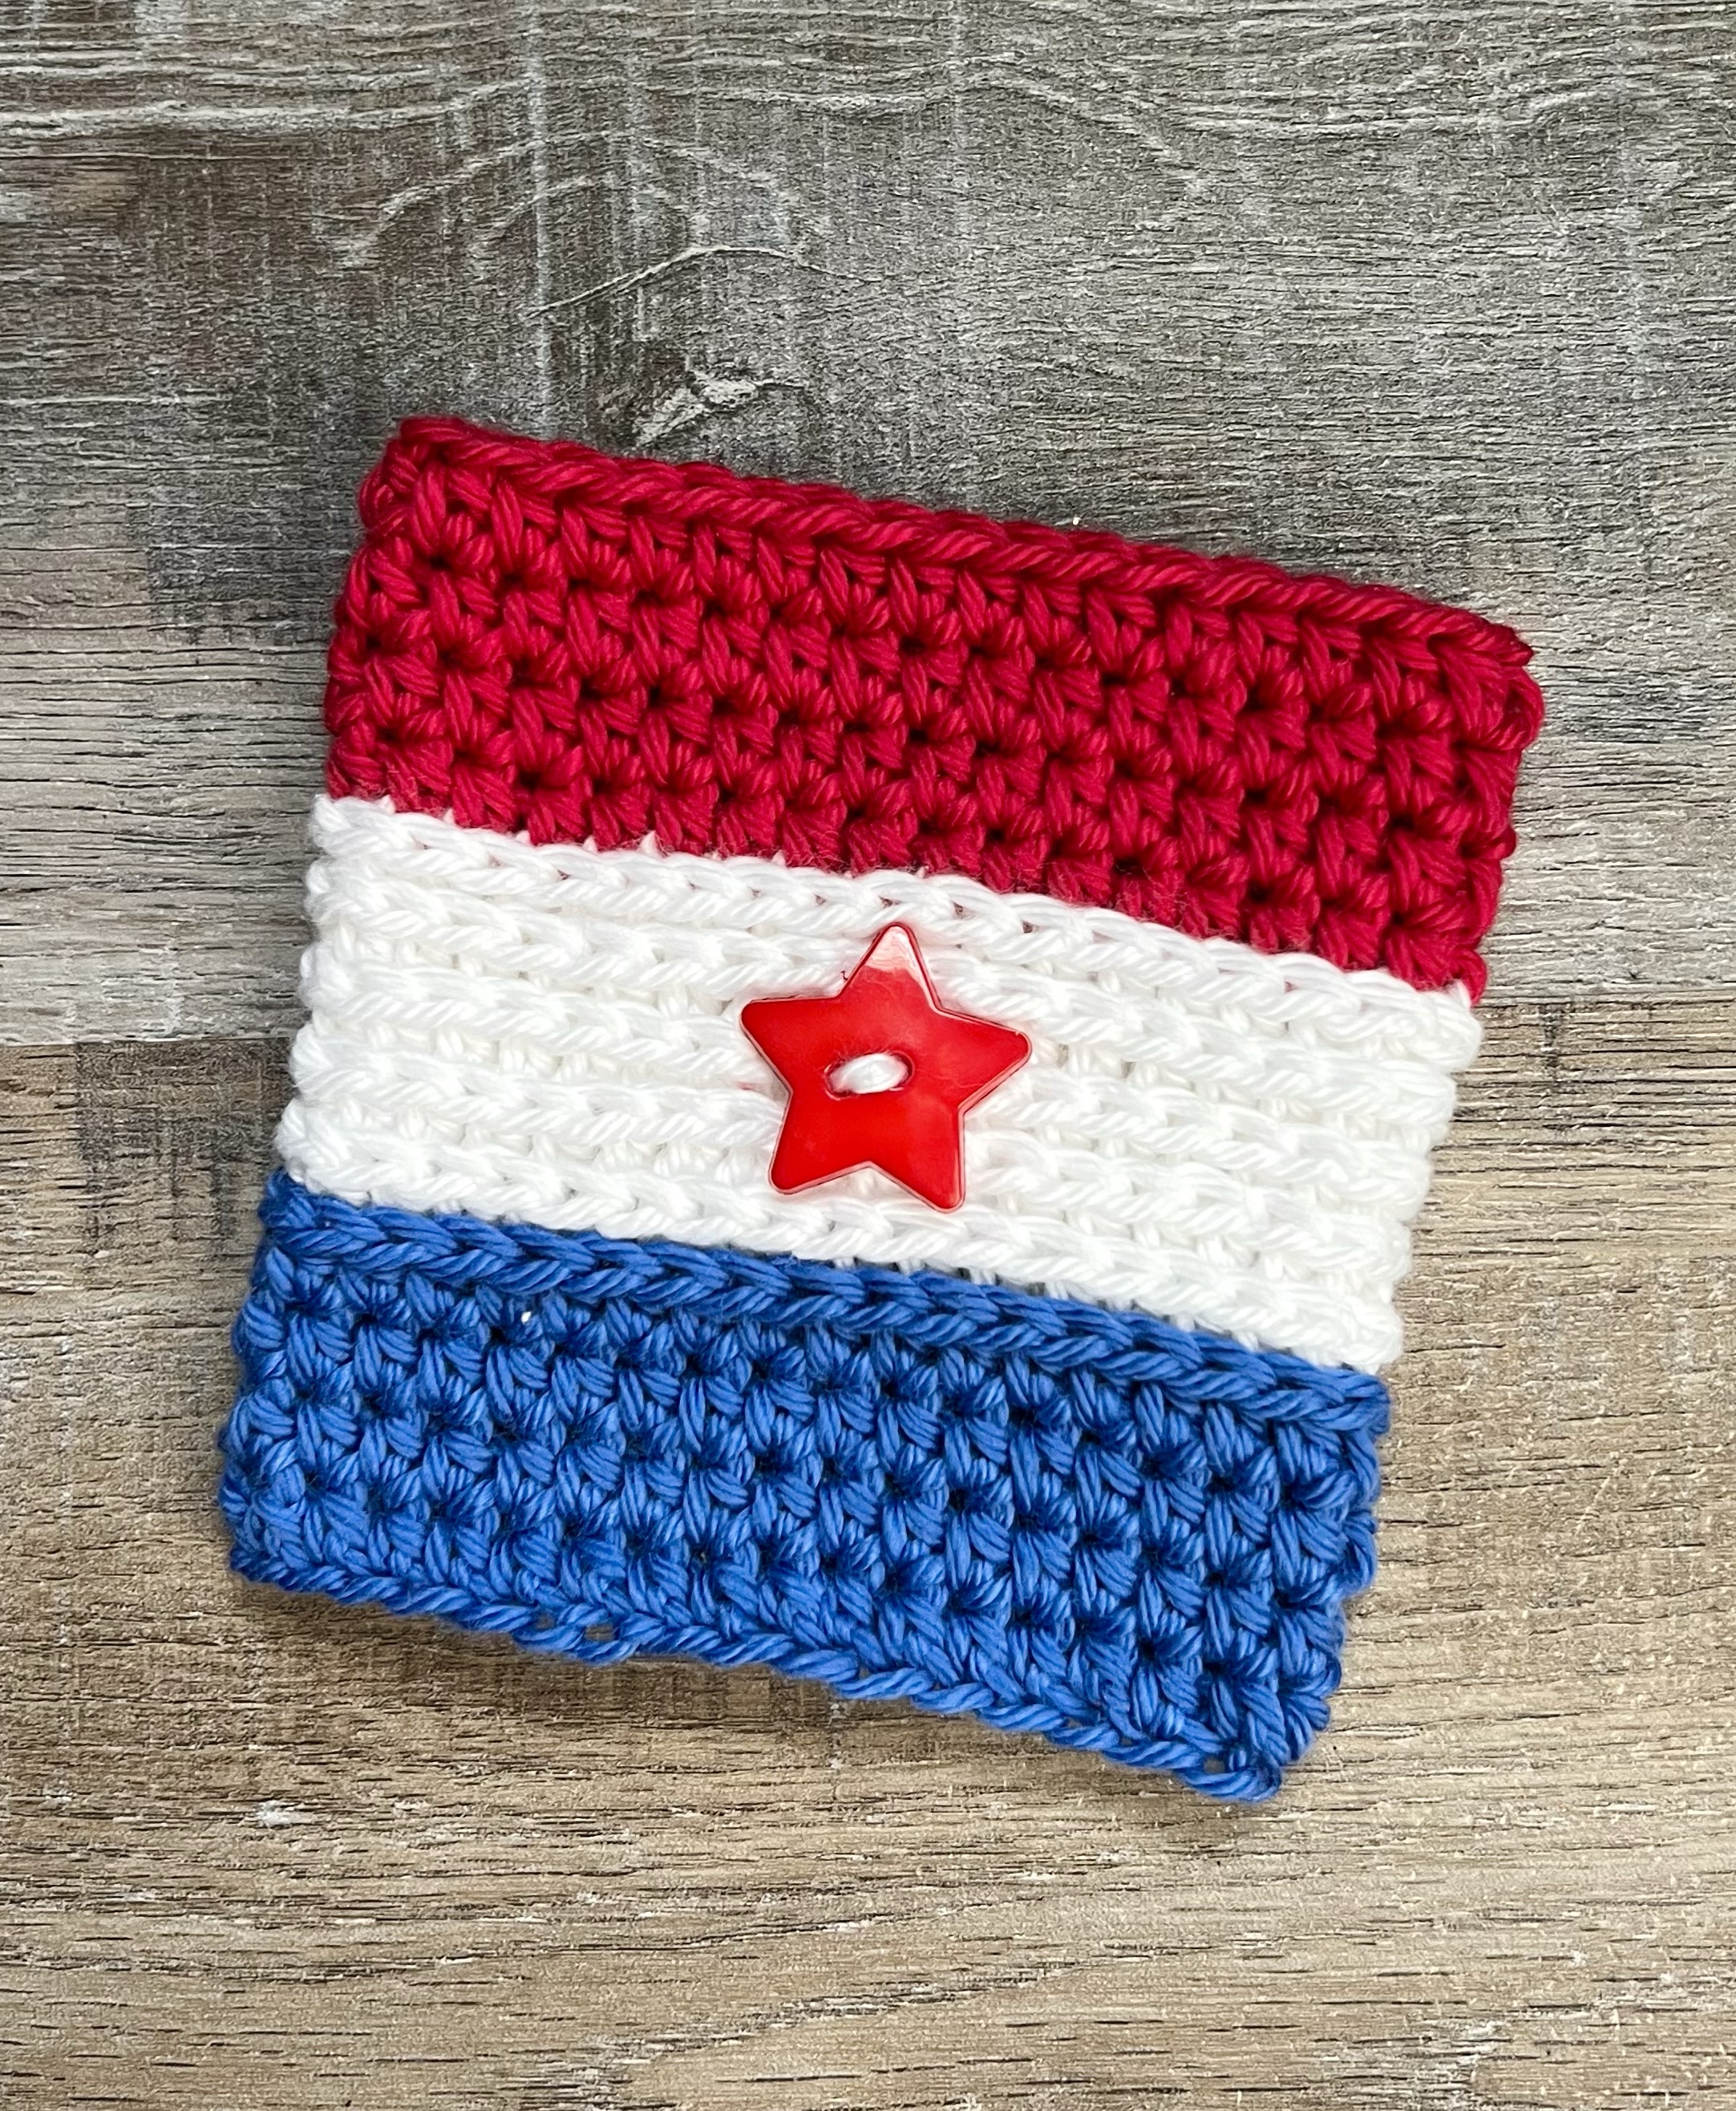
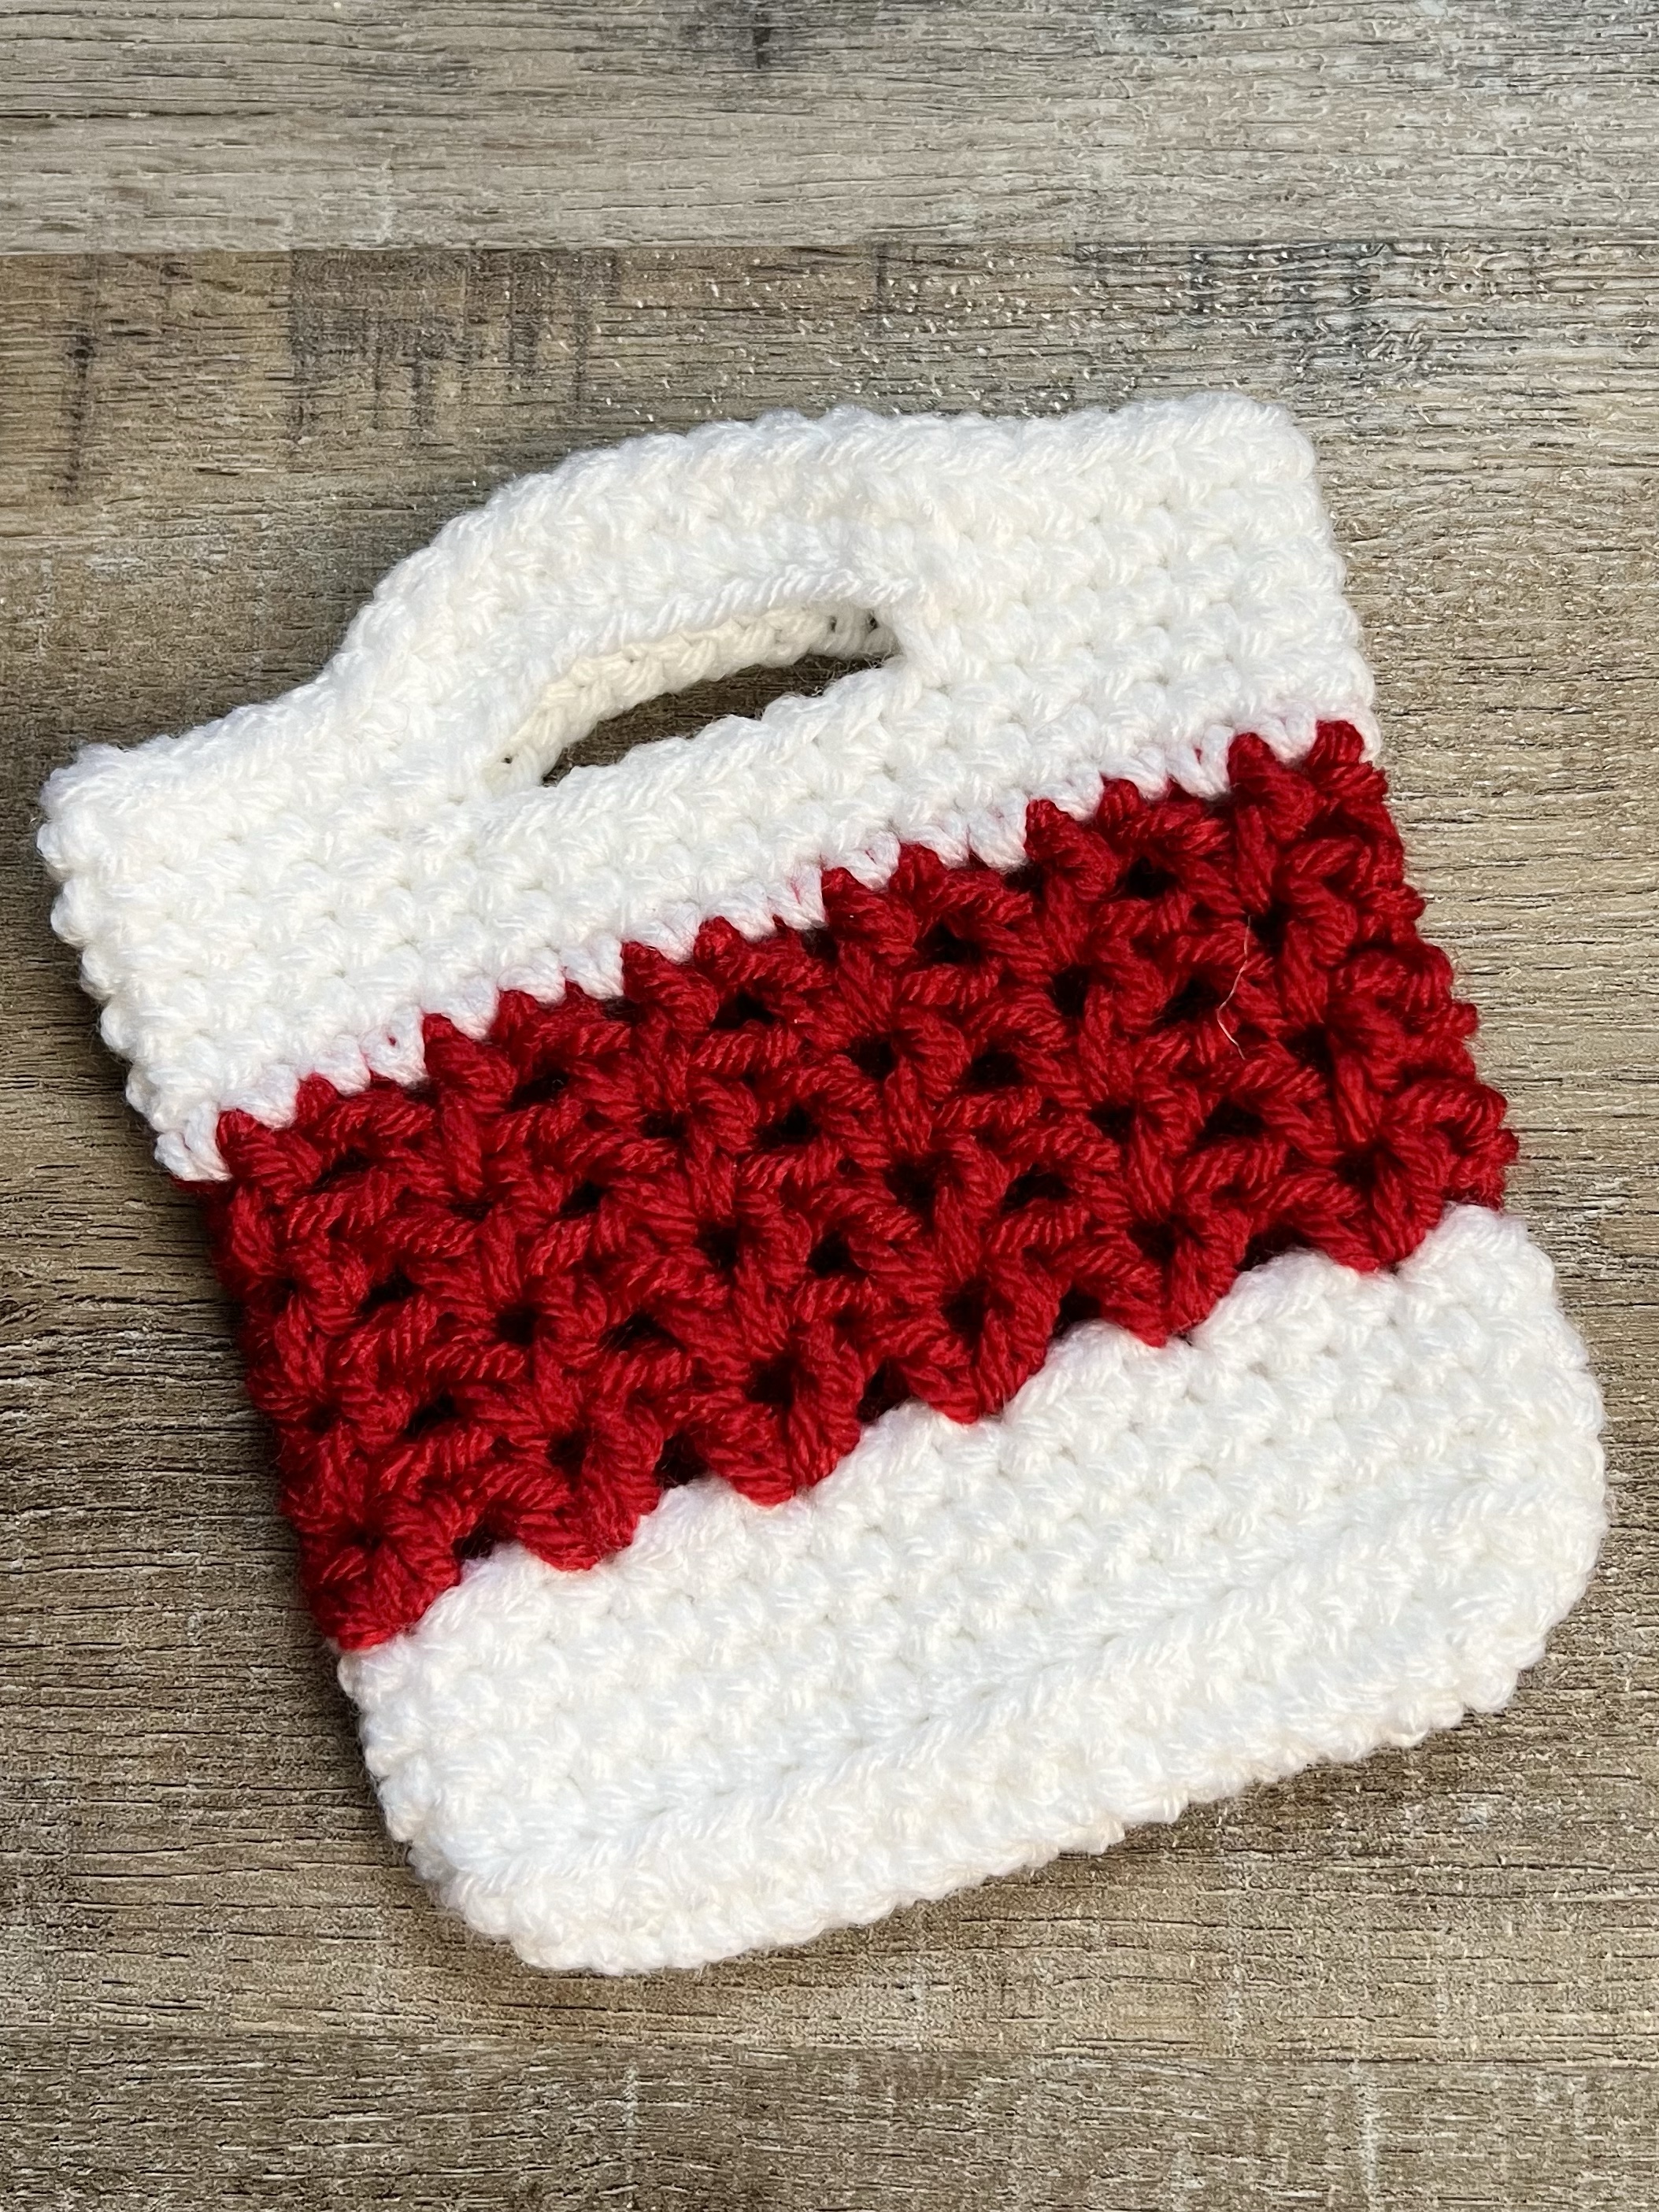
Do you like to give gift cards or cash for Christmas? This Crochet Mini Tote Gift Bag is the perfect size to tuck cards and cash in along with some yummy chocolate or Christmas candy. 🙂 It’s also great for small gifts like earrings or other jewelry. Or maybe tuck a little note pad, pen, and chocolates inside for a sweet friend gift. 🎁

Disclosure: Some of the links on my site are affiliate links, meaning, at no additional cost to you, I will earn a small commission if you click through and make a purchase. As an Amazon Associate I earn from qualifying purchases.

I used I Love This Yarn in White and Red with an H/5mm hook to stitch up my Mini Tote Gift Bags. The finished bag measures about 4.75 by 5.5 inches. You’ll find the pattern below along with a link to a free PDF for easy printing.

Crochet Mini Tote Gift Bag

Worsted weight yarn in 2 colors ( I used I Love This Yarn in White and Red)

H/5mm hook

Stitches used US terms:

Chain – ch

Single Crochet – sc

Slip Stitch – ss

Back Loop Only – blo

Special Stitch – v-stitch (dc, ch 1, dc) in same stitch 

Round 1: With color A, ch 15.  sc in 2nd ch from hook and in next 12 ch. Work 3 sc in last ch. Working in the other side of beginning ch, sc in next 13 stitches. Work 3 sc in last stitch. Join with ss to first sc. (32 stitches)

Round 2: ch 1. sc in same stitch as ss and next 13 stitches. Work 3 stitches in next stitch. sc in next 15 stitches. Work 3 sc in next stitch. sc in next stitch. Join with ss to 1st sc. (36 stitches)

Round 3: ch 1. Working in blo, sc in same stitch as ss and in each stitch around. Join with ss to first sc. (36 stitches)

Rounds 4-6: ch 1. sc in same stitch as ss and in each stitch around. Join with ss to first sc. (36 stitches)

Change to color B. 

Round 7: ch 3 (counts as first dc and ch 1) dc in same stitch as ss (First v-stitch made). *skip next 2 stitches, work v-stitch in next stitch* Repeat from * to * around to last 2 stitches. Skip last 2 stitches and join with ss to 2nd ch in beginning ch 3. (12 v-stitches)

Rounds 8-10: ss into ch 1 space. ch 3 (counts as first dc and ch 1) dc in same ch 1 space (First v-stitch made). Work v-stitch in each ch 1 space of v-stitch in previous row. Join with ss to 2nd ch of beginning ch 3. (12 v-stitches)

Change to color A. 

Round 11: ch 1. sc in same stitch as ss and in each ch 1 space and dc stitch around. Join with ss to first sc. (36 stitches)

Rounds 12-13: ch 1. sc in same stitch as ss and in each stitch around. Join with ss to first sc. (36 stitches)

The next Round will make the handles. 

Round 14: ch 1. sc in same stitch as ss and in the next 5 stitches. ch 10. Skip next 6 stitches. sc in next 12 stitches. ch 10. Skip next 6 stitches. sc in next 6 stitches. Join with ss to first sc. (44 stitches)

Round 15: ch 1. sc in same stitch as ss and in each stitch and ch around. Join with ss to first sc. (44 stitches)

Round 16:  ch 1: sc in same stitch as ss and in each stitch around. Join with ss to first sc. (44 stitches)

Fasten off and weave in ends. 

Finished gift bag measures about 4.75 by 5.5 inches. 

Here’s the link to the free PDF…

Of course you can stitch up these cute bags in any color combo. They would be fun to use as favor bags for a birthday party stitched up in bright colors and filled with tiny treasures. 🥳

I hope you enjoy this pattern!

Anita

Posted in Christmas, Crochet, Gifts | Tagged , , | 1 Comment

Happy 4th of of July

Hi friends,

Wishing all of my friends in the United States a Happy Independence Day!! 🇺🇸

Disclosure: Some of the links on my site are affiliate links, meaning, at no additional cost to you, I will earn a small commission if you click through and make a purchase. As an Amazon Associate I earn from qualifying purchases.

Details for making this wreath are here.

I hope your day is filled with family, friends, and fun! ❤️🤍💙

Anita

Posted in Uncategorized | Leave a comment

Jingle Bell Wood Bead Ornaments

Hi friends,

It’s July 1st and that means it’s time for Christmas in July!! 🎄 I have some fun things planned for this month so I hope you’ll follow along with me. And if you don’t want to craft for Christmas just yet, pin my posts to your Pinterest boards for later. 😊

Disclosure: Some of the links on my site are affiliate links, meaning, at no additional cost to you, I will earn a small commission if you click through and make a purchase. As an Amazon Associate I earn from qualifying purchases.

We’ll start the month off with a fun and easy Jingle Bell Wood Bead ornament. You’ll need some jingle bells (mine are about 3/4 inch), natural wood beads (mine are about 3/4 inch), natural twine, and 1/8 inch ribbon to tie the little bows. You can also change the size of the jingle bells and wood beads to make the ornaments larger or smaller.

Begin by cutting a piece of twine about 14 inches long and thread the jingle bell onto the twine. Then thread both ends of the twine through 3 wood beads.

Tie a knot close to the top bead. I tied 2 knots, overlapping the 1st knot with the 2nd knot so my beads weren’t able to slide on the twine. Leaving a loop for hanging, tie the ends of the twine together. Trim any excess twine.

Using the ribbon, tie a bow just above the top bead and your ornament is finished! Super quick and easy to make.

This would be a fun activity to do with the kids on a hot Summer afternoon. They could make them for all their friends and be ready for Christmas gift giving.

These cute Jingle Bell Wood Bead Ornaments can also be used as package tie-ons. They will add a little jingle-y fun to all your gifts. 😊

I made another fun ornament using wood beads a few years ago in this post. It’s a little snowman and he’s so cute! It’s also a great project to do with the kids. 🎄

Anita

Posted in Christmas, Gifts | Tagged , | Leave a comment

Crochet Summer Brights Can Cozy

Hi friends,

Summer means bright colors, hot temps, and cold drinks! My Crochet Summer Brights Can Cozy will help protect your table – and your hands – from the condensation on your cold cans while showing off the bright colors of Summer. Such a fun make to use poolside or on the beach!

Disclosure: Some of the links on my site are affiliate links, meaning, at no additional cost to you, I will earn a small commission if you click through and make a purchase. As an Amazon Associate I earn from qualifying purchases.

I used I Love This Cotton yarn in Bright Citrus, White, and Glowing with an H/5mm hook to stitch up my cozies. You’ll find the pattern below along with a link to a free PDF for easy printing. I added the cute flower buttons just for fun – they are totally optional. 🙂

Crochet Summer Brights Can Cozy

I Love This Cotton (4 weight yarn) – Bright Citrus, White, and Glowing

H/5mm hook

Flower buttons (optional)

Stitches used in US terms:

Chain – ch

Single Crochet – sc

Half Double Crochet – hdc

Slip Stitch – ss

Special Stitch:

V-stitch – (dc, ch 1, dc) in same stitch 

Make Magic Ring with Bright Citrus, ch 1. 

Round 1: Work 9 hdc in ring. Join with ss to first hdc. Pull ring closed. (9 stitches)

Round 2: ch 1. 2 hdc in same stitch as ss and in each stitch around. Join with ss  to first hdc. (18 stitches)

Round 3: ch 1. 2 hdc in same stitch as ss. *hdc in next stitch, 2 hdc in next stitch * Repeat from * to * around to last stitch. hdc in last stitch. Join with ss to first hdc. (27 stitches)

Round 4: ch 1. Working in blo, sc in same stitch as ss and in each stitch around. Join with ss to first sc. (27 stitches)

Rounds 5-7: ch 1. Working in both loops, sc in same stitch as ss and in each stitch around. Join with ss to first sc. (27 stitches) 

Change to White.

Round 8: ch 3 (counts as 1st dc and ch 1), dc in same stitch as ss – first v-stitch made. *skip next 2 stitches, work v-stitch in next stitch* Repeat from * to * 7 more times. Join with ss to 2nd ch of beginning ch 3. (9 v-stitches)

Rounds 9-12: ss into ch 1 space, ch 3, dc into same ch 1 space. Work v-stitch in each ch 1 space around. Join with ss to 2nd ch of beginning ch 3. (9 v-stitches)

Chang to Glowing. 

Round 13: ch 1. sc in same stitch as ss and in each ch 1 space and dc around. Join with ss to first sc. (27 stitches)

Rounds 14-17: ch 1. sc in same stitch as ss and in each stitch around. Join with ss to first sc. (27 stitches)

Fasten off and weave in ends. 

Sew on buttons if using. 

Here’s the link to the free PDF…

I hope you enjoy this pattern! What colors will you use to stitch up your Crochet Summer Brights Can Cozy? I would love to see your makes!

Anita

Posted in Crochet, Summer | Tagged , | Leave a comment

Crochet Star(Fish) Dishcloths

Hi friends,

I found this Crochet Star Dishcloth pattern on Pinterest and really liked the texture it has. It also reminded me of a starfish – probably because I love the beach so much. 😉 It made me think of the starfish we saw while we were visiting Bar Harbor, Maine a few years ago. It was low tide and this little guy was hanging out in just a few inches of water waiting for the tide to roll back in. I shared about our trip to New England in the Fall of 2016 here – it is high on my list of favorite vacations!

Disclosure: Some of the links on my site are affiliate links, meaning, at no additional cost to you, I will earn a small commission if you click through and make a purchase. As an Amazon Associate I earn from qualifying purchases.

I chose to make my Star Dishcloths in beachy colors since I was thinking of starfish 😉 , but of course you can make them any color. I used I Love This Cotton yarn in White, Aqua, and Taupe with an H/5mm hook to stitch up my dishcloths. They work up quickly and are really fun to make!

Since they are made with cotton yarn, they can also be used as spa cloths. I think they would make a whimsical and fun hostess gift for a friend who lives near the ocean, maybe with some cute seashell soaps. Or make them in Christmas colors and get a head start on your gift making. What color will you make yours?

Anita

Posted in Crochet, Gifts | Tagged , | 9 Comments

Gingerbread Cookies – June Christmas Card

Hi friends,

We’re halfway through the year which means it’s time for June’s Christmas Card design. 🎄 I’m so excited that I have kept up my goal to design and create a Christmas card each month! You can find the cards I’ve made so far here… January, February, March, April, and May. I’ve been trying to keep my cards fairly simple so I can make several at a time. I’ve made 4 to 6 cards each month which seems to be working out well for me. 🙂

Disclosure: Some of the links on my site are affiliate links, meaning, at no additional cost to you, I will earn a small commission if you click through and make a purchase. As an Amazon Associate I earn from qualifying purchases.

This sweet card was made using the stamp set called Gingerbread Cookies from Mama Elephant. The sentiment is from the Merry Little Cupcakes stamp set from Unity Stamp Company.

I stamped the plate of gingerbread cookies with Memento Tuxedo Black ink on white card stock and colored the image with Copic markers. Then I cut the image out, leaving a tiny white border around it.

I attached a piece of green card stock to a white card and layered a strip of patterned paper over it. I stamped “Sweet Holiday Wishes” with black ink near the top left side of the card. I attached the plate of cookies to the card using foam tape. To finish it off, I added 3 red sequins. Super sweet and simple!

This would be a cute card to attach to a plate of homemade cookies for a sweet Christmas gift. 🍪

Have you started making any Christmas cards yet? I think I’m really going to like having so many made ahead of time. 🙂

Anita

Posted in Cards, Christmas, Stamping | Tagged , , | 6 Comments

4th of July Star Door Hanger

Hi friends,

Are you ready to celebrate Independence Day? The 4th of July is just around the corner and I have a fun Star Door Hanger to add to your patriotic decor. 🇺🇸

Disclosure: Some of the links on my site are affiliate links, meaning, at no additional cost to you, I will earn a small commission if you click through and make a purchase. As an Amazon Associate I earn from qualifying purchases.

Here’s what you’ll need…

First, trace your 10 inch star on the back of the scrapbook paper and cut out. Apply a thin layer of Mod Podge to the wood star using a foam brush. Attach the cut out paper star to the wood star, smoothing out any wrinkles. Let dry and apply a thin layer of Mod Podge over the paper. Let dry.

Make your beaded hanger by cutting a piece of twine about 16 inches long. Fold it in half and thread the beads onto the twine. I used 6 beads on mine. Pull the loop through the top bead, leaving enough for a hanging loop, and tie a knot close to the bead. Also tie a knot close to the bead at the bottom. Use an awl, or the tip of your scissors, to poke a hole through the paper at the top of the star. Thread one end of the twine on the beaded hanger through the hole and tie in a double knot on the back. Trim any excess twine.

I used the easy Re-fabbed bow method to make a bow with various ribbons I had on hand. Then I attached the bow and my 4 inch star using my hot glue gun.

This little project took less than 30 minutes to put together! It would be a fun Summer activity to do with the kids.

I think this would also be cute done in white and natural for a little farmhouse Christmas decor. I may have to go get some more supplies…😉

Anita

Posted in Decor, Summer | Tagged , | Leave a comment

Patriotic Wreath

Hi friends,

I have a fun Patriotic Wreath for you today! It’s super easy to make and will just take a few minutes to be ready for your front door.

Disclosure: Some of the links on my site are affiliate links, meaning, at no additional cost to you, I will earn a small commission if you click through and make a purchase. As an Amazon Associate I earn from qualifying purchases.

You’ll need a styrofoam wreath form (mine is 14-inches), some patriotic print ribbon, your choice of embellishments, and a few straight pins. I found all of my supplies at Hobby Lobby.

Start by attaching your ribbon to the wreath form with a couple of straight pins like in the photo below.

Then wrap the ribbon tightly around the wreath form, overlapping the edges. Secure with more straight pins and trim off the excess ribbon.

If you are using a second ribbon, like my thinner blue ribbon with white stars, wrap it over the other ribbon and secure with a straight pin.

I cut a small piece of the blue ribbon, folded it in half, and attached it with a straight pin to the back of the wreath for a hanger.

Then attach the embellishments. I used hot glue to attach my curly red sparkles. The pom poms were attached to a wire stem, so I cut them down and poked the wire into the wreath – it will go right through the ribbon.

It’s the perfect wreath for your front door all Summer!

Don’t need a Patriotic Wreath? Make it in your favorite colors to match your decor – the color options are endless! Embellish your wreath with flowers, greenery, pom poms or anything else that works for you. 🙂

Anita

Posted in Decor, Summer | Tagged , | 1 Comment

Crochet Patriotic Cup Cozy

Hi friends,

Are you having a BBQ or picnic for the 4th of July? Or maybe you just want a new cup cozy for Summer? This easy Crochet Patriotic Cup Cozy works up so quickly that you can make one for all of your guests to take home with them after the party. 🙂

Disclosure: Some of the links on my site are affiliate links, meaning, at no additional cost to you, I will earn a small commission if you click through and make a purchase. As an Amazon Associate I earn from qualifying purchases.

It’s a super easy pattern using half double crochet stitches. The white section is worked in the 3rd loop to give it a little more texture. (Here’s a great tutorial on crocheting in the 3rd loop.) I used I Love This Cotton yarn with a G/4.0mm hook to stitch up my cozies.

Here’s the pattern along with a link to a free PDF for easy printing.

Crochet Patriotic Cup Cozy

Worsted weight yarn (size 4) – I used I Love This Cotton in White, Red, and Royalty

G/4.0mm hook

Star button – optional

Stitches used in US terms:

Chain – ch

Slip Stitch – ss

Half Double Crochet – hdc

Note: chains at beginning of rounds do not count as stitches. 

Chain 34 with Royalty and join to first chain with ss to form a ring.

Rounds 1-4: ch 1. hdc in each stitch around. Join with ss to first hdc. (34 stitches)

Change to White. 

Rounds 5-9: ch 1. hdc in the 3rd loop of each stitch around. Join with ss to first hdc. (34 stitches)

Change to Red. 

Round 10: ch 1. hdc in the 3rd loop of each stitch around. Join with ss to first hdc. (34 stitches)

Rounds 11-13: ch 1. hdc in each stitch around. Join with ss to first hdc. (34 stitches)

Fasten off and weave in ends. 

Sew on button if desired. 

Here’s the link to the free PDF…

Of course you can always make the Crochet Patriotic Cup Cozy in any color combo or even a solid color. It would be so fun in bright Summer colors like orange, white, and lime green!

Anita

Posted in Crochet, Summer | Tagged , | 1 Comment

Double Chocolate Chip Cookies

Hi friends,

Who likes chocolate chip cookies? 🙋🏼‍♀️ These Double Chocolate Chip Cookies take them to the next level! There are chocolate chips, cocoa, and to kick the flavor up a notch, instant coffee granules added to the batter. Oh my!

Disclosure: Some of the links on my site are affiliate links, meaning, at no additional cost to you, I will earn a small commission if you click through and make a purchase. As an Amazon Associate I earn from qualifying purchases.

Don’t worry if you’re not a coffee fan. It’s not my favorite either – the coffee just enhances the chocolate to a richer flavor. The cookies are so tasty! You can find the recipe here at Chef Savvy.

Here they are just out of the oven. They smell amazing! If you don’t have any, I highly recommend silicone baking mats for making cookies – no more cookies sticking to your baking sheets. 😊

I made a double batch to take to a graduation party and there were only 3 or 4 cookies left so I think they enjoyed them!

Oh, and they are amazing warm and fresh from the oven – so gooey and yummy!

Anita

Posted in Recipes | Tagged | Leave a comment