Quick and Easy Easter Cards

Hi friends,

I love making cards for all the holidays, but sometimes they sneak up on me! Thankfully you can make some really cute cards quickly with just a few supplies! I have 2 Quick and Easy Easter Cards to share with you today. 🐰

Disclosure: Some of the links on my site are affiliate links, meaning, at no additional cost to you, I will earn a small commission if you click through and make a purchase. As an Amazon Associate I earn from qualifying purchases.

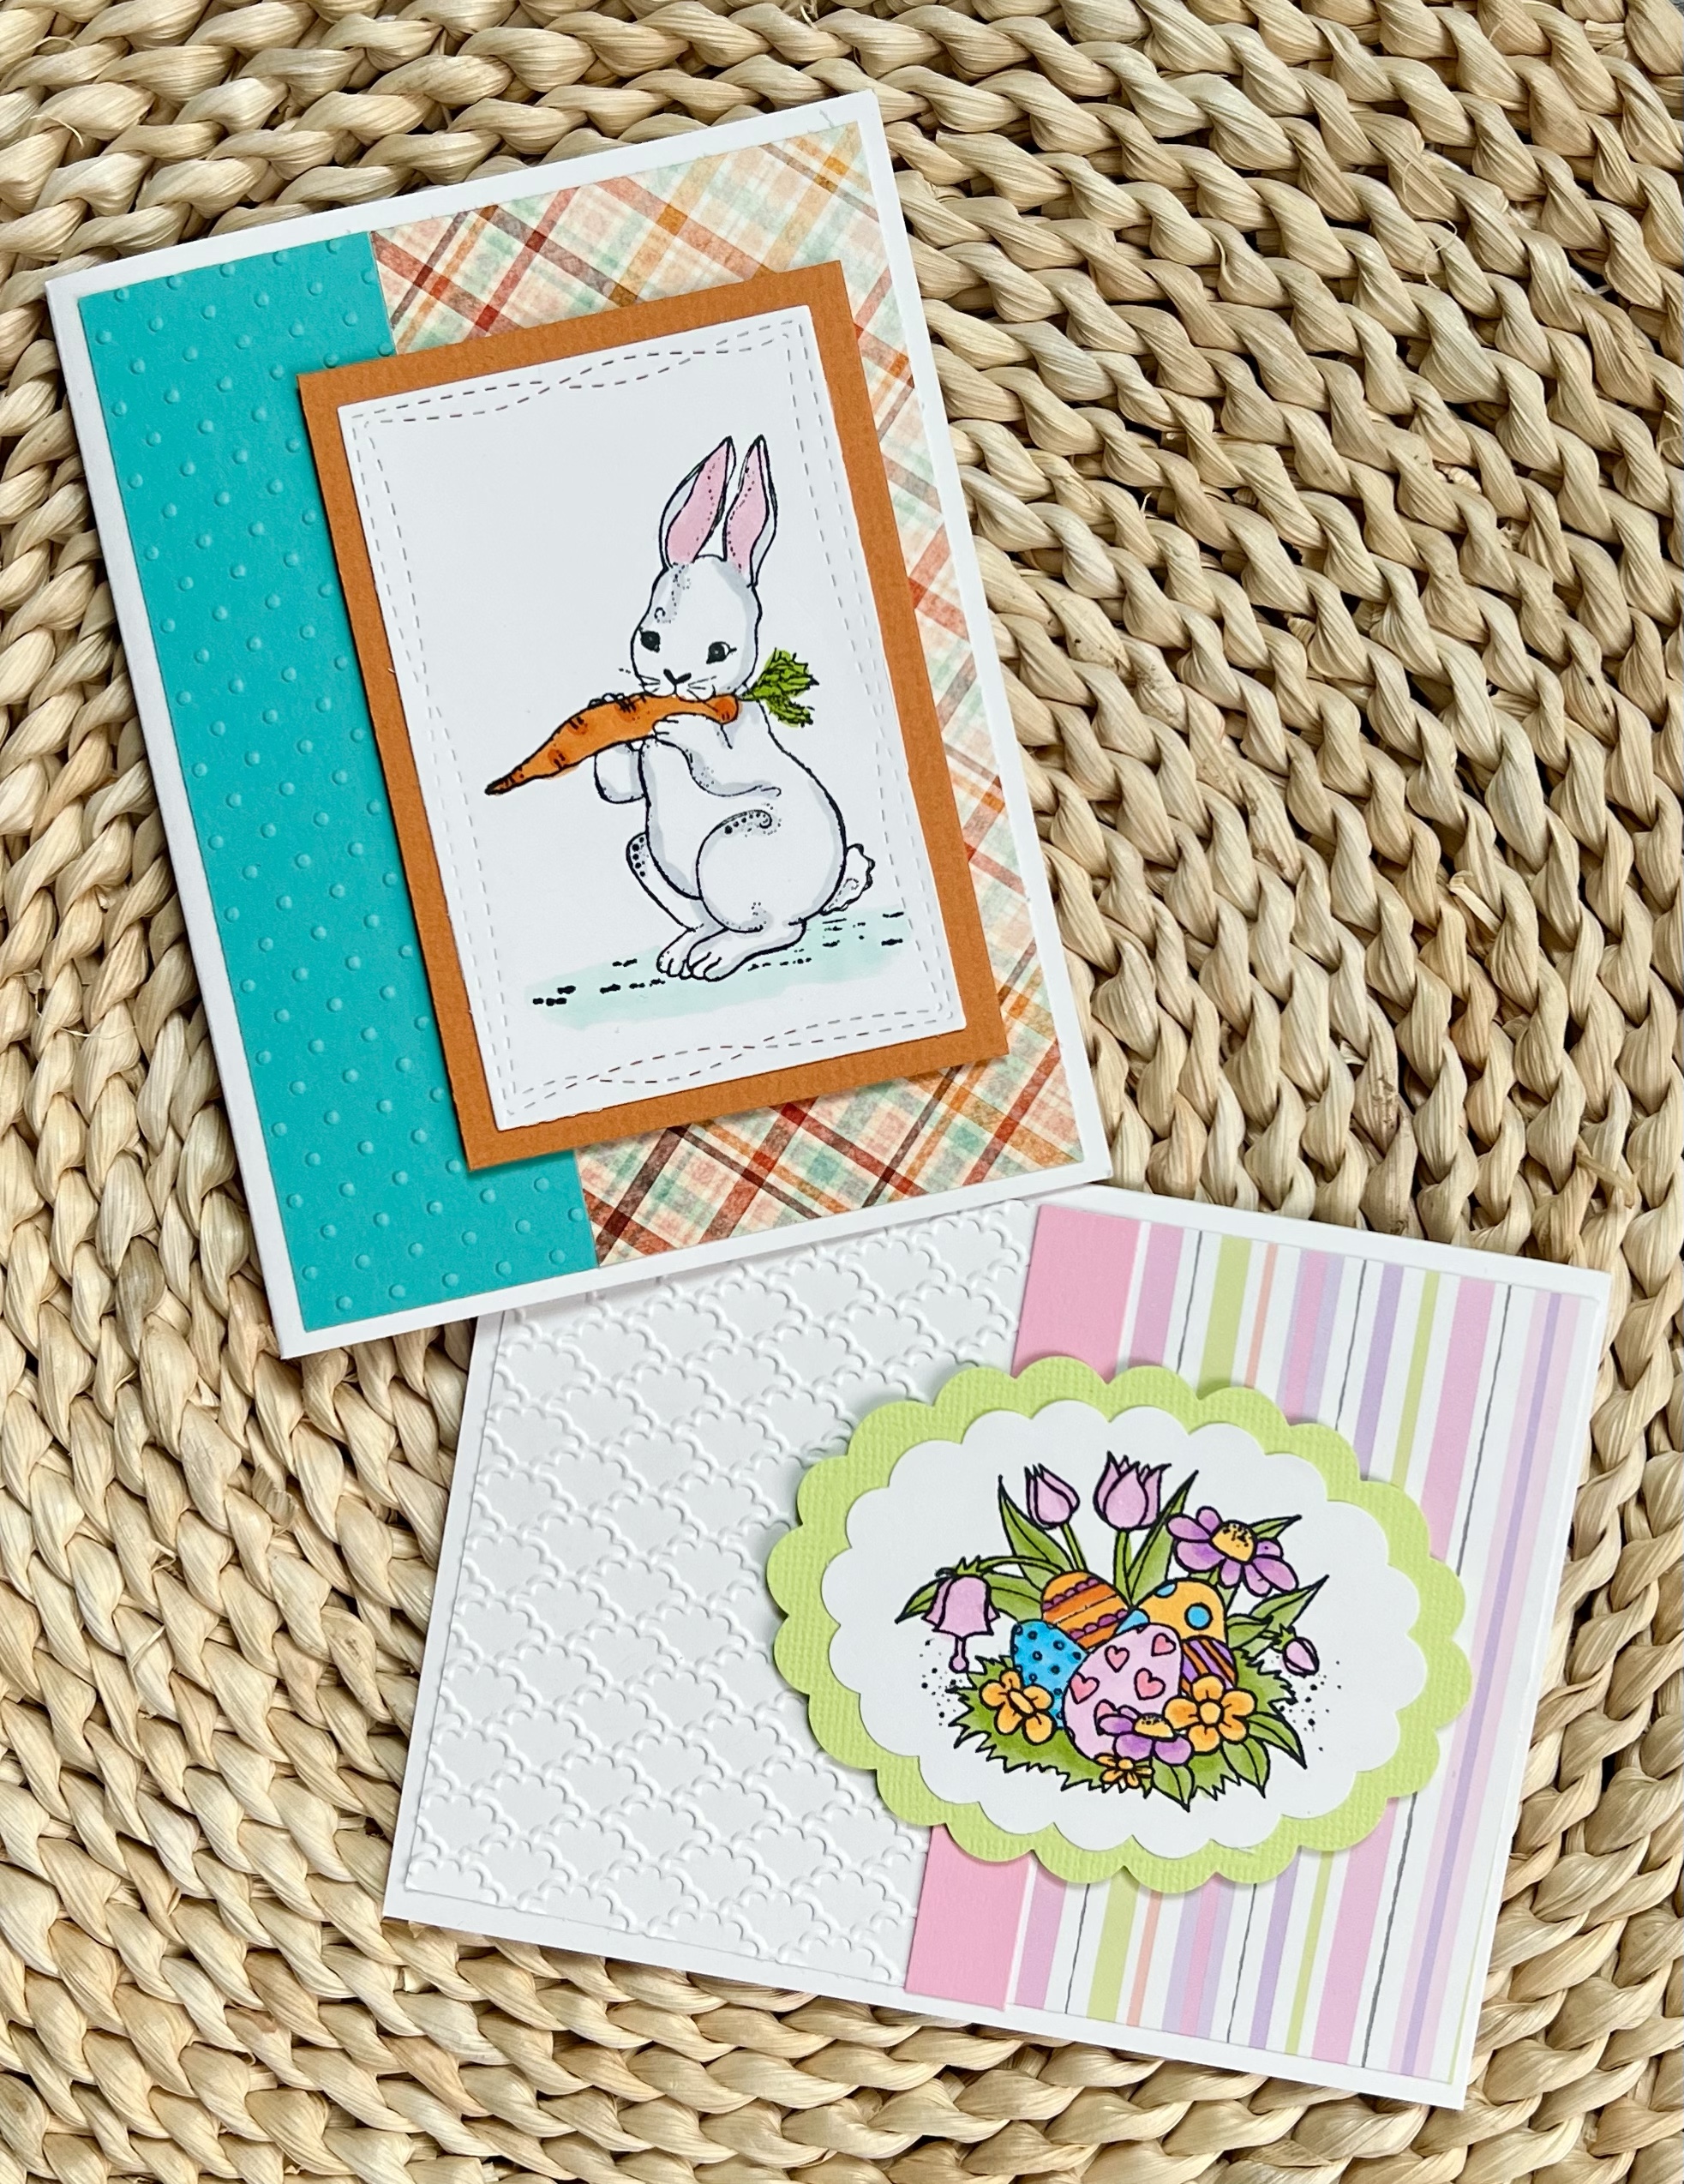
Both of these cards are made using the same basic layout – one is vertical and the other is horizontal. Here’s what you’ll need…
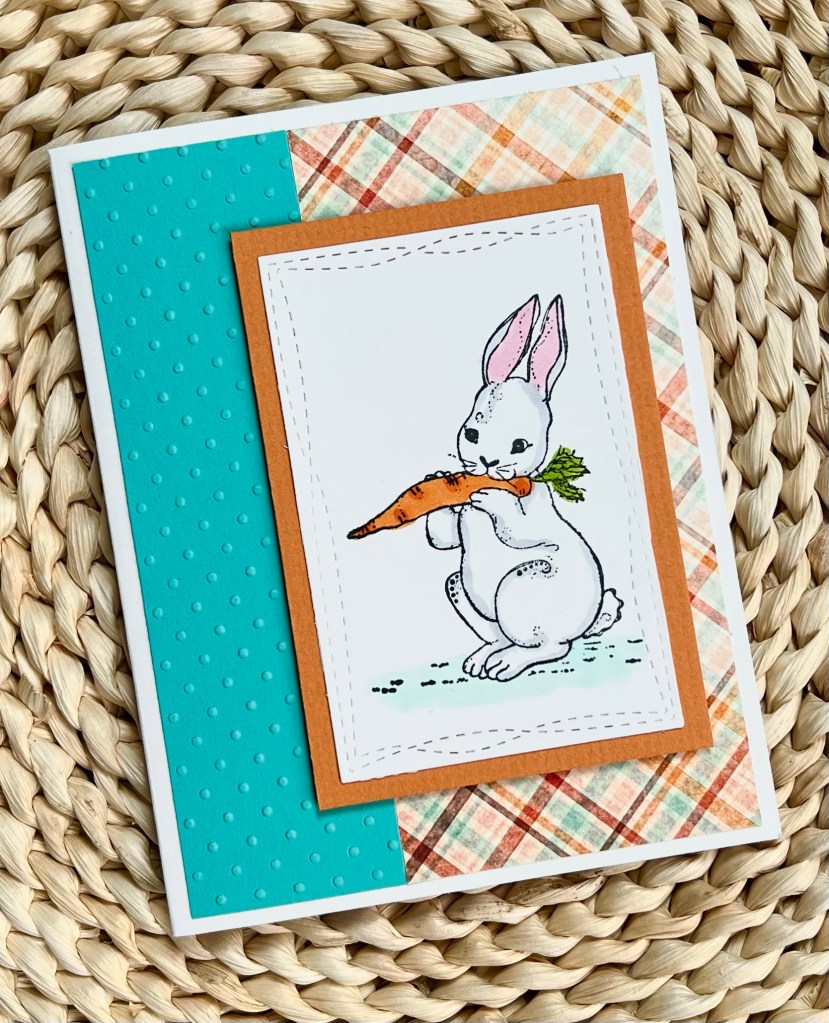
To make the cards, I stamped the images with Memento Tuxedo Black ink on white card stock and colored them with Copic markers. I die cut the images and layered them to coordinating card stock. I embossed a piece of solid card stock and attached it to one side of a white card. I attached a piece of patterned paper next to the embossed card stock. On the Easter egg card I also added a strip of pink card stock where the 2 papers met. I attached the stamped images to the cards using foam tape.

The cards came together super fast and this layout is perfect for using up some of those paper scraps you’ve been saving. 😉 I love this layout because you can use it for any card you might need to make – just use your favorite image with any color combo you can imagine!

Anita

Posted in Cards, Easter, Stamping | Tagged , , | 2 Comments

Mini Easter Bunny Tobacco Basket

Hi friends,

I found this cute mini tobacco basket at Hobby Lobby in the seasonal department. It measures about 6-inches square and includes the twine tied on the corner for hanging. It also came in a white painted version.

Disclosure: Some of the links on my site are affiliate links, meaning, at no additional cost to you, I will earn a small commission if you click through and make a purchase. As an Amazon Associate I earn from qualifying purchases.

The rest of my supplies also came from Hobby Lobby’s seasonal department. The cute bunny cutout came in a package of 12 – 6 with straight ears and 6 with one bent ear – including the white pom poms for the tails. You can see other Easter crafts I made with the bunny cutouts here and here. The mini Easter eggs and the Easter grass were just the extra touch I needed.

I painted my bunny cutout white acrylic paint and then lightly dry brushed it with brown paint. I attached the white pom pom tail with my hot glue gun. I used foam tape to attach the bunny to the basket.

Using my hot glue gun, I attached some of the Easter grass to the sides of the basket. Be careful not to burn your fingers! These silicone finger protectors from Dollar Tree might help with that. 😉 Then I used hot glue to add the mini Easter eggs.

This is a fun and quick craft that will add a little whimsy to your Easter decor. 🐰

Anita

Posted in Decor, Easter | Tagged , | Leave a comment

March Christmas Card

Hi friends,

I almost didn’t make it, but I managed to design a Christmas card for March! I’m trying to create a new design each month and make a few of each design to have ready for sending in November. This month’s card is super quick and easy – and I love the vintage feel of this cute snowman. 🙂

Disclosure: Some of the links on my site are affiliate links, meaning, at no additional cost to you, I will earn a small commission if you click through and make a purchase. As an Amazon Associate I earn from qualifying purchases.

The snowman is from the In the Meadow stamp set from Unity Stamp Company. He comes with 2 sentiments and a snowflake stamp – it is such a cute set!

I stamped the snowman with Memento Tuxedo Black ink on white card stock and die cut him using the Wonky Stitch Square STAX dies from My Favorite Things. I layered the image to red card stock die cut using the same set.

I attached a piece of patterned paper to a white card and then attached my stamped image using foam tape. I stamped “Merry Christmas” (this stamp or this stamp are similar) with green ink on white card stock. I die cut it using the Essential Stitched Sentiment die set from My Favorite Things and attached it to the card.

If you’re interested, this is my favorite adhesive to use when attaching card stock and paper layers on my cards. You can find refills here.

This is such a simple card to make, but I just love the way it turned out! If you want to see the other Christmas cards I’ve made so far this year, you can find January here and February here.

Anita

Posted in Cards, Christmas, Stamping | Tagged , , | 13 Comments

Crochet Spring Spa Cloth

Hi friends,

Spring is finally here! It’s a great time to make yourself some new Crochet Spring Spa Cloths in pretty Spring colors. Or gift some to someone who can use a little pampering. 😊 They are a great project for beginners and work up really quickly.

Disclosure: Some of the links on my site are affiliate links, meaning, at no additional cost to you, I will earn a small commission if you click through and make a purchase. As an Amazon Associate I earn from qualifying purchases.

I used I Love This Cotton yarn in White, Pink, and Waterlily with an H/5mm hook to stitch up my spa cloths. I think Waterlily is discontinued, but there are other pretty options to choose from.

You can find the pattern below along with a link to a free PDF if you’d like to easily print it.

Crochet Spring Spa Cloth

I Love This Cotton yarn

H/5mm hook

Stitches used in US terms:

Foundation Single Crochet – fsc

Chain – ch

Single Crochet – sc

Back Loop only – blo

Slip Stitch – ss

Row 1: work 16 fsc. Turn. (16 stitches)

Rows 2-18: ch 1. sc in blo of each stitch across Turn. (16 stitches)

Do not turn after Row 18

Begin working in Rounds. 

Round 1: ch 1. sc evenly around, working 3 sc in each corner. Join with ss to first sc. 

Rounds 2-4: ch 1. sc in blo of each stitch, working 3 sc in each corner. Join with ss to first sc. 

Finished spa cloth measures about 6.5 inches square.    

Here’s the link to the free PDF:

These Crochet Spring Spa Cloths can also be used as pretty dishcloths in your kitchen since they are made from cotton. You can give your dishes the “spa treatment”. 😉

I hope you enjoy this pattern!

Anita

Posted in Crochet, Gifts | Tagged , | 1 Comment

Pooh and Piglet Birthday Card

Hi friends,

Have you seen the new Winnie the Pooh stamps at Unity Stamp Company?!?! They are amazing and my collection is growing – so far they have released 5 different sets. 🙂 Three of the sets feature Pooh and Piglet and two feature Eeyore. One of the Eeyore sets is a sentiment set with lots of “Poohisms” that are perfect for all your cards. I’m hoping they will release Tigger soon!

Disclosure: Some of the links on my site are affiliate links, meaning, at no additional cost to you, I will earn a small commission if you click through and make a purchase. As an Amazon Associate I earn from qualifying purchases.

I used the Winnie the Pooh: How Do You Spell Love? set to make this sweet Pooh and Piglet Birthday card. I stamped the image with Memento Tuxedo Black ink on white card stock and colored it with Copic markers. The Copic colors I used for Pooh were Y26, Y19, and Y21. The colors for Piglet are R01 and R02 with YG07 and YG05 for his little outfit.

I masked off the image and using a cloud stencil (similar to this), I added light blue ink using these great Blender Brushes from Tailored Expressions. Using the Blender Brushes with green ink, I added grass using a stencil like this one.

I die cut the image using the Scallops & Rectangles Nesting dies from Unity Stamp Company. I layered the image to blue card stock die cut using the same set and attached it to a white card.

The birthday sentiment is from the So Glad You Were Born set from Unity Stamp Company. I stamped it with blue ink on white card stock, punched it out with an oval punch, and inked the edges with blue ink using a sponge dauber. I attached the sentiment to the card using foam tape.

Pooh and Piglet are sure to brighten anyone’s birthday! 🙂

Anita

Posted in Cards, Stamping, Uncategorized | Tagged , | 1 Comment

Crochet Easter Bunny

Hi friends,

I found the cutest Crochet Easter Bunny pattern here at Winding Road Crochet! It’s a free pattern and I just fell in love with the little bent ear – how cute is that?!?! Adding a pom pom tail and a lace ribbon bow makes it such a sweet bunny.

Disclosure: Some of the links on my site are affiliate links, meaning, at no additional cost to you, I will earn a small commission if you click through and make a purchase. As an Amazon Associate I earn from qualifying purchases.

It’s a super easy pattern to follow and works up very quickly. It’s worked in 2 pieces that you crochet together and stuff with Poly-Fil. I used Yarn Bee Soft & Sleek yarn in Soft Pink and Silver Grey with an I/5.5mm hook to stitch up my bunnies.

I used a Clover Pom Pom maker (the 1-5/8 inch size) and I Love This Yarn in White to make the cute bunny tails. I took the yarn tails from tying the pom pom together and threaded them through my stitches to tie the pom pom onto the bunny. Then I added a lace ribbon bow. The finished bunny measures about 12.5 by 5.5 inches.

I think this cute bunny would be adorable in a baby’s nursery or a toddler’s room. You might want to use it just for decoration though due to the pom pom tail and the ribbon bow – better to be safe!

Since the Crochet Easter Bunny works up so quickly, it would be a fun addition to an older child’s Easter basket. Or a sweet addition to your own Easter decor!

Anita

Posted in Baby, Crochet, Easter, Gifts | Tagged , , , | 10 Comments

Farmhouse Bunny Beaded Plaque

Hi friends,

Looking for something a little different to craft for Easter? This Farmhouse Bunny Beaded Plaque will add a little rustic touch to your Easter decor and it’s super easy to make!

Disclosure: Some of the links on my site are affiliate links, meaning, at no additional cost to you, I will earn a small commission if you click through and make a purchase. As an Amazon Associate I earn from qualifying purchases.

You’ll need a 10-inch wood circle and 2 wood bunny silhouettes. My wood circle came in a package of 6 from Hobby Lobby. My bunnies are also from Hobby Lobby. They came in a package of 12 along with little white pom poms for the tails. You’ll also need some 1/2-inch split wood beads like these and dark brown and white acrylic paint .

I used a chip brush to apply the brown paint to the wood circle, just sort of brushing it on and not covering the entire circle. You can see what I mean in the photo below. I painted the bunnies with white paint and then lightly dry brushed them with brown paint.

I attached the split wood beads to the wood circle with hot glue. I hot glued the bunnies to the center of the circle and glued on the cute little pom pom tails.

My Farmhouse Bunny Beaded Plaque looks cute with my sweet little ceramic bunnies that I picked up at Target for just $3.00!

This would also look so cute painted up in more traditional Easter colors if that’s more your style. 🙂

Anita

Posted in Decor, Easter | Tagged , | 3 Comments

Happy Easter Bunny Wreath

Hi friends,

I found these cute little bunny cutouts at Hobby Lobby in their Easter section. There are 12 bunnies – 6 of each silhouette – along with 12 bunny tail pom poms. And in case you didn’t know, all of the Easter merchandise is 40% off! I also picked up a package of their 10-inch plywood circles to use as a base to make this fun Happy Easter Bunny Wreath.

Disclosure: Some of the links on my site are affiliate links, meaning, at no additional cost to you, I will earn a small commission if you click through and make a purchase. As an Amazon Associate I earn from qualifying purchases.

I traced my bunnies on the back of some scrapbook paper and cut them out. Then using a thin coat of Mod Podge applied with a foam brush, I glued the cut outs to the wood bunny silhouettes

I painted my wood circle with 2 coats of white chalky finish paint, letting it dry between coats. Using my Cricut Explore Air 2 and orange permanent vinyl, I cut out the Happy Easter image (#M43C45 in Cricut Design Space). Using transfer tape, I applied the sticker to the center of my circle,

I attached my bunnies to the circle with E6000 clear adhesive. The adhesive dries quickly, but not too quickly, so you can move the bunnies around a little if you need to. I used my hot glue gun to attach the cute little bunny tails and to attach a loop of natural twine to the back for hanging.

It turned out so cute! Such a fun and different twist for an Easter wreath to decorate your front door. 🐇

This would also be such a cute idea for a nursery with the baby’s name in the middle done in colors to match the decor. 🙂

Anita

Posted in Cricut, Decor, Easter, Uncategorized | Tagged , , | 1 Comment

Crochet Bobble Sunglass Pouch

Hi friends,

I have a fun new Crochet Bobble Sunglass Pouch pattern to share today. The days are getting longer and we will all be reaching for our sunglasses more often. 😎

Disclosure: Some of the links on my site are affiliate links, meaning, at no additional cost to you, I will earn a small commission if you click through and make a purchase. As an Amazon Associate I earn from qualifying purchases.

The Crochet Bobble Sunglass Pouch works up super quickly and you can make it in your favorite color – or 2 colors like I did. 😊 I used I Love This Cotton yarn in Eastern Nova and Pink with a G/4.5mm hook to stitch up my pouch.

The pattern is below along with a link to a free PDF if you’d like to easily print it.

Crochet Bobble Sunglass Pouch

I Love This Cotton yarn – Eastern Nova and Pink

G/4.5mm hook

1/2 inch button

Stitches used in US terms:

Foundation Half Double Crochet – fhdc

Chain – ch

Half Double Crochet – hdc

Bobble Stitch – bobble

Single Crochet – sc

Slip Stitch – ss

Special stitch: Bobble Stitch – Yarn over, insert hook into stitch, and pull up a loop. Yarn over, pull through two loops. Repeat 4 times – there will be 6 loops on the hook. Yarn over and pull through all 6 loops. Sc in next stitch to complete the Bobble stitch.

Front of pouch

Row 1: Using Eastern Nova,  work 23 fhdc. Turn. (23 stitches)

Row 2: ch 1. hdc in first 3 stitches. *work bobble in next stitch, hdc in next 3 stitches* Repeat from * to * across. Turn. (4 bobbles, 15 hdc)

Row 3: ch 1. hdc in each stitch across. Turn. (23  stitches) 

Row 4: ch 1. hdc in first 3 stitches. *work bobble in next stitch, hdc in next 3 stitches* Repeat from * to * across. Turn. (4 bobbles, 15 hdc)

Row 5: ch 1. hdc in each stitch across. Turn. (23  stitches) 

Row 6: ch 1. hdc in first 3 stitches. *work bobble in next stitch, hdc in next 3 stitches* Repeat from * to * across. Turn. (4 bobbles, 15 hdc)

Row 7: ch 1. hdc in each stitch across. Turn. (23  stitches) 

Row 8: ch 1. hdc in first 3 stitches. *work bobble in next stitch, hdc in next 3 stitches* Repeat from * to * across. Turn. (4 bobbles, 15 hdc)

Row 9: ch 1. hdc in each stitch across. Turn. (23  stitches) 

Fasten off and weave in ends. 

Back of pouch

Row 1: Using Pink, work 23 fhdc. Turn. (23 stitches)

Rows 2-9: ch 1. hdc in each stitch across. Turn. (23  stitches) 

Do not fasten off. 

Place the back onto the wrong side of the front. ch 1, sc the pieces together beginning at the top of one long side, around the bottom, and up the other side – working 3 sc in each of the bottom corners. 

ss across the back only to the center of the top of the pouch. ch 12 to make loop. ss back to the top of the pouch and continue with ss across. 

Fasten off and weave in ends. 

Sew on button.  

Here’s the link to the free PDF…

This is a great pattern for using up your scraps. What color will you make your Crochet Bobble Sunglass Pouch? I would love to see your makes!

Anita

Posted in Crochet, Summer | Tagged , | Leave a comment

Wood Heart Carrot

Hi friends,

Hearts aren’t just for Valentine’s Day! I picked up this pallet heart from Hobby Lobby’s Valentine’s Day clearance thinking, that with a little paint and greenery, it might make a cute whimsical carrot to add to my Easter decor. And I think it did! 🥕

Disclosure: Some of the links on my site are affiliate links, meaning, at no additional cost to you, I will earn a small commission if you click through and make a purchase. As an Amazon Associate I earn from qualifying purchases.

The heart measures about 14-inches long and 14-inches wide at the widest part. First I painted the heart with orange acrylic paint. After it dried, I used a 1-inch spouncer to add white polka dots. Then to add a little depth, I lightly dry brushed some brown paint over the entire heart after the polka dots were completely dry. (This is a great set of acrylic paints if you need to replenish your craft room.)

The heart came with a sawtooth hanger on the back, but I took that off so I could attach the greenery. Using hot glue, I attached a bunch of faux greenery to the back of the heart. Then I hot glued some natural twine to the back for hanging. To finish it off, I hot glued a bow made from various ribbons to the front of the heart.

I love the way it turned out! Something a little different but so fun! 🥕

You can make carrots with just about any size heart – the long skinny ones would be great! A basket filled with small carrot hearts would be so cute along with my Rustic Farmhouse Easter Bunny!

Anita

Posted in Decor, Easter | Tagged , | Leave a comment