Mini Glitter Ornaments

Do you need a last-minute gift? These tiny ornaments are super quick and amazingly easy to make – and they may be on clearance at your favorite craft store!

All you need are mini clear glass ornaments, fine glitter, and clear floor wax. I found this package of 20 mini iridescent glass ornaments and the glitter at Michael’s. The floor wax came from Target – any clear floor wax will work.

To make the ornaments, carefully remove the metal tops and hangers. Pour a little floor wax into an ornament. Swirl it around to coat the inside. Pour the excess back into the bottle. Using a small funnel, pour glitter into the ornament while the wax is still wet. Shake the ornament to cover the inside with glitter. Shake excess glitter back into the container. Let the wax dry. Shake the ornament over a container to remove any loose glitter. Carefully put hanger and metal top back on.

Tip: if you don’t have a funnel, just roll up a small piece of paper into a cone shape and tape. It will work just as well.

It took less than half an hour to make all 20 mini ornaments!

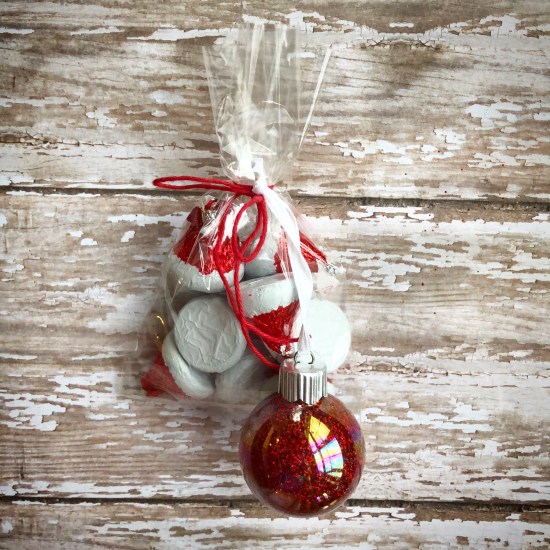
I tied the ornaments on small bags filled with candy to give as little gifts to our youth group at church. (I found the cute Santa hat Hershey’s Kisses at Target.) You could also put several ornaments in a pretty basket or bowl and wrap it with cellophane for a great hostess gift.
These clear glass ornaments come in different sizes – I made some larger ones in this post and packaged 2 of them together as small gifts last year.

If you don’t have time to make them this year, be sure to check out the clearance sales at your local craft stores so you’ll have the ornaments on hand to make for next year!

Thanks for stopping by,

Anita
Posted in Christmas, Gifts | Leave a comment

The Best Oatmeal Cake

Really! The Best Oatmeal Cake ever!! It is just so yummy! The cake has just a hint of cinnamon and the broiled icing has brown sugar, coconut, pecans, and butter – so tasty! 😋

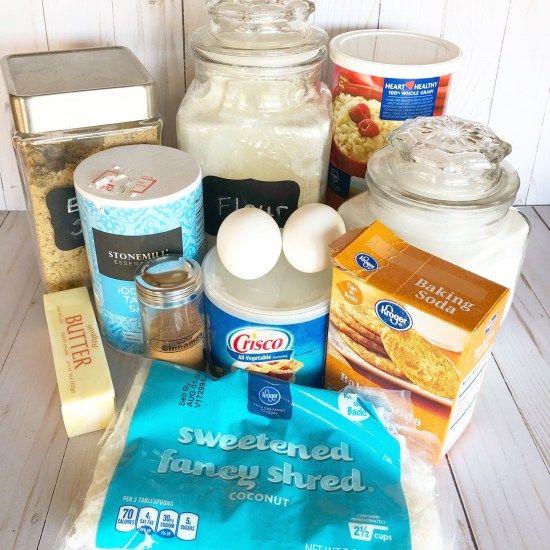
You probably have most of the ingredients you’ll need right in your kitchen – except maybe the coconut and the pecans. (I forgot to add the pecans to the picture. 😐)

You’ll find the full recipe below.

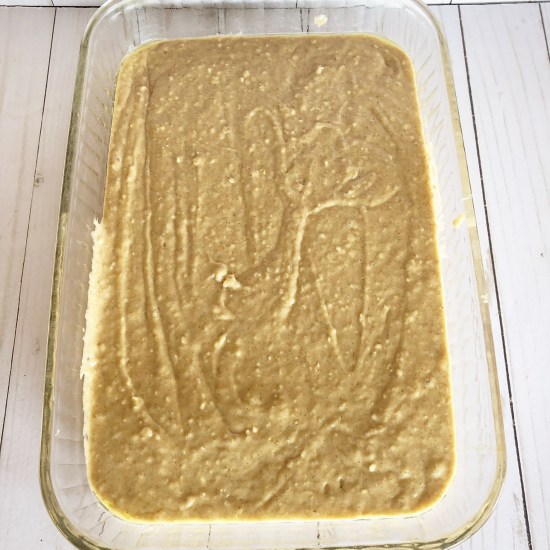
Here’s the cake ready to go into the oven…

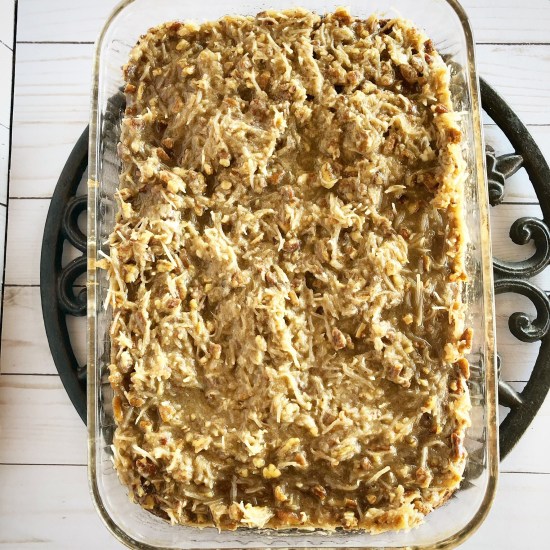
Hot out of the oven with the icing spread over the top and ready to go under the broiler…

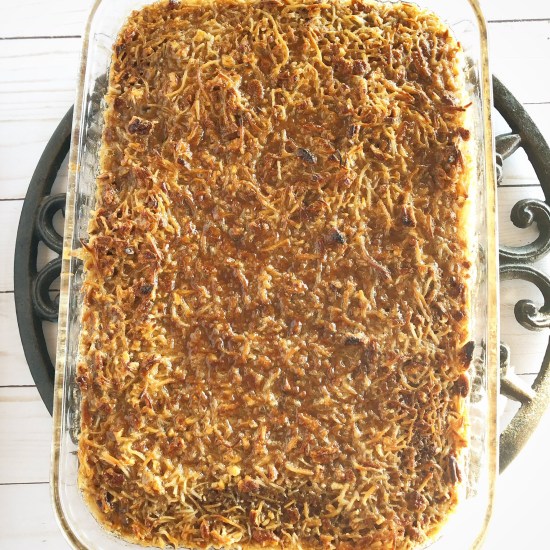
And here is the Best Oatmeal Cake fresh and hot from the oven! My kitchen smells amazing!! Now comes the hard part…waiting for it to cool! 😉

Here’s the recipe:

The Best Oatmeal Cake

Preheat oven to 350 degrees. Spray a 9 by 13 inch baking pan with cooking spray.

Cake:

  • 1 cup oatmeal
  • 1-1/4 cups boiling water (mix with oatmeal in a small bowl and set aside while you mix the rest of the cake ingredients)
  • 1-1/3 cups flour
  • 1 teaspoon baking soda
  • 1 teaspoon salt
  • 1 teaspoon cinnamon
  • 1 cup sugar
  • 1 cup brown sugar
  • 1/2 cup shortening
  • 2 eggs
  • 1 teaspoon vanilla

Sift together flour, baking soda, salt, and cinnamon. Add sugar, brown sugar, shortening, eggs, and vanilla. Mix well. Add oatmeal mixture. Beat well. Spread in prepared pan and bake for 25 to 30 minutes until toothpick inserted in the center comes out clean.

Broiled Icing:

  • 1 stick butter or margarine at room temperature
  • 1 cup brown sugar
  • 1 cup pecan pieces
  • 1 cup shredded sweetened coconut
  • 5 tablespoons cream (I have also used almond milk or regular milk as a substitute and the both work well)

Mix all ingredients together and spread over warm cake. Set your oven to broil and place cake under broiler until icing has browned. Watch the cake very closely – the icing browns quickly!

This is my husband’s 2nd favorite cake – you can find his very favorite cake, Angel Food with Homemade Peach Icing, here.

Enjoy!

Anita

Posted in Recipes, Uncategorized | Leave a comment

Baby’s 1st Christmas Ornament

My sweet friend Lydia asked if I would make an ornament for her precious little boy’s 1st Christmas. I was so touched and of course told her I would love to!

I thought of the adorable Snow Peep stamps from Unity Stamp Company and thought this cute little guy would be just perfect. The stamp set is called Heart Warming and cuddling the sweet little bear that’s just what he is! 

I stamped the snowman with black ink on white card stock and colored the image with Copic markers. I added a dot of clear glitter glue to the snowflakes. Once the glitter glue was dry, I punched the image with a circle punch.

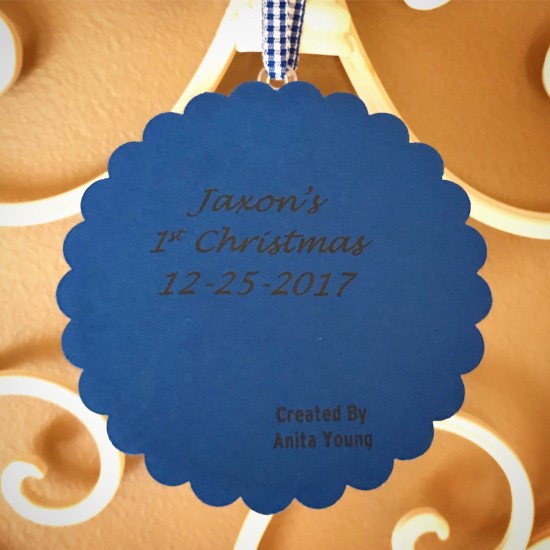
For the back of the ornament, I printed “Jaxon’s 1st Christmas 12-25-2017” on blue card stock. Then I punched it out with a scalloped circle punch and attached the stamped image to the front of the circle.

To make the ornament, you will use half of a clear ball ornament like this one I found at Hobby Lobby.

Clear Ball Ornament - 3Clear Ball Ornament - 3

You’ll also need a little fake snow. I like this Iridescent Snow I found at Michaels.

Put a little bit of the snow in the ornament. Carefully put a bead of clear drying craft glue around the rim of the ornament and glue to the scalloped circle, being sure to put the hanger of the ornament at the top of the stamped image. Then knot a piece of ribbon to the ornament for hanging on your tree.

Change the colors to make this for a sweet baby girl. Or change the stamped image to just about anything to make it personalized for anyone on your Christmas list.

Thanks for stopping by…

Anita

Posted in Christmas, Gifts, Stamping | Leave a comment

Last-Minute Christmas Cards

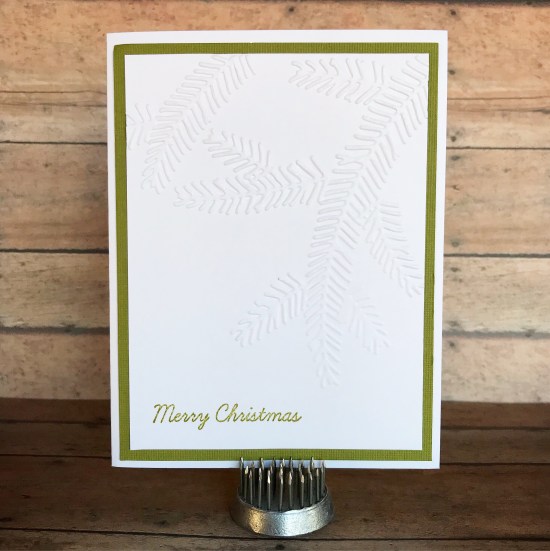
There’s still time to make your Christmas cards. No – really!! These cards come together in just minutes and they look so elegant.

All you need are embossing folders, sentiment stamps, ink, and card stock. And some adhesive to put it all together.

The embossing folders are from Stampin’ Up. They are discontinued, but there are so many fun folders out there – use your favorites! The Merry Christmas stamp is from the Old Traditions set from Unity Stamp Company.

To make the cards, emboss a panel of white card stock with the embossing folder. Stamp the sentiment with red or green ink. Layer to a panel of red or green card stock and attach to a white card. Stamp your sentiment on the inside and you’re done!

img_9943

Take a few minutes and whip up some last-minute Christmas cards! You really do have time! 🙂 🎄

Thanks for stopping by,

Anita

Posted in Cards, Christmas, Stamping, Uncategorized | Leave a comment

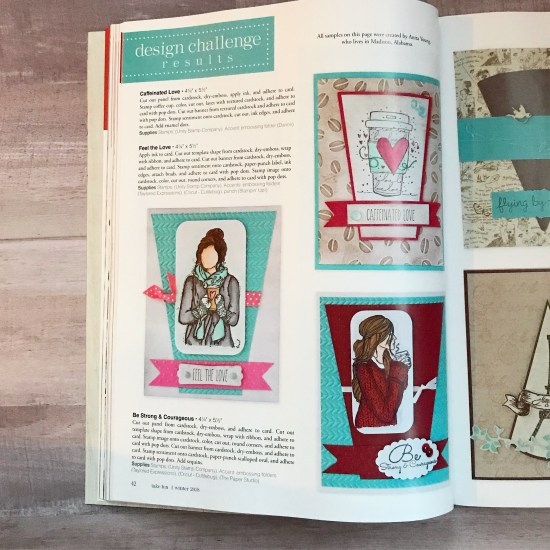
Three Cards Published In The New Take Ten!!

The Winter 2018 issue of Take Ten Magazine is out and I’m so excited! I have 3 cards published in this issue and they are all on the same page. So fun to have my own page in the magazine. 🙂

All 3 stamp sets are from Unity Stamp Company. I’ve said it before in other posts, but this is seriously the best company! They have so many great stamps and the quality is amazing – plus great customer service and awesome sales! You need to check them out! 🙂

Here are some closer pictures of each card.

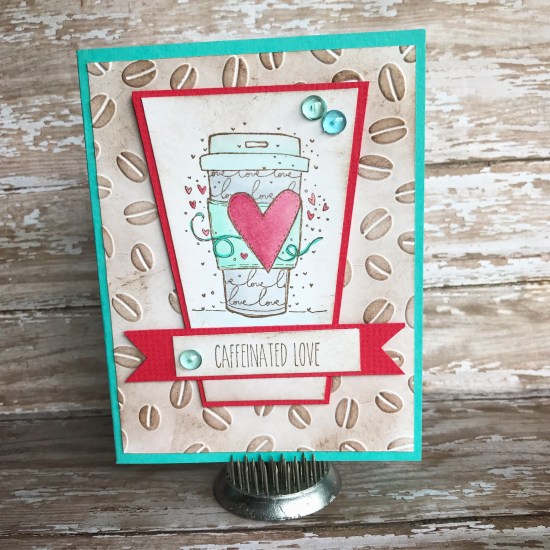
The set for this card is called Love to Go. I’m not sure where my coffee bean embossing folder is from, but here’s a link to a similar one.

This set is called Hello Love. The Cable Knit embossing folder is from Taylored Expressions and the Swiss Dot embossing folder is from Cuttlebug.

And this one is Dream of Being. I used the Cable Knit and Swiss Dot embossing folders along with the Heart embossing folder from Hobby Lobby.

img_9898

I just love Take Ten magazine. Every quarterly issue is packed full of inspiration from amazing artists – if you love to stamp, you will love this magazine!

Take Ten Winter 2018 — Available December 1st

Thanks for stopping by…

Anita

Posted in Stamping | 4 Comments

Joy Farmhouse Wood Sign

Do you have a corner in your house that just needs something Christmas-y? Do you want to make something but are running short on time? This cute Joy Farmhouse Wood Sign may be just what you are looking for!

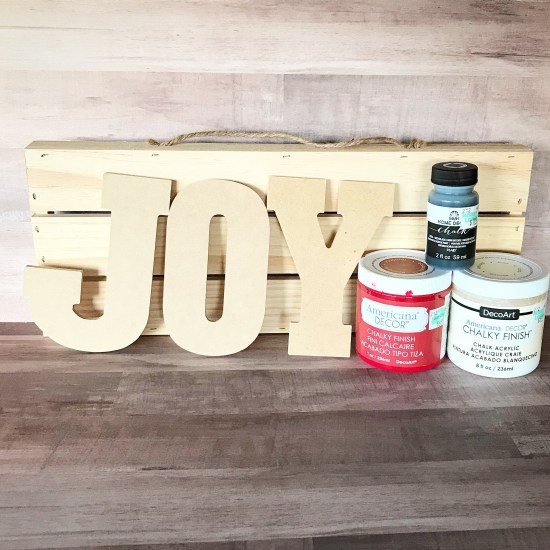
I found the slatted wood sign in the unfinished wood section at Hobby Lobby. It measures about 15-3/4 inches by 6-1/4 inches. The unfinished letters were just a few steps away in the same aisle. The tag on the letters say they are 5 inches but they are closer to 5-1/2 inches. And the chalk paint is in an aisle nearby…

I painted the front and sides of the sign with 2 coats of Lace Chalky Finish paint from DecoArt, letting it dry between coats. (You can also paint the back if you want to, but it’s not necessary.) Don’t worry – it doesn’t take long to dry! Then I very lightly dry brushed some Folk Art Home Decor Chalk paint in Rich Black on the sign. The letters are painted with 2 coats of Romance Chalky Finish paint from DecoArt and very lightly dry brushed with black. You’ll only need to paint the front and sides of the letters since they will be glued to the sign and you won’t see the back.

Once everything is dry, use a strong glue to adhere the letters to the sign. I like E6000 Clear Industrial Strength Adhesive. Be sure to get the clear/transparent glue and not the white glue! Trust me on this! 😉

This little sign is a cute farmhouse-style addition to your Christmas decor that you can put together pretty quickly! Hobby Lobby has lots of different unfinished wood signs/plaques to choose from as well as different styles of letters. You can easily change things to make your sign exactly the way you want it.  🙂

I hope your season is filled with JOY!

Thanks for stopping by,

Anita

Posted in Christmas, Decor, Gifts, Uncategorized | 2 Comments

Cuddly Crochet Reindeer 

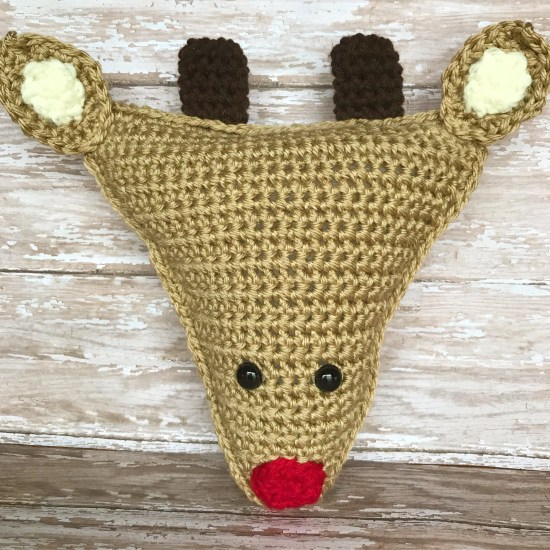
Here’s another sweet, cuddly pattern from Sarah at Repeat Crafter Me. You start with the same pattern used on this sweet Candy Corn I made in this post and this adorable Christmas Tree I made in this post and then add the ears and the cute red nose.

img_9786

I used worsted weight yarn that I had in my stash in light brown, dark brown, cream, and red. The eyes are 12mm safety eyes that I purchased from Amazon.

This cute little guy can be stitched up in just an evening and is sure to bring a smile to a sweet little face – along with lots of cuddles!

Thanks for stopping by,

Anita

Posted in Christmas, Crochet, Gifts | Leave a comment

Gray Crochet Infinity Scarf

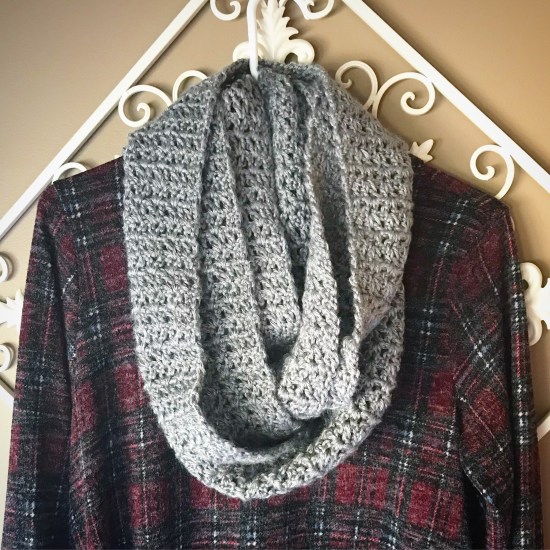
I found this cute plaid dress at this great little boutique near me called The Katie Grace Boutique. If you are local, you need to check this place out! It’s a great shop in a refurbished little house on highway 72 between Madison and Athens, AL. They have the cutest clothes with really reasonable prices. And they get new stock all the time! If you’re not local (or even if you are), they have a website you can find here at shopkatiegrace.com or they also have an app you can find in the App Store – just search for The Katie Grace Boutique. Here’s a link to their Facebook page – there’s a shop button on there, too. You’ll want to check out their online store for great clothes you can only find there – they ship very quickly or you have the option to pick up your order at the store if you are local. Can you tell I kinda like this little boutique? 😊

I’m not friends with the owner and I’m not getting anything for this post. I just wanted to share my favorite boutique with you!

img_9872

Anyway, I decided I needed a gray infinity scarf to go with my new cute dress. I used Caron Simply Soft Yarn in gray heather with a J/6mm hook to crochet my scarf. By using the larger hook it made the scarf drape beautifully.

Here’s the pattern:

Chain 35 loosely.

  • Row 1 – Double crochet in 4th chain from hook. (3 skipped chains count as a double crochet). *Skip 2 chains. Double crochet, chain one, double crochet (V-stitch) in next chain.* Repeat from * to* across until last 4 chains. Skip 2 chains. Double crochet in final 2 chains. Turn. (9 V-stitches and 2 double crochet at each end)
  • Row 2 – Chain 3 (counts as double crochet). Skip first double crochet. Double crochet in next double crochet. Work V-stitch in chain-one space. Repeat V-stitch across to last 2 double crochet. Double crochet in last 2 double crochet. Turn.
  • Repeat Row 2 to desired length. Crochet ends together to make into infinity scarf.

I made my scarf about 70″ long so I would be able to double it once I put it on. I love it with my dress!

img_9873

I paired my dress with my new scarf, black leggings, and ankle boots to make a fun Fall outfit. I can also add a sweater or maybe a jean jacket when the temps drop a bit more.

This pattern works up super quickly – I made mine in just a couple of hours – so you have plenty of time to stitch up some of these for Christmas gifts!

Stay warm!

Thanks for stopping by,

Anita

Posted in Crochet, Gifts, Uncategorized | Leave a comment

Crochet Gift Bag

Our family is at the age where gift cards or cash are on everyone’s wish list. I like to be a little creative when giving them – the little envelope from the store just won’t do!!

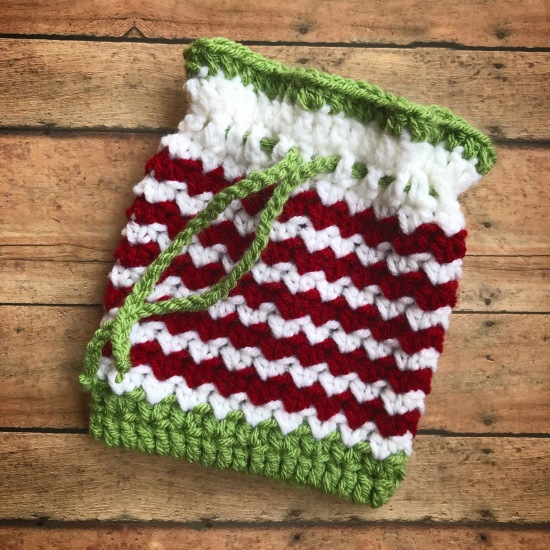
I found the pattern for this cute gift bag here on Ravelry at Maki Crochet. It’s really fun and easy to make. You can easily adjust the size by the number of beginning chains and the number of rows you crochet.

img_9820

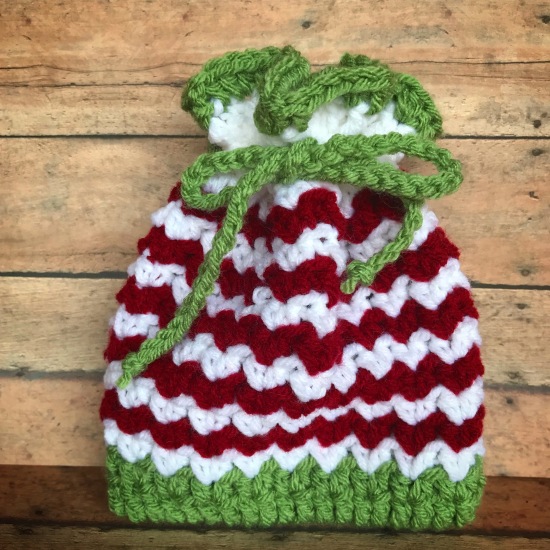
I used I Love This Yarn in mid green and Red Heart Super Saver Yarn in white and burgundy. I crocheted the bag with a G/4mm hook. For this bag I began by chaining 40. I crocheted the first 2 rows with green and then alternated white and burgundy for the next 11 rows, ending the pattern with white. The next 2 rows are done in white with the final row crocheted in green. I chained 80 to make the drawstring. The drawstring is woven through the first row of double crochet to cinch the bag closed.

img_9821

This finished bag measures about 5-1/2 by 6-1/2 inches (but you can make it any size you want 😊). Plenty of room for a gift card and some yummy sweets!

Thanks for stopping by,

Anita
Posted in Christmas, Crochet, Gifts | 2 Comments

Christmas Deco Mesh Wreath

Are you looking for a new Christmas wreath for your front door? This is such a fun and easy wreath to make – and it will only take a couple of hours from start to finish!

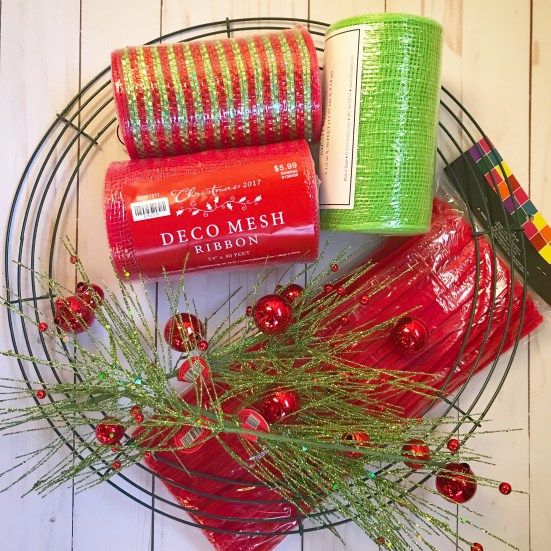
Here’s what you’ll need:

  • 5.5-inch wide deco mesh in your choice of colors (I chose lime green, red, and red/green combo)
  • Wire wreath form – this one is a 16–inch form
  • Chenille stems to match your deco mesh
  • Some type of accent pieces like my glittery greenery stems with red ornaments
  • Wire cutters
  • You may also need thin wire or hot glue for attaching your accent pieces

You will need to cut 9-inch lengths of the deco mesh. I just measured and cut them with my scissors. There are 8 sections to the frame and I twisted 4 chenille stems around each section. Each chenille stem will hold 3 pieces of the deco mesh so I cut 32 pieces of each color.

I twisted the chenille stems around the wreath frame, alternating them by twisting around the 2 outer rings and then the 2 inner rings. Here’s a close up of  one of the sections of the frame.

img_9867

Be sure to twist them tight so they don’t slide easily on the frame. Here’s the wreath frame with all of the chenille stems twisted on.

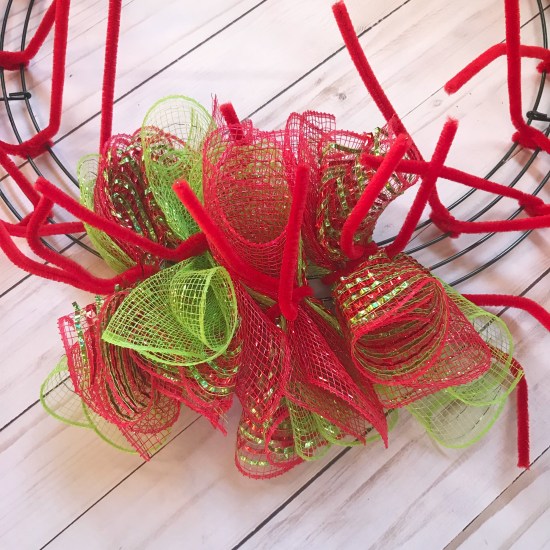
Take a piece of the deco mesh and roll it up. I folded my ends to the center and then just folded it over so the ends were on the inside. Roll and stack 2 more pieces on top of your first one. Don’t worry about trying to make it perfect – it will look great once you are completely finished! Then place your stack of 3 pieces on the center of one of the chenille stems and twist the stems tightly several times to secure the mesh to the wreath.

Here’s a picture of one section of the wreath with mesh attached to each chenille stem.

I alternated my 3 colors of mesh in each little stack as I went around my wreath. After you have attached all the mesh, cut the chenille stems with wire cutters. Be careful to not cut too close – you don’t want them untwist!! Then just bend the ends of the stems down. Fluff up the deco mesh sections if you need to.

Attach your accent pieces using hot glue or wire – my glittery greenery stems had wire in them so I just wrapped that around the wreath frame and added a dab of hot glue to keep them in place.

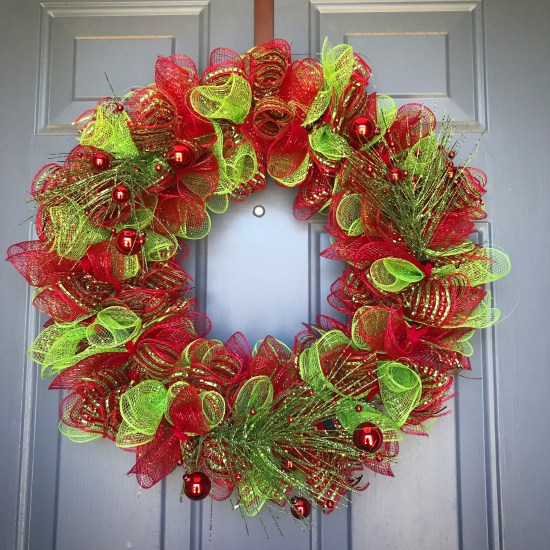
And here it is all finished! 

It measures about 22 inches across – such a pretty way to greet your friends and family over the Christmas season!

Thanks for stopping by,

Anita

Posted in Christmas, Decor, Uncategorized | Leave a comment