Red, White, and Blue Afghan

My youngest goddaughter just graduated from high school – where have the years gone?!?!? Seems like just yesterday she was sitting in my living room playing with my old Barbies. Now she will be heading off to the University of South Alabama in August to study meteorology. So very proud of her!

Since she will be off on her own for the first time, I wanted her to have a little something that she could wrap up in on those cool, late nights of studying to remind her that she is loved. USA’s school colors are red, white, and blue (no surprise there 🙂 ), so I began searching for a crochet pattern that used 3 different colors of yarn.

I’ve had this book, Afghans for All Seasons, for a looong time! The publishing date is 1993!! I was surprised to find that it is still available here on Amazon.

IMG_6226

The pattern I used was Fourth of July Fanfare found on page 46. Of course with that name the colors used in the pattern were red, white, and blue – a happy surprise and just perfect for what I was looking for.

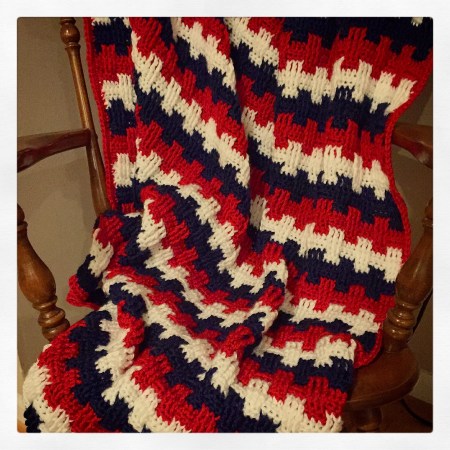
Here’s the finished afghan. It’s the perfect size to snuggle up with on a cool, south Alabama fall evening while studying for that next test.


IMG_6224

I used Red Heart Soft yarn to make the afghan soft and cuddly. It’s a fun, easy pattern to make and would work well with any of your 3 favorite colors. Or if you live where the Summer evenings get a bit cool, the red, white, and blue would be perfect to snuggle up with while you’re watching the fireworks on the Fourth of July :).

Thanks for stopping by,

Anita


Posted in Crochet, Gifts, Uncategorized | 4 Comments

My Friend

This card is one of my favorites. There is something about the color combo that I just love!

IMG_6197

The embossing folder (any frame type embossing folder will give you the same effect), butterfly punch, oval punch, and “my friend” stamp are all from Stampin’ Up. The lattice background stamp is from Hero Arts – I’m not sure it is still available, but any open background pattern would work.

To make the card, emboss the front of a green card with the embossing folder. Trim a piece of patterned paper to fit inside the embossed area. Stamp the piece with the lattice background stamp using brown ink and lightly ink the edges. Attach to the card.

Stamp “my friend” with brown ink on white card stock. Punch with the oval punch, ink the edges with brown ink, and attach to the card. 

Punch 3 butterflies from 3 different coordinating papers. Fold the wings up from both sides of the body. Attach to the card by gluing only the body to the card. Attach a tiny pearl to each butterfly. 

This card makes a great birthday, thinking of you, or thank you card. 

Thanks for stopping by,

Anita

Posted in Cards, Uncategorized | Leave a comment

So…I Got Published :)

The new issue of Take Ten magazine is about to hit the newsstands and yours truly has 3 cards published in this issue!! 🙂

Here’s a link to purchase the new issue – Take Ten June/July/August 2016, if you’re interested. Two of my cards are on page 41 and the third is on page 43.

IMG_6221

Always so much fun when my creations are chosen to be published!! 🙂

Thanks for stopping by,

Anita


Posted in Cards, Uncategorized | Leave a comment

Patriotic Hurricanes

These hurricanes have become one of my favorite things to decorate. I used them in the winter here. And for Easter here. With the Summer holidays coming up, I started searching Pinterest for a way to update them for the season. I found this fun and easy pin and thought it was just perfect! (And I don’t need to find a place to store them if I decorate them for each season 🙂 )

IMG_6191

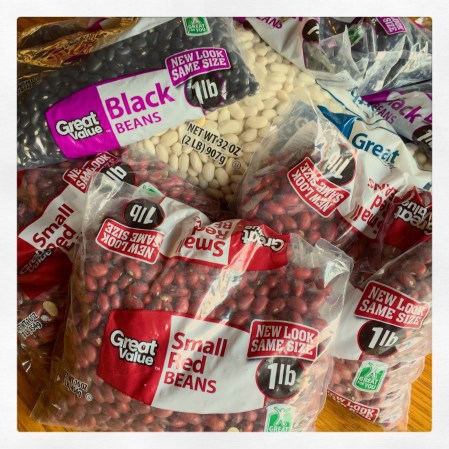
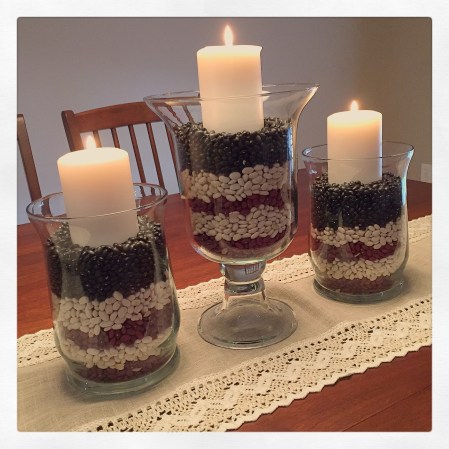
I used dried white Great Northern beans, small red beans, and black (blue) beans to layer in my hurricanes. (I may or may not have had to pick some of the beans up off the floor 😉 ) Then I just nestled a white pillar candle into each one. I used about 1 pound of each color of beans in each hurricane – you may need more or less depending on the container you use.

And here are my hurricanes all ready for Summer…

IMG_6190

Such a simple, quick, and easy way to add some patriotic color to my table – great for Memorial Day through Labor Day!

Thanks for stopping by,

Anita

Posted in Decor, Uncategorized | 1 Comment

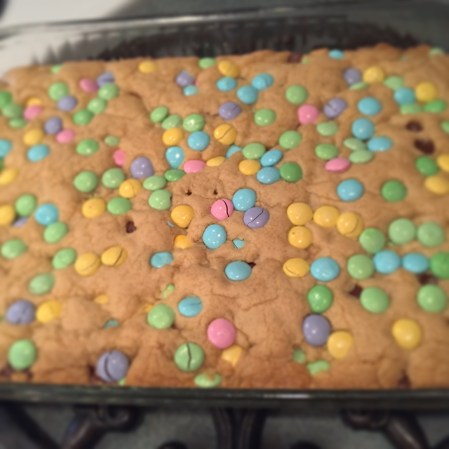
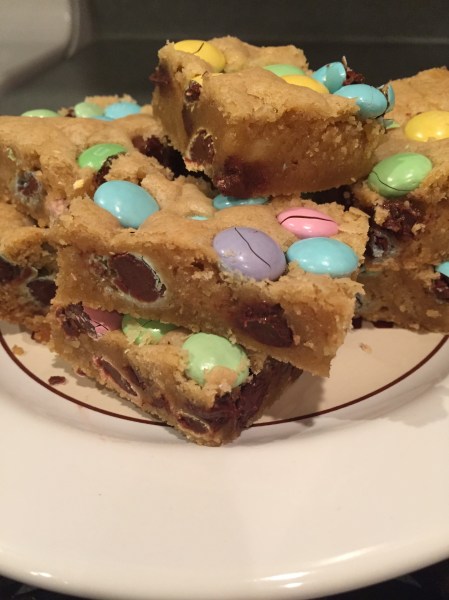
M&M Cookie Bars

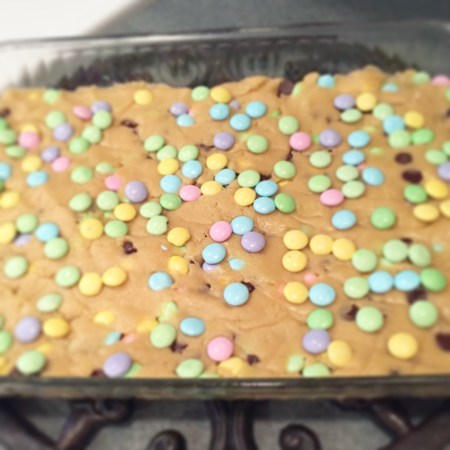
We had missed 3 Sundays in a row with our junior high Sunday school class and I decided to bring them a little treat when we were finally back in town. I found this recipe for M&M cookie bars on Pinterest. Making cookie bars is so much faster when you are pressed for time but still want all the yummy goodness of a tasty cookie!

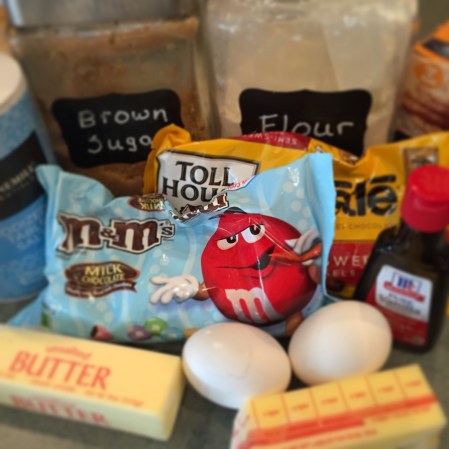
All the ingredients…

IMG_6213

In the pan ready for the oven…

IMG_6214

Golden brown fresh from the oven…

IMG_6215

So yummy!!

IMG_6204

I followed her recipe with the exception of adding about 3/4 cup chocolate chips along with the M&Ms…because you can never have too much chocolate!! 🙂 These would also be great for all those Summer picnics using the seasonal red, white, and blue M&Ms.

Thanks for stopping by,

Anita


Posted in Recipes, Uncategorized | Leave a comment

Graduation – A Day To Celebrate

It’s that time of year – graduations from high school and college! We always have several graduates that we want to remember with a small gift and this year is no exception.

This clean and simple card works up quickly. I was able to make several in just a short time and it’s perfect for everyone.

IMG_6211

The embossing folder is from Cuttlebug, the graduation cap stamp is from Stampendous and the sentiment is from Hero Arts – I’ve had all of these forever!!

I embossed a panel of white card stock and attached it to a white card. I stamped the cap with black ink on white card stock. It’s lightly colored with gray Copic markers, trimmed, layered to black card stock, and attached to the card with foam tape. “a day to celebrate” is stamped with black ink on white card stock, trimmed, and attached to a black card stock oval with foam tape. The oval is then attached to the card.

And that’s it! If you are in need of a quick graduation card, this is it!! Just use whatever embossing folder and graduation stamps that happen to be in your stash and you can have this finished in just a few minutes.

Wishing all the best to this year’s graduates!!! 🎓

Thanks for stopping by,

Anita

Posted in Cards, Uncategorized | Leave a comment

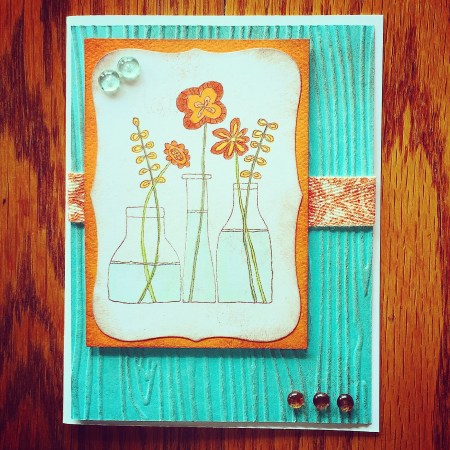
Bottled Blossoms Card

I used another great stamp from Unity Stamp Co. to make this card. Bottled Blossoms is part of their {itty bitty} line, which really isn’t so itty bitty – the stamp measures 2.5 x 3.25 inches. 

IMG_5843

I stamped the image with brown ink on white card stock and colored it with Copic markers. I used a label die from Spellbinders Nestabilities collection to die cut the image and lightly sponged the edges with brown ink. The image is layered to orange card stock that has been sponged with brown ink.

I used the woodgrain embossing folder from Stampin’ Up to emboss a panel of turquoise card stock, lightly inked the panel with brown ink, and attached an orange patterned twill ribbon. The panel is attached to a white card with foam tape. The stamped image is attached over the ribbon with foam tape. Two turquoise dew drops are glued to the stamped image and 3 brown ones are glued to the bottom right corner of the card. 

This is another great, versatile image – birthday, thank you, thinking of you – so many uses! I love when you can use a stamp in so many different ways :).

Thanks for stopping by,

Anita
Posted in Cards, Uncategorized | Leave a comment

Just a Note…

Are you a list maker? Do you jot down little notes to remind yourself of what you need to do? I am always writing myself notes to remember things…I tell myself it is because my brain is just so full that it’s hard to remember everything! 😉

Here’s a cute little pad to write down all those things that might slip your mind. I sent this one to my Mom for Mother’s Day – not saying she forgets things – she has a full brain, too!

IMG_6010

Here’s the inside…

IMG_6011

My notepad measured 8 x 3 inches and was about 1/4 inch thick. I cut the green card stock cover to measure 8 1/4 inches by 6 1/2 inches. Then I scored it at 3 1/8 inches and again at 3 3/8 inches. I attached the note pad to the inside using score tape from Scor Pal.

To decorate the front, I used the vine embossing folder from Sizzix to emboss a panel of lighter green card stock. I attached it, along with a panel of patterned paper, to the front of the notepad cover. I stamped “Just a Note…” from Hero Arts on mustard card stock with olive ink and punched it with the label punch from Stampin’ Up. I attached it to a scalloped oval punched from the lighter green card stock with foam tape and attached the entire piece to the notepad cover with foam tape. To finish it, I glued green gingham ribbon around the cover to hide the seam where the two papers come together and tied it in a bow.

This will work with any notepad you may have on hand – just adjust the measurements to fit the size of your notepad. Happy list making!!

Thanks for stopping by,

Anita

Posted in Cards, Gifts, Organization, Uncategorized | Leave a comment

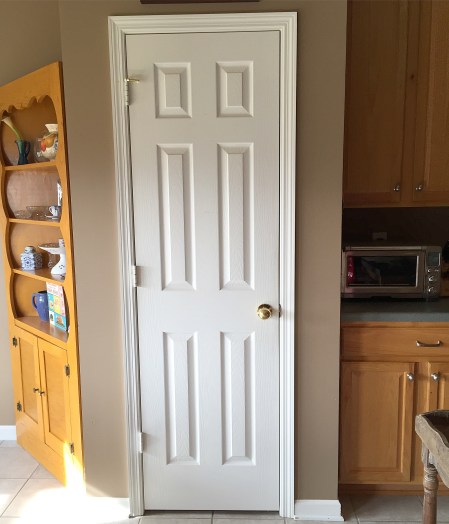
Pantry Door Refresh

We have big ideas for updating our kitchen. Big ideas like knocking down walls, changing a double window to French doors, new cabinets, bigger island, new flooring…pretty much just gutting it and starting over. But we’re not sure when we’ll have the energy and courage to start another major remodeling project! 😛 I hope it will be sooner rather than later, but in the meantime I needed to do something about my pantry door.

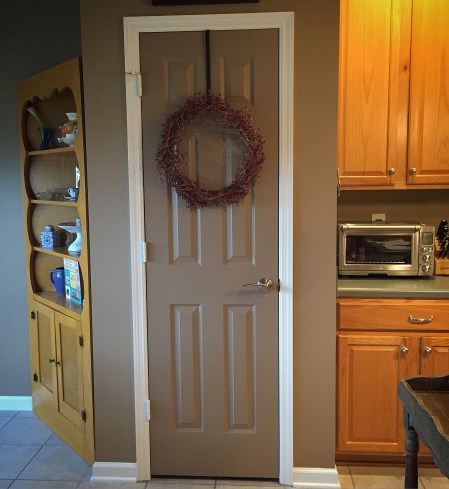
The pantry door was in dire need of a facelift. I could have just repainted it white, but I wanted something a little different. So I painted it just a shade darker than the wall color. I also refreshed the trim with a new coat of white. Then we replaced the doorknob with a new lever. The paint was left over from some other projects so the only cost was for the new door lever.

Here’s the before pic…

IMG_5948

And after…

IMG_5959

(Not the greatest pictures, but you get the idea 🙂 )

Still dreaming of a full remodel, but this little refresh will help make the waiting a little easier!

Thanks for stopping by,

Anita


Posted in Decor, Uncategorized | 3 Comments

Parmesan Pork Chops

I’m not sure where I found this recipe. I wish I could remember so I could give credit where credit is due. It’s one I’ve saved in my recipe book to keep it handy. This a super easy and tasty way to prepare boneless pork chops. They come out so moist and tender – sure to become a family favorite! Prep time takes only minutes…one of my favorite things about this recipe :).

Parmesan Pork Chops

  • 1 cup grated Parmesan cheese
  • 1 cup Italian breadcrumbs
  • 1 teaspoon pepper
  • 1 teaspoon garlic powder
  • 1/4 teaspoon dried basil or dried parsley
  • 4 (4-oz) 1/2-inch thick boneless pork chops
  • 1 tablespoon olive oil

Preheat oven to 350°

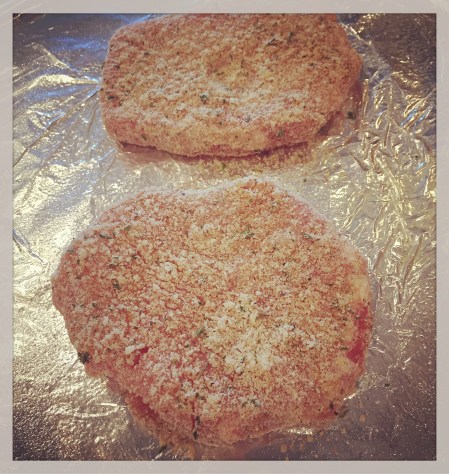
Combine Parmesan, breadcrumbs, pepper, garlic powder, and basil on a plate. Rub pork chops with olive oil and coat with breadcrumb mixture, pressing to make sure they are coated well.

Spray a foil-lined baking sheet with cooking spray. Add pork chops and lightly spray them with cooking spray. Bake 40 – 45 minutes.

Ready for the oven…

IMG_5945

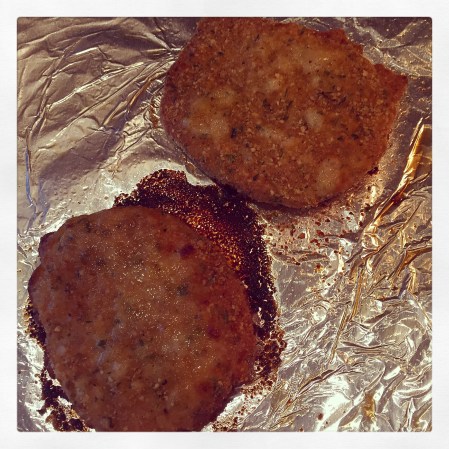
Golden and delicious…

IMG_5947


This recipe is so easy to adapt to the number of pork chops you need. I cut it in half because I only needed 2 pork chops. But if you need more than 4 pork chops, just increase the amount of each ingredient accordingly.

Add your favorite vegetables or salad and maybe some fresh bread or rolls and you have a yummy weeknight dinner for your family.

Thanks for stopping by,

Anita

Posted in Recipes, Uncategorized | Leave a comment