Altered Canvas Clip Picture Frame

I love this idea! Instead of the traditional picture frame, use a bulldog clip to hold your photo. It makes it so easy to change out your photo and you can make them to perfectly match your decor.

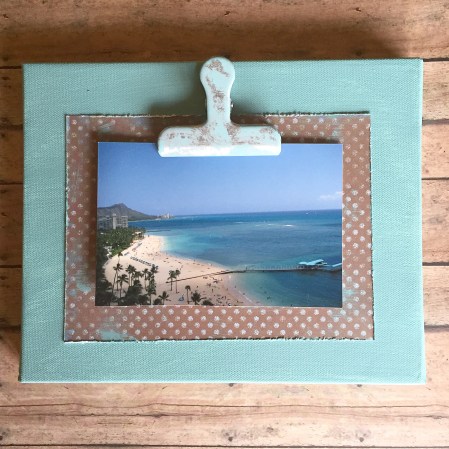
I started with an 8×10 inch blank canvas from the craft store and an extra large bulldog clip that I picked up at Target.
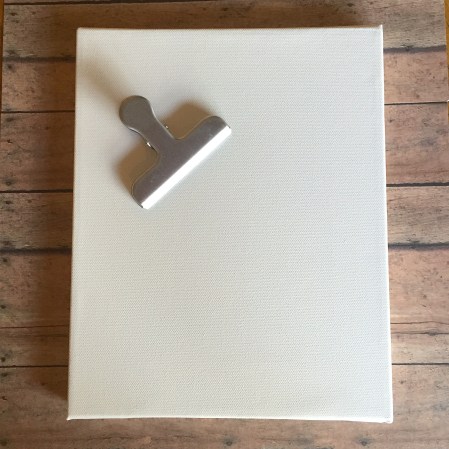
IMG_6389

I brushed the canvas with one coat of Folk Art Home Decor Chalk Paint in Cascade. I didn’t worry about full coverage because I wanted it to have a distressed look. Just add another coat of paint if you’d rather not have any white peeking through. I cut a piece of heavier-weight patterned scrapbook paper to 6×8 inches and used an edge distresser to roughen up the edges a bit. I lightly brushed the edges with the same paint and also dry brushed a little over the rest of the piece. Then the piece is attached to the painted canvas with scrapbook adhesive.

When I put the clip on the canvas, the silver looked a bit stark next to the rest of the project so I brushed a bit of the chalk paint on the clip to soften it up. I used Crafter’s Pick the Ultimate Glue to adhere the clip to the canvas. I really like the way it turned out!
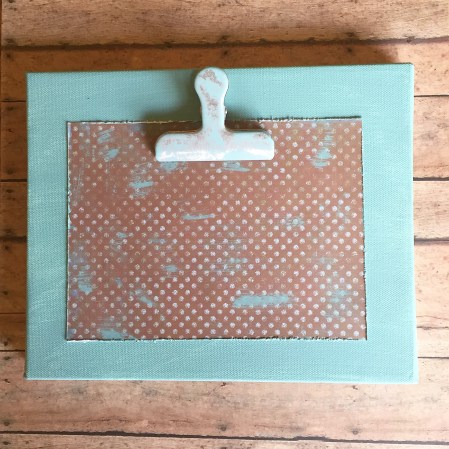
IMG_6390

Here it is with a 4×6 print…

IMG_6391

I found the canvas on sale for around $3.00 and the bulldog clip was $3.00. I already had the paint from this Painted Vase project and the scrapbook paper in my stash. A picture frame to perfectly match my decor for about $6.00 – a pretty good deal! And the possibility of color and pattern combinations are endless! If you need a different size, there are so many canvas sizes to choose from.

You can make these in your favorite colors to match your decor. Or make some for unique gifts – add a favorite picture or even a handwritten recipe card to make it extra special. 🙂

Thanks for stopping by,

Anita


Posted in Decor, Gifts, Uncategorized | Leave a comment

Birthday Wishes

Happy Birthday! This is another cute set from Unity Stamp Company called Sparkly Gift. I made this card for a sweet friend’s birthday. 

I stamped the image with brown ink on white card stock and colored it with Copic markers. I punched the image with a circle punch and layered it to a scalloped circle punched from patterned paper. I added clear glitter glue to the “sparkles” on the image. The sentiment is stamped with purple ink on white card stock, trimmed close, and layered to purple card stock. 

To assemble the card, emboss a panel of white card stock with the swirl embossing folder from Cuttlebug. Attach a strip of purple card stock that has been punched with the scalloped edge punch from Fiskars. Attach panel to a green card. Attach both stamped images with foam tape. Finish the card with 3 tiny green buttons. 

Make this card in your favorite color combination. Or change the sentiment and colors and it would make a great Christmas card!

Happy stamping!

Thanks for stopping by,

Anita

Posted in Cards, Uncategorized | Leave a comment

Chalk Painted Bud Vase

You have some of these stashed away in your garage, basement, or attic. I know you do! Those clear bud vases from the florist that you just can’t quite throw away, but you don’t know what to do with them. Well, I have an idea for you!

IMG_6387

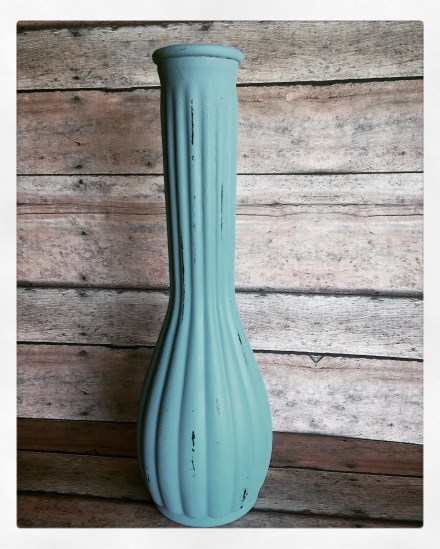
I picked up some of this Folk Art Home Decor Chalk Paint in a beautiful shade of blue called Cascade at my local Hobby Lobby. I love that it comes in 2 oz bottles in several different colors – perfect for small projects! After washing the vase with warm soapy water, let it dry thoroughly. Then simply paint the outside of the vase with 2 coats of paint, making sure to let it dry completely after each coat. After the 2nd coat is dry, lightly sand the vase in different areas to give it a distressed look. Spray the vase with 2 light coats of a matte sealer spray to help keep the paint from chipping off. 

The finished vase…

IMG_6388

Since the vase is painted on the outside, you can actually use it to hold fresh flowers – just be careful with getting the outside too wet – water could ruin your paint!

These pretty vases add a touch of color to small spaces – make several in different shapes, sizes, and colors. (Check your local thrift store – they usually have a ton of vases at very low prices!) Perfect little housewarming gifts, too!

Thanks for stopping by,

Anita


Posted in Decor, Gifts, Uncategorized | 1 Comment

Elastic Stretch Bracelets

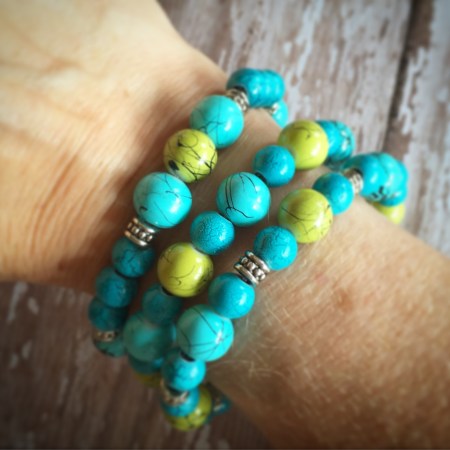
Stretch bracelets are everywhere! I have several that I’ve picked up over the last couple of years and kept thinking “I should make these!” I mean, the craft stores are filled with all manner of beautiful beads – I could make them in any color or style I wanted! So I finally took the plunge, bought some supplies, and tried my hand at this simple craft.

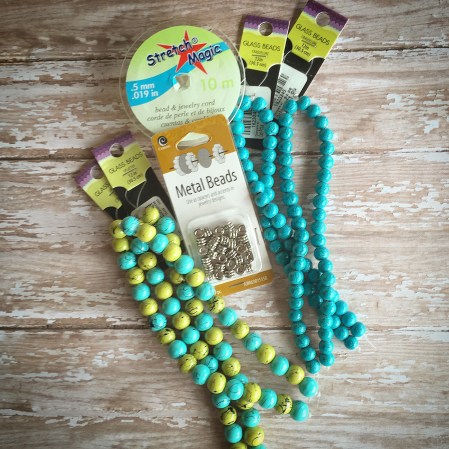
Here is what I got for my first attempt at making these bracelets…

IMG_6363

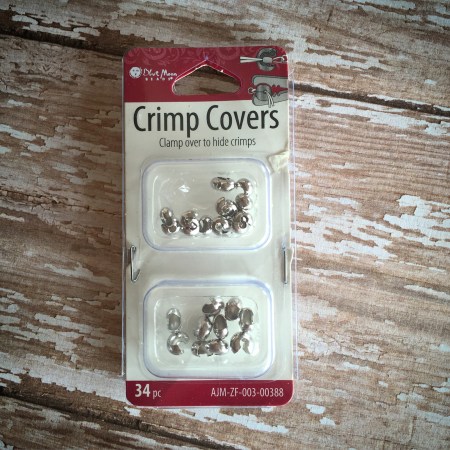
I opted for glass beads with metal beads to use as spacers. The options are truly endless! I found this spool of Stretch Magic in the jewelry section with all the other cording. I also got some of these Crimp Covers to cover the knot after tying off the Stretch Magic.

IMG_6366

I’ve seen several different ideas on how to determine the length of elastic you’ll need to make your bracelet. What I did was to measure loosely around my wrist and add about an inch to that to get the finished size of my bracelet (I like them to be a little loose). Then I added 5-6 inches to that measurement so I would have plenty of room to string the beads without them falling off the other end and to have enough to tie it off when I was finished. 

So here are the measurements for my bracelets. My wrist measures about 6 inches (I have tiny wrists 🙂 ). Add an inch so the bracelet fits loosely and you get 7 inches. Then add 5 inches to that and I cut my elastic 12 inches long. I cut 2 pieces to use on each bracelet since my elastic was pretty thin. I’m sure they make it in different thicknesses – get the thickest you can for your beads or double it up like I did. You want it to be strong enough to hold up to a lot of wear!

Plan the pattern you want to make. I placed the beads in a row until I got the pattern and length that I wanted. Before stringing your beads, give the elastic a good stretch to loosen it. Then simply string your beads onto the elastic. To finish the bracelet, tie a surgeon’s knot (here’s a great video). Then put a drop of glue on the knot to make it stronger and trim off excess elastic. I covered the knot with a crimp cover but you can also slip it inside one of the beads if it will fit.

And here they are…

IMG_6364

I love them all stacked together!

IMG_6365

I was able to make all 3 bracelets using just one package of each of the bead strings – with a few left over. I also have several of the metal beads left, too. 

These were so easy and fun to make! So many bead choices, so many colors, and even themed beads to personalize your bracelets. They would make great gifts!

Thanks for stopping by,

Anita
Posted in Gifts, Uncategorized | Leave a comment

Seashells

One of my very favorite things to do when we go to the beach is to walk along the shore looking for seashells. I do it every single time we go – every day we’re there if I can! And I always come back with at least a few – sometimes a pocketful.😄

These pics are from the beautiful gulf in Destin, FL. We were able to spend a week here in early May. It was wonderful! We had perfect weather and the beaches weren’t crowded yet. It was the best time to go…but don’t tell anyone or they will all want to go then – it will be our secret! 😉

IMG_6339

IMG_6340

The question is always “what will I do with the seashells when I get home”? I made this Muslin Flower Jelly Jar to put them in from one of our trips, but it doesn’t hold very many. So I needed to come up with another option…

I had this square glass container from a lovely fresh flower arrangement (Thanks, Jenny!) that I thought would be perfect. With just a couple of touches, it now serves as a great place to display my seashells and there is room to add more from our next trip to the beautiful gulf beaches. (Don’t forget to soak your shells in bleach water and air dry to kill any bacteria!)

IMG_6338

I wrapped the container with blue chevron washi tape and added a strip of cork tape over that. Then I wrapped the top several times with twine and tied on the shell charm (I found it in the jewelry area of my local craft store). You could also use one of your shells by glueing a jewelry finding to the top of your favorite shell. I wanted something bigger than what I had so I settled on the charm – hopefully I’ll be able to find the perfect shell to replace it on the next beach trip!

So until our next beach vacation, I have this little reminder of the Emerald Shore!!

Thanks for stopping by,

Anita

Posted in Decor, Uncategorized | Leave a comment

Happy Father’s Day, Dad – I Miss You!

Tomorrow will be a year since my Dad went home. It’s been a hard year filled with lots of tears and getting through all the “firsts” without him. Not a day goes by that he’s not in my thoughts. I miss him so very much! 


I miss the “so how’s Anita doing?” whenever I would talk to him on the phone. I miss the “hey, look who’s here” when I would walk into the house for a visit. I miss his hand on the back of my neck when he was telling me something important. I miss seeing him at the end of the table during family gatherings. I miss watching the cheesy commercials on TV and groaning and laughing at them together. I miss his advice when I asked for it. I miss his many stories about all that happened to him in his 83 years. I just miss HIM…

But I am so grateful that I had him for nearly 55 years of my life. Grateful that he loved us well. Grateful that we have so many memories to cherish. Grateful he is my Dad. He taught me so much over the years and was a huge part in making me the person I am today. I hope I am making him proud…

A friend said that she thinks Dad will be standing right behind Jesus to welcome me home when my time comes…what a thing to look forward to!! Until that glorious day…I miss you and love you Dad…Happy Father’s Day!…always in my heart!! ❤

Thanks for stopping by,

Anita

Posted in Uncategorized | Leave a comment

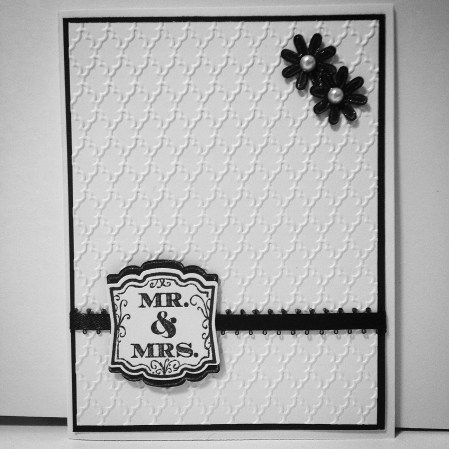
For the Happy Couple – Wedding Card

Summer wedding season is here! This is a simple yet elegant card to make for the happy couple. 

IMG_6328

The stamp, embossing folder, and punches are all from Stampin’ Up. Stamp “Mr. & Mrs.” with black ink on white card stock and punch out. Punch the shape again from black card stock. Cut this piece in half and attach to the stamped image leaving a small border at the top and bottom. I added a little clear glitter glue to the black card stock. 

Emboss a panel of white card stock with the Fancy Fan embossing folder and layer over a slightly larger black card stock panel. Attach a piece of black satin ribbon and then attach the card stock piece to a white card. Punch 2 tiny flowers from black card stock and attach to the card. Glue a tiny pearl in the center of each flower. Attach the stamped piece over the ribbon using foam tape. I also added a little clear glitter glue to the flowers.

This is an easy card to personalize – just change the colors to the ones the bride and groom have chosen for their big day. 

Thanks for stopping by,

Anita

Posted in Cards, Uncategorized | Leave a comment

Balloons Make the Day So Much Better

Have I mentioned that I love Unity Stamps??? My collection from them is ever-growing and they are always coming out with great images. Like this one called Evelyn Girl. She is so fun with her balloon bouquet ready to make the day a little better.

I made this card for a sweet friend’s birthday and I hope it brightened her day. 🙂

FullSizeRender

I stamped the image with brown ink on white card stock and colored it with Copic markers. I layered it to turquoise paper that was punched on one side with the doily lace punch by Martha Stewart. (You can find it here on Amazon.) I stamped the sentiment with brown ink on white card stock, trimmed it close, and layered it to yellow card stock.

To assemble the card, attach a strip of patterned paper to a coral colored card. Then attach Evelyn Girl and the sentiment with foam tape.

She is a super fun image to color – the possible color combinations are endless!!

Thanks for stopping by,

Anita
Posted in Cards, Uncategorized | Leave a comment

DIY Patriotic Clothespin Wreath

You may have seen these Patriotic Clothespin Wreaths floating around the different DIY websites. With the 4th of July just around the corner, I thought it might be fun to make one. Here’s my take on it…

I started out with a 12-inch flat wooden wreath form from my local craft store. Add in some wooden clothespins from the dollar store, wooden stars from the craft store, and acrylic paint (a happy coincidence that the brand name of some of the paint is “Anita’s” 🙂 ) and you have all you need to create this fun project.

IMG_6310

I started out by clipping the clothespins around the wreath to figure out how many I would need – I needed 68 to fit my wreath. Then to mimic the 13 stripes on the American flag, I set aside 28 clothespins to paint red and 24 to paint white (4 for each stripe). That left me with 16 to paint blue. Depending on the size of the wreath form you choose, just adjust the number of clothespins for each section.

I painted the wreath form white, along with 24 clothespins and 10 stars. Then I painted 28 clothespins red and painted 16 blue. (I used two coats of paint.) You could also use spray paint which would cut down the time to create this wreath quite a bit. I had the acrylic paint in my craft stash so I just used what I had on hand.

After everything is dry, simply clip the clothespins on the wreath creating the stripes by using 4 red alternating with 4 white. Add the blue clothespins and glue the stars to the blue section. I finished the wreath with a couple coats of a matte sealing spray.

And here it is…

IMG_6311

A fun addition to your Summer decor! 🇺🇸

Thanks for stopping by,

Anita


Posted in Decor, Gifts, Uncategorized | 2 Comments

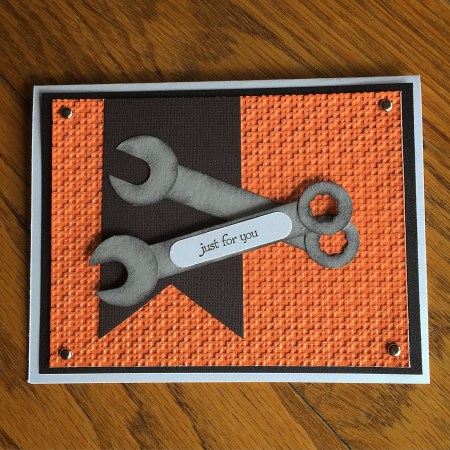
Just For You – Masculine Card

Like a lot of my card-making friends, I tend to struggle with making masculine cards. So when I saw this card on Pinterest, I knew it would be perfect for my brother-in-law’s birthday. Sometimes it is so helpful that there are so many other talented cardmakers out there who share their ideas with the rest of us!!

Here is my take on this great card that I found on the scrap sprinkle crop blog.

IMG_6212

I changed the color scheme and the sentiment, but other than that I pretty much “card lifted” her design. It is such a clever idea – just perfect for that special handyman in your life.

Thank you, Jessica Lewis, for this great idea!!

Thanks for stopping by,

Anita

Posted in Cards, Uncategorized | Leave a comment