Have you seen the new Winnie the Pooh stamps at Unity Stamp Company?!?! They are amazing and my collection is growing – so far they have released 5 different sets. 🙂 Three of the sets feature Pooh and Piglet and two feature Eeyore. One of the Eeyore sets is a sentiment set with lots of “Poohisms” that are perfect for all your cards. I’m hoping they will release Tigger soon!
Disclosure: Some of the links on my site are affiliate links, meaning, at no additional cost to you, I will earn a small commission if you click through and make a purchase. As an Amazon Associate I earn from qualifying purchases.
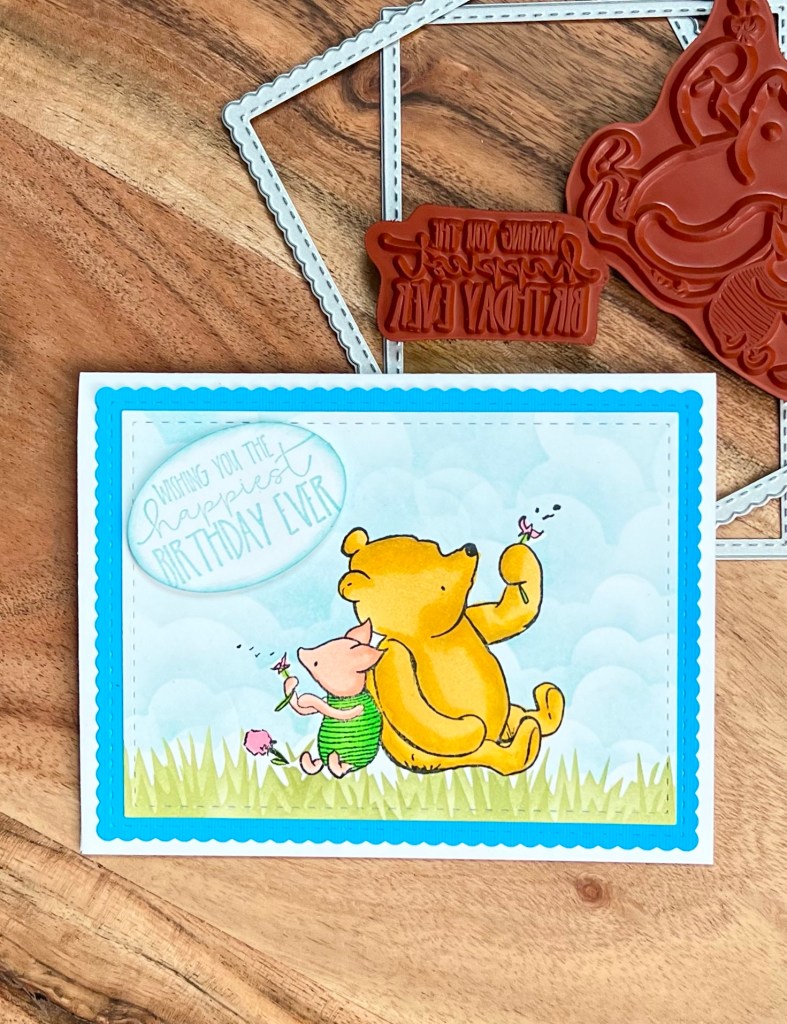
I used the Winnie the Pooh: How Do You Spell Love? set to make this sweet Pooh and Piglet Birthday card. I stamped the image with Memento Tuxedo Black ink on white card stock and colored it with Copic markers. The Copic colors I used for Pooh were Y26, Y19, and Y21. The colors for Piglet are R01 and R02 with YG07 and YG05 for his little outfit.
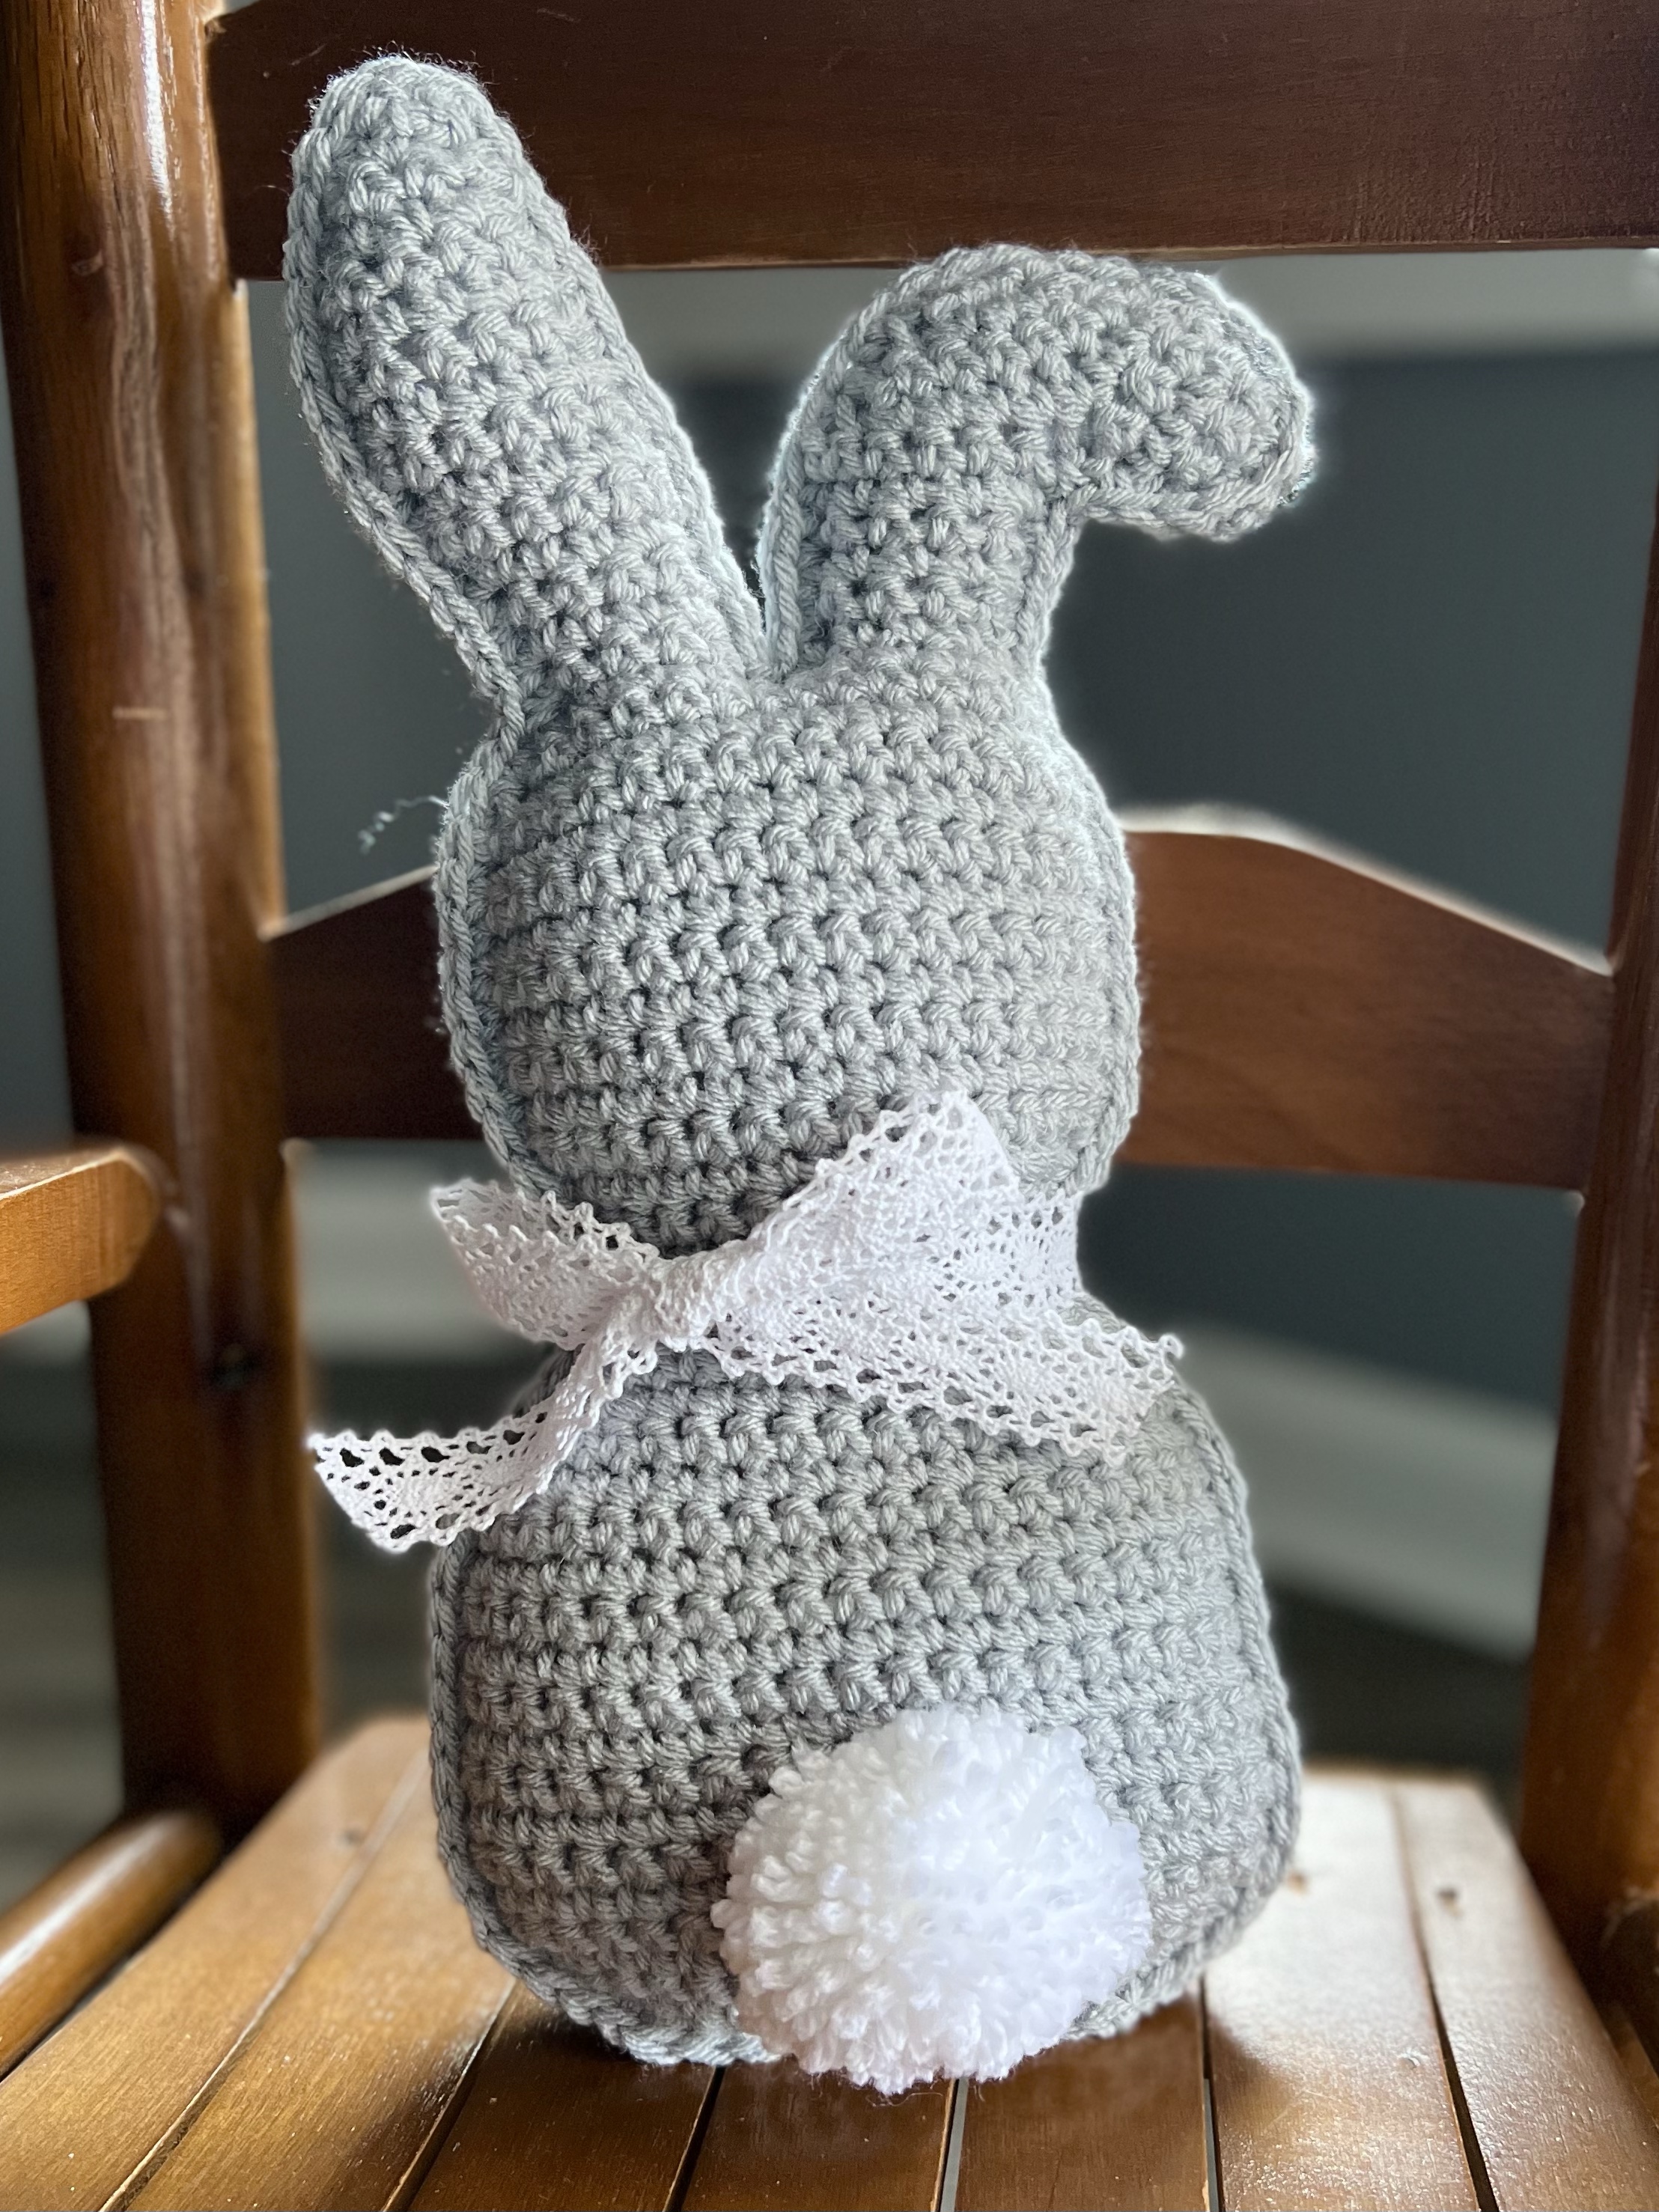
I found the cutest Crochet Easter Bunny pattern here at Winding Road Crochet! It’s a free pattern and I just fell in love with the little bent ear – how cute is that?!?! Adding a pom pom tail and a lace ribbon bow makes it such a sweet bunny.
Disclosure: Some of the links on my site are affiliate links, meaning, at no additional cost to you, I will earn a small commission if you click through and make a purchase. As an Amazon Associate I earn from qualifying purchases.
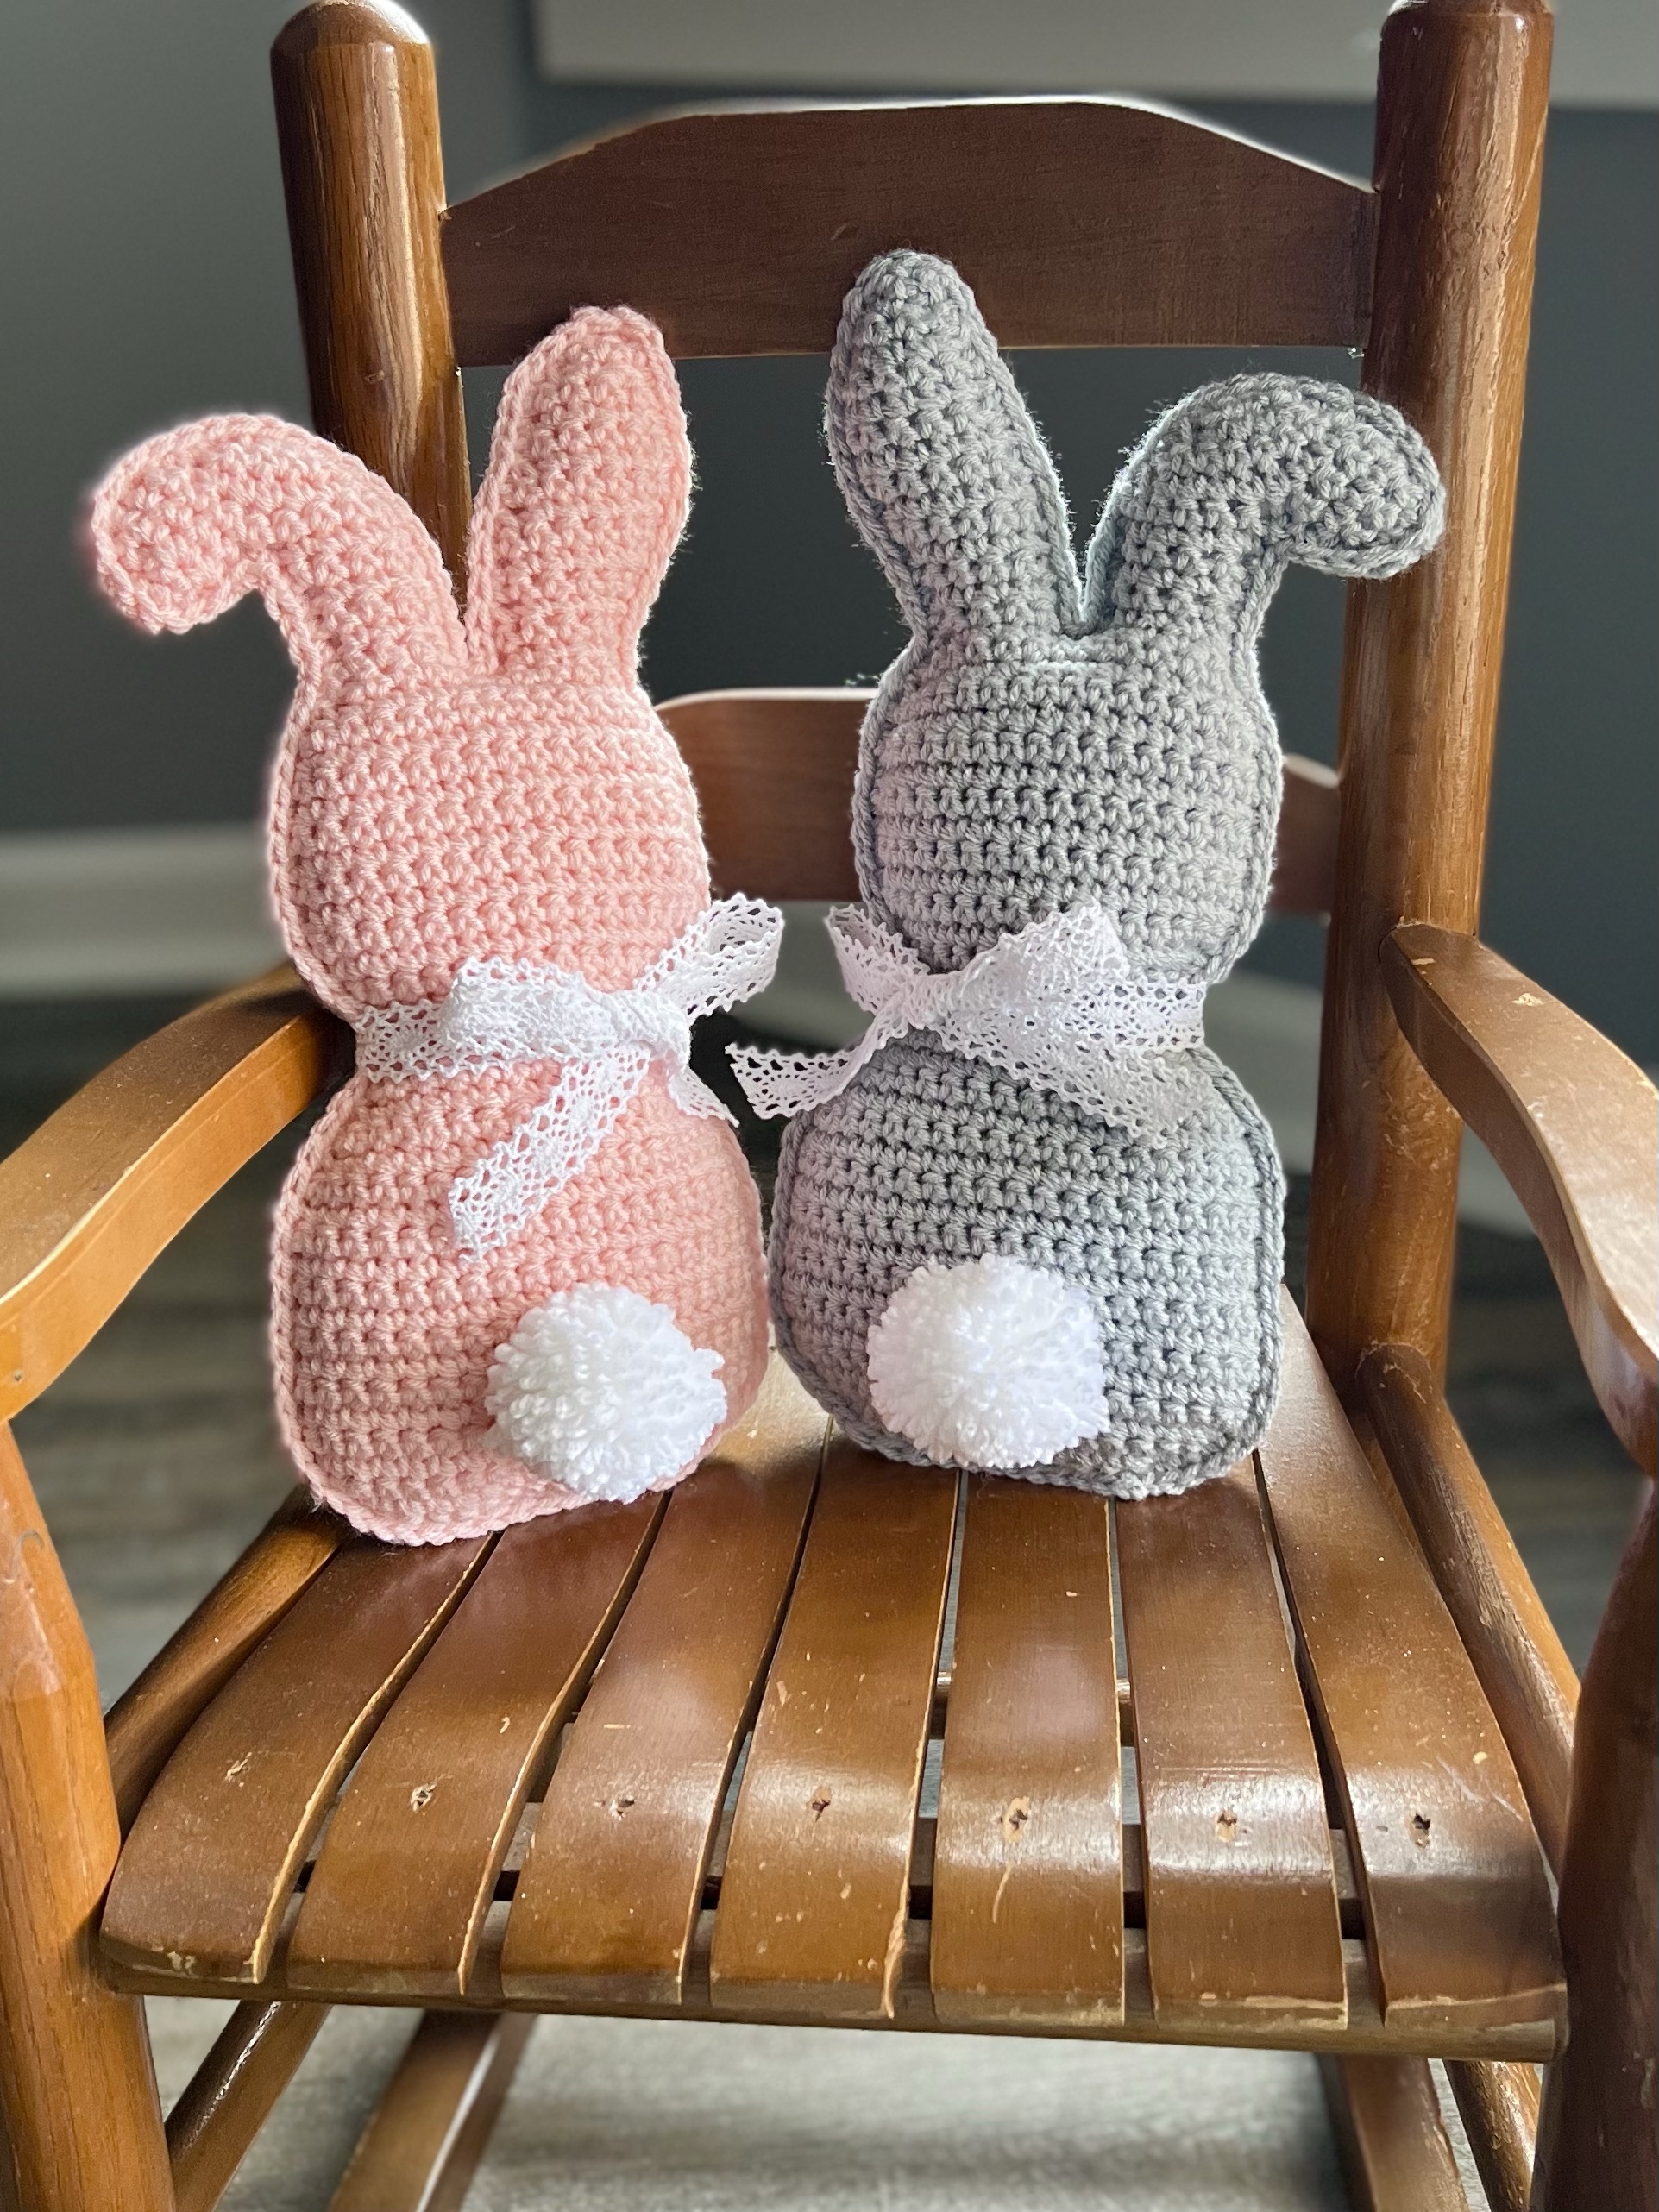
It’s a super easy pattern to follow and works up very quickly. It’s worked in 2 pieces that you crochet together and stuff with Poly-Fil. I used Yarn Bee Soft & Sleek yarn in Soft Pink and Silver Grey with an I/5.5mm hook to stitch up my bunnies.
I used a Clover Pom Pom maker (the 1-5/8 inch size) and I Love This Yarn in White to make the cute bunny tails. I took the yarn tails from tying the pom pom together and threaded them through my stitches to tie the pom pom onto the bunny. Then I added a lace ribbon bow. The finished bunny measures about 12.5 by 5.5 inches.
I think this cute bunny would be adorable in a baby’s nursery or a toddler’s room. You might want to use it just for decoration though due to the pom pom tail and the ribbon bow – better to be safe!
Since the Crochet Easter Bunny works up so quickly, it would be a fun addition to an older child’s Easter basket. Or a sweet addition to your own Easter decor!
Looking for something a little different to craft for Easter? This Farmhouse Bunny Beaded Plaque will add a little rustic touch to your Easter decor and it’s super easy to make!
Disclosure: Some of the links on my site are affiliate links, meaning, at no additional cost to you, I will earn a small commission if you click through and make a purchase. As an Amazon Associate I earn from qualifying purchases.
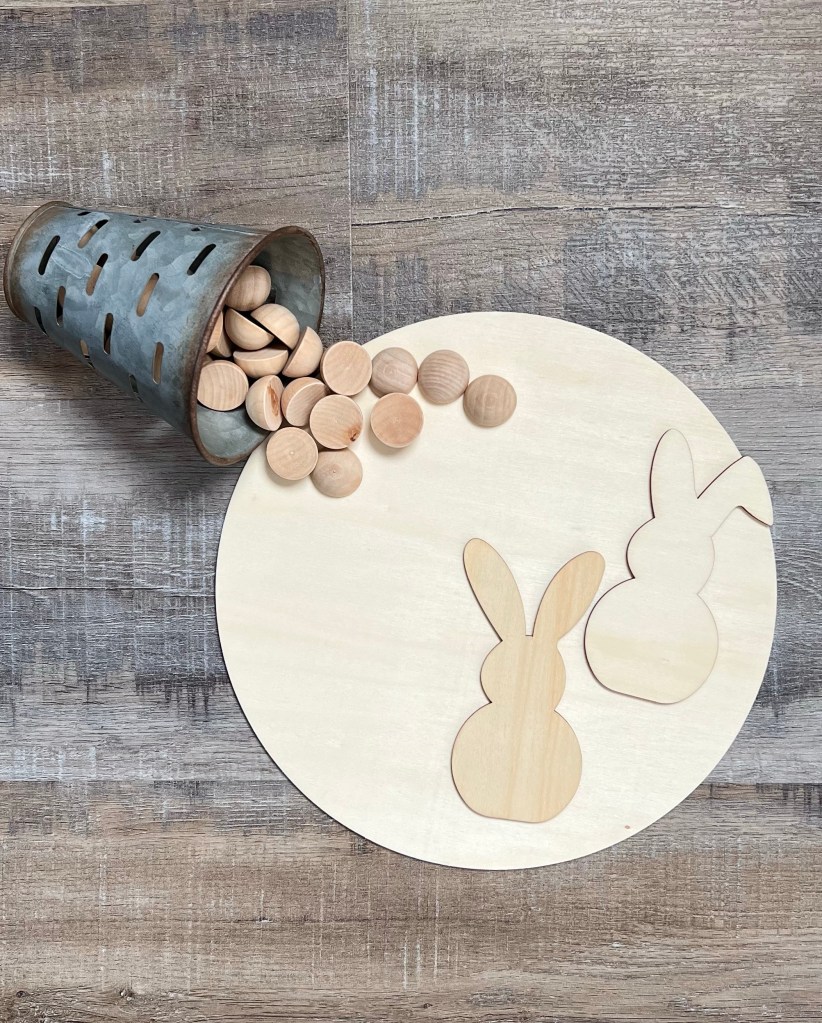
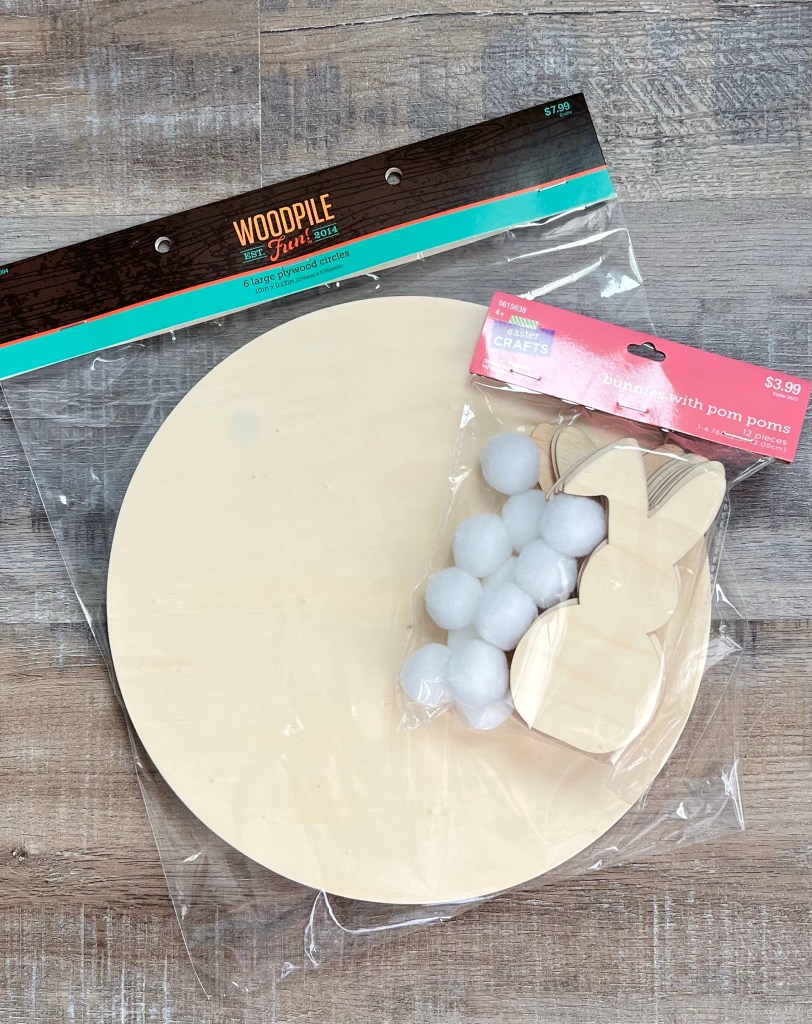
You’ll need a 10-inch wood circle and 2 wood bunny silhouettes. My wood circle came in a package of 6 from Hobby Lobby. My bunnies are also from Hobby Lobby. They came in a package of 12 along with little white pom poms for the tails. You’ll also need some 1/2-inch split wood beads like these and dark brown and white acrylic paint .
I used a chip brush to apply the brown paint to the wood circle, just sort of brushing it on and not covering the entire circle. You can see what I mean in the photo below. I painted the bunnies with white paint and then lightly dry brushed them with brown paint.
I attached the split wood beads to the wood circle with hot glue. I hot glued the bunnies to the center of the circle and glued on the cute little pom pom tails.
My Farmhouse Bunny Beaded Plaque looks cute with my sweet little ceramic bunnies that I picked up at Target for just $3.00!
This would also look so cute painted up in more traditional Easter colors if that’s more your style. 🙂
I found these cute little bunny cutouts at Hobby Lobby in their Easter section. There are 12 bunnies – 6 of each silhouette – along with 12 bunny tail pom poms. And in case you didn’t know, all of the Easter merchandise is 40% off! I also picked up a package of their 10-inch plywood circles to use as a base to make this fun Happy Easter Bunny Wreath.
Disclosure: Some of the links on my site are affiliate links, meaning, at no additional cost to you, I will earn a small commission if you click through and make a purchase. As an Amazon Associate I earn from qualifying purchases.
I traced my bunnies on the back of some scrapbook paper and cut them out. Then using a thin coat of Mod Podge applied with a foam brush, I glued the cut outs to the wood bunny silhouettes
I attached my bunnies to the circle with E6000 clear adhesive. The adhesive dries quickly, but not too quickly, so you can move the bunnies around a little if you need to. I used my hot glue gun to attach the cute little bunny tails and to attach a loop of natural twine to the back for hanging.
It turned out so cute! Such a fun and different twist for an Easter wreath to decorate your front door. 🐇
This would also be such a cute idea for a nursery with the baby’s name in the middle done in colors to match the decor. 🙂
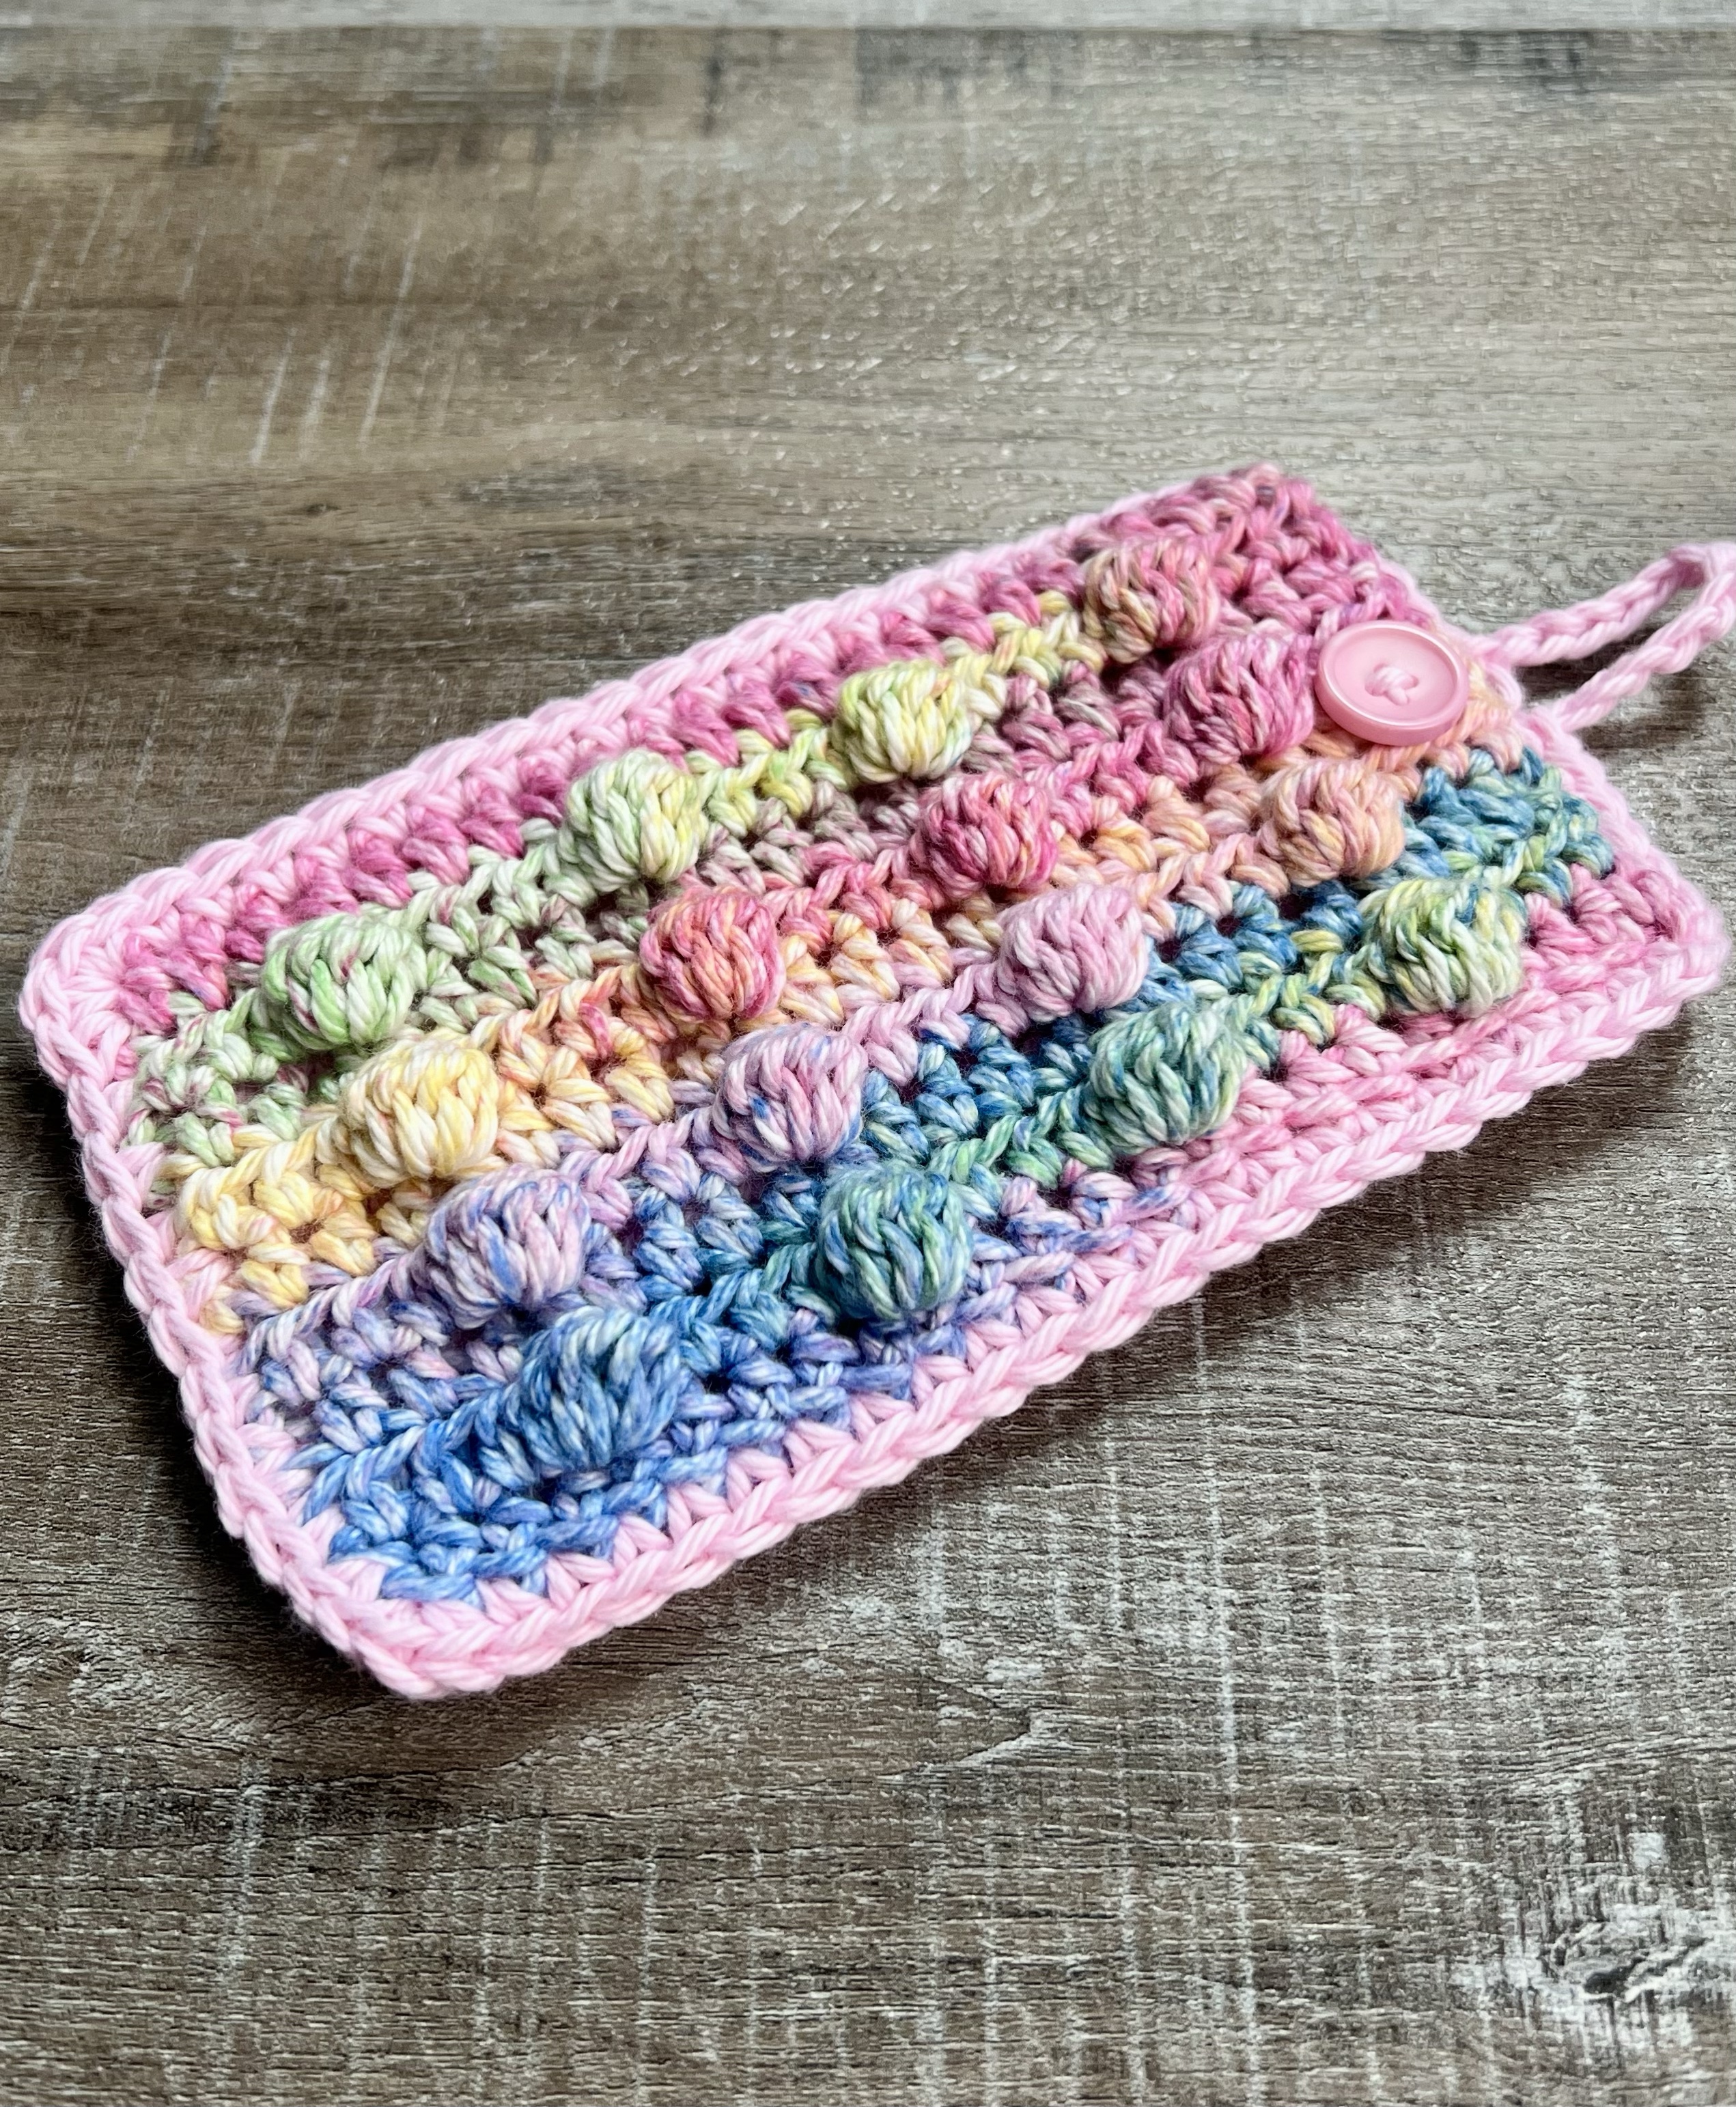
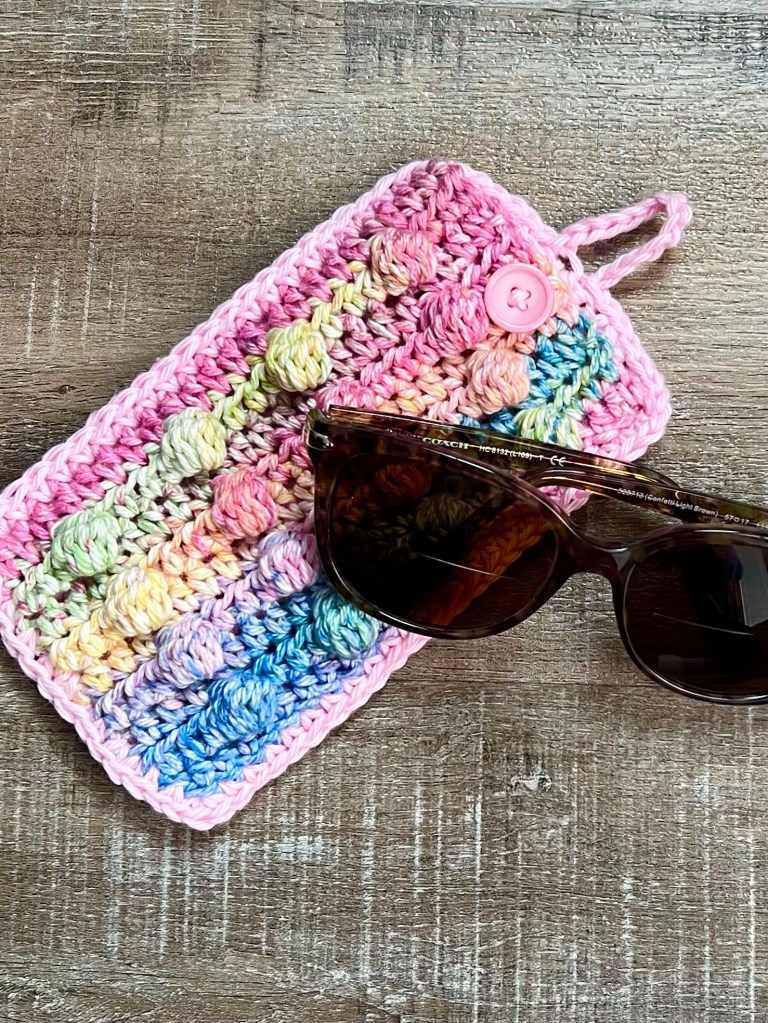
I have a fun new Crochet Bobble Sunglass Pouch pattern to share today. The days are getting longer and we will all be reaching for our sunglasses more often. 😎
Disclosure: Some of the links on my site are affiliate links, meaning, at no additional cost to you, I will earn a small commission if you click through and make a purchase. As an Amazon Associate I earn from qualifying purchases.
The Crochet Bobble Sunglass Pouch works up super quickly and you can make it in your favorite color – or 2 colors like I did. 😊 I used I Love This Cotton yarn in Eastern Nova and Pink with a G/4.5mm hook to stitch up my pouch.
The pattern is below along with a link to a free PDF if you’d like to easily print it.
Crochet Bobble Sunglass Pouch
I Love This Cotton yarn – Eastern Nova and Pink
G/4.5mm hook
1/2 inch button
Stitches used in US terms:
Foundation Half Double Crochet – fhdc
Chain – ch
Half Double Crochet – hdc
Bobble Stitch – bobble
Single Crochet – sc
Slip Stitch – ss
Special stitch: Bobble Stitch – Yarn over, insert hook into stitch, and pull up a loop. Yarn over, pull through two loops. Repeat 4 times – there will be 6 loops on the hook. Yarn over and pull through all 6 loops. Sc in next stitch to complete the Bobble stitch.
Front of pouch
Row 1: Using Eastern Nova, work 23 fhdc. Turn. (23 stitches)
Row 2: ch 1. hdc in first 3 stitches. *work bobble in next stitch, hdc in next 3 stitches* Repeat from * to * across. Turn. (4 bobbles, 15 hdc)
Row 3: ch 1. hdc in each stitch across. Turn. (23 stitches)
Row 4: ch 1. hdc in first 3 stitches. *work bobble in next stitch, hdc in next 3 stitches* Repeat from * to * across. Turn. (4 bobbles, 15 hdc)
Row 5: ch 1. hdc in each stitch across. Turn. (23 stitches)
Row 6: ch 1. hdc in first 3 stitches. *work bobble in next stitch, hdc in next 3 stitches* Repeat from * to * across. Turn. (4 bobbles, 15 hdc)
Row 7: ch 1. hdc in each stitch across. Turn. (23 stitches)
Row 8: ch 1. hdc in first 3 stitches. *work bobble in next stitch, hdc in next 3 stitches* Repeat from * to * across. Turn. (4 bobbles, 15 hdc)
Row 9: ch 1. hdc in each stitch across. Turn. (23 stitches)
Fasten off and weave in ends.
Back of pouch
Row 1: Using Pink, work 23 fhdc. Turn. (23 stitches)
Rows 2-9: ch 1. hdc in each stitch across. Turn. (23 stitches)
Do not fasten off.
Place the back onto the wrong side of the front. ch 1, sc the pieces together beginning at the top of one long side, around the bottom, and up the other side – working 3 sc in each of the bottom corners.
ss across the back only to the center of the top of the pouch. ch 12 to make loop. ss back to the top of the pouch and continue with ss across.
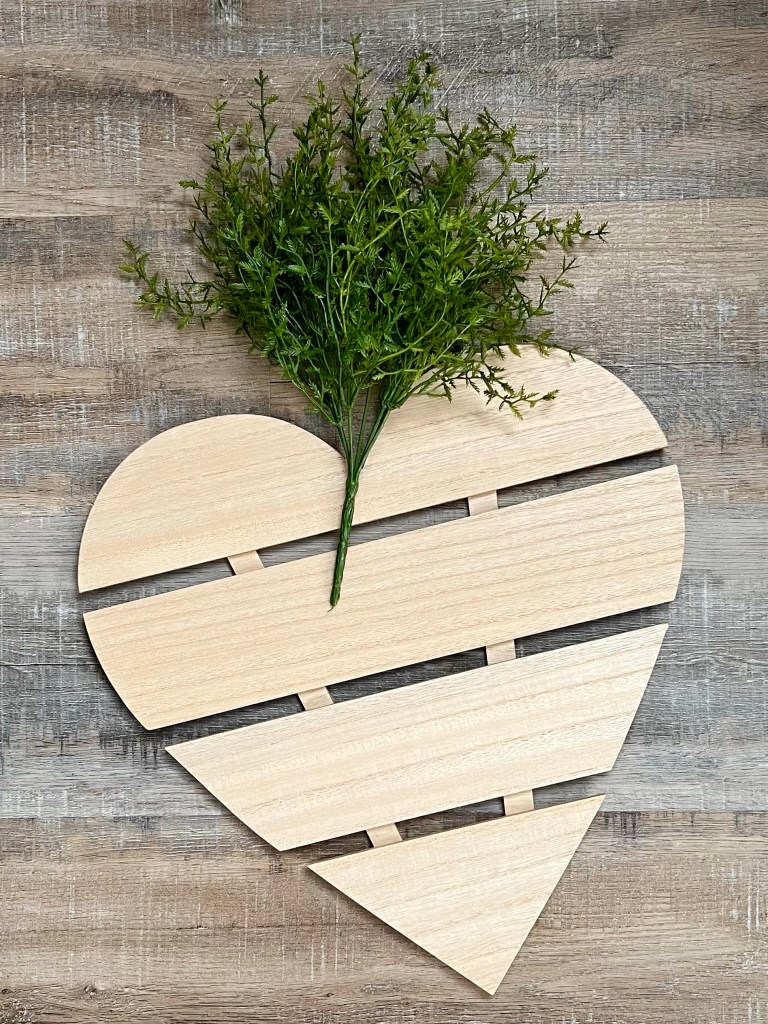
Hearts aren’t just for Valentine’s Day! I picked up this pallet heart from Hobby Lobby’s Valentine’s Day clearance thinking, that with a little paint and greenery, it might make a cute whimsical carrot to add to my Easter decor. And I think it did! 🥕
Disclosure: Some of the links on my site are affiliate links, meaning, at no additional cost to you, I will earn a small commission if you click through and make a purchase. As an Amazon Associate I earn from qualifying purchases.
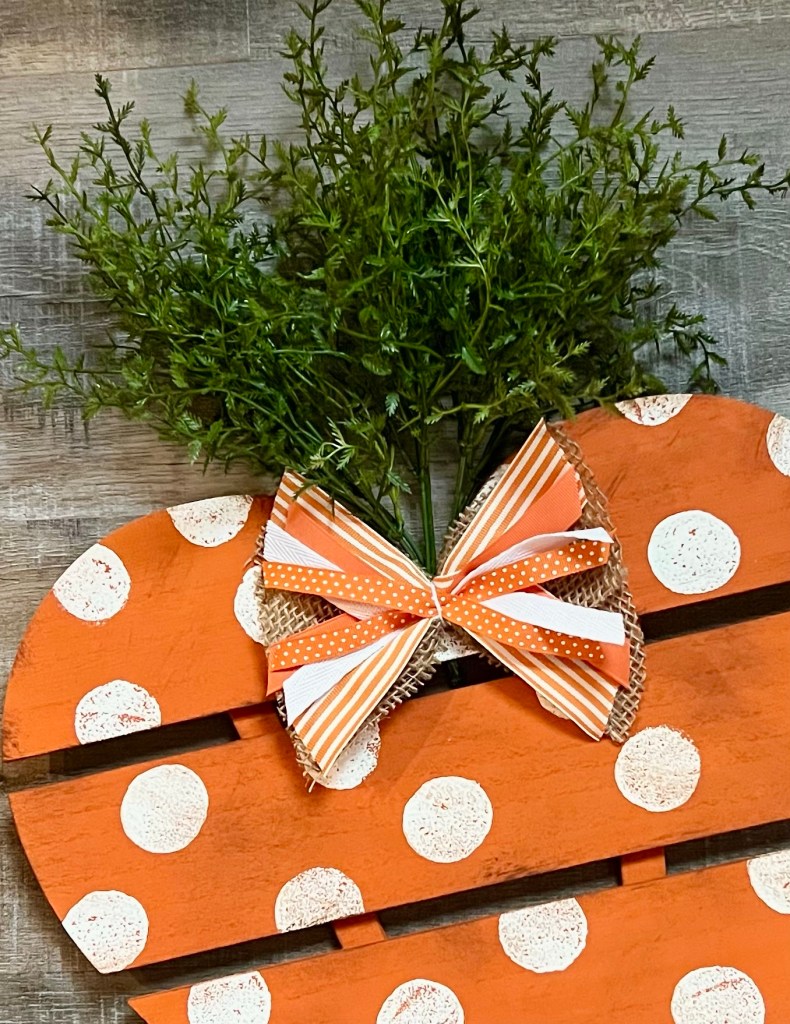
The heart measures about 14-inches long and 14-inches wide at the widest part. First I painted the heart with orange acrylic paint. After it dried, I used a 1-inch spouncer to add white polka dots. Then to add a little depth, I lightly dry brushed some brown paint over the entire heart after the polka dots were completely dry. (This is a great set of acrylic paints if you need to replenish your craft room.)
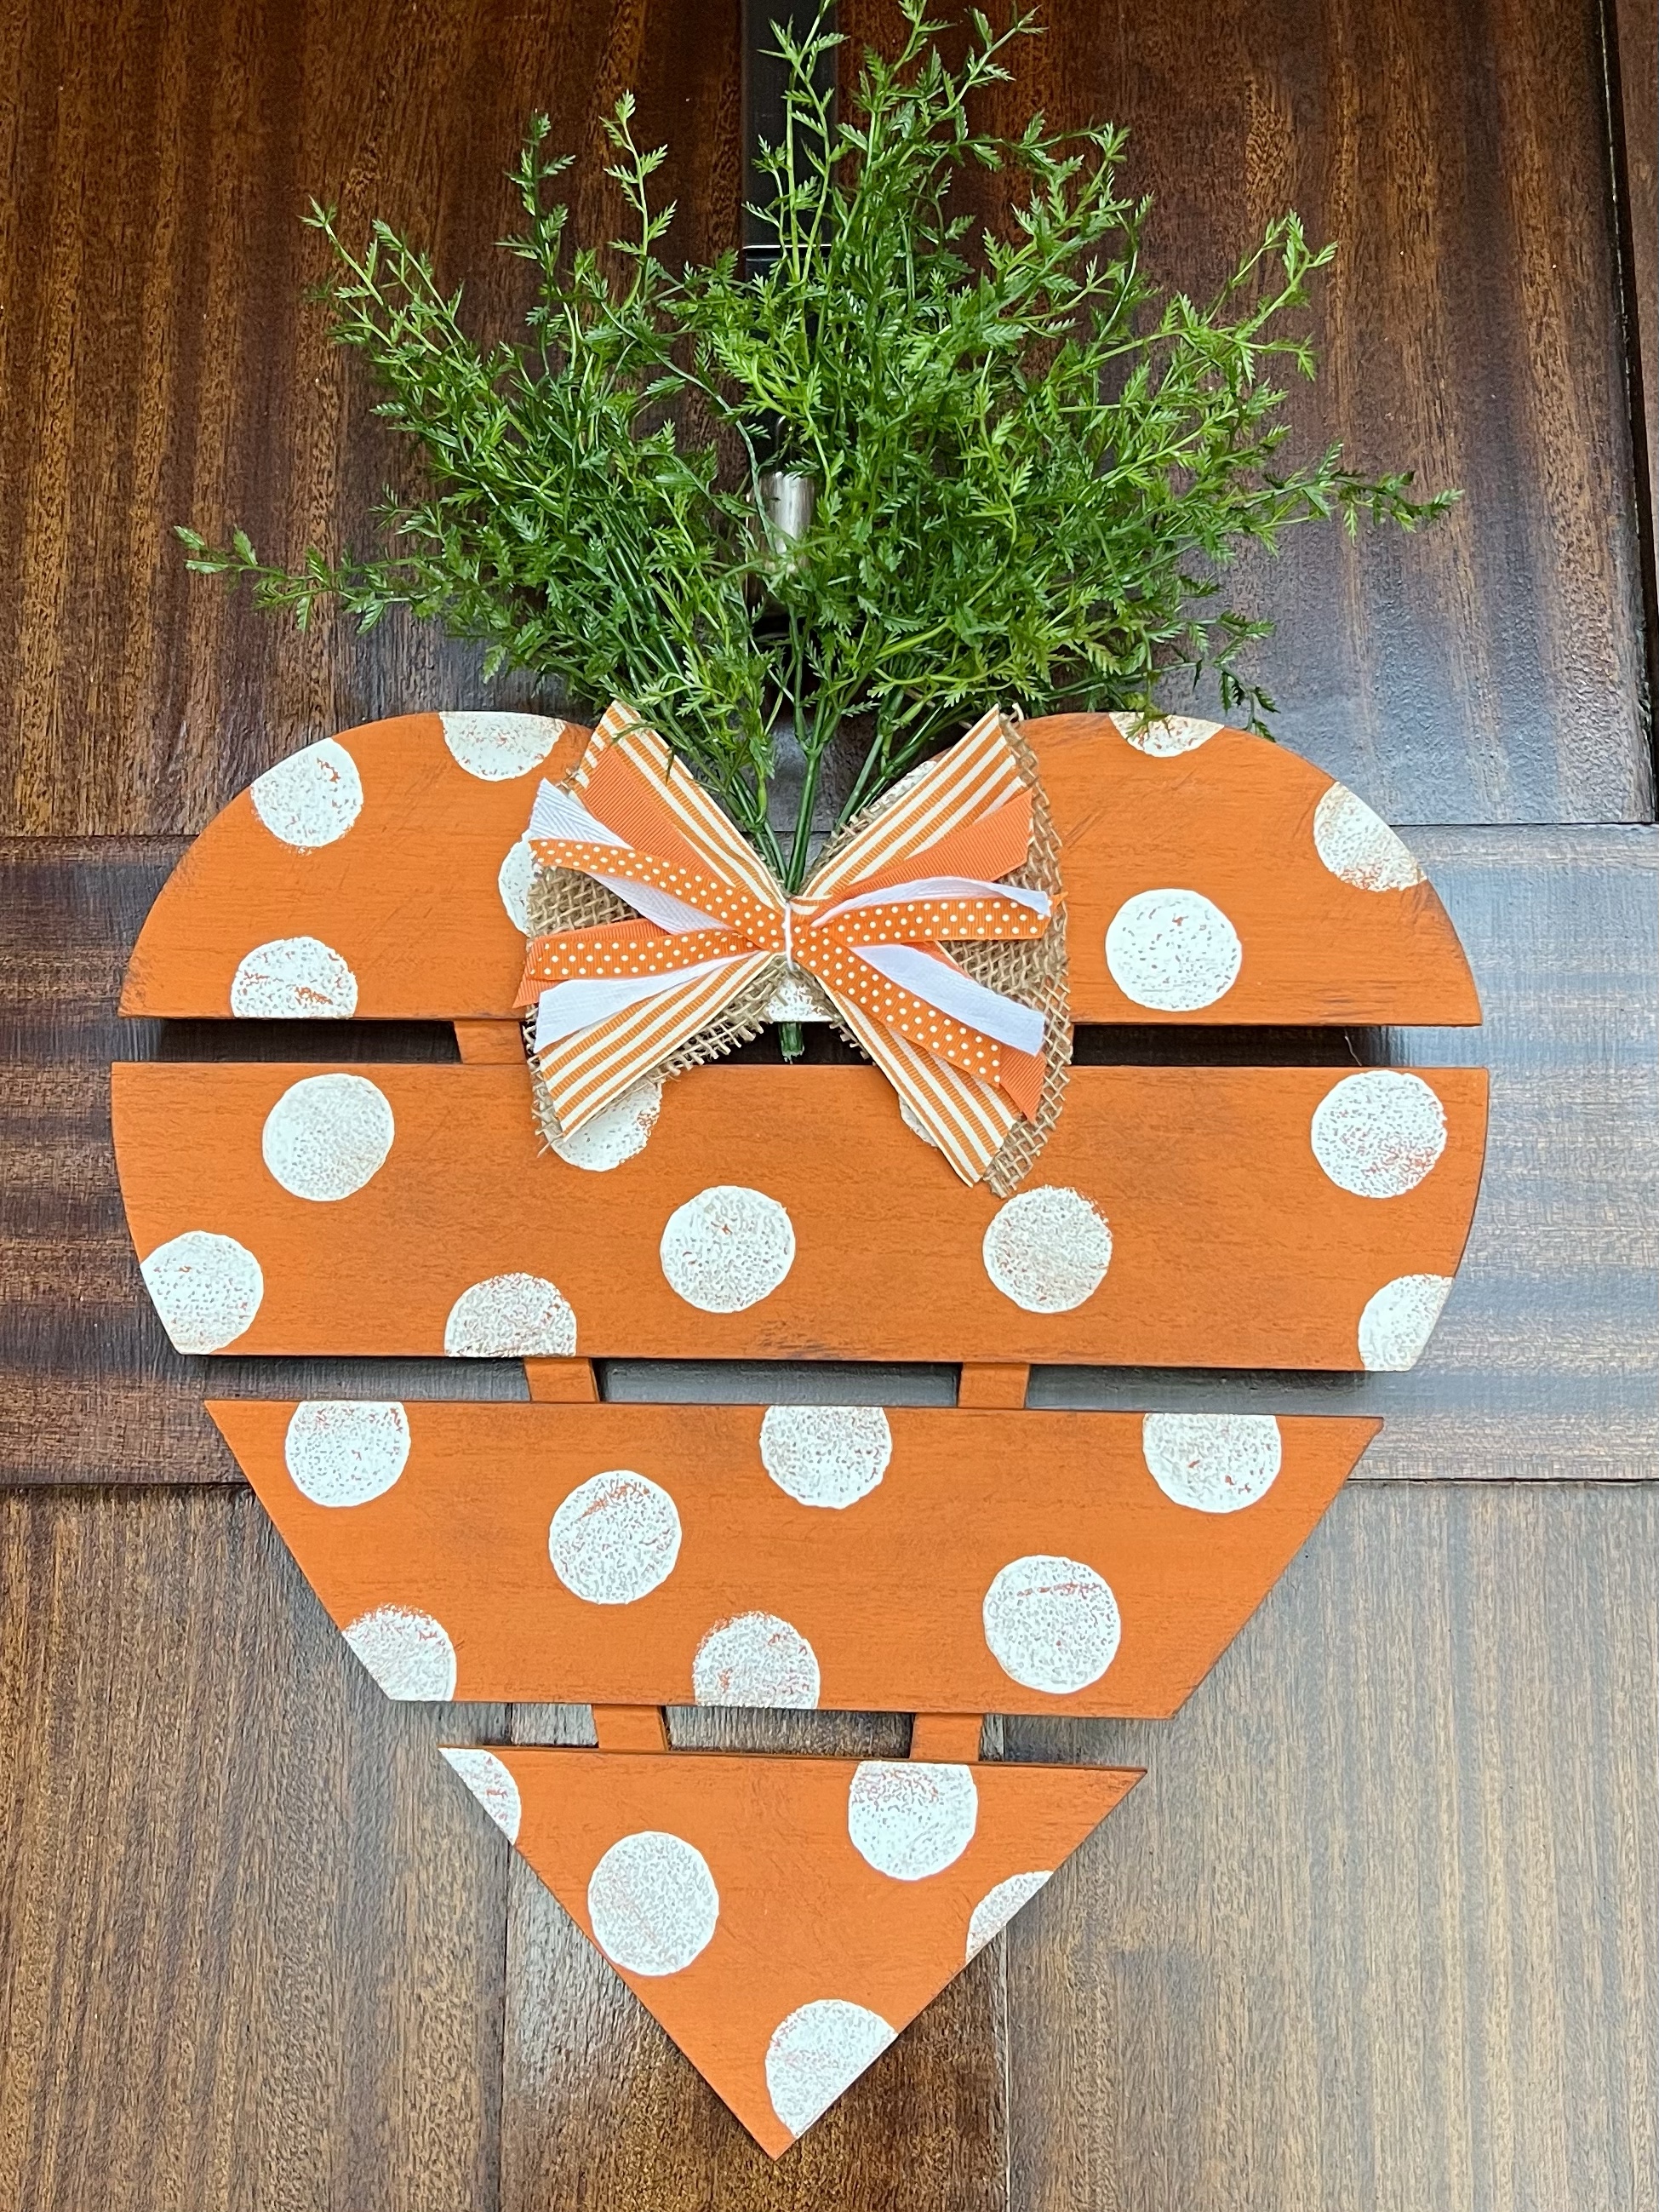
The heart came with a sawtooth hanger on the back, but I took that off so I could attach the greenery. Using hot glue, I attached a bunch of faux greenery to the back of the heart. Then I hot glued some natural twine to the back for hanging. To finish it off, I hot glued a bow made from various ribbons to the front of the heart.
I love the way it turned out! Something a little different but so fun! 🥕
You can make carrots with just about any size heart – the long skinny ones would be great! A basket filled with small carrot hearts would be so cute along with my Rustic Farmhouse Easter Bunny!
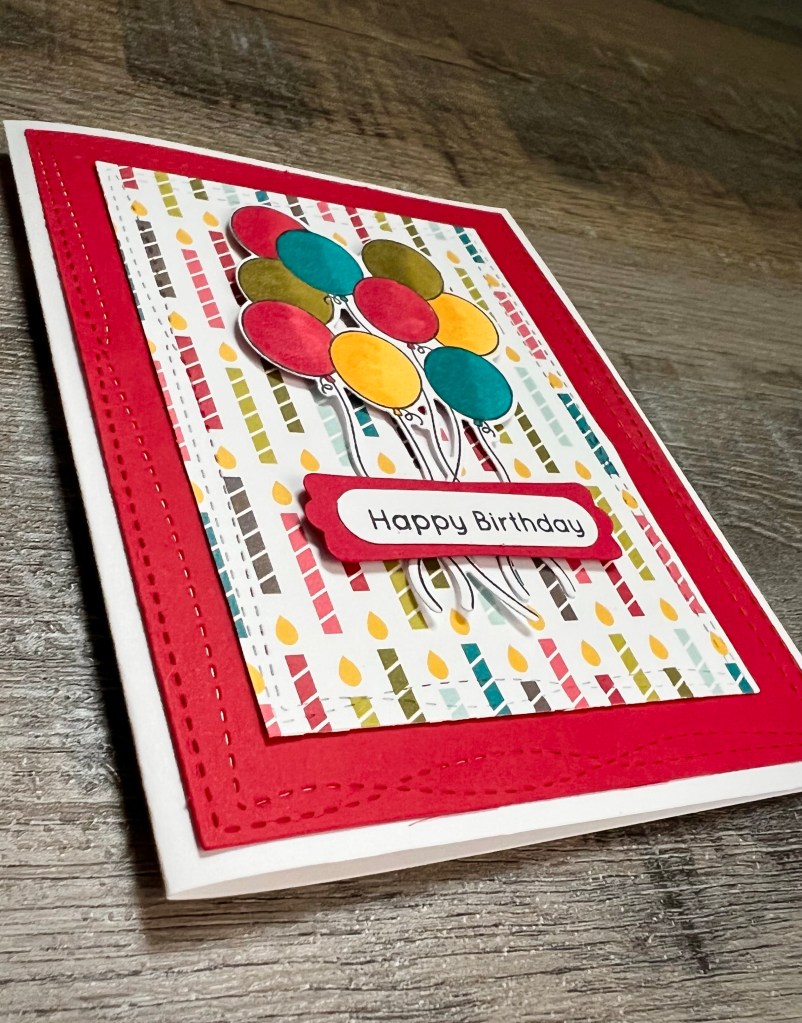
What says “Happy Birthday” more than a fun bunch of balloons? 🎈🎈🎈
I made a couple of cards in slightly different color combos using the Balloon Bundle stamp set along with the matching Balloon Bundle Die-namics die (both from My Favorite Things) that will work for anyone’s special day. The balloons are so fun to color and the die makes it super easy to cut them out.
Disclosure: Some of the links on my site are affiliate links, meaning, at no additional cost to you, I will earn a small commission if you click through and make a purchase. As an Amazon Associate I earn from qualifying purchases.
I stamped the sentiment with black ink on white card stock, punched it with a label punch, and layered it to another label punched from red card stock. My label punches are discontinued, but Stampin’ Up has a great set of Message Dies that has some similar shapes.
I added the balloons to the card using foam tape and then added the sentiment over the balloon strings using foam tape.
The Balloon Bundle stamp set also comes with 2 more sentiments that make this set perfect for any celebration. And of course your color options are endless…this is such a fun set! What will you celebrate?
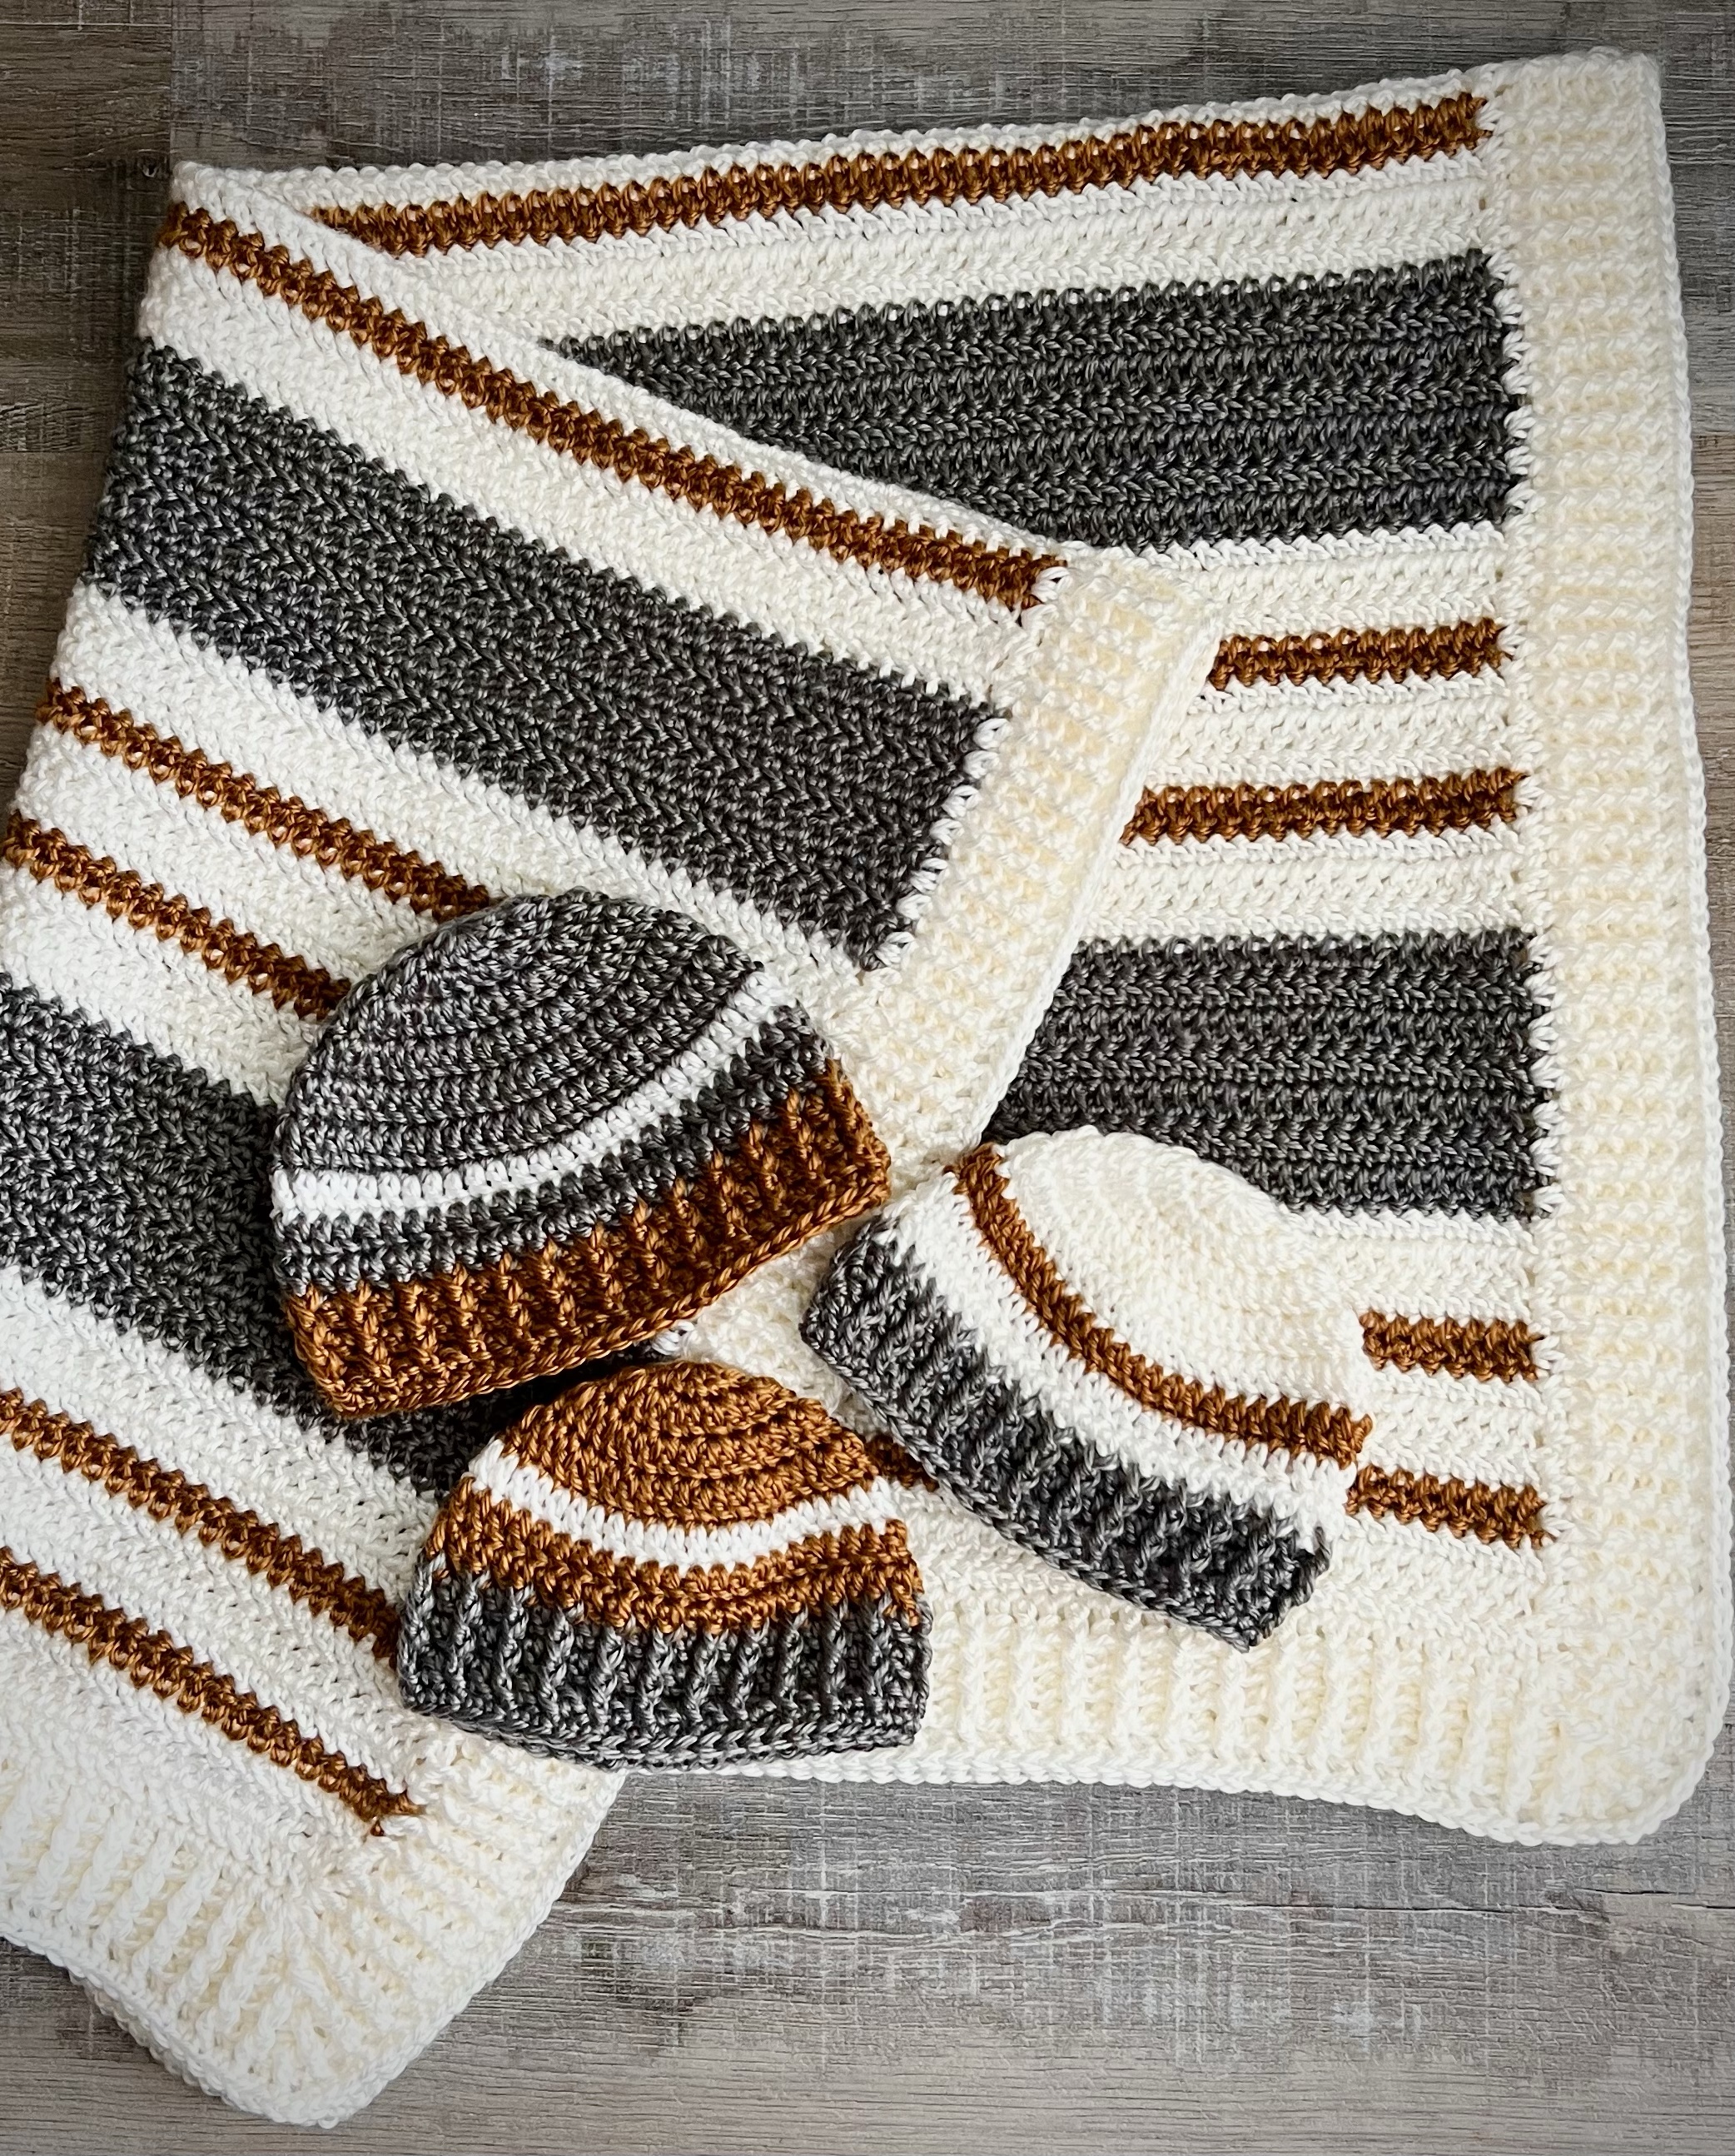
If you’ve followed me for a minute, you know that I love to crochet baby blankets. 🙂 So when my godson and his beautiful wife were expecting their first baby I knew I had to make one for him. He was born on February 14th and is just the sweetest little guy! 💙
Disclosure: Some of the links on my site are affiliate links, meaning, at no additional cost to you, I will earn a small commission if you click through and make a purchase. As an Amazon Associate I earn from qualifying purchases.
I also made Porter 3 little beanies of different sizes so he can grow into them for next Fall and Winter. The free Parker Crochet Baby Hat from Sewrella is one of my favorite patterns and she has 6 different sizes starting from 0-3 months and going through Child size.
I hope Porter will enjoy snuggling in this blanket as much as I loved making it for him!
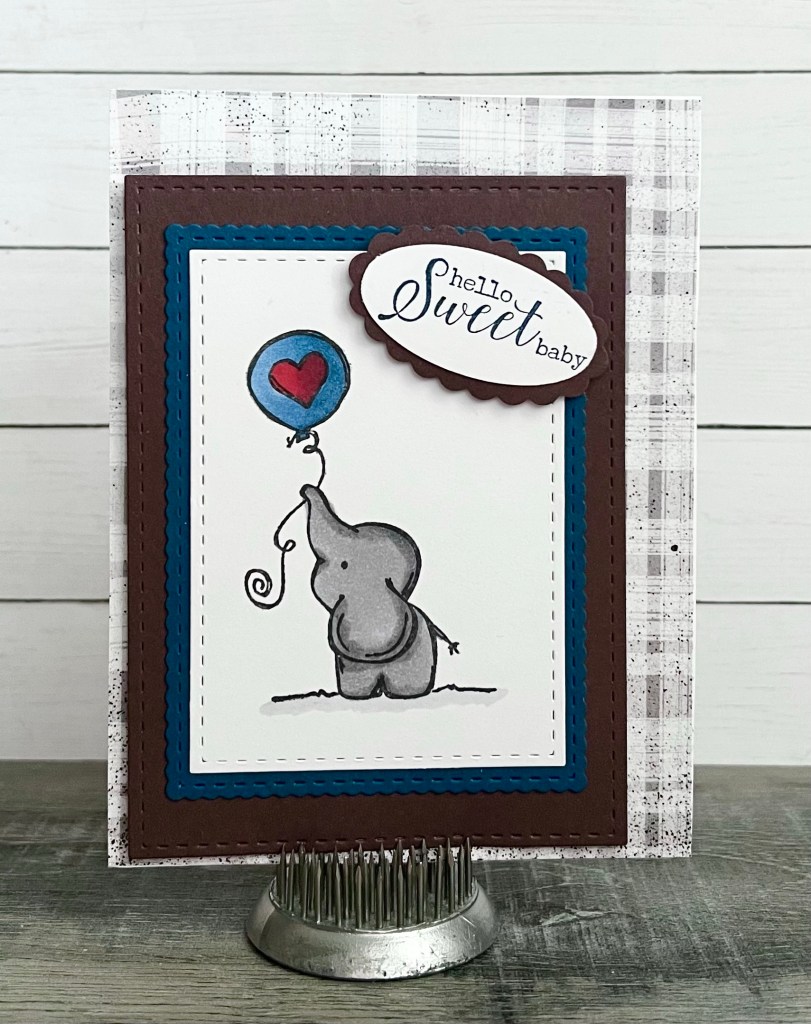
Sweet Elle from Unity Stamp Company is one of my favorite stamps to use for making baby cards. I love the way this card turned out and even though her name is Elle, she made a fantastic baby boy card. 💙 This card was for my godson and his beautiful wife for their first baby – he was born on February 14th and I can’t wait to meet him!!
Disclosure: Some of the links on my site are affiliate links, meaning, at no additional cost to you, I will earn a small commission if you click through and make a purchase. As an Amazon Associate I earn from qualifying purchases.
To assemble the card, I attached a piece of patterned paper to a white card and attached the stamped piece with foam tape. The sentiment is also attached with foam tape.
With a change of color, Sweet Elle makes a sweet baby girl card. And with a change of sentiment, she makes a perfect birthday card!
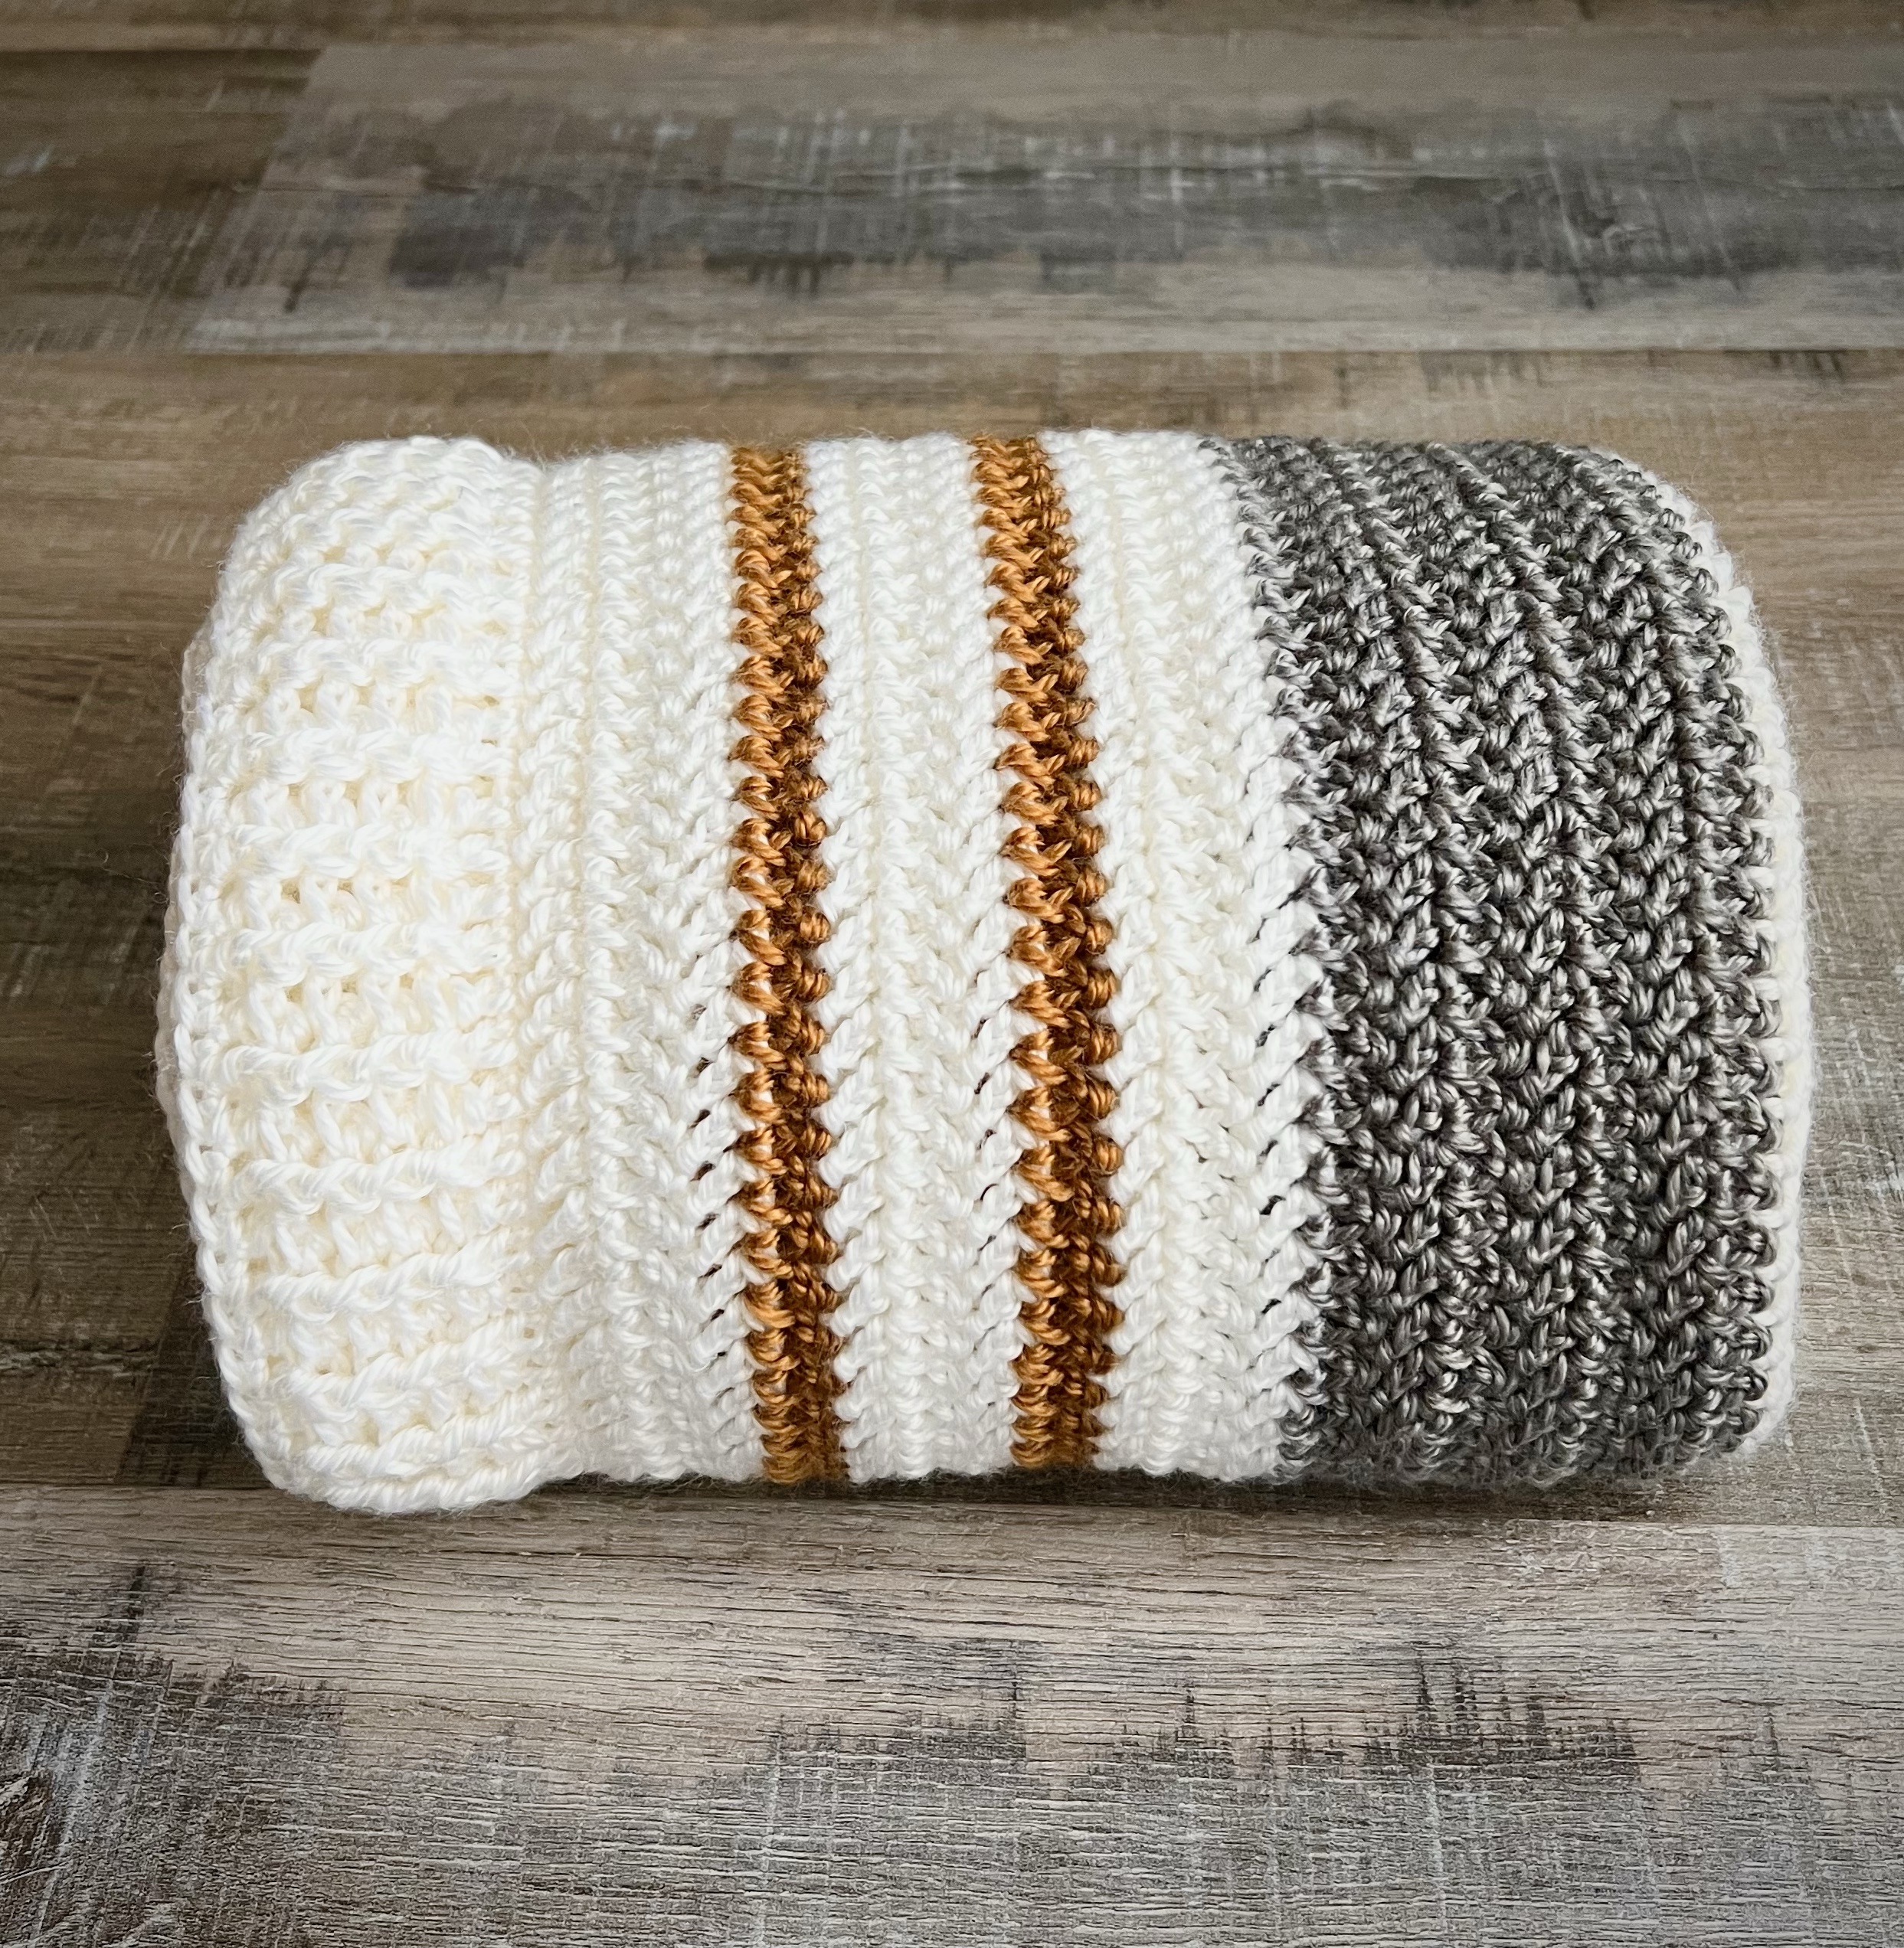
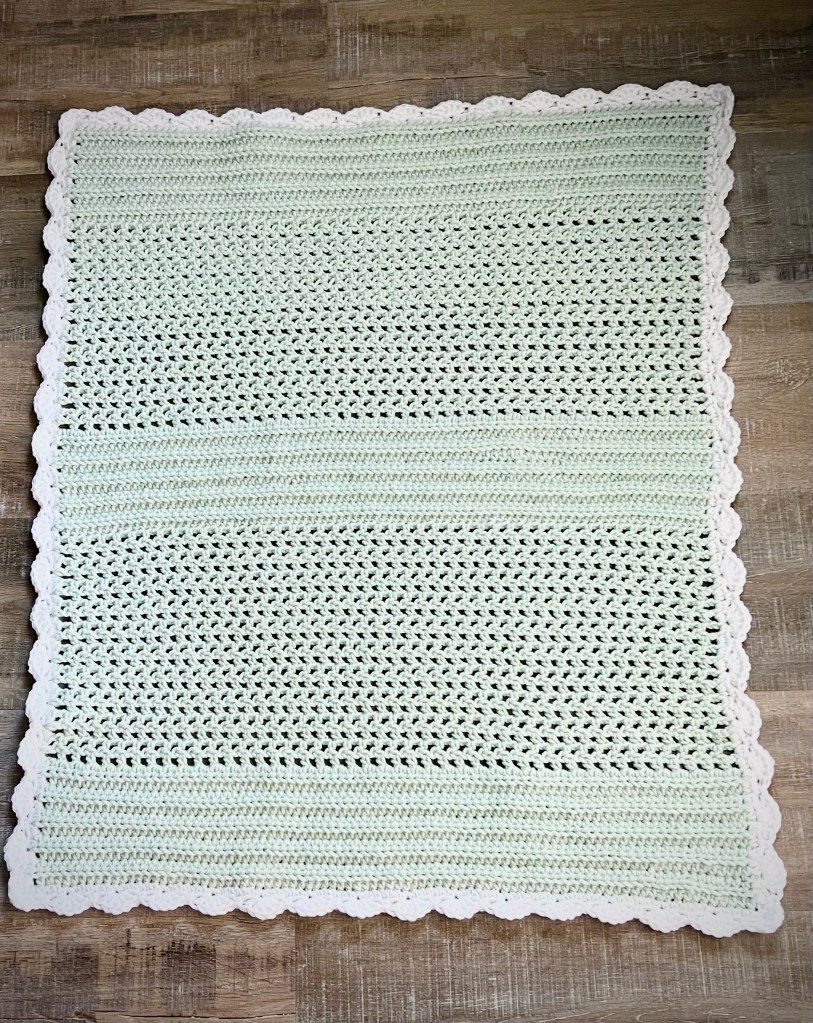
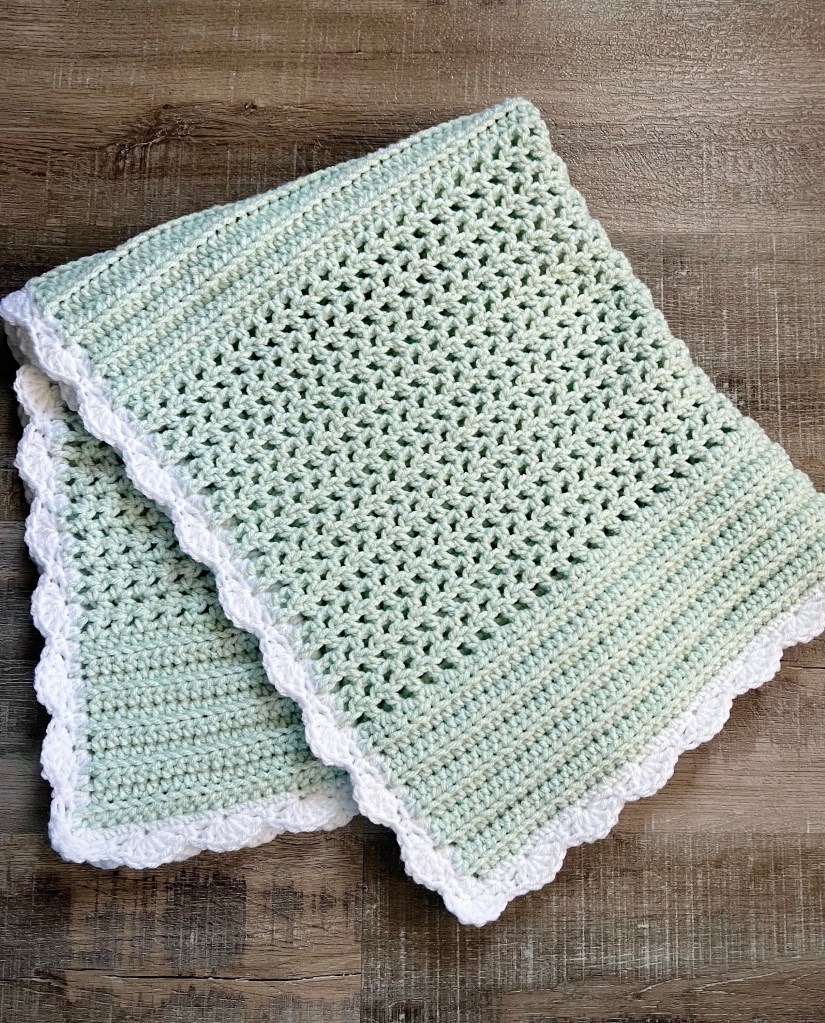
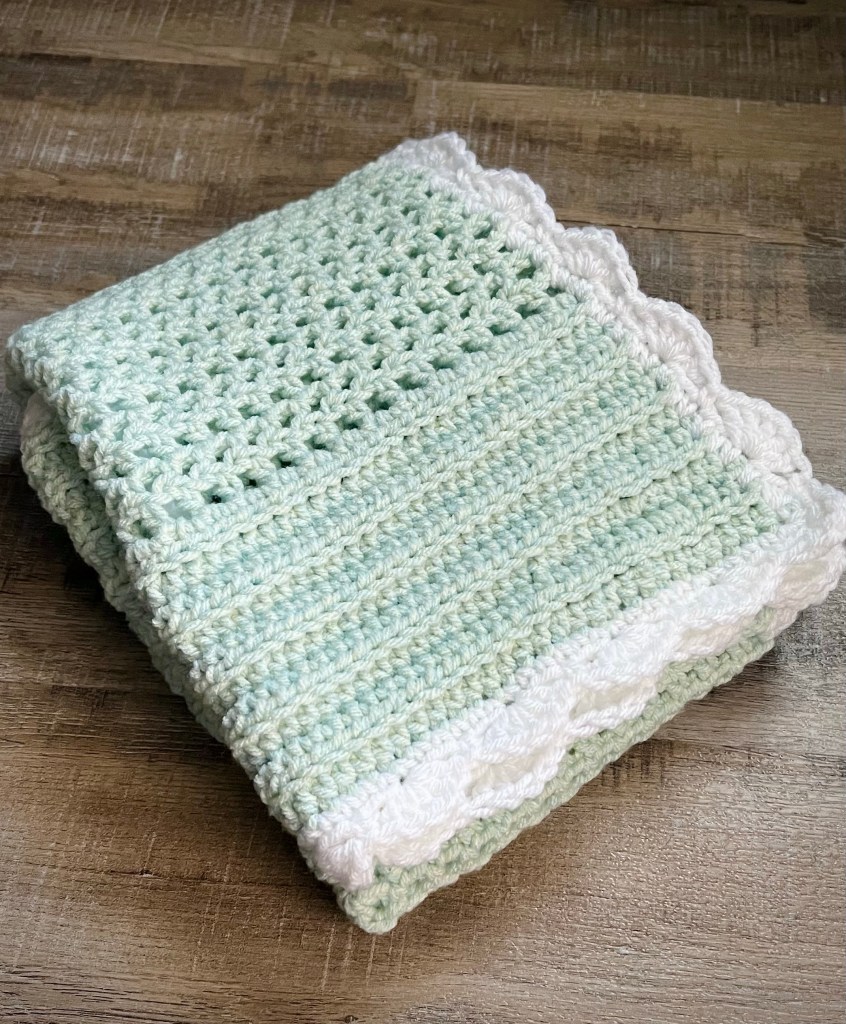
I have a new Sweet and Simple Crochet Baby Blanket pattern to share with you today. It works up quickly and is made with basic crochet stitches, so I think it would be a beginner friendly pattern. The finished size of the blanket is about 25 by 30 inches including the border.
Disclosure: Some of the links on my site are affiliate links, meaning, at no additional cost to you, I will earn a small commission if you click through and make a purchase. As an Amazon Associate I earn from qualifying purchases.
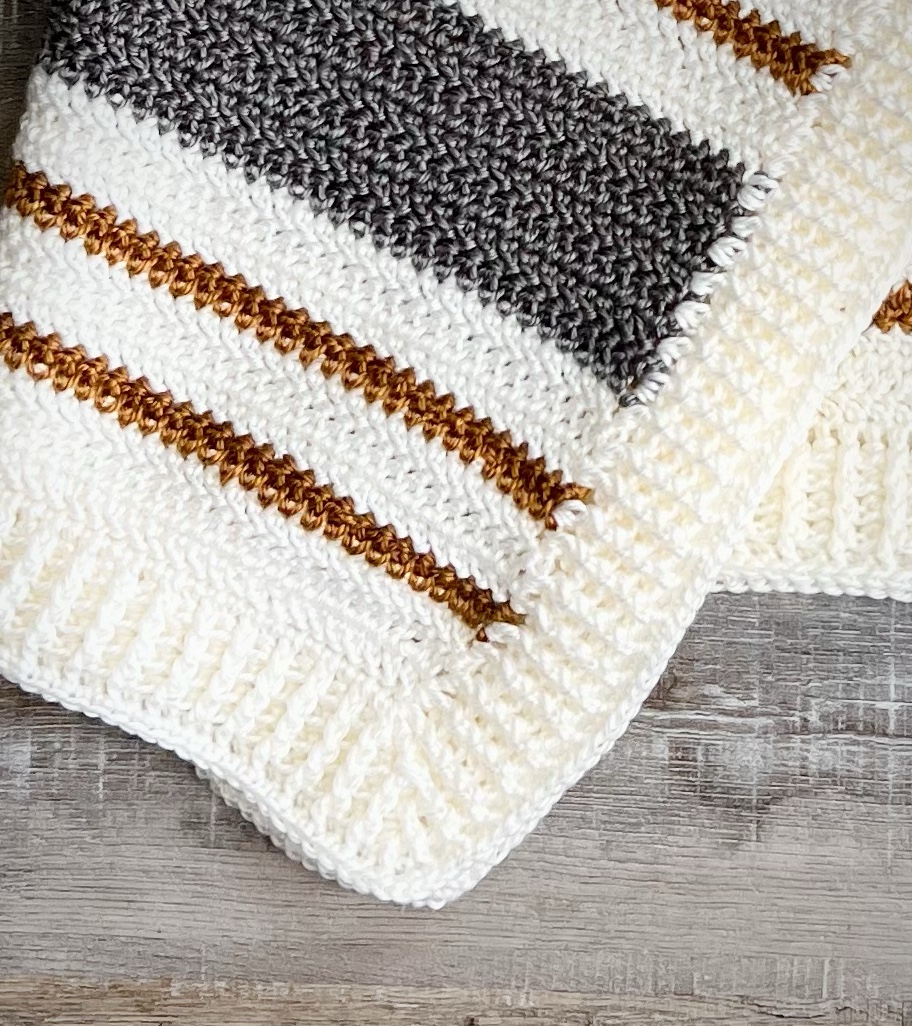
I used I Love This Yarn from Hobby Lobby with an I/5.5mm hook to stitch up my blanket. I started my blanket with the foundation half double crochet stitch. If you need a tutorial for this stitch, you can find a great video here. I love starting my projects this way – it gives such a clean beginning edge to my project which is great when adding a border.
If you find it difficult to crochet evenly around your project when adding the first row of your border, I found this post that has some great tips on how to do it and keep your work from puckering.
The free pattern for the Sweet and Simple Crochet Baby Blanket is below and I’ve also included a link to free PDF if you’d like to easily print it.
Crochet Sweet and Simple Baby Blanket
I Love This Yarn (4 weight) – You’ll Be Mist (about 11 ounces – 2 (5 ounce) skeins plus a little from a third skein) and White (about 1.5 ounces)
The color You’ll Be Mist has been discontinued, but the color Spa appears to be similar.
I/5.5mm hook
Stitches used in US terms:
Foundation half double crochet – fhdc
Chain – ch
Half Double Crochet – hdc
Back Loop Only – blo
Single Crochet – sc
Slip Stitch – ss
Double Crochet – dc
Notes:
(1) chain 2 at beginning of row counts as a hdc stitch
(2) chain 3 at beginning of row counts as 1 hdc stitch and 1 chain
Begin with You’ll Be Mist.
Row 1: work 88 fhdc. Turn. (88 stitches)
Rows 2-10: ch 2 (counts as 1st hdc)
Skip 1st stitch. hdc in blo of next stitch and each stitch across. Turn. (88 stitches)
Row 11: ch 3 (counts as 1 hdc and 1 ch). Skip 1st stitch. hdc in next stitch. *ch 1, skip 1 stitch, hdc in next stitch.* Repeat from * to * across. Turn. (45 hdc and 44 ch 1 spaces)
Rows 12-30: ch 3 (counts as 1 hdc and 1 ch). Skip 1st stitch and 1st ch 1 space. hdc in next hdc. *ch 1, skip ch1 space , hdc in next hdc* Repeat from * to * across, ending with hdc in 2nd ch of ch 3 from previous row. Turn. (45 hdc and 44 ch 1 spaces)
Row 31: ch 2. Skip 1st hdc. *Hdc in next ch 1 space , hdc in next hdc* Repeat from * to * across, ending with hdc in 2nd ch of ch 3 from previous row. Turn. (88 stitches)
Rows 32-40: ch 2 (counts as 1st hdc) Skip 1st stitch. hdc in blo of next stitch and each stitch across. Turn. (88 stitches)
Row 41: ch 3 (counts as 1 hdc and 1 ch). Skip 1st stitch. hdc in next stitch. *ch 1, skip 1 stitch, hdc in next stitch.* Repeat from * to * across. Turn. (45 hdc and 44 ch 1 spaces)
Rows 42-60: ch 3 (counts as 1 hdc and 1 ch). Skip 1st stitch and 1st ch 1 space. hdc in next hdc. *ch 1, skip ch 1 space, hdc in next hdc* Repeat from * to * across, ending with hdc in 2nd ch of ch 3 from previous row. Turn. (45 hdc and 44 ch 1 spaces)
Row 61: ch 2. Skip 1st hdc. *Hdc in next ch 1 space , hdc in next hdc* Repeat from * to * across, ending with hdc in 2nd ch of ch 3 from previous row. Turn. (88 stitches)
Rows 62-70: ch 2 (counts as 1st hdc) Skip 1st stitch. hdc in blo of next stitch and each stitch across. Turn. (88 stitches)
Change to White.
Begin working in rounds.
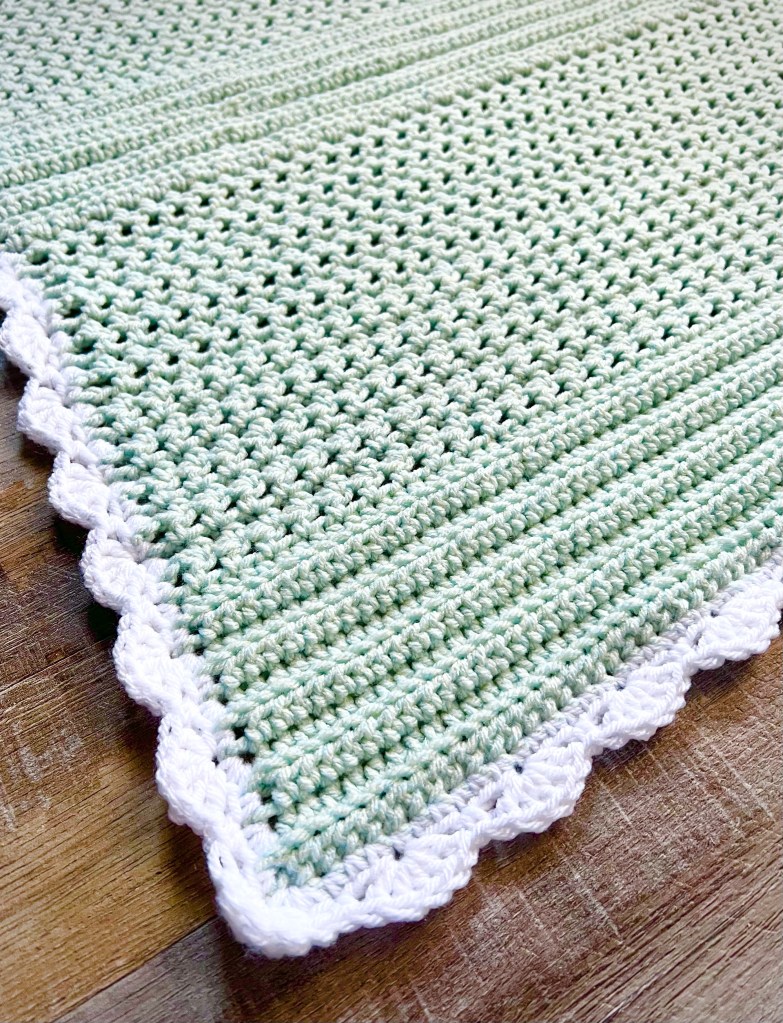
Rnd 1: ch 1 (does not count as stitch) sc evenly around blanket, working 3 sc in each corner. Join with ss to 1st sc. Do not turn.
Rnd 2: ch 1. sc in same stitch as ss. *Skip 2 stitches, 5 dc in next stitch. Skip 2 stitches, sc in next stitch.* Repeat from * to * around. Join with ss to first sc.
This is such a versatile pattern. You can make it with a contrasting border like I did, or make it completely one color. You can make the sections of the blanket in different colors, maybe the solid rows of hdc in one color with the other sections in another color. Or make the solid sections with stripes of 2 different colors. Lots of options! 🙂
What color will you make your Sweet and Simple Crochet Baby Blanket?
Disclosure: Some of the links on my site are affiliate links, meaning, at no additional cost to you, I will earn a small commission if you click through and make a purchase. As an Amazon Associate I earn from qualifying purchases.