Disclosure: Some of the links on my site are affiliate links, meaning, at no additional cost to you, I will earn a small commission if you click through and make a purchase. As an Amazon Associate I earn from qualifying purchases.
If you want to take a look at the other Christmas cards I’ve made so far this year, you can find all the info by clicking on each month – January, February, March, April, May, and June.
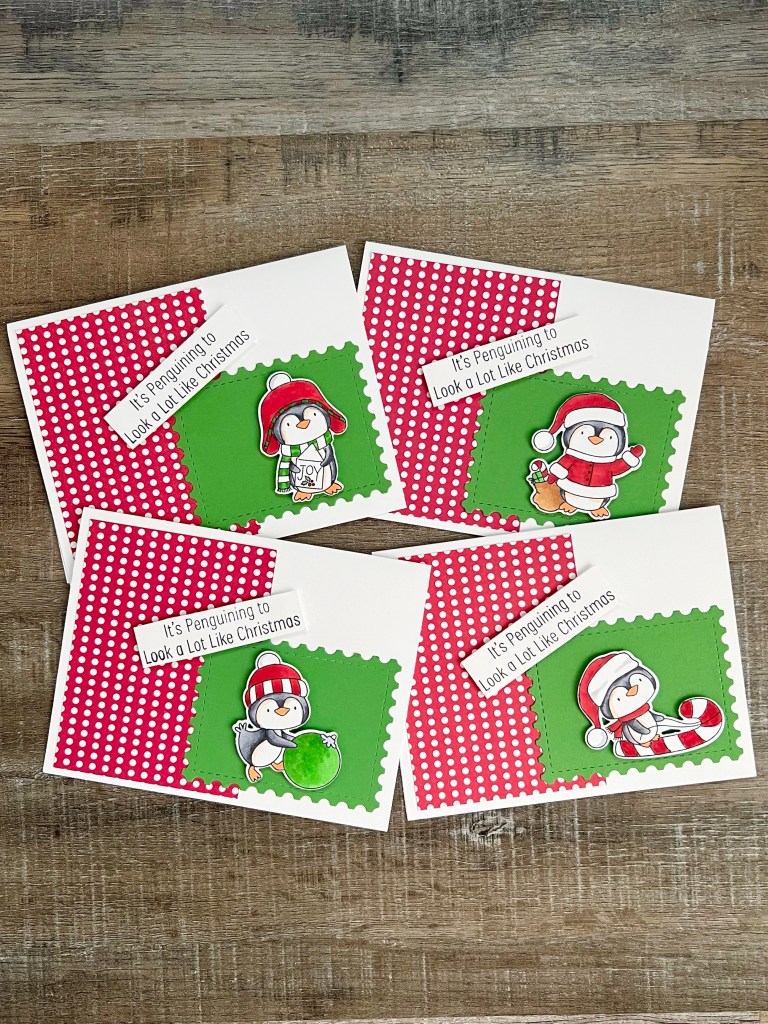
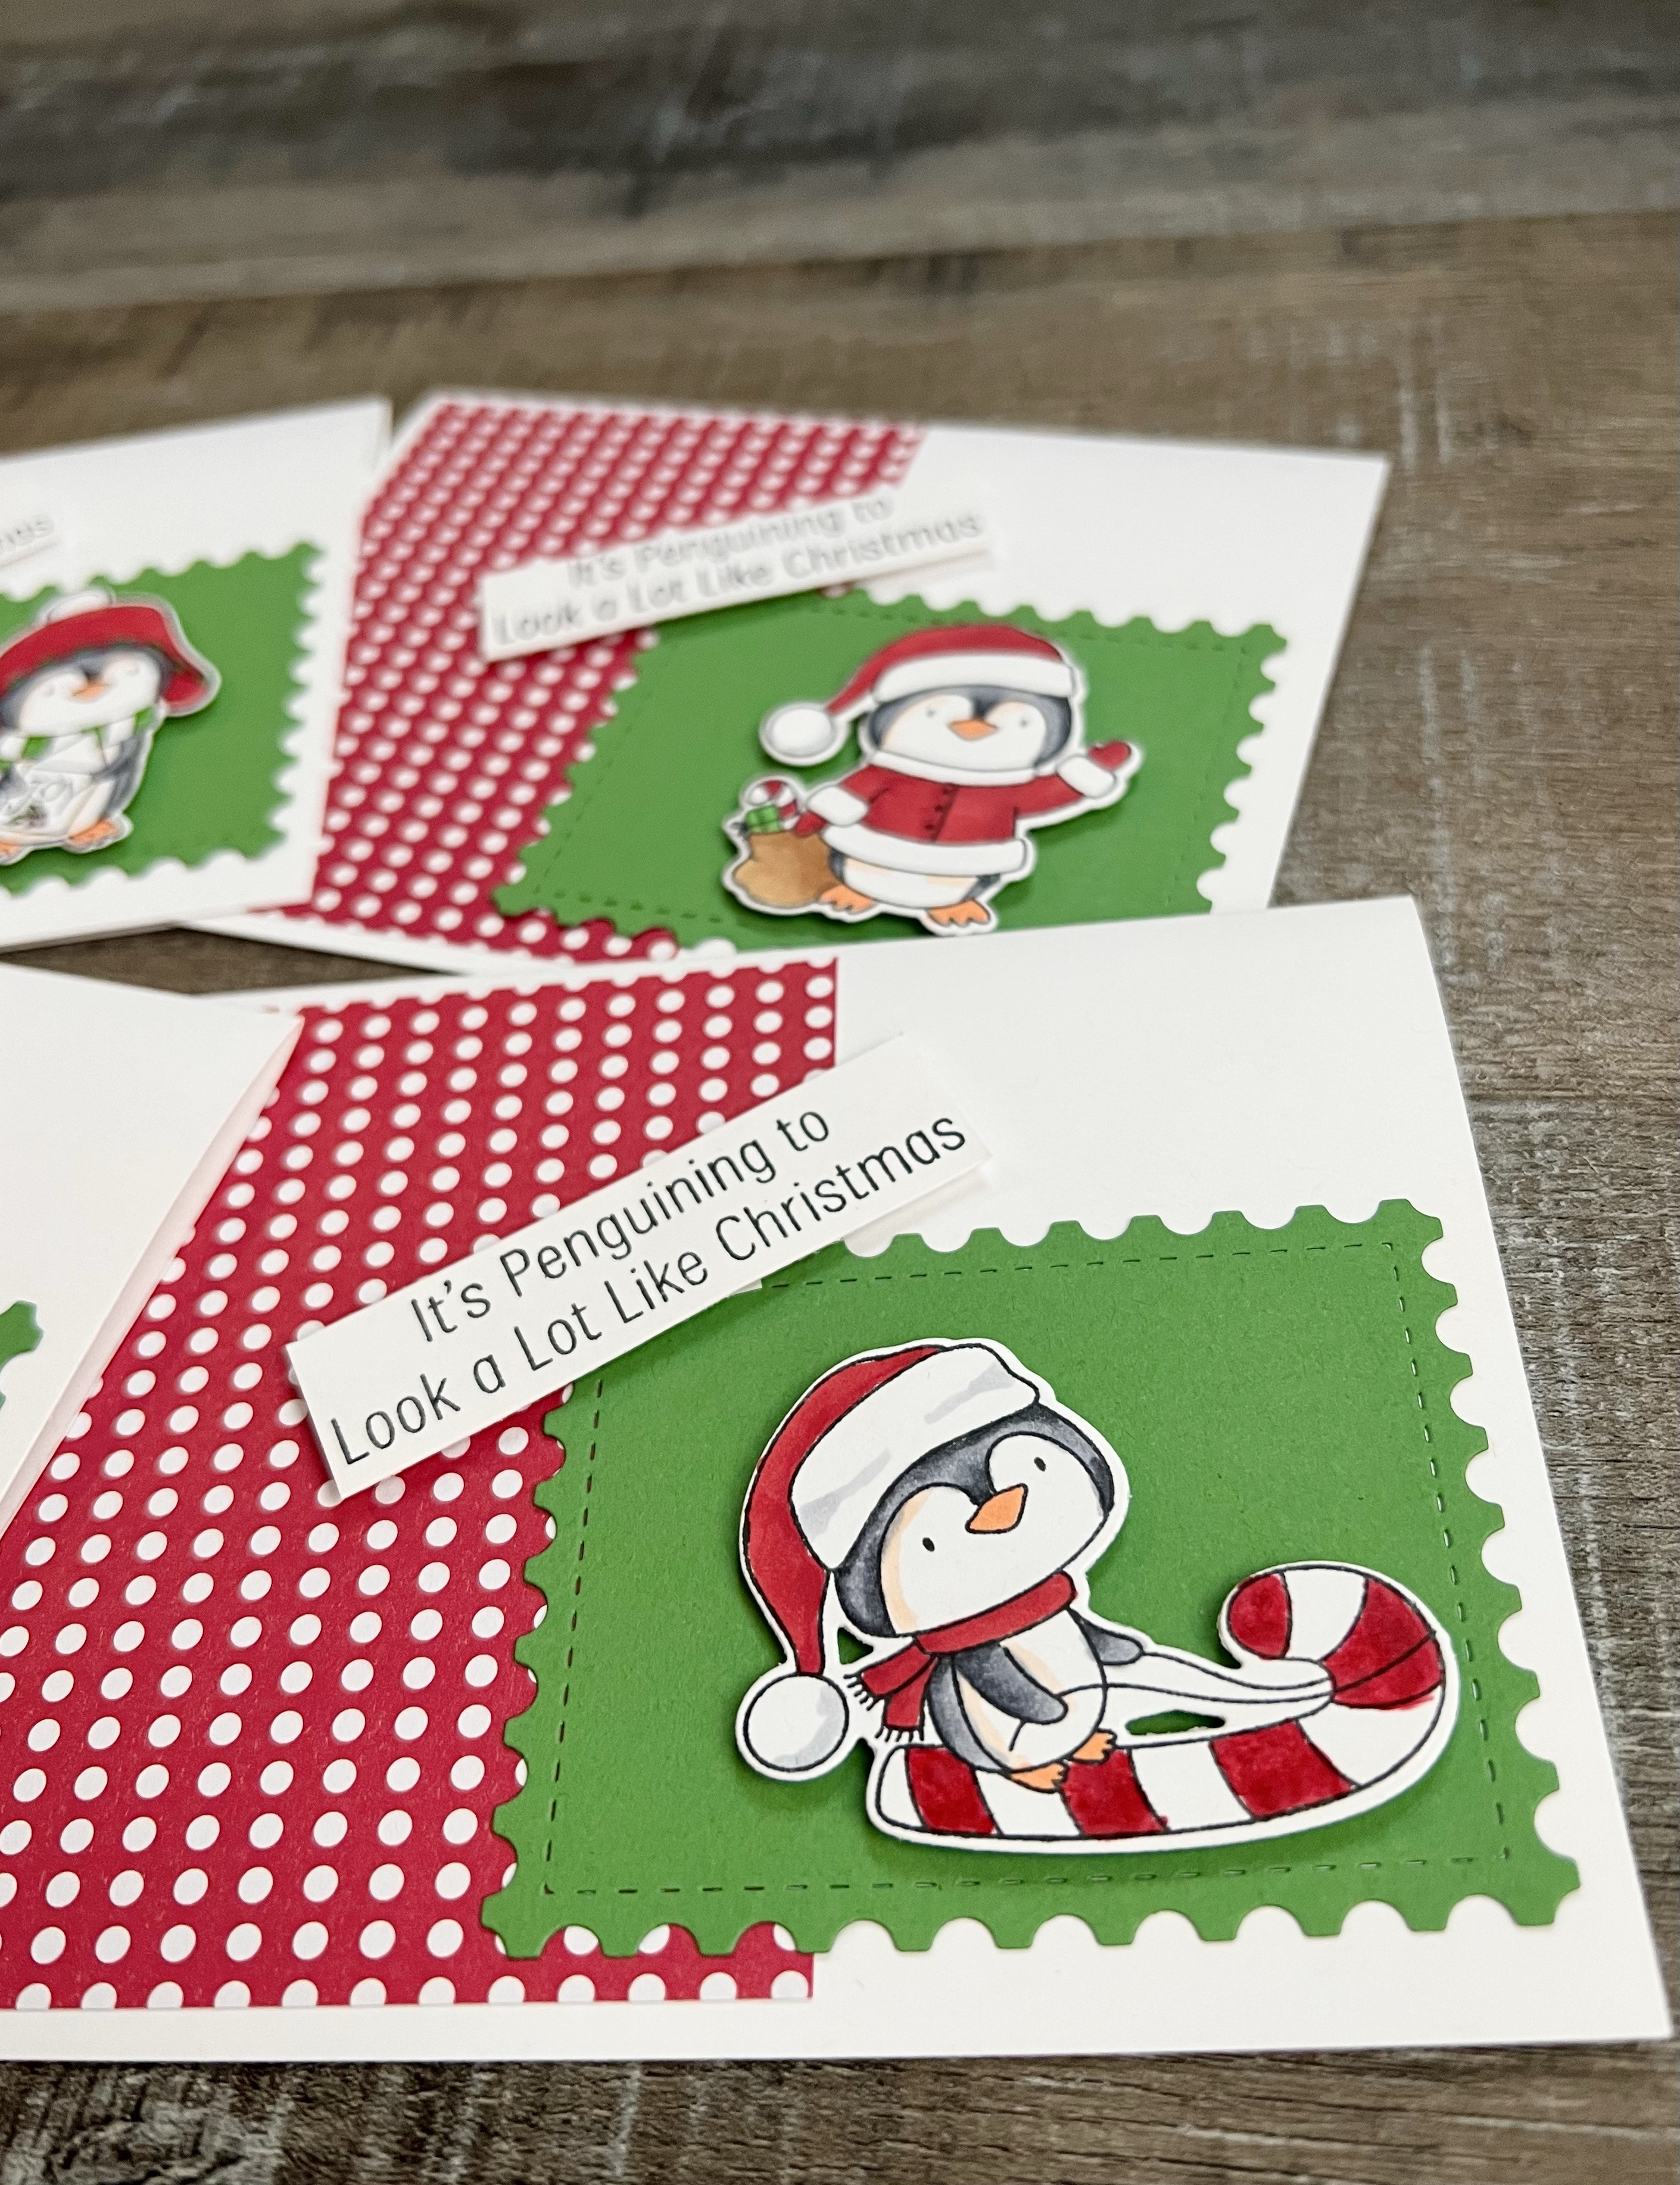
I couldn’t decide which Penguin to use so I made a card using each one. 🙂 I stamped the images with Memento Tuxedo Black ink on white card stock and colored them with Copic markers, I used the matching dies to cut out each image.
I used a postage stamp die to cut the green card stock. (This is a similar die set.) To make the card, I attached a piece of red patterned paper to a white card and attached the green piece over the patterned paper. I attached the penguins with foam tape. The sentiment is stamped with black ink on white card stock, trimmed close, and attached to the card with foam tape.
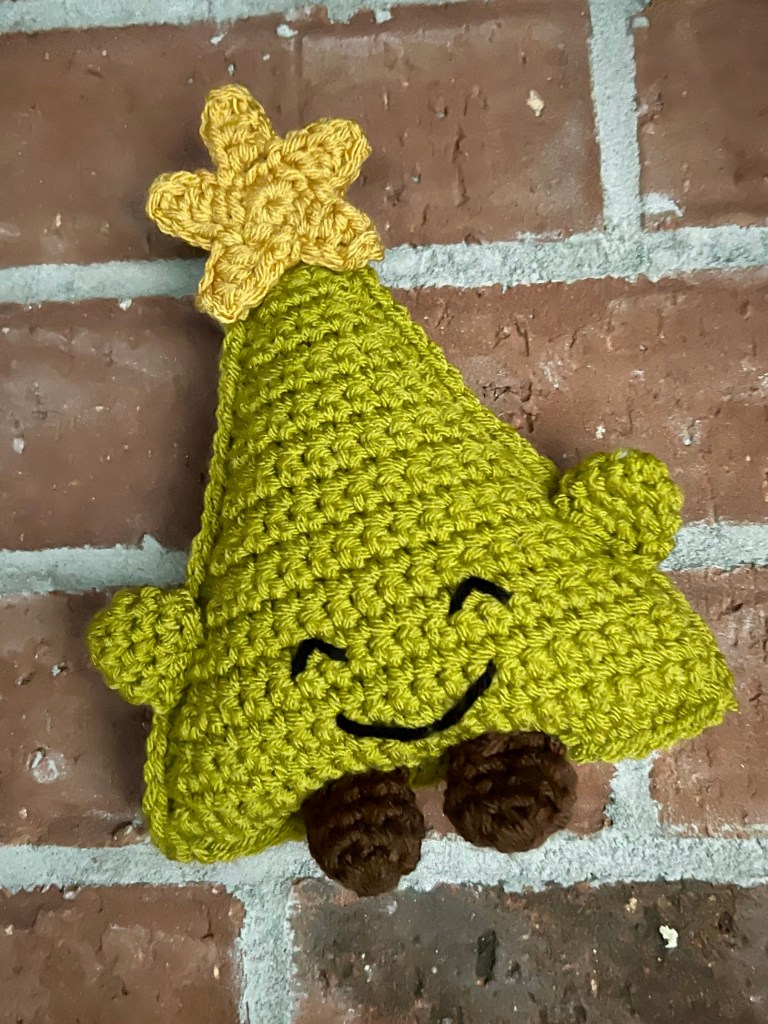
Christmas in July continues with this adorable Crochet Christmas Tree Cuddler. 🎄 Just look at that cute face and those sweet little arms waiting for a hug! 🤗 It’s the perfect size for little hands – he measures about 7 inches tall and 6 inches wide.
Disclosure: Some of the links on my site are affiliate links, meaning, at no additional cost to you, I will earn a small commission if you click through and make a purchase. As an Amazon Associate I earn from qualifying purchases.
I found the pattern here at Heather-Corinne.com. It’s a super easy pattern to follow and works up quickly. I stitched up my Cuddler in one evening using a G/4mm crochet hook with Yarn Bee Soft & Sleek yarn in Green Apple, Mustard, and I Love This Yarn in Brown for his little legs. The color Green Apple is discontinued but Kale is a similar color that would work great. Use your favorite worsted weight (4) yarn to stitch him up.
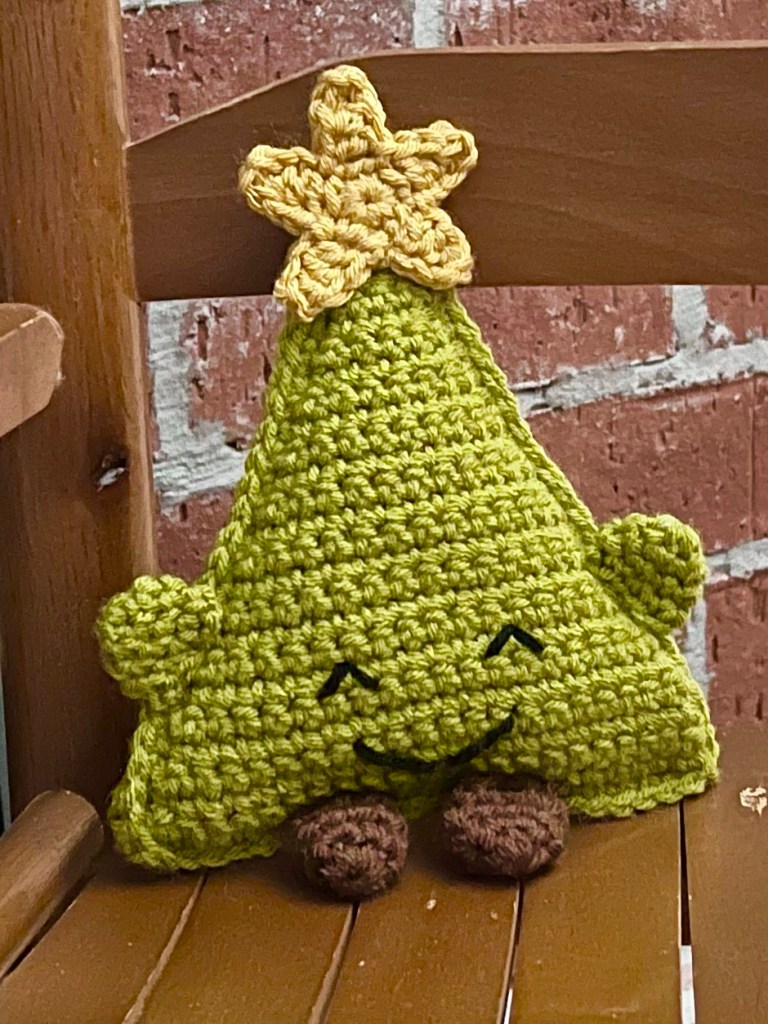
Here he is sitting on my little rocking chair. He would look so cute peeking out of the top of a Christmas stocking or tucked under the tree. He is sure to bring a smile to a little one’s face.🎄
If you haven’t discovered Heather-Corinne.com yet, you might want to check her out. She has a ton of really cute patterns on her site. I have so many more I want to make… 🙂
Taking a break from Christmas in July to share these yummy Soft and Chewy M&M Cookie Bars. But don’t worry…I’ll be back with more Christmas ideas so stay tuned! 🎄
Cookie bars are the perfect Summer treat! They don’t take long to make and since you bake the whole batch of dough at once, your kitchen doesn’t get too hot. 😊
Disclosure: Some of the links on my site are affiliate links, meaning, at no additional cost to you, I will earn a small commission if you click through and make a purchase. As an Amazon Associate I earn from qualifying purchases.
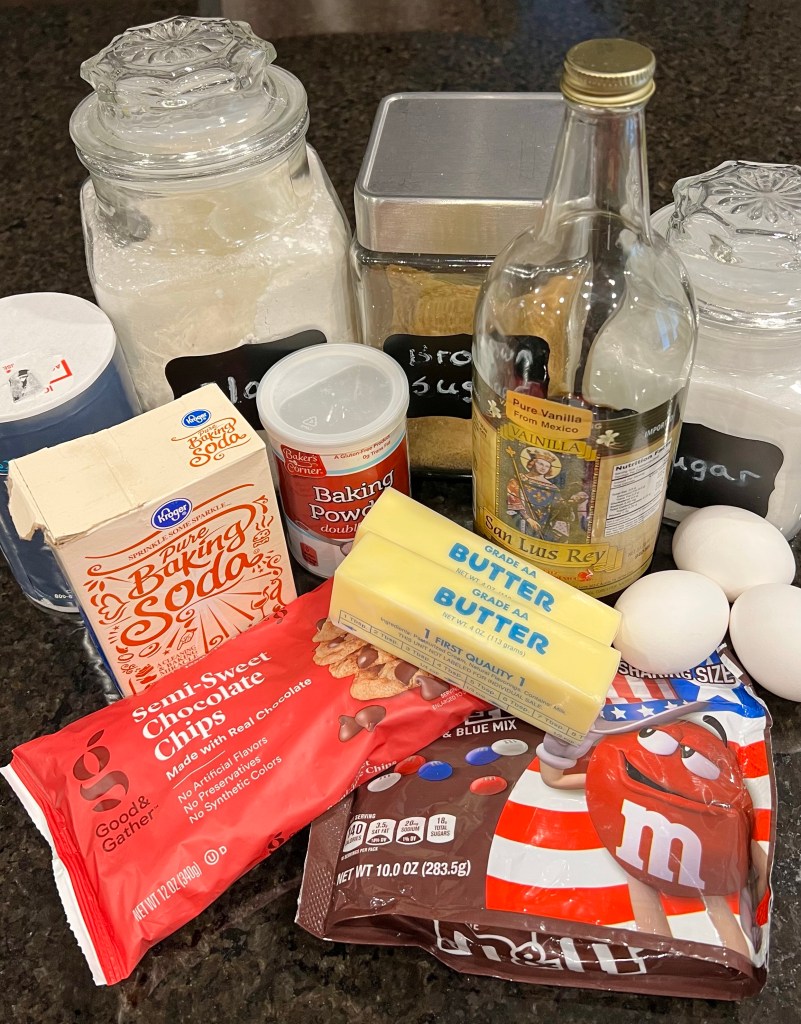
There are lots of recipes for M&M cookie bars out there. This Soft and Chewy M&M Cookie Bar recipe is one of my favorites! It has chocolate chips as well as M&Ms because you can never have too much chocolate! 😋 You may even have most everything you need already in your kitchen.
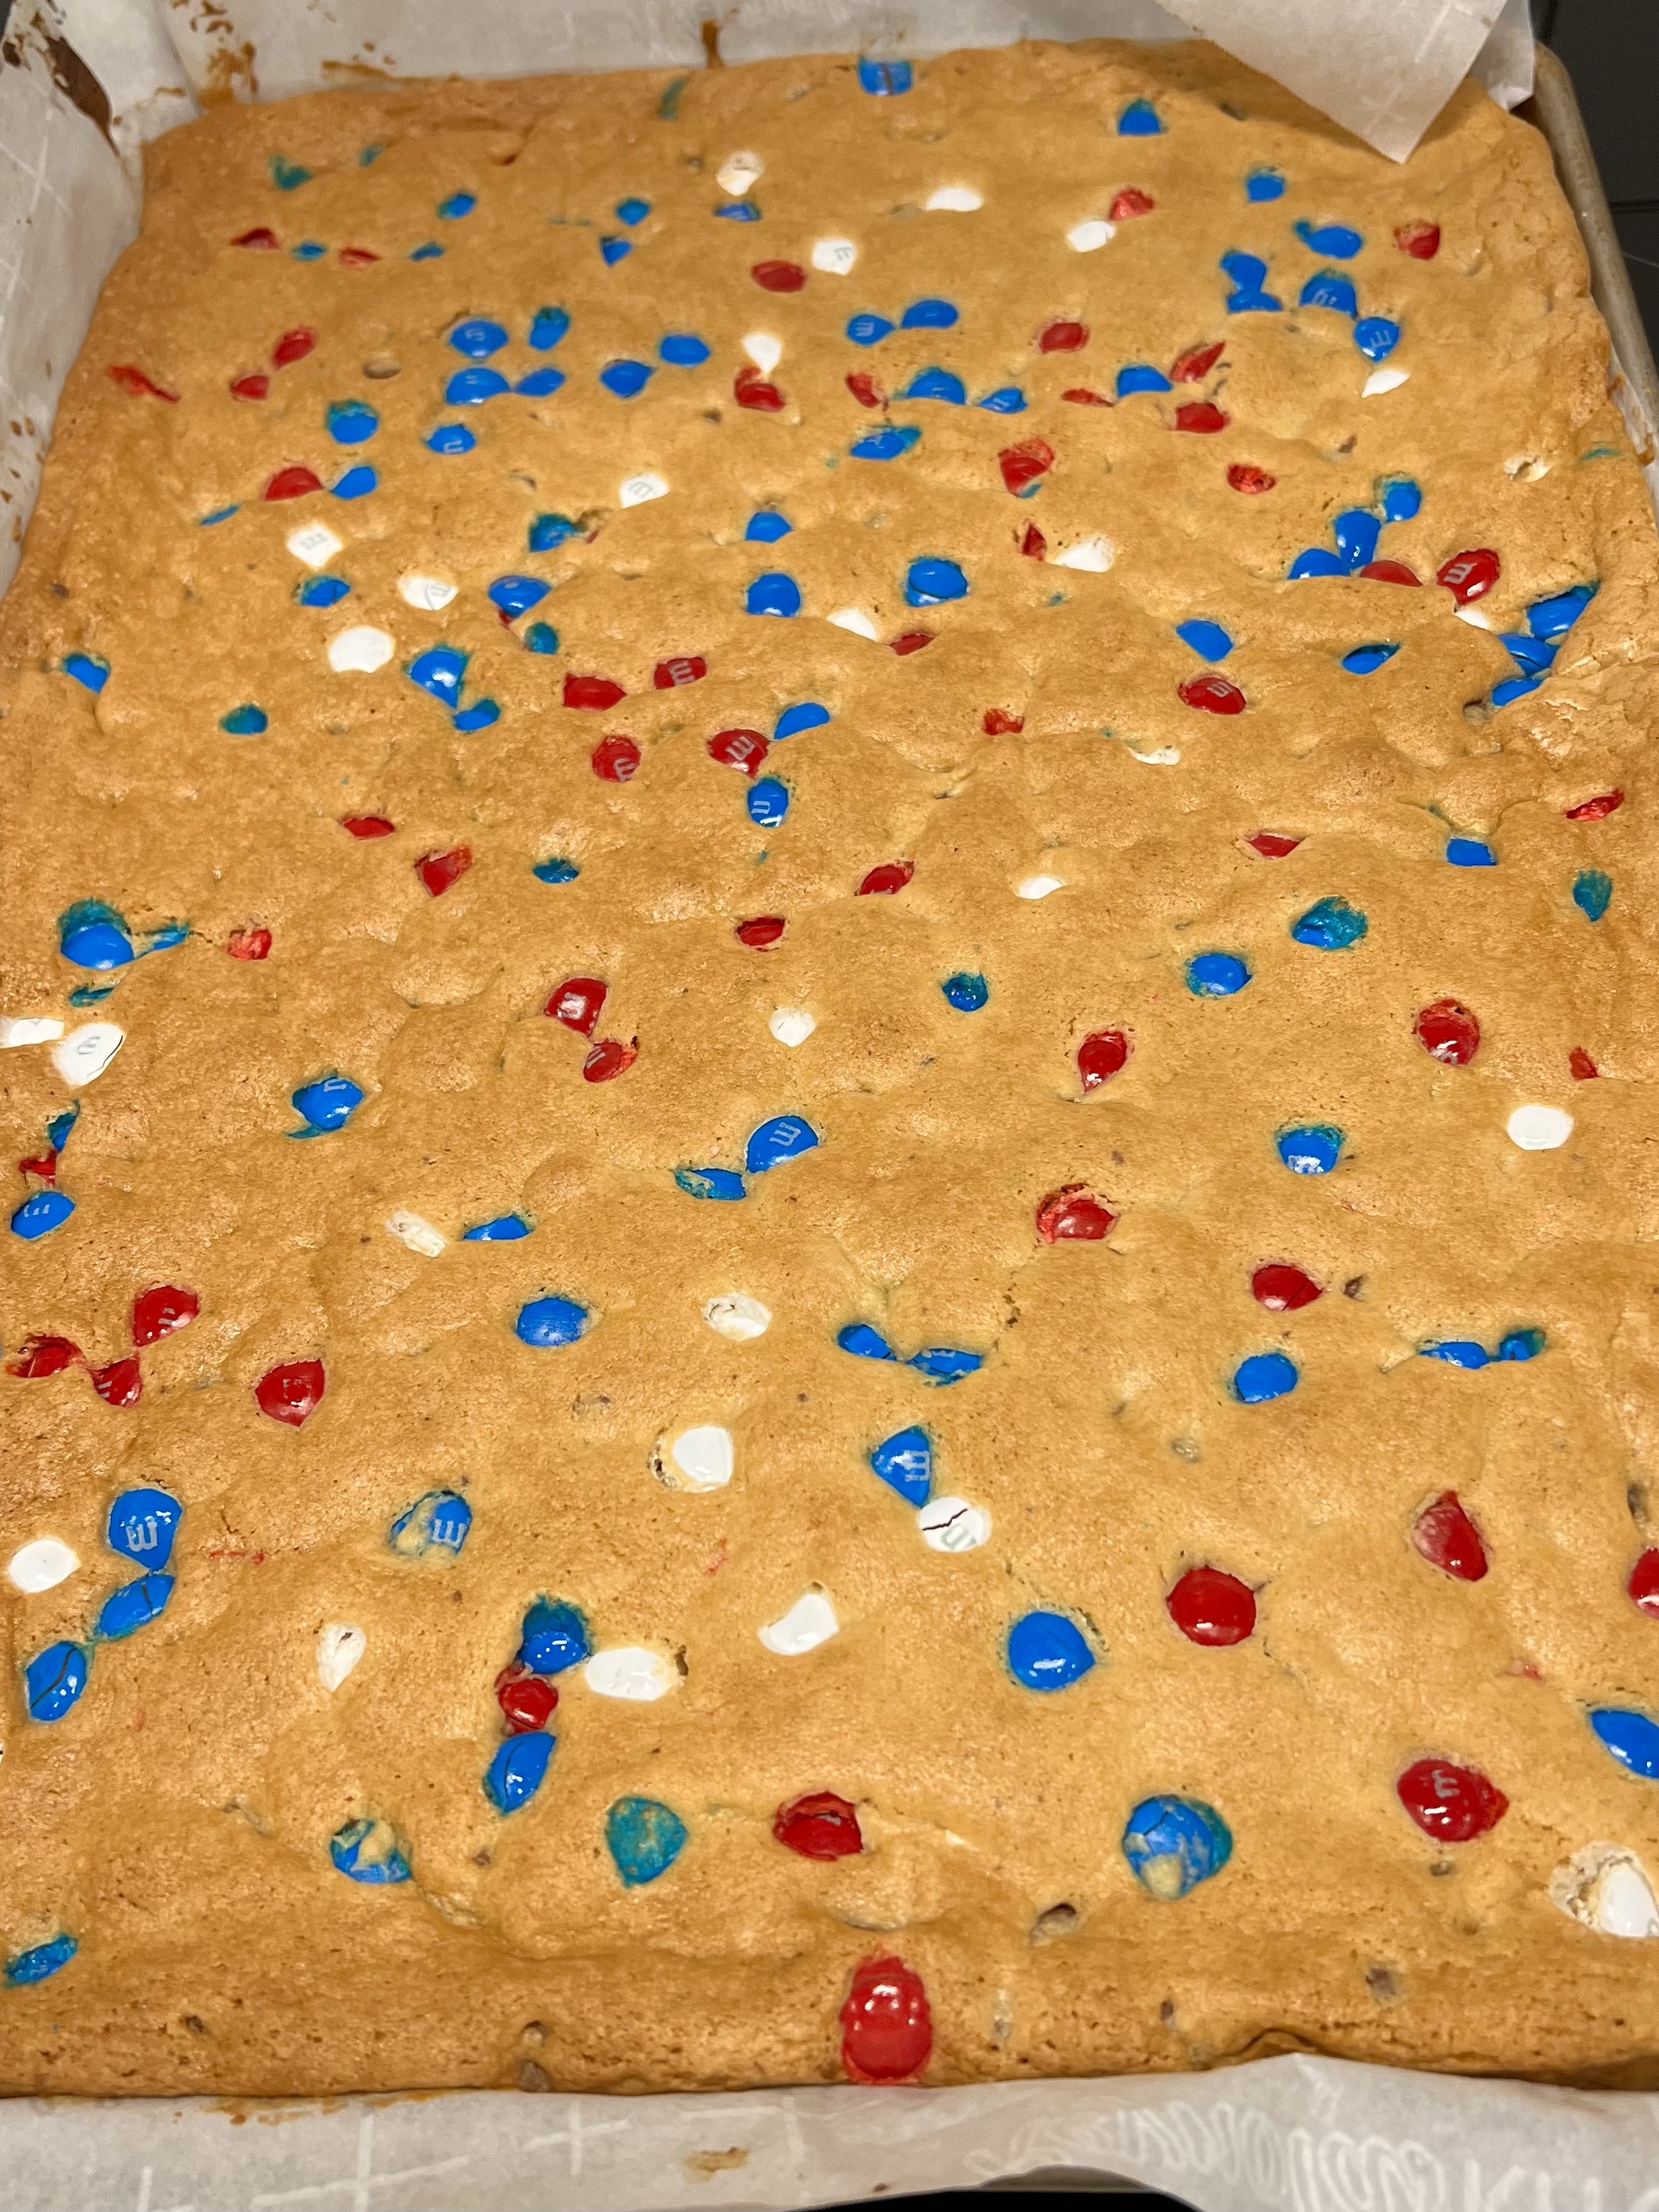
This is a large batch recipe – you’ll make them in an 11 x 17 rimmed baking sheet – so it’s a great recipe to take to BBQs and potlucks. The recipe calls for lining your baking sheet with parchment paper – do not skip this step! It makes everything so much easier! I also got my hands a little wet to make it easier as I was spreading the dough.
Here’s the dough ready to go into the oven and after about 22 minutes baking. My kitchen smelled so good!
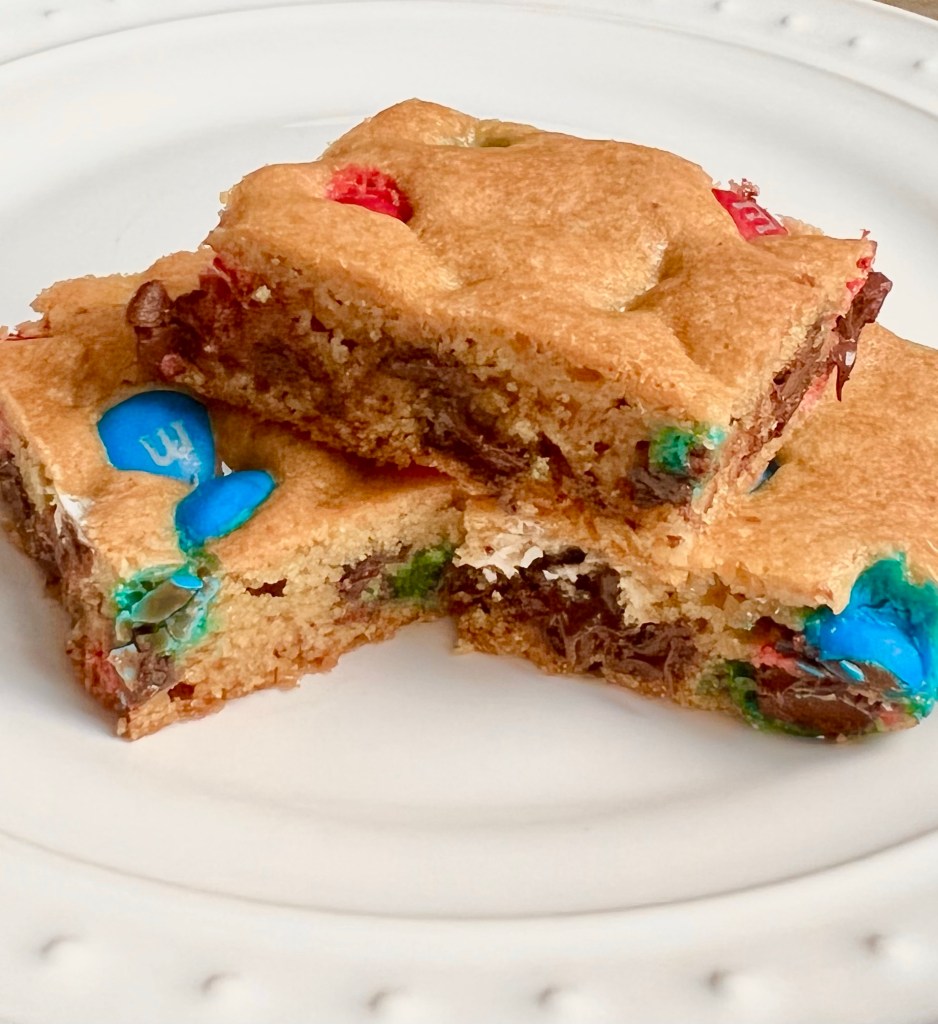
After the cookies are cool, cut them into bars and enjoy!!
These Soft and Chewy M&M Cookie Bars are really easy to make. And you can make them start to finish – including cooling time – in about an hour! I promise everyone will love them! 😋
Do you like to shop the clearance aisles after holidays? I do! You never know what you might find that you can alter or repurpose for another holiday at deeply discounted prices. 🙂
Disclosure: Some of the links on my site are affiliate links, meaning, at no additional cost to you, I will earn a small commission if you click through and make a purchase. As an Amazon Associate I earn from qualifying purchases.
Here’s a storage tip for you… 🙂 I have 3 plastic bins that I keep my clearance items in. That way I have easy access so I can remember what I bought and I can keep my items sorted by season or theme – making it easier to see what I have to alter or repurpose.
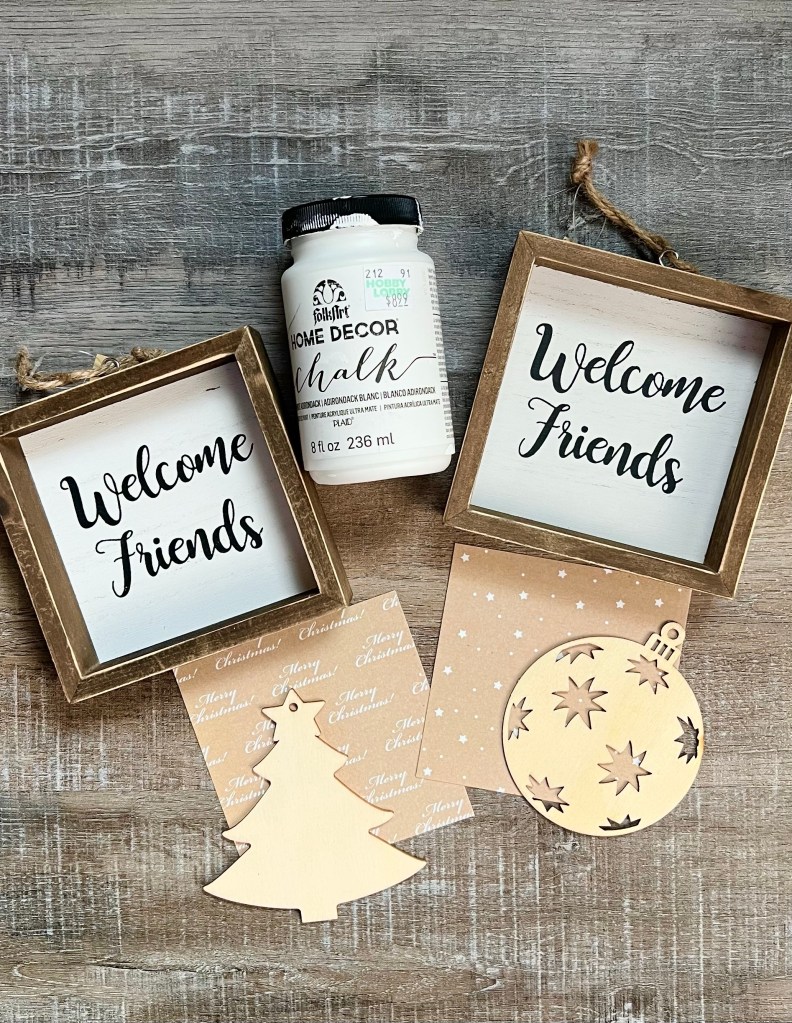
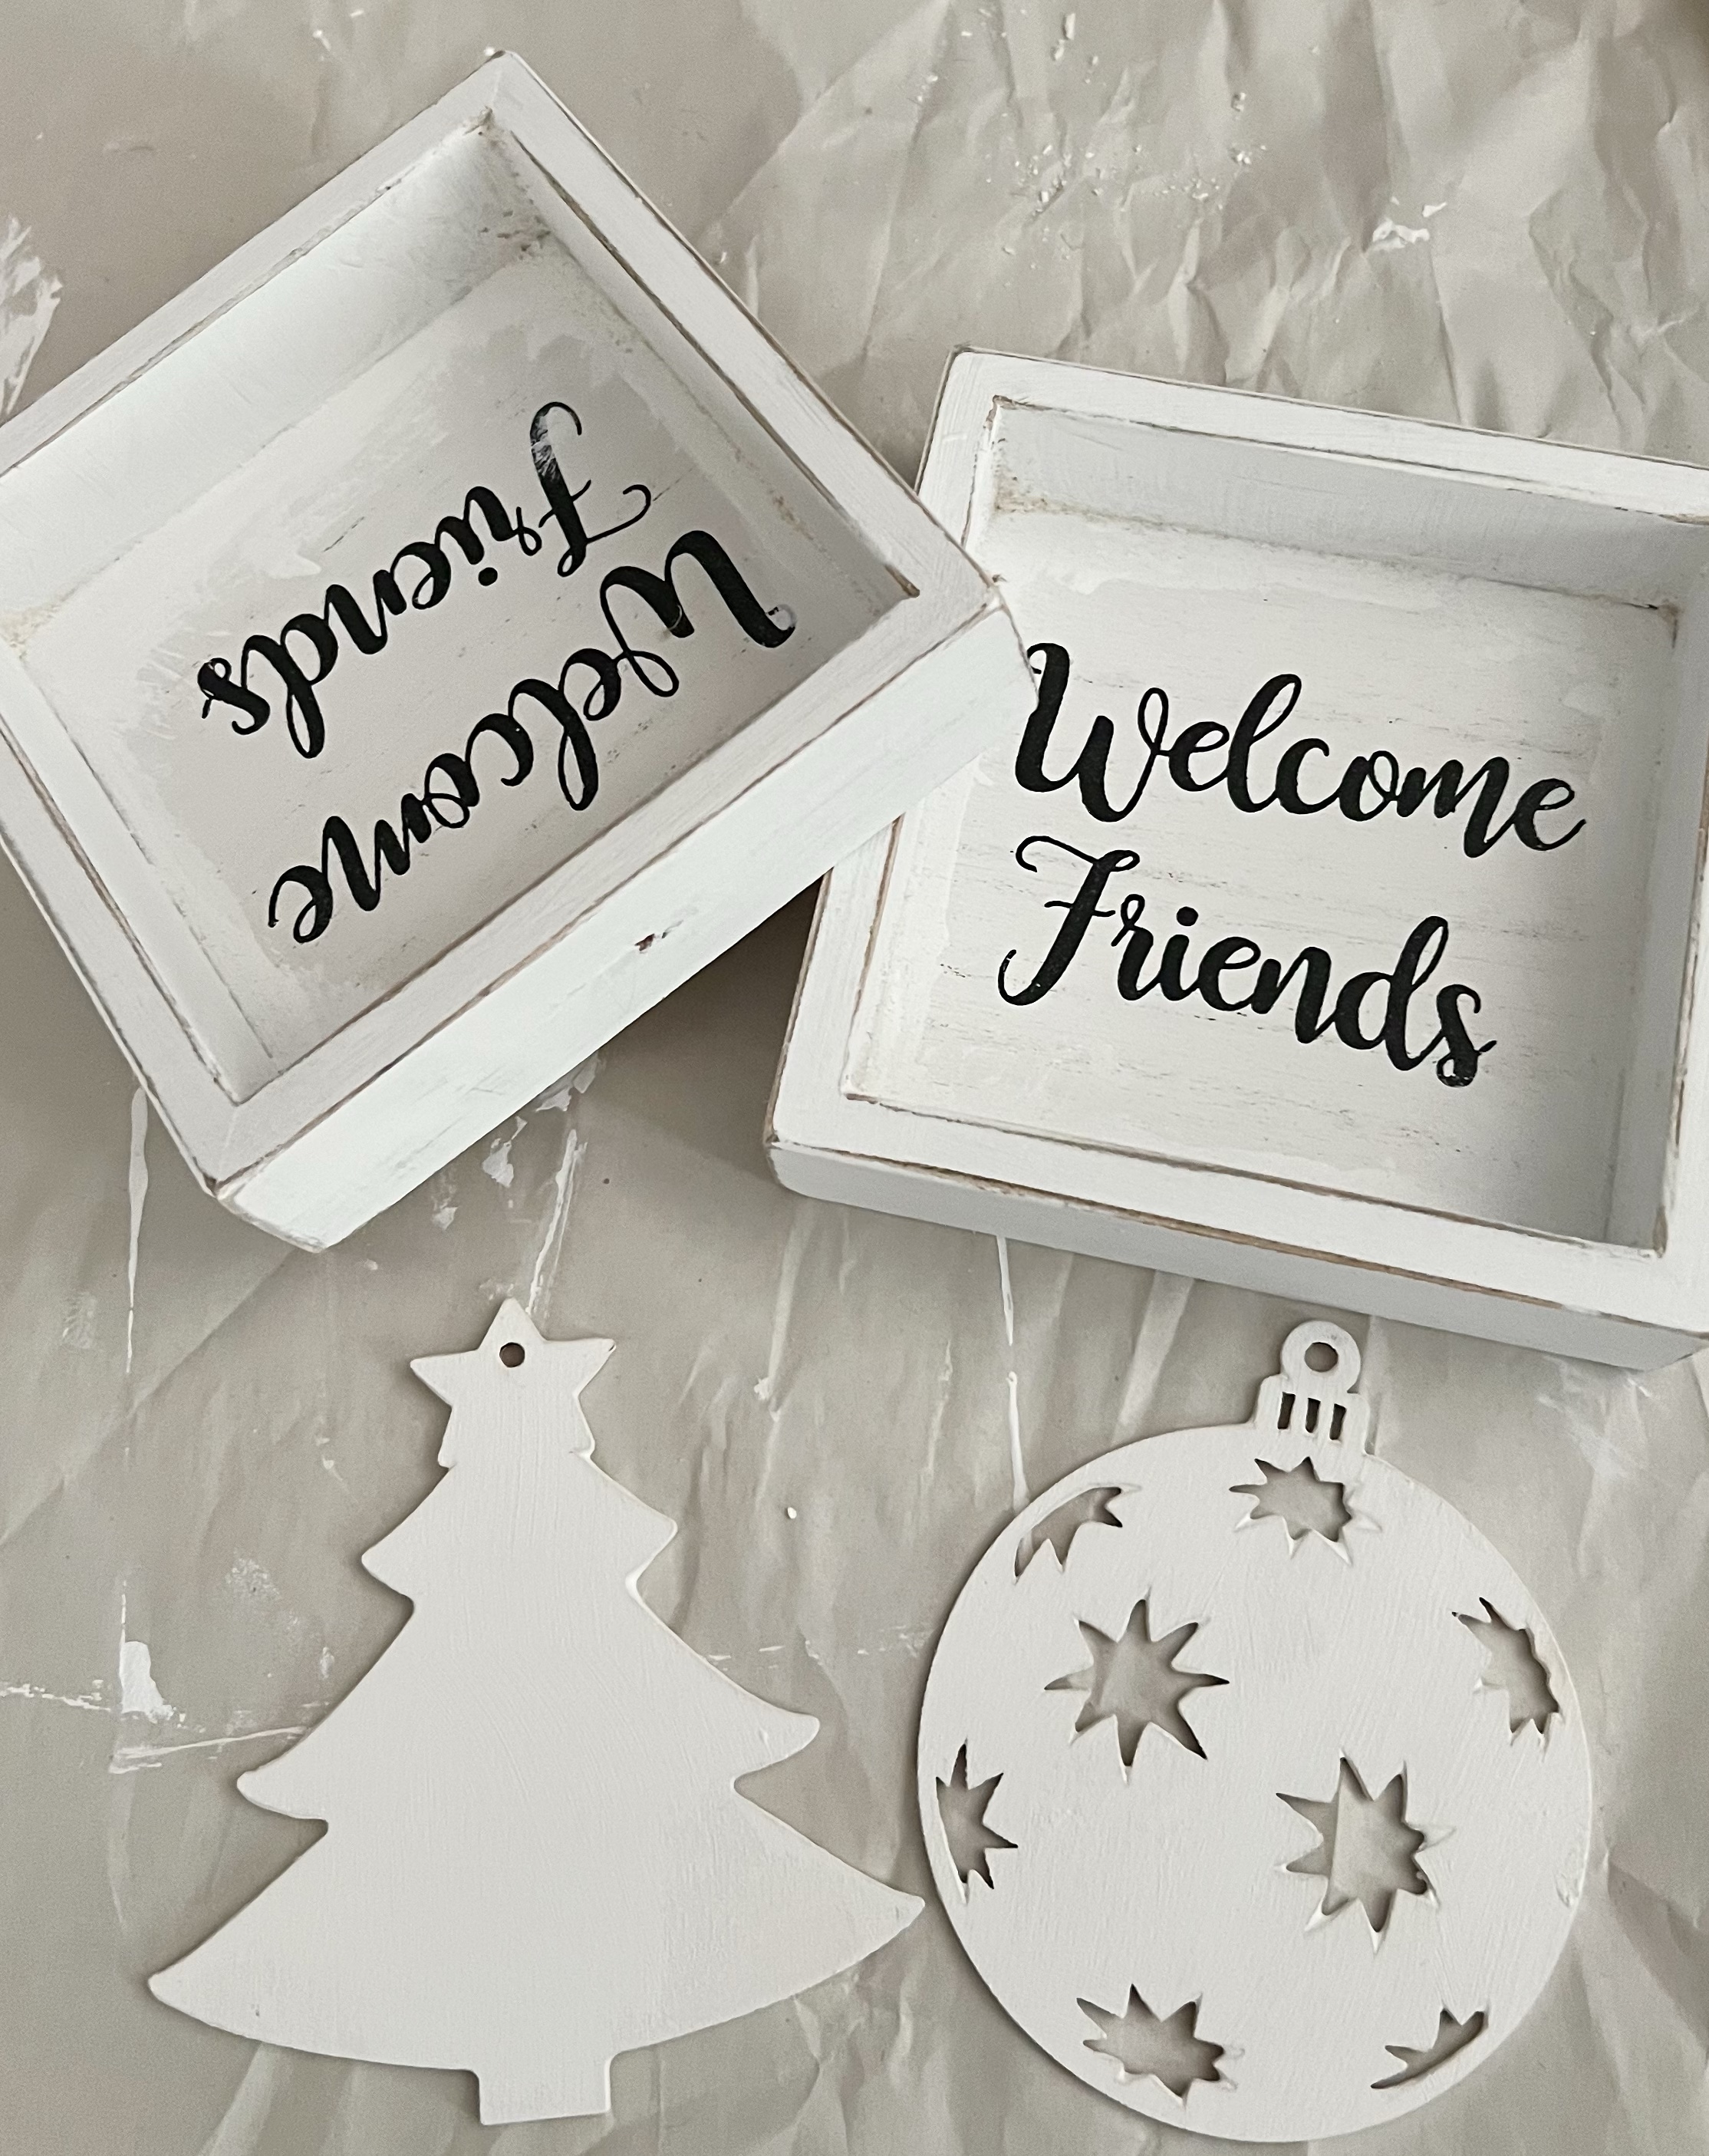
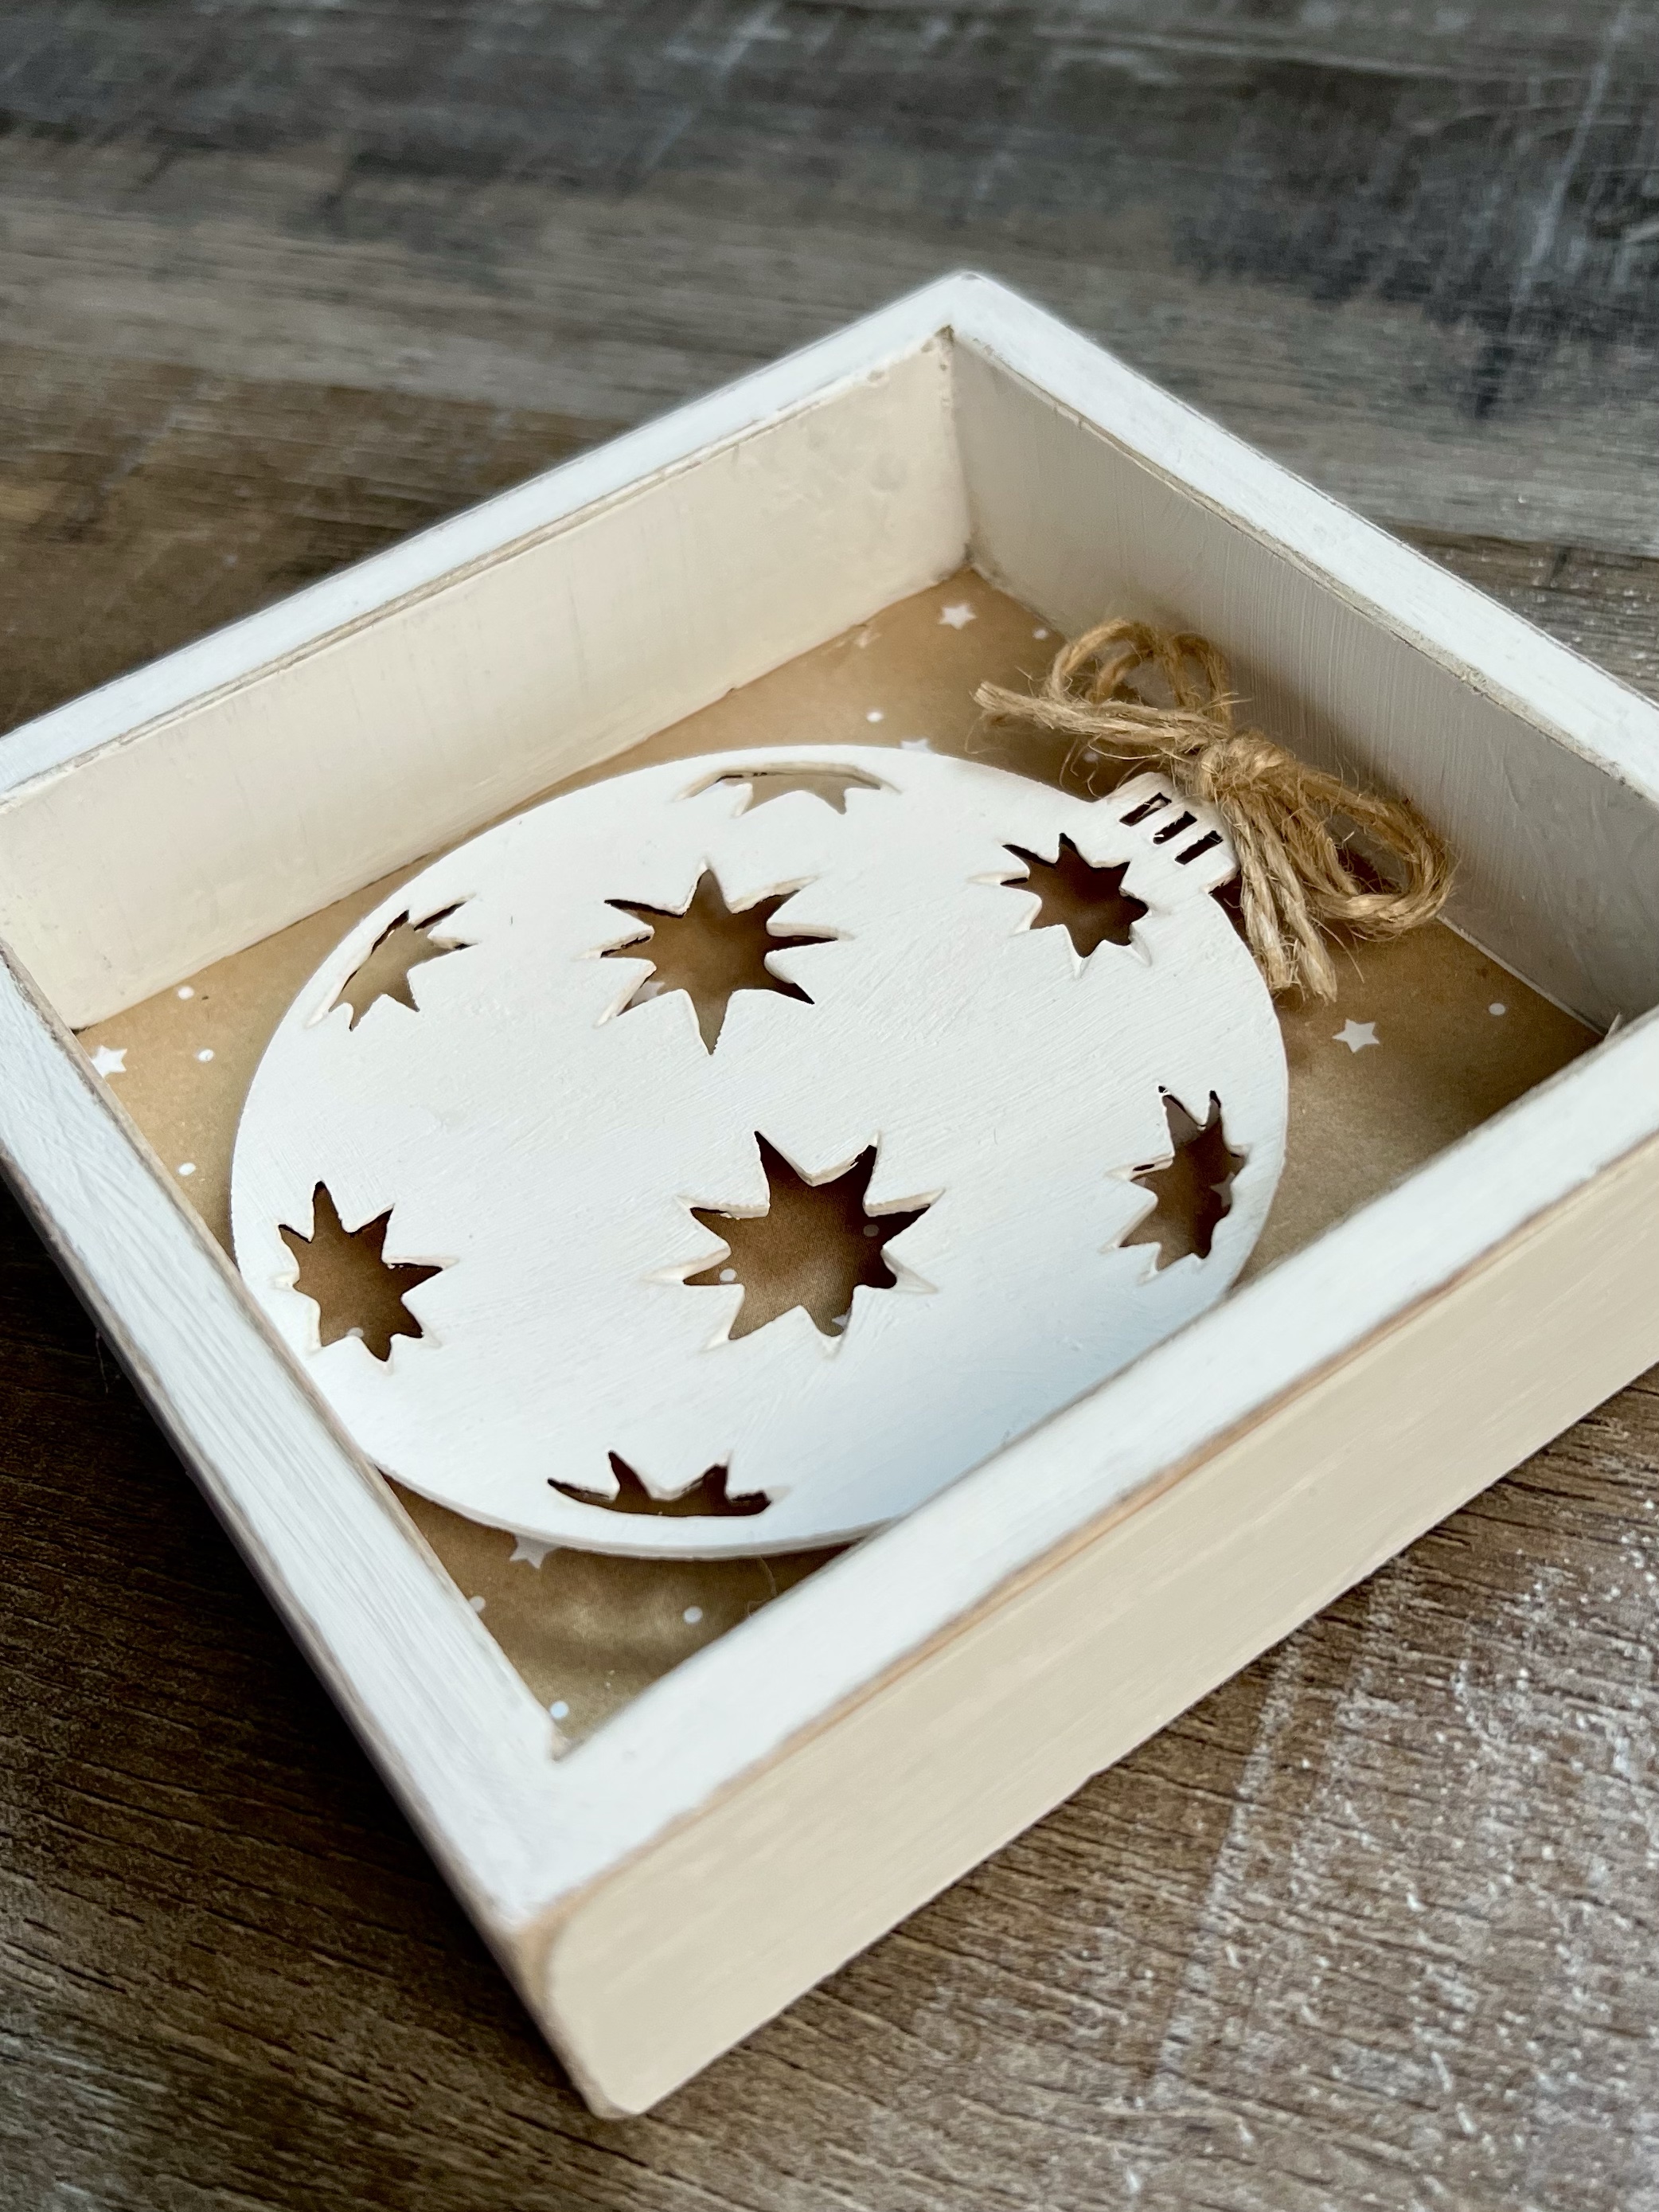
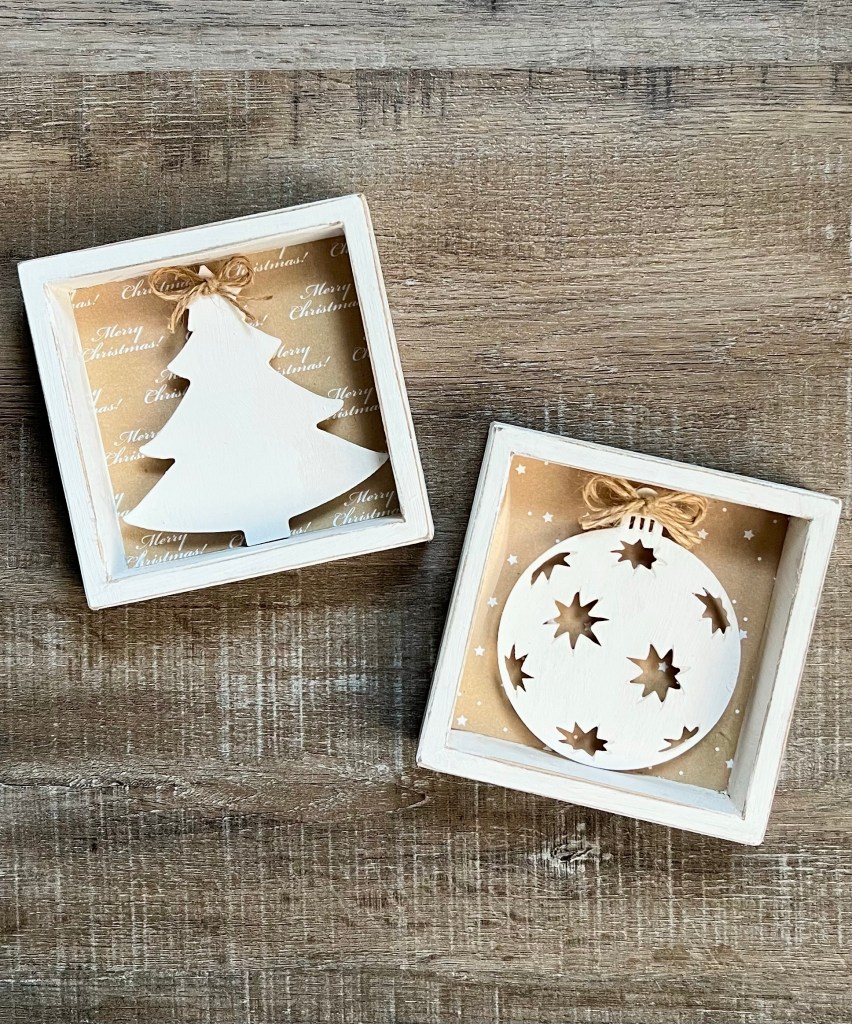
I found these little signs last Fall at the Hobby Lobby clearance sale for about $1.00 each. I’ve seen similar sized signs for different holidays so you may be able to find them on clearance other times, too. They measure 4.75 inches square and are cute just as they are, but I bought a couple thinking maybe I could alter them. I also had these wood ornaments that I picked up at Dollar Tree last year. They come in a package of 5 and they usually have them when they start stocking Christmas items. (These are similar.)
The first thing I did was to remove the screw eye at the top of the sign since I wasn’t going to hang it. Then using FolkArt Home Decor Chalk Paint in White Adirondack and a chip brush, I painted the frame of the sign with 2 coats of paint letting it dry thoroughly between coats. I didn’t bother painting over the words because my patterned scrapbook paper was thick enough to cover them. If you’re paper is thinner, go ahead and paint over the words, too. I also painted my ornaments with 2 coats of the white paint.
Once the paint was dry, I used the sand paper to sand the paint off the edges of the frame to give it a rustic farmhouse look.
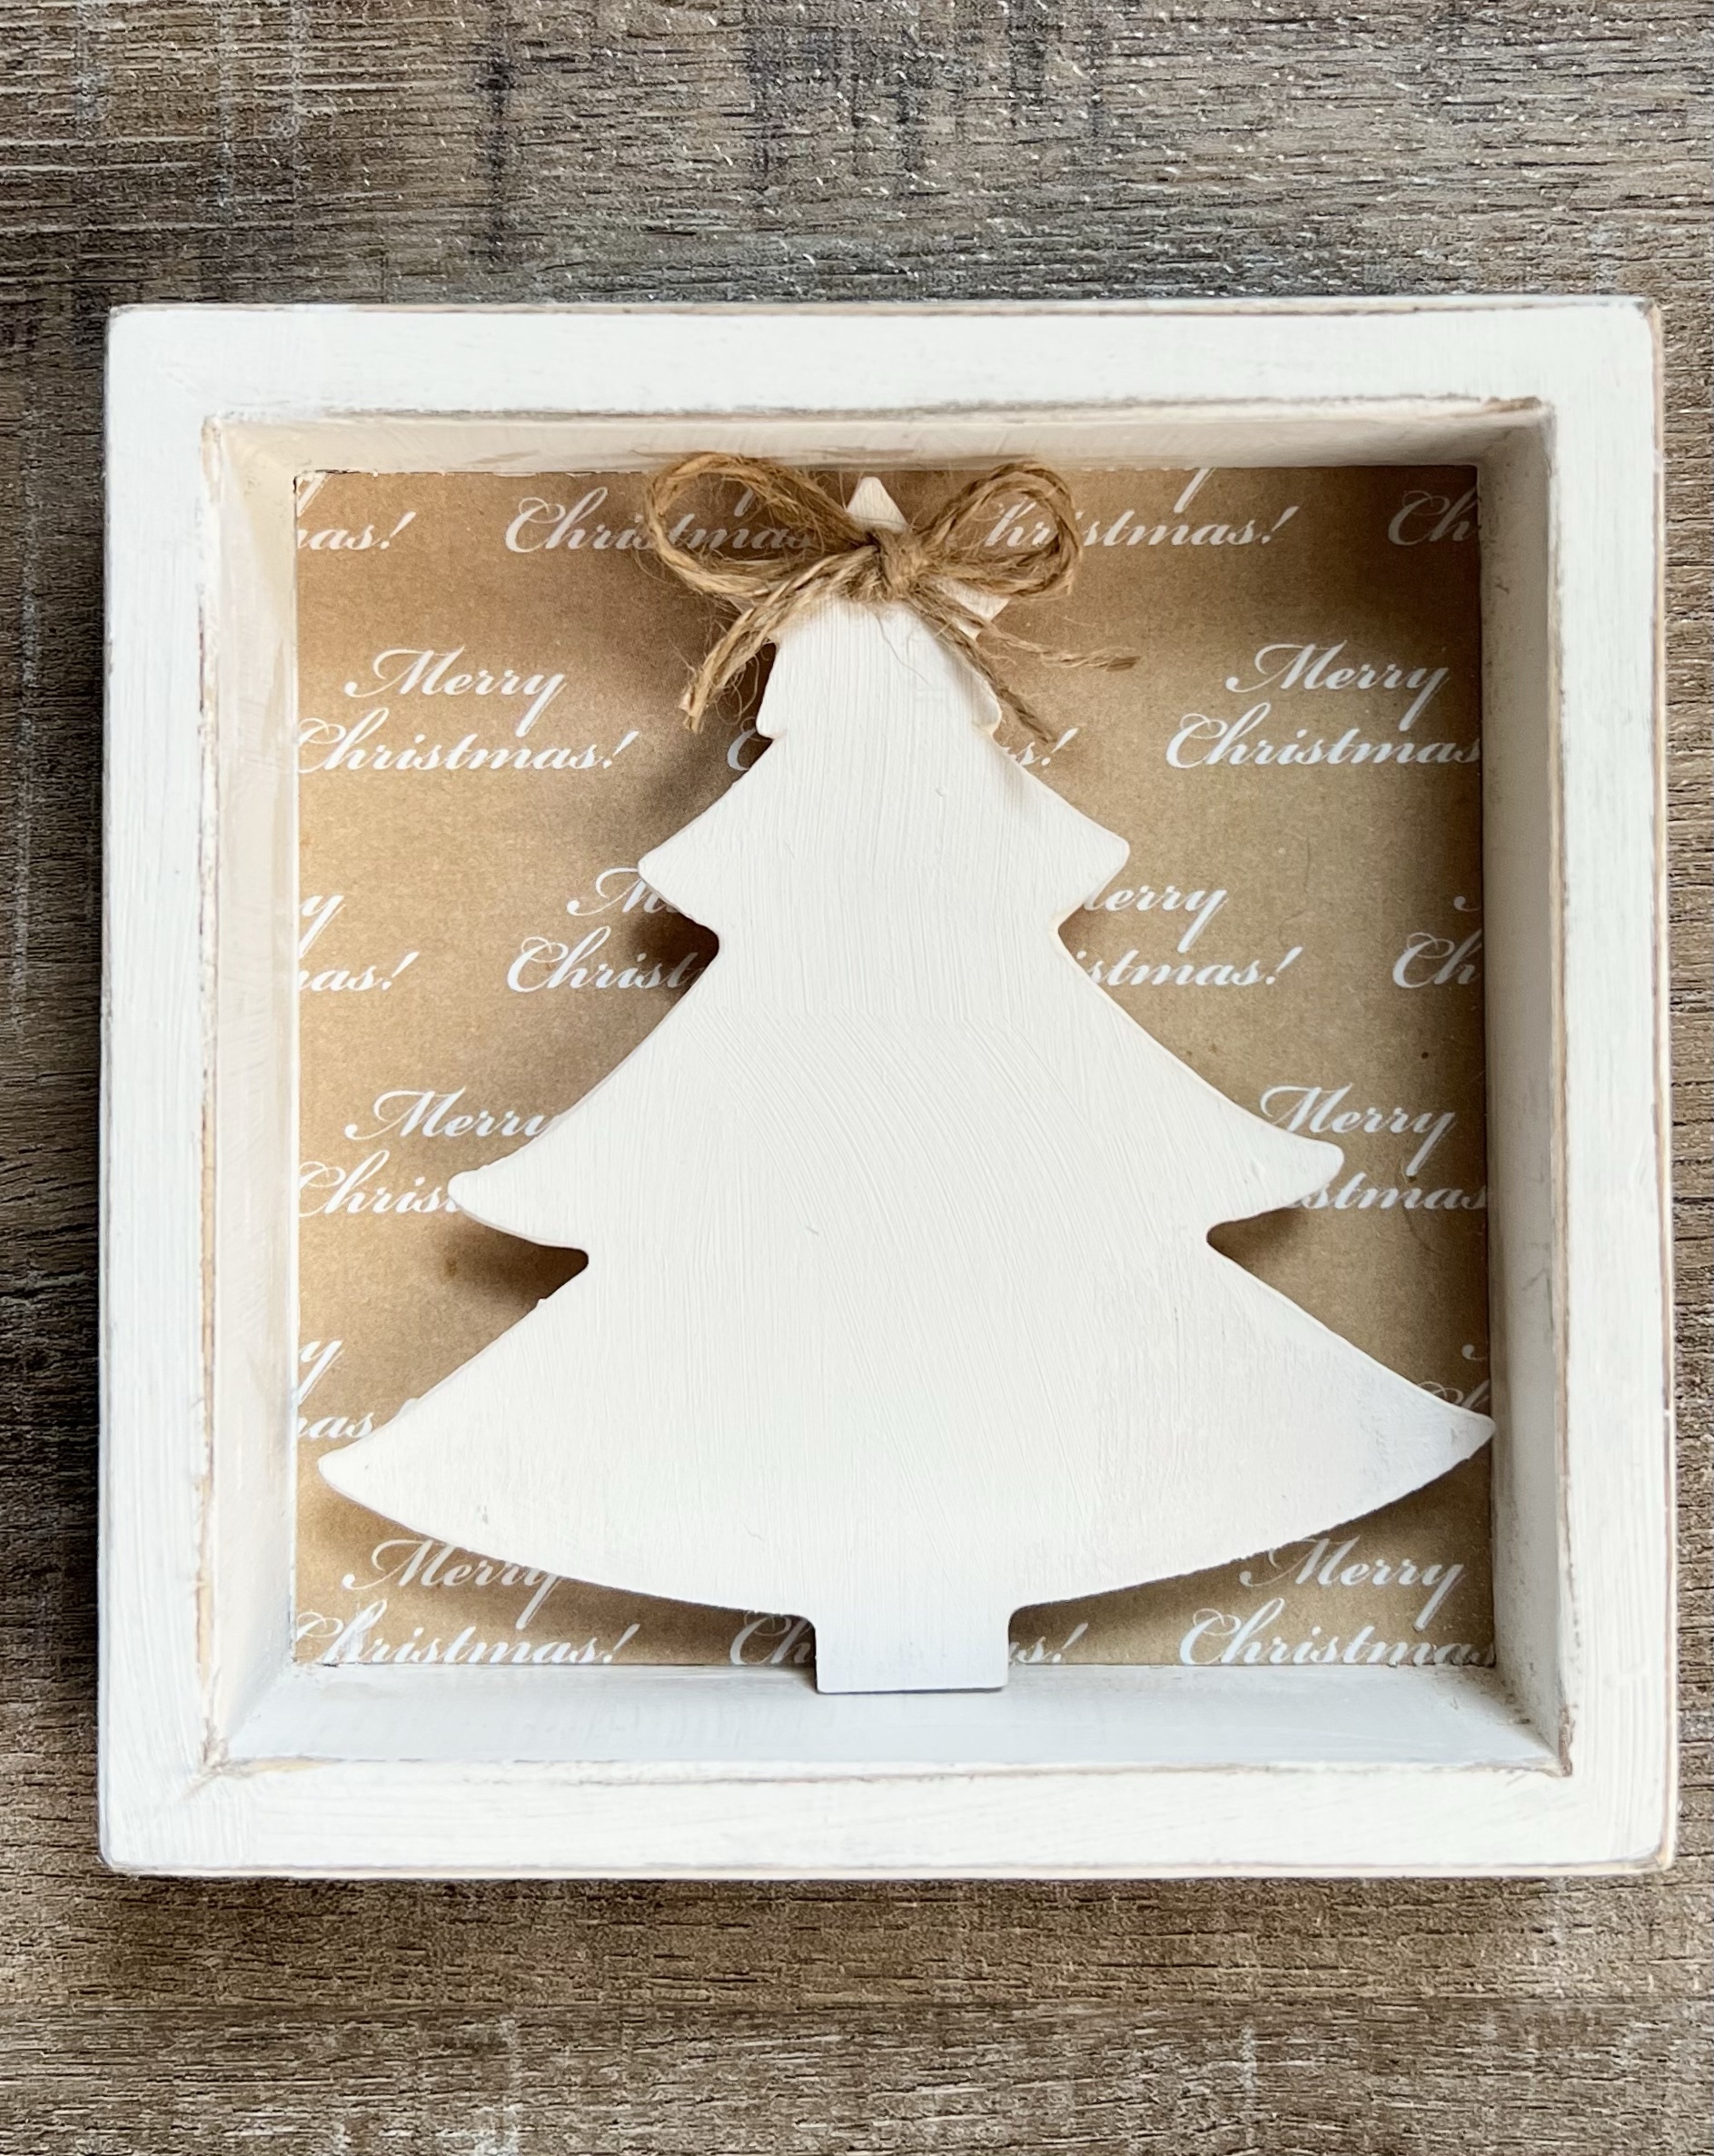
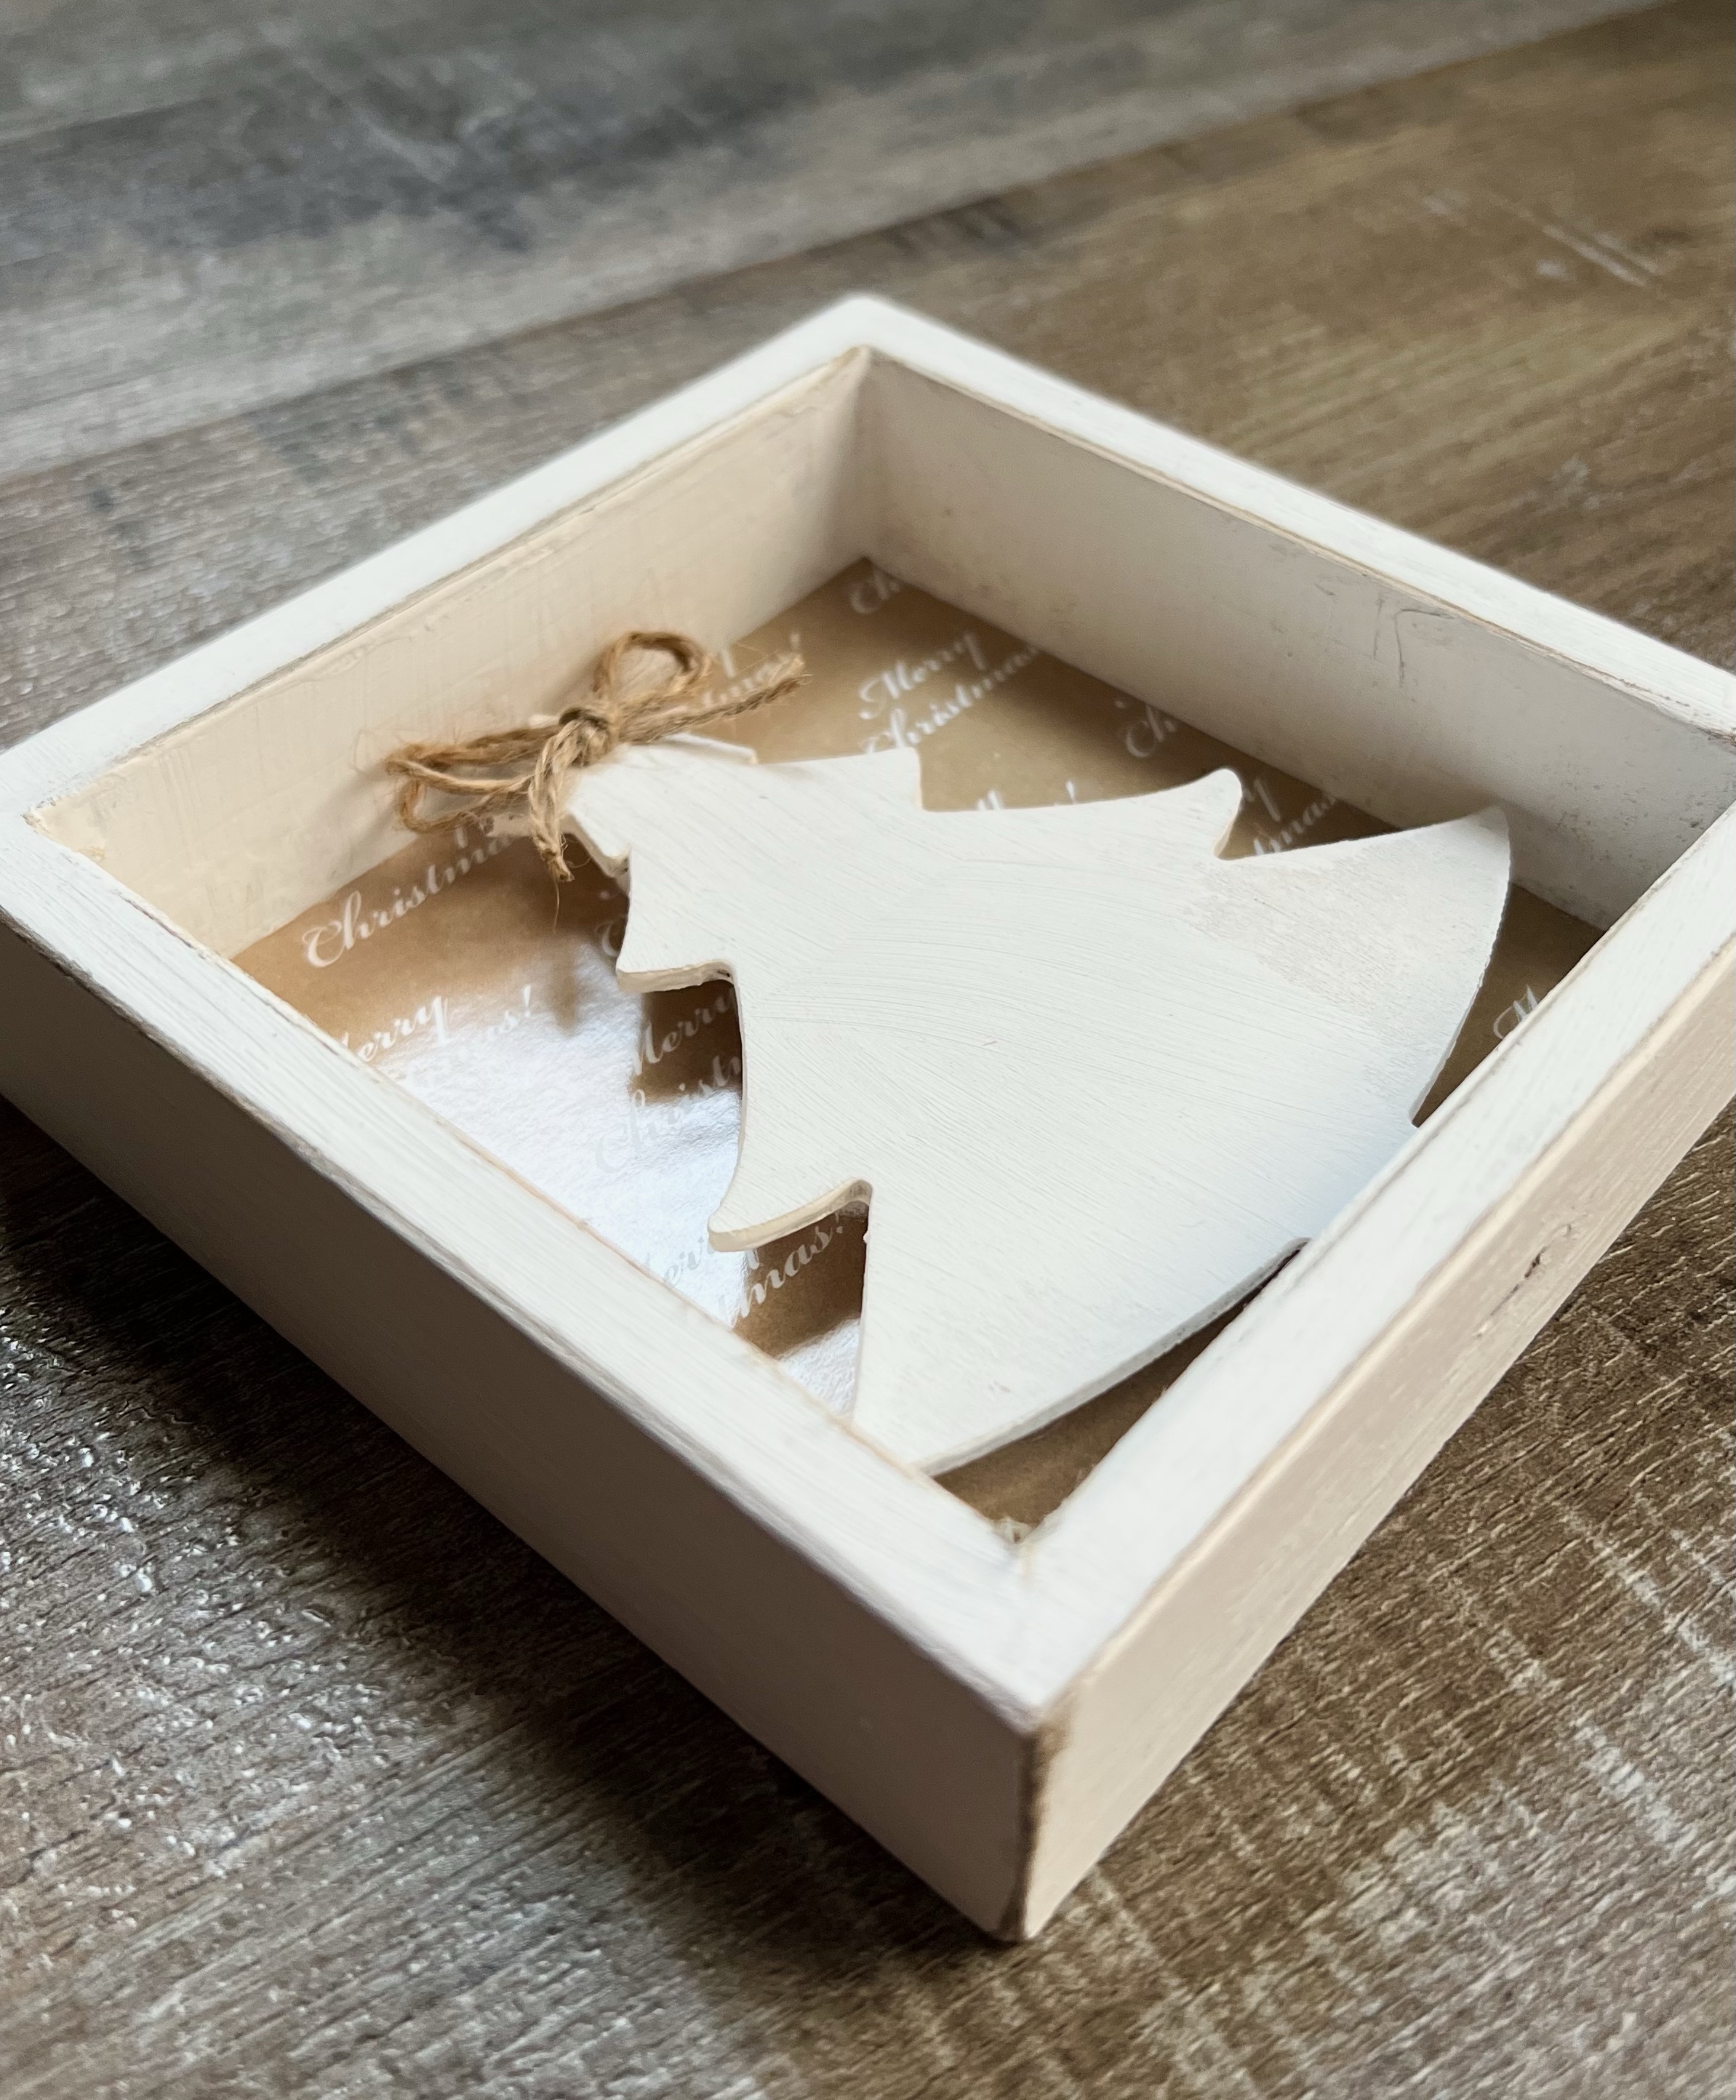
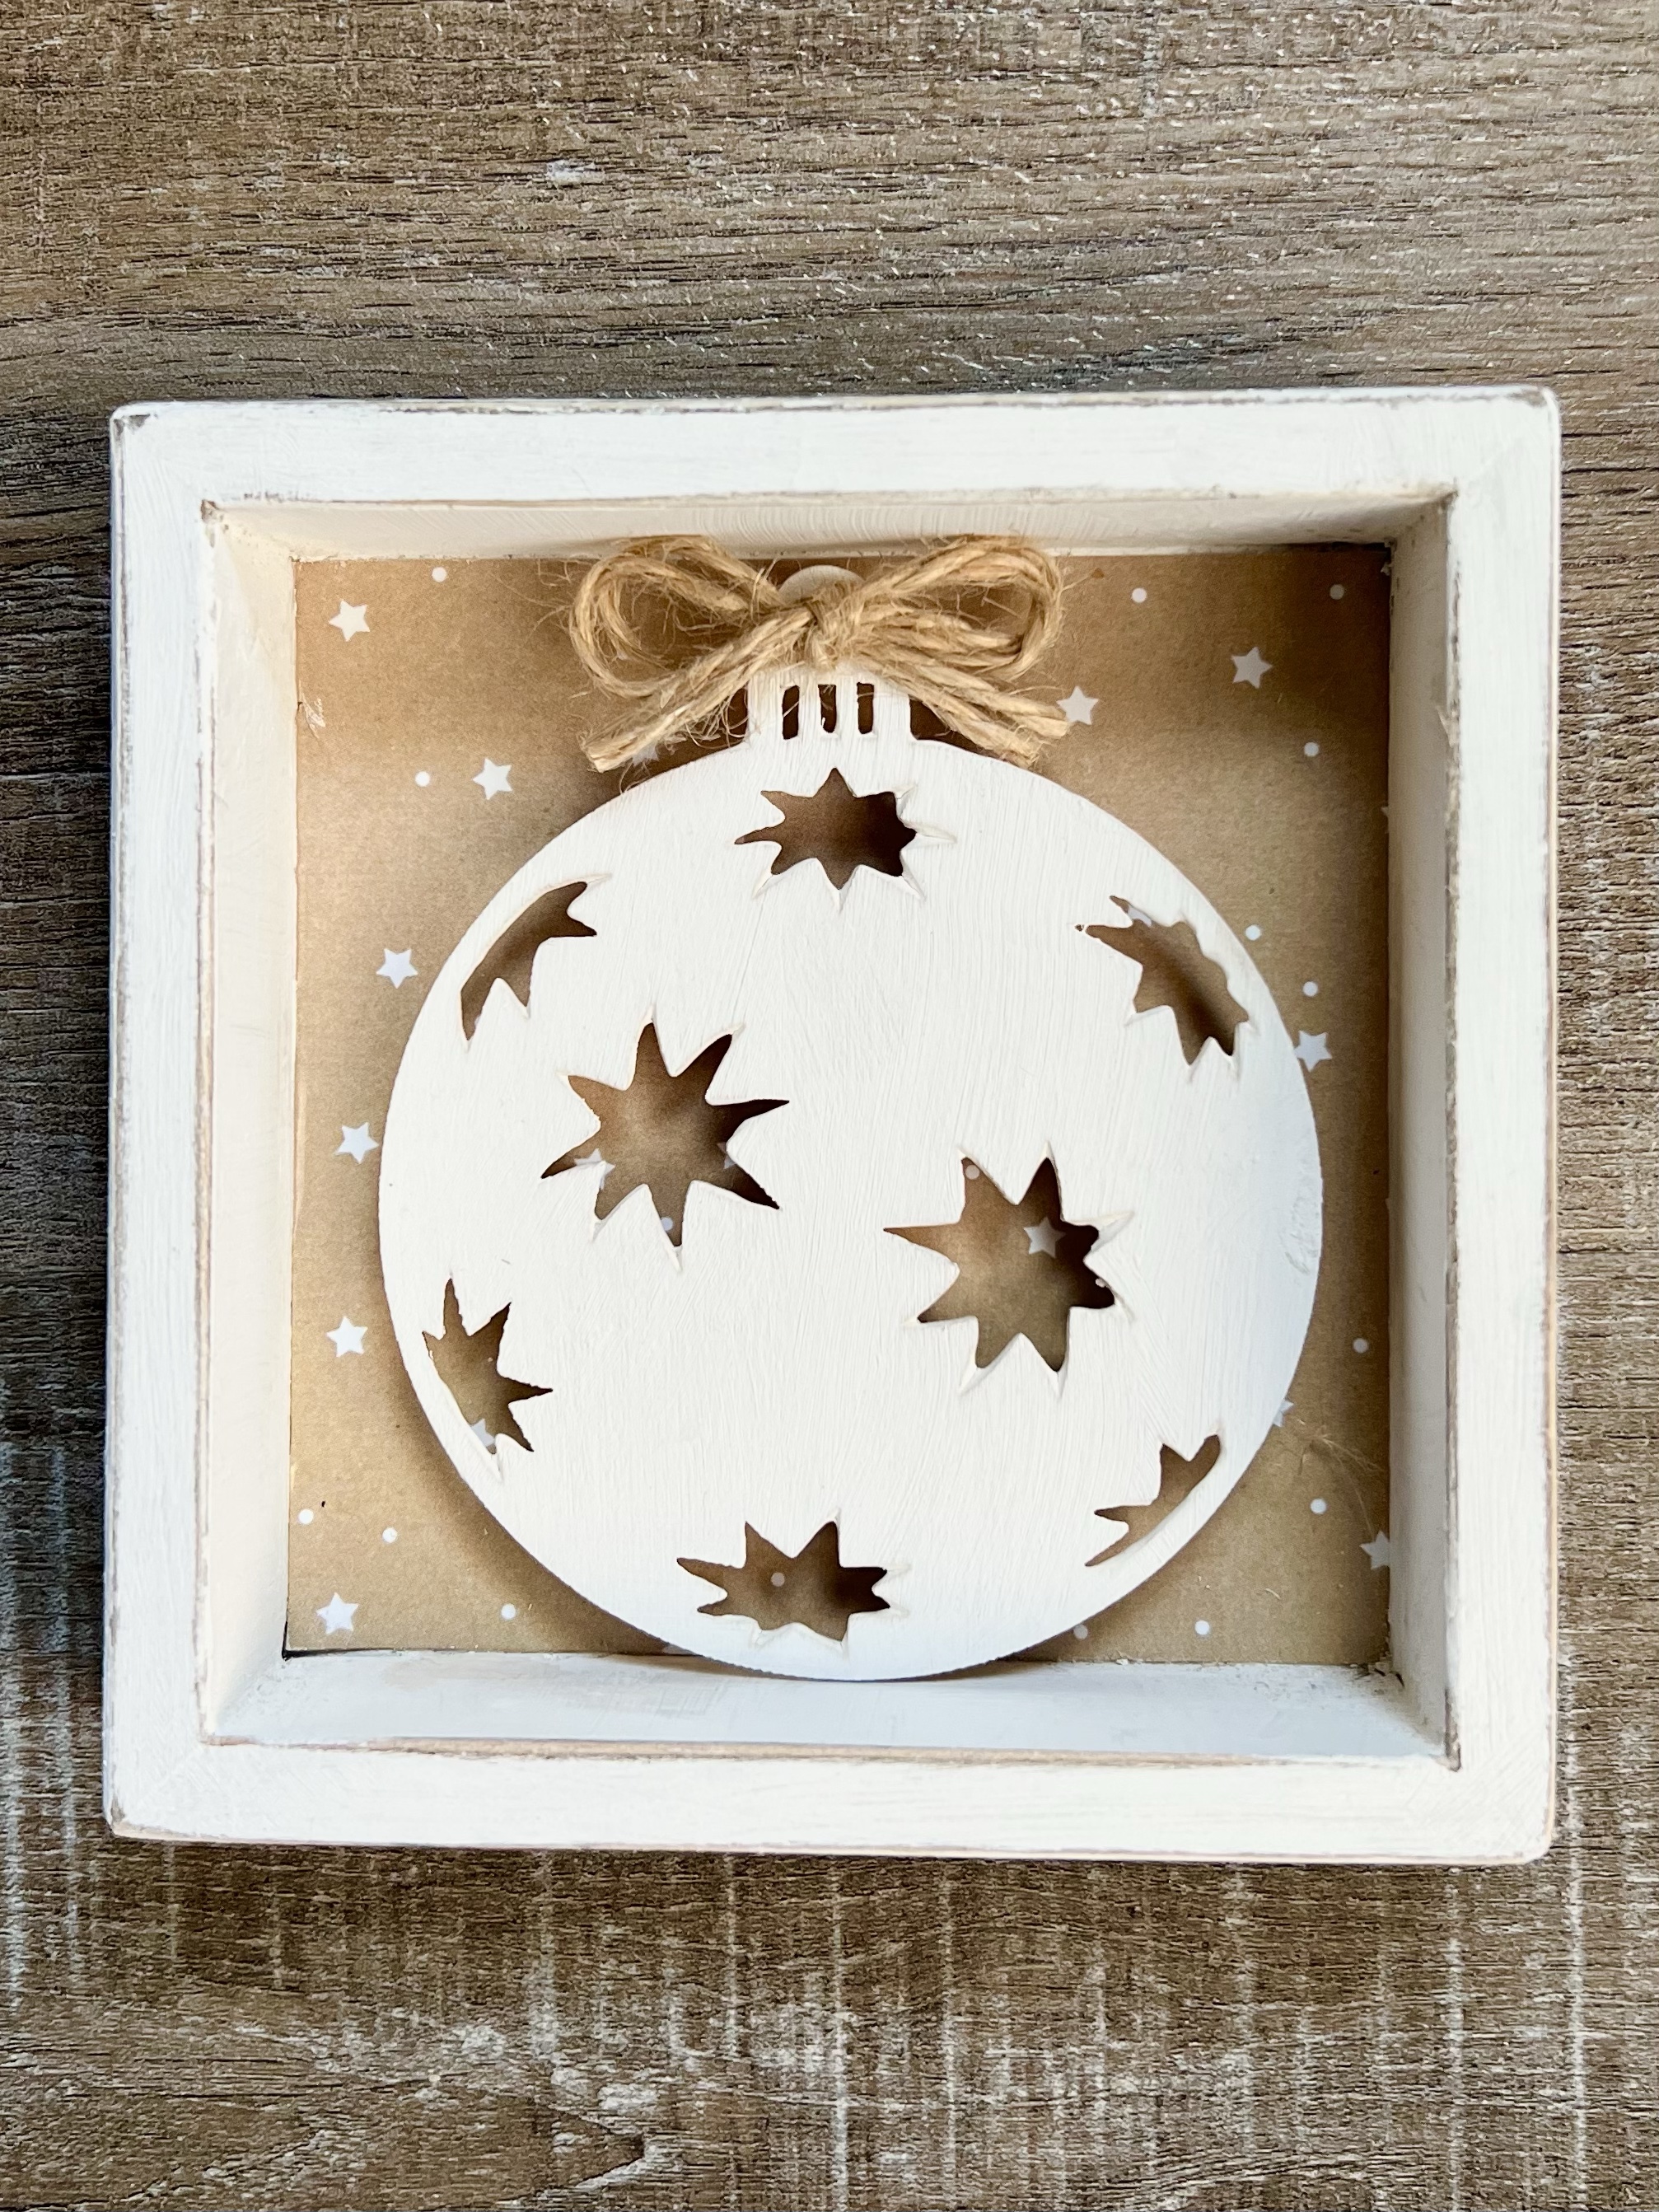
I cut my scrapbook paper to fit inside the frame. I applied a thin coat of Mod Podge with a foam brush to the inside of the frame and then adhered the scrapbook paper. Make sure to put the hole from the screw eye on the bottom before adhering your paper so the pattern will be the right way and the hole won’t show. I put the pop dots on the back of the ornament and attached it to the frame. If you want the ornament to pop up a little more, just add another pop dot on top of the first one. I finished it off with a twine bow on the top of the ornament.
I really like the way they turned out! They are so simple, yet so pretty! They are the perfect size for tiered tray decor, shelf sitters, or to tuck into some greenery on your mantel.
Keep your eyes open as you shop the clearance aisles in your favorite stores – you never know what you might find that you can turn into the perfect gift or decor item. 🙂
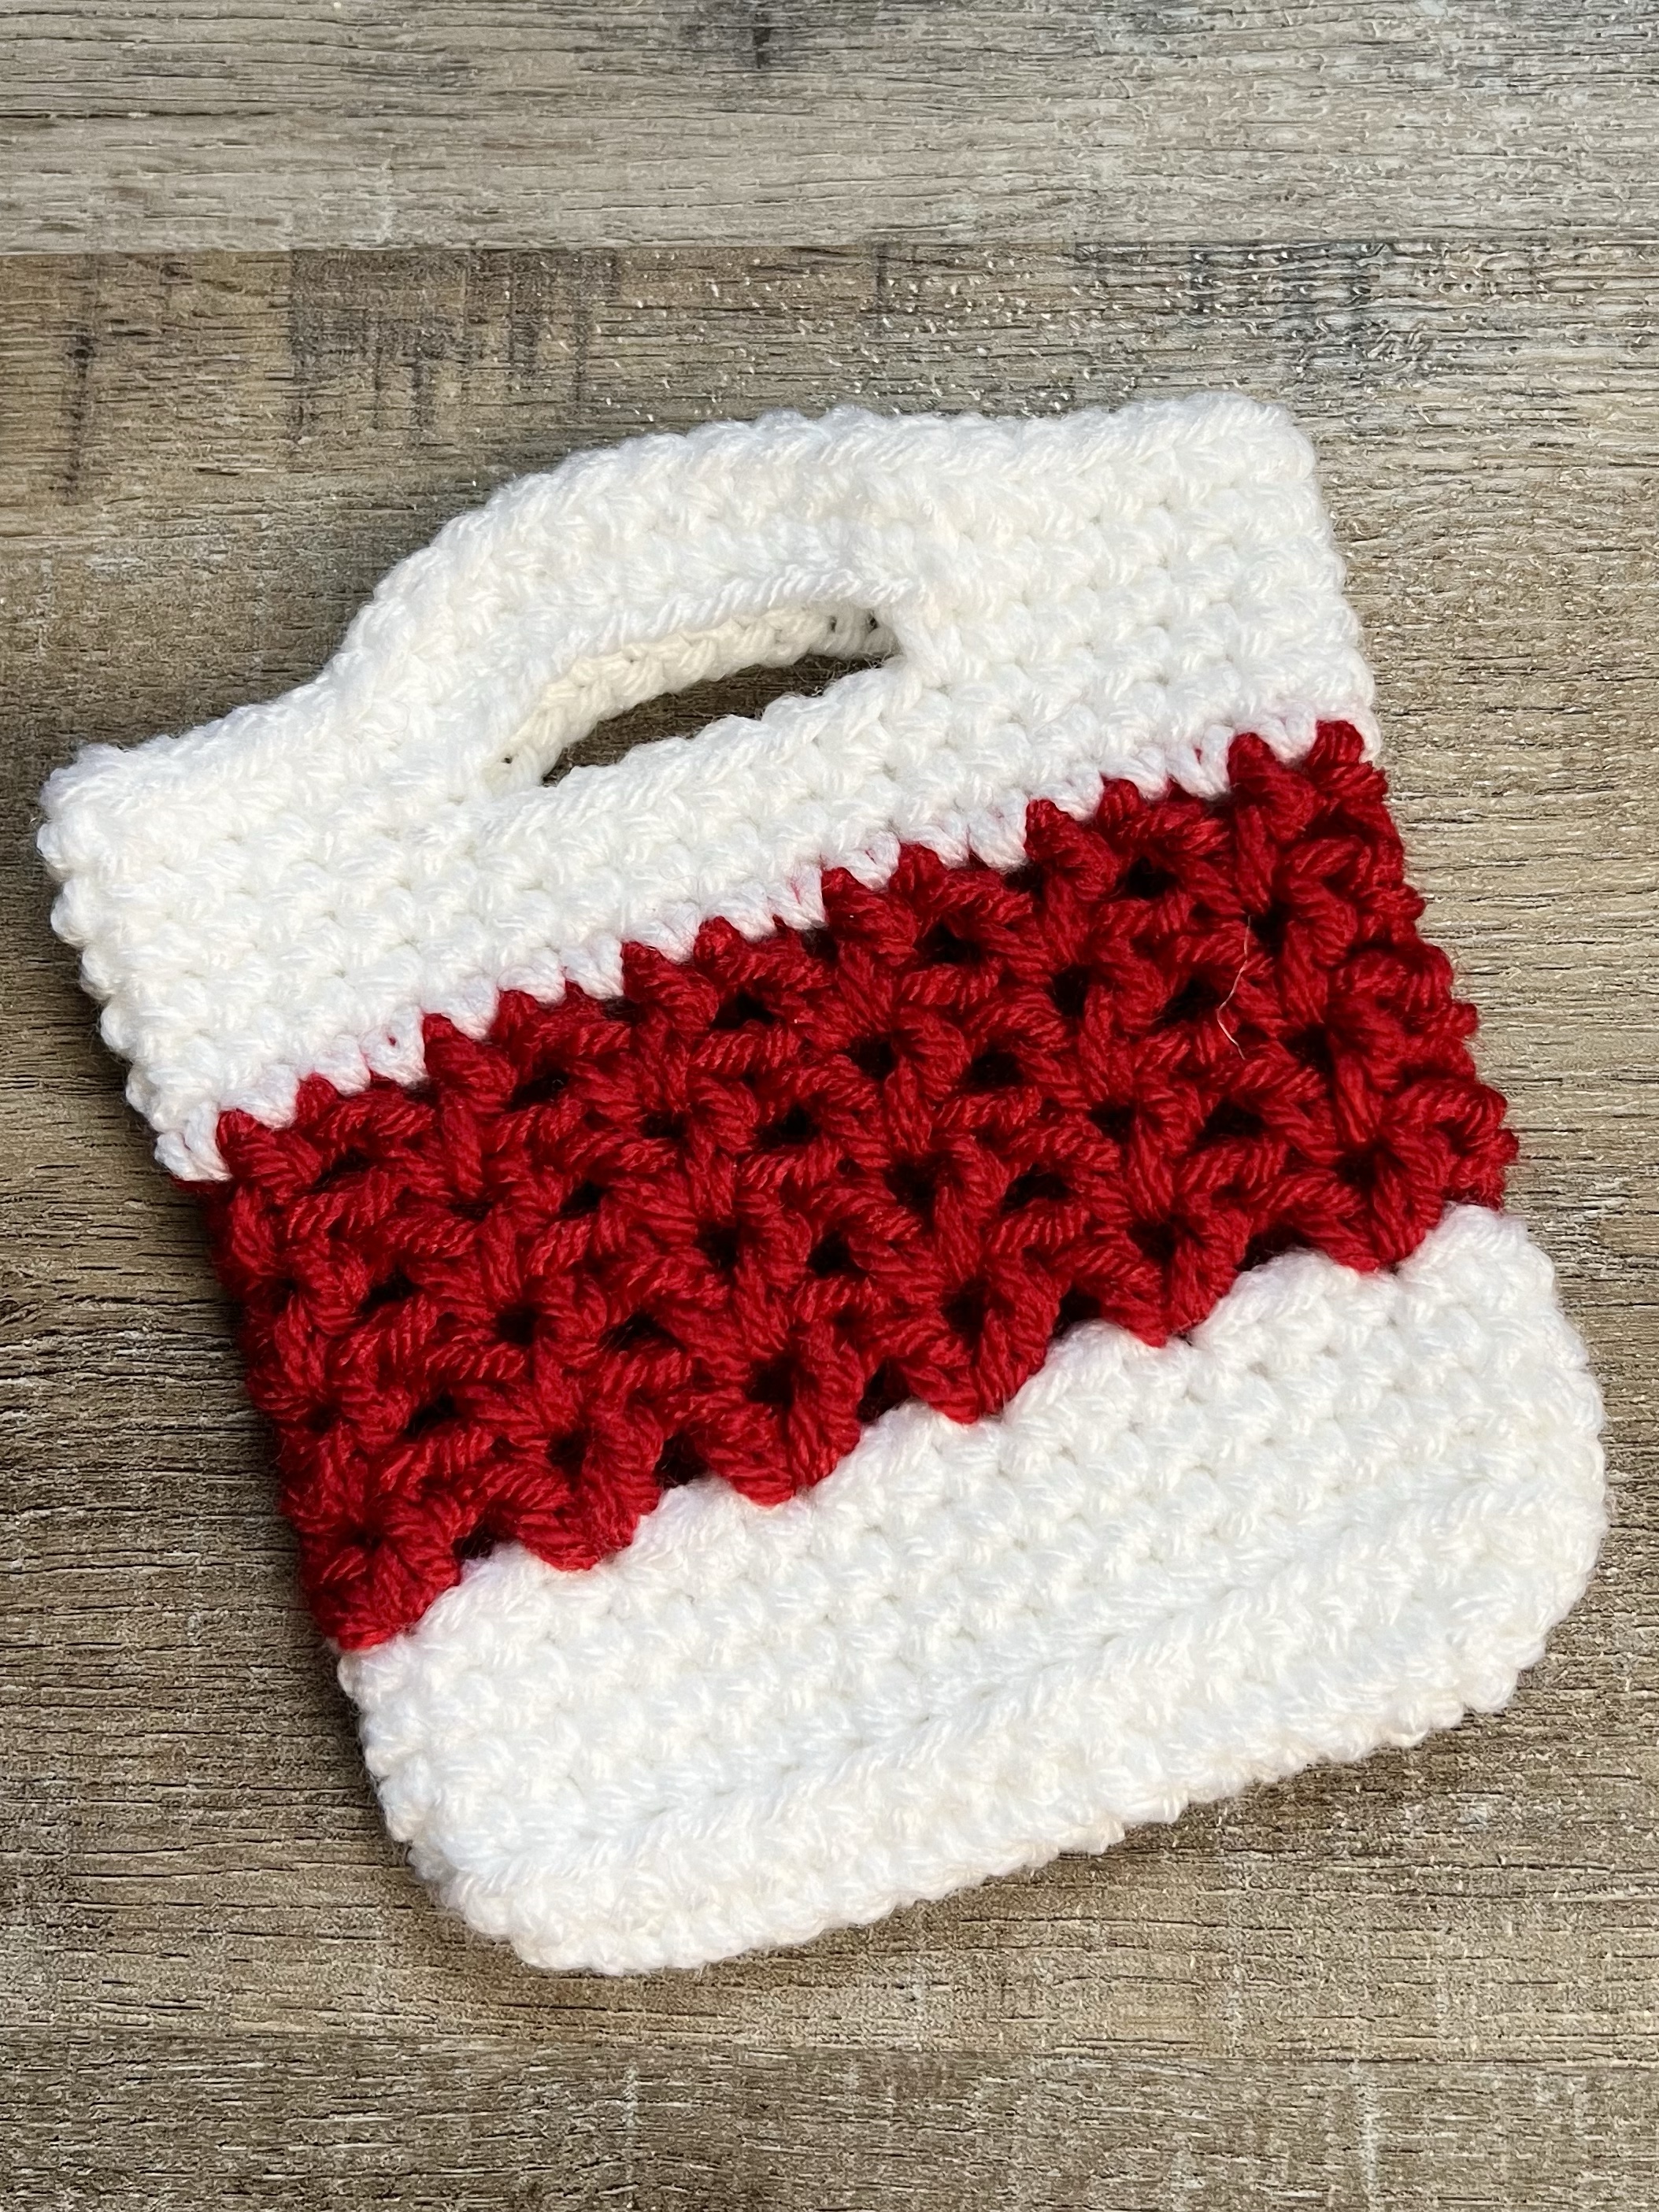
Do you like to give gift cards or cash for Christmas? This Crochet Mini Tote Gift Bag is the perfect size to tuck cards and cash in along with some yummy chocolate or Christmas candy. 🙂 It’s also great for small gifts like earrings or other jewelry. Or maybe tuck a little note pad, pen, and chocolates inside for a sweet friend gift. 🎁
Disclosure: Some of the links on my site are affiliate links, meaning, at no additional cost to you, I will earn a small commission if you click through and make a purchase. As an Amazon Associate I earn from qualifying purchases.
I used I Love This Yarn in White and Red with an H/5mm hook to stitch up my Mini Tote Gift Bags. The finished bag measures about 4.75 by 5.5 inches. You’ll find the pattern below along with a link to a free PDF for easy printing.
Crochet Mini Tote Gift Bag
Worsted weight yarn in 2 colors ( I used I Love This Yarn in White and Red)
H/5mm hook
Stitches used US terms:
Chain – ch
Single Crochet – sc
Slip Stitch – ss
Back Loop Only – blo
Special Stitch – v-stitch (dc, ch 1, dc) in same stitch
Round 1: With color A, ch 15. sc in 2nd ch from hook and in next 12 ch. Work 3 sc in last ch. Working in the other side of beginning ch, sc in next 13 stitches. Work 3 sc in last stitch. Join with ss to first sc. (32 stitches)
Round 2: ch 1. sc in same stitch as ss and next 13 stitches. Work 3 stitches in next stitch. sc in next 15 stitches. Work 3 sc in next stitch. sc in next stitch. Join with ss to 1st sc. (36 stitches)
Round 3: ch 1. Working in blo, sc in same stitch as ss and in each stitch around. Join with ss to first sc. (36 stitches)
Rounds 4-6: ch 1. sc in same stitch as ss and in each stitch around. Join with ss to first sc. (36 stitches)
Change to color B.
Round 7: ch 3 (counts as first dc and ch 1) dc in same stitch as ss (First v-stitch made). *skip next 2 stitches, work v-stitch in next stitch* Repeat from * to * around to last 2 stitches. Skip last 2 stitches and join with ss to 2nd ch in beginning ch 3. (12 v-stitches)
Rounds 8-10: ss into ch 1 space. ch 3 (counts as first dc and ch 1) dc in same ch 1 space (First v-stitch made). Work v-stitch in each ch 1 space of v-stitch in previous row. Join with ss to 2nd ch of beginning ch 3. (12 v-stitches)
Change to color A.
Round 11: ch 1. sc in same stitch as ss and in each ch 1 space and dc stitch around. Join with ss to first sc. (36 stitches)
Rounds 12-13: ch 1. sc in same stitch as ss and in each stitch around. Join with ss to first sc. (36 stitches)
The next Round will make the handles.
Round 14: ch 1. sc in same stitch as ss and in the next 5 stitches. ch 10. Skip next 6 stitches. sc in next 12 stitches. ch 10. Skip next 6 stitches. sc in next 6 stitches. Join with ss to first sc. (44 stitches)
Round 15: ch 1. sc in same stitch as ss and in each stitch and ch around. Join with ss to first sc. (44 stitches)
Round 16: ch 1: sc in same stitch as ss and in each stitch around. Join with ss to first sc. (44 stitches)
Fasten off and weave in ends.
Finished gift bag measures about 4.75 by 5.5 inches.
Of course you can stitch up these cute bags in any color combo. They would be fun to use as favor bags for a birthday party stitched up in bright colors and filled with tiny treasures. 🥳
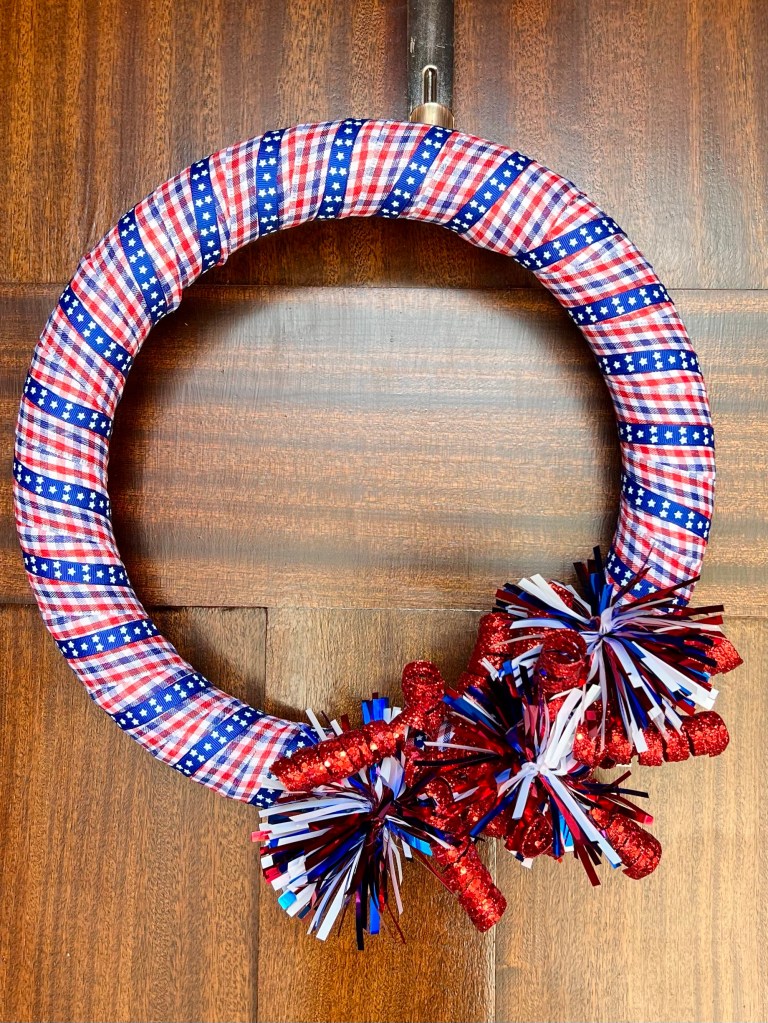
Wishing all of my friends in the United States a Happy Independence Day!! 🇺🇸
Disclosure: Some of the links on my site are affiliate links, meaning, at no additional cost to you, I will earn a small commission if you click through and make a purchase. As an Amazon Associate I earn from qualifying purchases.
It’s July 1st and that means it’s time for Christmas in July!! 🎄 I have some fun things planned for this month so I hope you’ll follow along with me. And if you don’t want to craft for Christmas just yet, pin my posts to your Pinterest boards for later. 😊
Disclosure: Some of the links on my site are affiliate links, meaning, at no additional cost to you, I will earn a small commission if you click through and make a purchase. As an Amazon Associate I earn from qualifying purchases.
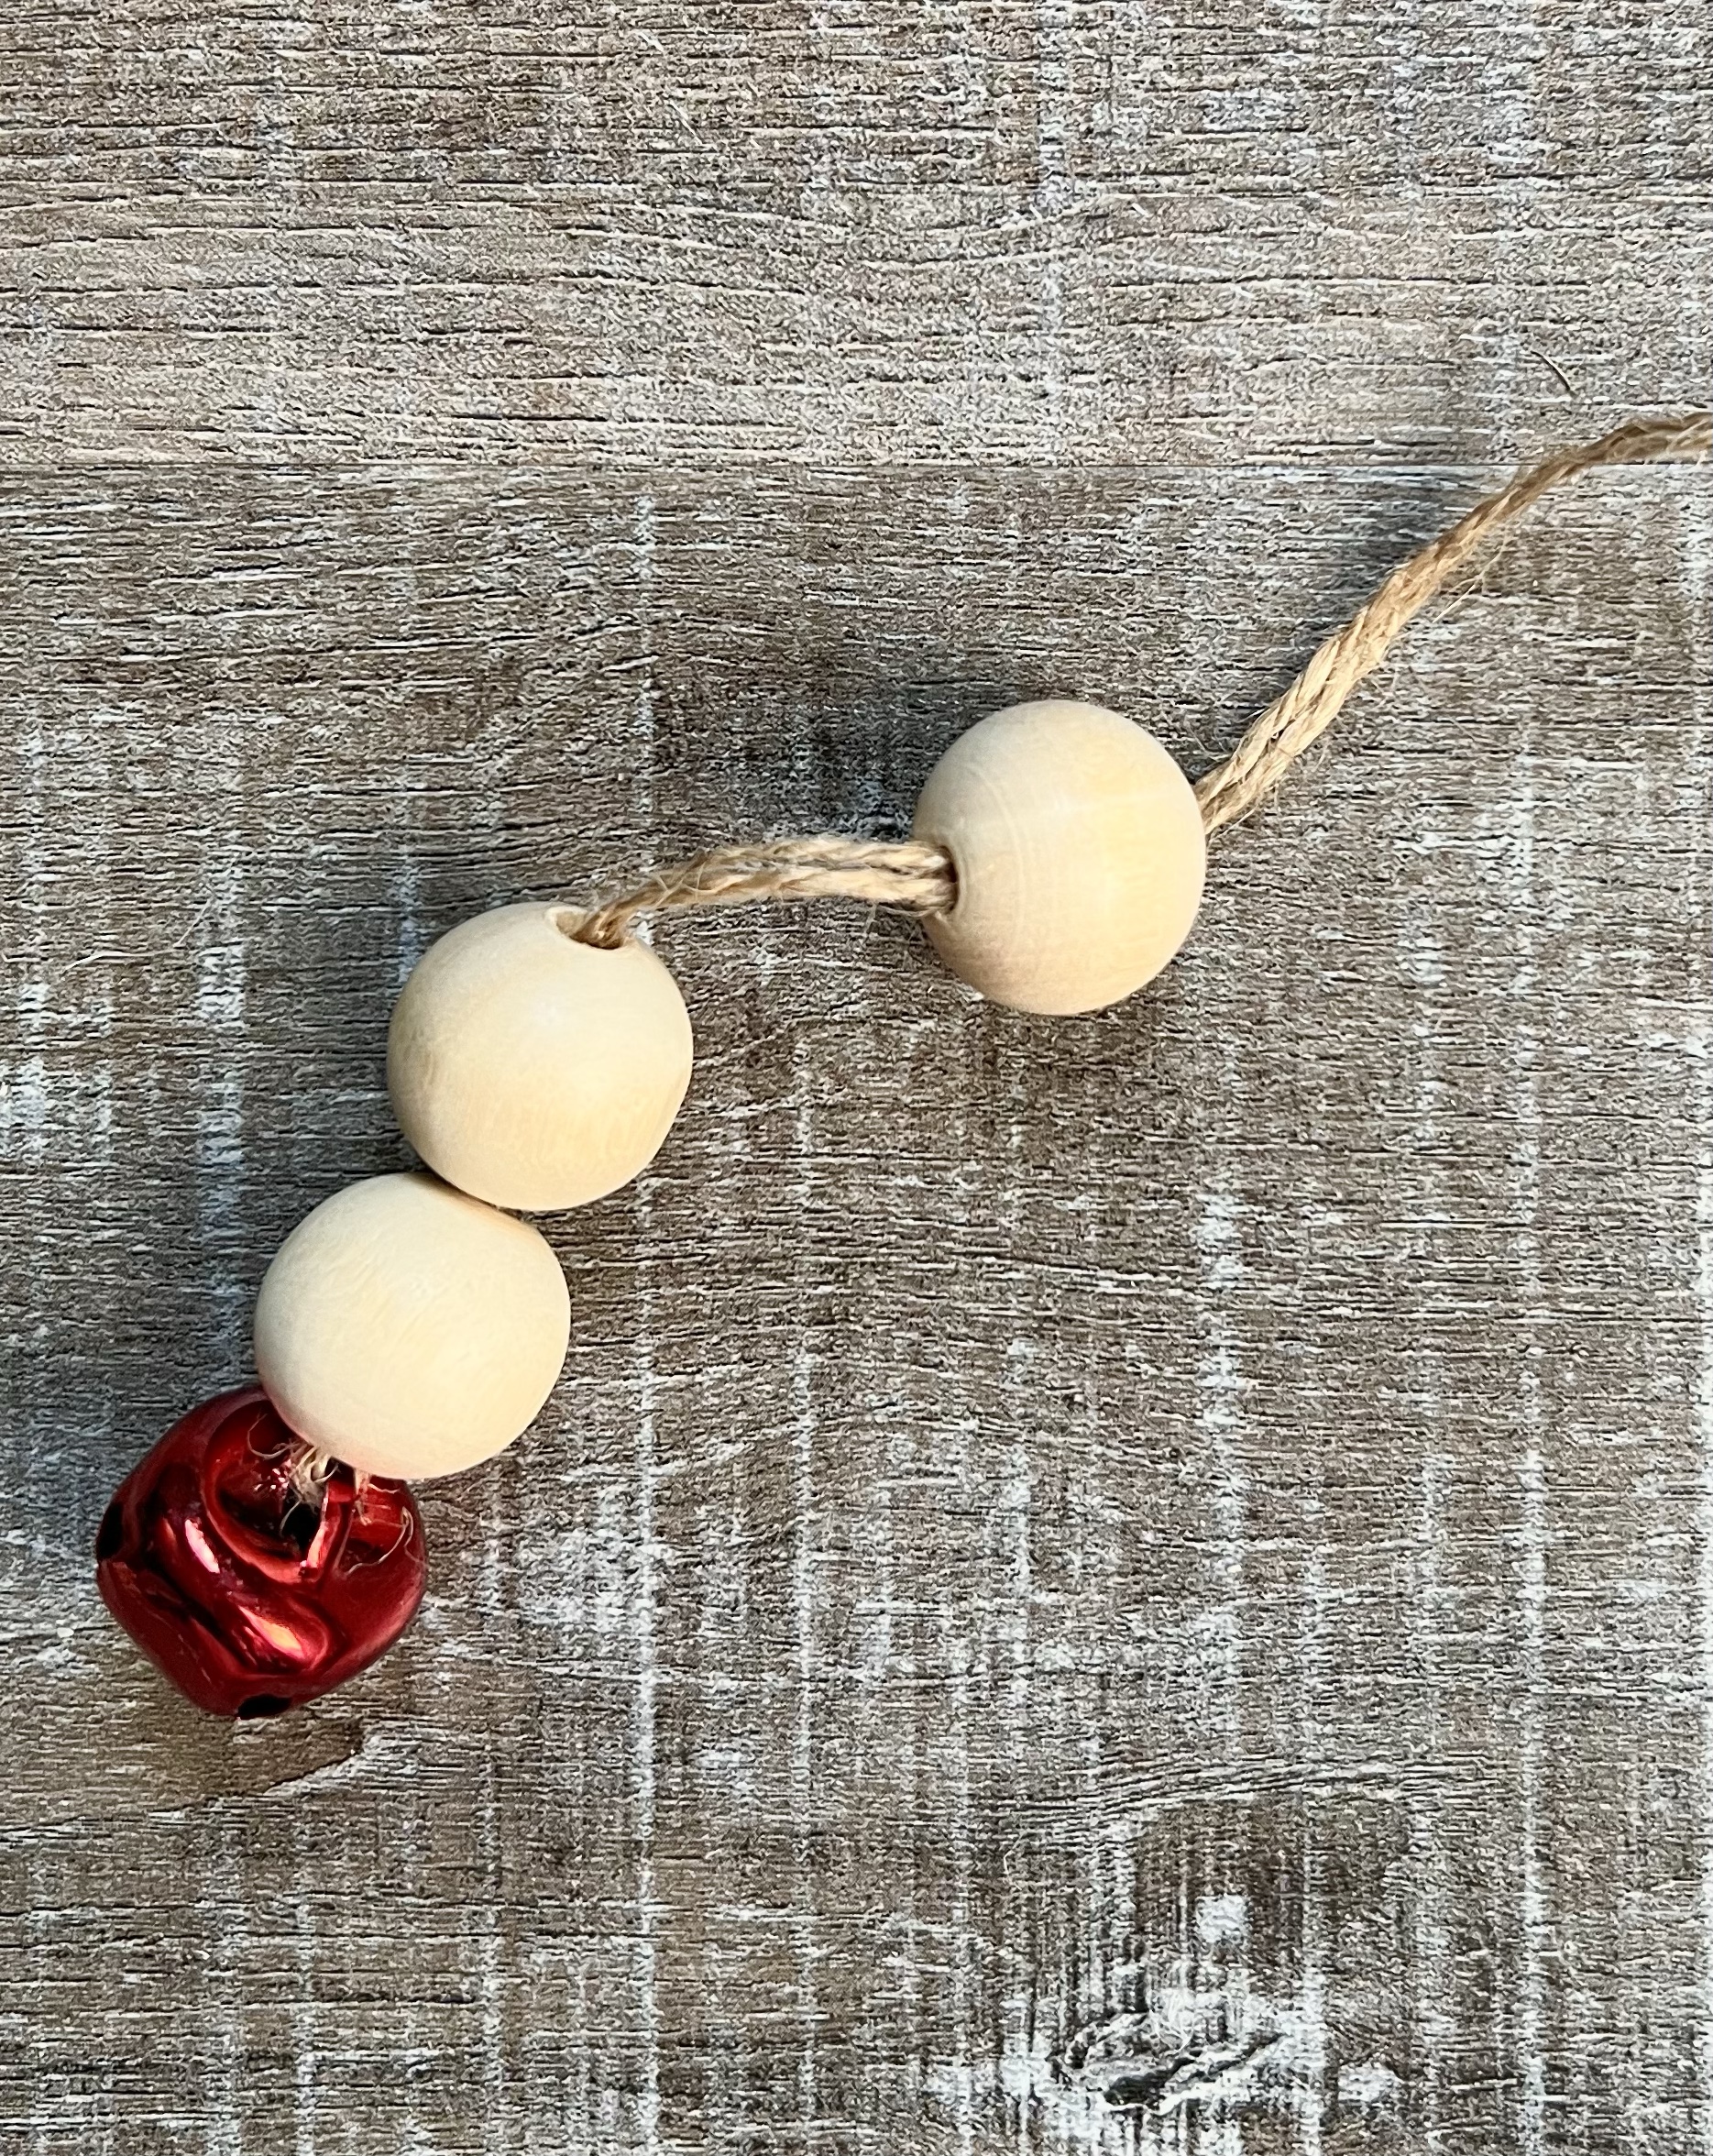
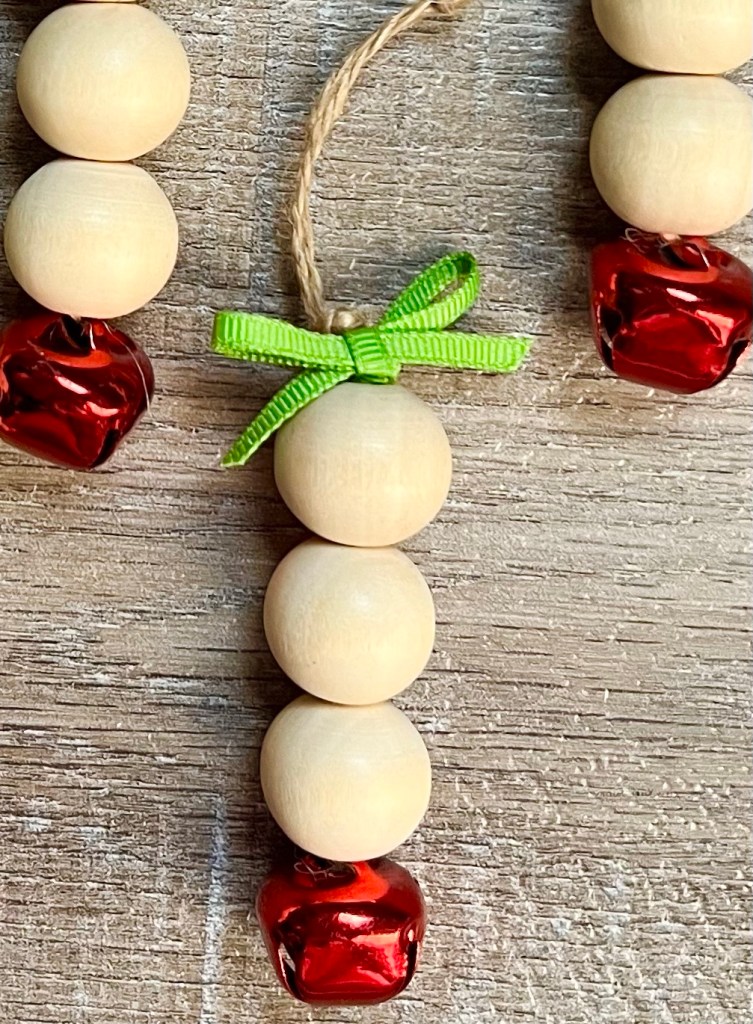
We’ll start the month off with a fun and easy Jingle Bell Wood Bead ornament. You’ll need some jingle bells (mine are about 3/4 inch), natural wood beads (mine are about 3/4 inch), natural twine, and 1/8 inch ribbon to tie the little bows. You can also change the size of the jingle bells and wood beads to make the ornaments larger or smaller.
Begin by cutting a piece of twine about 14 inches long and thread the jingle bell onto the twine. Then thread both ends of the twine through 3 wood beads.
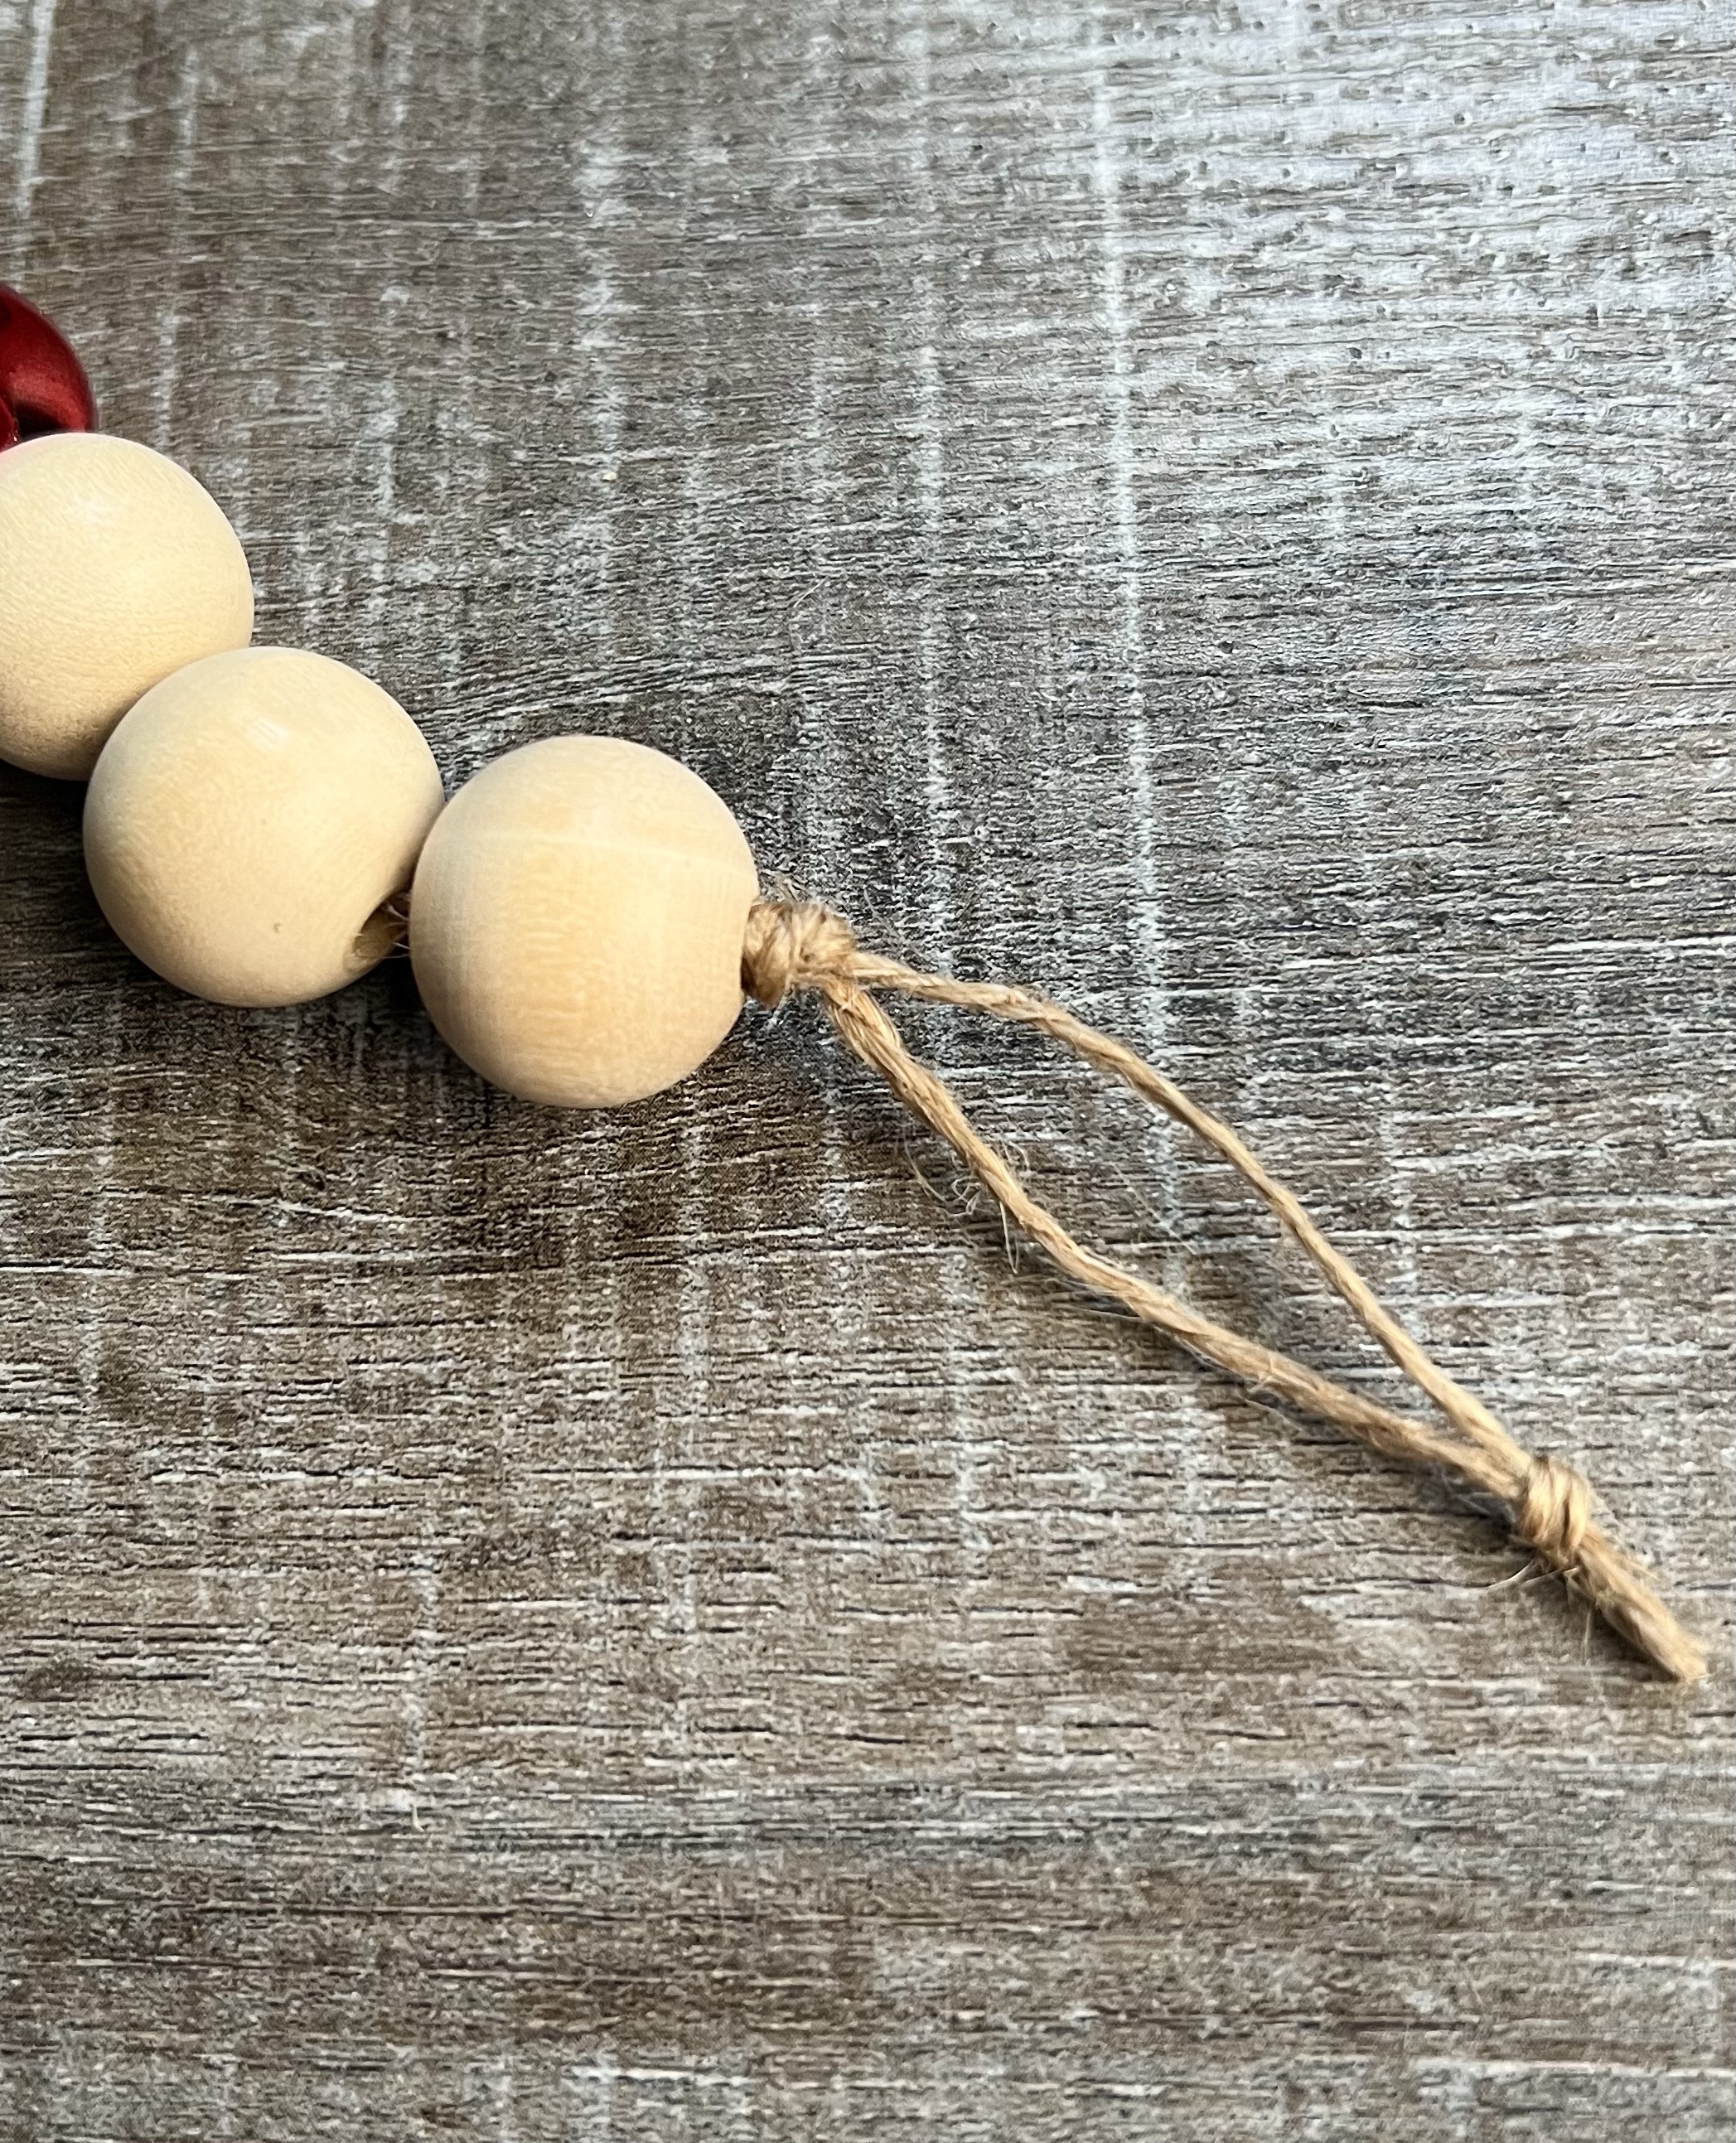
Tie a knot close to the top bead. I tied 2 knots, overlapping the 1st knot with the 2nd knot so my beads weren’t able to slide on the twine. Leaving a loop for hanging, tie the ends of the twine together. Trim any excess twine.
Using the ribbon, tie a bow just above the top bead and your ornament is finished! Super quick and easy to make.
This would be a fun activity to do with the kids on a hot Summer afternoon. They could make them for all their friends and be ready for Christmas gift giving.
These cute Jingle Bell Wood Bead Ornaments can also be used as package tie-ons. They will add a little jingle-y fun to all your gifts. 😊
I made another fun ornament using wood beads a few years ago in this post. It’s a little snowman and he’s so cute! It’s also a great project to do with the kids. 🎄
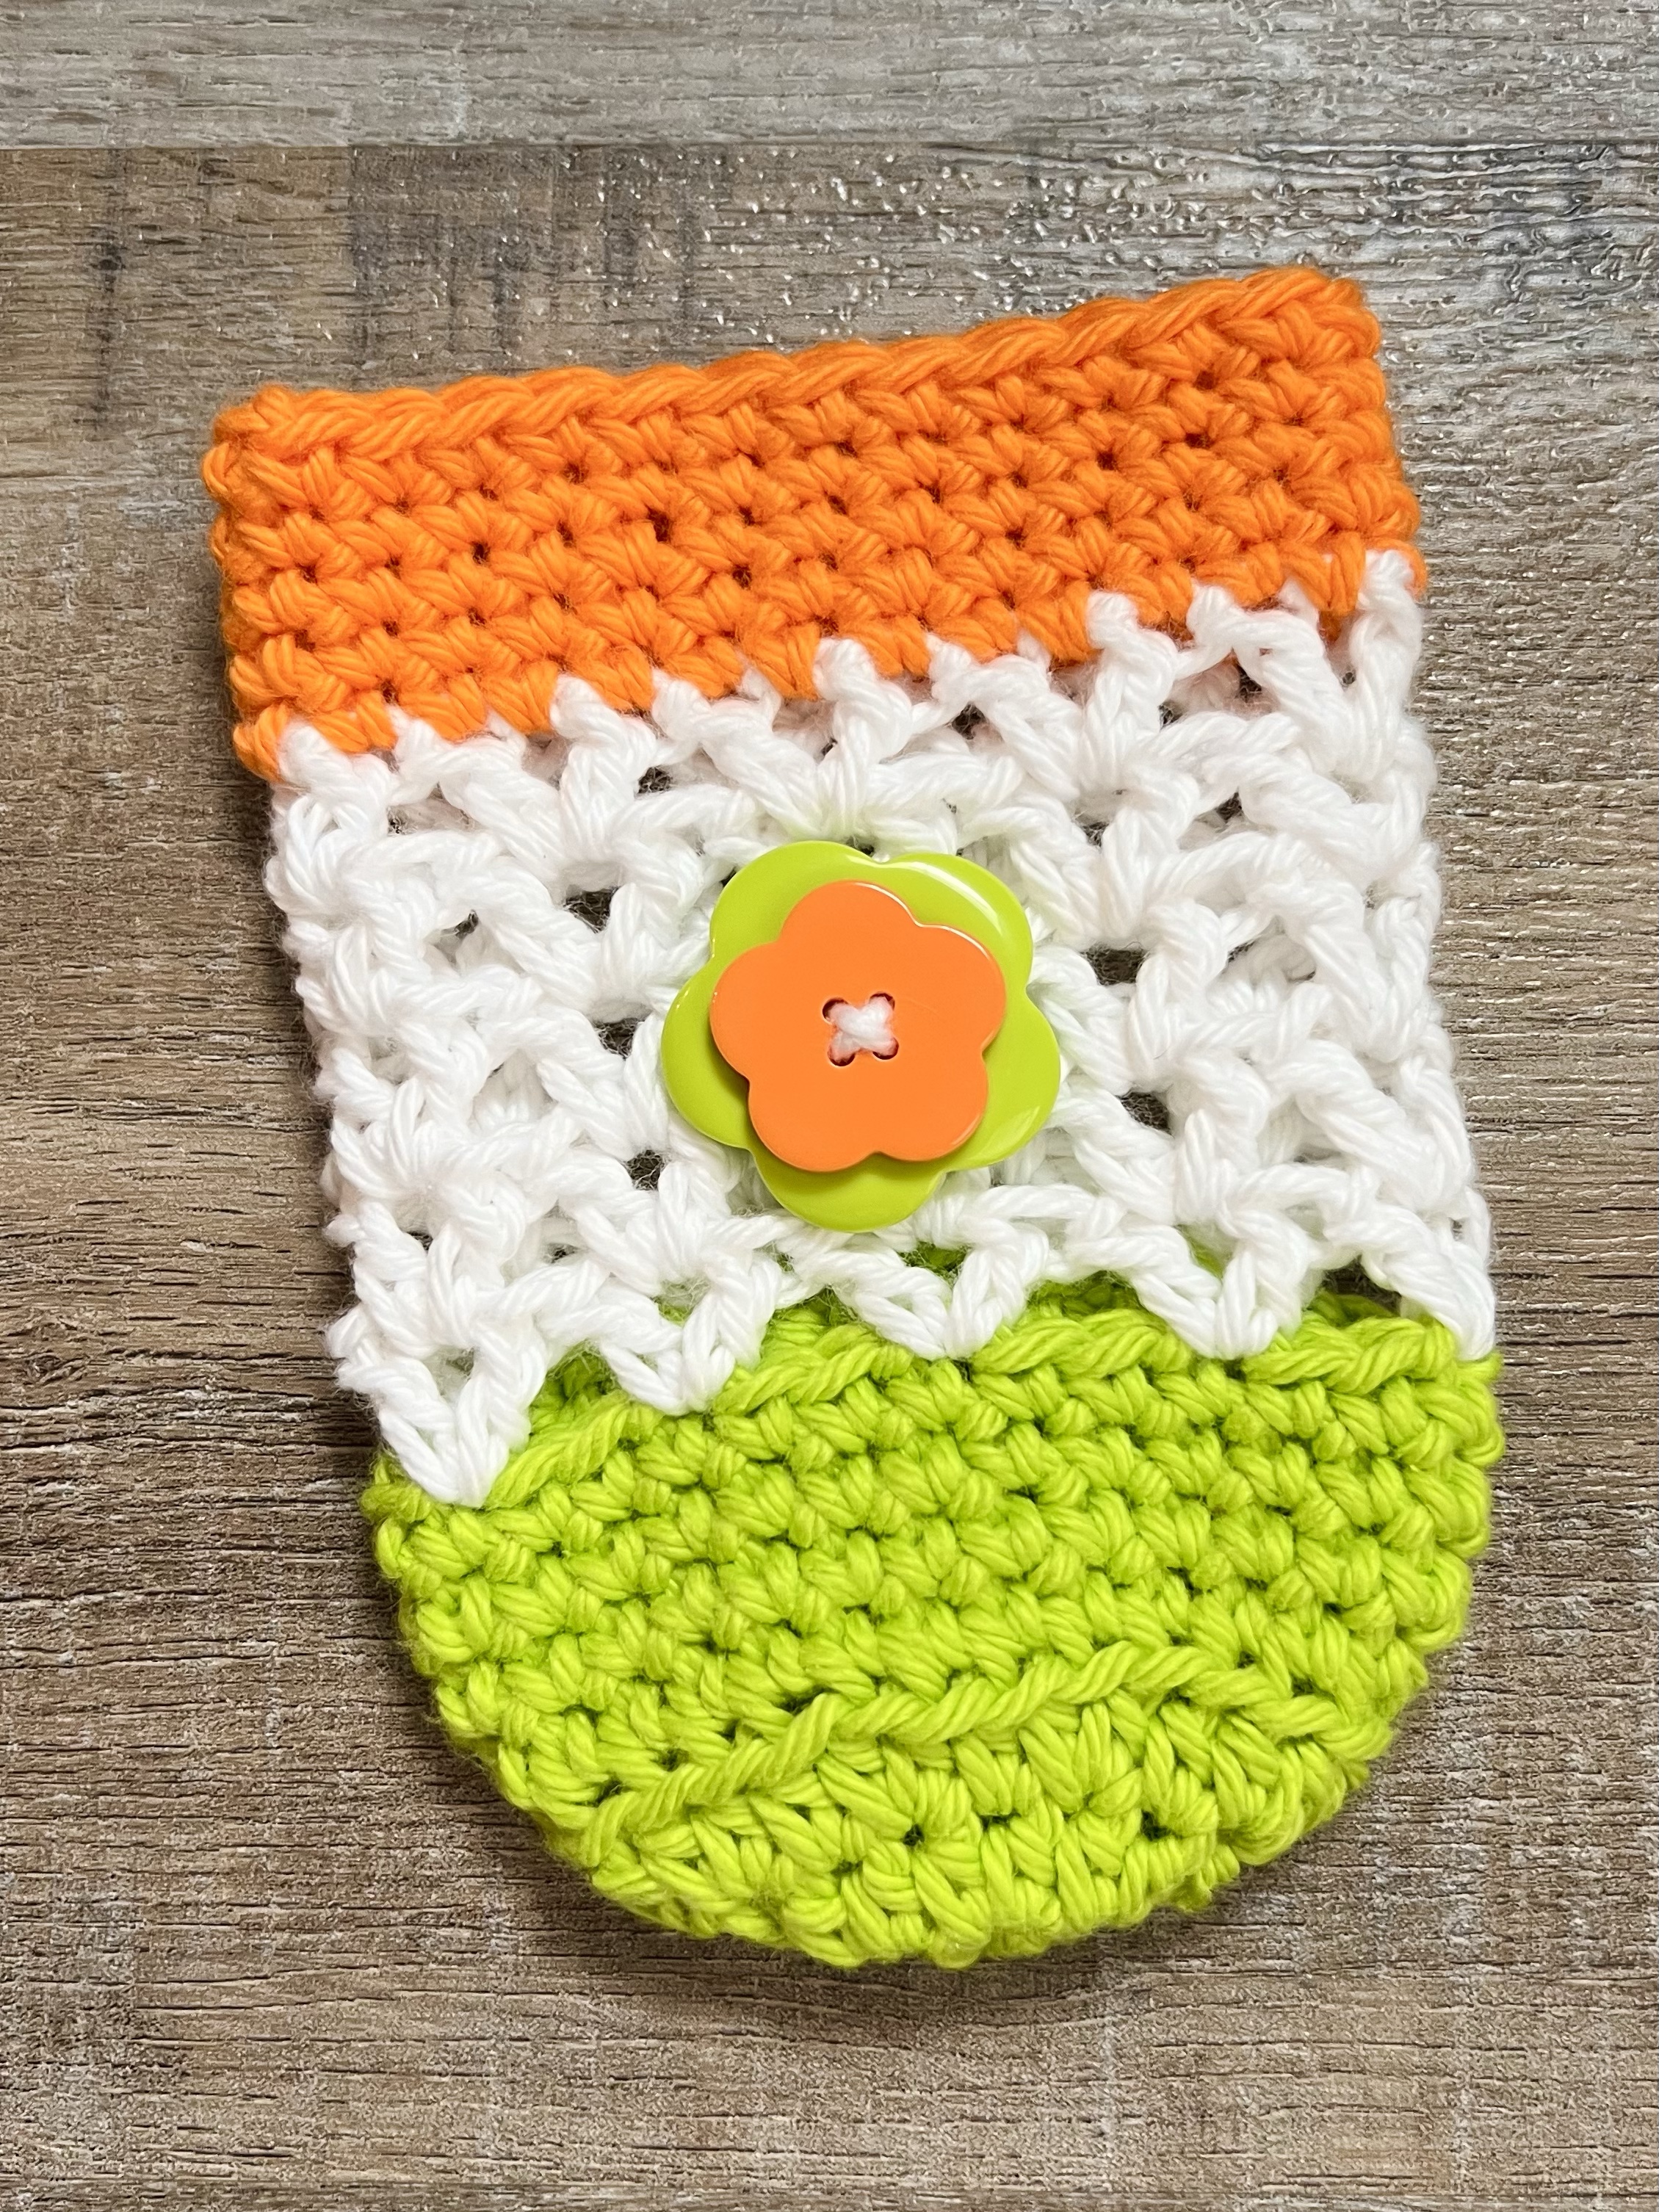
Summer means bright colors, hot temps, and cold drinks! My Crochet Summer Brights Can Cozy will help protect your table – and your hands – from the condensation on your cold cans while showing off the bright colors of Summer. Such a fun make to use poolside or on the beach!
Disclosure: Some of the links on my site are affiliate links, meaning, at no additional cost to you, I will earn a small commission if you click through and make a purchase. As an Amazon Associate I earn from qualifying purchases.
I used I Love This Cotton yarn in Bright Citrus, White, and Glowing with an H/5mm hook to stitch up my cozies. You’ll find the pattern below along with a link to a free PDF for easy printing. I added the cute flower buttons just for fun – they are totally optional. 🙂
Crochet Summer Brights Can Cozy
I Love This Cotton (4 weight yarn) – Bright Citrus, White, and Glowing
H/5mm hook
Flower buttons (optional)
Stitches used in US terms:
Chain – ch
Single Crochet – sc
Half Double Crochet – hdc
Slip Stitch – ss
Special Stitch:
V-stitch – (dc, ch 1, dc) in same stitch
Make Magic Ring with Bright Citrus, ch 1.
Round 1: Work 9 hdc in ring. Join with ss to first hdc. Pull ring closed. (9 stitches)
Round 2: ch 1. 2 hdc in same stitch as ss and in each stitch around. Join with ss to first hdc. (18 stitches)
Round 3: ch 1. 2 hdc in same stitch as ss. *hdc in next stitch, 2 hdc in next stitch * Repeat from * to * around to last stitch. hdc in last stitch. Join with ss to first hdc. (27 stitches)
Round 4: ch 1. Working in blo, sc in same stitch as ss and in each stitch around. Join with ss to first sc. (27 stitches)
Rounds 5-7: ch 1. Working in both loops, sc in same stitch as ss and in each stitch around. Join with ss to first sc. (27 stitches)
Change to White.
Round 8: ch 3 (counts as 1st dc and ch 1), dc in same stitch as ss – first v-stitch made. *skip next 2 stitches, work v-stitch in next stitch* Repeat from * to * 7 more times. Join with ss to 2nd ch of beginning ch 3. (9 v-stitches)
Rounds 9-12: ss into ch 1 space, ch 3, dc into same ch 1 space. Work v-stitch in each ch 1 space around. Join with ss to 2nd ch of beginning ch 3. (9 v-stitches)
Chang to Glowing.
Round 13: ch 1. sc in same stitch as ss and in each ch 1 space and dc around. Join with ss to first sc. (27 stitches)
Rounds 14-17: ch 1. sc in same stitch as ss and in each stitch around. Join with ss to first sc. (27 stitches)
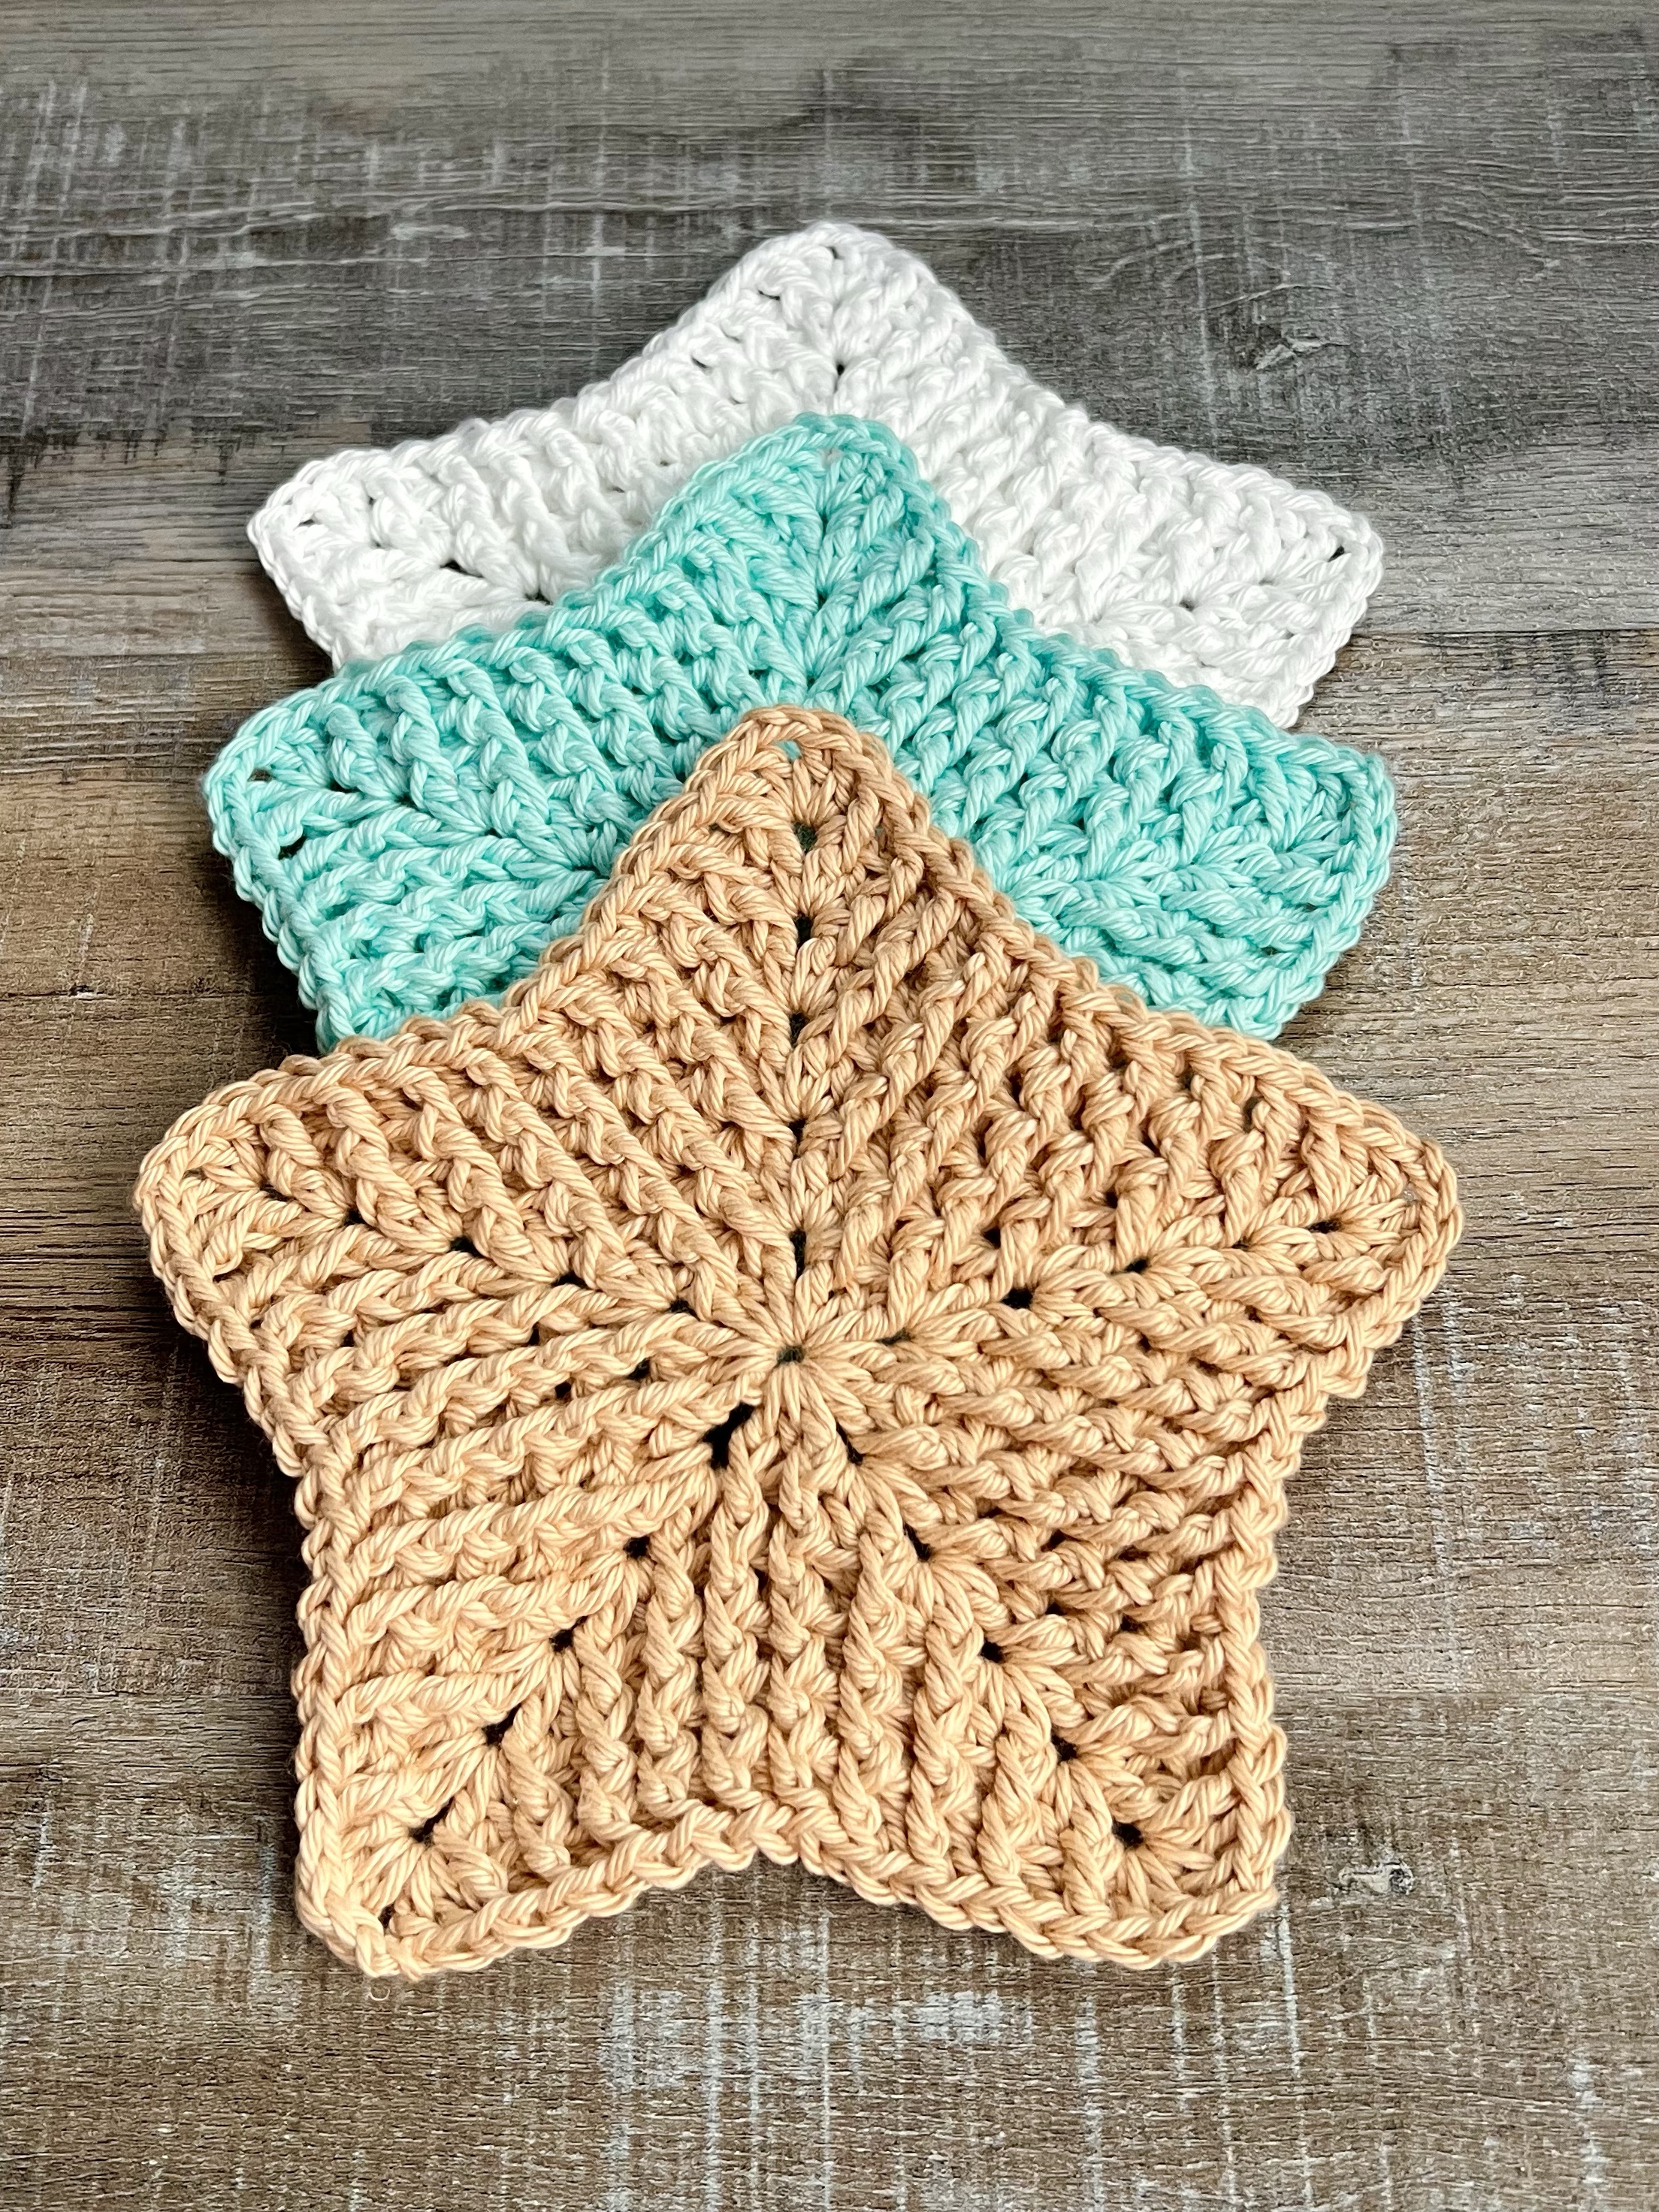
I found this Crochet Star Dishcloth pattern on Pinterest and really liked the texture it has. It also reminded me of a starfish – probably because I love the beach so much. 😉 It made me think of the starfish we saw while we were visiting Bar Harbor, Maine a few years ago. It was low tide and this little guy was hanging out in just a few inches of water waiting for the tide to roll back in. I shared about our trip to New England in the Fall of 2016 here – it is high on my list of favorite vacations!
Disclosure: Some of the links on my site are affiliate links, meaning, at no additional cost to you, I will earn a small commission if you click through and make a purchase. As an Amazon Associate I earn from qualifying purchases.
I chose to make my Star Dishcloths in beachy colors since I was thinking of starfish 😉 , but of course you can make them any color. I used I Love This Cotton yarn in White, Aqua, and Taupe with an H/5mm hook to stitch up my dishcloths. They work up quickly and are really fun to make!
Since they are made with cotton yarn, they can also be used as spa cloths. I think they would make a whimsical and fun hostess gift for a friend who lives near the ocean, maybe with some cute seashell soaps. Or make them in Christmas colors and get a head start on your gift making. What color will you make yours?
We’re halfway through the year which means it’s time for June’s Christmas Card design. 🎄 I’m so excited that I have kept up my goal to design and create a Christmas card each month! You can find the cards I’ve made so far here… January, February, March, April, and May. I’ve been trying to keep my cards fairly simple so I can make several at a time. I’ve made 4 to 6 cards each month which seems to be working out well for me. 🙂
Disclosure: Some of the links on my site are affiliate links, meaning, at no additional cost to you, I will earn a small commission if you click through and make a purchase. As an Amazon Associate I earn from qualifying purchases.
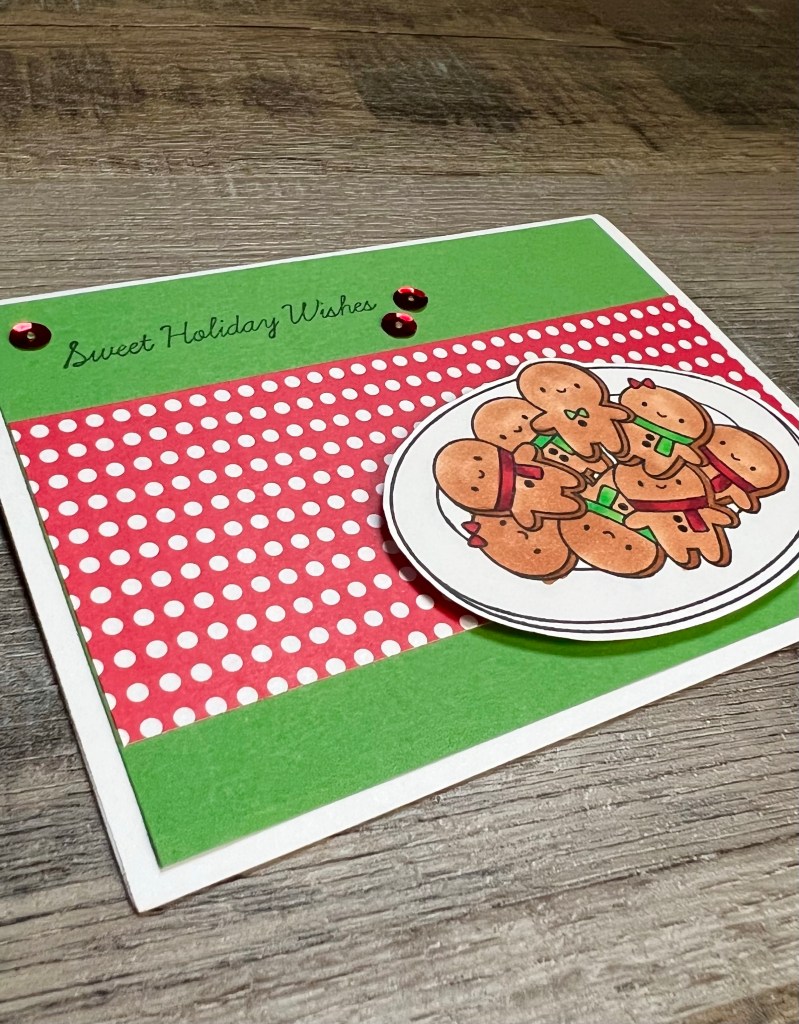
I stamped the plate of gingerbread cookies with Memento Tuxedo Black ink on white card stock and colored the image with Copic markers. Then I cut the image out, leaving a tiny white border around it.
I attached a piece of green card stock to a white card and layered a strip of patterned paper over it. I stamped “Sweet Holiday Wishes” with black ink near the top left side of the card. I attached the plate of cookies to the card using foam tape. To finish it off, I added 3 red sequins. Super sweet and simple!
This would be a cute card to attach to a plate of homemade cookies for a sweet Christmas gift. 🍪
Have you started making any Christmas cards yet? I think I’m really going to like having so many made ahead of time. 🙂
Disclosure: Some of the links on my site are affiliate links, meaning, at no additional cost to you, I will earn a small commission if you click through and make a purchase. As an Amazon Associate I earn from qualifying purchases.