Marker Storage

If you’ve followed my blog for a while, you know that I use Copic markers to color my stamped images quite often. I’m not an expert in coloring with them by any stretch of the imagination, but they have become my marker of choice. So many colors to choose from and they blend together beautifully.

As my collection has grown, I needed to find a storage option that could not only store what I have but also leave room for more – because we all know that more colors will find their way into my craft room ;).

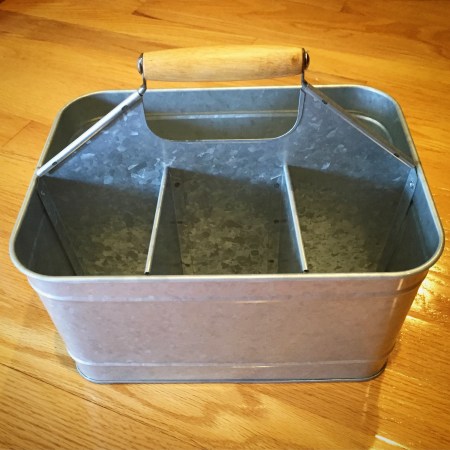
I found this great galvanized carry all here on the Target website. One side is divided into 3 compartments.

IMG_6592

The other side is one open compartment. Plenty of room to store markers and other coloring mediums – or markers in one side and a project in progress in the other.

IMG_6593

Here it is with my Copic markers in the divided side and I put my water color crayon sets on the other side. With plenty of room to grow my collection :).

IMG_6594

Happy coloring!!

Thanks for stopping by,

Anita

Posted in Organization, Uncategorized | Leave a comment

Work of Art Christmas Card

Earlier this week I posted a birthday card using the Work of Art stamp set from Stampin’ Up. Today I wanted to share a Christmas card using the same set and basic layout. Yes, I know it’s only August 😉 – but the months are going to fly by, so it’s time to get started on those Christmas cards!

IMG_6587

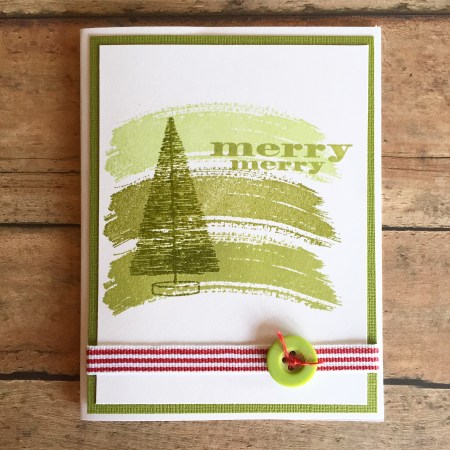
I stamped the large swoosh 3 times using (from the bottom up) Pear Pizzazz, Old Olive, and Certainly Celery inks from Stampin’ Up on white card stock. Let the ink dry completely – this is a very important step. If the ink is not completely dry, embossing powder will stick where you don’t want it!! I stamped the Christmas tree with Pear Pizzazz ink over the swooshes and immediately sprinkled clear embossing powder over the tree. Tap off the excess and heat with your heat gun to melt the powder. (There are a lot of options on heat guns. Here’s a link to Amazon with several choices. The one I have is made by Milwaukee. I think they may have discontinued it – I’ve had it forever and it’s still going strong!) The tree is from the Bottle Trees set by Hero Arts – sadly the set is no longer available on their site :(. But if you don’t have a tree that will work, I think this one would be great.

Stamp the sentiment with Pear Pizzazz ink. I’m not sure who made this stamp – it’s been in my stash a long time and it’s not marked with the company. Just use your favorite Christmas sentiment!

Layer the stamped panel to green card stock. Add red and white striped ribbon and attach the panel to a white card. Tie a green button with red twine and attach over the ribbon.

The same basic layout as the Work of Art Birthday Card in this post, but a totally different look!

Thanks for stopping by,

Anita


Posted in Cards, Christmas, Uncategorized | Leave a comment

Work of Art Birthday Card

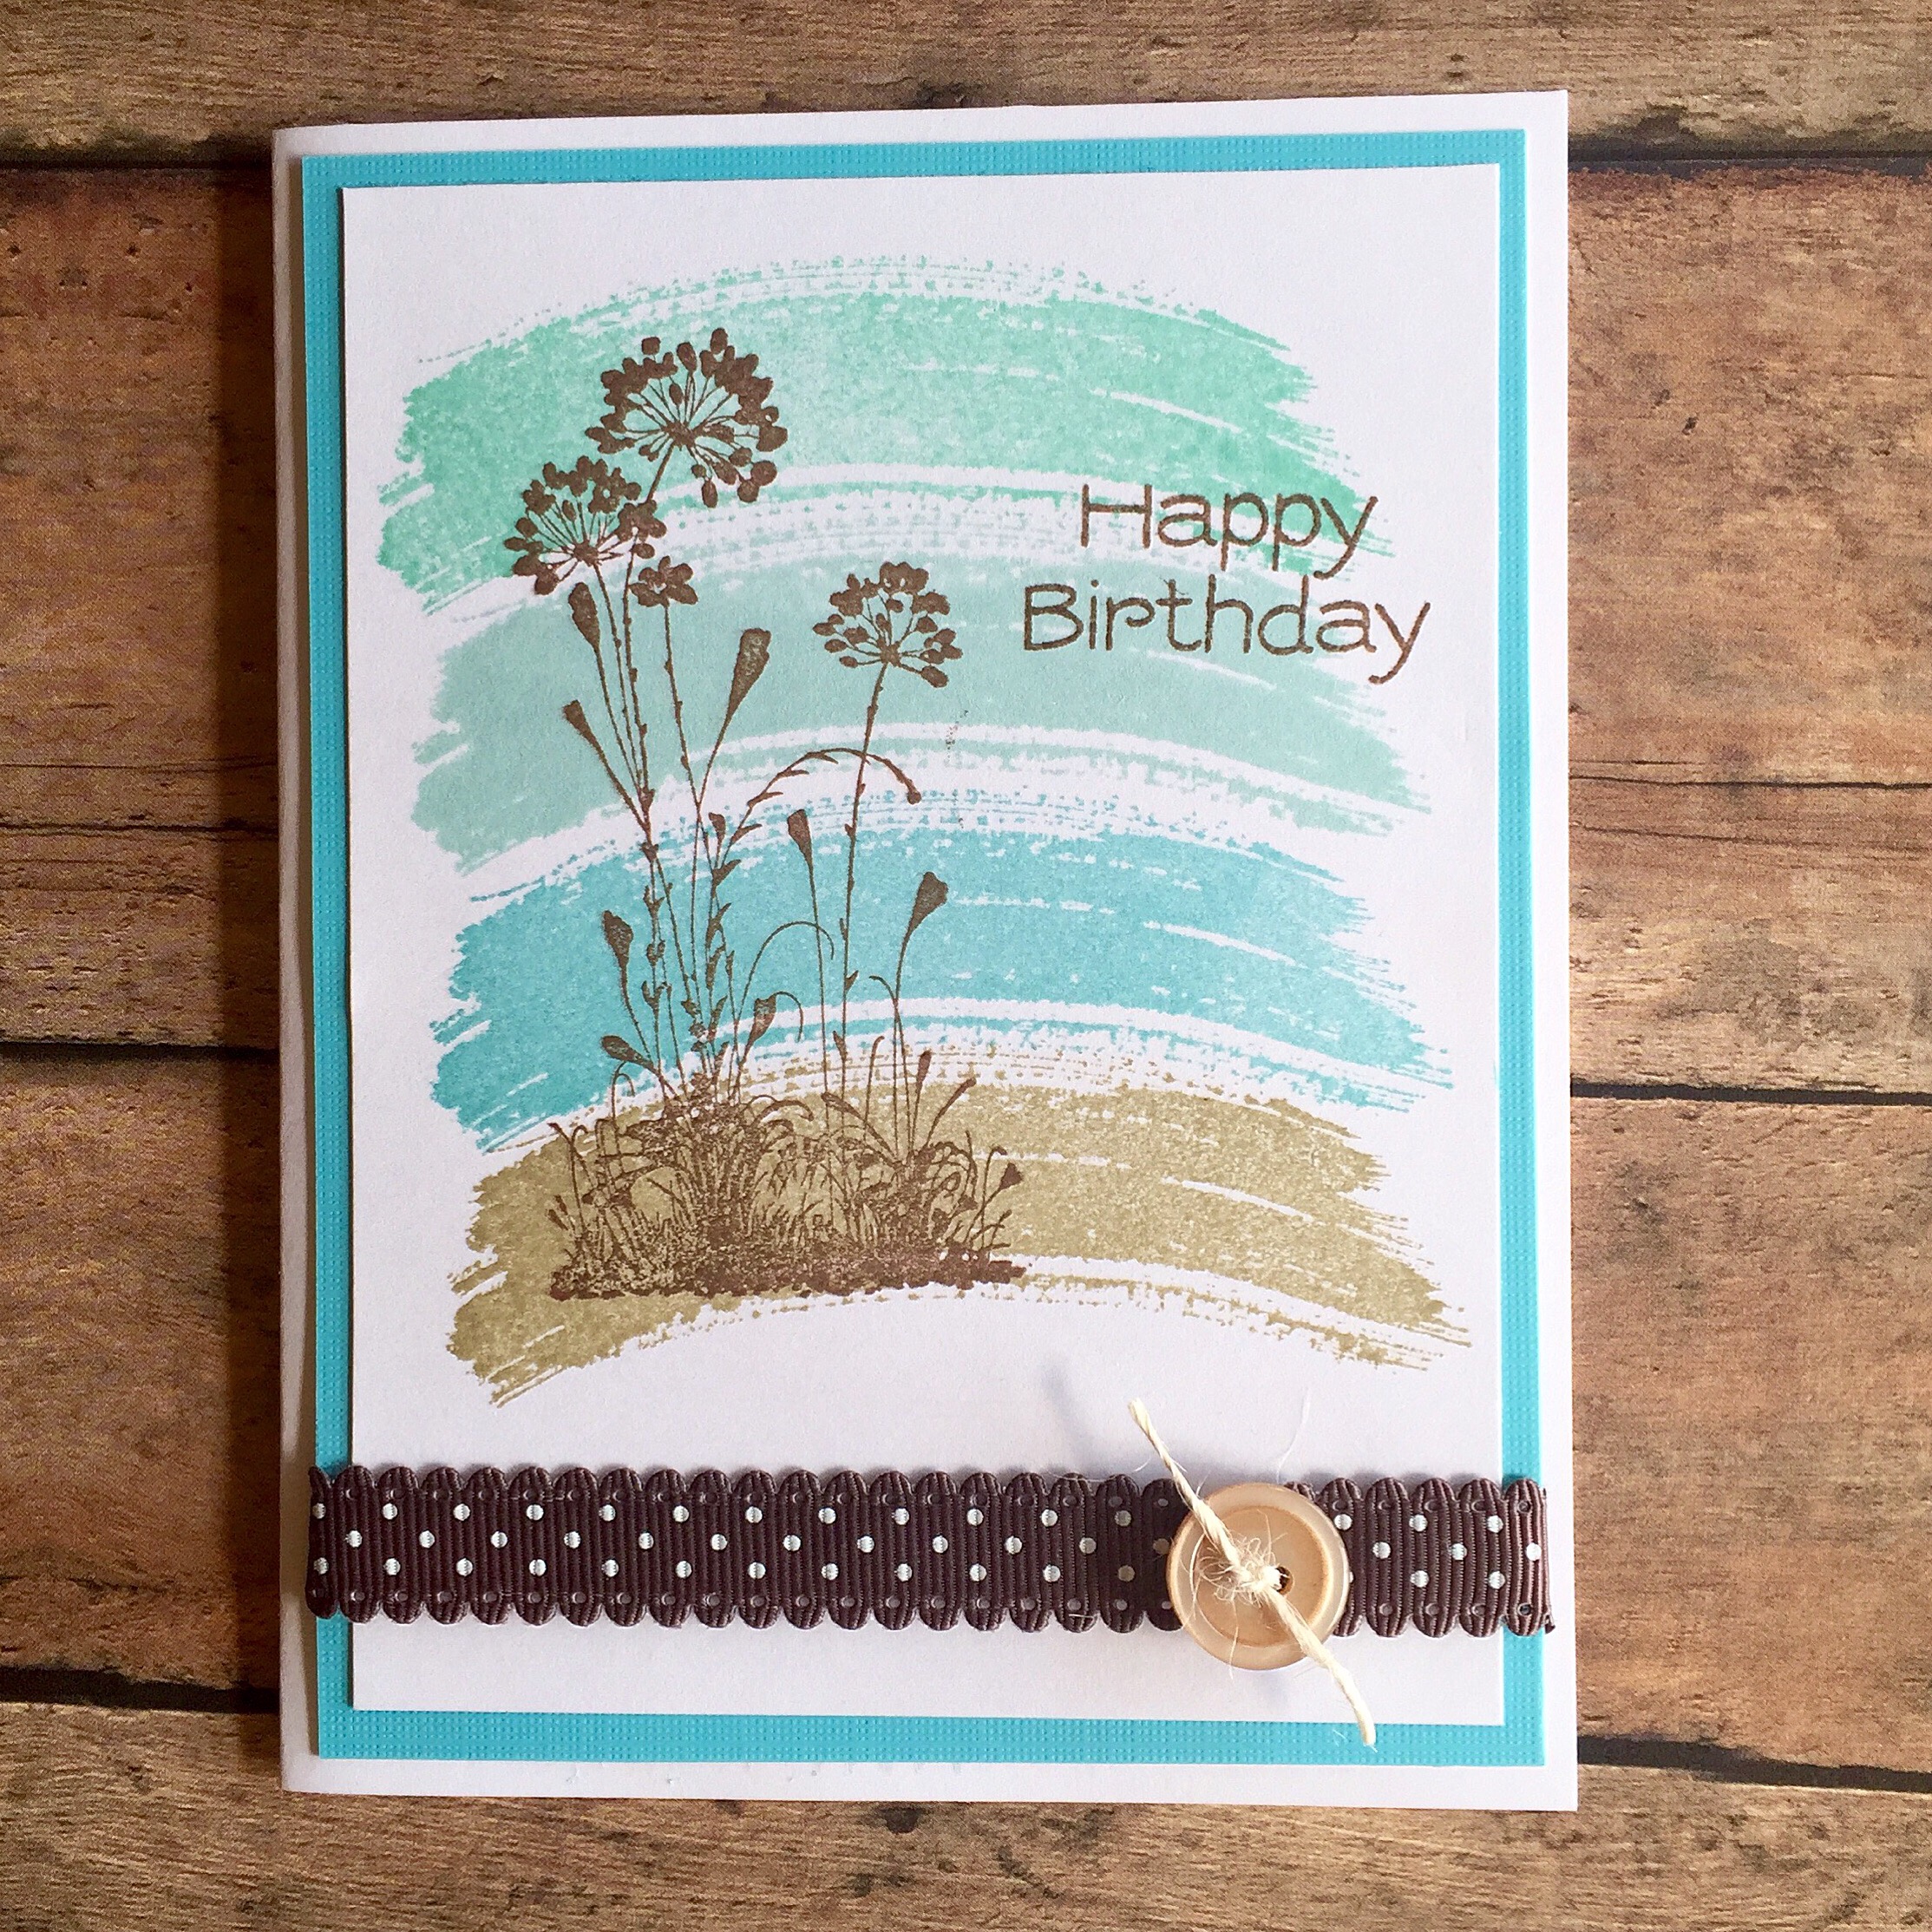
I love this stamp set! The Work of Art stamp set from Stampin’ Up has endless possibilities. I paired it with flowers from the retired Serene Silhouettes stamp set (also from Stampin’ Up) to create this birthday card. Any solid flower image can replace the one I used to get the same effect if you don’t have this particular set. 


I stamped the large swoosh stamp 4 times on white card stock. In case you want to know, the colors I used from the bottom up are Crumb Cake, Baja Breeze, Soft Sky, and Pool Party – all from Stampin’ Up. I stamped the flowers and the sentiment over the swooshes using Rich Cocoa ink from Memento. I layered the stamped panel to turquoise card stock, added brown polka dotted ribbon, and attached the panel to a white card. To finish it off, I tied a button with twine and attached it over the ribbon.

This is a great card for so many occasions – just change the sentiment or colors to make it just what you need!

Stay tuned and I’ll share a Christmas card using the same basic sketch as this card later this week.

Thanks for stopping by,

Anita

Posted in Cards, Uncategorized | 1 Comment

A Simple Hello

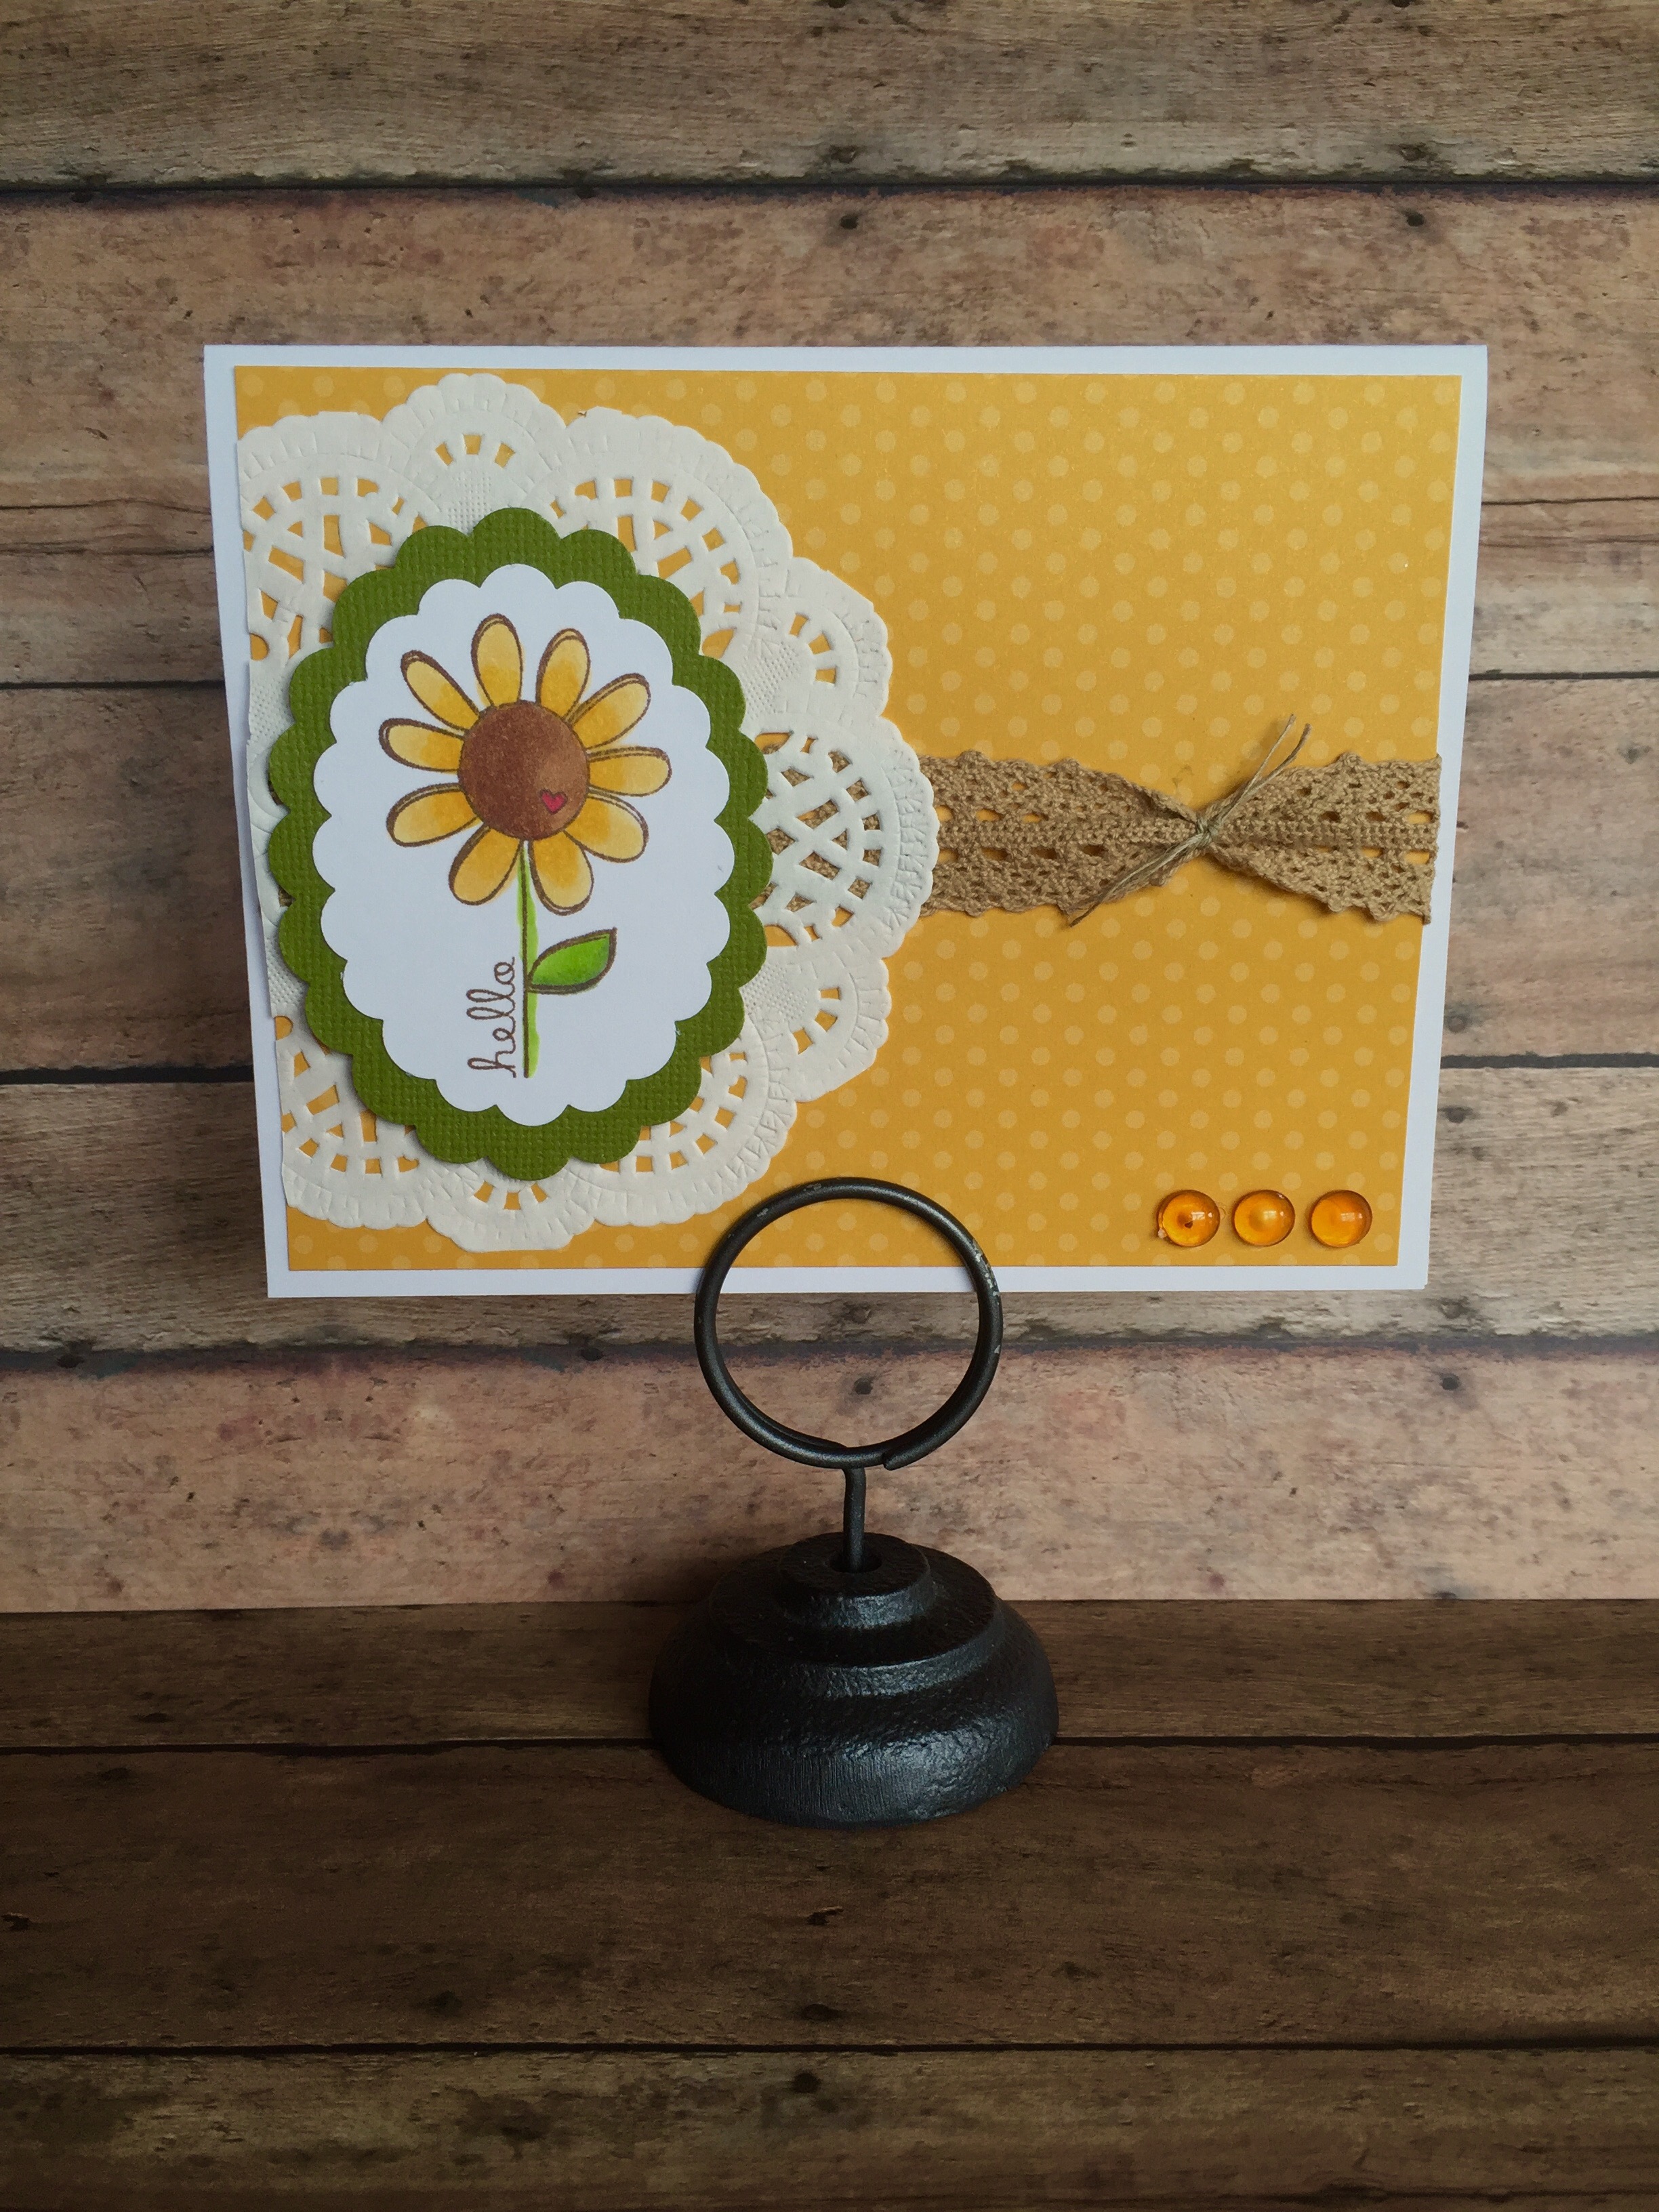
Here’s a quick little card to just say “hello”. The stamp is another great one from Unity Stamp Company called Hello Daisy. I love the simplicity of this stamp and the tiny heart in the center is just so cute!


I stamped the daisy with brown ink on white card stock. I colored it with Copic markers and punched it with a scalloped oval punch. I layered the stamped image to a larger scalloped oval punched from green card stock. 

To make the card, add a piece of crocheted lace ribbon to a panel of golden patterned paper. Attach a 4- inch paper doily over the ribbon, leaving about a half an inch overhang on the left side – trim this off. Tie a thin piece of twine around the ribbon. Attach panel to a white card. Then add the stamped daisy to the card with foam tape. To finish it off, add 3 dew drops (or 3 tiny buttons) to the bottom right corner. 

This card comes together very quickly. It’s a great any occasion card. It would work perfectly with any color scheme, too. 

Thanks for stopping by,

Anita

Posted in Cards, Uncategorized | Leave a comment

Maple Roasted Veggies 

Here’s a tasty way to add some sweetness to roasted vegetables. And it’s so simple! I used carrots, cauliflower, and Brussels sprouts, but go ahead and use your favorite vegetables!

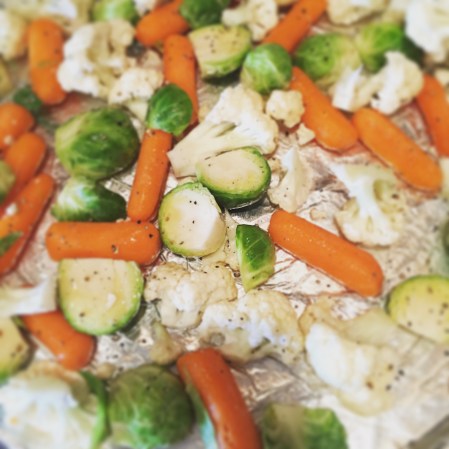
Prepare your vegetables by rinsing and cutting into bite-size pieces. I cut the ends off the Brussels sprouts and then sliced them in half, cut the cauliflower into florets, and used baby carrots. Put your vegetables into a large bowl. Spray with olive oil spray and sprinkle with salt and pepper. Mix well – you may have to spray with olive oil spray another time or two to make sure all the vegetables get a light coating. Then drizzle with a tablespoon or two of maple syrup and toss to coat. I didn’t measure the syrup so I’m not exactly sure how much I used – just enough to coat the vegetables.

Line a baking pan with aluminum foil and spray with olive oil spray. Spread your prepared vegetables in a single layer on the pan. Bake at 420 degrees for about 20 minutes until tender.

Here’s the before…

IMG_6577

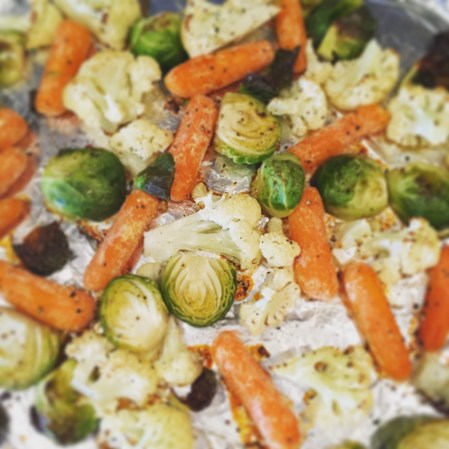
And here are the veggies in all their mapley goodness…

IMG_6578

This is such an easy side dish to make with any weekday meal – it may become a family favorite!

Thanks for stopping by,

Anita

Posted in Recipes, Uncategorized | Leave a comment

Christmas in July

It’s only 5 months until Christmas! 😳 I know – it’s crazy to be thinking of Christmas already…but we all know how fast those 5 months are going to fly by! And if you are going to craft any of your decorations or gifts, well, it’s time to get started. 😀

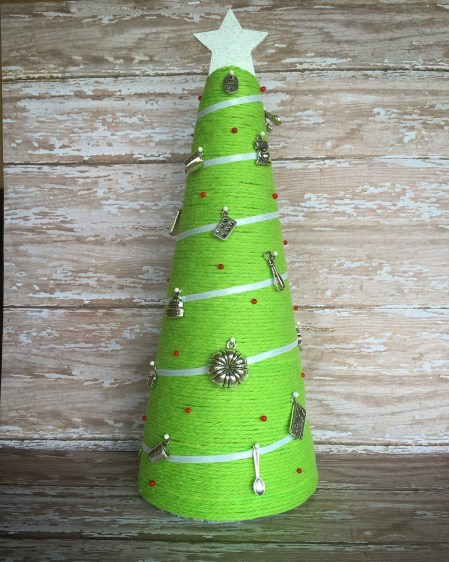
Here’s a little Christmas tree that is fun to put together for a decoration or a little gift.

IMG_6576

I picked up a 3.8-inch x 8.8-inch styrofoam cone (like this one) from the craft store. I wrapped it with bright green worsted weight cotton yarn, using a little glue at the beginning and end to make sure the ends were secured. Then I wrapped the tree with thin white satin ribbon to mimic garland. I secured each end of the ribbon with a straight pin.

I found great charms at Bohemian Findings to use on my tree. I wanted to make a cooking/baking themed tree and she had collections with several charms in a package as well as individual charms to choose from. You can find just about any theme you are looking for in her shop!

I simply used straight pins with a tiny white ball to attach the charms to the tree. To add a little color, I randomly added straight pins with red glass ball heads. I found them in the sewing section of Hobby Lobby. 

Every Christmas tree needs a star to top it off. I die cut 2 stars from thin chipboard using the 2nd to smallest star from this Nestabilities set from Spellbinders. I painted them with white acrylic paint and spread a thin layer of clear glitter glue on each star to add a little sparkle. Then I glued them together back to back with a flat toothpick between them, leaving enough of the toothpick out to stick into the top of the tree. I added a little glue to the toothpick for a little more stability.

I think I may have to make more of these in different sizes. A group of several together would make such a cute centerpiece or mantle decoration!

Merry Christmas in July! 🎄

Thanks for stopping by,

Anita

Posted in Christmas, Decor, Gifts, Uncategorized | 1 Comment

Wintery Mason Jars

It’s about 852 degrees with 1000 percent humidity in Alabama right now! 😳 OK, maybe I’m exaggerating a bit, but it is hot!!! And I am incredibly thankful for air conditioning…

In an effort to make the heat a little more bearable, I’ve started thinking about the holiday season – it will be here before we know it! This is a fun and simple idea that is great for the holidays as well as the entire Winter season.

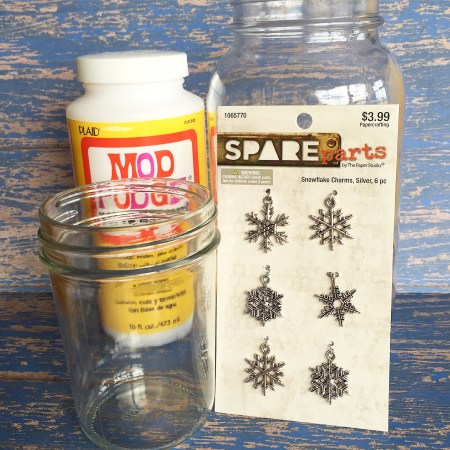
All you need are some smooth mason jars, Mod Podge, epsom salt, and embellishments.
IMG_6566

Apply a generous coat of Mod Podge to the outside of the jar using a foam brush. I left the very top, threaded part clear to make it easier to add the ribbon and twine around the jar. Then sprinkle the epsom salt over the wet Mod Podge. I held the jar over a bowl and spooned the epsom salt onto the jar, shaking off the excess. Let it dry completely. I sealed the jars with a light coat of matte sealing spray. I added linen ribbon around the top of the jar and then wrapped it several times with natural colored twine, leaving long tails for making a bow.

The large snowflakes on the jars are thin chipboard die cuts from the scrapbooking section of my local craft store. I painted them with white acrylic paint and, while the paint was still wet, sprinkled them with extra fine glitter to add a little sparkle. I punched a small whole in the snowflake and, using turquoise twine, tied a silver snow flake charm to it. Then I threaded one end of the turquoise twine under the natural twine and tied the snowflake embellishment to the jar. Finish it off by tying both colors of twine together into a bow. 

IMG_6567

I think the small jar would look so pretty with a votive candle in it! Maybe some greenery in the large jar…or fill a treat bag with some yummy treats and add it to either jar for a fun gift. Make several jars, add votives, and line your mantle with them…since they are Wintery and not Christmasy, you could leave them out from December 1st to Valentine’s Day. 🙂

Thanks for stopping by,

Anita

 

Posted in Christmas, Decor, Gifts, Uncategorized | Leave a comment

Mini Canvas Magnets

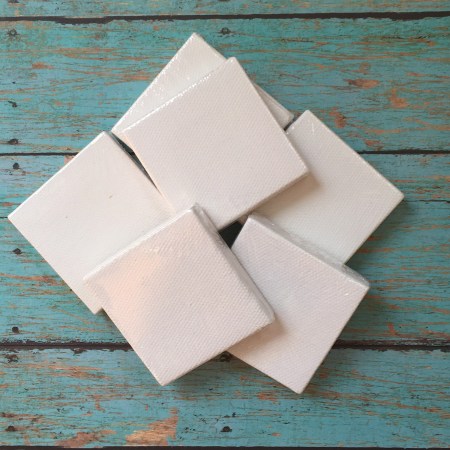
I saw these tiny 2×2 inch stretched canvases at my local craft store (they come in a package of 6) and thought they were so cute!! I had to come up with something to use them for – they are just so adorable. 🙂 So…what to do?

IMG_6554

They are the perfect size for magnets. I pulled out my trusty paints and card making supplies and here is the end result…

IMG_6555

I painted them with Native Turquoise and Deep Peach chalk finish acrylic paint, let them dry, and then dry brushed a little Rich Brown on the edges and across the top. The paint is CraftSmart brand that I found at Michael’s craft store. Then I stamped the words “hello” or “friend” with brown ink on the corner of the canvas. The stamps are from the Heartfelt Sentiments set from Unity Stamp Company.

The butterfly on the peach canvas is stamped with turquoise ink on white card stock, die cut, and glued to the canvas by just the body, then the wings are folded up away from the canvas. The stamp and die set is from ART-C. (I found mine at Michael’s) The heart is punched from turquoise card stock using the Owl Punch from Stampin’ Up and attached to the canvas.

The flower on the turquoise canvas is punched from terra cotta card stock. I used an older punch from Stampin’ Up that is no longer available, but any small flower punch will work. I added a dew drop to the center of the flower and another one over the word “hello”.

To make them into magnets, I added a thin strip of magnet tape to the top and bottom of the back of the frame. Even though the magnet tape had adhesive on it, I added a bit of glue to make sure it would stay adhered to the frame.

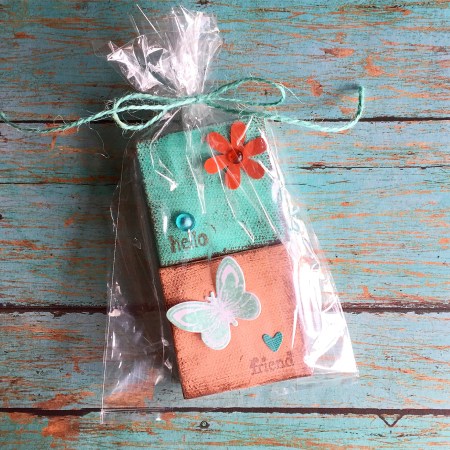
Here they are packaged and ready to give as a small thinking of you gift.

IMG_6557

The possibilities are truly endless with these tiny blank canvases – holidays, birthdays, monograms – anything you can imagine! Just have fun! 🙂

Thanks for stopping by,

Anita

Posted in Decor, Gifts, Uncategorized | Leave a comment

Sweet Summertime 

Who doesn’t enjoy a nice glass of iced tea in the Summertime? Whether you choose sweet or unsweet, with lemon or without, you can’t beat a refreshing glass on a hot Summer afternoon!

This is a fun card made with Summertime in a Jar from Unity Stamp Company. 

IMG_6540

I stamped the image with brown ink on white card stock, colored it with Copic markers, and layered it to blue card stock. The tag is made from patterned card stock. I set an eyelet in the top and tied it with ribbon. The stamped image is attached to the tag with foam tape. The sentiment is stamped with brown ink on white card stock and trimmed close. Then I attached it to the tag and glued on 2 tiny red gems.

To assemble the card, emboss a white card stock panel with the bubble embossing folder and a blue panel with the dot embossing folder (both are from Cuttlebug). Attach the white panel to the card and then add the blue panel. Attach a strip of red card stock over the blue. Then attach the tag to the card with foam tape.

If your Summer drink of choice is lemonade, just color the drink in shades of yellow. Or change the lemon slice to a lime slice and color the drink in a limey green color and you have limeade. Whatever cold drink you choose, I hope you are enjoying your favorite Summertime beverage. 🙂

Thanks for stopping by,

Anita


Posted in Cards, Uncategorized | Leave a comment

Green Beans with Mushrooms

Sometimes it can be hard to eat all the vegetables we should. This is a tasty and healthy side dish that goes with just about anything!

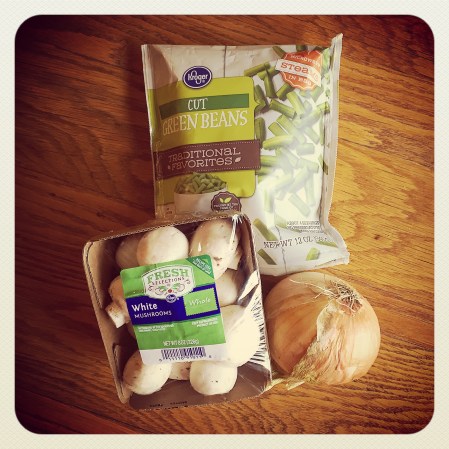
I started with frozen green beans, white mushrooms, and an onion.

IMG_6508

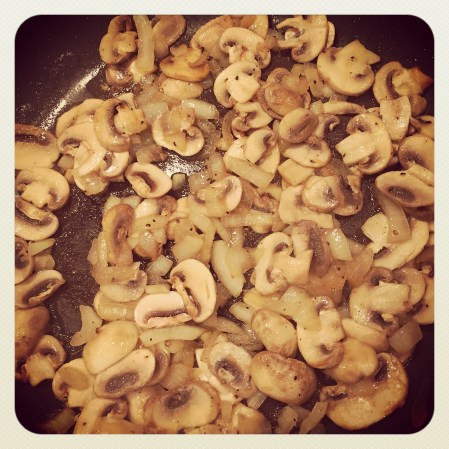
Coarsely chop half of a large onion. Rinse and slice mushrooms. Spray a nonstick skillet with olive oil spray. Heat over medium heat and add onions. Sauté for a few minutes until beginning to soften. Add sliced mushrooms to the skillet and spray with olive oil spray. Add your favorite seasonings – I used salt, fresh ground pepper, and garlic powder. Continuing sautéing until tender and lightly browned.

IMG_6509

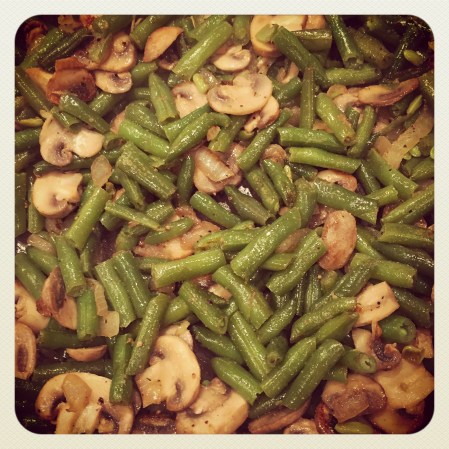
While the mushrooms and onions are cooking, steam green beans in the microwave for about 8 minutes. Drain and add the green beans to the skillet, spray with a little olive oil spray, and season with more salt, pepper, and garlic powder. Sauté for several more minutes. 

IMG_6510

If you like more onion, of course you can use the whole onion! This dish would also be so good with fresh green beans! It’s a simple way to add more vegetables to your diet. 

Thanks for stopping by,

Anita
Posted in Recipes, Uncategorized | Leave a comment