Celebrate with Cake

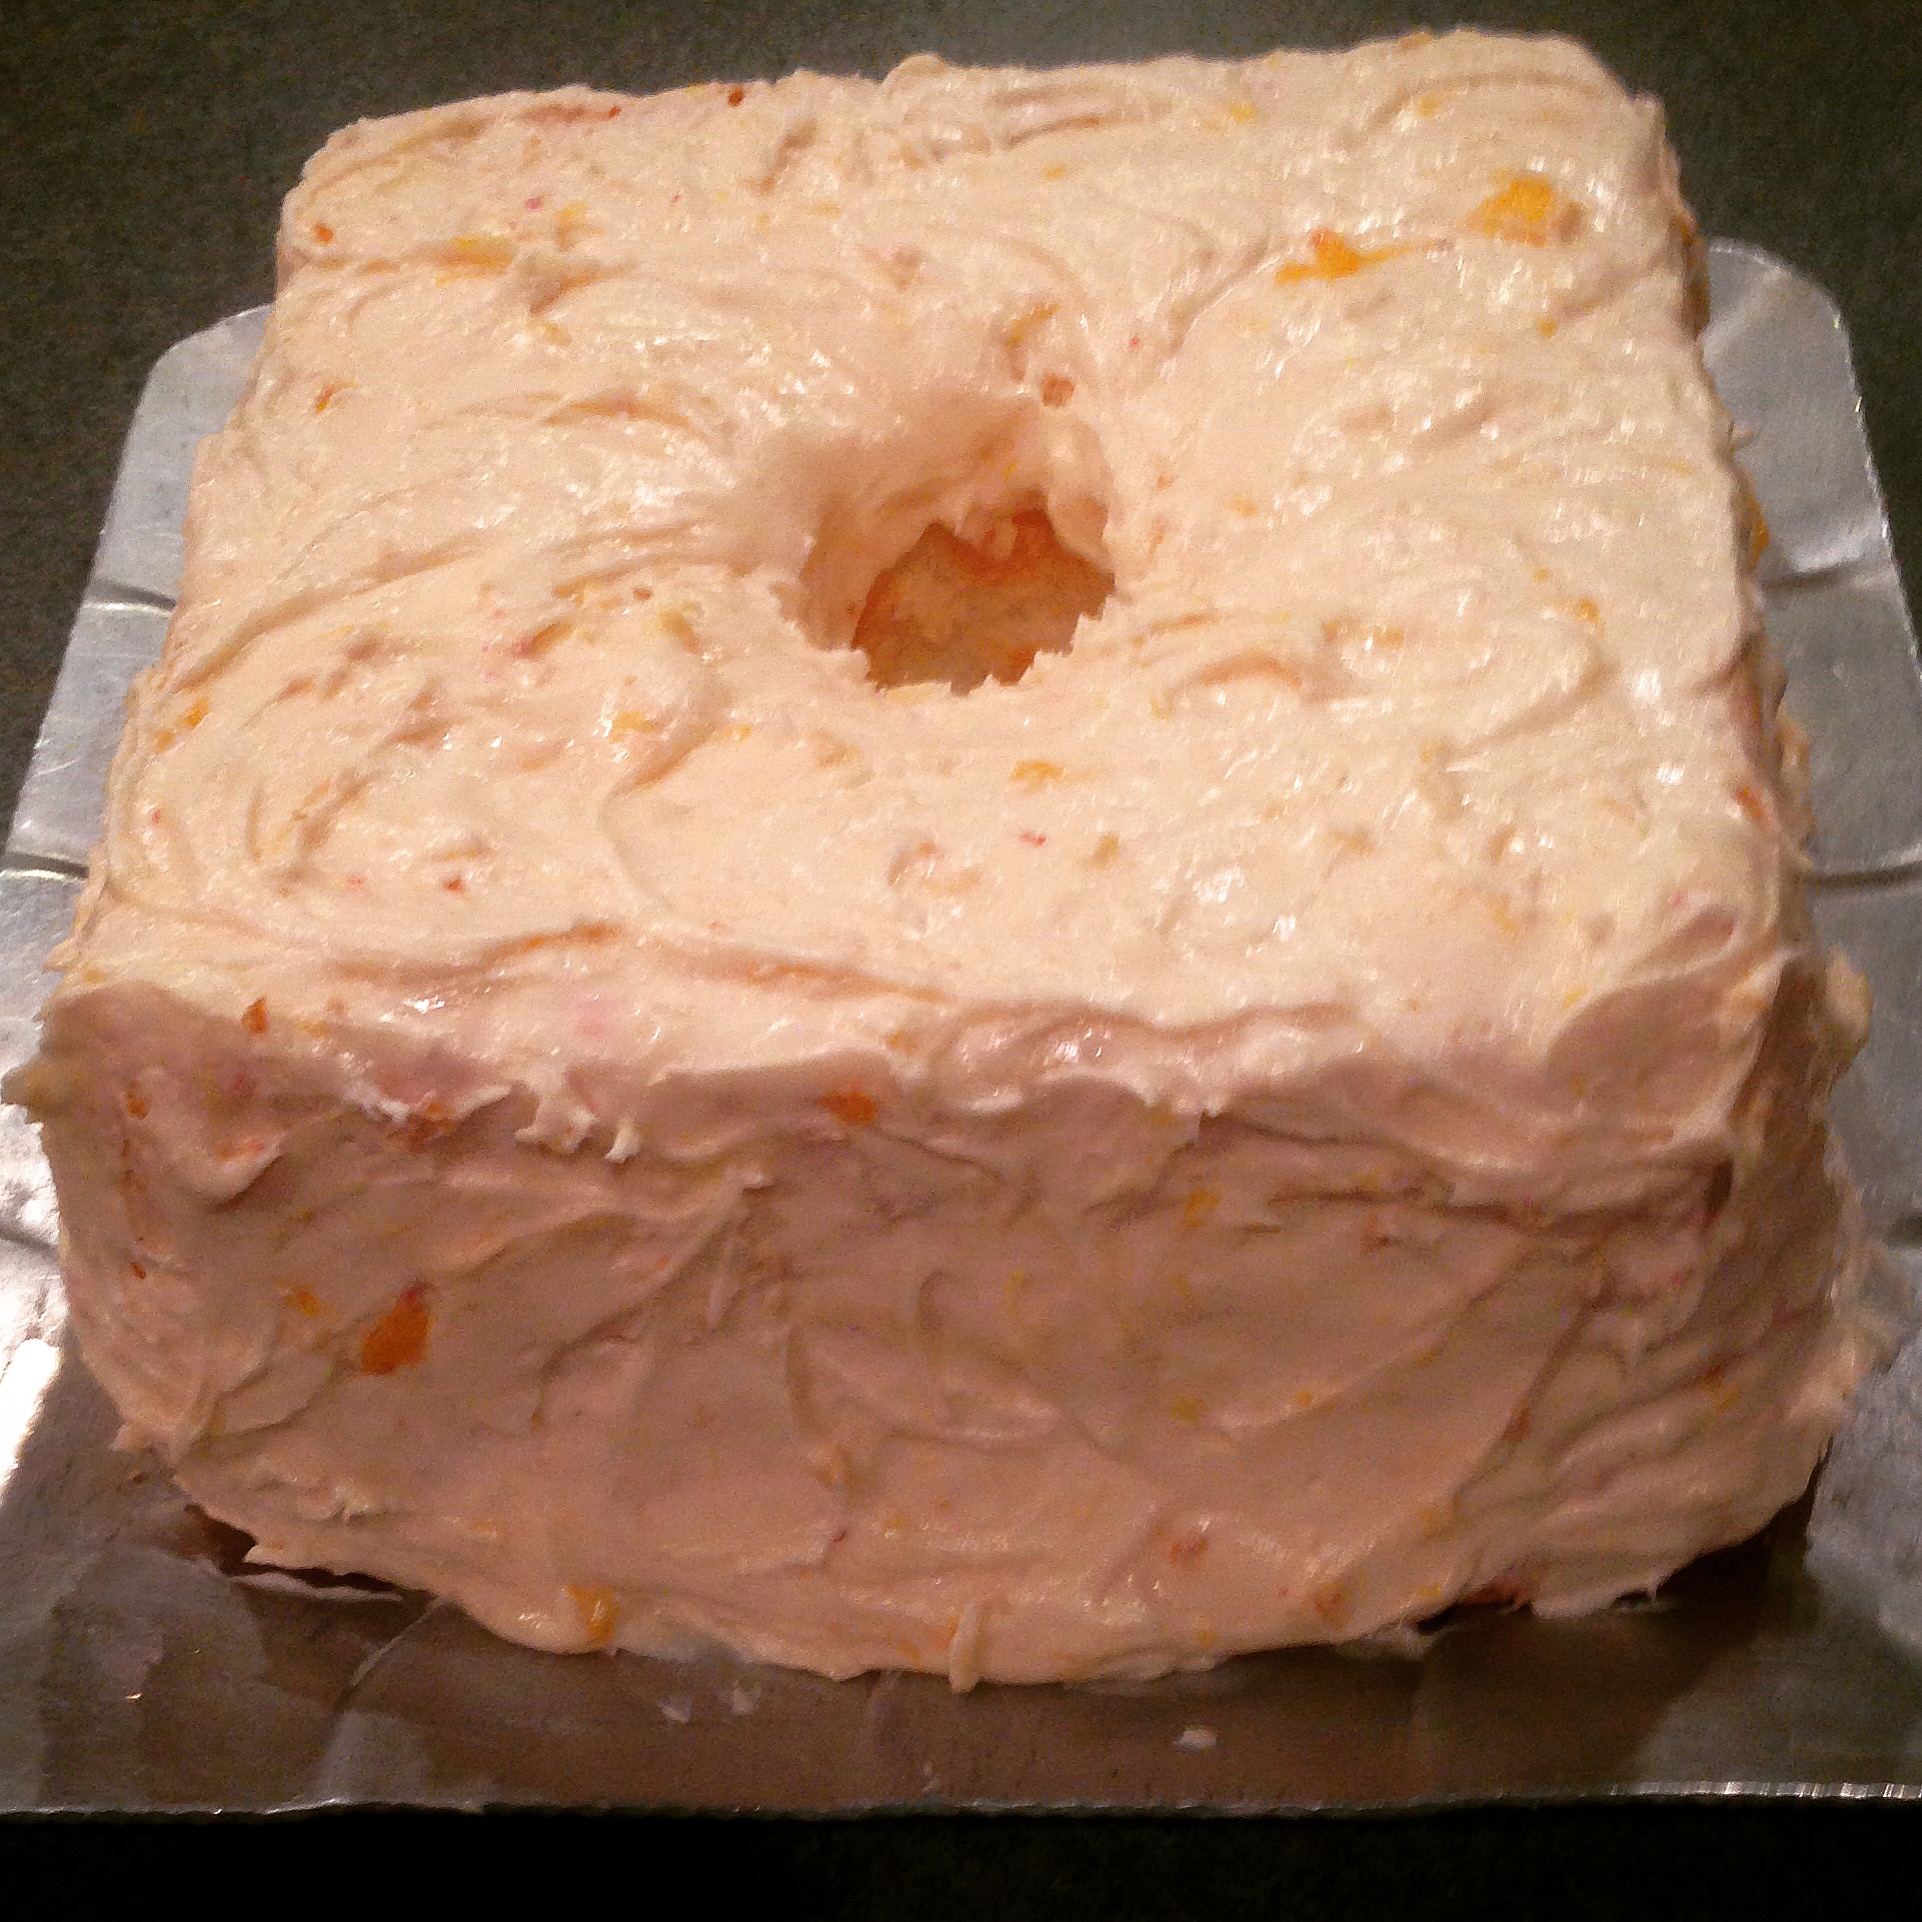
My husband’s birthday was a few days ago and I made him his favorite birthday cake ~ Angel Food with Homemade Peach Icing. The recipe for the icing can be found on this post. I have to admit that I used a box mix for the cake. It’s just too easy and it still tastes delicious!

Stampin’ Up has the perfect stamp set, Big Day, that I used to make his birthday card ~ the sentiment couldn’t be better 🙂 Here’s the card…

IMG_4530

I put 3 of the stamps together on my acrylic block and stamped them with brown ink on white card stock. I used Copic markers to color the image, trimmed it, and layered it onto green card stock. I attached a piece of patterned paper to green card stock and wrapped it with twine tied in a bow. This piece is attached to a turquoise card. The stamped piece is attached with pop dots.

The perfect card to go with his perfect cake ~ I even colored the icing on the cake in a yummy peachy color! I think he liked the card as much as he liked his cake…

Well, almost 😉

Thanks for stopping by,

Anita

Posted in Cards | Leave a comment

Recipe Notebook and Easy Peach Icing Recipe

I wanted a place that would give me easy access to the everyday recipes that I use all the time. You know, those staple recipes you use every couple of weeks for dinner or your very favorite dessert recipes. Rather than using a recipe box, I decided to alter a simple spiral notebook and write my faves in there. I know there are all kinds of apps to do this, but sometimes I just want something pretty to hold in my hands 🙂

I found my notebook at Target. It is just a simple spiral notebook with a couple of dividers. I use the first section for Main Dishes; the other 2 are for Sides and Sweets. It’s a great time to find the perfect notebook with all the school supplies on the shelves ~ you might even find a sale!

IMG_3799

First I stamped the mixer and utensils on a white card stock panel and colored them with my Copic markers. The stamps are from A Muse Studio. I added “recipes” with stickers, but you could easily stamp the word instead. I then distressed the entire panel with brown ink, adding more to the edges. I covered the entire front of the notebook with brown striped paper. Then I attached a panel of green patterned paper and brown polka dot paper on top of that. The stamped piece is layered onto the brown polka dot paper. I tied a green corduroy button with brown embroidery floss and attached that along with another button to the bottom right corner. I also added patterned paper to the back of the notebook just to give it a finished look. Add a few pieces of ribbon knotted onto the spiral and you have a cute way to organize those favorite recipes!

Here’s a simple icing recipe that my husband always requests for his birthday. I put it on Angel Food cake and it is amazing!

Peach Icing

  • 1 stick butter, softened
  • 1 lb powdered sugar (or more if needed)
  • 1 small ripe peach, peeled and finely chopped
  • 1 tsp vanilla
  • 1 to 2 Tbsp milk, if needed

Cream butter with your mixer until smooth. Add about 1/4 of the powdered sugar and mix well. Add 1/2 of the peaches and the vanilla, mixing well. Continue to mix in powdered sugar and peaches until the icing reaches a spreadable consistency, adding a little milk if needed.

IMG_4458

Just yummy! You can change the fruit to strawberries or raspberries. Or leave out the fruit and add some unsweetened cocoa powder for chocolate icing. Or make it chocolate-raspberry! Or leave out the fruit and add another teaspoon of vanilla for some amazing vanilla icing…use your imagination and just enjoy!!!

Thanks stopping by,

Anita

Posted in Gifts, Organization, Recipes | 8 Comments

“Stuff” Binder

We have so much “stuff” coming up in the next few months that my brain is having a hard time keeping up with schedules, to dos, and crafty ideas popping into my head! Things like traveling to conferences with my hubby, the wedding of my oldest goddaughter, Christmas shopping and crafting, and traveling for the holidays ~ not to mention just the day to day “stuff”!! I know your life is just as crazy!!!!

So I decided to try to get a little organized. I’m a list maker ~ there is something so satisfying in being able to cross off a completed task. And, of course, a simple notebook just won’t do 🙂

I found this pretty, coral-colored, mini binder at Target along with plastic divider tabs, and paper to fit. Although it was a great color, it needed a little “something”. After a bit of stamping and some patterned paper, this is the result…

IMG_4490

The fun letters are from an alphabet set by Technique Tuesday. The flower stamp and the punches to match are from Stampin’ Up. I stamped the flower twice in coral ink and once in turquoise ink, then punched out each section and layered them together. “Stuff” is stamped in coral ink on white card stock and then the edges of the panel are sponged with the same ink. I cut the chevron paper to fit inside the pocket on the front of the binder, attached a strip of polka dot paper, and then attached the stamped images. Slip the finished piece into the pocket and you have a cute binder to help you stay organized!

Now, if I can just remember to write everything down…

Thanks for stopping by,

Anita

Posted in Gifts, Organization | Leave a comment

Happy Birthday

Celebrating birthdays is alway so much fun. I love giving handcrafted gifts and, of course, a special birthday card is a must! It’s one of my life’s little joys to make special cards for special people 🙂

This card was super easy to make ~ just my style 😉 I chose bright colors for a Summer birthday, but you could easily change the color scheme  for your special birthday person. 

IMG_4441

I chose 4 different patterned papers and cut them into banners of different lengths. The green banner is a little wider than the other three. I layered them onto a turquoise card stock panel and attached a strip of patterned paper over the top. Then the panel is attached to an orange card. 

“Happy Birthday” is a stamp from Stampin’ Up. I stamped it with orange ink on white card stock and then punched it out with the oval punch which is also from Stampin’ Up. The image is attached to the card with pop dots.

It’s a clean and simple card that I hope will make the birthday girl or guy feel special!

Thanks for stopping by,

Anita

Posted in Cards | Leave a comment

Altered Mason Jars

I love mason jars! There is so much you can do with them and they can be decorated to fit into almost any decor. I made these as a centerpiece for a baby shower for a special little girl and her Momma a couple of years ago. Now I use them when I decorate my mantle for Spring.

IMG_4414

You can find the link to making the muslin flowers on my Muslin Flower Jelly Jar post. I attached a strip of burlap around the jars, then glued the flowers in place over the seam. I tied a pink ribbon bow around the top. I opted to add the silver band to the jars, but of course you can leave that off. Now fill them with your favorite flowers, branches, or even a candle!

These are so versatile ~ simply change the color of the ribbon and button to match your decor or the season. You could even use velcro to attach the button to make changing it out super easy. And the ribbon is just tied on ~ no glue involved :). Such a fun and inexpensive way to add a little charm to your home.

Thanks for stopping by,

Anita

Posted in Decor, Gifts | 2 Comments

Happy Retirement 

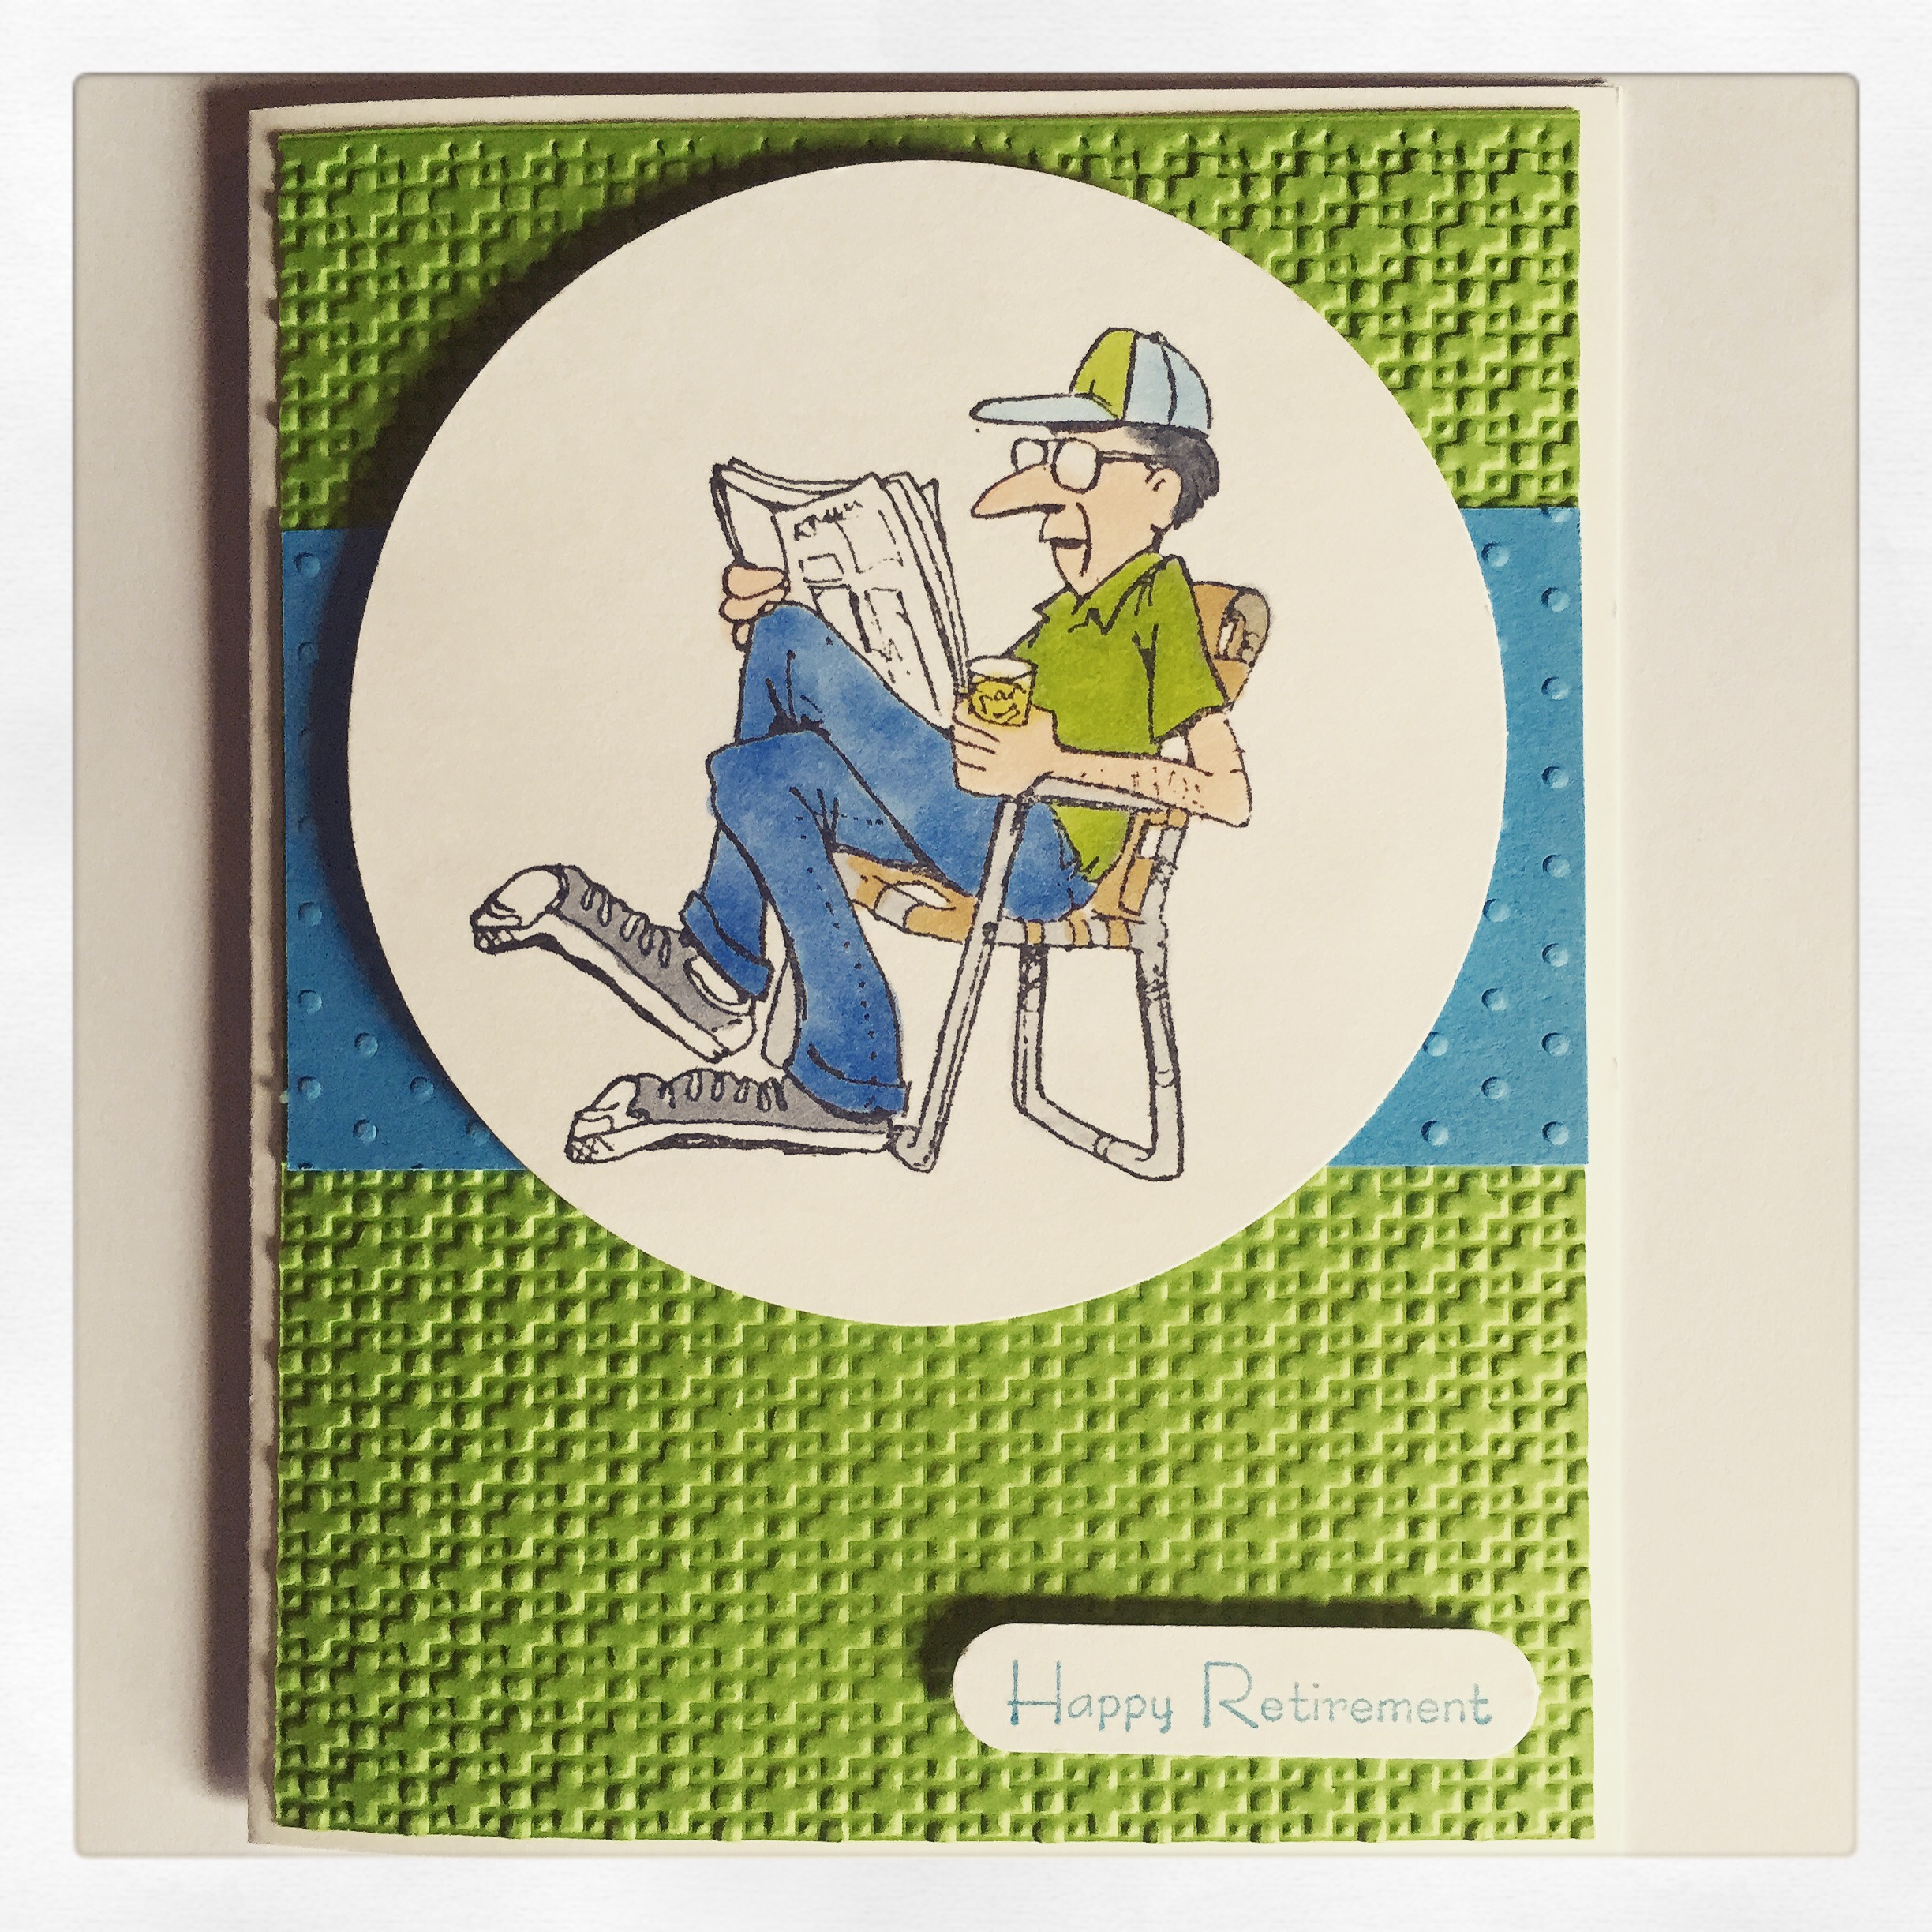
A good friend of ours was beginning the next chapter of his life ~ retirement!! Of course he needed a special card to celebrate this momentous occasion 🙂 Here’s the fun card I made for him…

IMG_3863

This is an old stamp from Visual Image Printing ~ not sure the company is even around any more. The “Happy Retirement” stamp, square lattice embossing folder, and word label punch are all  from Stampin’ Up. The dot embossing folder is from Cuttlebug. The 3 1/2-inch circle punch is from Marvy Unchida.

Stamp the image with black ink on white card stock, color with Copic markers, and punch with the circle punch. Emboss a panel of green card stock with the square lattice folder and attach it to a white card. Emboss a strip of blue card stock with the dot folder and attach it to the card. Attach the stamped image with with pop dots. Stamp the sentiment with green ink on white card stock, punch it out with the label punch, and attach it to the card with pop dots. You could easily change the sentiment to make this card for another occasion.

Just a simple little card to congratulate our friend on moving on to a less (or maybe more) hectic life as he enjoys his retirement!

Thanks for stopping by,

Anita

Posted in Cards | Leave a comment

Waffle Crochet Dishcloths

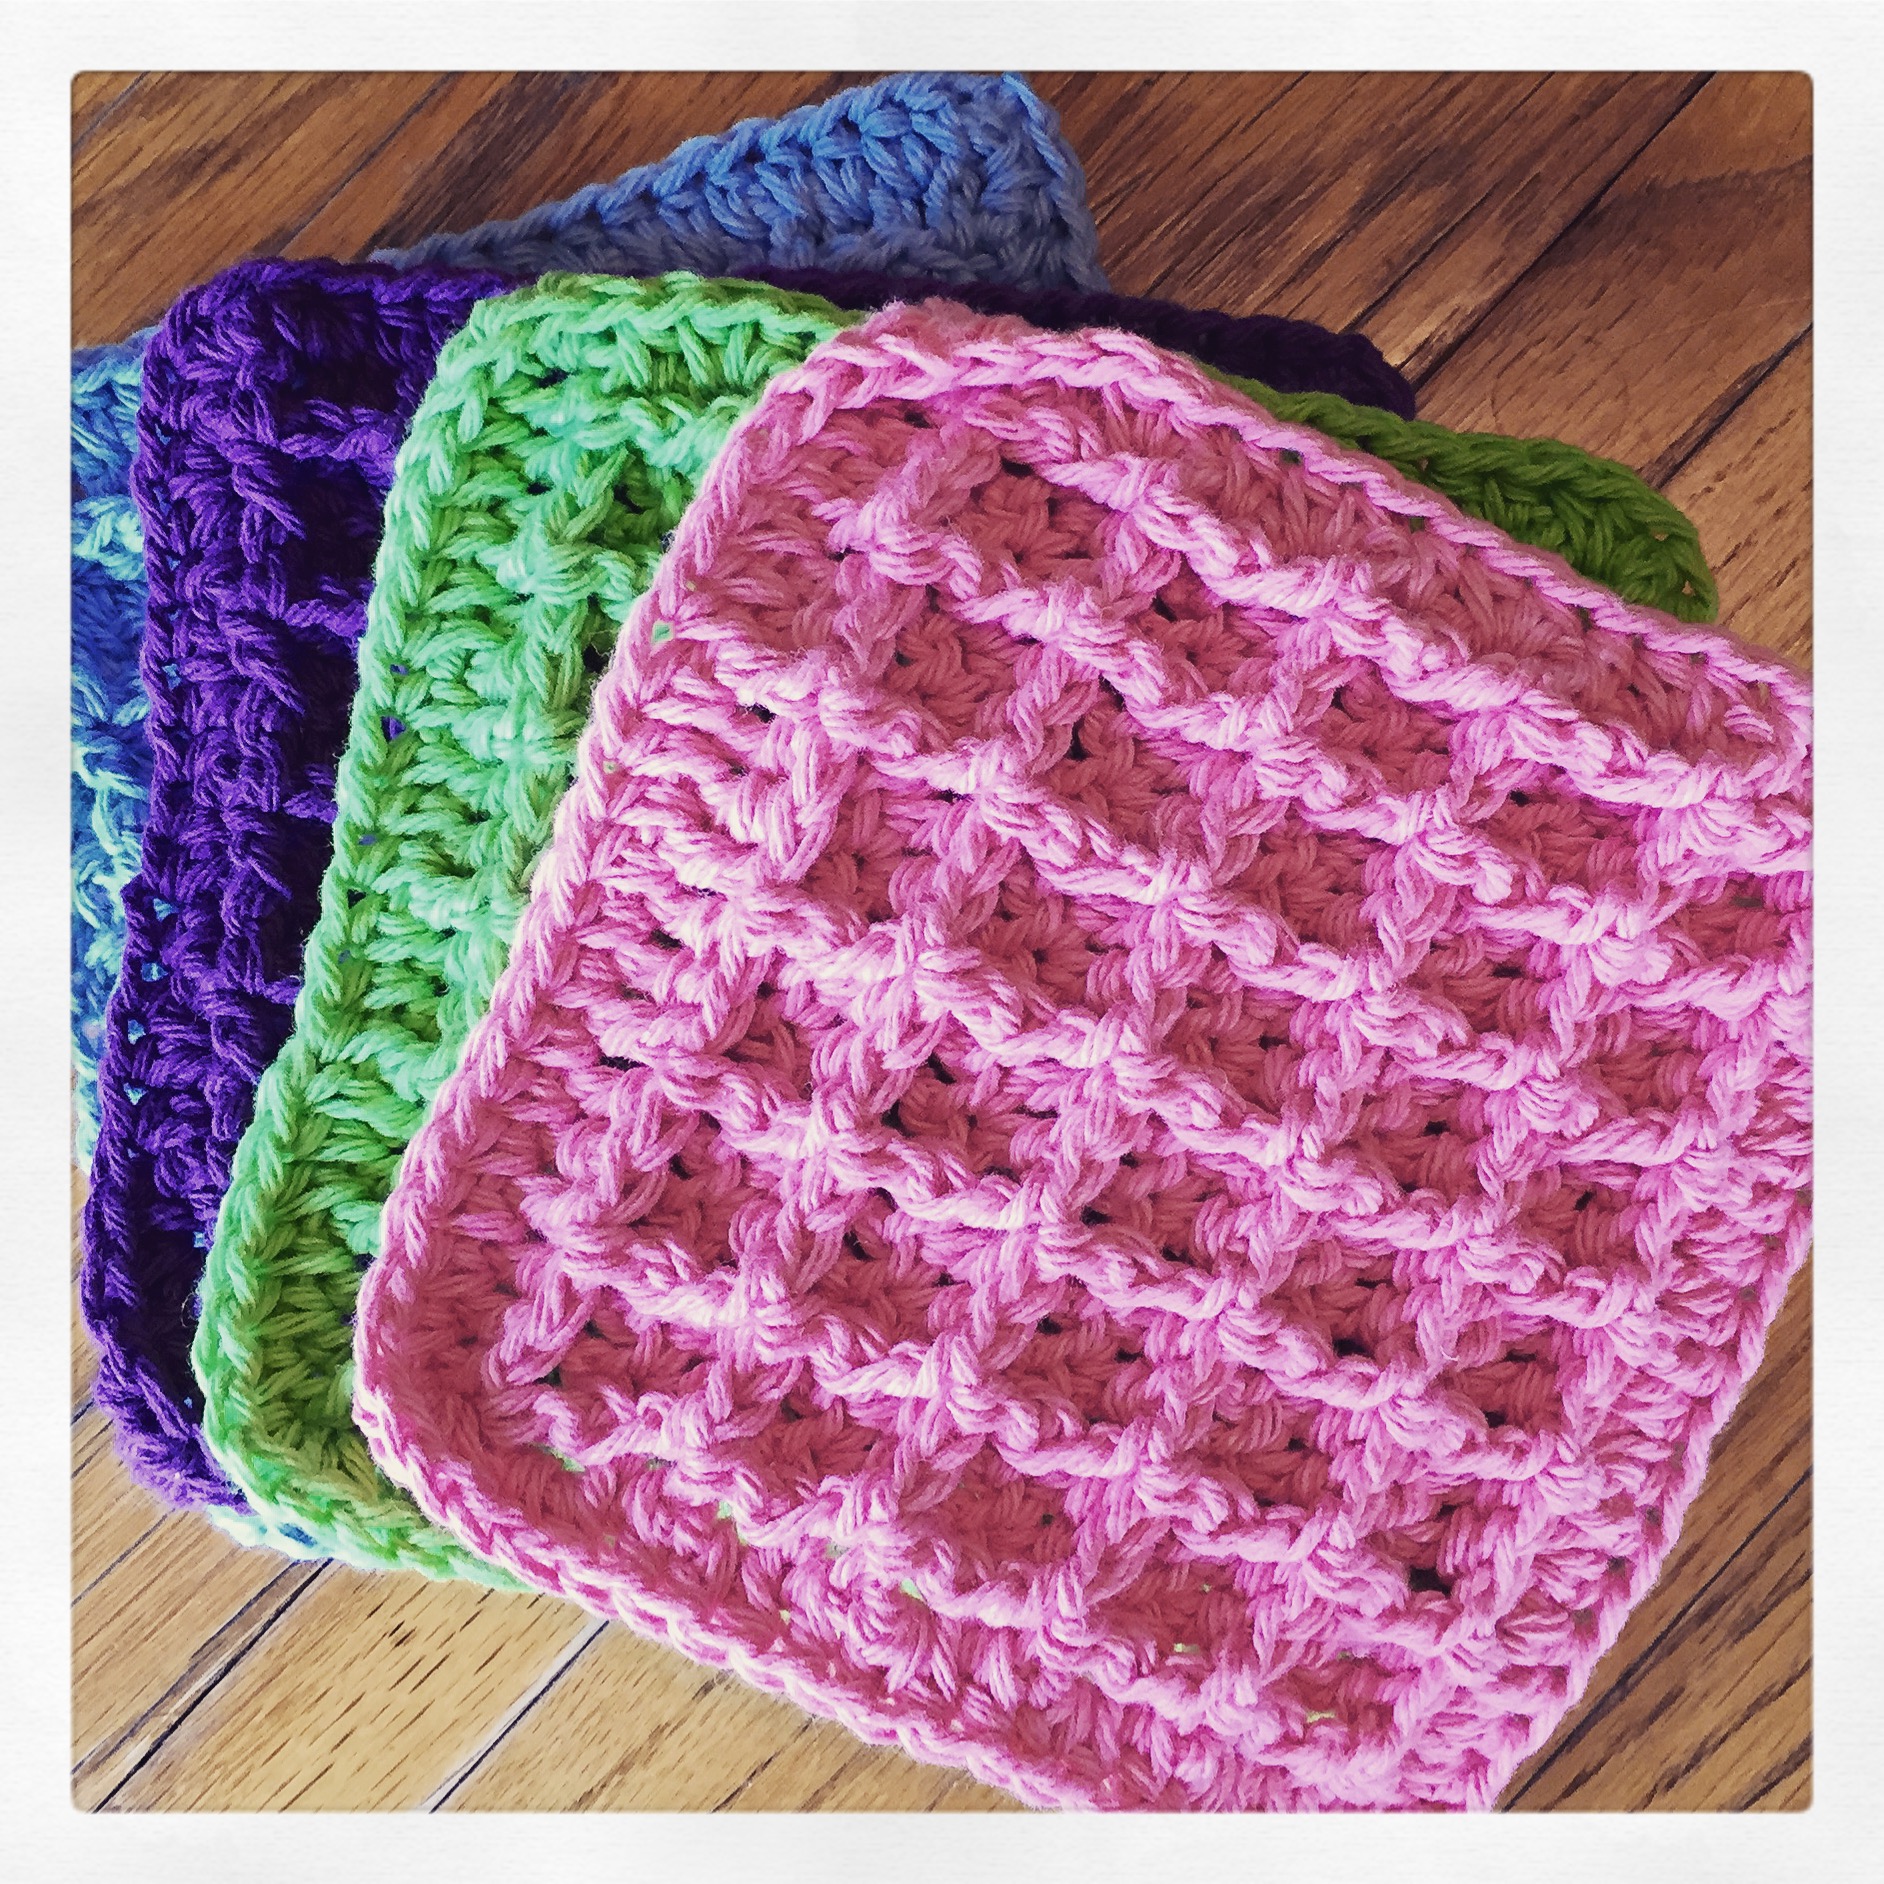
Do you end up with a lot of leftover yarn from your projects and you just don’t know what to do with it? Yeah, me too! It’s not enough for a big project and too much to just throw away. I had some leftover cotton worsted weight yarn from making market bags and was searching for something to do with it. I found this great pattern for these Crochet Waffle Dishcloths on Ravelry. Ravelry is a wonderful site with all kinds crochet and knit patterns, many of them are free! Lots of inspiration on this site!

IMG_4401

These work up super fast and are so easy to make. You can whip up several in an evening watching your favorite movie.

I followed the  pattern as written so the dishcloths are about 7 x 7 inches square. There are easy to follow instructions on how to increase the pattern if you would like your dishcloths to be larger.

These would make cute hostess gifts rolled and tied with a little twine. Or even though the pattern calls them dishcloths, I think they could make great face cloths since they are crocheted with cotton yarn. Pair them with your favorite facial cleanser (or body wash) for an inexpensive gift. I’m thinking I may add them into the boxes for Operation Christmas Child this year.

Thanks for stopping by,

Anita

Posted in Crochet, Gifts | 1 Comment

Spool Key Ring

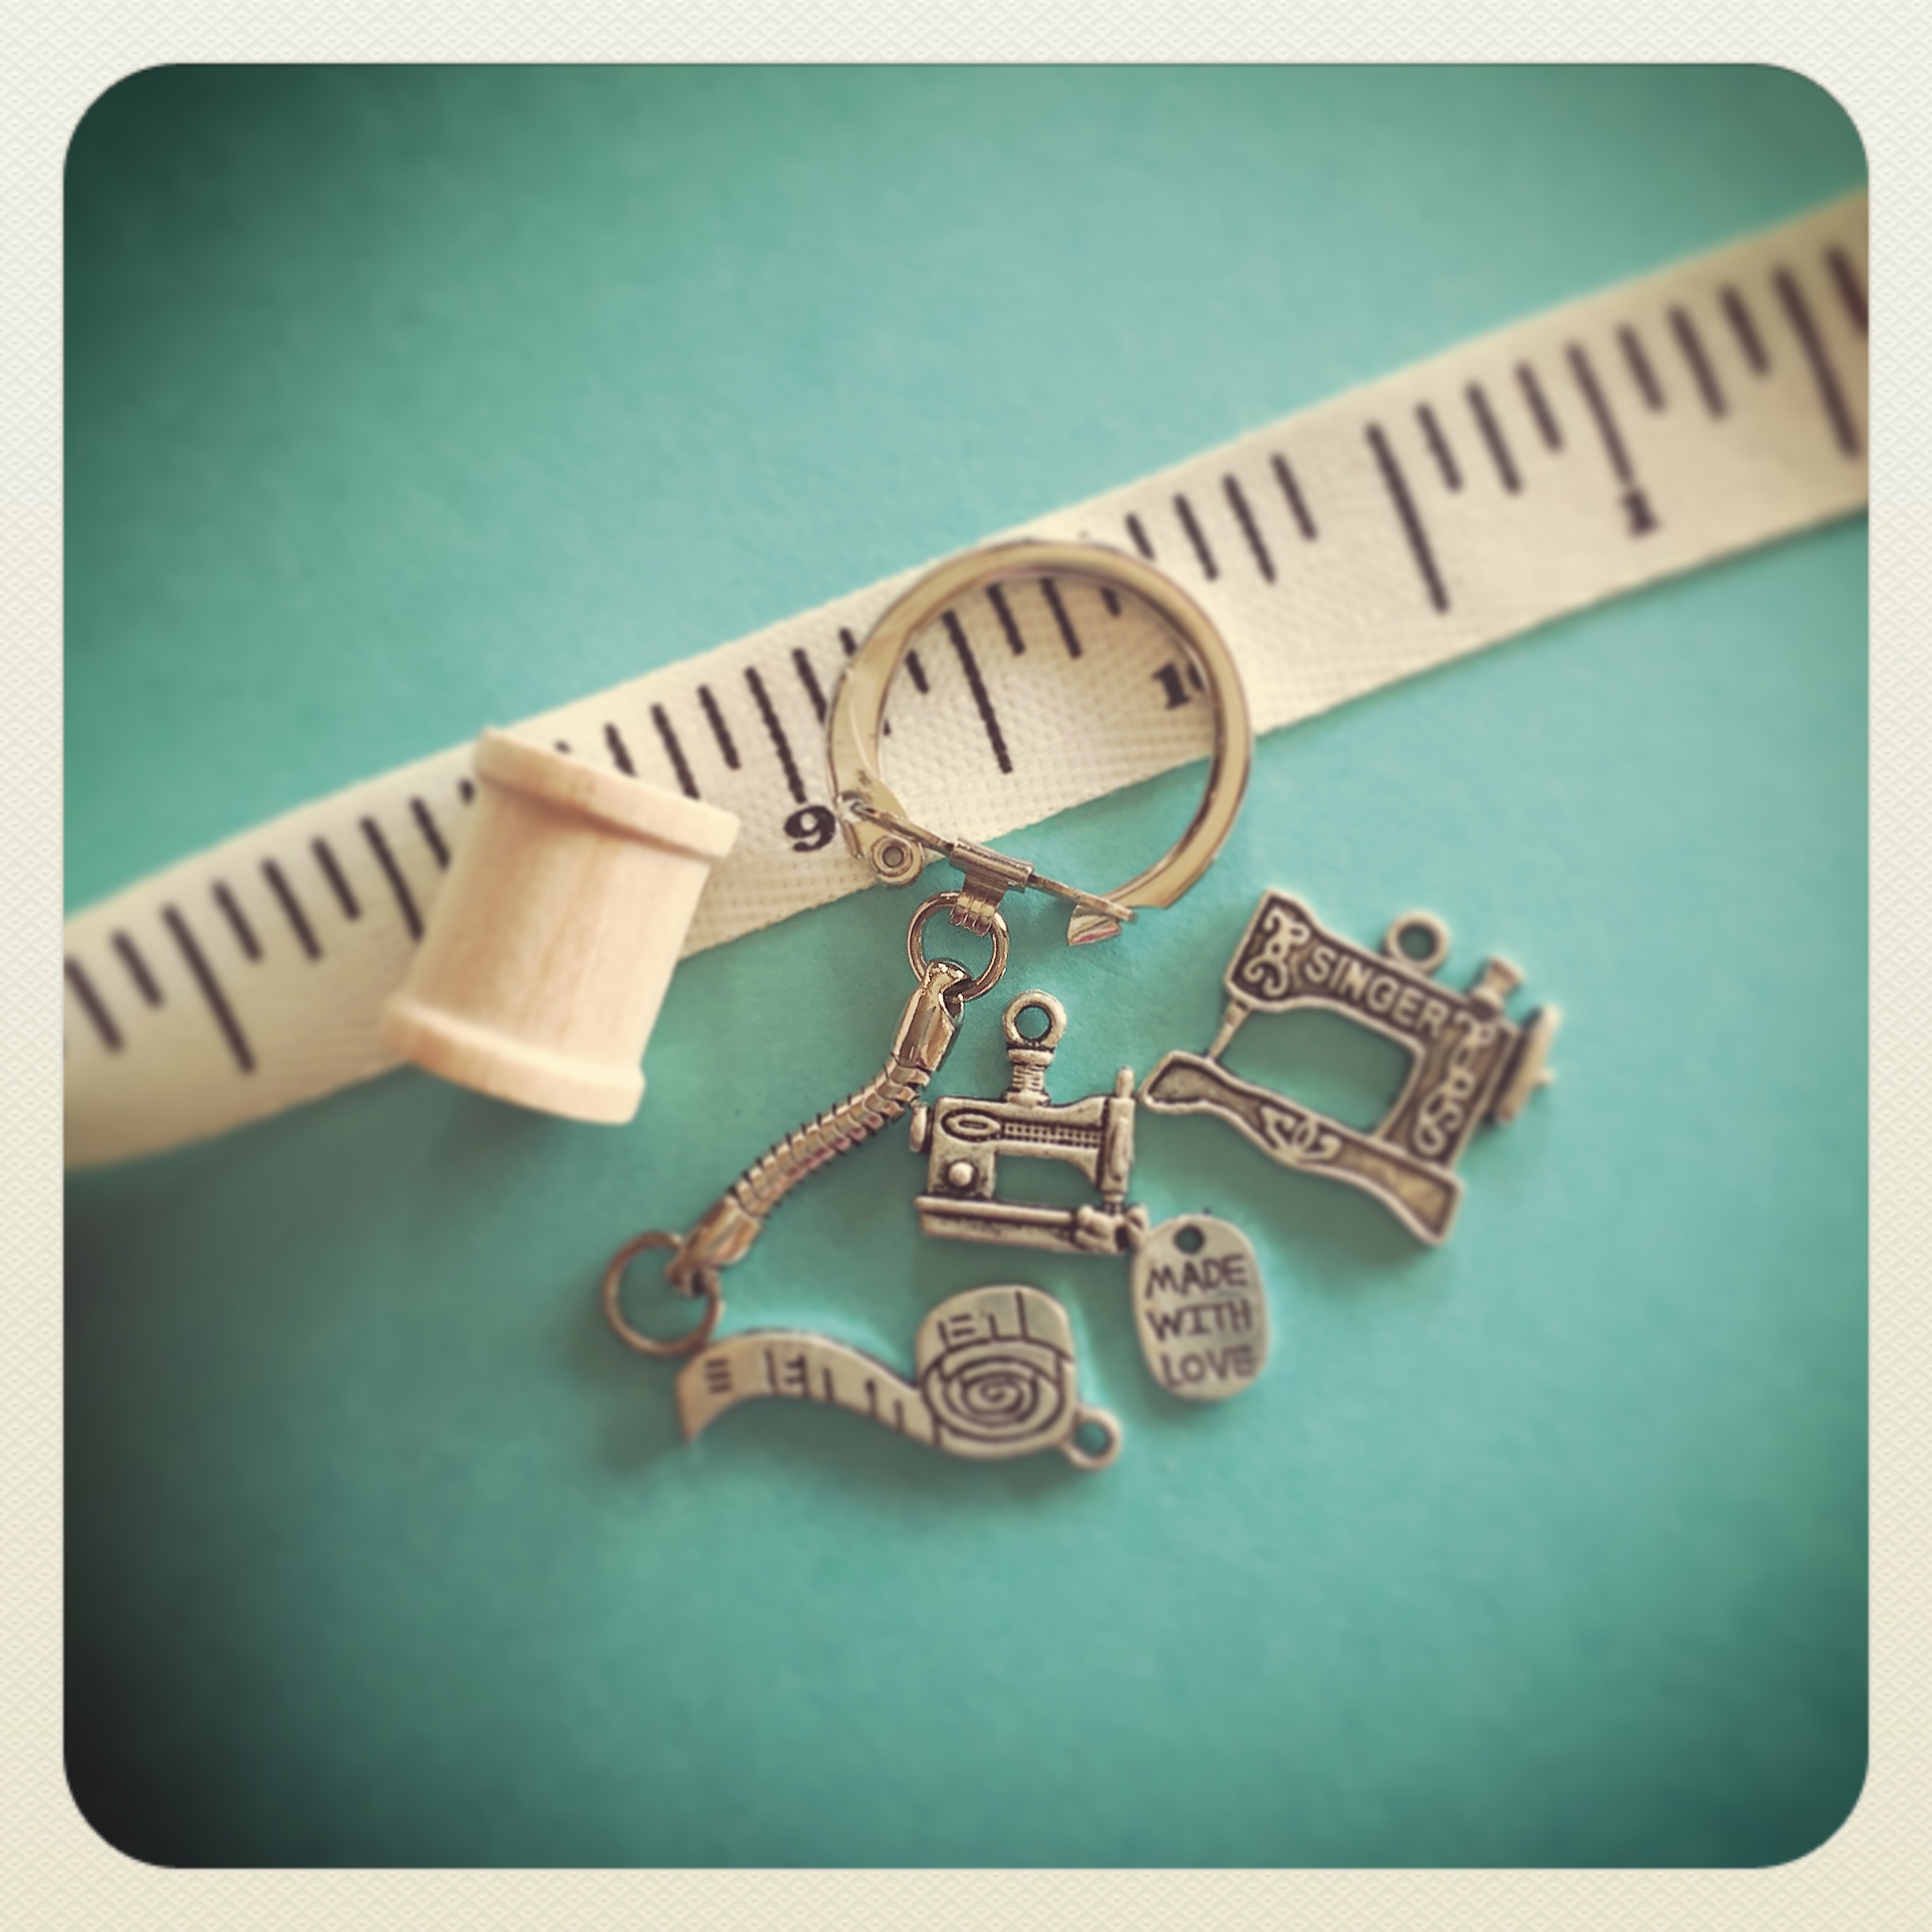
I’ve seen so many cute things made with wooden spools…this key ring is one of my favorites! They are so easy to make and you can personalize them using different charms.

IMG_3773

I found my charms at Bohemian Findings on Etsy. This shop has tons of different themed charms, great prices, and quick shipping! I will be ordering from them again 🙂 The “made with love” charm is from Hobby Lobby.

I got these locking key chains from Amazon. The wooden spools are 3/4-inch tall and available at Michaels and Hobby Lobby or your local craft store. This key ring is a sewing theme (I also included a tiny key charm) and I found this great ruler ribbon at Hobby Lobby.

The first thing I did was cut a small piece of ribbon to wrap around the spool. Then I inked both the ribbon and the spool with brown ink to give it a bit of an aged look. I glued the ribbon to the spool.

You’ll need to take the jump ring off the bottom of the key chain. Be sure to twist it open and not pull it open. Thread the chain through the spool and slip the jump ring back on. Before twisting the jump ring closed, slip the charms onto the ring; I like to put 2 on each side. Then twist the jump ring closed. And that’s all there is to it!

And here I am all set to make my next key ring!

IMG_4393

I’m using mine to corral all those little shopper’s savings cards. It would also make a great gift for the new driver ~ personalize it with charms just for her. These are so easy and inexpensive that they would make a great “just thinking of you” gift 🙂

Thanks for stopping by,

Anita

Posted in Gifts | 1 Comment

My Dad

This is a very personal post. Quite unlike my normal posts. Just sharing my heart. 

My wonderful Dad passed from this earth one month ago today, June 20th. Not a day goes by that I don’t miss him…let me tell you a little about this most amazing man.  IMG_4320

He was a family man: husband, dad, “Pa” to his grand and great grandkids, uncle, brother, and son. He was a friend and Korean War veteran. He was a French Horn player for most of his life, playing in the Michigan City Municipal Band for 52 years! He was a humble man who did so much during his life. You can read more about his life here if you’d like. He never thought he was doing anything special ~ just living his life in the best way he knew how. He loved his wife, family, and country. He made so many sacrifices so we as his family could have everything we needed.

He, along with my Mom, taught us the value of faith, family, and hard work. I remember walks through the cemetery with him where we would make the rounds of the family graves and he would tell me about each person. Family always meant so much to him. He worked hard while we were growing up, but was home for dinner nearly every night. He was always there when we needed him and always had time for us.

I think that maybe I inherited my love of travel from him and my Mom. Every summer we would take a family vacation. Sometimes small, sometimes bigger, but always somewhere to get away from the hustle and bustle of every day life.  We had great times traveling in the old station wagon, fighting over who would sit in the rear facing seat! 

Dad was a proud veteran of the Army Military Police during the Korean War. He served his country well for 18 months and came home to marry the girl waiting for him. That marriage lasted 60 years!

Dad was not one to talk on the phone and would usually find an excuse to hand the phone to Mom after just a few minutes talking with me. Our last phone conversation was just over a week before he died. He told me then, “everything is in order”. It broke my heart. But it also opened the door for me to ask him a question ~ not because I didn’t already know the answer, but because I wanted the comfort of hearing him say it. I asked him if he believed that Jesus died on the cross for him. He unhesitatingly answered “Yes”. Not a surprise to hear his answer ~ he was a man of faith. But what a comfort to me. Because I believe the same, I know that one day I will be together with my Dad in heaven. Dad is there now ~ no more pain, no more suffering. As he would say… “It’s more better”.

I am still heartbroken over losing the very best Dad. But what a blessing to love someone so much that saying goodbye is so very hard.

I can still hear him say “So how’s Anita doing?”…well, Dad, its been so very hard…but little by little, day by day, it’s getting “more better”.

Always in my heart, Dad ~ I love you!

Anita

Posted in Uncategorized | Leave a comment

It’s 165 days until Christmas…

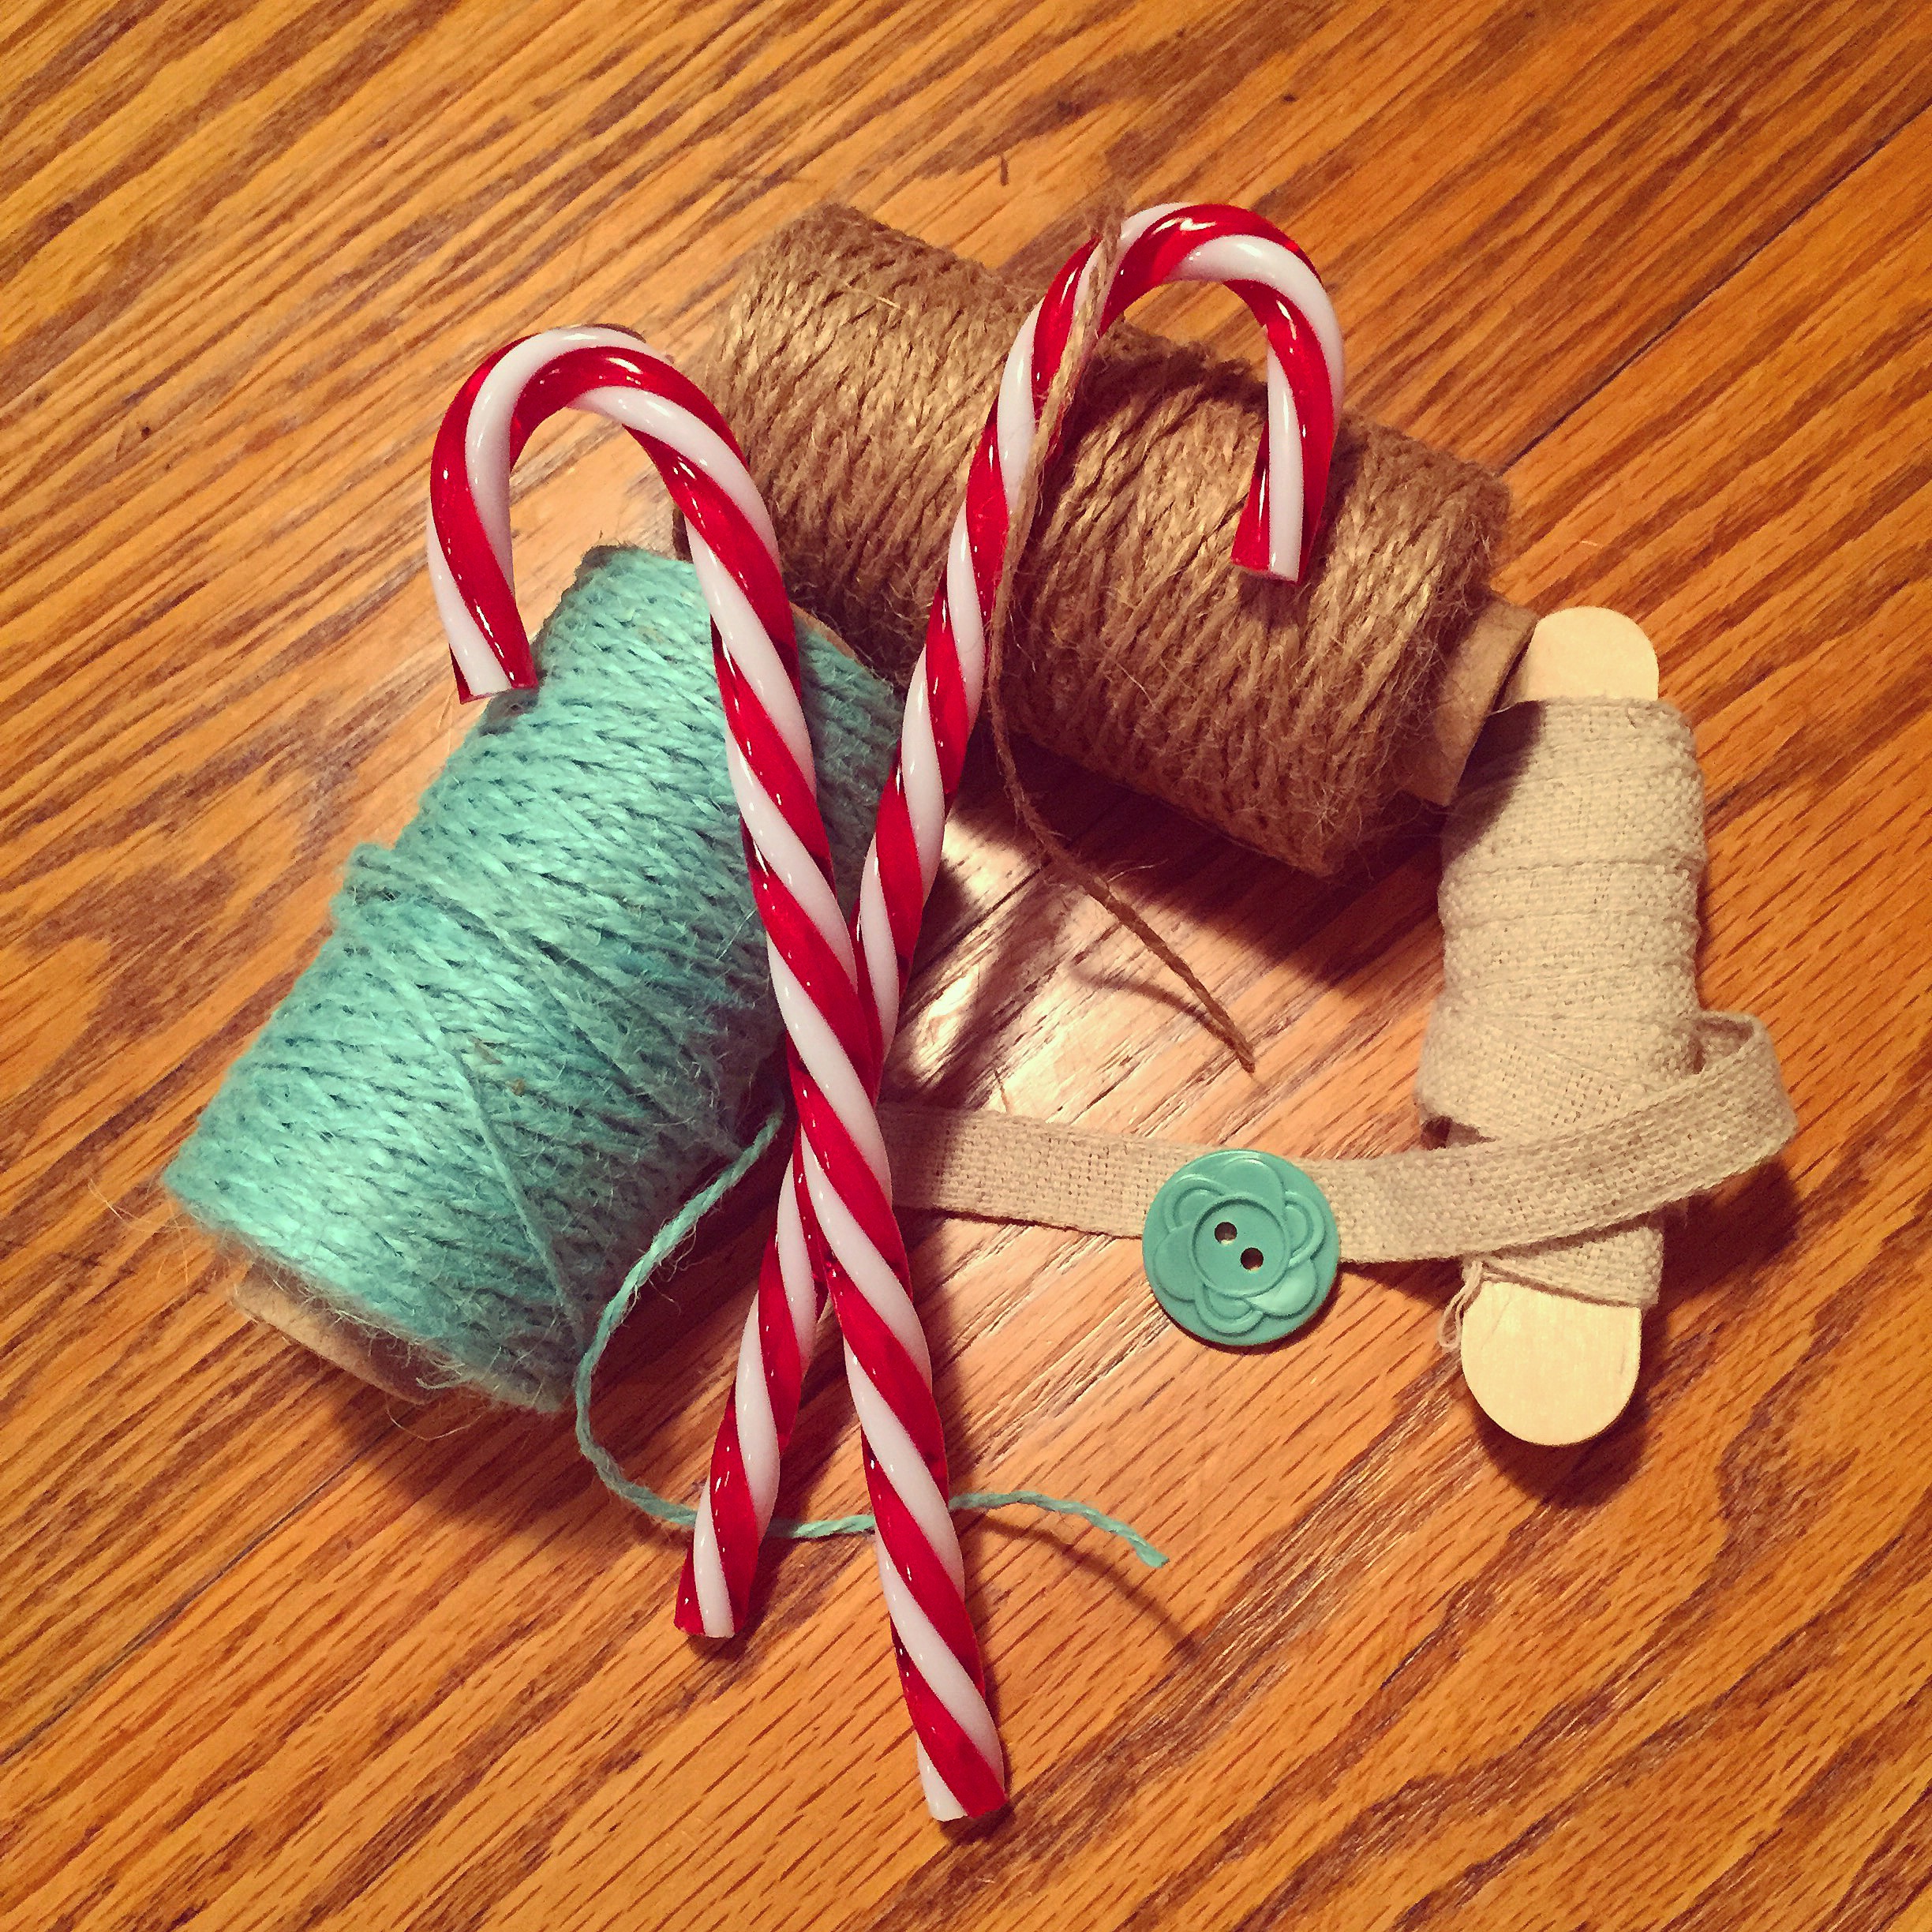
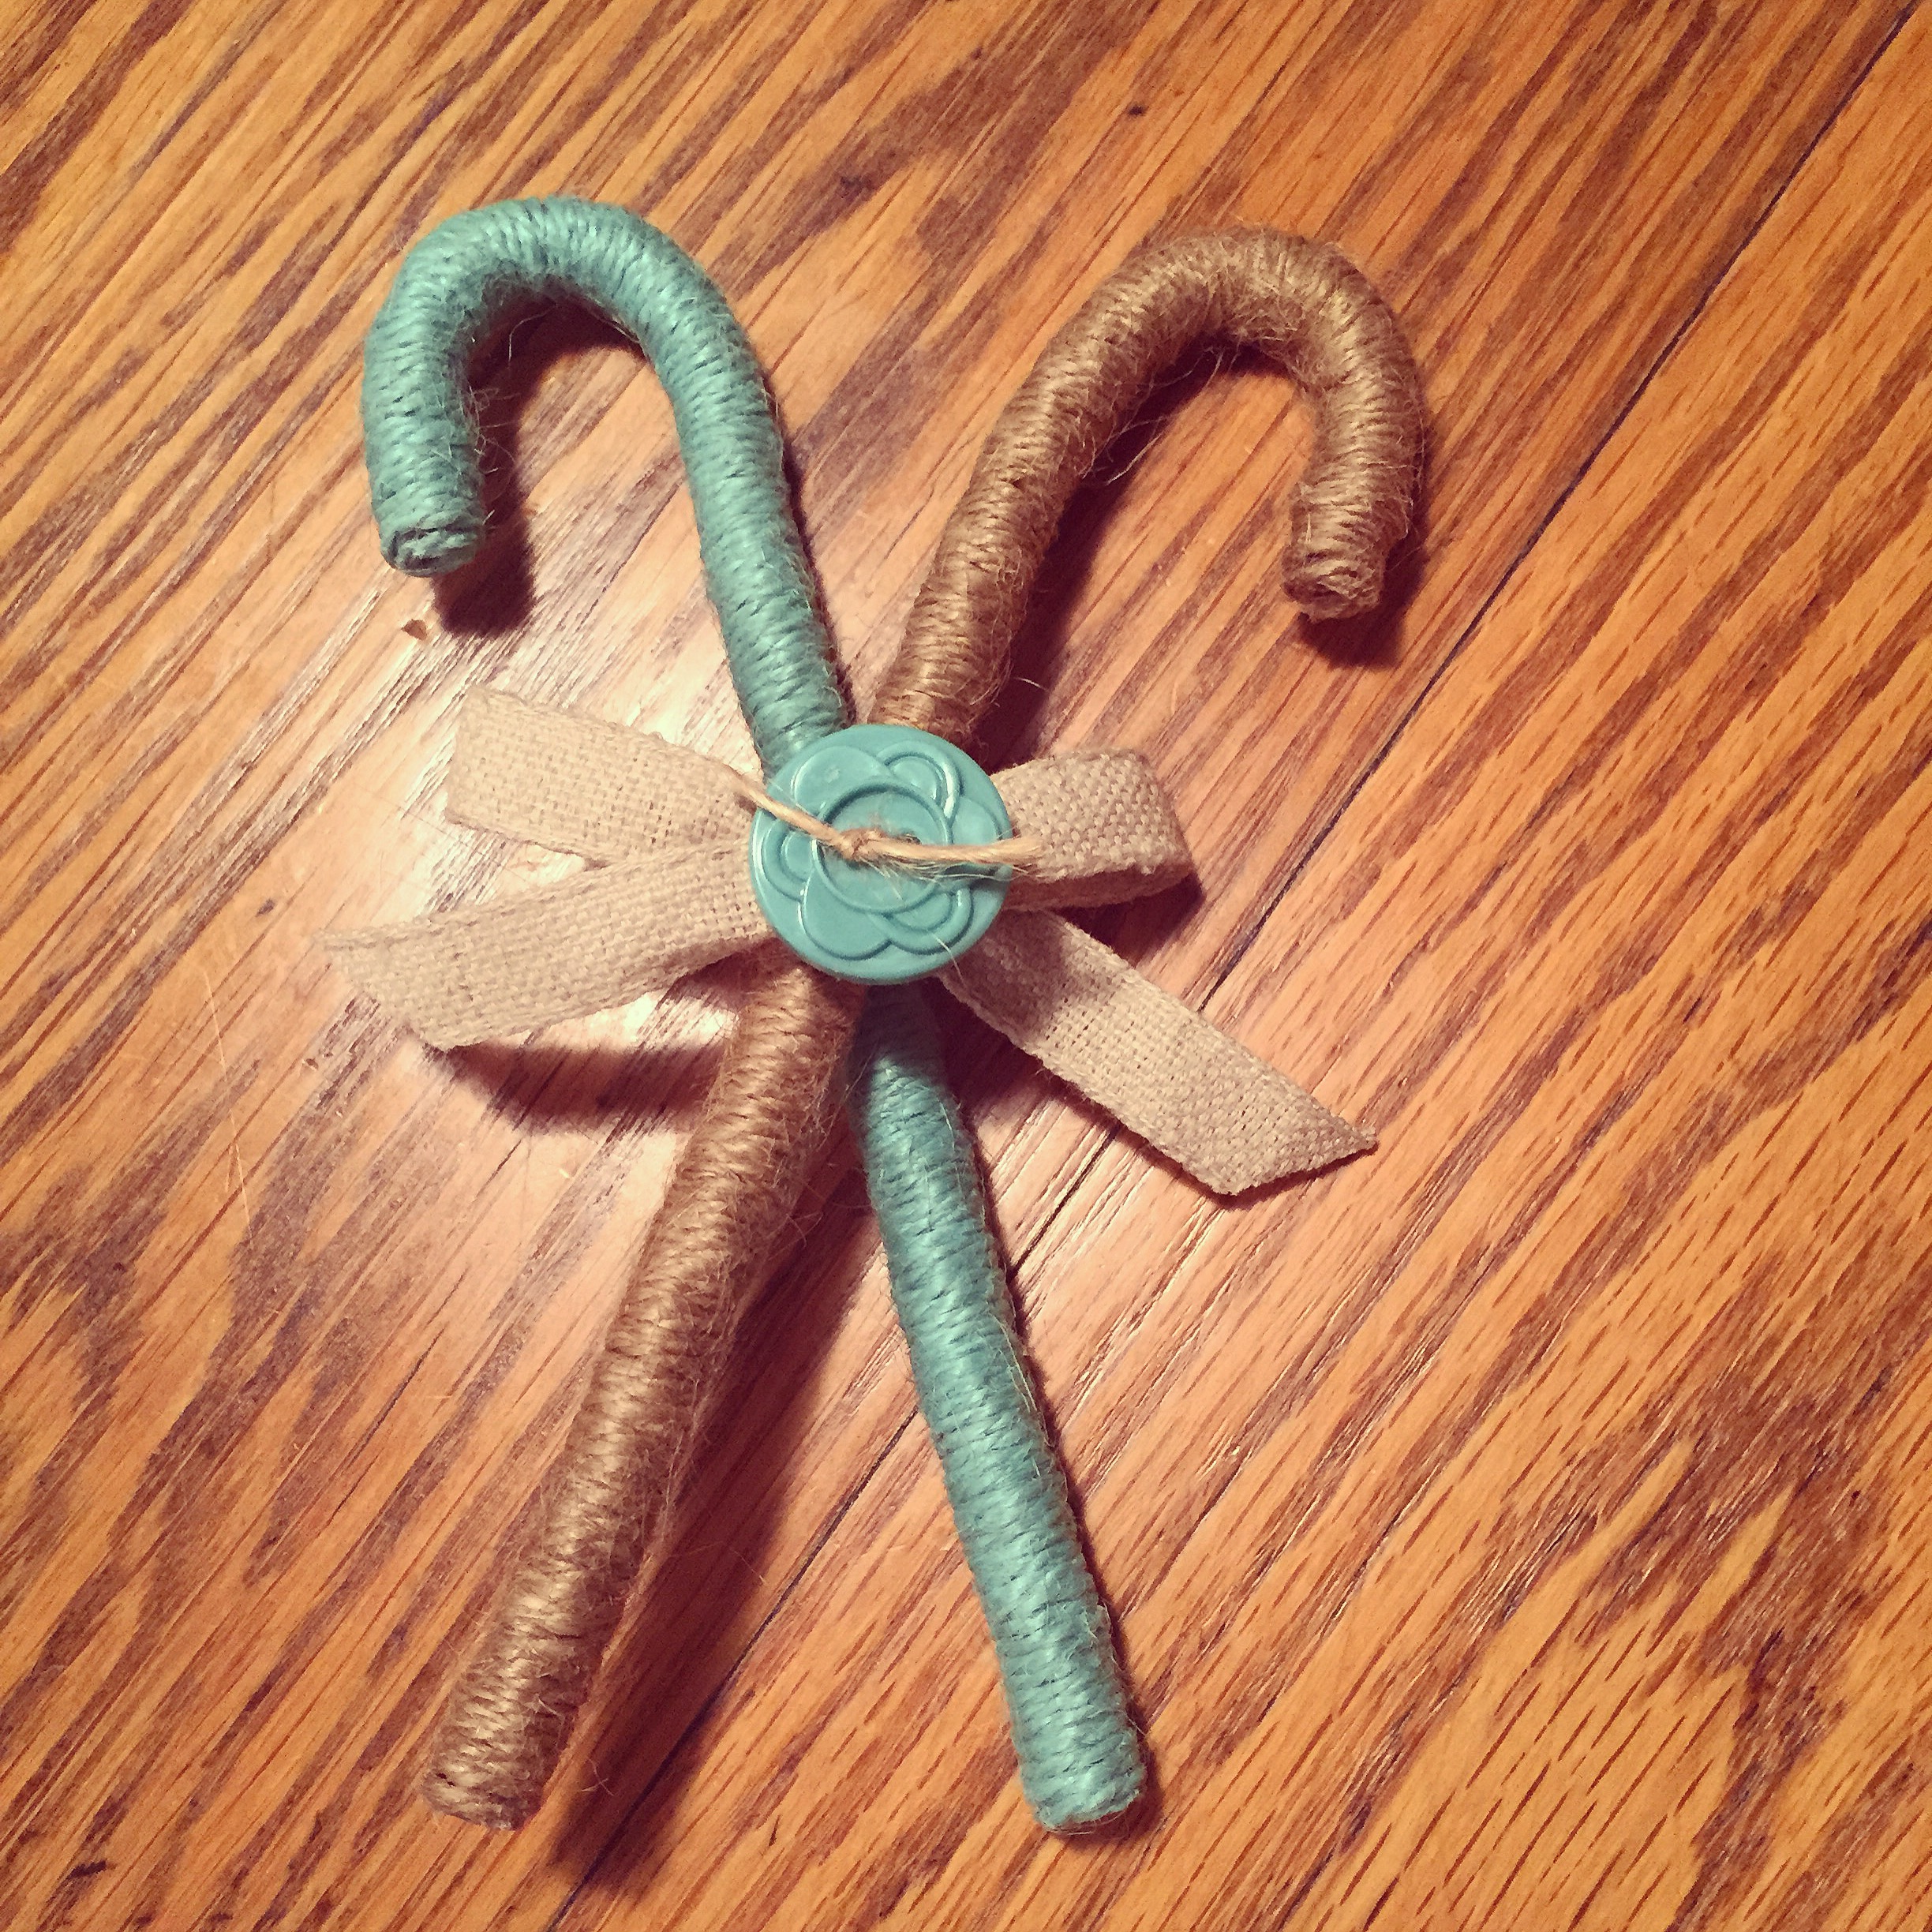
…and we all know how fast that time will fly by!!! I found these plastic candy canes at the after Christmas clearance sale at Michaels last year. I wanted to alter them from the traditional red and white for a more vintage look. I found some great spools of twine, also at Michaels, in natural and turquoise that were perfect for what I had in mind.

IMG_4374

I started by putting a strong glue that dries clear (I like Crafter’s Pick) on the bottom of the candy cane. I wound the twine into a tiny circle (no need to cut the twine, you can just continue wrapping from here), glued it to the bottom of the candy cane, and held it there for a couple of minutes to dry. Then I added a little more glue up the sides of the candy cane and just started wrapping the twine tightly around the candy cane. Continue wrapping around the curve to the other end. I added glue on the sides near the end to keep the twine in place. Finish the wrapping by making another tiny circle and glue it in place on the end. Before tying the wrapped candy canes with linen ribbon, I added a drop or two of glue to hold them together. I tied a turquoise button with natural twine and glued it to the center of the bow

. IMG_4373

Attach an ornament hanger to the back and these will look so pretty on your tree. Or maybe fill a cute basket with them. You can also use them individually instead of tying them together. There are so many beautiful colors of twine out there, so pick your favorite colors and start wrapping :).

Thanks for stopping by,

Anita

Posted in Christmas | 2 Comments