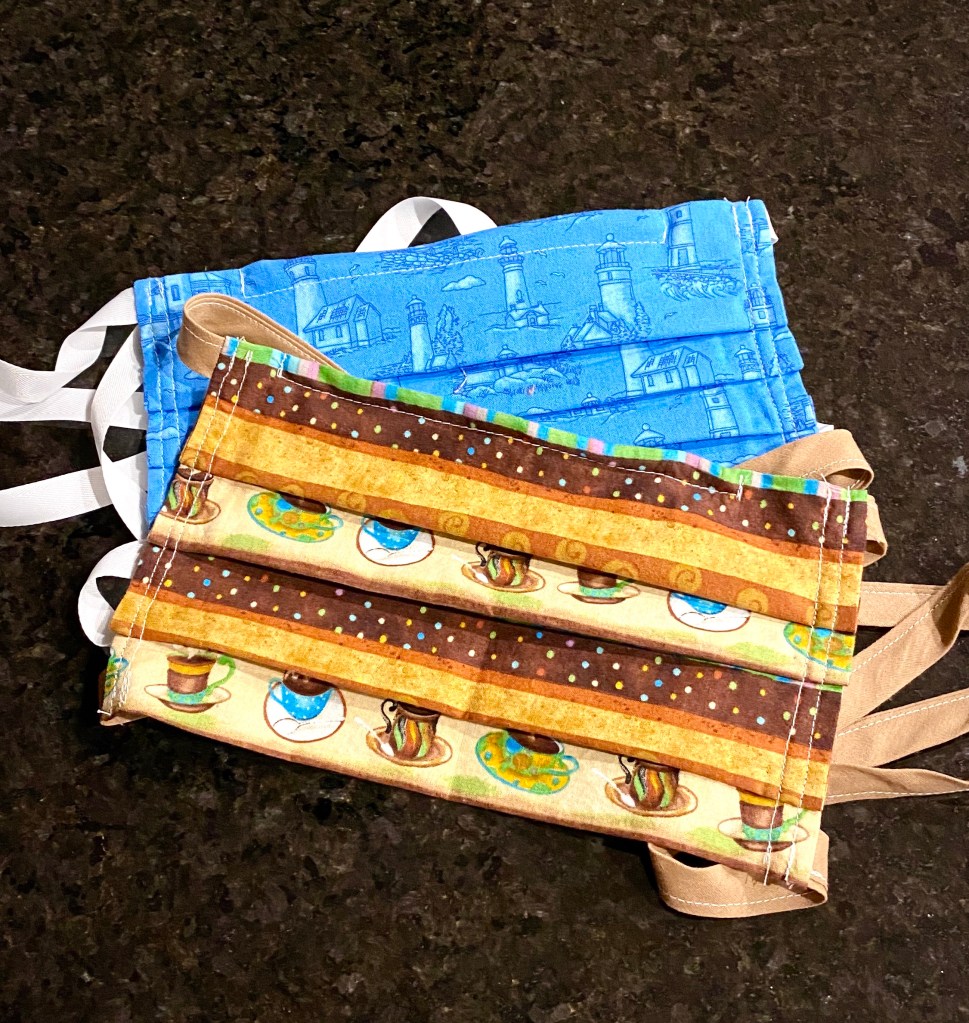
We are living in such crazy times. Whoever thought we would be wearing masks to go to the grocery store or pharmacy?!?!
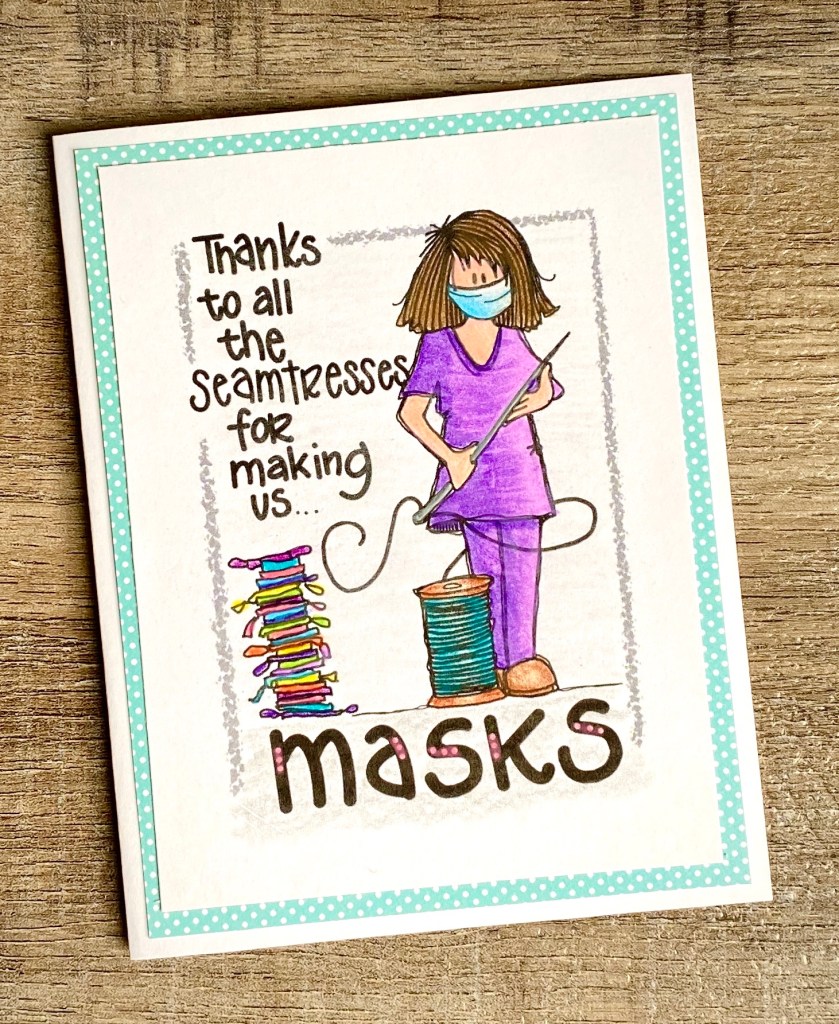
Although I can do a lot of crafty things, sewing has never been one of my talents. My sweet friend Laura made masks for my husband and me. I wanted to send her a thank you note for thinking of us. I found this great image from Nola Chandler on her Instagram page and her Facebook page (look in her photos). It was the perfect image to use for the card. She has several other images that are so great for the things we are all going through right now.
Disclosure: Some of the links on my site are affiliate links, meaning, at no additional cost to you, I will earn a small commission if you click through and make a purchase. As an Amazon Associate I earn from qualifying purchases.
I printed the image on white card stock and colored it with colored pencils. I layered the image to patterned paper and attached it to a white card.
Praying this all ends soon…but until it does, stay safe and healthy everyone!
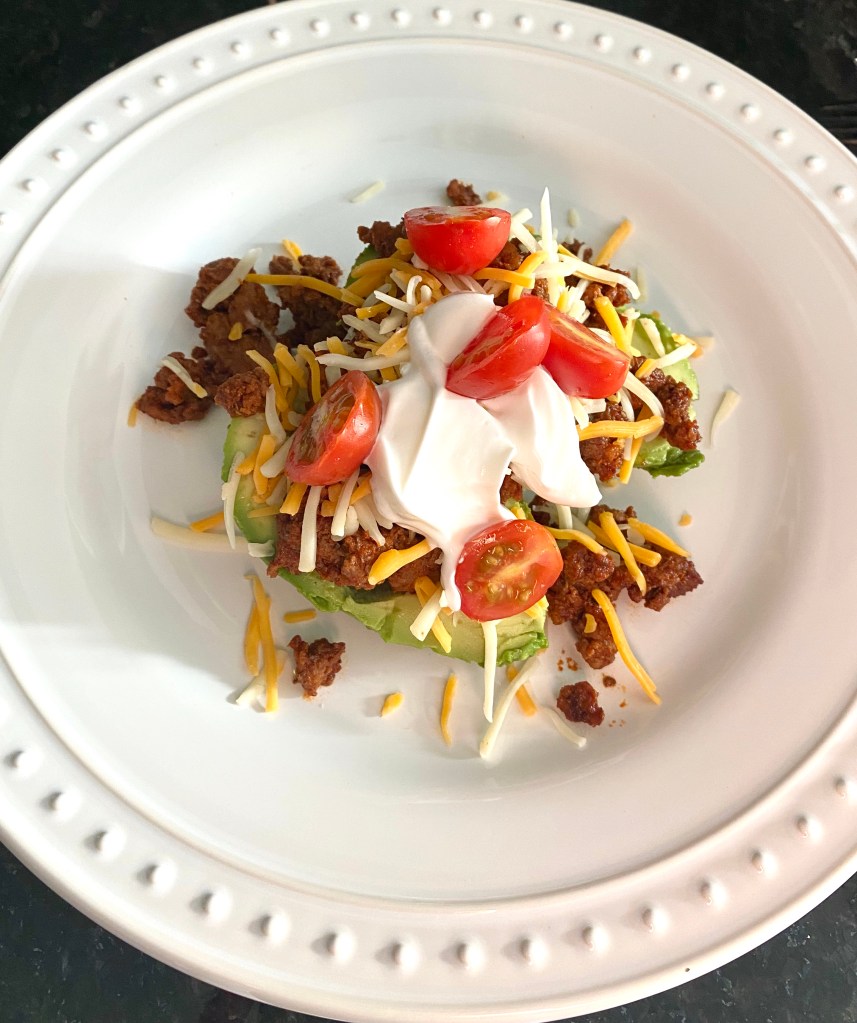
This is a really simple main dish recipe that comes together in just minutes. I found the recipe here at House of Yumm. It’s a great way to get all the taco flavors without the carbs from the tortillas – if you’re watching those. Or it’s just a tasty meal even if you’re not!
Disclosure: Some of the links on my site are affiliate links, meaning, at no additional cost to you, I will earn a small commission if you click through and make a purchase. As an Amazon Associate I earn from qualifying purchases.
After cutting my avocados in half and removing the pit, I carefully scooped out each half keeping it intact. I placed the halves on my plate and added the cooked taco meat. Then just add your favorite toppings – cheese, sour cream, tomatoes, lettuce, cilantro – all the yummy toppings you would add to a traditional taco.
Add a side of chips and salsa or Mexican rice and you have a tasty, quick, and easy meal!
This a super easy recipe to double if you need to. I hope you enjoy it! 🙂
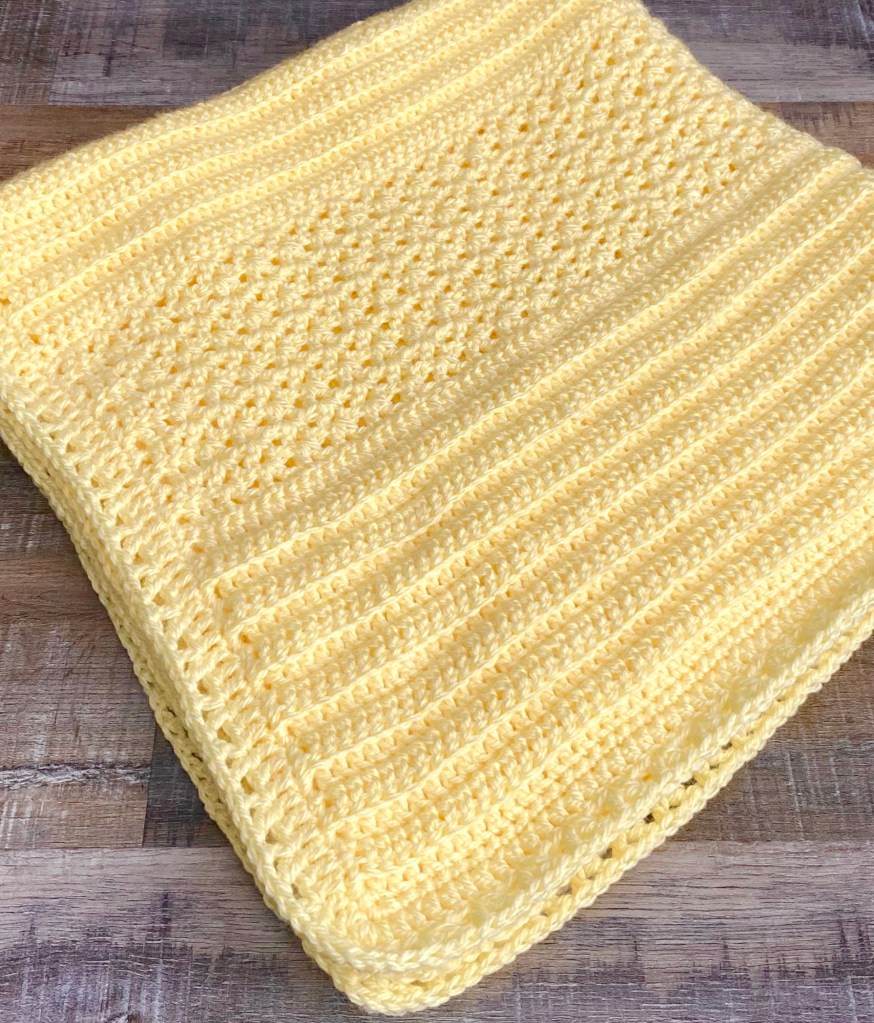
A while back, a sweet friend gifted me with a big box of yarn. It included several skeins of Bernat Softee Baby Yarn in Lemon. Every time I looked at it, it made me think of warm, sunny days. I knew it would make a snuggly, sunny blanket for a precious little one. You’ll find my new crochet pattern below.
Disclosure: Some of the links on my site are affiliate links, meaning, at no additional cost to you, I will earn a small commission if you click through and make a purchase. As an Amazon Associate I earn from qualifying purchases.
Sunny Dreams Crochet Baby Blanket
Finished blanket measures approximately 27 by 30 inches.
Bernal Baby Soft yarn in Lemon (light weight #3) I used about 2 and 1/2 skeins
G/4mm hook
Stitches used US terms:
Foundation Double Crochet – fdc
Chain – ch
Back Loop Only – blo
Double Crochet – dc
Slip Stitch – ss
Special stitch: v-stitch (dc, ch 1, dc) in same stitch
Row 1: work 120 fdc. Turn. (120 stitches)
Rows 2-15: ch 2 (counts as first stitch). Skip 1st stitch. dc in blo of each stitch across. Turn. (120 stitches)
Row 16: ch 1. sc in both loops of each stitch across. Turn. (120 stitches)
Row 17: ch 2 (counts as first stitch). Skip 1st stitch, dc in next 2 stitches. Skip next stitch, *(dc, ch 1, dc) in next stitch (v-stitch made), skip next 2 stitches* Repeat from * to * across to last 5 stitches. v-stitch in next stitch. Skip next stitch, dc in last 3 stitches. Turn. (38 v-stitches and 3 dc at beginning and end of row)
Rows 18-26: ch 2 (counts as first stitch) Skip 1st stitch, dc in next 2 stitches. Work v-stitch in next ch 1 space. Repeat v-stitch in each ch space across to last 4 dc. Skip next dc, dc in last 3 stitches. Turn. (38 v-stitches and 3 dc at beginning and end of row)
Row 27: ch 1. sc in each stitch and ch space across. Turn. (120 stitches)
Row 28: ch 2 (counts as first stitch). Skip 1st stitch. dc in each stitch across. Turn. (120 stitches)
Rows 29-42: ch 2 (counts as first stitch). Skip 1st stitch. dc in blo of each stitch across. Turn. (120 stitches)
Row 43: ch 1. sc in both loops of each stitch across. Turn. (120 stitches)
Row 44: ch 2 (counts as first stitch). Skip 1st stitch, dc in next 2 stitches. Skip next stitch, *(dc, ch 1, dc) in next stitch (v-stitch made), skip next 2 stitches* Repeat from * to * across to last 5 stitches. v-stitch in next stitch. Skip next stitch, dc in last 3 stitches. Turn. (38 v-stitches and 3 dc at beginning and end of row)
Rows 45-53: ch 2 (counts as first stitch) Skip 1st stitch, dc in next 2 stitches. Work v-stitch in next ch 1 space. Repeat v-stitch in each ch space across to last 4 dc. Skip next dc, dc in last 3 stitches. Turn. (38 v-stitches and 3 dc at beginning and end of row)
Row 54: ch 1. sc in each stitch and ch space across. Turn. (120 stitches)
Row 55: ch 2 (counts as first stitch). Skip 1st stitch. dc in each stitch across. Turn. (120 stitches)
Rows 56-69: ch 2 (counts as first stitch). Skip 1st stitch. dc in blo of each stitch across. Turn. (120 stitches)
Do Not Turn after Row 69.
Border:
Round 1: ch 1. sc evenly around all 4 sides of blanket, working 3 sc in each corner. Join with ss to first sc.
Round 2: ch 2. dc in each stitch around, working 3 dc in each corner. Join with ss to first dc.
Round 3: ch 3. dc in same stitch as ss. *Skip next 2 stitches. Work v-stitch in next stitch.* Repeat from *to* around, working (dc, ch 1, dc, ch 1, dc) in each corner. Join with ss to 2nd ch of beginning ch 3.
Of course, you can make this sweet blanket in any color. I think it would be beautiful in white, pink, green, or blue – or even in white with a pink, blue, yellow, or green border.
I hope you enjoy this pattern! I would love to see your finished blankets!
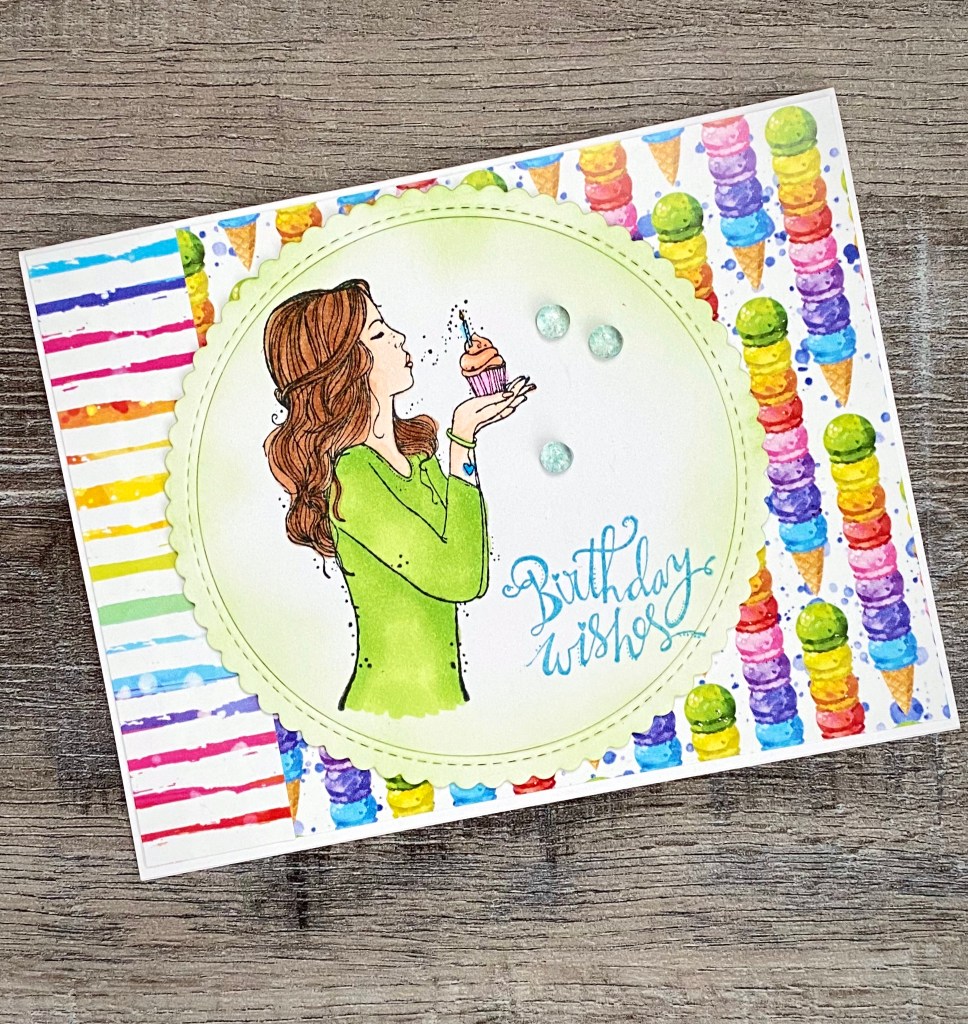
Y’all know that I love Unity Stamp Company! They are always coming out with great new stamps and supplies – and they have the best sales!!!
The set I used for this card is called Hip Hip Hooray. It includes the birthday girl along with 2 different sentiments. The patterned paper I used also came from Unity Stamp Company. The stitched scalloped circle frame die I used is discontinued, but here is a similar one.
Disclosure: Some of the links on my site are affiliate links, meaning, at no additional cost to you, I will earn a small commission if you click through and make a purchase. As an Amazon Associate I earn from qualifying purchases.
I stamped the girl with Memento Tuxedo Black ink on white card stock and colored her with Copic markers. The sentiment is stamped with turquoise ink. Then I die cut the image with the scalloped circle frame die. The die actually cuts the center circle out, leaving the scalloped stitched part as a frame. I turned the piece over and attached foam tape to the frame, overlapping onto the center circle to keep it as one piece. Then I used these Blender Brushes from Taylored Expressions to brush light green ink around the edges.
I attached the panel of ice cream cone patterned paper to a white card and then added the strip of striped paper. I attached the stamped image to the card using the foam tape I put on the back earlier. I added 3 gems similar to these to finish the card.
Such a fun way to wish someone special a Happy Birthday!
Mother’s Day is May 10th this year. There is still plenty of time to craft something wonderful for all those special Moms out there. 🙂
I know we are all still staying home – and I hope this finds everyone doing well. A little crafting may help to pass the time and be a good distraction from all that is happening.
If you are like me, your craft room is full of possibilities…Maybe I can help you out with a few ideas! Click on the link above or below each photo for all the details on each project.
Disclosure: Some of the links on my site are affiliate links, meaning, at no additional cost to you, I will earn a small commission if you click through and make a purchase. As an Amazon Associate I earn from qualifying purchases.
This Crochet Color Block Tote Bag works up quickly and is a great size. You can also stitch it up in one color if you’d like.
This Farmhouse Valentine Rag Wreath isn’t only for Valentine’s Day – it’s a great addition to her everyday Farmhouse Decor! You can also use a traditional round wreath form instead of a heart.
Super fast and easy, this Crochet Spring Stripes Can Cozy can be stitched up in her favorite Spring colors. Include a 12 pack of her favorite soft drink for a fun gift.
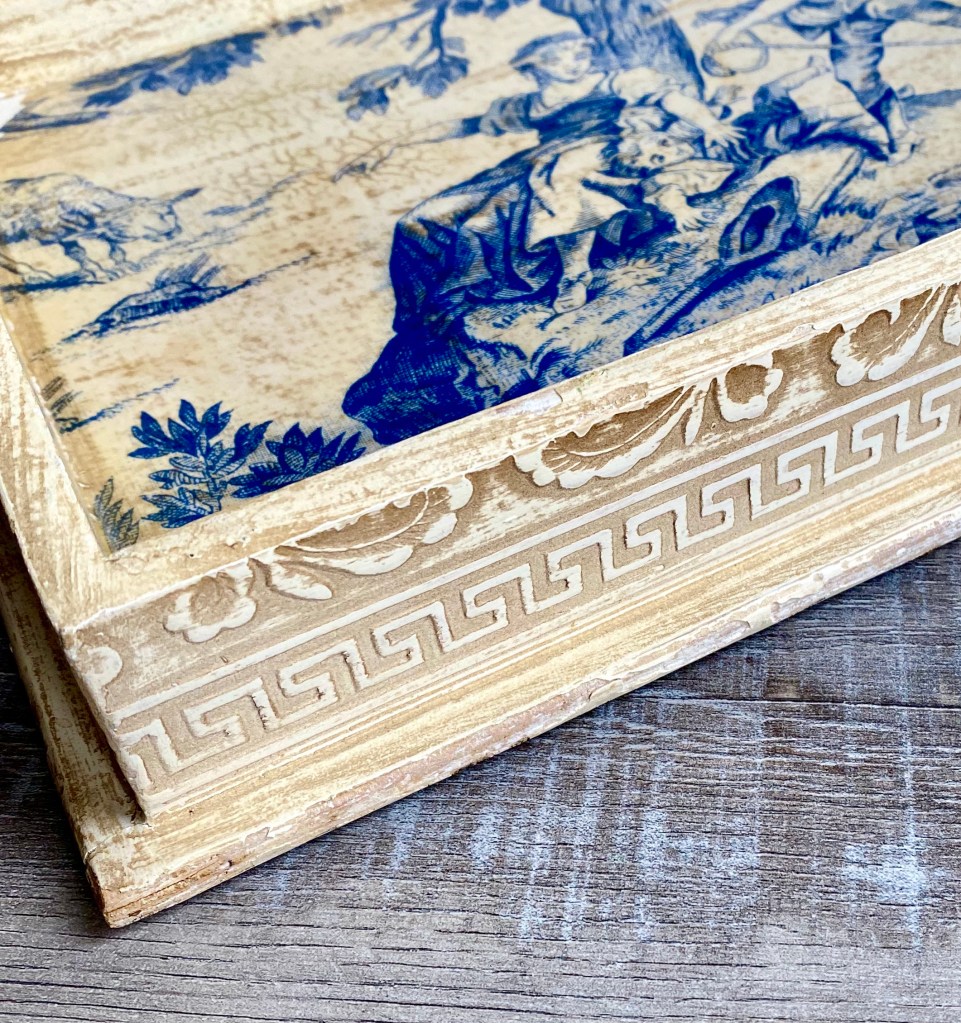
I bought this tray at a thrift store a long time ago thinking it would be a great item to repurpose. It wasn’t something that would go with my decor, but I loved the detail on the sides and thought, with a little paint, I could make it a beautiful piece for my home.
Since we are all home right now – and I hope you are all doing well – I pulled it out of my garage, cleaned it up, and got out my chalk paint.
Disclosure: Some of the links on my site are affiliate links, meaning, at no additional cost to you, I will earn a small commission if you click through and make a purchase. As an Amazon Associate I earn from qualifying purchases.
What do you have hiding in your garage or attic that you can repurpose into something beautiful for your home? A little time, a little paint, and a little imagination – you may be surprised by what you can do!
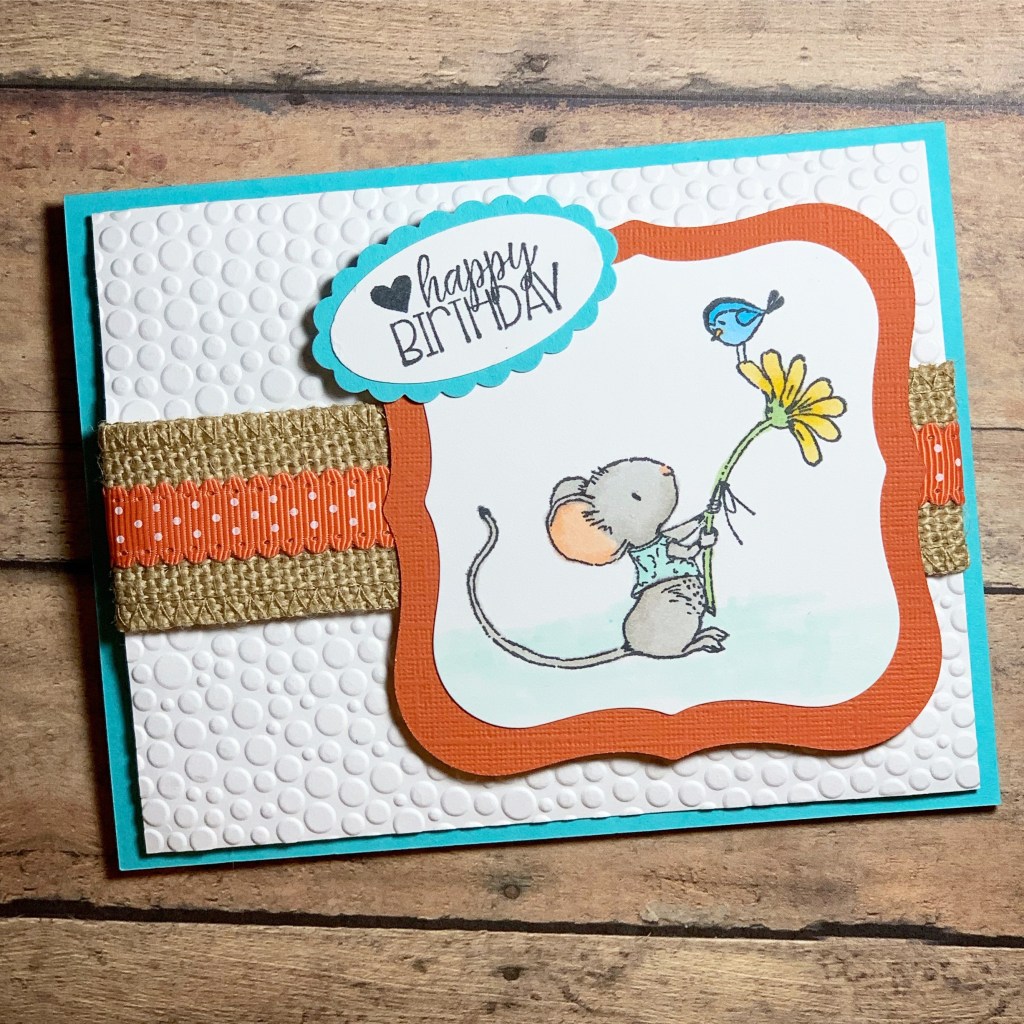
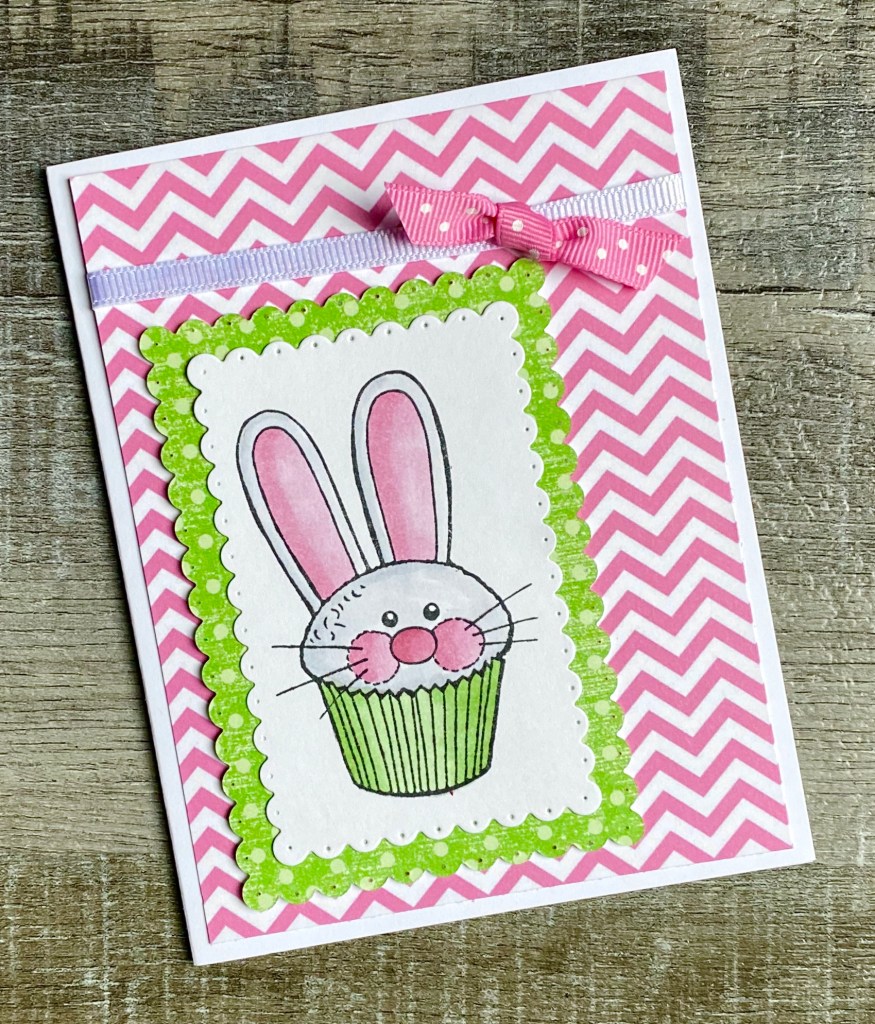
I have a sweet little Easter card to share with you today. This sweet bunny cupcake is an old stamp from Stampendous and is discontinued. You can use your favorite Easter stamp and make your card using my layout.
Disclosure: Some of the links on my site are affiliate links, meaning, at no additional cost to you, I will earn a small commission if you click through and make a purchase. As an Amazon Associate I earn from qualifying purchases.
To make the card, I stamped the bunny cupcake with Memento Tuxedo Black ink on white card stock and colored the image with Copic markers. I die cut the image with the Dotted Rectangle die and layered it to a larger rectangle die cut from patterned paper.
I added a white grosgrain ribbon to a panel of patterned paper and attached the panel to a white card. I attached the stamped image to the card with foam tape and finished the card with a knotted pink ribbon.
This is a super easy card to make – it lends itself to any occasion. Just change your stamped image and color scheme for birthday, new baby, Halloween, Christmas, or anything else you want to celebrate.
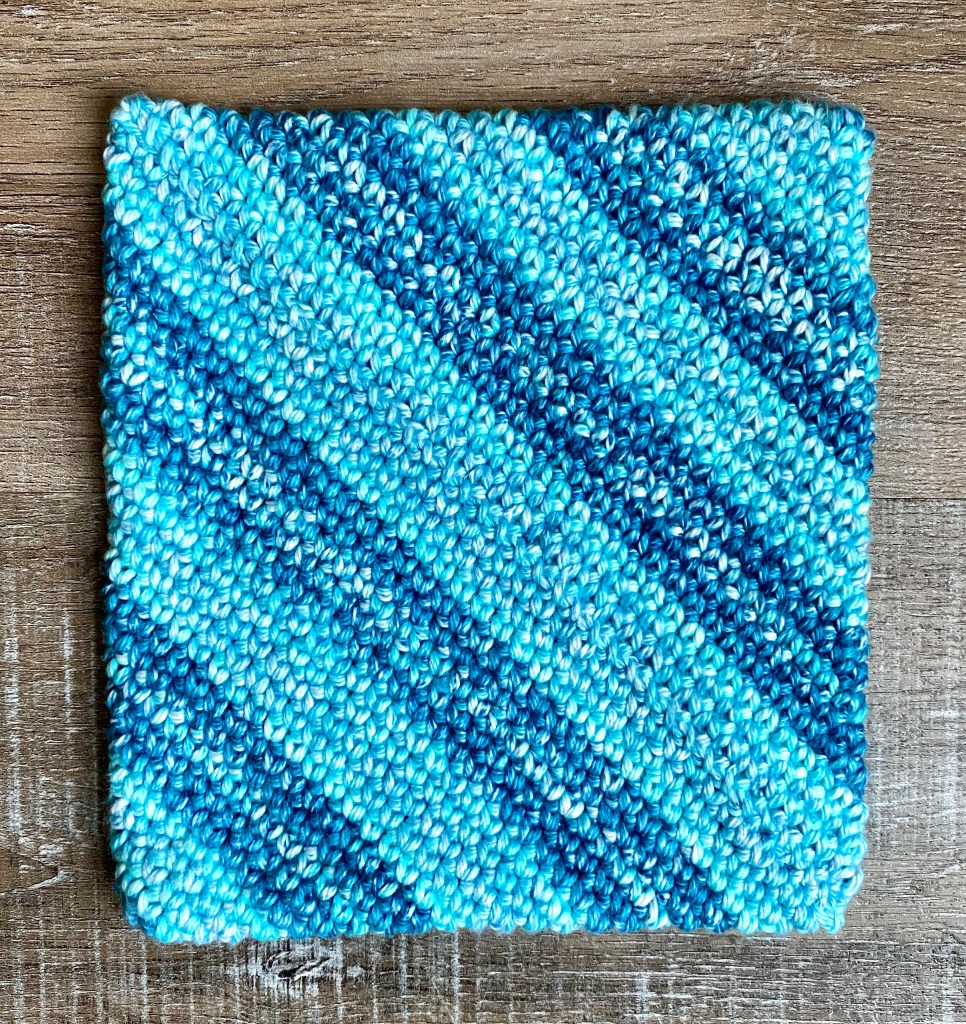
This is just about the easiest crochet potholder pattern I’ve ever used. You can find it here at Adventures of a DIY Mom. Once you get started, it’s just continuous single crochet. A great pattern when you want to just relax and watch a movie. 🙂
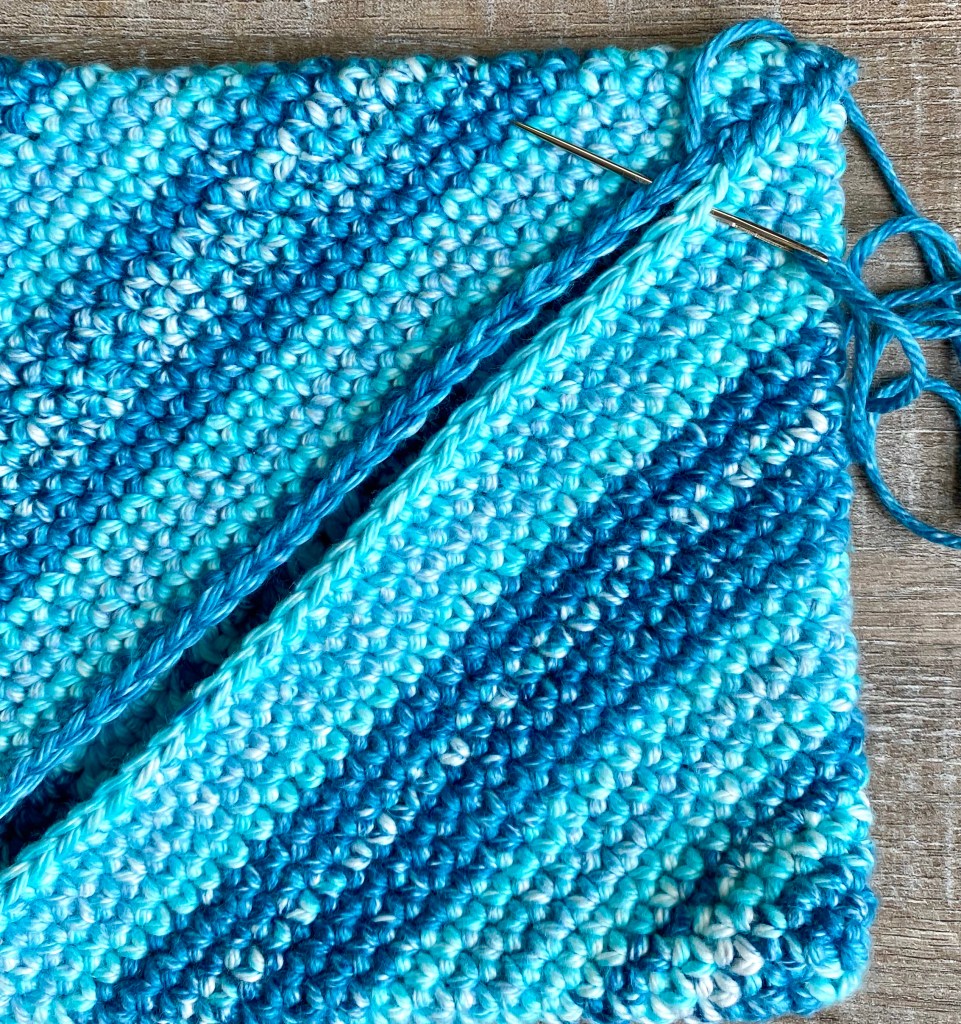
Here’s picture of the completed potholder. I used I Love This Cotton yarn in Teal Print with a G/4mm hook. (I love these Clover hooks.)
Disclosure: Some of the links on my site are affiliate links, meaning, at no additional cost to you, I will earn a small commission if you click through and make a purchase. As an Amazon Associate I earn from qualifying purchases.
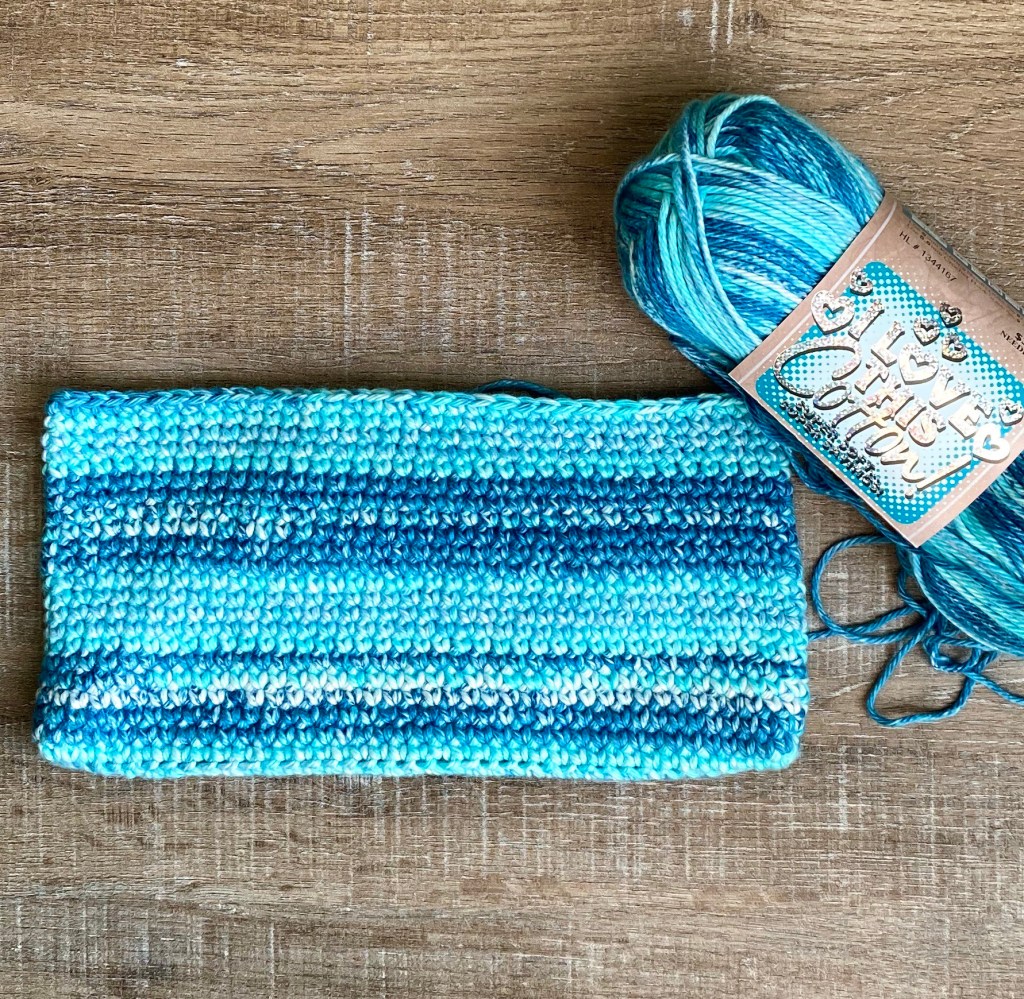
This is what your potholder will look like as you are crocheting it.
This is how your potholder will look before you sew the seam together.
Use a tapestry needle to sew the seam closed.
This is such an easy way to crochet a double layer potholder. I love the way the edges of the potholder are just as thick as the rest of it because of the way it is stitched up.
It’s an easy pattern, but such a great pattern! Maybe you already know about this pattern – if you do, then you probably know how happy this makes me. If you didn’t know about it (like me) – I hope you enjoy it! 🙂
I hope you are all doing well and weathering this storm our world is in. It’s a tough time for all of us and I hope my little blog posts are giving a much needed distraction for a few minutes.
On that note, my husband and I decided to make these amazing Thin Chocolate Chip Cookie recipe from Alton Brown. These are crispy rather than chewy and, as the recipe says, they are thin. They are so tasty! 😋
Disclosure: Some of the links on my site are affiliate links, meaning, at no additional cost to you, I will earn a small commission if you click through and make a purchase. As an Amazon Associate I earn from qualifying purchases.
Fresh from the oven!
The recipe says to use parchment paper on your cookie sheets. I used silicone baking mats and they worked great! I also used almond milk because that’s all I had and it worked wonderfully.
You may have everything you need in your kitchen right now to make these yummy cookies. I promise your family will thank you! 😊
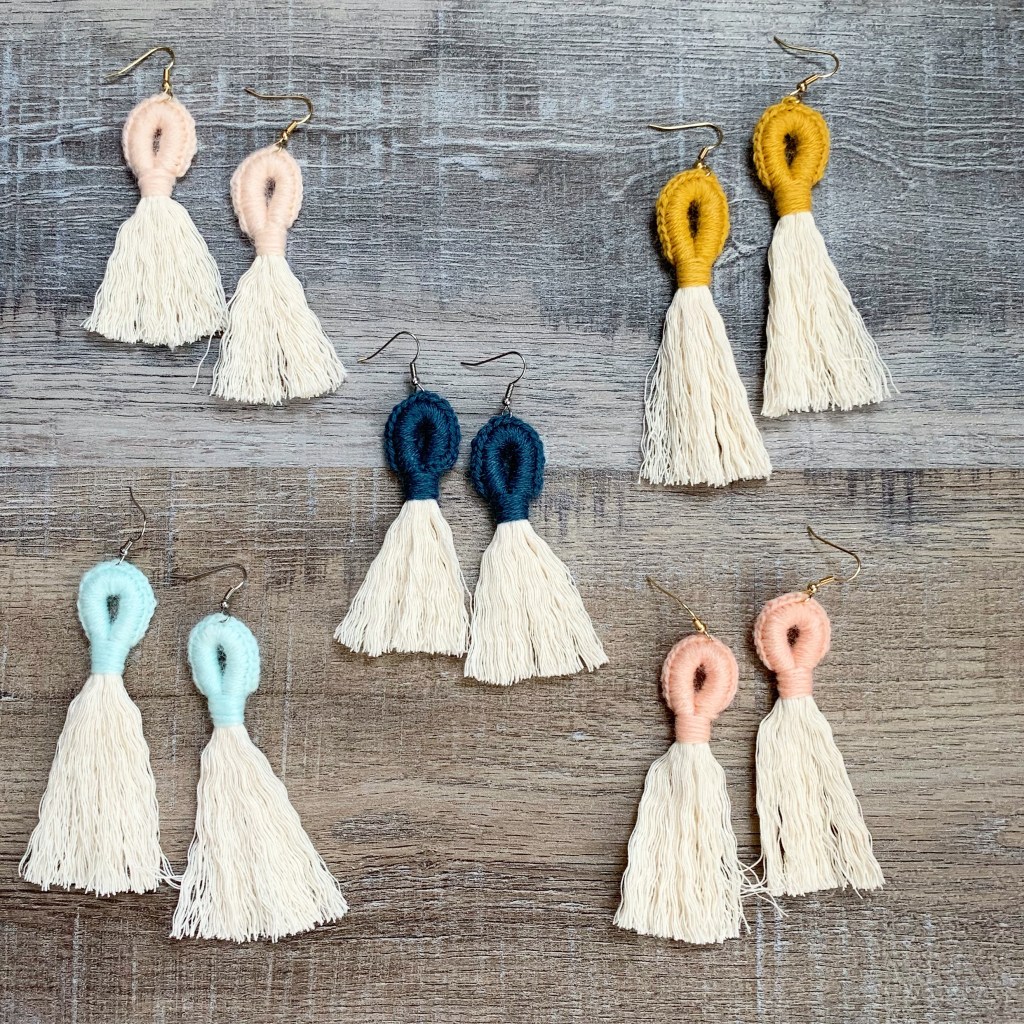
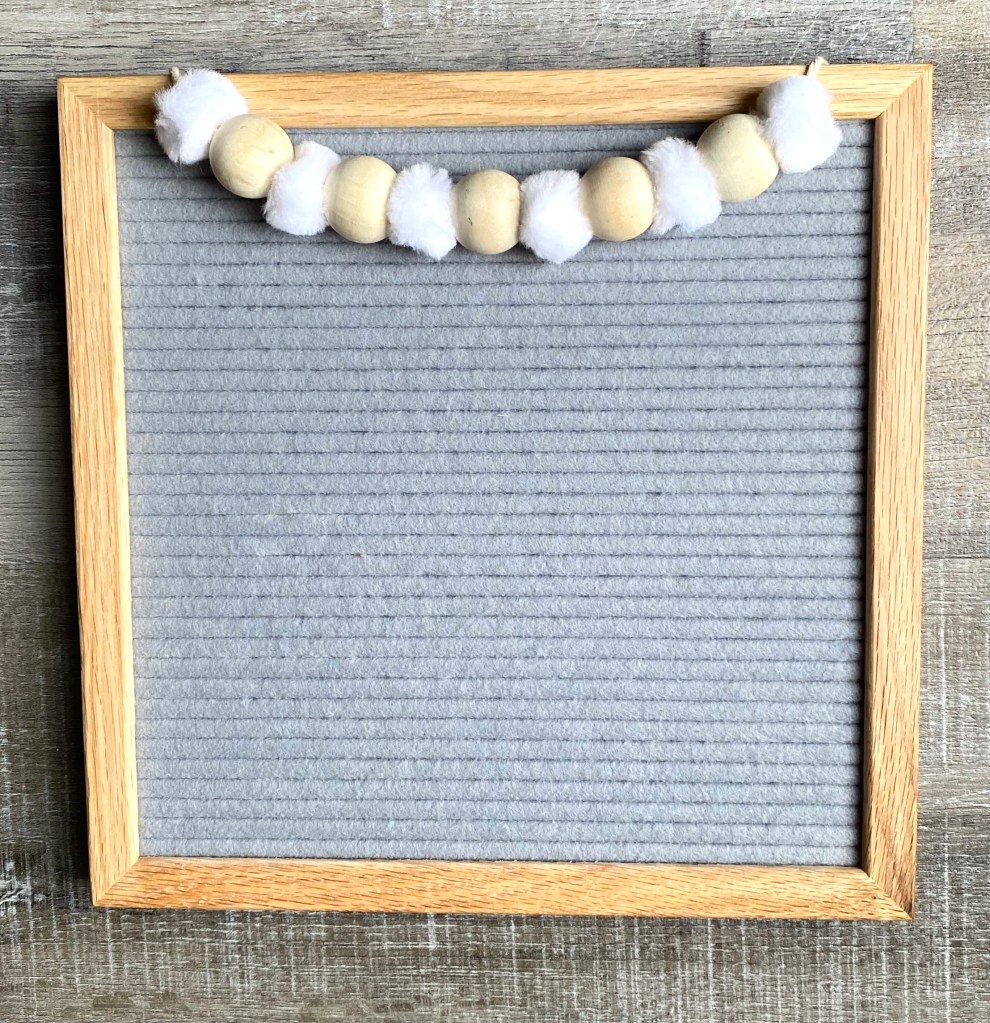
Do you have a letter board? My friend got me one for my birthday a couple of years ago and it’s so fun to change the quote for the seasons, holidays, or just everyday. This is the one she gave me – the felt background comes in several different colors to match your decor.
I thought it might be fun to add a little something to the board, but I didn’t want it to be permanent. This garland is a fun, easy way to “dress up” my board when the mood strikes me 🙂
Disclosure: Some of the links on my site are affiliate links, meaning, at no additional cost to you, I will earn a small commission if you click through and make a purchase. As an Amazon Associate I earn from qualifying purchases.
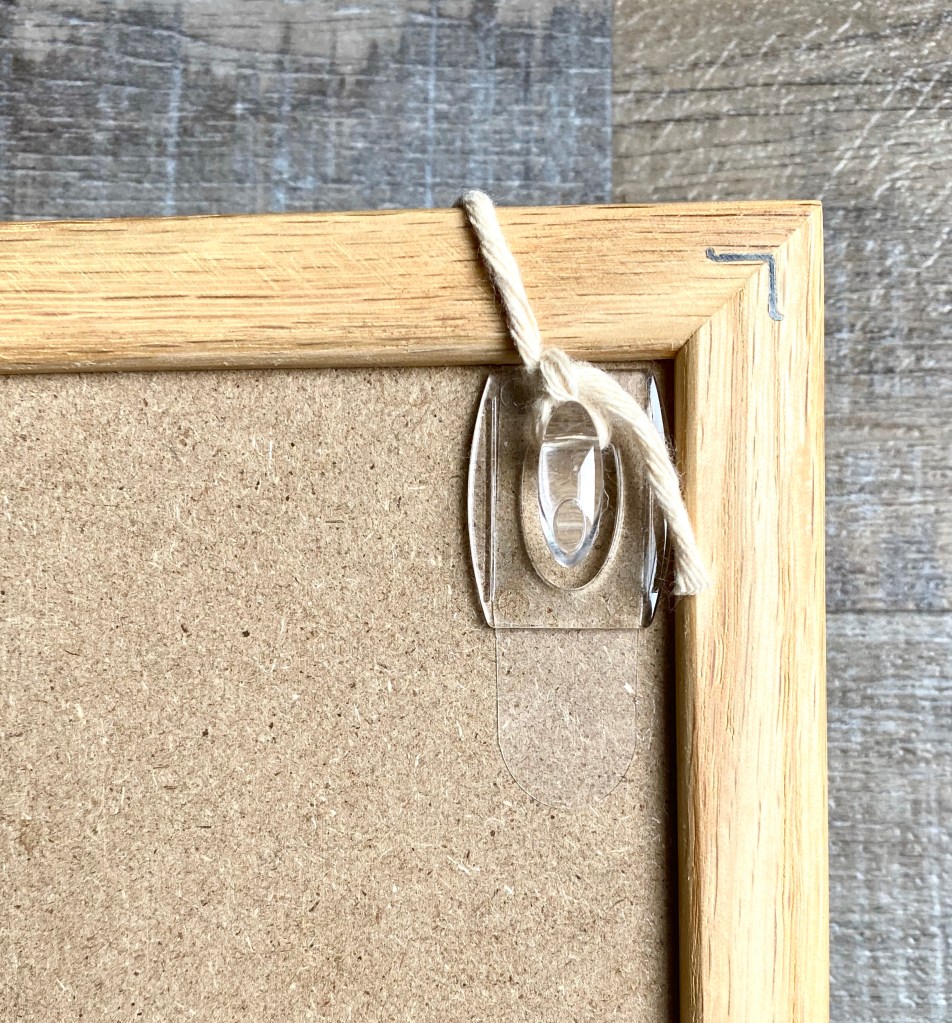
First attach the Command hooks to the top corners of the back of your board. Be sure to attach them upside down. You will be tying the garland around the hooks and you don’t want it to slip off!
Then simply string the beads and pom poms onto the cotton twine using a tapestry needle, leaving a tail at the beginning. Be sure to go through the center of each pom pom. Leave a tail at the end. The pom poms will not slide easily, so if you begin and end with a pom pom there is no need to tie a knot at the ends.
Tie the ends around the hooks, letting the garland drape across the front of the board. Trim off any excess twine.
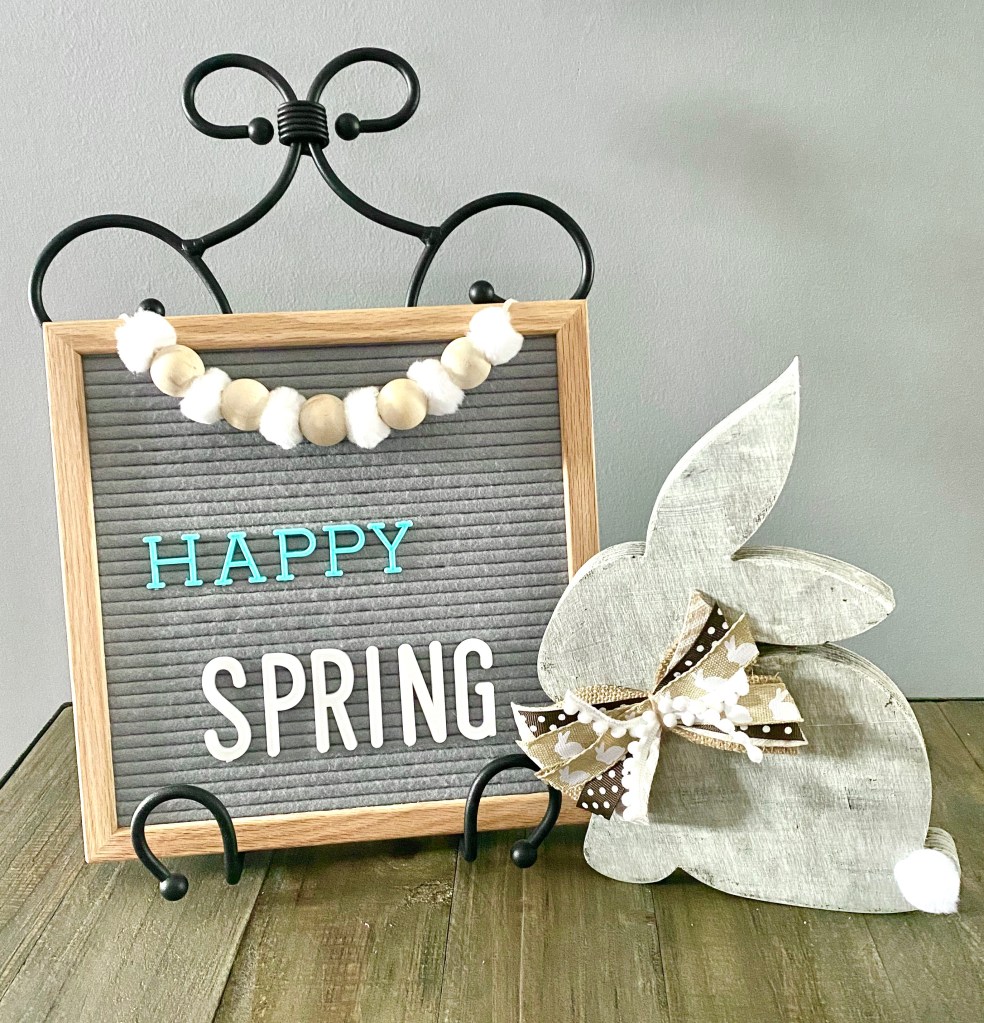
There are lots of fun letter and word sets to choose from so you can change up your quotes and sayings any way you like. There are also different sizes of boards to fit your space.
It’s super easy to slip the garland off the hooks whenever you want. You can also make several garlands with different color beads or pom poms for each season. So many possibilities…
Disclosure: Some of the links on my site are affiliate links, meaning, at no additional cost to you, I will earn a small commission if you click through and make a purchase. As an Amazon Associate I earn from qualifying purchases.